Blog by Steve Laug
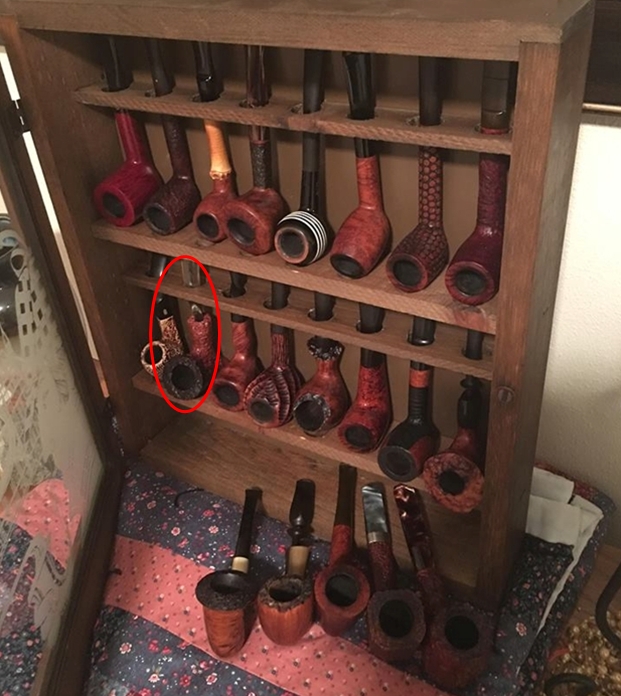
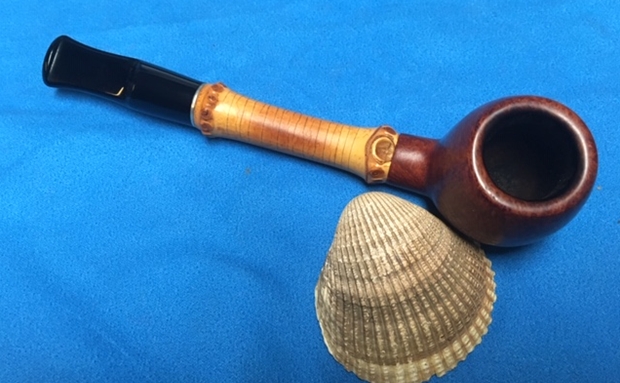
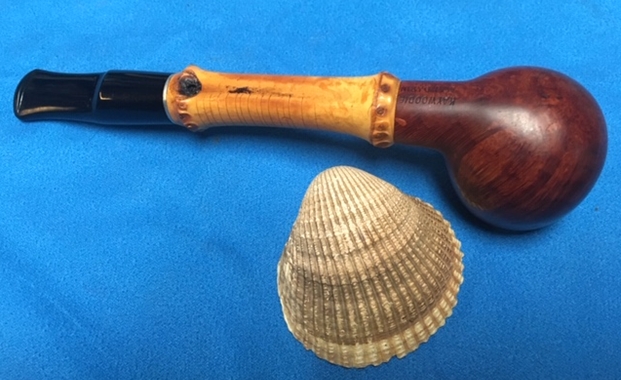
The next pair of pipes on the work table is another relatively new acquisition. The Mandarin with the acrylic stem comes from a collection Jeff and I purchased from Michigan. It included a pipe cabinet and 21 pipes that is pictured below. The second one came from a friend of Jeff’s who is always on the lookout for pipe he thinks we might be interested in the New York area. This one has the original stem. I have circled the first Mandarin in the photo below – third pipe from the left on the first shelf of the rack.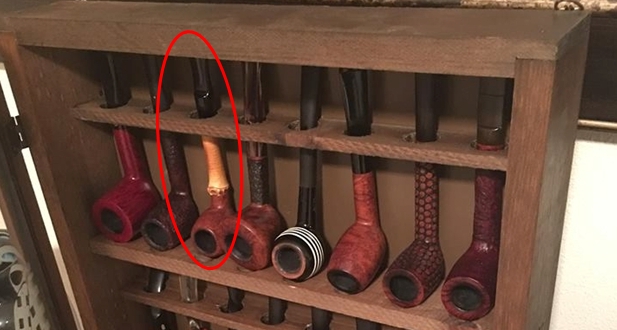 In the last box Jeff sent me he included both of these pipes. Both have the bamboo shank, both have an apple shaped bowl. Both are stamped Kaywoodie Mandarin on the underside of the bowl. Both had threaded stems and a metal space at the end of the shank. The first pipe from the rack above had a thinner diameter bamboo shank while the second was thicker – both were two knuckle bamboo pieces. The first pipe had a black acrylic replacement stem with a saddle while the second one had the original tapered stem with the Kaywoodie Club in a white circle on the left side of the stem.
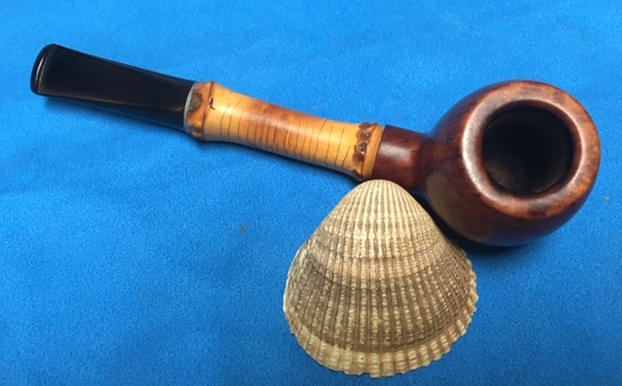
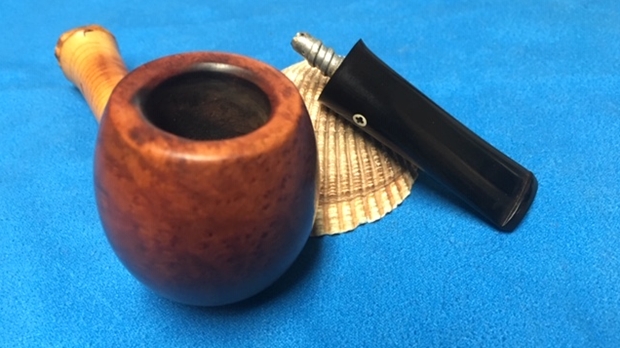
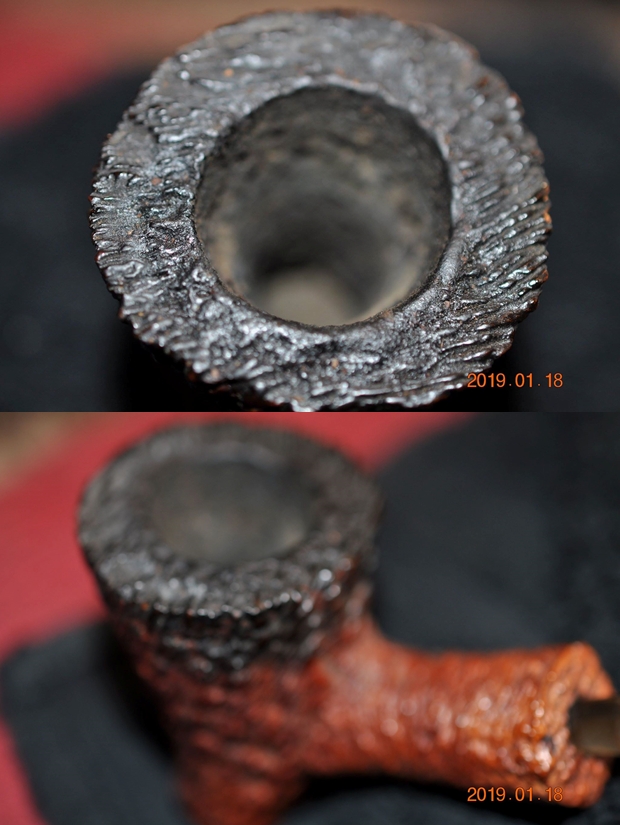
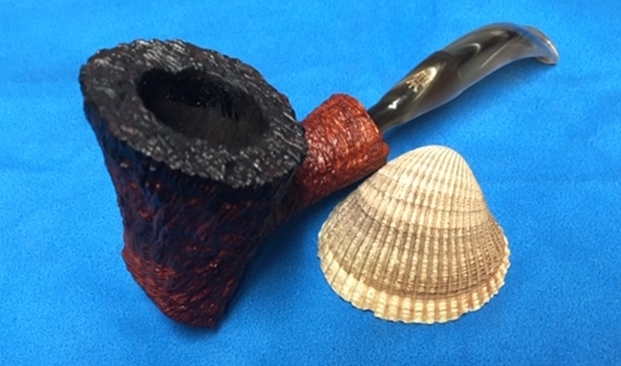
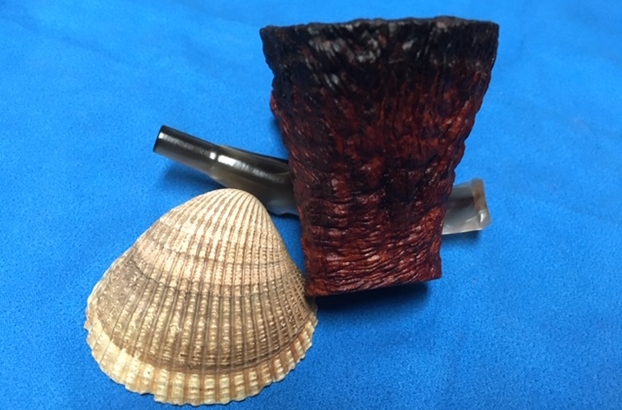
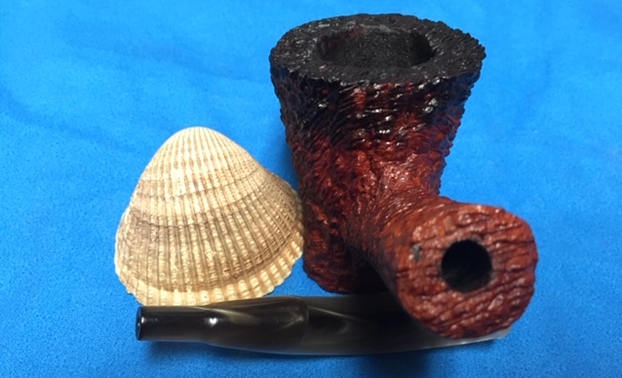
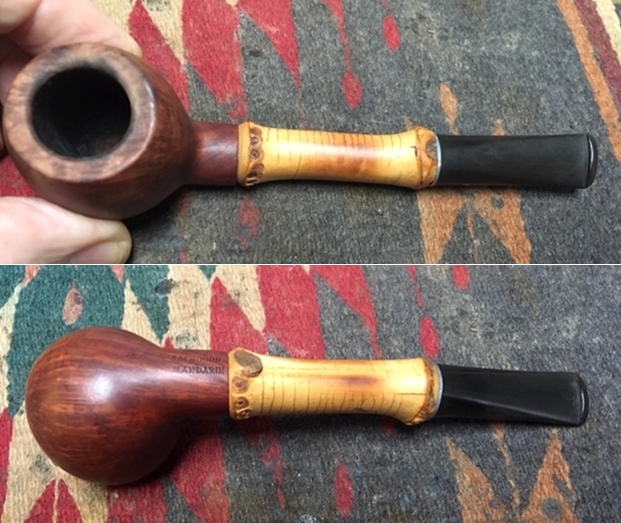
Both pipes were quite dirty which seems to be the case when working on pipes that were obviously someone’s favourite. Jeff took photos of both pipes before his cleanup work. The first pipe from the Michigan collection is shown first. There was a thick cake in the bowl and lava overflowing onto the rim top. The inner and outer edges of the bowl looked very good. The stem had some tooth marks and chatter on both sides near the button and some tooth damage to the sharp edge and top of the button. The photos below show the first pipe.
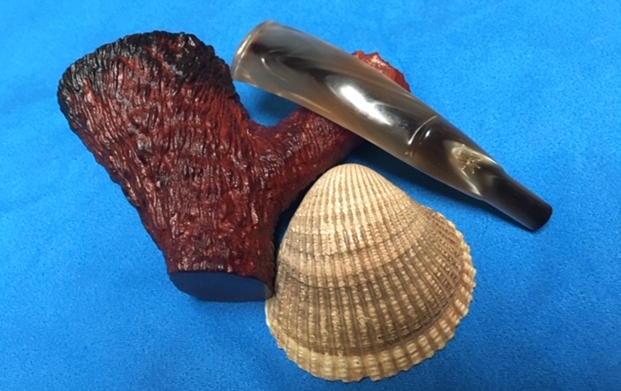
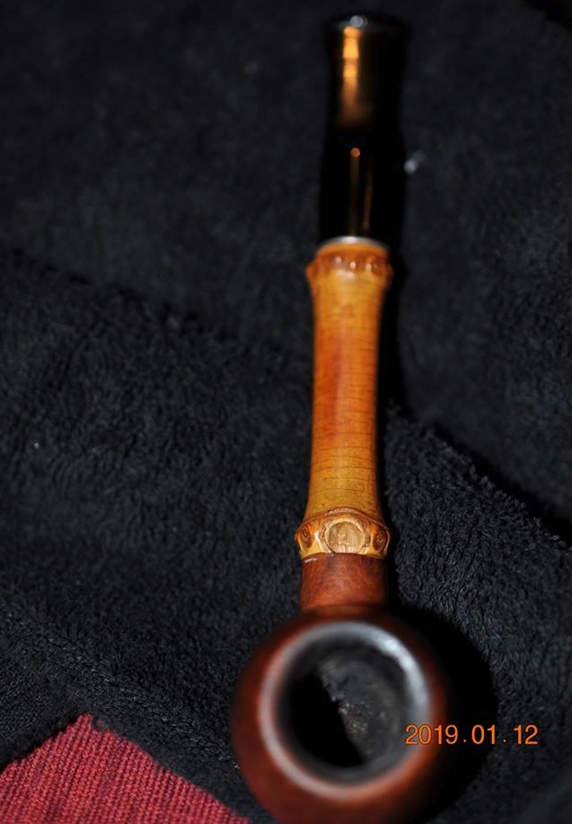 The next photo shows a close up of the bowl. You can see the thick cake in the bowl and the overflow of lava on the rim top. He also took photos of the bottom of the bowl to highlight the condition of the pipe. It had some great grain all around the bowl and some nicks. It was a dirty pipe and obviously well smoked. The bamboo shank extension had a nice patina and a crackle like look that had developed as the pipe was smoked.
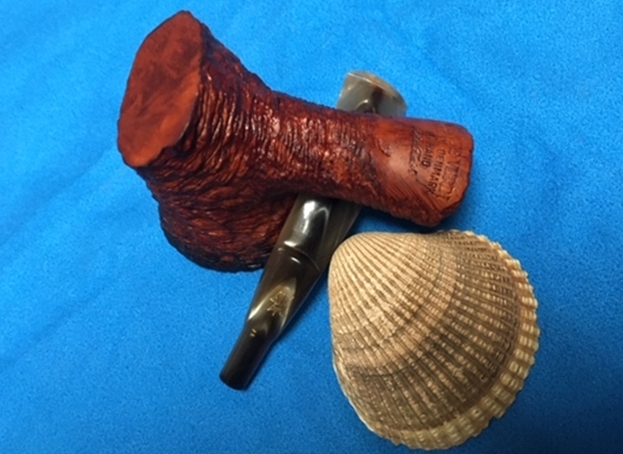
  The next photo shows the stamping on the underside of the shank. It is quite clear and legible. Jeff also took a photo of the shank and the fit of the replacement stem to the shank end. It is well done and the alignment is very good.
 The close up photos of the stem show the tooth marks in the surface near the button and the damage to the button itself on both sides. The tooth marks and chatter were repairable and the button could be reshaped.
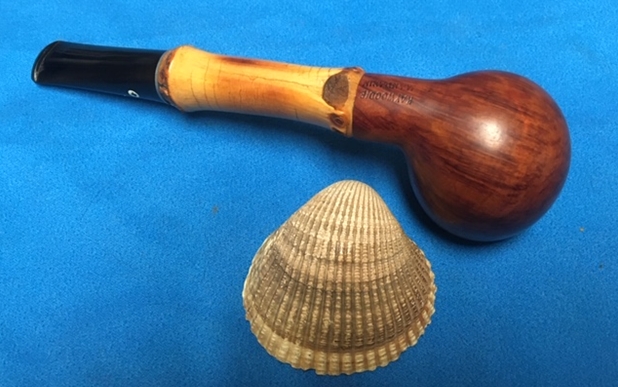
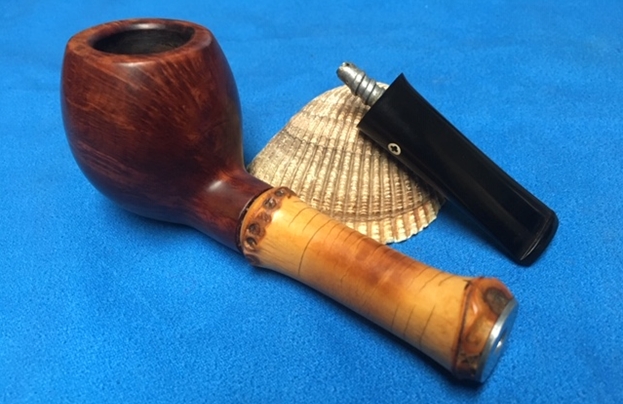
 The pipe from the New York purchase is shown second. There was a thin cake in the bowl and very little lava on the rim top. The inner and outer edges of the bowl looked very good. The original Kaywoodie vulcanite stem had some light tooth marks and chatter on both sides near the button and some light wear on the sharp edge of the top and the bottom of the button. The photos below show the second pipe.
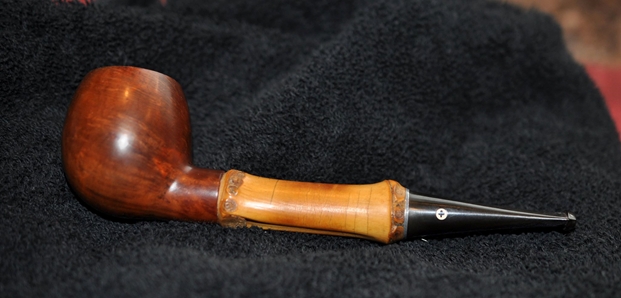
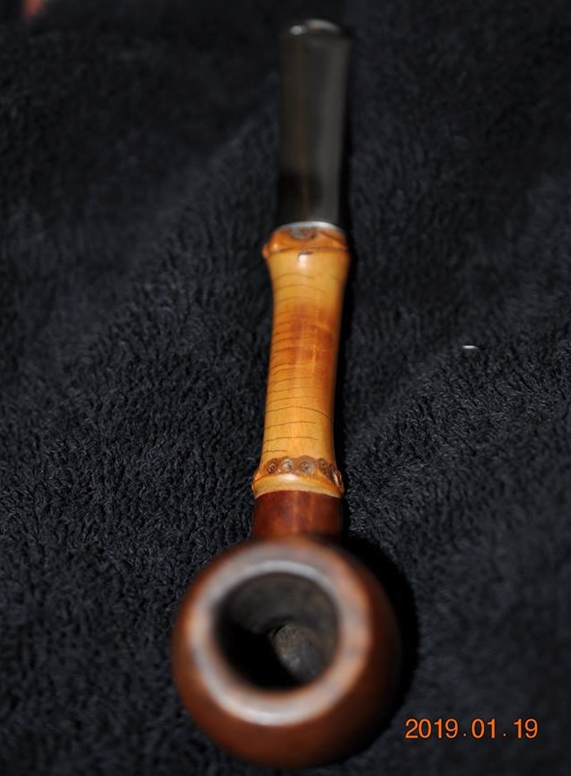 The next photo shows a close up of the bowl. You can see the cake in the bowl and the light burn marks on the right side of the inner edge of the rim top. The second photo below shows the stamping on the underside of the bowl – clear and readable Kaywoodie Mandarin.
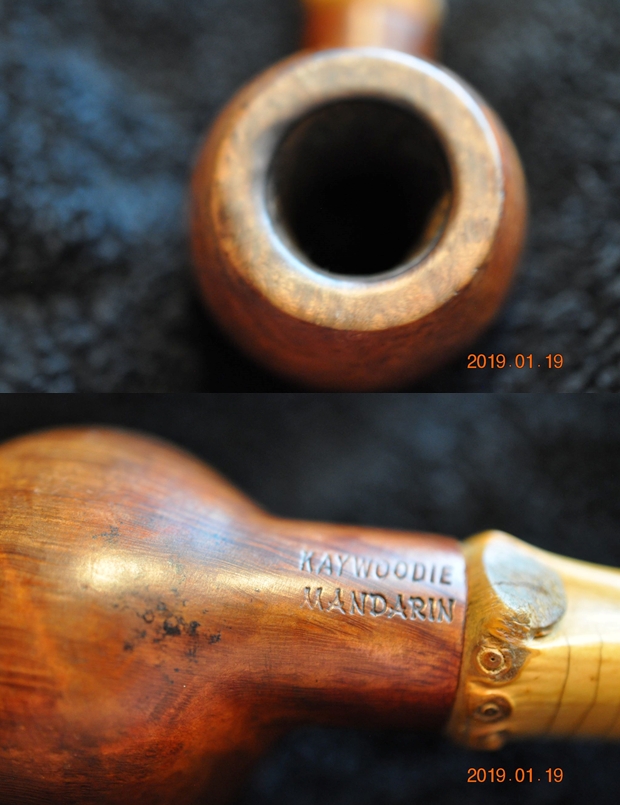 The Kaywoodie Club logo looks great and the fit of the stem to the metal spacer on the shank end is very good.
 He took close up photos of the stem top and bottom at the button. You can see the tooth chatter on both sides and the slight wear to the sharp edge of the button. Generally the stem is in very good condition.
 Jeff reamed both bowls with a PipNet pipe reamer and followed up with a Savinelli Fitsall pipe knife to remove the cake. He scrubbed out each mortise and the airway in the shanks and the stems with alcohol, cotton swabs and pipe cleaners. He scrubbed the exteriors of the bowl, rim, shank and stem with a tooth brush and Murphy’s Oil Soap to remove the oils and tars on the rim and the grime on the finish of the bowl of each pipe and bamboo shank. He rinsed them under running water. He dried them off with a soft cloth. He was able to remove most of the lava build up on the rim top of the first pipe and the little bit oon the second one. I took photos of the pipes to show its condition before I started my work on them. The first one is the Mandarin with the acrylic stem.
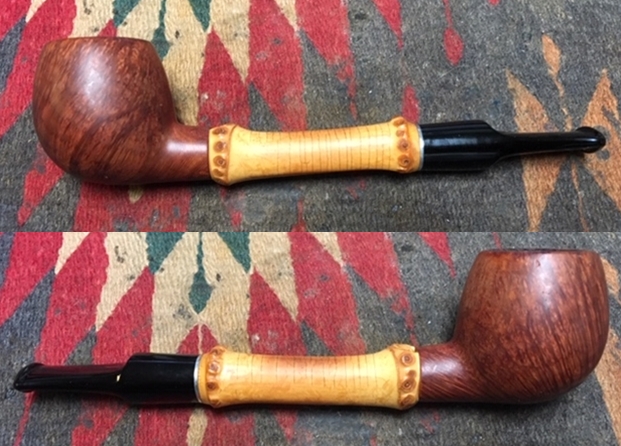
 Here are the photos of the second pipe.
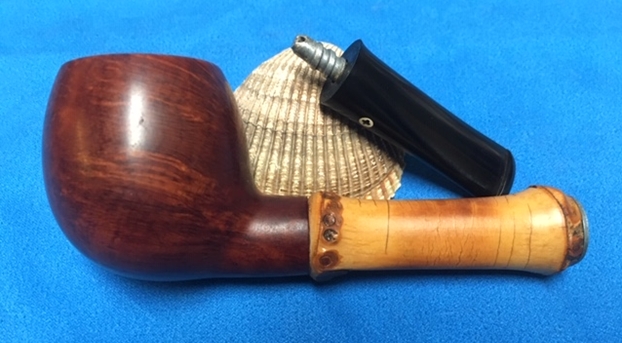
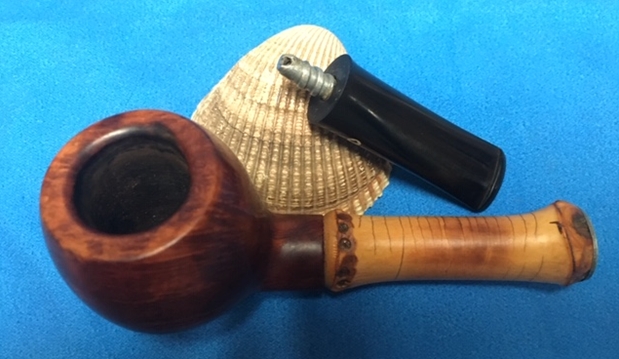
 I took close up photos of the bowl and rim top as well as the stem on each of the pipes. You can see the condition of the rim top and bowl in the first photo of each pipe. Jeff was able to remove almost all of the tar and oils but there was darkening and damage on the inner surface of the rim on the first pipe and the surface and inner edge of the second pipe. The acrylic stem on the first pipe had tooth chatter and some tooth marks on the top and underside of the stem near and on the button surface. The vulcanite stem on the second pipe had some chatter but otherwise was in very good condition. The first set of photos show the first acrylic stem Mandarin. The second set shows the original vulcanite stem Mandarin.
The first pipe.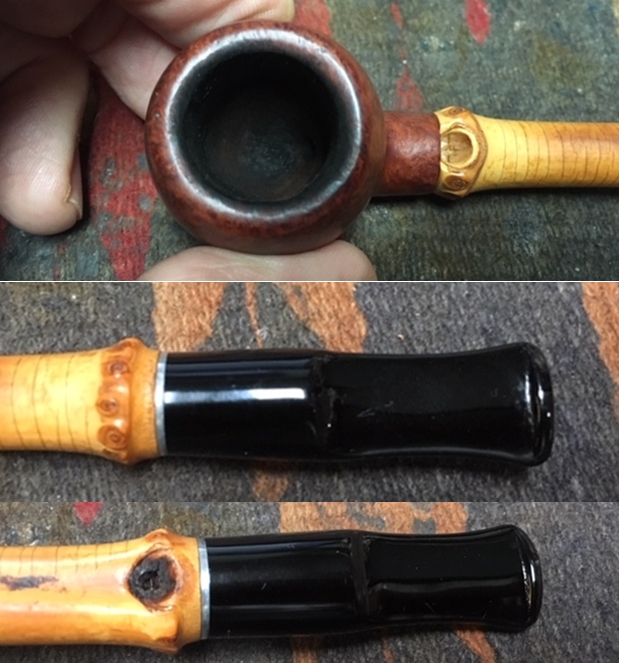 The second pipe.
 I wanted to confirm a possible date for both of these pipes. I turned to Pipephil to see what he had to say about the brand (http://www.pipephil.eu/logos/en/logo-kaywoodie-2.html). I have included a screen capture of the listing on the site. It appears to have been made between 1958-1967.
 I turned next to Pipedia to check out the Kaywoodie Collector’s Guide to see if I could get some more information on the Mandarin line. I found an interest monograph there called Notes on Kaywoodies Introduced between 1955 and 1968. It included reference to the Mandarin line. I include that in part below (https://pipedia.org/wiki/Collector%27s_Guide_to_Kaywoodie_Pipes). I have highlighted and underlined the Mandarin in the list below. Both of the pipes I am working on are the smooth versions.
NOTES ON KAYWOODIES INTRODUCED BETWEEN 1955 AND 1968
The material presented in this monograph is extracted from 1936, 1947, 1955, 1968-69, and four undated Kaywoodie catalogs. Based on a comparison of prices in the 1955 and 1968-69 catalogs, the four undated catalogs appear to span the period from the late 1950’s to the late 1960’s (i.e., after 1955 but before 1968). This section presents a brief summary of the Kaywoodie Pipes that appeared in these undated catalogs, but did not appear in either the 1955 or 1968-69 catalogs…
Here is a list of pipes from this time period.
…Hi-Bowl. Tall, tapered bowl in six shapes (see Table 5). Available in smooth or “rough” finish ($10).
Mandarin. Smooth or relief grain finish with burnished-bamboo shank ($10).
Setter. No shank, just a ridged hole for a slender, filter-free, push-bit. Available in “flat bottom” (hence, “Setter”) panel, billiard, and poker shapes. Smooth or textured finish ($10).
Tuckaway. The 1955 catalog shows a Drinkless Tuckaway that was simply a smaller version of other Kaywoodie styles. The Tuckaways of the 1955-1968 period had military mountings, filter-free see-thru bits, and were packaged in a leatherette case. Available in Standard, Relief Grain, and Super Grain grades ($6-$8, depending on grade). Miniatures. Two-inch miniature replicas of “their big brother”, complete with the Drinkless fitment and Synchro Stem. The catalogs show these as individually-cased pipes but multiple pipe sets were apparently available. Price: $5.
Miniatures. Two-inch miniature replicas of “their big brother”, complete with the Drinkless fitment and Synchro Stem. The catalogs show these as individually-cased pipes but multiple pipe sets were apparently available. Price: $5.
Colossal Super Grains. Available in three “oversize” shapes (see Section 3.2) in hand-carved or smooth finishes ($5).
Now I knew that both pipes came from this time period. They were made between 1955-1968. Somewhere along the way the first pipe had been repaired and given an acrylic stem (this was the Michigan pipe). The other pipe from the NY connection had the original stem and threaded tenon though the stinger apparatus had been clipped off.
I started by working on the rim top of both pipes. The first pipe had a more classic apple shaped rim that came to a rounded top curved into the bowl. The second one had a flat rim top that I suppose could have come from a restoration sometime in its life but I could not be sure of that.
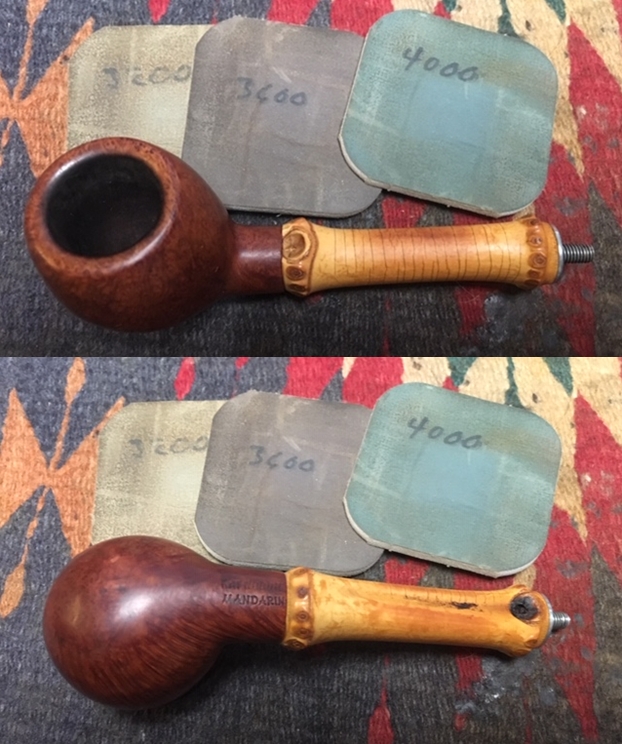
To smooth out the damage on the rim of the first pipe I sanded out the burn damage and the nicks with a folded piece of 220 grit sandpaper. I sanded the inner edge of the rim and the rounded top to remove the damage. On the second pipe I used a folded piece of 220 grit sandpaper to give the inner edge of the rim a slight bevel to remove the burn marks and smooth out the rim top and outer edge.
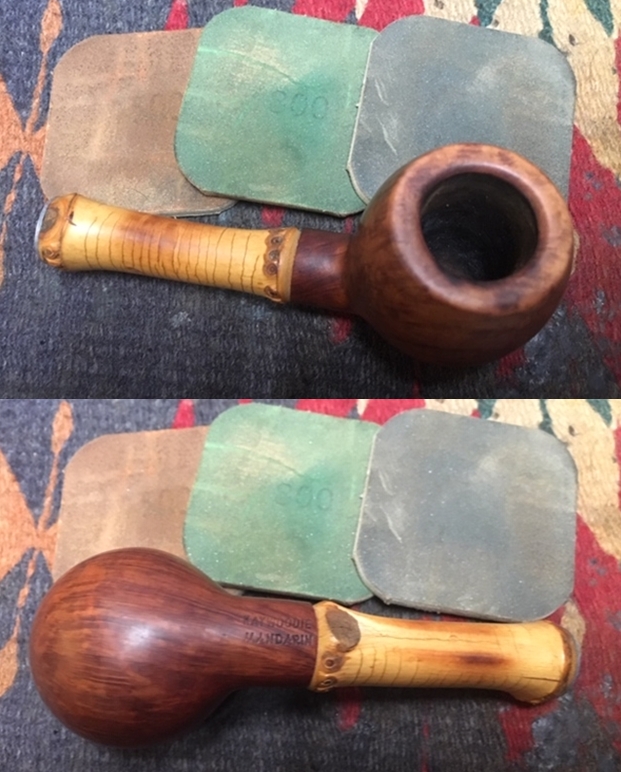
 I polished the bowls and the rim top on both pipes with micromesh sanding pads – wet sanding with 1500-2400 grit pads and dry sanding with 3200-12000 grit pads. I wiped the surface down after each sanding pad with a damp cotton cloth.
The first pipe.


 The second pipe.


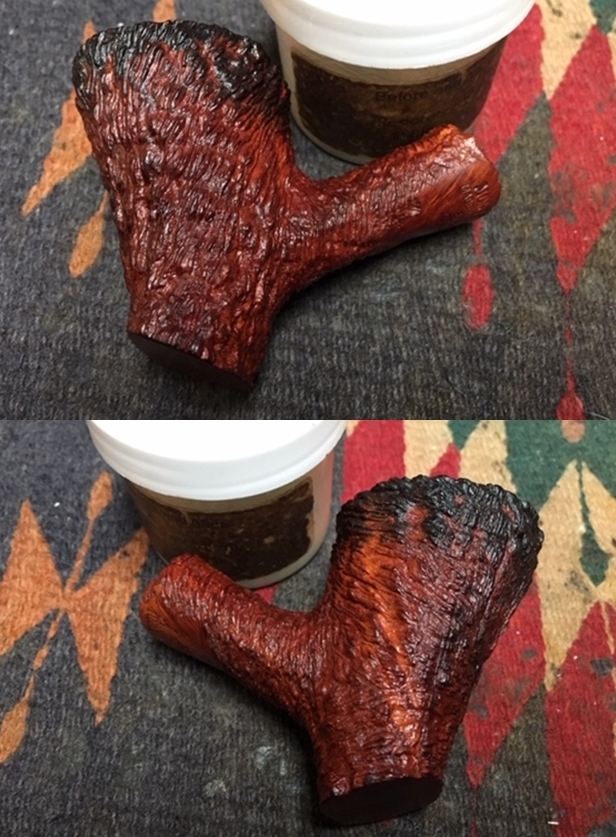
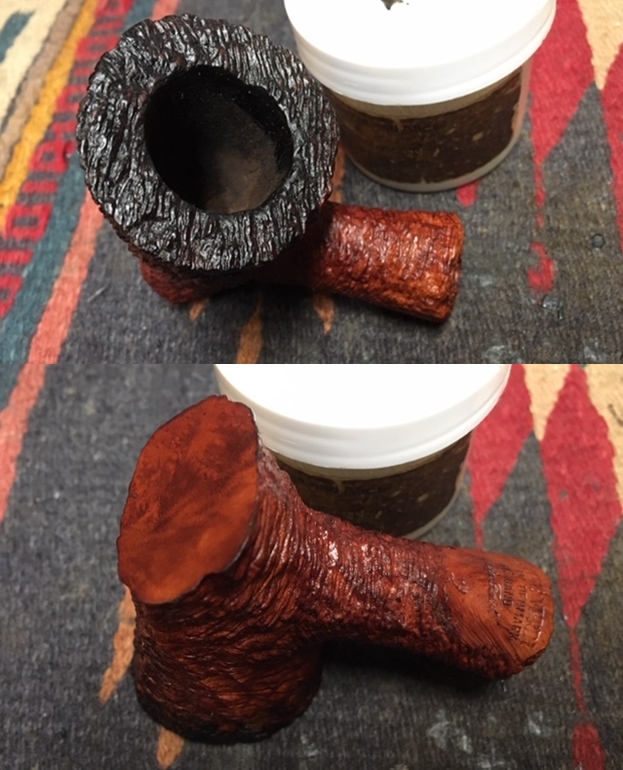
 With the rim top cleaned, polished and restored on both of the pipes I worked some Before & After Restoration Balm into the surface of the briar with my fingertips to clean, enliven and protect it. I worked it into the bamboo on both pipes as well to enliven it as well. It took some time to really get it into the grooves and valleys of the bamboo but I was able to work it in. I used a shoe brush to make sure it was deep in the grooves. I let the balm sit for a little while and then buffed with a cotton cloth to raise the shine. The following photos show the bowls at this point in the restoration process. The bowl and the rim top on both pipes look really good and the darkening and lava are gone. The grooves and patina on the bamboo also look really nice with the new finish. I am very happy with the results. (Hopefully by now you can tell which is which. If not the pipe with the threaded metal tenon sticking out is the one with the acrylic stem from the Michigan collection.)
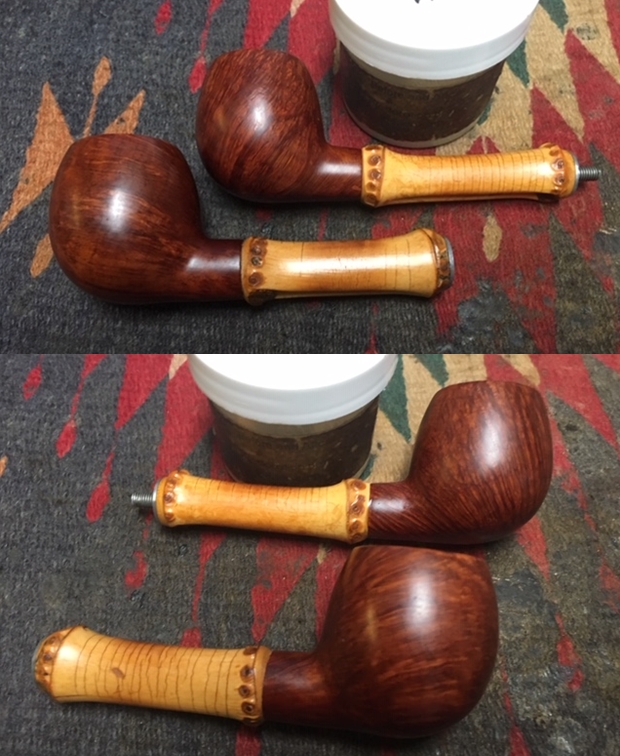

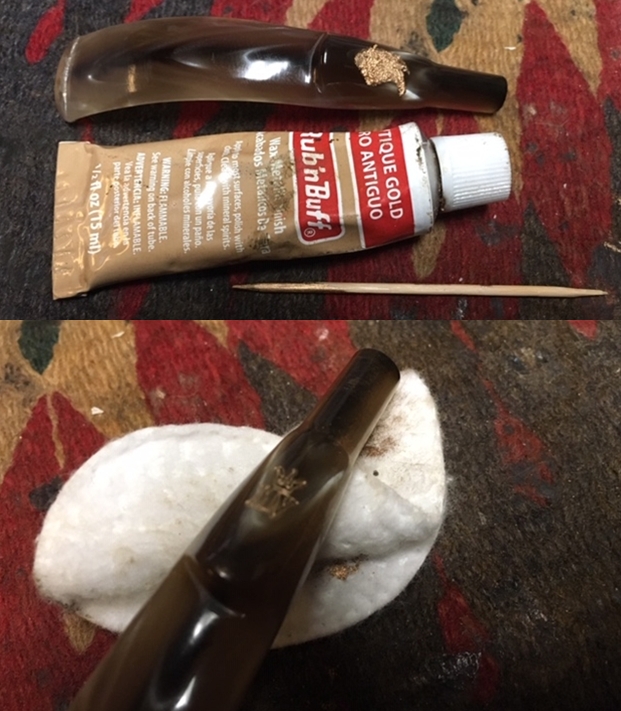
 I set aside the bowls at this point and turned my attention to the stems. I started with the acrylic replacement stem from the Michigan collection. I sanded out the tooth marks on the button surfaces on both sides with a folded piece of 220 grit sandpaper. I sanded it with a folded piece of 400 grit sandpaper to sand out the scratches. Once I was finished the tooth marks and chatter were gone.
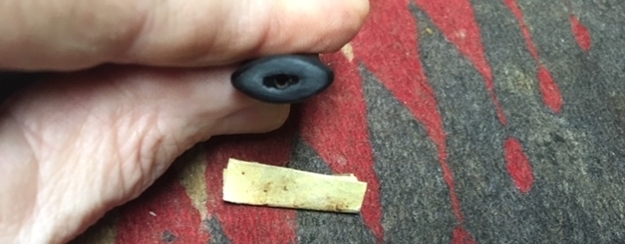
 As I finished the stem I noticed that the end of the stem had an unfinished slot – merely a round hole that comes standard on replacement stems. It needed to be shaped and a slot cut in the end. I used a series of needle files to cut open the slot and shape it. I still needed to sand the slot but it was starting to look good. I folded a piece of 220 grit sandpaper and sanded the edges of the button to further shape it. The photos tell the story.
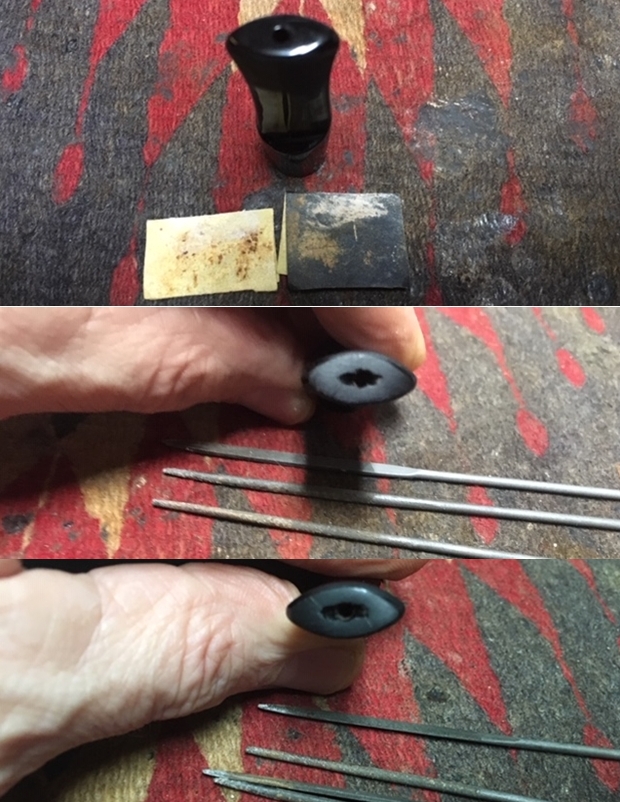
 I moved onto the original Kaywoodie vulcanite stem from the New York find. I sanded out the tooth marks on the button surfaces on both sides with a folded piece of 220 grit sandpaper. I sanded it with a folded piece of 400 grit sandpaper to remove the scratches. Once I was finished the tooth marks and chatter were gone.
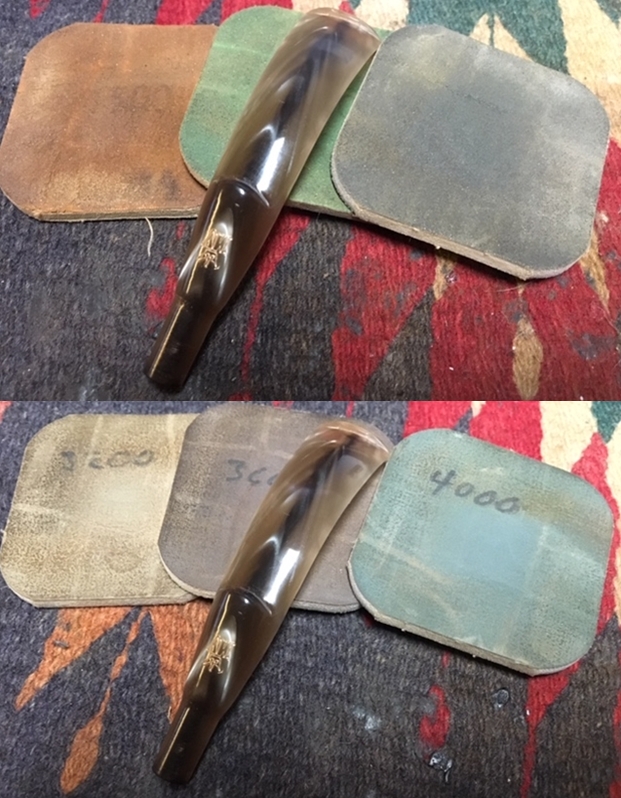
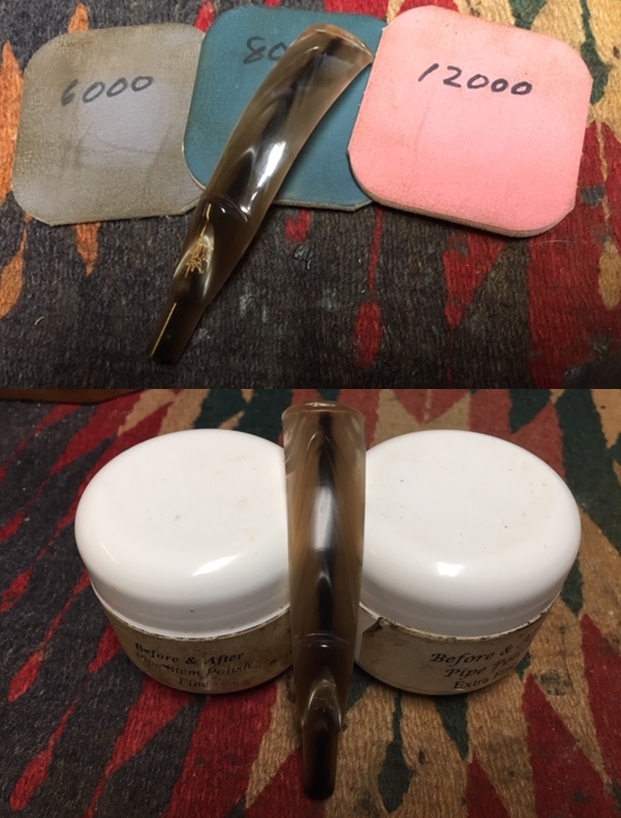
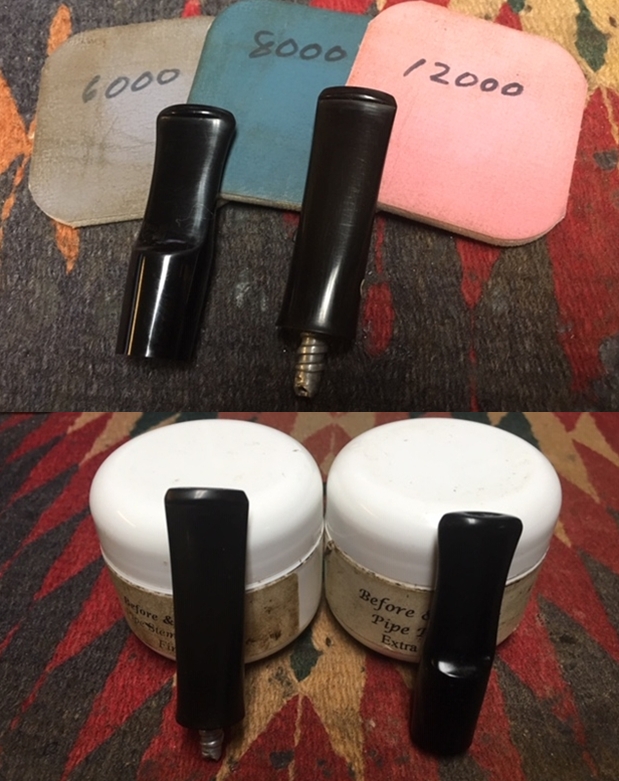
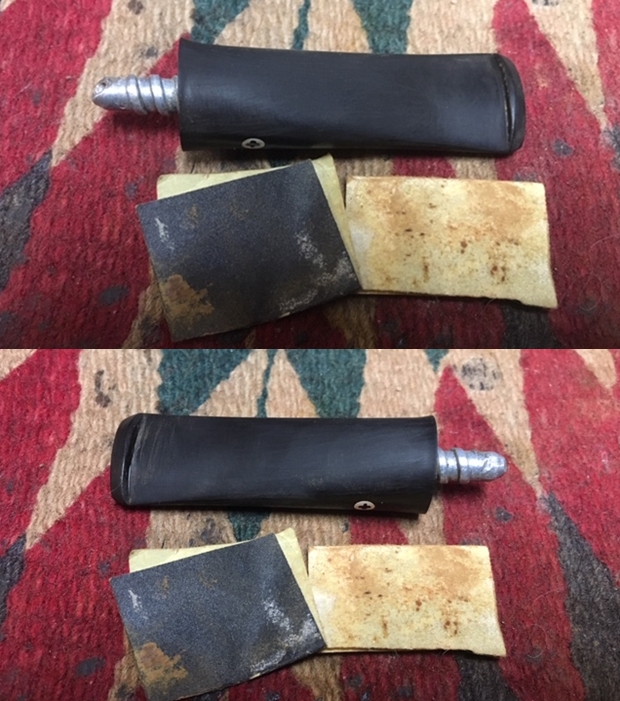 I polished both stems with micromesh sanding pads – wet sanding with 1500-2400 grit sanding pads and dry sanding with 3200-12000 grit sanding pads. I wiped them down after each sanding pad with a damp cloth. I polished them with Before & After Pipe Stem Polish and wiped them down a last time with the damp cloth and some Obsidian Oil and set them aside to dry.
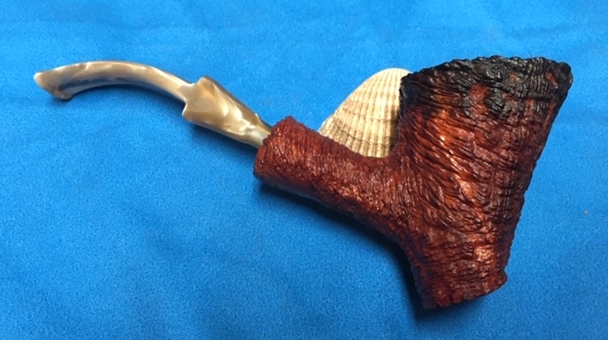
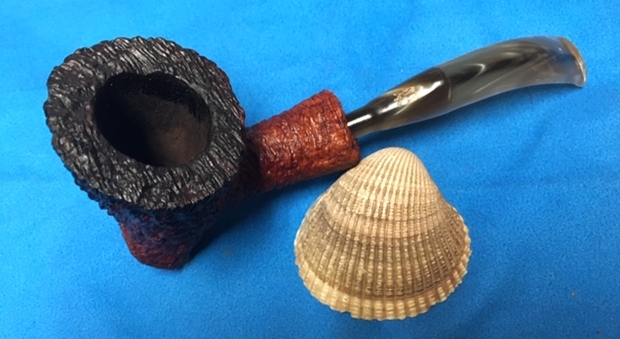
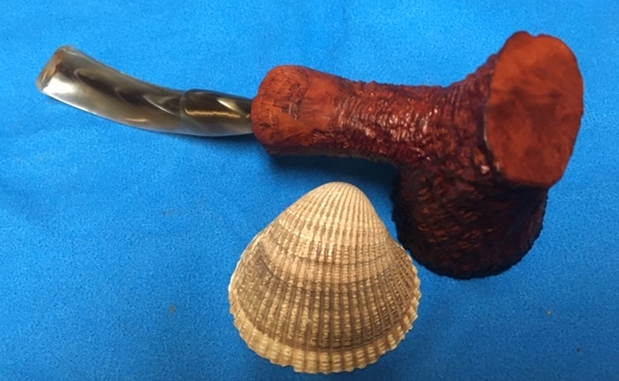
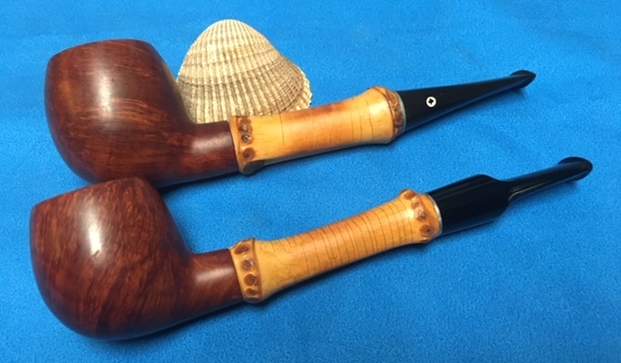
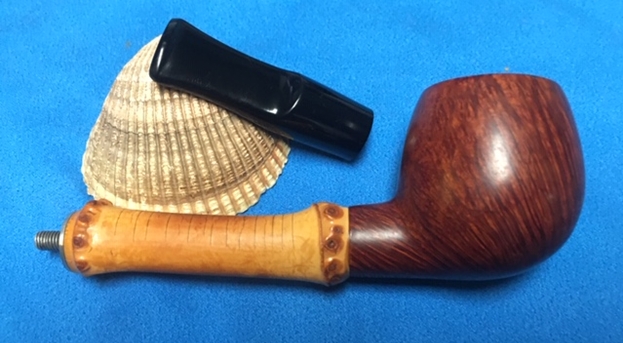
 This beautiful pair of Kaywoodie Mandarin Smooth Apples really are unique and special pipes. The bamboo shank and the smooth well grained bowls make them quite stunning. I have a pair of these in my own collection and they are great smoking pipes. The patina on the old bamboo is very nice. You have to figure at the earliest these pipes come from the mid to late 50s and early 60s and at the latest they come from 1968. That means that they may be 64 years old at the earliest and then at the latest 51 years old. Either way they are old pipes. They have a lot of life left in them that is for sure and will definitely outlive most of us. I polished the bowls and stems with Blue Diamond polish on the buffing wheel. I gave the bowls and stems multiple coats of carnauba wax. I buffed both pipes with a clean buffing pad to raise the shine. I hand buffed them with a microfiber cloth to deepen the shine. The pipes polished up pretty nicely. The rich grain shining through the medium brown stain came alive with the buffing. The rich contrasting brown colour works well with the polished black vulcanite stem. The finished pipes are beautiful and feel great in the hand. Have a look at them in the photos below.
  The dimensions of the first pipe with the replacement Lucite stem are Length: 6 inches, Height: 1 1/2 inches, Outside diameter of the bowl: 1 1/4 inches, Chamber diameter: ¾ of an inch.
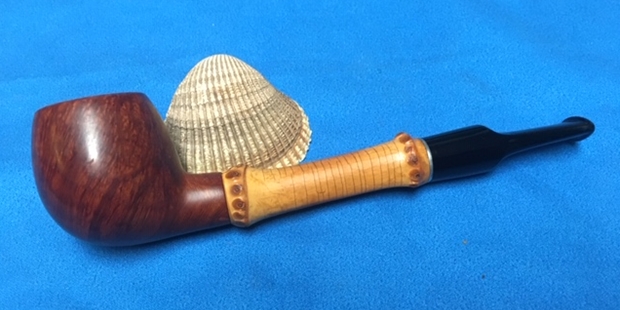
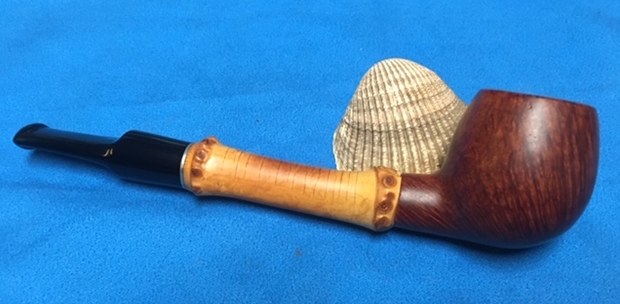


 The dimensions of the second pipe with the original Kaywoodie vulcanite stem are Length: 6 inches, Height: 1 1/2 inches, Outside diameter of the bowl: 1 3/8 inches, Chamber diameter: ¾ of an inch. I will be putting both Mandarin pipes on the rebornpipes online store individually and they can be purchased individually or as a pair. The patina on the bamboo of both pipes is a bonus on these beauties. Thanks for walking through the restoration with me on this pair of oldtimers.