
Blog by Dal Stanton
Last year, when my wife and I were in the US for some months for our periodic furlough reconnecting with friends, family, and sponsors of our work in Bulgaria, I was also trying to connect with pipes – I love the search! As I’ve done many times before, I was trolling through the eBay offerings. I came across a listing for a lot of pipes, which the seller described as: Huge Lot Of 66 Smoking Pipes Pre-Owned Pre-Smoked and Deeply Loved. The further description was that the Lot of 66 was a donated item, that the collection belonged to one owner, and they repeated that the collection had been “Loved”. There were several other pictures providing break downs of the overview below. As you might expect, I started going through the pictures to see what I could see – the seller said that they were not pipe people, they did not know the brands nor the specific histories. This is always a good sign – treasures could be lurking in the mass of 66 pipes! I could see very easily one OBVIOUS treasure – a Gourd Calabash. Well, I did the math, determined a budget, and with my wife’s blessing, went to the auction block and I won – which surprised me. There turned out to be several treasures in the Lot of 66 which will gradually make their way to The Pipe Steward worktable to be restored and recommissioned to benefit the Daughters of Bulgaria, helping women and girls, and their children, who have been trafficked and sexually exploited. 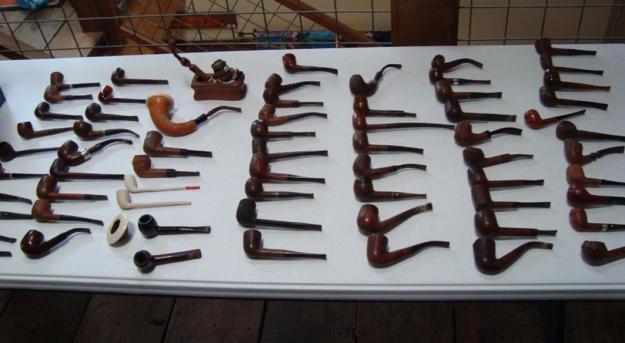 I toted the Lot of 66 back to Bulgaria with me (thanks to a very patient wife!) and now the Sculpted Gourd Calabash is now on the worktable. What prompted the Calabash’s retrieval from the ‘Help Me!’ basket was a text message I received from a man who said he was looking for a Meerschaum pipe and a Calabash. Brian had met one of my colleagues in Plovdiv, Bulgaria, and through their conversation, he discovered that I restored pipes and that he had a bucket list of sorts, of pipes he was trying to acquire while in Europe for a short work stay. Brian and I began to text back and forth, and I told him I did have a Calabash and a few Meerschaums. He was able to look at the Sculpted Gourd Calabash on The Pipe Steward site in the ‘For Pipe Dreamers Only’ section – unrestored pipes that folks may commission. We agreed on the Calabash and since he was leaving Bulgaria soon, I went to work straight away on his ‘Bucket List’ Calabash along with the other projects on my worktable. Only later, as we continued to text each other, did I discover that Brian was an Airforce serviceman from Washington State and lives on a farm where he and his wife provide foster care for children. He said he was on a short military training exercise in Bulgaria. My sense of appreciation grew – not only for the service to his country, but their care and concern for children. I also discovered that Brian has become very interested in pipe restoration and may give it a go! So, to work on the Calabash.
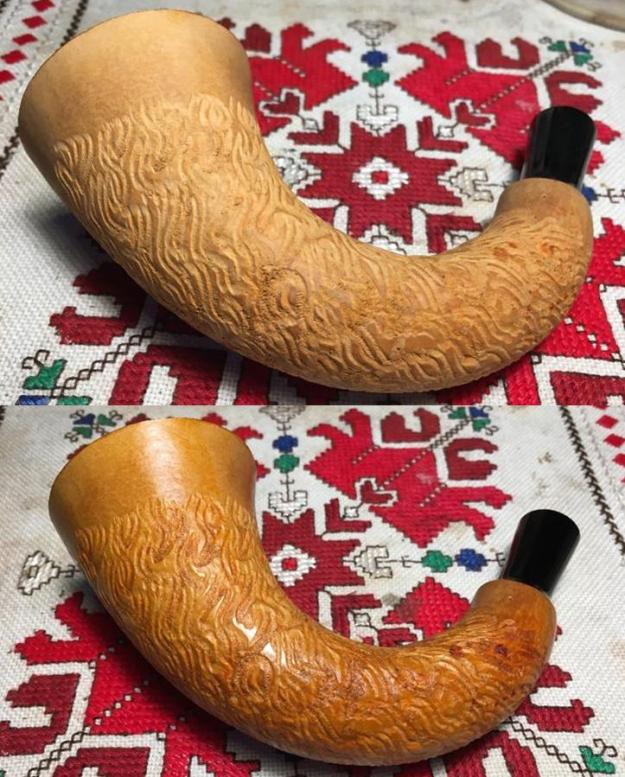
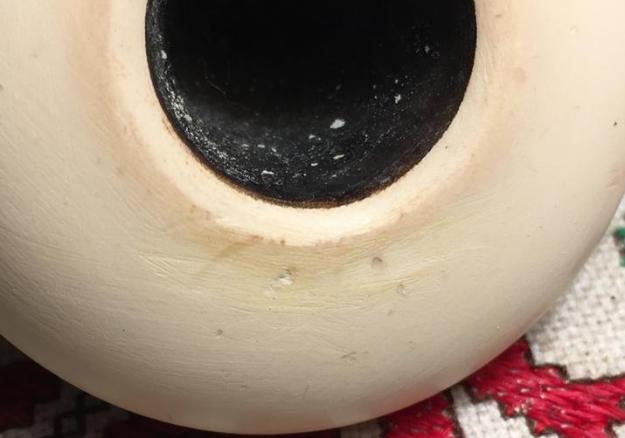
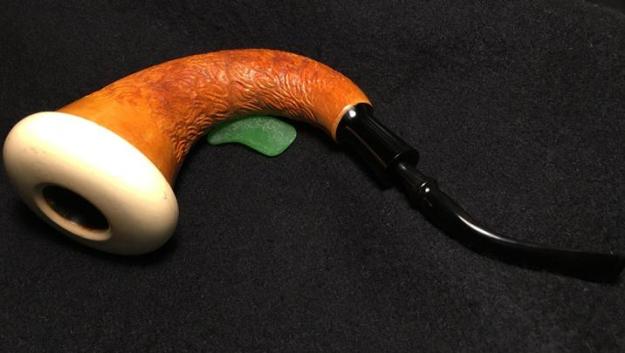
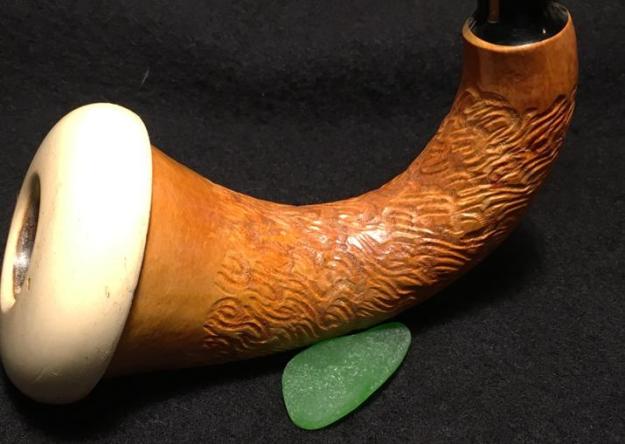
One of the discoveries I made when I looked at the Calabash for the first time in hand – what I could not see in the pictures, was that the gourd was sculpted – a very interesting and attractive design that both adds an unexpected ‘fresco’ of sorts on the gourd, and also a different, tactile feel. On my worktable here in Sofia, Bulgaria, I take pictures of the Sculpted Gourd Calabash to chronicle his condition.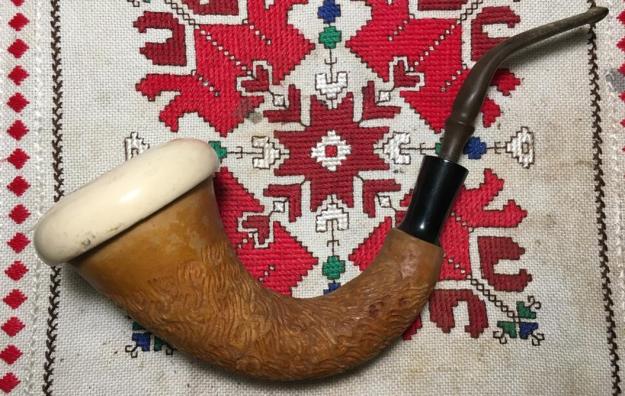
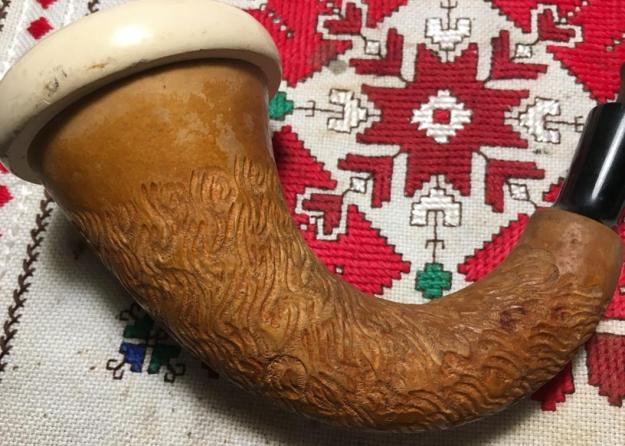

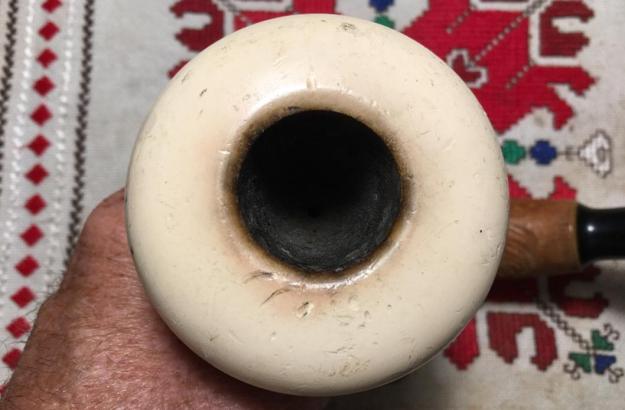

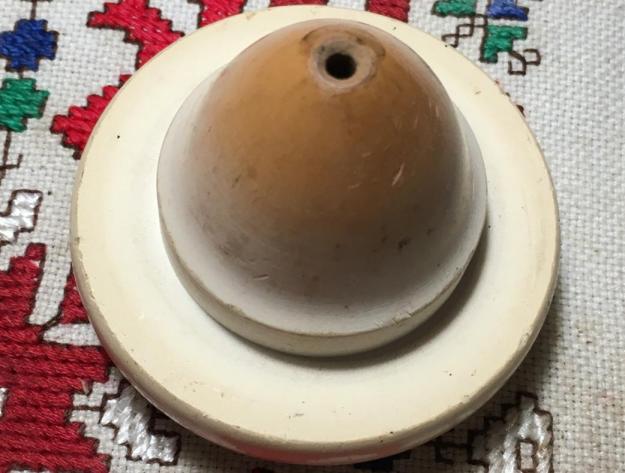
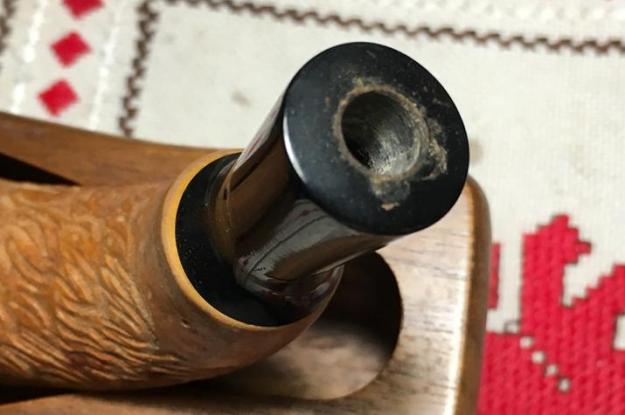
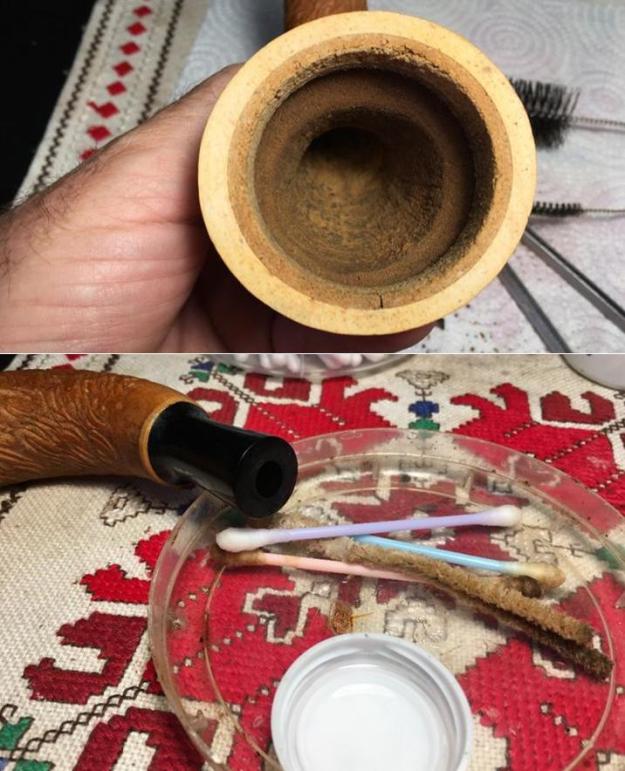
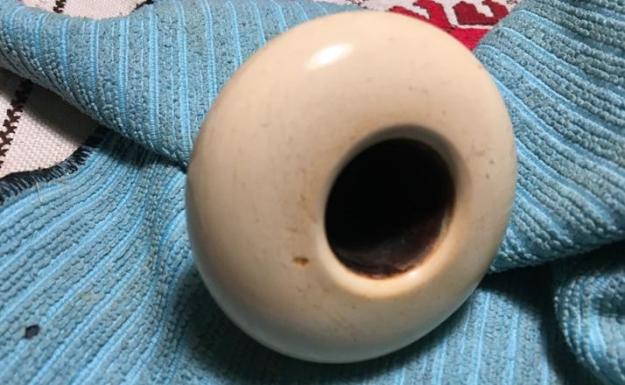
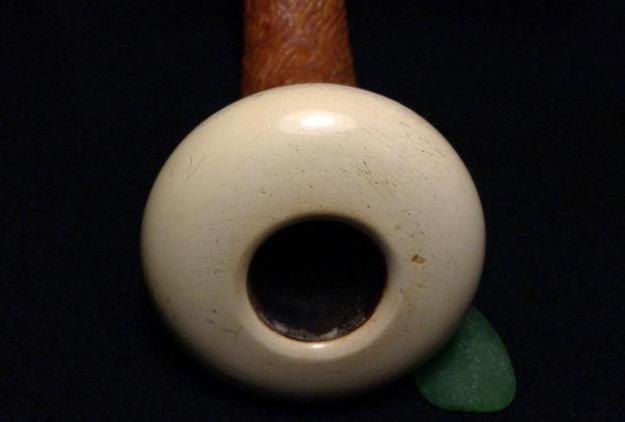
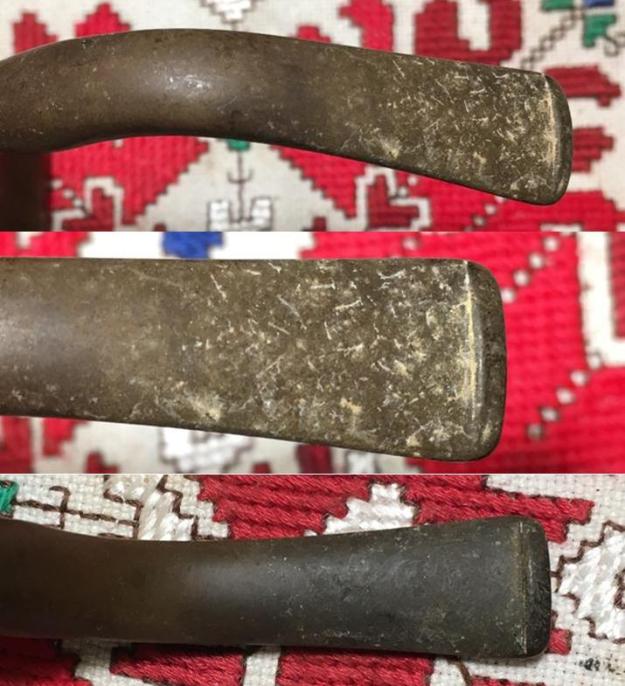 The first thing that draws the attention to this Gourd Calabash after the sculpted design is taken in, is the sheer size of the pipe. From the end of the Meerschaum cup to the end of the fancy push tenon stem is just at 9 inches! The cup is 2 ¾ inches wide and the cup chamber is 1 3/8 inches deep. The pipe has no markings to reveal its origins. The gourd is generally in good shape and carries with it the normal signs of age – nicks and scrapes on the gourd surface. The surface shows the latent shininess of former finishes which look like blotches in the pictures above – these need to be removed. When I investigate the inside of the gourd I see dust and loose particles that need to be cleaned. The cork gasket which forms the connection between the Meerschaum cup and the gourd is in good shape but is dry. On rebornpipes, one of Steve’s best practices is to apply a little petroleum jelly to the gasket to condition it and to create a renewed seal. I’ll try this out as well. The cup itself is solid but sports some small chips on the top, near the chamber opening. There are also nicks and scratches revealing the bumps and bruises he’s collected along the way. I’ll work on sanding these out. The push tenon stem has significant oxidation and tooth chatter. The shank extension is made of plastic and is scraped up a bit on the end, but it should clean up nicely.
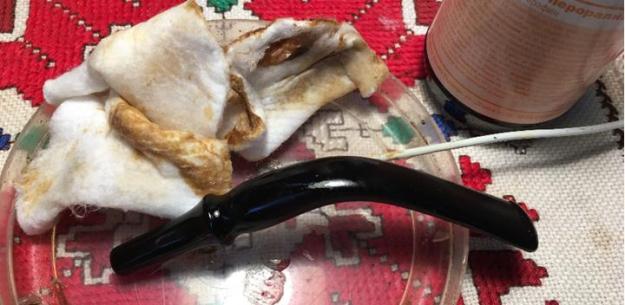
I begin the restoration of this treasure of the Lot of 66 for Brian’s bucket list by first cleaning the internals of the stem with pipe cleaners and isopropyl 95%. After this, I add the stem to the Before and After Deoxidizer bath, along with a couple other stems in process. I let the stem soak in the Deoxidizer overnight. The next morning, I fish out the stem from the Deoxidizer, let it drain off, and wipe liquid and oxidation off with cotton cloth pads wetted with light paraffin oil. This removes the raised oxidation. I wipe and buff the vulcanite and put it aside to dry. The Before and After Deoxidizer has grown in my appreciation for the job it does. The stem looks great.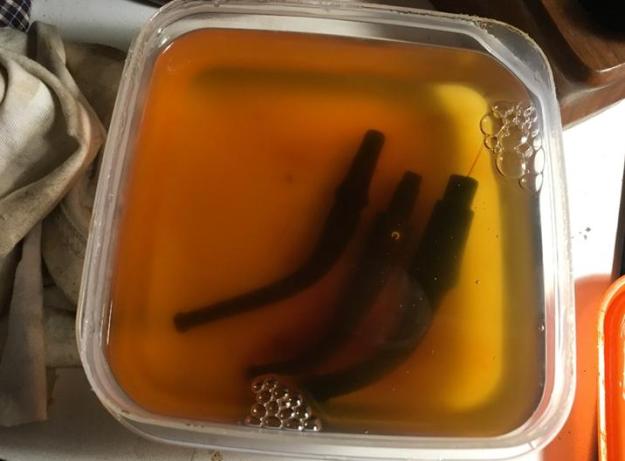
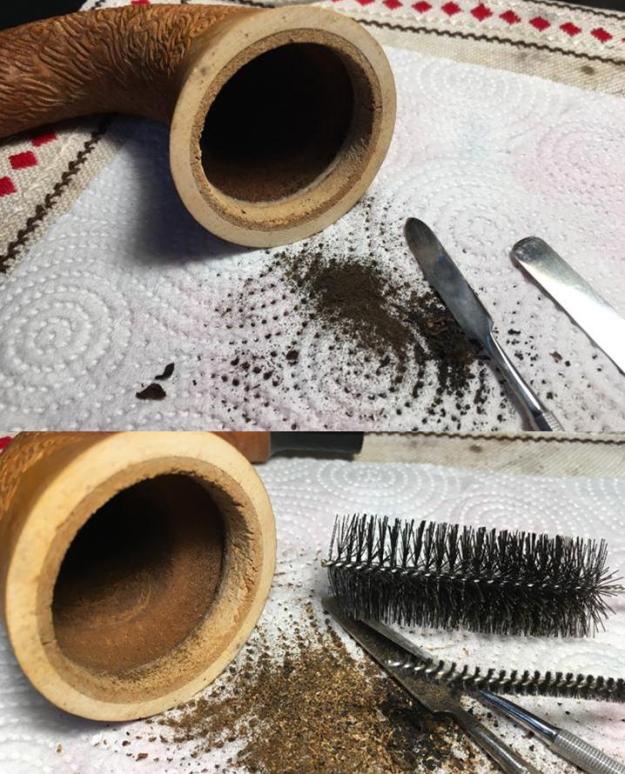
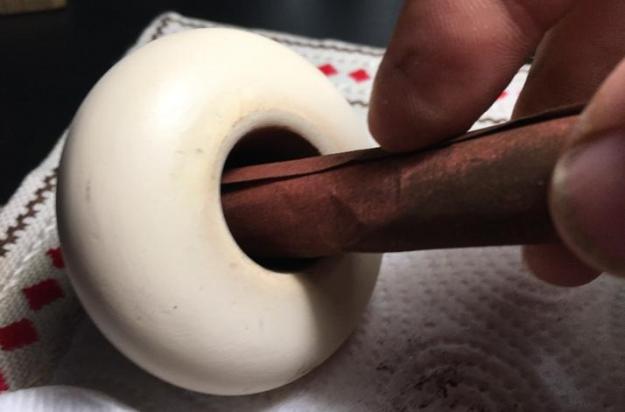
 Turning now to the gourd, I look again inside the gourd and the walls are dark, with some dried tars. I won’t be able to get it all cleaned, but I take a dental spatula to scrape what I can off. I put down some paper towel to help in cleanup. I also employ a long-wired shank brush to reach into the gourd and travel the curve. I do the same thing with a brush through the mortise into the gourd. This loosens more hardened tars. After I finish with the scraping and the brushing, I clean the mortise with pipe cleaner and cotton bud dipped in isopropyl 95%. The internals are as clean as I can manage!
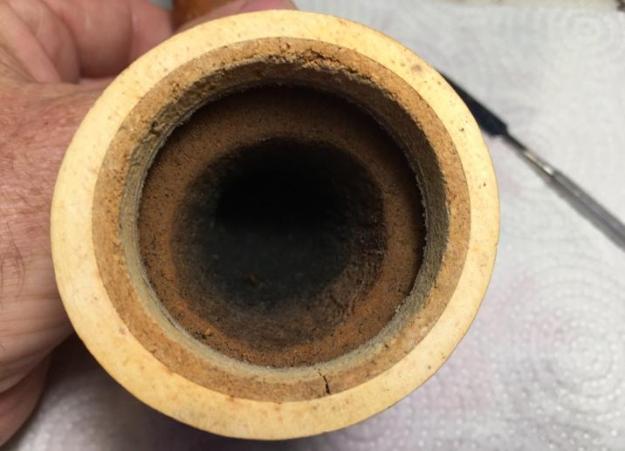
 Before I turn to the external surface of the gourd, I finish the internal by applying petroleum jelly with my finger to the cork gasket to rejuvenate it.
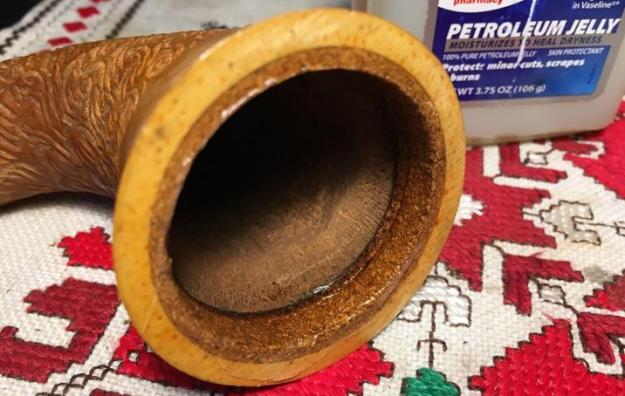 To clean the grime from the gourd surface and in the sculpting crevices as well as to remove the old shiny finish, I use undiluted Murphy’s Oil Soap with cotton pads and a bristled tooth brush. I then gently rinse the gourd using the toothbrush and a very light flow of water – avoiding water getting inside the gourd. I hand dry the gourd with paper towel and let it set to dry thoroughly. While I had the Murphy’s out, I did a quick clean over of the Meerschaum cup using a cotton pad.
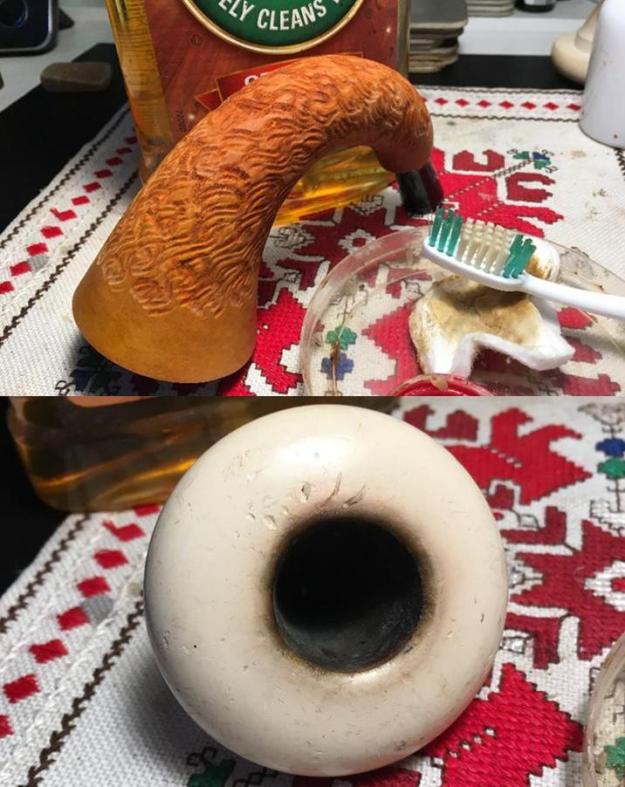
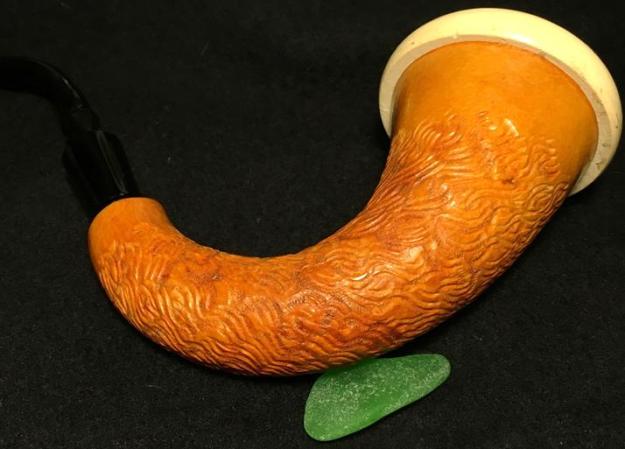
 After the gourd thoroughly dries, I want to rejuvenate the surface. Using Before and After Restoration Balm I work the balm into the sculpted gourd with my fingers. I take two pictures to mark the beginning for comparison. I’m looking forward to seeing what the Balm does with the thirsty, dry gourd! I was not disappointed – oh my! The richness of color that exemplifies a classic Gourd Calabash is evident. Every pipe man and woman hopes to have at least one Gourd Calabash in their collections!
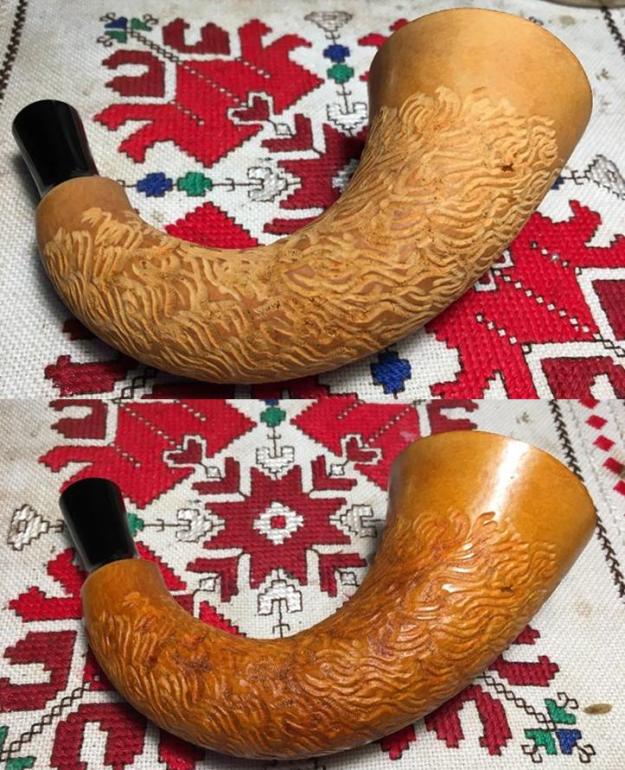
 I put the gourd aside to rest and pick up the Meerschaum cup. I take another close look at the chamber and at the chipping on the cup dome. I think that the chips are too deep to sand out totally, but I take a piece of 470 grade paper and lightly sand the surface of the Meer cup. I strategically and lightly sand out nicks on the surface and the bevel of the cup. I’m not able to remove the deepest divots next to the chamber lip but it looks better. As I sand, I use a dampened cotton cloth to wipe off the Meer dust.
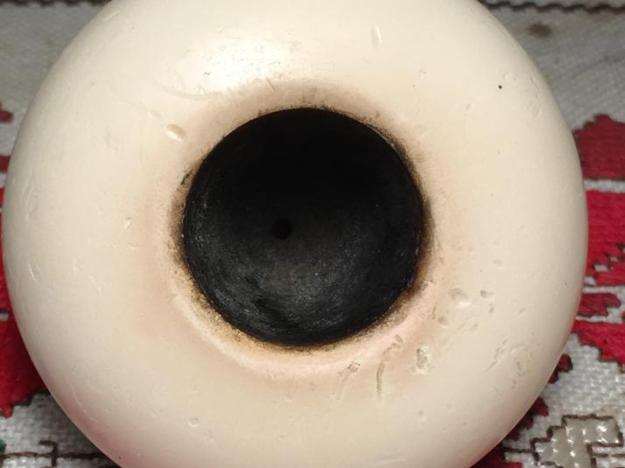
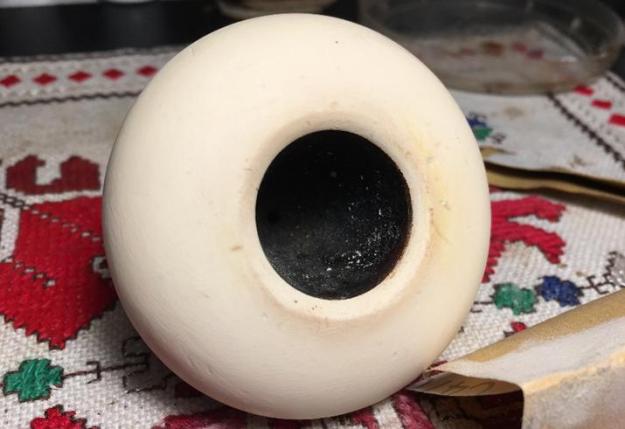
 Before going further with the Meer cup surface, I take the Savinelli Fitsall Tool and gently scrape the chamber. The cake is very light, and it doesn’t take much. I follow by sanding the chamber with a piece of 240 grade paper around a Sharpie pen and then wipe the chamber with a cotton pad and alcohol.
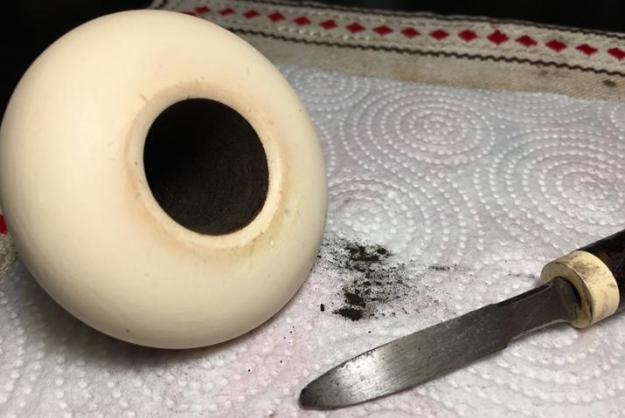
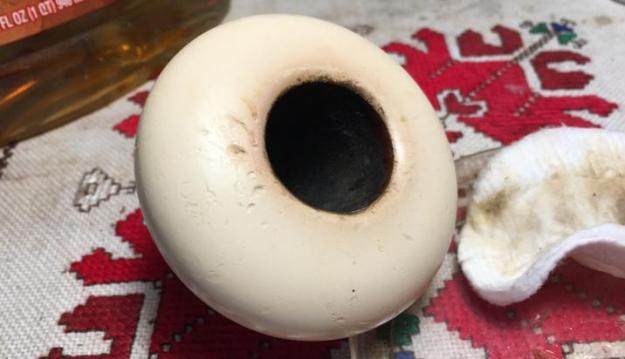
 Now I bring the Meerschaum cup through a micromesh pad cycle by wet sanding with pads 1500 to 2400 then dry sanding with pads 3200 to 12000. As I sand, I do not get carried away! Sanding Meerschaum is a much gentler activity than briar! As I progress to the latter, more polishing pads, the Meerschaum begins to reflect like glass. Nice!
 The next step with the restoration of the cup is to apply bee’s wax to the Meer surface. Bee’s wax is excellent in protecting the Meer surface as well as encouraging a rich patina. I have Bulgarian bee’s wax available and I melt it with a hot gun. When it liquifies, I apply it to the surface with a cotton bud. I also warm the Meer cup with the hot air so that it allows for the more even application of the melted wax. I prop the cup in a small plastic cup. As I apply the melted bee’s wax with a cotton bud, the wax congeals very quickly as it cools on the Meer surface. At the end of the application, the wax is caked on the surface. It takes some work as I begin removing the excess, congealed wax, using a cotton cloth. As the excess comes off, it reveals the surface and it buffs more easily. Finally, with all the excess removed, I use a micromesh cloth to give the cup a hearty hand buffing. The Calabash’s Meer cup is now ready for a gourd. It looks good.
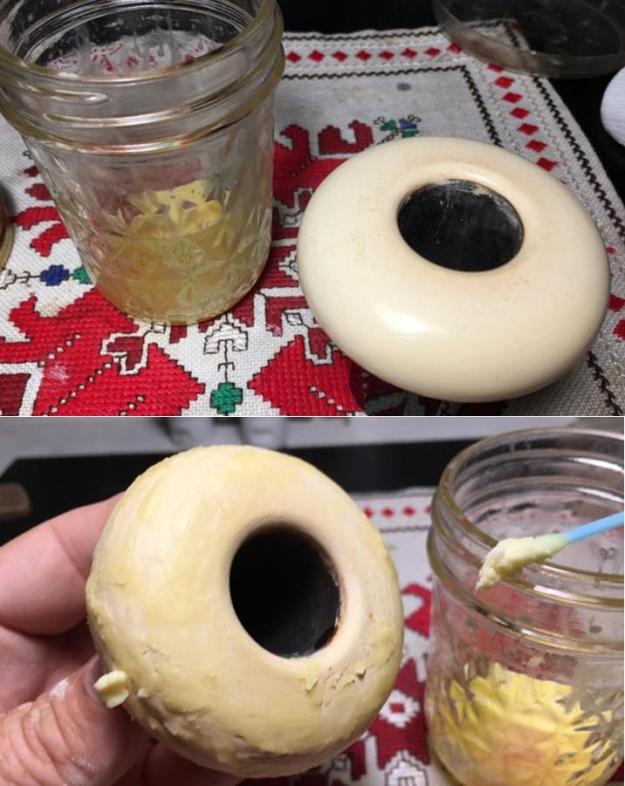
 Now, to the fancy push tenon stem. The bit is rough with chatter. I will remove it by using a piece of 240 grade paper. I also take a flat needle file to redefine the button. I follow the 240 paper with 470 grade paper removing the scratches left by the 240 paper. Then, I use 600 grade paper and sand the entire stem to remove rough spots in the vulcanite as well as removing the tracks of the 470 paper. Finally, I buff the entire stem with 0000 grade steel wool.
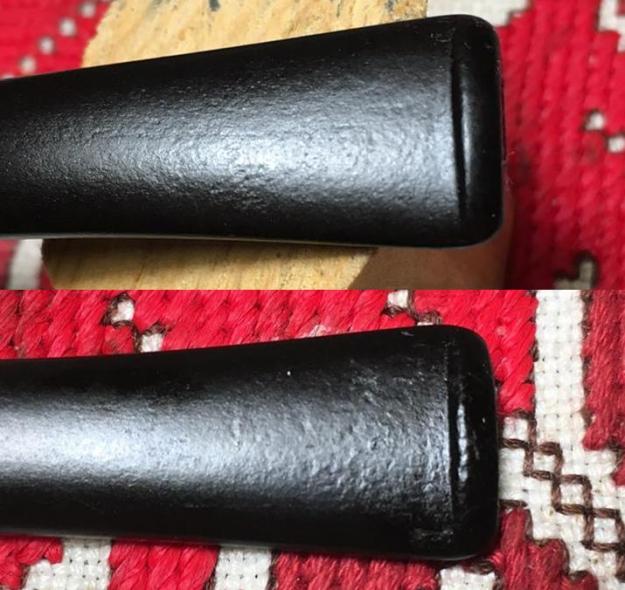

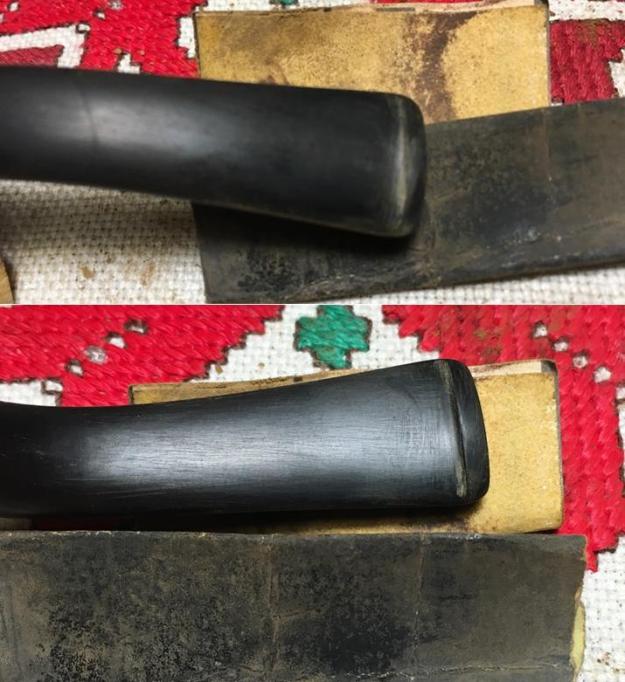
 Following the steel wool buff, I want to rejuvenate the vulcanite. First, I apply Before and After Fine Polish then Extra Fine Polish to the stem. I work each in with my fingers throughout the stem. After each application, I wipe/buff the polish with a cotton cloth. The vulcanite responds well with a deeper black – it looks good.
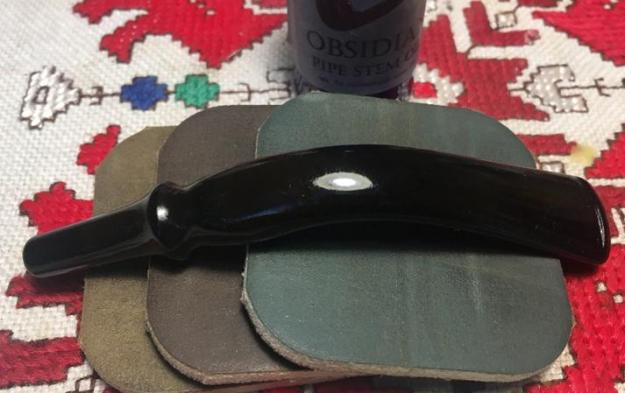
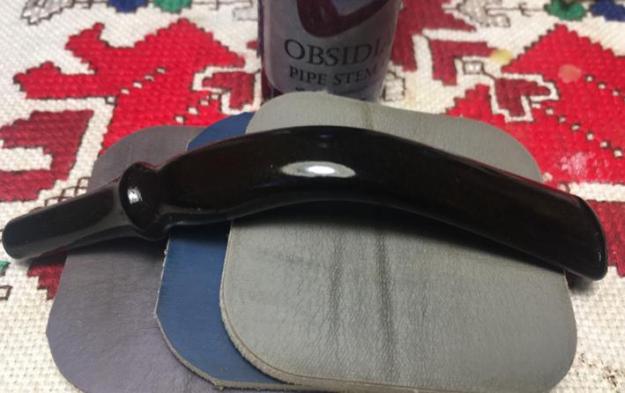
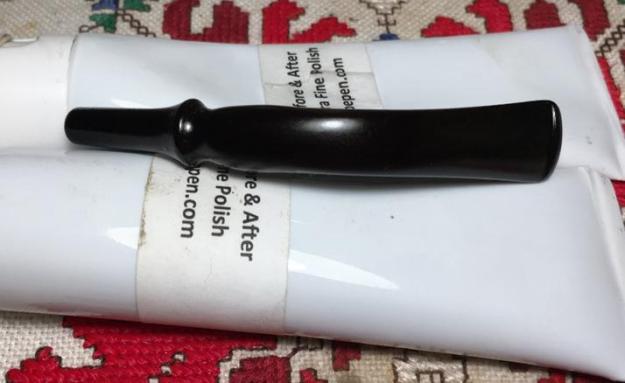 Now to the micromesh pads. With pads 1500 to 2400 I wet sand followed by 3200 to 4000 and 6000 to 12000 are dry sanded. After each set of three I apply a coating of Obsidian Oil. The polished vulcanite pop is nice to behold!
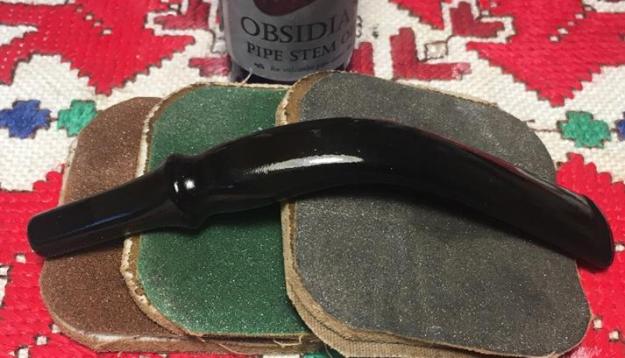
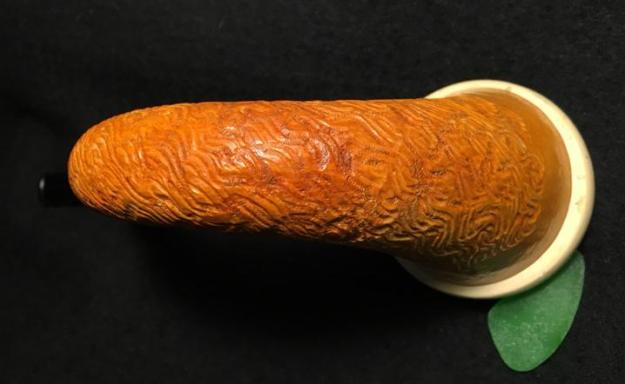
 Now to the Calabash’s sculpted gourd. Using the Dremel, I mount a cotton cloth buffing wheel dedicated to Blue Diamond compound. Using the fine abrasive compound, I sand the smooth gourd areas to bring out more gloss. I also want to test carefully the application of the compound to the sculpted area which has peeks and valleys. I’m interested to see if Blue Diamond will also enhance this area. Using the slowest speed on the Dremel, I work the buffing wheel around the gourd – both smooth and sculpted. The sculpting is very intricate and the more I look at it the more amazing it is – very nice touch on an already classic shape. I can work the compound into the sculpting and the results are good. The surface is shining up well. I take a picture applying the compound – no small feat with only two hands! I also run the buffing wheel with Blue Diamond on the shank extension as well as on the unattached fancy stem.
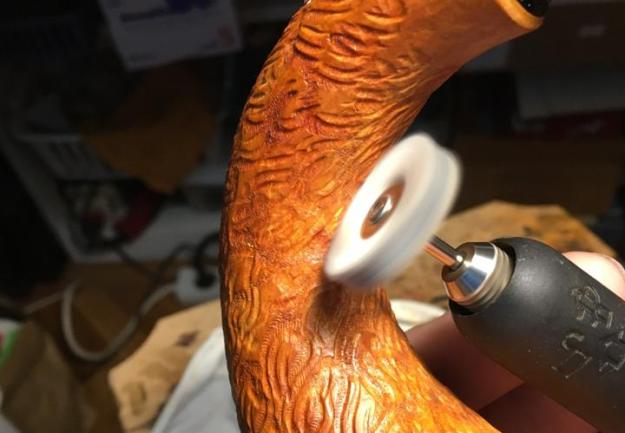 No – this next picture is not repeated from above, unfortunately. In the interest of full disclosure, as I was working the Blue Diamond compound on the stem, I noticed oxidation that I did not see before – or wasn’t as obvious until I started buffing up the vulcanite with the compound. Well, I’ll spare you all the pictures of starting from the beginning by re-sanding the stem starting with 240, 470, 600, steel wool and the full run of 9 micromesh pads… Let this picture represent the whole…. Thankfully, back to ‘now’ with the second picture.
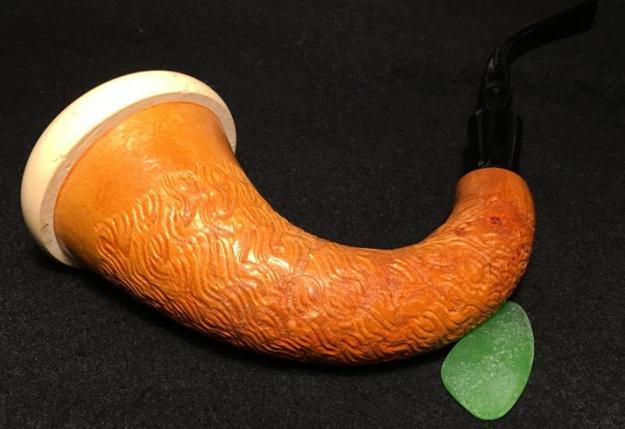
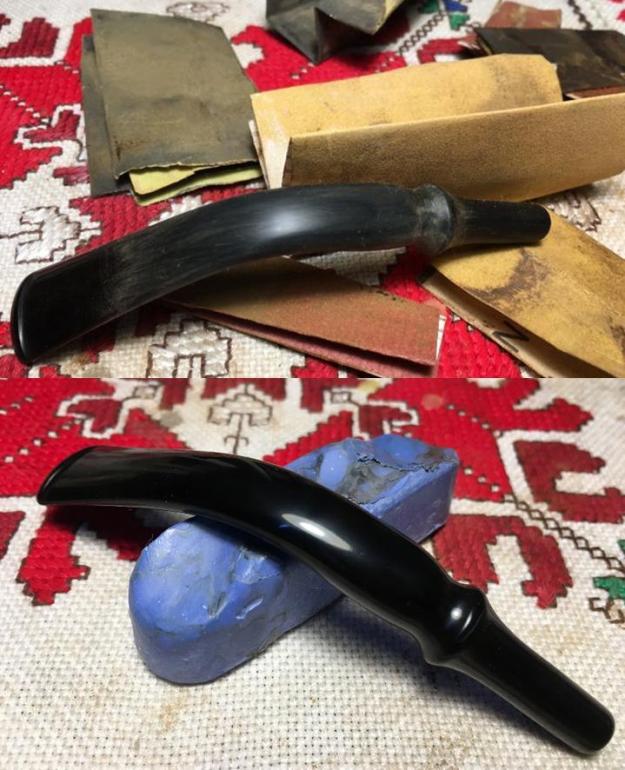 I give the gourd and stem a quick hand buff with a felt cloth to remove compound dust in preparation for the application of wax. I mount another cotton cloth buffing wheel dedicated to carnauba wax onto the Dremel. I increase the speed up to about 40% and apply the wax to both gourd, stem and shank extension – the cup and stem are not assembled. I find that the compact Dremel buffing wheel allows me to work in a much more directed way. To spread the carnauba wax over the sculpted, rougher area, I steer the buffing wheel in the same direction as the sculpted valleys. In this way, the wax does not gum up but continues to spread evenly over the surface and crevices. As I watch the waxing unfold, oh my! Gourd skin loves carnauba wax! After some coats of wax, I use a micromesh cloth to buff up the gourd and stem surface. I also buff the Meerschaum cup with the cloth.
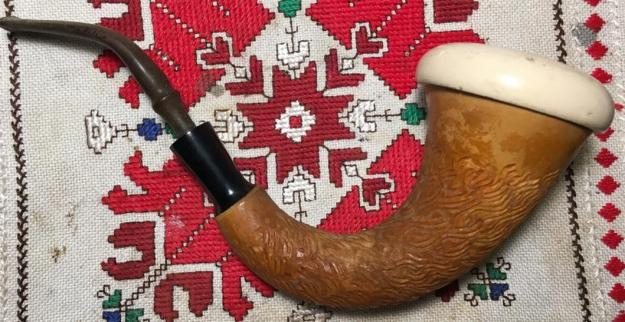
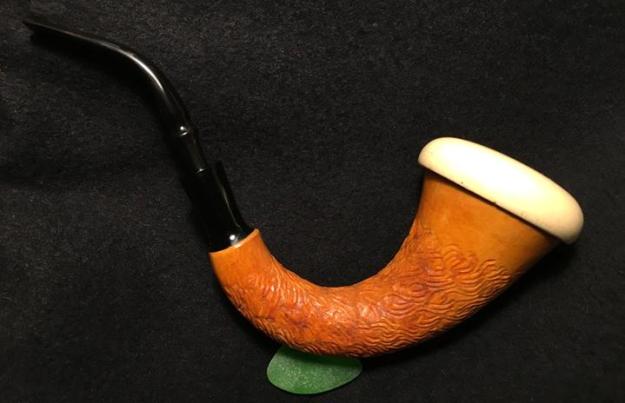
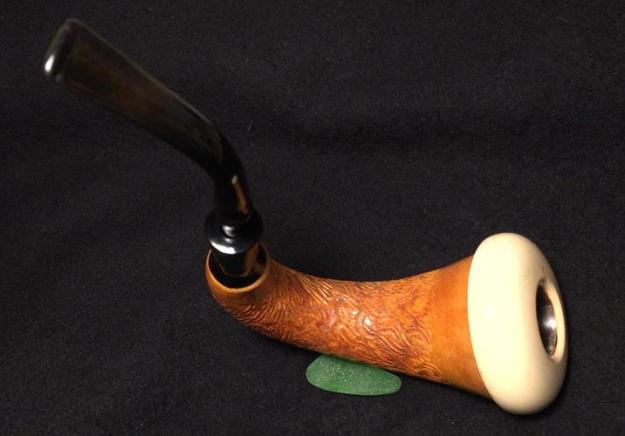
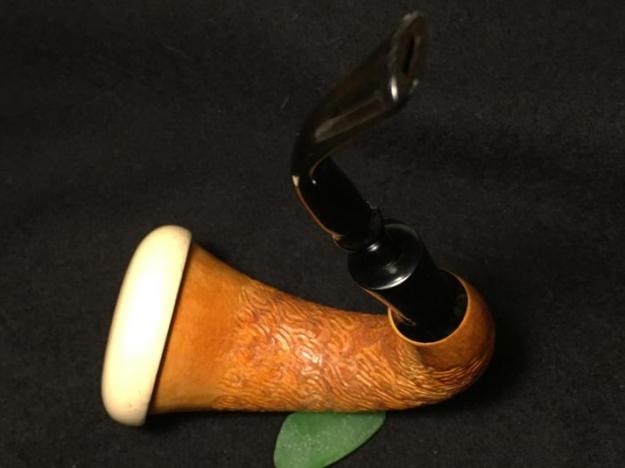
I am very, very pleased with the results of this Sculpted Gourd Calabash. The design created on the gourd surface attracts the eye and holds it. The smooth gourd ‘bands’ below the Meerschaum cup and over the gourd shank, connecting to the shank extension, create a symmetry that works well. The Meer cup looks good. It carries some of the former scars and cuts – a sign of the Calabash’s history. I’m glad that Brian will take good care of this Calabash as he returns to the US after his tour of service in Bulgaria. I appreciate his service to his country and that his bucket list Sculpted Gourd Calabash benefits the Daughters of Bulgaria, women and girls (and their children) who have been trafficked and sexually exploited. Thanks Brian and thanks for joining me through this restoration! 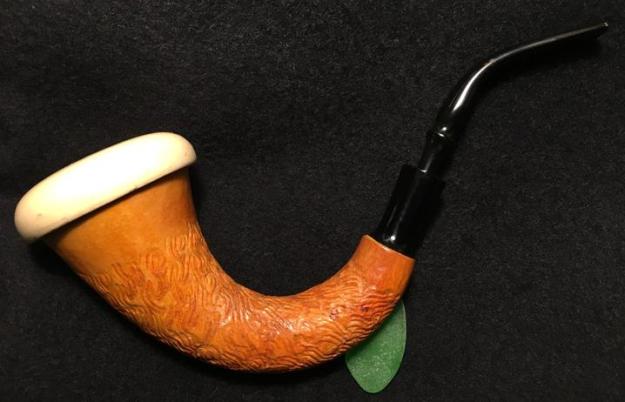


Thanks again Dal, this has become one of my got pipes
LikeLike
Reblogged this on The Pipe Steward.
LikeLike