Blog by Steve Laug
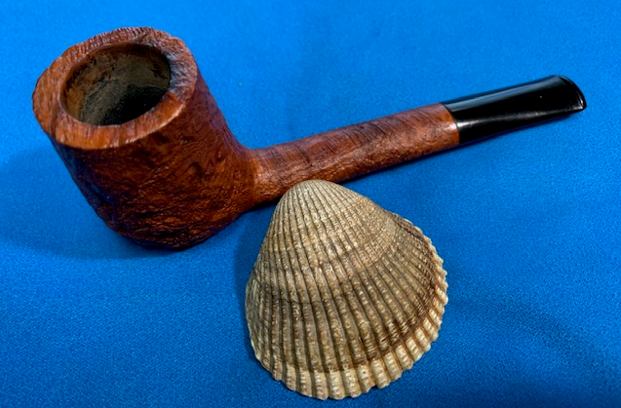
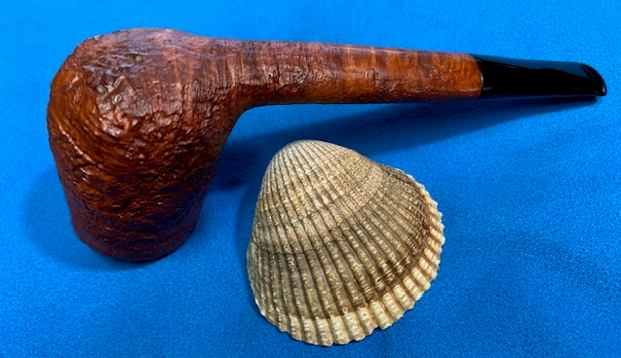
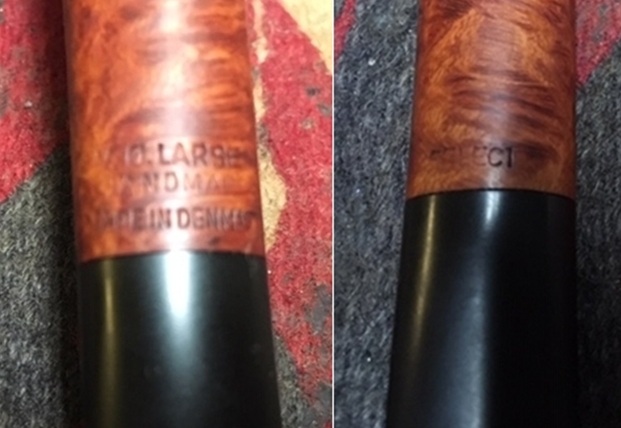
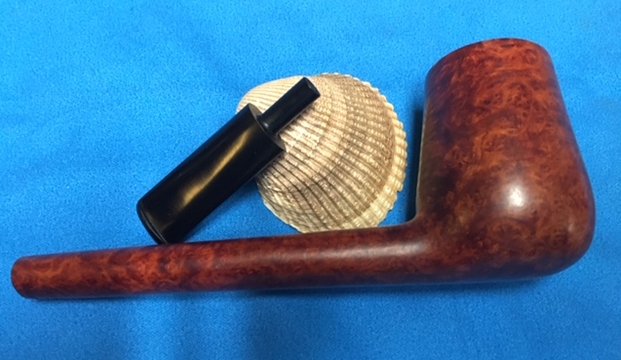
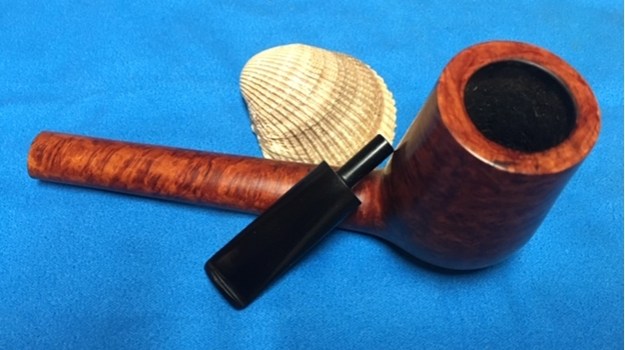
 The next pipe in the queue is from a fellow in Florida who picks up some pipes for Jeff and me. It was one of several that he found and sent to us. It is a well-made W.O. Larsen Select, Brandy shaped Canadian. The entire pipe had some beautiful cross grain on the front and rear of the bowl and the top and underside of the shank. It had some great birdseye grain on both sides of the bowl and shank. The bowl has a Brandy snifter shaped bowl and a long, oval shank that defines the Canadian shape. The pipe has a rich medium brown finish that really makes the grain on the pipe stand out. The carver at Larsen did a great job utilizing the block of briar to maximize the grain. The pipe is stamped on the underside of the shank. It reads W.O. Larsen over Handmade over Made in Denmark. On the topside of the shank it is stamped SELECT. The stamping is horizontal on the end of the shank on both sides next to the stem/shank junction. The stem is short, tapered vulcanite and has no marking or stamping on it. This is a beautiful example of the work coming from W.O. Larsen.
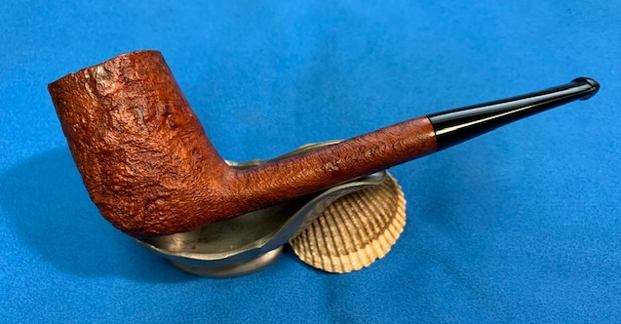
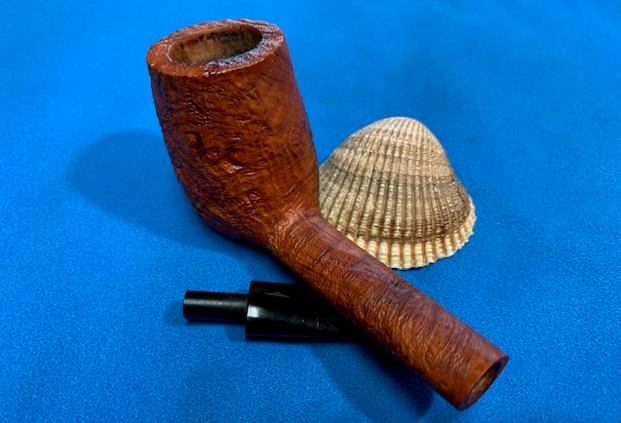
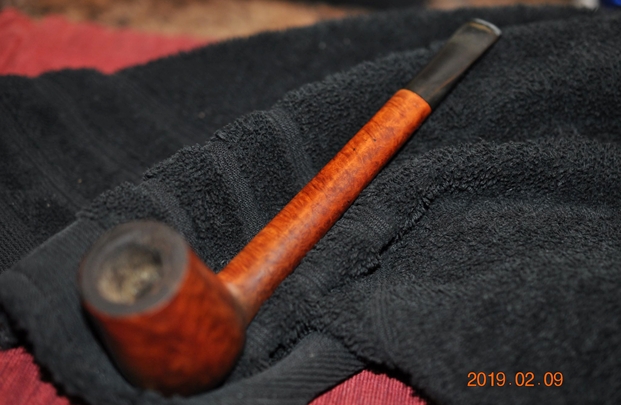
Jeff took some photos of the pipe when he received them to show the general condition of the pipe before he started his cleanup work. The pipe was very dirty and well used. There was a thick cake in the bowl and a thick coat of lava overflowing onto the rim top. It was hard to know if the edges of the bowl were damaged or not because of the cake and lava. The exterior of the briar was dirty with grease and oils from being held. The vulcanite stem is dirty and had deep tooth marks on both sides of the stem at the button edge and some wear on the button edge itself. The photos below tell the story and give a glimpse of this beauty.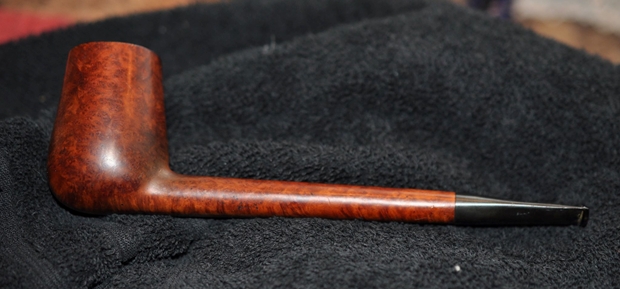
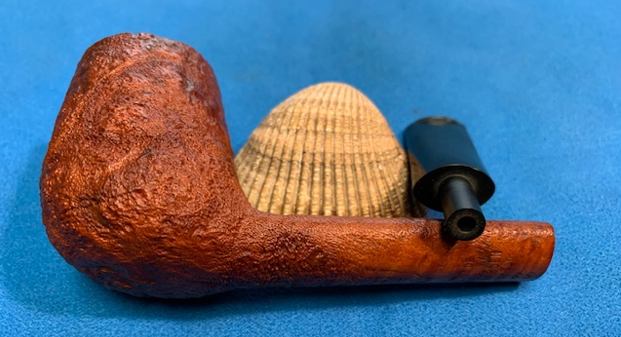
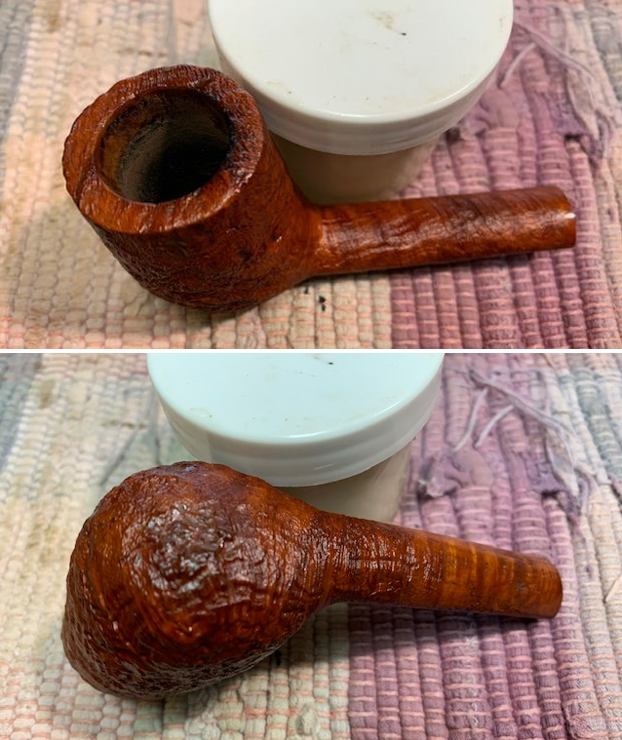
 Jeff took photos of the bowl and rim to capture the condition of the pipe before he started his cleanup work. There was a thick coat of lava on the rim and the cake in the bowl. It shows the mess this pipe was in when we received it. The thick lava overflow on the rim top made it hard to know what the inner edges of the bowl looked like. The outer edge appeared to have deep gouge on the right side of the rim top. I have circled it in red to identify the issue. There is also a general accumulation of grease and grime ground into the finish on the rest of the bowl and shank.
 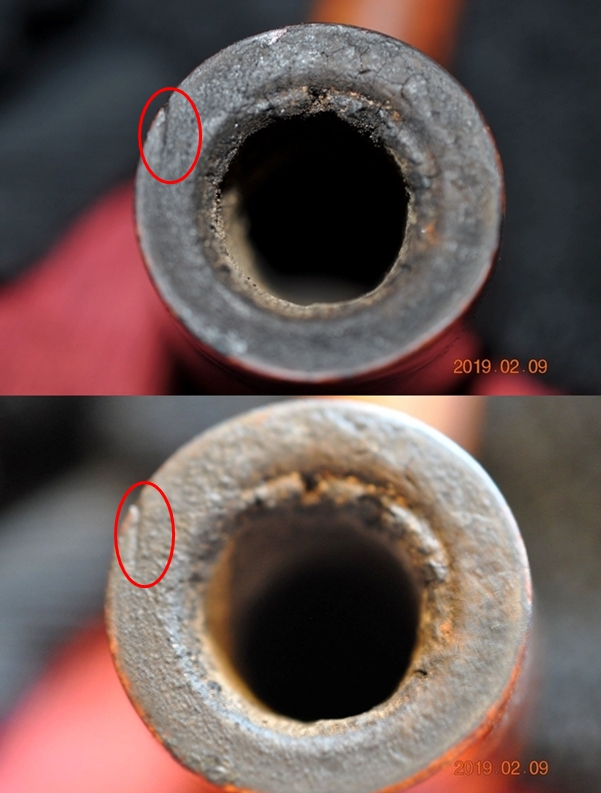 He also took a photo of the right and underside of the bowl and shank to show the interesting grain around the bowl and shank. The finish is very dirty but the grain is visible in the photos.
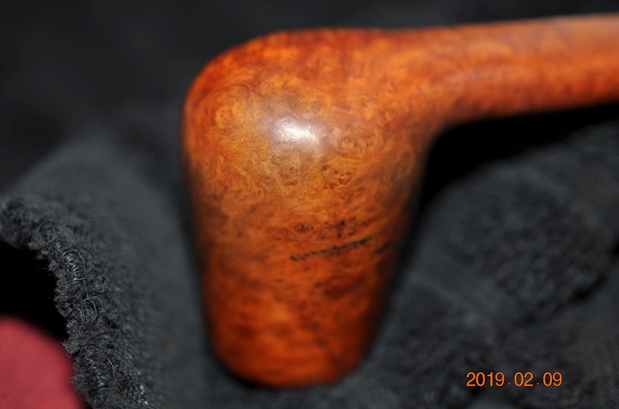 Jeff took photos of the stamping on the top and underside of the shank. It reads as noted above and is clear and legible.
 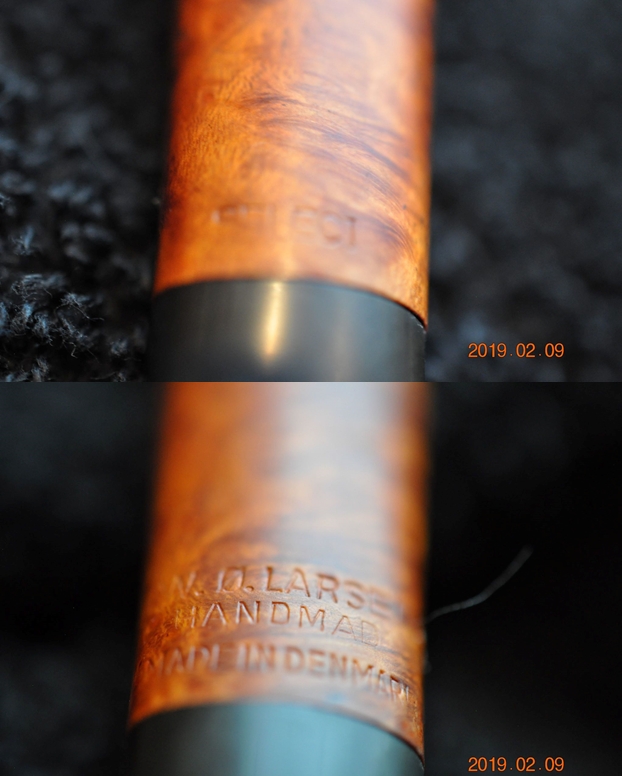 The next two photos show the stem surface. They show the tooth marks and chatter on both sides near the button. There are also some marks on the sharp edge of the button. The stem is dirty and is covered in scratches.
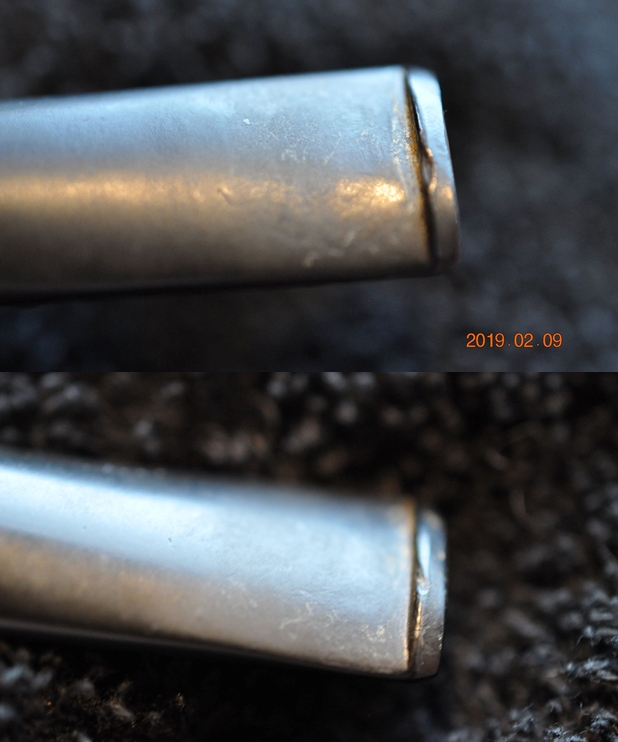 I wanted to refresh my memory about the pipes coming out of Ole Larsen’s Copenhagen tobacco shop. I knew that many famous Danish Carvers started their careers carving for the shop. I turned first to the pipephil wesite to get and over view of the brand. Here is the link (http://www.pipephil.eu/logos/en/logo-l2.html). I did a screen capture of the section on the site showing a summary of the brand and the typical stamping.
  I then turned to Pipedia to do a bit more reading about the brand and the various lines making it up. Here is the link (https://pipedia.org/wiki/W.%C3%98._Larsen). The link took me to some pages on the finepipes.com website. Here is the link to the summary of the history of the brand. I quote it in full. I have marked the pertinent section with bold font to mark out the section on the SELECT series (https://www.finepipes.com/pipes/danish/w-o-larsen?sort=20a&page=2&zenid=562ff4b9d62f4f612d0f6ee60cab1224).
W.O. Larsen was one of the most famous tobacco shops in Copenhagen, with a beautiful store located on Copenhagen’s famous “Walking Street.” During the flowering of the Danish pipe in the ’60’s, they first began retailing pipes by such carvers as Sixten Ivarsson, Sven Knudsen, Poul Rasmussen, and Brakner. Urged on by his store manager Sven Bang, the owner, Ole Larsen, decided to begin making pipes in the basement of the shop. He first hired Sven Knudsen as the pipe maker, who soon passed the job to his protégé Hans “Former” Nielsen. Larsen’s fortunes rose along with the rest of the Danish pipe business, and Former was soon managing a group of carvers in the old Larsen cigar factory. Among these were Teddy Knudsen, Tonni Nielsen, Jess Chonowitch, Peter Hedegaard and others, who were responsible for the Select and Straight Grain series before they branched out on their own. After Former left to start Bentley pipes in Switzerland, his duties were taken over by Soren Refbjerg Rasmussen, while the straight grains were made by Teddy’s student Benni Jorgenson. As Ole’s health began to fail, the reins were taken over by his son Nils. Nils became convinced that the way for Larsen to prosper was by entering the low-end market, and acquired the Georg Jensen pipe factory to make an array of less expensive pipes. This turned out to be a fatal error, and Larsen was recently sold to Stanwell, who continue to produce so-called “Larsen” pipes in their huge factory. Thus ended an important part of Danish pipe history.
Also included on the finepipes site was a pipe that was very similar to the one on my worktable. It was similarly shaped and was called a Canadian/Brandy. The most important difference is the Cumberland stem on the one in the photo below. Here is the link to the pipe (https://www.finepipes.com/index.php?main_page=product_info&cPath=5_61&products_id=10289&zenid=562ff4b9d62f4f612d0f6ee60cab1224).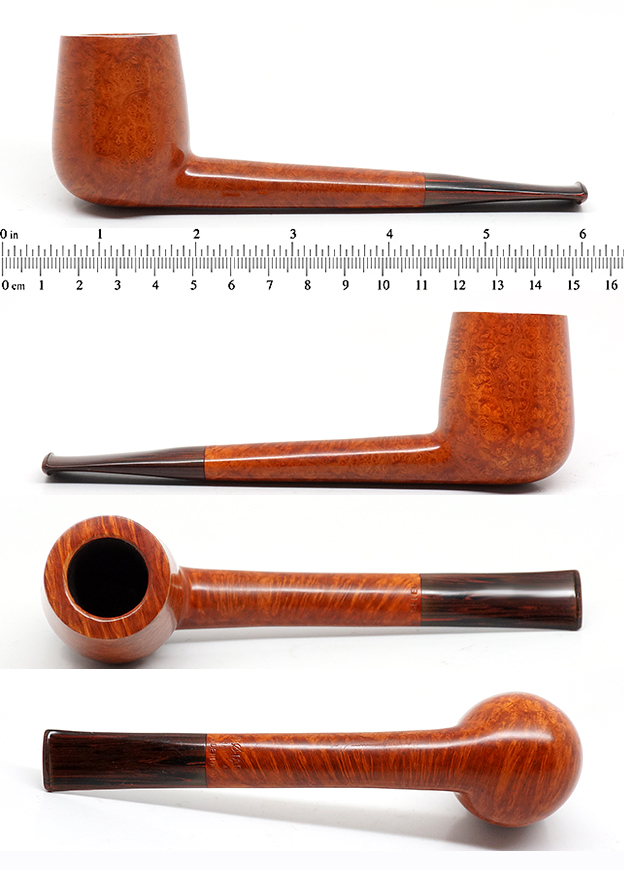 From the above information I knew that the pipe came from the 1960s and was carved by some of the Danish greats who were responsible for the SELECT and STRAIGHT GRAIN series. Names like Teddy Knudsen, Tonni Nielsen, Jess Chonowitch, Peter Hedegaard and others are some of those associated with the series pipe that I am working on. In many ways it is a high grade pipe made by a great maker but a pipe that I may never know the actual carver who crafted it in WO Larsen’s studio.
Armed with that information I turned to the pipe on my table. Jeff had reamed the bowl with a PipNet pipe reamer and followed up with a Savinelli Fitsall pipe knife to remove the cake. He scrubbed out the mortise and the airway in the shank and the stem with alcohol, cotton swabs and pipe cleaners. He scrubbed the exterior of the bowl, rim, shank and stem with a tooth brush and Murphy’s Oil Soap to remove the oils and tars on the rim and the grime on the finish of the bowl. He rinsed it under running water. He dried it off with a soft cloth. He was able to remove the lava build up on the rim top and you could see the overall condition of the bowl top and edges of the rim. He scrubbed the stem with soap to remove the grime on the surface. I took photos of the pipe to show its condition before I started work on it.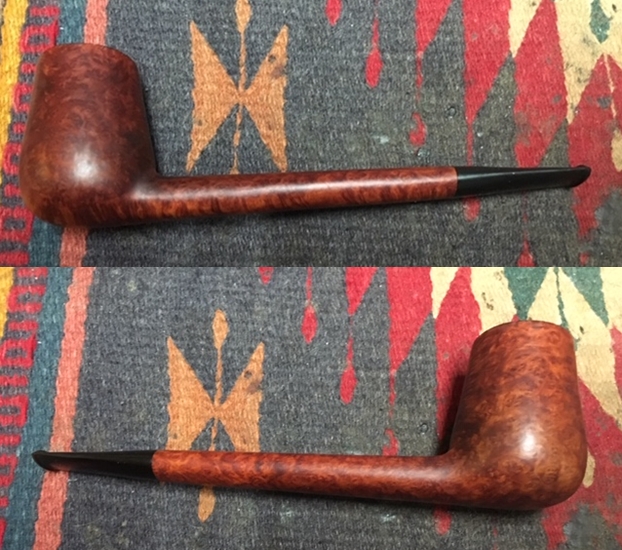
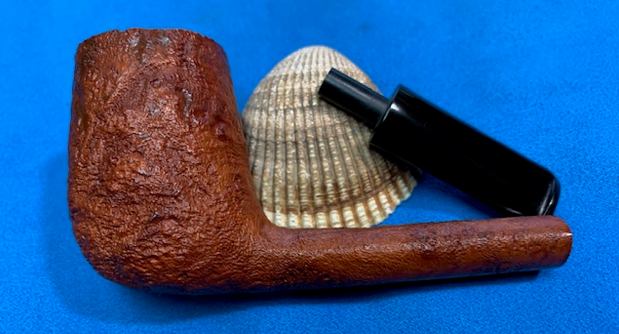
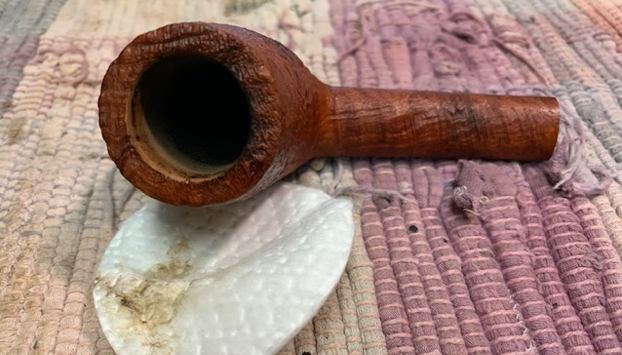
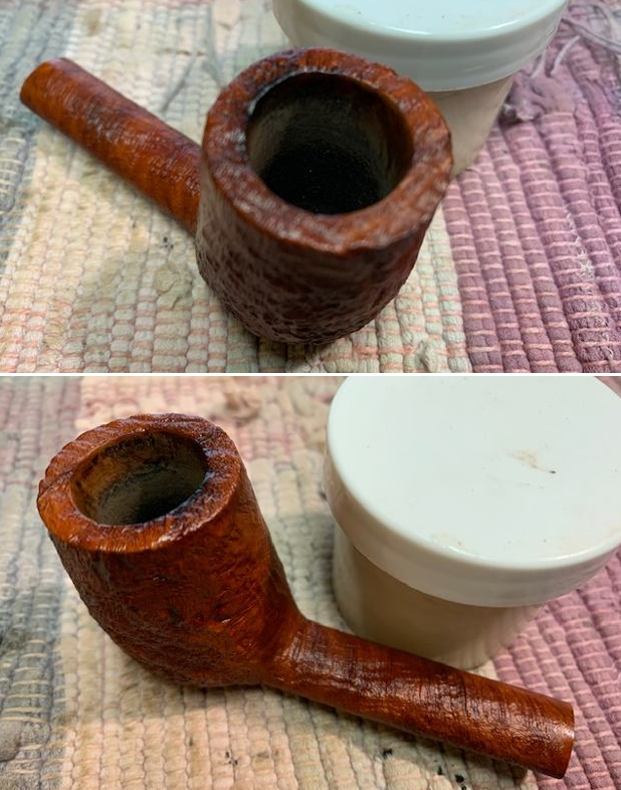
 I took a close up photo of the rim top to show the darkening on the top and the deep gouge on the right side of the outer edge of the rim top. Jeff had done an amazing job cleaning off the lava buildup. The outer edge of the rim has some deep nicks on the front of the bowl. The inner edge of the bowl had some darkening and some wear on the left side. The vulcanite stem photos show the tooth marks and the wear on the button surface on both sides. I also decided to take photos of the stamping on both the top and underside of the shank to show its condition.
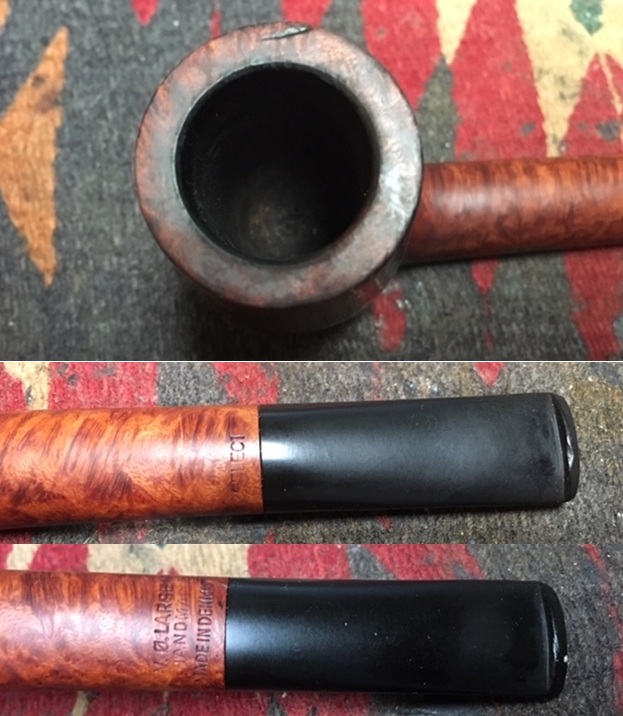
 I decided to start my work on the pipe by addressing the darkening and damage to the rim top and edges. I topped the bowl on a topping board with 220 grit sandpaper to remove the damage and minimize the outer and inner edge damage. I was able to remove much of the damage. To address the gouge in the rim top on the right side I filled it in with clear super glue and continued the topping until it was smooth. I cleaned up the inner edge with a folded piece of 220 grit sandpaper to minimize the damage to the edge.
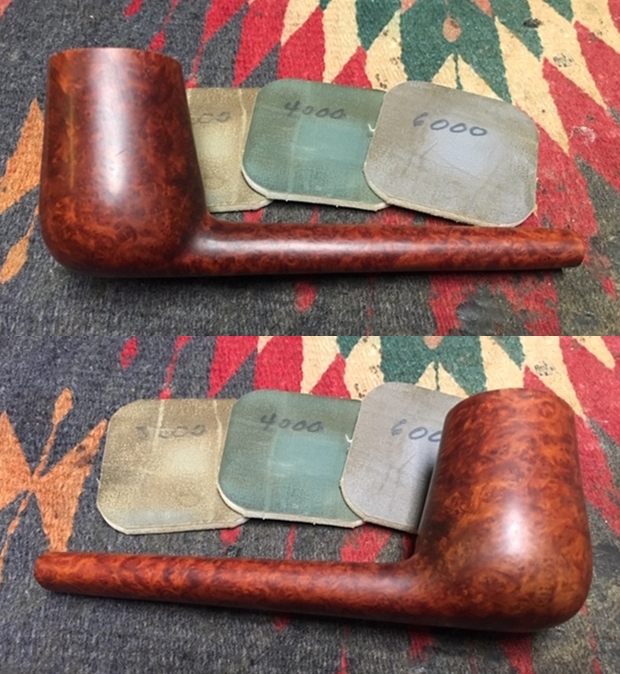
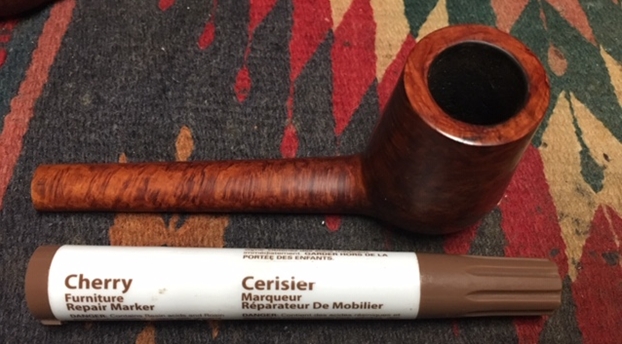
 I polished the bowl sides and rim top with micromesh sanding pads. I wet sanded with 1500-2400 grit pads and dry sanded with 3200-12000 grit pads. I wiped the bowl and rim down with a damp cloth after each pad. As I polished it the sanded rim top began to shine and blend in with the rest of the briar. When I finished polishing the rim top I stained it with a Cherry stain pen to match the colour of the rest of the bowl.
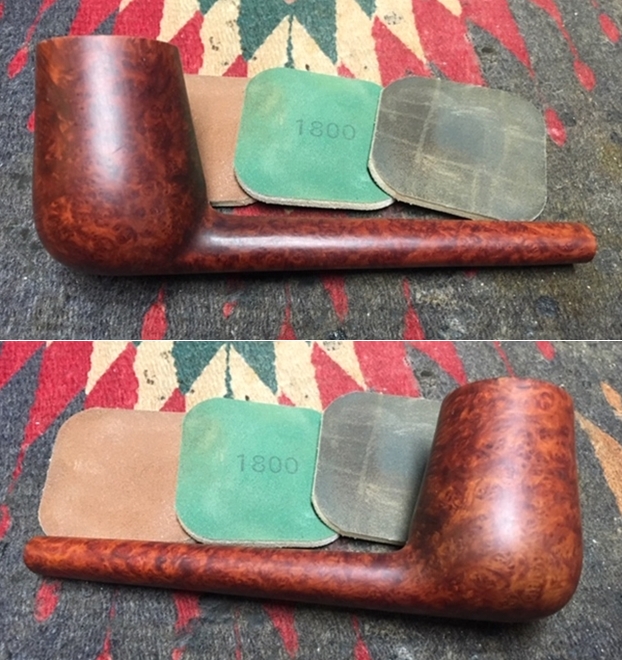
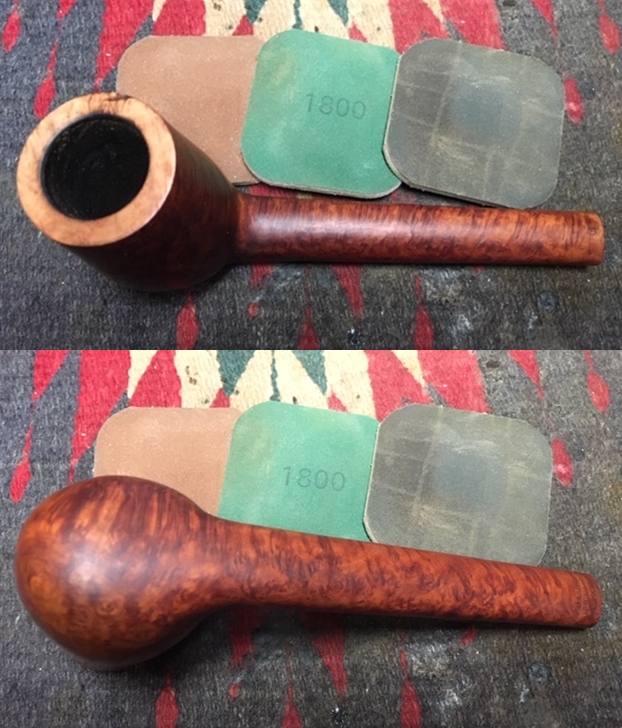
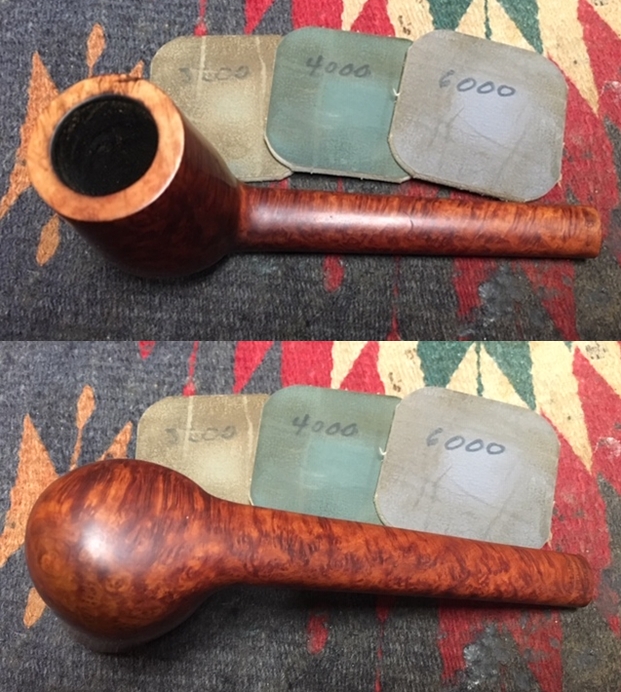
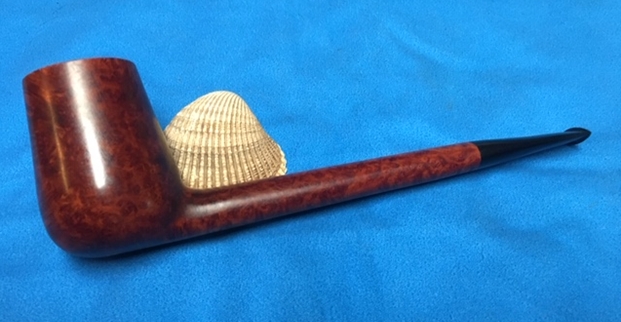
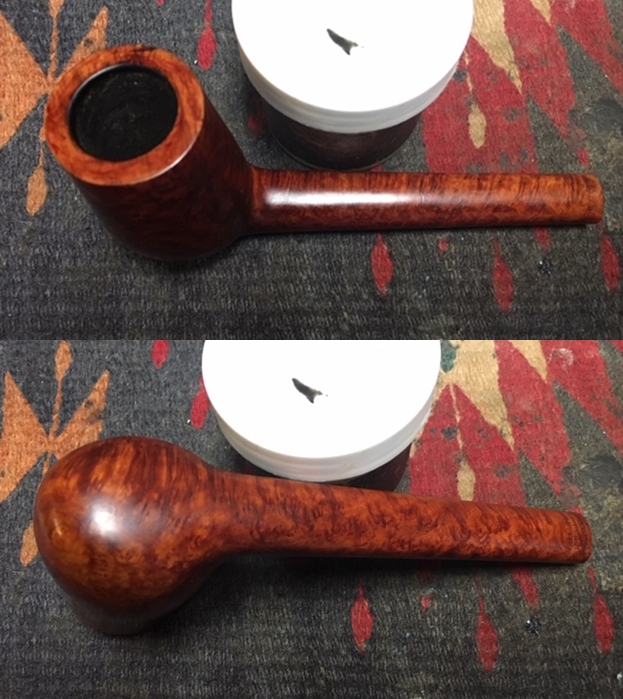
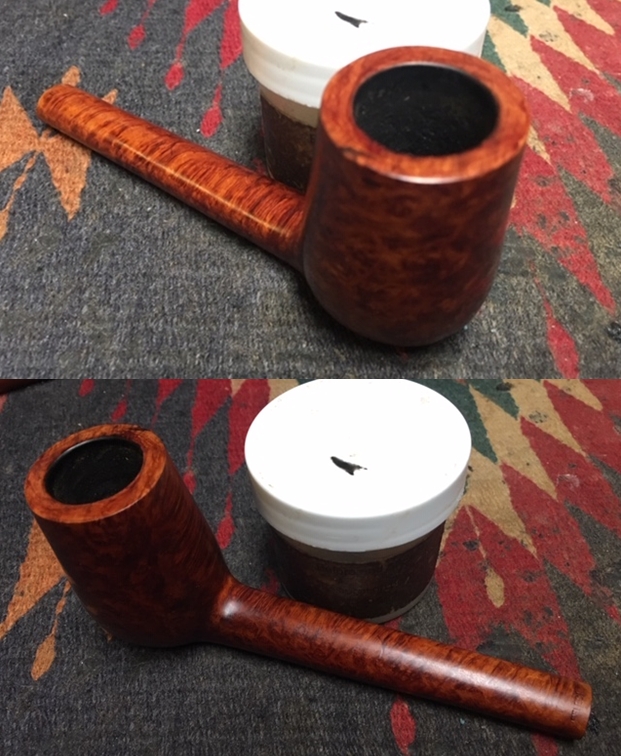
 Once the stain had dried. I worked some Before & After Restoration Balm into the surface of the briar with my fingertips to clean, enliven and protect it. I let the balm sit for a little while and then buffed with a cotton cloth to raise the shine. The following photos show the bowl at this point in the restoration process. The bowl and the rim top look really good. The pipe looks very good with the rich finish on the bowl and rim. I am very happy with the results.
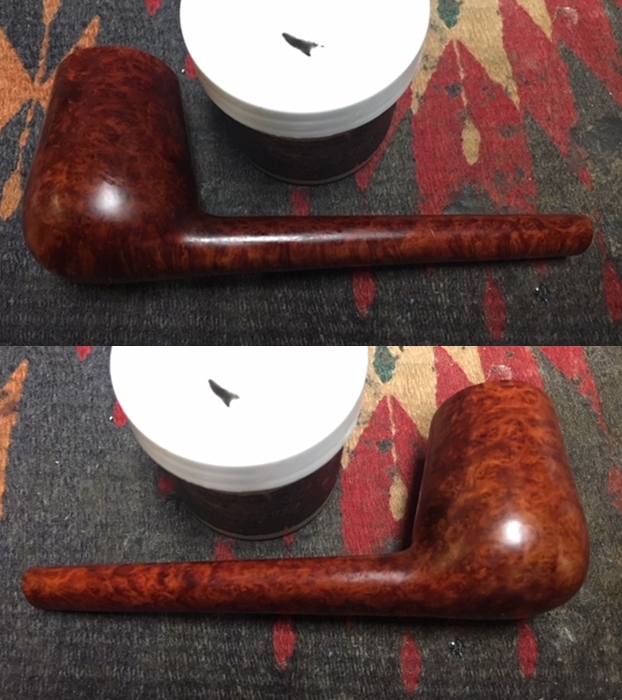
 I used a folded piece of 220 grit sandpaper to smooth out the damage to the stem and reshape the button. Once the surface was smooth I sanded out the scratch marks and started the polishing of the stem with a folded piece of 400 grit sandpaper. I wiped the stem down with Obsidian Oil and took the following photos.
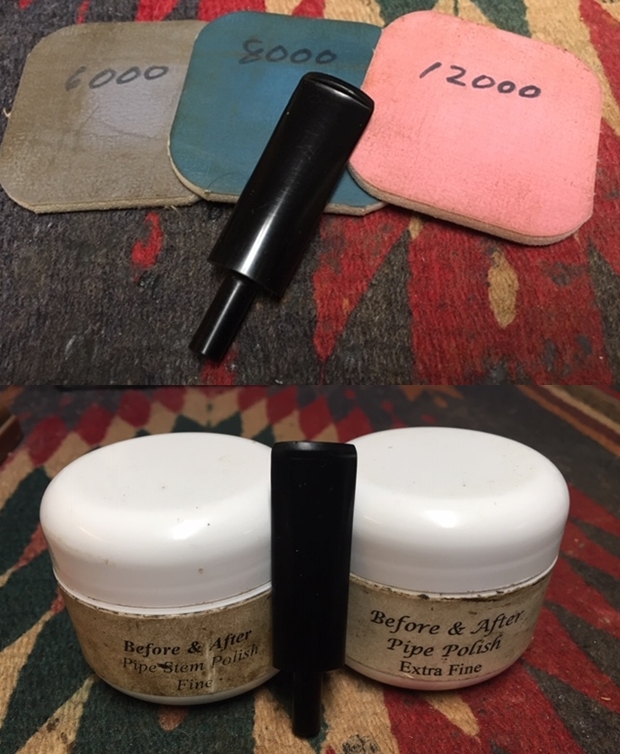
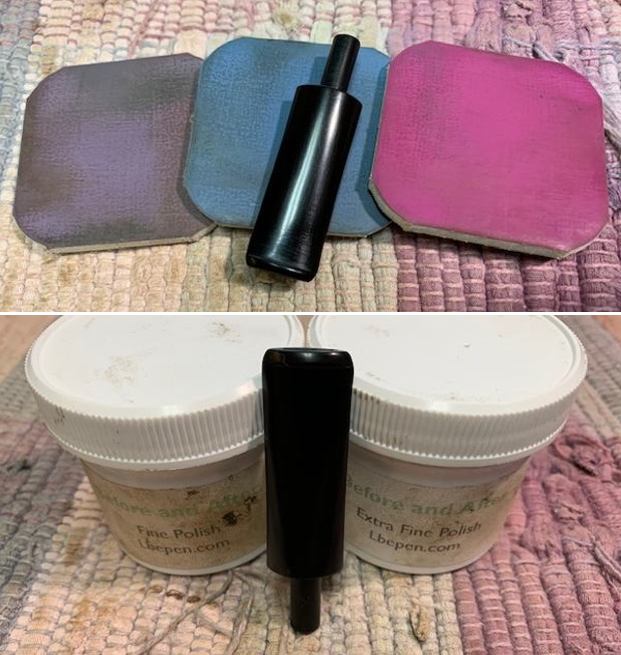
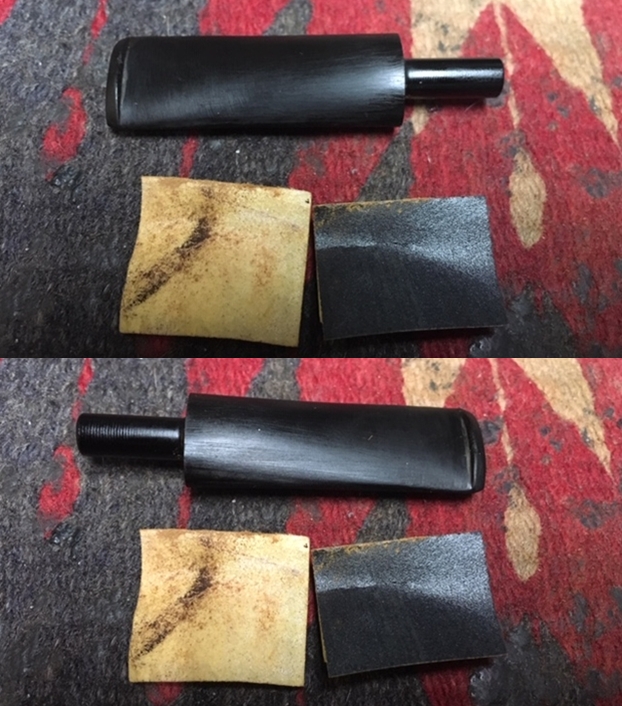 I polished the stem with micromesh sanding pads – wet sanding it with 1500-2400 grit pads and dry sanding it with 3200-12000 grit pads. I wiped the stem down with a damp cloth after each pad. I polished it with Before & After Pipe Stem Polish – Fine and Extra Fine. I wiped it down with a coat of Obsidian Oil and set it aside to dry.
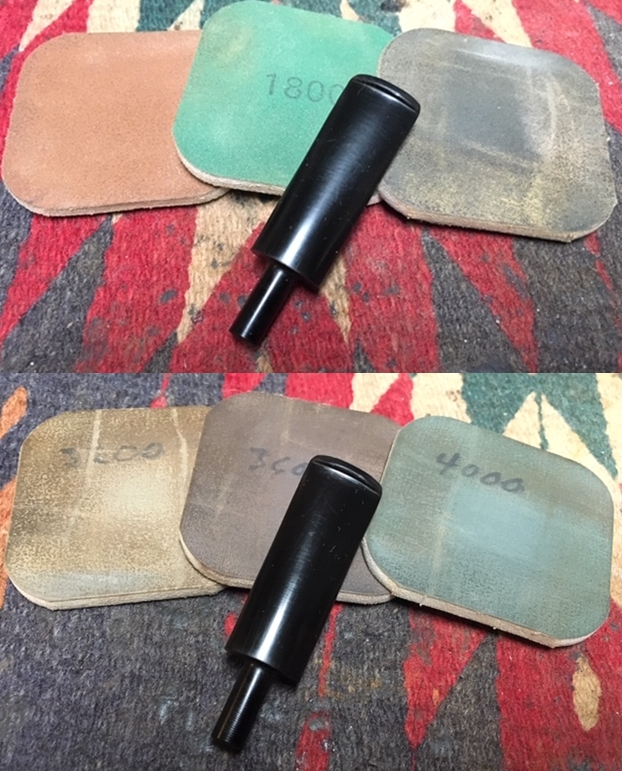
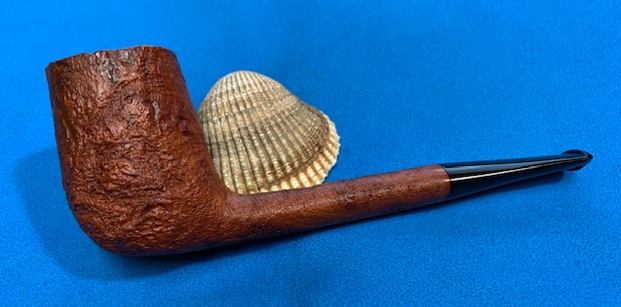
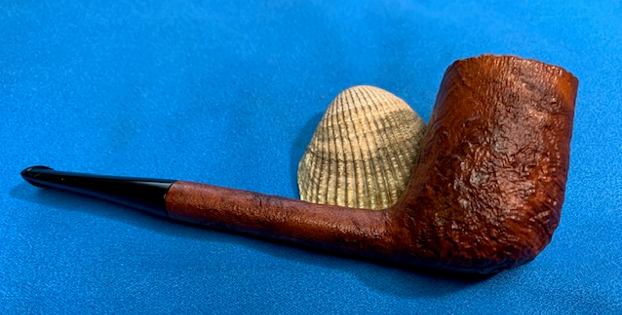
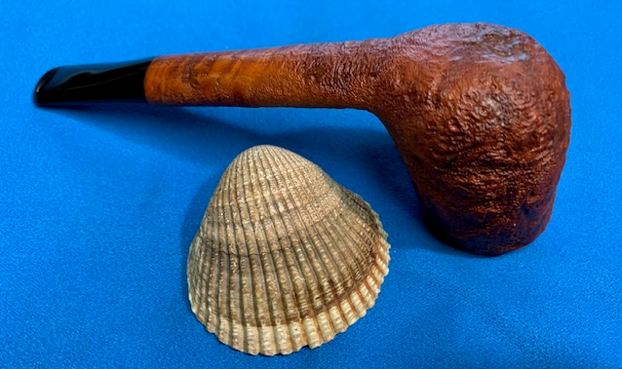
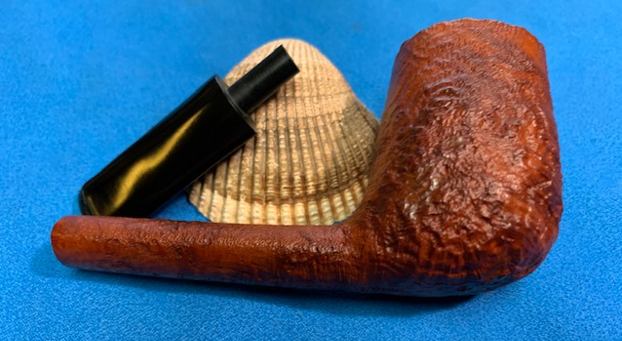
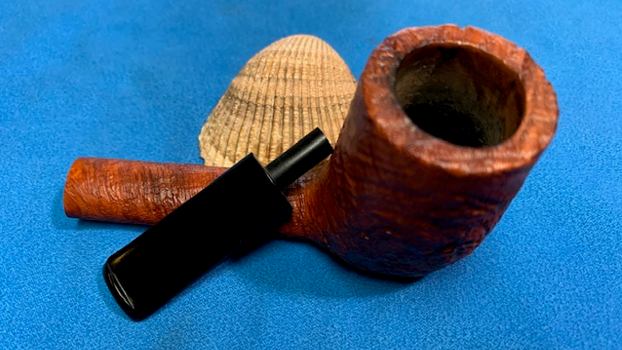
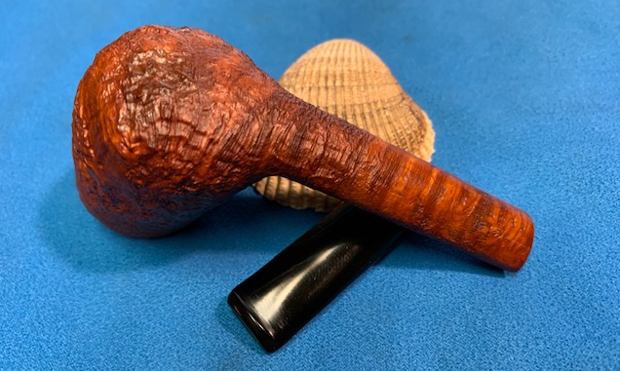
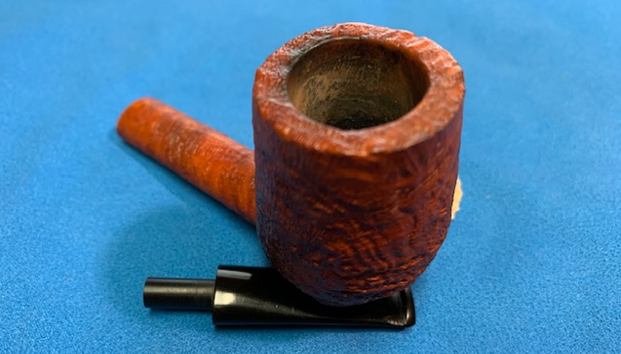
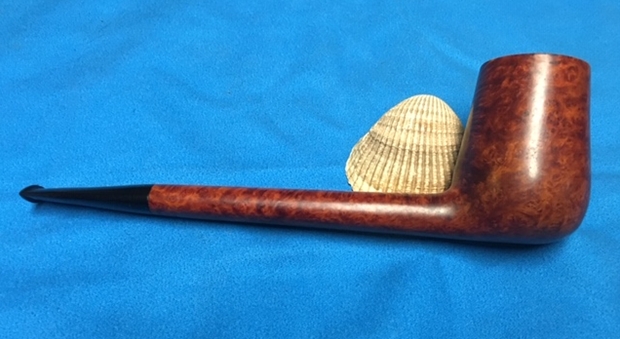
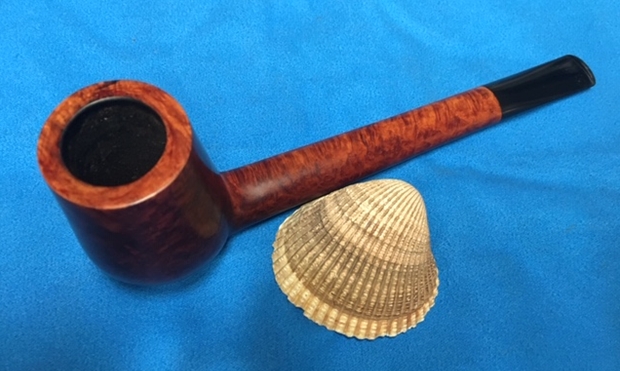
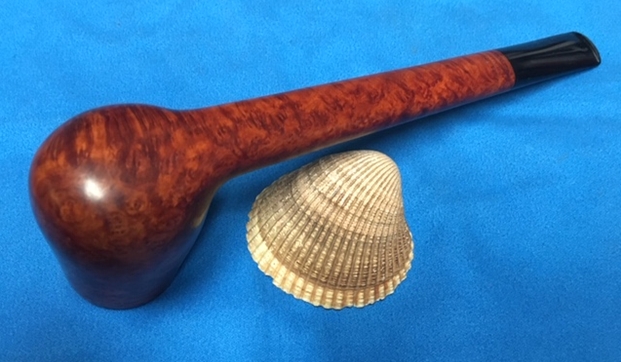
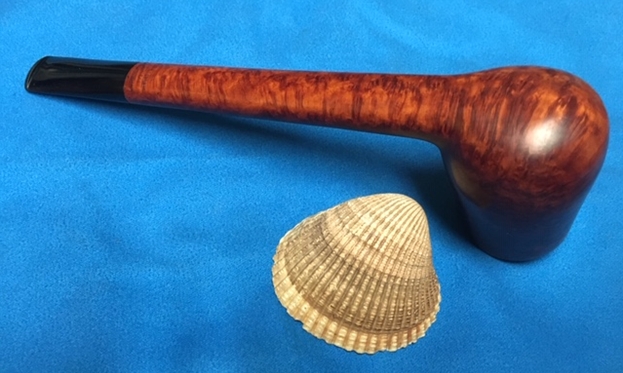
 I put the stem back on the bowl and polished them both with Blue Diamond polish on the buffing wheel. I gave the bowl and stem multiple coats of carnauba wax. I buffed the pipe with a clean buffing pad to raise the shine. I hand buffed it with a microfiber cloth to deepen the shine. The pipe polished up pretty nicely. The grain on the natural brown briar that had darkened over time came alive with the buffing. The finish worked well with the polished black vulcanite stem. Have a look at it in the photos below. The dimensions are Length: 7 inches, Height: 2 1/4 inches, Outside diameter of the bowl: 1 3/8 inches, Chamber diameter: 3/4 of an inch. This beauty will soon be on the rebornpipes store. It would make a beautiful addition to somebody’s pipe rack. Thanks for walking through the restoration of this Danish take on the Canadian/Brandy shape from the 60s with me as it was a fun pipe to work on.


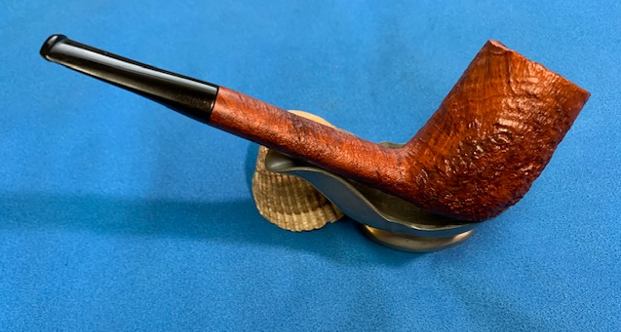
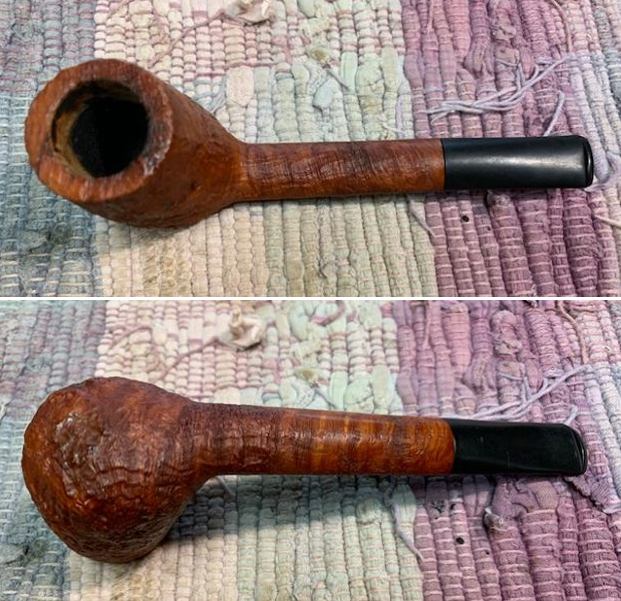 The rim top cleaned up really well. The rim top and outer edge of the bowl looked very good. The inner edges showed some darkening on the back of the bowl. The stem surface looked very good with a few tooth marks and chatter on both sides near the button.
 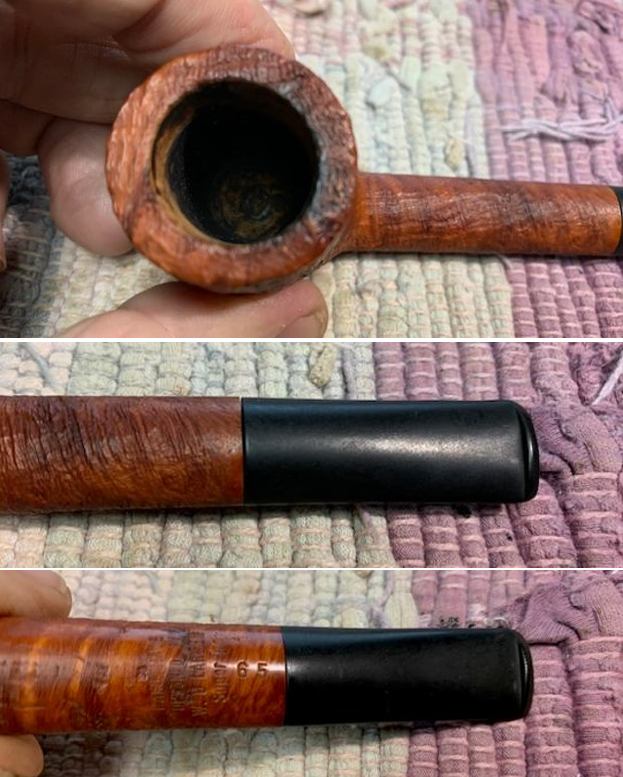 The stamping on the underside of the shank is clear and readable. It is stamped as noted above.
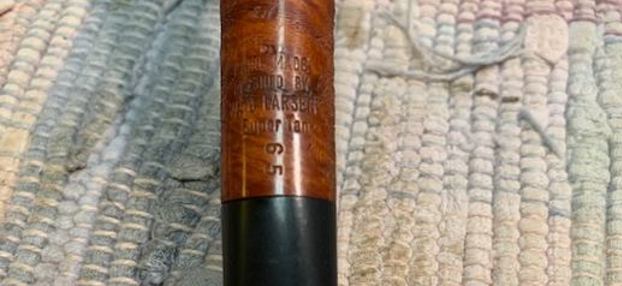 I removed the stem and took a photo of the pipe to give a sense of the whole. The short taper stem is nice and the photo gives a sense of what the pipe looks like.
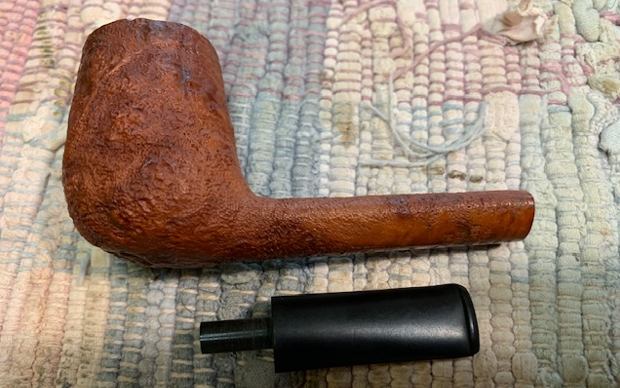 I turned to Pipephil (http://www.pipephil.eu/logos/en/logo-l2.html) to get a quick view of the brand once again. I did a screen capture of the site’s information and have included that below. The pipe I am working on is a W.O. Larsen as it is stamped similarly to the ones in the photos. It is interestingly stamped with a lot more detail than any of the ones shown in the screen capture below. With the “Designed By W.O. Larsen” addition it is a bit unique.
 I turned to Pipedia (https://pipedia.org/wiki/W.%C3%98._Larsen) for a quick read. The site is worth reading the history of the shop and the brand and its influence on Danish pipe carving. There was no additional information on the unique stamping on this pipe.
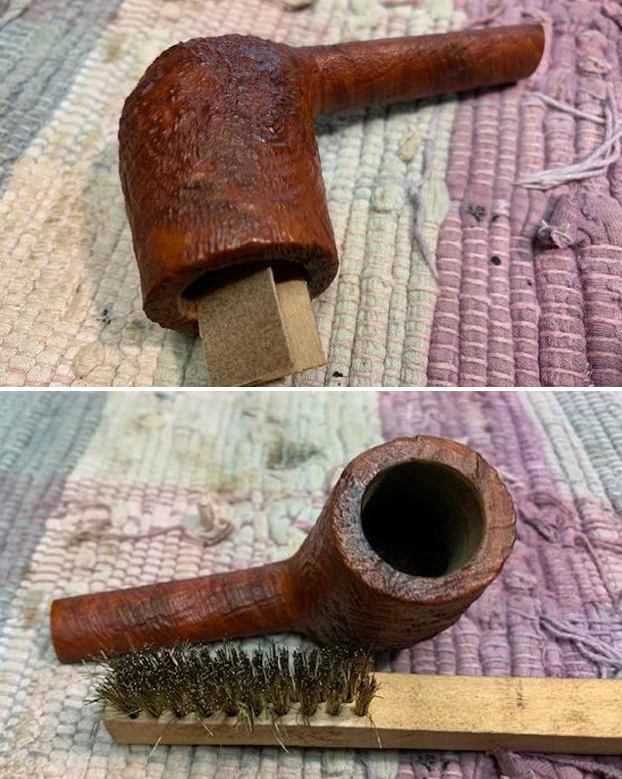
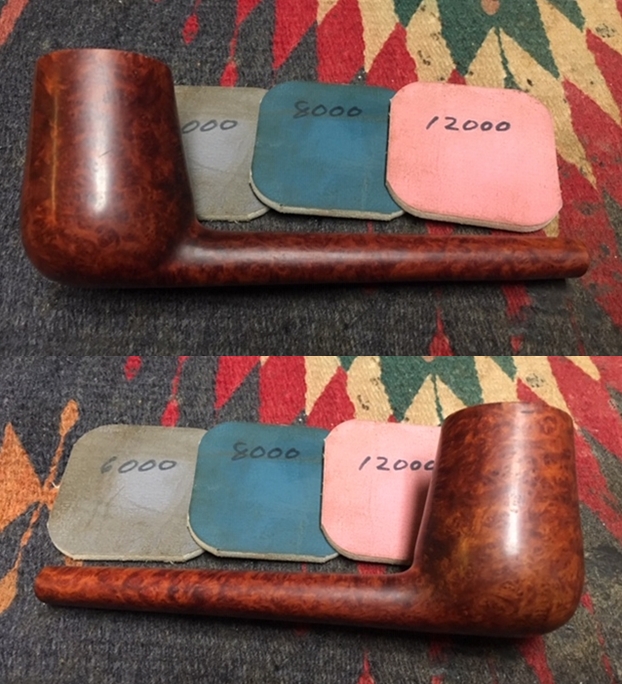
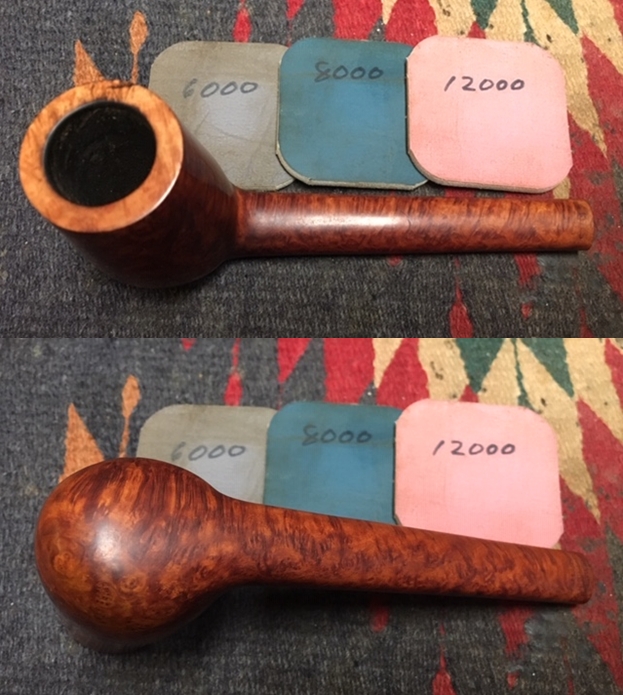
 I rubbed the bowl and shank down with Before & After Restoration Balm. I worked it into the surface of the bowl sides and shank with my fingertips to clean, enliven and protect the briar. I let the balm sit for about 10-15 minutes and buffed with a cotton cloth to raise the shine. The grain came alive and the fills while visible look better than when I began.
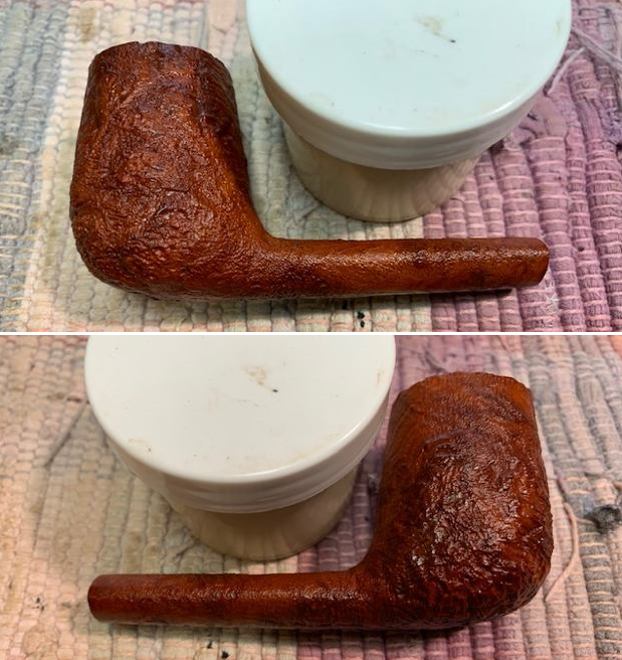
 I set the bowl aside and turned to work on the stem. I “painted” the stem surface with the flame of a lighter and was able to lift out all of the tooth marks and chatter on the surface. The little that remained I sanded out with 220 grit sandpaper. I started polishing it with 400 grit wet dry sandpaper.
 I polished the vulcanite stem with micromesh sanding pads – 1500-12000 grit pads. I wiped it down with Obsidian Oil after each sanding pad. I used Before & After Pipe Polish – both Fine and Extra Fine to further polish the stem.
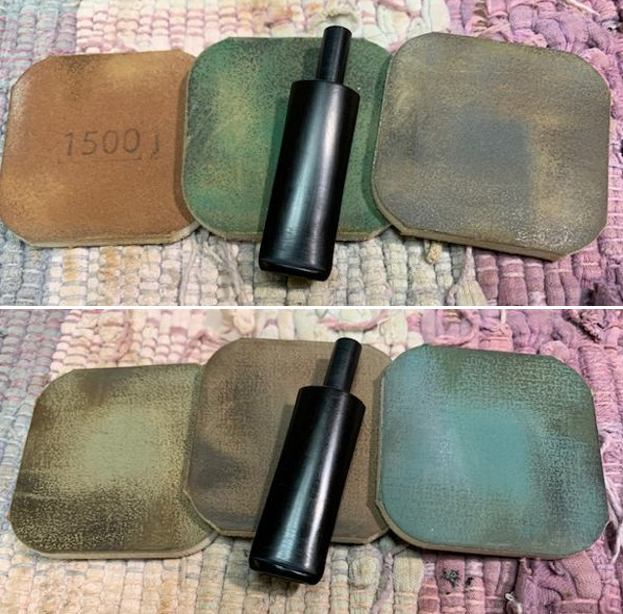
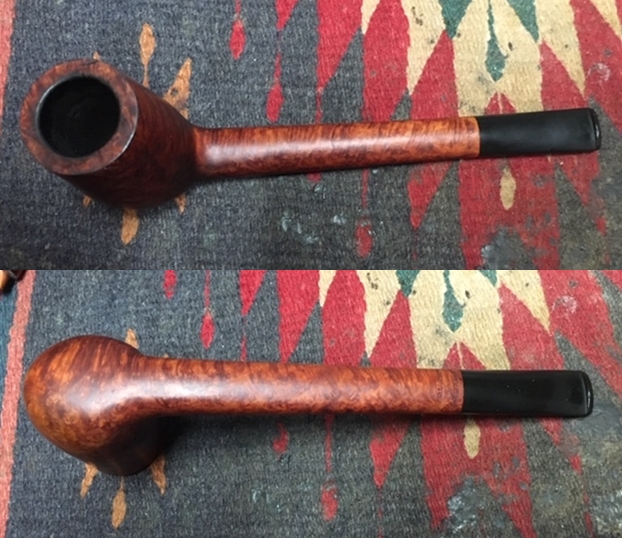
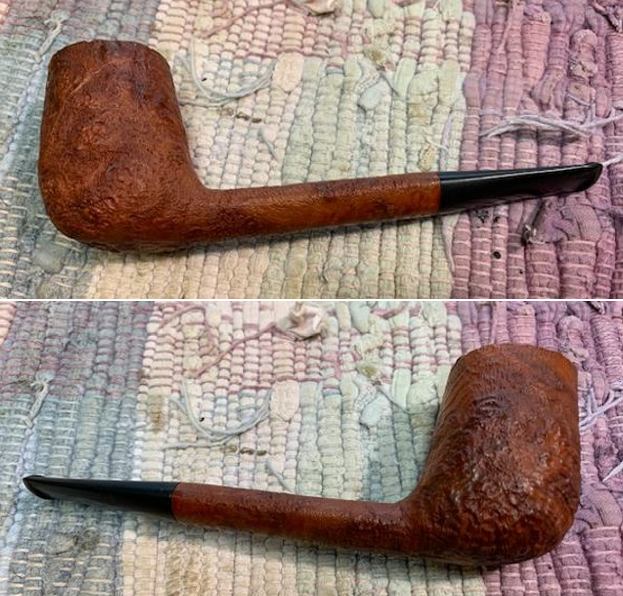
 This Larsen Hand Made Designed By W.O. Larsen Super Tan 65 is a great looking pipe now that it has been restored. The shape is elegant and flowing with a thin turned vulcanite stem. I put the stem back on the bowl and carefully buffed the pipe with Blue Diamond on the buffing wheel using a light touch on the briar. I gave the bowl and the stem multiple coats of carnauba wax on the buffing wheel and followed that by buffing the entire pipe with a clean buffing pad. I hand buffed the pipe with a microfiber cloth to deepen the shine. The finished W.O. Larsen Super Tan Canadian fits nicely in the hand and feels great. Give the finished pipe a look in the photos below. The dimensions of the pipe are Length: 5 ½ inches, Height: 1 ¾ inches, Outside diameter of the bowl: 1 1/8 inches, Chamber diameter: ¾ of an inch. I will be putting it on the Danish Pipe Maker section of the rebornpipes store shortly. If you are interested in adding this pipe to your collection send me a message or an email. Thanks for reading this blog and my reflections on the pipe while I worked on it. There are many more to come!