Tag Archives: stem work

From Sow’s Ear to Silk Purse


Blog by Steve Laug

This morning I decided to do a few more refurbs on pipes from my box. It is getting low on options as I have reworked the majority of the interesting ones. There are about 25 or so pipes to choose from now and many are in a real state of disrepair. As I sorted through them I came upon this one. I took it out of the box and turned it over in my hands. The bowl was clogged with the remnants of the last smoke – dried tobacco and sticky tars. I decided that this was the first pipe I would work on today. It would be a challenge to see if anything beautiful could come from this mess. It was a beat up old pipe. I think the previous owner must have always had it in mouth and chewed on it like a piece of straw and then used it to hammer nails. The top was chipped and dented with valleys and mountains and the whole covered in a thick coating of tars – pipe lava. The stem was gnawed on had deep dents and tooth marks. It was oxidized to a rich brown that stank of sulfur.

The first step in the process for me is always to ream the bowl and clean out the detritus of the past. I used a dental pick to get the remaining dottle out of the bowl and to make way for my reamers. I find that the dental pick works well as it is sharp enough to break into the hardened ball of tobacco remnant and remove it quickly. I work it around to clean out any loose leftovers so that I can work on the hardened cake that is left in the bowl. This one had a thick cake that was a bit crumbly and soft once the tobacco ball was removed. It would need to be reamed back quite a bit. I generally ream back to bare wood on these old timers as I want to start a hard cake that is not built upon the old crumbling base cake that was in the pipe when I started. I used the PipNet reamer on this one. I fit the cutting head into the T handle and began to carefully turn the reamer into the bowl. I generally do this over a plastic bucket as it is a mess. The coarse dust of the carbon that is cut away is a black cloud if you are not careful. I proceed slowly as it is easy to angle the cutting head and take the bowl out of round. Once it is done I tap out any dust that remains before moving the pipe to my work desk.
 ImageImage

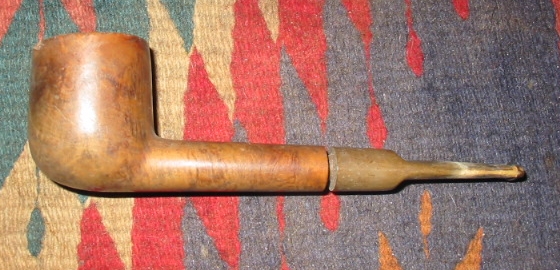
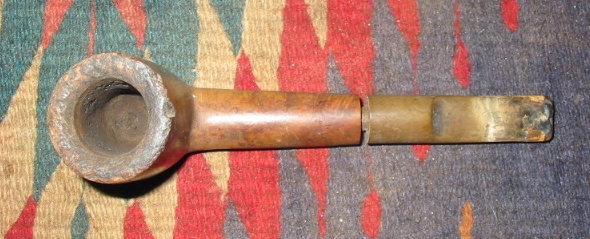
On the desk I had placed a work surface that was washable and then took out the soft cotton wash cloths that I use to remove grime and stains and wet them with Isopropyl. I washed down the outside of the bowl including the rim. It removed much of the dirt the first pass and I continued to scrub until the cloth came back clean. For this part of the process I leave the old stem in place as it serves as a handle for me to hang on to while I am working with the bowl. I picked at the grime on the top of the bowl a bit with the dental pick and decided that indeed this one was a candidate for topping. The two pictures above show the pipe after the reaming and cleaning of the bowl. It is ready to be topped.

In preparation for topping the bowl I use a flat surface – either a hard flat board or a piece of glass to which I anchor the sand paper. This time however I wanted to try out a new trick that I had learned from a friend on one of the online forums so I anchored a piece of 240 grit sand paper on a Masonite clipboard and put the clipboard on the desk top. Topping the bowl is a careful process that involves keeping the rim flat on the sand paper and turning it either clockwise or counter clockwise until the chips and dents are minimized. The trick is to take if far enough to remove the majority of the dents and chips without changing the overall profile of the bowl. Too much of the top removed changes the pipe rather than merely restoring it. As I sand the top of the bowl I stop to check it regularly to see if I have removed enough of the damage to the bowl. On this particular pipe it took me quite a bit of time to take it down slowly to the point it was smooth enough to do the next step in the process.

Often once the top is close to being smooth enough the last remaining dents can be steamed out and then a minimal amount of sanding will finish the job. On this particular pipe the top was smooth after sanding it. There was no need to remove any further dents. However there were some major chips out the outer edge of the rim. To remove them would have involved sanding off a fairly significant amount of the top and would have changed the overall look of the pipe. I decided instead to chamfer the edges on the outer portion of the rim. I used a piece of sand paper held at an angle that I maintained throughout the sanding. The idea was to hide the battered edge and remove some of the damage while minimizing some of the larger chips. Once I had the outer rim repaired to my satisfaction I did the same to the inside rim to regain some of the roundness of the bowl. The previous owner seemed to have used a knife to remove cake so there were major chunks taken out of the inside edge. Chamfering the inner edge took care of most of the damage and made the rest relatively invisible to a quick glance.

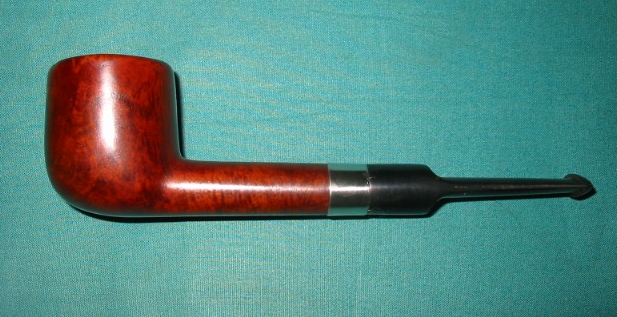
I then cut a stem to fit – turning the tenon on a precast stem and also taking off the excess vulcanite on the area where the stem joined the shank. I wanted to get the fit to be precise without gaps. Once I had the fit correct and just needed to sand out the scratches I put the bowl in the alcohol bath to let it soak and remove the stain. I continued to work on the stem while it soaked. I generally leave the bowl in the bath for a minimum of 30 minutes and have even left them over night in an extremely dirty bowl. Once I take it out of the bath I wipe it down with a dry cotton cloth and let it dry. I then sand the bowl down to remove any scratches in the surface. I start with a 400 grit wet dry sand paper and work my way through the Micro-mesh pads 1500, 1800, 2400, 3200, 4000, and 6000 to get a good smooth surface. As I worked on the shank I noticed a fine crack that became evident as I removed the grime from the inside of the shank. I heated a nickel band and pressure fit it to the shank to take care of the crack.

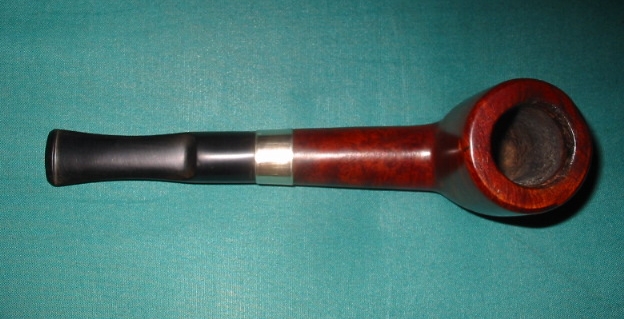
I finished the bowl by re-staining it with a medium brown stain as an undercoat and then buffed and sanded it yet again. A top coat of oxblood stain followed that sanding. I find that the two coats of stain complement each other and add some depth and patina to the pipe that only the one colour does not give. It was then polished on the buffing wheel with White Diamond and then given several coats of carnauba wax. I had also finished the stem and put it on the bowl and buffed and waxed the entirety.

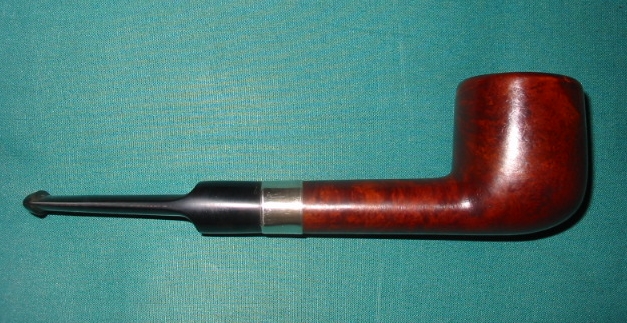
This is the finished product. I think you would agree it has ceased to be a sow’s ear and has become a silk purse!
ImageImageImage


Hot off the refurb desk


This is one that I just finished refurbishing. It came in a box of pipe bowls that I was given that needed re-stemming. I cleaned and reamed it and removed the tars on the rim. The shank had a small crack in it that needed to be fixed so before I re-stemmed it I cleaned the outside of the shank with a cotton swab of acetone to remove any finish that was on the area that the band would cover. I measured the outer diameter of the shank, picked out a nickel band. Just before placing the band I put some super glue in the crack and let it dry. Once done I dabbed a bit of all purpose glue where the band would go and then heated band so that I could pressure fit it in place. I re-stained the bowl with a dark brown aniline stain to give it a more even finish. I buffed it with Tripoli and White Diamond before giving it a coat of wax. Then I laid it aside.

I found an interesting stem blank that would give the pipe a pleasing look to my eye. I turned the tenon with a PIMO tenon turning tool until it was a close fit and then did the rest of the work on the tenon with sand paper by hand. Once I had the tenon fitting snugly I took my Dremel to the outer diameter of the stem to bring it as close as possible to the diameter of the shank of the pipe. I finished the exact fit by hand with varying grades of sand paper. Upon completion of the fit I used 240, 400 and 600 grit sand paper to remove the scratches and then 1500,1800, 2400, 3200,4000 and 6000 micro-mesh sanding pads to finish the polish on the stem. I put the stem on the pipe and then took it to the buffer and did a final buff with White Diamond buffing compound on a mixed felt/flannel wheel. Remember never buff a stem without it being in place on the bowl or you will round the edges at the stem/shank connection.

Once I had the stem as smooth as I wanted I gave it a coating of Obsidian Pipe Stem Oil and let it dry for half an hour and then buffed the entire pipe with a carnuaba wax buff.

Here is the finished product:

ImageImageImageImage

Poor draw on a stem


Blog by Steve Laug

I was working on a stem for a friend this evening. The bowl on the pipe had a great wide open draw. The stem by itself was awful – it was like sucking on a coffee stirrer. It was a Aerosphere pipe. He had plugged the carburetor which was good. Somehow the stem itself was not drawing. I heated it and straightened it. I pushed a pipe cleaner through the straight stem and a chunk of some kind of fabric fell out. I used a light and looked down the stem and saw that the airway was a half circle. I used a needle file to open it up and to open the slot on the button as well. I then reheated with a pipe cleaner inserted to keep the airway open and then bent it so as not to kink the stem. The draw is wide open now. This caused me to post here regarding opening airways on bent stems.

Here are a few things to consider:
1. Is there anything in the stem itself clogging the airway? Could be a chunk of pipe cleaner lint, or fabric or just plain gunk.
2. Is the button open or is the slot on it constricting?
3. Is there a kink in the airway caused by the bend itself? This can happen when the stem is bent too far for the thickness of the stem at the bend.
4. What is the shape of the airway from shank to button? Round? Oblong? Oval? half circle? Check it before you drill it?

Anyway just a heads up – check before you drill it open.

Correcting an overturn on screw mount stem


Blog by Steve Laug

In years past I remember posting on a variety of pipe forums I have been a part of regarding correcting an overturned stem with a screw mount. I have had old Kaywoodies and others that have this kind of stem and inevitably they were overturned so that the stem did not line up. It was semi tolerable on round stems but even then it was bothersome for me. The worst was on a bulldog with a diamond shank and stem. To not have the diamonds line up just bugged me. I knew there had to be a fix for this but I had no idea what it could be. I used various paper washers to help with the process. I used cardboard and even thin leather. All of these were less than satisfactory. Besides I am a bit anal about that kind of thing and I want it as it should be not half way there.

I don’t remember who posted the help for me or if I picked it up in talking with folks but I have been using this method for a long time now. I have seen others ask on various forums for a method for correcting the problem and have often typed out a response for them. Today I had a few moments to spare so I thought I would write up the procedure and share it with you.

My procedure is actually quite simple. I have a small microwavable bowl that I fill with enough water to cover the metal tenon and about a quarter inch of the stem when it is placed in the bowl. My bowl has a 2 ½ inch diameter so I can lay the stem in it at an angle with the button over the edge. Care should be taken as the water can and will bring out oxidation on the stem and it can be a pain to remove. I try to not allow the water to climb too high on the stem to minimize the work. I also place the stem in with the bend down on a bent stem. Vulcanite has memory and will straighten with heat so I have found that placing the stem with the outer bend in the bowl aids in keeping the bend.

Once the stem is placed in the water I place the bowl in the microwave and set it on high heat for 2 minutes. This generally gets the water boiling or just under boiling. If you worry about the metal causing trouble with your microwave you can heat the water without the stem and stick the stinger/screw mount end in the boiling water once it is removed. Once it is hot I let it stand in the water for another 2 minutes and then reinsert in the shank of the pipe. The glue should be softened enough to turn the stem until it is in the correct position. Once I get it straight I set it aside and let it cool and the fix is finished.

I have used one other method with good success as well and that is a heat gun as the source of the heat. For me it is a bit more labour intensive as you have to keep the stem moving so as not to burn the vulcanite. It does work well though and you do not have to fight the oxidation. Once it is heated use the same procedure as above to straighten the stem and fit. Let cool and you have it finished.

If the stem does not turn easily you have not heated it enough. Give it some more heat with the gun or the water until it is easily turned on the shank. I have used this method on all pipes with the screw mount tenon/stem and had good success.

Because it worked so well with the metal screw mounts I decided to give it a try with a bone screw tenon on a couple of older meerschaum pipes and an old deco Bakelite pipe. The pipes I chose to try the method on were pipes of little value so that if it did not work it would not be a loss. I put a cup of water in the microwave and stood the stem in it tenon down and set the timer for two minutes (time to boil a cuppa in my microwave). I took it out at a minute and gave it a try and it was better. I put it back in the water and let the two minutes finish. I don’t know if the tenon loosened or if it swelled but it is certainly fixed.

On these old timers my two concerns with the microwave were integral damage to the bone tenon from the heat moving from the inside out and secondly to the Bakelite stem. I did not want it to become brittle from the same process. I tried to minimize that by putting it in the water. I have learned on the metal ones to insert the stem and tenon while the water heated in the microwave for maximum effectiveness. I decided to do that as well. I have been smoking these pipes now for several months and taking them apart to clean them without any problems. It seems that they have not been compromised.

I have yet to try it on amber as I have not had an amber stem to sacrifice. I now know that it works on Lucite, vulcanite, Bakelite and on older bone tenons. I continue to experiment with these older pipes to learn what I can in terms of restoration. If you have suggestions or ways in which you have worked with this issue let me know.

Patching a bite through


I thought I would write an article on this topic as I just finished repairing a bite through on an old London Made pipe with a vulcanite stem. It is fresh in my mind so it will be easy to write it down, plus I enjoy passing on my refurbishing processes to others to experiment with.

To begin the patching process you need to make sure the stem is clean of all oils, waxes and oxidation. You want the patch to bond well with the original stem. I have also found that any oxidation will show through the patch and leave a blemish on the stem that is cannot be removed as it is under the patch. With that in mind I removed the oxidation from the stem with repeated soaks in a tub of Oxyclean. I mix it 1 scoop to a quart of hot water. I put the lid on it and shake vigorously to mix the powder. Once it is well mixed the stem goes into the water for its first soak. I wash it off and sand or buff between soaks to remove any oxidation that is soften enough to remove it. Then it goes back into the jar for another soak. I repeat the process until the stem comes out clean.

I take it from the final wash and I sand the stem with multiple grits of sand paper to get the stem back to a matte black finish. I don’t want a sheen on the stem yet as I want a bit of roughness in order that the patch will adhere well. Once completed, I use a dental pick to clean up the area around the bite through and remove any remaining rubbish in the hole. I then used a small needle file to roughen the broken surface of the spot to prepare it for the patch.

I soak a pipe cleaner in olive oil (not dripping oily but enough to make it slick as you do not want it gurgling out the hole and messing up the part you have just cleaned. Believe me Super Glue will not stick to oily slick surfaces and it will never dry when mixed with oil.) The pipe cleaner is inserted into the button on the stem just past the bite through. This provides a block on the underside of the hole and also a non stick surface so that the glue used in the repair does not fill the airway and cause the pipe cleaner to bond to the inside of the stem.

I used clear Krazy Glue/Super Glue (you can get black Super Glue from wood working supply sites online) and did an initial fill on the hole. The idea is to get a good bond on the hole itself and not try to over fill. Once it was dry (very quickly) I sanded the surface to roughen the initial patch and then filled the hole and surrounding dent to a bit overfilled (a bubble if you can picture that). I set it aside over night and then the next morning sanded it smooth to match the surrounding surface. If the hole is large the idea is to build out toward the middle with repeated applications of the glue.

I have experimented with different drying times that are optimal for the sanding process and found that the one I stated above works the best for me. The first application is a quick dry and is sanded while the glue is not cured. The second application is hard when I sand it. I use multiple grits (400, 600) of wet dry sand paper and then microfiber sanding disks (1800, 2400, 4000) to blend the patch to the surrounding stem area and then gave the entirety a buff with red Tripoli and then white diamond. I finished the polishing with 4000 grit microfiber disk and it is virtually invisible and has formed a hard bond with the stem.

I am just an amateur refurbisher sharing how I do a patch. I am sure others here, particularly the pipe repair folks, have other methods and better ones. But this one works for me. I will try to do a photo essay on the next pipe stem I patch to show pictorially what I do.

Oh… for information sake – I have pipes that I have repaired in this manner that I have been smoking for 10 years that show no breakdown in the patch.

Journal of a Stem Patch


I had this old four hole stinger Kaywoodie Drinkless Canadian that came to me in great shape other than a fairly large bite through on the top of the stem. It was in great shape otherwise, barely smoked and very clean. No other tooth marks no dents, and no chatter – just the big old hole in the centre on the top of the stem. I thought I would take pics of the process I go through to patch it. So here it is from start to finish.

Step 1: I cleaned the hole and picked out any bits of stuff with a dental pick and wiped it down with an alcohol rag. Once it was dry, I put some soft wax on a finger nail file and inserted it in the button under the hole. The wax or grease keeps the glue from sticking to the file and permanently binding it to the stem. Here is a picture:


Step 2: I drip Super Glue on the hole and build up the edges a bit. This one is a large hole so I want to make sure that there are no bits that break free around the edges of the hole.


Step 3: The next two photos show the addition of vulcanite dust to the mix. I sanded down an old clean stem that was in my box and that I use for mixing with the glue on these larger holes. I had about a 1/2 teaspoon of dust. I dripped glue into the hole and then added the dust to the mix. After the dust I added a few drops more of glue and then dust again until the hole was filled with the vulcanite dust and glue mixture.


Step 4: I left it to dry for a half hour while I worked on another pipe that I was cleaning. Once it was dry, I removed the file and tested to make sure it was dry. I sanded the first bit with 220 grit sand paper and then a sanding block with medium grit. Here is the next shot.


Step 5: Once I had the majority of the patch smooth I moved on to 400 wet dry sandpaper to keep working at the patch and blending it into the stem.


Step 6: Once it was smooth to the touch I moved on to 600 wet dry and sanded some more in a vertical and a horizontal pattern with a small folded piece of sand paper as I worked to blend the patch.


Step 7: When it got to the point of blending that can be seen in the next photo I switched to the 1800 micromesh pads and used a spot of water on the patch to assist the blending with the pads.


Step 8: When it was smooth to touch I used the buffer and hit it with Tripoli and white diamond and then brought it back to the desk to use the 2400 and 4000 micromesh pads. Here is the finished product, waxed and ready to smoke.