Blog by Steve Laug
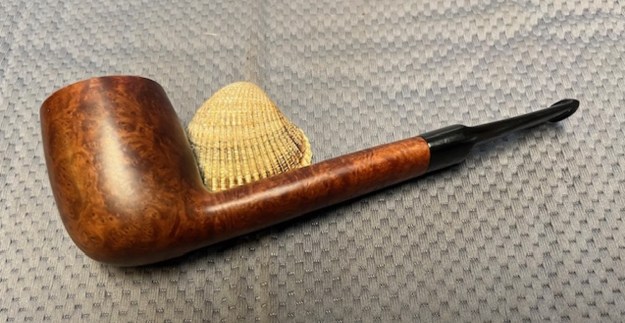
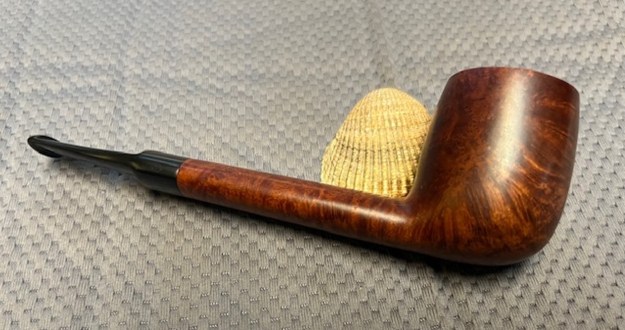
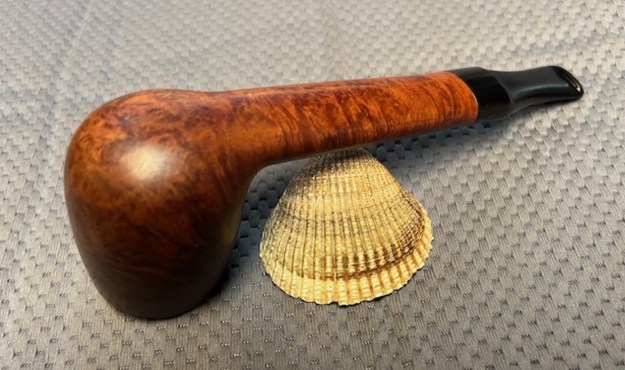
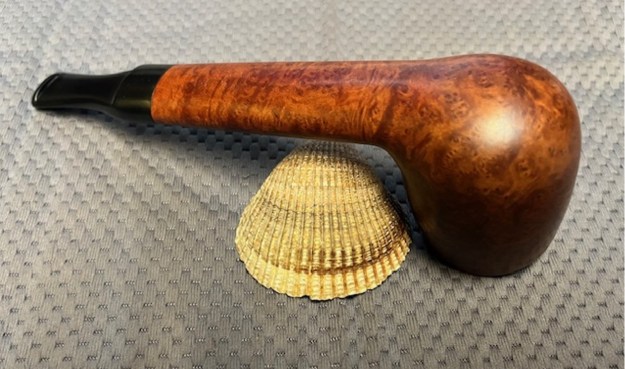
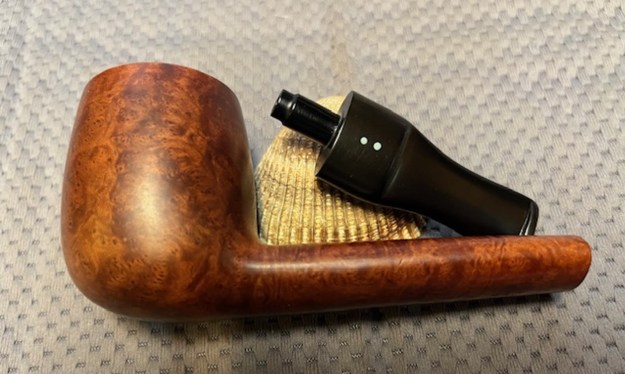
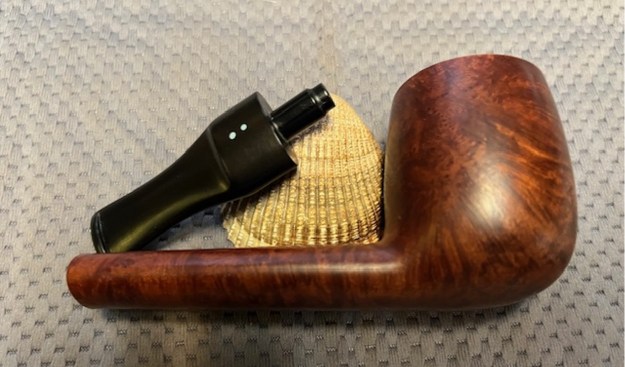
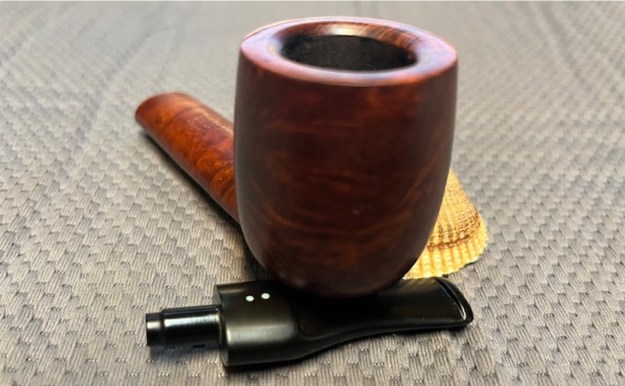
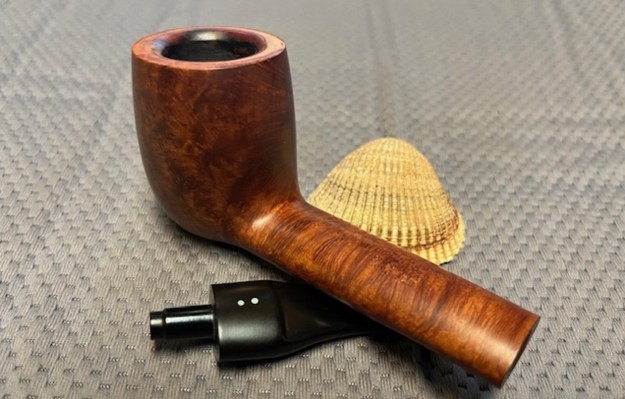
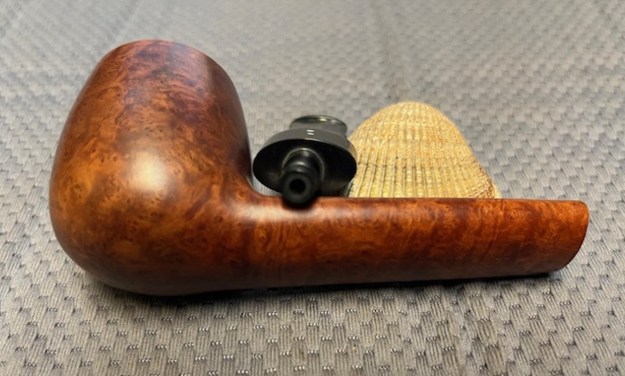
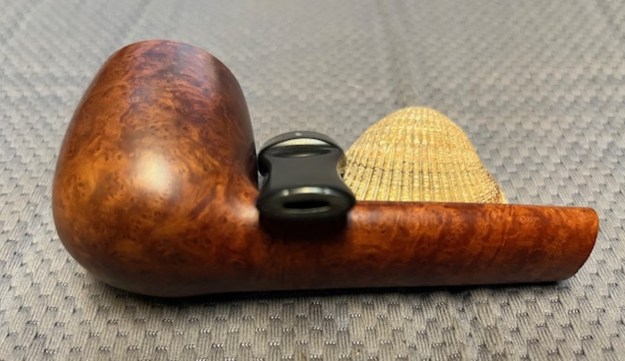
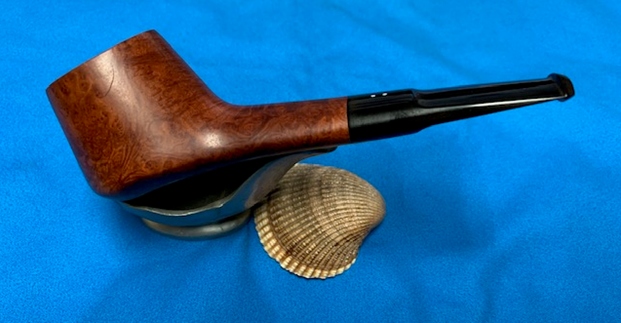
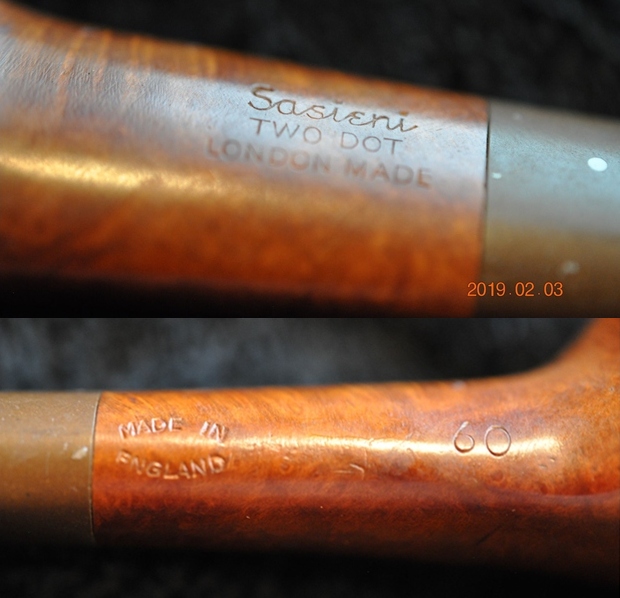
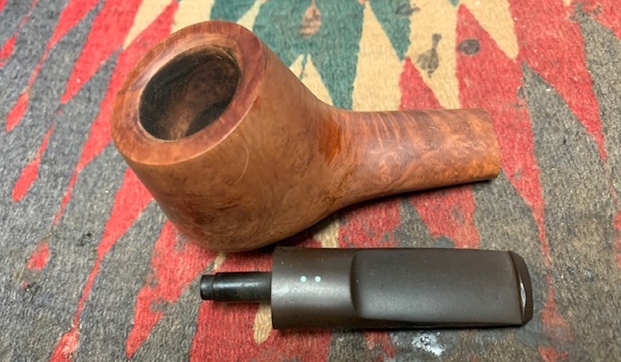
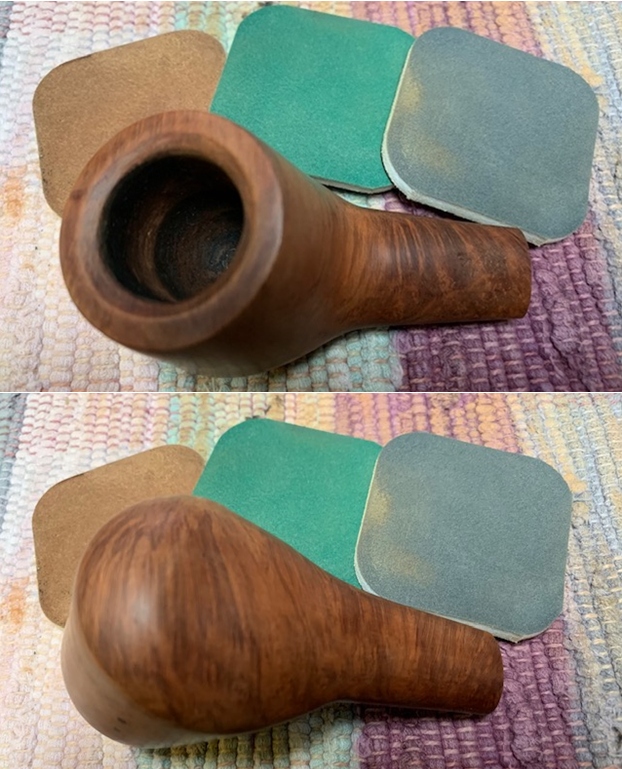
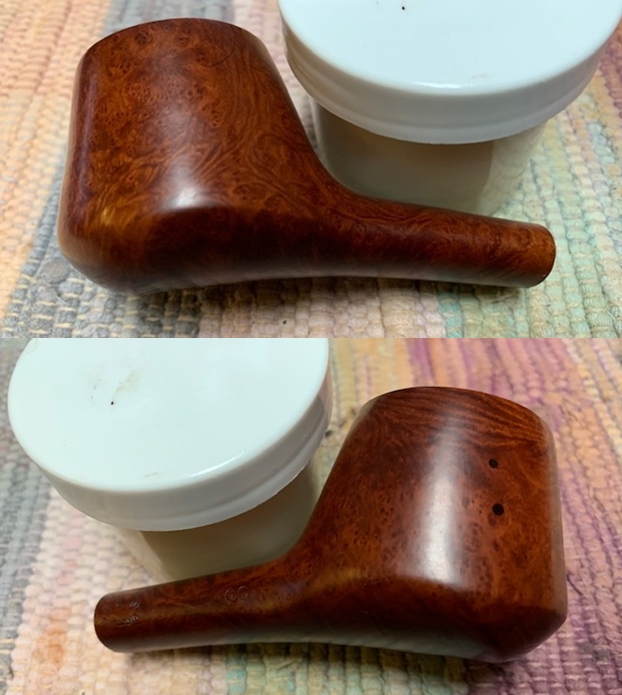
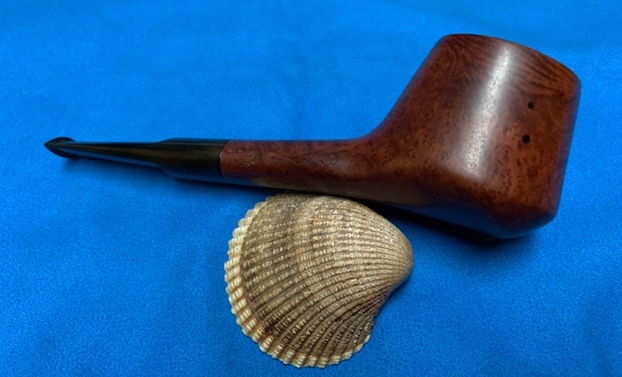
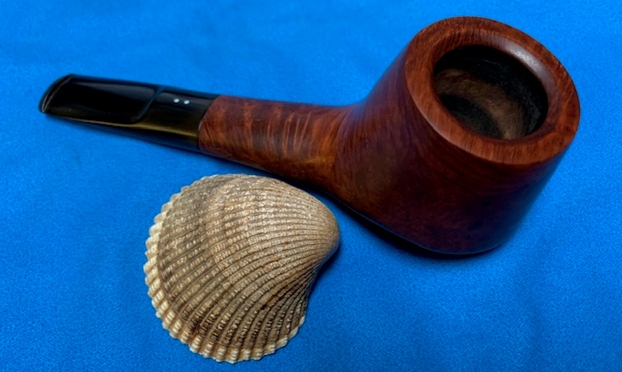
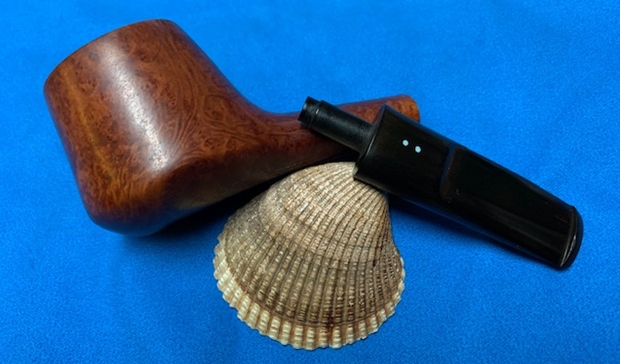
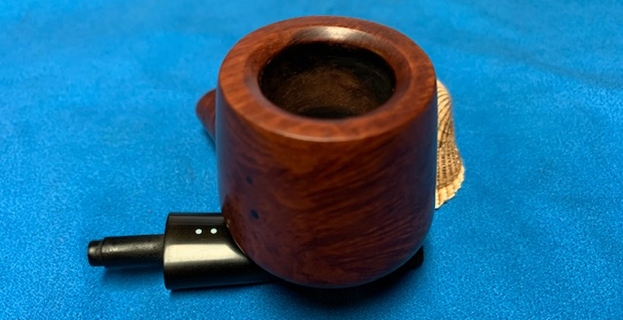
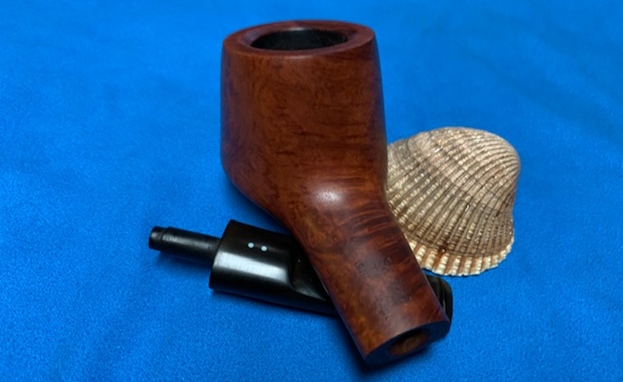
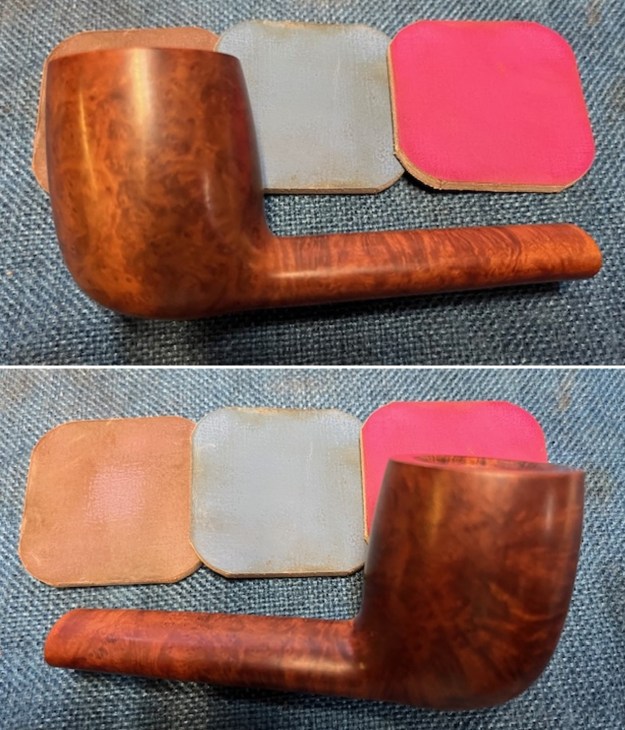
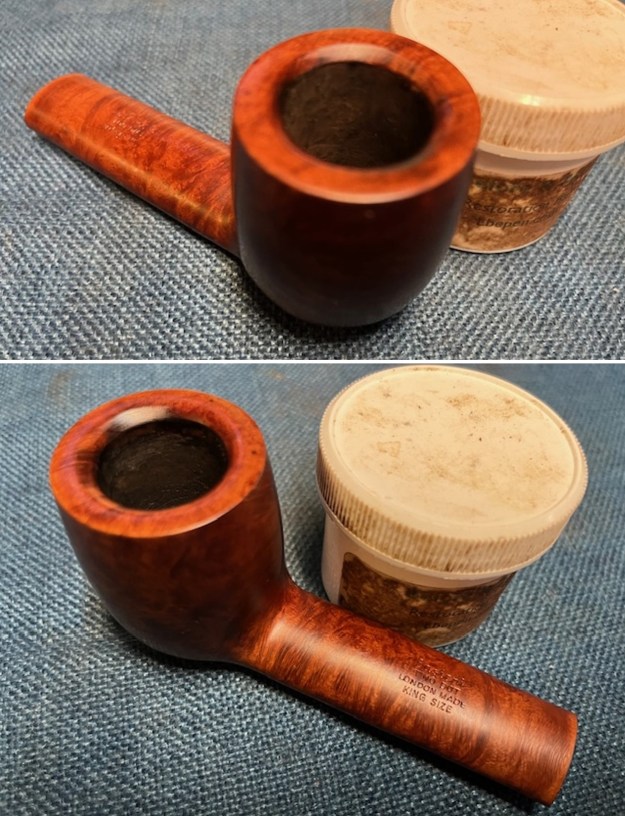
Last week I received a package of pipes to work on for a friend, Scott. I had no idea what was coming but when it arrived I was surprised with the interesting and amazing pieces he included for me to work on. These included a nice looking large Dunhill 841 ODA Lovat, a Campaign pipe with a Calabash style bowl and a start on the stem, a Sasieni 2 Dot London Made Canadian with a Lovat style saddle stem, and finally an older GBD MR&Co silver banded 5 Lovat. All of them are quite lovely and also interesting for me to be able to work on. I took a photo of the box when I unpacked the pipes.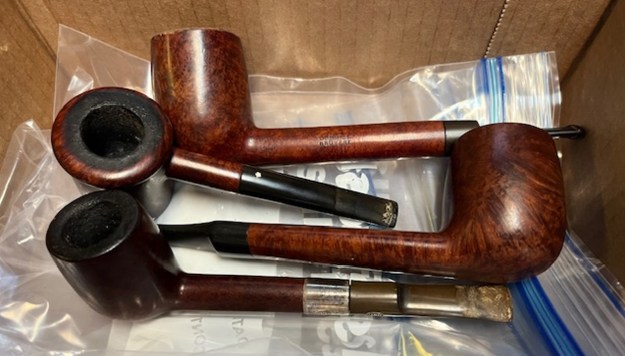 The second pipe I chose to work on from this lot was the large Sasieni Two Dot Large oval shank Lovat. The pipe has a smooth, rich brown finish. The stamping on the topside of the shank read Sasieni [over] Two Dot [over] London Made [over] King Size. On the underside the COM Stamp was shaped like football and read Made in [arched over] England. That is followed by a shape number 44G. The bowl had a heavy cake in it and the rim top and inner edges had a heavy lava built up. The cake was thicker on the back half of the bowl. The outer edge of the bowl looked very good. The finish was very dirty with grime ground into the bowl sides and shank. The stem was calcified and oxidized and there were tooth marks on the top and underside ahead of the button. The Sasieni two blue dots were on top of the saddle portion of the stem. I took a few photos of the pipe before I started working on the pipe and have included them below.
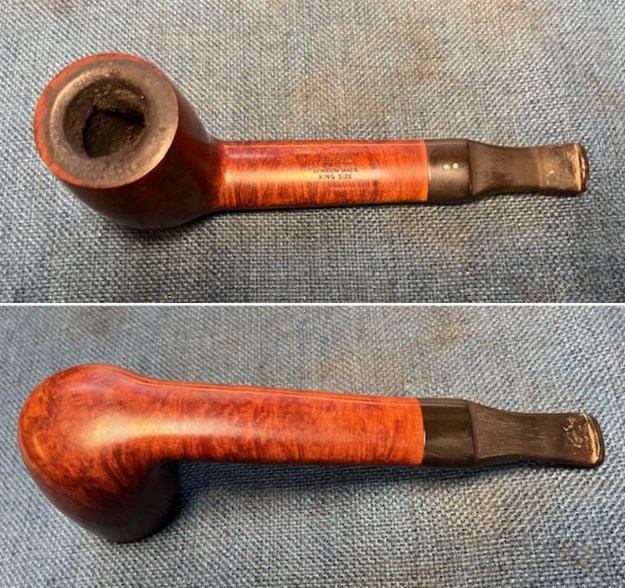
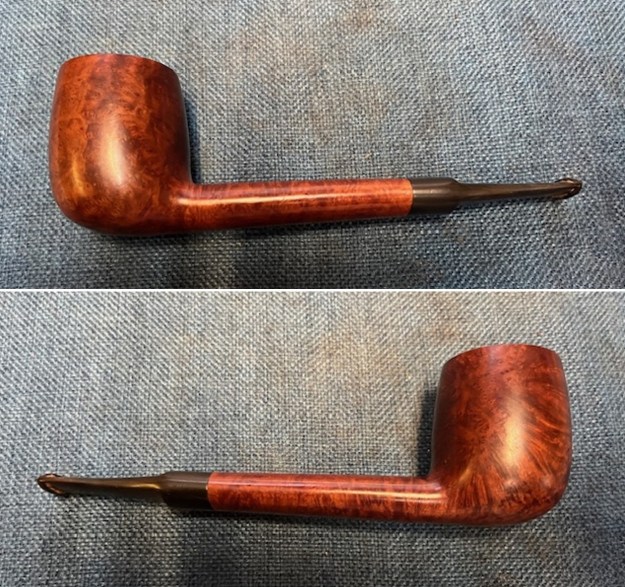
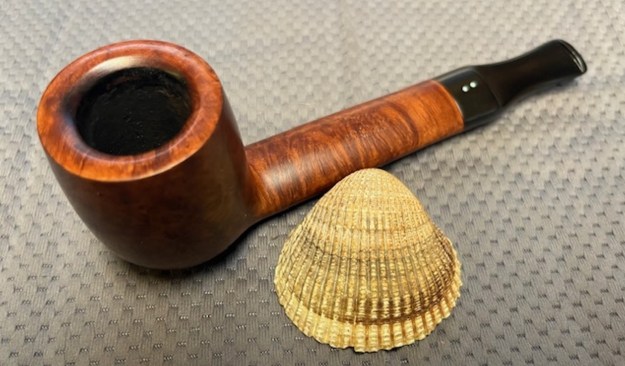
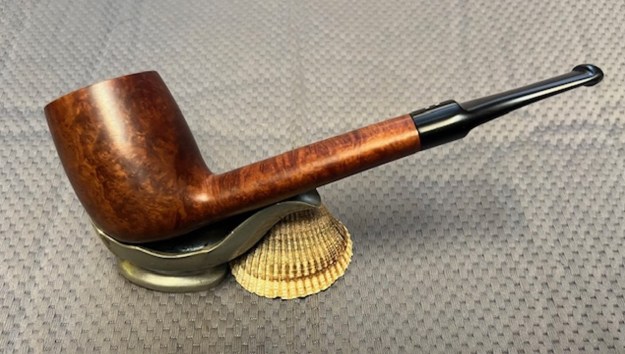
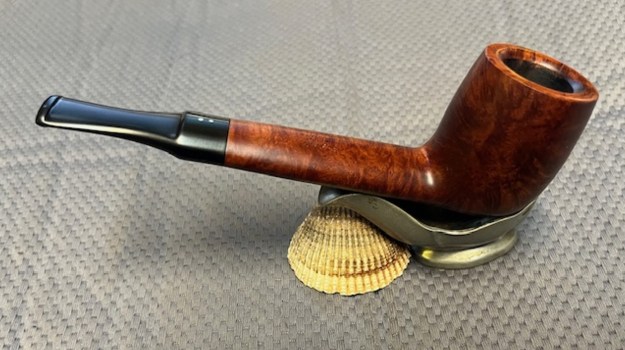
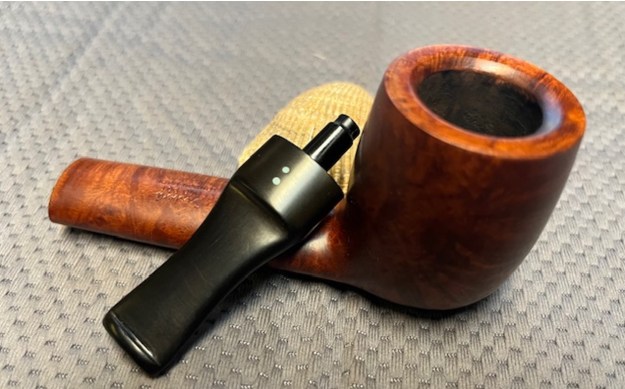
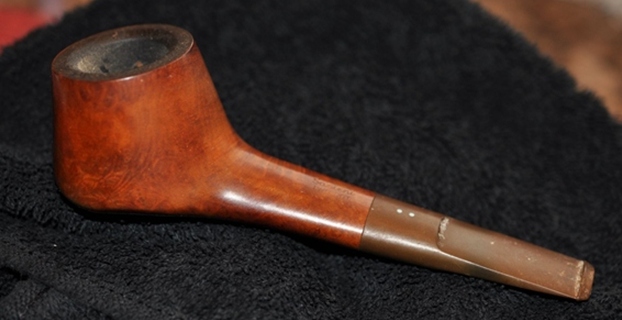
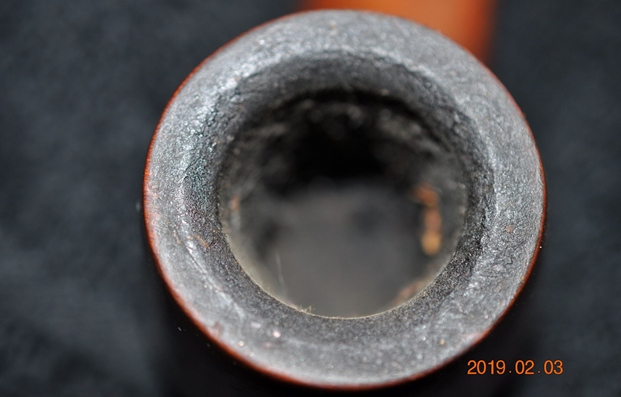
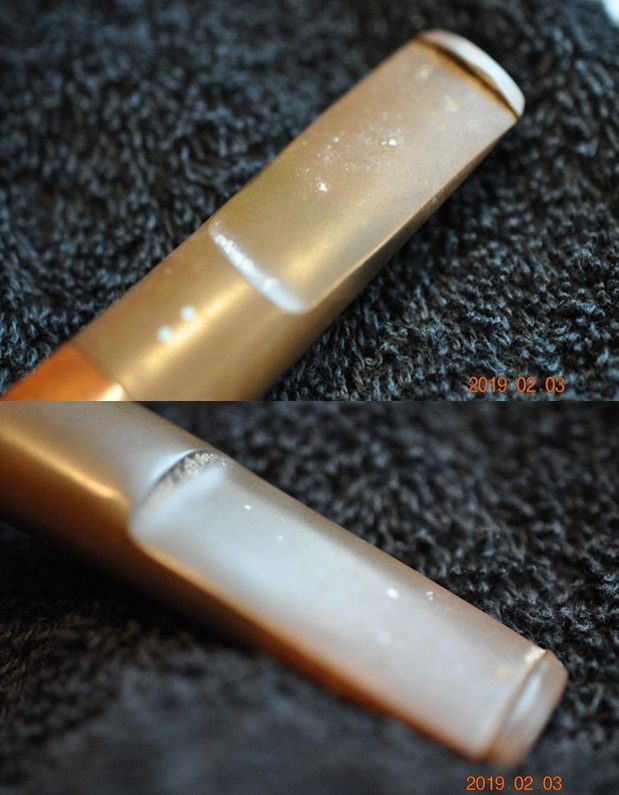
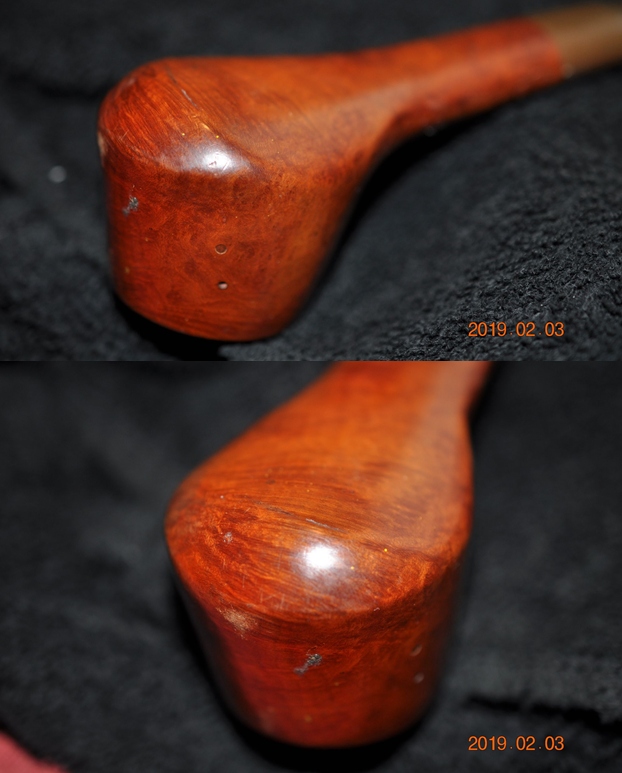
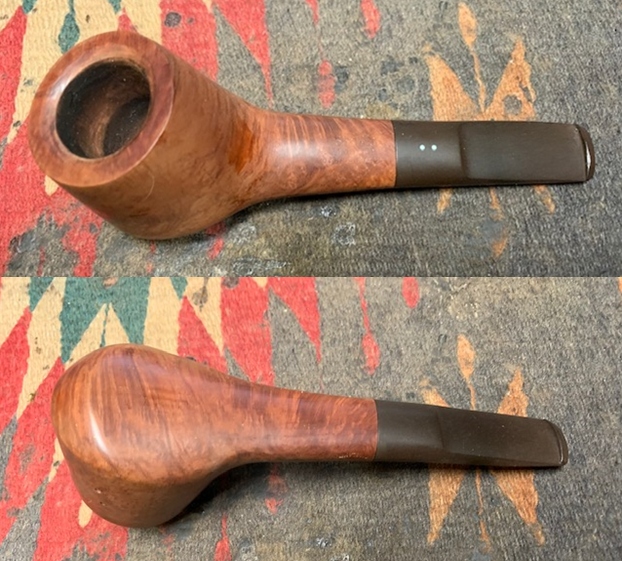
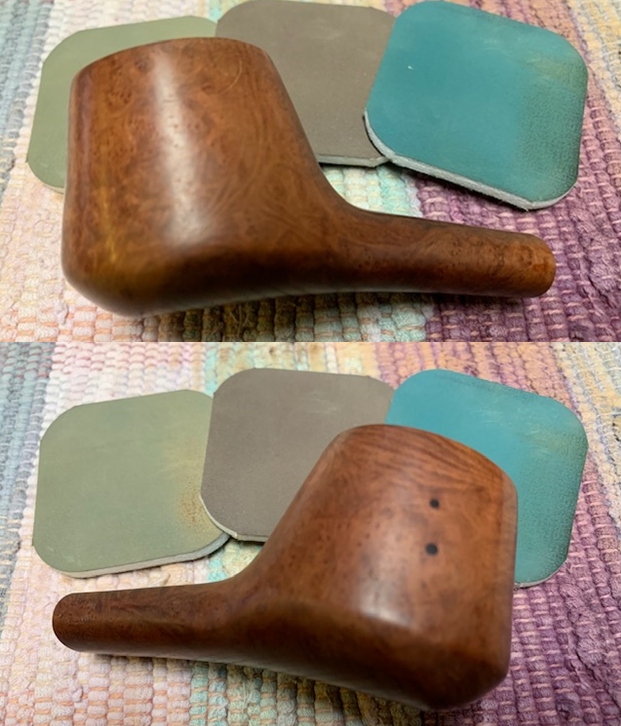
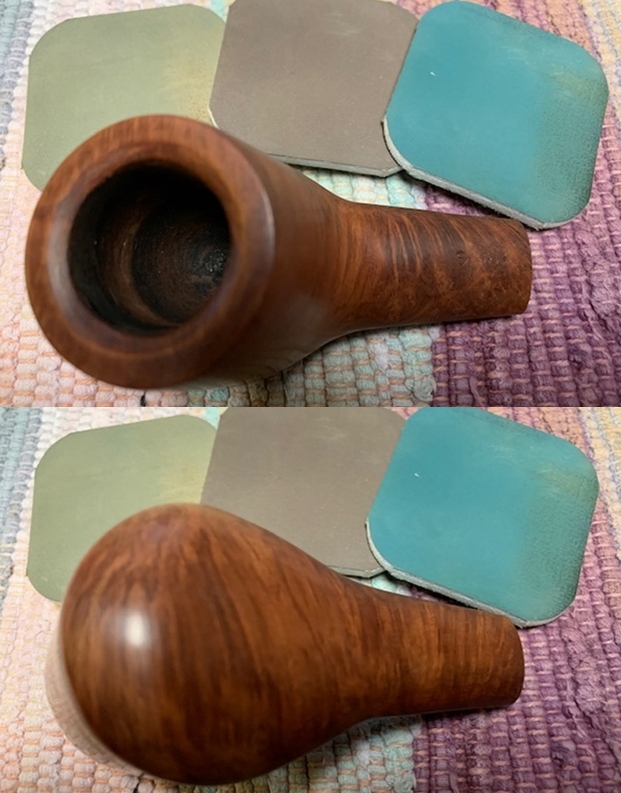
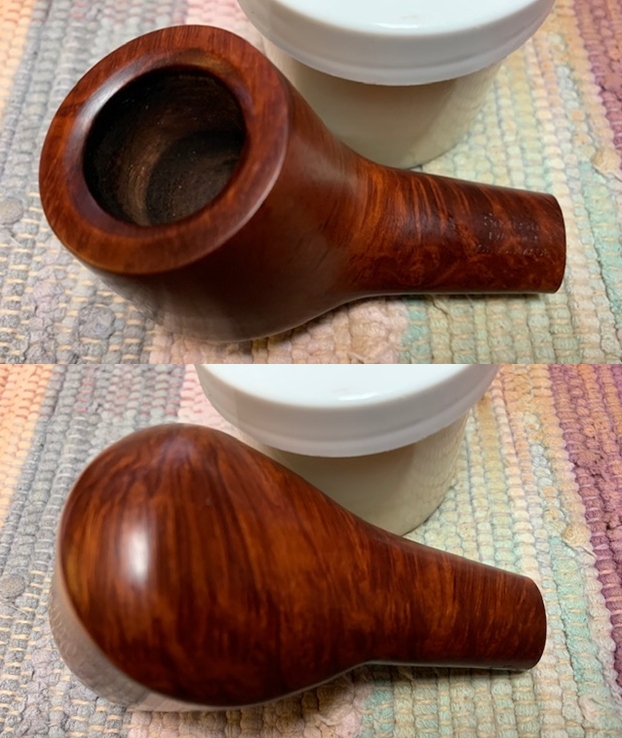
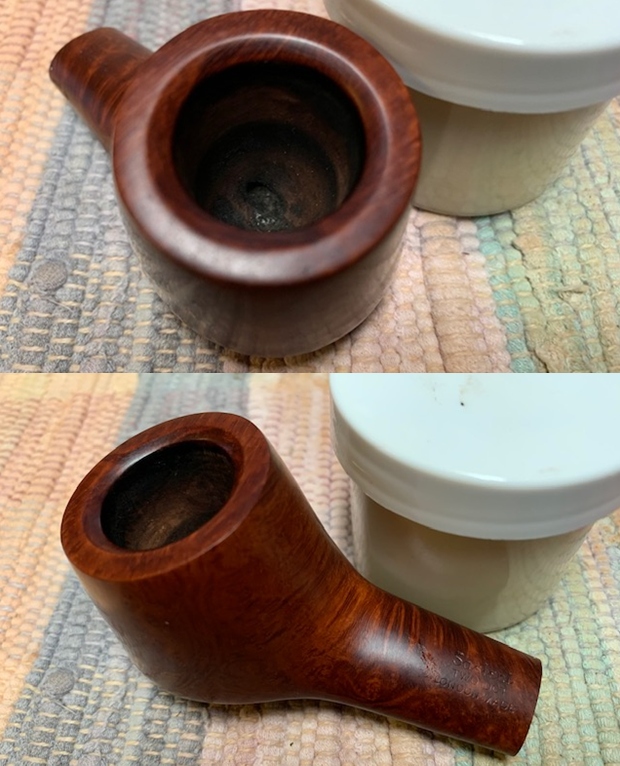
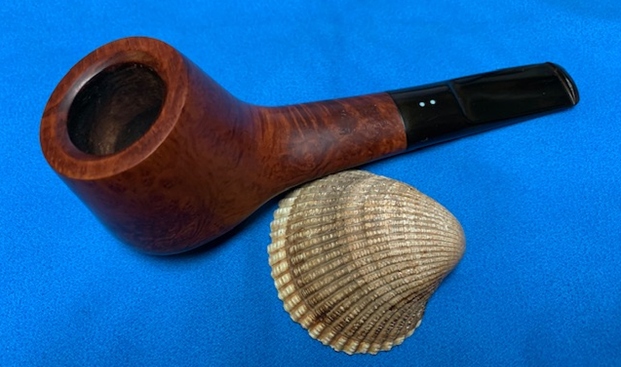
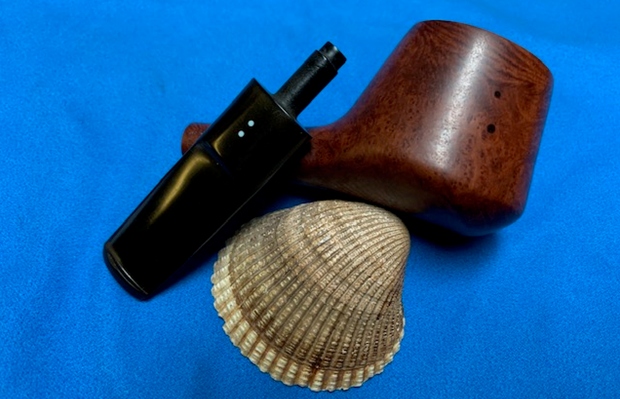
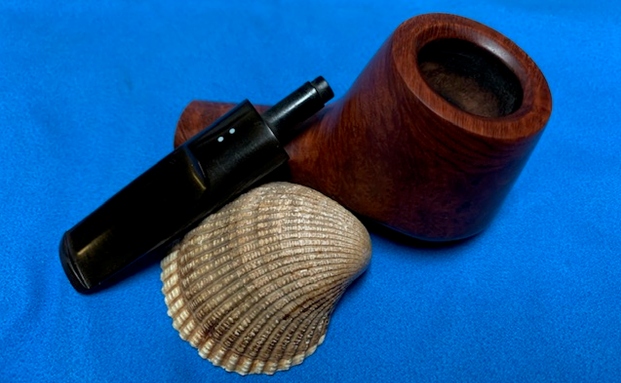
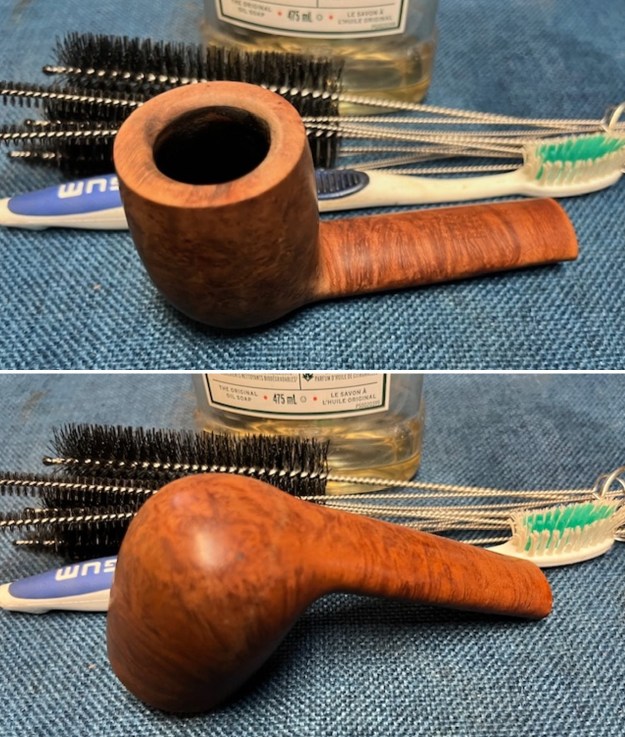
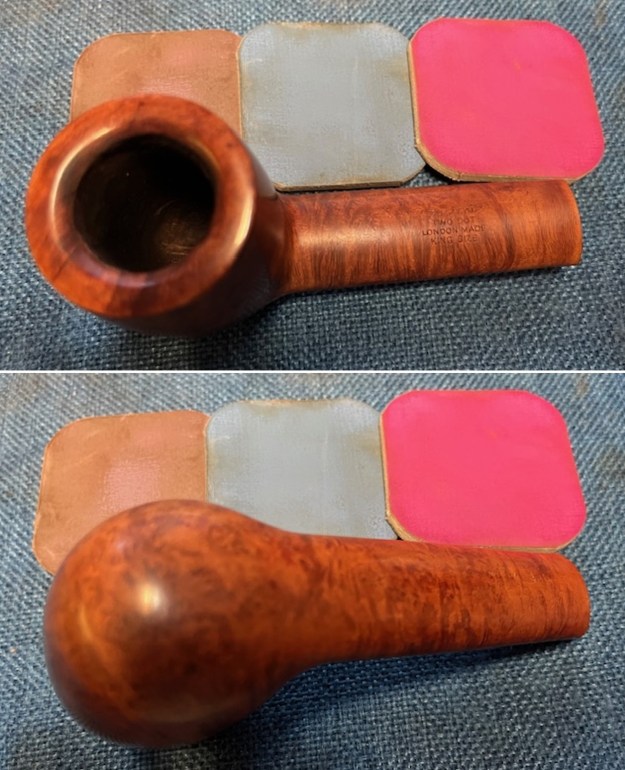
 I took a photo of the rim top and bowl to show the condition of both of them. The bowl itself had a thick cake on the walls and bowl bottom. The rim top showed a heavy coat of lava and the inner edge was heavily caked and its condition would be revealed with cleaning. The outer edge looks good. The photos of the stem show the oxidation, calcification and tooth marks/chatter on both sides ahead of the button.
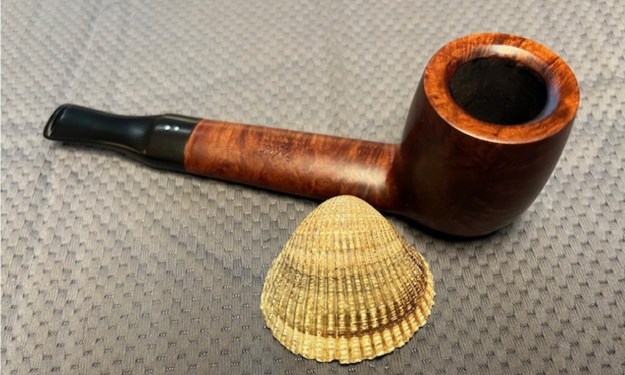
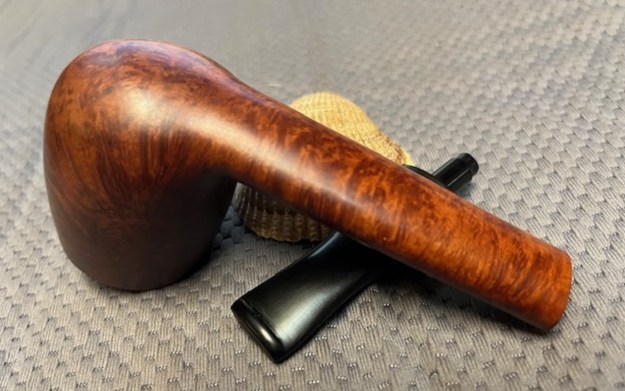
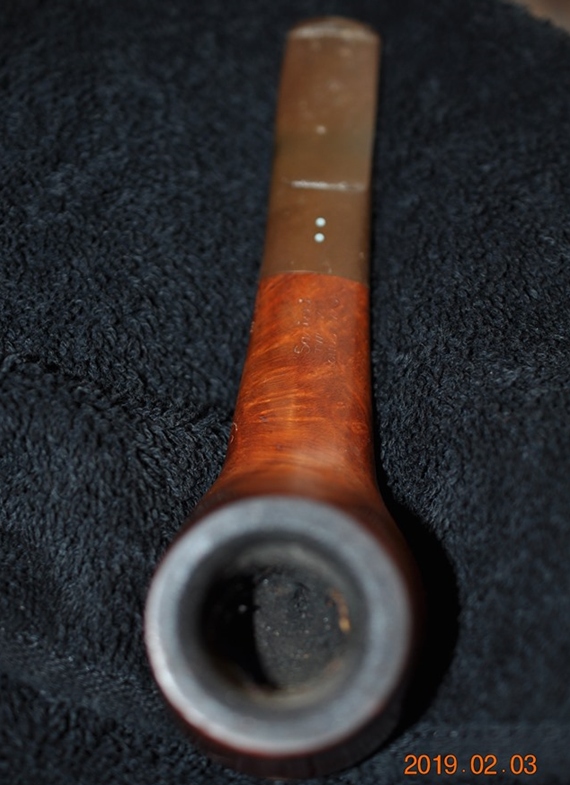
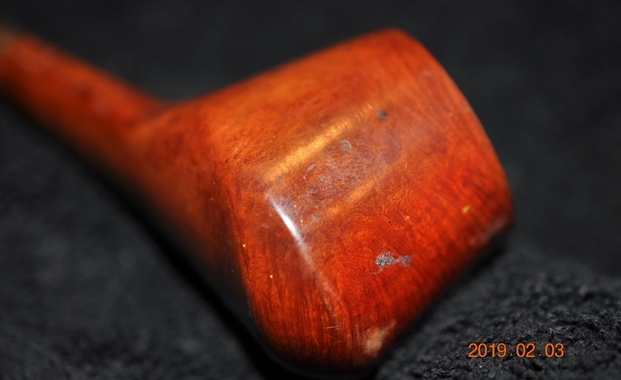
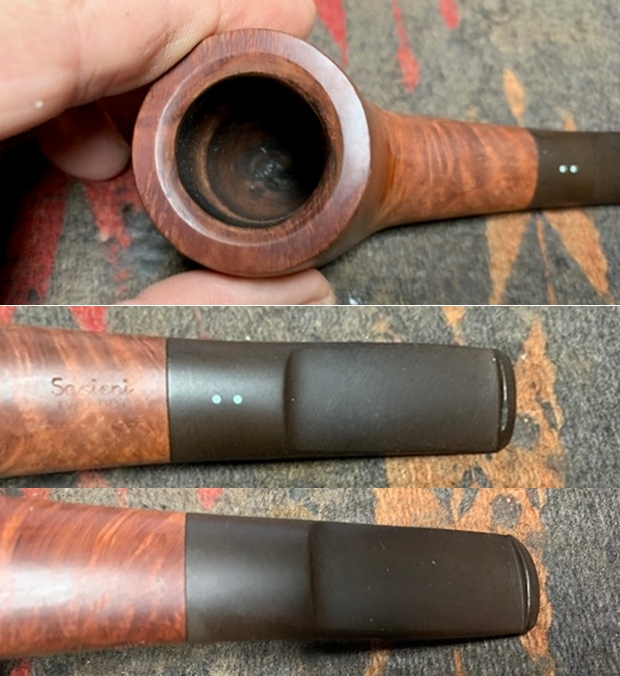
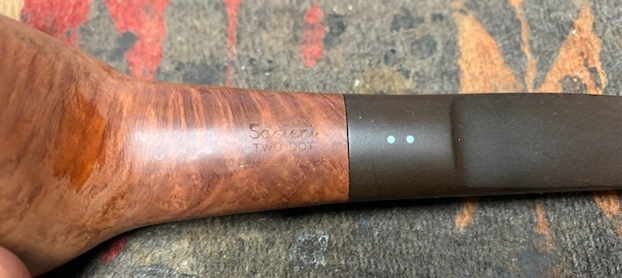
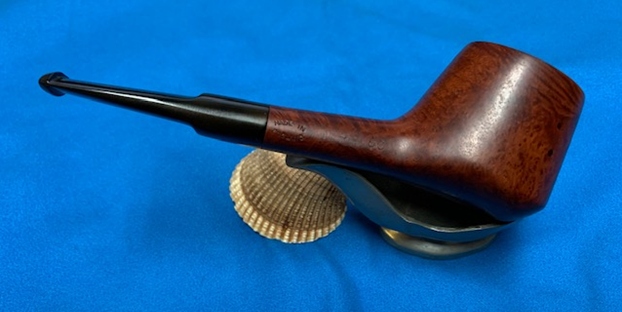
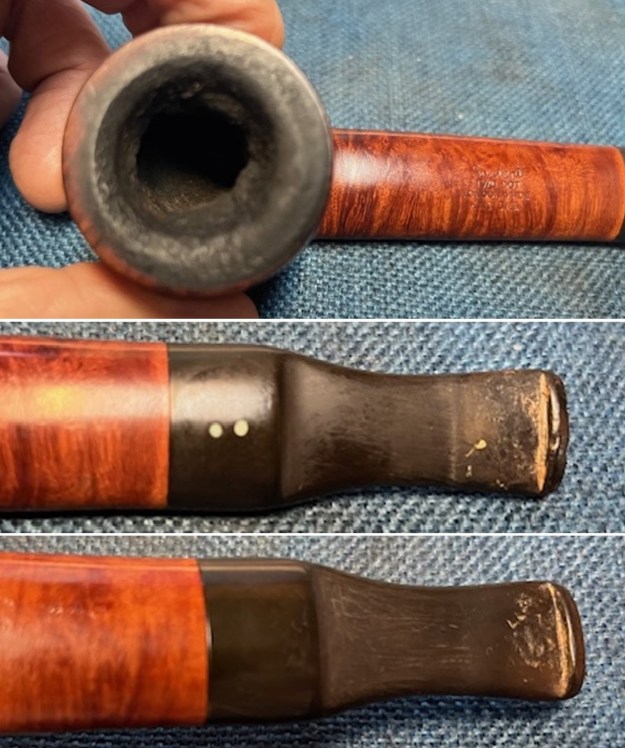 I took photos of the stamping on the sides of the shank. The stamping was clear and readable as noted above. I removed the stem from the shank and took a photo to show the proportions of the pipe.
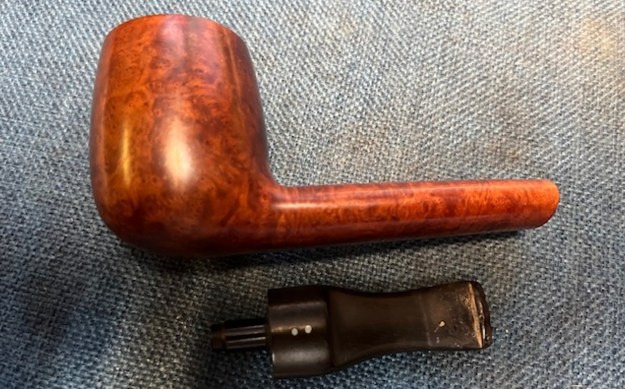
 Before I started my work pipe, I turned to Pipephil’s site (http://www.pipephil.eu/logos/en/logo-sasieni.html) to get a feel for the Two Dot pipes. As usual there is some helpful information in short form on the site. I have included a screen capture of the pertinent section below.
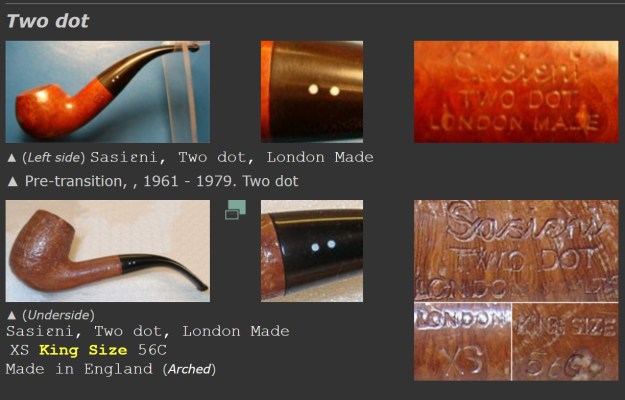 On the side bar it also included this information on the King Size stamping:
“King Size” marking in any Sasieni grade or finish were the largest pipes Sasieni regularly marketed.
“Two dot” pipes are not to be confused with the Duplicated One dot.
On the side bar there was also a link to move information in French regarding the Two Dot pipes (http://www.pipephil.eu/oddpipes/dots/sasieni-2dots.html). I ran it through Google Translate and picked up the following information that was quite helpful. (I know Google translate is greatly lacking but it at least gives a sense of the meaning of the words.) I am including the link and the translation should you want to check it out.
Two-Dot Sasieni
If you are intending to acquire your first Sasieni pipe, and your budget does not allow you to splurge these days, I cannot recommend enough that you take a closer look at the colonized pipes at this London pipe maker.
What differentiates the Sasieni two-point pipes from those with four? Very few two things, judge:
Alfred Sasieni wanted the pipes marked with the diamond to be absolutely perfect. Those which had even a surface irregularity (sandpit) the size of a tenth of a pinhead, were to be considered second choice.
At the beginning of the sixties (see diagram here http://www.pipephil.eu/logos/fr/infos/sasieni-timechart.html), while the house was already marketing second-choice pipes through sub-brands [1], it was finally decided to sell the “almost perfect” under the prestigious Sasieni brand, but by reducing the points to two.
These two-point pipes were marketed from 1961 until the early 1980s. On the second-hand pipe market these models are generally sold at very fair prices [2]…
[1] Illustrated list of Sasieni’s sub-brands or second brands.
[2] Do not confuse Sasieni pipes marked with a double point, with those that have a point on either side of the pipe.
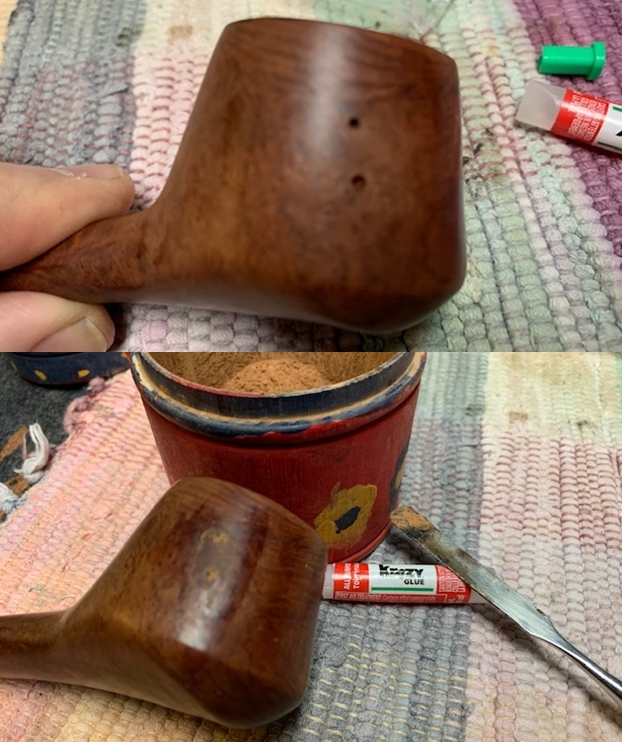
From that information I knew that I was dealing with an “almost perfect” piece of briar and that explained the two small pinprick holes on the right side of the bowl. I also knew that the Two Dots were marketed for a short period from 1961 to the early 1980s which gave a time frame for this pipe. With the King Size stamp I also knew that I was dealing with one of the largest pipes that Sasieni marketed.
By the way, Pipedia gives a great history of the brand (https://pipedia.org/wiki/Sasieni) that is well worth reading.
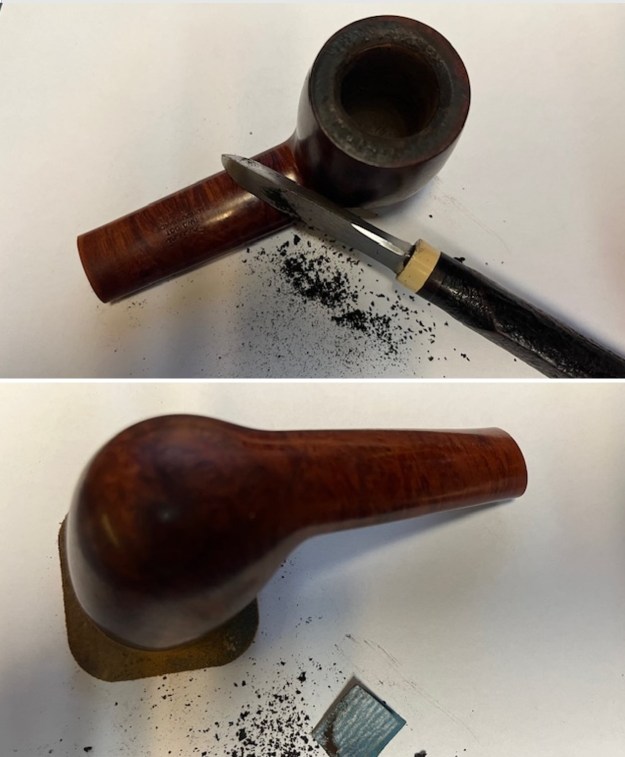
Now it was time to work on the pipe. I used a PipNet Pipe reamer first to take out the majority of the cake. It was a deep bowl so I used a Savinelli Fitsall Pipe Knife to clean up the remaining cake in the bowl and to scrape off the lava on the rim top. I used a dowel wrapped with 220 grit sandpaper to smooth out the walls of the bowl. I checked for damage on the bowl walls and it was in good condition. I sanded the bevel on the inner edge of the rim with 220 grit sandpaper and the thick lava coat on the rim top with a 320 grit sanding pad.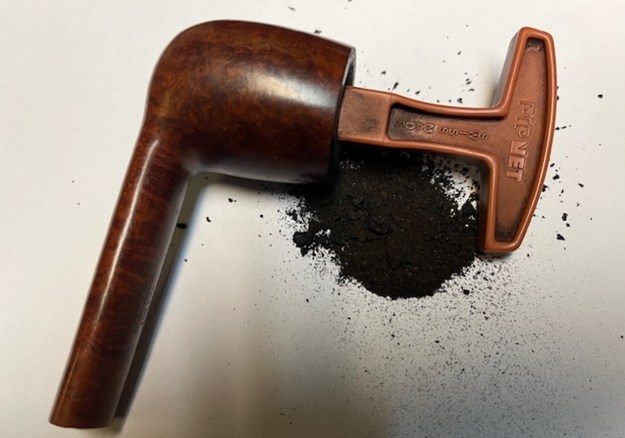
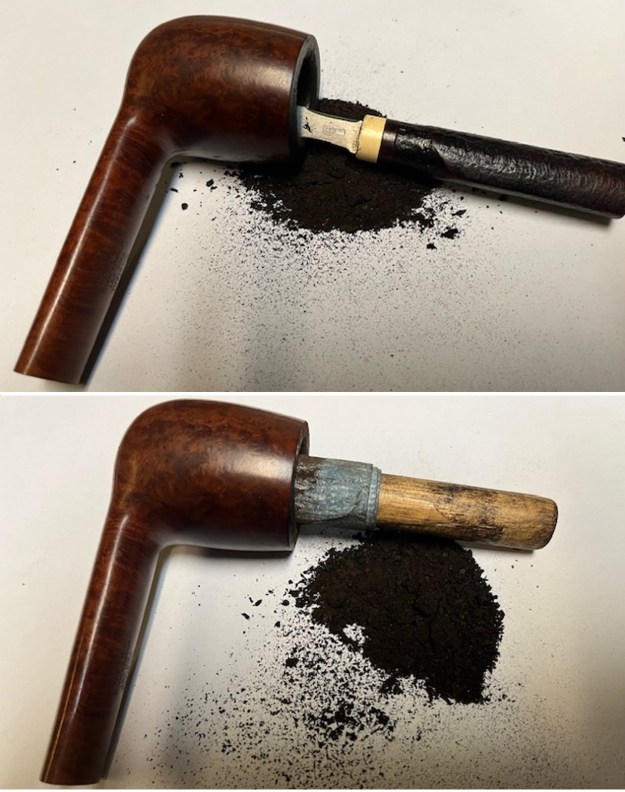
 I scrubbed out the inside of the shank, mortise and the airway in both the stem and the bowl. I used pipe cleaners, cotton swabs and isopropyl alcohol. It cleaned up very well.
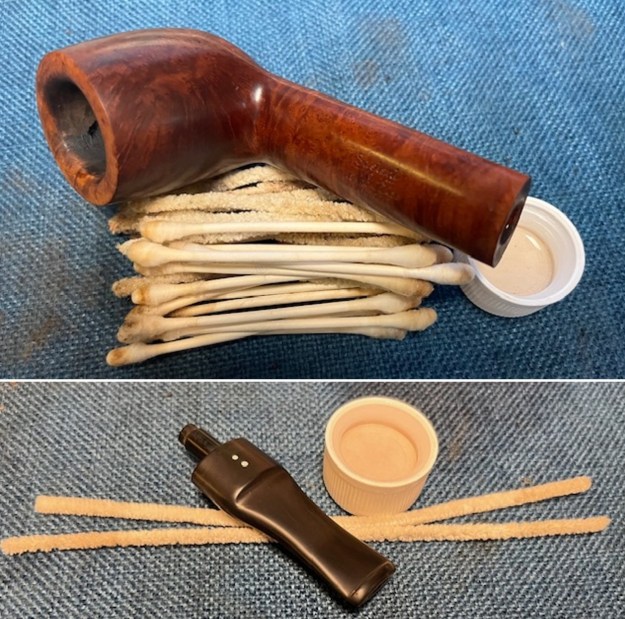 I scrubbed the exterior of the bowl with a tooth brush and undiluted Murphy’s Oil Soap to remove the grime and debris in the finish. I scrubbed out the mortise and tenon with small tube brushes and soap to remove the oils and tars in the shank area. I rinsed it with warm water to remove the grime and oils in the finish and shank. It has a fresh look that really highlights the grain in the briar.
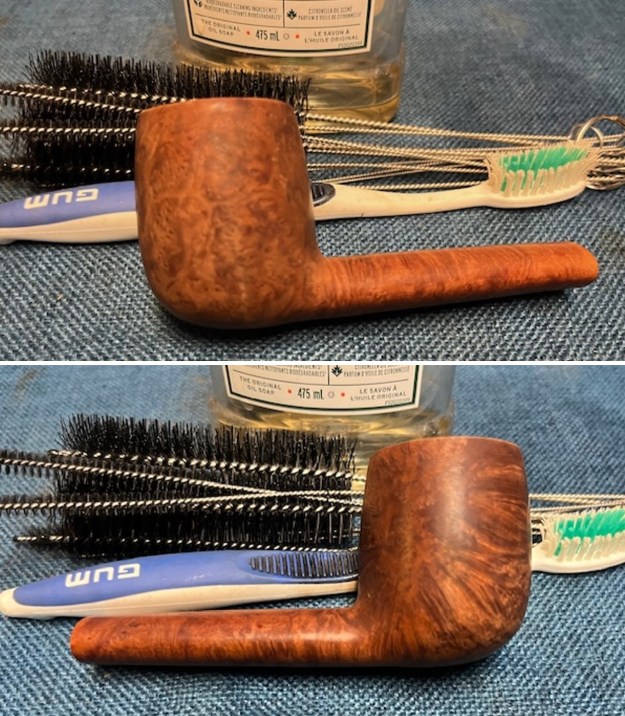
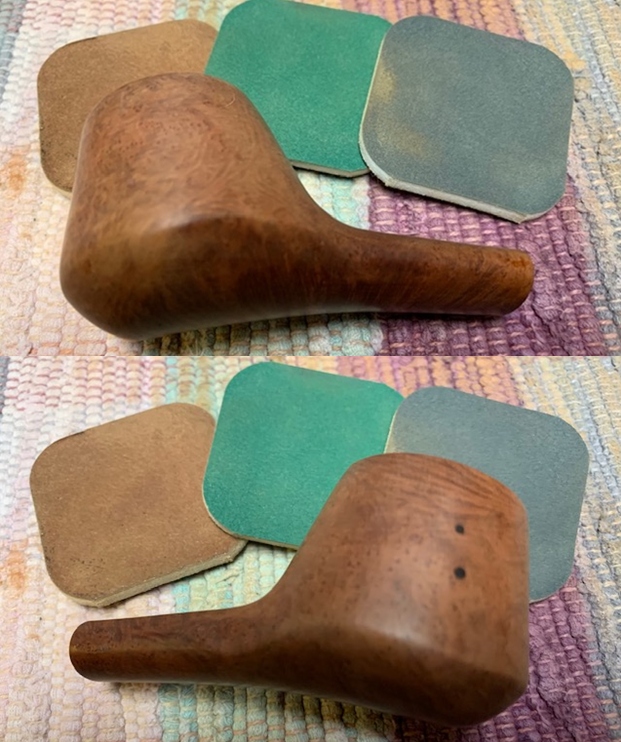
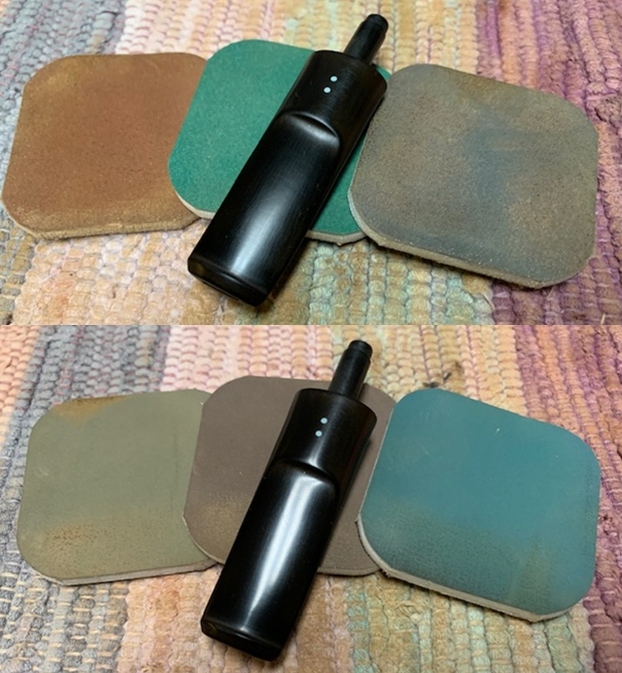
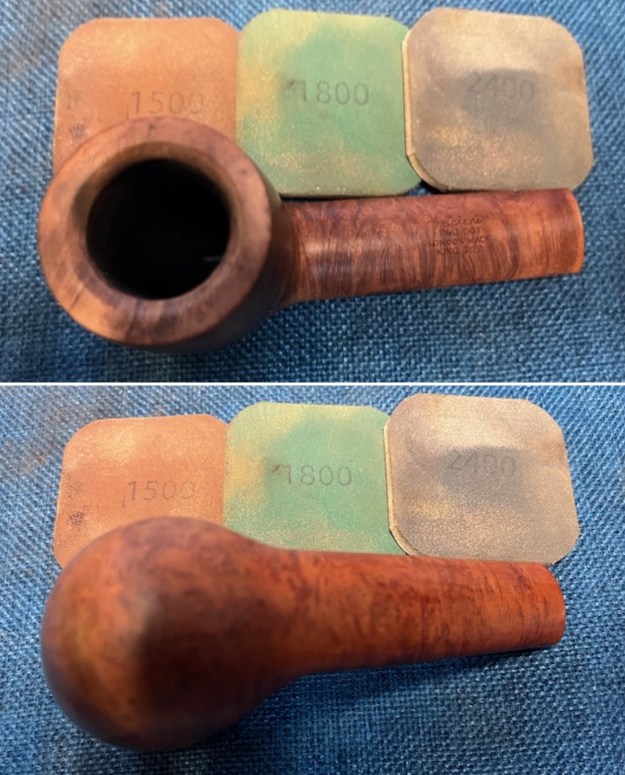
 I polished the briar with micromesh sanding pads to minimise the scratches in the briar. I dry sanded with 1500-12000 grit pads and wiped the bowl down after each pad with a damp cloth to remove the sanding debris. By the end of the nine pads the briar took on a rich shine and the rim top looked very good.
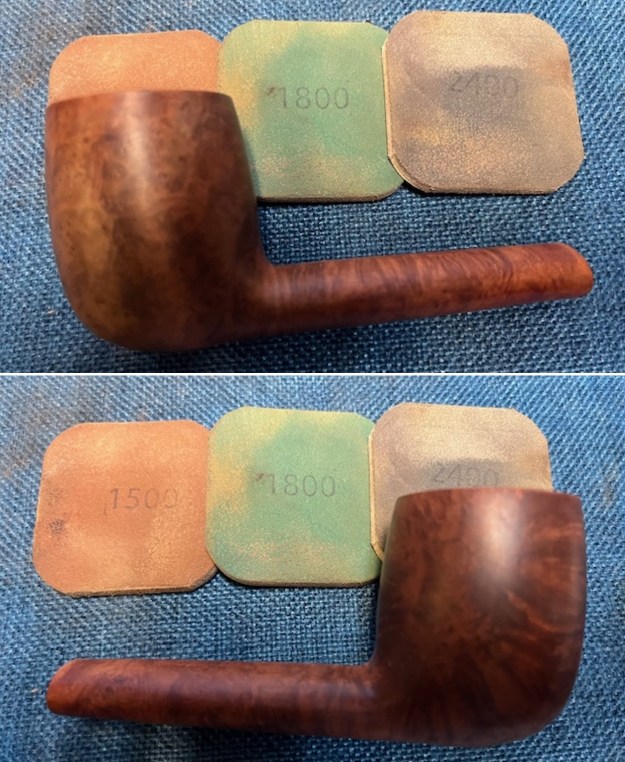
 I paused the polishing process long enough to give the rim top a light stain with a Maple stain pen to add some colour back to the light areas on the rim top. It matched the colour of the rest of the bowl and would do so even more once polished. Once finished I continued the polishing process with micromesh sanding pads.
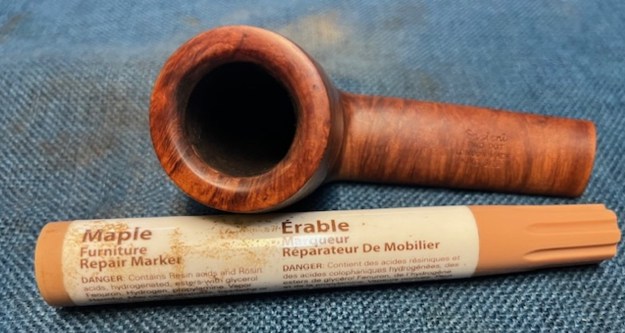
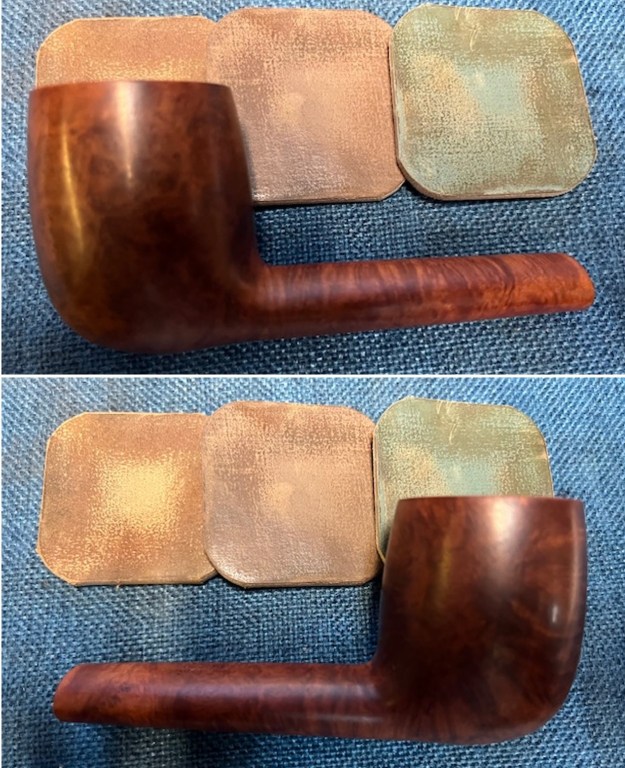
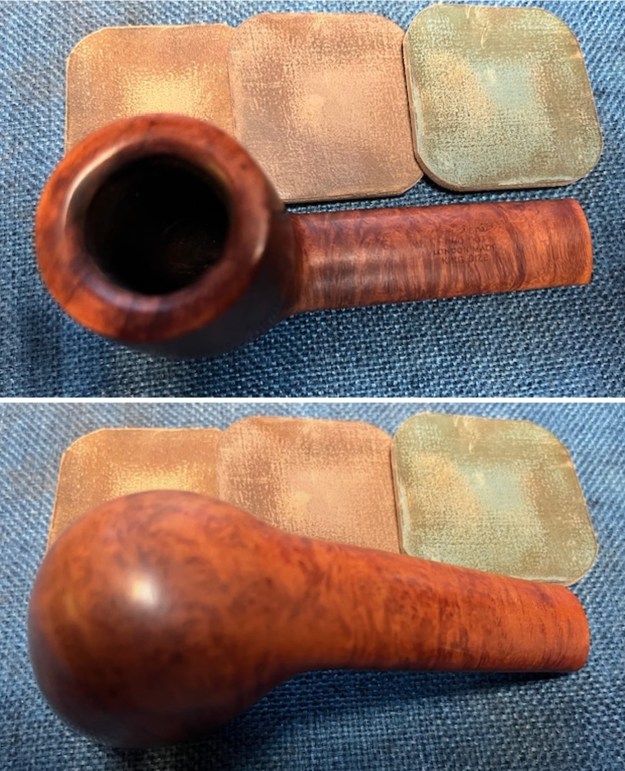
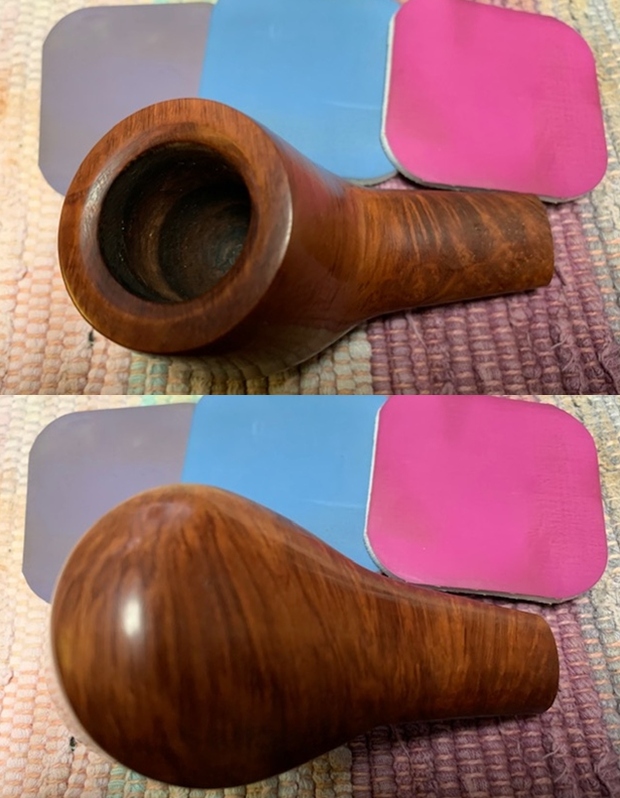
 I rubbed the bowl down with Before & After Restoration Balm. It is a paste/balm that works to deep clean the finish, enliven and protect the briar. I worked it into the briar with my finger tips o make sure that it covered every square inch of the pipe. I set it aside for 10 minutes to let it do its work. I buffed it with a cotton cloth. The briar really began to have a deep shine. The photos I took of the bowl at this point mark the progress in the restoration.
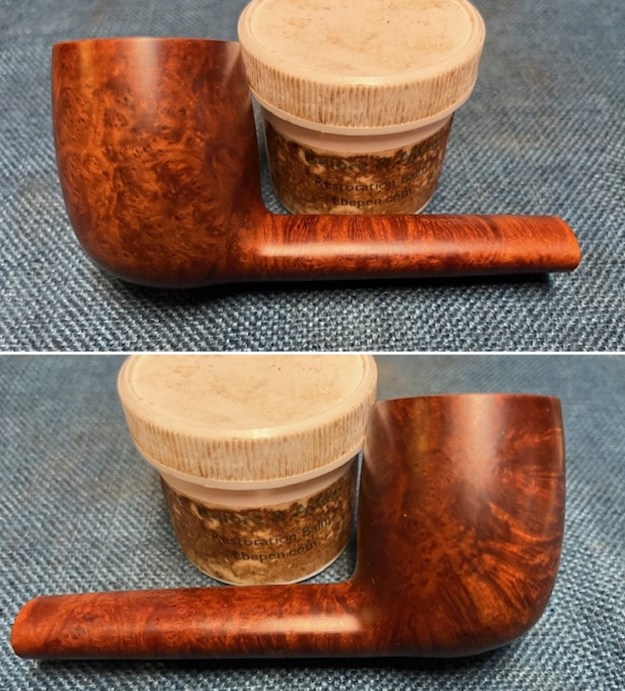
 I set the bowl aside and turned my attention to the stem. First, I wanted to address the tooth marks in the surface on both sides. I “painted” the surface of the vulcanite with the flame of a Bic lighter and was able to significantly lift the tooth marks. I sanded the remaining marks and chatter with 220 grit sandpaper to smooth them out.
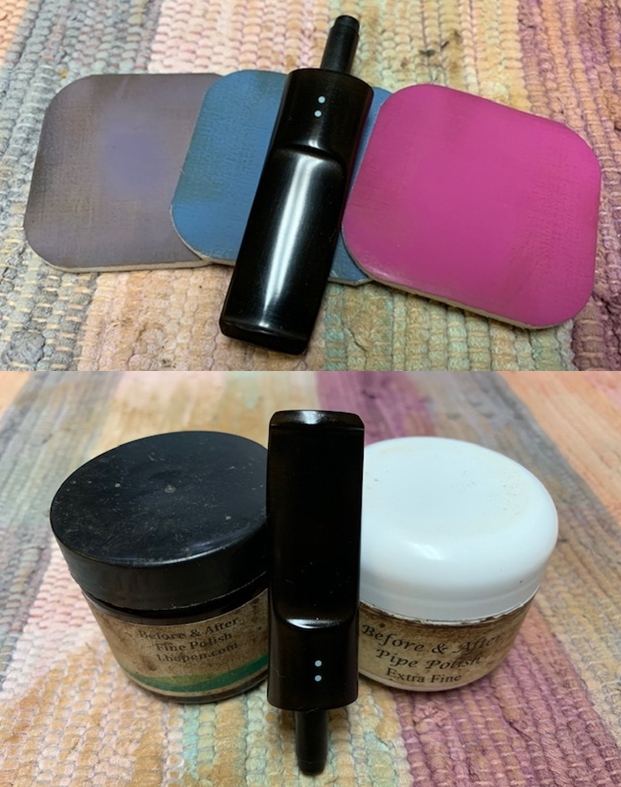
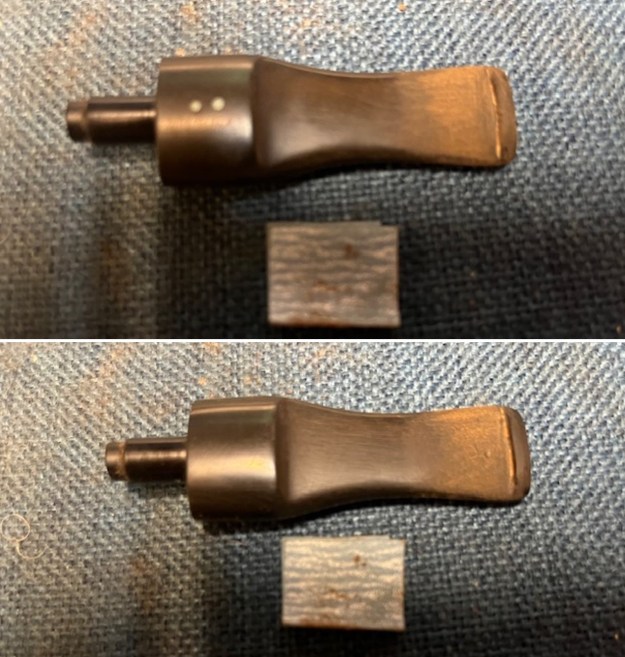 I sanded the stem with 320-3500 grit sanding pads to break up the remaining oxidation. I wiped it down after each sanding pad with an Obsidian Oil impregnated cloth. It began to look good.
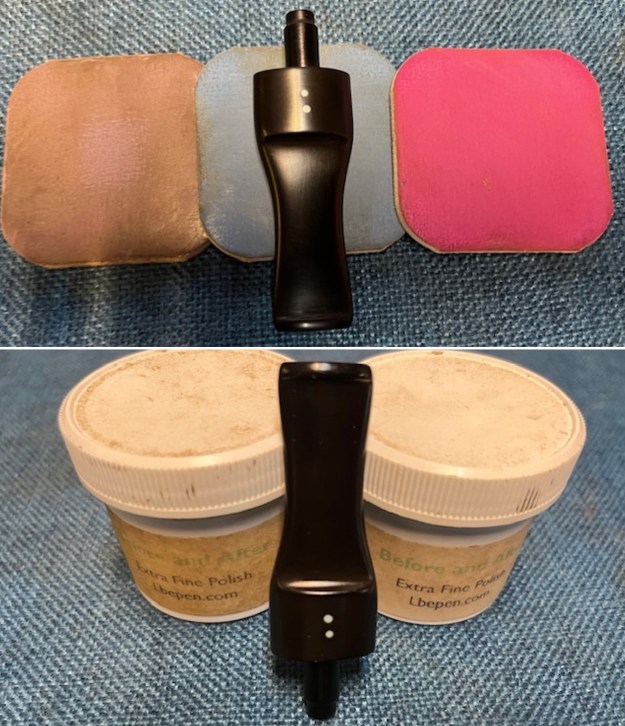
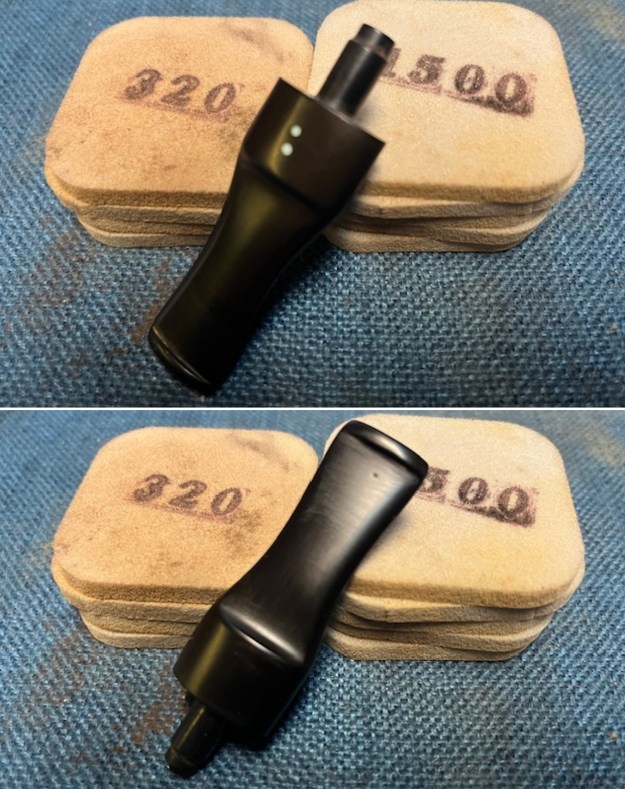 I polished the stem with micromesh sanding pads – dry sanding with 1500-12000 grit pads. I wiped the stem down after each sanding pad with Obsidian Oil. I polished it with Before & After Pipe Stem Polish – both Fine and Extra Fine. Once I had finished the polishing I gave it final coat of Obsidian Oil and set it aside to dry.
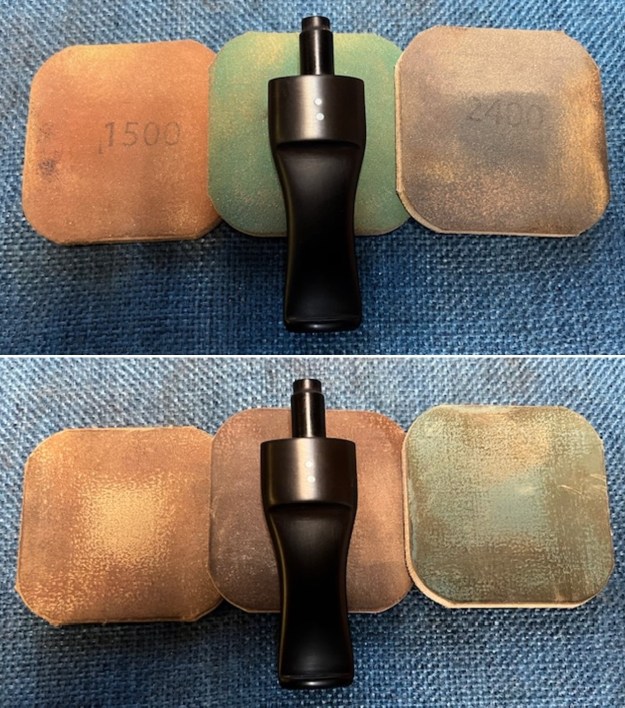
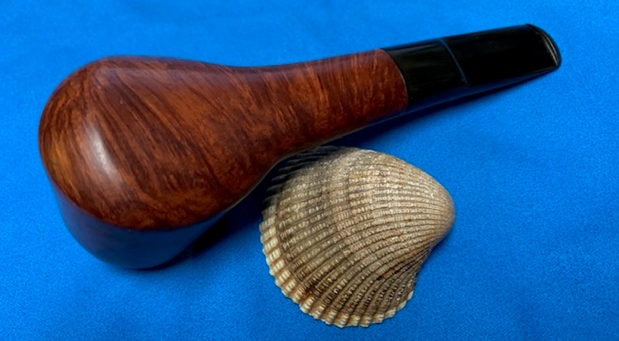
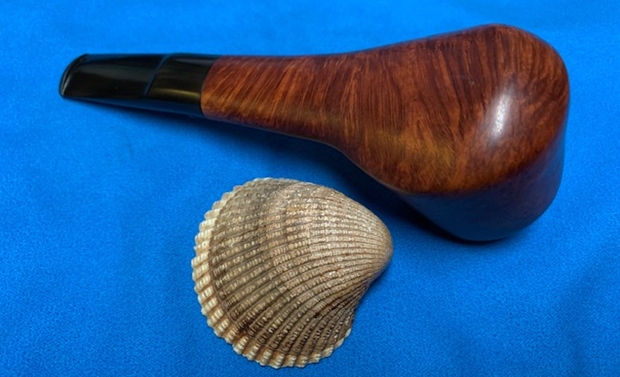
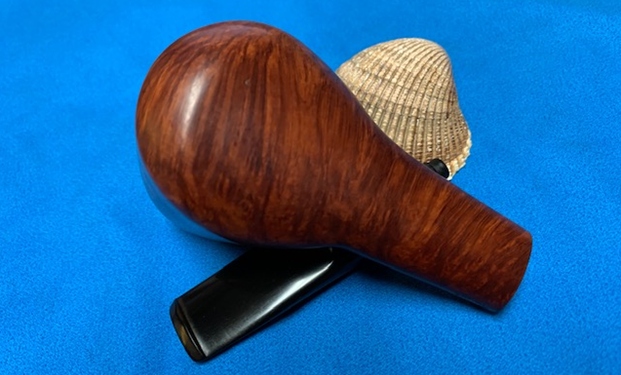
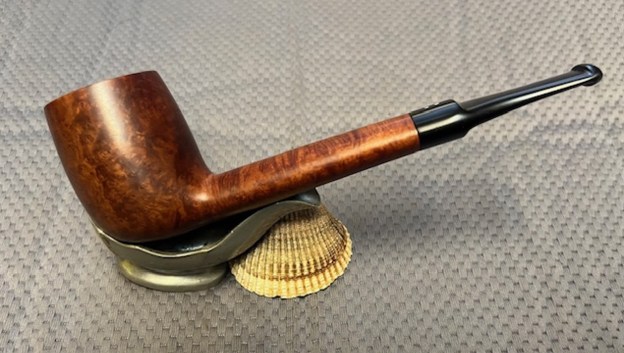
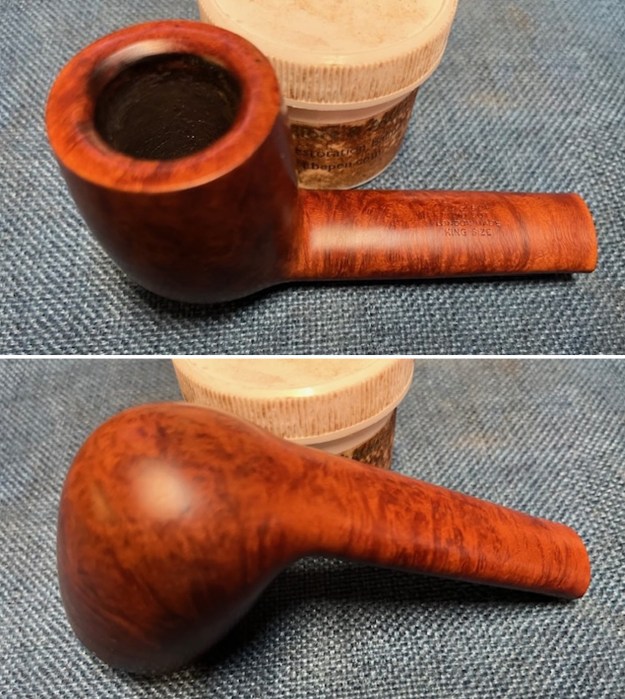
 I put the Sasieni Two Dot London Made King Size 44G oval shank Lovat bowl and stem back together. I polished the bowl and stem with Blue Diamond to polish out the scratches in the briar and the vulcanite. I gave the bowl and the stem multiple coats of carnauba wax. I buffed the pipe with a clean buffing pad to raise the shine. I hand buffed it with a microfiber cloth to deepen the shine. The pipe polished up pretty nicely. The reddish/brown stains worked amazingly well with the polished vulcanite taper stem. The grain around the bowl and shank and looks quite remarkable. This is truly a beautiful Sasieni Two Dot King Size 44G Lovat. The finished pipe is shown in the photos below. The dimensions of the pipe are Length: 6 ½ inches, Height: 2 inches, Outside diameter of the bowl: 1 ½ inches, Chamber diameter: 7/8 of an inch. The weight of the pipe is 2.22 ounces/64 grams. I have two more of Scott’s pipes to work on and then I will be sending them back to him. I am sure he will soon add them into his rotation and enjoy some great smokes. Thanks for walking through the restoration with me. Cheers.
As always, I encourage your questions and comments as you read the blog. Thanks to each of you who are reading this blog. Remember we are not pipe owners; we are pipe men and women who hold our pipes in trust until they pass on into the trust of those who follow us.