by Steve Laug
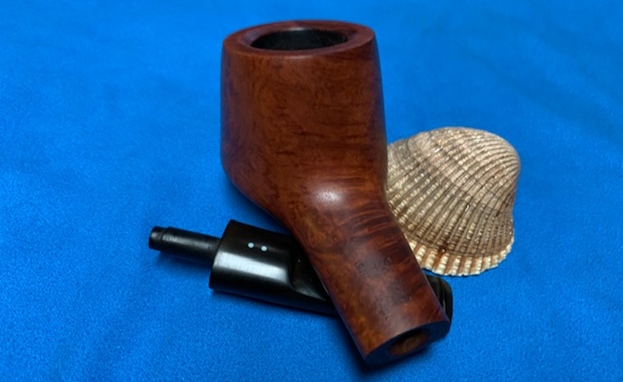
Not too long ago I received an email from a Andrew in Greece asking if I could work on some pipes for him. He had some that needed a stem and a couple of pipes with broken stems and a Canadian that had a crack down the back of the bowl and across the right side. We emailed back and forth and he sent me the following photos. I figured they would be some interesting pipes to work on so he sent them to me to work on. 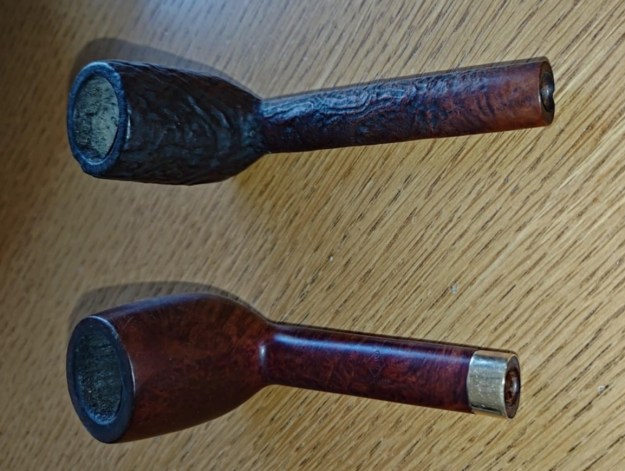
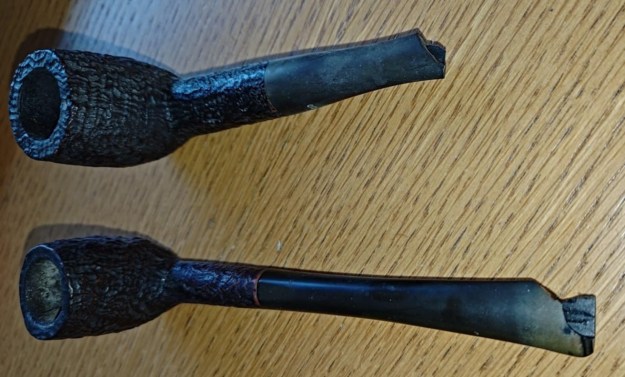
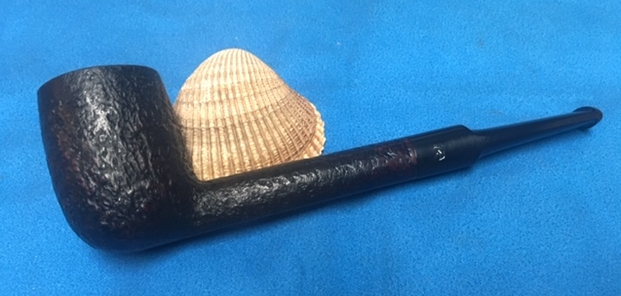
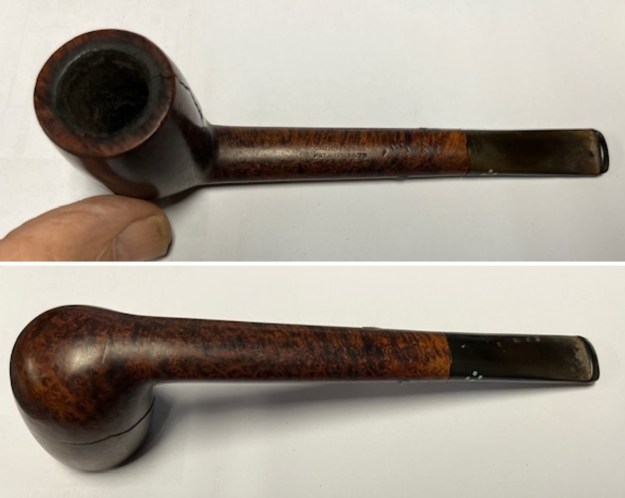
 I received the box yesterday. When I opened it this morning I was amazed to see what he had sent. The Sandblast Canadian that needed restemming was stamped 264 Peterson’s Kapruf. The rest of the stamping was quite faint. The pipe needed to be restemmed and it had a small divot in the shank end and what looked like a crack. The second, a smooth Canadian was a BBB Ultonia 504 with a gold band. The two Sandblast with broken stems turned out to be Stanwells. The larger on is stamped Stanwell [over] Regd. No. 969-48. It is followed by the shape number 858 [over] Old Briar. The smaller one is stamped Stanwell [over] Regd. No. 969-48 followed by de Luxe followed by the shape number 87. The last of the five with the shattered bowl is an 8 Dot Sasieni [over] London Made [over] Pat. No. 1513428. It was also stamped “Amesbury”. They were going to be an interesting lot to work on.
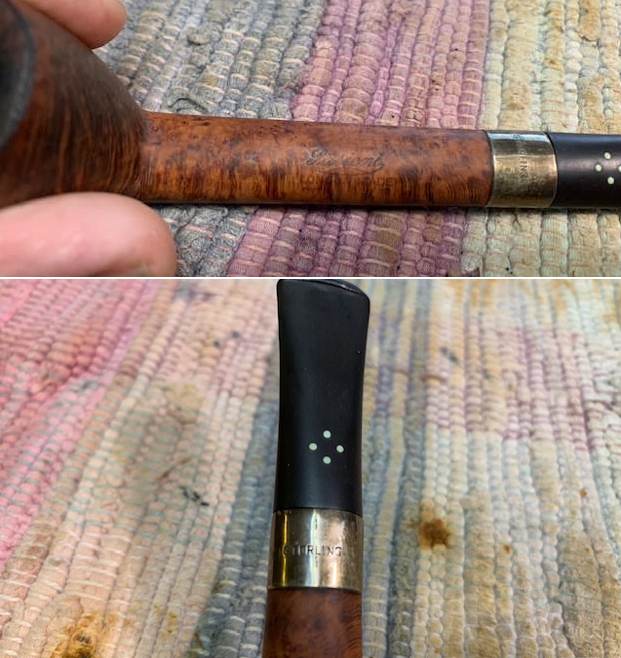
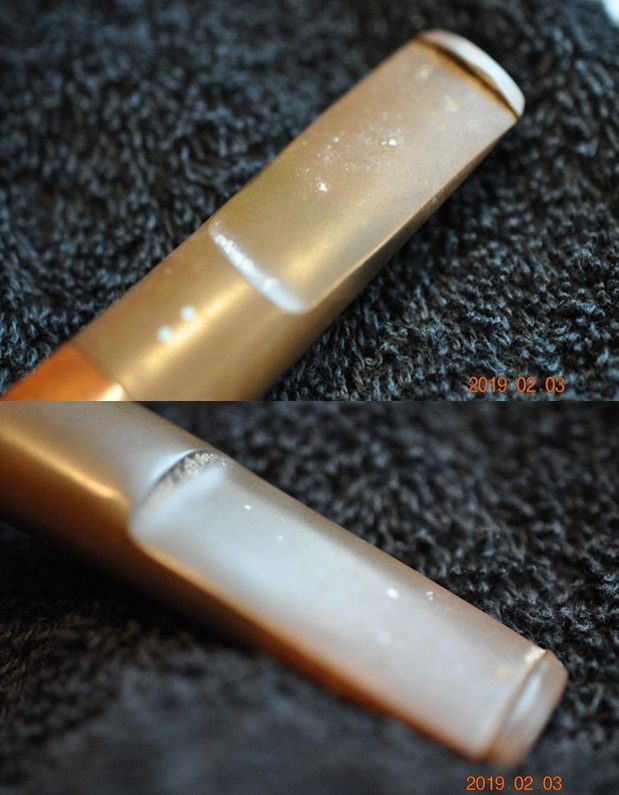
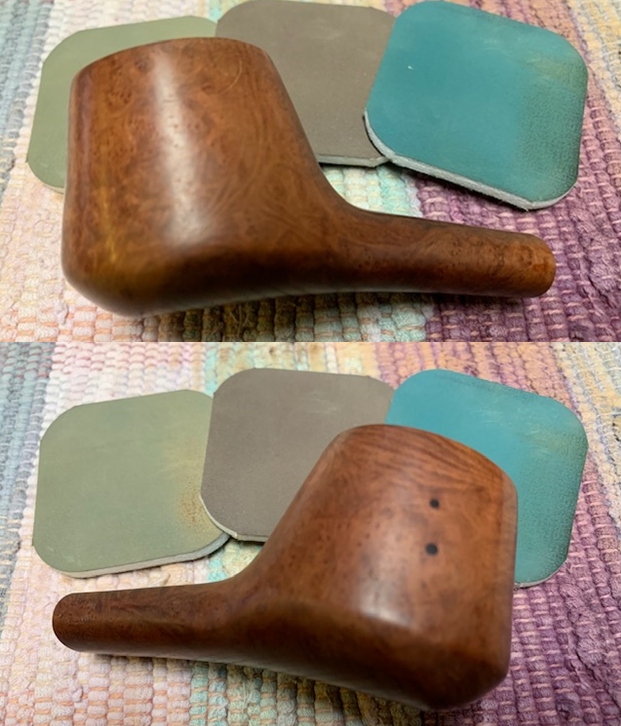
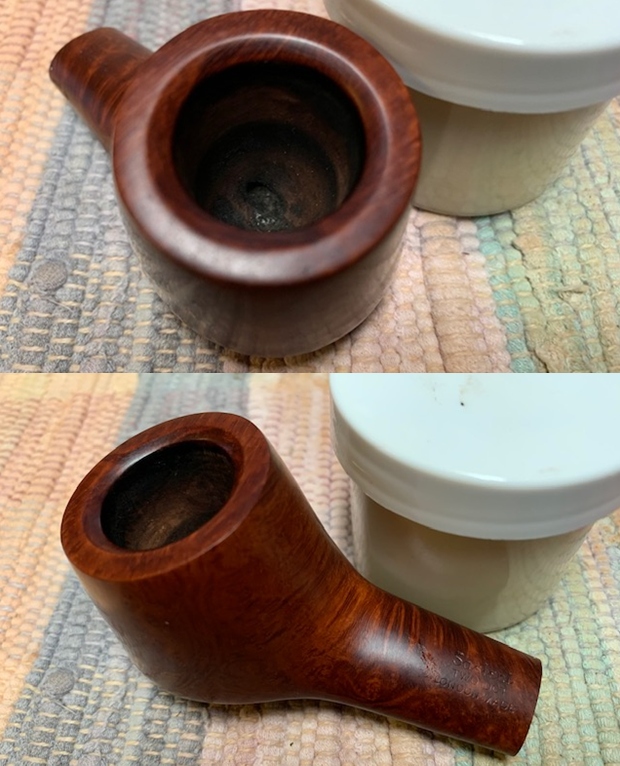
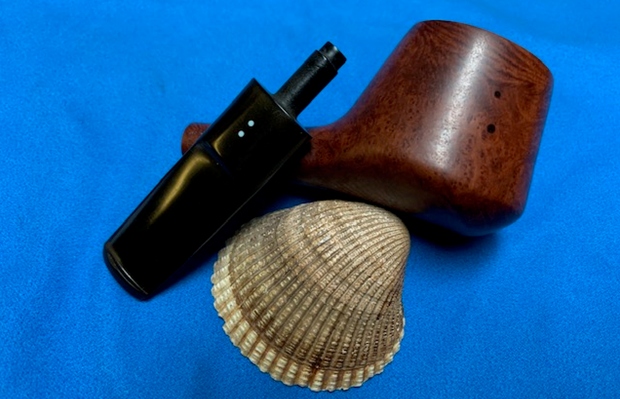
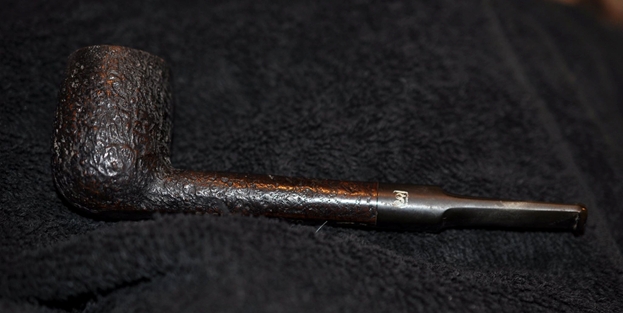
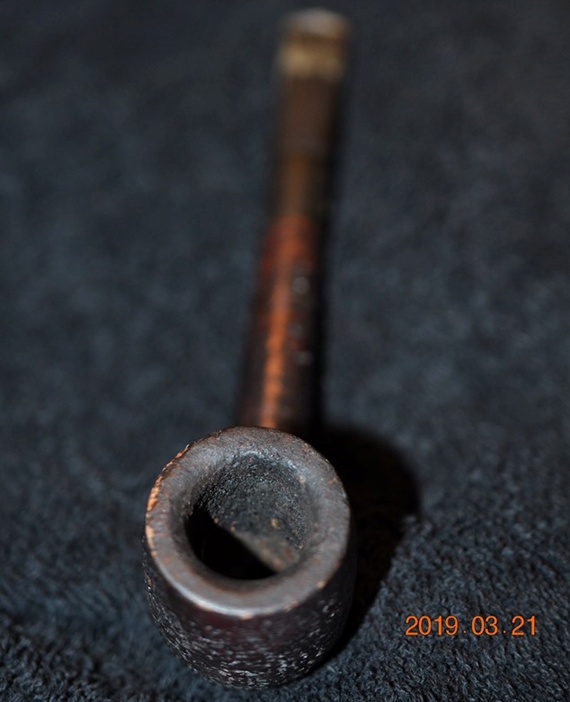
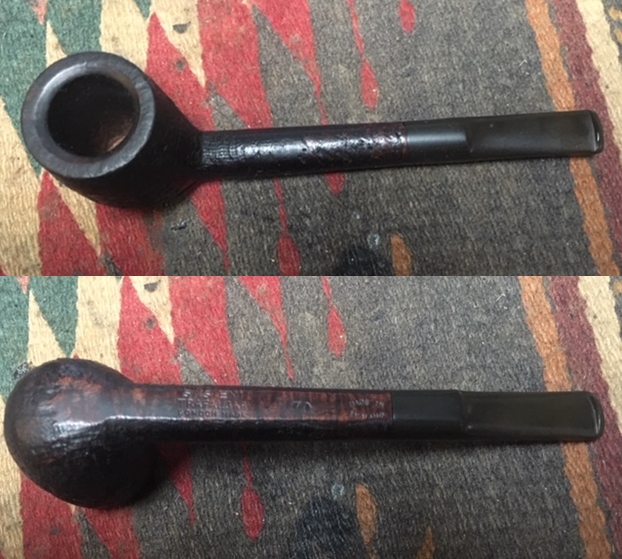
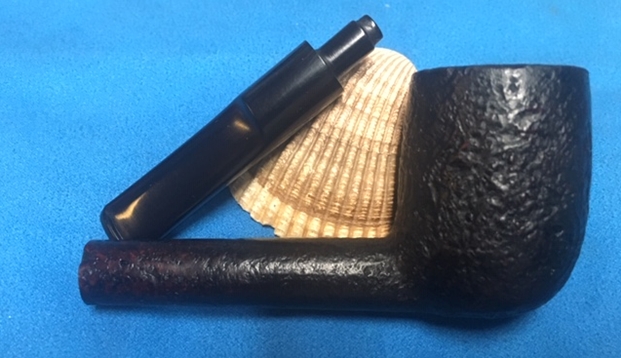
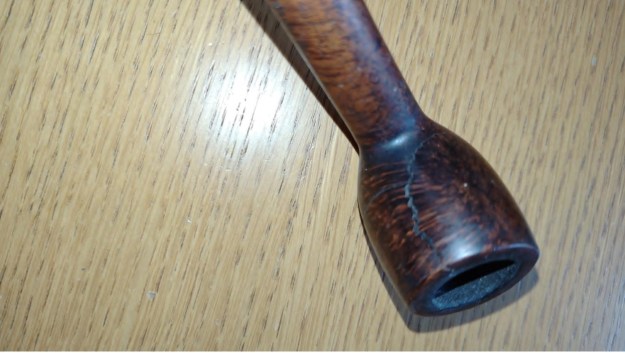
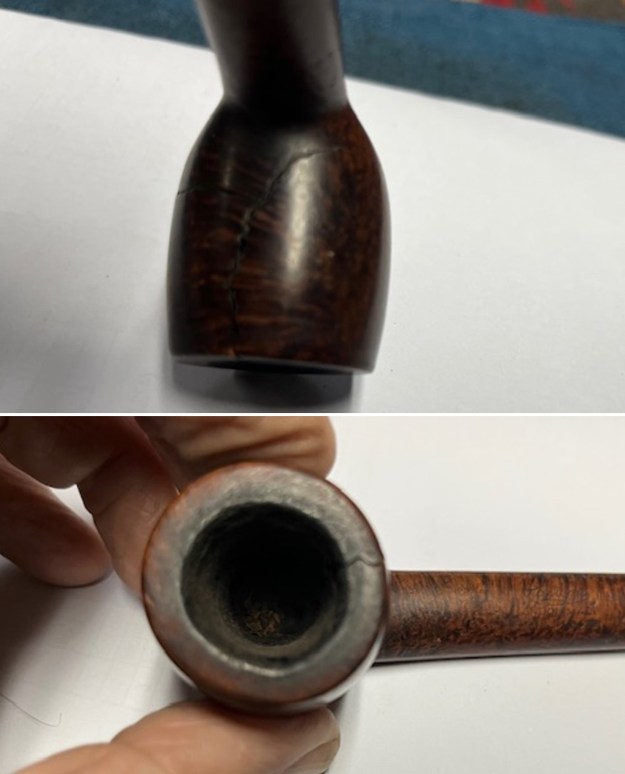
I chose to deal with the cracked bowl on the 8 Dot Sasieni Canadian next. It was in badly damaged condition, questionably the worst in the lot. The stamping on the left topside of the shank was Made in England in a Rhombus shape near the bow and shank. That is followed by Sasieni in script with the flourish curling under the stamping [over] London Made [over] Pat. No. 1513428. On the right topside it was stamped “Amesbury”. It was faint in spots but still was readable. The cracks around the bowl went from the top right side down most of the bowl and curved around the backside and curved up to the top. There was also a crack that went from the vertical one across the right side of the bowl. The bowl was heavily caked and there were spots of lava on the rim top and inner edge. The inner edge was a little rough from previous reaming. The shank was solid and the stem was oxidized and had tooth marks on the top and underside ahead of the button. 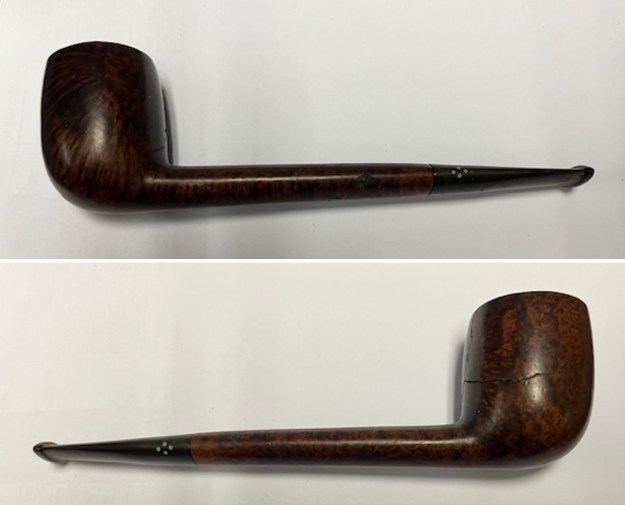
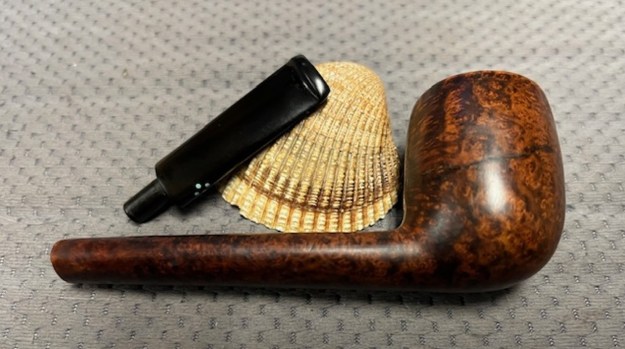
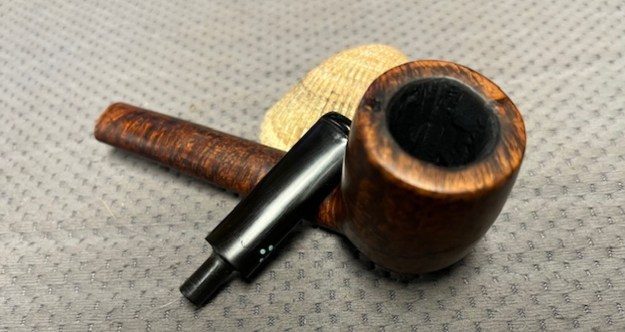
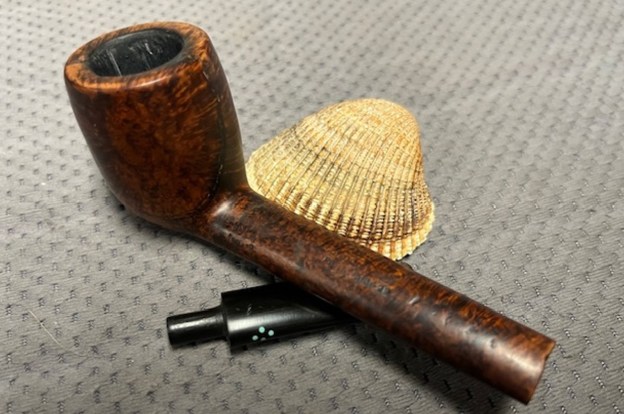
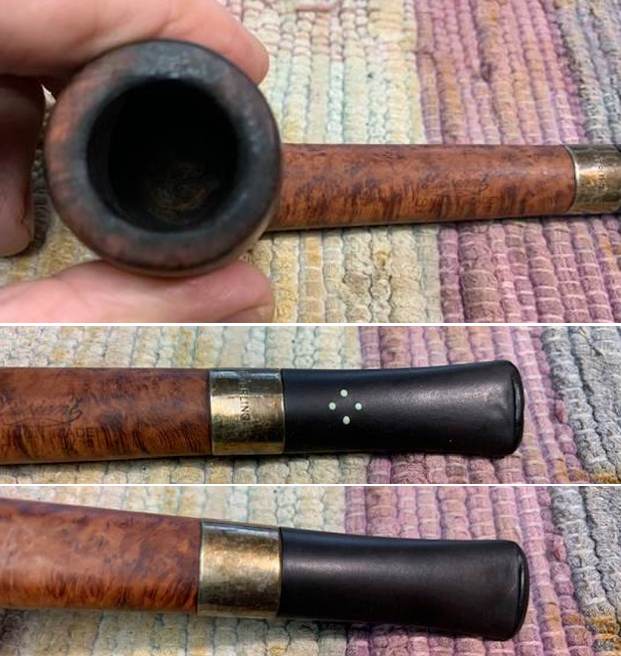
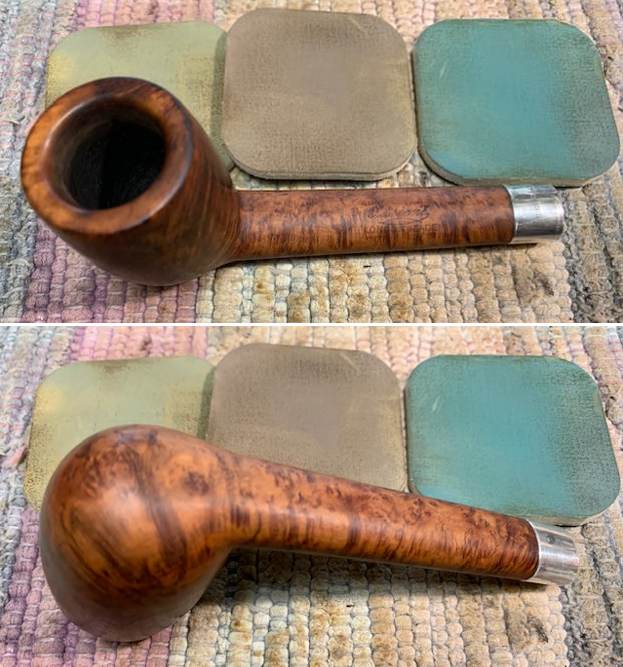
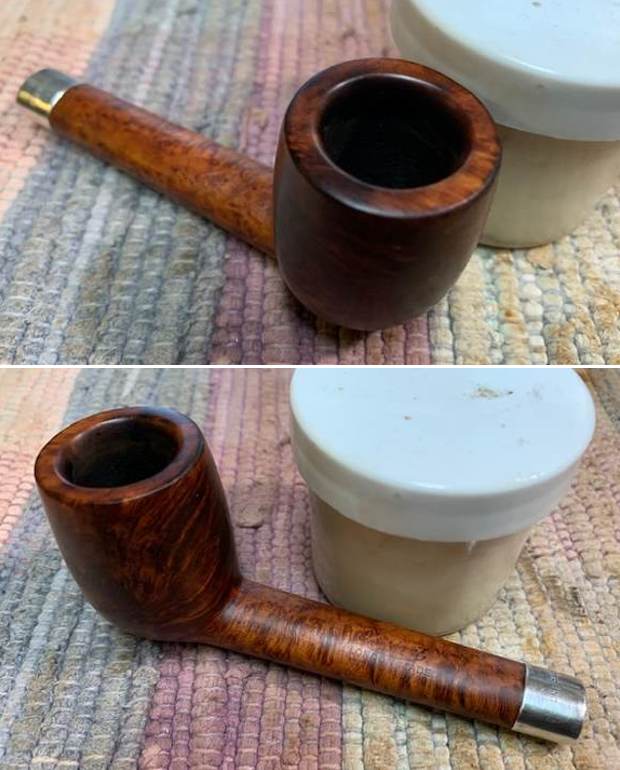
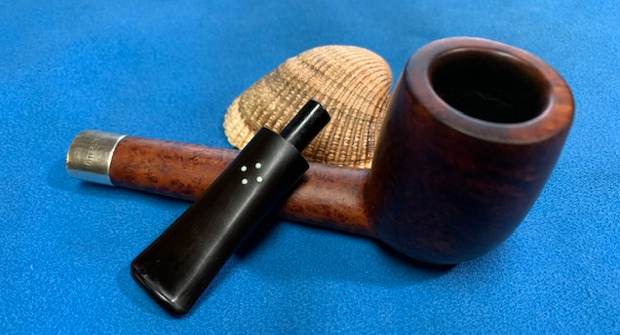
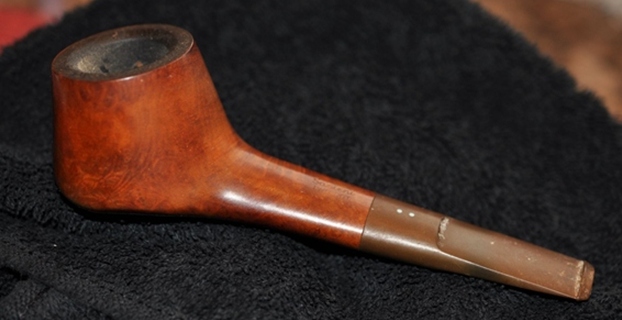
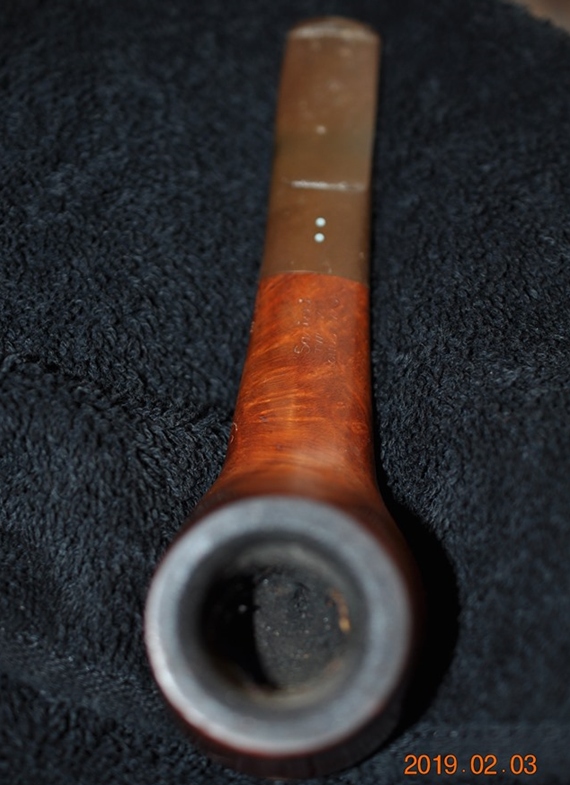
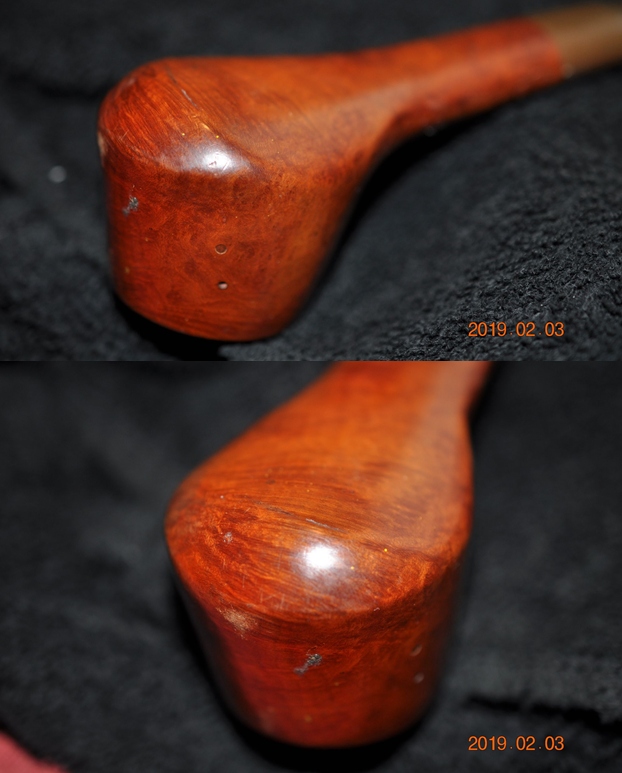
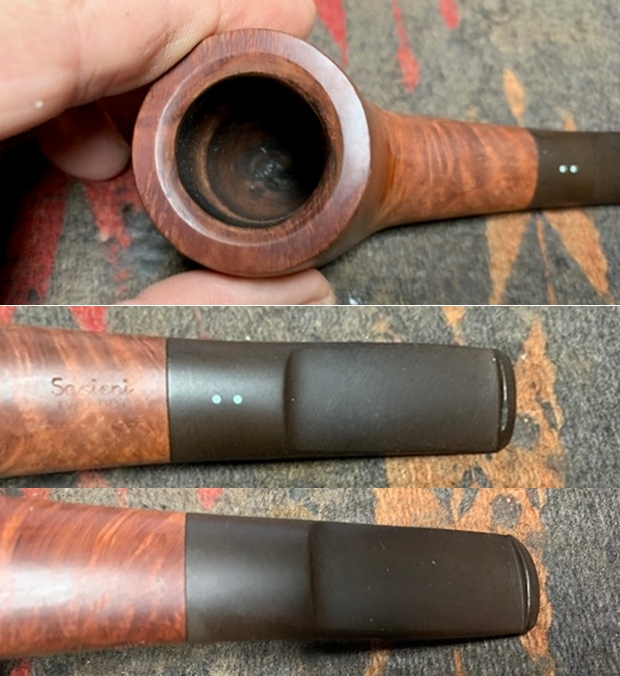
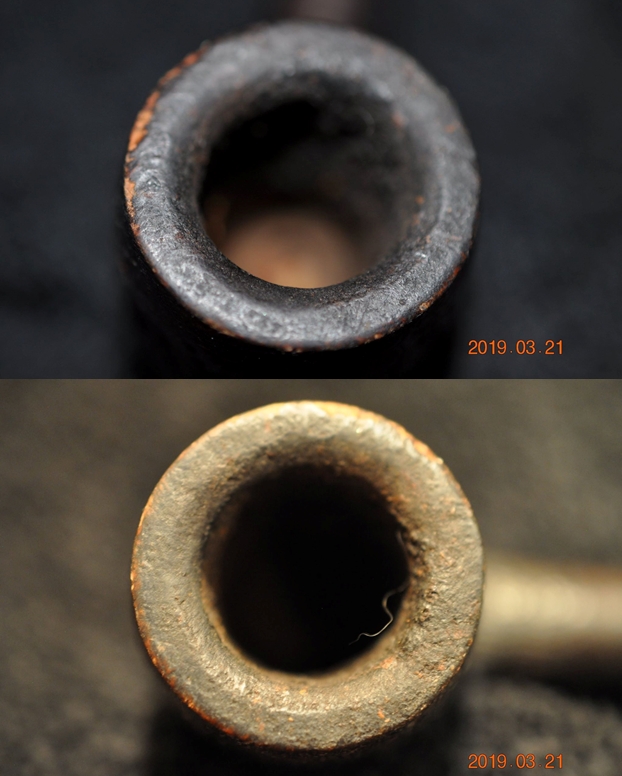
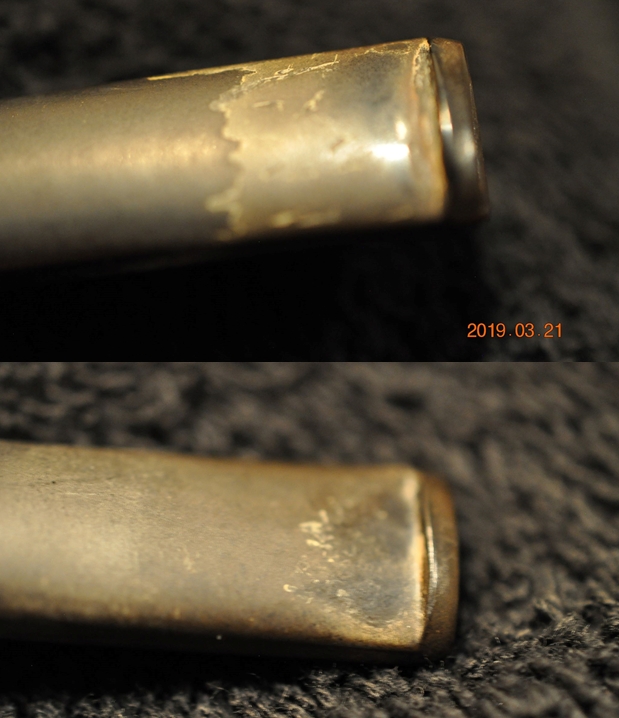
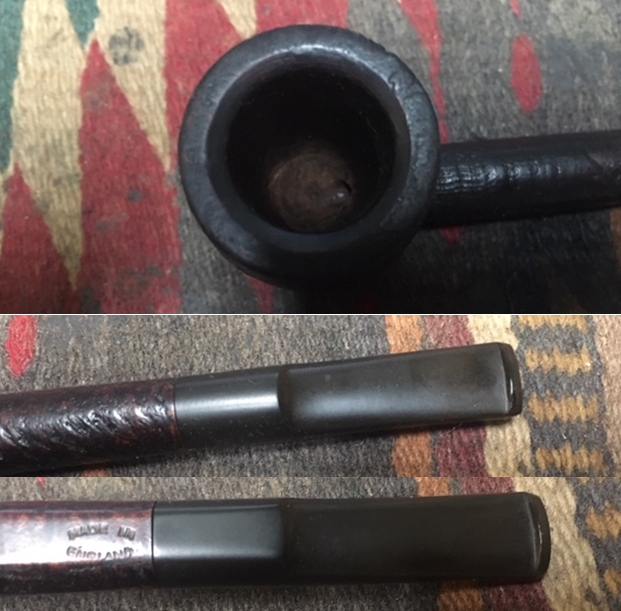
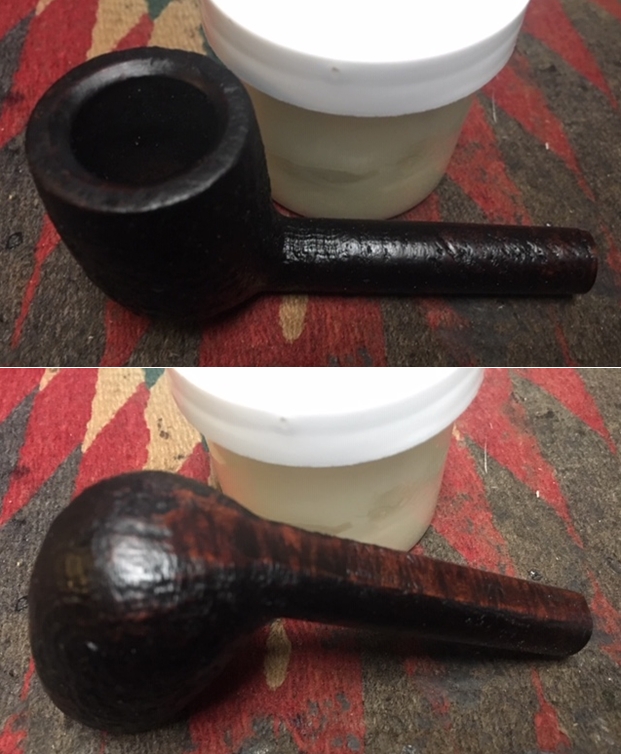
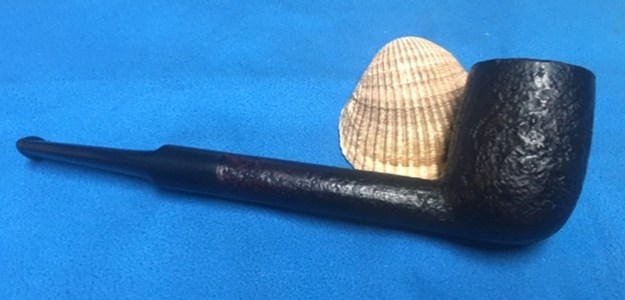
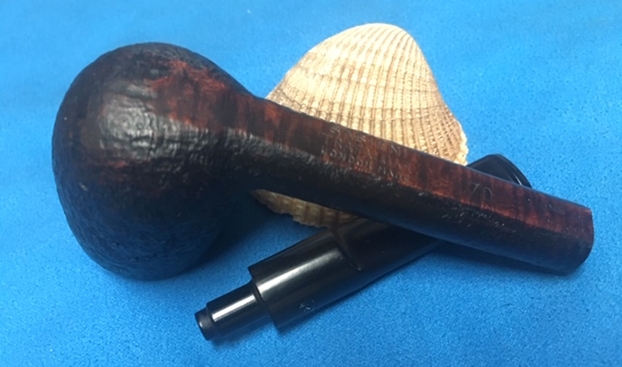
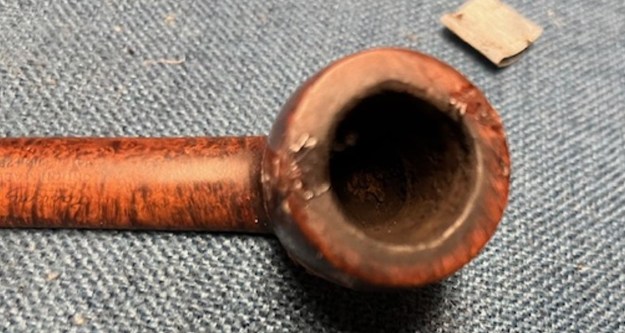
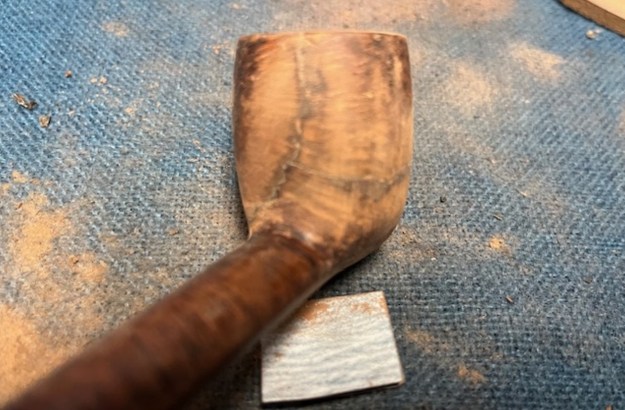
 I took a photo of the bowl and rim top to show the condition of them bowl. There was lava on the rim top, some darkening and several cracks on the rim top that matched those on the bowl sides. The inner edge was also damaged. The shank and the stem were also shown. The stem is oxidized, lightly calcified and had tooth marks and chatter on both sides ahead of the button.
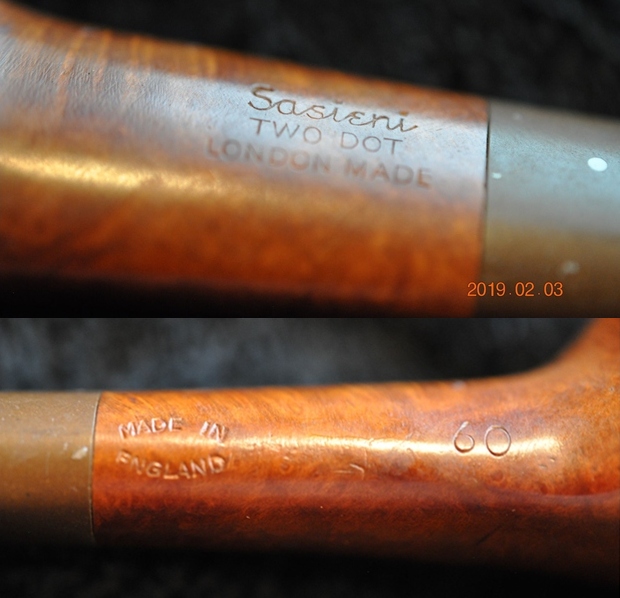
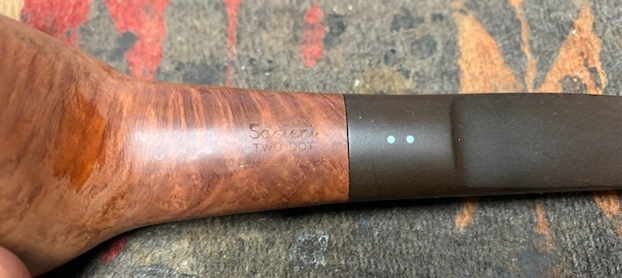
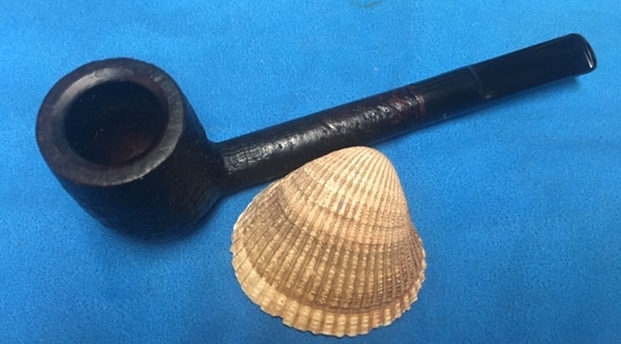
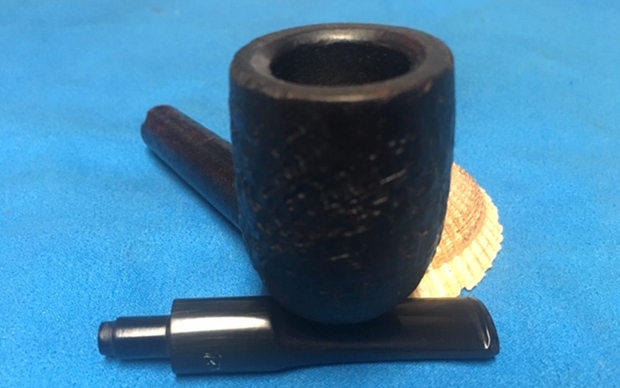
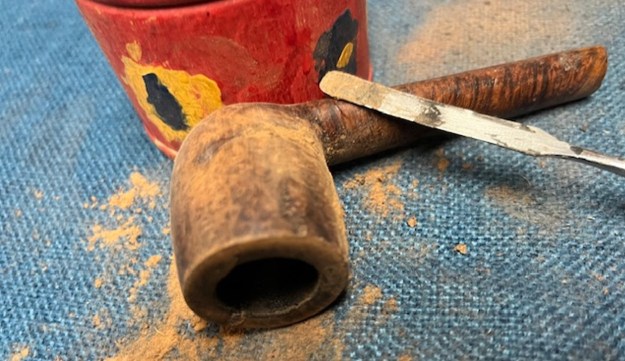
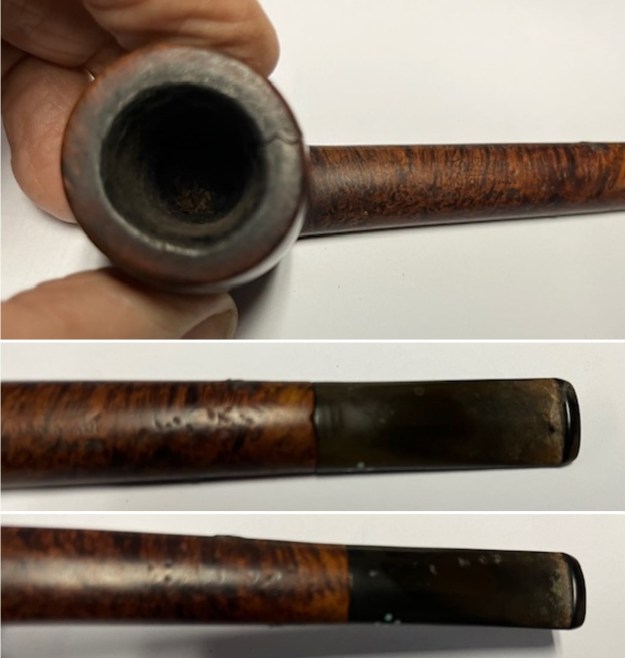 I also took a photo of the top underside of the shank to show the faint stamping that was present. It is faint in spots but is still readable as noted above.
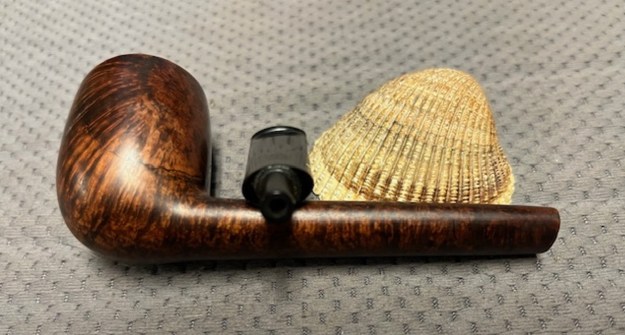
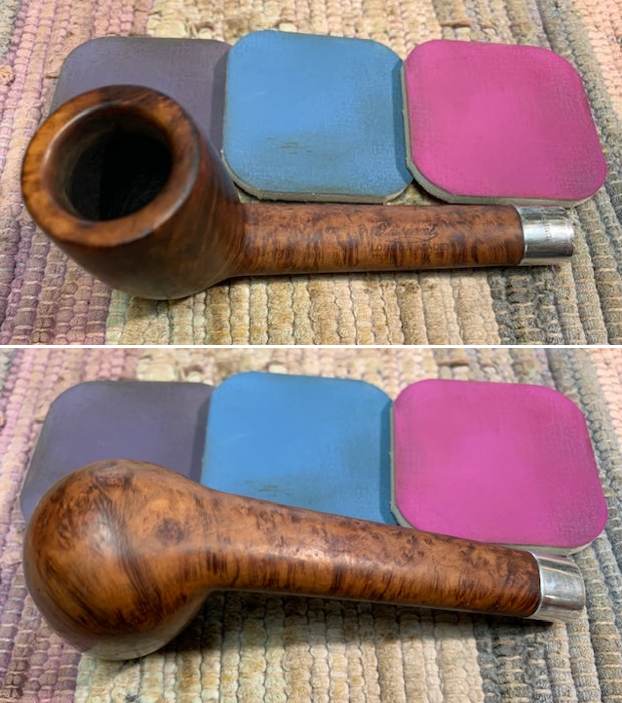
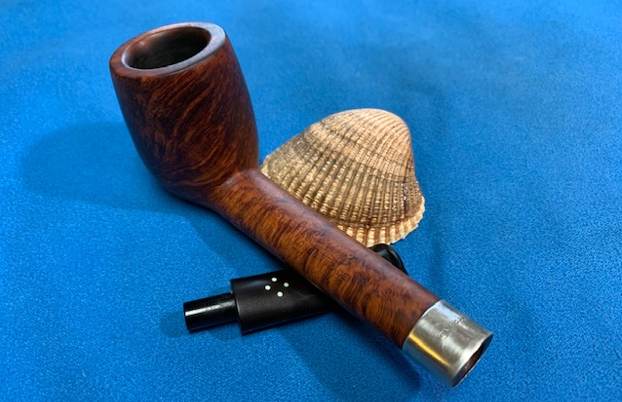
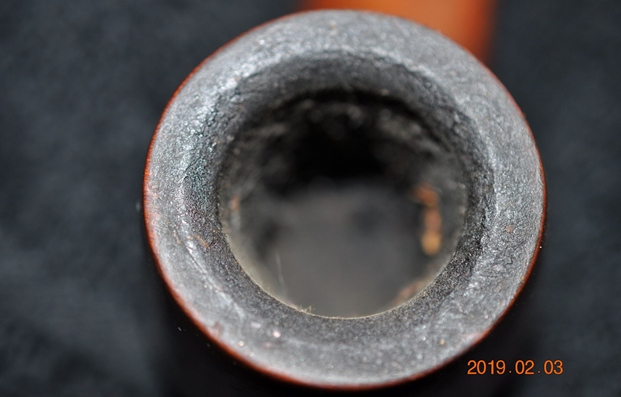
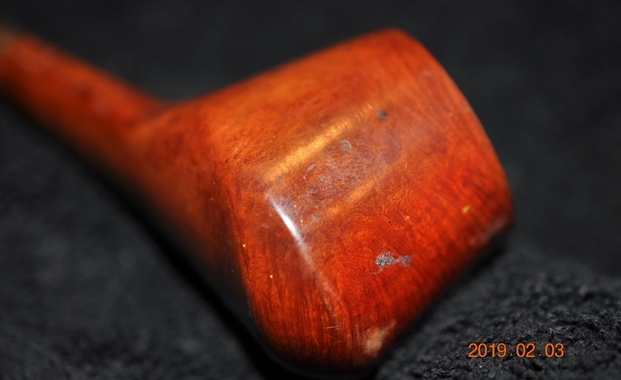
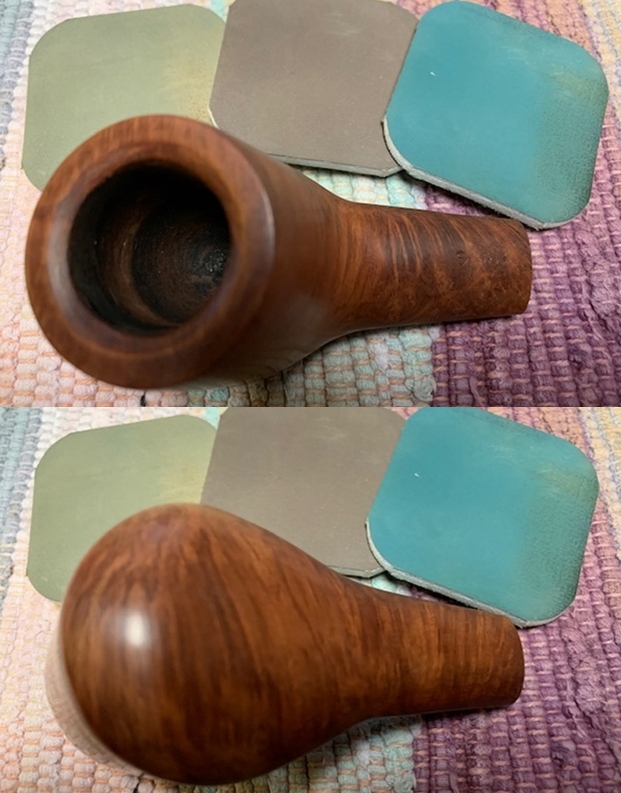
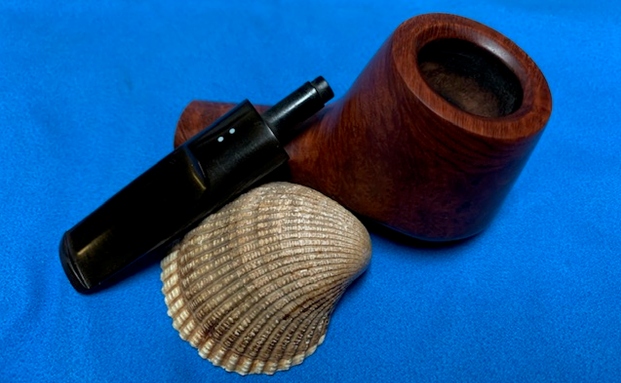
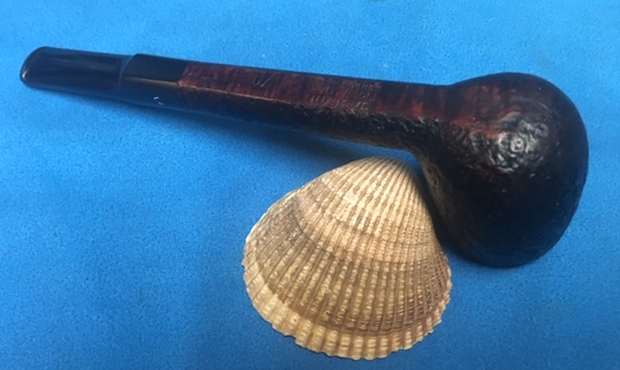
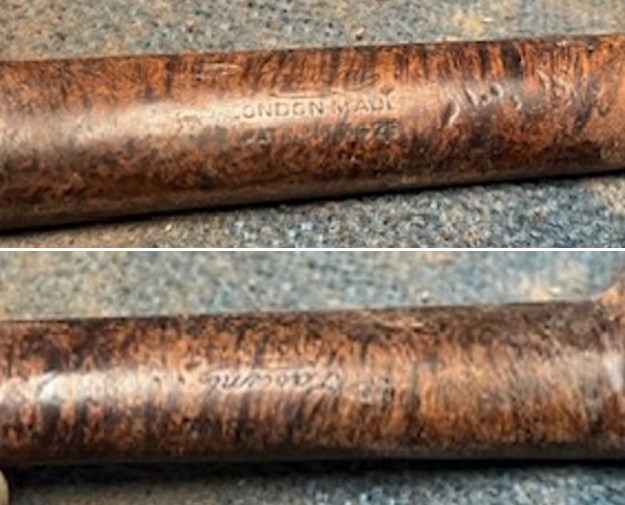 I took photos of the cracked bowl showing the damage around the sides and the rim top. They were deep cracks. My estimation was that they went all the way through to the inside of the bowl. Hard to know for sure because of the thick cake on the walls.
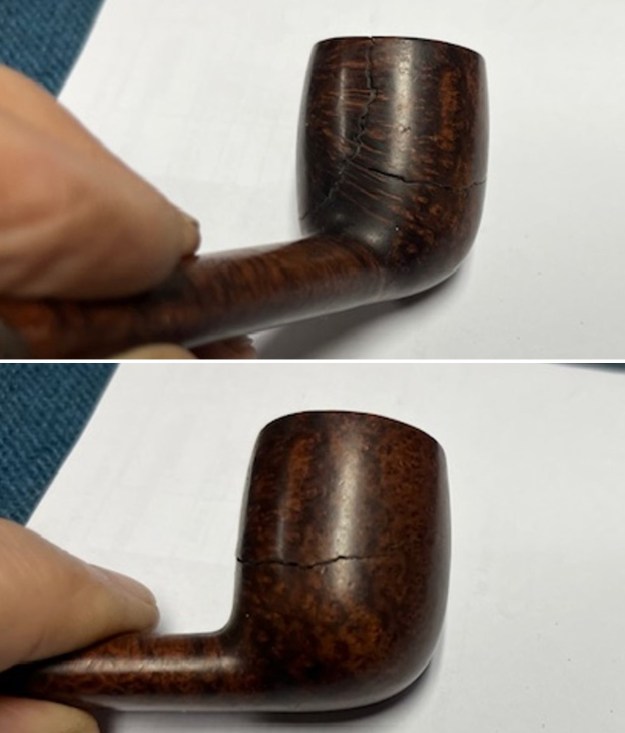
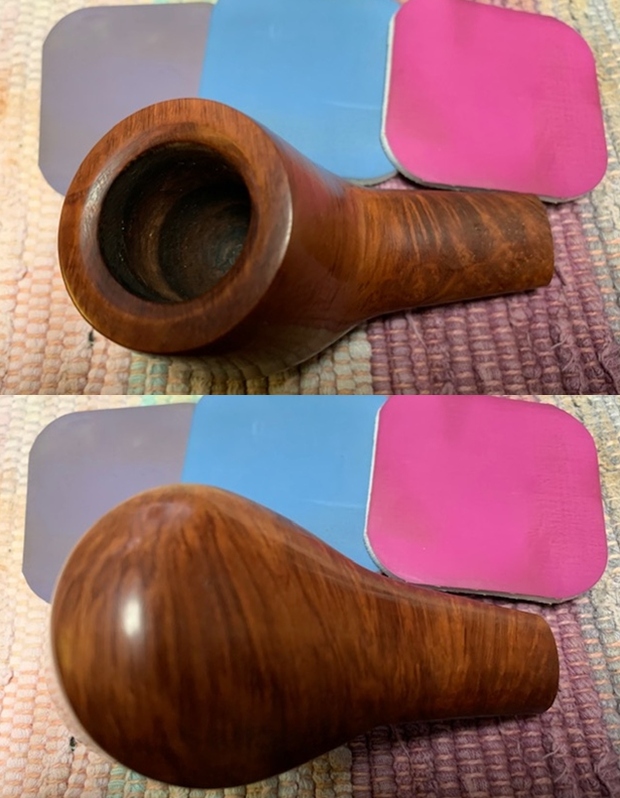
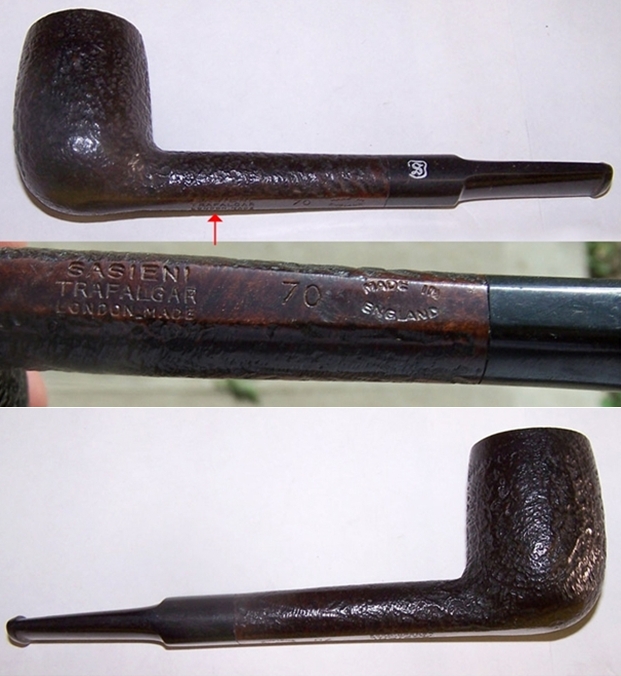
 Before I started my work on the pipe, I decided to do some work on the stamping of this pipe to get an idea of the time period it was carved. I turned first to Pipephil’s site to see what I could learn (http://pipephil.eu/logos/en/logo-sasieni4.html#doubleonedot). I found a pipe that was stamped the same way as the one I am working on. It is stamped on the left side of the shank like the third pipe in the screen capture photo below. Mine is stamped the same way with Sasieni in script with the fish tail. Underneath it is stamped London Made [over] Pat. No. 1513428). The one I have is stamped on the top right side and read “Amesbury” rather than “Wimbledon” stamp in the same place. I included the side bar notes below the picture. From that I knew that the pipe was made during Pre-transition Period 1927-1949.
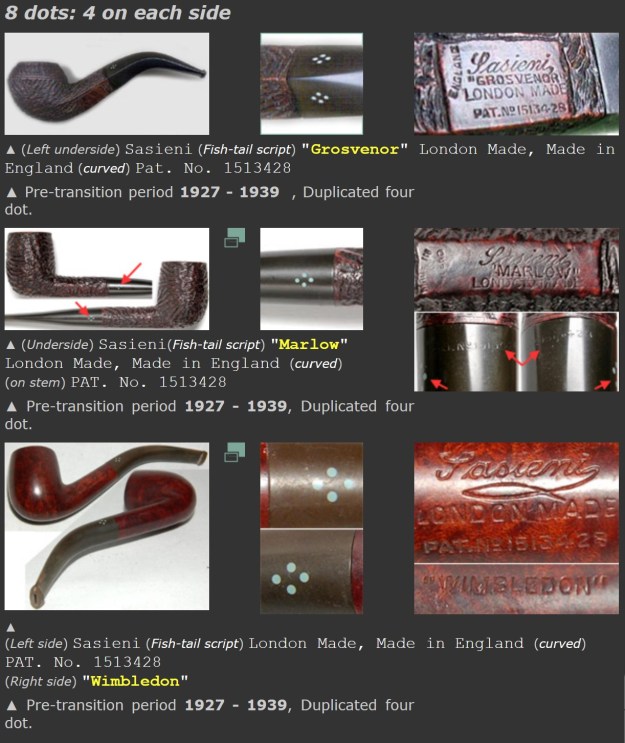
I then turned to Pipedia for more detailed information (https://pipedia.org/wiki/Sasieni). I quote a section of that article below. It refers to the Patent Number that is on the pipe I have on the table. The underlined portion below is particular pertinent to this pipe.
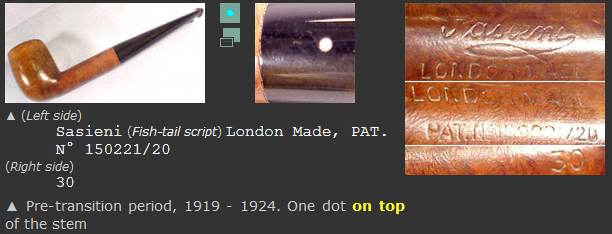
To begin with, there are three main elements to dating the Sasieni pipe, the patent number, the style of the name “Sasieni” as it appears on the shank, and the Dots themselves. Naturally, there are exceptions to these rules (this hobby would be boring without them), but for the most part these guidelines apply better than 95% of the time. All Sasieni One, Four, and Eight Dot pipes made before W.W.II and destined for the U. S. market carried a patent number on the shank which usually started with the numbers “15″, with 150221/20 and 1513428 being representative of the group. Also, the name “Sasieni” was stamped on the shank in a very florid manner, with the tail of the last “i” sweeping underneath the name forming a shape which has been compared to a fish by more than one collector. This script was discontinued by Alfred almost immediately after he took over the company, so this alone tells you your pipe is pre W.W.II. Underneath in block lettering are the words “London Made”, with the patent number making the third line.
The dots will help you narrow this down further. As we mentioned, the short lived U. S. market One Dot was introduced around 1920, and was replaced by the early to mid 1920’s by the Four Dot. The 1920’s Four Dot is distinguishable by the florid Sasieni script, a patent number, and four blue dots, which are quite small compared to the pipes of post war years. Furthermore, by 1935 Sasieni began stamping pipes, based on the shape, with their own names, which were usually, but not always, English towns. For example, apples were stamped “Hurlingham”, bulldogs were “Grosvenor” or “Danzey”, and panels were “Lincoln”. One rare and interesting variation of this was the large bent, dubbed “Viscount Lascelles”. Even in this soft Sasieni market, these pipes regularly sell for $150 in their rare appearances in mailers.
The pipe I have is one that was made for the US market as established by the Patent Number on the shank. The flourished “i” confirms that the pipe was made Pre-transition, 1927 – 1935. The third line stamped is London Made in block lettering. With all that information I knew that this pipe was from the period before the transition so it was an old timer.
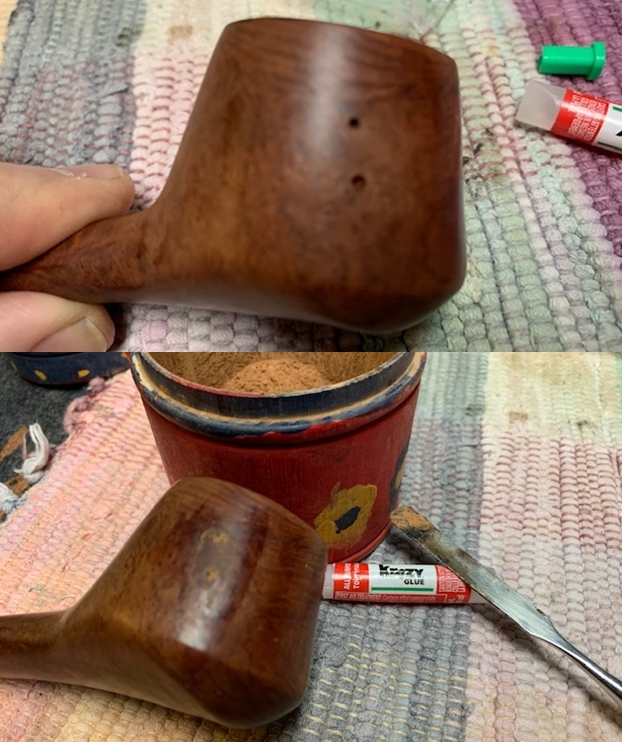
I reamed the bowl with a Pipe Net pipe reamer to carefully scrape out the cake that was present to get it back to bare briar. I had to be careful as the bowl was very fragile and could easily fall to pieces. Before I worked more on the bowl I wanted to repair the cracks in the bowl walls.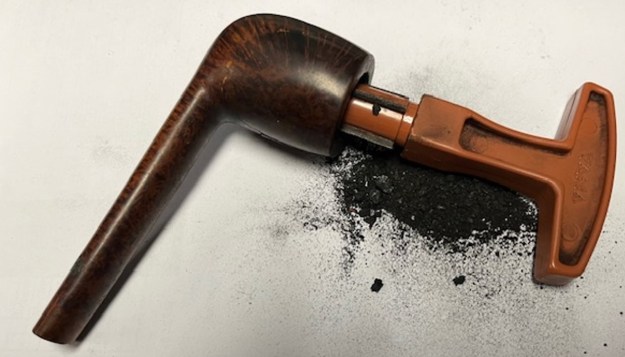 I filled in the cracks around the bowl sides with clear CA glue to first stabilize the bowl sides and build a base. Once that was done I sanded the are smooth with a folded piece of 220 grit sandpaper.
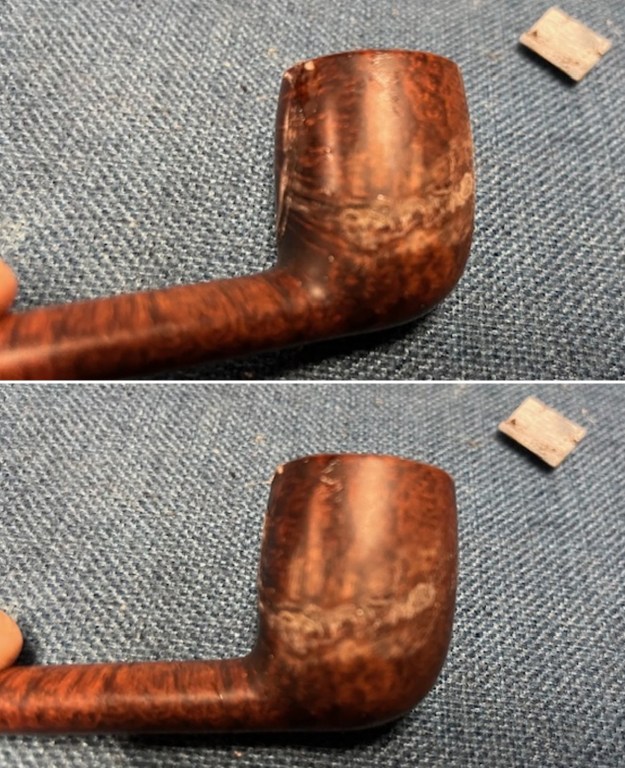
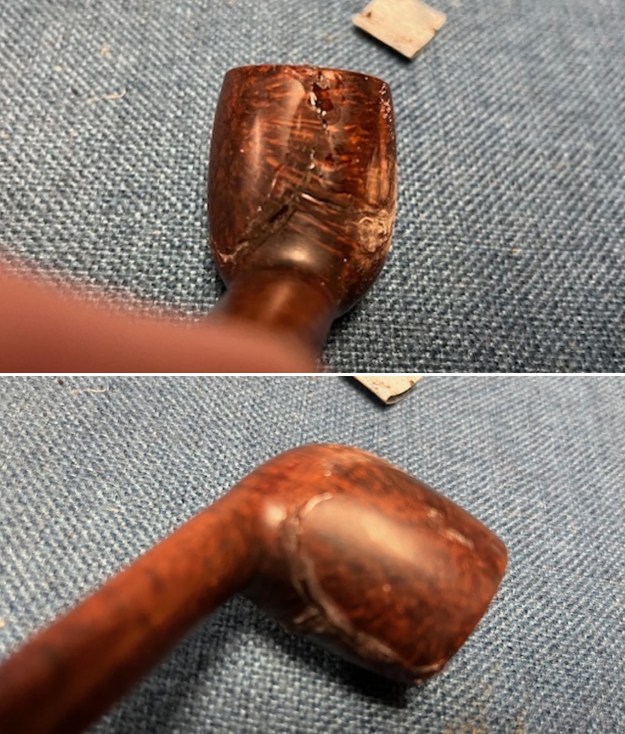
 Once the repairs were flattened I filled in the gaps in the repaired cracks with briar dust and clear CA glue.
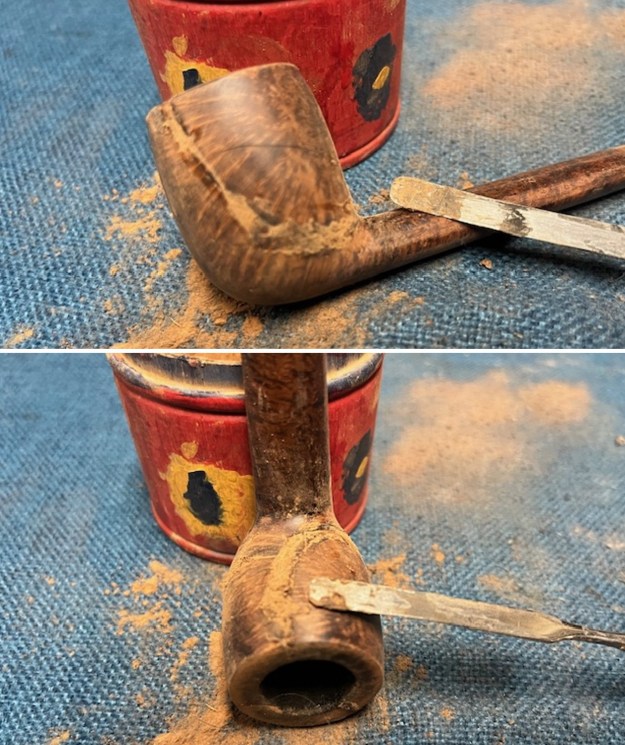
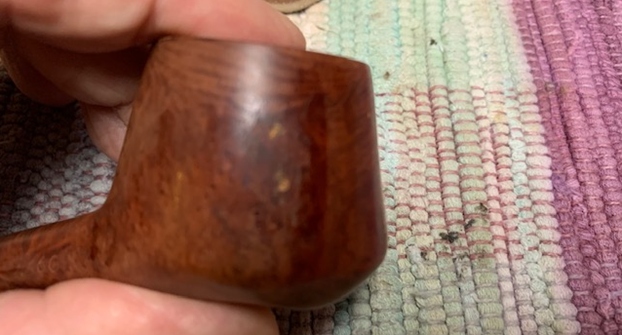
 I sanded the rim top and the repairs on the bowl sides with 320 grit sandpaper to smooth out the repairs to the briar. It looks much better but still needs sanding.
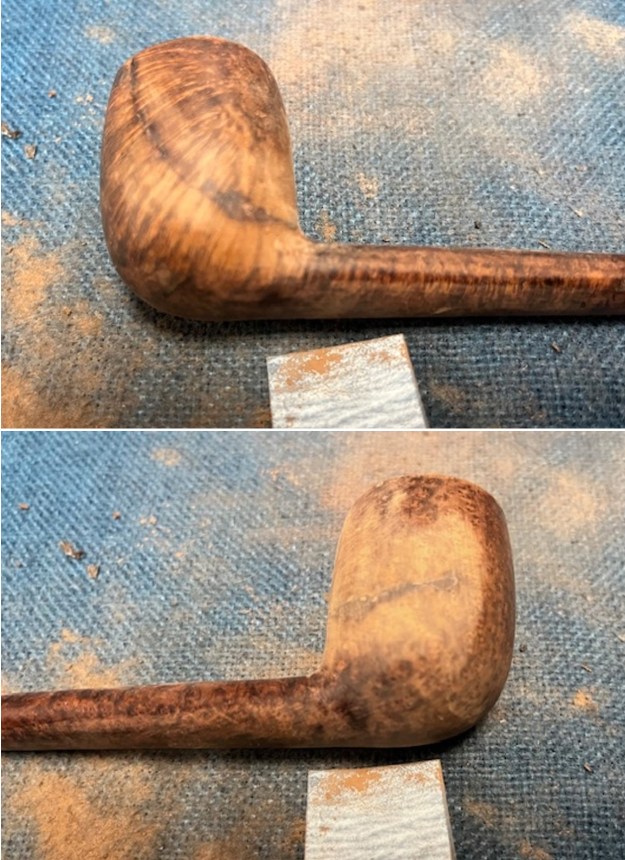
 Once I had smoothed out the repairs I cleaned up the reaming in the bowl. I scraped out the remaining cake in the bowl with a Savinelli Fitsall Pipe Knife. I then sanded the bowl walls with 220 grit sandpaper wrapped around a dowel. It made the internal damage very clear.
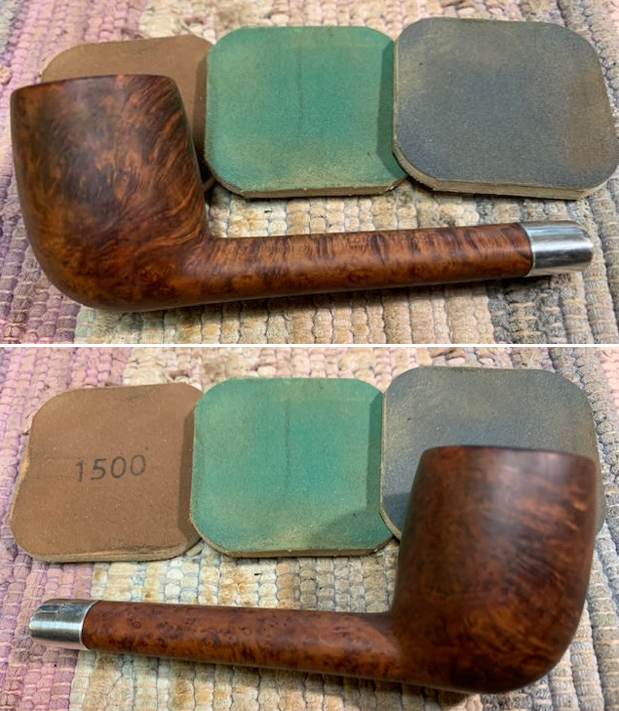
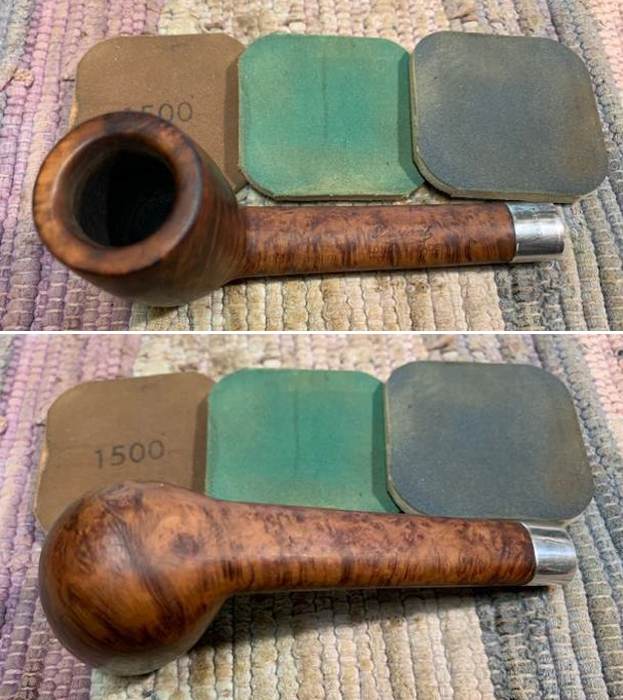
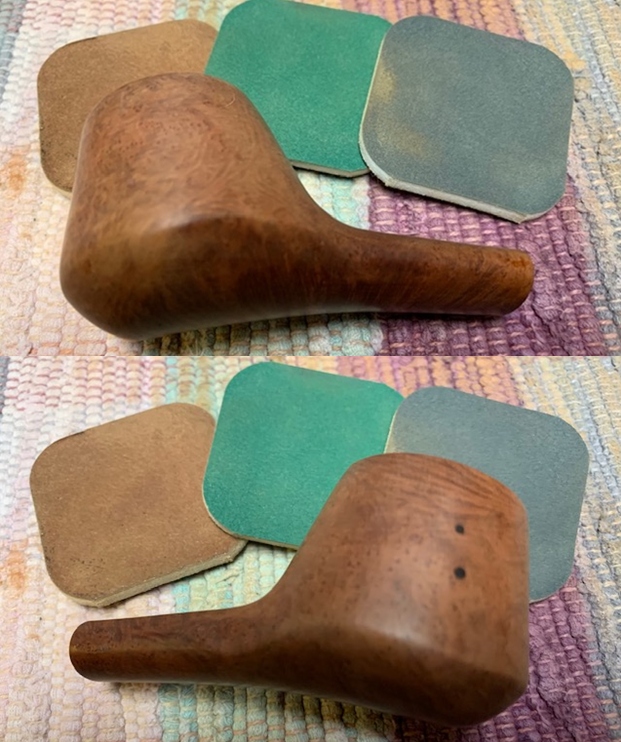
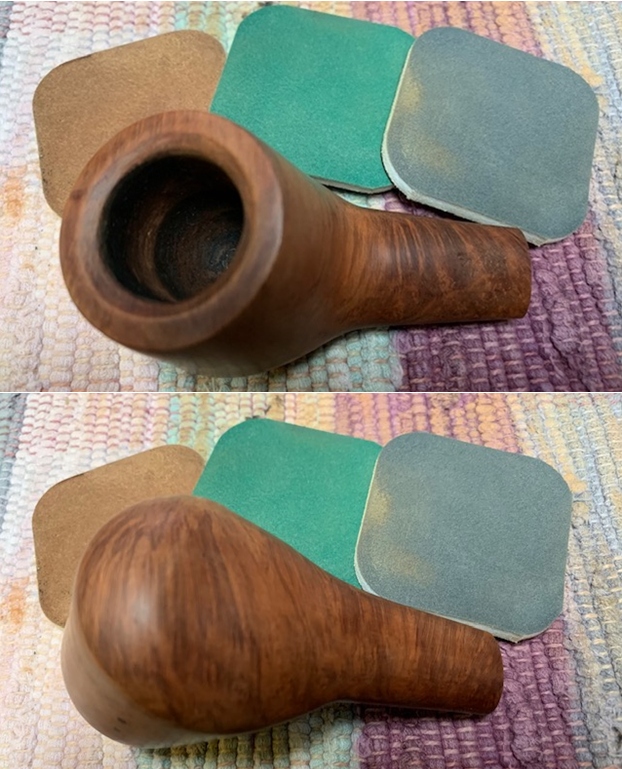
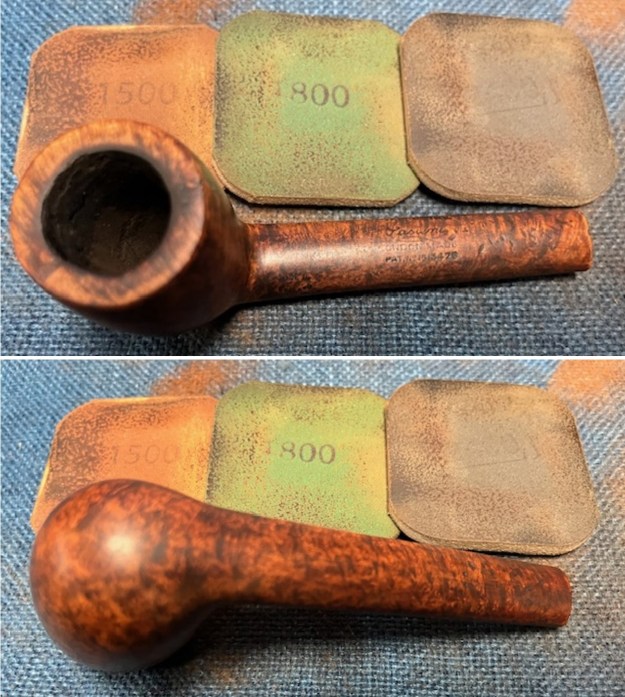
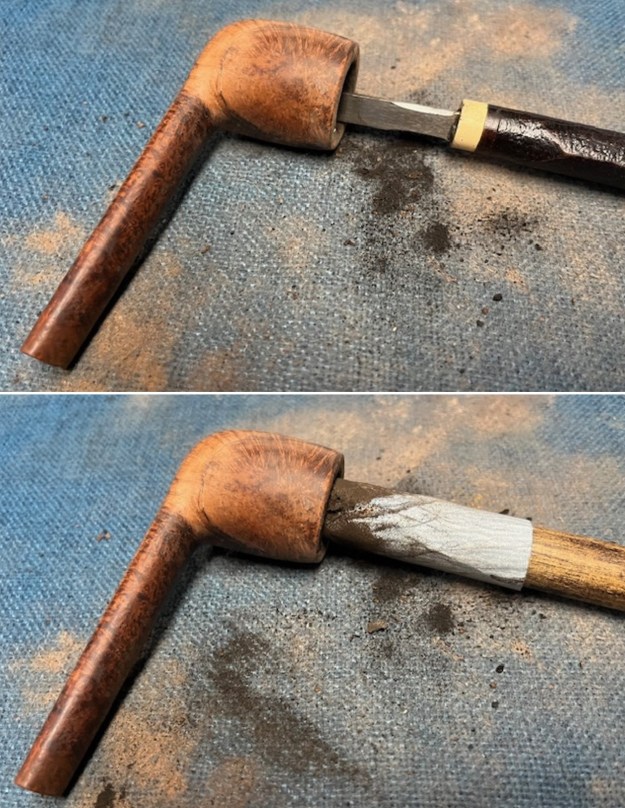 I sanded the bowl with 320-3500 grit 2×2 inch sanding pads blend them into the surface of the briar. They are very visible on the surface but they are solid and should hold up well. I wiped the bowl down with a damp cloth after each sanding pad.
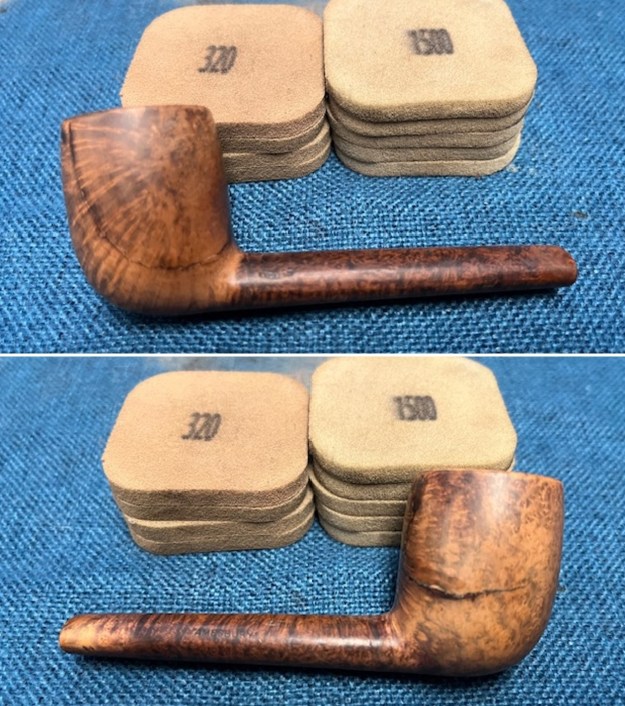
 I stained the briar with a dark brown aniline stain. I applied it with a dauber and flamed it to set it in the grain. I repeated the process to ensure a good coverage on the repaired briar. The coverage on the briar was spotty and showed the spots where I had done the repairs.
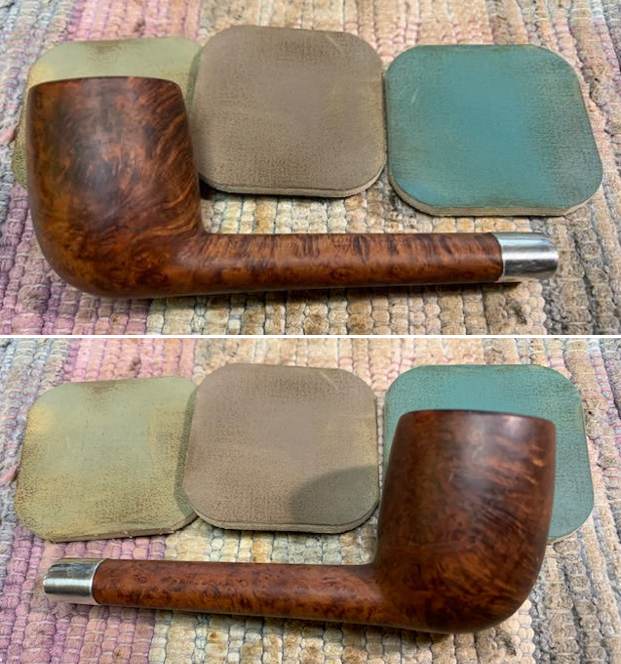
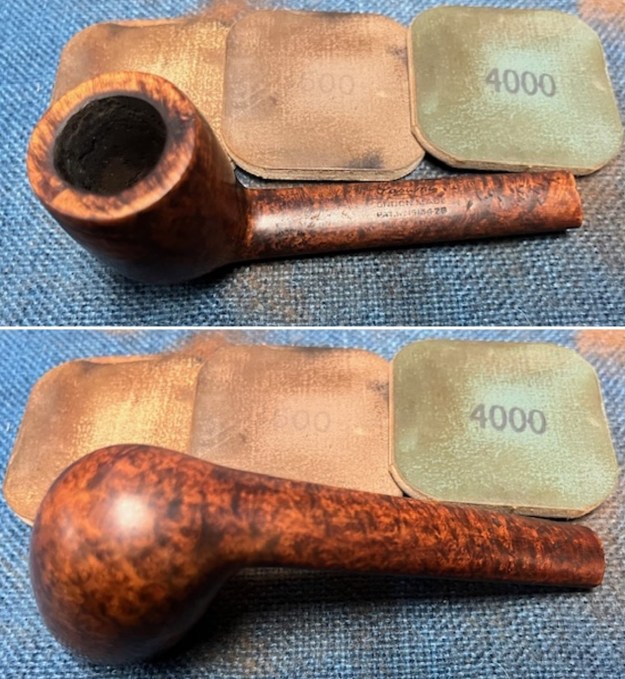
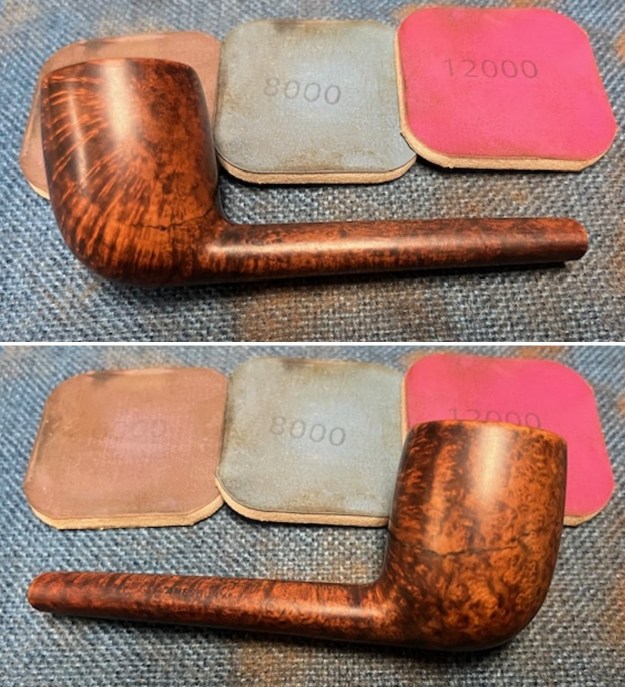
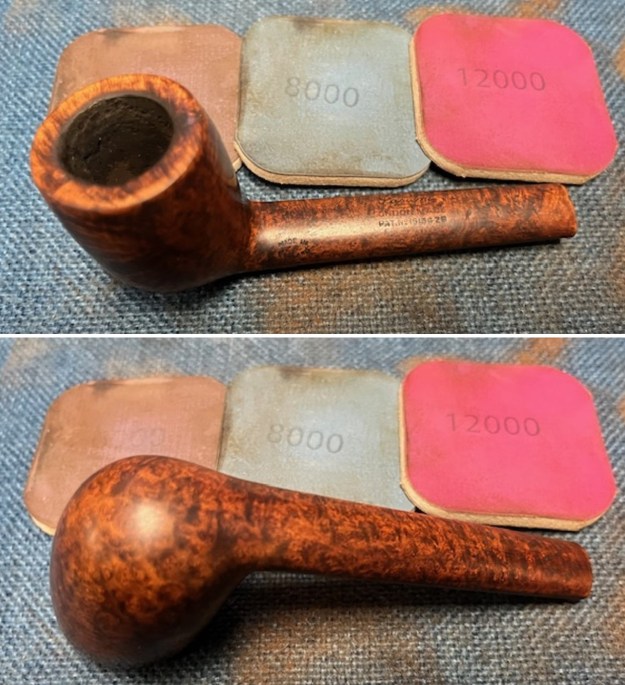
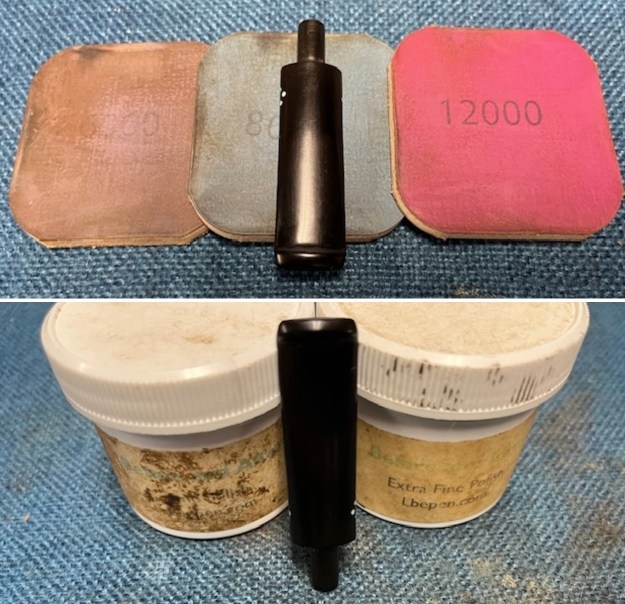
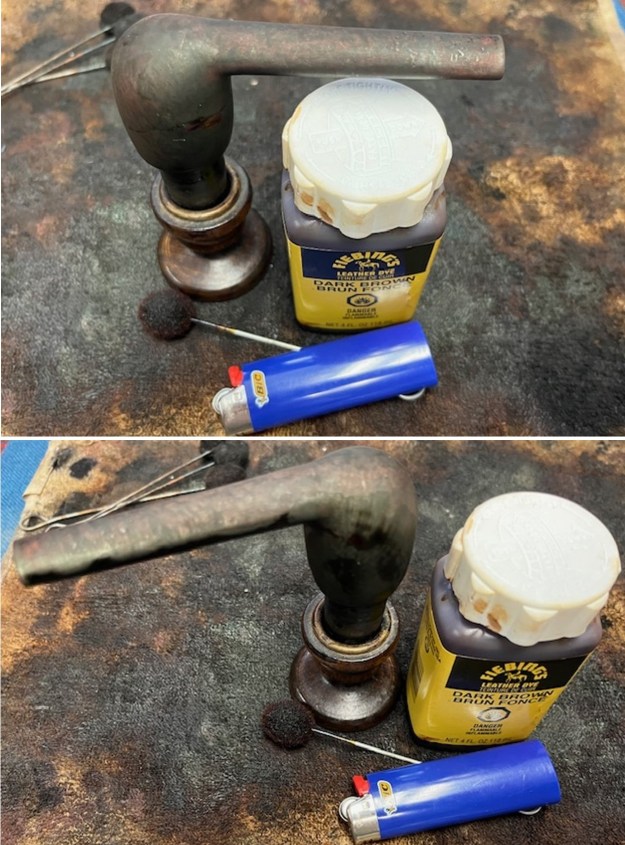 I polished the briar with 1500-12000 grit micromesh sanding pads. I dry sanded with each pad and then wiped the bowl down after each pad to remove the debris. It began to look rich and smooth.

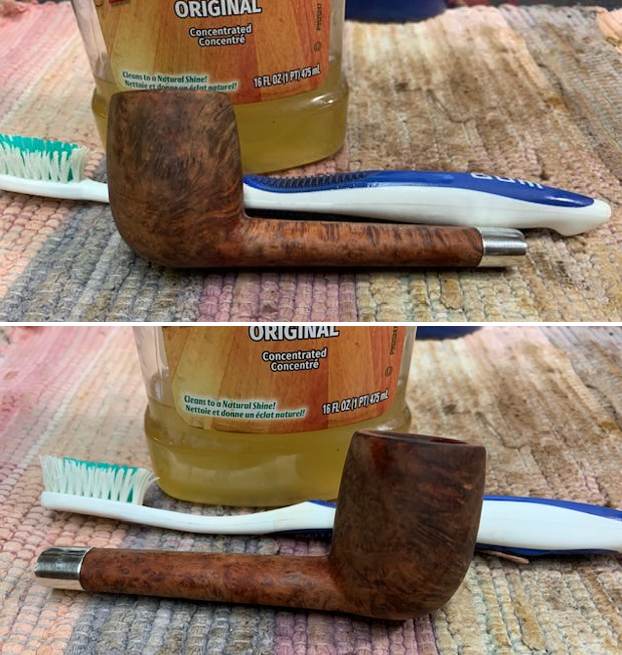
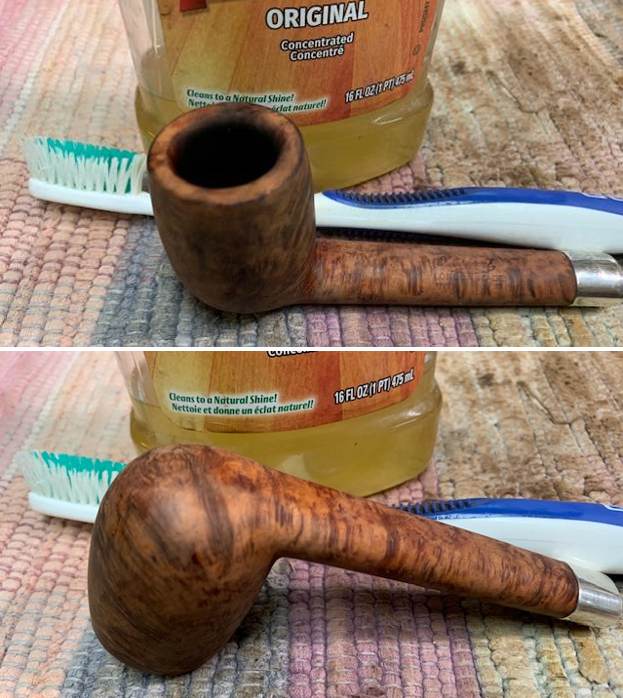
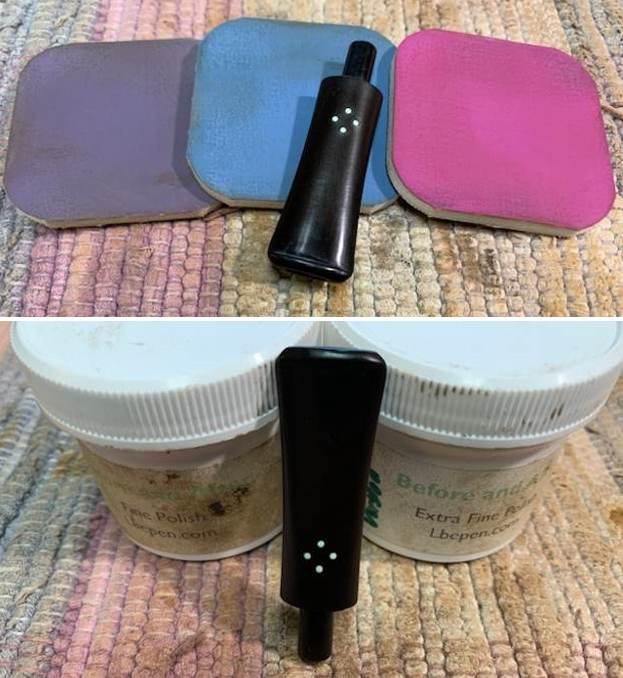
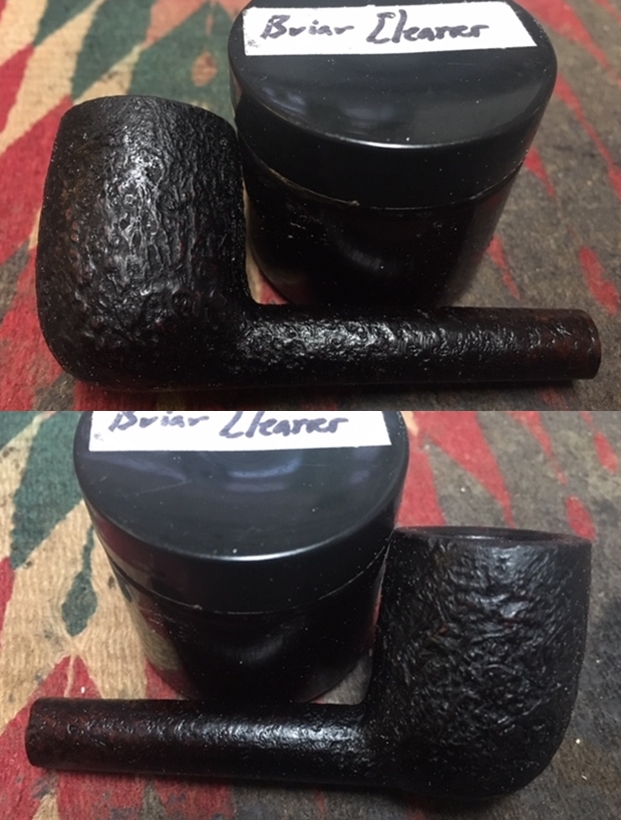
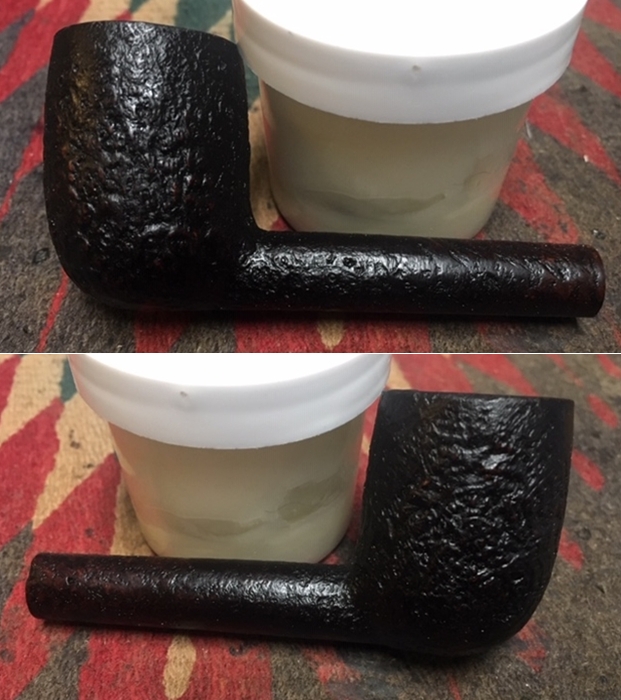
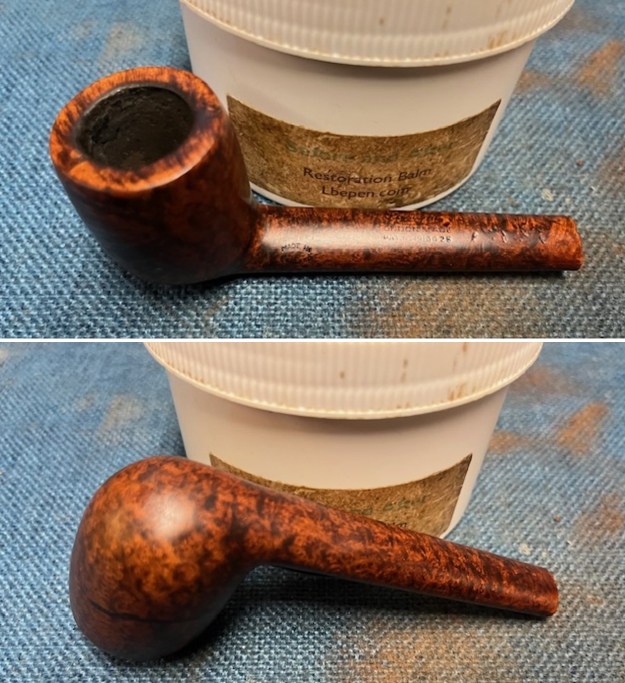
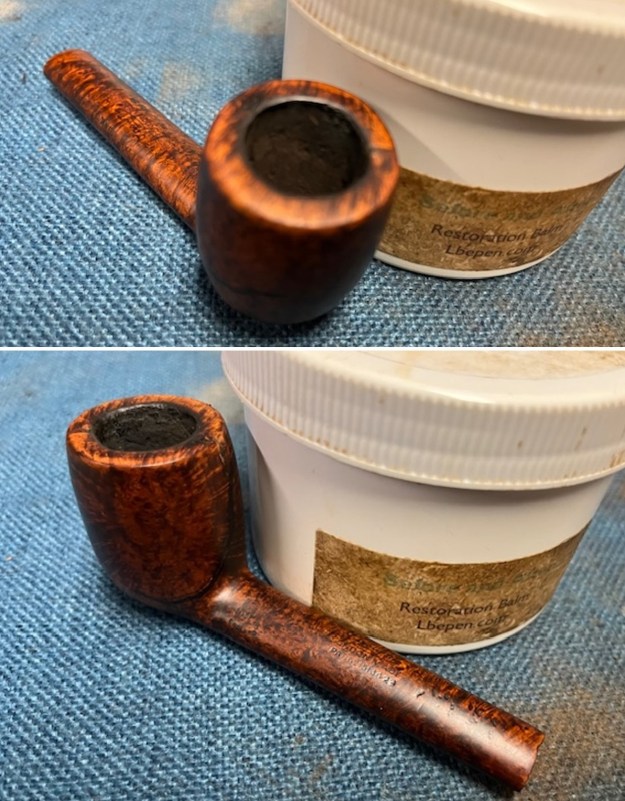
 I worked some Before & After Restoration Balm into the surface of the briar with my finger tips to work it into the finish. The product is incredible and the way it brings the grain to the fore is unique. It works to clean, protect and invigorate the wood.
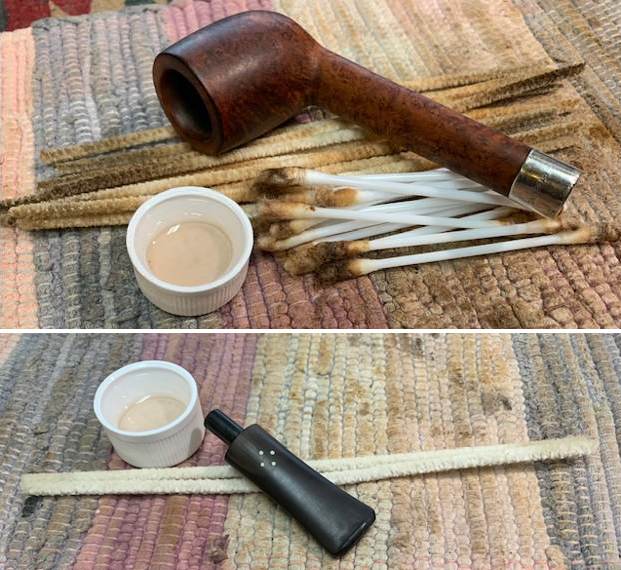
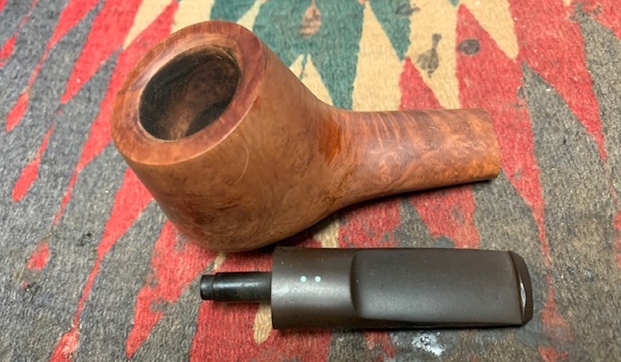
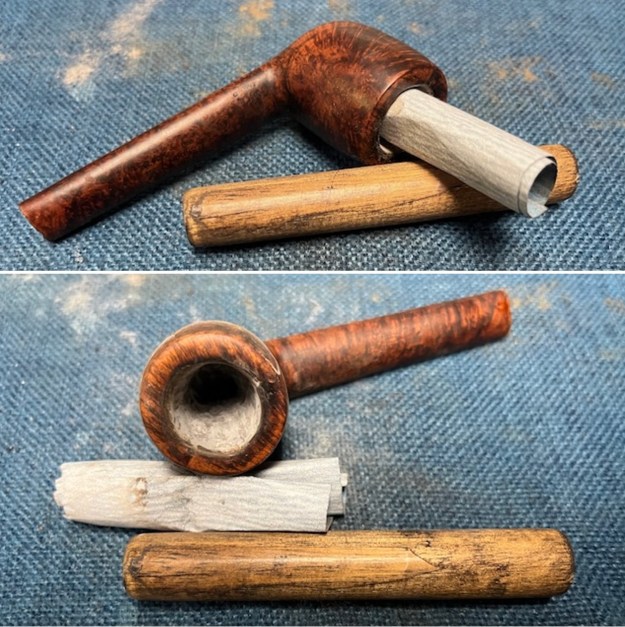
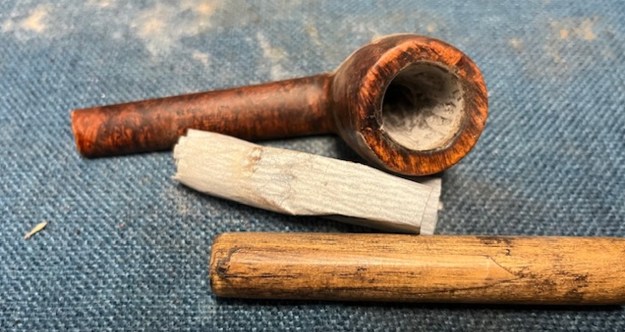
 I cleaned out the internals of the shank and bowl with pipe cleaners, cotton swabs and isopropyl alcohol. The pipe is very clean. I like it clean to make a better fit for new stem. I cleaned out the airway in the stem I had chosen with pipe cleaners and alcohol.
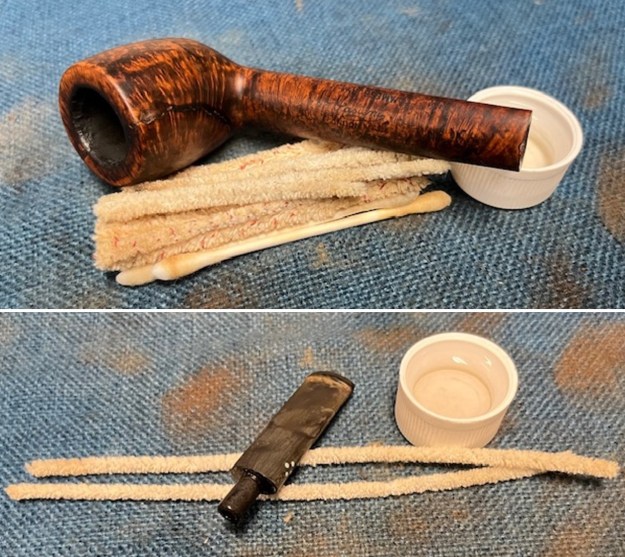 With the externals completed it was time to deal with the internal cracks matching those on the outside. I mixed a batch of JB Weld to repair the matching cracks on the inside walls of the bowl. I smooth out the repair with a dental spatula. Once it cured I smoothed out the repair with sandpaper wrapped around a dowel.
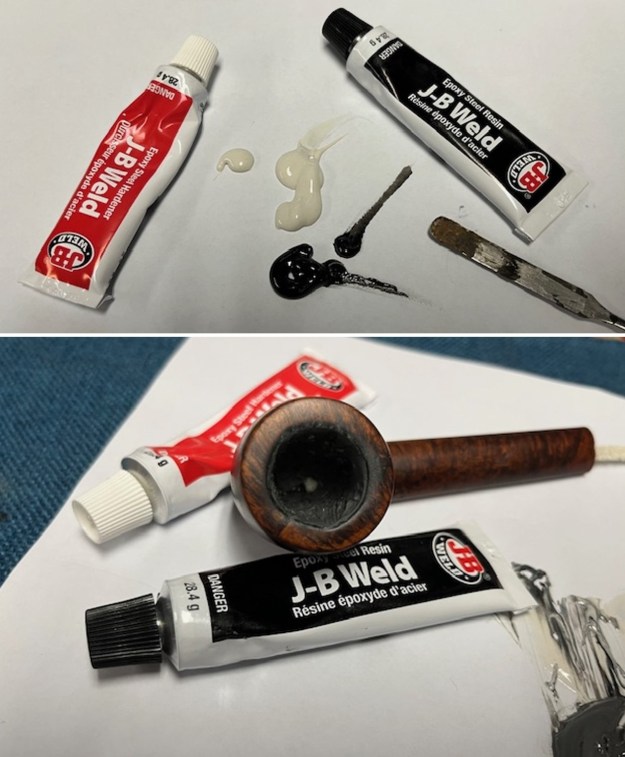
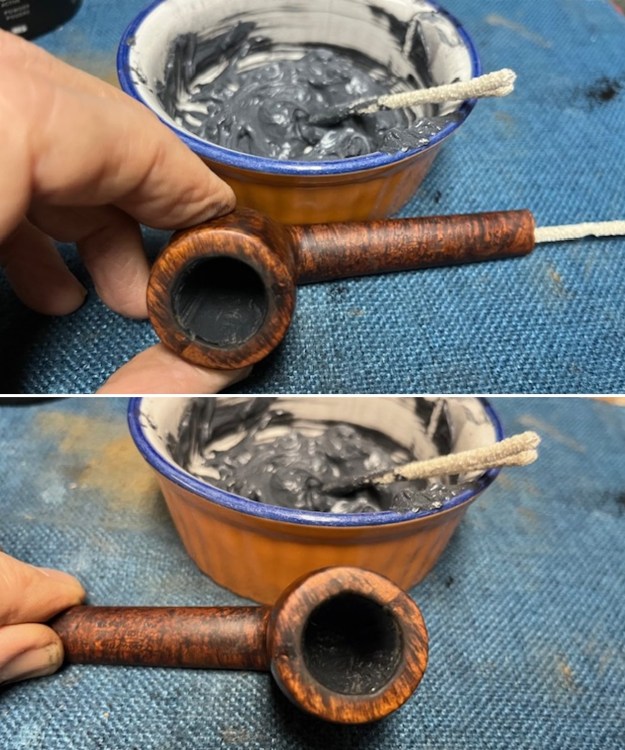
 I mixed a bowl coating charcoal powder and sour cream and coated the inside of the bowl with the coating to protect it while it developed a cake.
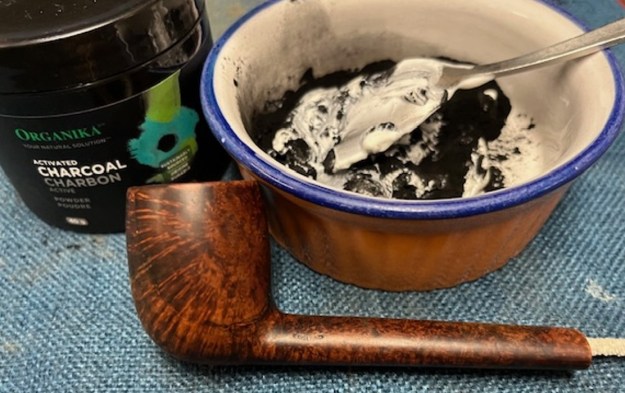
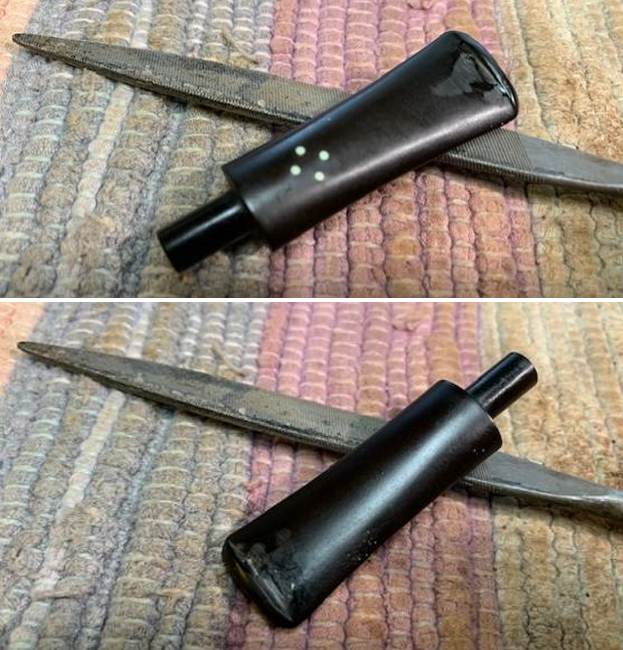
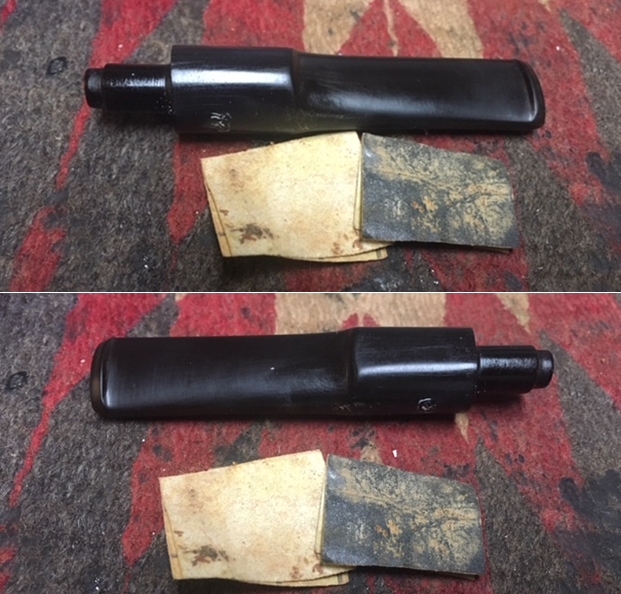
 I set the bowl aside and turned my attention to the stem. I filled in the tooth marks and nicks in the stem surface with Extra Strength Rubberized Black CA glue. I let it cure then used a flat file to recut the button edge and flatten the repairs in the surface. I sanded the repaired areas with a folded piece of 220 grit sandpaper to blend them into the surface.
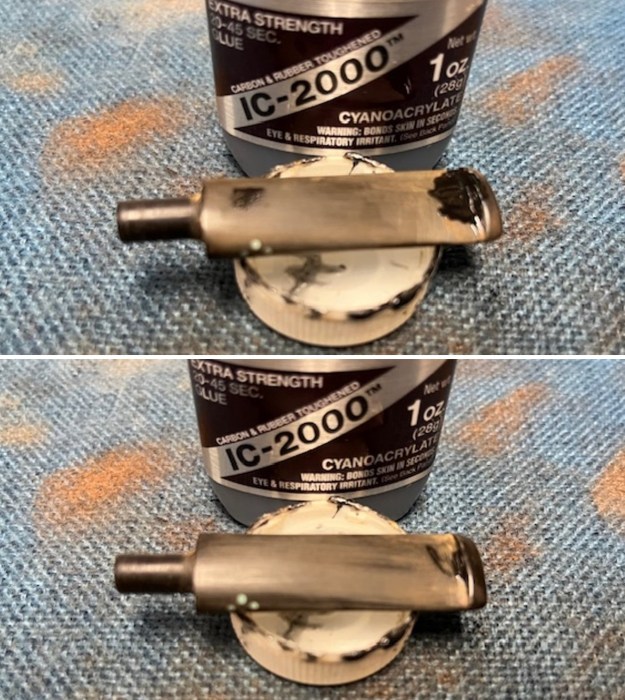
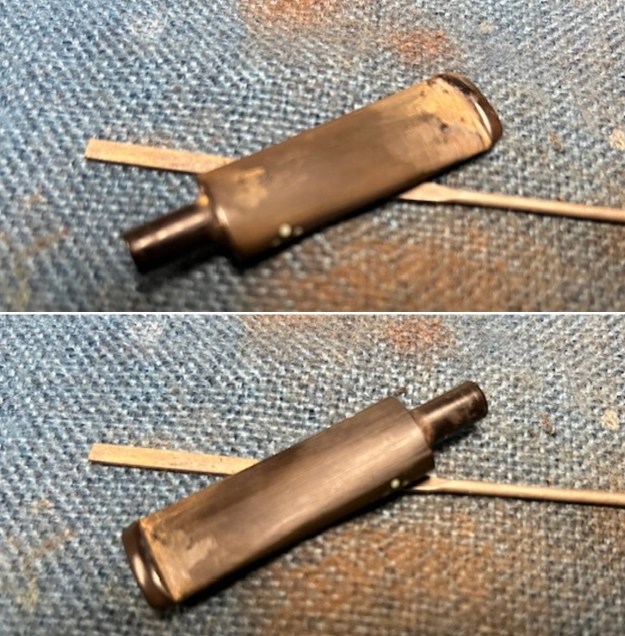
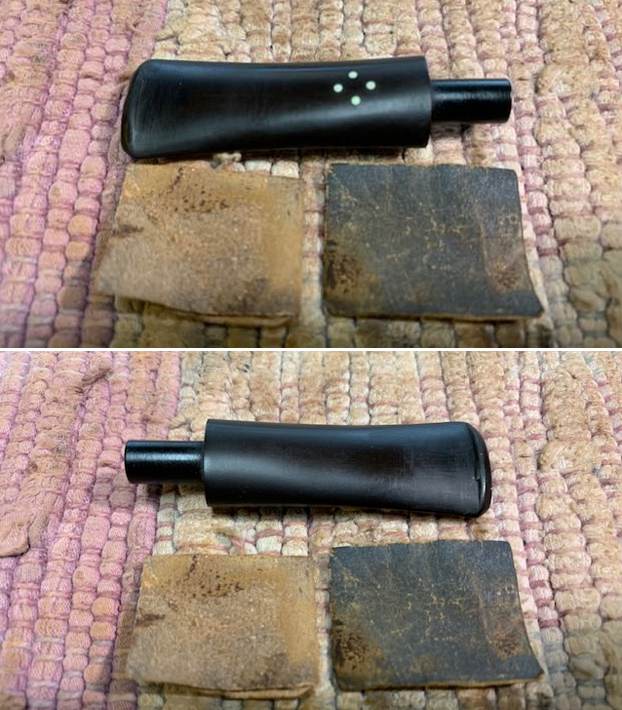
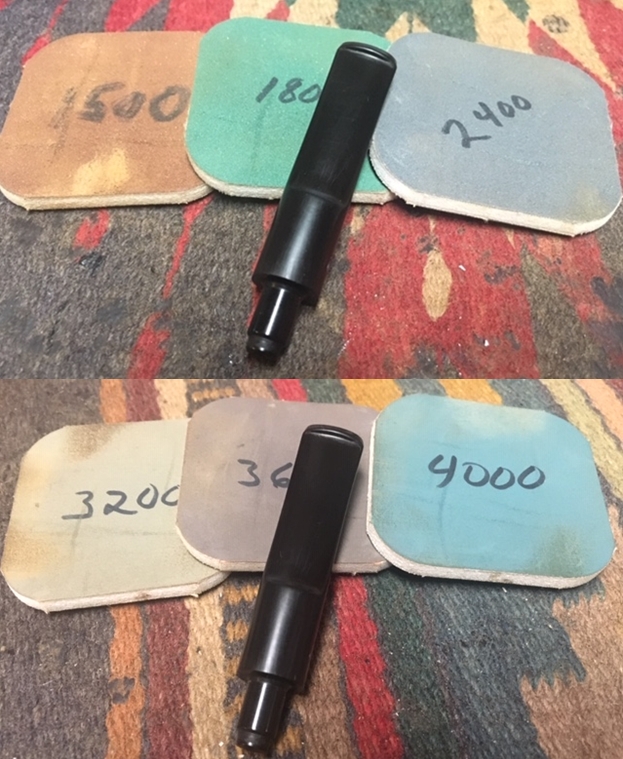
 I sanded the stem with 320-1500 grit 2×2 inch sanding pads. I wiped the stem down after each sanding pad with an Obsidian Oil Cloth to remove the sanding dust. It began to look very good.
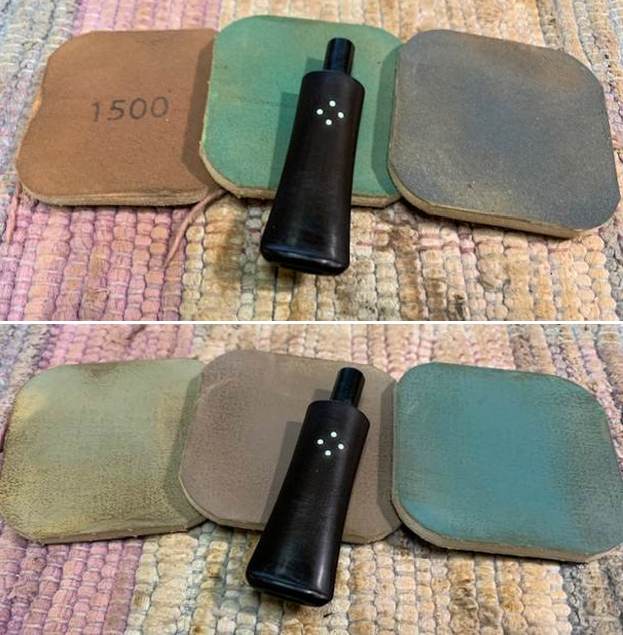
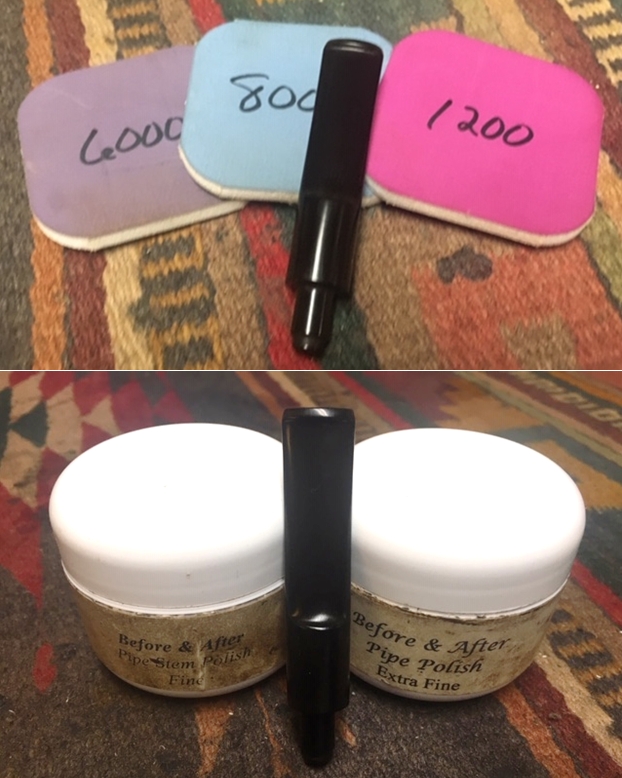
 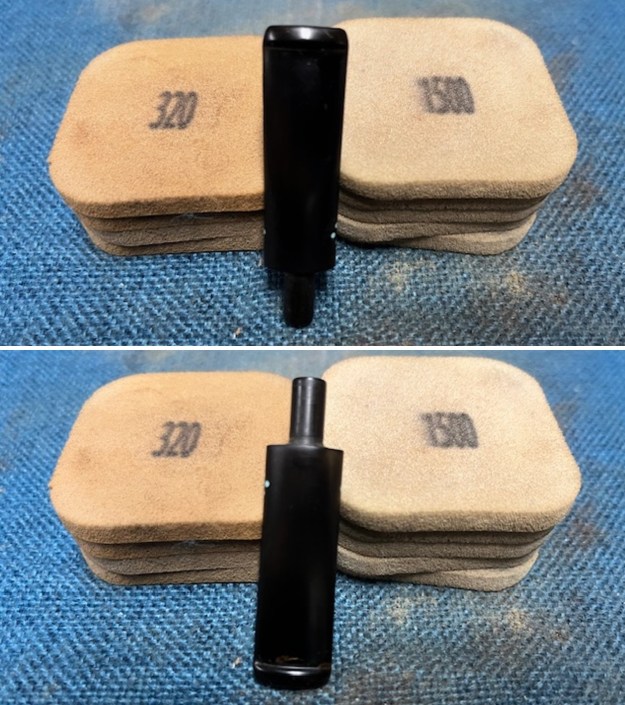 I polished the stem with micromesh sanding pads – dry sanding with 1500-12000 grit pads. I wiped the stem down after each sanding pad with an Obsidian Oil Cloth. The stem began to take on a rich shine.
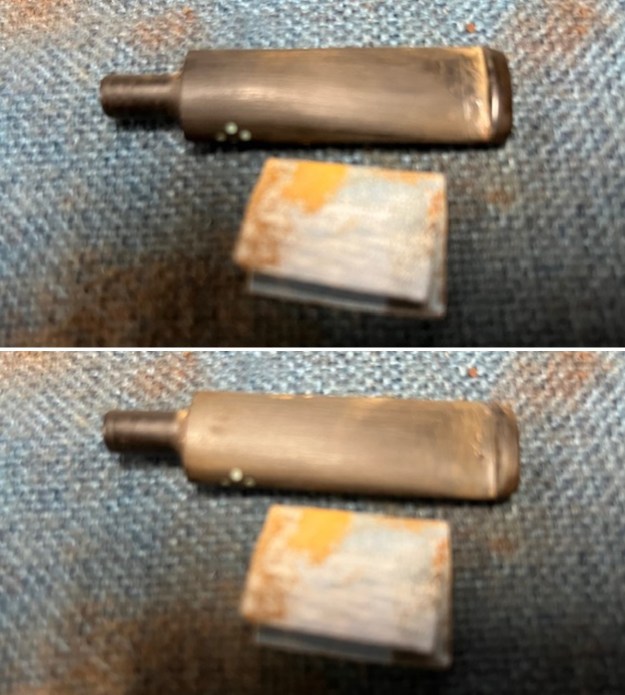
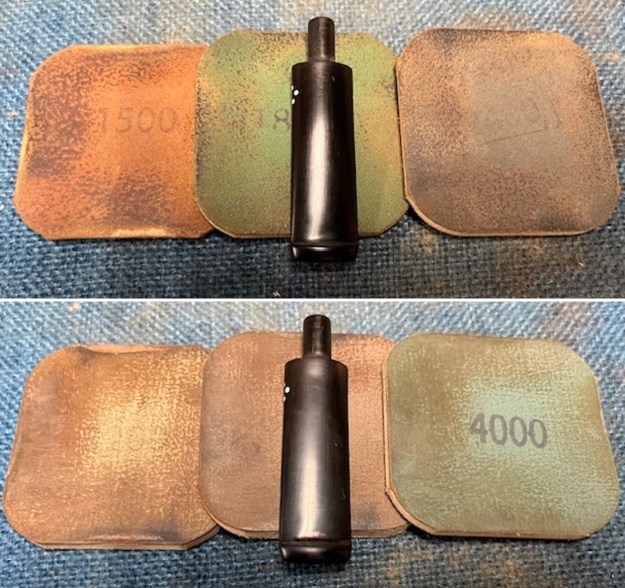
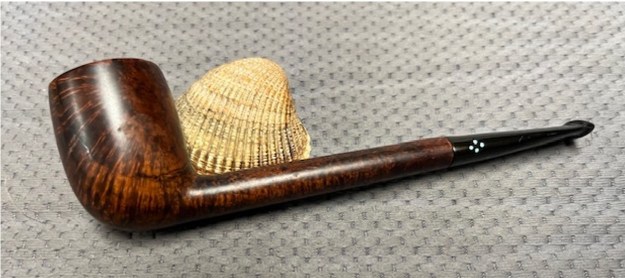
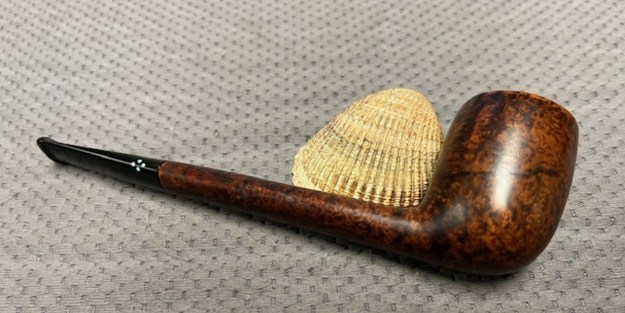
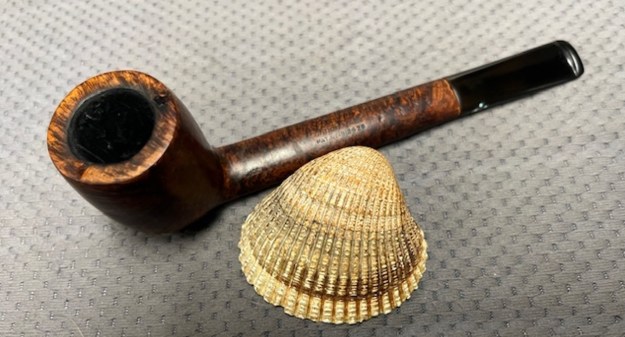
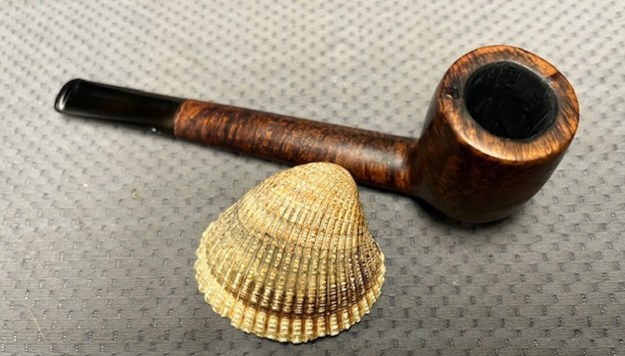
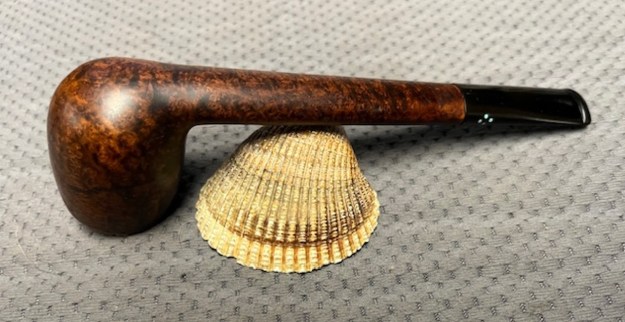
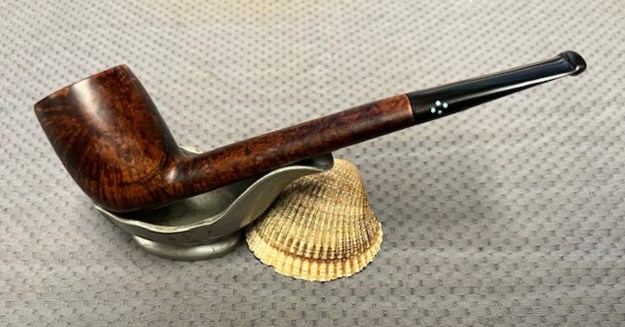
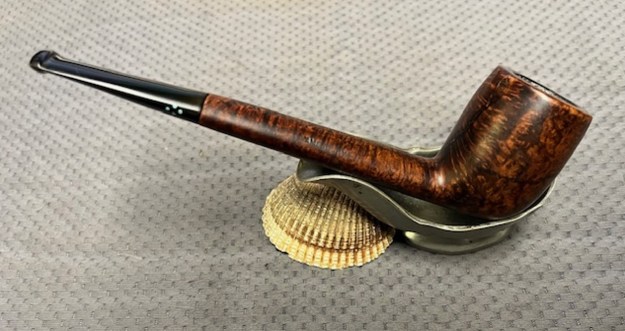
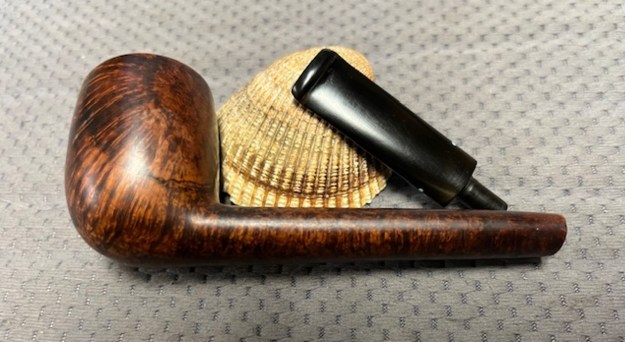
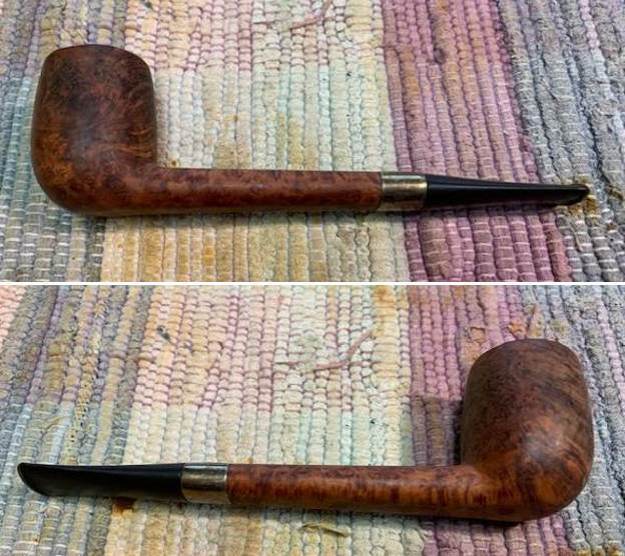
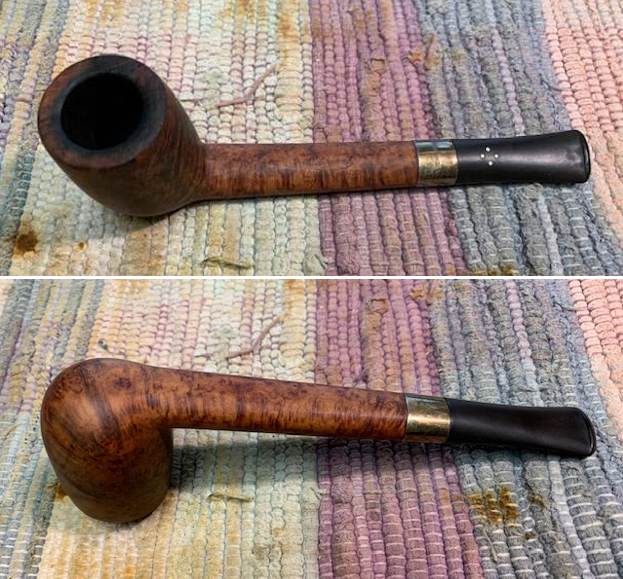
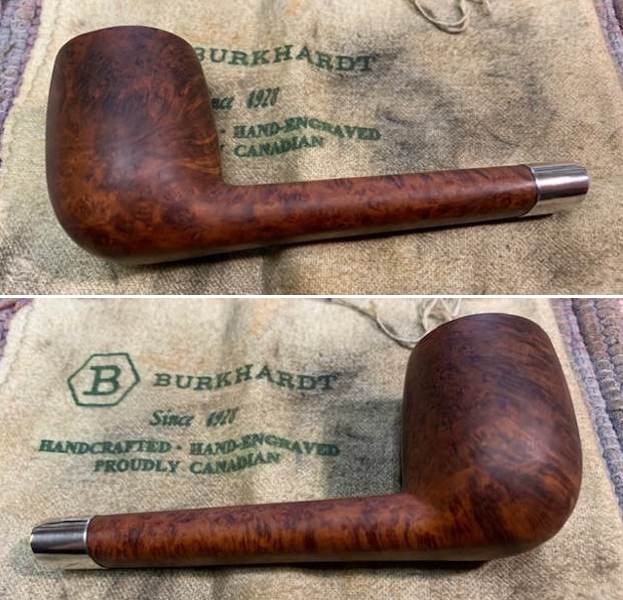
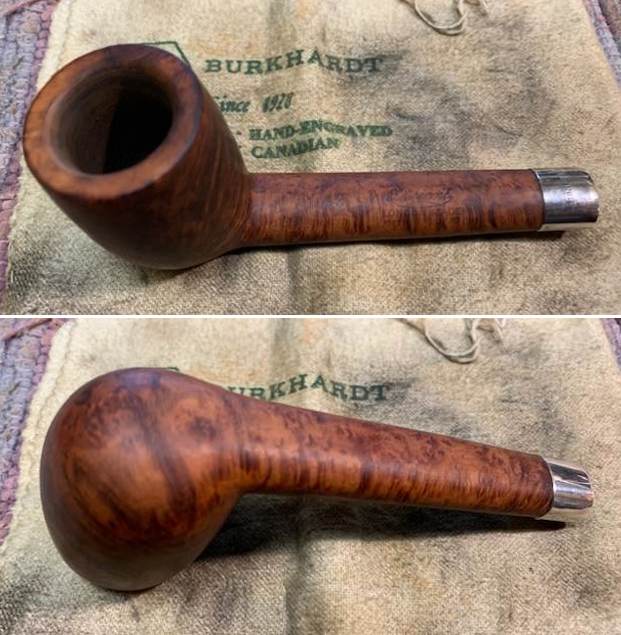
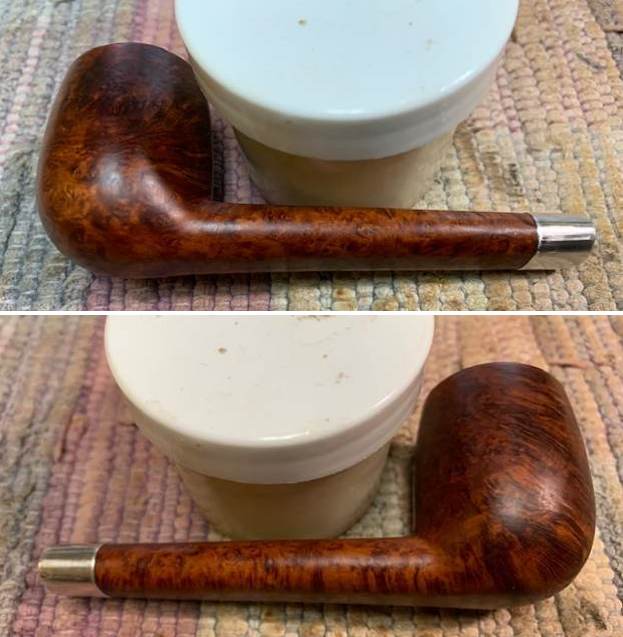
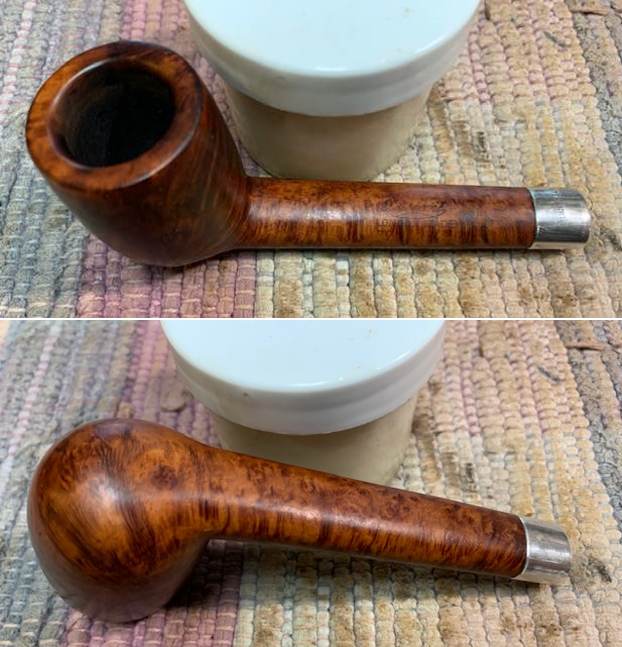
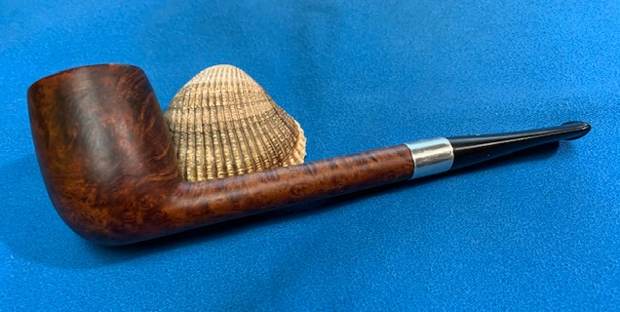
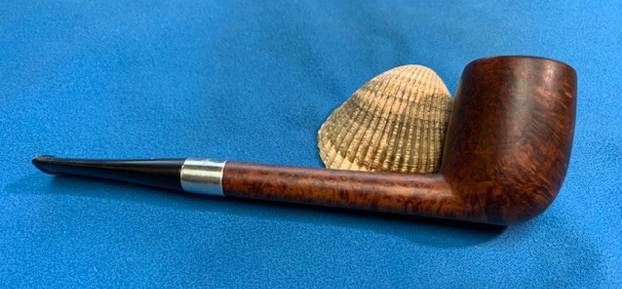
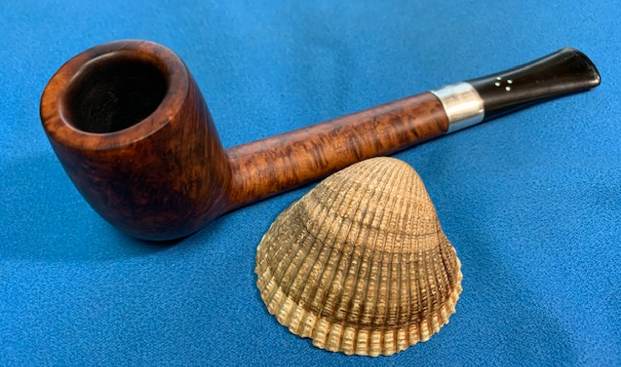
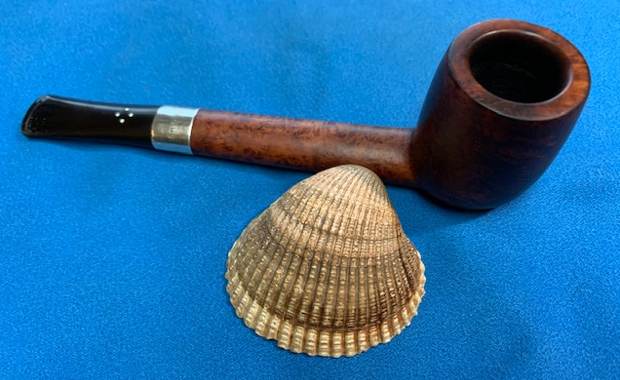
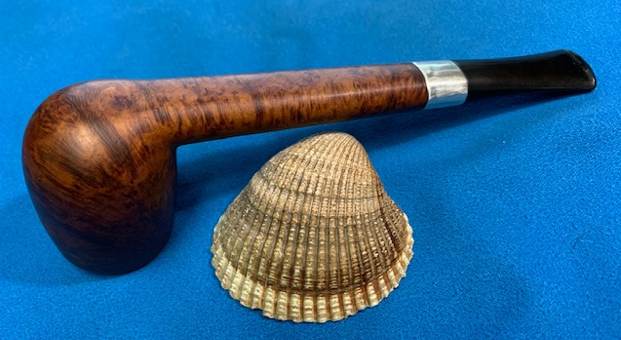
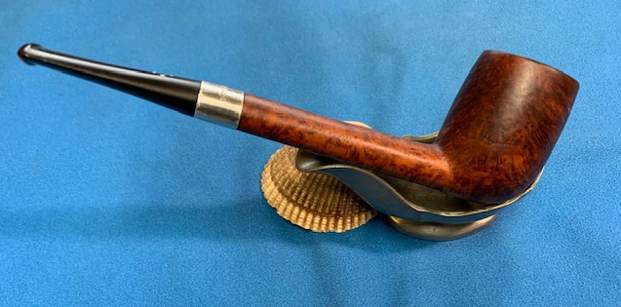
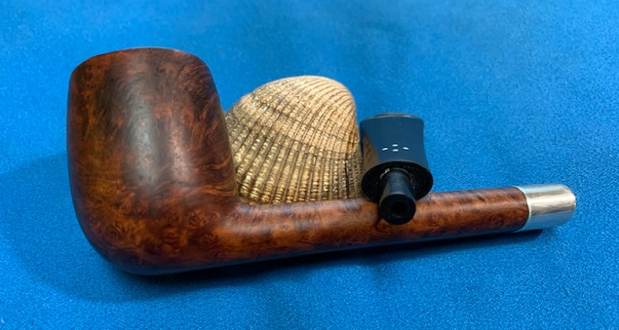
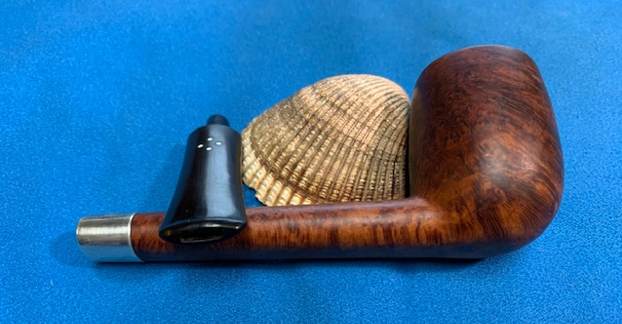
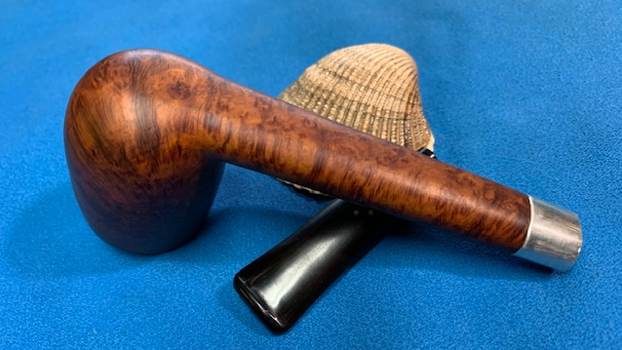
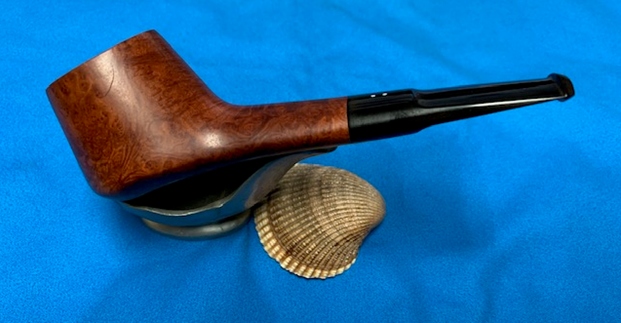
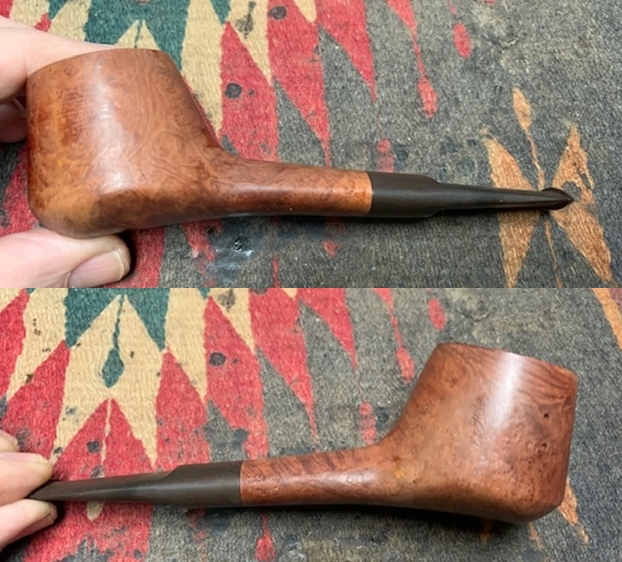
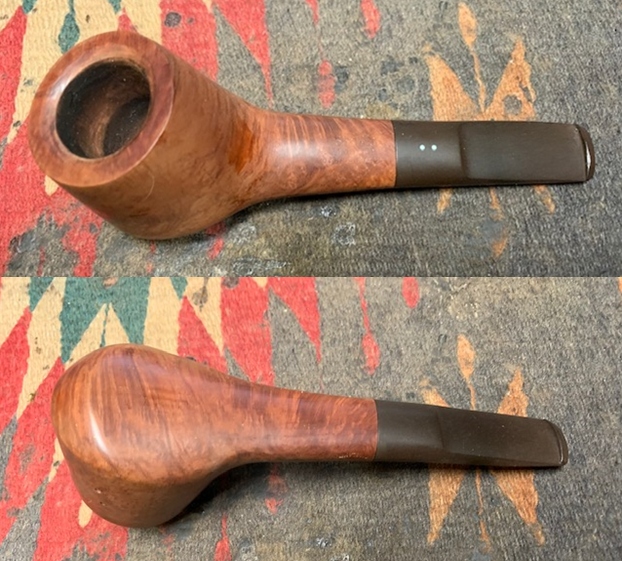
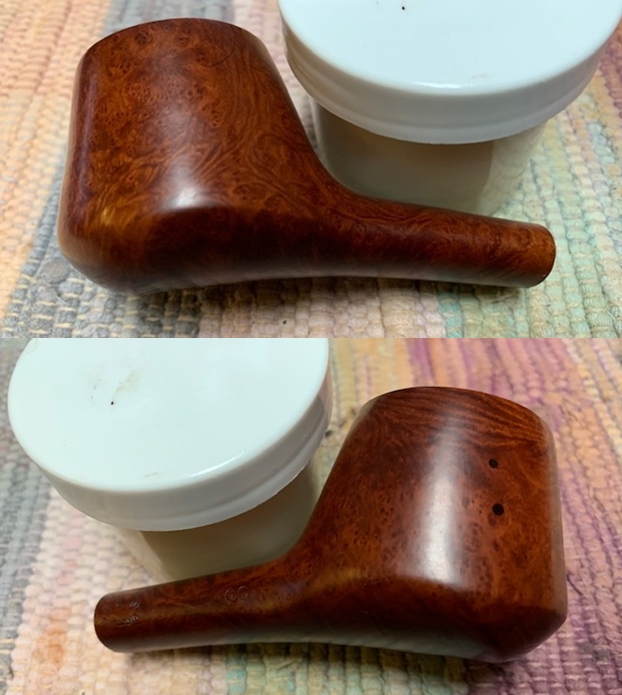
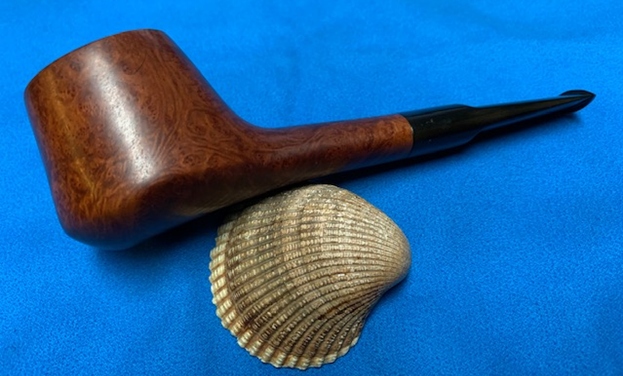
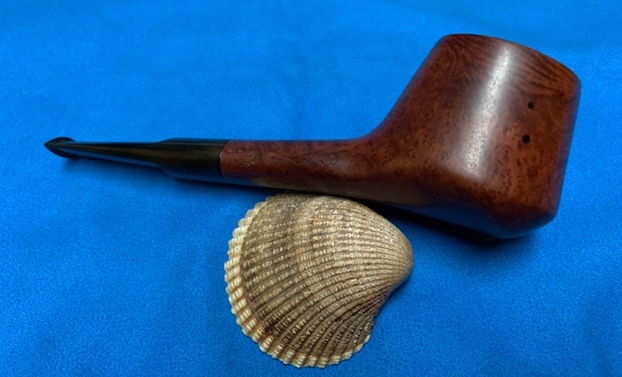
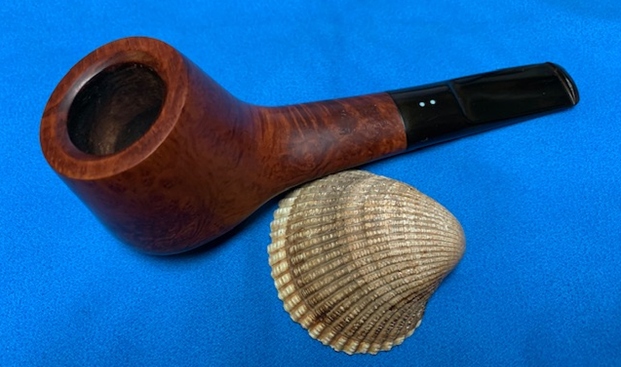
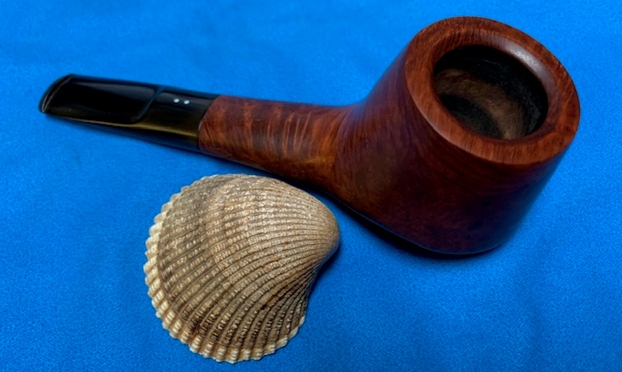
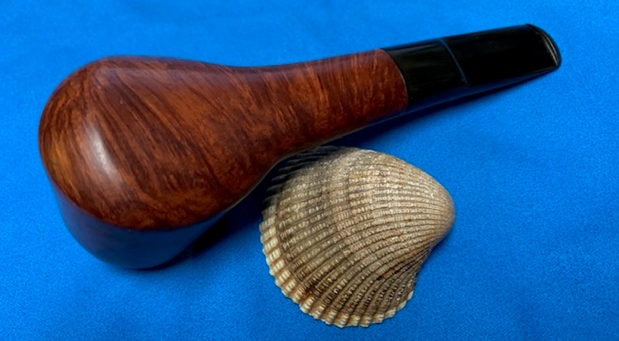
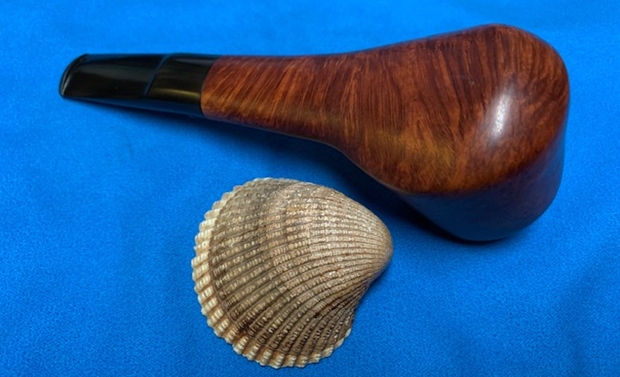
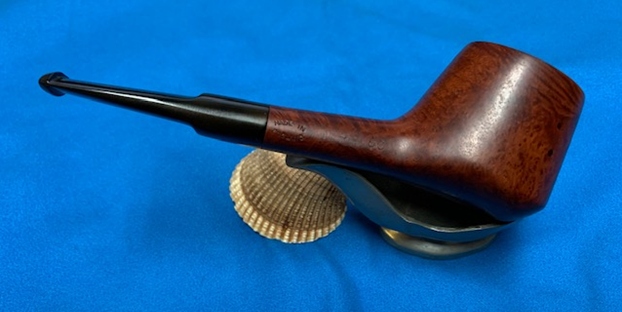
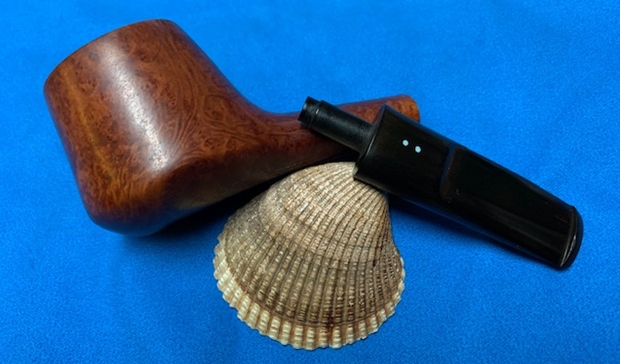
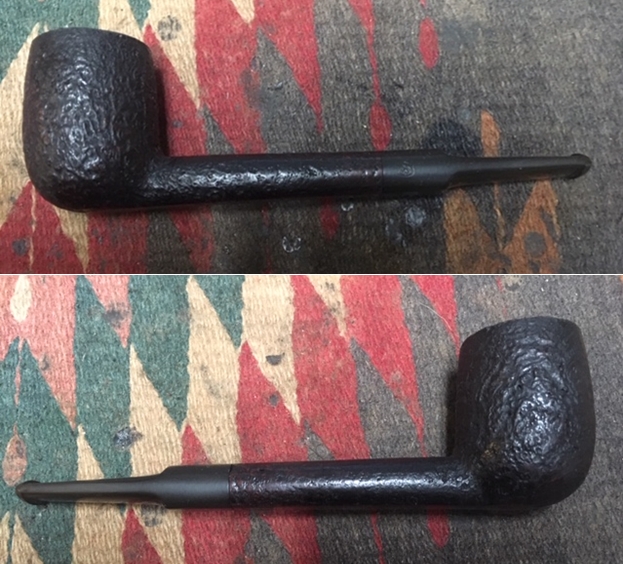
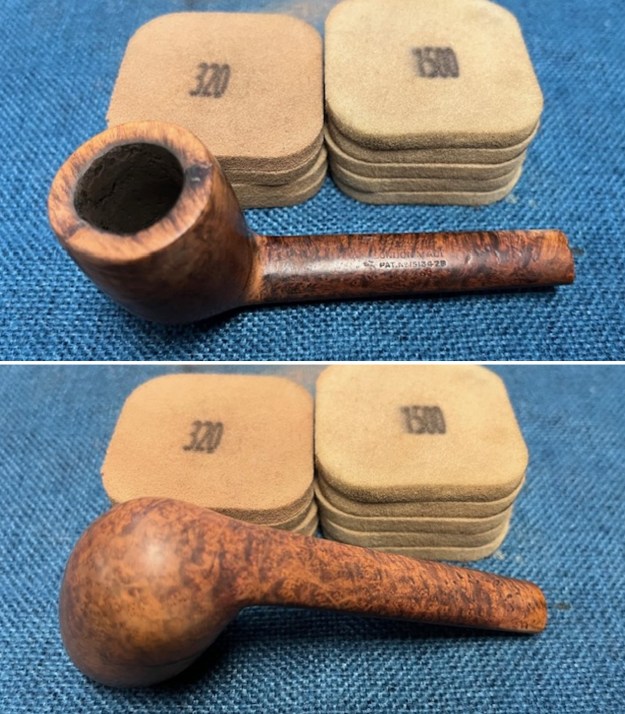
 This older Sasieni London Made Pat. No. 1513428 “Amesbury” Canadian with a vulcanite taper stem is a great looking pipe now that it has been restored. The “Humpty Dumpty” repairs on this shattered do not hide the beautiful grain on the briar. It still shines through the polished finish and is stunning. I put the stem back on the bowl and carefully buffed the pipe with Blue Diamond on the buffing wheel. I gave the bowl and the stem multiple coats of carnauba wax on the buffing wheel and followed that by buffing the entire pipe with a clean buffing pad. I hand buffed the pipe with a microfiber cloth to deepen the shine. The finished Sasieni London Made Pat. No. 1513428 “Amesbury” Canadian fits nicely in the hand and feels great. Give the finished pipe a look in the photos below. The dimensions of the pipe are Length: 5 ¾ inches, Height: 1 ¾ inches, Outside diameter of the bowl: 1 ¼ inches, Chamber diameter: ¾ of an inch. The weight of the pipe is 28 grams/.95 ounces. It is a beautiful pipe and one that I hold until I have finished working on the other two pipes that Andrew sent me. Once I am finished with the lot they will be heading back to Greece. Thanks for walking through the restoration with me as I worked over this pipe. Thanks to each of you who are reading this blog.