Tag Archives: restaining

A Barling’s Frustration


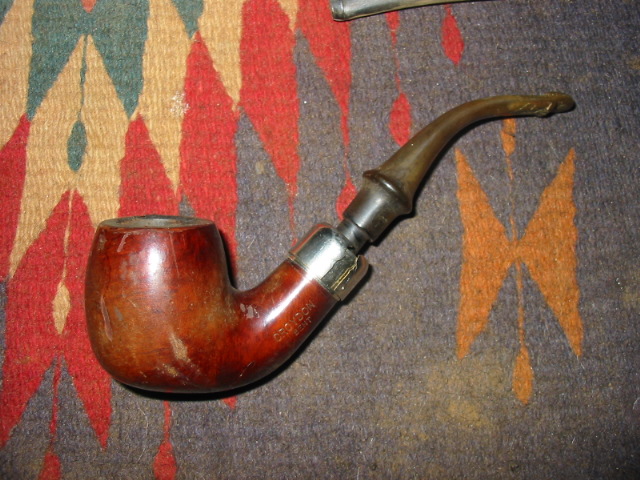
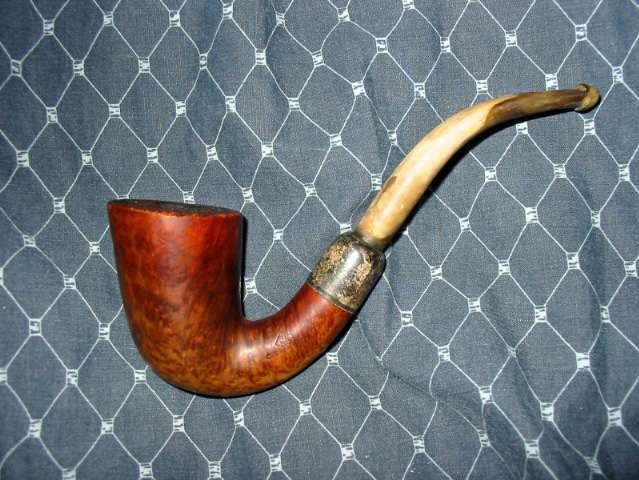
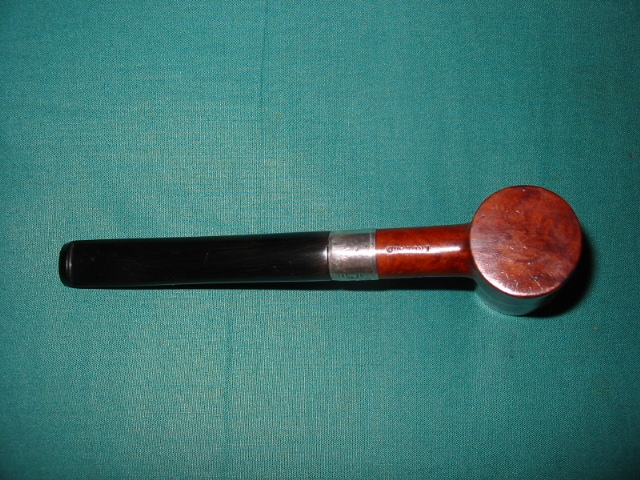
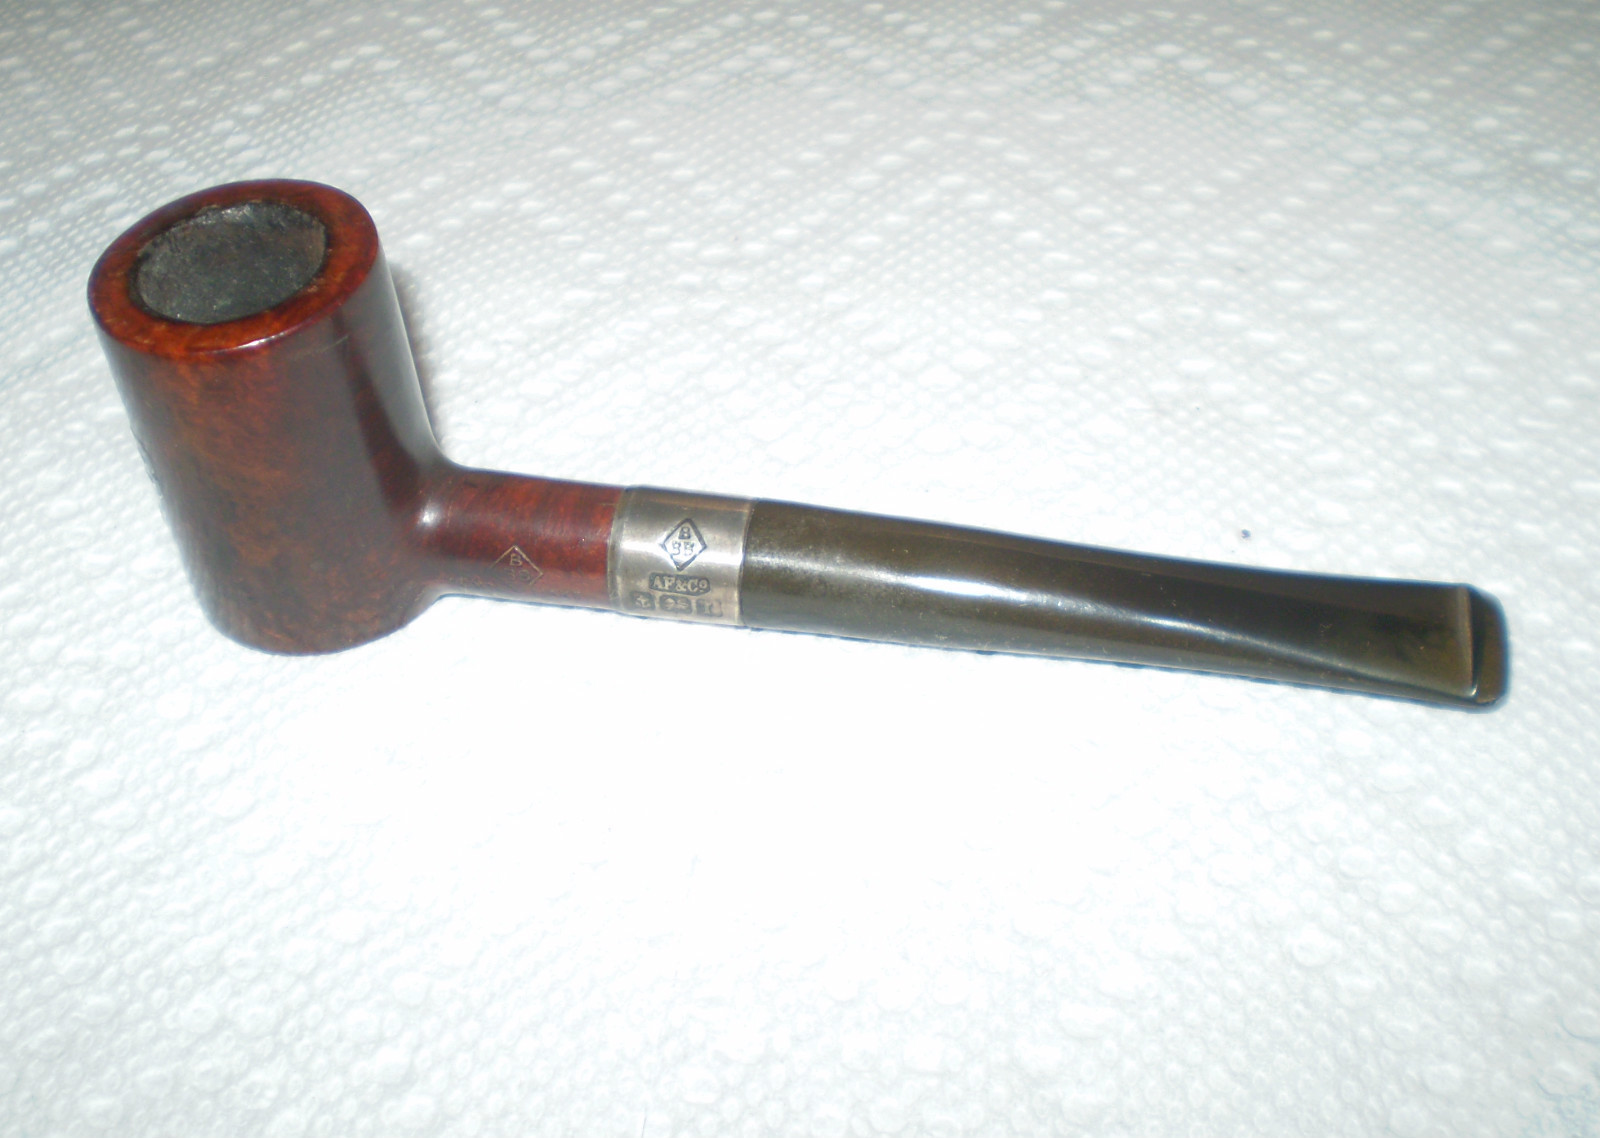
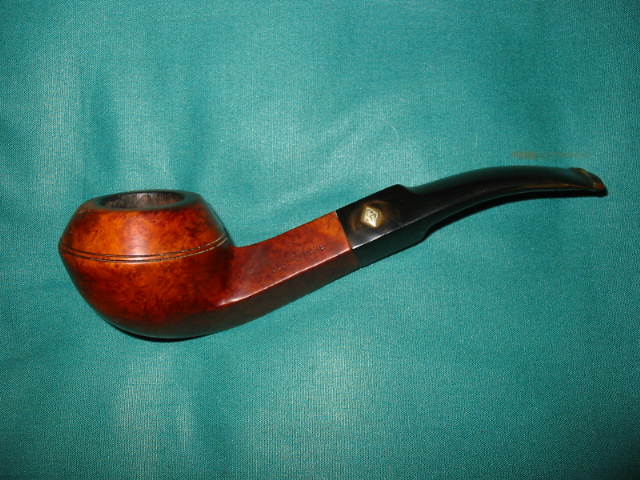
I had this old bowl in my box that just looked like a Barlings. I took it out and studied under bright light and a loop. It had the arched Barlings over Make. The other side was stamped EL and Made in England (I believe). It had a serious crack in the shank so I superglued it and banded it. This little pipe became the definition of frustration for me. It was a beautiful and I was incredibly hopeful when I cleaned it up and prepared it for the new stem I had cut for it. The grain was very nice and to find that it was an older Pre-transition Barling’s pipe was exciting. The bowl cleaned up very well. The shank and new band looked great. All that remained was to finish working over the stem for it.

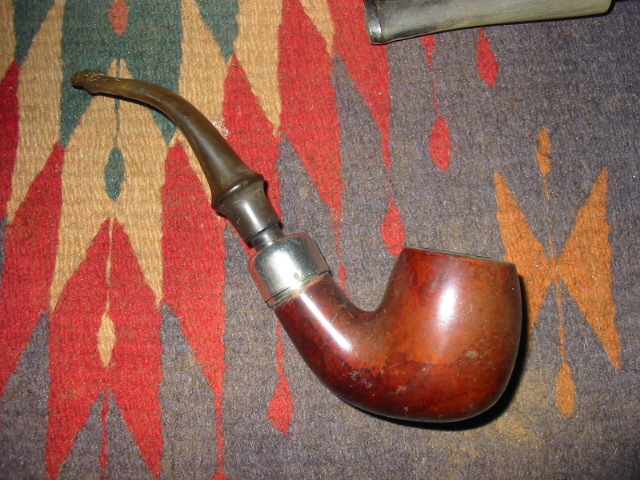
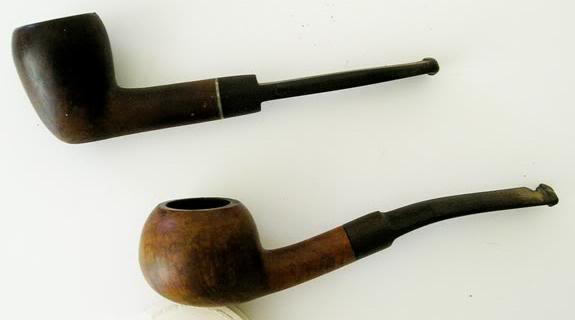
About that time my wife came down to the basement where I was working on it and we decided to go for our Saturday morning walk about. We had planned to take the bus down to an area we like to visit and check out the antique shops. This is something that we both enjoy so I put the little Barling’s my pocket and brought along some sand paper to work on it while sitting and waiting for the bus. We had a good morning, went to the Vancouver Flea Market and even found a couple of older Peterson pipes that I picked up. We decided to have some lunch before going home so we walked over to a nearby Korean BBQ and ordered a nice lunch.

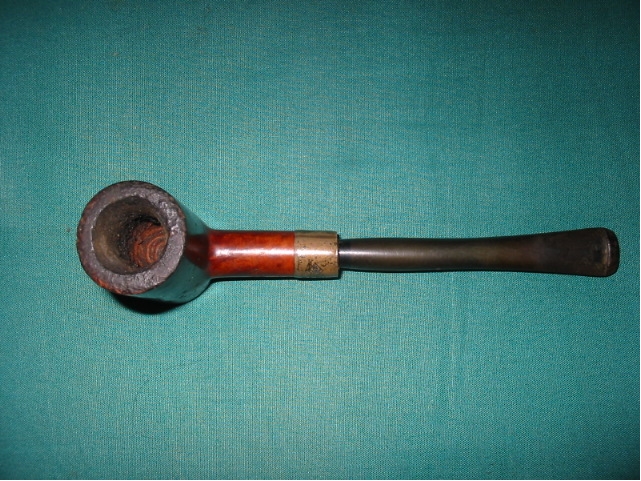
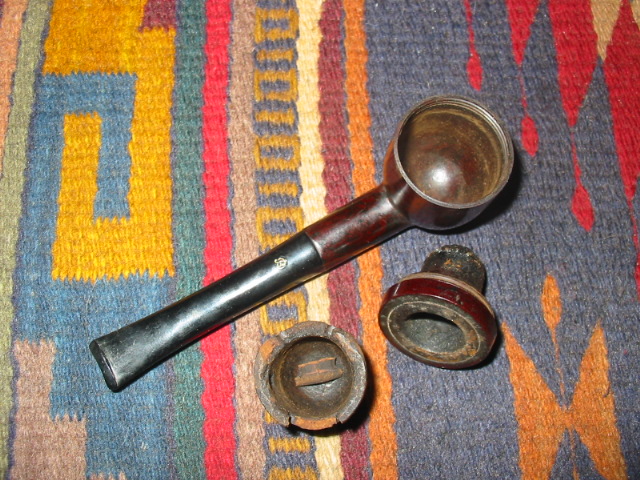
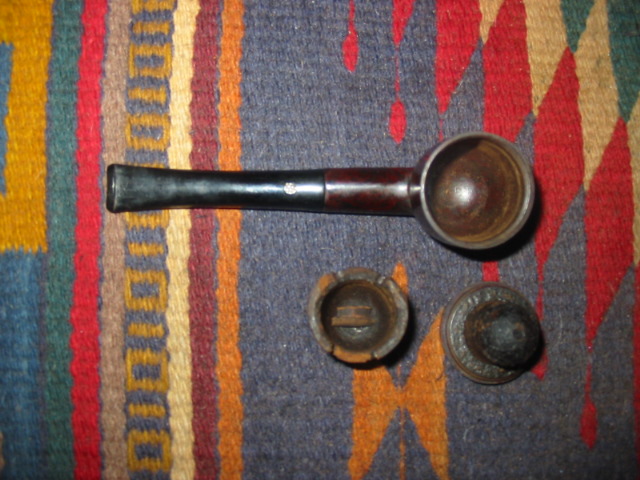
While we were waiting for our lunch I guess the pipe fell out of my pocket. I did not notice until the waiter stepped on something and I heard a crack. Well the long and short of it is when we sat down to lunch it had fallen out of my pocket and when the waiter stepped on it the shank cracked off just ahead of the band. I had a sick feeling as I picked up the pieces of the broken old timer. My visions of a nice older Barling’s Pot shape were pretty much crunched. I put the pieces on the table and looked them over as we continue to wait for the meal and I grumbled about my stupidity in not zipping the coat pocket and also about bringing it with me in the first place.

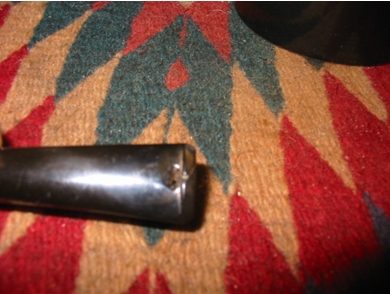
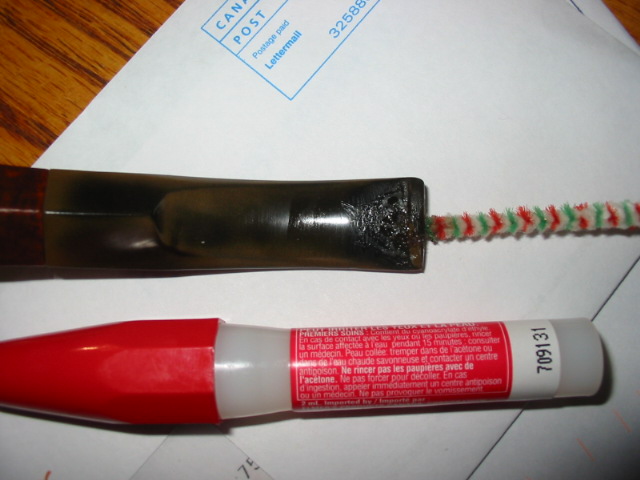
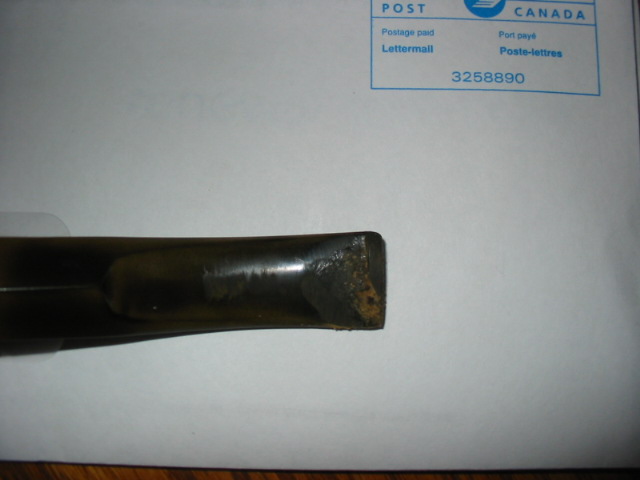
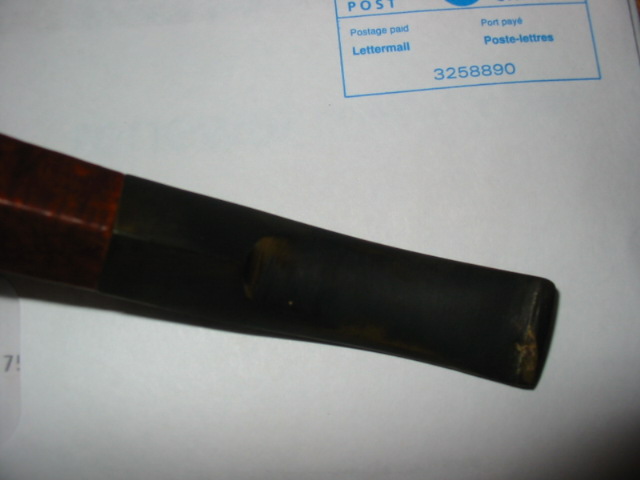
Once we had finished eating and headed home I had calmed down enough to think about what I would do with the pipe. I took the pieces to the basement work table and turned on a bright overhead light so that I could examine the damages. As I looked at the broken shank I could see that the wood was darkened, almost burned around the crack. It was almost as if the heat in the shank had found a flaw in the briar and followed it outward to the surface. It had not gotten all the way to the surface but was just under the outer layer of the finish. So it appeared that the crack was worse than I had imagined.

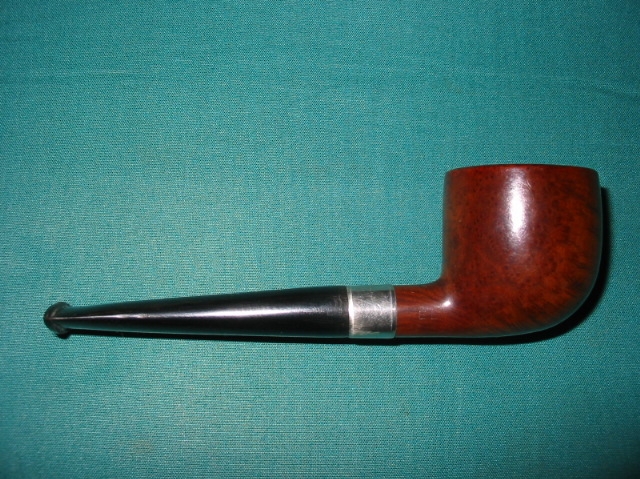
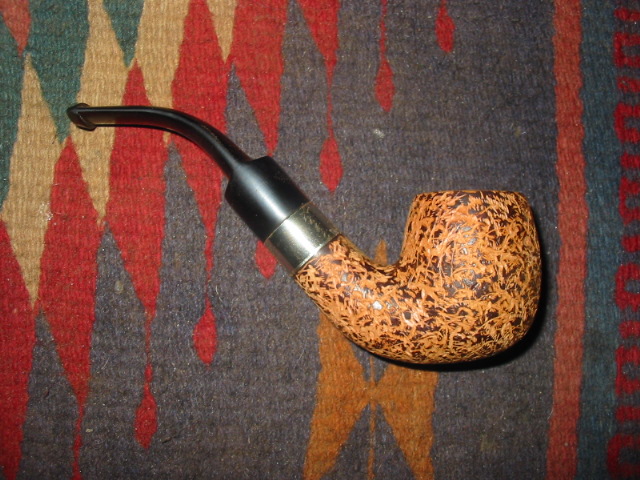
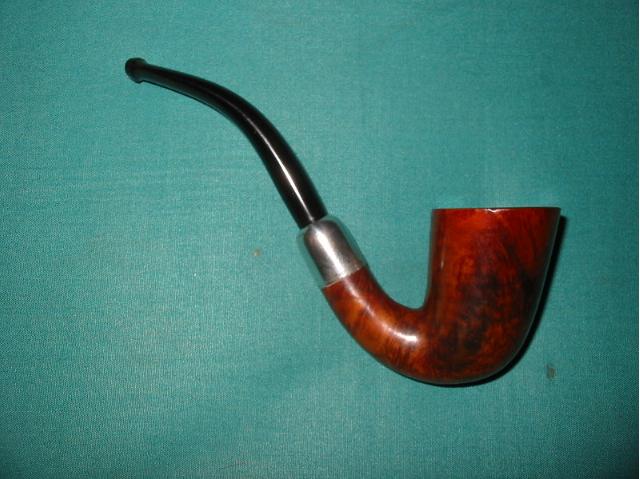
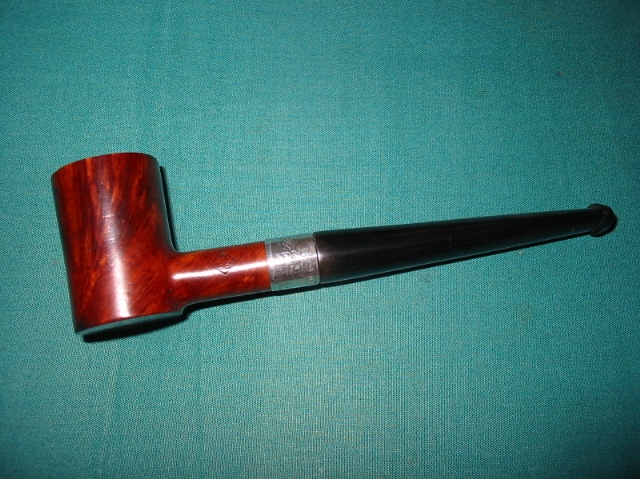
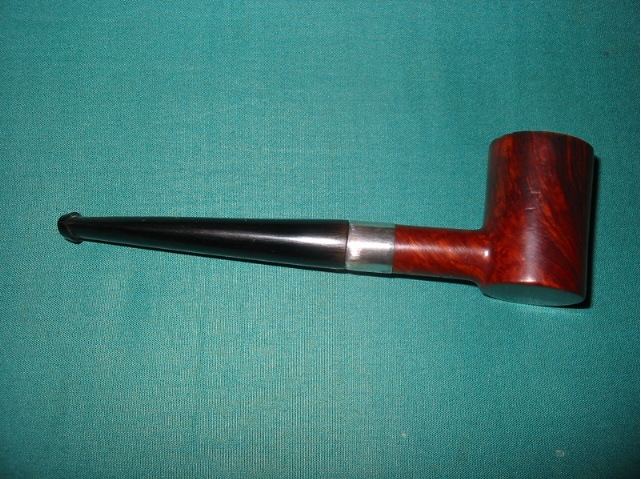
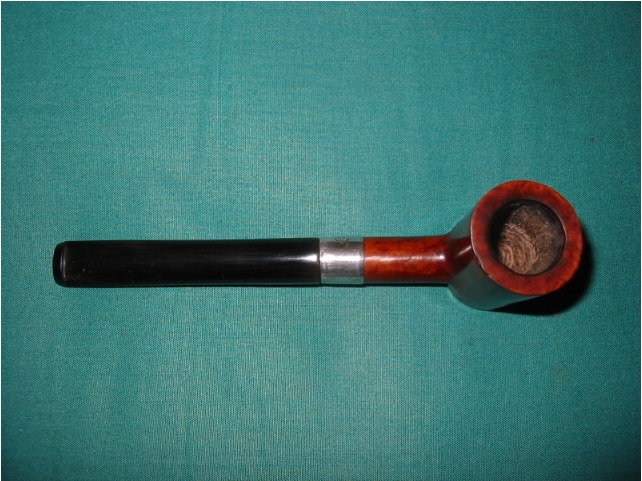
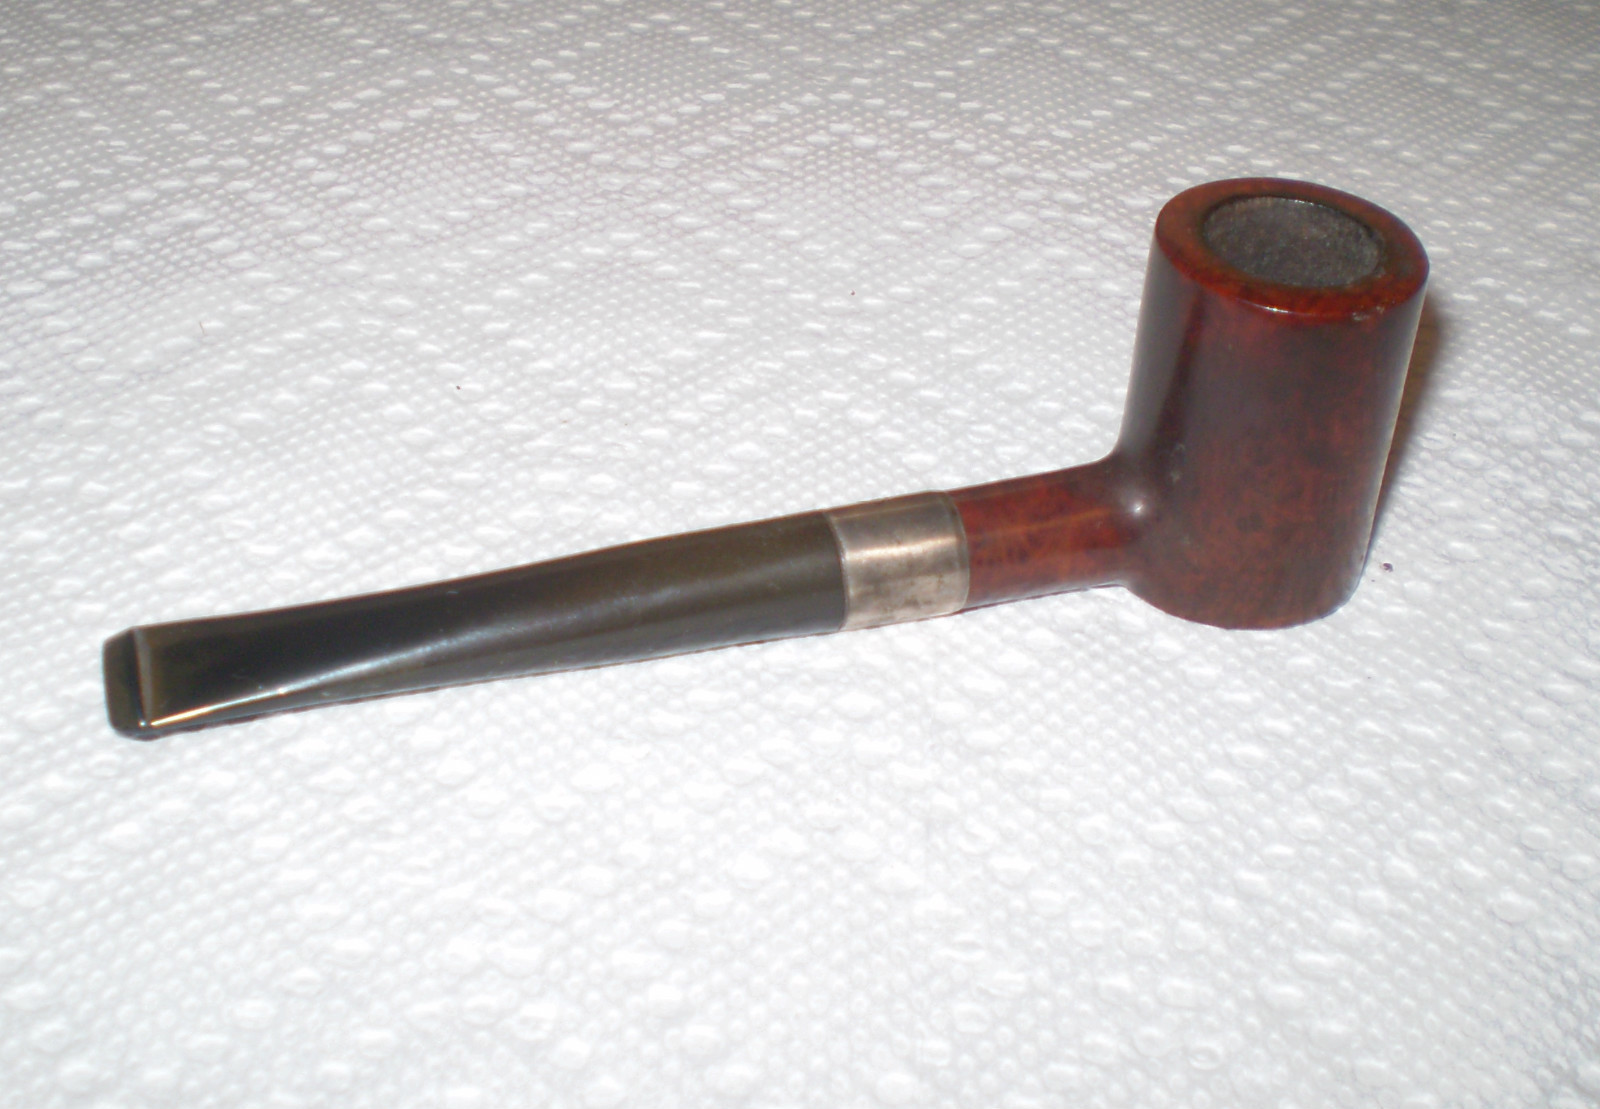
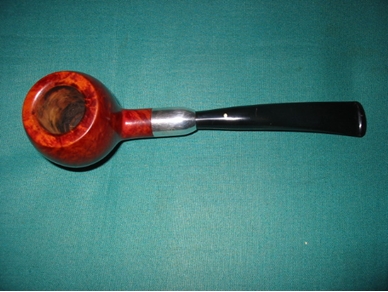
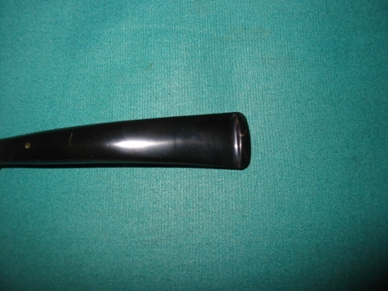
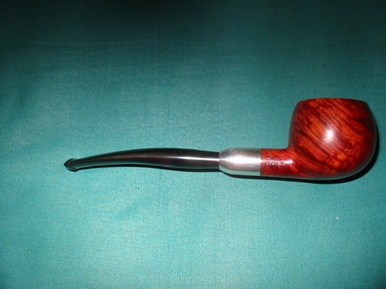
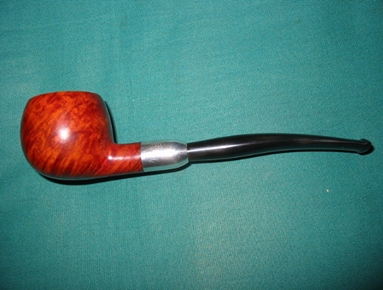
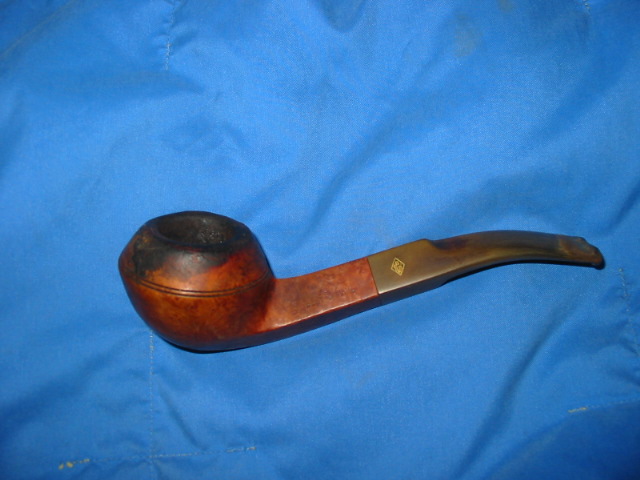
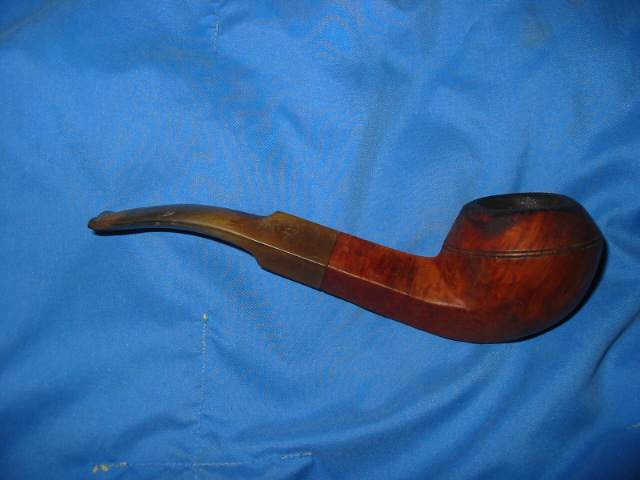
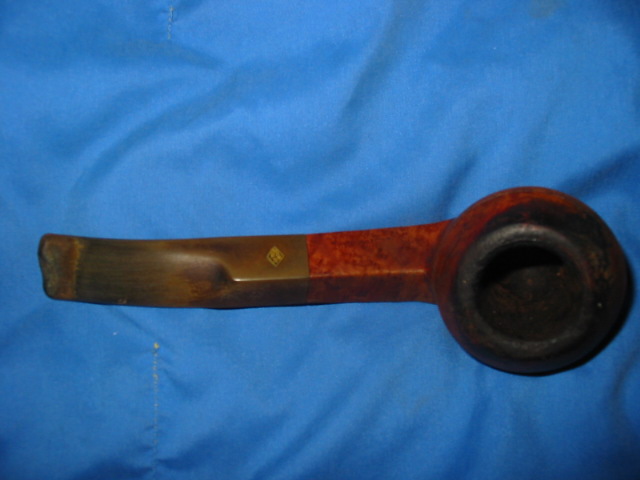
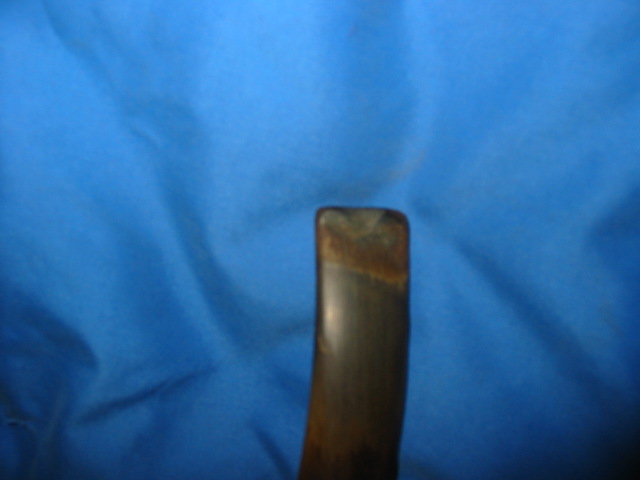
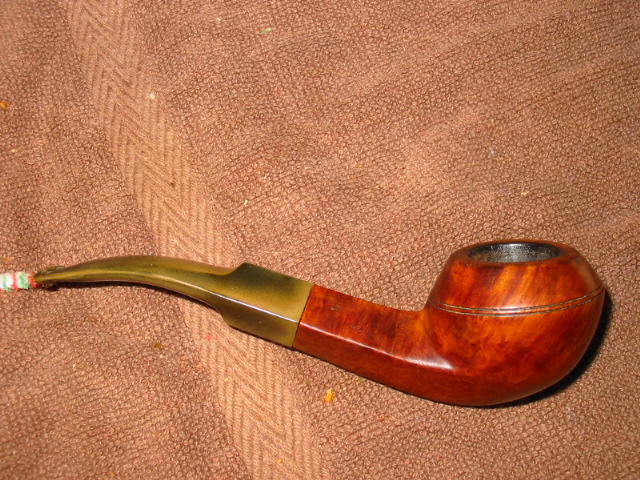
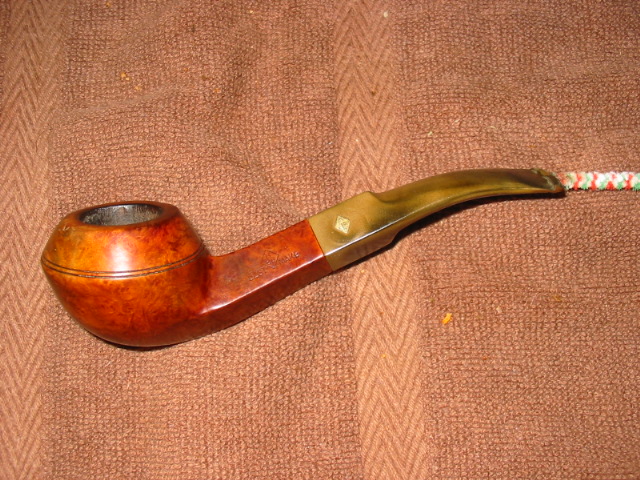
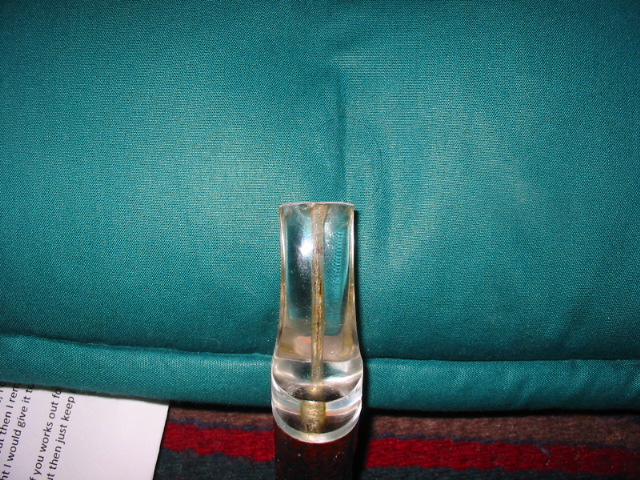
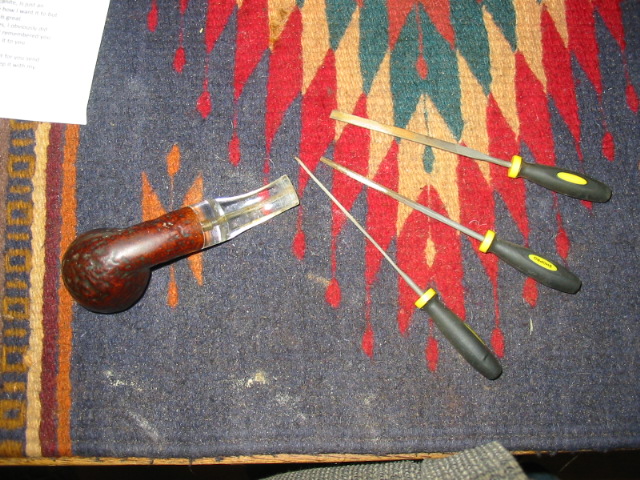
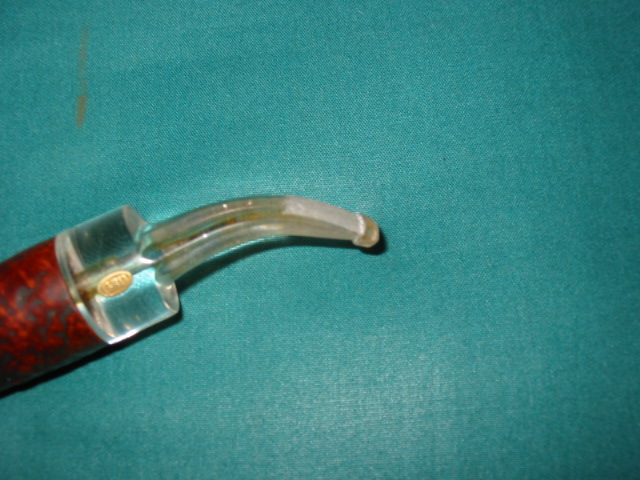
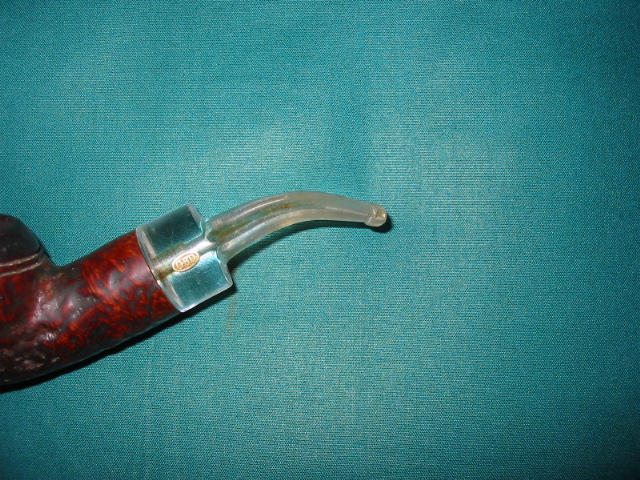
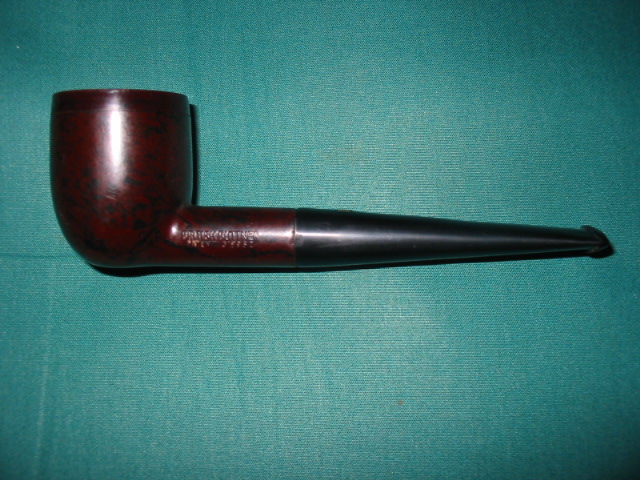
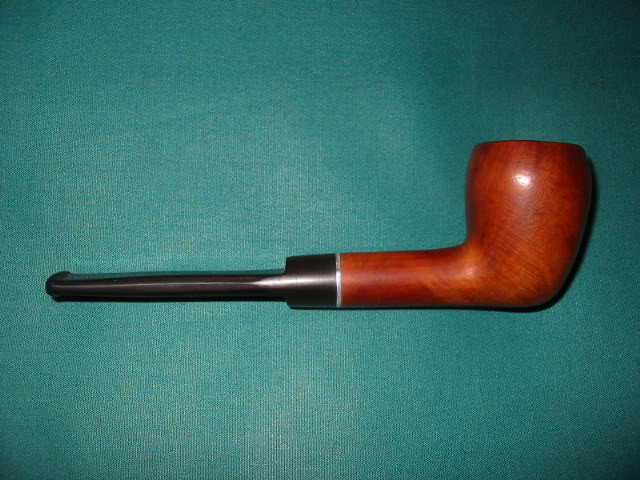
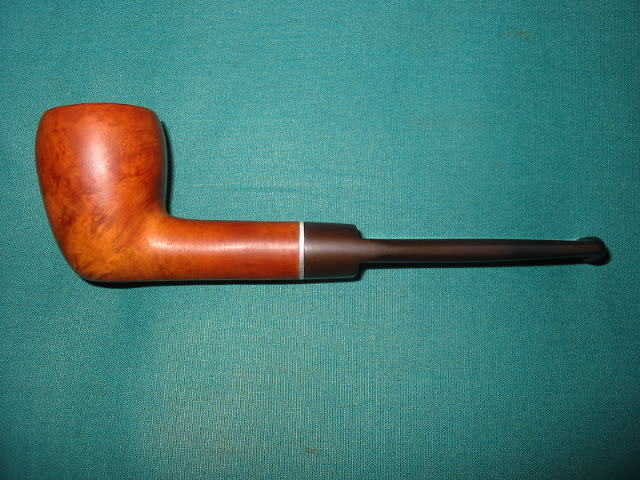
That helped me to get over being incredibly frustrated and disappointed in the broken shank. So I spent some time looking it over and decided I could work with it. I decided to turn it into a nose warmer. The saddle stem I had made was too small in diameter to fit so I had to cut another stem. I cut off the ragged edges of the break and used a piece of sandpaper on a solid board to face the shank again. I also drilled out the shank and opened it up enough to accept the new tenon. The tenon is a bit shorter than normal 5/8″ to allow a little difference between the opening in the bowl wall and the mortise. I re-banded the shank for a second time to strengthen the shank after the previous break. I fit the stem to the pipe and sanded and polished it to a shine. Then I buffed and waxed the “new” little pipe. I made it such that I can one day put a church warden stem on the bowl should I desire to do so. For now though it is a nose warmer with a short taper stem. Total length is 4 3/4 inches.

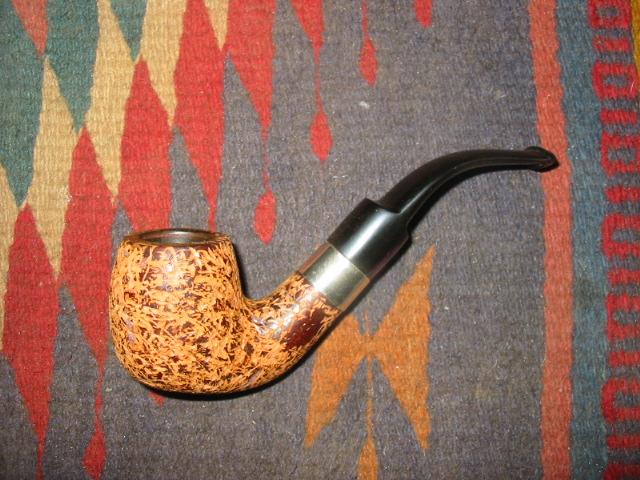
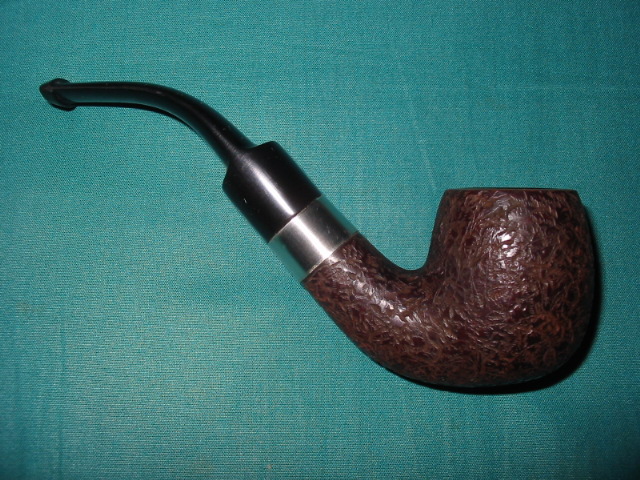
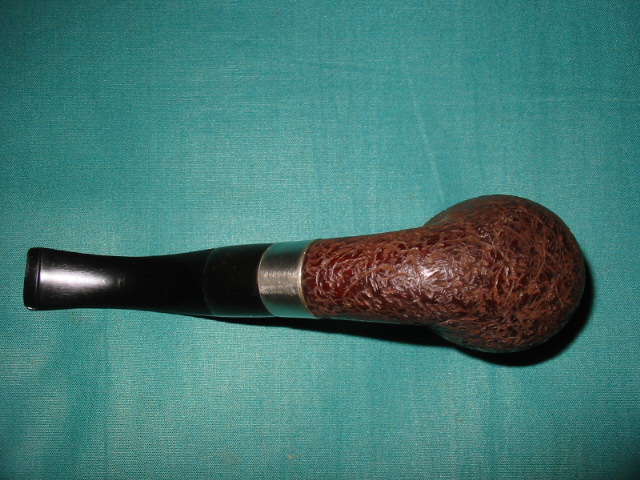
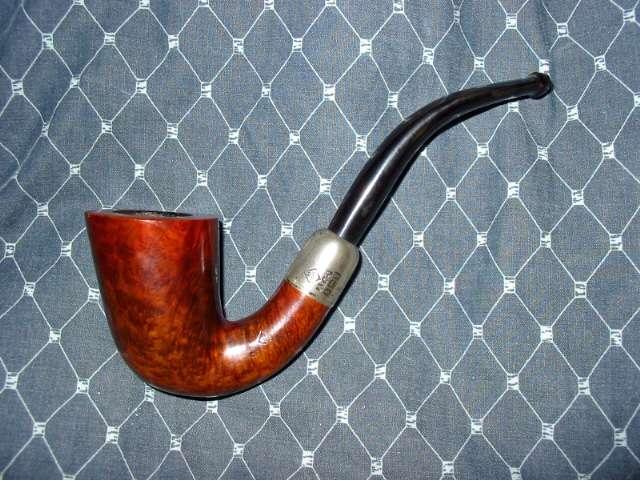
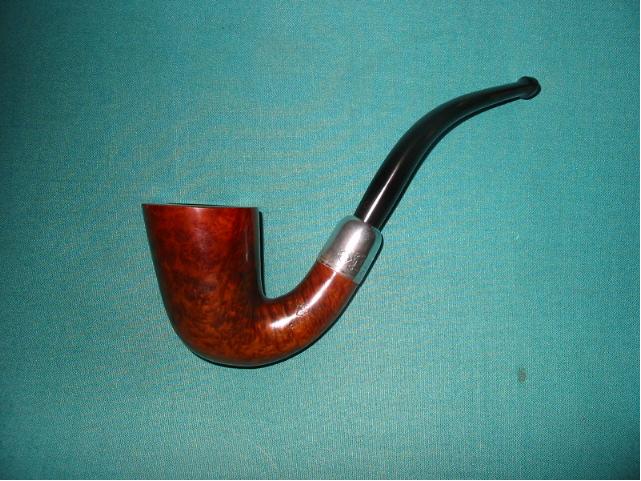
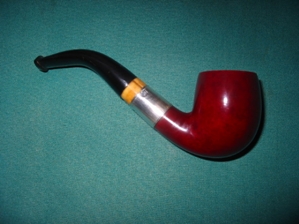
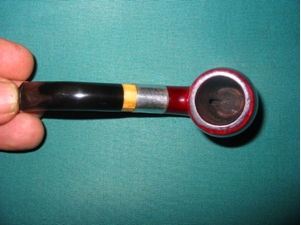
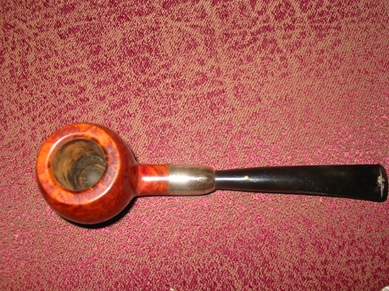
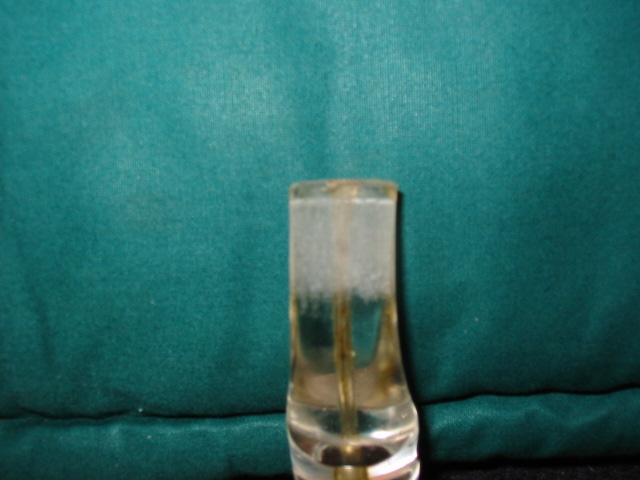
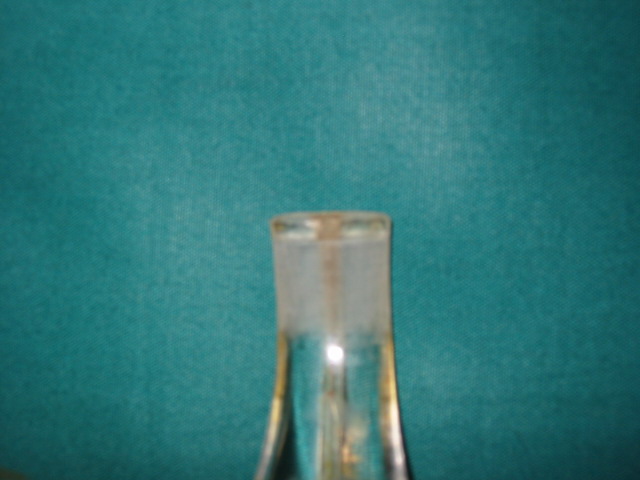
Here are some pictures of the finished pipe. I had pictures of the pipe before and after the break but somehow they were erased so this is all I have left to show. I hope you can imagine what it looked like with the new saddle stem before it broke. But if not, you can see the new version. I am also ordering a churchwarden stem for it so I can fit one of those to it as well. Should look great that way as well.

ImageImageImage

Old Croydon-Reborn


I have spent a bit of time on this old Croydon Bent (Peterson Line of seconds I believe). In fact I probably spent more time than I should have done, judging by other refurbishers throw away buckets. Sometimes I just have to see what I can make of an old tired ugly looking pipe. It is a challenge more than it is a labour of restoration. In fact it could probably be argued that when I am done with this one it really no longer should be considered a Croydon at all. I suppose it is a matter of how far one goes in the process of restoration before it becomes a totally new work of briar. In my mind this one would probably qualify for the removal of the name – or at least a hyphenated name CROYDON-REBORN.

When I received this one it was in pretty rough shape. In the pictures below you can see the state of the finish on the bowl. There were places where pieces of the lacquer finish were peeling away and falling off. The stain on the bowl was spotted and variegated. Even the many fills all over the bowl had shrunken significantly and what remained were dips and divots in the surface. The rim was one part of the pipe that was in pretty good shape. It had some tar build up and a bit of blackening but no nicks and dents. That is actually remarkable given the condition of the rest of the pipe. The silver shank cap was split in half and torn from the stem being jammed in and out of the bowl. The P-lip stem was also marked with tooth chatter, was oxidized and dented.

ImageImageImage

I did not have any end caps in my collection of pipe odds and ends so I decided to put a regular nickel band on the shank as it was thin and weakened from the broken shank cap. I cleaned the shank end with alcohol and dried it out. I heated a band and pressure fit it on the shank. There was a small gap at the edge that I filled with wood glue to give stability to the shank. I probably should have waited to apply the band but the shank seemed fragile and I wanted to stabilize it before further work on the bowl.

I have never liked the thin Peterson type stems so I decided to restem it with a saddle fish tail stem. I used my PIMO tenon turner and turned the tenon close and sanded it to a good tight fit. I used my Dremel to take down the excess diameter of the stem and worked on the ridges and seams with the Dremel. I sanded the roughness of the new stem until it was smooth with 240 grit sandpaper followed by 400 and 600 grit wet dry sandpaper and a bit of water. It was finished with the regular regimen of micromesh pads – 1500, 1800, 2400, 3200, 4000 and 6000 grit. The final polish was done on the buffer with White Diamond and carnauba wax.

The bowl was a major problem. I tried to strip the bowl using acetone and 99% Isopropyl alcohol and could not break through the finish – don’t what they coated it with but it would not let go. I resorted to sanding the bowl to try and remove the finish and sanded, sanded and re-treated it with acetone and alcohol. The finish was finally gone and I had a raw briar bowl with so many fills in it that it looked like it had freckles. I decided to try staining it with a dark brown stain to hide the fills and give it a good deep colour that was a bit opaque. Once it was dry I buffed it and polished it with wax. It looked really awful and I hated it!!! Soooo… I decided to rusticate it. I used my fist full of nails (pipe with nails inserted in it) to do the rustication that appears in the photos below. The previous coat of stain that I had applied helped with the process of rustication and I could clearly see where I needed to do a bit more work. This is when I wished that the band was not present as it would have been a bit easier to avoid contact with the band and the rusticator.

Image

ImageImage

Once the rustication was acceptable to me, and the pipe felt good in the hand I prepared it for staining. On this one that involved using the floral frog to knock off any loose chips of briar and to smooth out the surface before I wiped it down with a damp alcohol cloth. I also sanded the rim smooth and used the micromesh to get rid of any scratches. A smooth rim and a smooth spot around the Croydon stamping would look good on the finished pipe. I decided to go for an aged leather like finish on this pipe as it seemed to fit the shape and the look. I gave the pipe a coat of black stain as an undercoat and then buffed it off the high spots. I gave the entirety a coating of Fiebing’s Medium Brown for the top coat. I flamed it and after drying took it to the buffer for a light buff. I waxed it with Halcyon II and buffed it with a soft cloth to give it the final look. Below are pictures of the finished pipe. In my book it is a significant improvement over the original!

ImageImageImage

One of my favourite refurbs – 1919 BBB Bent Calabash


I was going through some old pictures on my hard drive the other day and found this one that I bought on EBay for a very reasonable price early in 2008. I finished refurbishing it in March of 2008. It was and is one of my favourites. You can see from the picture below what kind of shape it was in when I got it. In the pictures on EBay it looked worse than it does in the picture below. I opened the box when it arrive expecting far worse. I bid on it because I liked the shape of the pipe and I figured it would be a challenge.

The stem was oxidized to the brown white coloration that appears below. It almost appeared to be a horn stem – but it was not. When I removed it from the shank – which took a bit as it was stuck by the goop in the shank and the oxidation that portion was black. I put it in the freezer for a short period of time to cause some expansion and contraction in the stem that would loosen it from the shank. When I took it out of the freezer it was easily removed. I went to work on the inside of the stem with shank brushes and pipe cleaners, both bristle and fluffy dipped in alcohol. I worked on the stem until the cleaners came out white and clean.

I then mixed a batch Oxyclean and soaked it in the solution overnight to soften the oxidation. I find that the Oxyclean solution (warm water and a half scoop of Oxy in a pint jar) works wonders in softening the oxidation. It does not remove it but it made it easier to remove. Once I took it out of the solution the next morning to work on it I used 240 grit sandpaper to remove the oxidation. It worked well to take off the brownish white coating on the stem. Once that was finished it was a dull brown and I continued to work on it with the 400 grit wet dry sandpaper until it was a dull black. I then progressed to 600 grit wet dry sandpaper to further remove the grime. I used both of these sandpapers with water as I find it gives the grit more bite on the stem. I had not discovered micromesh at this time so I used 800 and 1000 grit sand paper and continued to sand the stem clean. By the time I used the 1200 grit wet dry sandpaper the stem was looking like new. I took it to my buffer and used the Tripoli and White Diamond to finish the job.

While the stem was soaking in the oxy I reamed and cleaned the pipe bowl and shank. I worked on it until the pipe cleaners came out clean. It took many bristle cleaners and many fluffy one to get it clean. I also used cotton swabs in the shank to remove the tars and build up there. I scrubbed the outside of the bowl and rim with Murphy’s Oil Soap to remove the grime and deep seated dirt on the bowl. After I finished the scrub and clean I put the bowl in a bath of Isopropyl alcohol to remove any remaining dirt and grime and the badly damaged finish on the bowl. That was the first night of my working on the pipe. I went to bed that evening with both the bowl and the stem soaking in their separate baths.

Image

The next morning I finished up the stem and set it aside as I described above. I turned my attention to the pipe bowl. I removed it from the alcohol bath and dried it off. I used a wet cloth and a butter knife heated over a flame to raise the dents in the outer rim of the pipe and the sides of the bowl. The process is quite simple. You wet a cloth, wring it out so it is not dripping wet yet still wet. Then fold it and put it over a dent. Heat the knife (I use our gas stove to do it but have also used an alcohol lamp). I then lay the flat blade of the knife on the dent. You will hear a hiss as the heat causes steam to rise from around the blade. The steam causes the dent to rise. I applied the blade repeatedly until the dents were minimized. Then I took it to my work table and used a flat board and a piece of sandpaper to top the pipe just enough to remove the remaining dents and damage. I do that on a flat surface to maintain the flatness of the rim without changing the angle. When that was finished I wiped down both the bowl and rim with an alcohol damp cloth to remove any residual sanding dust.

I then used an aniline stain, in this case medium brown as I had researched and found that the colour matched the colour of the pipe when it was new. I used the dauber that came with the stain and applied it to the rim and the body of the pipe. I started at the bottom of the bowl and worked my way up to the rim. The rim always the last part I do. Once it was completely covered with stain I ignited it with my lighter to set the stain. The process is called flaming the stain (at least that is what I call it.) I let it dry while I put a coat of wax on the stem.

When the stain was dry I took the bowl to my buffer and gave it a buff with Tripoli and White Diamond to remove the top coat of the stain and the opacity of the stain. The result can be seen in the picture below. I also used some silver polishing compound applied with a soft cloth to remove the tarnish on the end cap. I finished that process with a silver polishing cloth to give it a good shine. When that was completed I gave the bowl and cap a good buff with carnauba wax then reinserted the stem and gave the entire pipe an extra coat of wax for a finish.

Image

I still smoke it today and it delivers proudly! The last two pictures below show what the pipe looks like today after 4 years of use. It has developed a deep patina to the bowl and the warmth of the medium brown stain has mellowed into a richness that is really nice. Repeated waxings over the years have helped mellow the finish and also deepen the black of the vulcanite stem. This is one of my favourite old pipes. It truly is a reborn pipe. In 7 years it will be 100 years old. Some days I wish it could talk because I can’t even begin to imagine the stories it could tell.

ImageImage

The 1912 BBB Poker


Blog by Steve Laug

I picked up this old 1912 BBB Poker on EBay not long ago. It is stamped BBB in a diamond on the shank and on the underside England. The silver is hallmarked Birmingham 1912. It is a smaller group 1 or 2 sized pipe. In the pictures the military stick bit looked like it belonged. It looked like it was shipped that way from the factory. The grime on the silver and on the shank as well as the oxidation on the stem made it appear to be that style of pipe. When it arrived with the other 5 pipes that I bought with it I examined it a bit more closely. In the picture below you can see the roughness of the stem. It is definitely poorly cut. The closer I looked the more I realized that it was a poor replication of an older stem. A BBB pipe of this age came with a different style of military stem and it had an orifice button rather than a slot like this one. The stick bit was not original as it was a slotted bit and was not finished smoothly. There were lots of file marks on both sides of the stem. When I removed the stem I was even more certain that it was a poor copy. The one thing I was still thinking was that it was definitely spigot or military bit pipe.

ImageImage

Then I began to work on the shank and the band. Someone had darkened the end of the shank to make it look almost black like the tarnished silver band. Once I cleaned the silver and cleaned the shank I could see that it was not a silver end cap at all but a very typical BBB silver band. In the picture below you can clearly see the end of the shank showing as it sits inside the silver band. I used a 1500 micromesh pad to clean off the end of the shank and return it to wood. When I re-stained the pipe I would also re-stain the shank end to match. It was clear that I would need to do a bit of research on what kind of stem was originally on this poker style pipe if I was to restore it to its original glory.

Image

I have a copy of the BBB Catalogue reprint from Gary Shrier so I got it out and went to work researching the look of the missing original stem. It became clear rather quickly that the pipe shape I had originally came with a taper stem with an orific button. In the catalogue is the exact shape in the exact size. I could not believe it. I laid the bowl on the page and then traced out the shape and size of the stem. A part of my hobby refurbishing is collecting old stems. I buy them wherever and whenever I find them and stockpile them in an old coffee can in my office. I went and got the can and emptied it on my desk to sort through what I had. I have yet to organize them by size so it is a matter of dumping the can out and digging through them. Well, I found one in my can of stems that had the right orifice button and the correct taper so I turned the tenon and fit the stem to the pipe. I used my Dremel to remove excess diameter from the stem so that it was the same diameter as the shank and band.

I also had to clean up the bowl of the pipe as the top was pretty beat up and the inside rim had been chipped and cut as if it had been carelessly reamed with a knife. I steamed the dents from the rim and carefully did a minor topping on the bowl to bring the top back to smooth and the inner and outer rim to smooth. I also chamfered or beveled the inner rim to bring it back into round. There were also dents on both sides of the bowl so I steamed those out as well. I use a wet cloth and a hot butter knife (heated over a flame) to raise the dents. I finished the work on the pipe by re-staining the top to match the bowl then buffed it and gave it a final polishing with White Diamond and then several coats of carnauba wax.

Here are pictures of the finished pipe. Other than being in colour it is a perfect match to the one in the catalogue.

ImageImageImageImage

Edit – 24 Feb. 2013 – I just came across an old BBB poker on eBay that is similar to the one above. I did some research on the stem on the one above and restemmed it. The one in the eBay photos is a newer version of the same pipe number. I have attached two photos below for sake of comparison.

BBB Poker BBB Poker 2

Refurb on an old AD pipe from 1909


Blog by Steve Laug

I finished refurbishing this old timer. I love the looks of it and wanted to share it with you all. It is a bit of a mystery in that it has no stamping on the bowl. The only marking is a hallmark that dates it to 1909 and the letters stamped in the silver of the band AD. The pipe is a cased little thing – just 4 inches long. The stem has a bone tenon but a slotted button instead of the orific hole on most pipes of that era. The ivory band is part of the stem and it inserts into the metal band. The bowl is stained an oxblood red. I reamed and cleaned bowl and shank. I cleaned the threads and the inside of the stem with a shank brush, bristle pipe cleaners and fluffy cleaners. The silver band was polished with tarnish cleaner and a silver cloth. The stem was sanded to remove chatter and then I used Micromesh pads 1500,1800, 2400,3200 4000 and buffed with Tripoli and White Diamond. I rubbed down the case with some leather renewer and it definitely looks better.

The book, Who Made that Pipe attributes the AD stamping to Alfred Dunhill. The Silver Hallmarks site dates it as Birmingham Silver 1909 and the Makers Marks identify the work as being done by Arthur Downing Ltd. That sounds correct to me. The final attachment photo is the clip from the Hallmarks Site. So the mystery remains – is it a Dunhill or is it a nice older pipe banded by Arthur Downing Ltd? Who knows but it smokes great.

Here are the pictures of the pipe before I worked on it
AD1
AD2

Here are some pictures of the finished pipe.
AD3
AD4
AD5

And here is a picture of the logo on the silver band as found on the British Hallmarks site. It matches the stamping on the silver band exactly.
Image

Stem Bite through repair – Savinelli Punto Oro Prince


Blog by Steve Laug

I picked up this little Savinelli Prince because I really like the shape of the pipe and the spigot style stem. I bid knowing full well that the stem had a bit through on it. Once it arrived I could have replaced the stem but decided to do a stem patch on it. The pipe itself was in great shape other than the bite through near the button on top of the stem. The underside of the stem was clean with no tooth marks or chatter. As I examined it I also noticed that the previous owner seemed to have done a halfway patch on it and in the process had broken a chunk out of the button and repaired with white glue. The white glue may have been applied by the seller to keep the pieces together while he sold it. I will never know for sure, but the glue would not hold for long as it is water soluble. The two pictures below show the extent of the damage in the stem and give a good idea of the state of the pipe as a whole. It was a great pipe with some unfortunate damage to the stem.

ImageImage 

I cleaned off the broken chunk with a dental pick, which was surprisingly easy and makes my above assertion about the seller doing a quick patch up more likely. I cleaned off the debris on the chunk (it was not very big, but was an essential piece of the button). I washed it with Isopropyl alcohol. Then I re-glued it with clear super glue. I purposely over filled the crack and pushed the piece in place until it held. I would sand off the excess glue once I had dealt with the bite through on the stem.

The bite through was a mess as well. There was oxidation in the hole as well as some built up dust and dirt. I picked the hole clean with the dental pick (by now you know that this is one of my indispensable tools in the refurbishing process). I wiped it down with a cotton swab and Isopropyl alcohol to get a good clean hole. By this point it was black and clean. I used a small round needle file to clean up the rough edges on the hole as I wanted a solid surface to work with. I washed it yet again with the alcohol to remove the grit from filing.

This time, instead of using the greased pipe cleaner in the slot I used a small nail file that fit the slot perfectly and gave a base to the glue. The hole was too big for just a pipe cleaner to provide the coverage. I greased both surfaces of the file and inserted it in the slot in the button. I gradually built up the hole with repeated applications of super glue. I let the layers dry before adding a new coating of glue. I have found that if I build it slowly around the edges it gives a better repair. Once it was built up I over filled the hole to make sure it is well covered and the hole is no longer visible. On this particular pipe I used clear super glue because I was out of the black super glue. Both versions work exceptionally well but the black has the benefit of being the same colour as the stem and is a little less visible.

After the glue was dried I used the flat blade needle file to rework the button back into shape and give it the nice sharp edges that it should have. I sanded the stem smooth, removing the excess glue and the roughness of the glue. I went on to sand it with 400 and 600 wet dry sandpaper and a bit of water to remove the scratches left by the 240 grit paper. Then I used the full range of micromesh pads, 1500, 1800, 2400, 3200, 4000 and 6000 grit to smooth it out. As usual I had a bowl of water near at hand to dip the pads as I sanded and to wash them of the slurry that comes as I sanded. Once they were smooth and shiny, the last three grits of micromesh really do a nice job giving the stem a sheen, I took the pipe to my buffer I finished it with White Diamond polishing compound.

ImageImageImageImage

I have been asked in the past how long the stem patches hold up and the durability of the patch. I have no long term proof of their durability but I have had this pipe for about two years and have smoked it quite a bit and the patch shows no sign of giving way. I clean it as I would any other pipe with pipe cleaners after use and then periodically breaking it down to give it a thorough cleaning inside and out. I would say that is a pretty good track record for a patched pipe. Time will tell but in the meantime it is very smokeable and looks great in my opinion.


Rebuilding a Button on a BBB Bulldog


Blog by Steve Laug

I picked up this older BBB Bulldog on EBay because I liked the shape of it. The bowl definitely needed some work as the lava had erupted over the front rim and down the contours of the pipe. The pictures below show the state of the bowl when it arrived. But that was not why I am writing about this pipe. That kind of refurbishing is part and parcel of buying older pipes on EBay. They always are pretty much in the state that this one was in. All of them require the same kind of procedures to clean them up and return them to a state of readiness for the new owner. But have a look at the button on the last three pictures below. It was virtually gone. I could have fit a new stem on the pipe but I wanted to retain the brass BBB logo and did not want to move it to a new stem. I also wanted to try to build up the button and see what I could do with it.

ImageImageImageImage

I have used Super Glue or Krazy Glue to repair bite throughs in the stem but had not use it to do repairs this extensive. I love the process of trying to devise a workable fix and so I decided to give it a go. I greased a fluffy pipe cleaner with olive oil and inserted it in the airway at the button. I do this so that the glue does not fill the airway and grease it so that the pipe cleaner is not a permanent feature of the stem as the super glue will stick to anything including your fingers if you get it on them. (By the way there is a solvent that is available should that happen to you.) The surface of the button was dirty and oxidized so I cleaned that with my dental pick and some acetone. I clean the surface before putting in the glue. I also sanded it to roughen the surface so the glue would bond well. In the top picture of the stem you can see that the top of the button is indented and the lip is worn smooth. The second stem photo shows the underside and you can see the major dent that needed work and the lip that was pretty well gone. I filled the hole on the underside first so that it would bond. Then I gradually built up the dent, letting it dry between applications of the glue. I believe it took 5 or 6 applications of the glue. Once it was filled I added more to build it up so that I could re-cut the button. In the picture below the patch is clear. It is a very rough surface but it is ready for the sanding and filing that will go into restoring the stem to normal. I built up the deep dent and also built up the missing portion of the button. On the top side of the stem I also built up the button in the same fashion.

Image

I set the stem aside to dry until the glue patch was very hard and turned my attention to the bowl. You can see in the pictures below that I took off the lava and tars on the top and cleaned the inside and outside of the entire bowl. By the time I was finished with the exterior of the bowl and shank and cleaned out the bowl and the inside of the shank with pipe cleaners and a reamer the stem was ready to work on. I reassembled it for the picture below.

ImageImage

You can see from the two profile pictures above that the button is present once again. The idea is to build up the end of the stem to the degree that the profile shows the button as it would have been on a pipe of this age. It took a layering process with the super glue to get it to the point it is in the above pictures.

The two photos below show the bottom of the stem as I worked on it with the files and the sandpapers. I used my small files, both the flat and the wedge file to cut away the material that I had built up to give a sharp button edge as differentiated from the surface of the stem. In the first picture you can see the initial cuts and the smoothing that I did to the surface of the stem with the files. I used 220 and 240 grit sandpaper to remove the rough surface of the glue on the stem and bring it to the right profile. The glue is very hard and it takes quite a bit of sanding to smooth it out. In the second picture you can see the final shaping that was done to the button and the surface of the stem is once again smooth. From this point all that remained was to sand it with 400 and 600 grit wet dry sand paper and then use the micro-mesh pads 1500, 1800, 2400, 3200, 4000 and 6000 grit on the stem. As usual I kept a bowl of water next to me to keep the pads wet as I sanded the stems. Each progressive grit polished the stem and button to a more clean and shiny stage. I also reworked the surface of the entire stem. Once that was done I took it to the buffer and used the Tripoli buff followed by the White Diamond buff to bring it to a sheen.

ImageImage

The last three pictures show the finished pipe – both the bowl which had been cleaned and polished with White Diamond and a light touch and then finished with some carnauba wax to complete it. The stem is completed in terms of bringing back the button and the stem profile. The area around the logo on the stem will need to be worked on with the edges of the micro-mesh pads to get in close and remove the remaining oxidation. Then the entirety will need to be lightly buffed and waxed. The main reason I posted these pictures is to show that the profile is now clear and the new button is clearly visible. The last picture shows the top of the stem and the button is clearly visible. There is a bit of oxidation in the button that I will need to work on with the pads as well but at least the old BBB Bulldog is now very smokable.

ImageImageImage

Reworking the button on a Perspex Stem on a GBD Prehistoric


I was gifted this older GBD Prehistoric by a good friend who knows I like working on seeming irreparable pipes.  He knows that I enjoy the challenge and that I work to get them back to a workable condition. The stem was truly a mess as can be seen from the photos below. It had bite through holes on both the top and the bottom of the stem. The button was destroyed by the bite marks. This one would prove to be a bit of a challenge. My usual method of repairing bite throughs with Super Glue would not work as the hole was on both sides of the stem. You can tell by the three pictures below the size of the hole. I included even the blurry ones to show the extent of the problem that needed to be addressed.

ImageImageImage

After carefully picking at the holes with my dental pick I could tell that the surrounding Perspex material around the holes was compromised and pieces continued to come off with very little pressure on the dental pick. It was clear then that I would have to shorten the stem back to the point on the stem where there was solid material to work with. To do this involved cutting off almost a ¼ inch of the stem. The two photos below show the stem after the material has been removed. I used my Dremel with a sanding drum on it to take back the stem to this point. Care must be exercised to keep the finished surface straight and level. But I have found that this is fairly easy to do with the Dremel set at the lowest speed.

ImageImage

Once the stem is cut back to the solid material a new button has to be carved. I use a series of needle files to do this. Note in the picture below the three files that I used the most. The top one is a flat rectangular one that does a great job on the top and bottom of the stem to cut a straight 90 degree edge into the Perspex. The oval and the round file I used to open the slot in the button to match the shape of the one I cut off. Once the stem has been cut the airway at the end is merely a round hole or as in this case was barely flared. I like an oval slot in the button and the files do a great job in that process. I have two sets of needle files that I use. I clean the teeth on the files with Isopropyl alcohol and a brass tire brush. It keeps them from getting clogged with the Perspex dust.

Image

In the three pictures below you can see the button that has been cut in the stem. I also used sandpaper to thin the stem profile forward of the button to give it the proper slope and give the button some depth. Note the rough surface of the stem is caused by the use of 240 grit sandpaper to accomplish this task. The top photo is the top side of the stem at the button, the second is the underside of the stem and the bottom photo is a profile shot to show the look of the button. When the stem was at this point it still needed quite a bit of sanding to smooth out the new button and shape the stem. The edges in the profile are a bit sharp and needed to be rounded to match the part of the stem that remained untouched. I rounded the edges with the 240 grit sand paper to match the shape of the stem.

ImageImageImage

The next two photos below show the stem after that reshaping has been done. I then had to polish the stem to get it back to it clear sheen. I started that with some 400 and 600 grit wet dry sandpaper that was used with water to give it the bite to cut through the scratches of the files and the sandpaper. The first photo shows the pipe next to another GBD Rhodesian for comparison sake. You can see in that photo how much of the Perspex stem I removed to cut the new button. The second photo shows the shaping and flow of the stem once I have finished with the polishing with the wet dry sandpaper.

ImageImage

The last three photos show the finished pipe. The bowl was polished and the polishing on the stem was done with the micromesh pads through the 1500, 1800, 2400, 3200, 4000 and 6000 grits soaked in water to facilitate a good polish. Each grit level of micromesh took out more of the scratching that remained after the sanding. By the 3200 grit the surface was smooth and shiny. The last two grits gave it a thorough polishing and then I finished it on the buffer with White Diamond and carnauba wax.

Refurbed Piece of pipe smoking history – A Brittish Buttner Billiard


Blog by Steve Laug

I picked this pipe up on Ebay awhile back solely for my historical interest in this kind of pipe. I am drawn to creative pipe manufacturers and the search for a drier and cooler smoke. It is that interest that attracted me to the gadgetry of the British Buttner pipes. This is the second one that I have purchased on Ebay. The first one is older (patent is earlier)and has a yellow Bakelite stem and is a pot in terms of shape. I have also collected a Bakelite canister that holds an extra clay insert bowl. I saw this one and added it to the collection. It looks like a briar billiard but is not. It is a Bakelite bowl and Vulcanite stem. The tenon is long and extends to the air hole in the bowl. There is a clay insert that sits in the bottom of the Bakelite bowl. This one has a few chips out of it but is still workable. The rim unscrews and holds clay bowl (much like a gourd calabash. It is mounted on the rim and screws into the bowl. I cleaned the inside of all three parts and cleaned the stem and shank. I have polished it with wax and since have smoked it several times. It is a very different smoke – very similar to a calabash smoke; very cool and dry.

Here are some pictures of it taken apart before cleaning:

ImageImage

Here it is cleaned and polished.

ImageImage

Here are some pictures of the older British Buttner


Refurbed Breezewood Acorn


I picked this old timer up in the ebay purchase that included the Bertrams author. It was almost black it was so dirty. It is incredibly light weight. Once I got the grime off I could see a wee bit of the stamping left and it read Breezewood. I reamed and cleaned the inside. The stem is a screw mount like the old Kaywoodies. It has been clipped of stinger contraption but it is a good open draw. I cleaned the stem and used the micromesh sanding disks on it. The bowl was soaked in an alcohol bath to remove the finish and grime and then sanded with 220, 400, 600 sand paper and then micromesh 1800, 2400, and 4000 grit pads. Here are the before and after shots. Below the pictures I have posted a write up of the history of Breezewood pipes by the late Mike Leverette (a friend and historian of things pipe).

The pipe is pictured in the top photo below of the two pipes.

Image

Here is a series of photos of the refurbished pipe.

Image

ImageImageImage

Here are some informational ads on Breezewood pipes

ImageImage

I wanted to include this brief article by Mike Leverette as it gives background history that is not commonly known or available regarding these early alternatives to briar that came out during the war years.

“There were at least three pipe brands made from the Mountain Laurel; Trapwell, Breezewood and Custombilt. Trapwell pipes were made by D & P Pipe Works beginning on or before 1943. D & P Pipe Works, owned by D. P. Levitas (Ross 2005), began making pipes in 1938 (Wilczak and Colwell 1997) probably in New York City but relocated to Sparta, Alleghany County, North Carolina in 1943 (Sparta/Alleghany CoC 2006), in order to be closer to the huge population of Mountain Laurel in the area. Later, this company changed their name to Sparta Pipe Works and still later to Sparta Industries. I have one Trapwell World’s Best Briar pipe in my collection, a small billiard, and here again; it is a great little smoker. World’s Best Briar was their marketing ploy for Mountain Laurel. Trapwell’s ‘trap’ is a highly complicated condensing system when compared to most regular metal condensers. After the war, Trapwell pipes were made from regular briar wood, or “imported briar” until their demise.

According to a 1942 Life magazine advertisement, Breezewood pipes were made by The Breezewood Pipe Company, located at 630 Fifth Avenue, New York City, though Wilczak and Colwell state the Breezewood pipes were made by Kaufmann Brothers & Bondy (KB&B) beginning in 1941 (Wilczak and Colwell 1997). The Breezewood Pipe Company may have been a subsidiary of KB&B. To quote the 1942 Life magazine advertisement; “There, deep in the Great Smoky Mountains, they found it – found an uncharted virgin forest of burls, great old burls that had been growing there uncounted years. And from these old burls, pipes of astonishing lightness of weight are made – their name: Breezewood.”

At the present time, this is all I have been able to find on the history of Breezewood pipes. Here again, the one Breezewood pipe, a small billiard, I have in my collection is a great little smoker. I am not overly fond of metal condensers and this Breezewood pipe has a simple tube condenser similar to Dunhill’s “inner tube”.