I have worked out a process of refurbishing old pipes as a hobbyist that has worked for me with ongoing improvements and learning being added almost every pipe I work on. That is not to say that I am even a wannabe professional because I am not. For me it is a way of doing something that I find relaxing and rewarding as well as something that I can actually finish. With my work I am involved in ongoing dealings with people and issues that seem never to really come to closure so to take a pipe and bring it back to life and enjoy a good smoke in it is something I take great pleasure in. I thought I would write a bit about my process using and old pipe that came in the mail that I picked up off of ebay as an example.
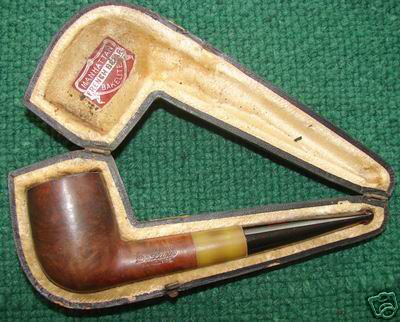
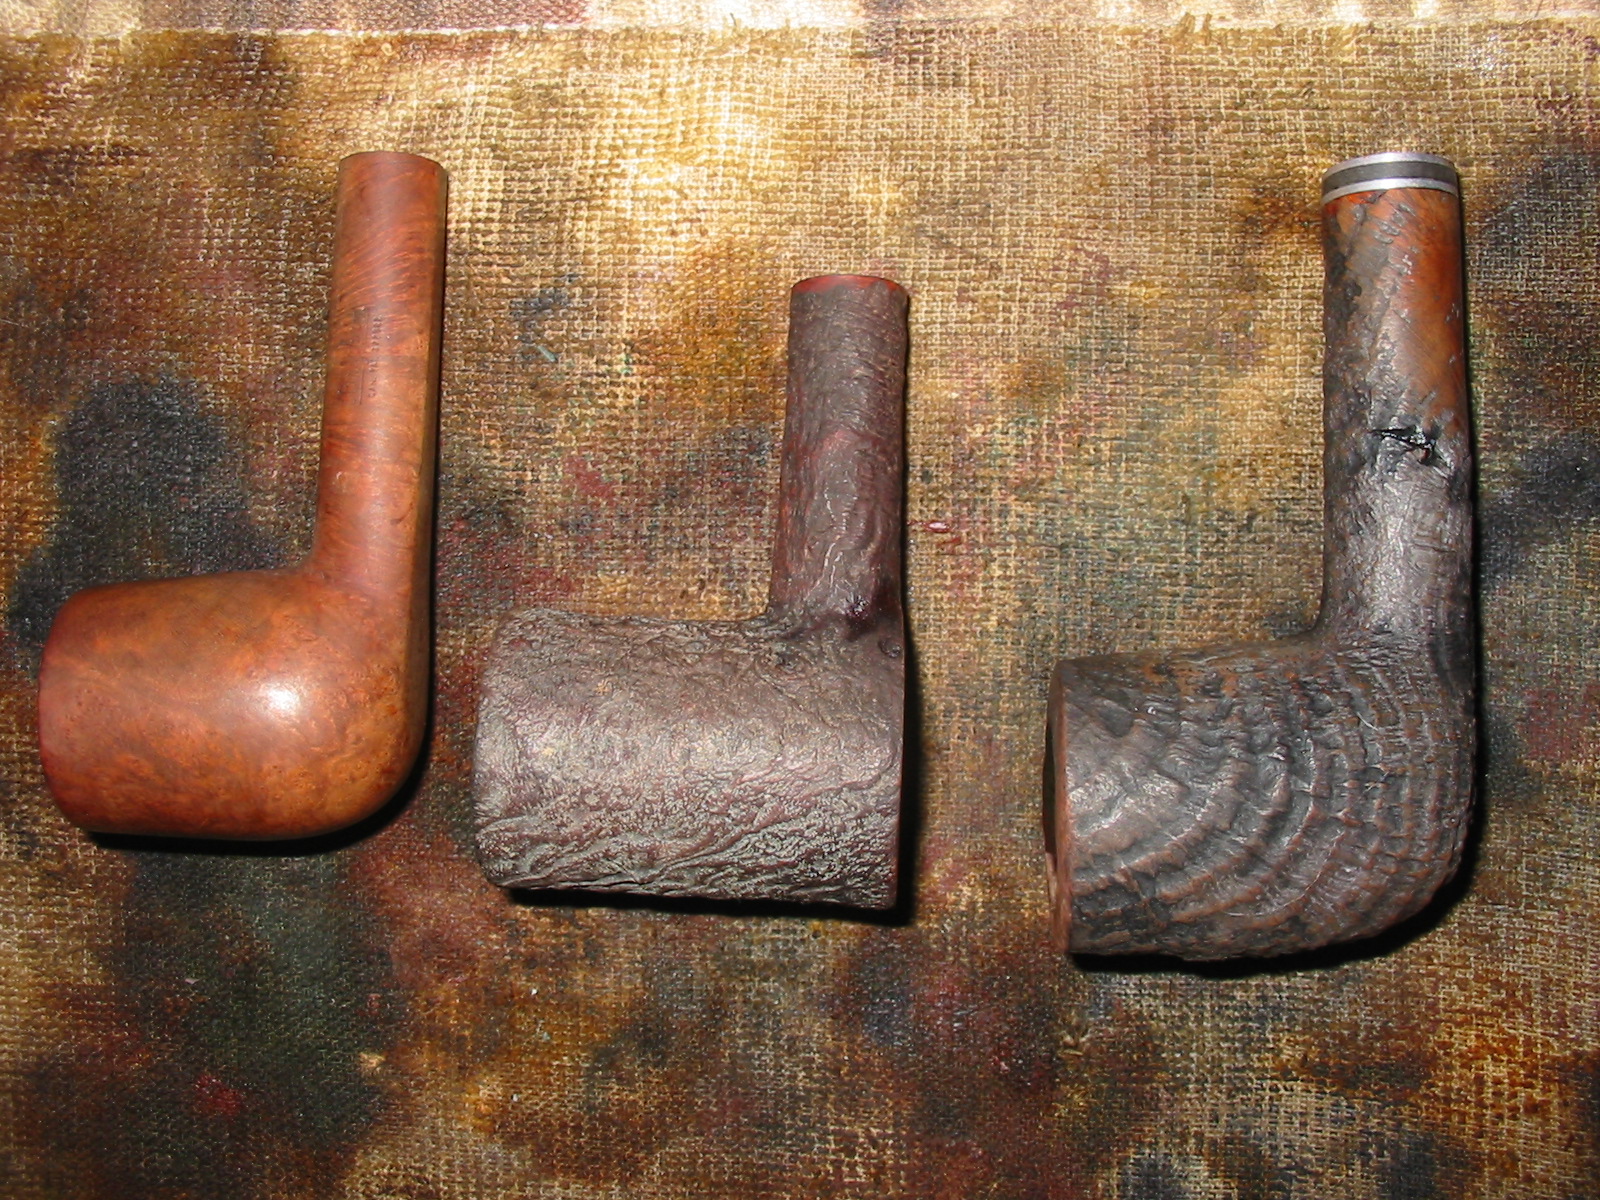
… I got home from Budapest, Hungary last week to find a package of pipes had arrived that I bought on EBay before I left. I opened the box to find a real mess waiting for me. The photos on eBay were not good and I was in no way prepared for what awaited when I opened the box. There were four pipes there – two Dr. Plumbs, a Stanwell with a broken tenon and a White Cliff meer-lined pear. The two Dr. Plumbs were what interested me in the lot and why I had initially bid. Dr. Plumb was an older second’s line of GBD and these two interested me. The first was a 9438 – GBD Rhodesian shape that I find is an all time favourite of mine. The second was a silver spigot Oom Paul – a shape that I have wanted to try for a long time. I figured the Oom Paul would be one I kept – not sure of the others in the lot. The White Cliff and Stanwell went back in the box and I turned my attention first to the Oom Paul.
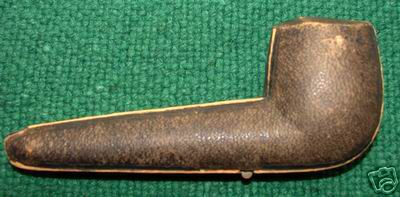
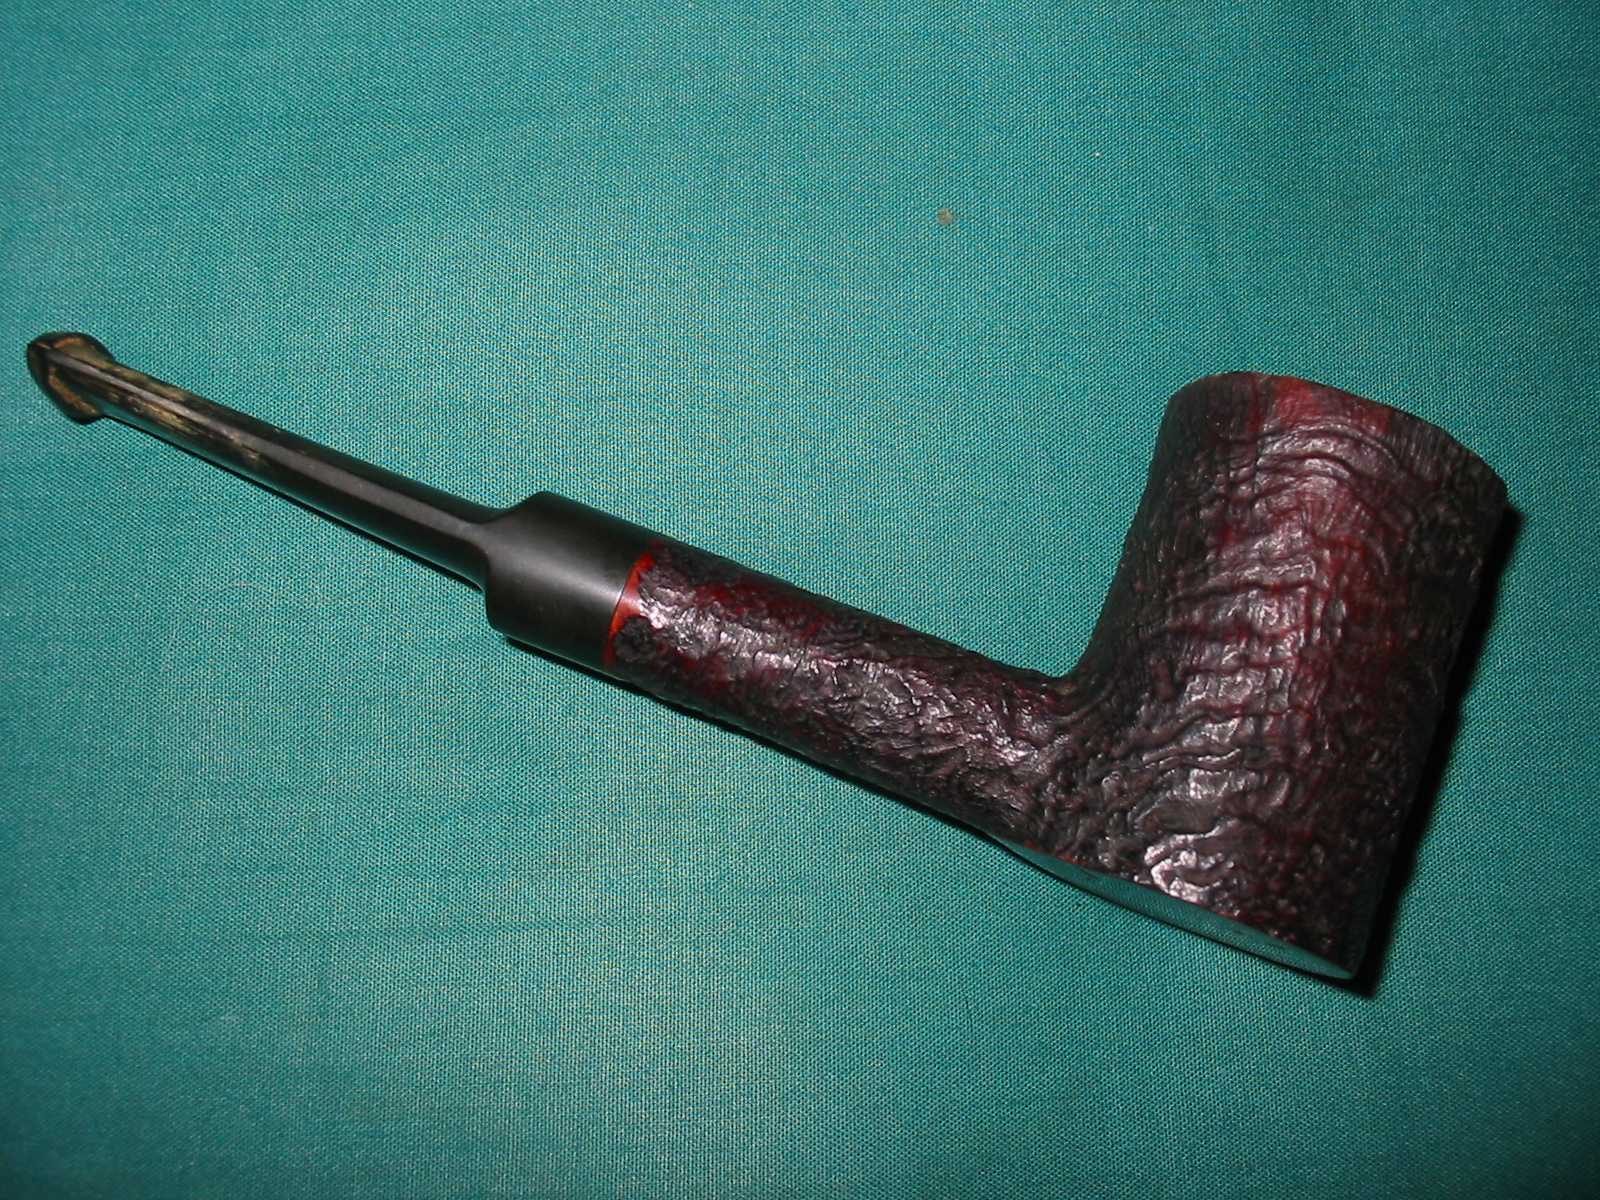
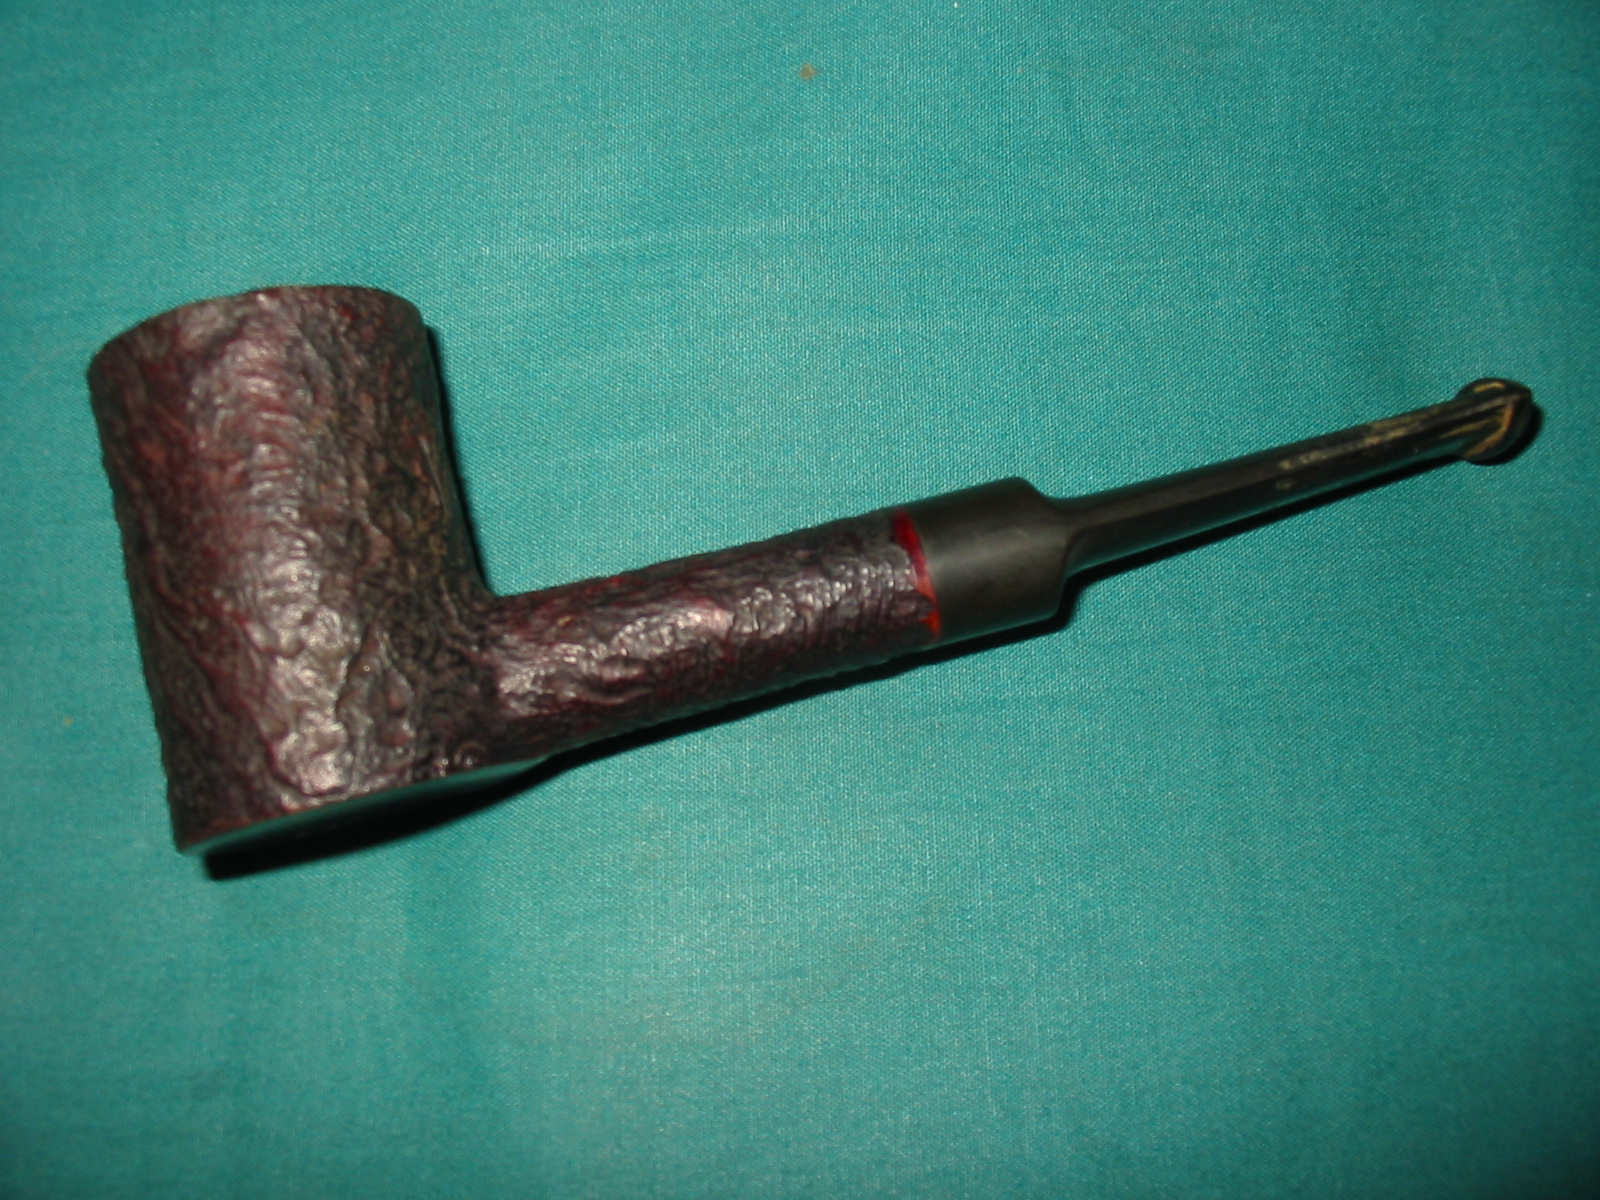
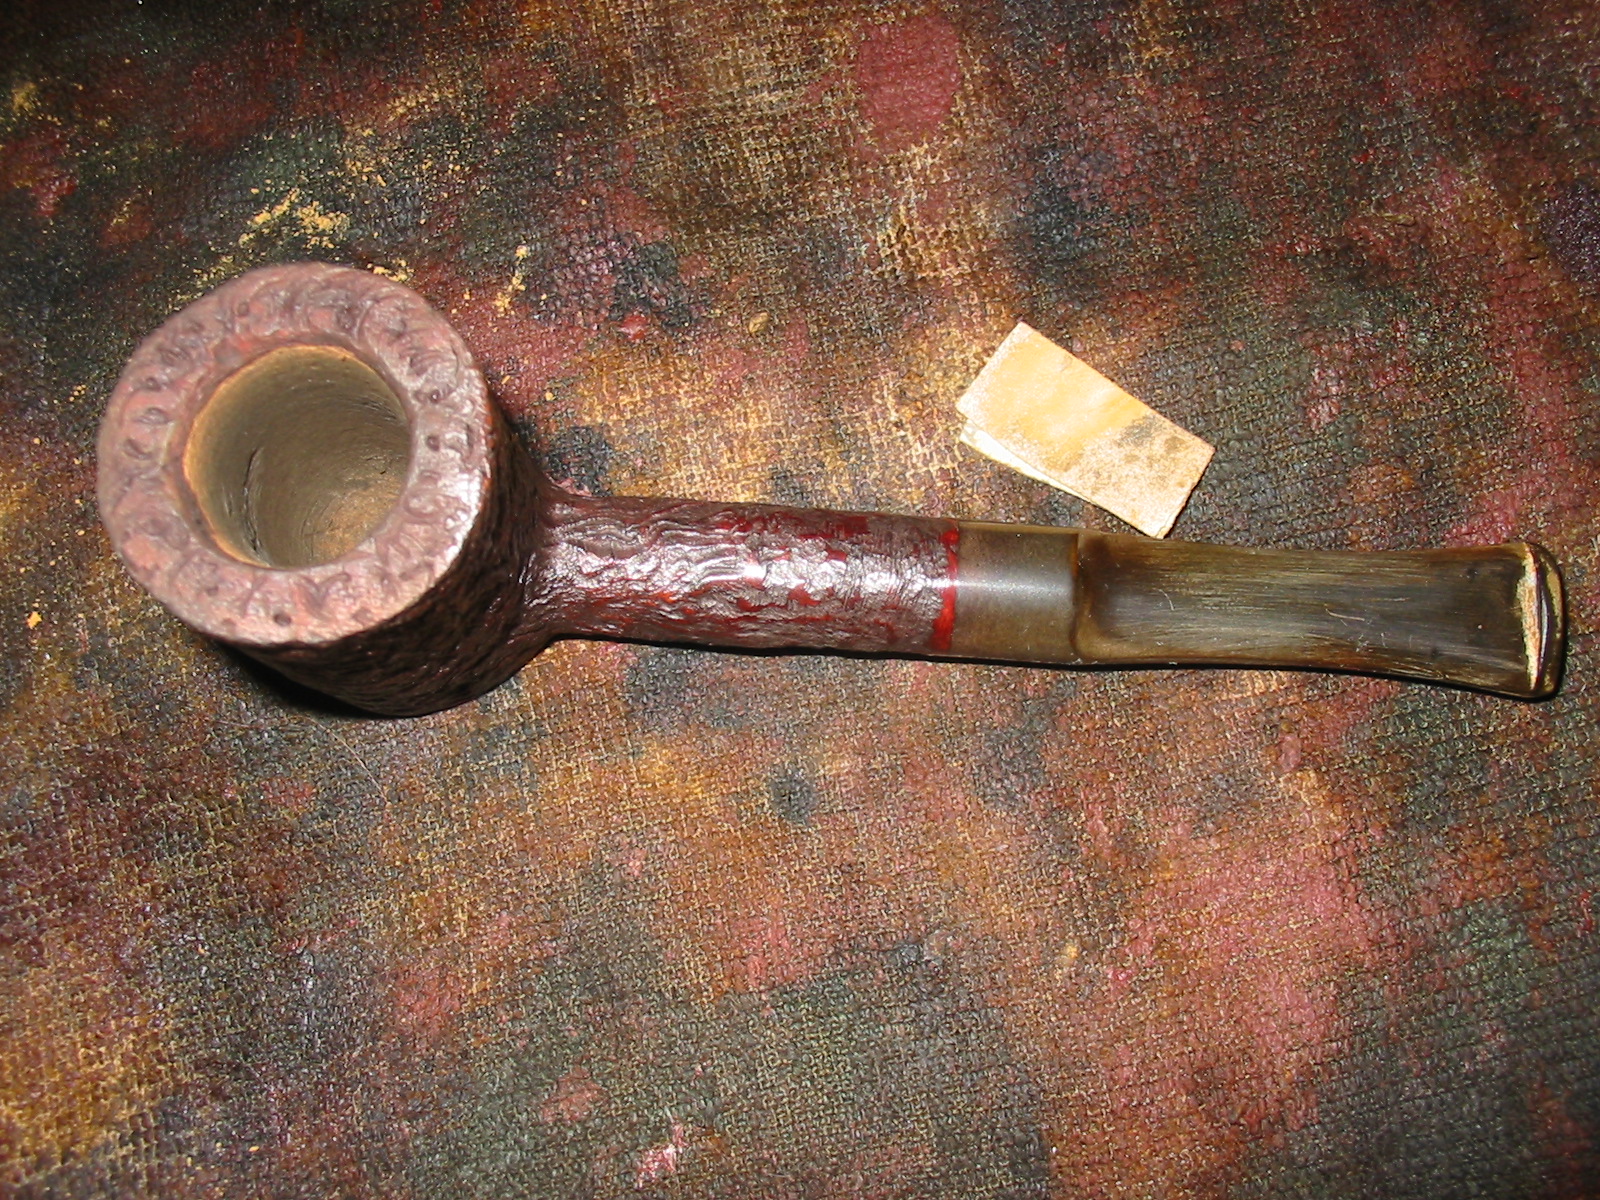
I took it out of the crumpled newspaper that wrapped it, being careful not to spill the ash and crumbling cake all over the place. It really was an ugly mess. I wanted to assess what needed to be done with it and whether it would be worth the effort. Sometimes even if it is really not worth it I will still clean it to practice methods and the use of new tools. This one was in desperate shape. The bowl was filled with crumbling cake and torn remnants of tobacco. The top was covered with a sticky and thick tar or lava that was about the thickness of a dime. The outside of the bowl had dark grime deeply embedded in the finish. It was muddy and dark enough that I could not see the grain at all. Now before you think it was an old patina finish – I assure that it was not. There was no way of even seeing the finish. It looked just like one of my dogs when he has been playing in the mud on a rainy day. I know somewhere underneath he has a black coat but it is not visible at all under the dirt and grime. This pipe was just unbelievably dirty.


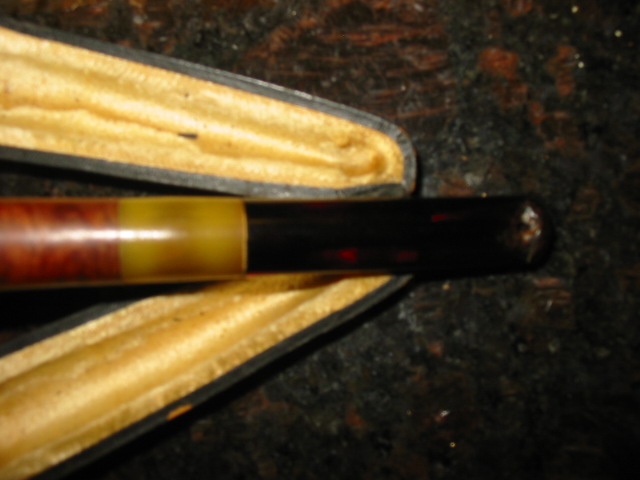
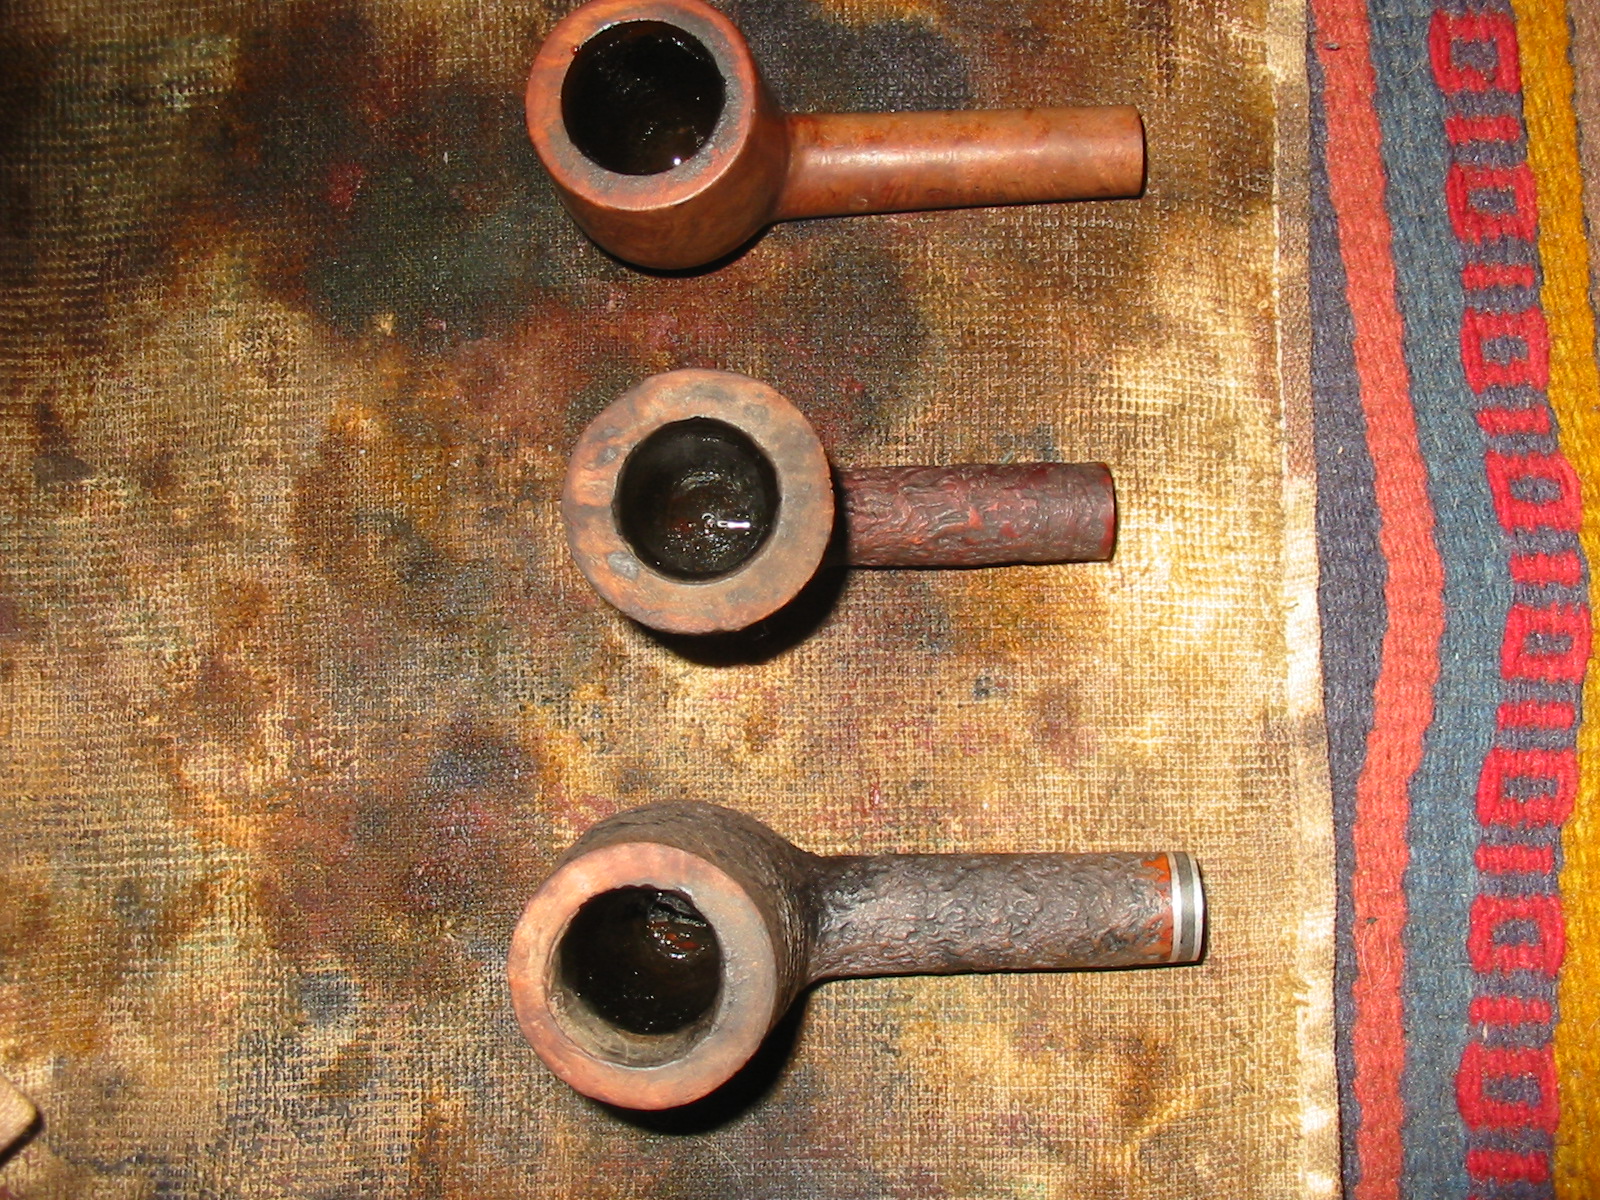
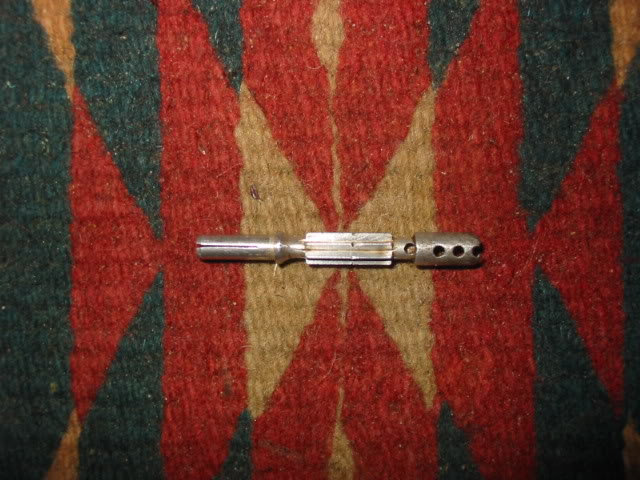
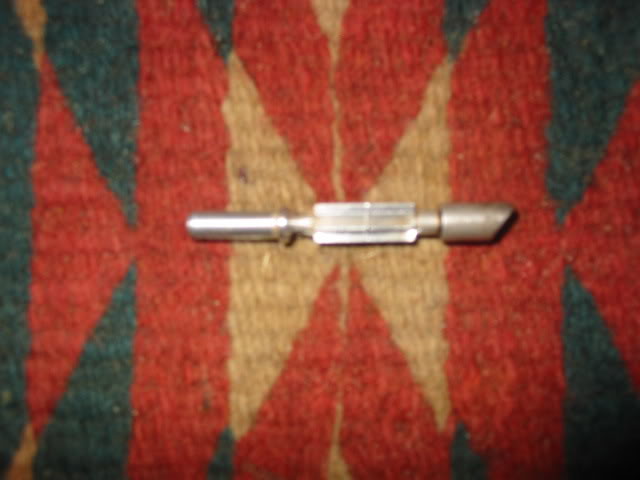
Working my way back along the shank of the pipe I came to the silver shank cap which was loose and very tarnished. It appeared to be sterling or at least silver plated under the tarnish. It had pulled away from the shank and was turned to one side. It appeared to have something engraved in it at about 1 o’clock but it was not clear under the tarnish and grime. The stem, a faux spigot, no long fit in the shank as it sat among the grime and crumbling build up of tars and a yellowish residue that erupted around the edges of the union of shank and stem. It was solidly embedded in this mess and was immoveable. The stem was an oxidized brown colour at the saddle and the curve. It had a silver cap at the end of the stem before it disappeared into the grime. That union of vulcanite and metal was a mottled edge of tarnish and grime. The button end of the stem was grimy and oxidized but it did not appear to have tooth marks or pits in it. It was merely encircled by that hard, white coloured material that can collect under a rubber bit protector. I moved to the lip of the pipe and looked at the slot. Unbelievable!! The airway was gone. The slot was filled and all that was left was a tiny hole the size of a pencil lead. The tar was erupting out of the slot and was a hard black semi circle that enclosed the button end.
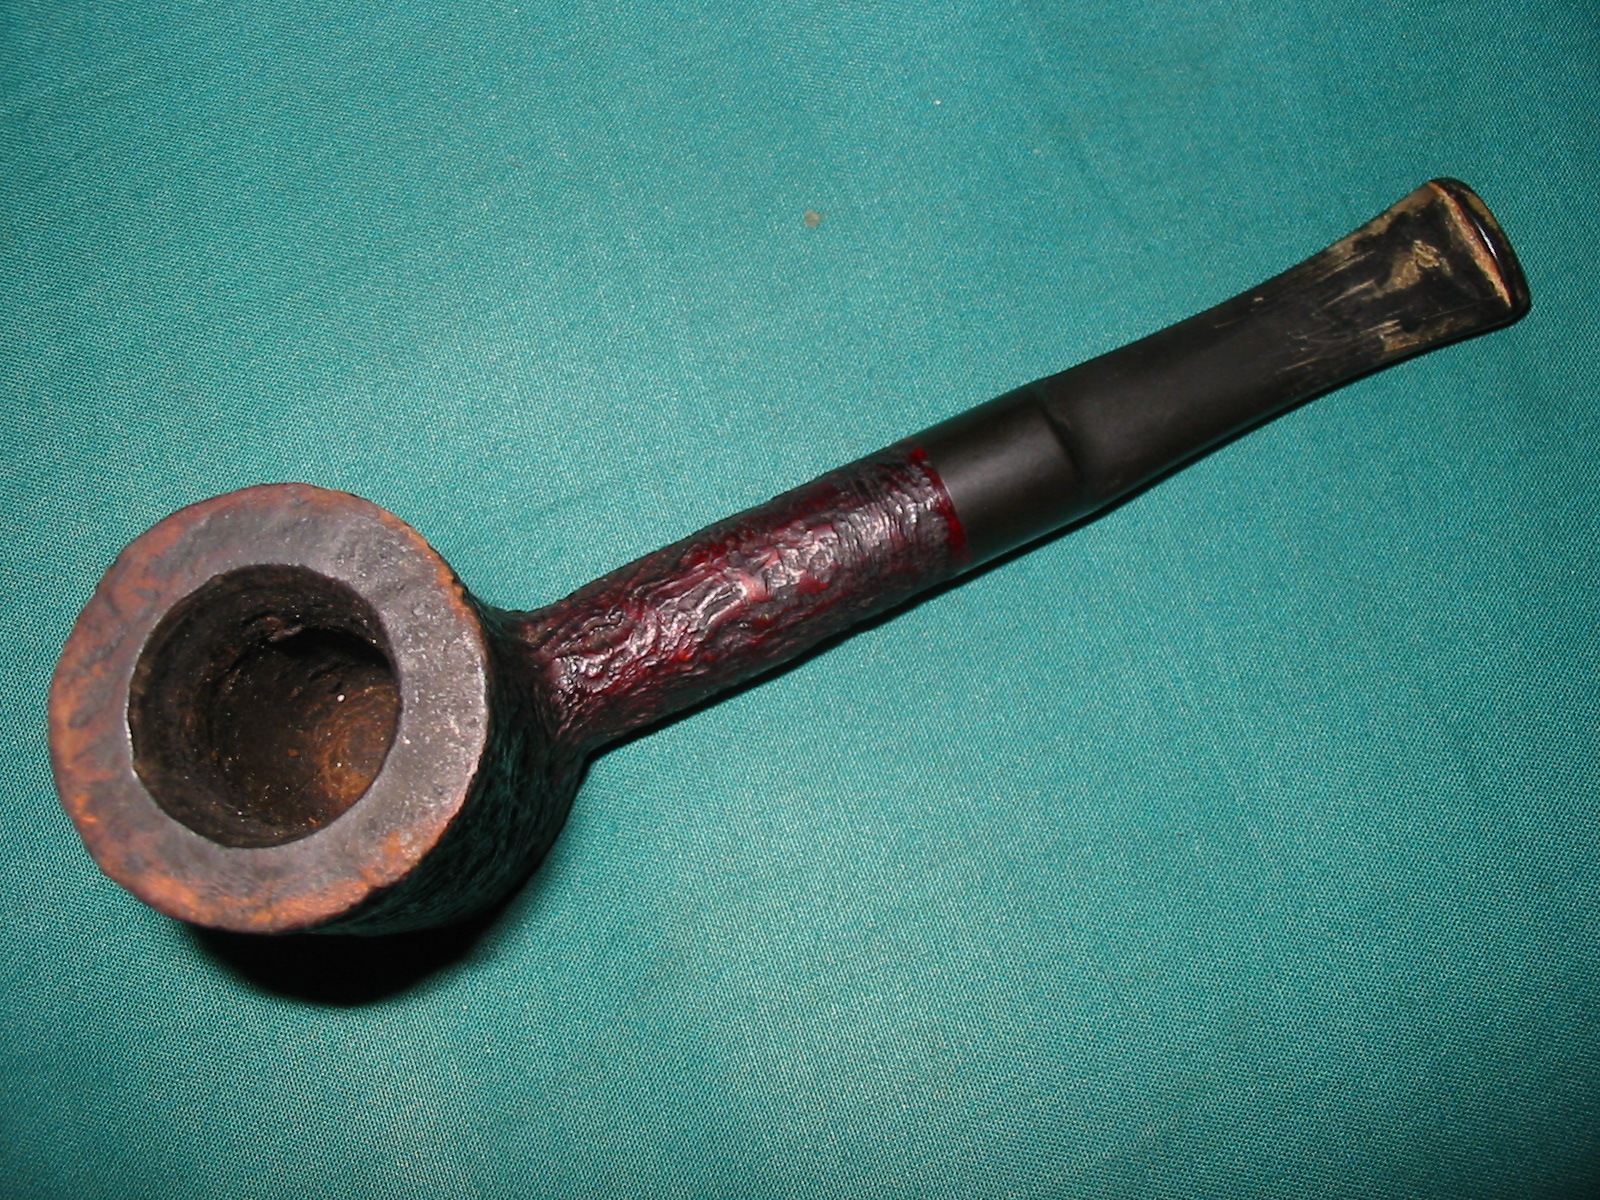
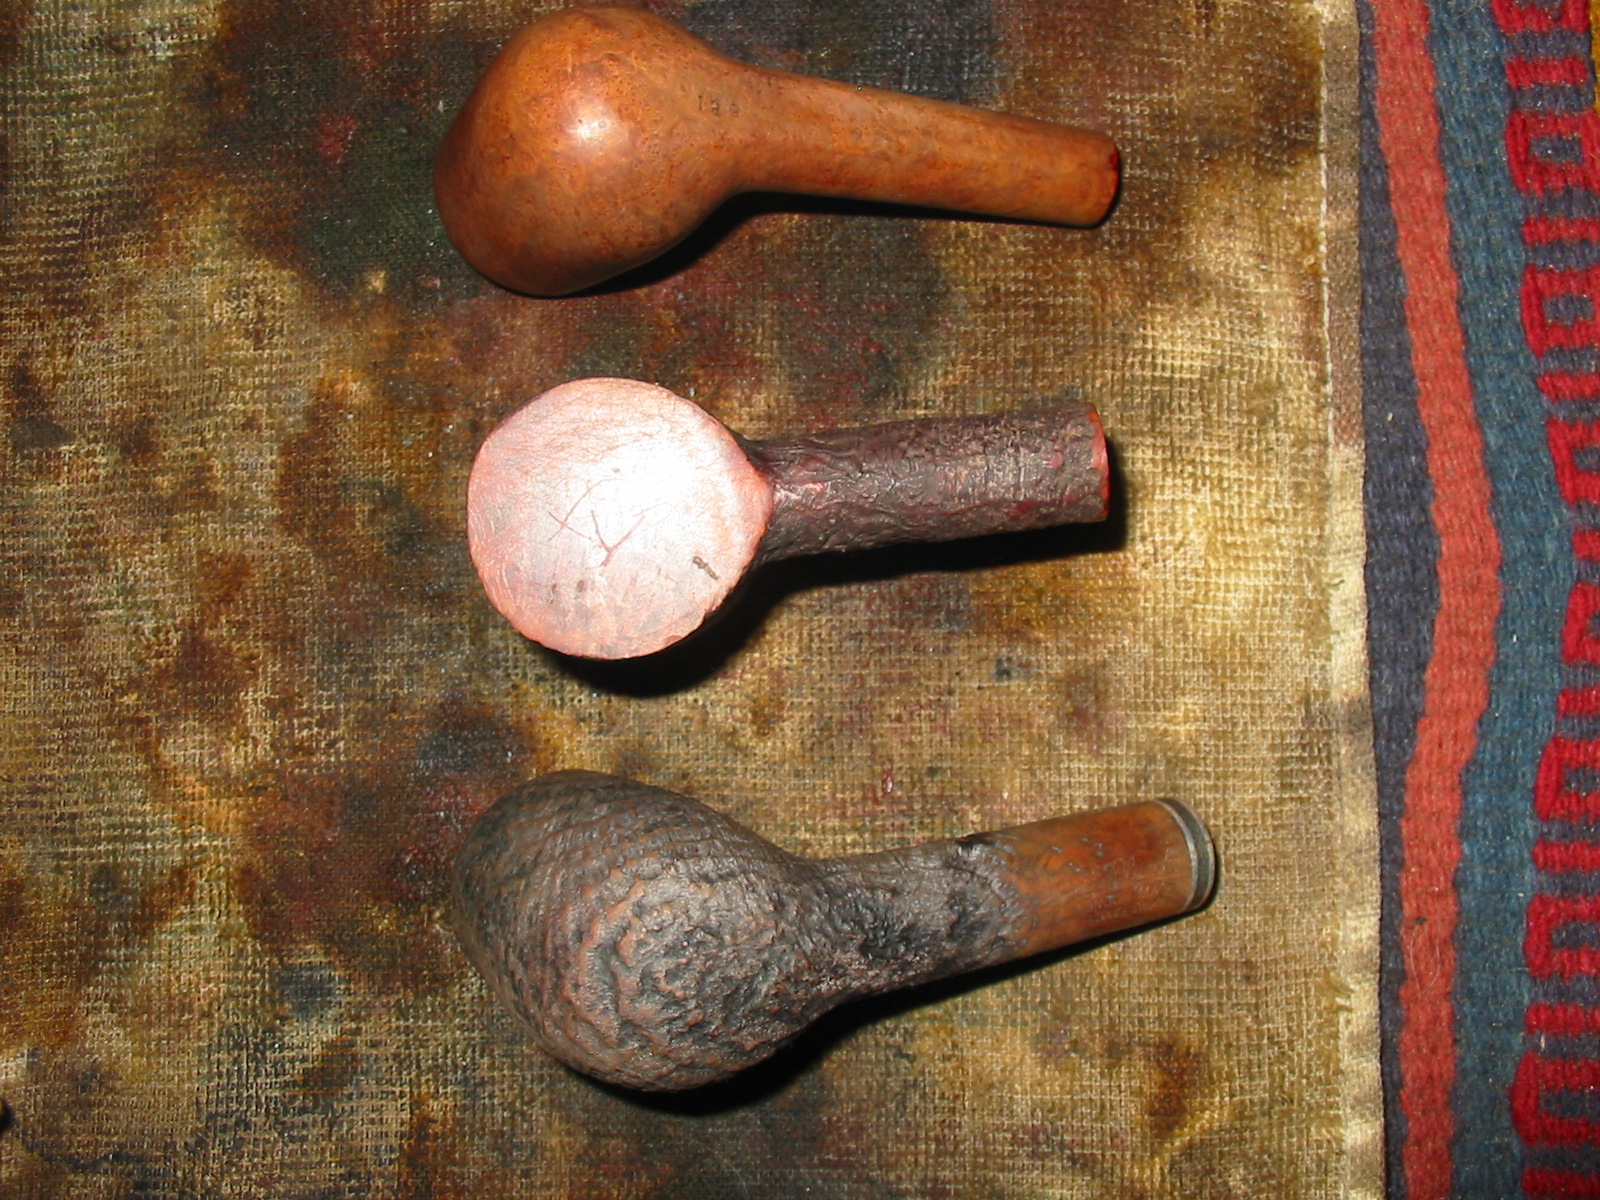
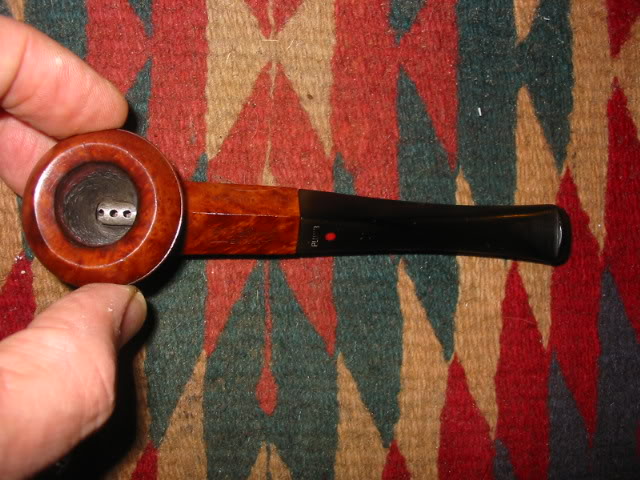
I turned the pipe over in my hands to look at the underside of the bowl. I always like to check and see if I am going to be surprised by a burnout or a blackening spot that could signal an impending burnout. I scraped some of the grime off the bottom of the bowl and found a spot that appeared to be the size of a pencil eraser on the bottom. It was black but did not appear to be burned or soft in anyway. I used saliva to clean away the grime a bit for a better look at this spot. It cleaned up slowly and with a soft cloth and a bit of spit it showed that what I was dealing with was a repair in the bowl bottom – a plug of briar that had been inserted. It was a bit darker than the briar around it but it was a good solid repair and did not appear to be loose or damaged. That was a good sign.
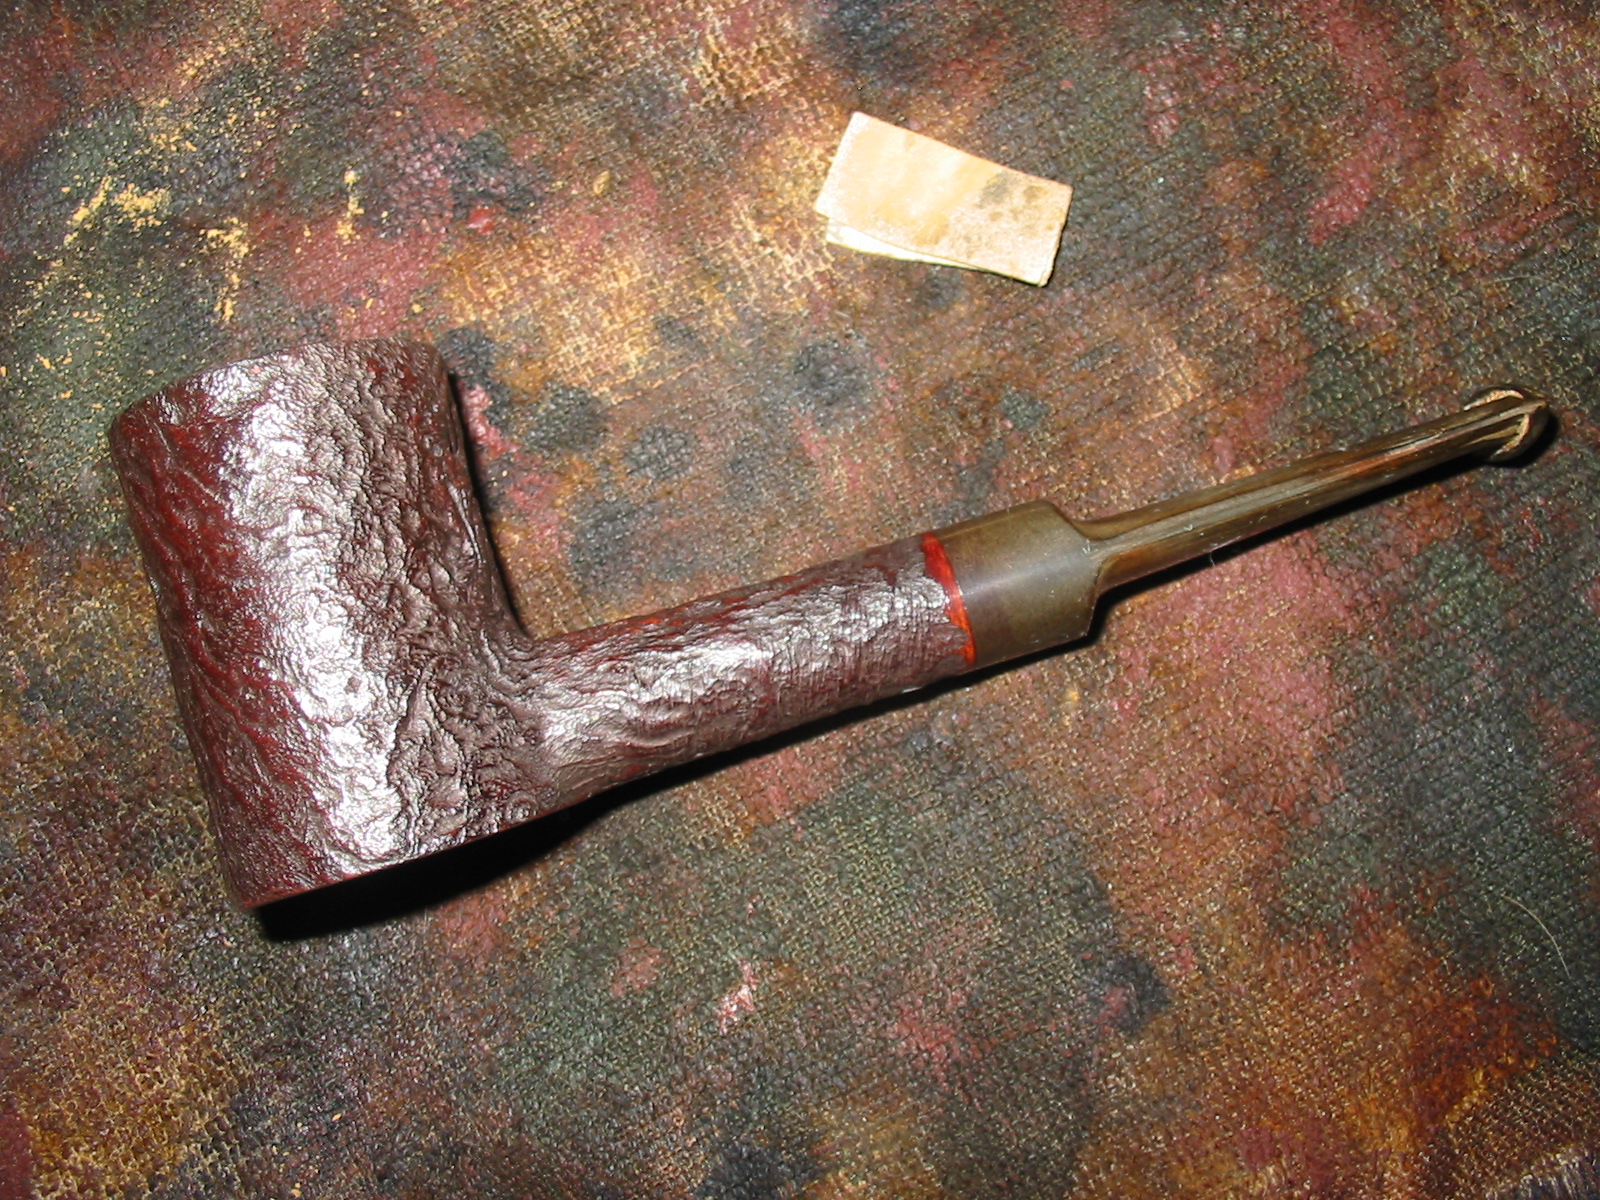
I laid the old pipe down and gave it a good hard look. Would this be worth the effort or would I end up pitching it at some point in the cleaning process? That is always a question I ask before I get everything out to do the cleaning. I picked up and turned it over in my hands again. I checked it over one more time and figured I would start and see what happened in the process. I set up my desk top work bench with newspaper as a base and then laid out the tools of the craft! I put out a variety of reamers and brushes of different sizes. I put out the dental picks that I knew would be needed in the stem and the shank. I put out the pipe cleaners – bristle, thin and fuzzy, the alcohol and the alcohol bath that I keep handy for bowls that need a soak. I drizzled some clean alcohol around the shank stem union and with a bit of wiggling and more dripping the stem came free. I use an ear syringe for that part of the work as it allows me to control the placement of the alcohol.
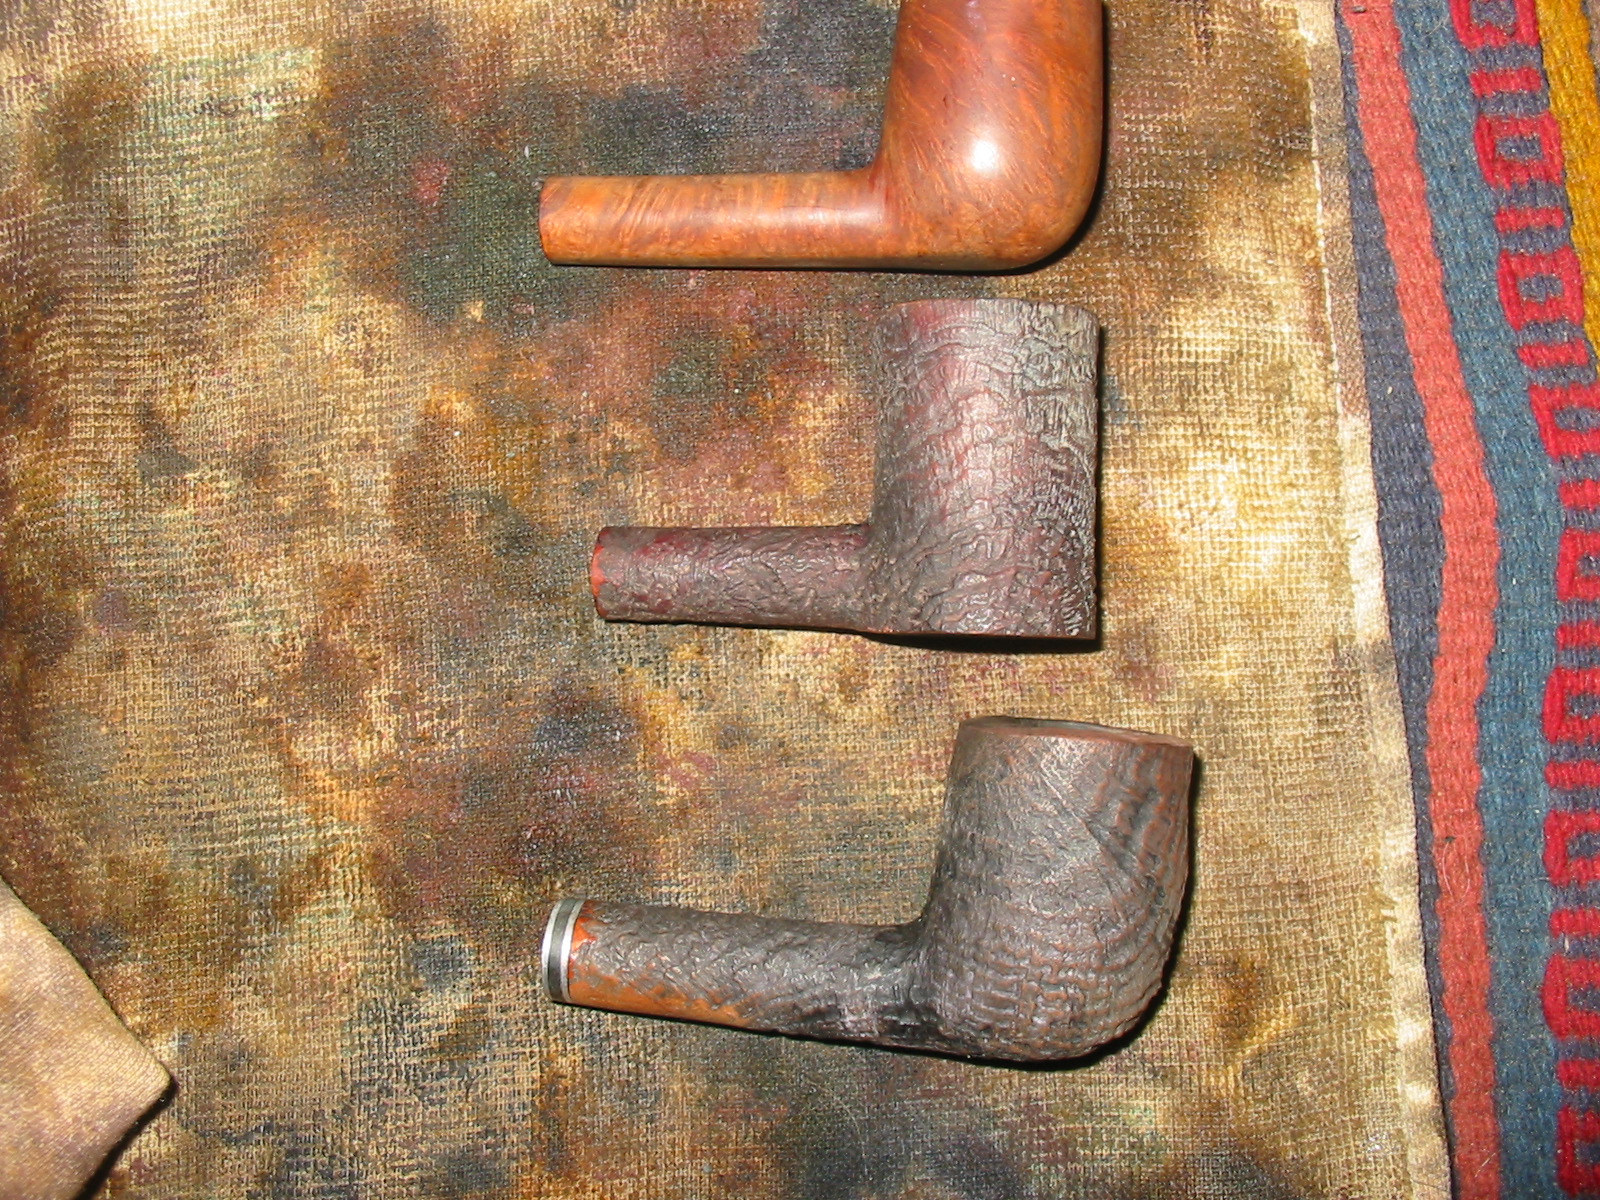
I set the stem aside and turned my attention to the bowl. I wiped down the outside with a soft cloth and Murphy’s Oil Soap (undiluted) to get the grime off and get some idea of what was underneath the mess. It took several applications and wipes with the cloth to get through the grime. I also wiped it down with an alcohol wipe to get the last of it off. As I was planning on refinishing the pipe anyway I was not concerned with the finish. Underneath the grime the briar was actually quite nice – birdseye on one side and a variety of grains the rest of the way around the bowl. The shank was flame grain. It looked promising. I took a sanding block that is fine grit and sanded the top of the bowl to get the grime off. It was rock hard and since I was refinishing the pipe anyway it was the preferred method of removing the grime. Once that was done I reamed the inside of the bowl and the inside of the shank. I used my Senior Reamer to start with and then the T reamer with the four different cutting heads. The bowl was lined with a crumbling cake that needed to be taken back to the bare wood as it kept letting go and falling apart. Once it had been cleaned out I was able to inspect the bowl for cracks and burned out areas. Fortunately it was clean and uncracked. The bottom of the bowl was below the airway so once it was cleaned I would need to use some pipe mud to build it up to the proper height.
The shank was really a mess. I could not fit a standard pipe cleaner through it and had to use a dental pick to open it up. Because it is a full bent a drill bit was unworkable past about the middle of the shank. I have a dental pick that have I straightened out a bit and it worked like a champ. The pipe had a sump in it like the Peterson system pipes and it was absolutely jammed packed with tars. The stem would not even fit in the shank it was so full of junk. I used a small brass battery terminal brush to work over the inside of the shank and the sump area once I had opened it up. I blew air through to make sure it was open. I used pipe cleaners and q-tips to clean it up. I kept at it until the airway and shank were clean. Once I finished with the interior of the pipe I put the bowl in an alcohol bath over night. I have found that this takes off all the grime that is rubbed into the finish and any remaining interior grime.
While it soaked I turned my attention to the stem. I opened the airway in the stem with my dental pick from the button end. I was able to remove the stinger apparatus in the tenon and then began to work on the interior of the stem. The stem itself was a mess on the inside – a pipe cleaner would not fit through so again the dental pick did the trick. I opened it up a bit then used over a 100 pipe cleaners and a bunch of q-tips to clean out the gunk. I also used a bristle shank brush to loosen things up. Once I cleaned it with lots of alcohol and many cleaners the inside was clean. The outside needed lots of attention. The Dr. Plumb painted logo (not stamped at all just a surface paint) was sacrificed to cleanliness. I sanded the stem with 1200 and 1500 grit sandpaper to get the brown out that even the buffer did not remove. After that was done I polished it on the buffer with red Tripoli and White Diamond. The stem was actually in very good shape once the grime and oxidation was removed. I cleaned the silver portion of the stem and the faux military mount with silver cleaner and then polished that and buffed it with a soft cloth. I also used steel wool on the stinger apparatus until the roughness and grime was gone from it and it shone. I inserted it back in the pipe for the first smoke to see if it would remain. The stem was in great shape and ready to be inserted in the shank of the pipe once it was done. It still needed to be buffed with Tripoli and White Diamond before a good coating of Carnuba was applied to keep the oxidation at bay.


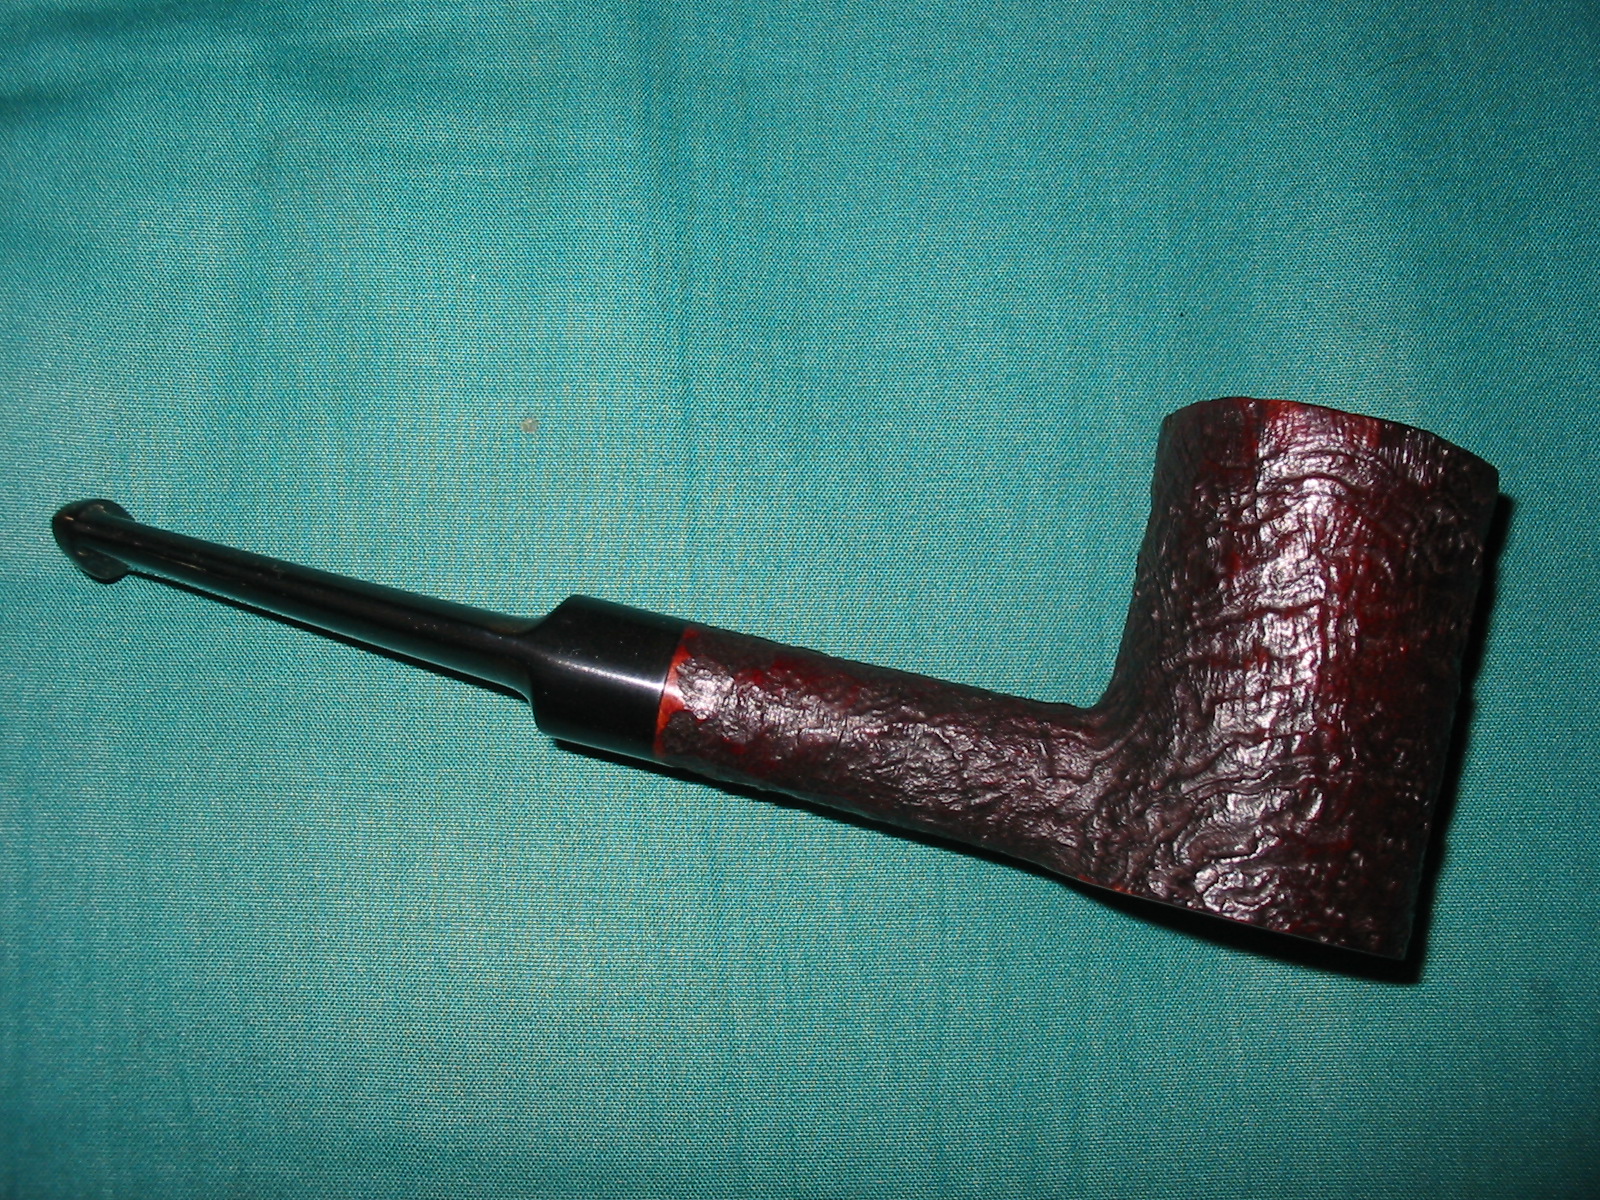
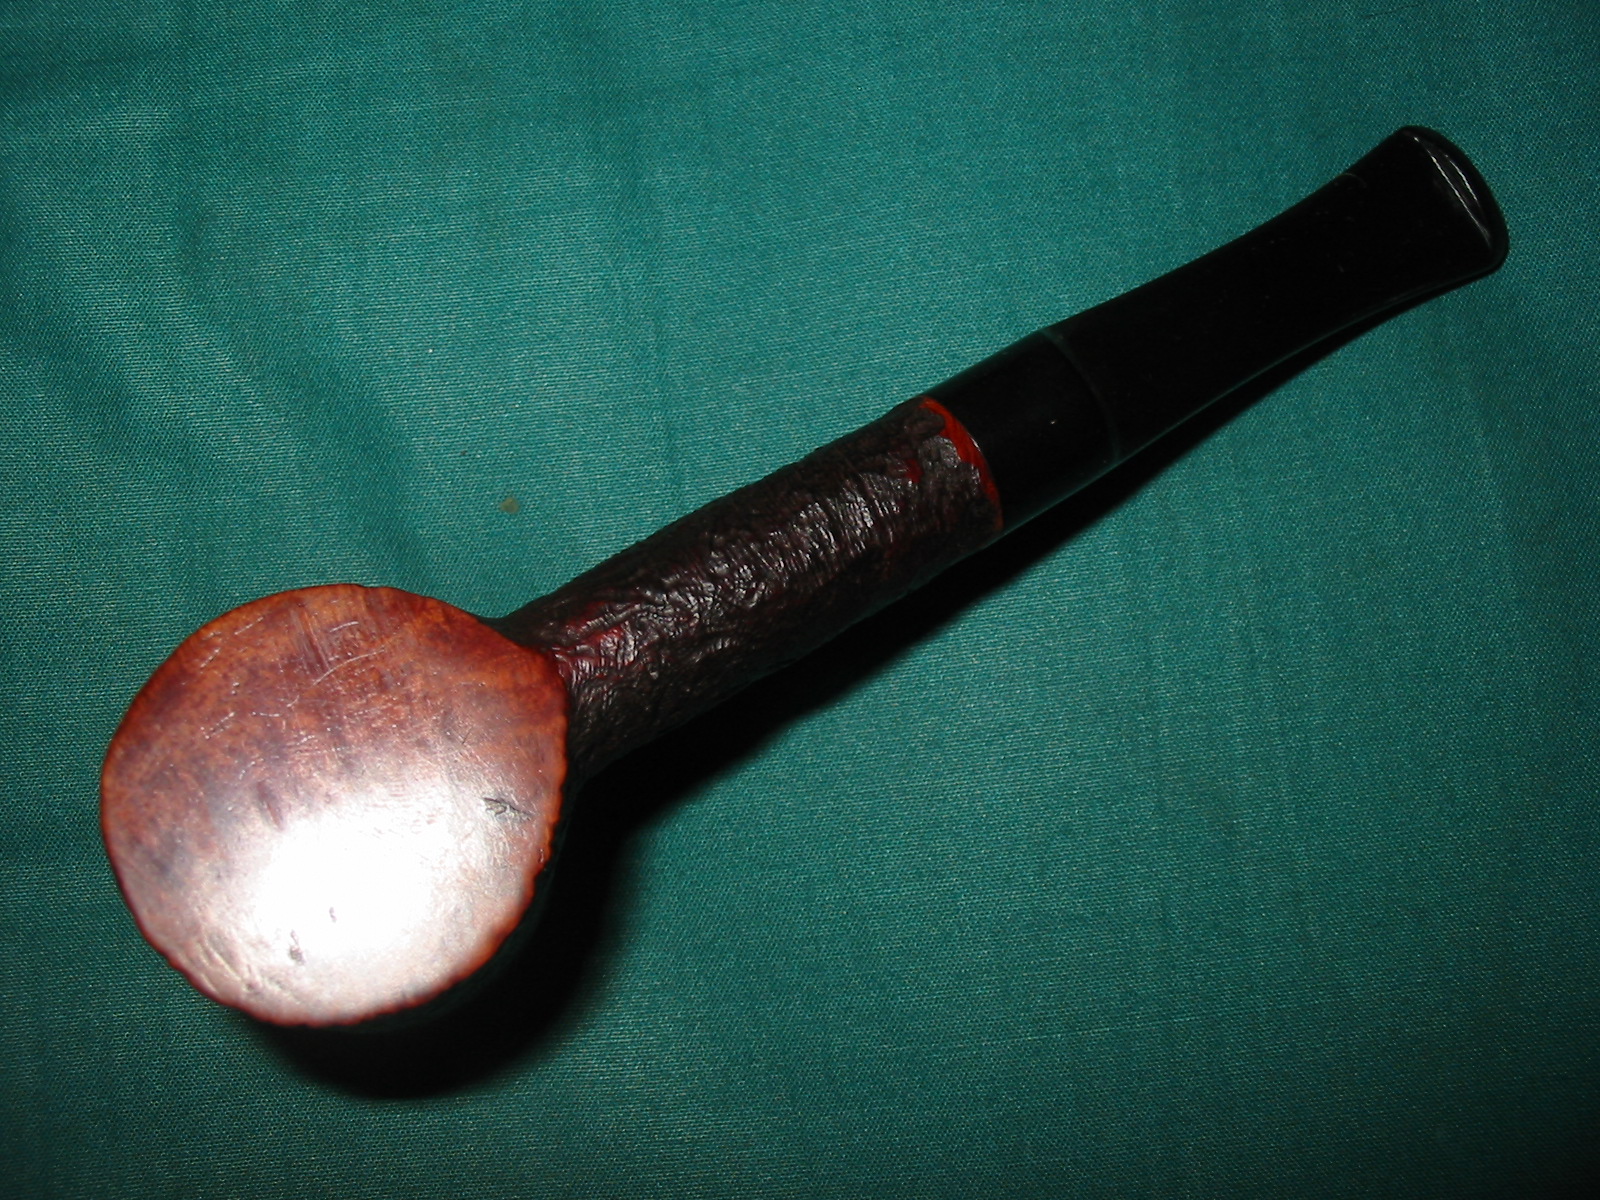
I removed the bowl from the alcohol bath and found that bath had done its magic. All the grime was off and the finish as well. What remained was a soft reddish briar that was clean and smooth to the touch. After bowl dried I sanded it with 1500 and 1800 grit sandpaper, being careful of the stamping that showed up on the bottom of the shank once the grime was gone. I finished the sanding with micro mesh pads in 1800, 2400 and 4000 grit. The top had some minor burned areas and the bowl was out of round so I bevelled the bowl top into the bowl to take care of the unevenness. When I finished sanding it I washed the outside down with a damp alcohol soaked rag to remove any dust and show any scratches that needed a bit more attention. Once those were taken care of I filled the bowl with cotton boles and using the ear syringe filled the bowl and shank with clean alcohol to remove any ghosts and residual tars in the bowl. I let it sit over night while the leaching process did its work.

While bowl was undergoing that treatment I took silver polish and a soft cloth and worked on the stem metal work. For the stinger apparatus I used some 0000 steel wool to clean off the staining. I buffed the stem with Tripoli and white Diamond and laid it next to the bowl.
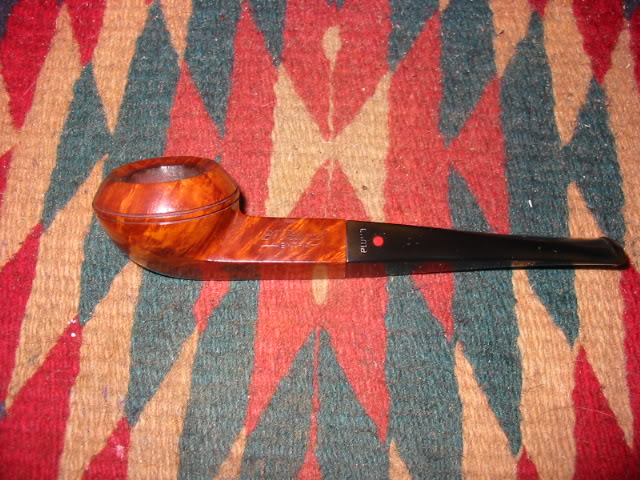
The next day I removed the cotton boles and let the bowl dry out. I opened a can of cherry stain that I use on these old timers that matches the original colour really well. I shook the alcohol based stain until it was well mixed and then using a soft rag and a folded pipe cleaner I applied it to the whole bowl. Once it was well coated in the stain I lit it on fire with a lighter to set the stain. Once that was done I set it aside to dry well.
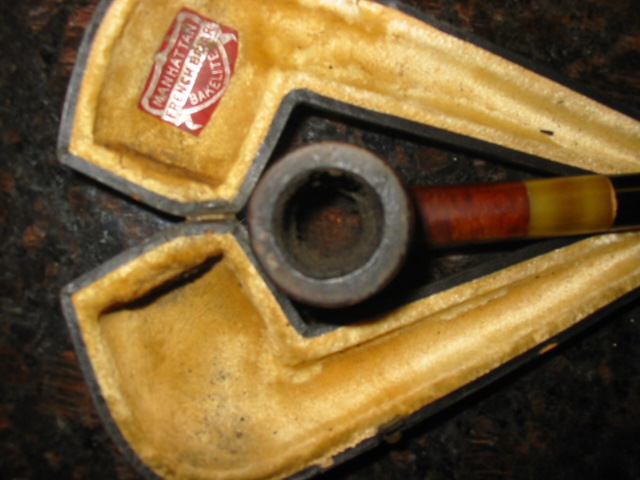
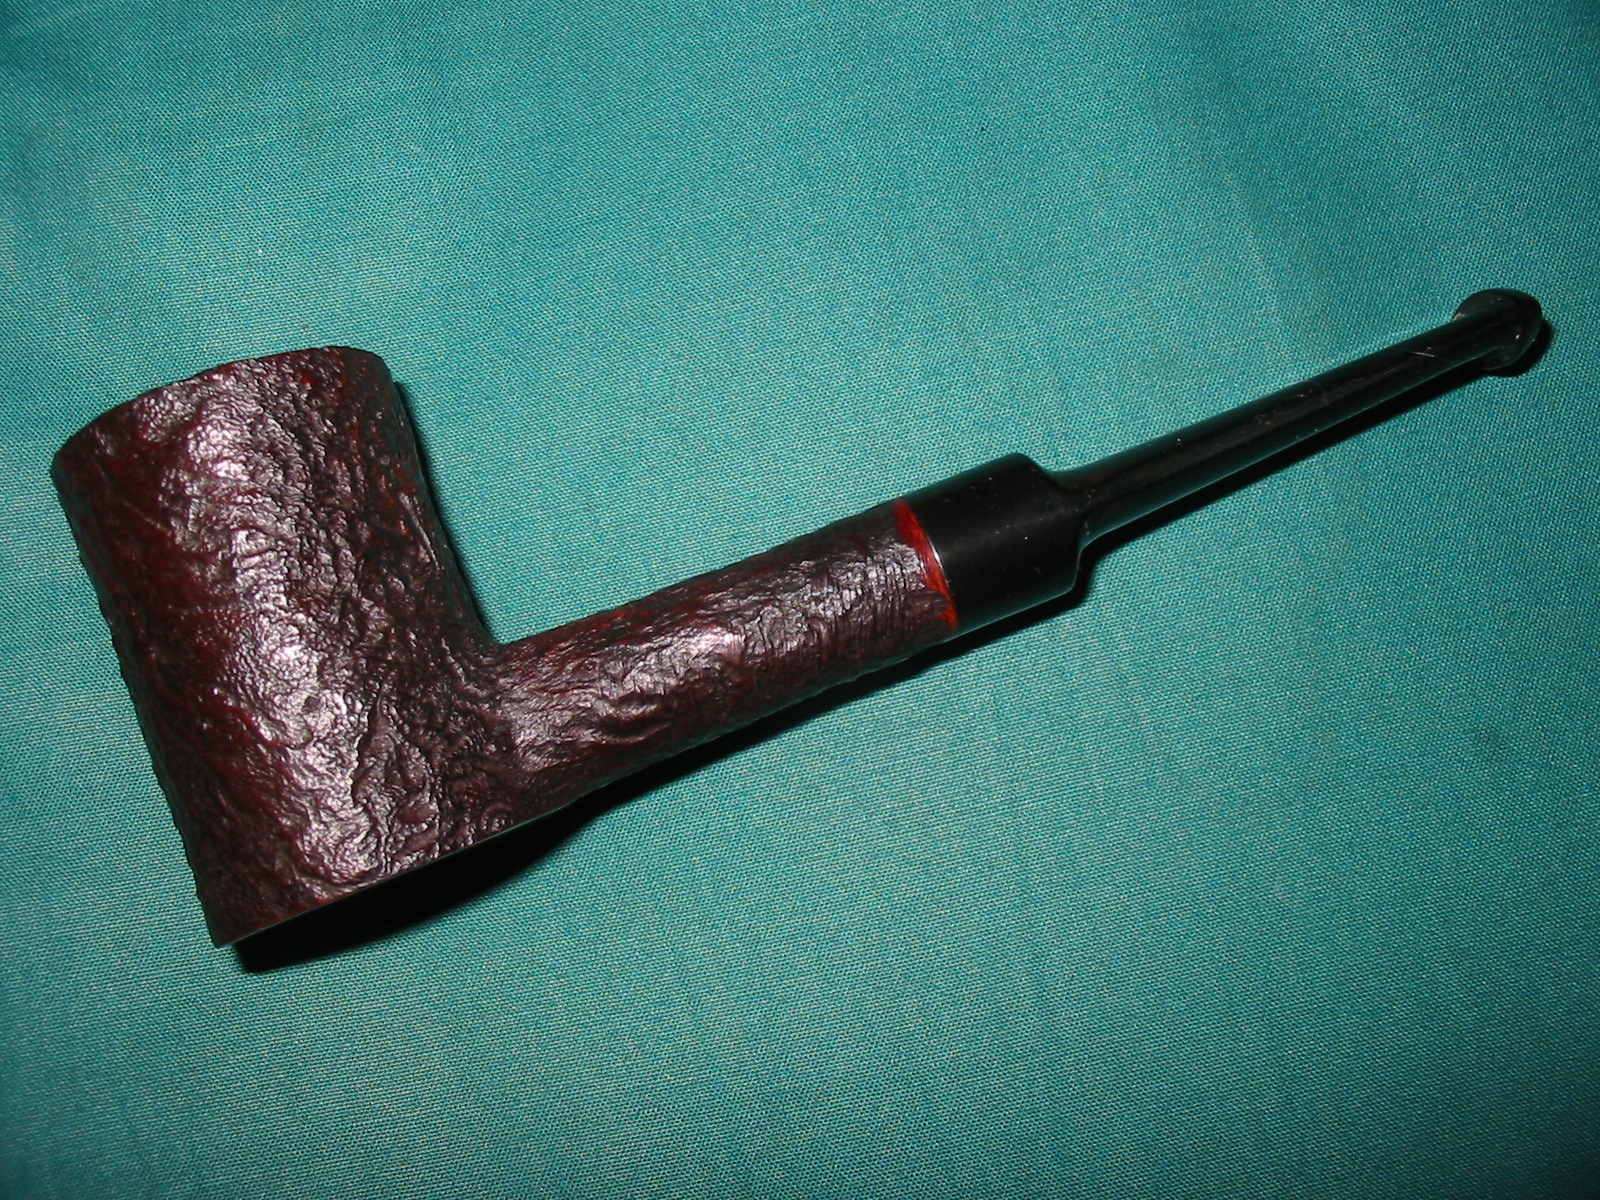
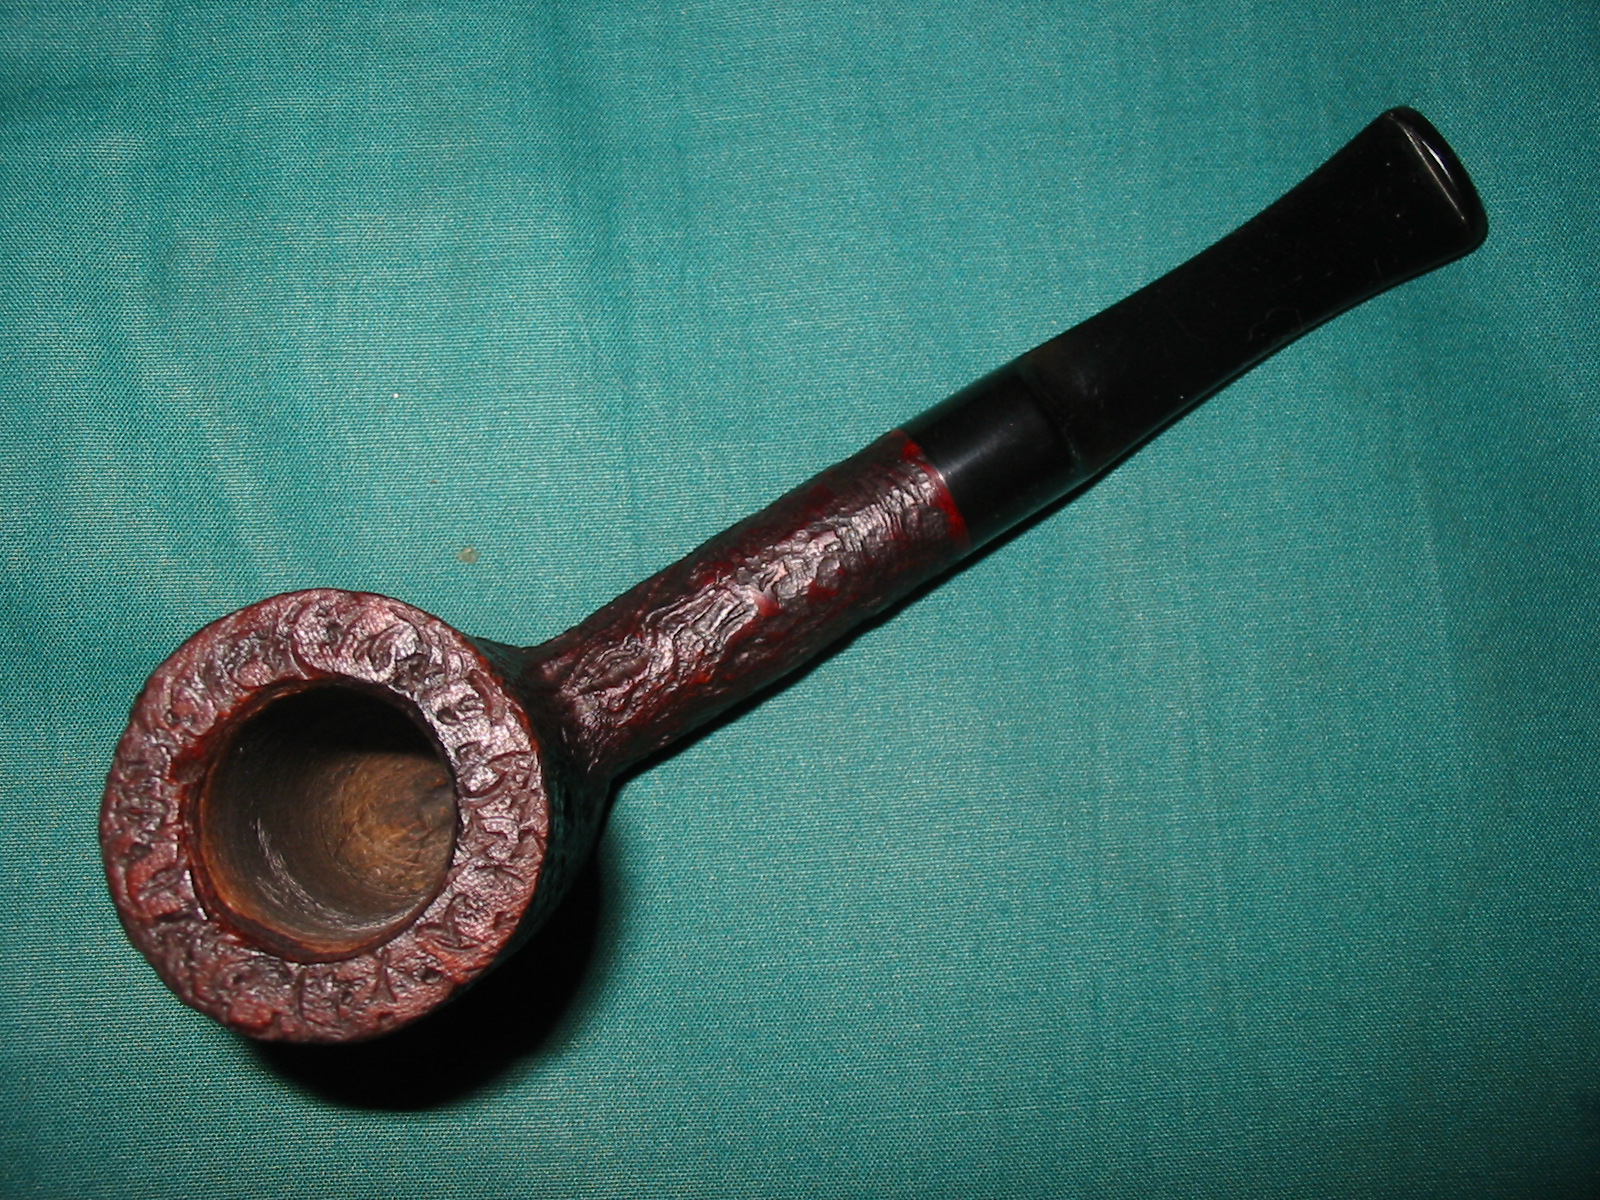
In the afternoon when the stain was dry I took it to the buffer and lightly buffed the stummel until it was smooth and shining. The finish looked really good. I gave it a good coat of wax and then polished the silver on the shank cap. I was able to turn the cap a slight bit and the initials that were engraved in it became visible – WGW. I took it back to the desk and inserted the mouth piece. It fit snugly into the shank and the look was as it should have been.


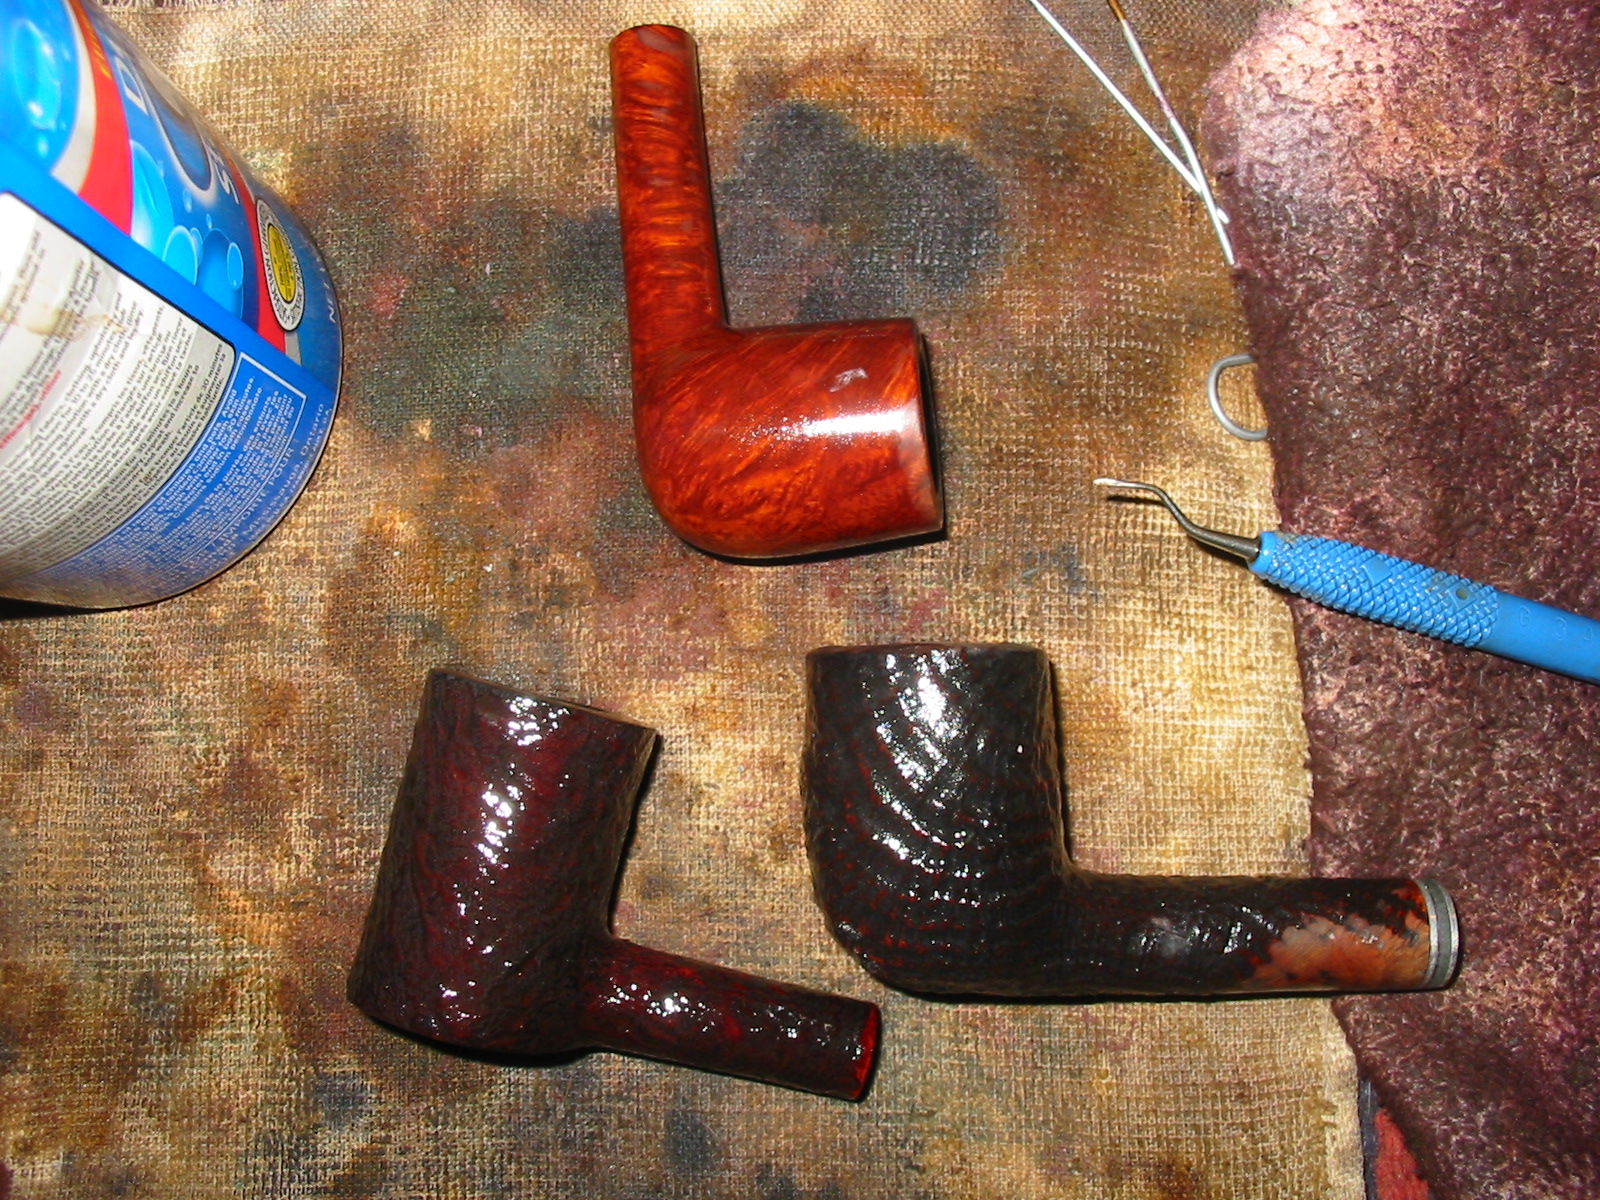
(In the last picture on the bottom right the plug in the bottom of the bowl is visible. I re-stained that area of the bowl and the plug is a little less visible.)
I then turned my attention to the inside of the bowl. I needed to raise the bottom of the bowl to meet the bottom of the draught hole and protect the plugged bottom of the bowl. I mixed a batch of pipe mud – cigar ash and water mixed to a pasty thick consistency and painted it with a folded pipe cleaner and packed it in place with a pipe tamper to raise the bottom of the bowl to the bottom of the airway. I let it dry for a day until it was hard and then prepared a bowl coating with activated charcoal and my secret ingredient and painted the inside of the bowl with it. I wanted this old timer to have a chance and with the cake gone I did not want to take a chance on burnout with it. I wanted it to have a fighting chance for a long life ahead. I set it aside to dry for two days and waited for the initial smoke once it was dry.
Two days went by and the bowl coating was dry and the mud was hard in the bottom of the bowl. I had packed the pipe in my brief case and took it to work with me for the ride home that evening. After work I packed the Dr. Plumb Oom Paul with Doc Piedmont and lit it with the Zippo. Wow what a clean, dry smoke. It was smooth and full of flavour. It is a great smoker and did not heat up at all during the smoke. I carefully knocked out the ash and inspected my bowl coating and the bottom of the bowl. It looked undisturbed and solid.
When I got home I removed the stinger that was in it to give it a go without the stinger to see what that does for it…my gut feel is that this pipe will be one of my go to pipes in the future.