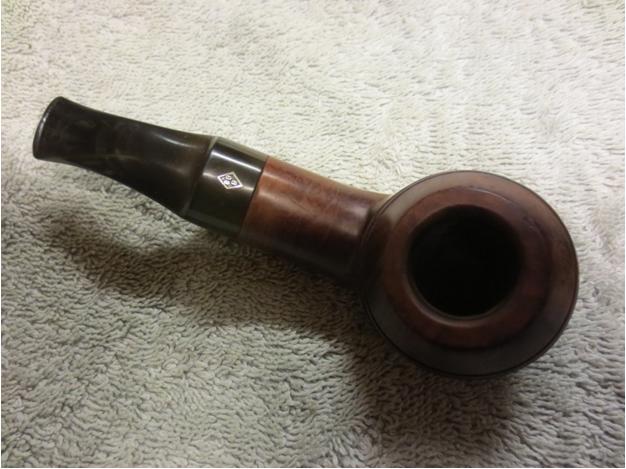
Blog by Steve Laug
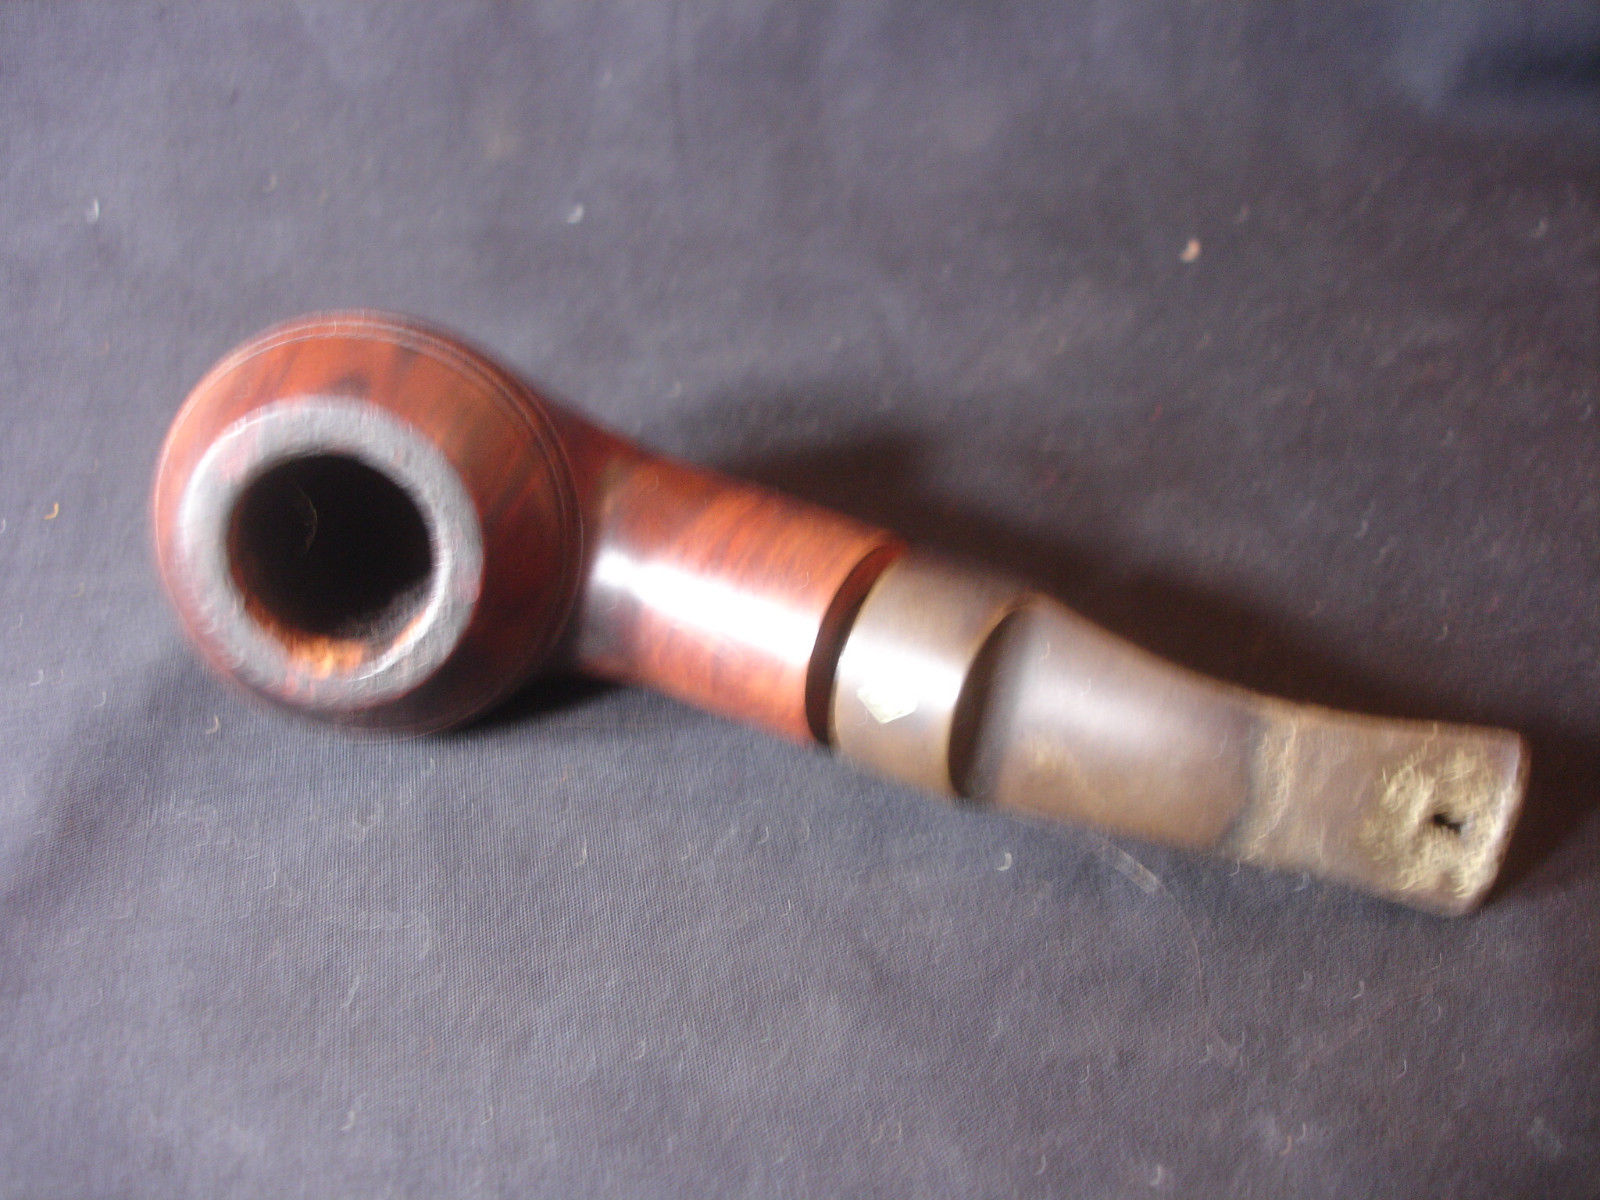
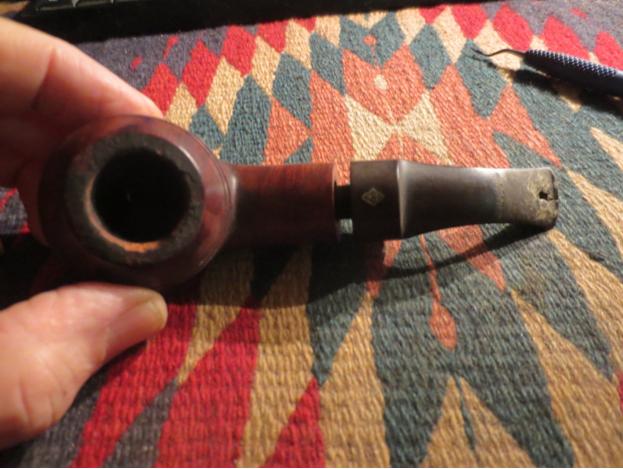
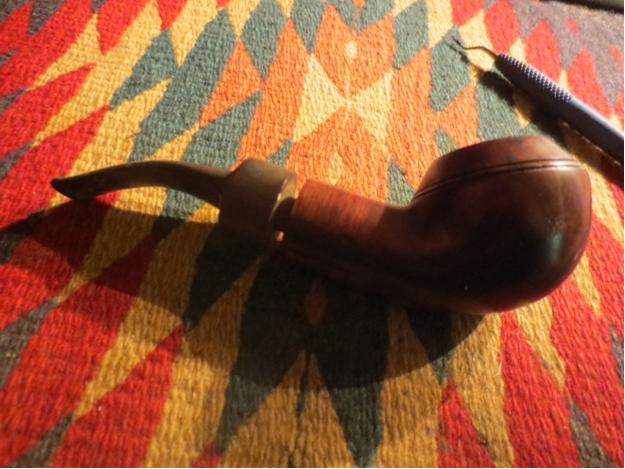
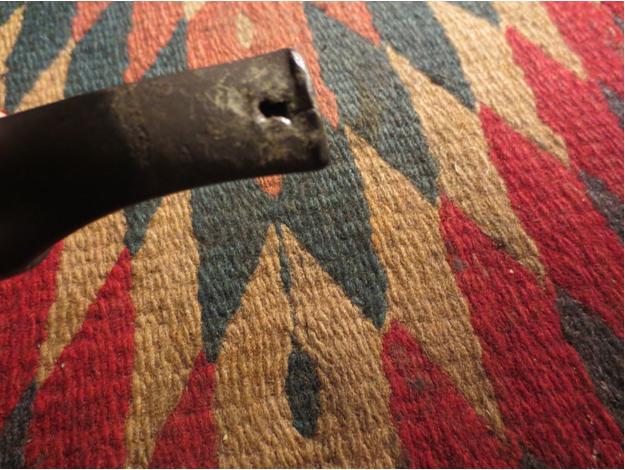
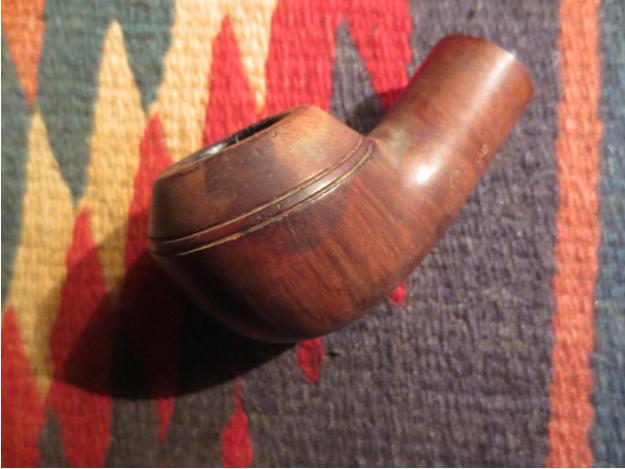
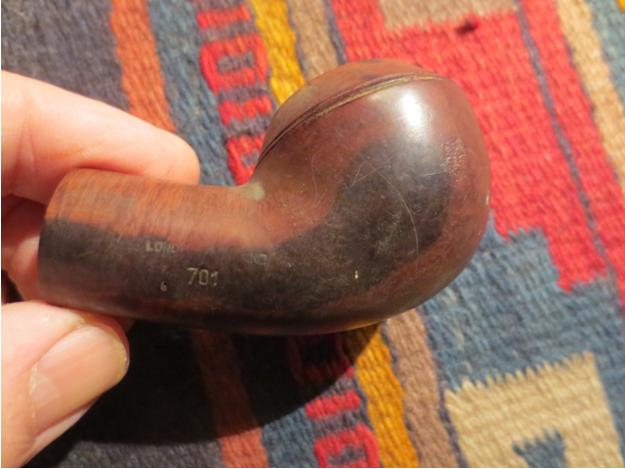
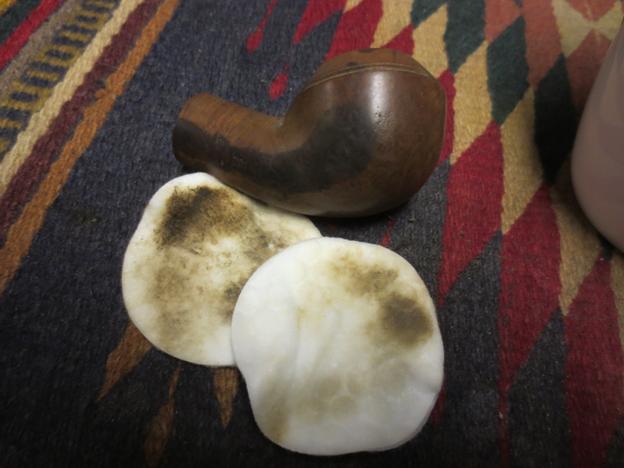
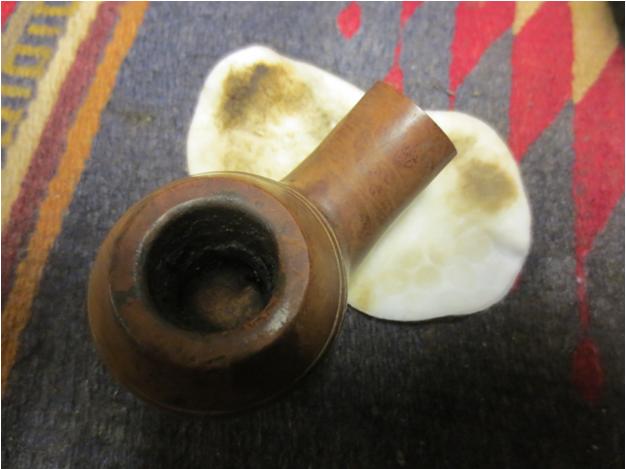
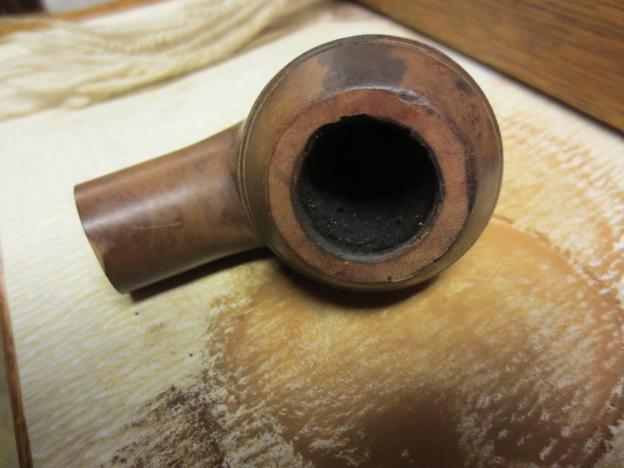
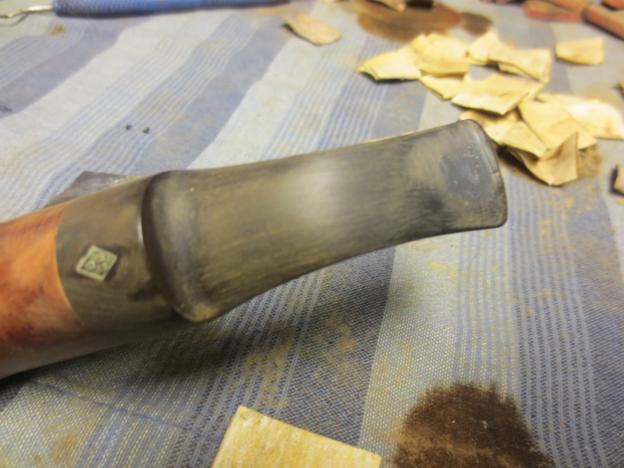
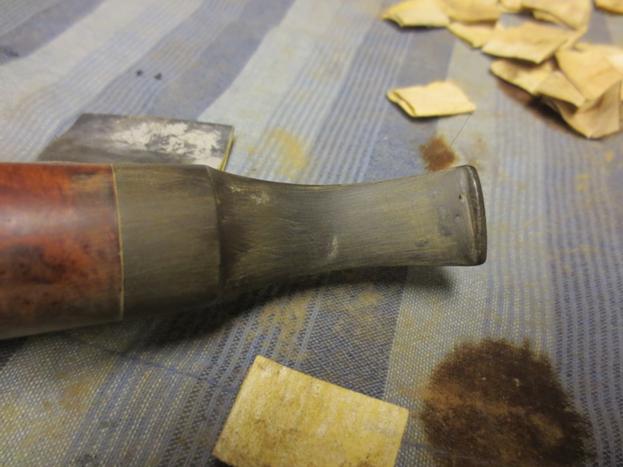
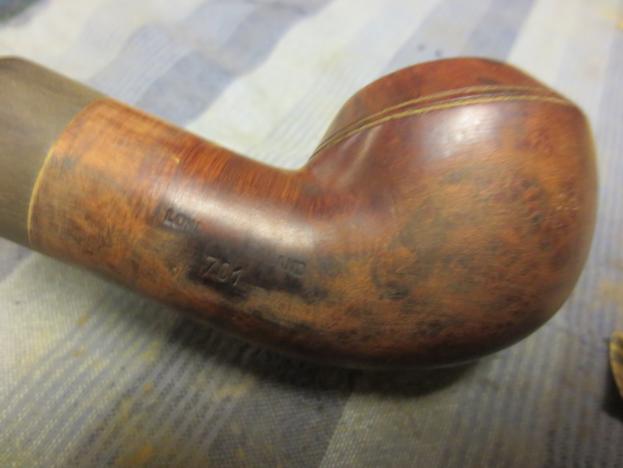
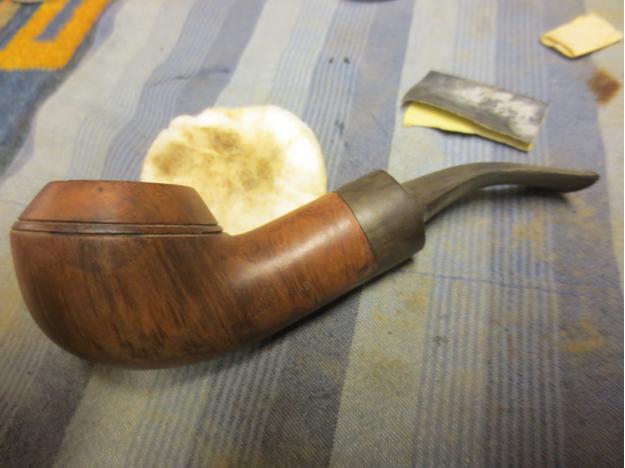
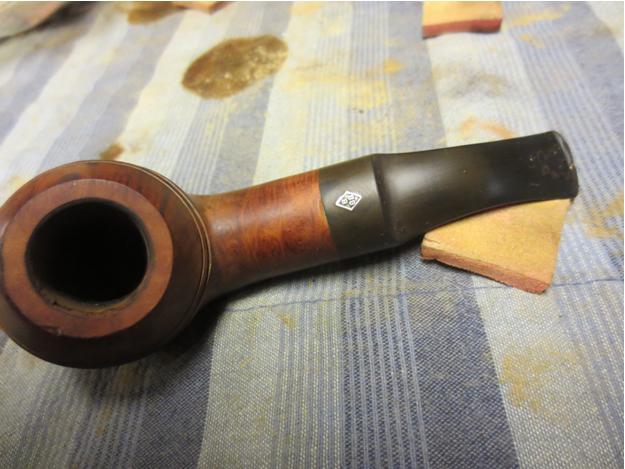
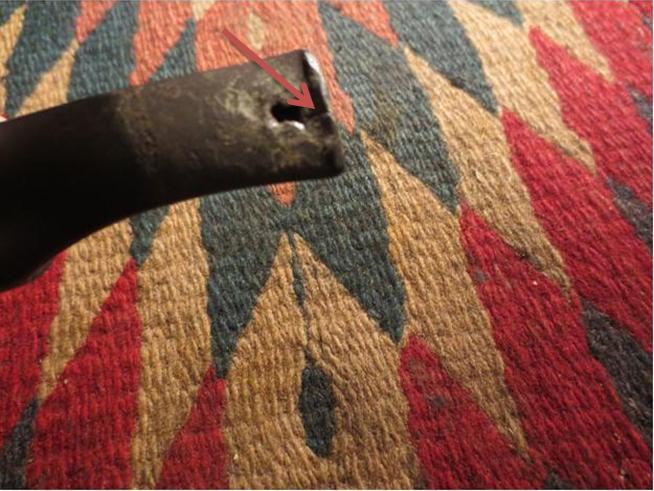
I recently posted about an old BBB 701 Rhodesian that I restored. It was quite a mess and needed a lot of attention to both the bowl and the stem. In the process I took some photos of the stem repair I did and thought I would write a blog on the process. The first three photos below show the state of the stem when I started. The top and bottom sides of the stem at the button had significant tooth chatter. The top of the stem had the bite through at the button and a much worn edge on the button. The underside of the stem had deep bit marks next to the button and small chatter up the stem about 1 inch. There was oxidation on the stem as well. In the photo there appears to be a crack from the bite through hole into the button and to the edge. That mark is more tooth marks but the stem material is not cracked in that way. The red arrow in the first two photos highlights the apparent crack. In the third photo the arrow points to the tooth marks on the surface of the stem.
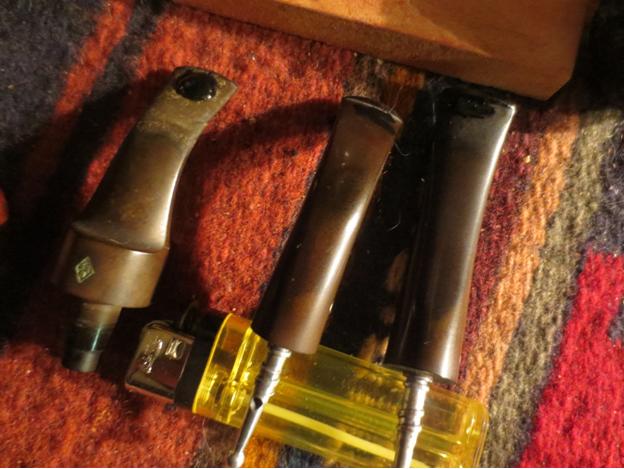
 The first step in preparing to patch the hole in the stem is to clean up the surface and remove any loose or damaged portions of the stem. I use a dental pick to pick at the edges of the hole and the cracks and broken spots on the stem. I also probe other potential thin spots on the top and the bottom of the stem. I particularly probed the tooth marks on the underside to see how thin the vulcanite was in those areas. Once I had picked away the damage I wiped down the areas with a cotton pad and alcohol. The surface needs to be free of wax or dirt before the patch is applied because these will cause the patch to not bind to the surface of the stem.
I have a nail file that I “stole” from my daughters that is a perfect fit in the slot of most pipe stems that I work on. It is tapered and pointed so that it fits deep into the airway underneath the hole in the stem. I want a hard surface under the patch for the glue to puddle against. In order to not glue the file into the stem permanently I apply a thick coat of Vaseline petroleum jelly to the end of the file before I insert it. I only put enough of the jelly on the file that it does not squeeze out of the hole and soil the repair area. This took time to get the hang of. Too much jelly makes a mess of the repair area and too little makes the super glued file the next problem you will need to address in repairing the stem. It takes practice to get it just right – don’t get frustrated and remember too much jelly is better than too little!
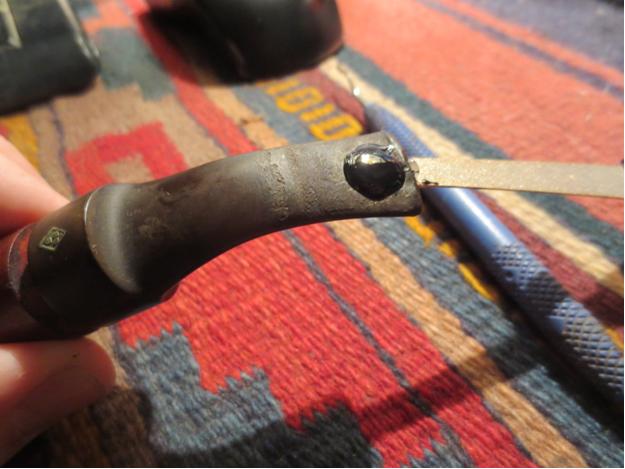
With the file inserted in the airway it is time to start the patch. I drip black super glue around the edges of the hole first to solidify the broken edges and provide a live edge to build on when I fill the hole. I let that first coat of glue dry hard to touch before adding the next layer of glue. I have used an accelerator in the past to quick dry the patch. This time I decided to do it the long way and let the patch cure between coats. In the photo below you can see the ring around the bubble of the patch that is that first layer of the repair. The arrow in the picture points to the cured edge of the repair that surrounds the bubble in the centre. I apply several more coats to the edge to build it out toward the middle. The final coat I purposely overfill because as the glue cures it shrinks. It is a bit more work to sand out the excess material but in the end it makes for a thicker and stronger patch. I also filled the tooth marks on the underside of the stem next to the button with the superglue. These took two coats to build it up enough to reshape the button with files and sandpaper. I set the stem aside overnight to give the glue patch time to cure and harden. The next morning, when the glue had hardened I sanded the patch with a folded piece of 180 grit sandpaper followed by more sanding with 220 grit sandpaper. I work to blend the edges of the repair into the surface of the stem and feather out the surface of the repair to match the surface of the surrounding stem material. In the photo below the arrow points to the patch. It is a slightly different colour of black to the rest of the stem at this point in the process. More sanding and working on the patch will change that.
 On the underside of the stem I sanded the patches until they were smooth as well. On this particular repair there were two small air bubbles that showed up when I sanded the patch. They are shown by the arrows. I refilled these small holes with a drop of black super glue and let it cure until hard then resanded the patched areas.
 When repairing the surface of the stem I always check the profile of the stem to make sure that I am not creating bulges in the surface of the stem. I want to maintain the flow and lines of the stem and not change the profile. When I sand the repairs I repeatedly look at the profile and often take pictures to make sure the flow and lines are smooth. The photo below shows the smooth profile of the stem after the repairs and initial sanding.
 I sanded the stem with 400 grit wet dry sandpaper with a spot of water on the stem. I sanded to remove the oxidation and to blend the patch into the surface of the stem on both the top and the bottom sides. As can be seen in the photos below the patch on the top side is smooth and blended into the stem. It is still a slightly different black colour but more sanding will remedy that. The patch on the underside is well blended. More work needed to be done with the two air bubble repairs to blend them further.
 I sanded the stem further with a medium and a fine grit sanding sponge. 3M makes this product and it is very flexible. I find that it allows me to follow the curves of the stem and the sharp edges of the button with little effort. The top and bottom of the stem are shown after sanding in the next two photos. The patches are now little more than small spots on the stem that will further disappear after sanding with micromesh sanding pads.
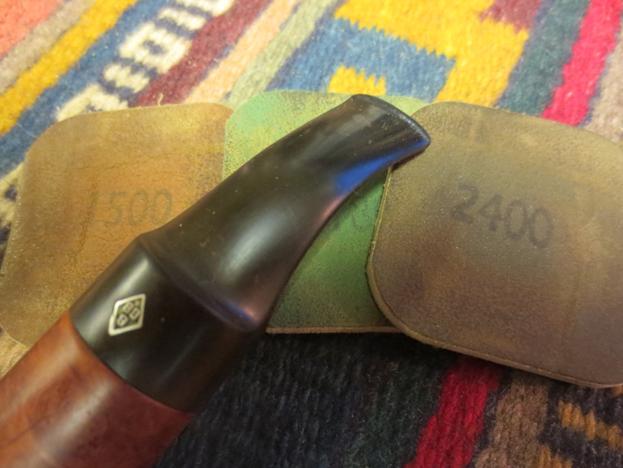
 I wet sanded the stem with 1500-2400 grit micromesh pads to smooth out the repair and further blend the patches. In the photo below you can see that the patch has all but disappeared on the top side of the stem. The one on the underside looks similar at this point in the process.
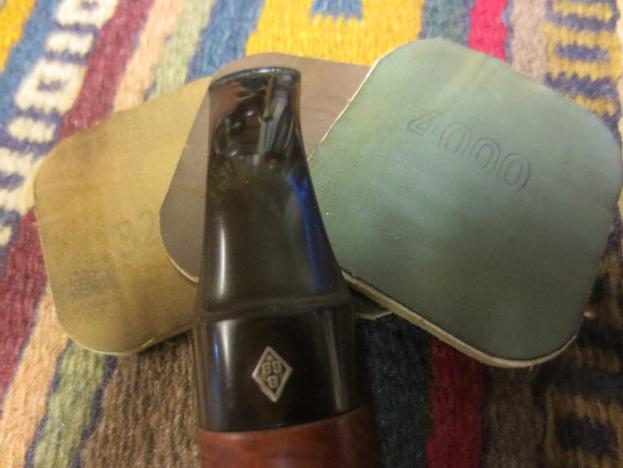
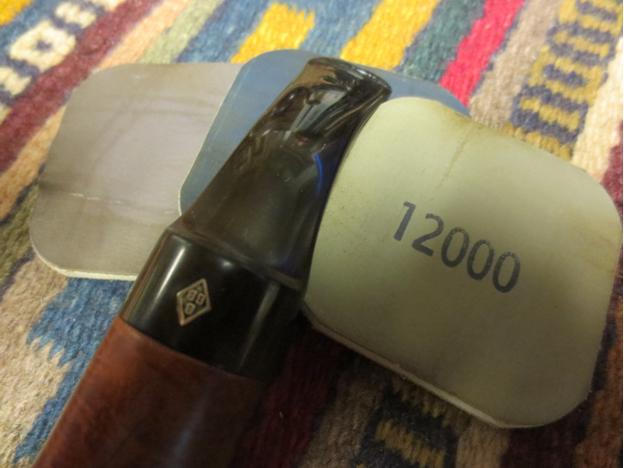
 I dry sanded the stem with 3200-12,000 grit pads. The surface of the stem began to shine and have a rich glow in the surface. Each successive grit of pad deepened the shine and the richness of the black stem.
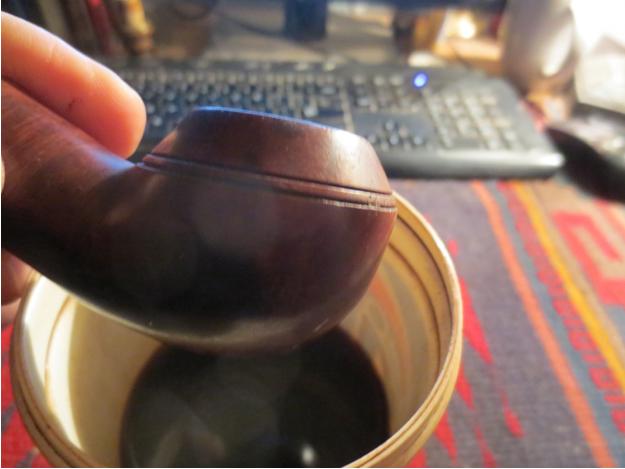
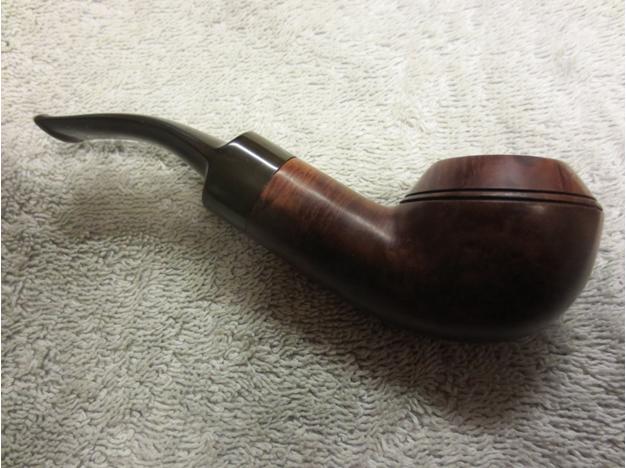
 I buffed the stem with White Diamond and gave it multiple coats of carnauba wax. I buffed it with a soft flannel buff to raise the shine. The final two photos show the top and underside of the stem the shine is rich enough that the flash is shown reflected in the surface of the stem. The hole is solidly repaired and the tooth marks on the underside of the stem no longer show. The edge of the button has been sharpened as well to distinguish between the stem surface and the button. The finished stem looks as if it was never damaged though under a bright light the spots are slightly visible if you know what you are looking for. The stem is now ready to be put into service. The proof of the durability of the patch will be seen over time as the pipe is smoked and used. On other stem repairs like this I have never had a problem with durability and I am hoping for the same with this stem.