Blog by Steve Laug
My brother Jeff always comes up with some amazing finds. I am not sure how he does it, but there is never a box of pipes that I get from him that does not have a surprising find in it. In this case we had talked about a meerschaum pipe that he was interested in picking up. I can’t remember where he had seen it but his sights were set on it. He had sent me some photos that he had received from the seller to give me an idea of what I would be dealing with when the pipe arrived. Here are the photos that he sent me. They are grainy and really don’t give an idea of the size and proportions of the pipe. They do however show the issues clearly. The shank was joined in two spots with nylon/Teflon threaded tenons and those had snapped off inside the shank. It also showed that the pipe had been smoked and the rim top was dark. There was some nice patina developing on the shank and bowl. I did not have a clue what the carving on the front of the pipe looked like. The next two photos show some close up views of the damaged areas. The first partially shows the damage of the first broken tenon on two parts of the shank. What it does not show is where the rest of the broken tenon is. I am pretty sure that it is in the other half of the shank. My guess is that somewhere along the way someone tried to take the pipe apart and snapped the tenon.
 The second photo shows the broken tenon at the bowl shank joint. This one is a bit more disconcerting because not only are parts of the tenon broken off in each side of the shank and bowl but it appears that someone tried to glue the two parts together. I would not know for sure until I had it in hand but that was my guess at this point. We talked about it and Jeff made the deal. Soon I would see the pipe in person.
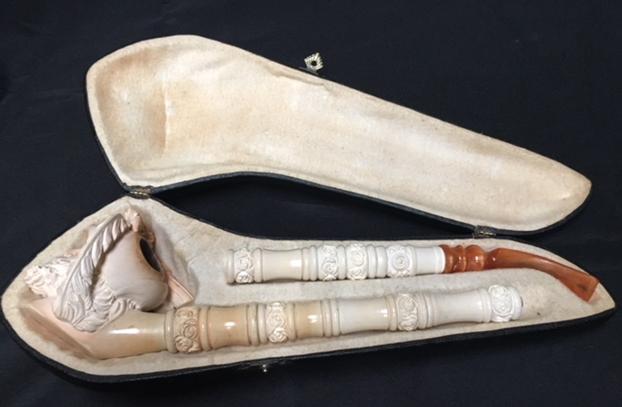
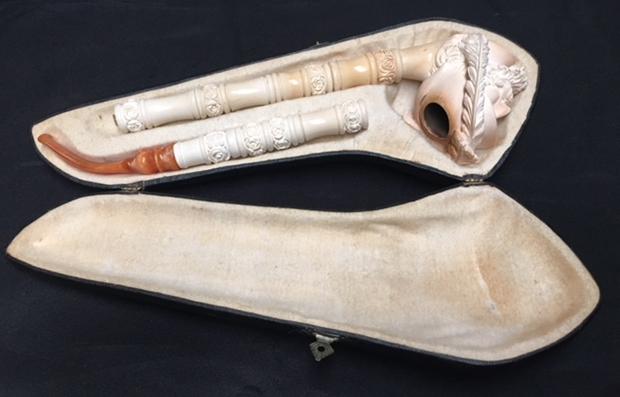
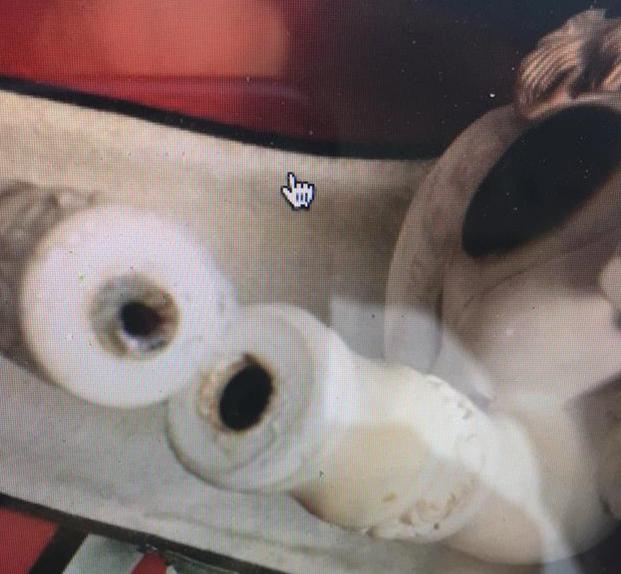 At this point your guess is as good as mine in terms of what the pipe looked like, what face was carved on the front and what the size and proportion were going to be. I had no idea what to expect but Jeff told me that he would send it home with my daughters when they returned from a visit for my Dad’s 90th birthday. Sure enough, he talked them into bringing a few pipes and a rack with them in their luggage. They got home around 11:30pm but that did not stop them from unpacking their bags to show me what they had brought home with them. In my second daughters luggage there was a long trombone shaped case – the case alone is 13 inches long and 4 inches wide at the widest point. It is three inches tall on the thickest portion of the case. It is covered with a black vinyl like many meerschaum cases are these days. I could see that the pipe inside must be a big one. I knew it was the one we had spoken of above but I had no idea what I was in for once I opened the case. Here are some photos of the case and what I saw when I opened it.
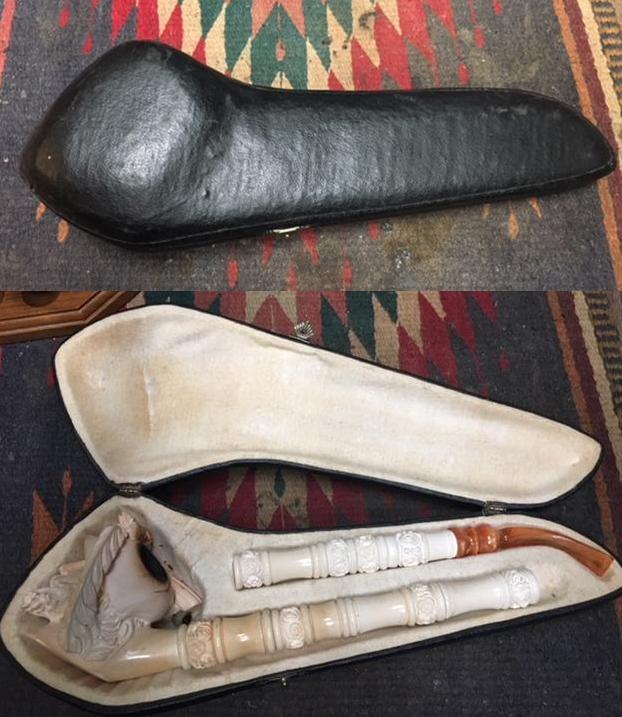 I put the pipe away because I did not want to be tempted to work on it until I had finished some repairs that I was doing for a guy here in Vancouver. Yesterday I finished the last of his repairs and last evening I took the pipe out to have a look. The end of the shank at the bowl had a piece of the nylon tenon broken off inside of it. I used an easy out and turned it into the tenon until it grabbed then unthreaded the tenon from the shank. One done, and not too difficult.
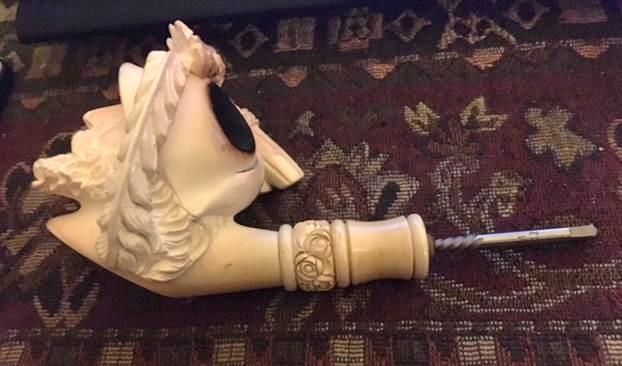 I used the easy out section that held the stem as well. It was also relatively painless. I turned it into the tenon until it grabbed then unthreaded the tenon from the shank piece. Two done, with no breakage and without making things worse!
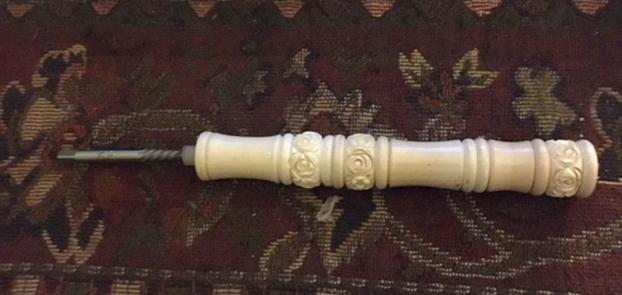 The third section was another story. It worried me because it was the piece that had been glued to the bowl end of the short shank. It had glue on the meerschaum surface that turned out to be rubber cement. I scraped it off and tried to turn that tenon out with an easy out. No success. It was glued in solid in the shank. I took out my cordless drill and fit it with a bit slightly larger than the airway in the tenon and carefully drilled it into the tenon. You have to be careful because one wrong move and the bit could damage the shank piece. Nerve wracking for sure! I was able to drill it carefully and when the bit grabbed I reversed the drill and unthreaded the glued piece from the shank. Success! All of the broken tenon pieces were removed. I could now see what else I had to do on this one.
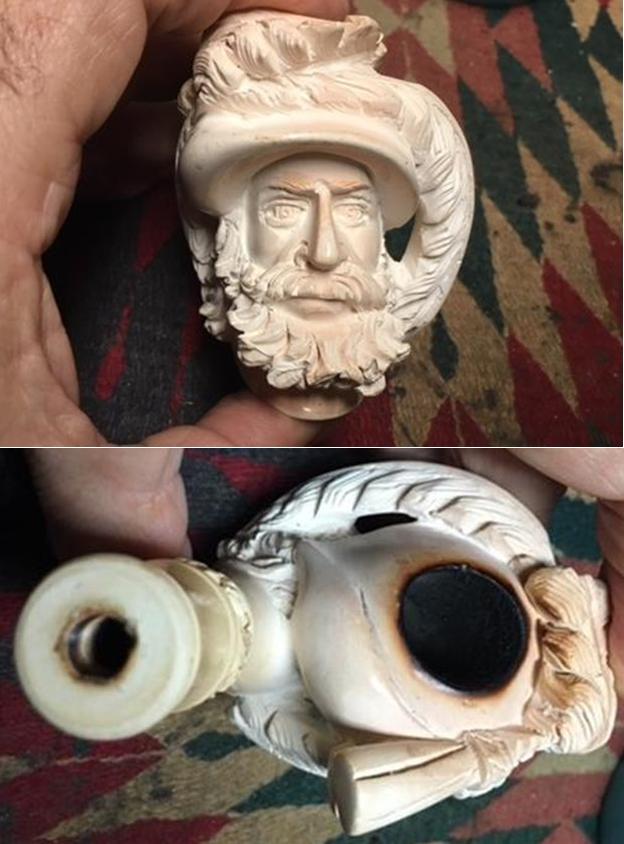
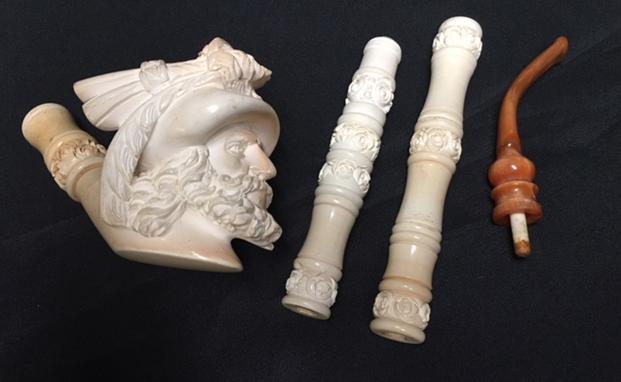
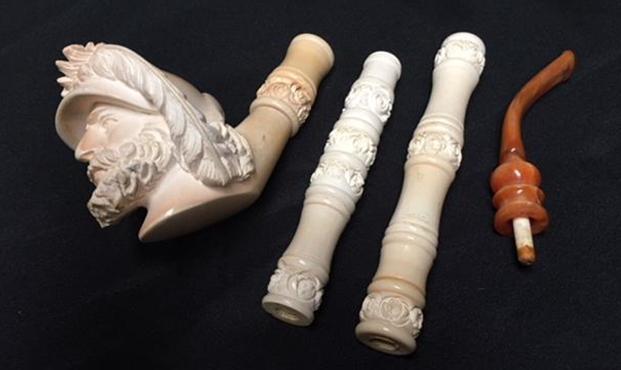
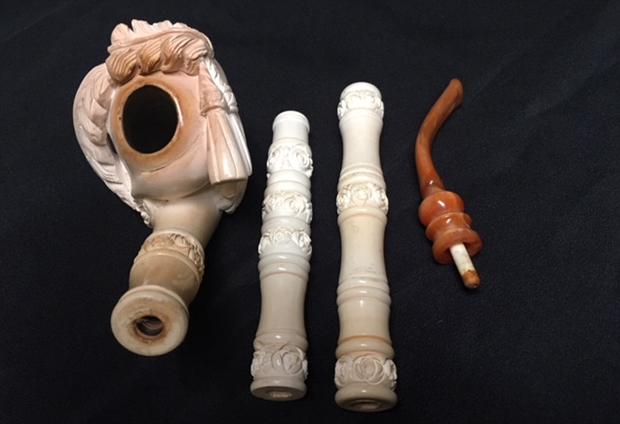
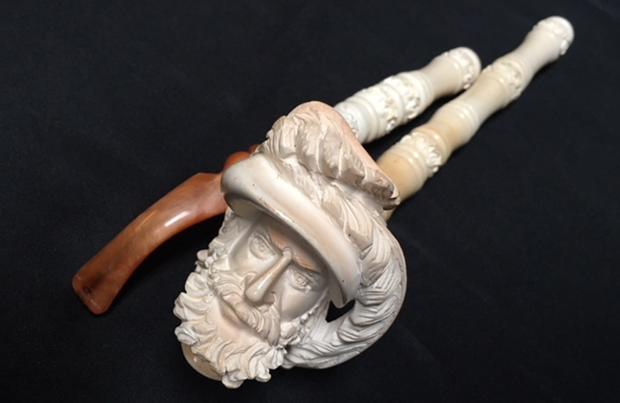
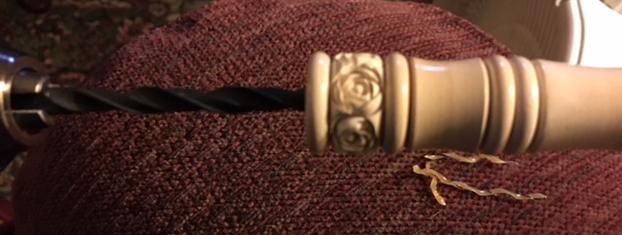 I started by checking out the connections between each section of the shank pieces. It did not take long to realize that the shank portions were made up of shorter spool like sections. I took the spools apart and took a photo of all the pieces. It was an interesting looking pipe. This is also the first look you are all getting of the figural. I think it is called a Courtier. It is a bearded gent with a cap and feather. It is well carved and very detailed.
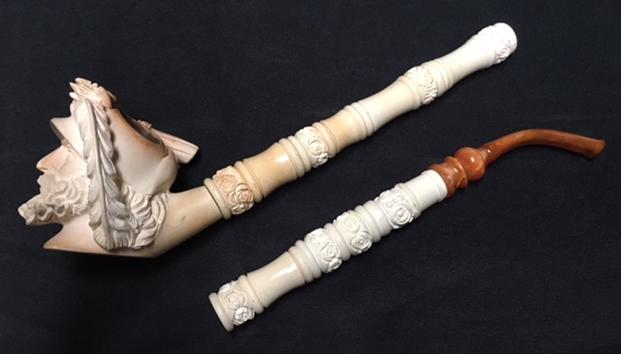
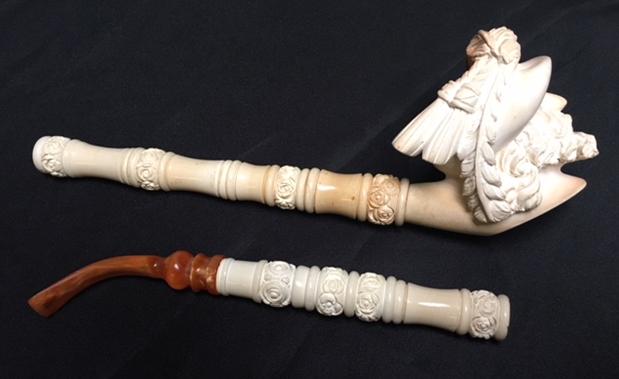
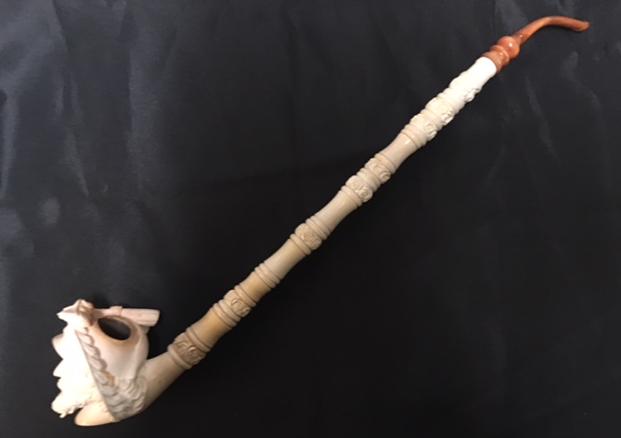
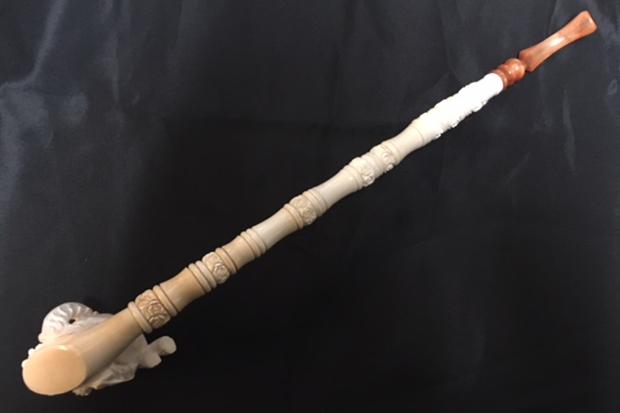
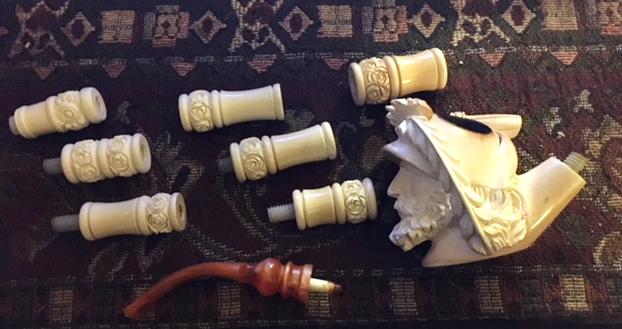 I decided before calling it a night to put the pipe back together again using the pieces of broken tenon that I had to reconnect the parts. I wanted to have some idea of the finished look of the pipe and what the length would be once it was all put back together. It is a long pipe. I measured it once I had it put together and from the tip of the beard to the end of the stem was 17 ½ inches. I truly had no idea this was what it would be when I first saw it in those first photos above. I took a couple of photos to show you what I saw. It is a gorgeous pipe with well done, intricate carvings. Now that all the parts were working I would need to clean them each. But that is it for the night. I packed the pipe back in the case and headed to bed.
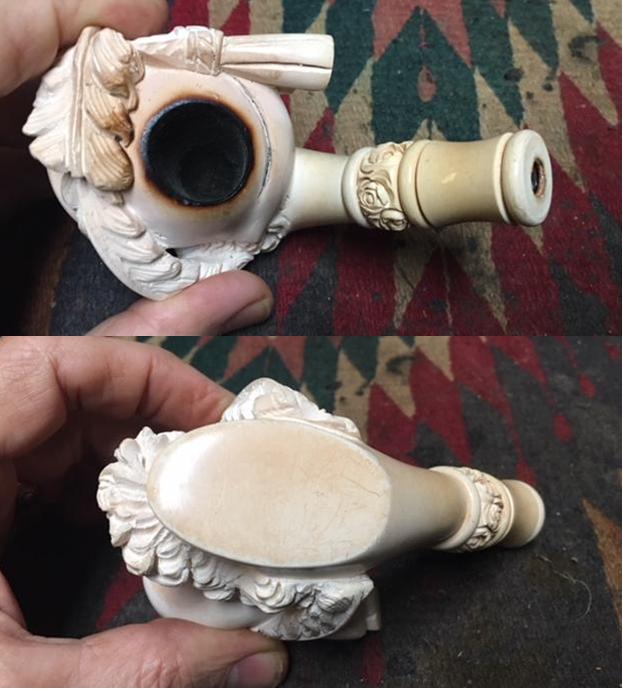
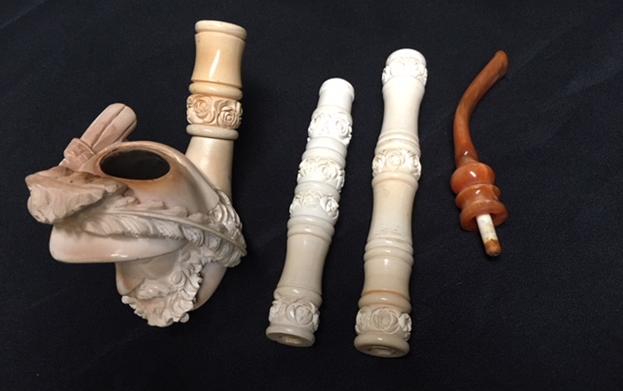
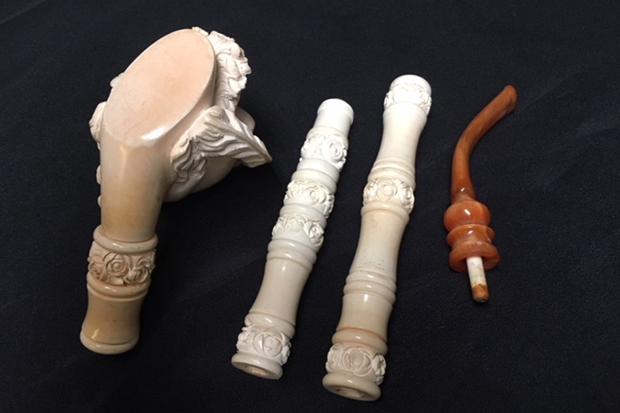
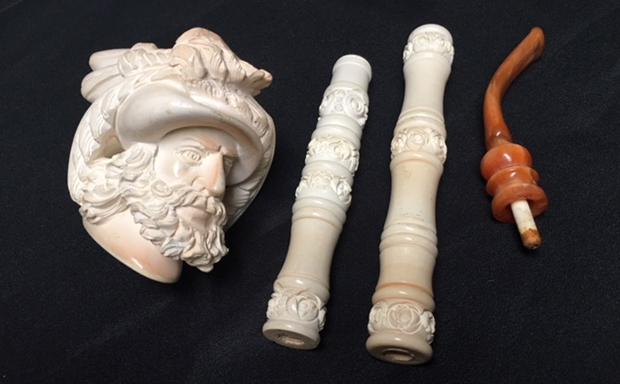
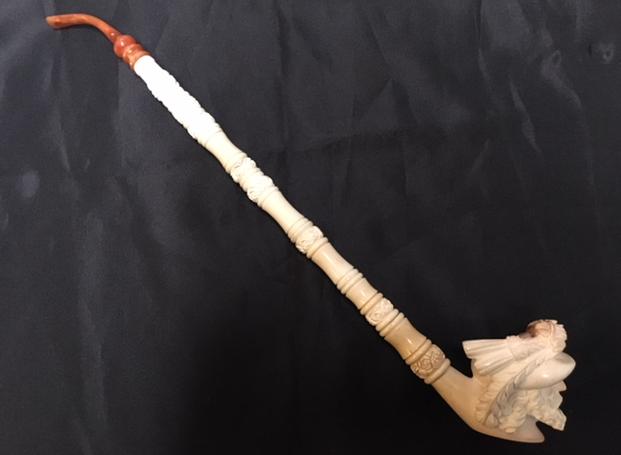
  The first thing I did in the morning was to take some photos of the figural carving. I wanted to have a look before I started the cleanup and have found that taking photos gives me a good idea of what I need to work on with each pipe. Here is what I saw. It was a beautifully carved, ornate piece. There was some patina developing on the shank and the bowl, particularly around the bottom portion and the sharper edges of the carving. The rim top had a bit of lava buildup that would need to be removed along with the cake. Overall this portion of the pipe was in excellent condition.
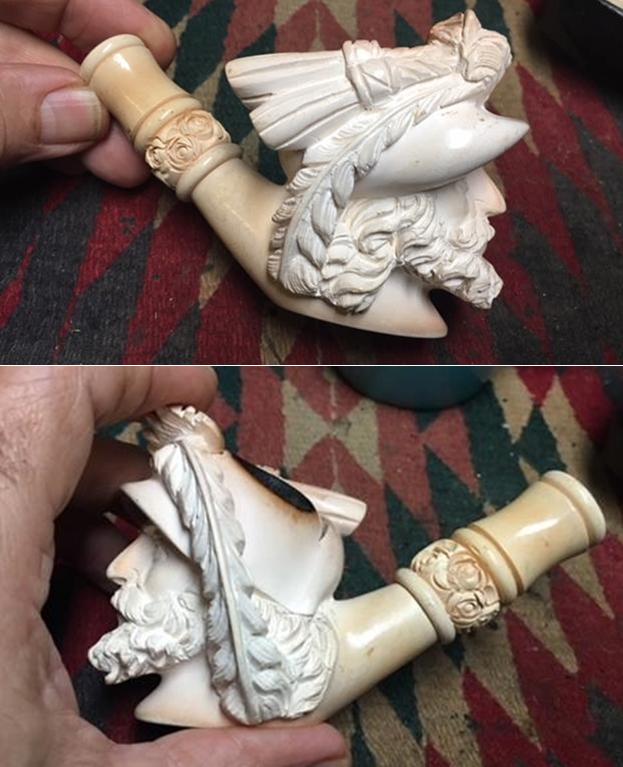
 I reamed the bowl with a Savinelli Fitsall Pipe Knife and removed all of the cake. I wanted the walls clean and uncaked. I followed that by sanding the inside of the bowl with a dowel wrapped with sandpaper. I wiped down the inside of the bowl with a damp paper towel to remove the dust and sanding debris.
 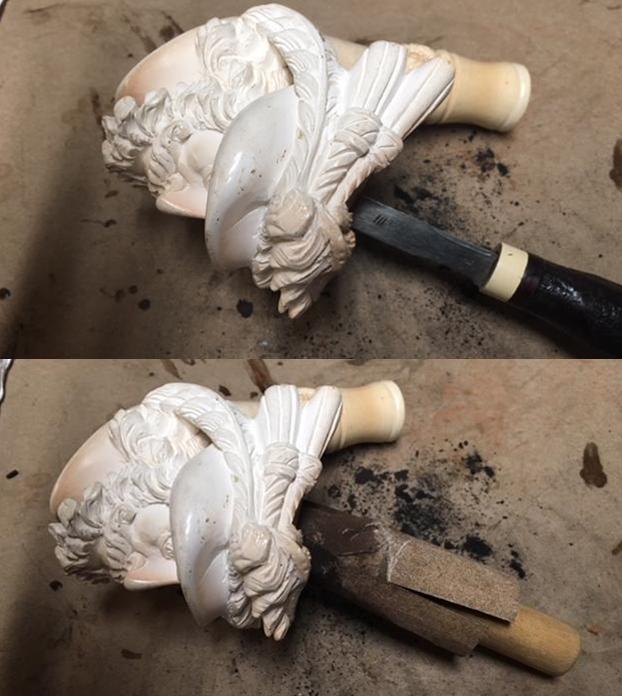 I tried to blow air through the shank and bowl and was surprised that it was clogged and nothing flowed. I unscrewed the shank piece from the bowl and blew through that. It was clear so I knew that the clog was in the bowl portion for sure. I tried to push a pipe cleaner through the airway and met a hard clog. So to open the clog I pushed a piece of stiff wire through the airway and worked it around to clear out the clog. I checked to make sure there was airflow and then cleaned out the shank with pipe cleaners, cotton swabs and alcohol until the airway was clean and there was unrestricted airflow between the bowl and shank. Part one of the airway cleanup was finished and I was ready to work on the rim top.
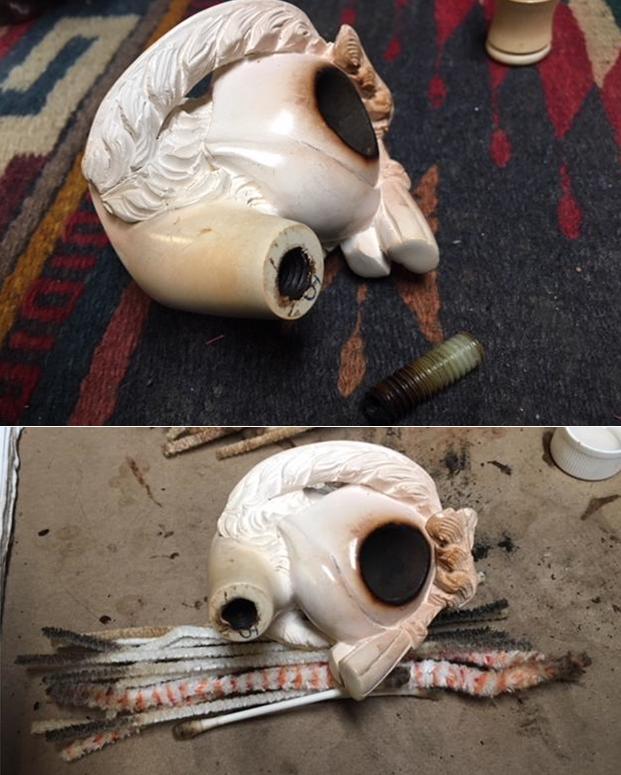 I sanded the lava on the top of the bowl with a 1500 grit micromesh sanding pad and wiped it down with a damp cotton pad. It did not take too much work to get the rim top clean. I cleaned out the grooves in the cap with a damp cotton swab to leave the top surface clean.
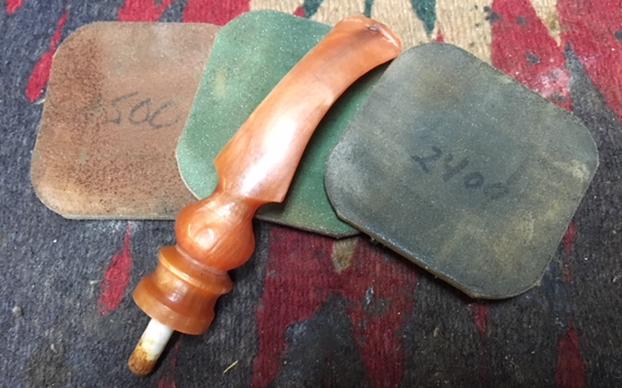
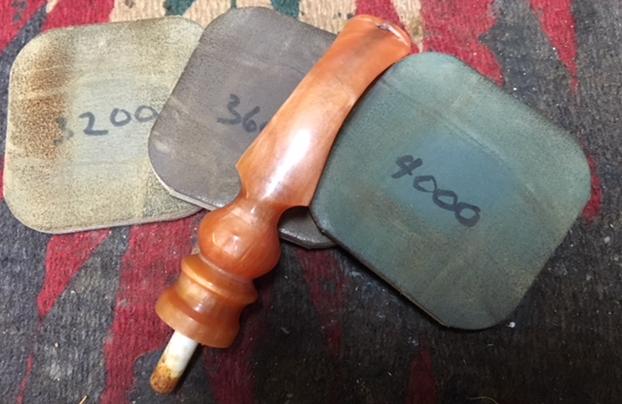
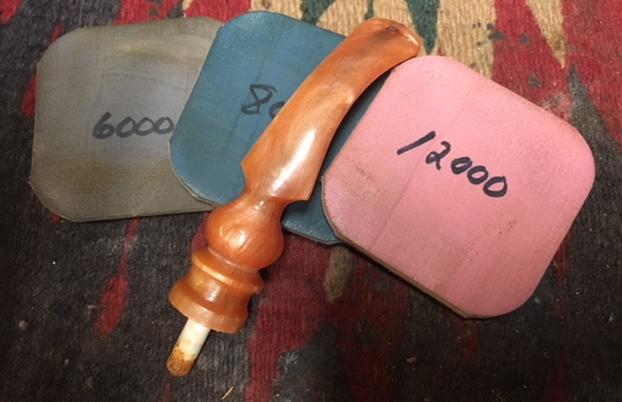
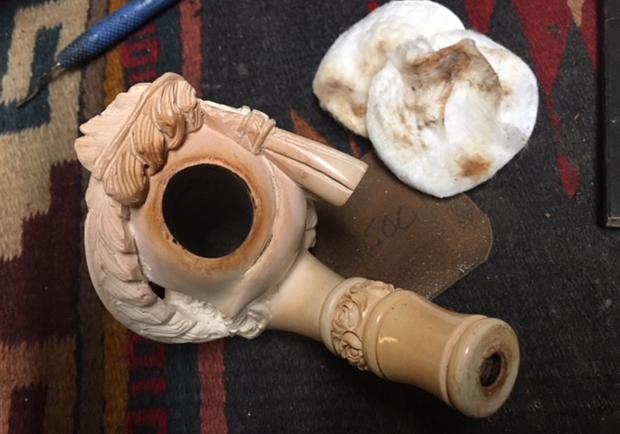 I polished the meerschaum top with micromesh sanding pads – wet sanding with 1500-2400 grit pads and dry sanding with 3200-12000 grit pads. I wiped down the top of the rim with a damp cotton pad after each sanding pad. The following photos show the progress.
 I cleaned up the shank section that was connected to the bowl. I scraped away the rubber cement on the surface of the shank end and cleaned out the interior with pipe cleaners, cotton swabs and alcohol. I beveled both ends of the nylon connector to help with the airflow. Once it was clean I attached the first spool to the bowl portion.
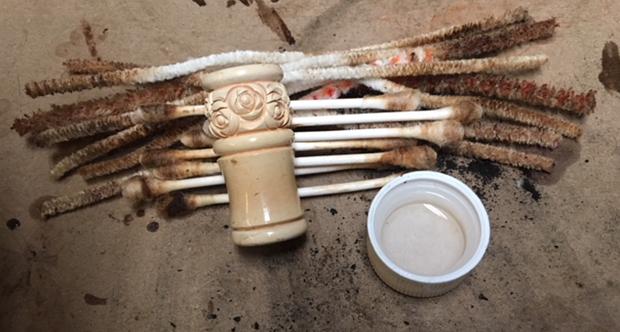 It was time to move on to the cleaning of each of the spools that made up the first section of the shank. I unscrewed the parts so that I could better work on them. It is easier to clean up the nylon connectors and the inside of the spool when they are apart. I used a pen knife to lightly bevel and open up the end of each of the connectors to improve the airflow. I cleaned out the airways in each section with pipe cleaners, cotton swabs and alcohol until they were clean. I checked the airflow on each section and then put it back together. Now the bowl and the first section of the shank were clean.
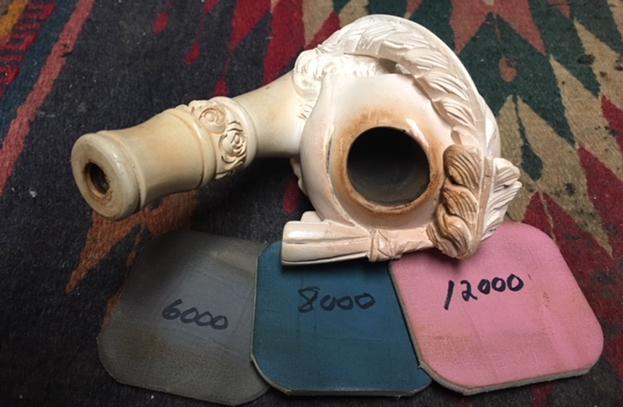
 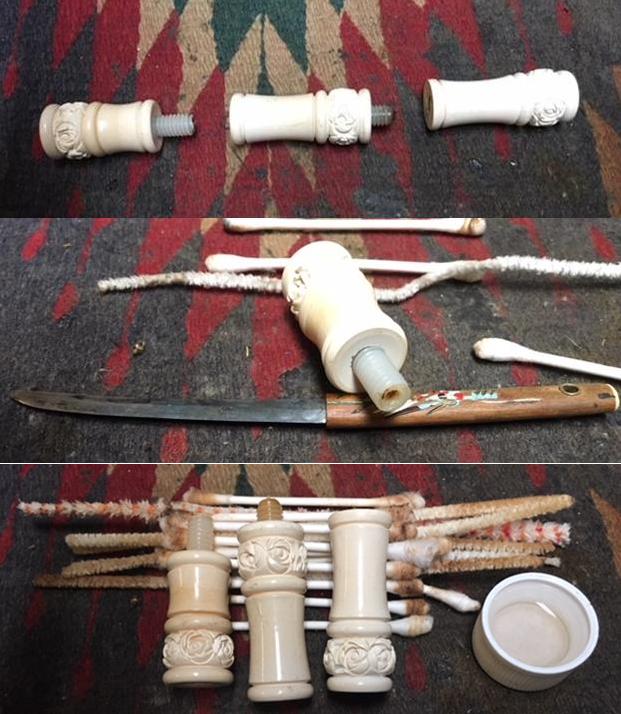 I put the spools back together and took a photo of the first section of the shank.
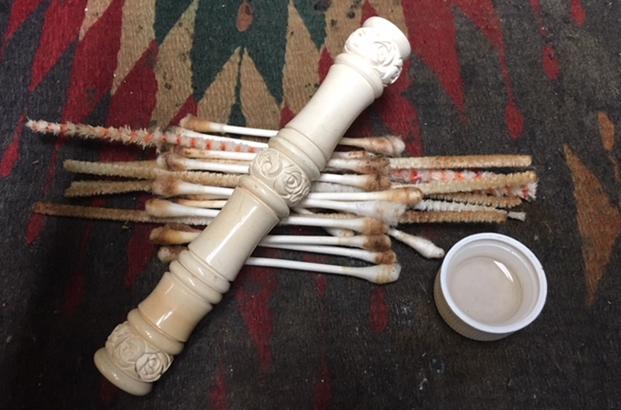 I moved on to the cleaning of each of the spools that made up the second section of the shank. I unscrewed the parts so that I could better work on them. It is easier to clean up the nylon connectors and the inside of the spool when they are apart. I used a pen knife to lightly bevel and open up the end of each of the connectors to improve the airflow. I cleaned out the airways in each section with pipe cleaners, cotton swabs and alcohol until they were clean. I checked the airflow on each section and then put it back together. Now the bowl and the first and second section of the shank were clean.
 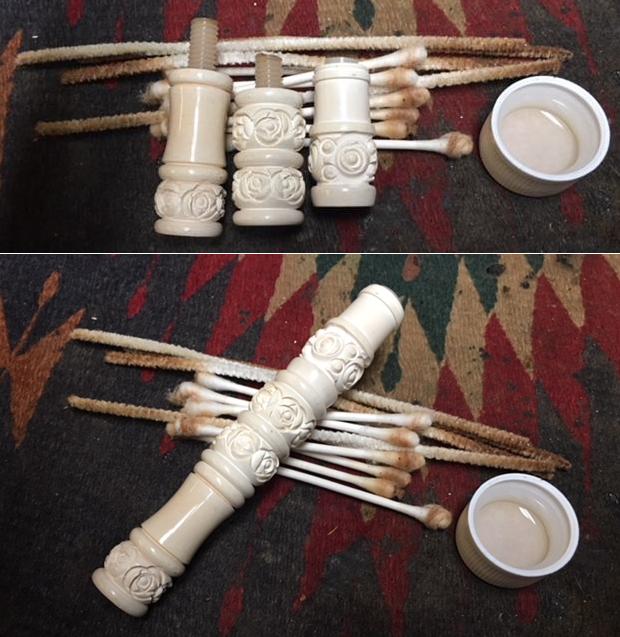 I cleaned airway in the stem with pipe cleaners and alcohol. I used a penknife to bevel the end of the push tenon. I sanded the exterior of the nylon push tenon to remove the buildup and stain that was on the white tenon end. The photo is a bit out of focus but you can see how dirty the airway was inside from the pipe cleaners under the stem.
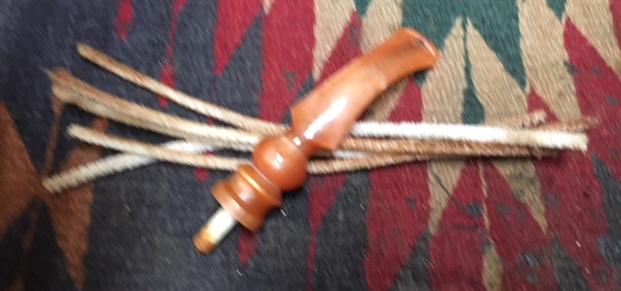 I wiped down the exterior of the stem and found another surprise. There was a hole in the top of the stem next to the button. In examining the hole I found that I was not dealing with a bite mark but with a misdrilled stem. The airway in the button was too high and that left the Lucite material too thin at that point. I took photos of the top and bottom of the stem and of the end view and include them now. The hole is the dark spot on the top side next to the button.
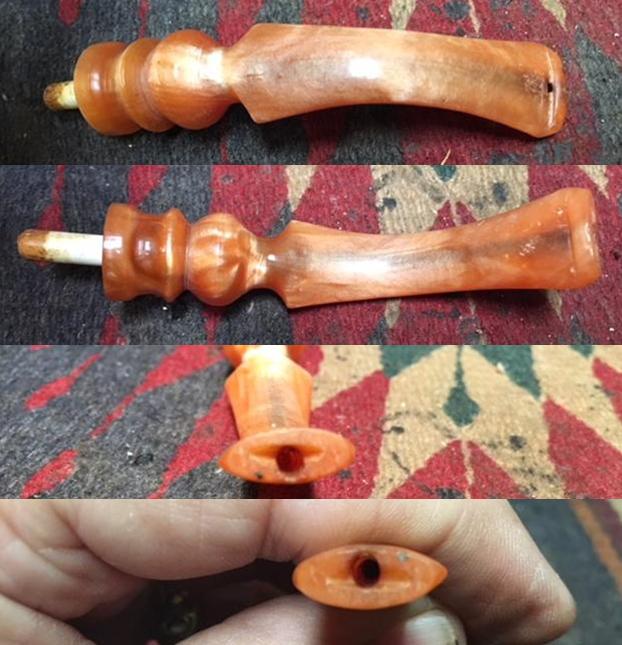 I put some Vaseline on the end of a pipe cleaner and inserted it in the airway below the hole in the stem surface. I filled it in with clear super glue. I build up the top of the button and filled in the over-drilled airway in the button at the same time.
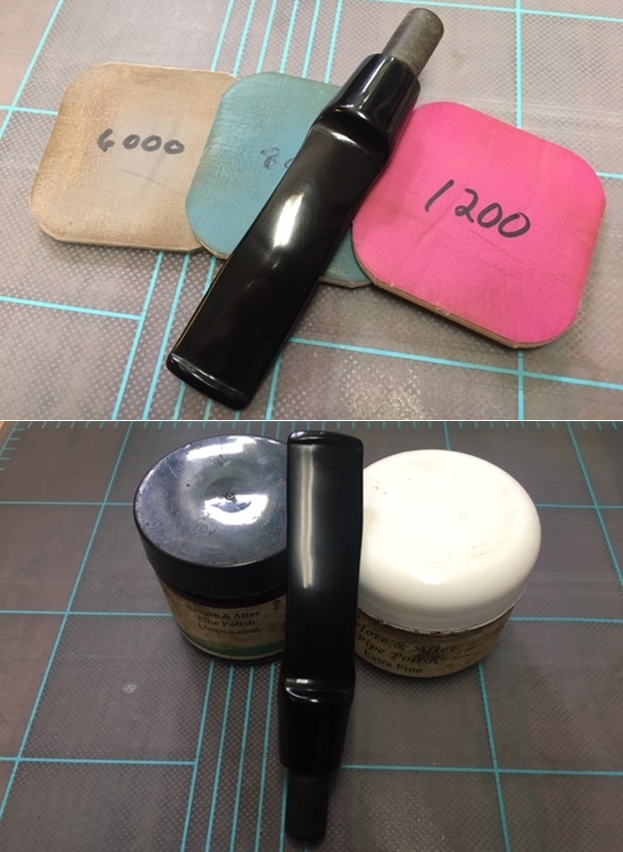
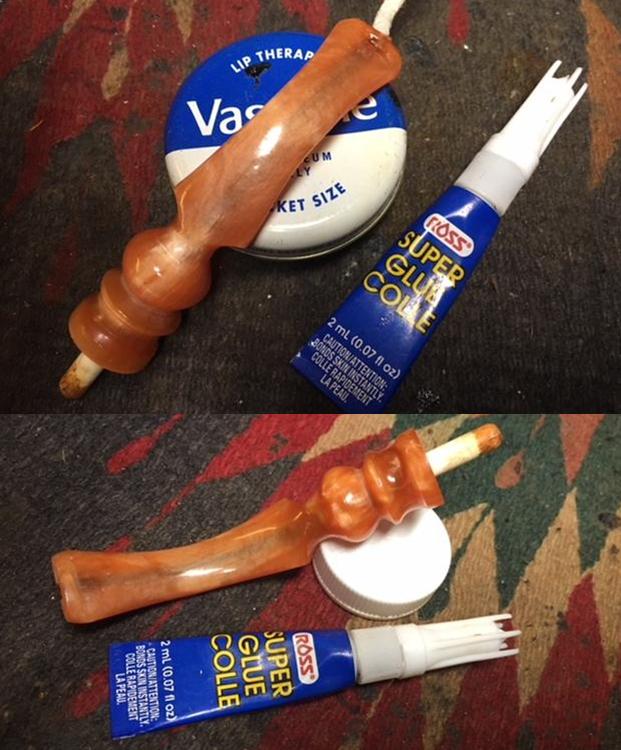 Once the repaired area cured I shaped the button edge on both the top and the underside with a needle file. I blended the repair into the surface of the stem with 150 and 220 grit sandpaper. I polished the stem with micromesh sanding pads – wet sanding with 1500-2400 grit pads and dry sanding with 3200-12000 grit pads. I wiped it down with a damp cotton pad after each grit. I buffed the stem with Blue Diamond on the buffing wheel.
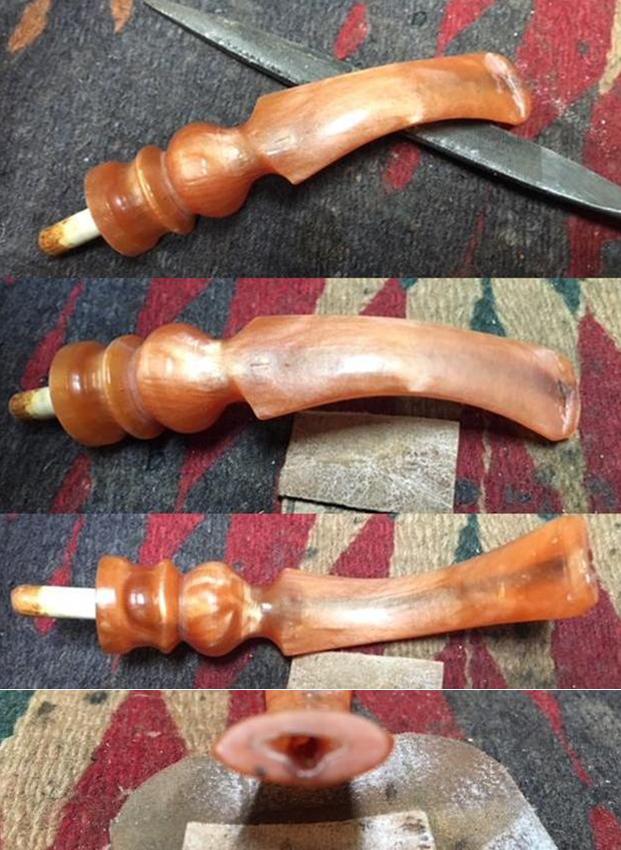
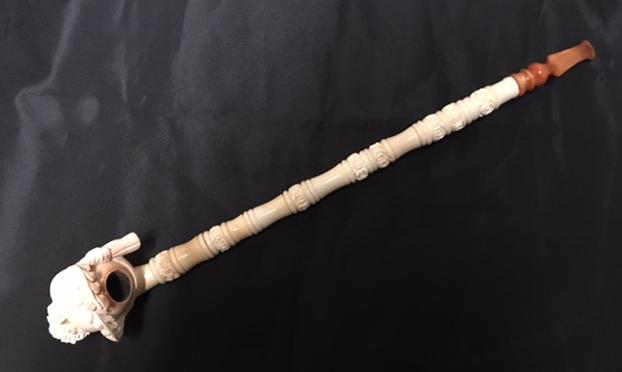
 I buffed the pipe with a shoe brush and finished polishing it with a soft microfiber cloth. Finally the pipe is clean and finished. I polished all of the parts individually with the cloth and took photos of the pipe before I put it together. This is one that I think I will hang on to for my own collection. I have ordered some new nylon connectors to replace the broken ones that I am using to hold it together at the moment. I took photos of the pipe as a whole and then broke it down and put it in the case and took photos of that to close this chapter of the story. Thanks for walking with me through this restoration.
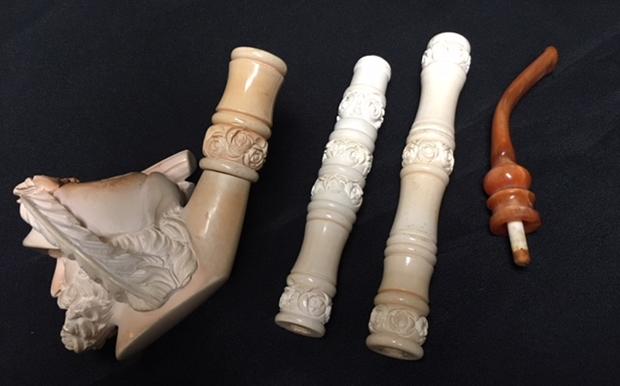

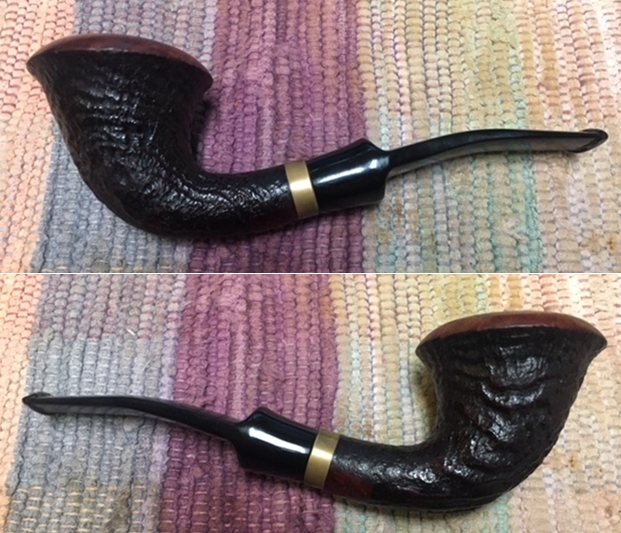
 It was obviously a well smoked pipe that the pipeman must have really loved. It had a thick cake in the bowl and heavy overflow of lava on the rim top that was also very thick. The inner edge of the bowl was also thickly caked. The photos I took of the stem are also very clear. There were tooth marks and chatter on both sides of the acrylic stem and a small bit through on the topside of the stem. Fortunately it was not too big a bit through so it was repairable.
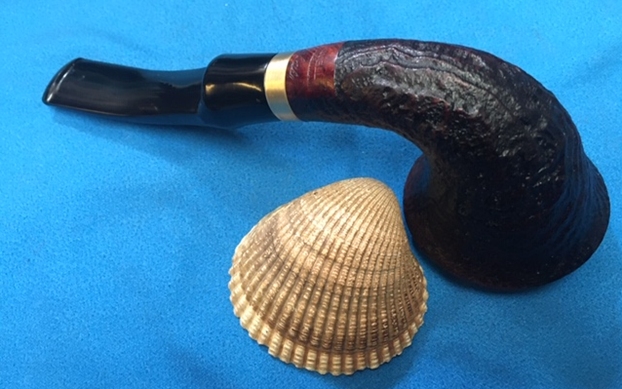
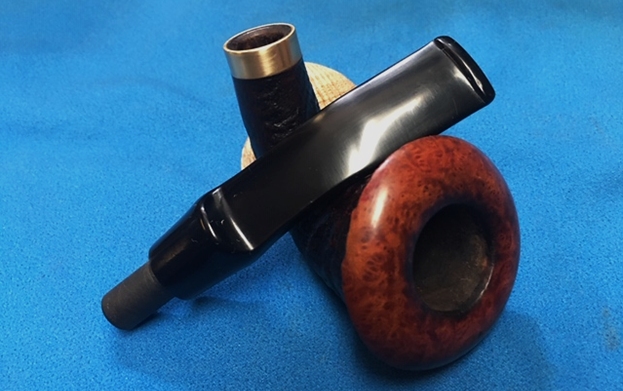
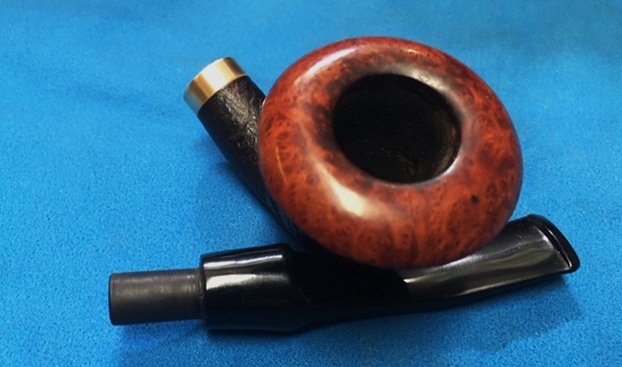
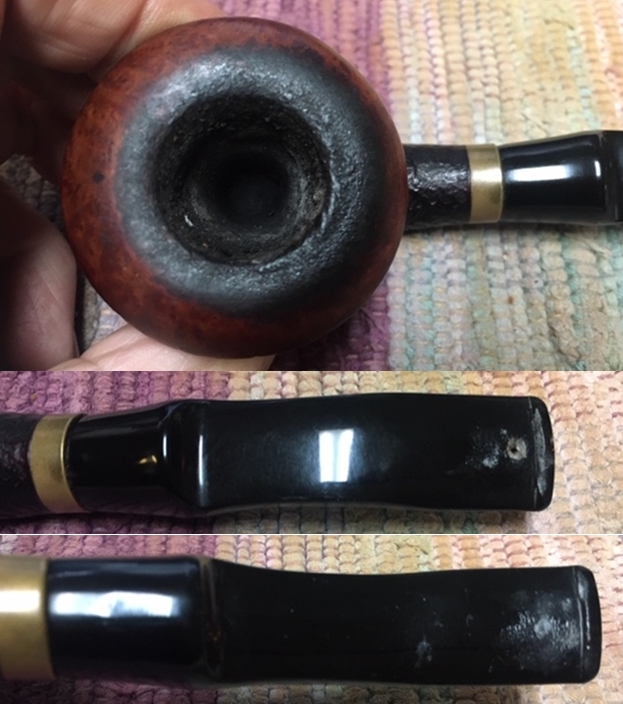 I took a photo of the stamping on the shank and it read Stanwell [over] Made in Denmark [over] Calabash in script. The brass decorative band was dull and oxidized.
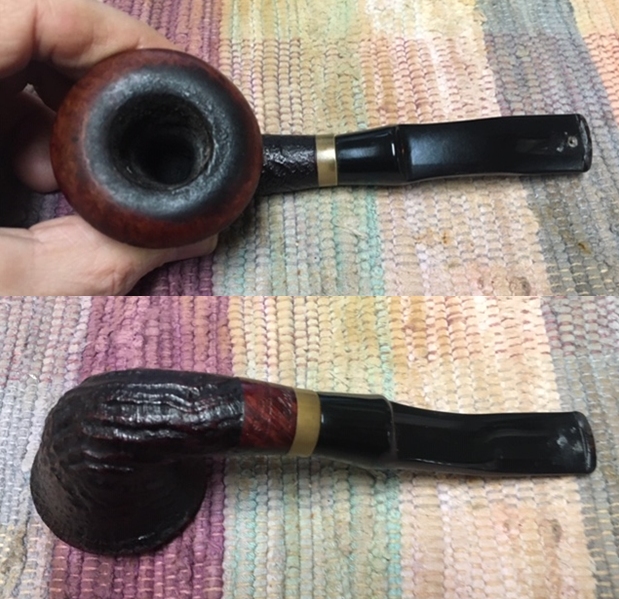
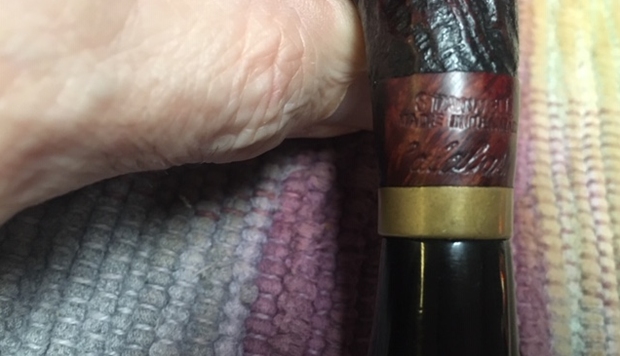 I took the stem off the shank and took photos of the pipe. The first photo below shows the pipe in profile and shows the bite through very clearly. The second photo shows the end of the tenon and how clogged it was with the tars and oils. My first thoughts were that it had an adapter in the tenon to fill it and convert it to a non-filter pipe. Once I cleaned it up it was clear that it was a regular tenon with a slight inset.
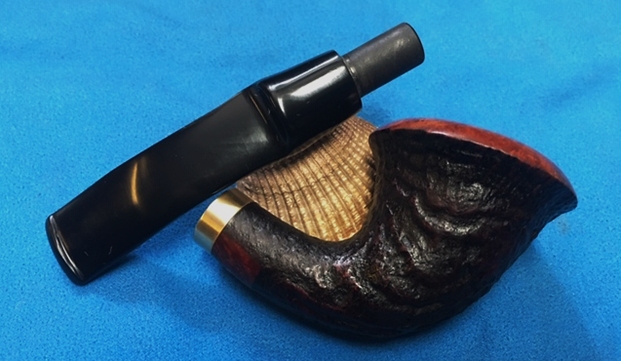
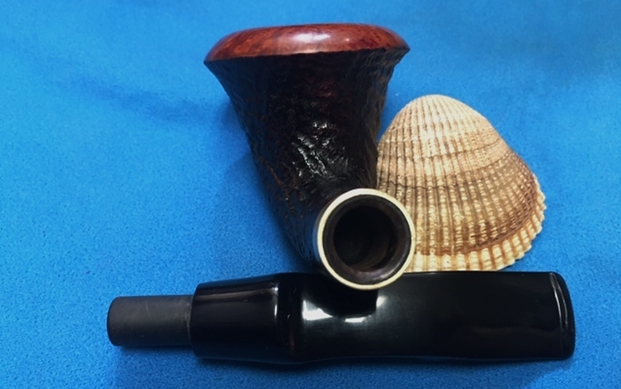
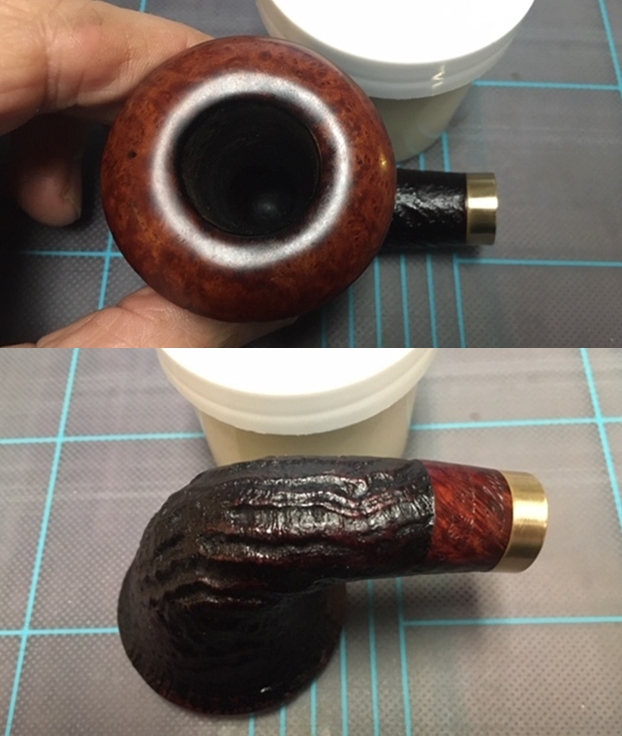
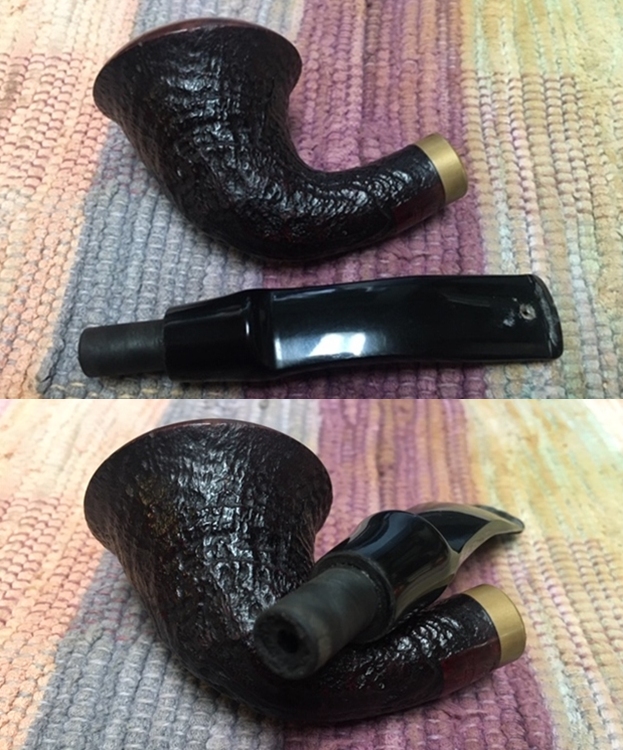 I like working on clean pipes so I reamed the bowl with three of the four cutting heads on the PipNet Pipe Reaming set. The bowl is conical so it took all three heads to remove the cake from the bowl. I cleaned up the remnants of cake with a Savinelli Fitsall Pipe Knife. I also scraped the calabash rim top with the knife to remove the lava.
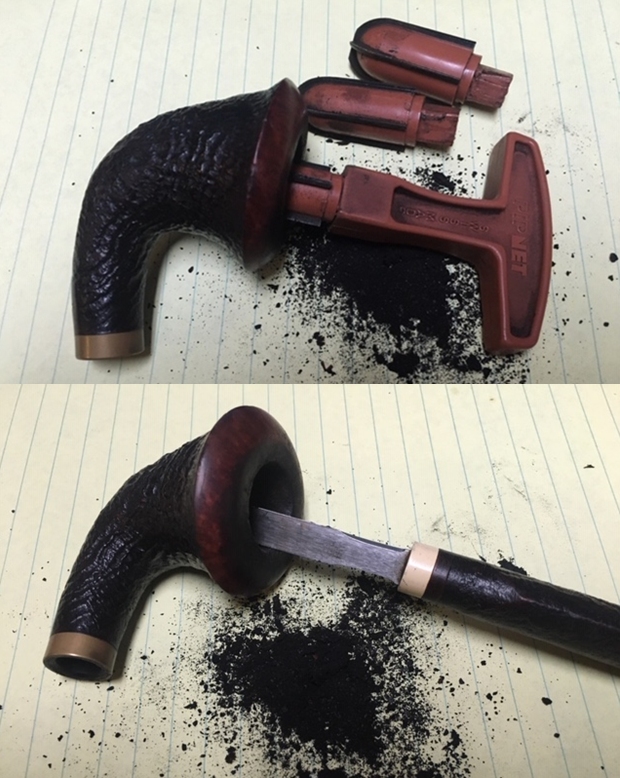
 I cleaned out the internals of the shank and stem with pipe cleaners, cotton swabs and alcohol. I worked them over until the inside of the pipe was clean.
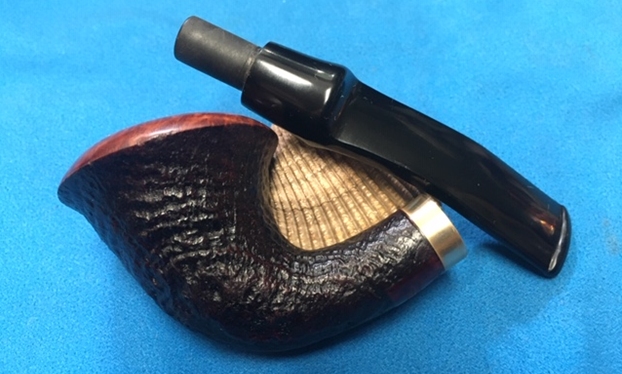
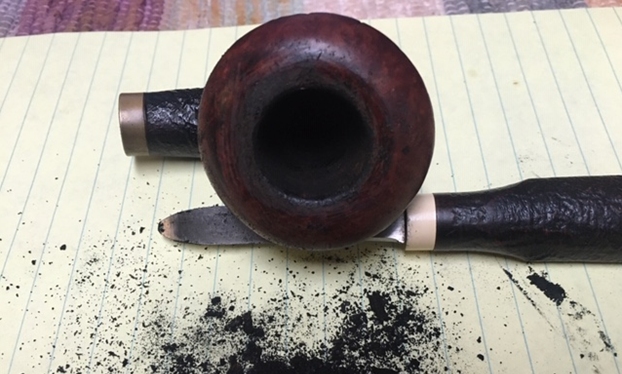
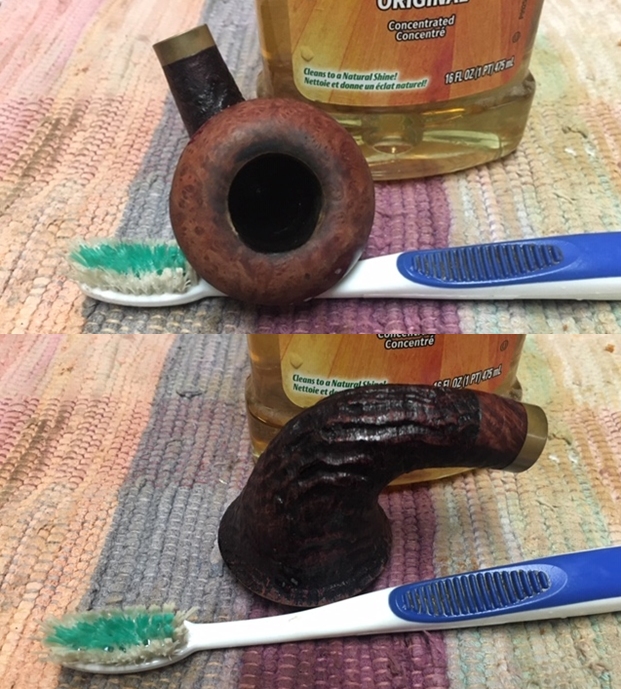
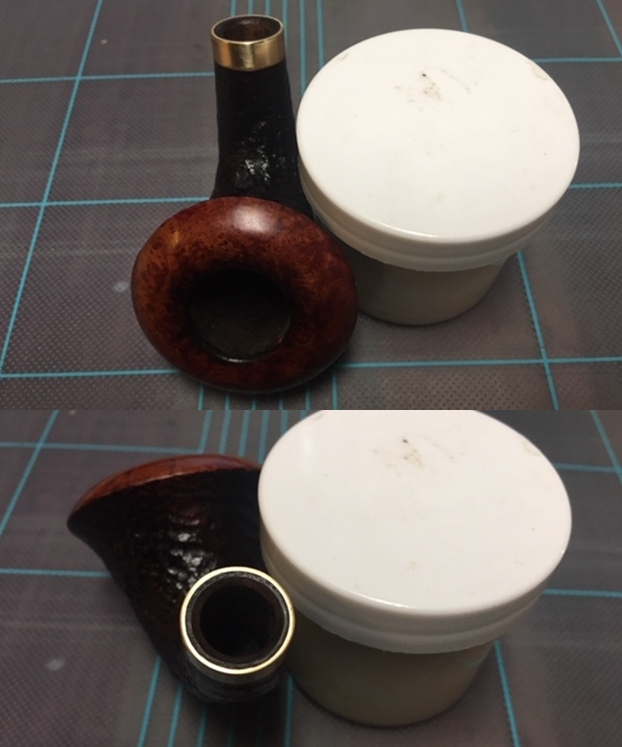
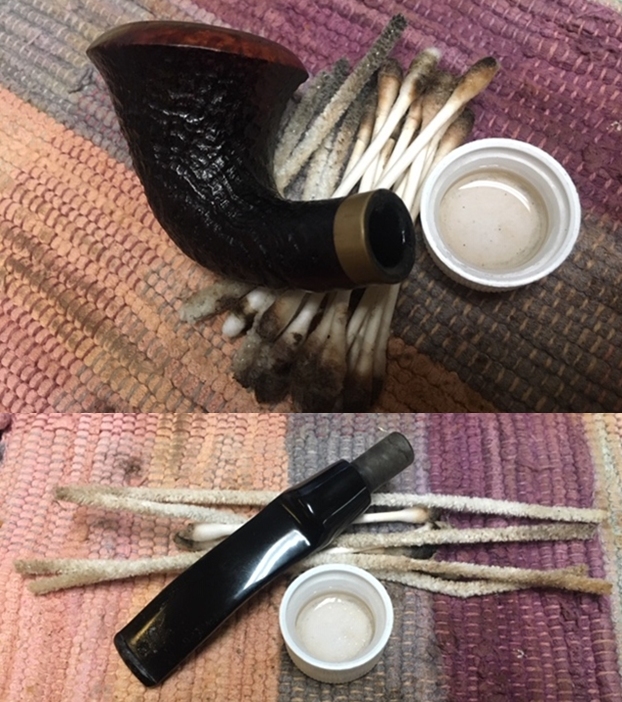 I scrubbed the exterior of the bowl and rim with a tooth brush and Murphy’s Oil Soap. I scrubbed the buildup on the rim top with the soap and tooth brush and was able to remove it all from the calabash top. I rinsed it off with running water and dried the pipe with a cotton cloth.
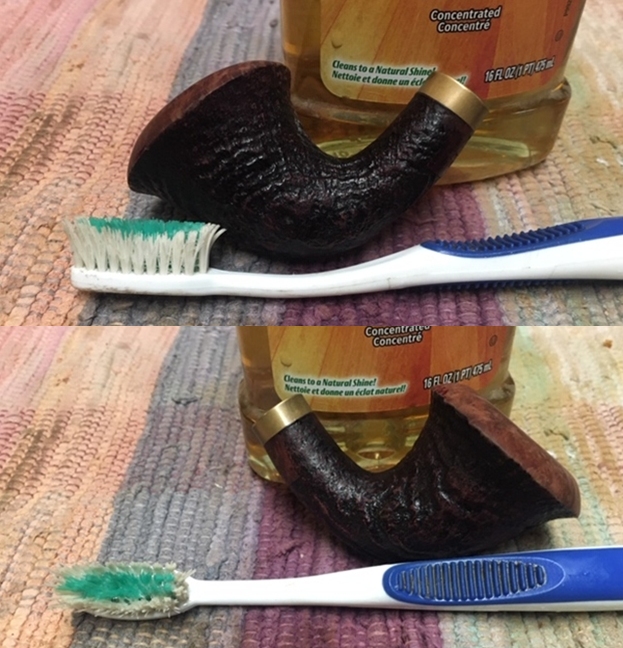
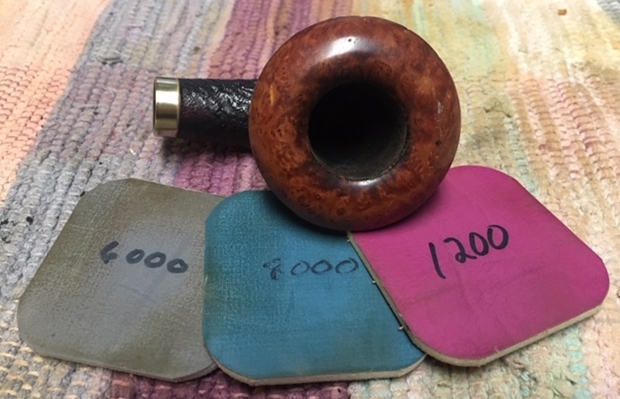
 I polished the smooth calabash rim top with micromesh sanding pads – 1500-12000 grit pads. I wiped the rim top down with a damp cloth after each sanding pad. The rim top began to look very good as it took on its shine.
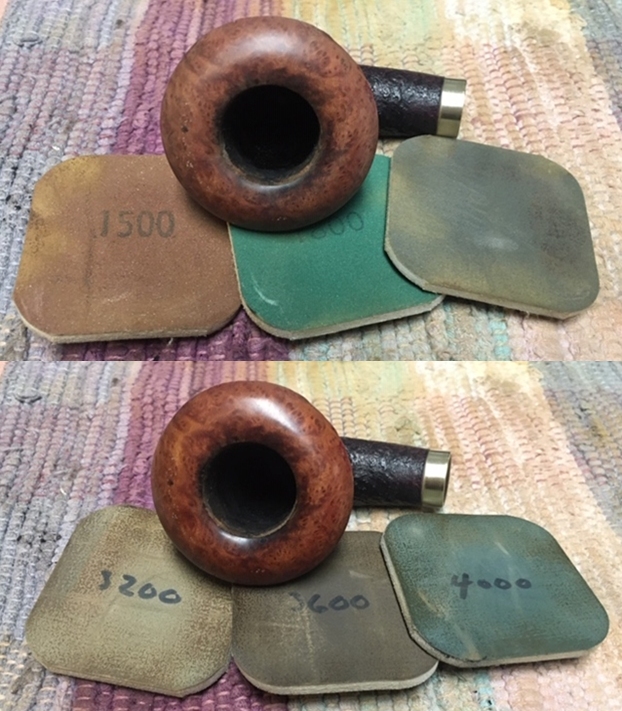
 I rubbed the bowl and rim top down with Before & After Restoration Balm. I worked it into the surface of the briar with my fingertips and a horse hair shoe brush to clean, enliven and protect it. I let the balm sit for a little while and then buffed with a cotton cloth and shoe brush to raise the shine. The Balm does a great job in bringing life to aged briar that has been cleaned.
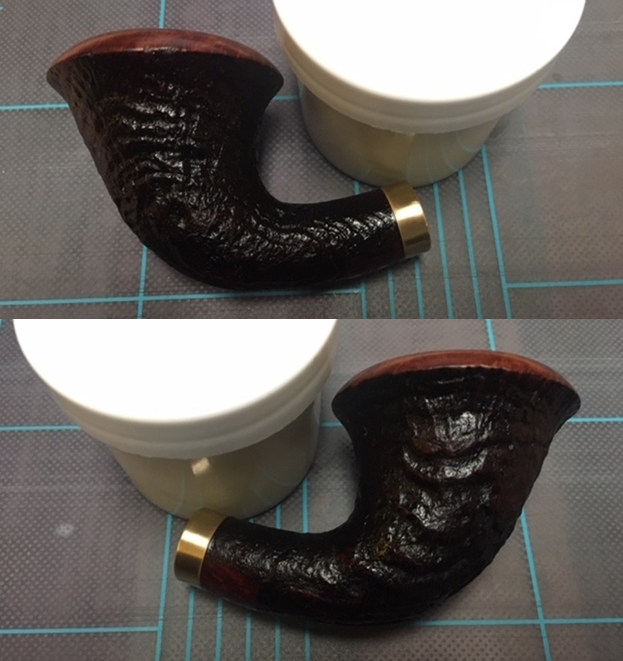
 I set the bowl aside and went to work on the stem. I cleaned off the surface of the stem with alcohol to remove greases and oils from the acrylic. I wanted it clean and dry so I could do the repair. Once it was clean I greased a pipe cleaner with Vaseline and inserted it into the airway of the stem. The greased pipe cleaner keeps the glue from filling in the airway.
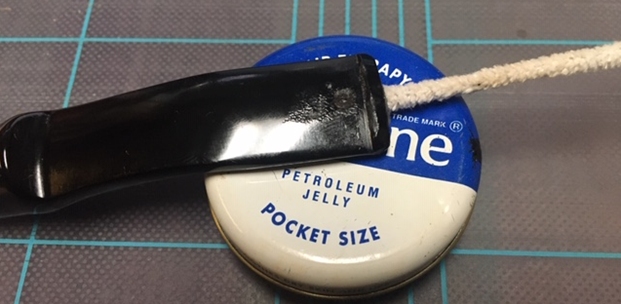 Since the hole in the top of the stem was quite small I decided to use just black super glue to fill in the damaged spot. I also used it to fill in the tooth marks and the dents in the surface. I set the stem aside to let the repairs cure.
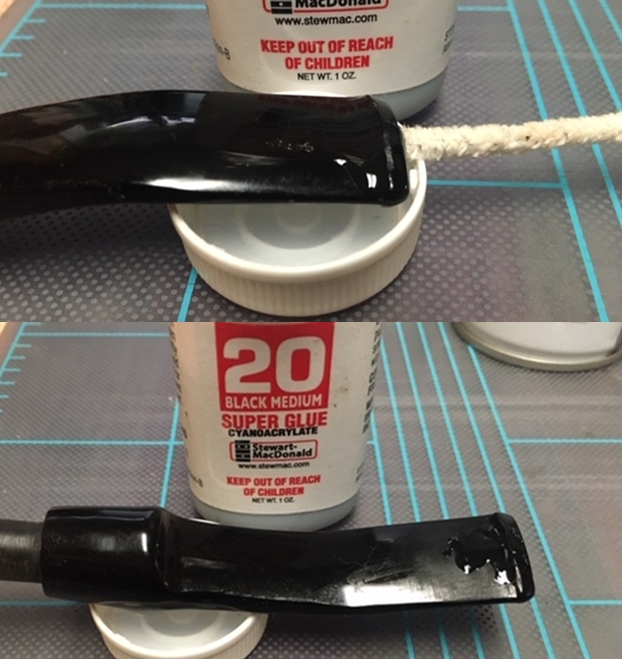 Once the repair cured I used a needle file to smooth out the repaired areas. I also cut the edges of the button on both sides and smooth it out. I would need to do a lot of sanding to blend it in but it would certainly look better. I sanded it with a folded piece of 220 grit sandpaper to smooth it out. I started the polishing with a folded piece of 400 grit wet dry sandpaper.
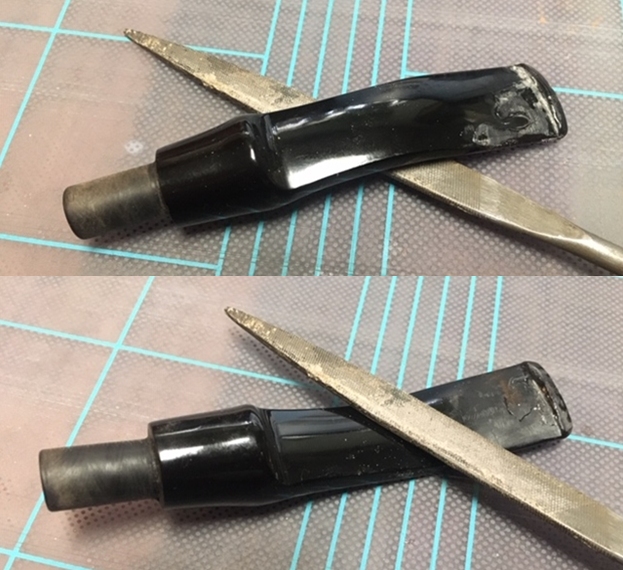
 I polished the acrylic stem with micromesh sanding pads – 1500-12000 grit pads. I wiped it down with a damp cloth after each sanding pad. I used Before & After Pipe Polish – both Fine and Extra Fine to further polish the stem.
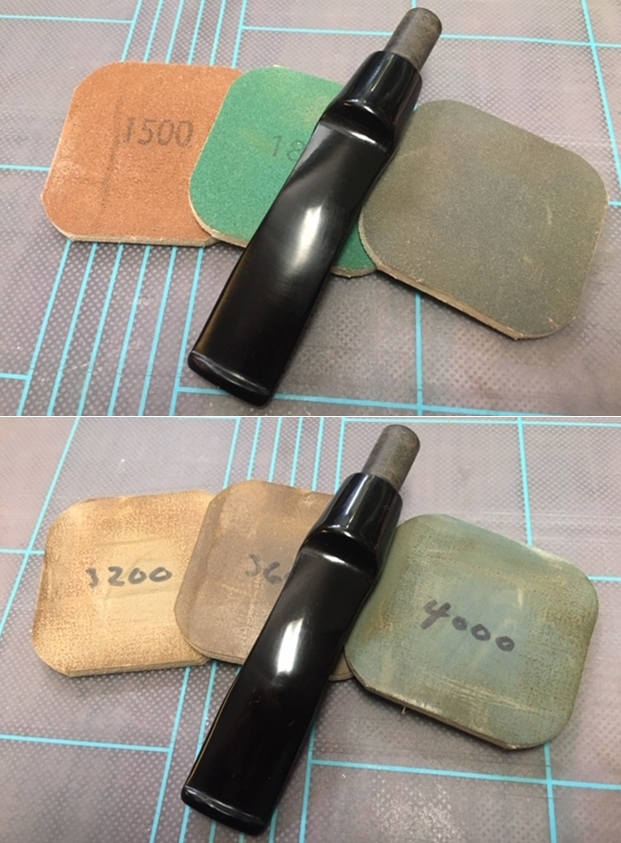
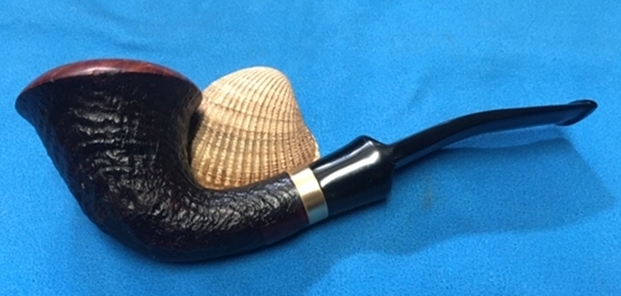
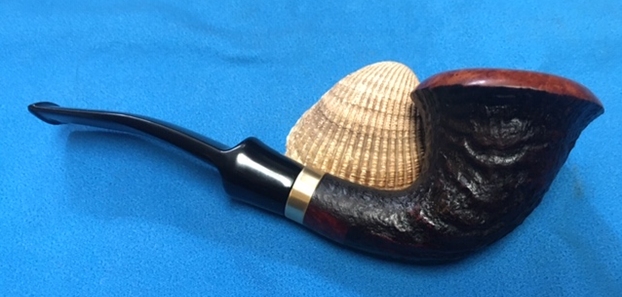
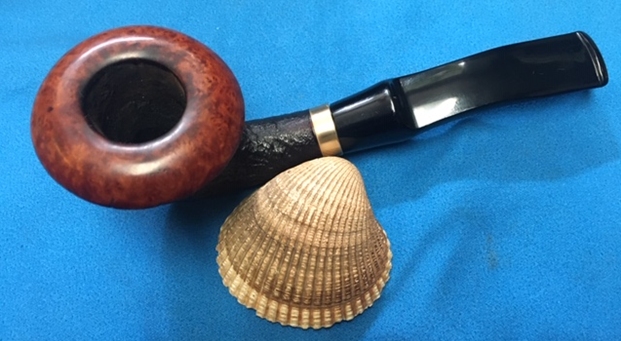
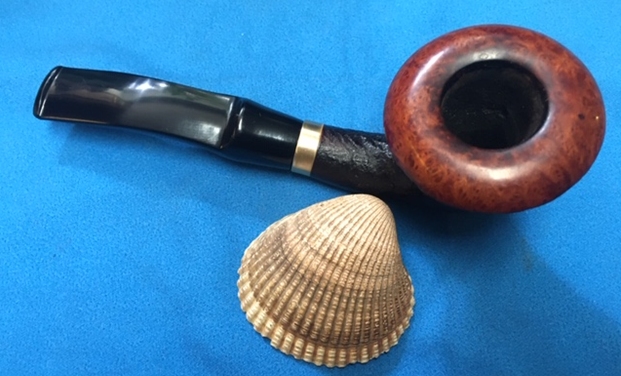
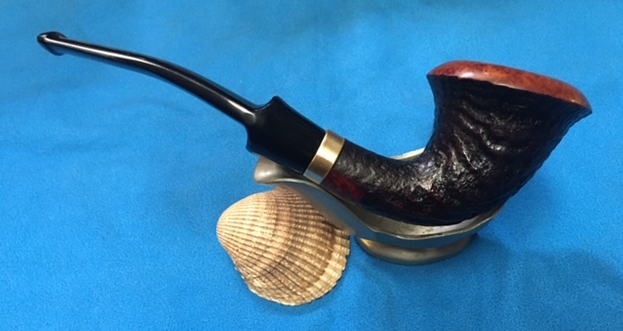
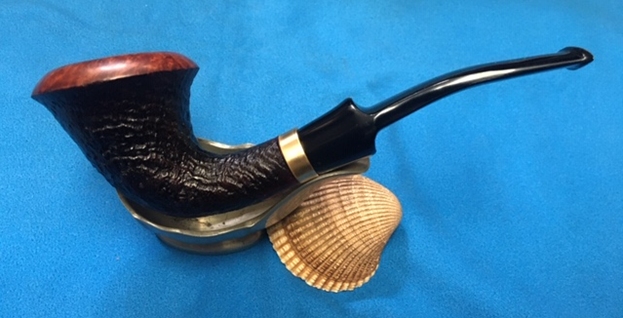
 The repairs and restoration of the Stanwell Calabash turned out really well. The mix of brown stains highlights the sandblasted grain around the bowl sides as well as the smooth calabash rim top. The finish on the pipe is in excellent condition and the contrasting stains work well with the polished acrylic saddle stem. I put the stem back on the bowl and carefully buffed the pipe with Blue Diamond on the buffing wheel using a light touch on the briar. I gave the bowl and stem multiple coats of carnauba wax on the buffing wheel and followed that by buffing the entire pipe with a clean buffing pad. I hand buffed the pipe with a microfiber cloth to deepen the shine. The finished Stanwell Calabash fits nicely in the hand and feels great. Give the finished pipe a look in the photos below. The dimensions of the pipe are Length: 5 ¾ inches, Height: 2 inches, Outside diameter of the bowl: 1 ¼ inches, Chamber diameter: ¾ of an inch. I am looking forward to hearing what the pipeman who dropped it off thinks of it when he picks it up. It should continue to serve him well. Thanks for reading this blog and my reflections on the pipe while I worked on it. This is an interesting pipe to bring back to life.