Blog by Steve Laug
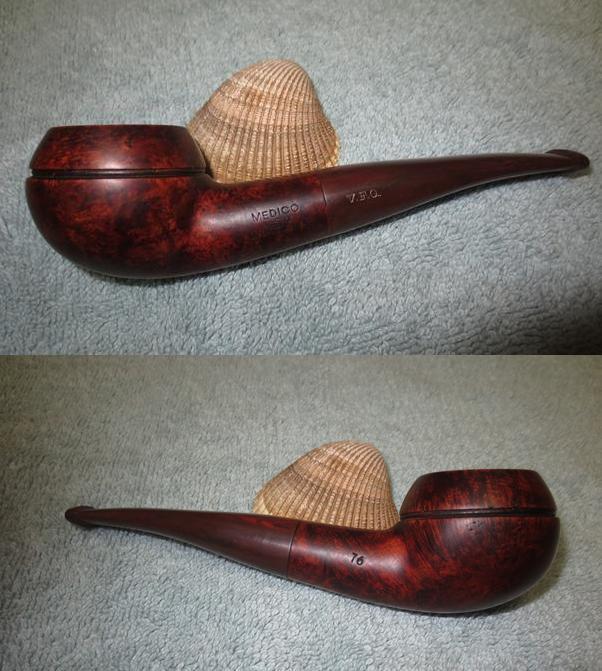
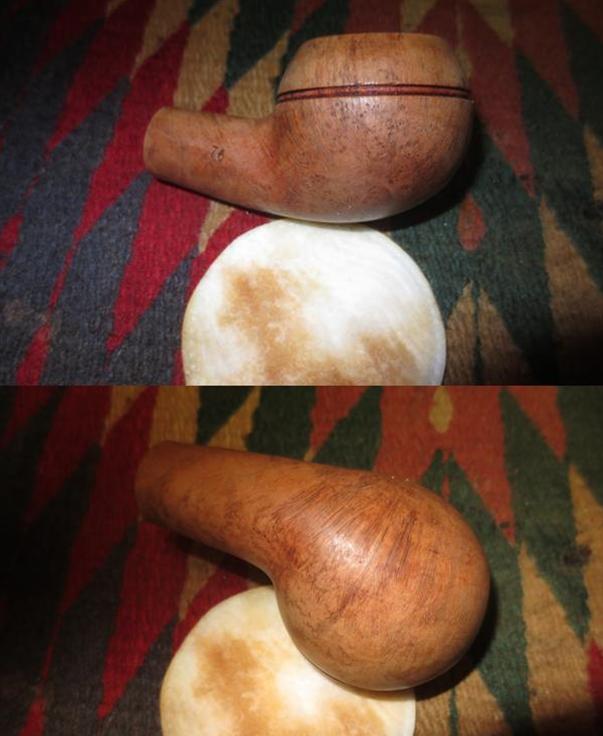
My brother Jeff and I visited an antique mall that was in an old grainery along a railroad track not too long ago. We went through the display cases and booths on two floors and found a few pipes. This was one of them – an old Medico VFQ Rhodesian. I have been told that VFQ means Very Fine Quality and underneath the grime it appeared that this one may have lived up to the stamping. The stem is a Cumberland like material with swirls and striations in a mahogany coloured stem. In classic Medico style the pipe was made for their paper filter and had a hollow, adjustable tenon. The tenon has a split on both sides that can be expanded should the stem become loose in the shank.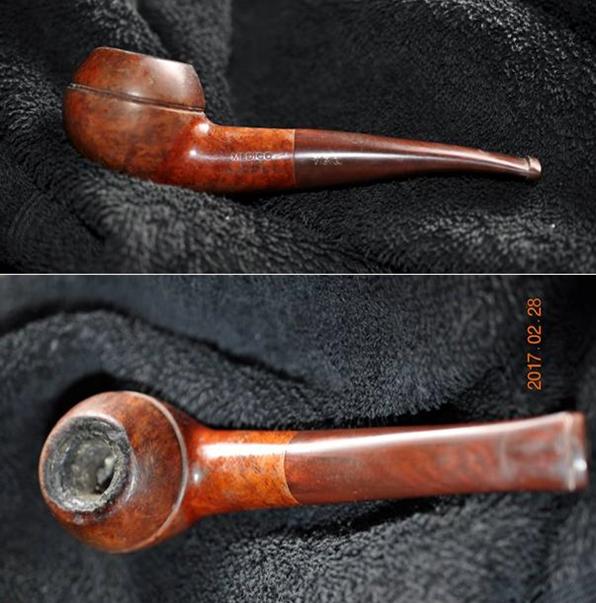 The pipe was in rough shape. The bowl was thickly caked and had remnants of tobacco in it. The rim top was covered with overflow from the bowl and there were some large chips on the top and inner edge of the bowl on the right side. The finish was shot with the top varnish coat peeling all over the bowl. The ring around the bowl was dirty but was undamaged.
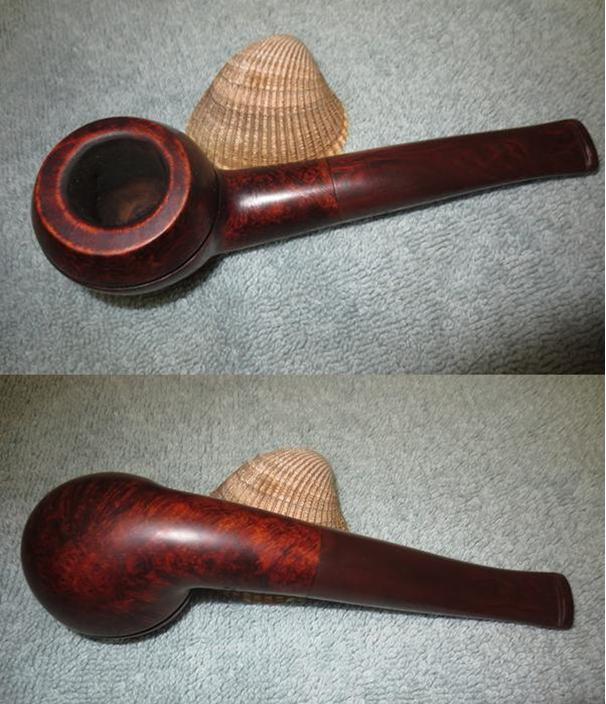
 The pipe was stamped Medico over V.F.Q. over Imported Briar on the left side of the shank. It also was stamped with the shape number 76 on the right side. The stem bore the V.F.Q. stamp on the left side as well.
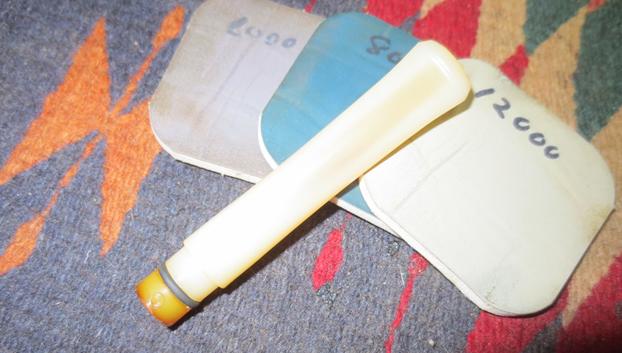
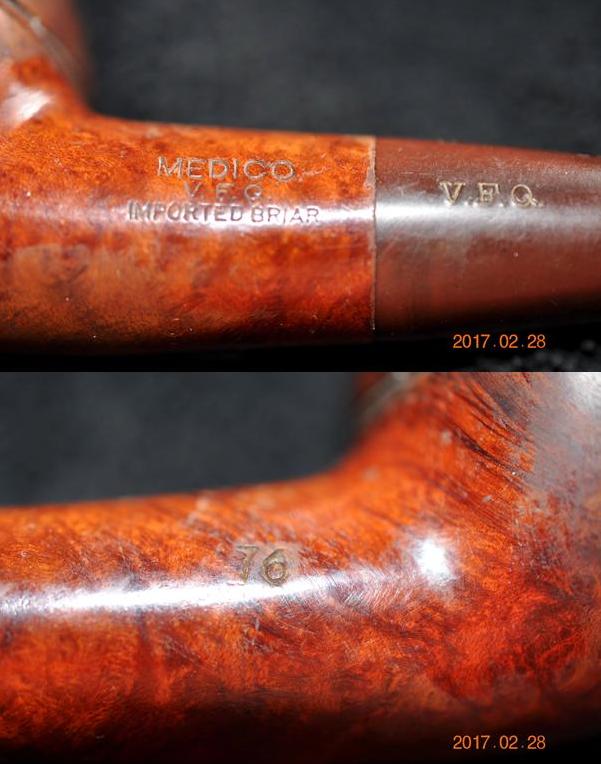 The stem was oxidized, dirty and had tooth chatter on both sides at the button. There was an old paper filter still in the tenon and the inside of the shank and stem were filthy.
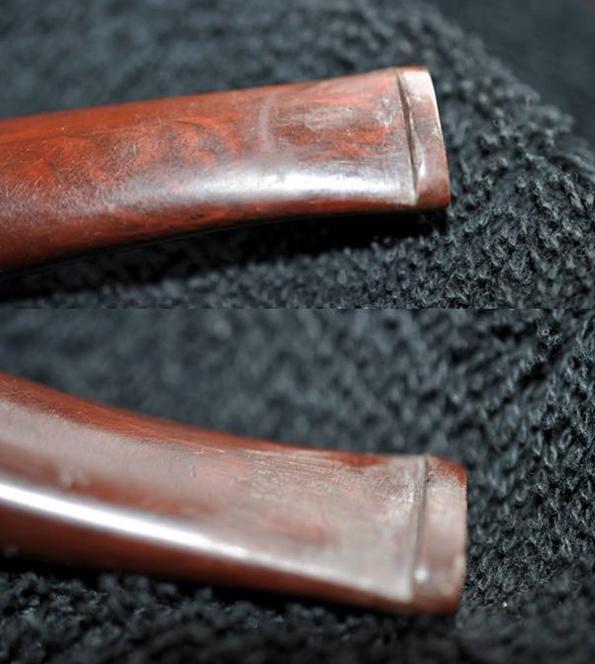 When we got back to my brother’s place we reamed the pipe and scrubbed it down with acetone on a cotton pad to remove the damage finish. We scrubbed the mortise, airway into the bowl and the stem with pipe cleaners, cotton swabs and alcohol. I took photos of the cleaned pipe when I finally brought it to my work table in Vancouver. (Notice the angle of the rim top on the bowl. It was not flat and the damage had left the front higher than the back.)
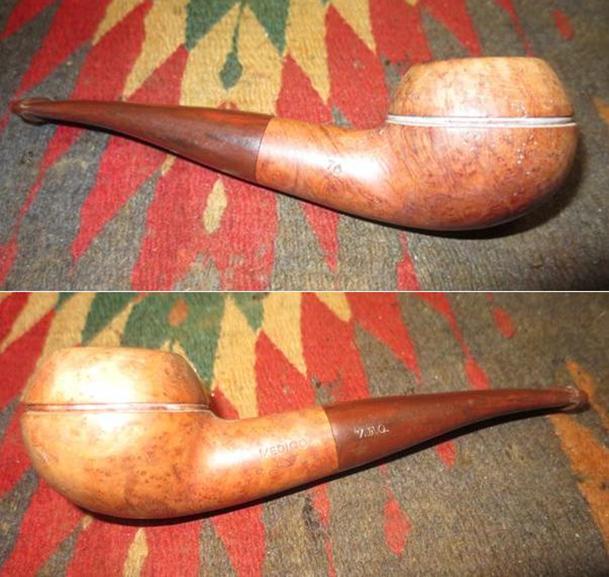
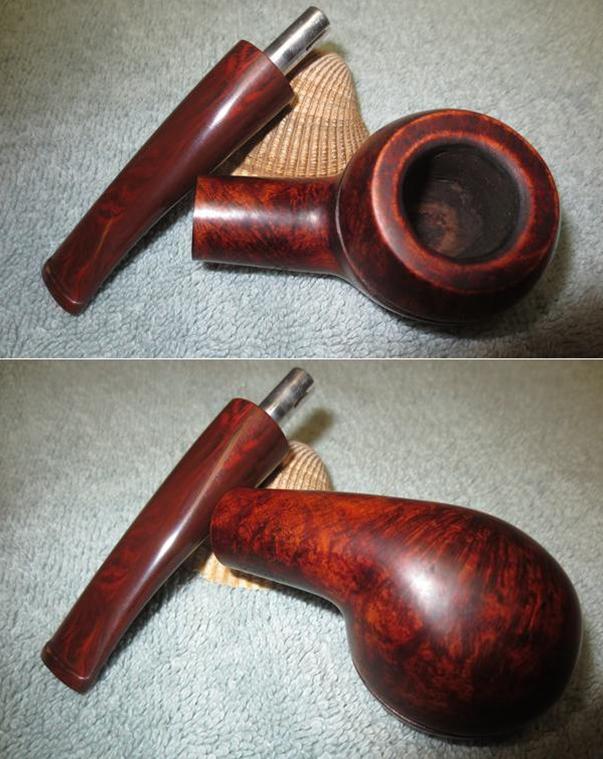
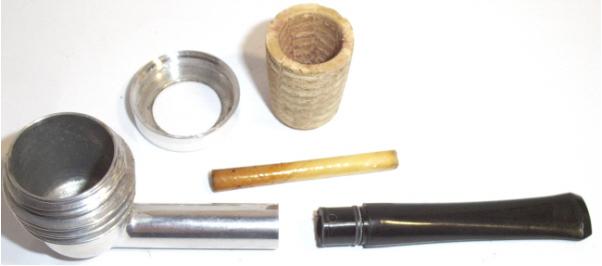
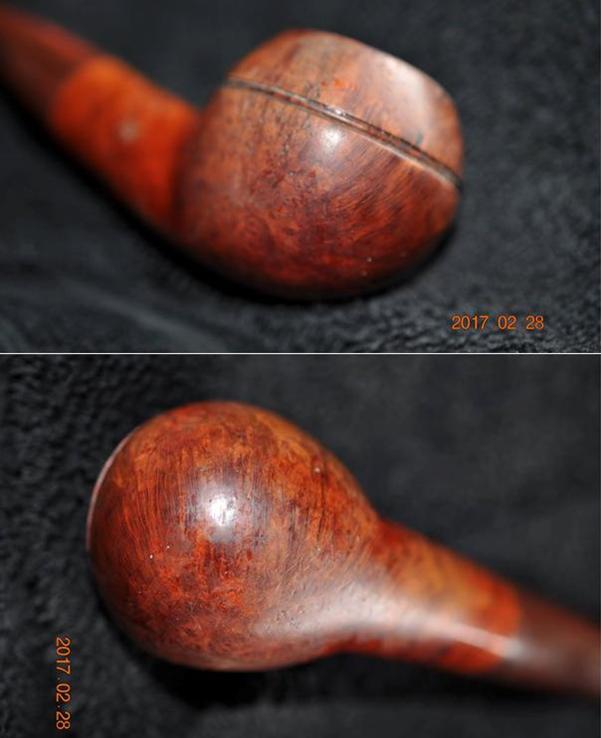
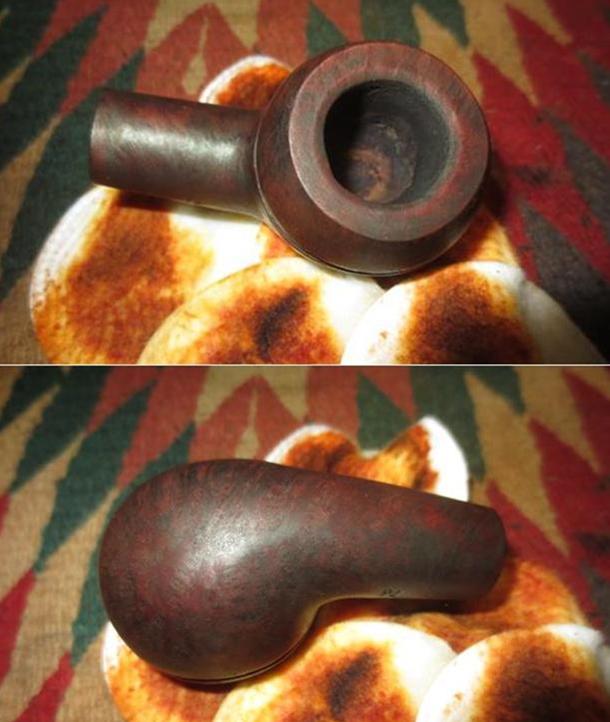
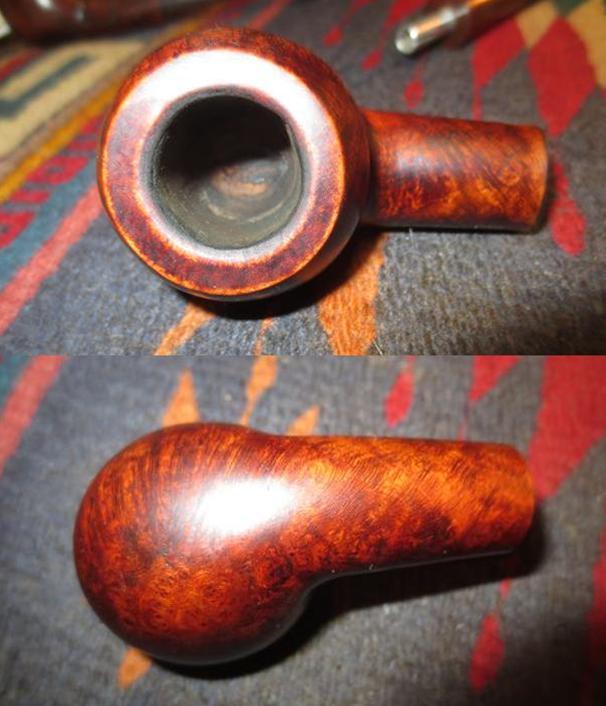
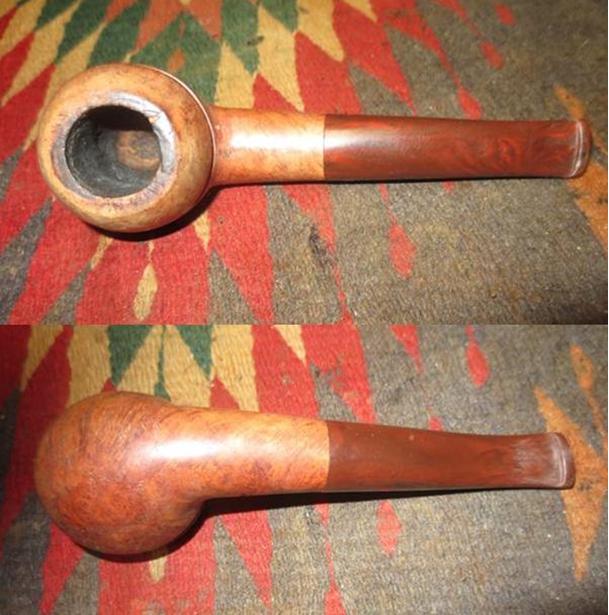 The next two photos show the condition of the tenon and bowl when taken apart and the damaged rim once all the cake had been removed. The rim had damage all the way around but the biggest damage was on the rear right side where there was a large chip missing.
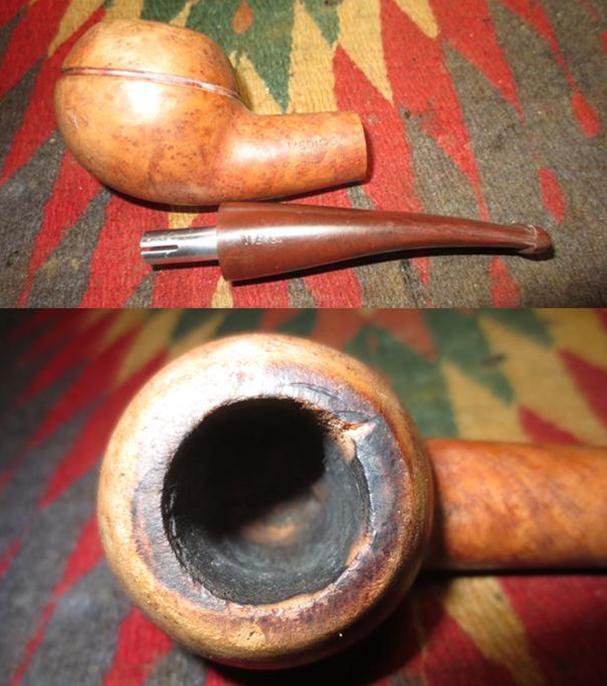 The stem shows some wear in the next photos and the striations of colour are almost not visible due to oxidation.
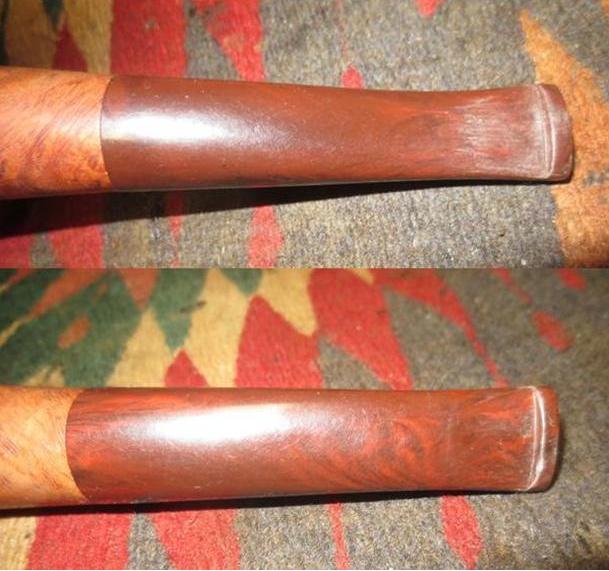 I decided to even out the height of the rim cap by carefully topping the bowl. Since the back side was higher than the front I was pretty sure I could remove most if not all of the chipped area on the rear right. I topped it on a board with 220 grit sandpaper and carefully leveled the bowl by applying more pressure to the rear of the bowl than the front and lifting the front edge off the paper as I remove the damaged and excess on the read of the bowl. It took some work to level the bowl properly and end up with an even top both from a vertical and horizontal view.
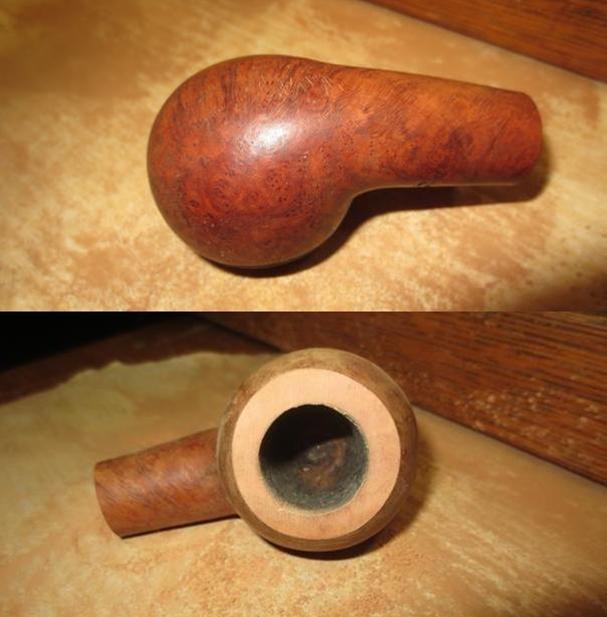 I used a folded piece of 220 grit sandpaper to bevel out the inner edge of the rim to remove the remaining rim damage and clean up the appearance of the rim.
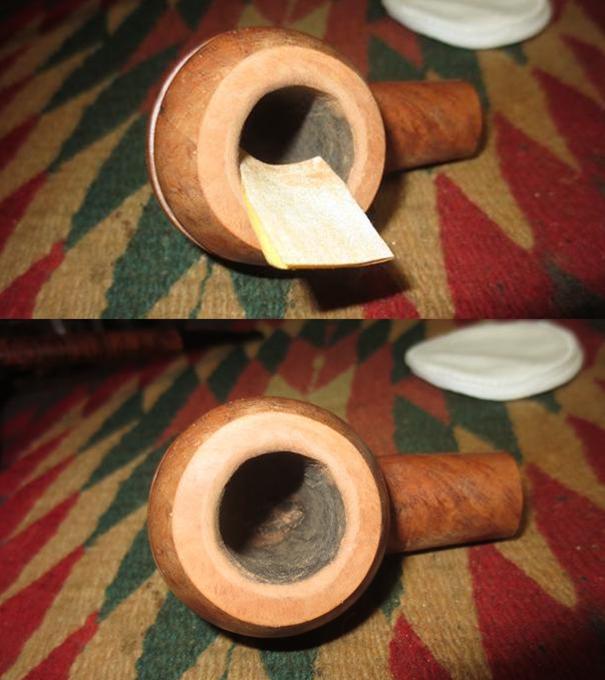 I sanded the rim with a medium and fine grit sanding sponge and with 1500-4000 grit micromesh sanding pads to remove the scratches. I wiped the bowl down with acetone on a cotton pad to remove the remaining finish and stain on the bowl in preparation for matching the newly topped rim with the colour of the rest of the bowl.
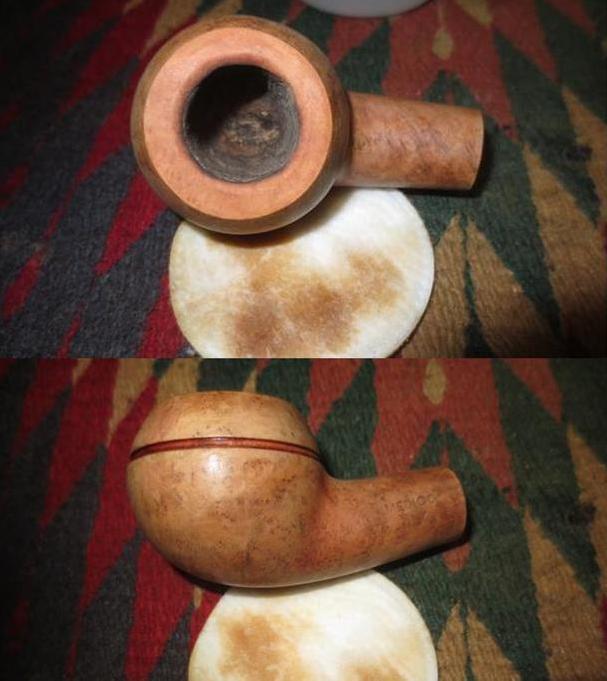
 I did a more thorough cleanup of the mortise and airway into the bowl to remove all of the sanding dust and remaining debris that was there. I scrubbed it out with cotton swabs, pipe cleaners and alcohol. I also ran pipe cleaners through the airway in the stem and cleaned the mortise with cotton swabs.
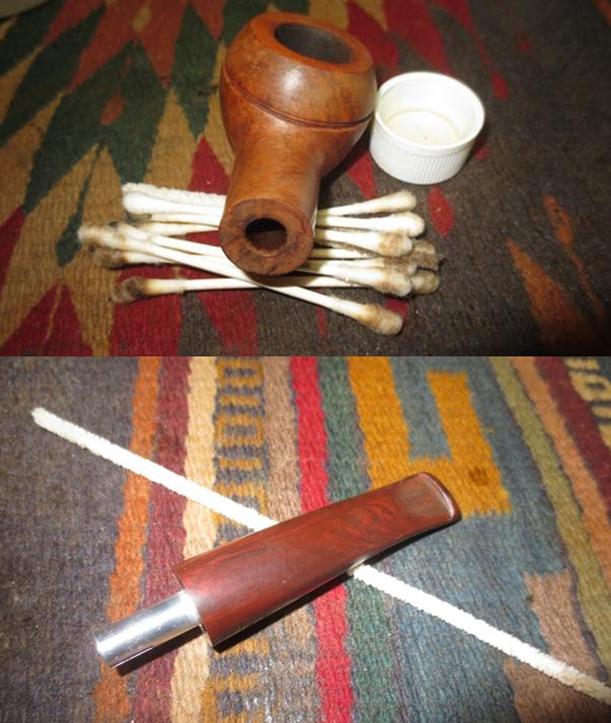 The bowl had many nicks and scratches. I sanded it with micromesh pads to remove the majority of them but decided to leave some of the deeper ones as beauty marks of the old pipe. In the photos the bowl looks pretty richly coloured but in reality it was faded and apart from the flash the grain did not stand out.
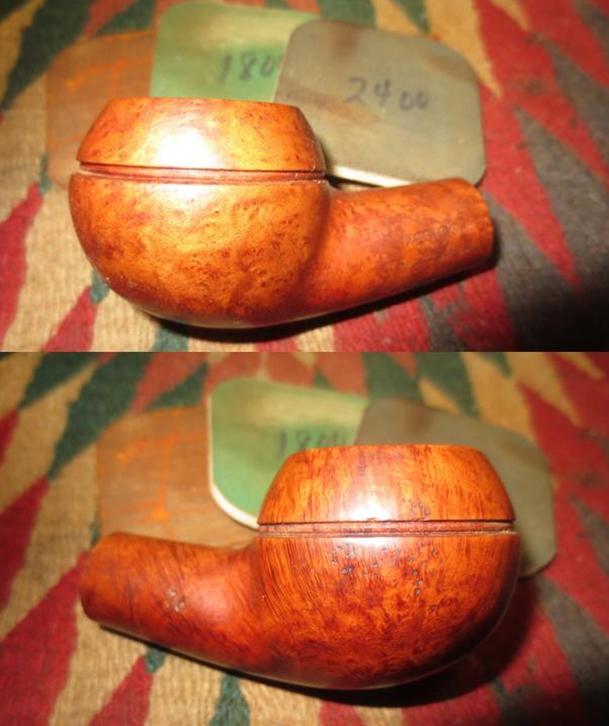
 I stained the bowl with a dark brown aniline stain, flamed it and repeated the process until I was happy with the coverage on the bowl. The look of the bowl in the next two photos is really odd. I think that it is a phenomenon of the flash because it did not look like this in person.
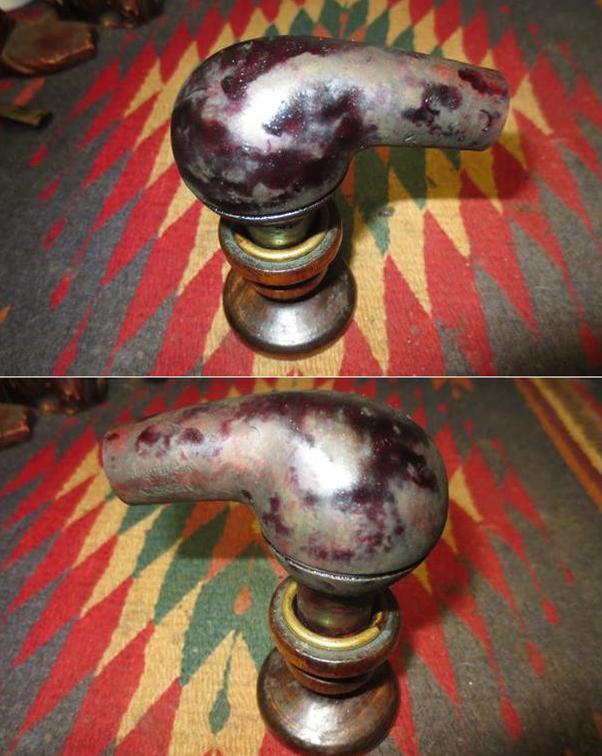 I wiped the bowl down with alcohol on cotton pads to remove some of the opacity of the stain and make it more transparent. In the photos below you can see that it is lighter but still to heavy to show the grain to my liking.
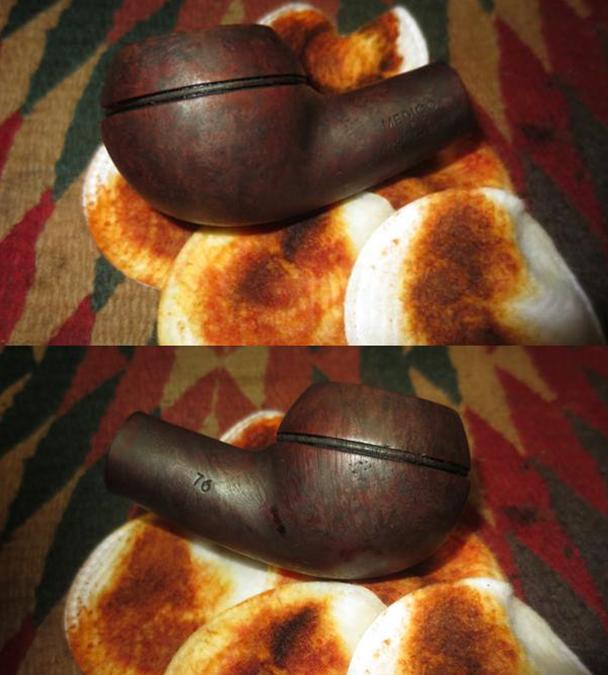
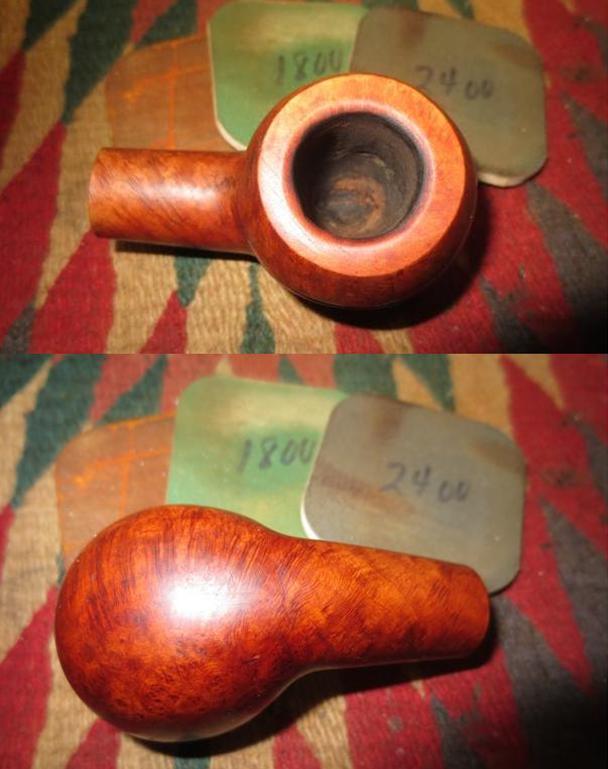
 I buffed the bowl with red Tripoli, sanded it with a medium and a fine grit sanding sponge, then polished it with 1500-2400 grit micromesh pads to remove some more of the dark stain and leave behind some nice contrasts in the grain of the bowl. The next photos show it after I had buffed it with Blue Diamond to polish it.
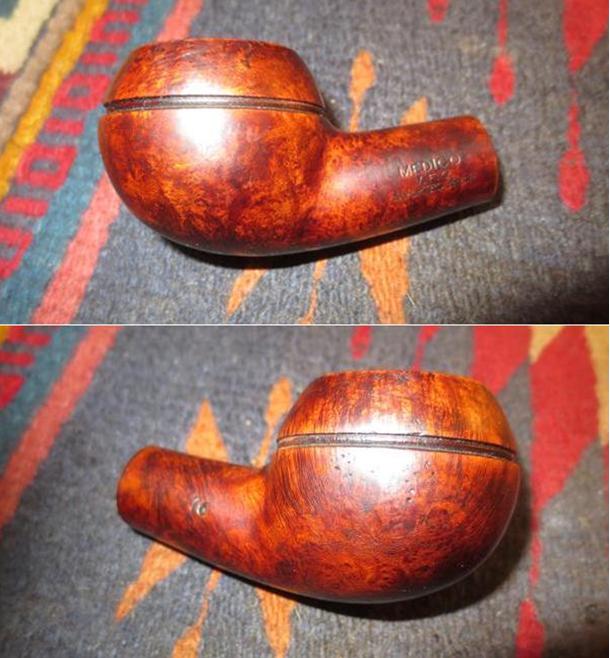
 I set the bowl aside for now and turned my attention to the stem. I have found that these Medico stems are not fully vulcanite and are a bit of a bear to polish. I have often been left to do the polishing by hand as the buffer can generate too much heat if I am not careful. The heat damages the material of the stem and forces you to start over. I sanded out the tooth chatter and marks on both sides of the stem and reshaped the button edges with 220 grit sandpaper. The flow of the top of the shank to the top of the stem was interrupted in that the height of the stem at that point was higher than that of the shank so I sanded the top half of the stem to make that transition smoother.
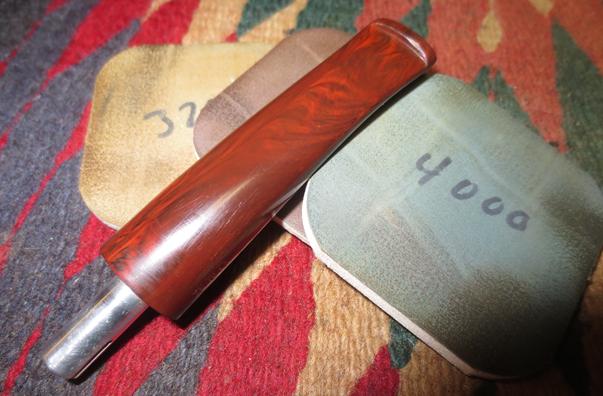
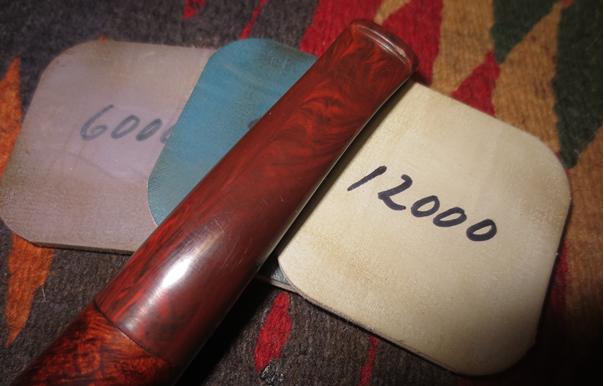
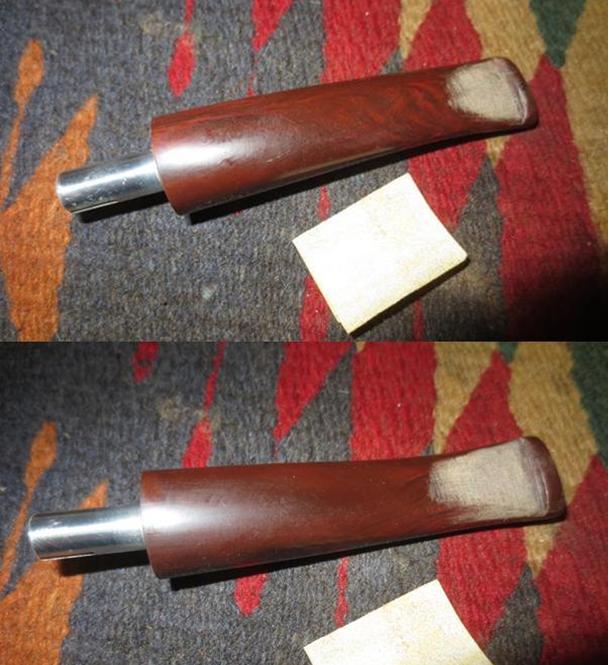 I polished the stem with micromesh sanding pads – wet sanding it with 1500-2400 until I removed the scratches left behind by the sandpaper. I dry sanded with 3200-12000 grit pads. I rubbed the stem down with Obsidian Oil between each sanding pad to give the pads more bite and allow them to really polish the stem. Between the 4000 and 6000 grit pads I buffed the stem very carefully (you have to have a light touch against the wheel). I gave it a final rub down of oil after the 12000 grit pad.
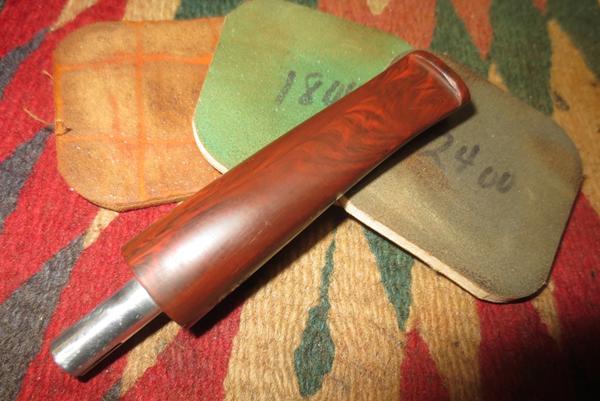
 I put the stem back on the bowl and buffed bowl and stem with Blue Diamond a final time. It really polishes the briar and with a careful/light touch can polish these older Medico stems. I gave the bowl and stem multiple coats of carnauba wax and buffed it with a clean buffing pad to raise the shine. I hand buffed it with a microfibre cloth to deepen the shine.The finished pipe is shown in the photos below. To me the stain goes really well with the polished Cumberland like stem. They play off each other very well. The contrast on the bowl raises the highlights in the stem and vice versa. This pipe will soon be on the rebornpipes store if you wold like to add it to your rack. It is very lightweight and comfortable in the hand. I think, judging from the condition of the pipe when I got it, that it will be a great smoking pipe, with or without the Medico filter.