Tag Archives: Polishing Meerschaum

Restoring an Old Cased Set of Aristocrat Meerschaums – Part 1


Blog by Steve Laug

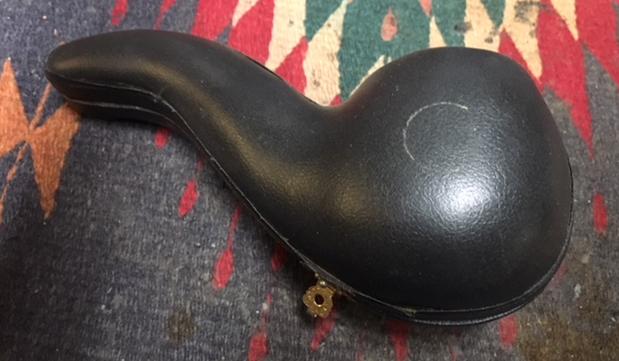
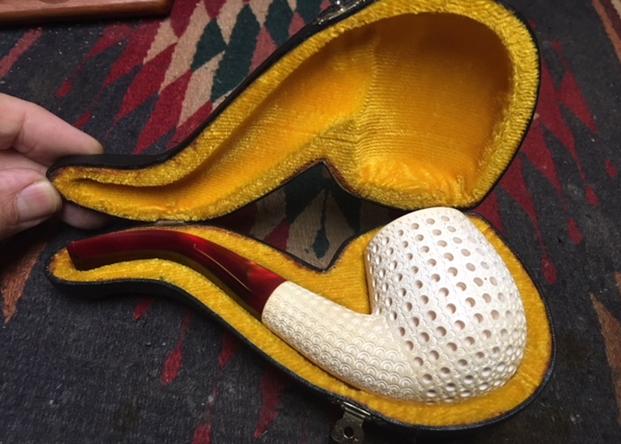
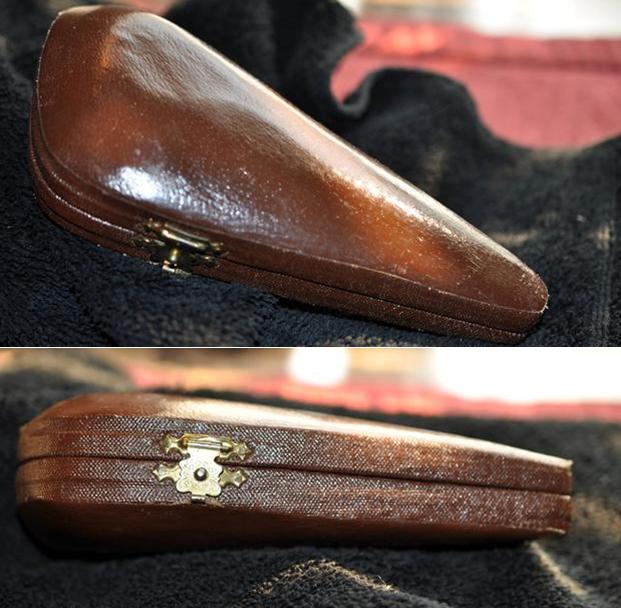
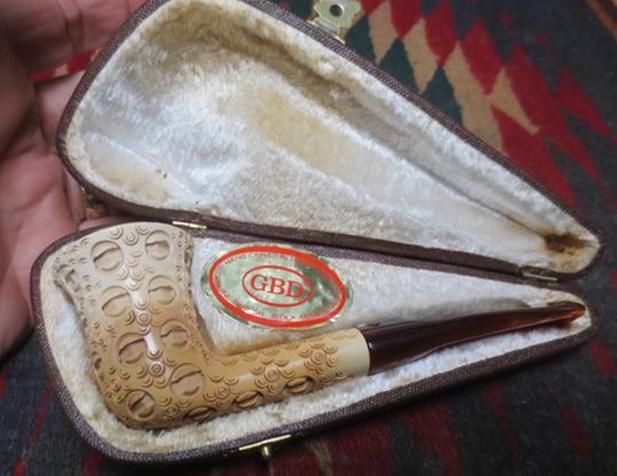
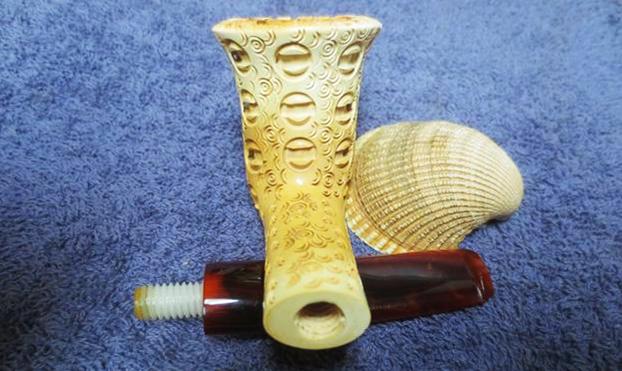
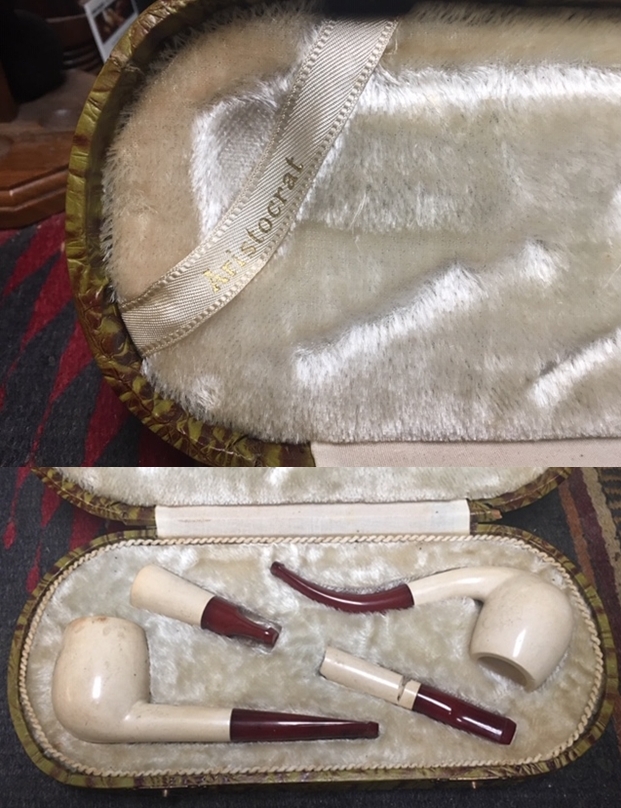
After working on the pair of Turkish Meerschaum pipes I wrote about earlier I decided to keep working on meers (https://rebornpipes.com/2019/07/21/cleaning-up-a-pair-of-no-name-turkish-made-meerschaums/). The next thing on the table was a cased set of meerschaums that included a straight billiard, a bent billiard a cigar holder and a broken cigarette holder. All were smooth meerschaum with red Bakelite or Redmanol stems. All had bone tenons directly screwed into threaded mortises in the meerschaum. There was no stamping on the pipes and holders or the stems. The box itself was covered in what looked like alligator skin with brass hinges and clasps. On the inside the case was lined in an off white preformed velveteen fabric. There was a corner ribbon across the left side of the lid that read Aristocrat. The straight billiard had been smoked pretty heavily and there was a cake in the bowl and the rim top had a thick lava coat. The exterior of the bowl was dirty. The stem had tooth marks and chatter on both sides near the button. The second pipe – the bent billiard was unsmoked but dirty with dust and debris of time. The cigar holder had been lightly smoked and there were tooth marks and chatter on in near the button. The cigarette holder was broken and two parts and the stem remained. There was a missing piece from the front of the holder. It was unused and broken.  I took photos of the case and the pipes and holders before I started my work on it. 
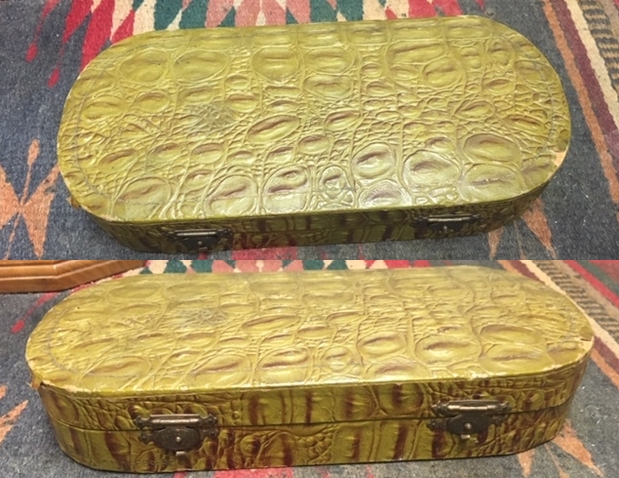
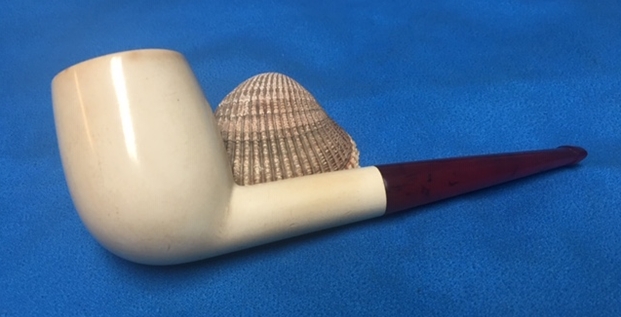
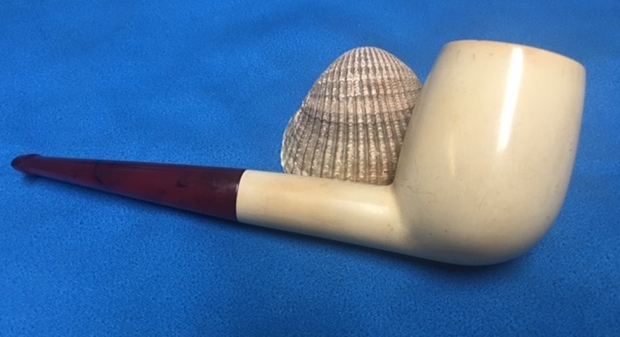
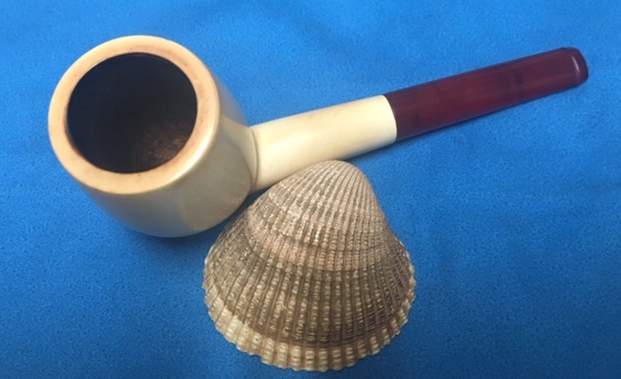
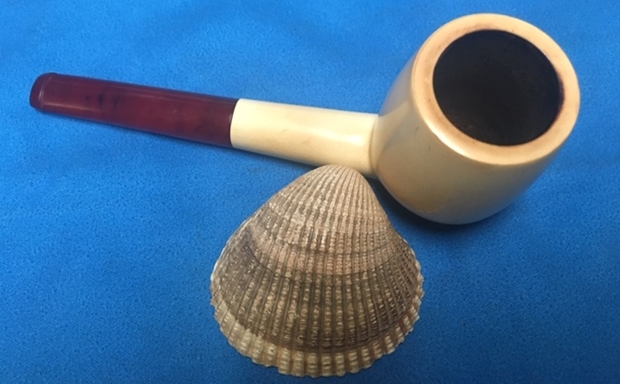
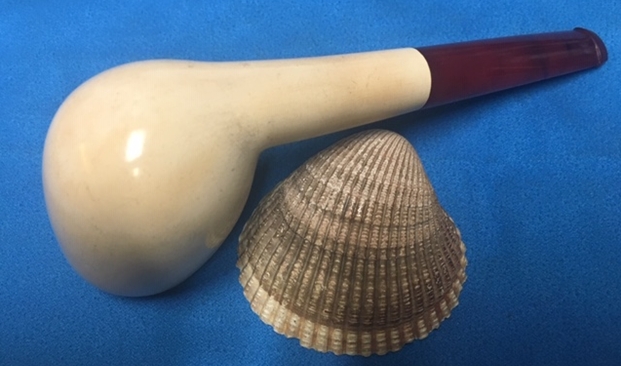
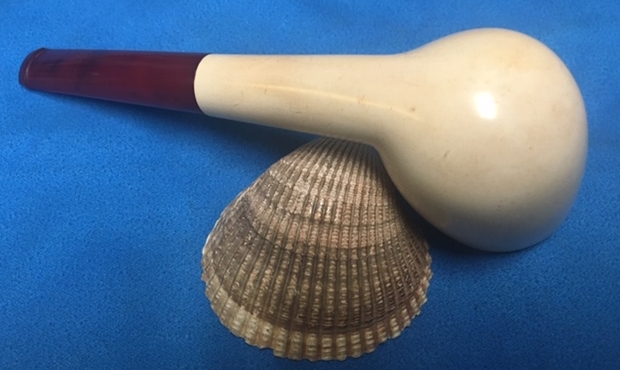
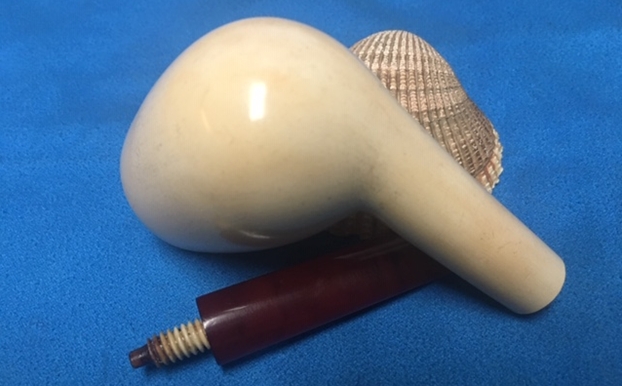
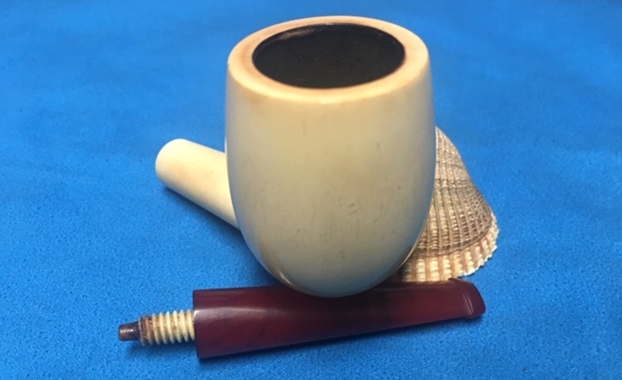
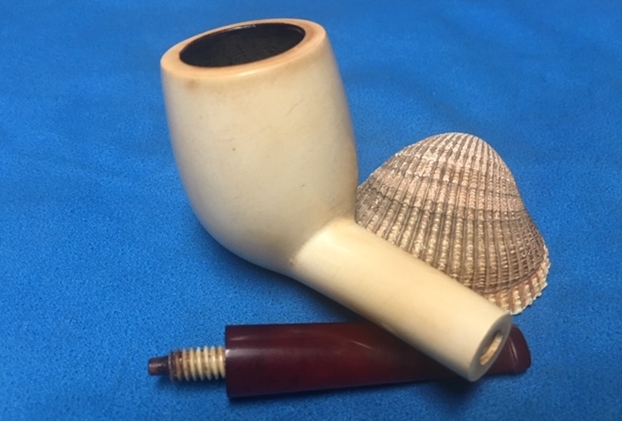
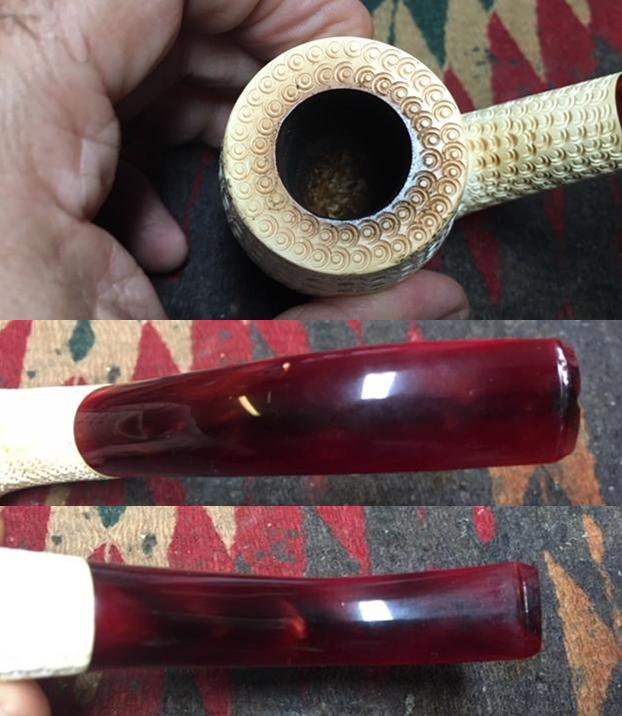
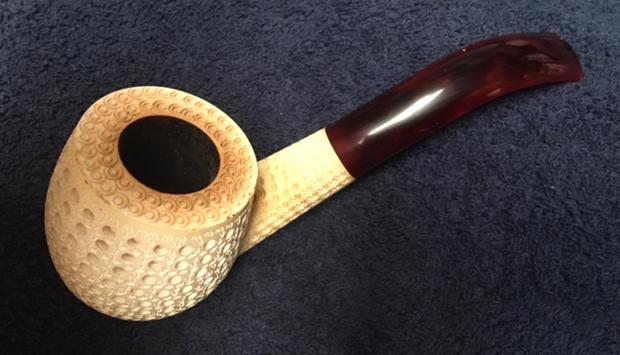
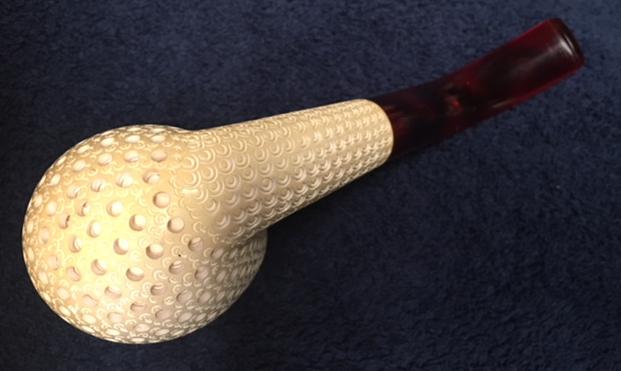
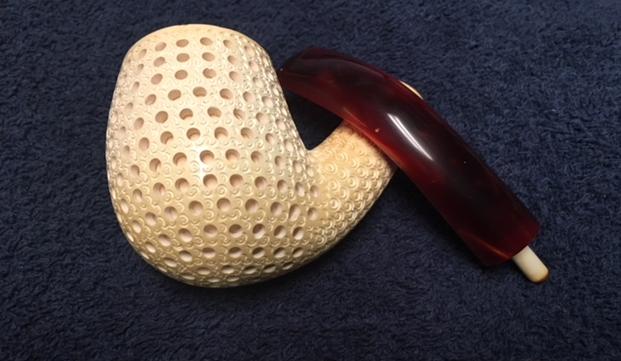
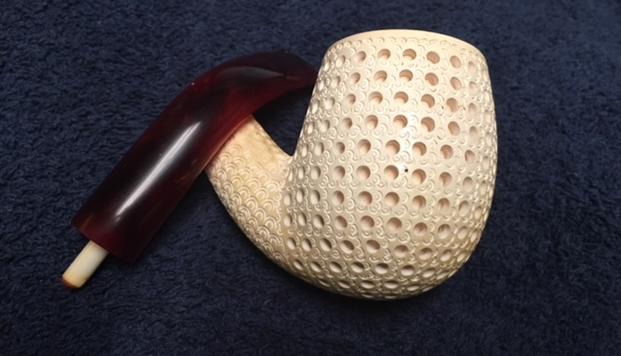
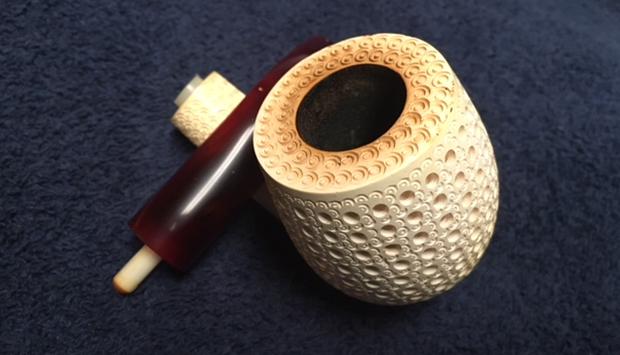
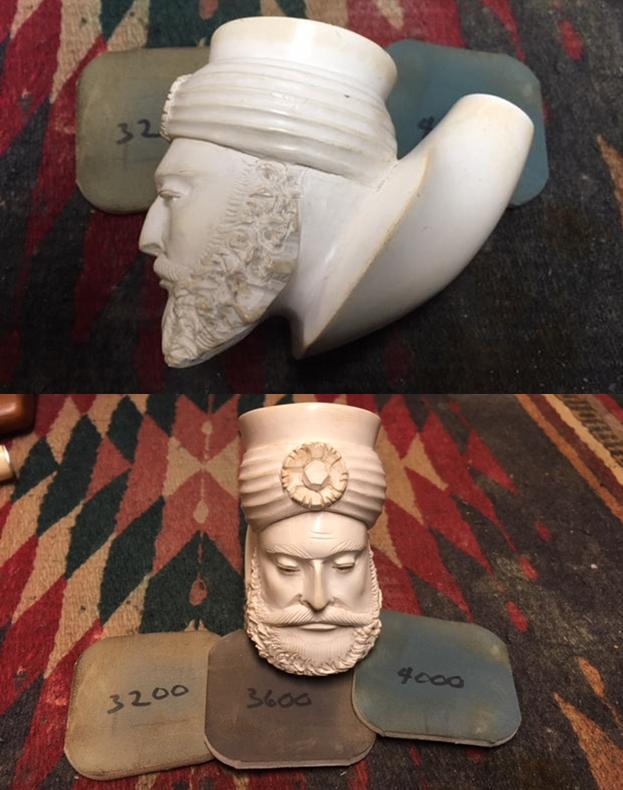
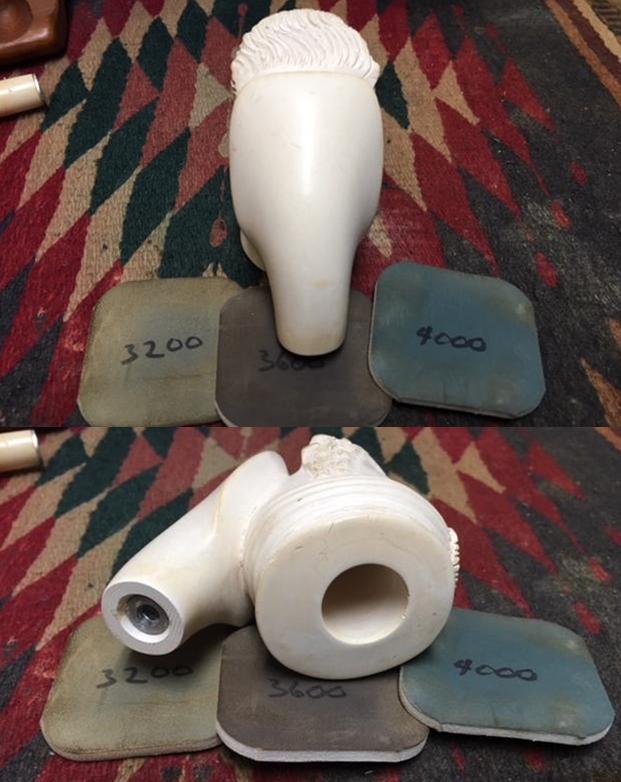
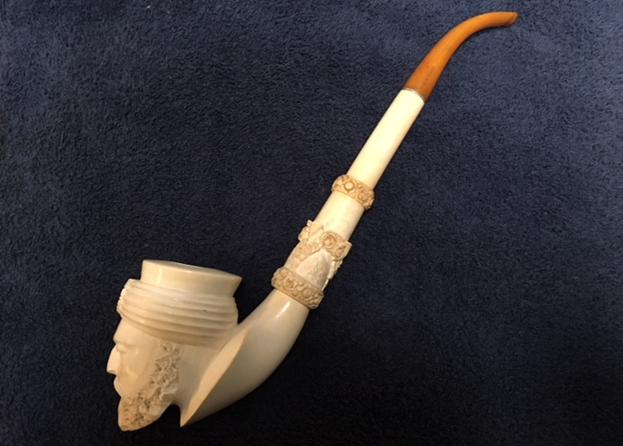
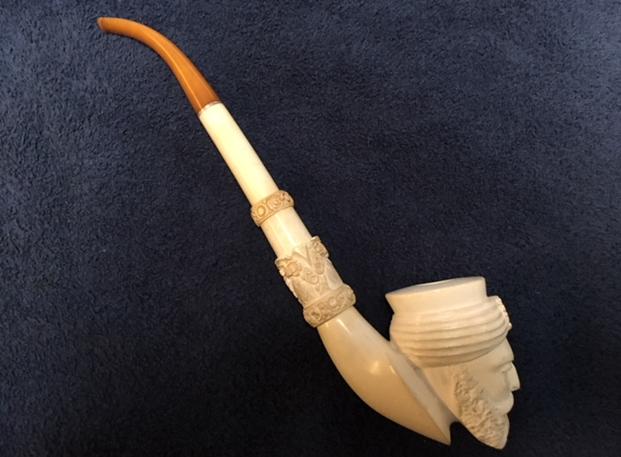
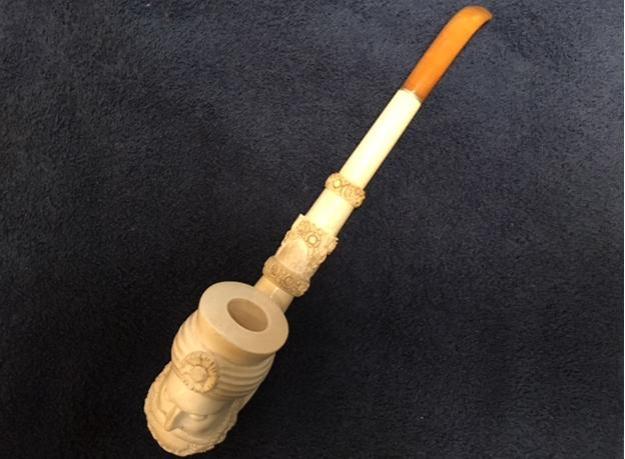
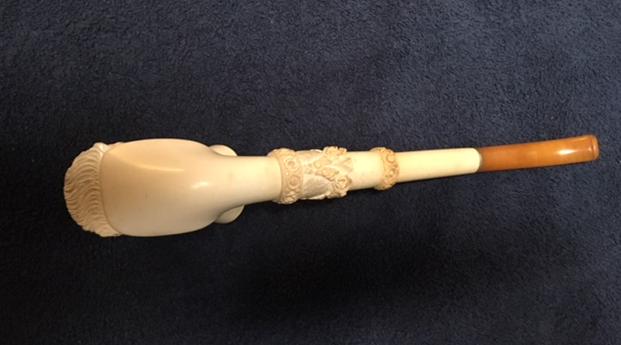
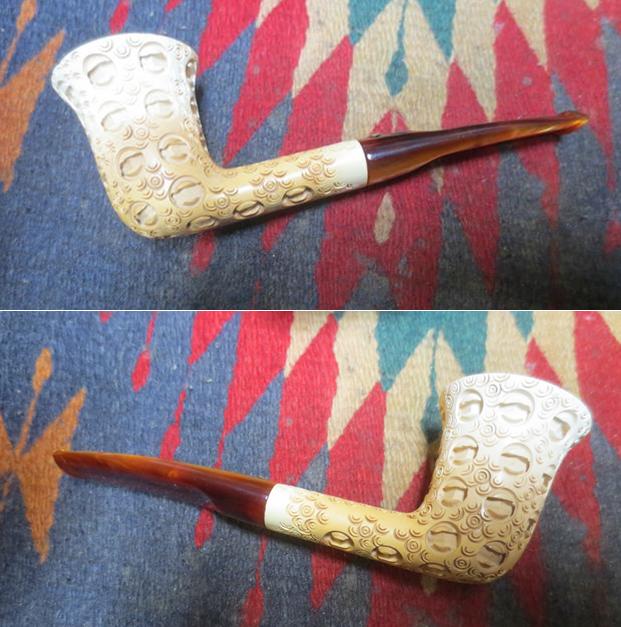
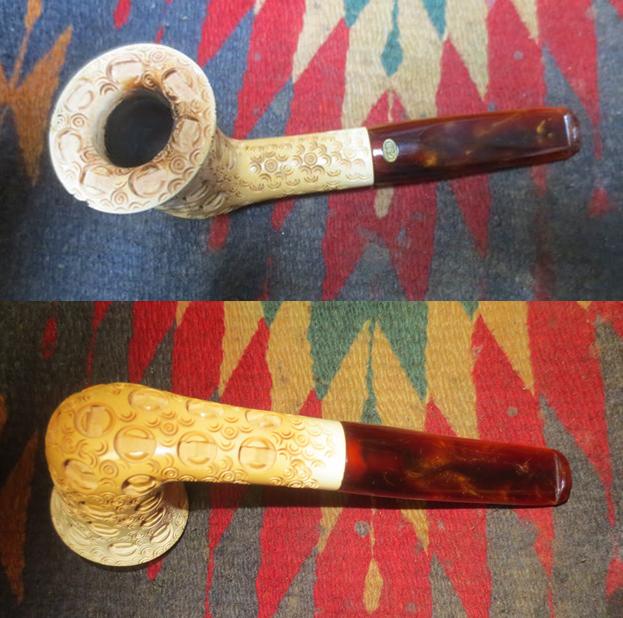
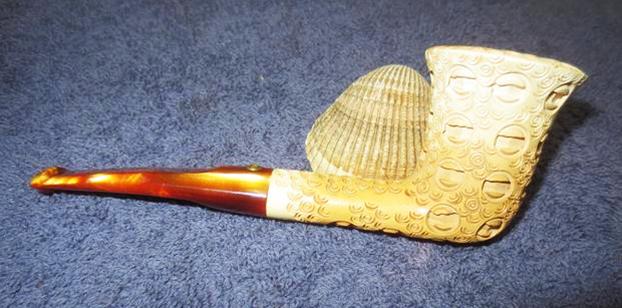
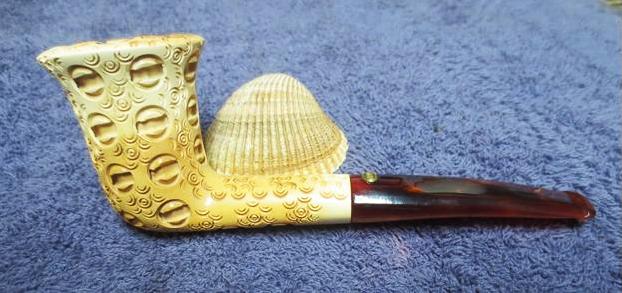
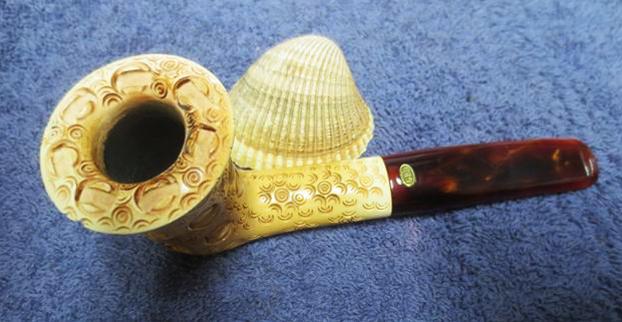
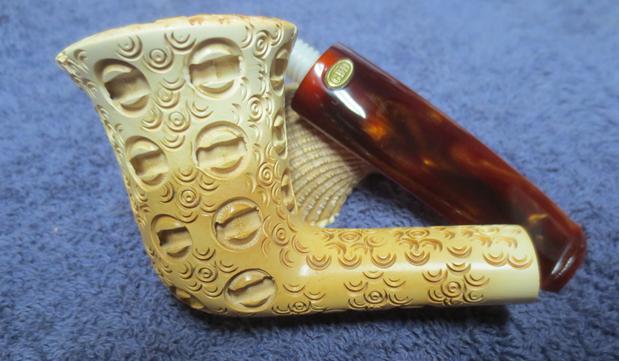
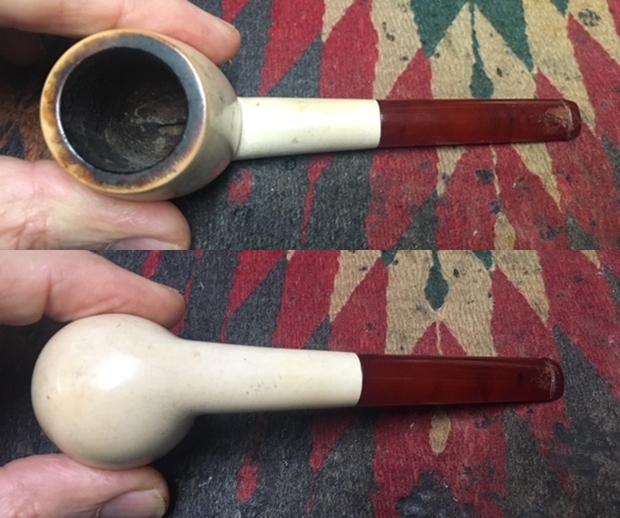
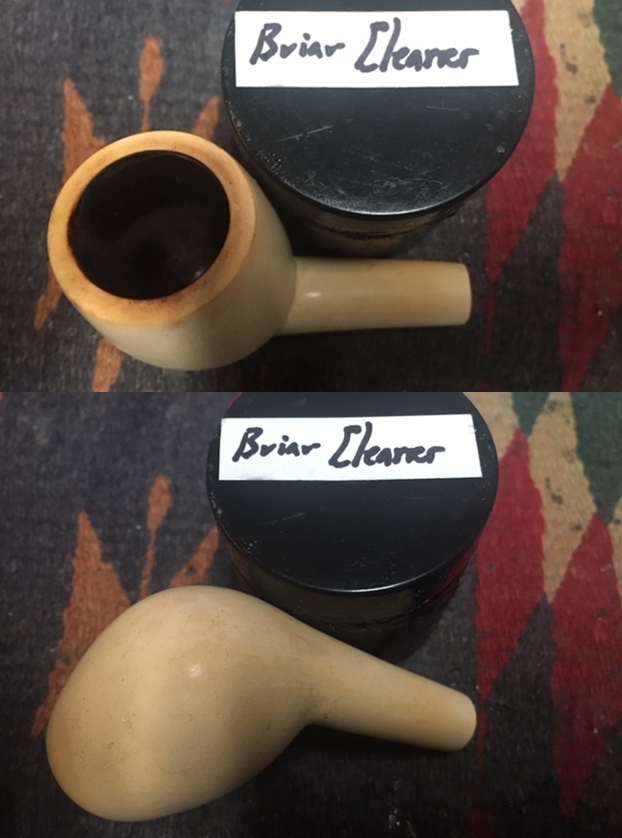
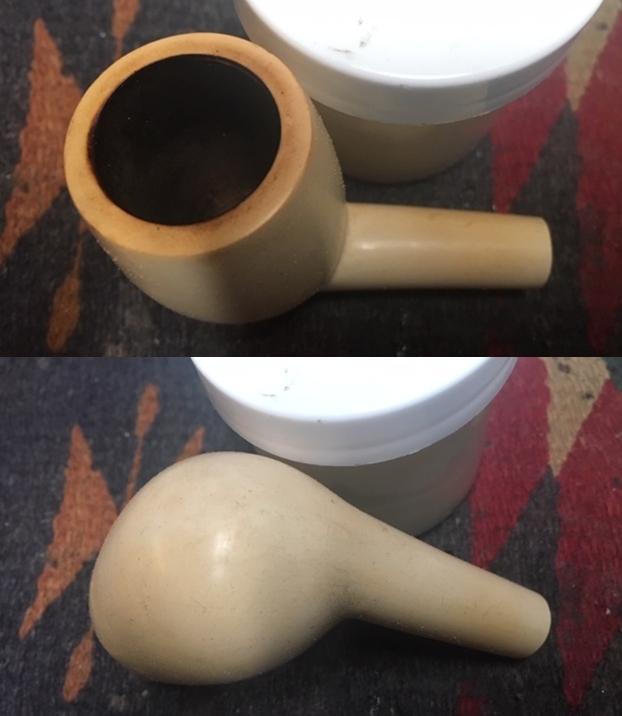
I took photos of each of the pieces in the collection. The first set of photos shows the smoked straight billiard. 
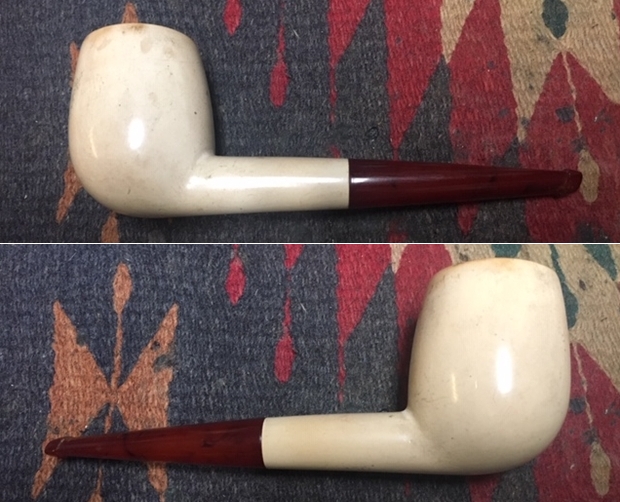
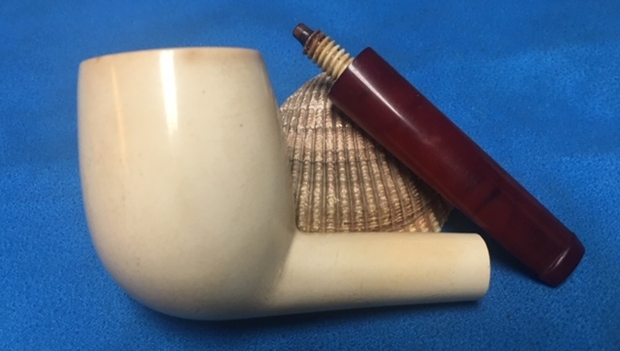
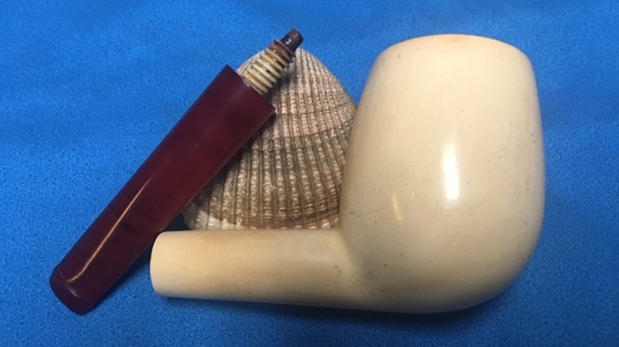
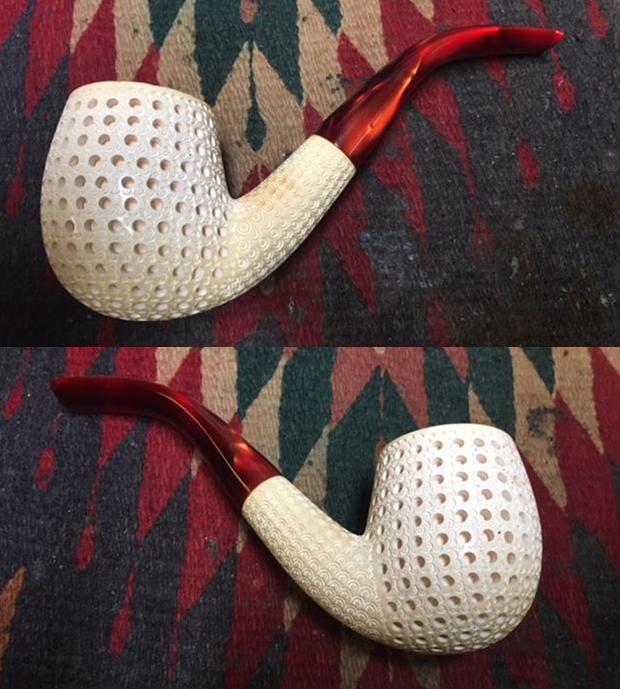
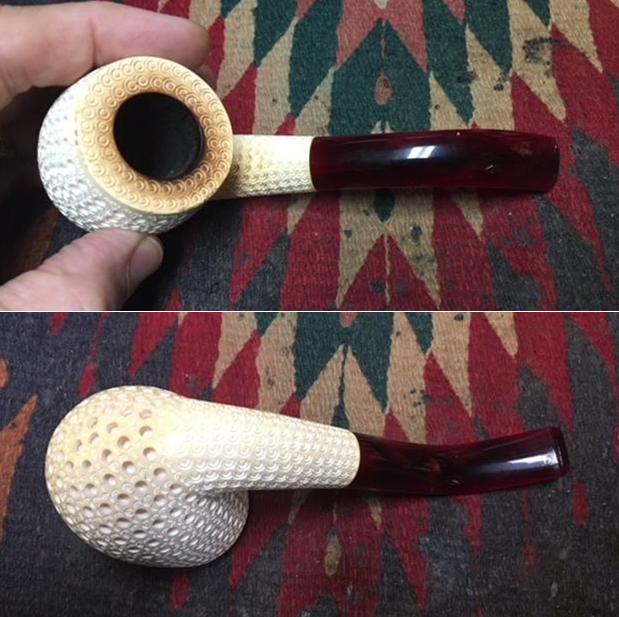
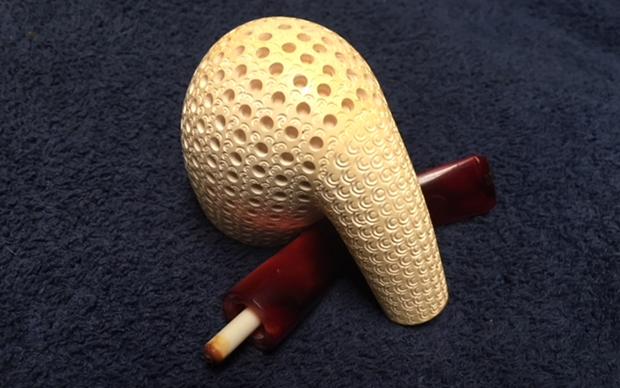
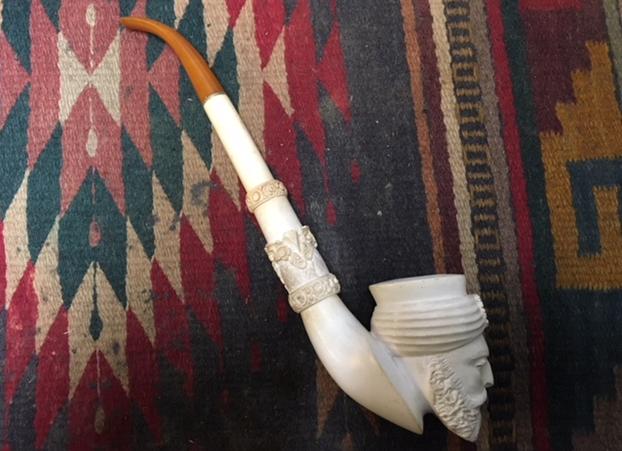
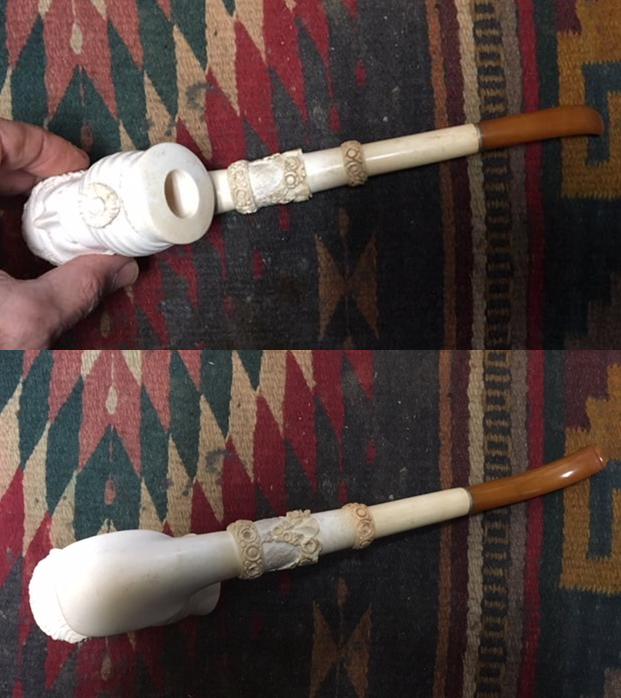
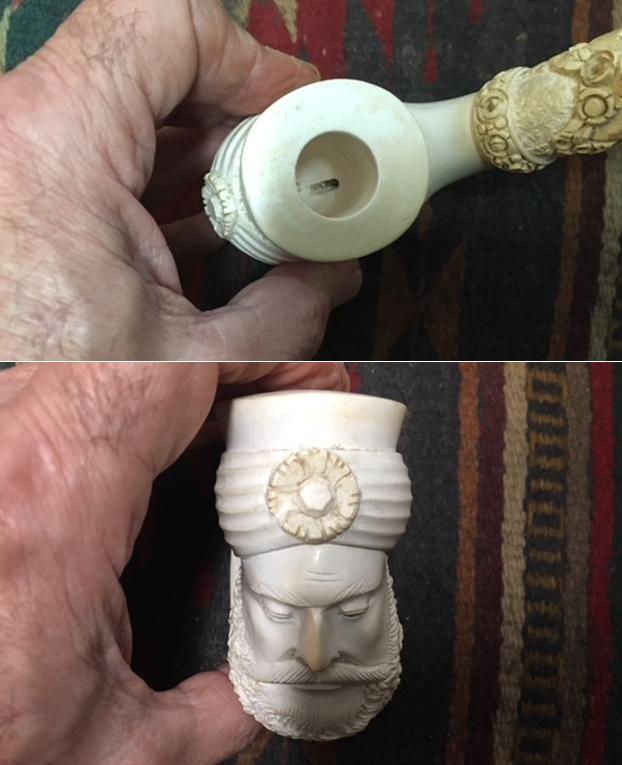
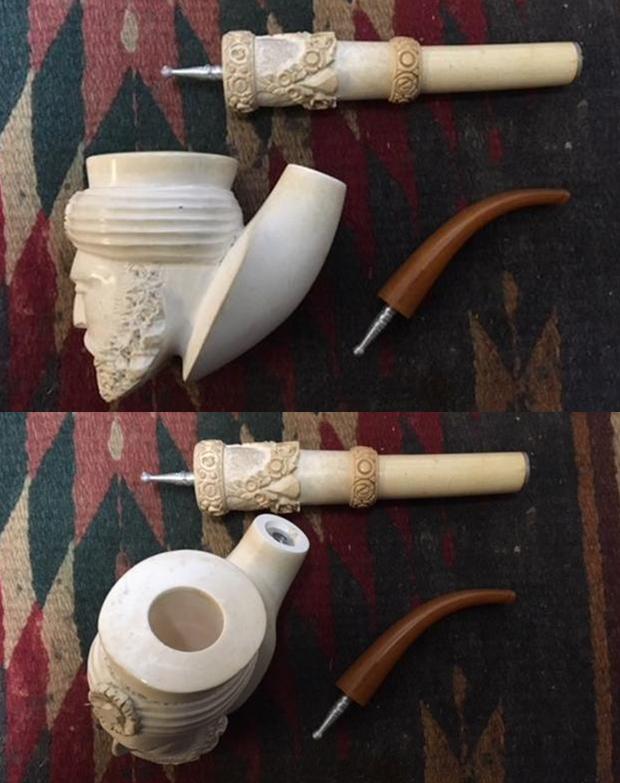
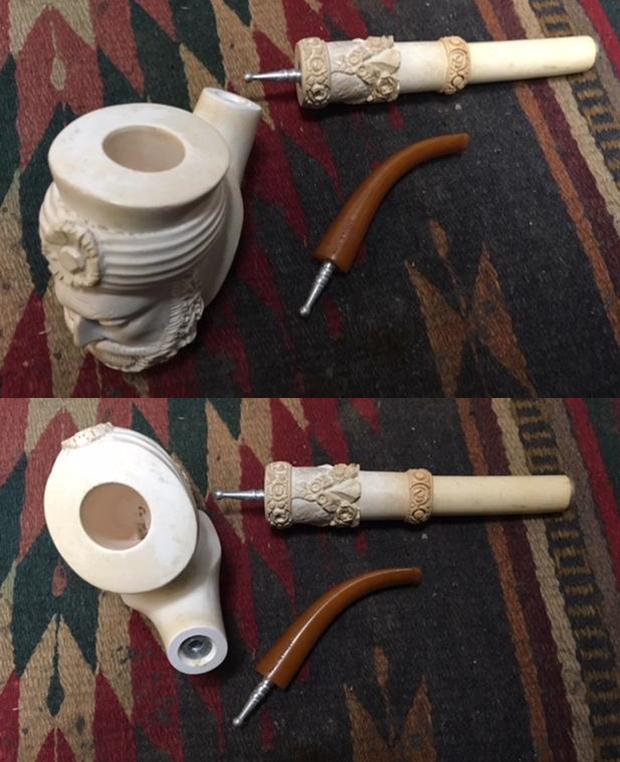
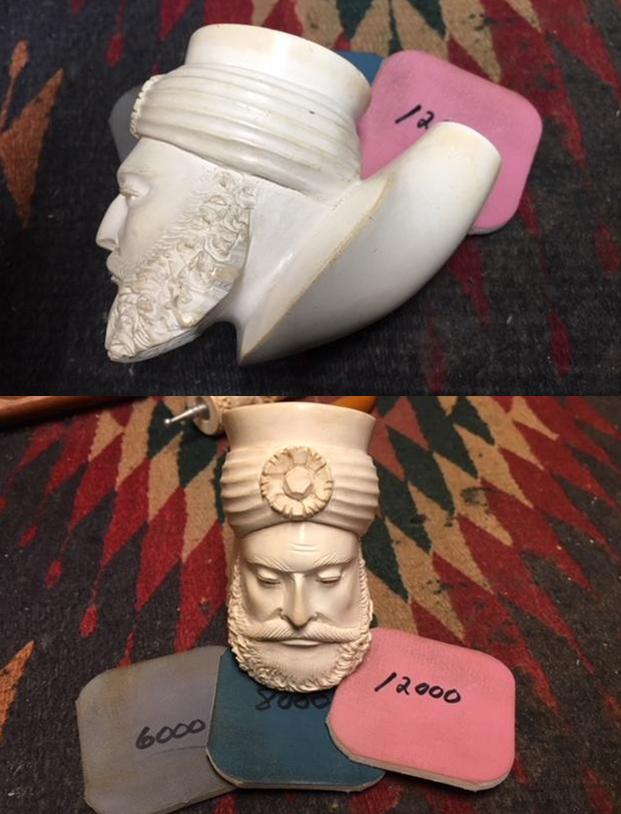
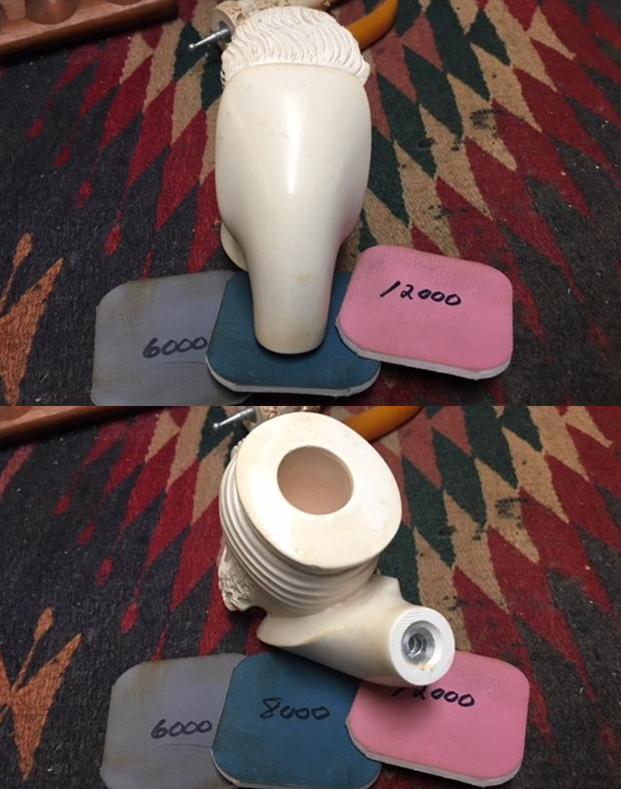
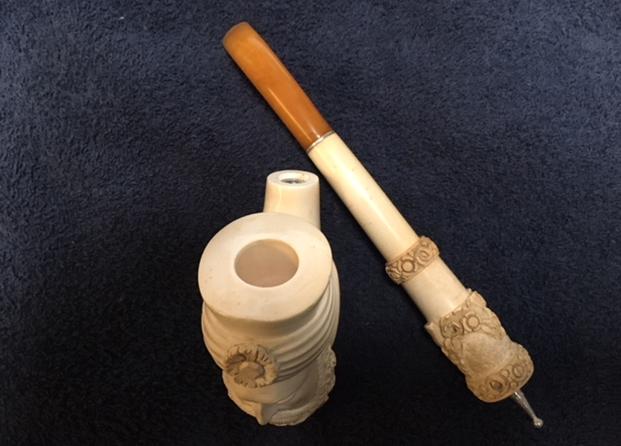
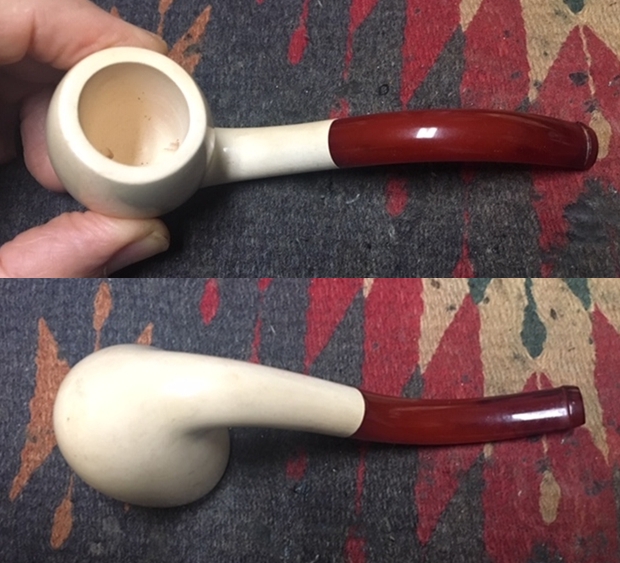
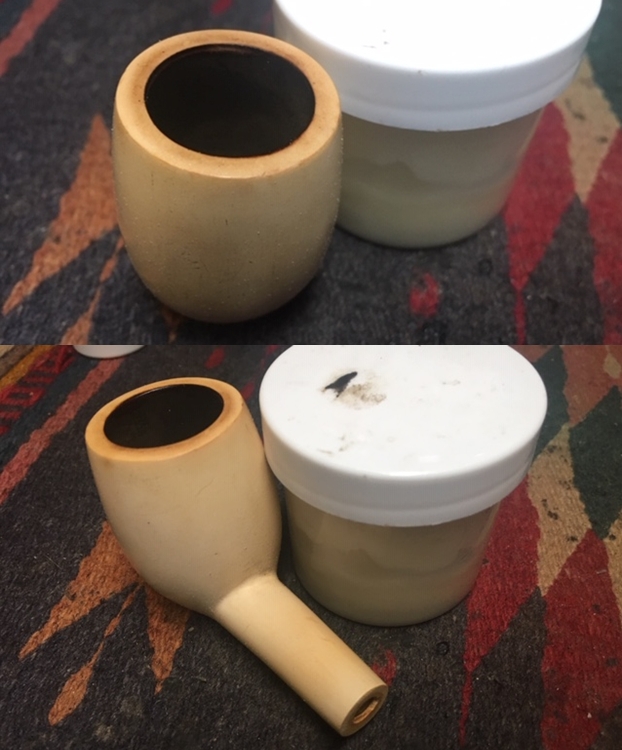
The second set of photos shows the unsmoked bent billiard. 
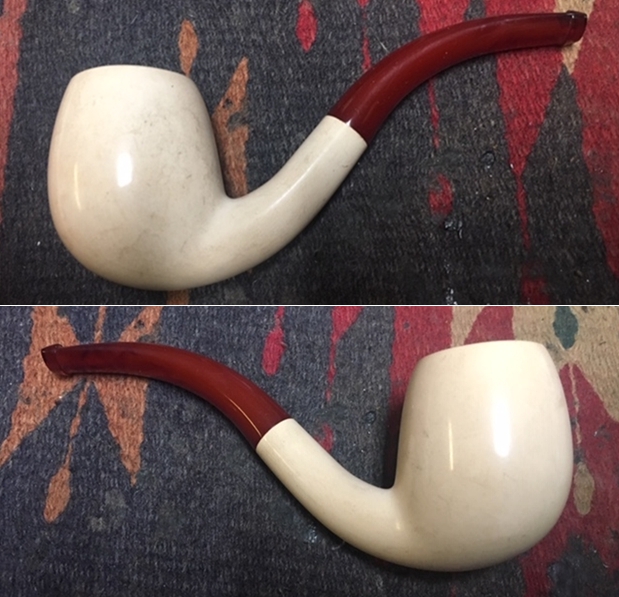
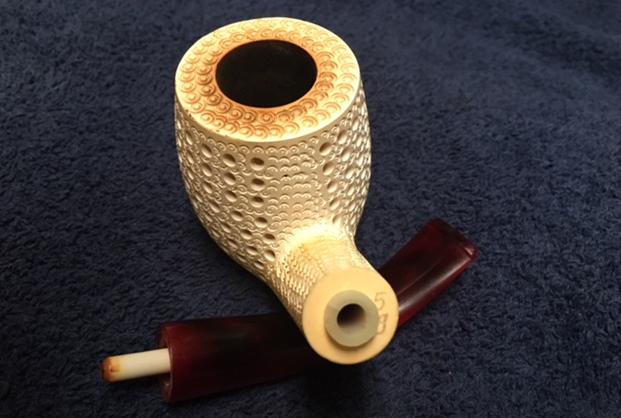
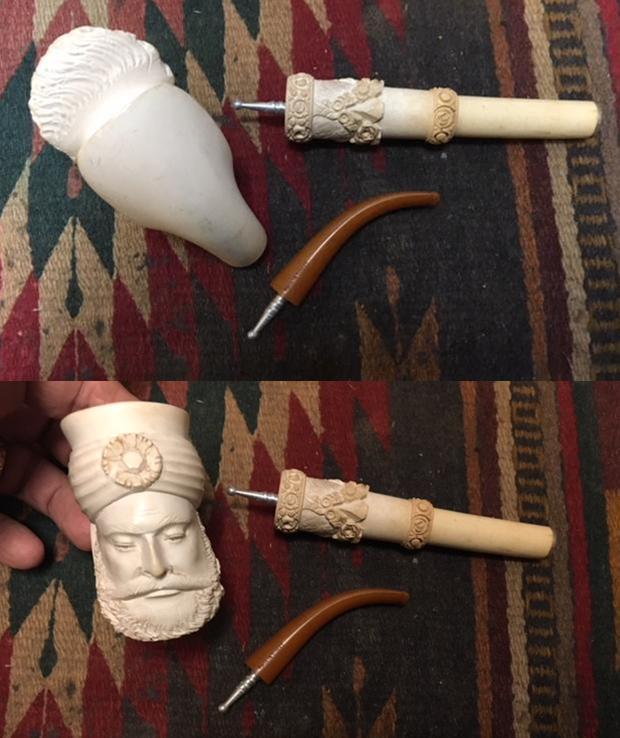
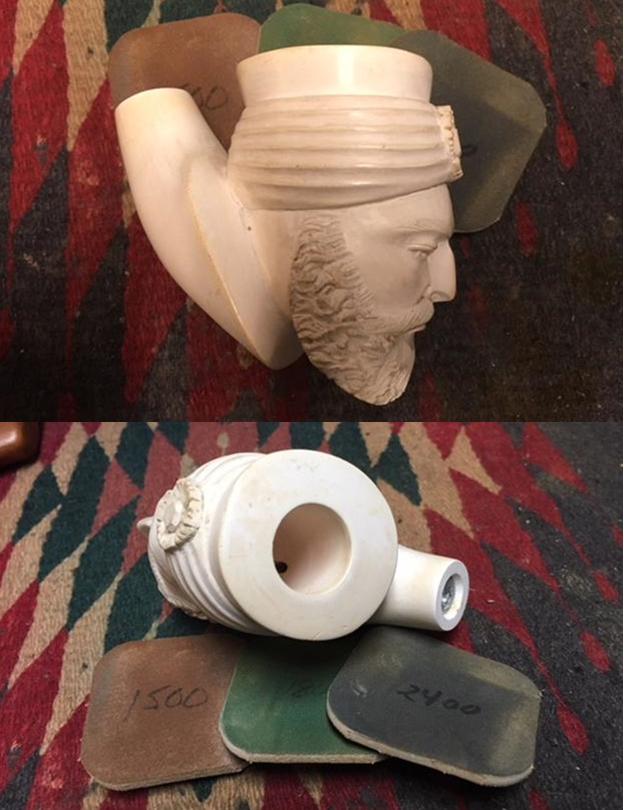
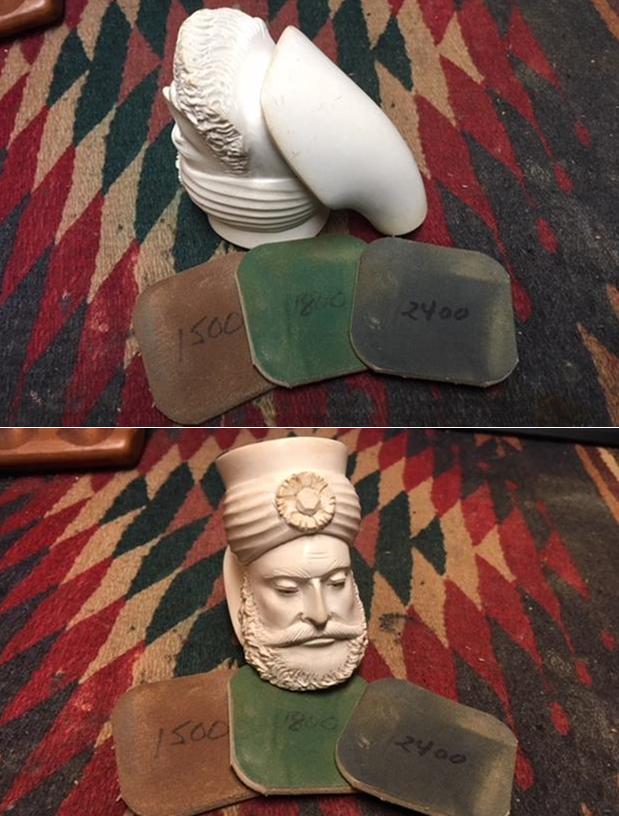
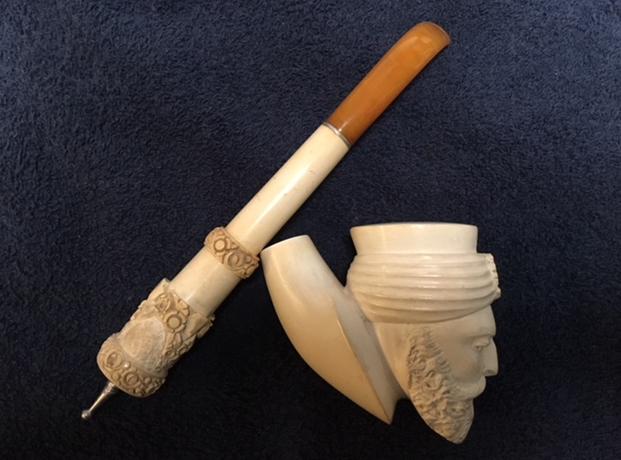
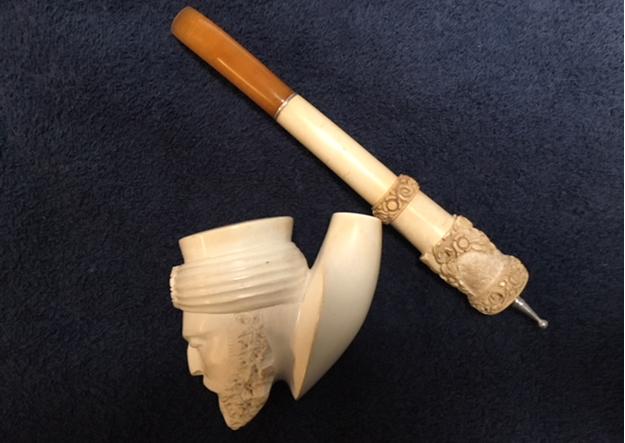
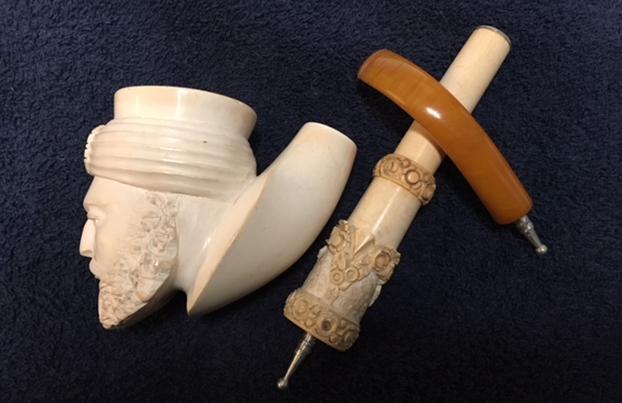
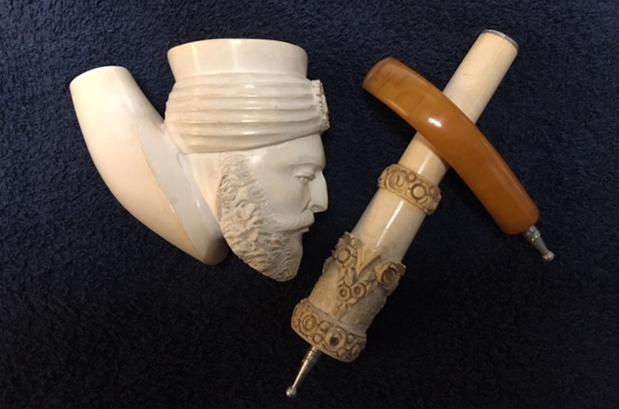
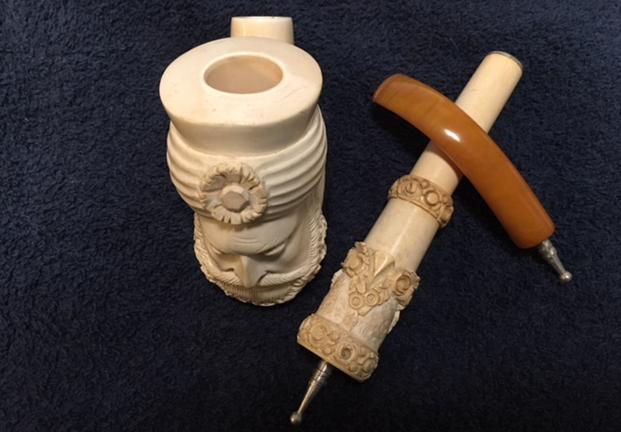
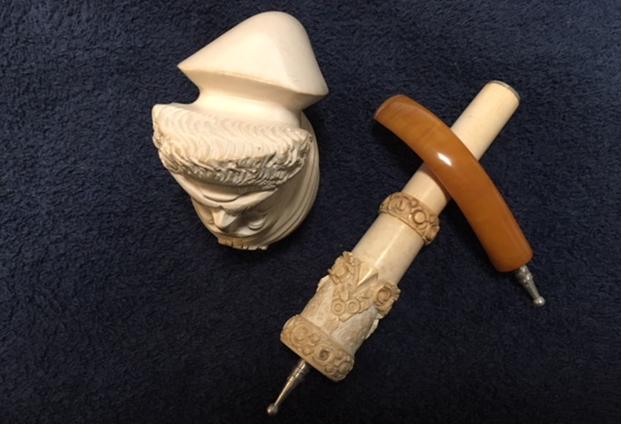
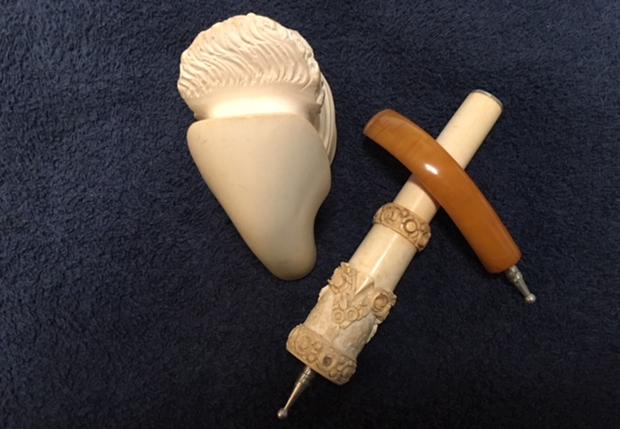
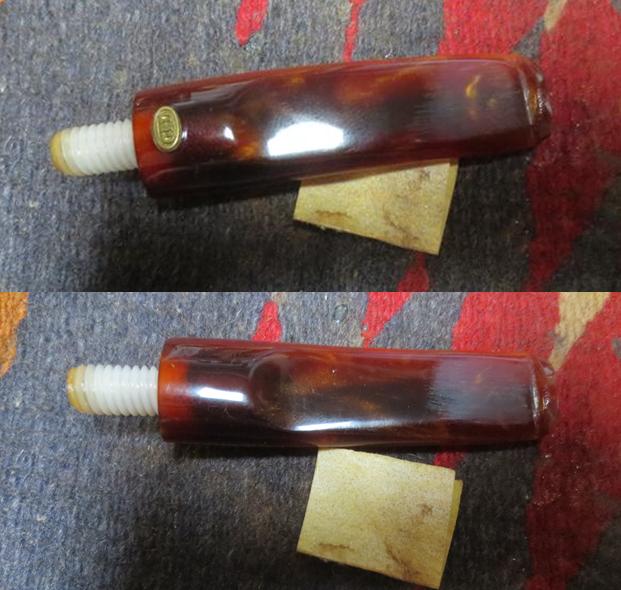
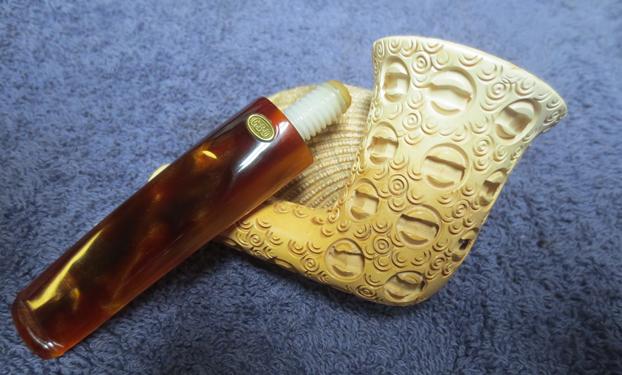
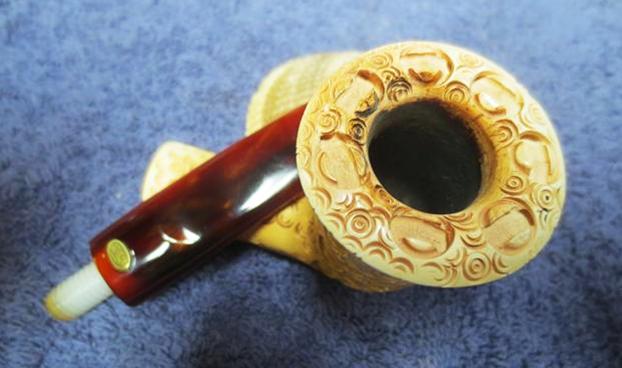
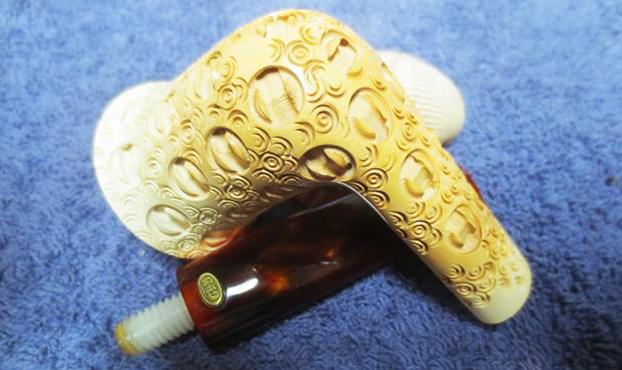
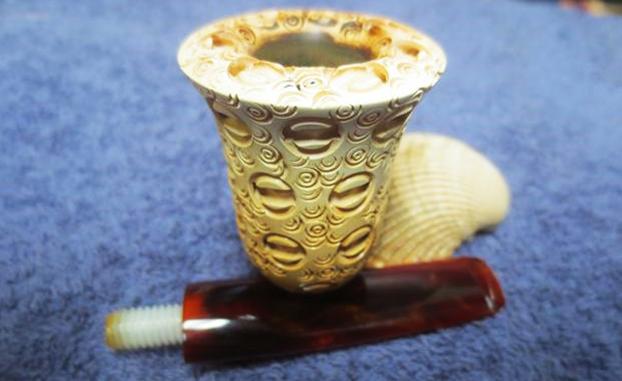
The third set shows the cigar holder. 
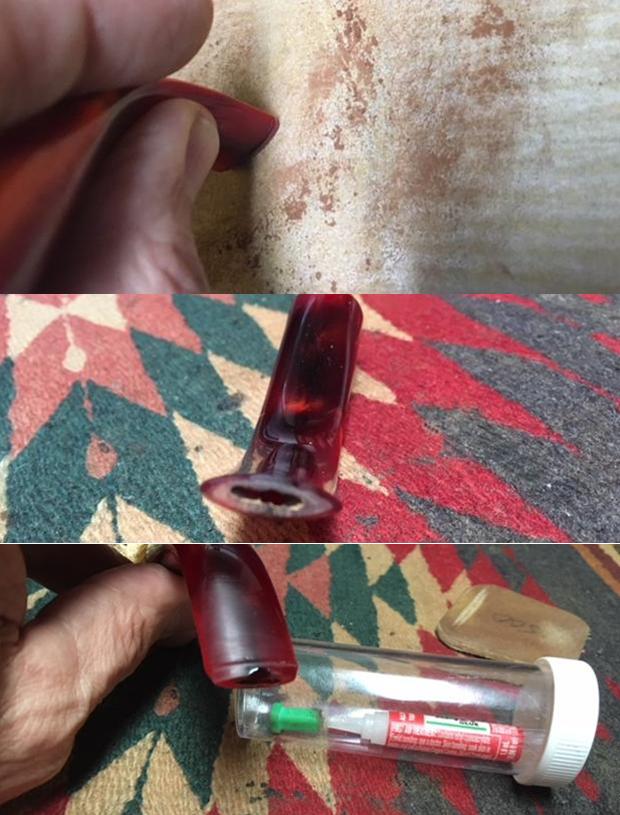
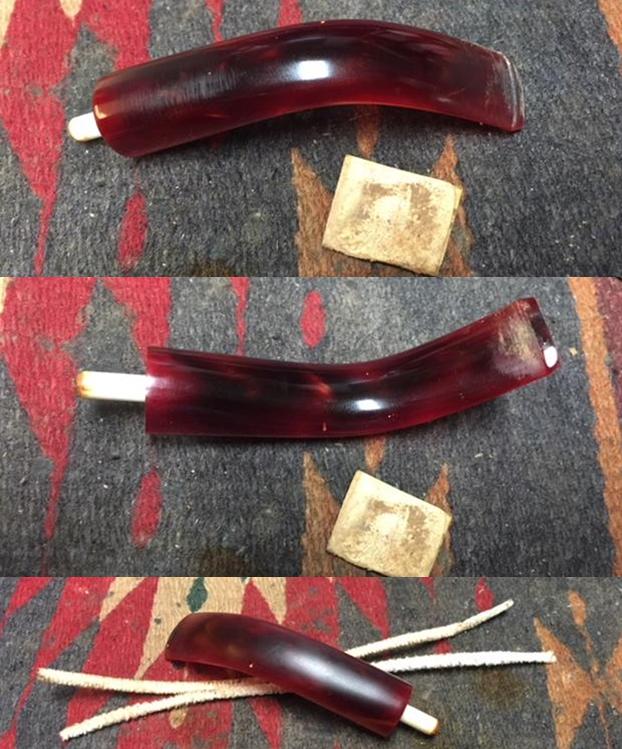
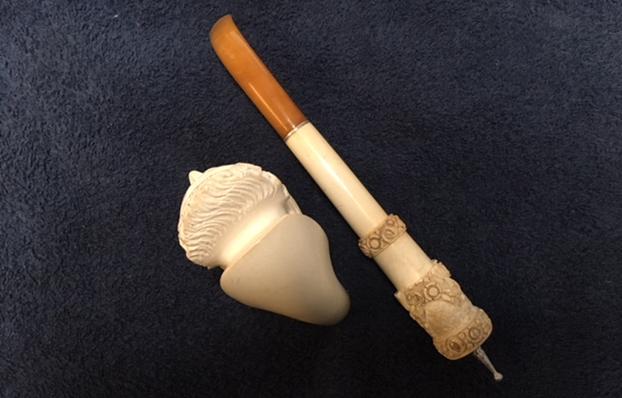
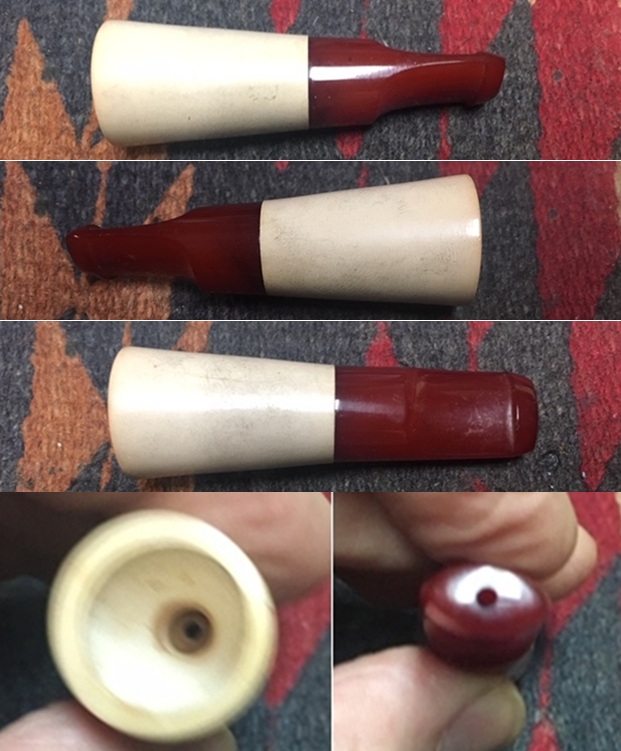
The fourth set shows the broken cigarette holder. All four of the pieces were dirty, some more than others but all needing work.
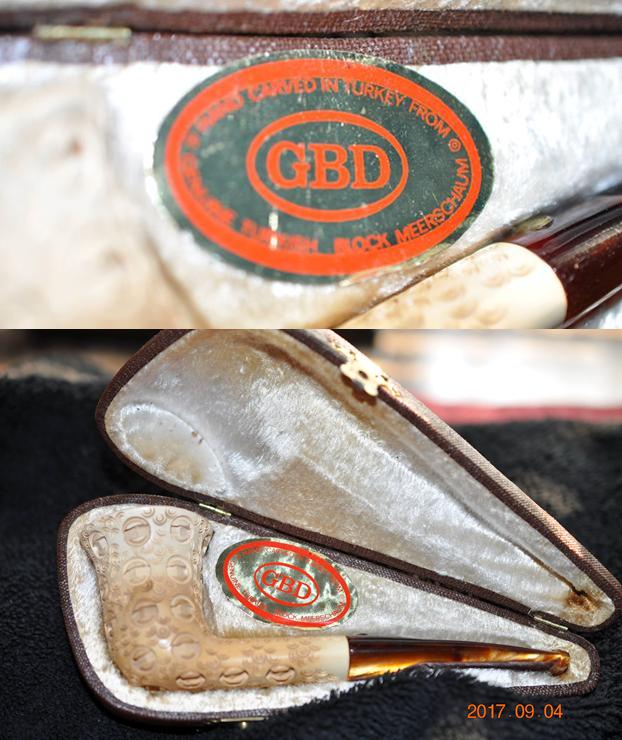
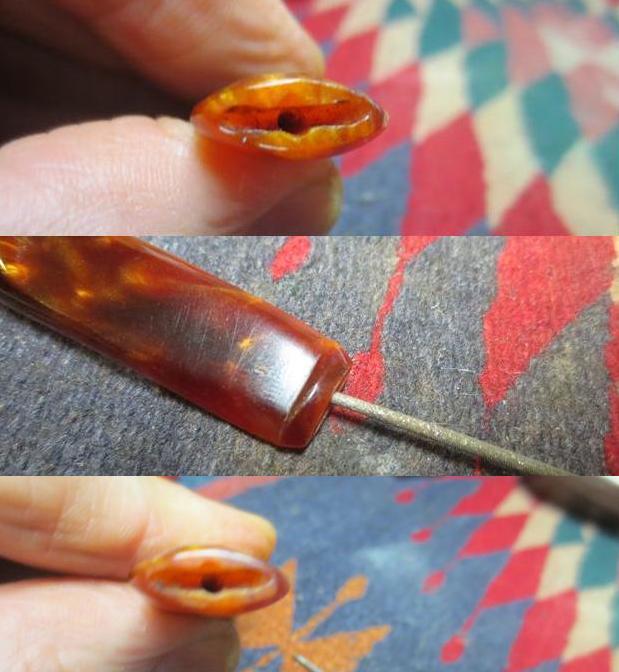
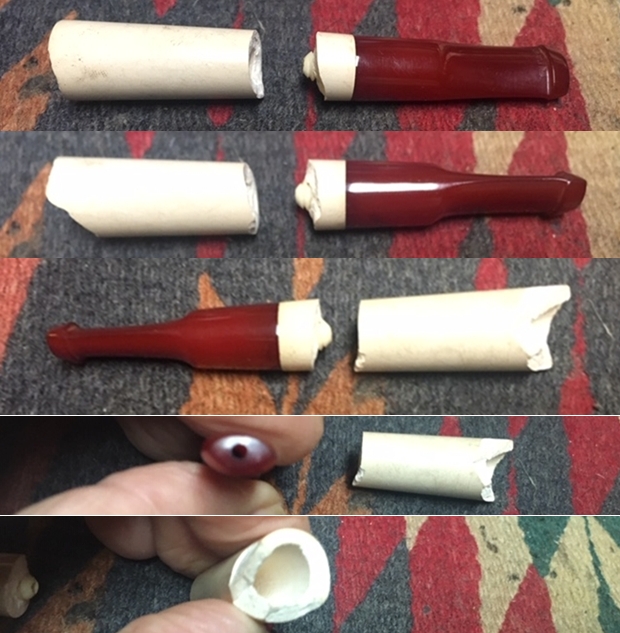
From what I could find on Pipephil’s site I found a listing for Aristocrat linking it to John Redman Ltd. in England (http://www.pipephil.eu/logos/en/logo-a7.html). The site says that it was an export brand from the company. In looking at the various stampings in the photos below I found that the Aristocrat stamping on the ribbon on the case above matches the second and third photo below.The photo below was a link on the site that took me to a photo of the John Redman LTD. and British Empire Pipe Com on Westland Place, Hackney, London, England. I think it is a nice historical touch to be able to include the photo.
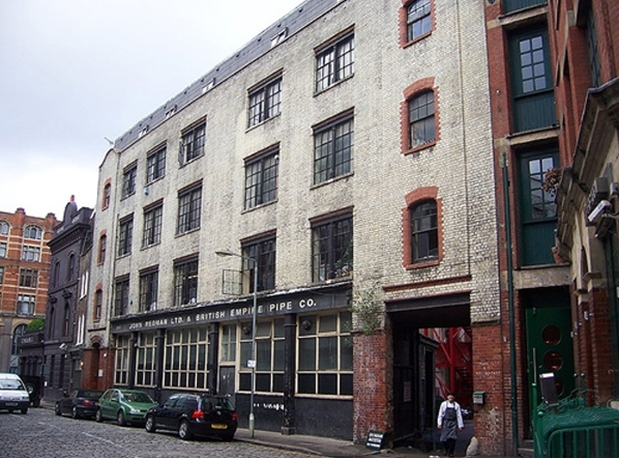
I turned to Pipedia (https://pipedia.org/wiki/John_Redman_Ltd./British_Empire_Pipe_Co.) to see if I could learn a bit more about the company. I quote the full article below:

John Redman Ltd. and British Empire Pipe Co. Other lines include Aristocrat, Buckingham, Buckingham Palace, Canberra, Captain Fortune, Dr John, Golden Square, Redonian, Richmond (not Sasieni), Twin Bore.

From these two sources it appears to me that this set of meerschaum pipes and holders was made for export by John Redman Ltd. I am not sure of the date as neither source gave clues to that information.

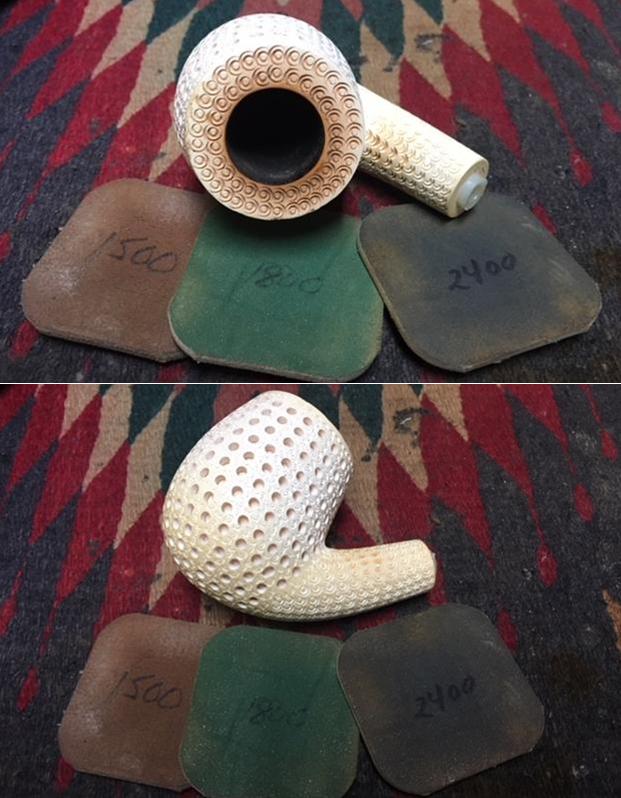
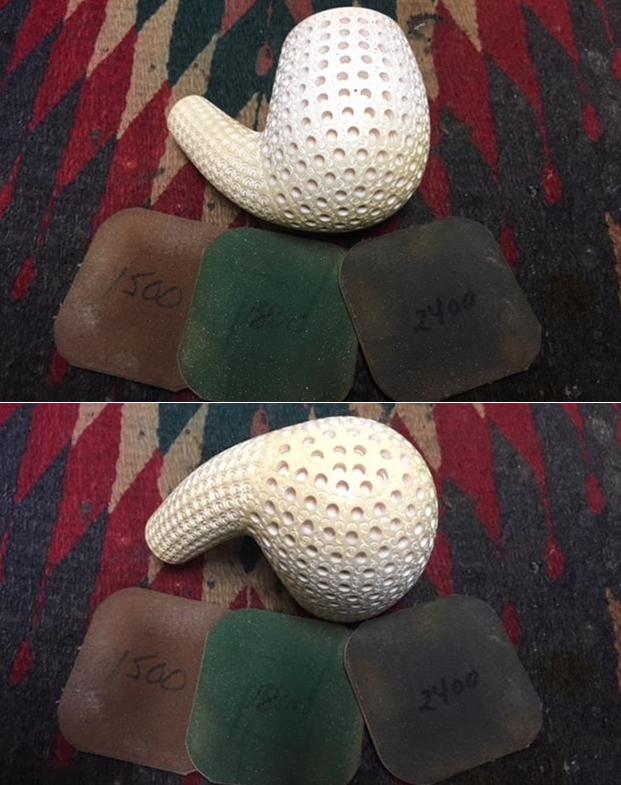
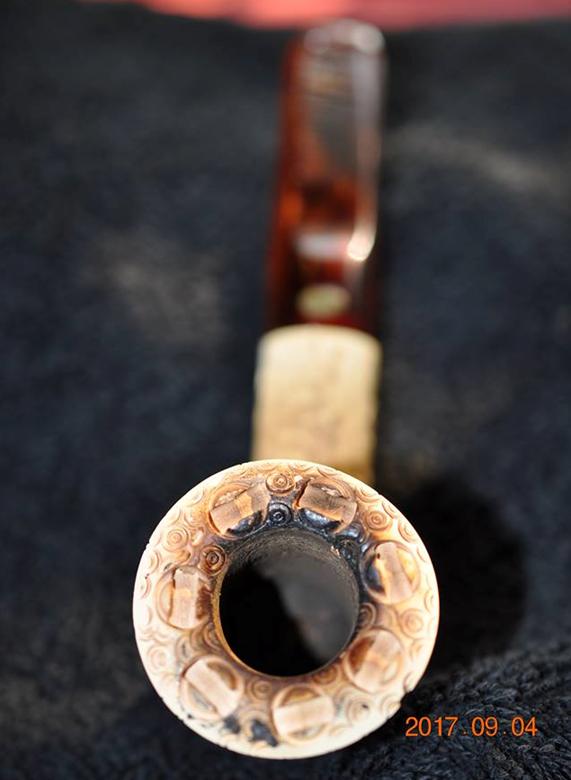
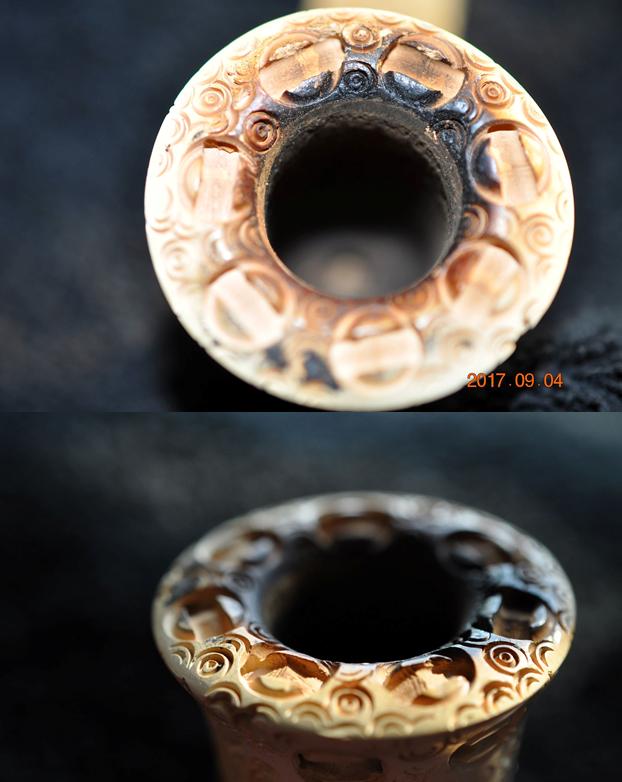
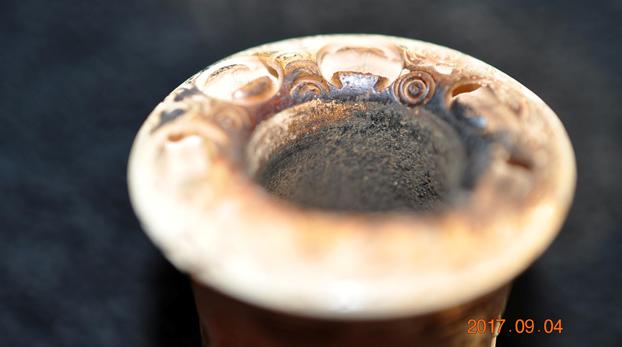
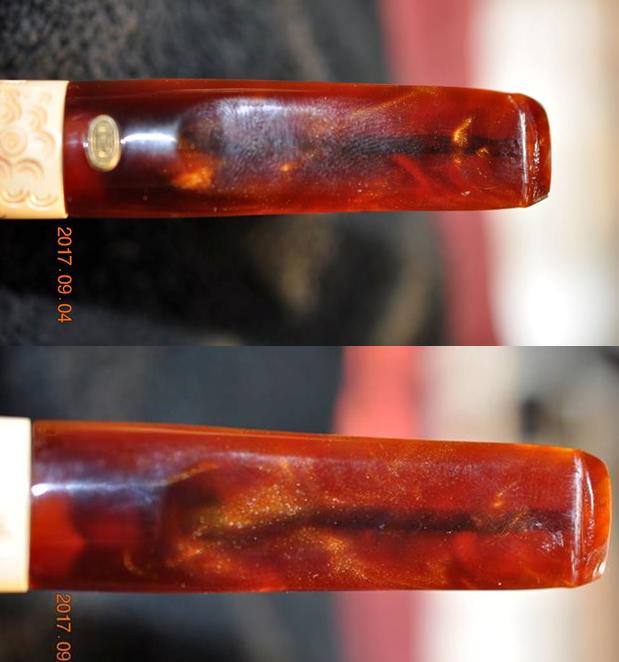
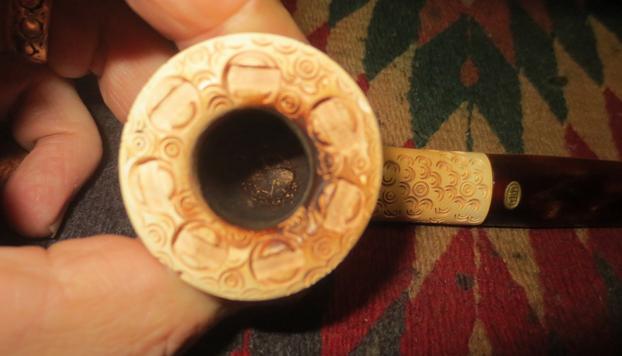
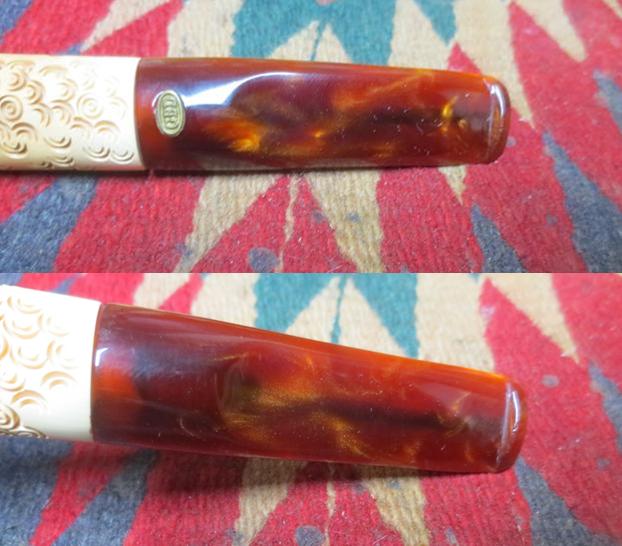
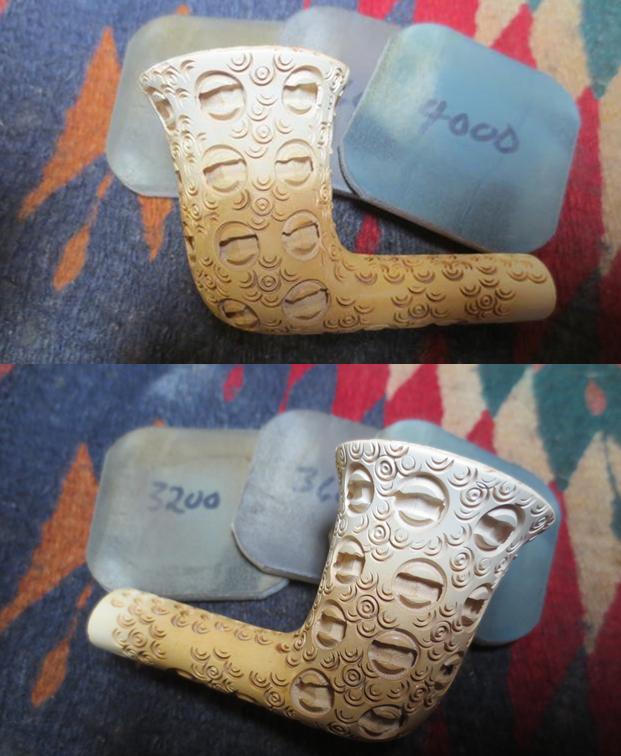
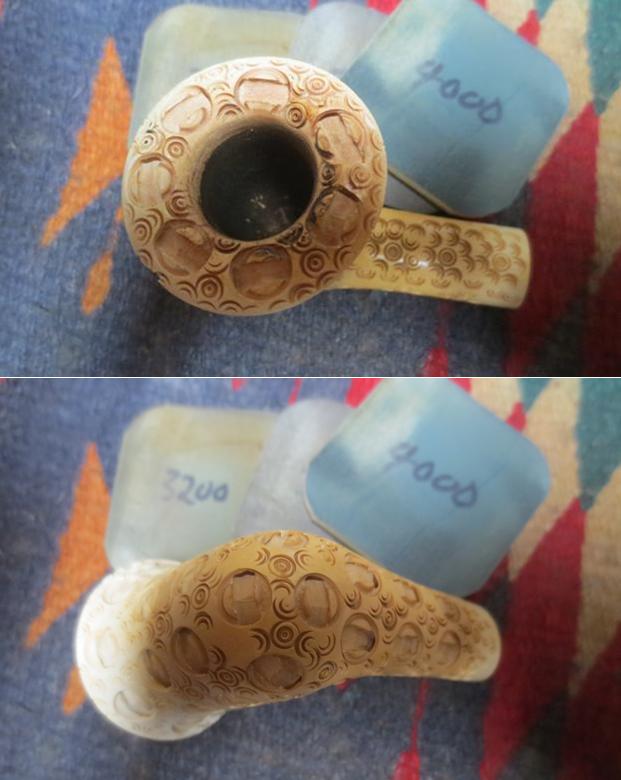
Given the information that I have in hand, I decided to start the restoration work on the straight meerschaum billiard. Only this pipe and the cigar holder had been smoked in the set so I figured why not start with the most smoked pipe – the most smoked billiard. I took close up photos of the bowl and rim top as well as both sides of the Bakelite stem to show the condition that the pipe was in when I started. The bowl had a thin cake from top to bottom. There was a thick coat of lava on the surface of the rim – heavier toward the back than the front but all around. The stem was clean but had tooth chatter and light tooth marks on the top and underside ahead of the button.
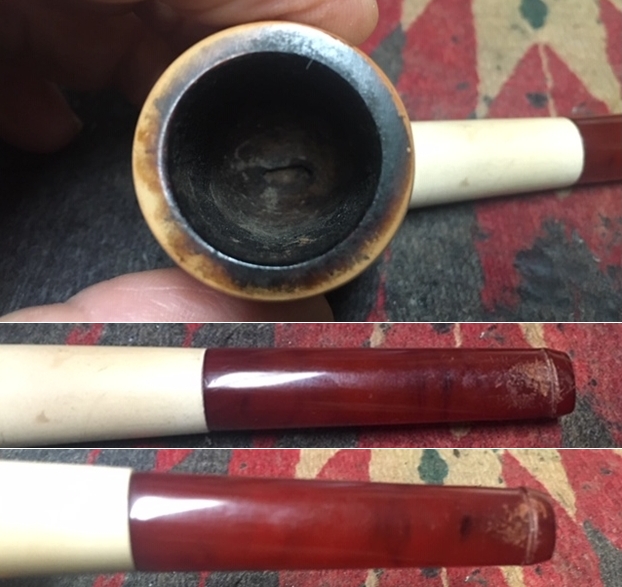
I used a 1500 grit micromesh sanding pad to start the rim top cleanup and sanded the outside of the bowl to start the cleanup process.
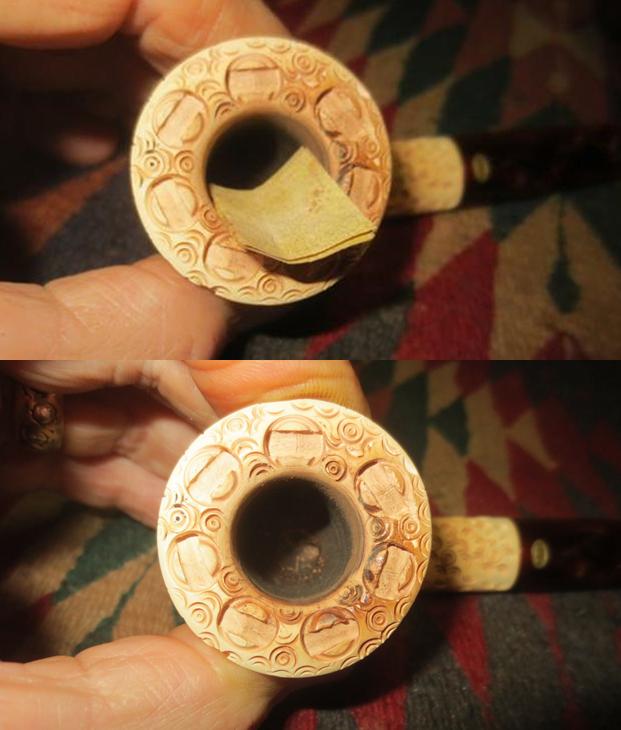
I reamed out the cake in the bowl with a Savinelli Fitsall Pipe Knife. I took the cake back to bare meerschaum. I sanded the walls of the bowl with a piece of dowel wrapped with 220 grit sandpaper until they were smooth.
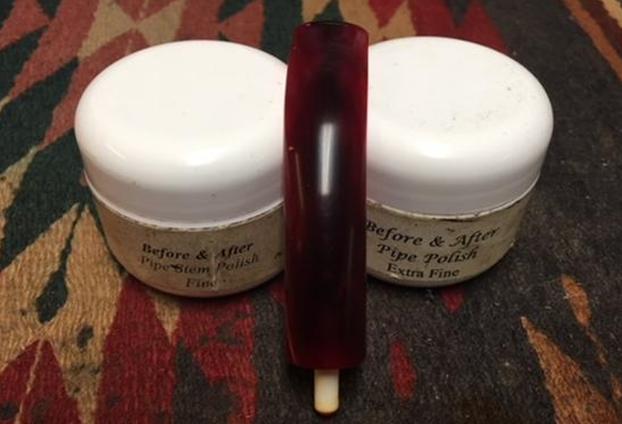
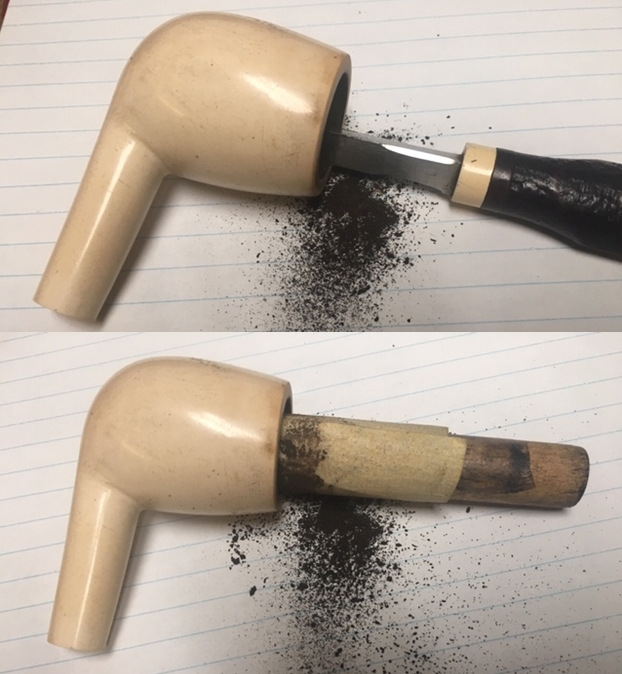
I decided to continue experimenting with a new product from Mark Hoover of Before & After Products. This one is a product he labels briar cleaner and it has the capacity of absorbing grime and dirt from the surface of briar. I decided to try it out this pair of meerschaum pipes. I rubbed the bowl down with some of his Briar Cleaner to see how it would work in this setting. In speaking to Mark he noted that the product is completely safe to use. The main product is even FDA approved edible. I rubbed it onto the bowl and rim top with my finger tips and worked it into the grime and grit on the bowl. I let it sit on the pipe for about 5 minutes before I rubbed it off with a microfibre cloth. I rinsed it under warm running water to remove the residue. I was pleasantly surprised by how clean the surface on the bowl looked when I was finished. 
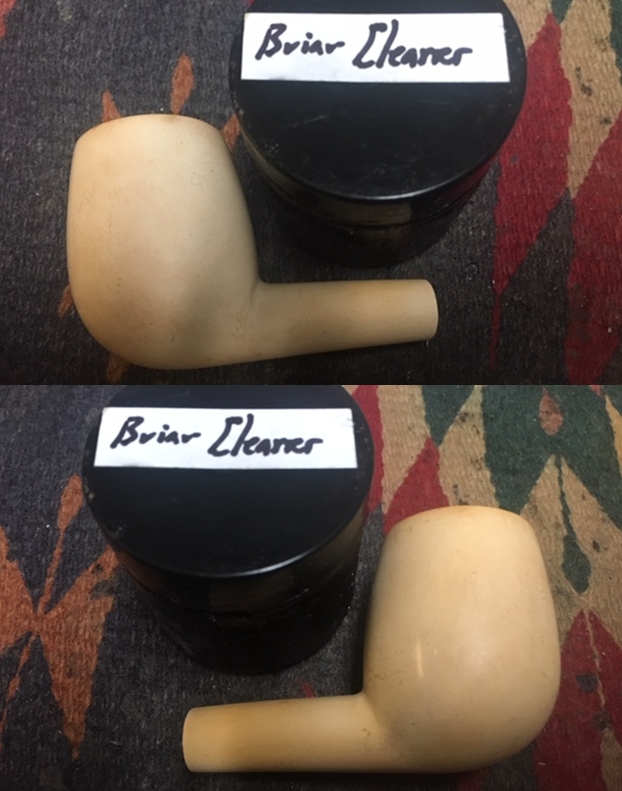
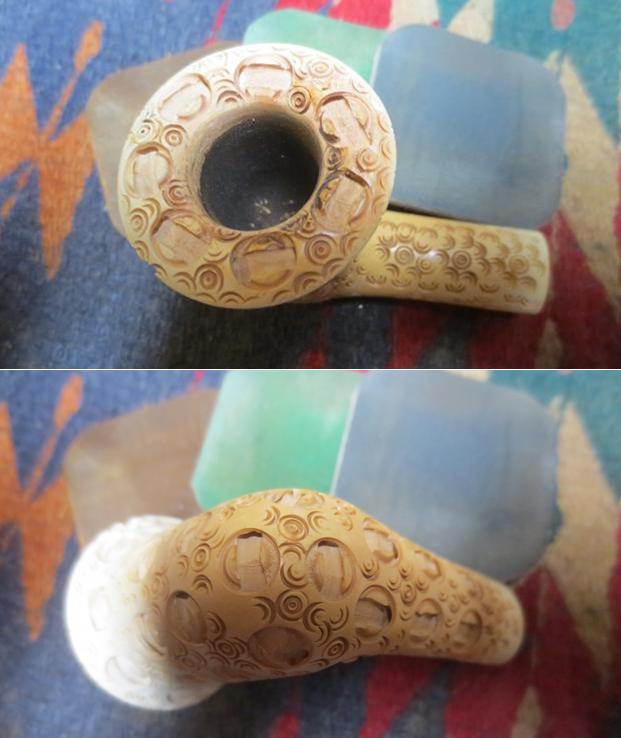
Since the cleaner had worked so well I decided to try out the Restoration Balm on the meerschaum as well. I rubbed the bowl down with Before & After Restoration Balm. I worked it into the meerschaum and let it sit for a short time. I buffed it off with a microfibre cloth to bring it some life. Once again I was very surprised at how well it worked. I sent Mark Hoover a note about this experiment. He was pretty amazed at the results and said he had not thought of using it for meerschaum but was not surprised as it was made to absorb grit and grime from the surface of a pipe. 
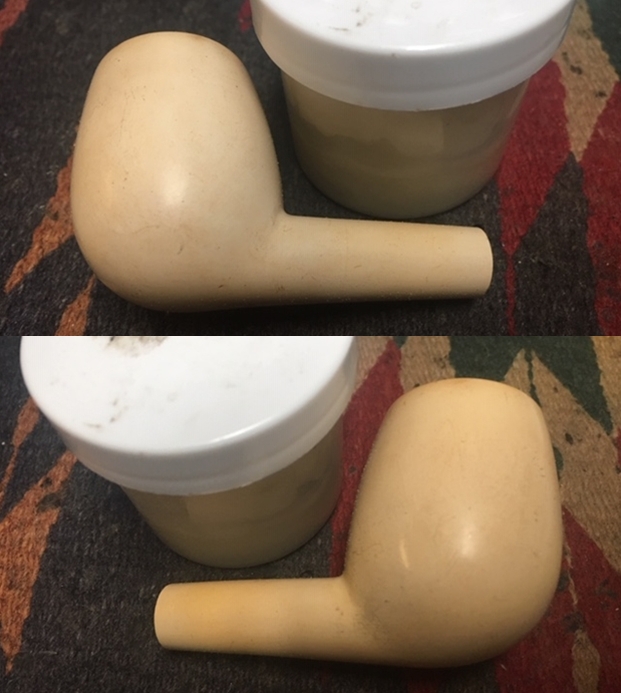
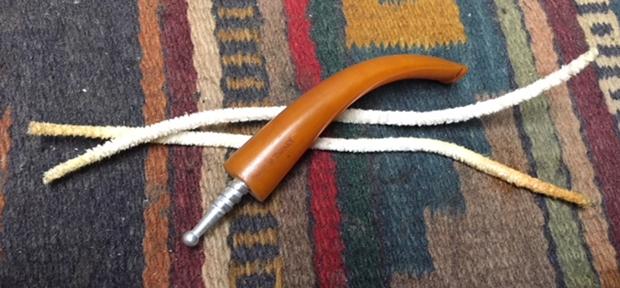
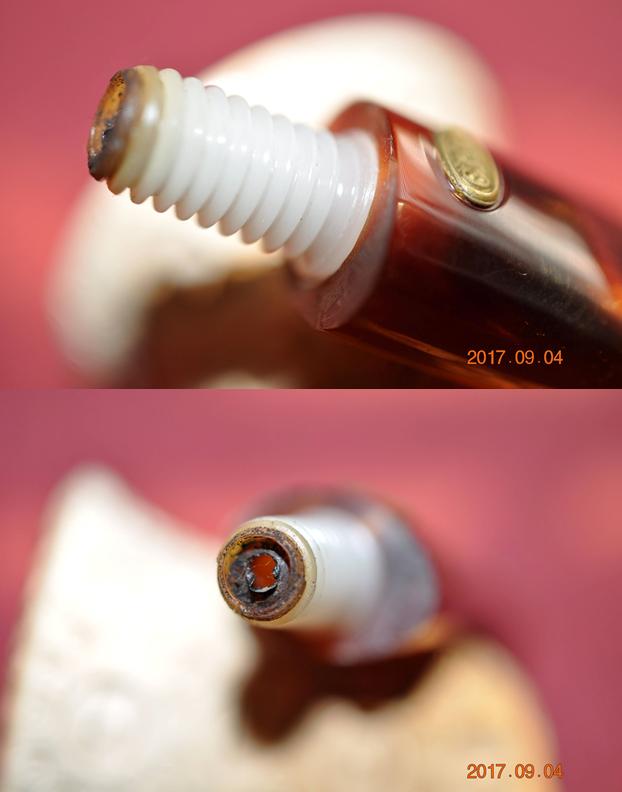
I cleaned out the internals of the airway in the shank and the stem as well as the mortise and the entrance of the airway into the bottom of the bowl. I used alcohol, cotton swabs and pipe cleaners to remove the grime. It was surprisingly clean for a pipe that was as heavily smoked as this one was. 
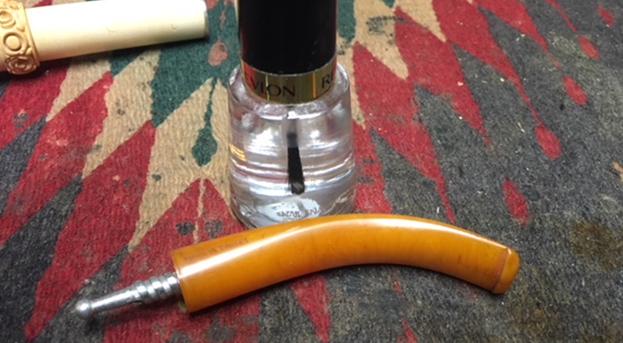
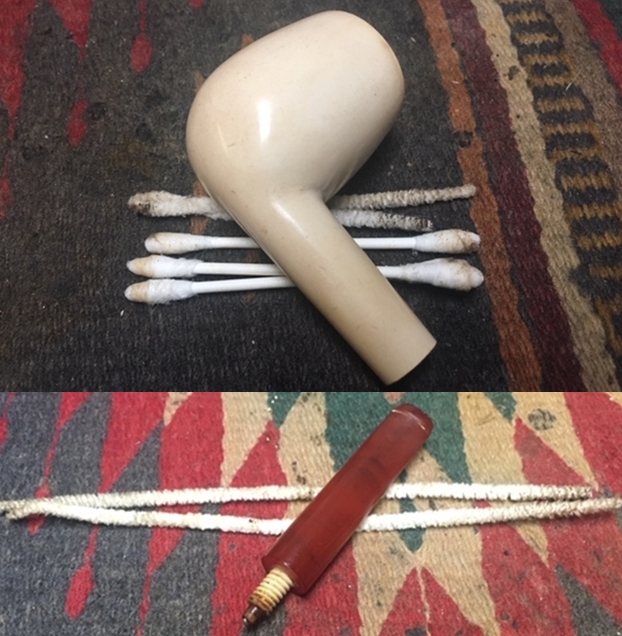
I set the bowl aside and worked on the stem. I sanded the tooth chatter and marks on both sides of the stem with a folded piece of 220 grit sandpaper and polished out the scratches from the sandpaper with a folded piece of 400 grit wet dry sandpaper. I wiped the stem down with Obsidian Oil and set it aside to dry out.
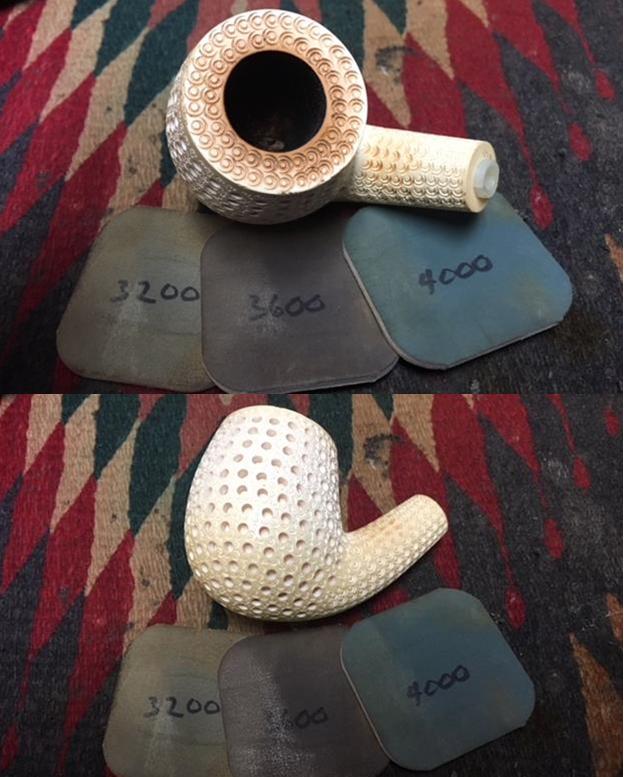
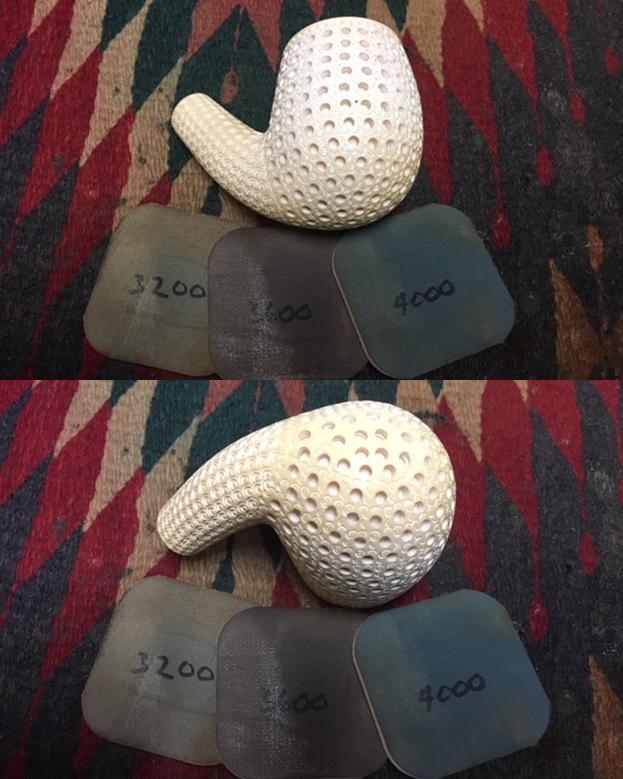
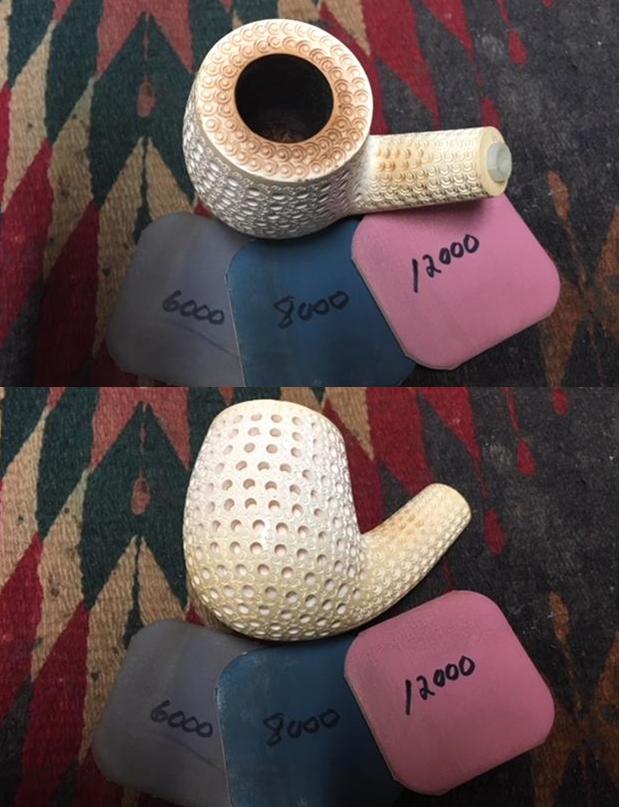
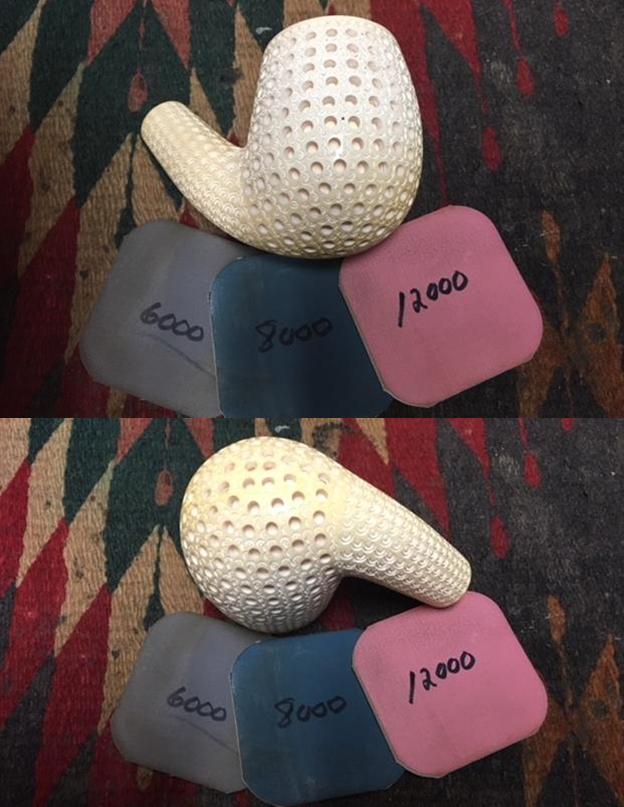
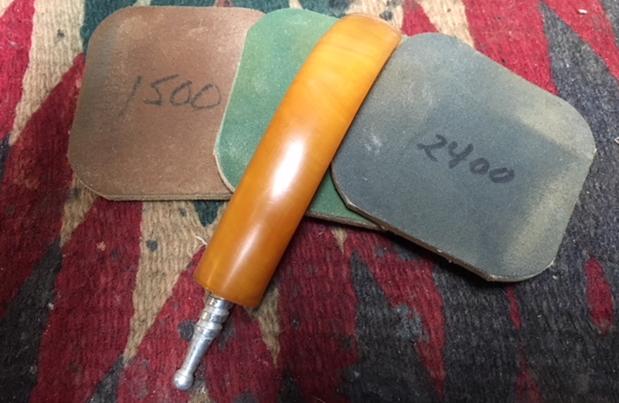
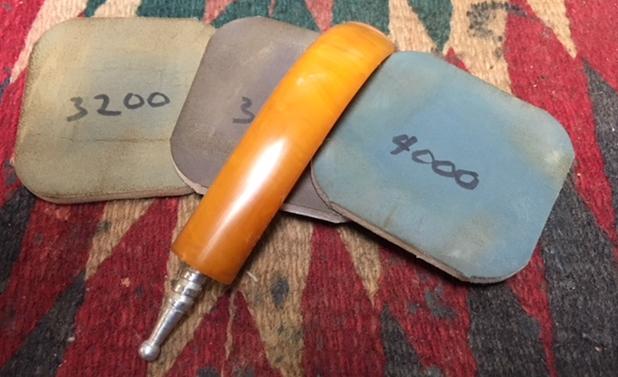
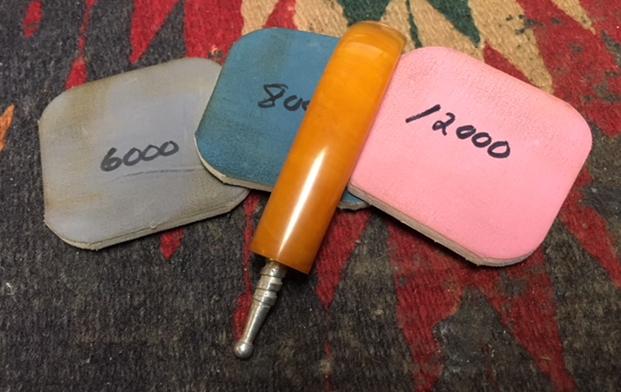
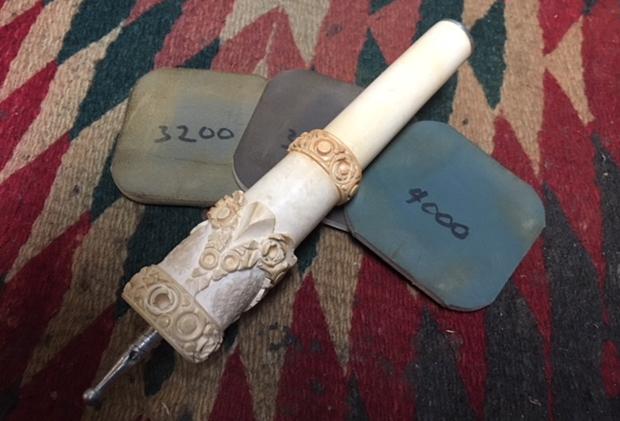
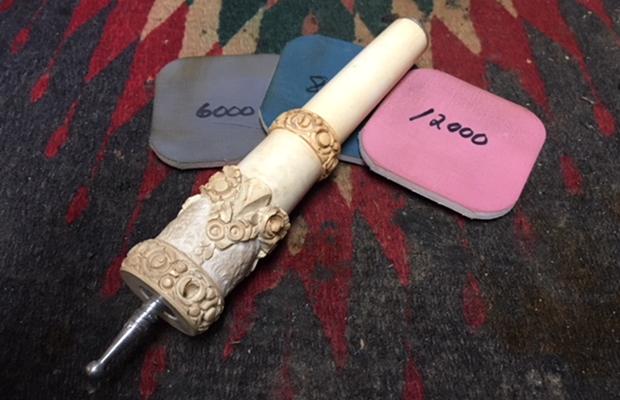
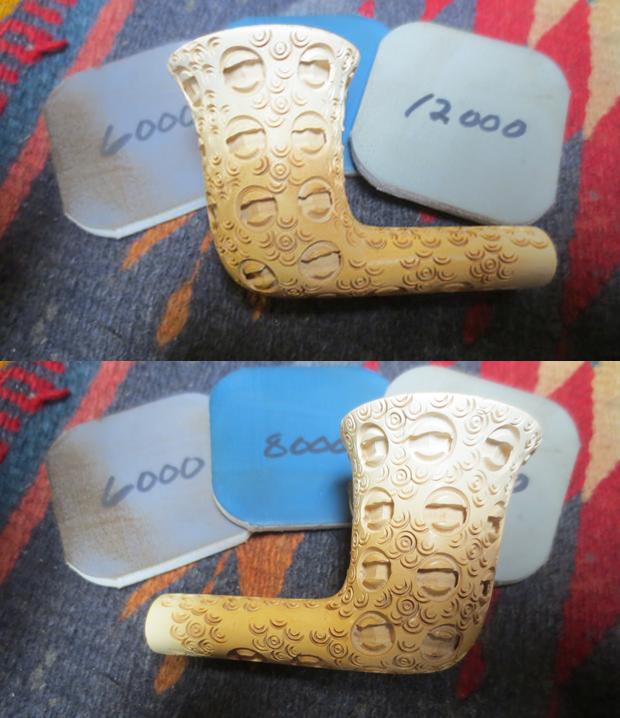
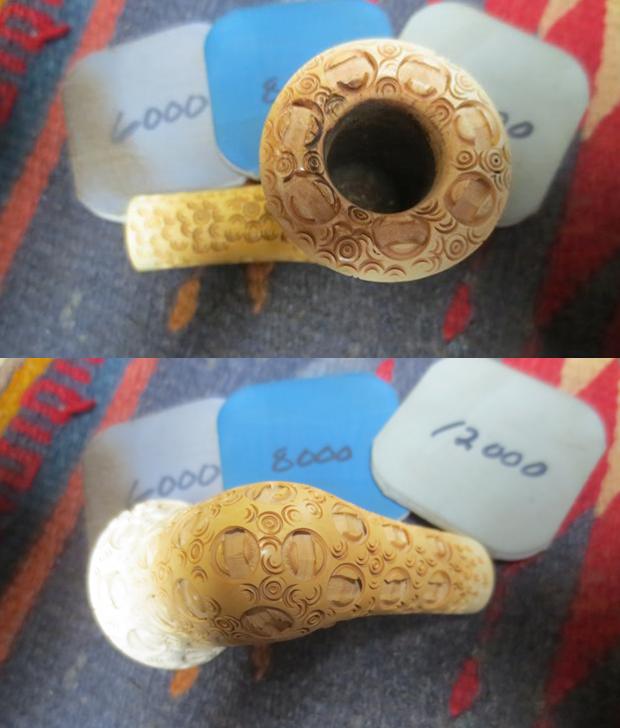
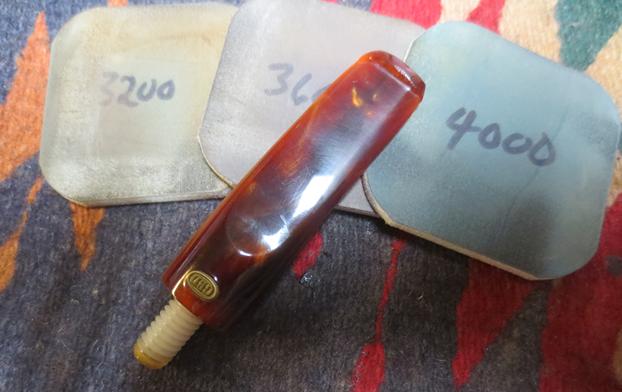
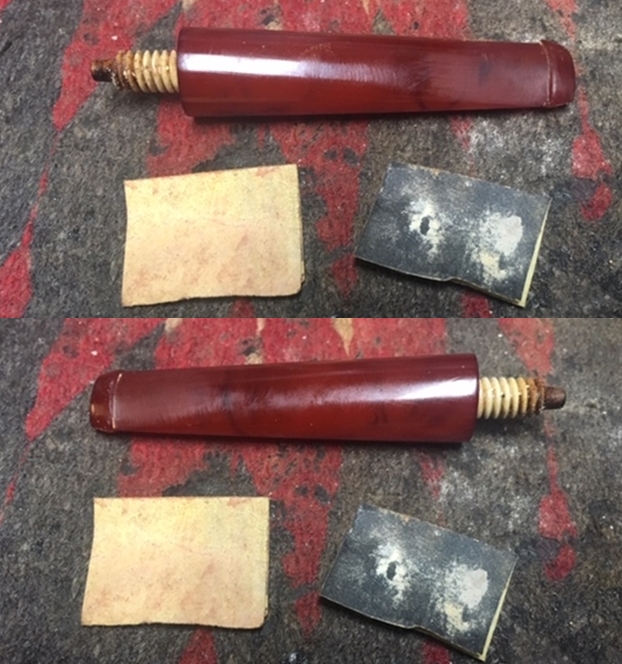
I wet sanded the stem with 1500 -12000 grit micromesh pads to polish it. I wiped it down with Obsidian Oil on a cloth after each sanding pad. After the 12000 grit pad I wiped the stem down a final time with Obsidian Oil and set it aside to dry. 
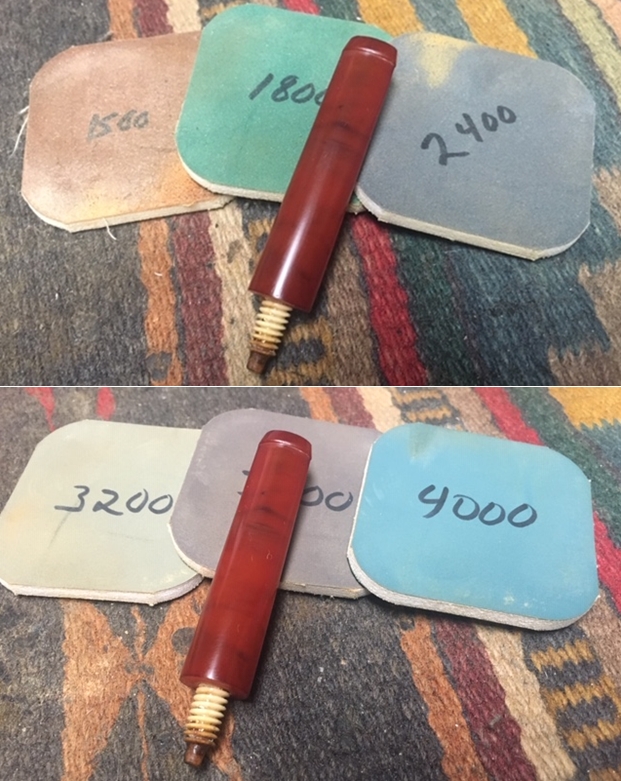
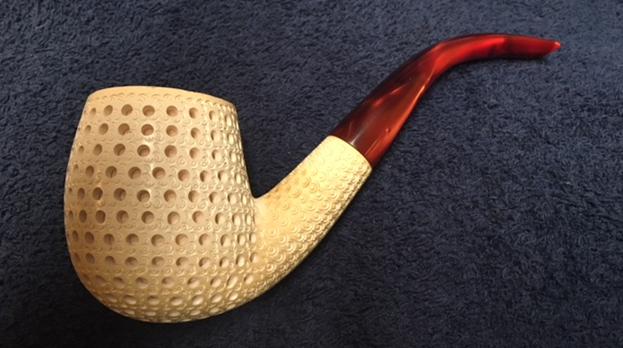
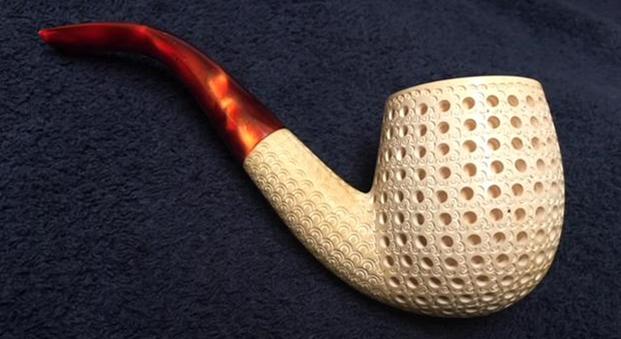
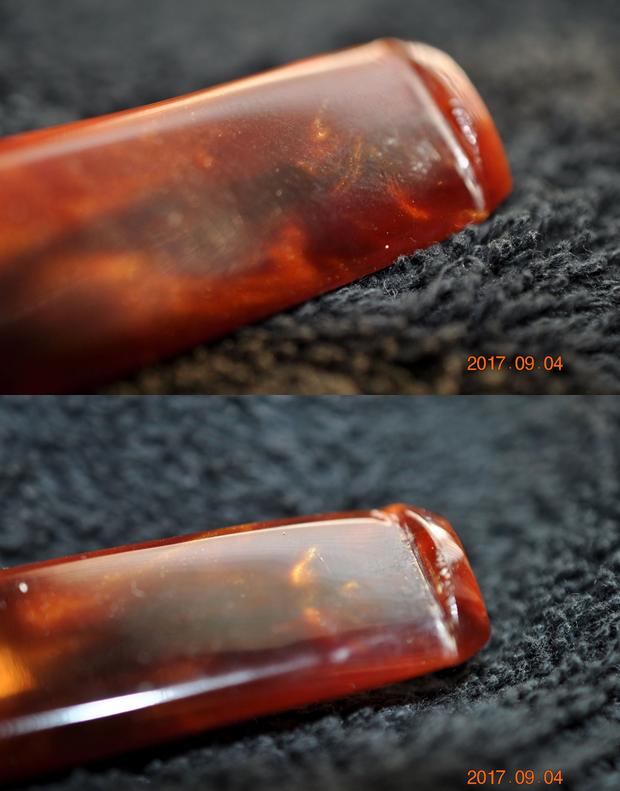
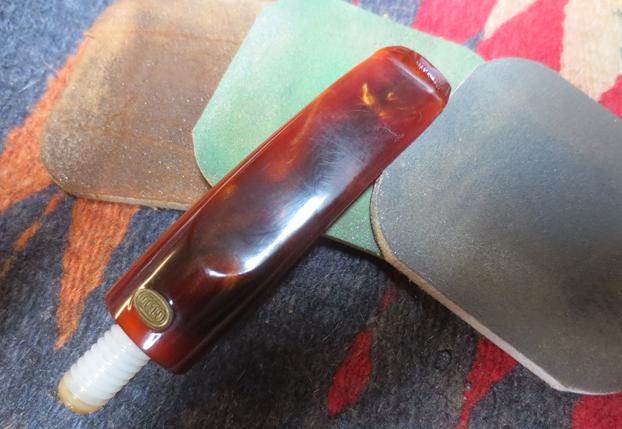
I put the bowl and stem back together. I polished the pipe with Blue Diamond to remove the remaining minute scratches in the briar and the Bakelite. I gave the bowl and stem several coats of Conservator’s Wax and buffed the pipe with a clean buffing pad to raise the shine. I hand buffed it with a microfiber cloth to deepen the shine. The pipe polished up pretty nicely. The contrast of the beautiful clean meerschaum with light colouring of age and the polished red Bakelite/Redmanol stem looked amazing. This older, beautiful, well made John Redman Ltd. Meerschaum straight billiard with a Redmanol stem will only get better with age. The finished pipe is shown in the photos below. The dimensions of the pipe are Length: 5 1/4 inches, Height: 2 inches, Outside diameter of the bowl: 1 1/4 inches, Chamber diameter: 7/8 of an inch. This is the first pipe from the Aristocrat pipe set in the photos at the beginning of this blog. The restoration of the remaining pieces in the set – the other pipe, the cigar holder and cigarette holder will be shown in future blogs. Thanks for walking through the restoration with me. Cheers. 

Refreshing a Lattice Work Meerschaum Bent Billiard


Blog by Steve Laug

I really am enjoying working on the last batch of pipes that my brother sent me. He does such a great job reaming and cleaning them that I have a fun job of bringing life back to a clean pipe. The next one up on my work table came in its own black vinyl (leather-covered??) case. From the outside the case looked like it contained a large apple shaped or round shaped pipe. The brass latch on the front edge and the hinges on the back were in great shape. There was a circle on the top outside of the case that looked like it had originally had a sticker logo on the outside of the case. It had long since disappeared and left its imprint on the surface of the case. The black case looked promising and made me wonder what was going to be inside. Jeff said he had picked this one up at an auction and it was in great shape.I opened the case and inside it was lined with golden yellow coloured velour. Nestled in the base of the case was a nice looking lattice meerschaum pipe that I think some would call and egg but to me was a bent billiard. The stem was a red acrylic with a Teflon/nylon push tenon and a nylon mortise insert. There was some light tooth chatter on the top and underside of the stem near the button on both sides and a small chip mid button edge on the outside.I took the pipe out of the case and took pictures of it before I did my polishing and clean up on it. It really looks good. Other than the chatter on the stem and the chip in the top of the button the rim top had some darkening and light build up. Jeff had reamed the bowl and scrubbed the exterior of the pipe with a soft soap. He had also cleaned out the mortise and airway in the shank and the stem. It was very clean. I took some close up photos of the rim top and the stem. You can see from the rim top that there was some darkening along the back edge of the bowl. There is some colouration happening on the top and underside of the shank and on the bottom and sides of the bowl. The rim is also taking on colour. It should not take too much work to clean off the darkening. The stem had some chatter than is visible around the button on both sides as well as a small chip that is visible in the photo of the top side of the stem.The thickness of the button lent itself to topping it slightly. I used the topping board and put the surface of the button face against the sanding board. I worked it against the sanding board and remove the chip that was on the face of the button. I filled in the remaining portion of the chip with clear super glue and set it aside to cure.I sanded nicks and the tooth chatter on both sides of the stem. I reshaped the button and blended the repair into the rest of the button surface with 220 grit sandpaper. With the sanding and reshaping there was sanding dust in the airway on the stem so I cleaned it with alcohol and pipe cleaners. I also cleaned off the white nylon push tenon. I polished the stem with micromesh sanding pads – wet sanding it with 1500-2400 grit sanding pads and dry sanding it with 3200-12000 grit pads. I rubbed it down with Obsidian Oil after each sanding pad. I finished polishing it with Before & After Pipe Polish using both the fine and extra fine versions. I gave it a final coat of Obsidian Oil and set it aside to dry. I polished the rim top with micromesh sanding pads – wet sanding with 1500-2400 grit pads and dry sanding with 3200-12000 grit pads. I polished the sides of the bowl and shank at the same time with the pads. I the polished stem with Blue Diamond to polish out the remaining small scratches. I buffed the bowl with a soft microfiber cloth. I gave the bowl multiple coats of Clapham’s Soft Beeswax and the stem several coats of carnauba wax and buffed the pipe with a clean buffing pad to raise the shine. I hand buffed the entire pipe with a microfiber cloth to deepen the shine. The pipe polished up pretty nicely. The finished pipe is shown in the photos below. The dimensions are Length: 6 ½ inches, Height: 2 1/4 inches, Outside diameter of the bowl: 1 3/4 inches, Chamber diameter: 3/4 inches. I will be adding it to the rebornpipes store shortly. If you are interested in adding it to your collection send me a message or an email to slaug@uniserve.com. Thanks for walking through the restoration with me as I worked over beautiful lattice meerschaum.

Refreshing a NOS, Large, Long Shank Meerschaum Sultan


Blog by Steve Laug

My brother Jeff was contacted by a fellow in Scotland who had a couple of meerschaum pipes that he wished to sell. This was one of them – a large, long shank, full bent, carved Sultan head with roses carved at intervals along the shank. It was in unsmoked, new old stock condition. The bowl is pristine and other than a few scratches so was the exterior. The shank and bowl have some colouration to it that I think must be due to the original waxing the bowl received when it left Turkey. The stem was an amber acrylic that had dulled over time but did not have any tooth marks or scratches. It had an orific opening in the button. On the right side of the stem near the shank/stem junction it is stamped Made in Turkey. The tenon is a threaded metal with a stinger apparatus integrated into the unit. There is also another metal stinger apparatus attaching the shank extension to the shank coming out of the bowl. I have never seen this type of connection in a meerschaum but I am sure others of you might have. The airflow seems unrestricted when either sucked on or blown through. It is a well carved pipe that needs polishing and simple cleaning. I took some close up photos of the carving and the bowl. The airway enters the bowl at the bottom in the middle. The rim top shows a scratch near my thumb. It is unsmoked as can be seen by the first photo. The second photo shows the carved Sultan head from the front. It is well executed and carved.I took the pipe apart and took photos of the various parts from different angles to show the carving on the shank and the bowl. The rose pattern on the shank extension and the details of the beard are well carved. The metal stinger connector on the stem and the shank extension are visible as well. The diameter of the stem does not match the diameter of the shank so that the pipe cannot be used in a shorter configuration. Scrolling through the photos below gives you a good idea of the condition of the pipe and the details of the carving. I took some photos of the acrylic stem to show its condition before I started to polish and restore the pipe. It is amber, almost butterscotch coloured acrylic with some interesting patterns in the swirls. The threaded metal tenon is a single unit so to remove the stinger would entail clipping the ball off the end of the threaded tenon. I am not willing to do that and will leave it intact.I ran some pipe cleaners through the stem to remove the debris of time in the airway and button. What came out was some dust from the original drilling that was the same colour as the stem material. Otherwise the stem was very clean and unsmoked.The tenon was slightly overclocked so I gave it a coat of clear fingernail polish to build up the threads so that when it was in place in the shank it aligned properly.I polished the stem with micromesh sanding pads – wet sanding with 1500-2400 grit pads and dry sanding with 3200-12000 grit pads. Some wet sand with all the pads but I have found that generally just wet sanding with the initial three grits is sufficient to remove the deeper scratches. The rest of the pads further polish the stem material. I polished the shank extension with micromesh as well. I sanded the smooth portions with 1500-12000 grit pads to raise a shine. I lightly went over the smooth surfaces of the roses to polish them. You can see the shine develop through the photos below. With the rest of the pipe polished it was time to turn my attention to the bowl. I wet sanded all of the smooth portions of the rim, the Sultan’s turban around the top portion of the bowl and the shank and collar of the pipe. I carefully worked on the cheeks and forehead of the carved face with the micromesh to shine it as well. I gently polished the smooth surfaces of the rosette on the turban and the beard of the figure with micromesh pads. The photos below show the developing shine on the bowl. This large, carved figural meerschaum is a real beauty with well carved features of a sultan head on the bowl flowing into the shoulders on the shank. There is a shank extension with roses carved around the round tube and diagonally up the sides. There are rustic portions in between the first two rings of roses. The shank then transitions to a smooth portion for about an inch, another ring of roses and then a smooth shank up to the end where there is a metal insert in the tenon to separate the stem from the shank. The stem is a screw in type with a metal stinger. The material is an amber acrylic that is in great condition. The unsmoked bowl and smooth rim top is in perfect condition. The acrylic stem is high quality and shined up well. I carefully buffed the bowl by hand using a shoe brush and waxed it with Conservator’s Wax. I buffed it again with the shoe brush to raise the shine on the meerschaum and acrylic. I hand buffed the entire pipe with a microfiber cloth to deepen the shine. The finished pipe is shown in the photos below. The new old stock meerschaum is slightly coloured from the wax and sitting but it is unsmoked and ready to break in. The dimensions of the pipe are: Length: 11 1/2 inches, Height: 3 inches, Outside Diameter: 1 3/4 inches, Diameter of the chamber: 3/4 inches, Chamber Depth: 1 ¾ inches. This large meerschaum will fit really nicely into the collection of any meerschaum collector. I am still deciding whether to smoke it or sell it on the rebornpipes store. If you are interested in acquiring it let me know by email to slaug@uniserve.com or send me a Facebook message. Thanks for walking through the restoration with me.

Renewing an old GBD Lattice Work Meerschaum Calabash


Blog by Steve Laug

When Jeff messaged me that he had picked up a GBD lattice meerschaum pipe, I was a bit surprised. I had read the there were GBD meets out there but I had never seen one let alone worked on one. I was excited to see what he had found. He sent photos of the pipe and case before he cleaned it up. The case was covered in brown canvas that had been waterproofed. It was in excellent condition and showed little wear or tear. The brass hardware looked new.When he opened the case, it was lined with a taupe plush fabric. The GBD logo was inside the base just above the inset for the pipe. It read, “Hand carved in Turkey from Genuine Turkish Block Meerschaum” in a circle around the GBD oval logo. The inside of the case was in excellent condition. Sitting in the form fitted case was a lattice meer. It looked to be in good condition and was already picking up a patina on the shank and lower half of the bowl.  The rim top was also lattice work and it had a bit of lava in the crevices and grooves of the lattice. There was a thick cake in the bowl that overflowed on the back inner edge of the bowl. The next four photos give various views of the rim top so that you can appreciate the work that needed to be down on the rim top of the pipe. Jeff took a photo of the side of the bowl and the underside of the bowl and shank to show the colouration – the patina that was already beginning to develop on the pipe. The trick would be to clean up the dirt and grime without damaging the patina.The stem had the GBD rondel in the top of the saddle portion and it was in great condition. There were tooth marks and chatter on both the top and underside of the stem and wear on the button surface. The slot in the button was also very tight and it was almost impossible to pass a pipe clean through the airway without a lot of effort. The nylon tenon was in excellent condition and screwed directly into threads in the mortise of the meerschaum. There was no shank line or receptacle end to receive the tenon. The airway in the tenon was clogged with bits of tobacco and tars so even going through the tenon end was difficult to do with a pipe cleaner. Jeff had to use a paper clip to open the airway in the stem before he could get a cleaner through from tenon to slot.Jeff did his usual thorough clean up on this meerschaum. He carefully reamed it with a PipNet reamer and cleaned up the remnants with a Savinelli Fitsall pipe knife. He scrubbed out the airway in the shank and the stem with alcohol, cotton swabs and pipe cleaners. He had to open the airway in the stem with a paper clip before he could get pipe cleaners through. He scrubbed the rim top with a tooth brush and Murphy’s Oil Soap and carefully rinsed it under running water. He dried it off with a soft cloth. The meerschaum in this pipe was very light weight. The swirls and lattice work are quite unique. I have not seen that kind of carving in the past. There were tooth marks and tooth chatter on both sides of the stem. The threaded tenon was in great condition as were the threads in the mortise. The stem was Lucite and was a combination of swirled reds/browns and tans. Whoever carved this in Turkey for GBD did a great job in making a beautiful pipe. I took photos of the pipe when I brought it to my worktable. I like to have a record of what the pipe looked like before I started for comparison once I have finished working on it. I took a photo of the rim top to show what it looked like after Jeff had scrubbed it. The lava on the front right of the rim was gone. The back side lava was gone and what was left was some darkening along the inner bevel of the rim and in the edges of the swirls in the lattice work. He did a great job on it.The stem damage is more obvious after he had cleaned it up. None of the tooth chatter or marks were too deep so they would be fairly straightforward to sand out.To vary my work pattern I decided to start on the bowl on this pipe. I picked at the remaining debris in the swirls of the lattice with a dental pick and was able to remove more of the debris. I used a folded piece of 220 grit sandpaper to work on the darkening around the beveled inner edge of the rim. I was able to remove almost all of it without changing the shape of the bowl or rim top.I spot cleaned the rim with a damp cotton pad to remove the debris that my work had left behind. With the rim top cleaned up it was time to polish the meerschaum bowl. I started polishing with 1500-2400 grit micromesh sanding pads. After each pad I wiped the bowl down with a damp cotton pad. I continued polishing using 3200-12000 grit pads and wiping it down after each sanding pad. I took photos of the bowl after each set of three pads to show the progress of the shine. I set the bowl aside and turned my attention to the stem. I sanded the tooth chatter and marks out of the Lucite with 220 grit sandpaper. It did not take too much sanding to remove the damage to the stem surface and the surface of the button on both sides.I reworked the button and slot using needle files to open up the airway enough to be able to easily push a pipe cleaner through the airway.I polished the stem with micromesh sanding pads – wet sanding with 1500-2400 grit pads and dry sanding with 3200-12000 grit pads. I wiped the stem down with a wet cotton pad after sanding with each pad. I buffed the stem with Blue Diamond on the buffing wheel and carefully buffed the bowl at the same time. I used a light touch on the bowl and a heavier touch on the stem. I avoided the GBD rondel so as not to damage it. The pipe feels great in the hand. The carving is very well done and the pipe is exceptionally pointing to a quality block or meerschaum. The developing patina is a bonus for whoever adds this one to their collection. The dimensions are Length: 5 ½ inches, Height: 2 inches, Bowl diameter: 1 ½ inches, Chamber diameter: ¾ inches. I will be adding it to the rebornpipes store shortly. If you want to add it to your collection email me at slaug@uniserve.com or send me a message on Facebook. Thanks for looking.

Restoring a piece of WDC Pipe History – A Meerschaum Bulldog


Blog by Steve Laug

When I was visiting my brother in Idaho, we called an eBay seller he had bought from before. We were looking for the Koolsmoke base and in the process of asking and buying that from her she also talked to us about other pipes that she had for sale. I love older WDC pipes so when she said she had a WDC Bulldog that was in a case that she would sell to me I was hooked. Then she said it was Meerschaum and that the case was in excellent condition. She said it was red leather-covered and stamped Genuine Meerschaum over Real Amber on the front of the case and Made in Austria on the back side of the case.  We asked her to send us some photos in an email and when she did I bought it. It was a beauty. I loved the shape, the condition the amber stem, actually just about everything about the pipe. Here are pics of the case when it arrived. I opened the case and took a photo of the WDC Triangle logo on the inside cover. The case was in excellent condition both inside and outside.I took a photo of the pipe before I removed it from the case. It looked really good sitting in the opened case. The shape is one of my favourites and the amber stem appeared to be in good shape at this point.I took the pipe out of the case and took a few photos of it to show the general condition of the pipe when I received it. I was amazed that it was in as good condition as it was.  I am guessing that was made in the late 1890’s through the early 1900’s. The bowl had begun to show some colour. There were some nicks and scratches on the sides and also on the stem itself. The rim top was tarred with overflow from the cake in the bowl. The stem was in good shape and showed tooth marks and chatter on the end of the stem on both sides near the button. It had a single hole orific style button. The stem aligned perfectly to the shank. That surprised me as most of the pipes of this era I have worked on had threaded bone tenons and either the internal threads on the shank or those on the bone tenon itself were worn and the stems were over turned. When I took it off the shank there was a small paper washer that had been carefully fitted to the shape of the stem and shank. That is why it aligned. I removed the washer and put the stem back on to find that it was indeed overturned.I scraped out the cake in the bowl with a Savinelli Fitsall Pipe Knife. I wanted to remove all of the cake so I carefully took it back to the meerschaum.I worked on the tarry build up on the rim with 1500-2400 grit micromesh sanding pads. I wiped rim top with a damp cotton pad repeatedly during the process of sanding it. I was able to remove all of the cake on the rim. There was some darkening around the outer edge of the rim and on the left side there was a small nick in the edge.With the rim cleaned I polished the entire bowl with micromesh sanding pads. I dry sanded it with 1500-12000 grit pads to polish the meerschaum and remove some of the finer scratches in the surface of the meerschaum. I left the larger ones and merely smooth out around them. To me these scratches give character and are an integral part of the story of the pipe. The photos below tell the story of the process. With the externals cleaned and polished I turned to the internals. I scrubbed out the shank and mortise with cotton swabs and alcohol. I cleaned the airway in the shank and the stem with pipe cleaners and alcohol. I scrubbed until the internals were clean.I moved on to work on the tooth marks and chatter on the stem. I sanded the stem with 220 grit sandpaper to minimize the scratches and nicks on the sides and angles of the stem.  I sanded out the tooth marks and chatter with little trouble as none of them were deep. That is one beauty of amber as a stem material. It is hard to dent!With the marks removed I decided to address the overturned stem before I polished the stem with micromesh. I have learned a good trick to correct the overturn on these bone tenons and threaded shanks. I have never read about it anywhere but it works really well. I used a clear nail polish, which dries hard and is neutral, to coat the threads on the tenon and the inside of the shank. I carefully apply the polish to the threads and set it aside to dry. It generally takes two or more coats to build up the threads enough to correct the overturn. I painted it the first time, let it dry and turned it on to the shank. It was better but needed a second coat. I gave it a second coat, let it dry and turned it on to the shank. It was a perfect fit. The alignment was spot on.I polished the stem with micromesh sanding pads – wet sanding with 1500-2400 grit pads and dry sanding with 3200-12000 grit pads. I wiped the amber down with a damp cotton pad between each different pad to remove the dust and check on the polishing. It did not take too long before the stem began to glow again. I love the look of a polished amber stem. This particular stem had some really nice patterns in the amber. The underside near the tenon was almost a birdseye pattern. I put the stem back in place in the shank. Things lined up perfectly. I gave it another quick polish with the 12000 grit micromesh pad. I hand waxed it with Conservator’s Wax because it is a microcrystalline polish and it really works well on meerschaum and amber. I rubbed the wax into the finish and buffed the pipe by hand with a microfibre cloth. The finished pipe is shown in the photos below. The meerschaum bowl has a rich glow to it and the amber stem looks really good. The combination is really nice with the amber and the meerschaum reflecting off of each other. I really like the looks of this old timer. It will more than likely remain in the collection with some of my other old timers. Thanks for looking.