Blog by Steve Laug
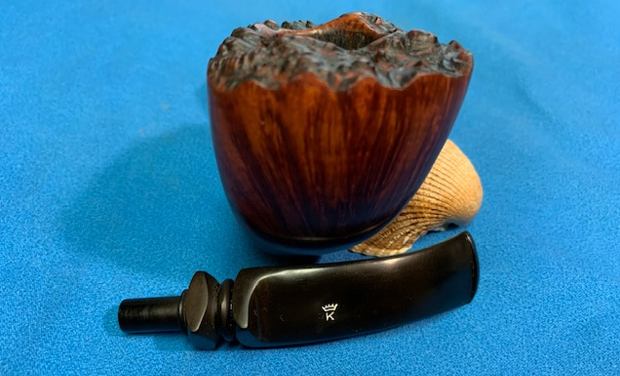
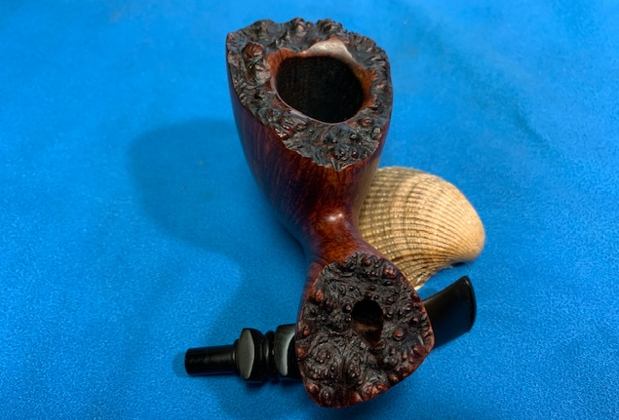
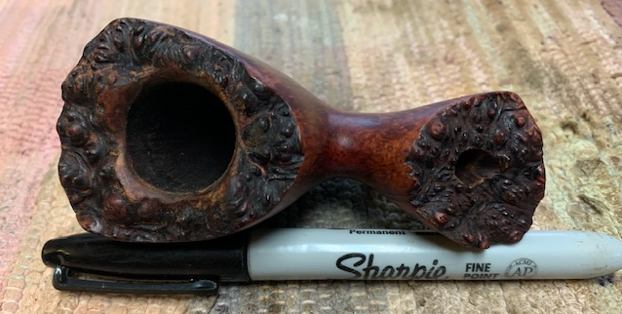
The next pipe is a really is one of four Knute Freehand pipes that we picked up in 2019. Because of that we are not sure where exactly this one came from – whether an auction, a sale or an antique store. Jeff cleaned the pipe in 2019 and now I am working on it in 2021. It is stamped on the underside of the shank and reads Knute [over] of Denmark. The exterior of the bowl was filthy with grime on the surface of the briar and there were paint flicks on the briar all the way around. There was a heavy cake in the bowl and an eruption of thick lava on the rim top that filled in most of the plateau on the rim top. Along with that there was dust and debris on both the rim top plateau and the shank end plateau. It was hard to know the condition of the rim top and rim edges because of the grime and thickness of the cake and lava. The cleaning would make it very clear! The fancy turned stem was dirty, oxidized, calcified with light tooth marks and chatter on both sides but nothing like what I was expecting from the condition of the bowl. Jeff took photos of the pipe to give a clear picture of what we were up against with this pipe. 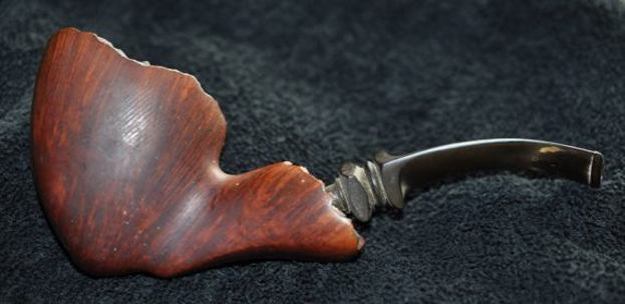
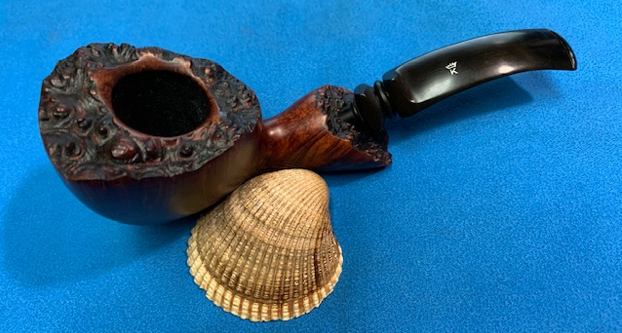
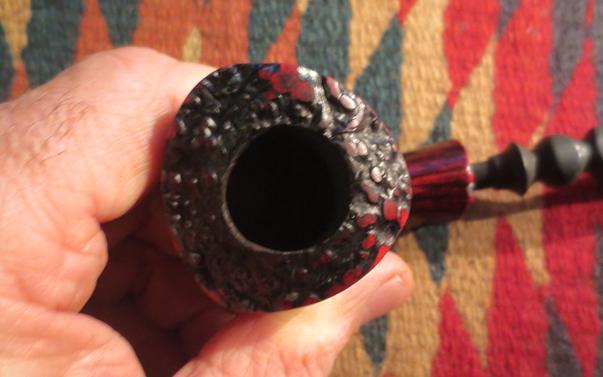
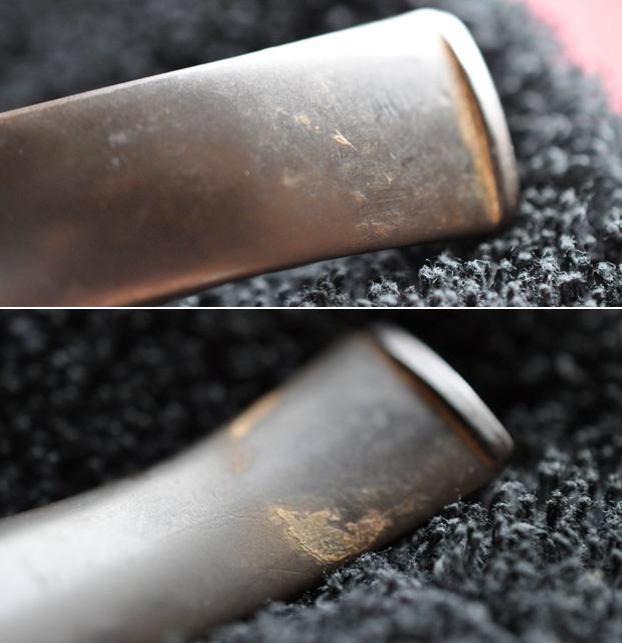
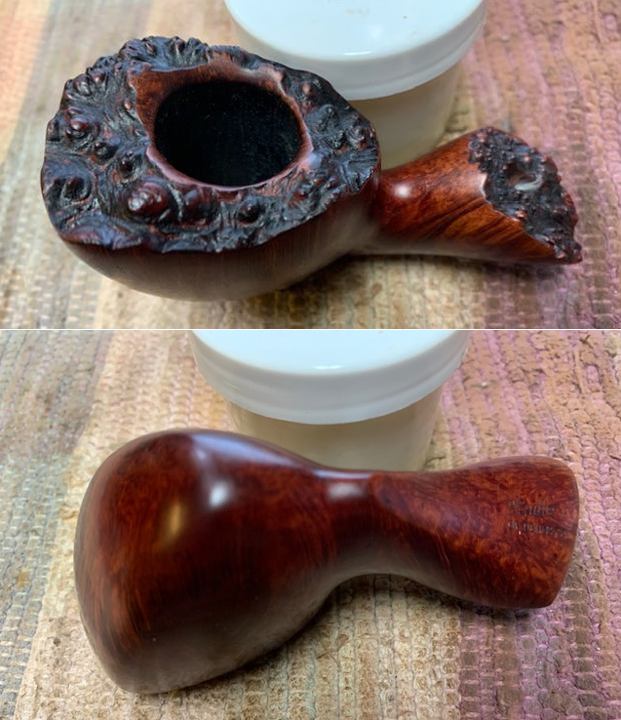
 He captured the cake in the bowl and the thick eruption of lava on the rim top plateau in all of the grooves and valleys exceptionally well in the next photos. It was very clear that it was someone’s favourite pipe! The stem is oxidized, calcified and shows the tooth marks and chatter on both sides ahead of the button.
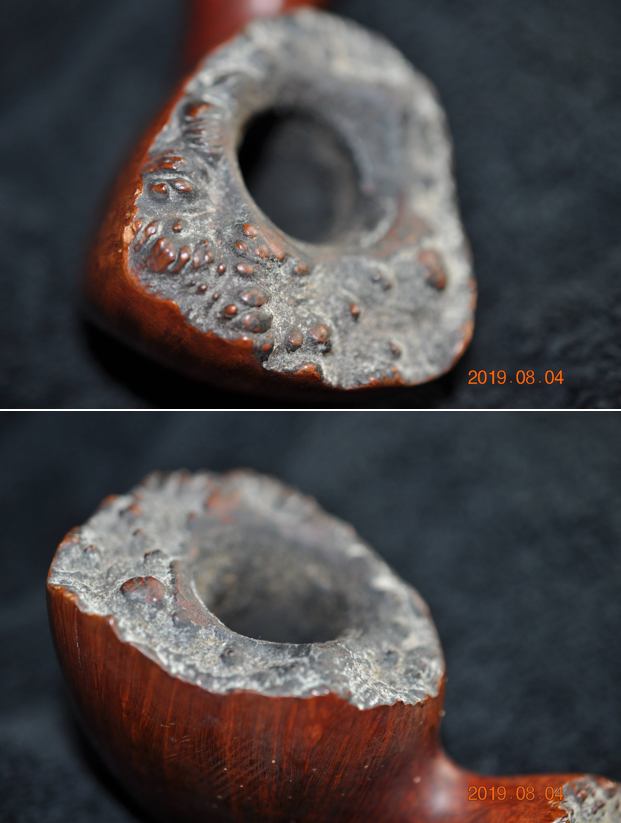
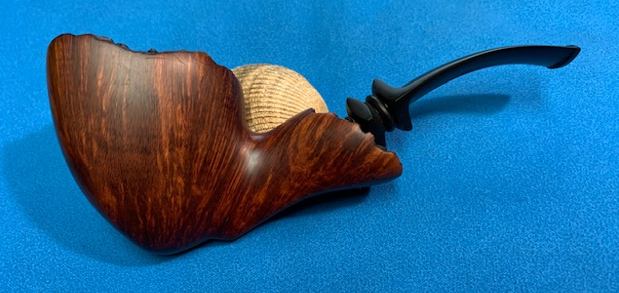
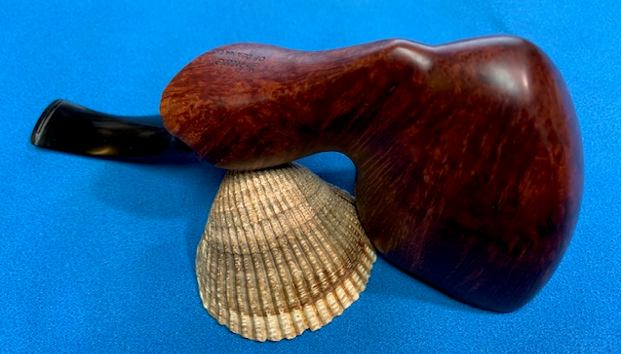
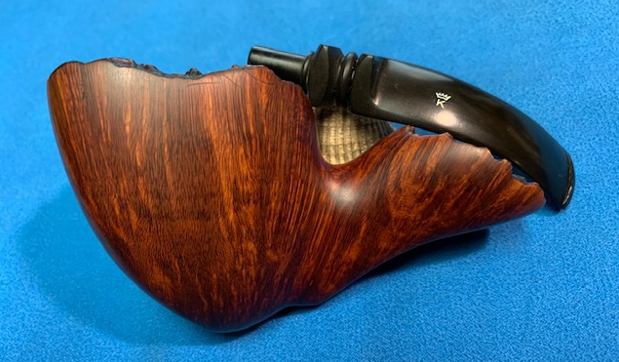
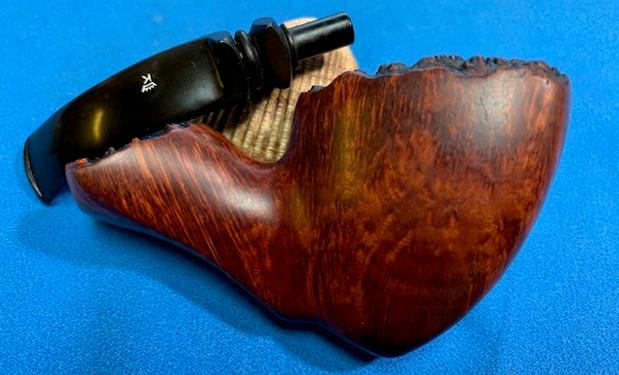
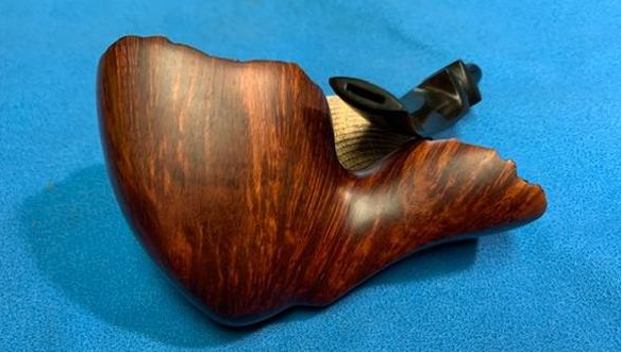
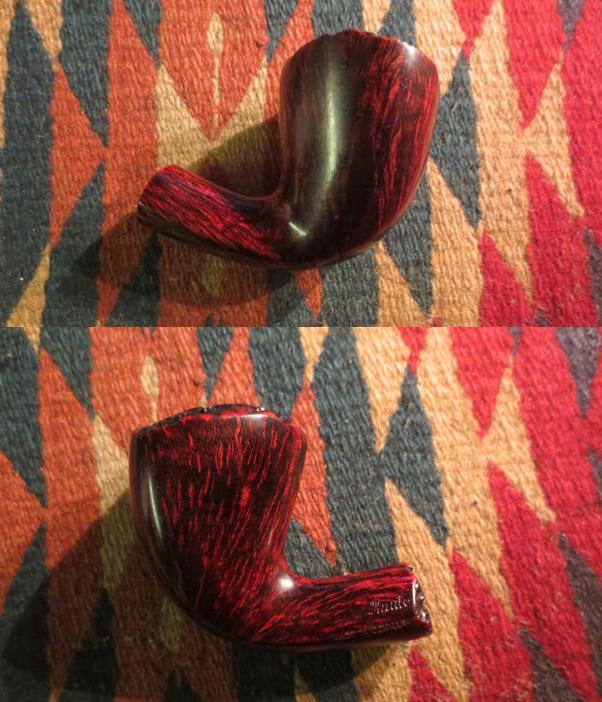
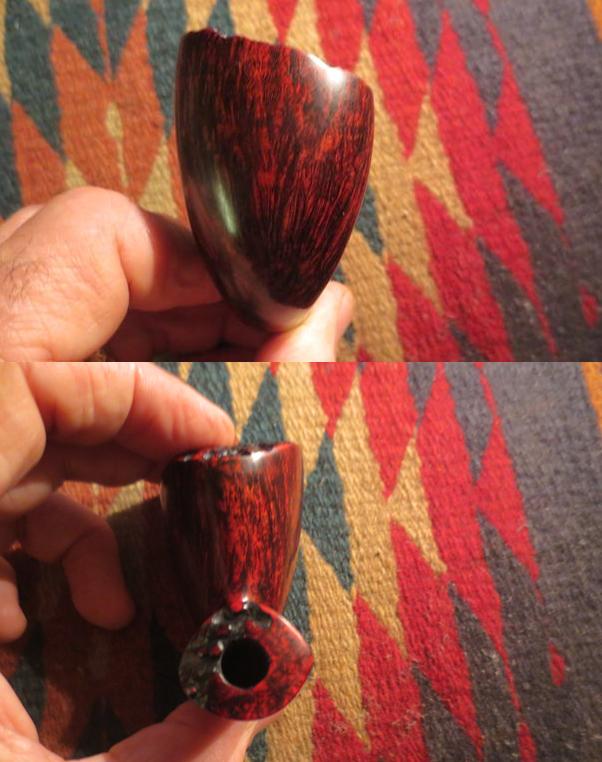
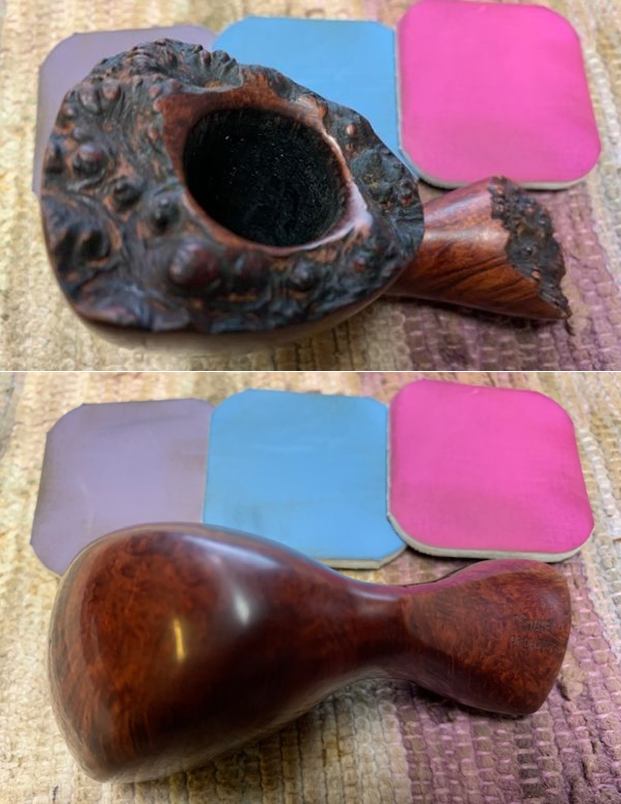
 Jeff captured some of the beauty of the shape and the grain in the next photo. It is quite stunning.
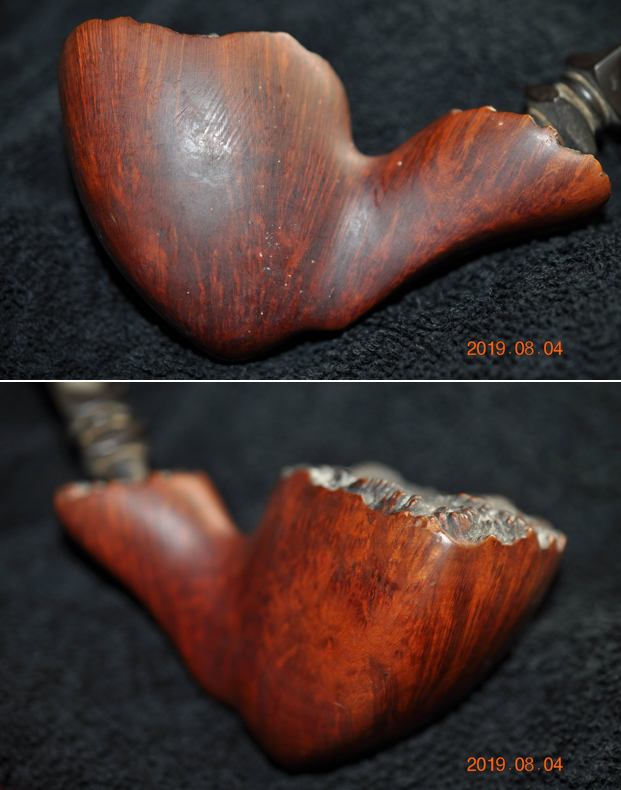
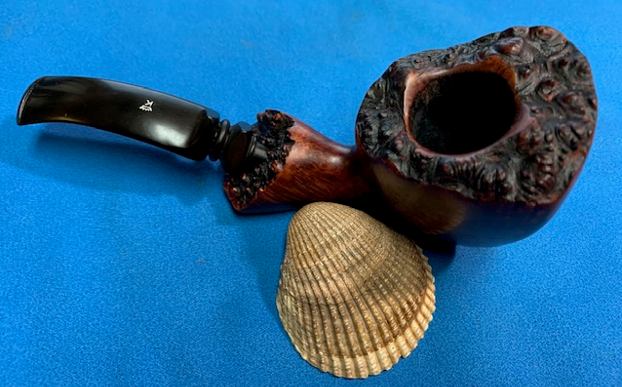
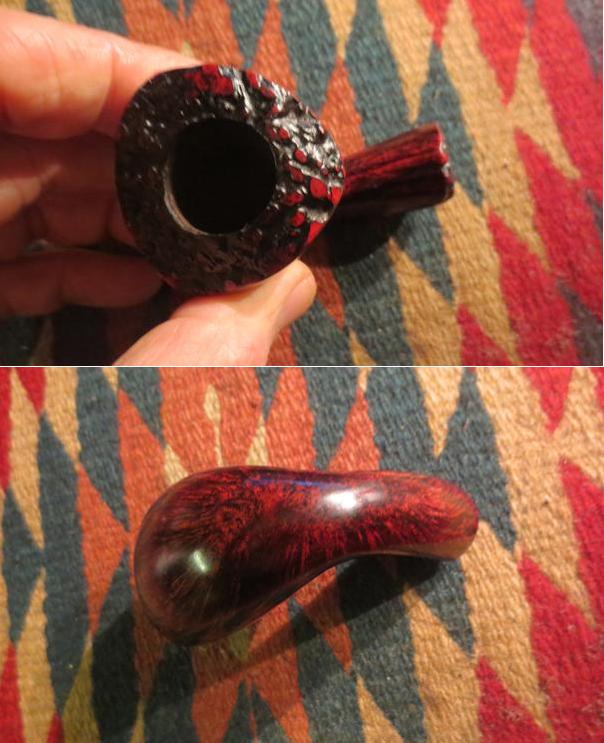
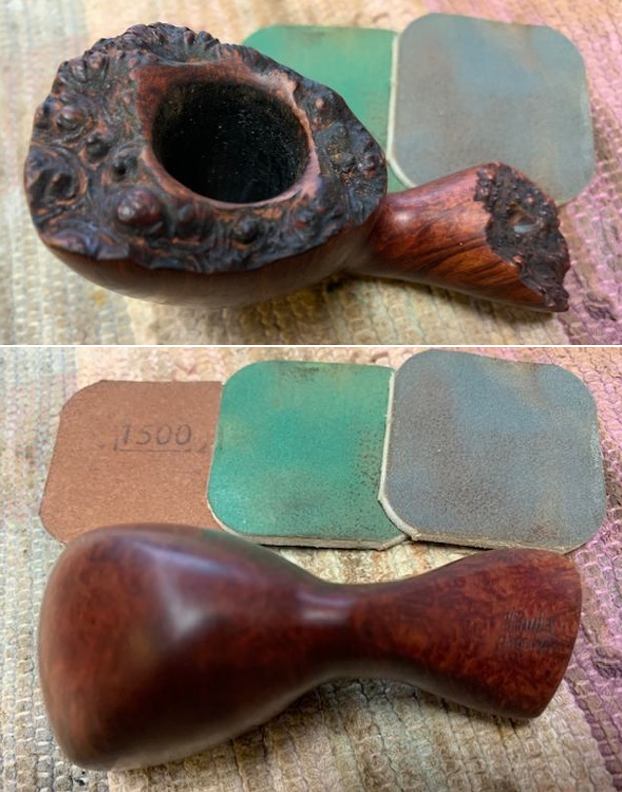
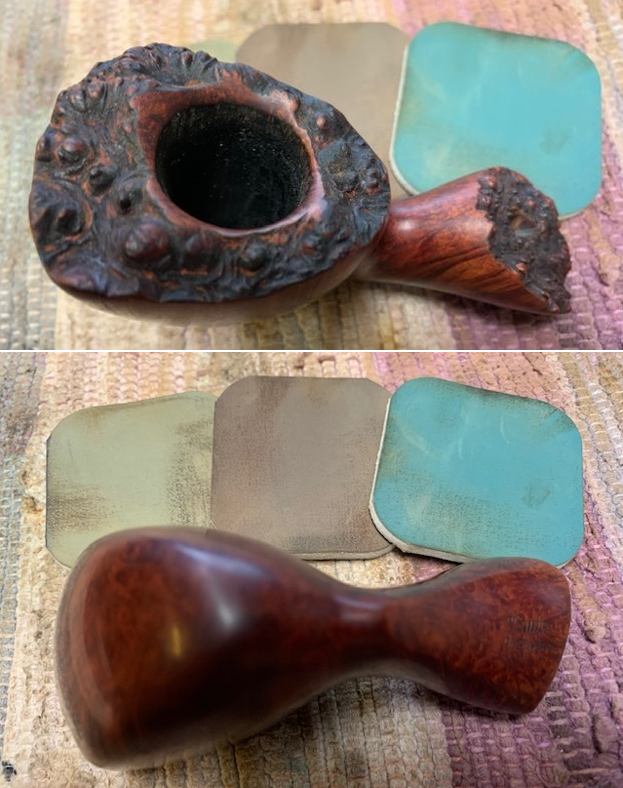
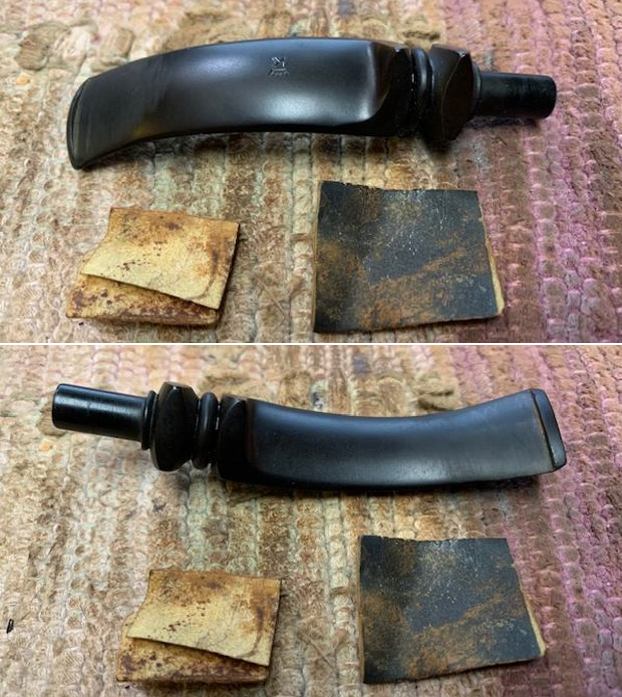
 He took photos of the plateau shank end to show how filthy it was too. The grime, dust and grit filled in most of the valleys and grooves of the finish.
 He took photos of the stamping on the underside of the shank. It is clear and readable as noted above. He also took a photo of the Crown K stamp on the top of the stem.
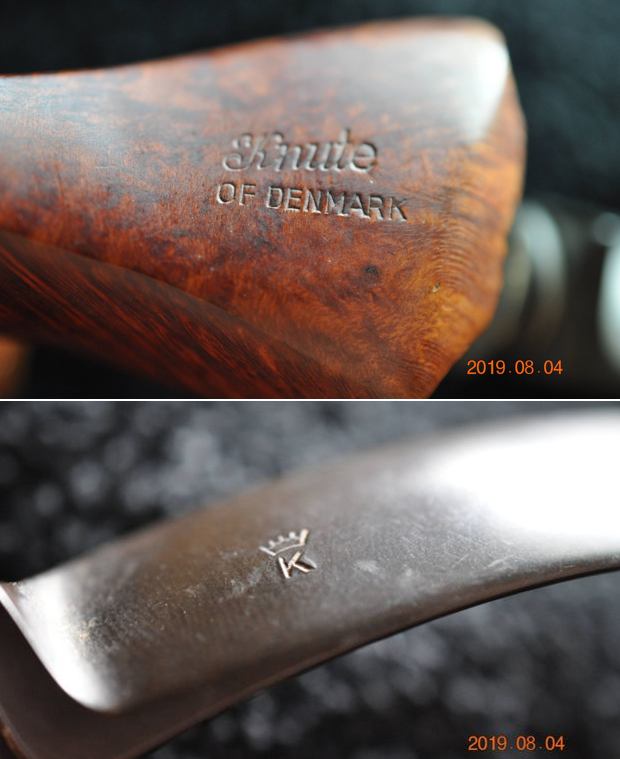 I turned to Pipephil’s site (http://pipephil.eu/logos/en/logo-k3.html) to confirm what I knew about the brand being made by Karl Erik. It did but did not give a whole lot of other information.
  I turned then to Pipedia (https://pipedia.org/wiki/Knute). I quote the article in full below.
Knute of Denmark pipes are said to be made by Karl Erik, see his listing herein.
Karl Erik Ottendahl was born in Aalborg in 1942, just a few miles from the very northernmost tip of Denmark. He began his career as a Lithographer as an apprentice in the craft at the age of 16. While working as an apprentice he began hand carving pipes as a hobby and to give as gifts to his more senior colleagues. He began his career making pipes for various labels in Denmark and the United States. Often he would make the higher grade pipes for a well known brand that was known for their midrange or low end pieces such as Wally Frank. While doing this he administered a factory of fifteen craftsmen. During this period he did make of some of his own handmade pipes, but he felt that the responsibility of managing the factory did not give him the freedom he wished he had.
Other brands confirmed to be from Karl Erik are: Champ of Denmark, HTL, Jobey Dansk, Knute, Golden Danish, Lars of Denmark, Larsen & Stigart (Copenhagen pipe shop), Shelburne, Sven Eghold and Wenhall (for Wenhall Pipes, New York), some Ben Wade and pipes marked IS and IIS.
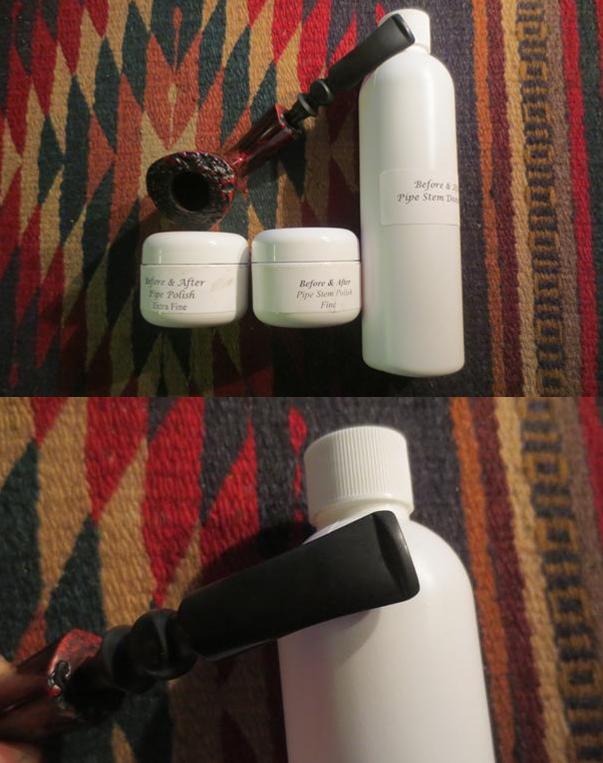
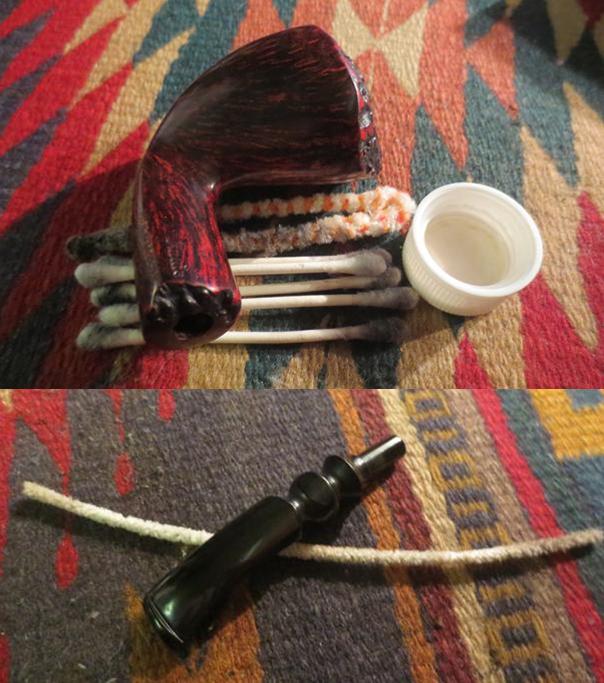
Now it was time to work on the pipe. It is really a beautiful piece. Jeff had done a great cleanup on the pipe. He reamed the bowl with a PipNet pipe reamer and followed up with a Savinelli Fitsall pipe knife to remove the cake. He scrubbed out the mortise and the airway in the shank and the stem with alcohol, cotton swabs and pipe cleaners. He scrubbed the bowl exterior with a tooth brush and Murphy’s Oil Soap to remove the grime on the finish of the bowl and the lava from the rim top. He rinsed it under running water. One of the benefits of this scrub is that it also tends to lift some of the scratches and nicks in the surface of the briar. He dried it off with a soft cloth. He cleaned the internals and externals of the stem with alcohol, pipe cleaners and cotton swabs. He soaked the stem in Briarville’s Pipe Stem Deoxidizer and rinsed it off with warm water and cleaned out the airway in the stem with alcohol, pipe cleaners and cotton swabs. I took photos of the pipe as I saw it when I put it on the table. 
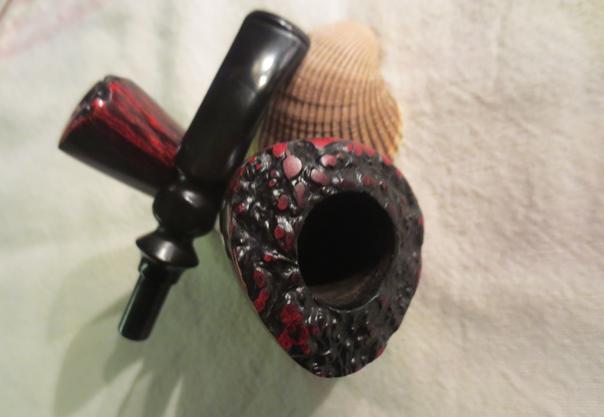
 I took photos of the plateau rim top and stem to show the condition. The rim top and inner bevel looked very good. The smooth bevel has some darkening but is clean. The stem was vulcanite and there were light tooth marks and chatter on both sides ahead of the button.
 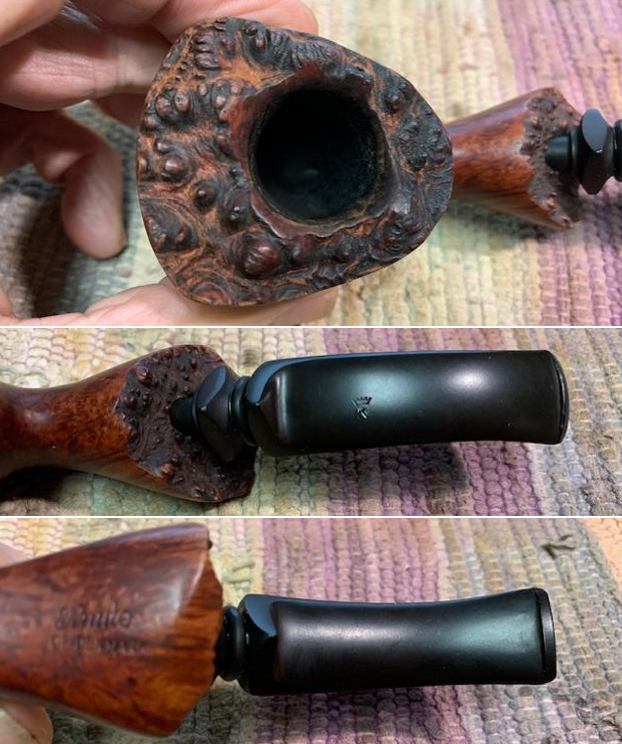 The stamping on the underside of the shank is clear and readable. It reads as noted above.
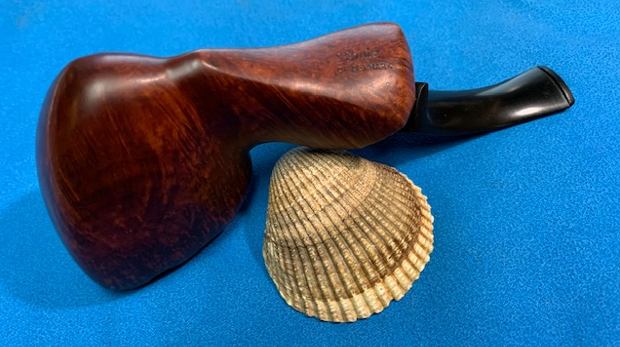
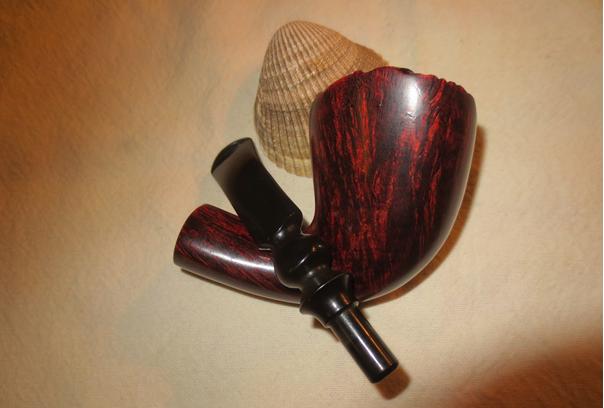
 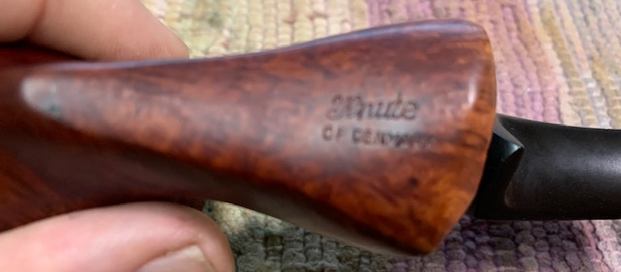 I removed the stem from the shank and took a photo of the pipe to give a sense of the proportions of the bowl and stem.
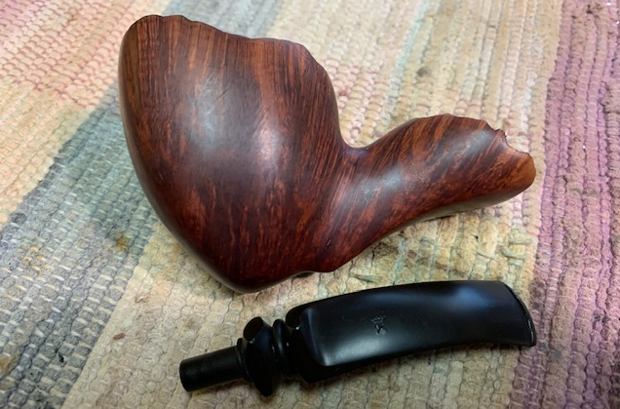 I started my work on it by sanding the smooth inner beveled rim top to remove the darkening on the edge. I used a folded piece of 220 grit sandpaper to clean it up. I stained it with a Walnut Stain pen and wiped it down. I filled in the valleys in the plateau with a Black Sharpie Pen. The contrast of the the bevel and the plateau is very nice.
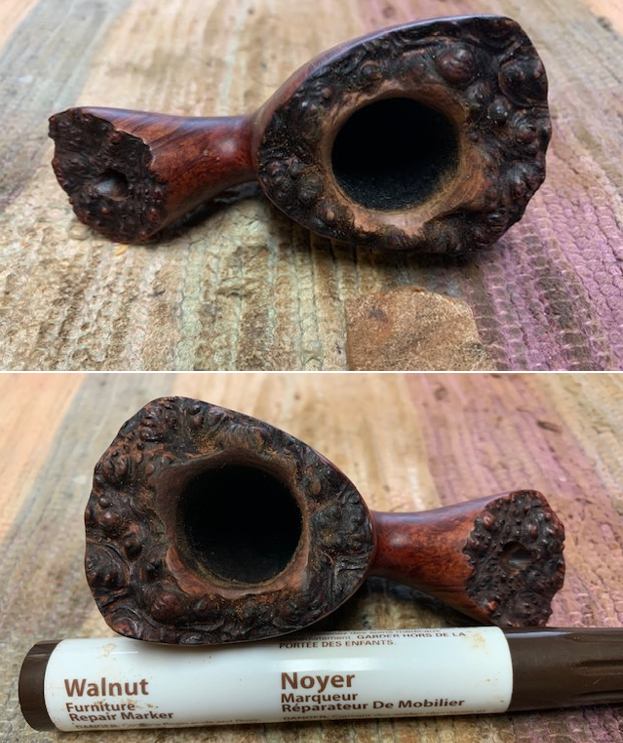
 I polished the briar with micromesh sanding pads – dry sanding with 1500-12000 grit sanding pads. I wiped the briar down with a damp cloth to remove the sanding dust and debris on the briar. The pipe began to take on a shine.
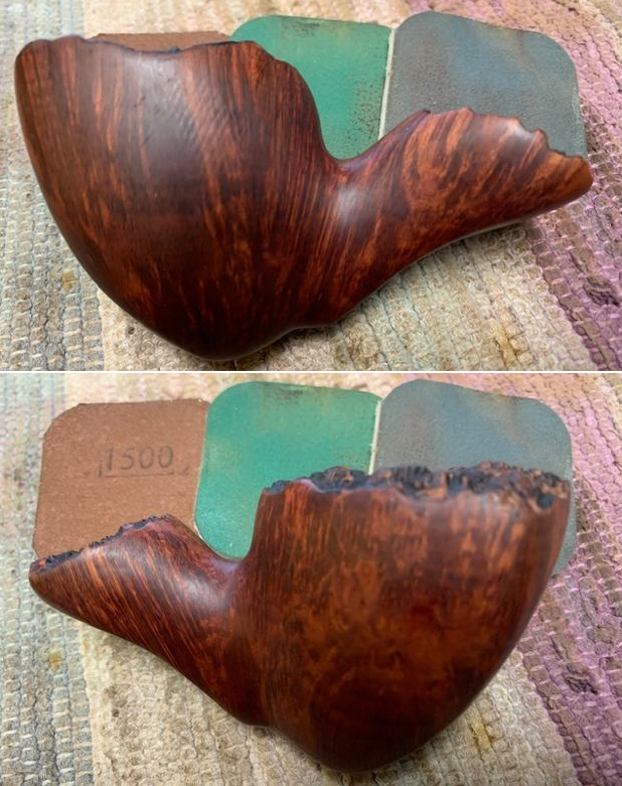


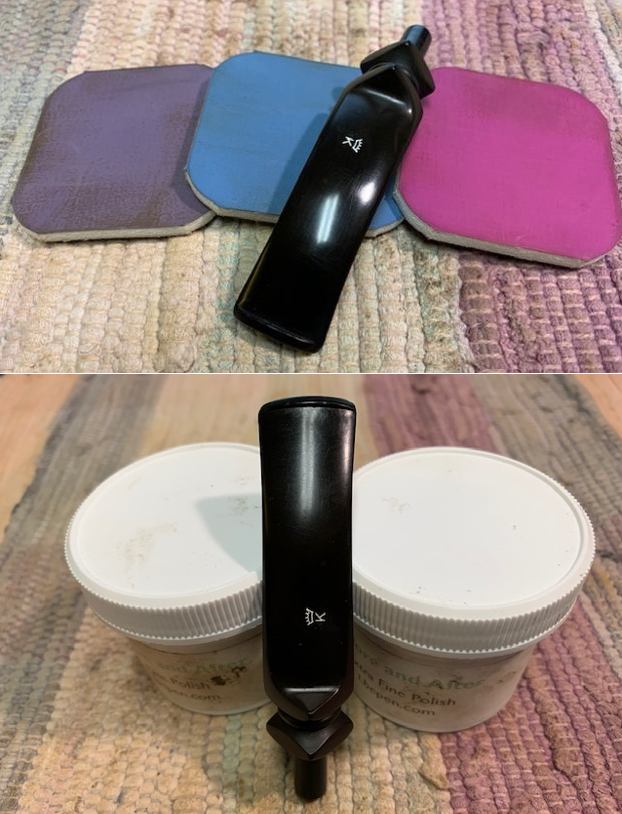
 I rubbed the bowl and shank down with Before & After Restoration Balm. I worked it into the surface of the bowl sides and shank with my fingertips to clean, enliven and protect the briar. I let the balm sit for 10 minutes, then buffed with a cotton cloth to raise the shine. The Balm did its magic and the grain stood out on the briar.
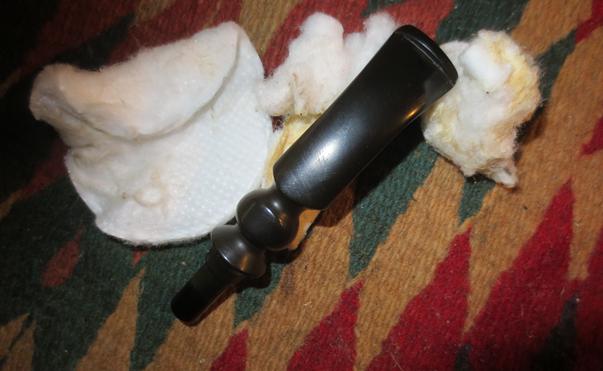
 I set the bowl aside and turned to the stem. I “painted” the stem surface with the flame of a Bic lighter to lift the tooth marks. I was able to lift them all enough that sanding them would remove what remained. I sanded out the remaining tooth marks and chatter with 200 grit sandpaper and started the polishing with 400 grit wet dry sandpaper.
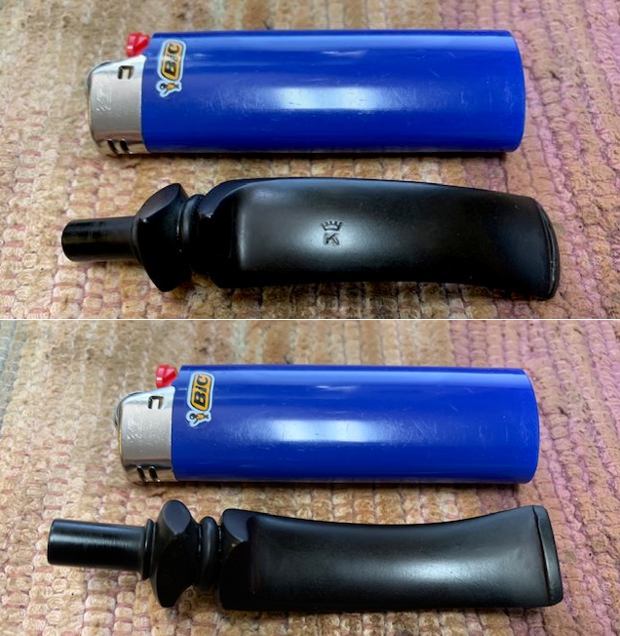
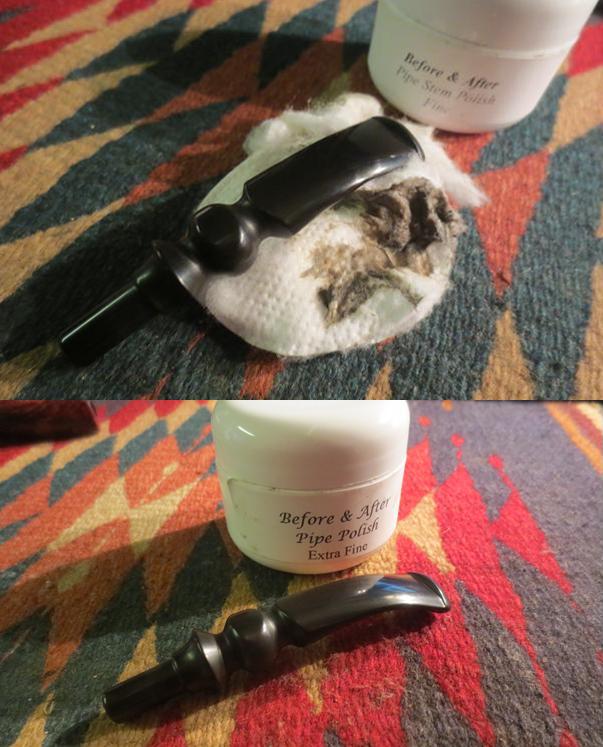
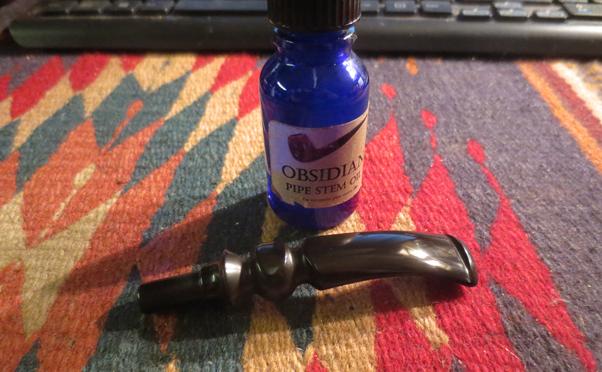
 I touched up the Crown K stamp on the stem top with white acrylic nail polish. Once it cured I scraped it off with my fingernail and then sanded the stem surface with a 1500 grit micromesh sanding pad.
 I polished the stem with micromesh sanding pads – 1500-12000 grit pads. I wiped it down with Obsidian Oil after each sanding pad. I finished the polishing with Before & After Polishes – both Fine and Extra Fine. I gave it a final rub down with Obsidian Oil and set it aside to dry.
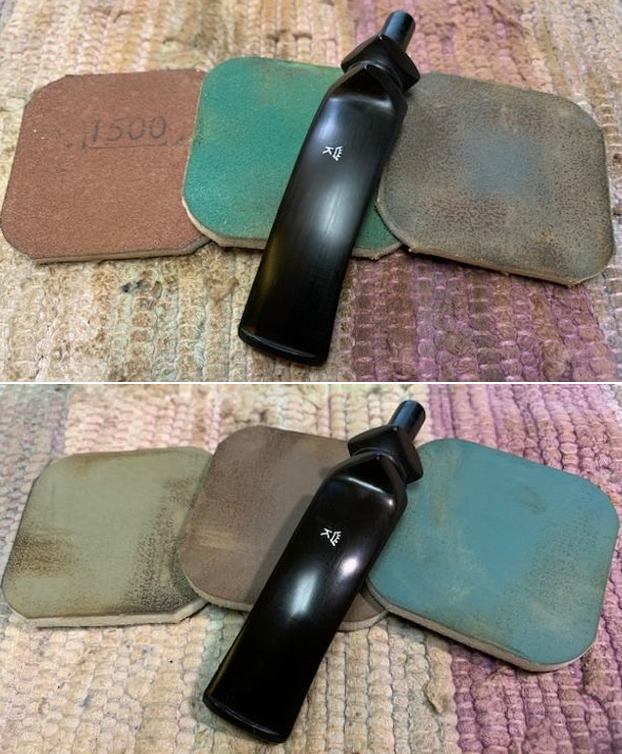
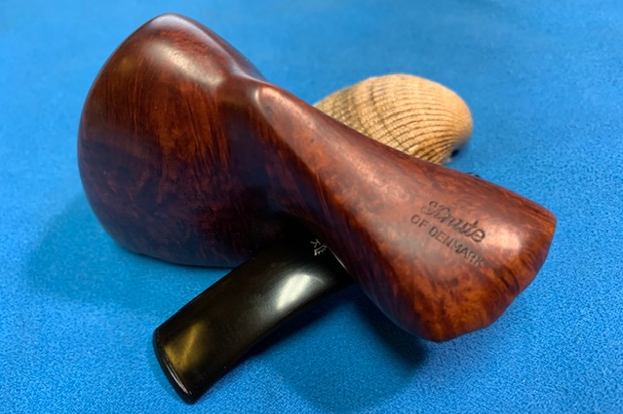
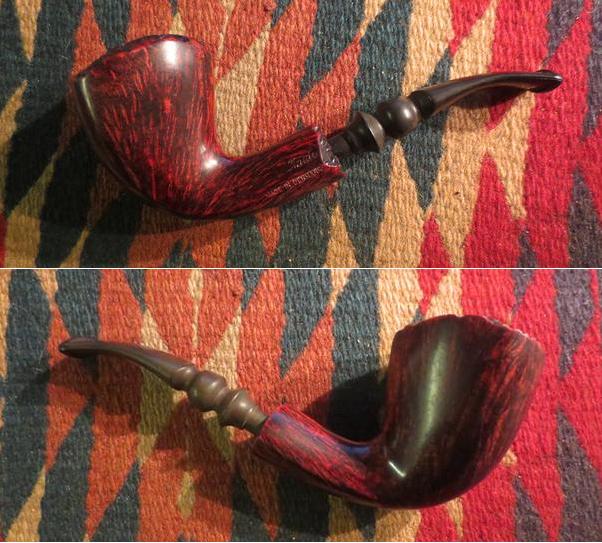
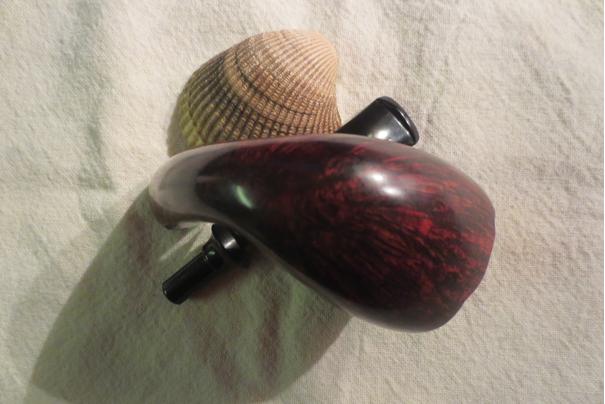
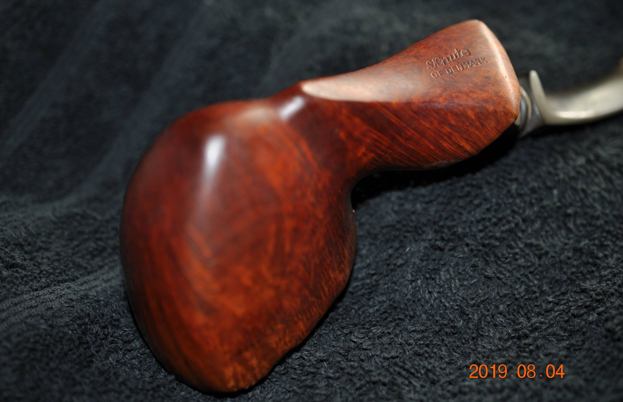
 This Knute of Denmark Freehand with a fancy turned vulcanite saddle stem is a beautifully grained pipe with a flowing shape that looks great . The rich browns and black on the plateau areas of the bowl makes the grain come alive with the polishing and waxing. I put the stem back on the bowl and carefully buffed the pipe with Blue Diamond on the buffing wheel using a light touch on the briar. I gave the bowl and the stem multiple coats of carnauba wax on the buffing wheel and followed that by buffing the entire pipe with a clean buffing pad. I hand buffed the pipe with a microfiber cloth to deepen the shine. The finished Knute of Denmark really is a beauty and fits nicely in the hand and looks very good. Give the finished pipe a look in the photos below. The dimensions of the pipe are Length: 6 inches, Height: 2 ½ inches, Outside diameter of the bowl: 1 ¾ inches wide X 2 ¼ inches long, Chamber diameter: 7/8 of an inch. The weight of the pipe is 2.68oz./76grams. This pipe will soon be on the Danish Pipe Makers section of the rebornpipes store if you would like to add it to your collection. Thanks for reading this blog and my reflections on the pipe while I worked on it. There are many more to come!