Blog by Steve Laug
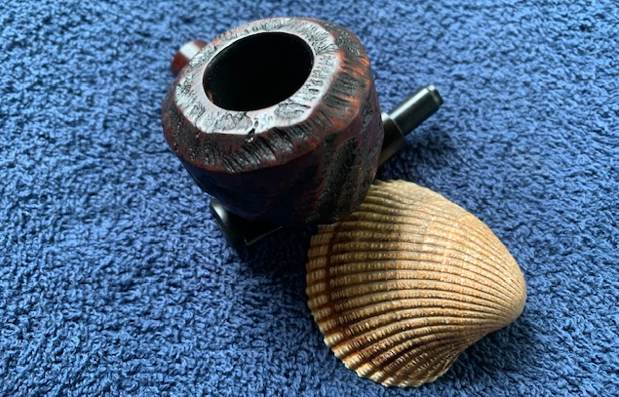
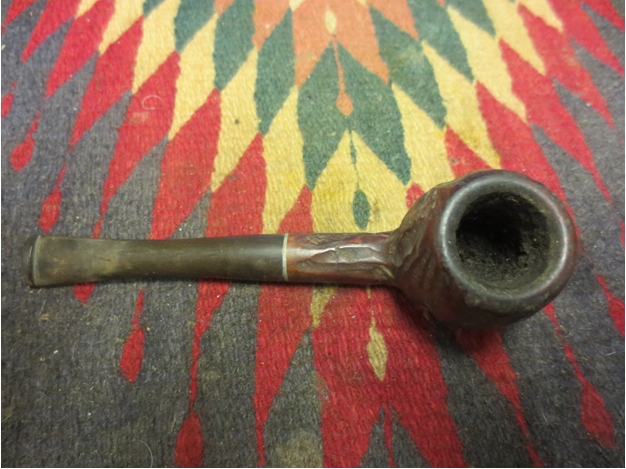
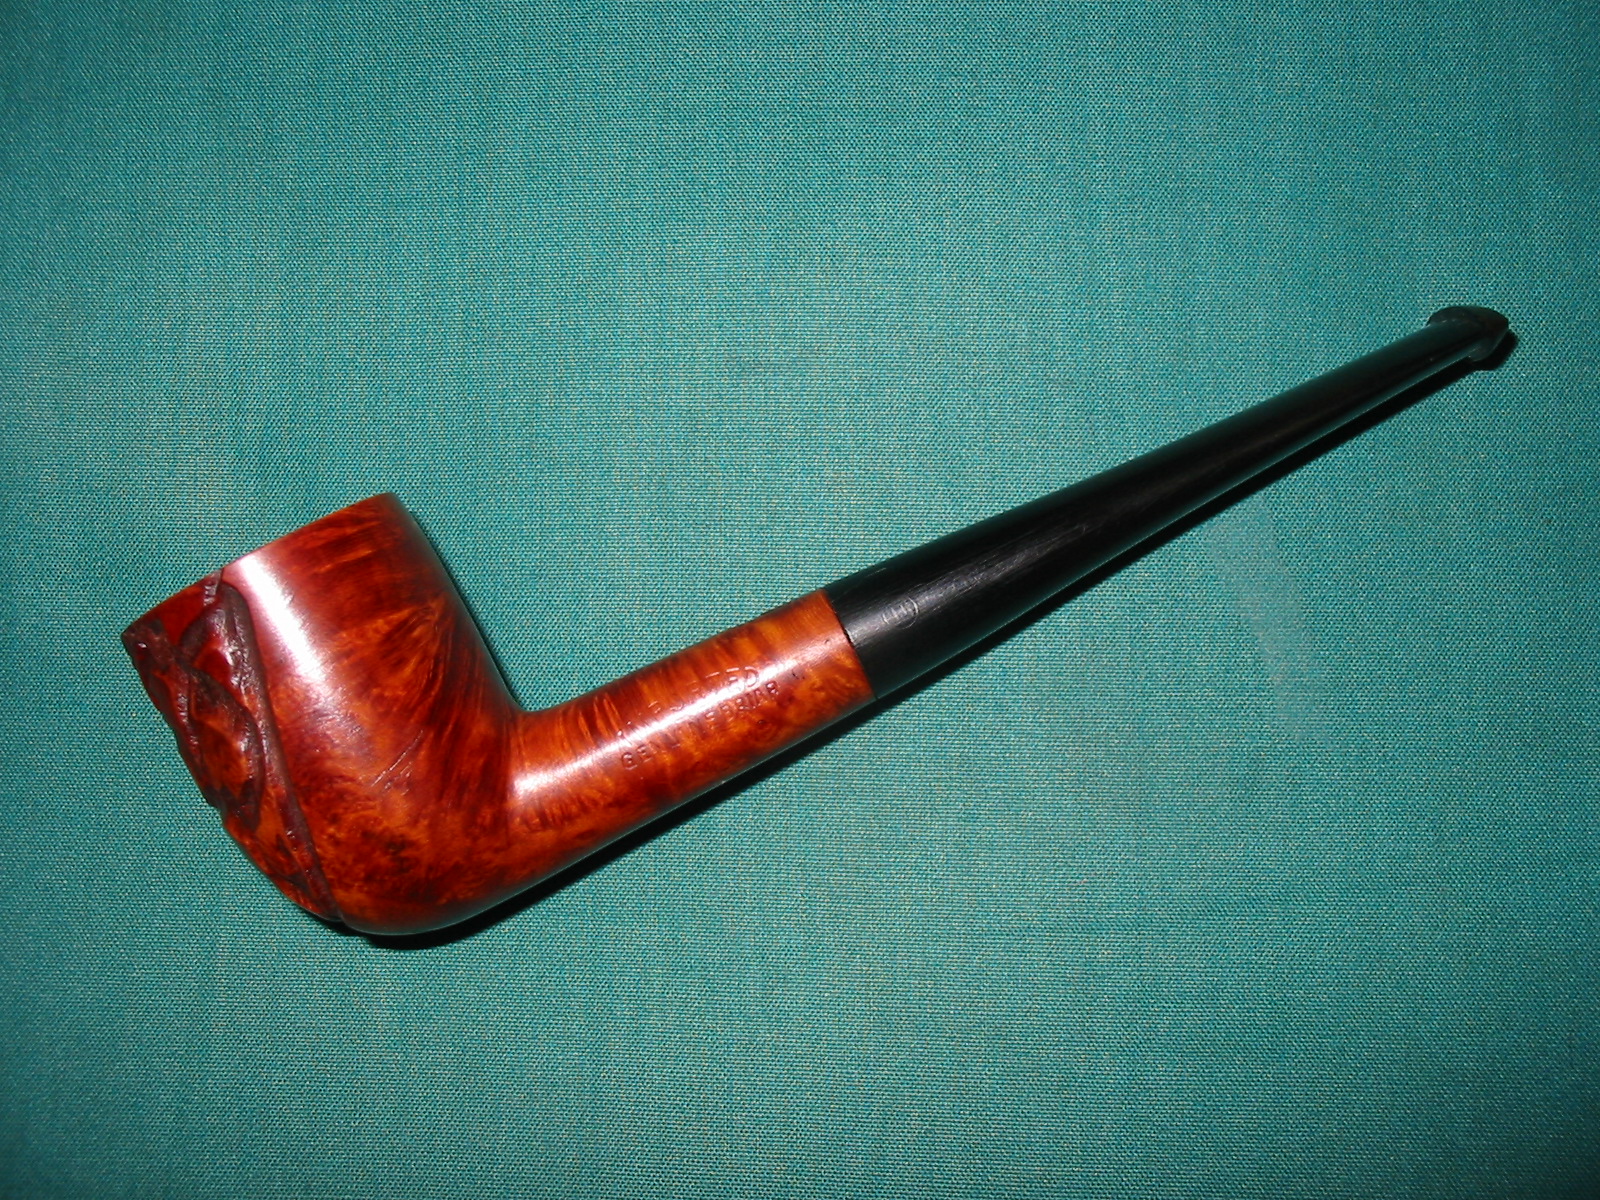
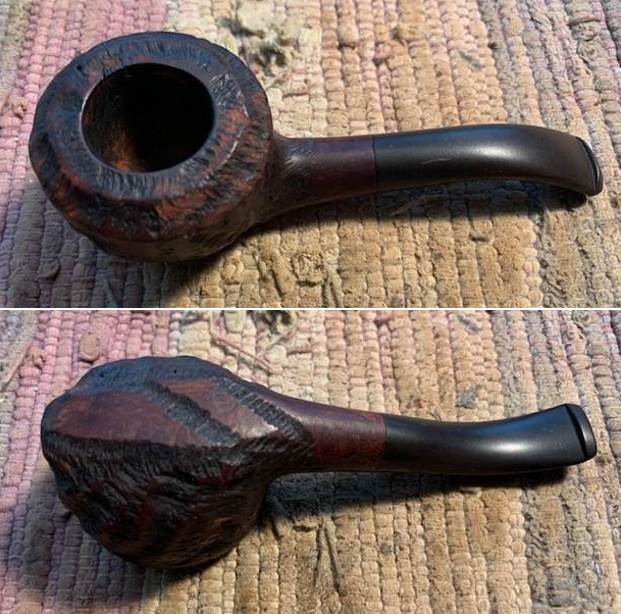
The next pipe is a really neat looking small Custom-Bilt Bullmoose/Scoop with a vulcanite taper stem. The classic scoop was made to hold in your hand and has a flat bottom on the bowl and shank so it can be a sitter as well. It is quite light weight and small with a taper stem and looks comfortable. We picked up this pipe from an online auction on 02/07/19 from Mountain Top, Pennsylvania, USA. Jeff cleaned the pipe in 2019 and now I am working on it in 2022. The only stamping is on the right side and reads IMPORTED BRIAR. The exterior of the rusticated bowl was filled with dust and debris. There was a light cake in the bowl and some dust and lava on the rim top and crowned cap. The cleaning would make it very clear! The stem was oxidized, calcified and had tooth marks and chatter on both sides near the button. Jeff took photos of the pipe to give a clear picture of what we were up against with this pipe. 
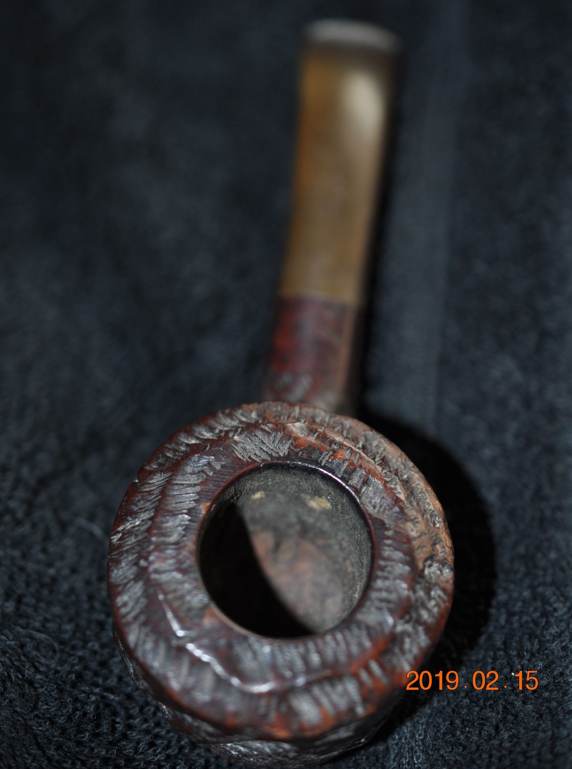 He captured the cake in the bowl and the debris and lava on the rim top and edges in the next photos. It was very clear that it was an exceptional smoker! The stem is oxidized, calcified and shows the tooth marks and chatter on both sides ahead of the button.
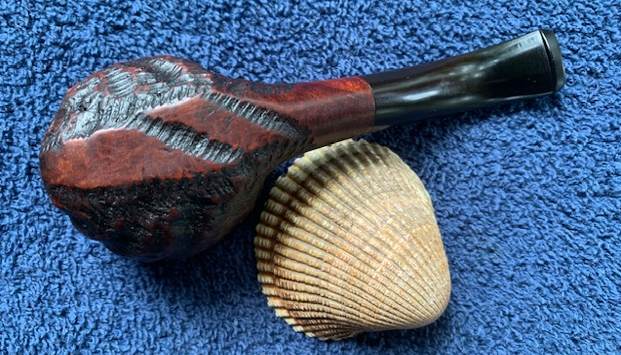
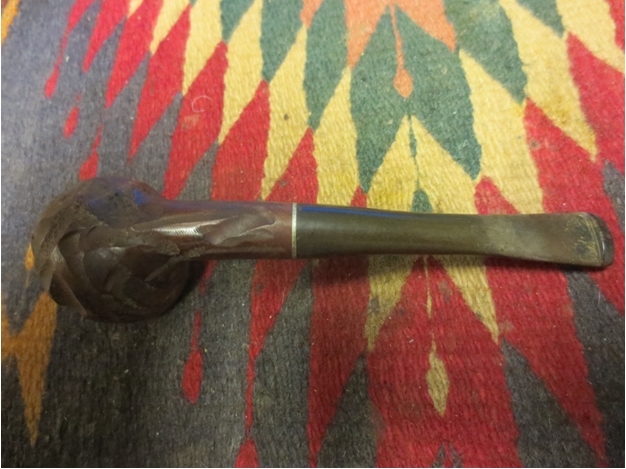
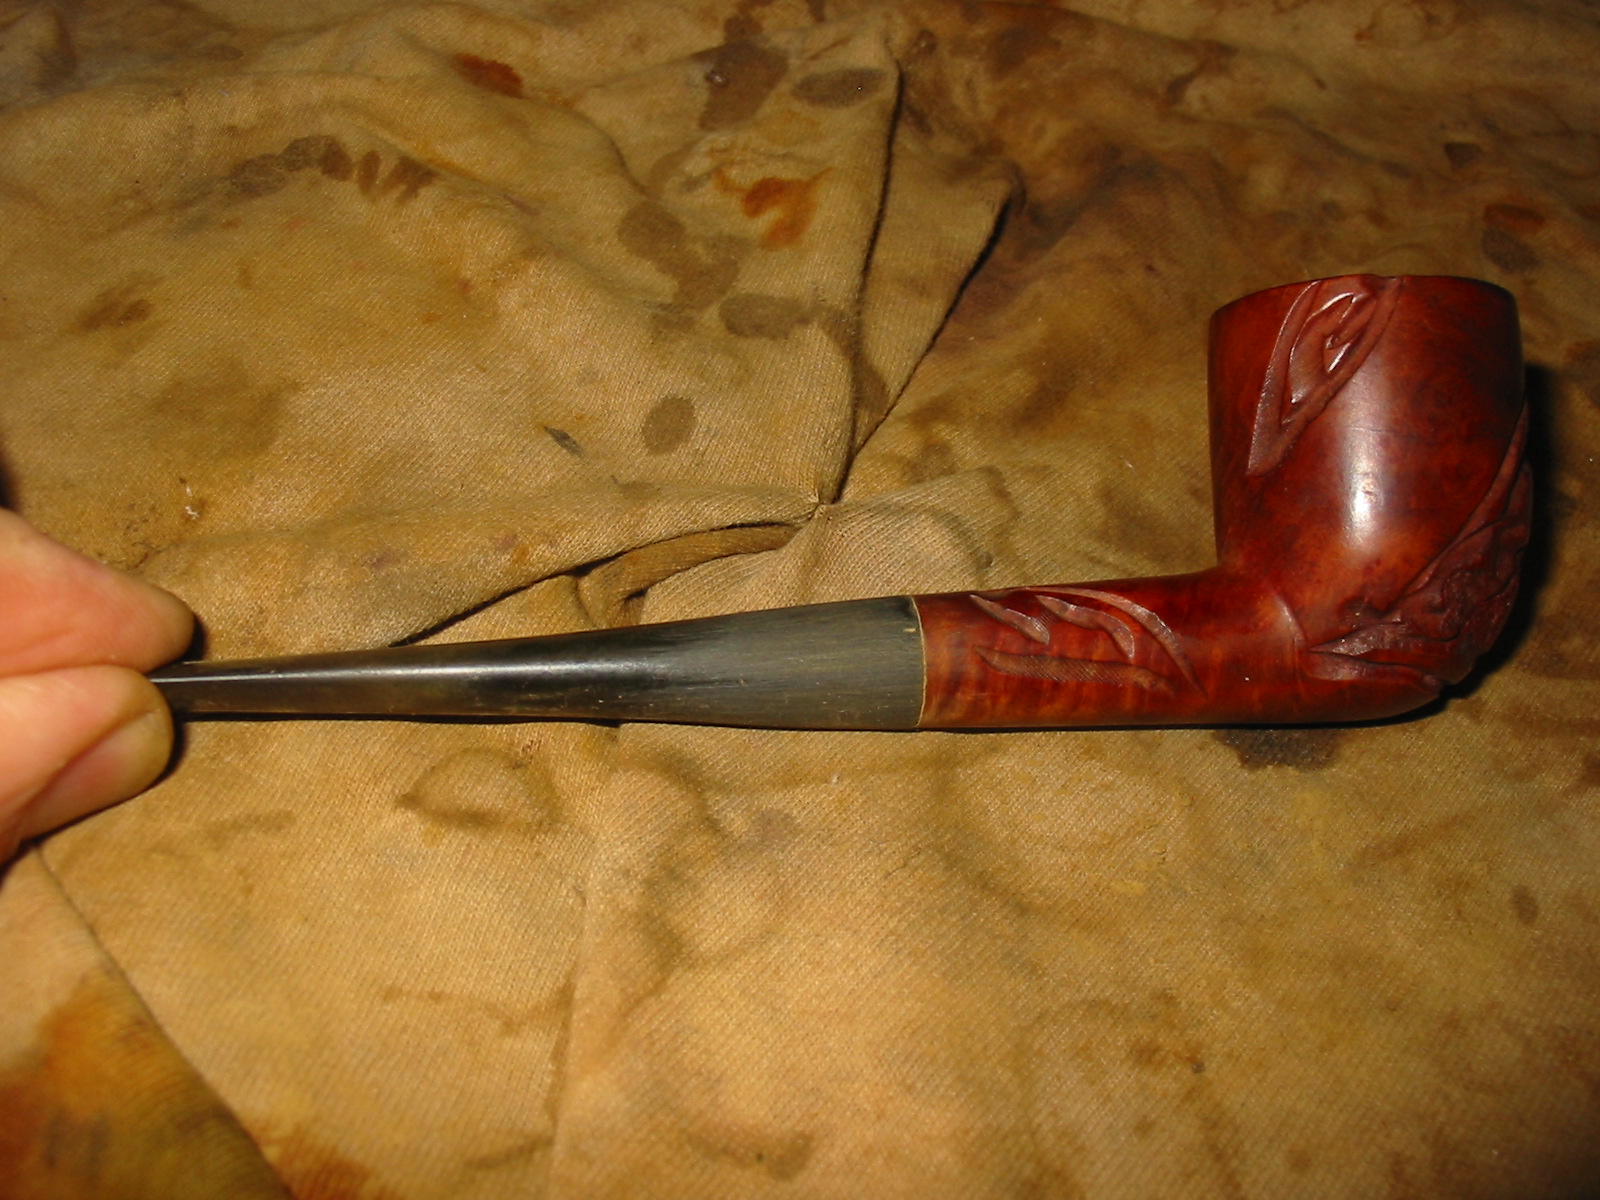
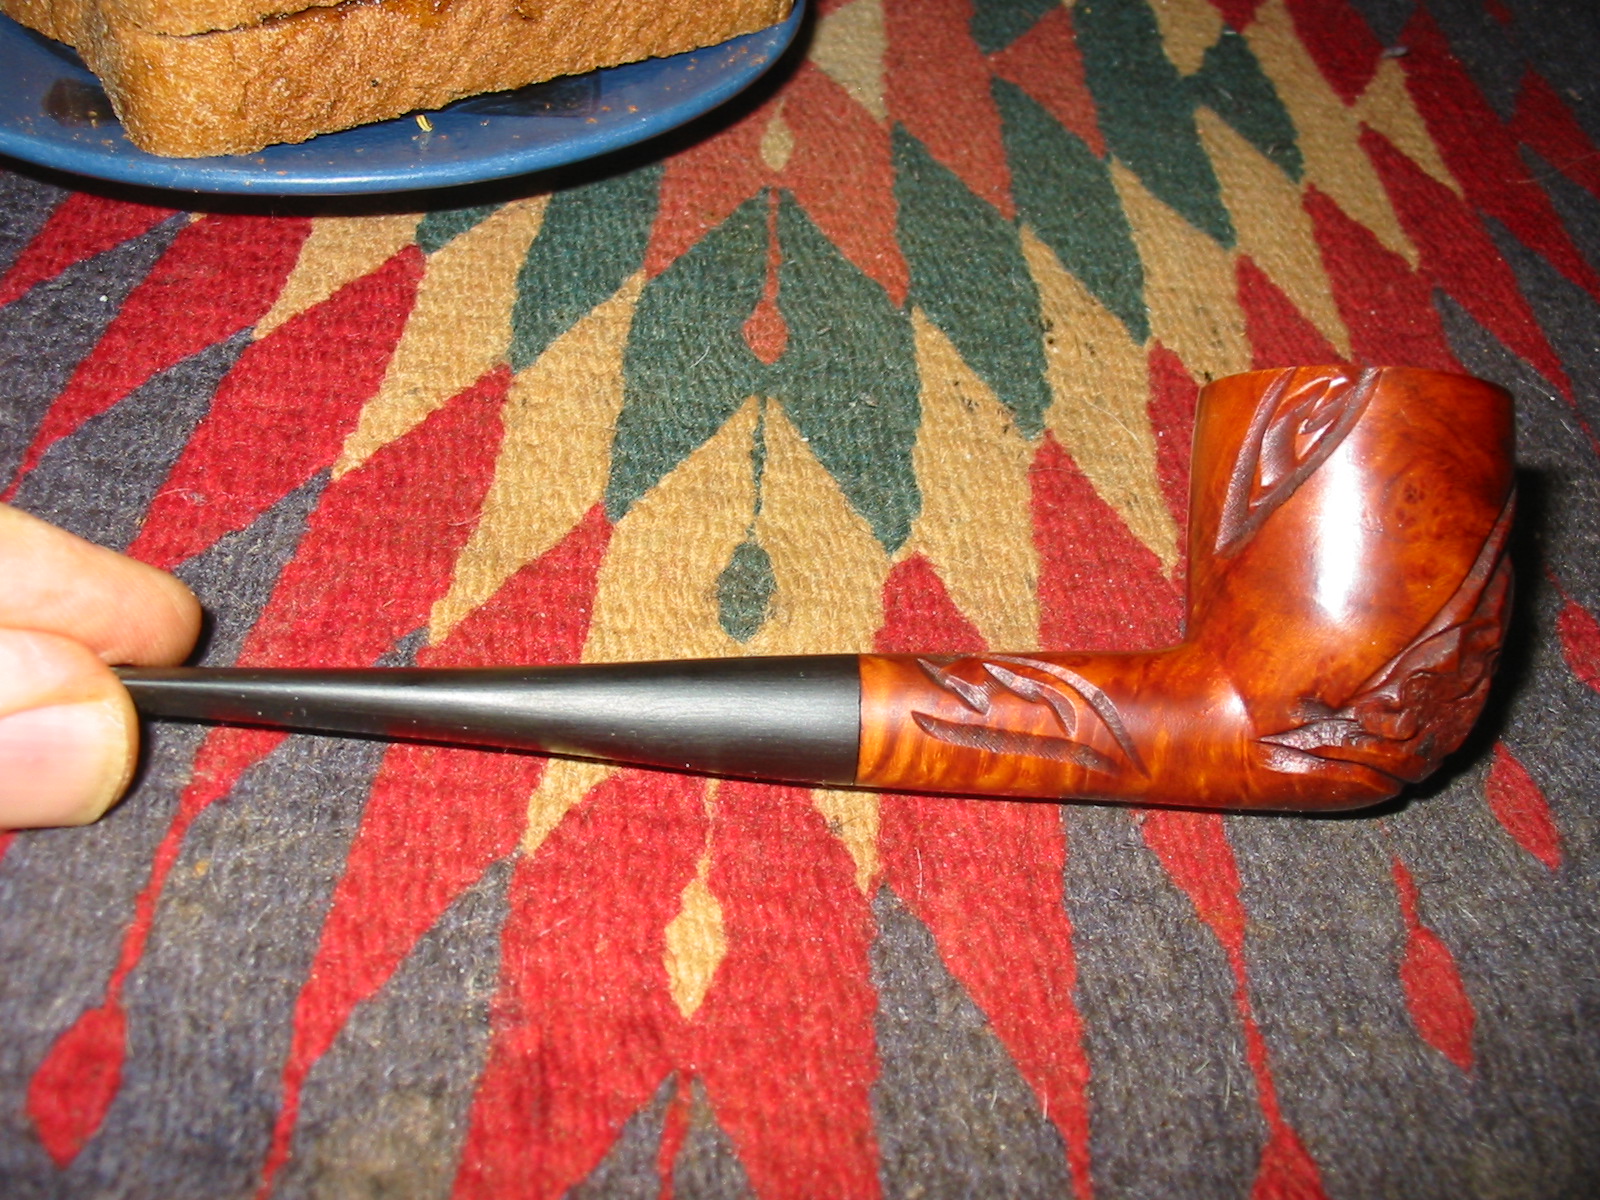
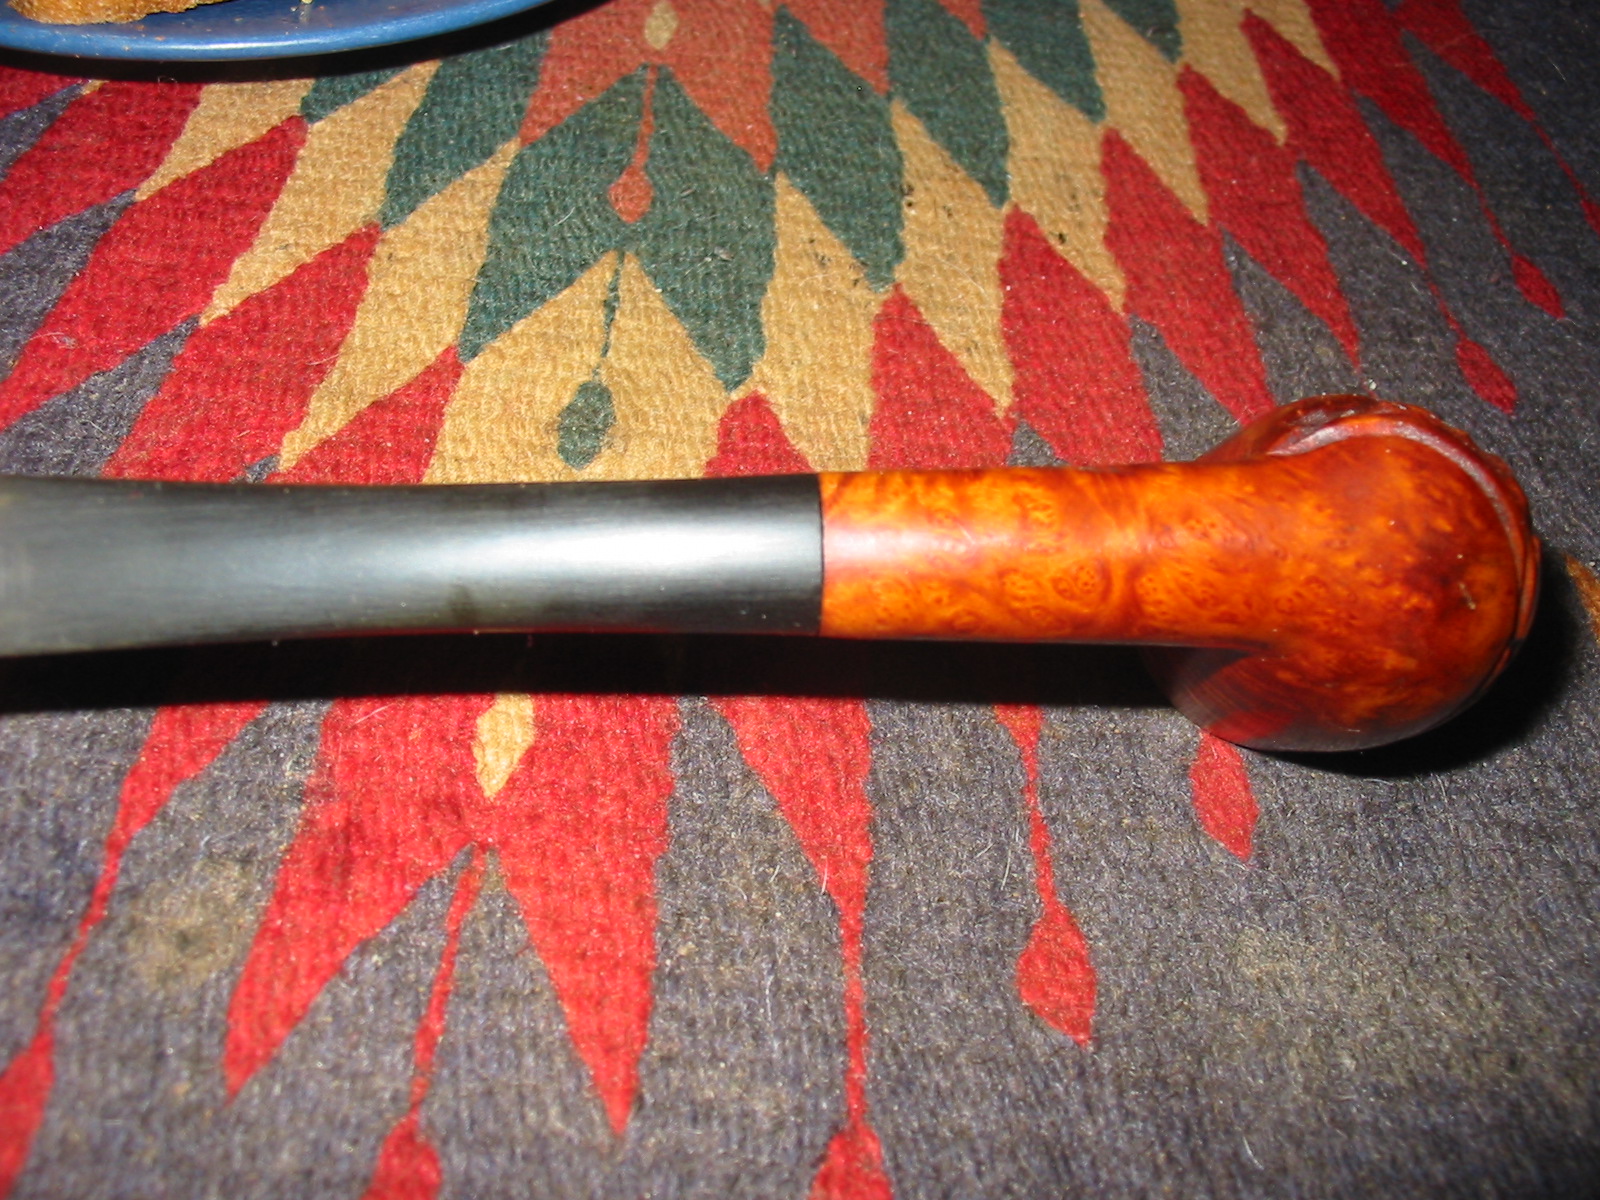
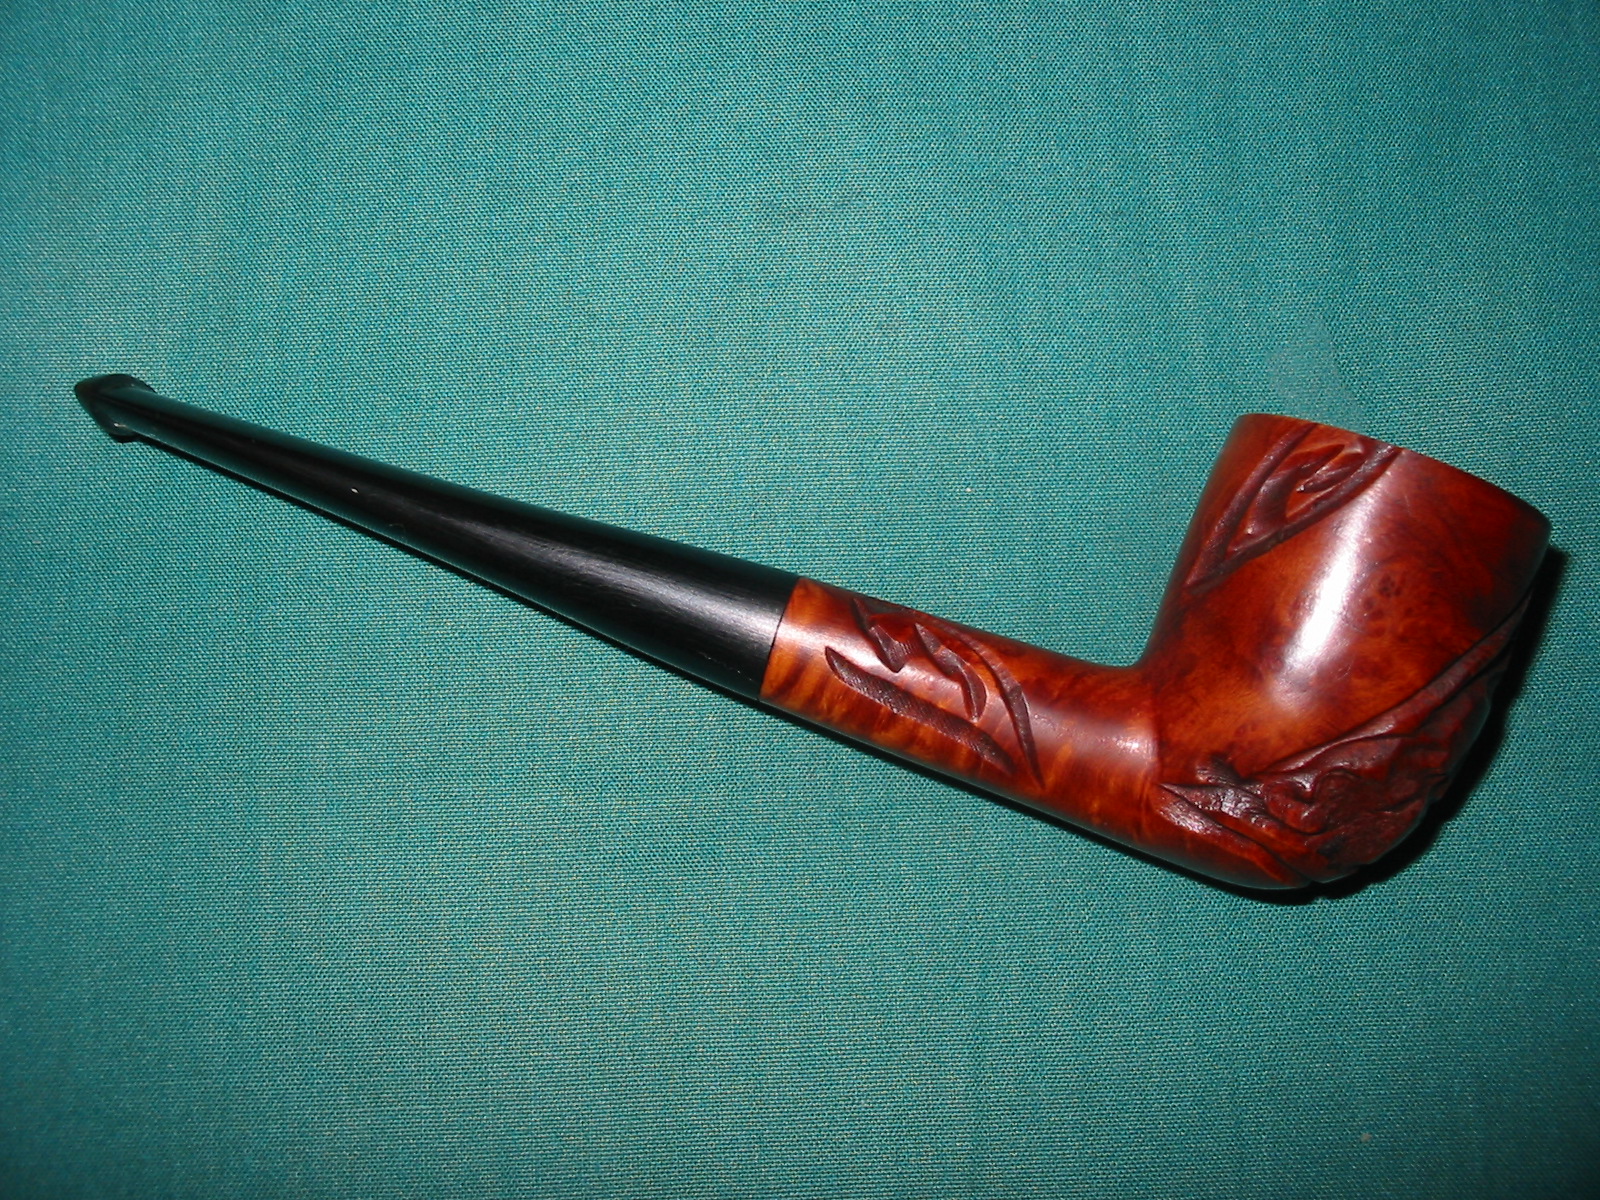
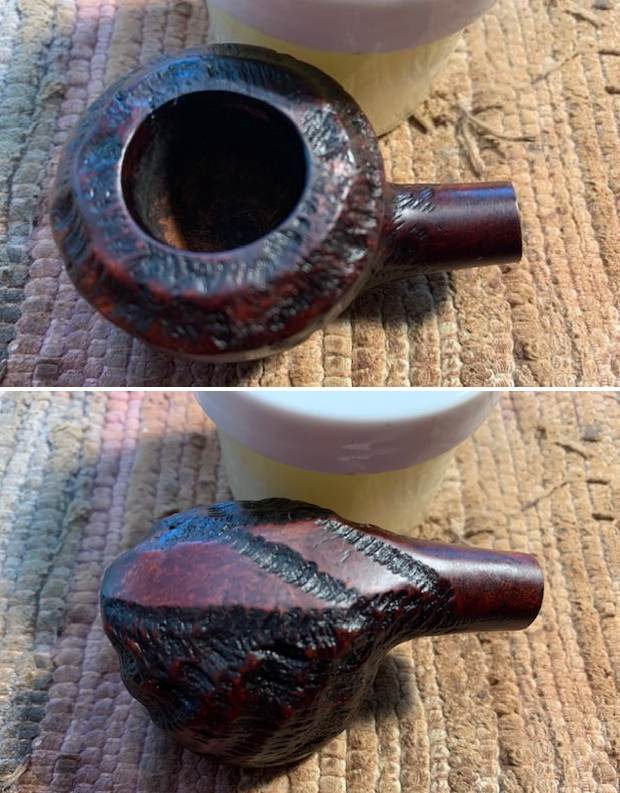
 Jeff captured some of the beauty of the shape and the grain in the next photo. The mix of grains in the smooth portions and the rustication is quite lovely as can be seen in the photo of the heel.
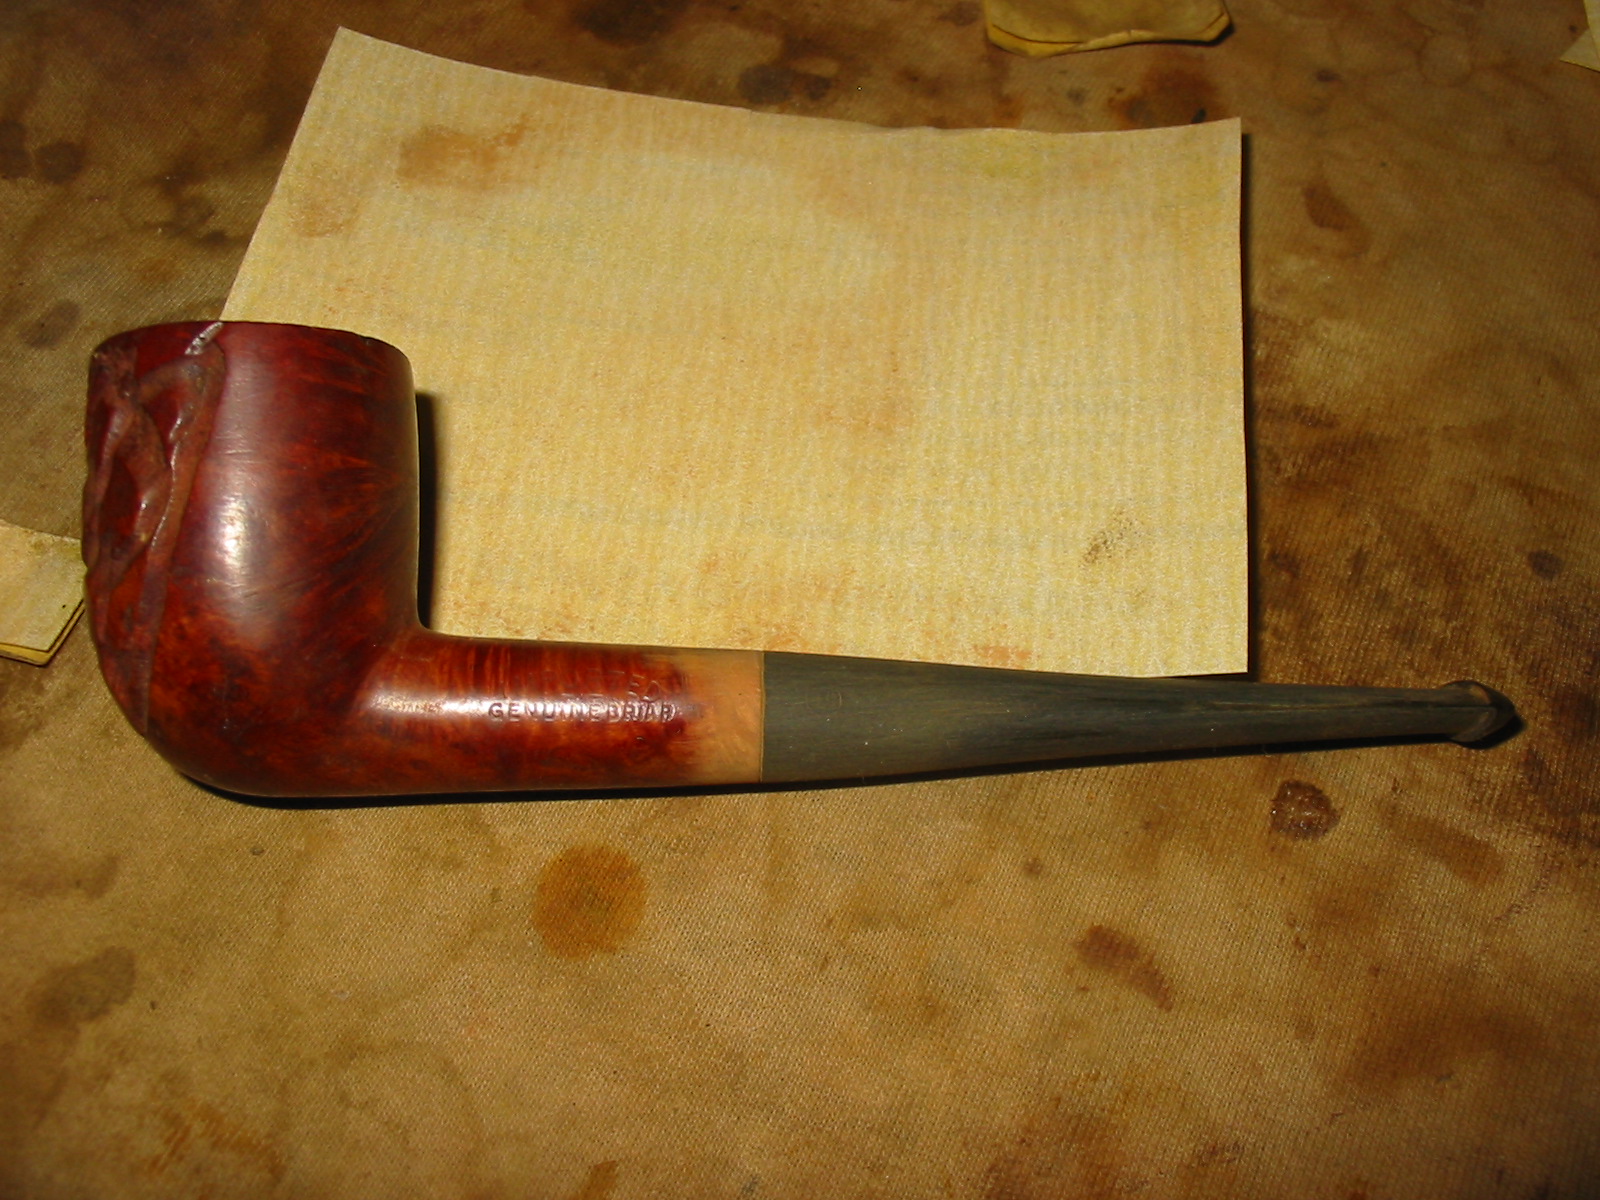
 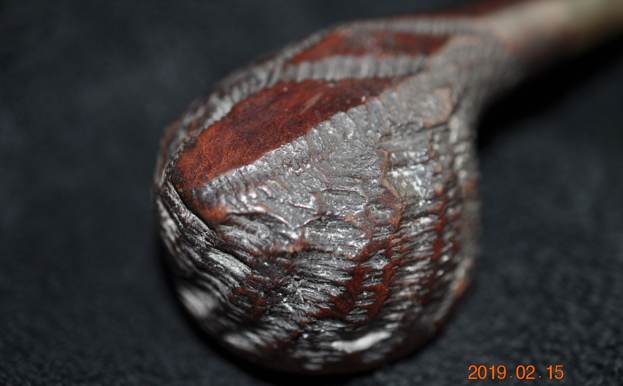 He took a photo of the stamping on the right side of the shank. It is double-stamped and reads IMPORTED BRIAR. There is no other visible stamping on the shank sides or the heel of the bowl so that remains a mystery.
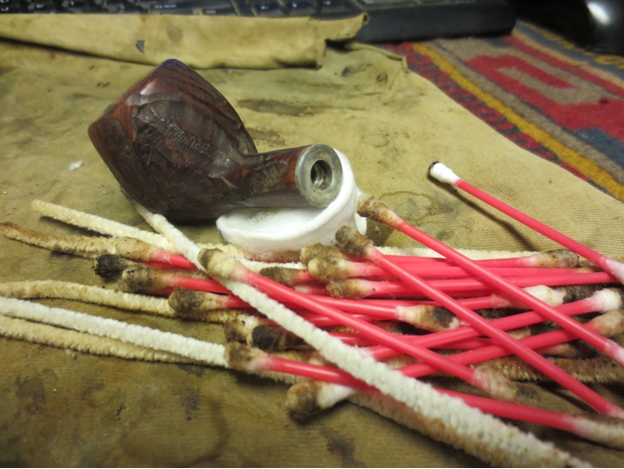
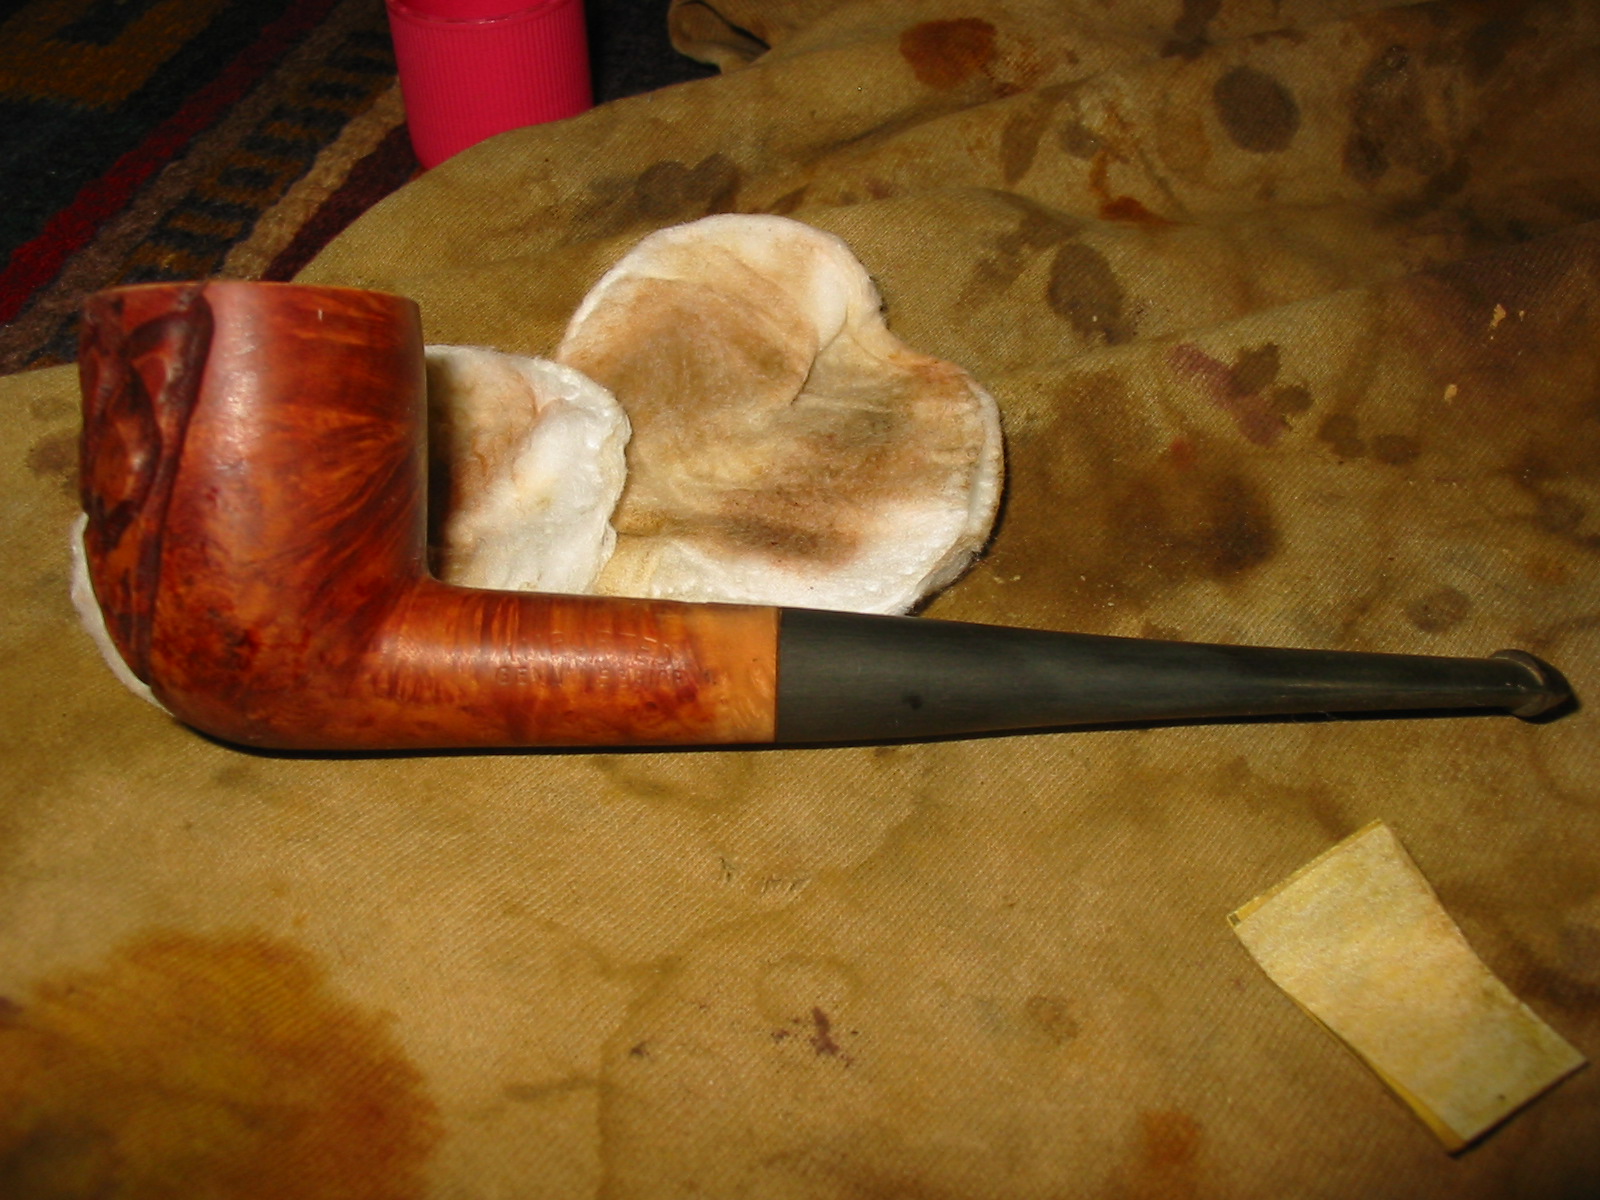
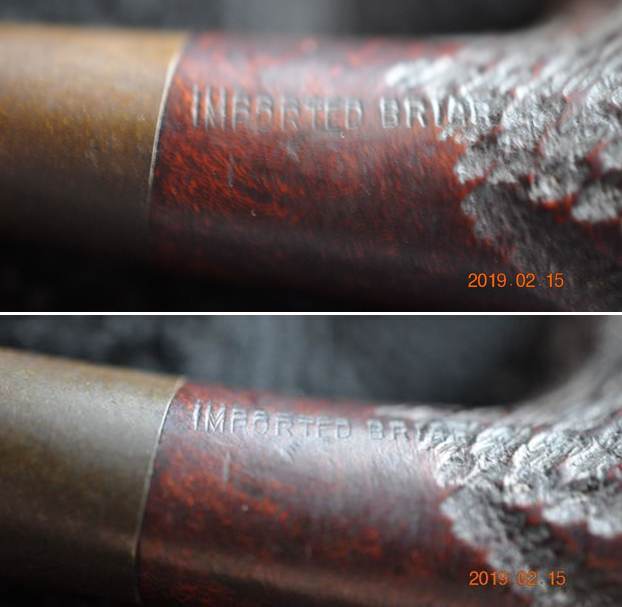 I am enjoying a cup of Ethiopian Medium Roast Coffee as I work on the pipe. It is really a unique short snorter. Jeff had done a great cleanup on the pipe. He reamed the bowl with a PipNet pipe reamer and followed up with a Savinelli Fitsall pipe knife to remove the cake. He scrubbed out the mortise and the airway in the shank and the stem with alcohol, cotton swabs and pipe cleaners. He scrubbed the bowl exterior with a tooth brush and Murphy’s Oil Soap to remove the grime on the finish of the bowl and the lava from the rim top. He rinsed it under running water. One of the benefits of this scrub is that it also tends to lift some of the scratches and nicks in the surface of the briar. He dried it off with a soft cloth. He cleaned the internals and externals of the stem with alcohol, pipe cleaners and cotton swabs. He soaked the stem in Briarville’s Pipe Stem Deoxidizer and rinsed it off with warm water and cleaned out the airway in the stem with alcohol, pipe cleaners and cotton swabs. I took photos of the pipe as I saw it when I put it on the table.
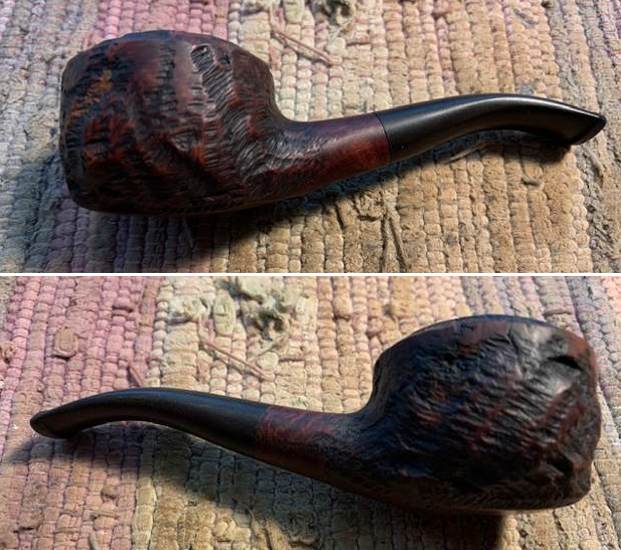
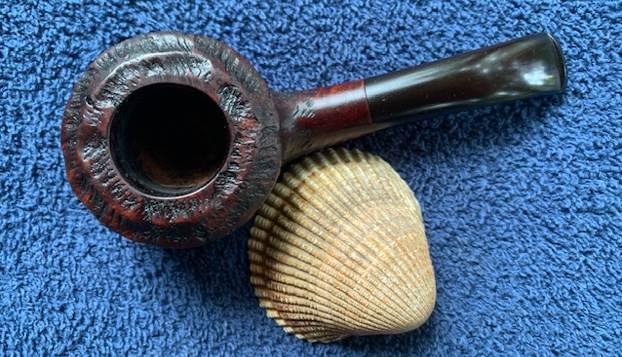
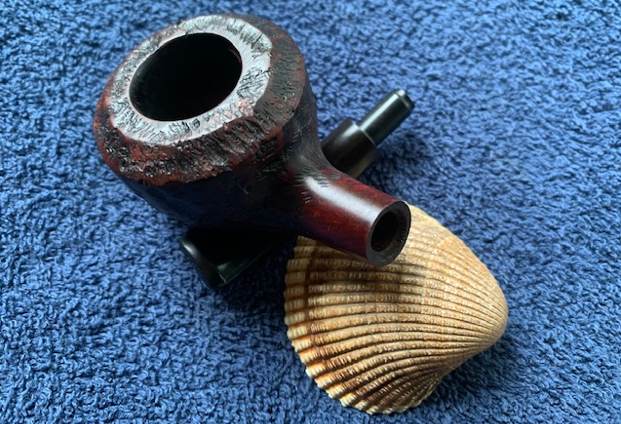
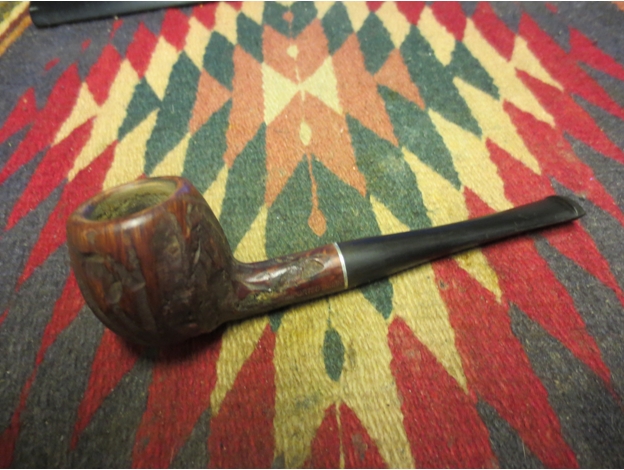
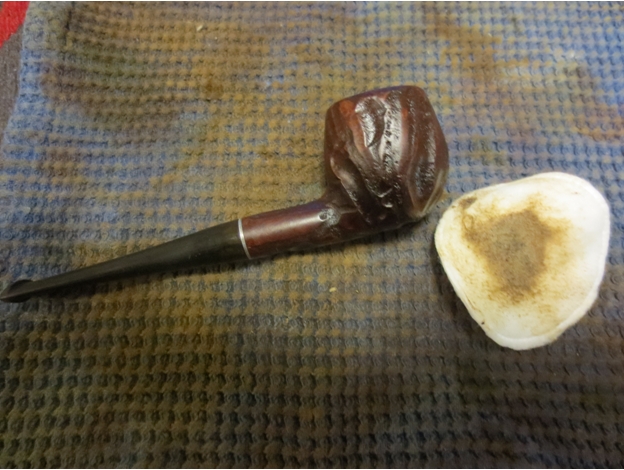
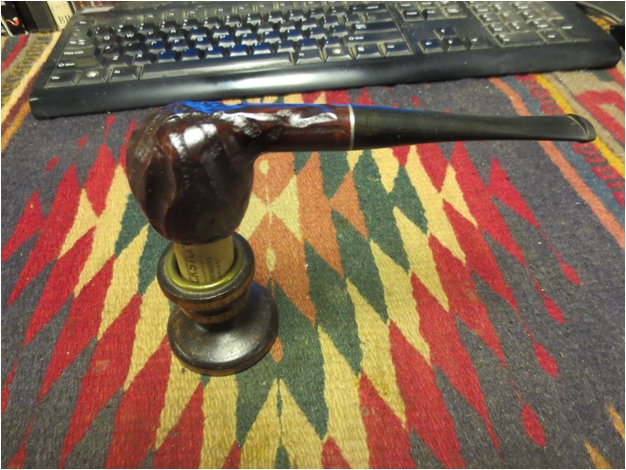
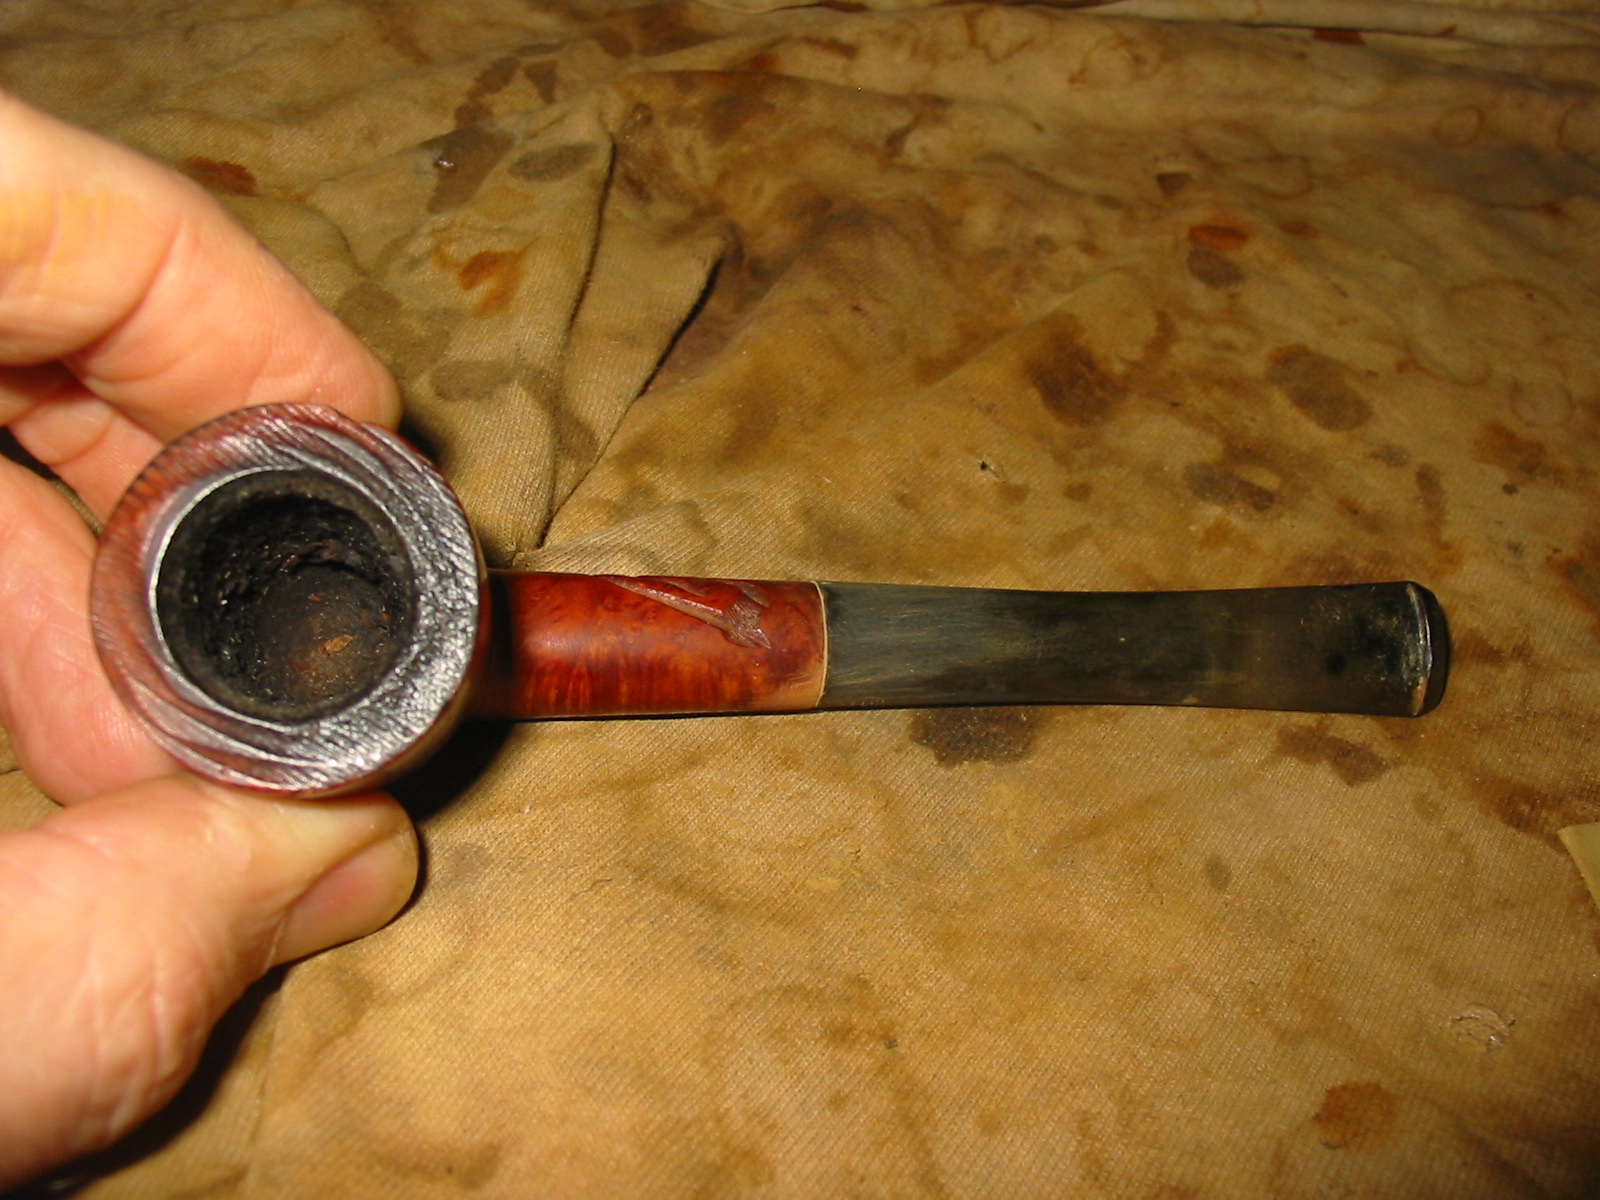
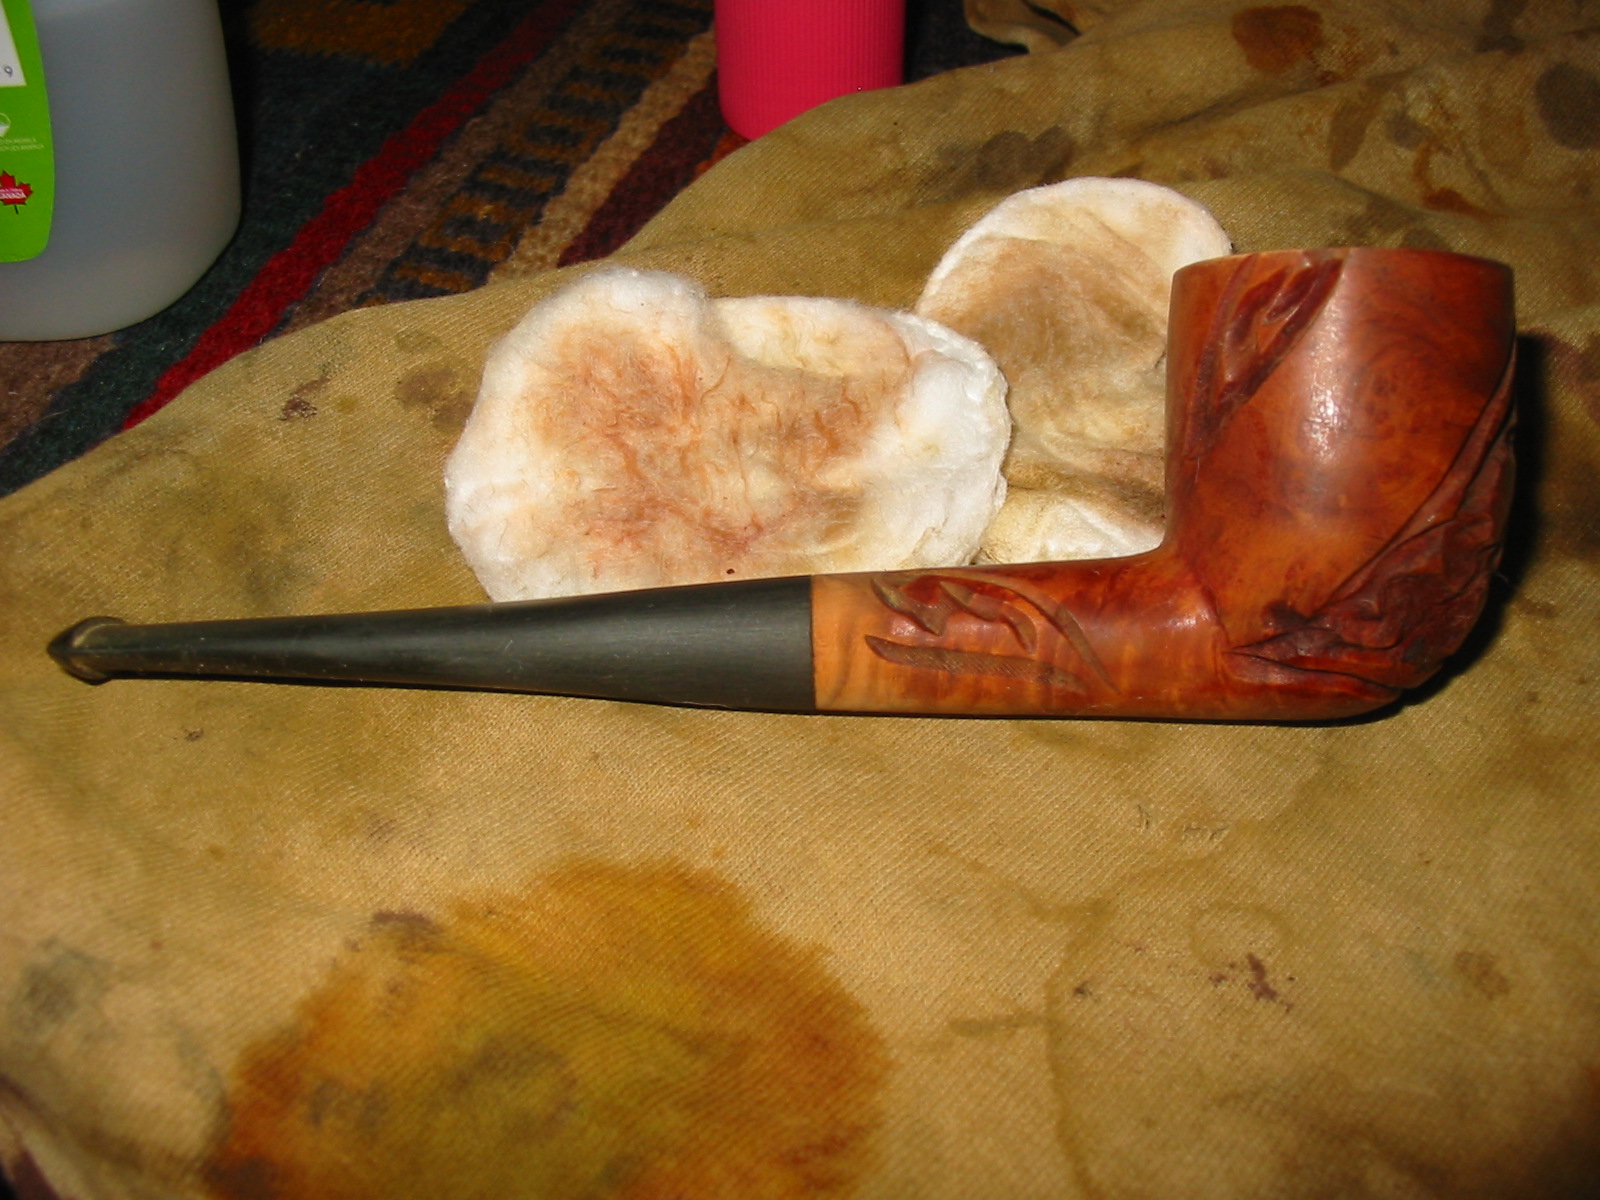
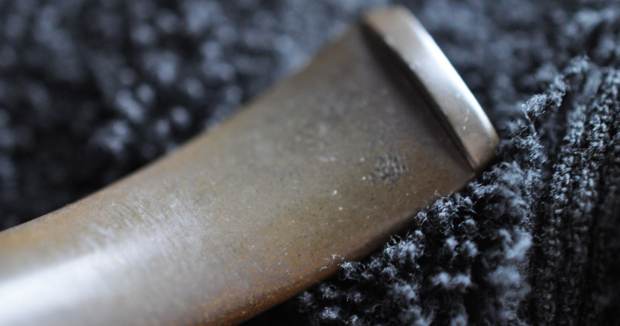
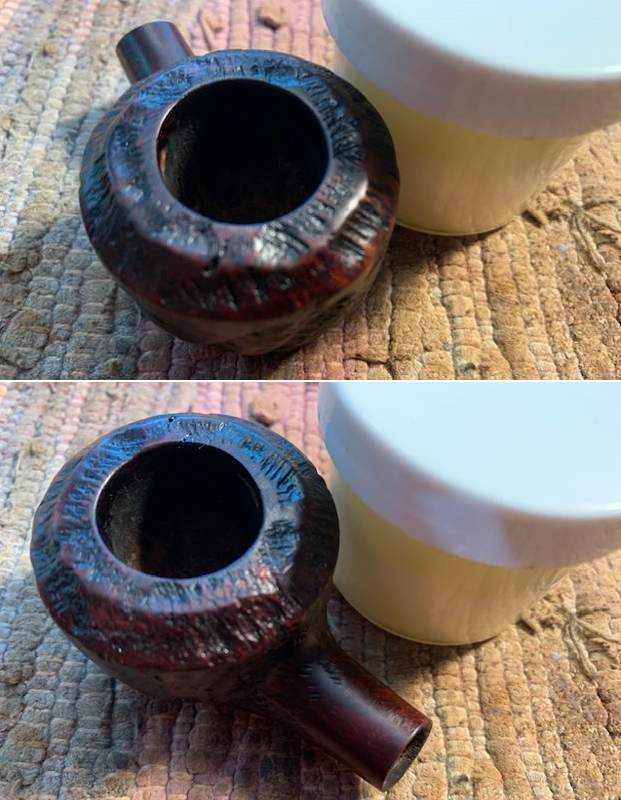
 I took photos of the rim top and stem to show the condition. The rim top and beveled edge looked amazing. The stem was vulcanite and there were tooth marks and chatter on both sides ahead of the button.
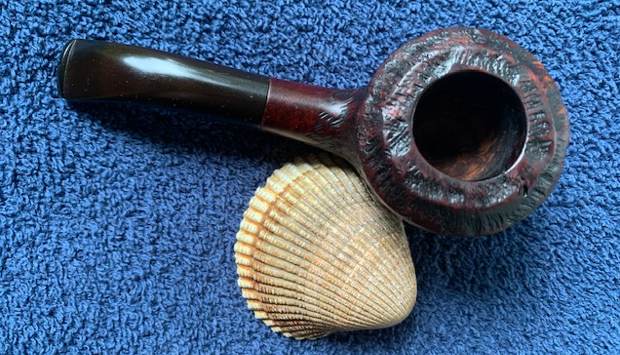
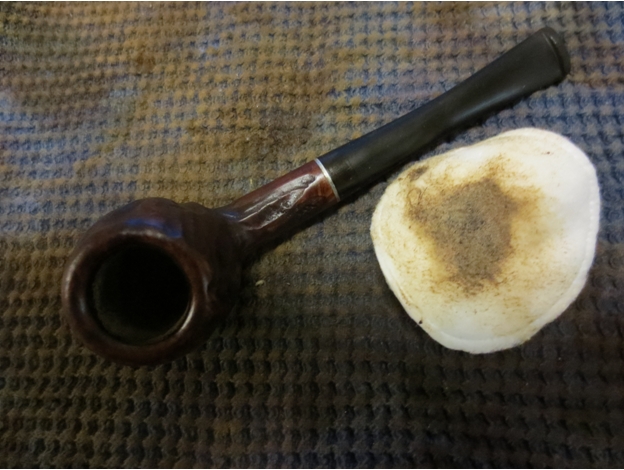
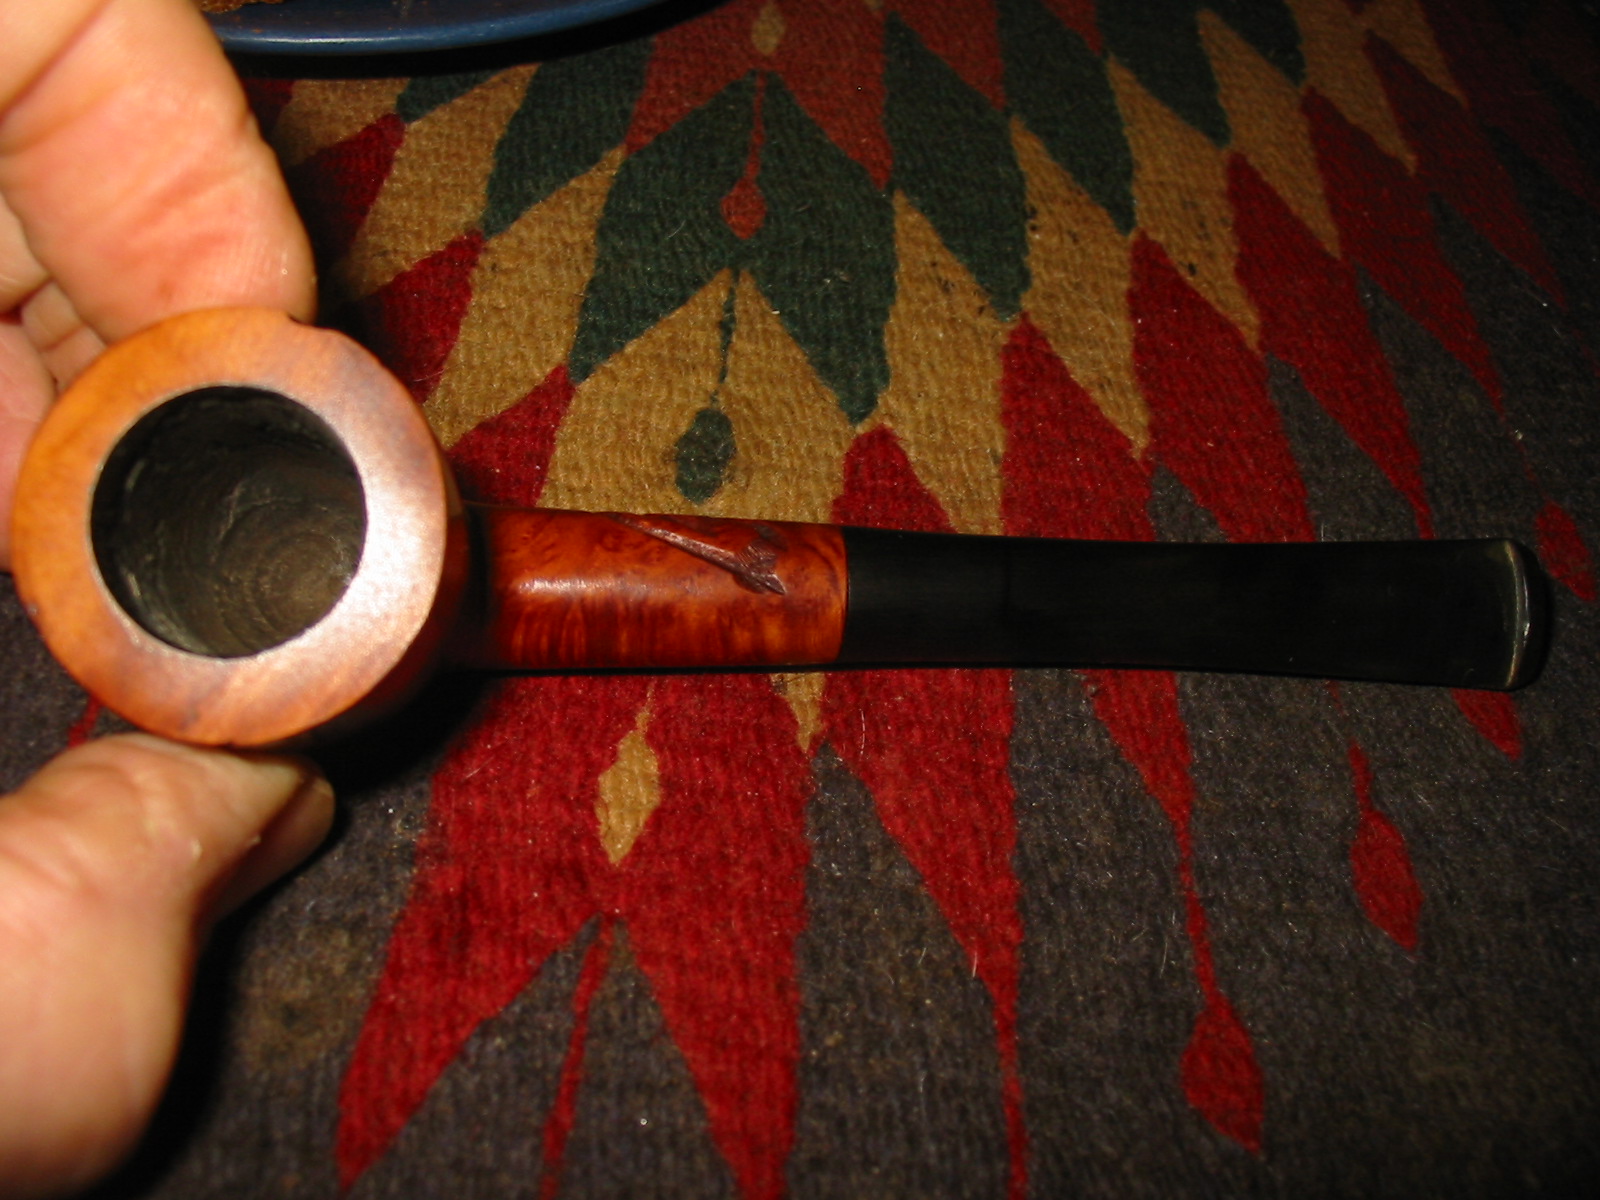
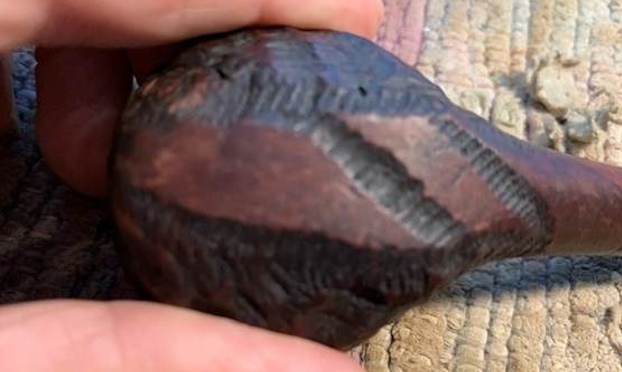
 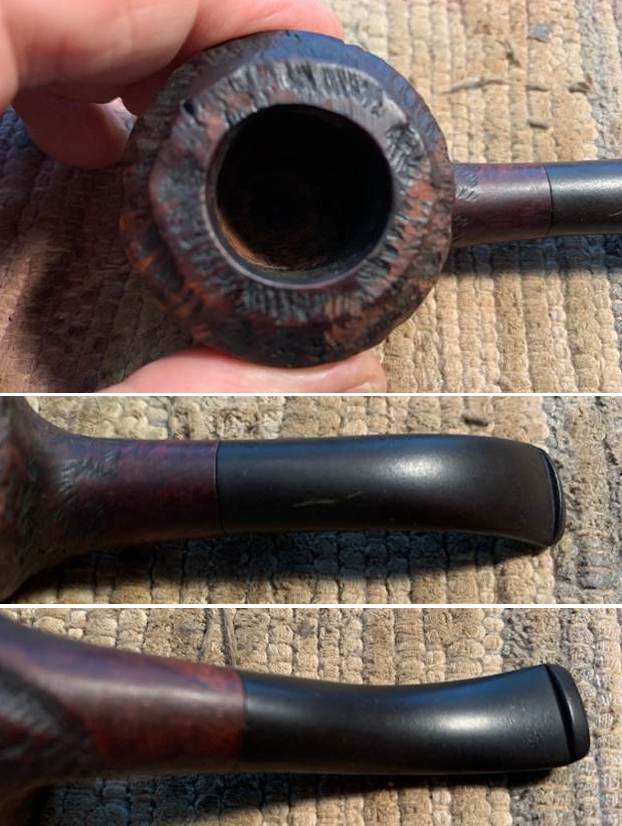 This pipe is a bit of a mystery with no stamping on the shank sides other than IMPORTED BRIAR double-stamped on the right side. I took photos of the right side and the heel of the bowl to see if any stamping shows up in the photos.
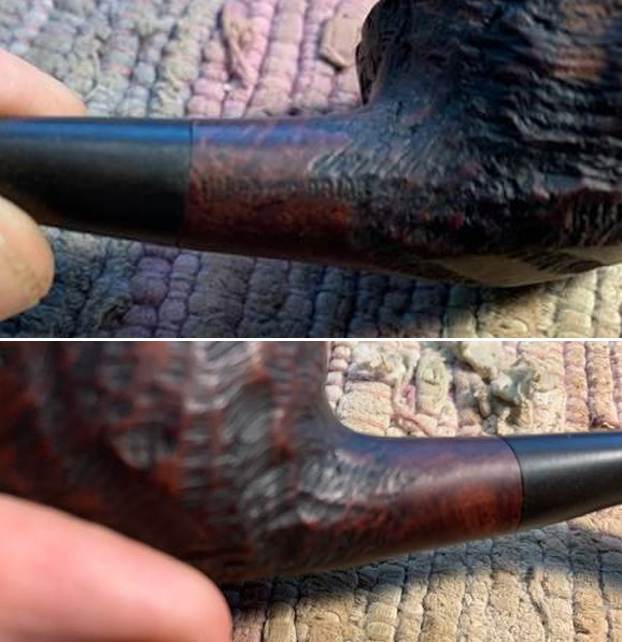
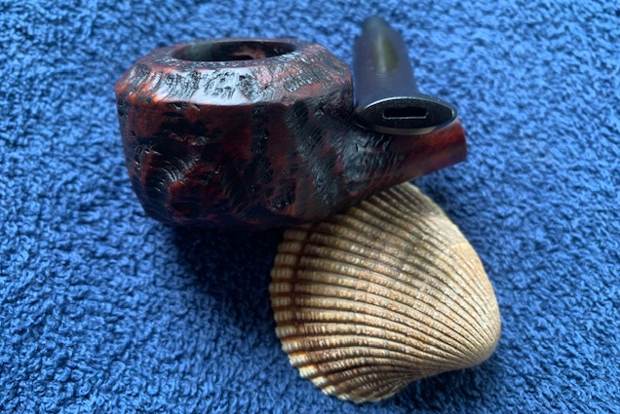
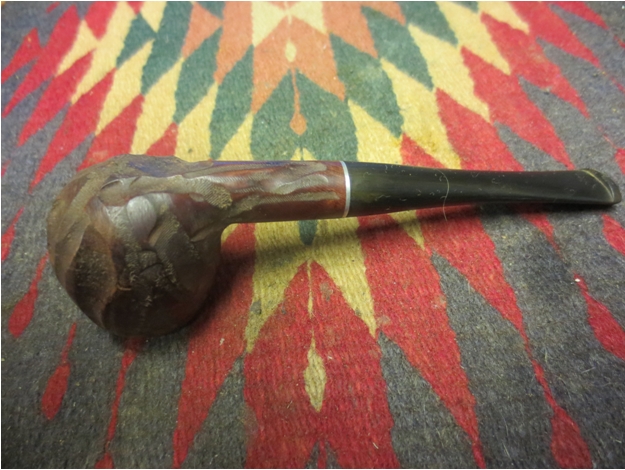
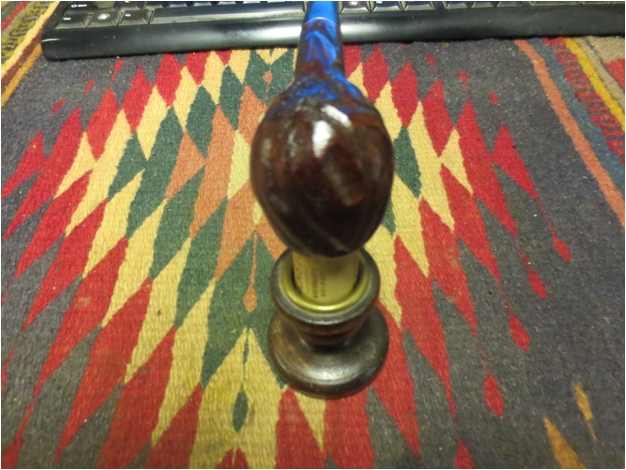
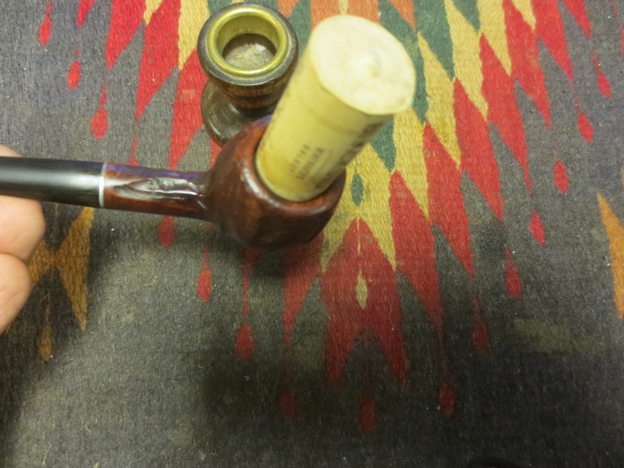
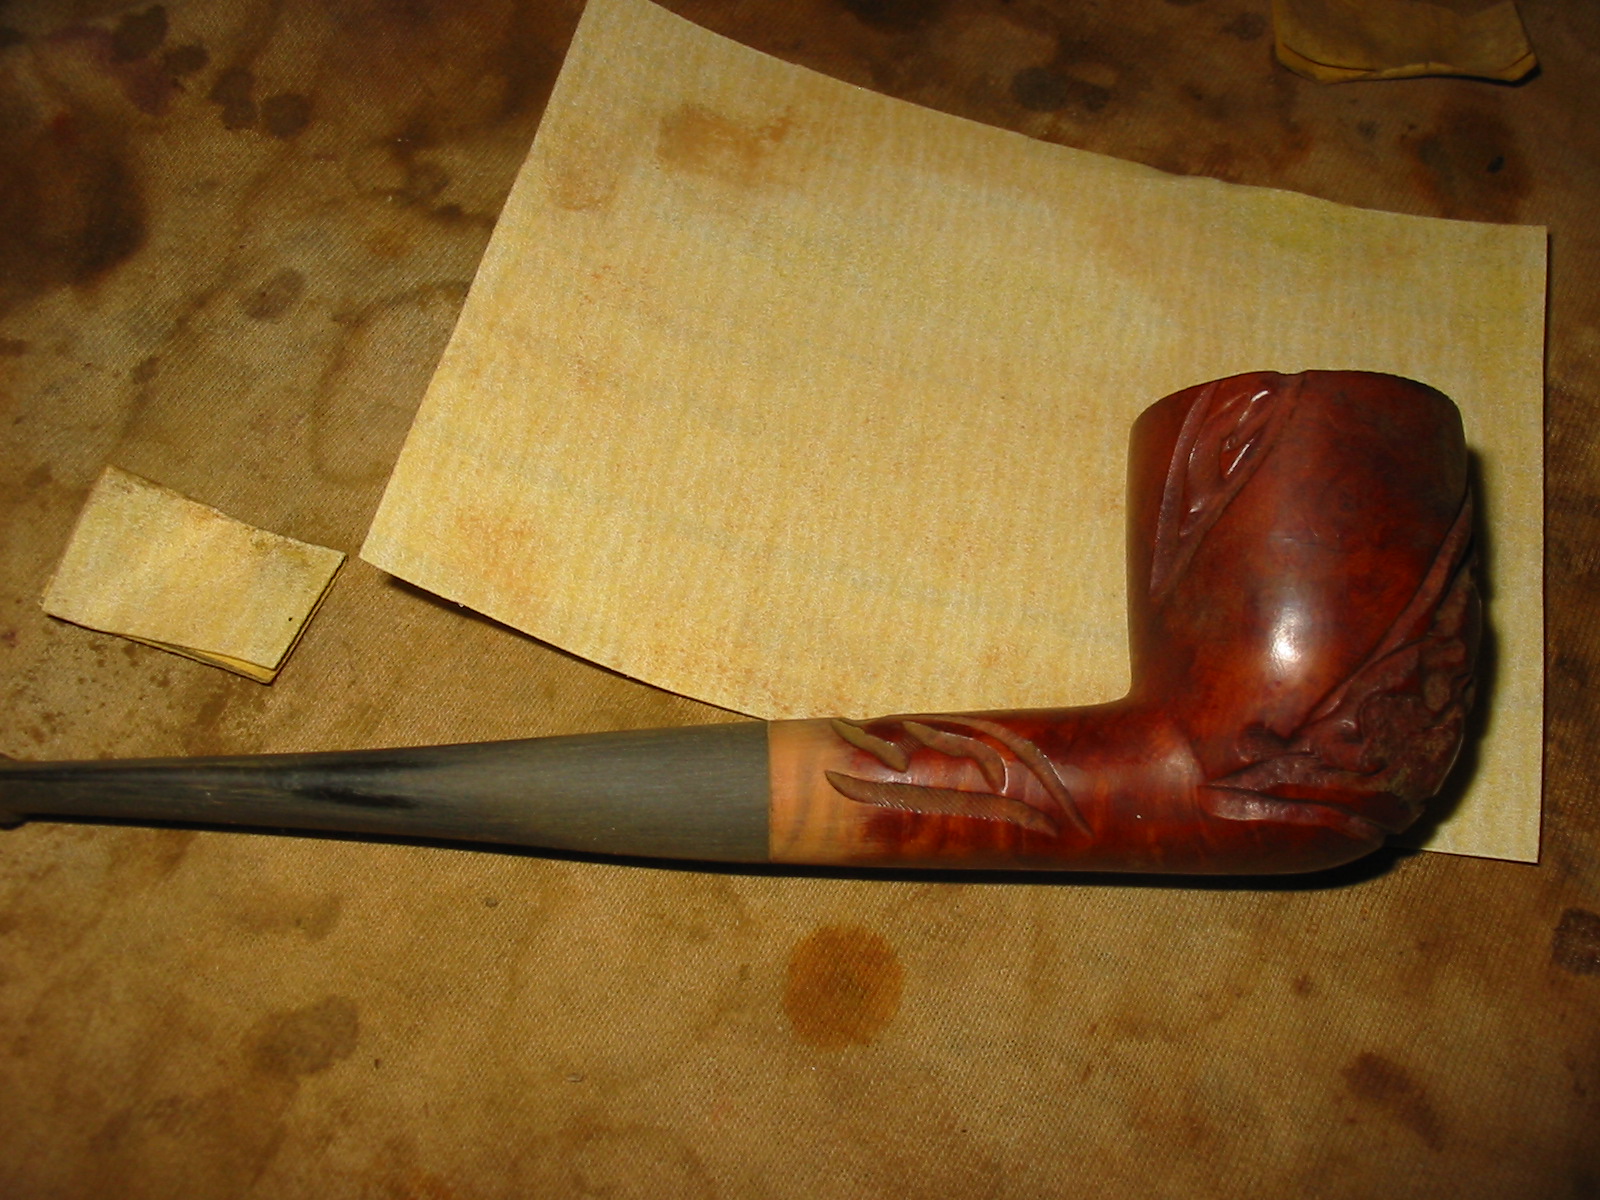
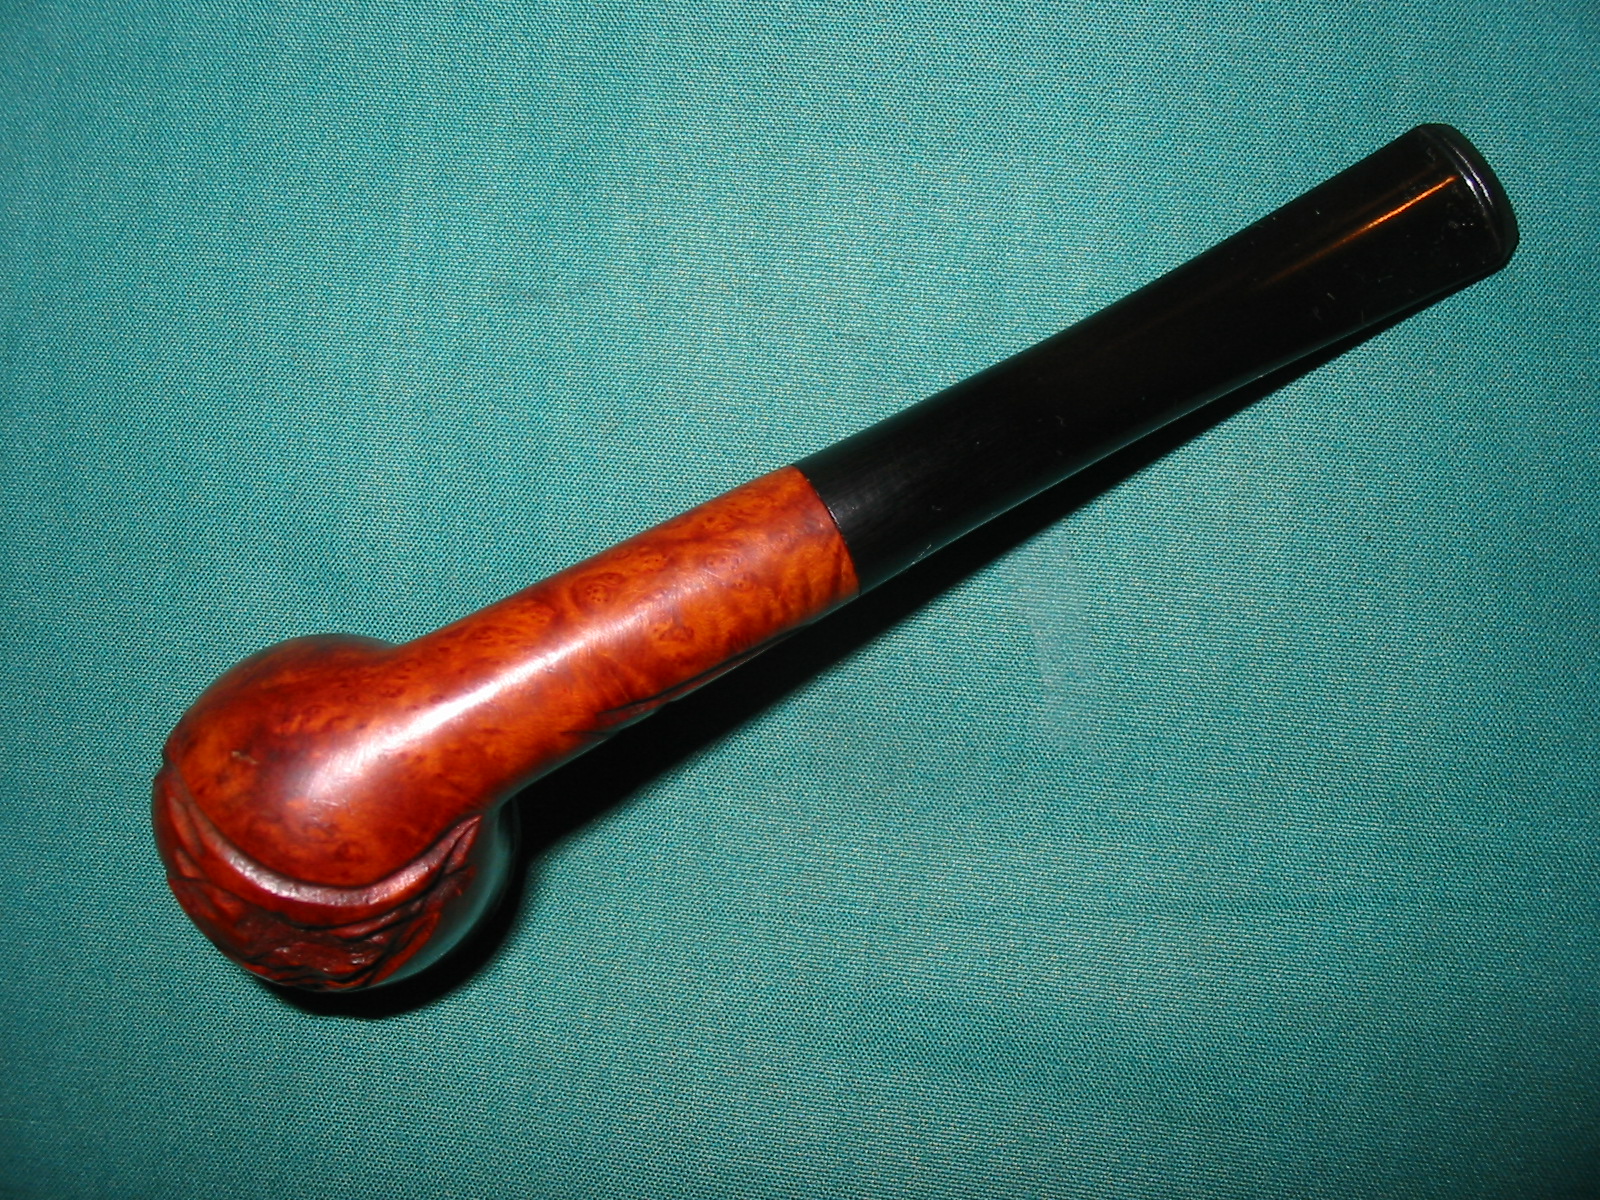
 I removed the stem from the shank and took a photo of the pipe to give a sense of the proportions of the bowl and stem.
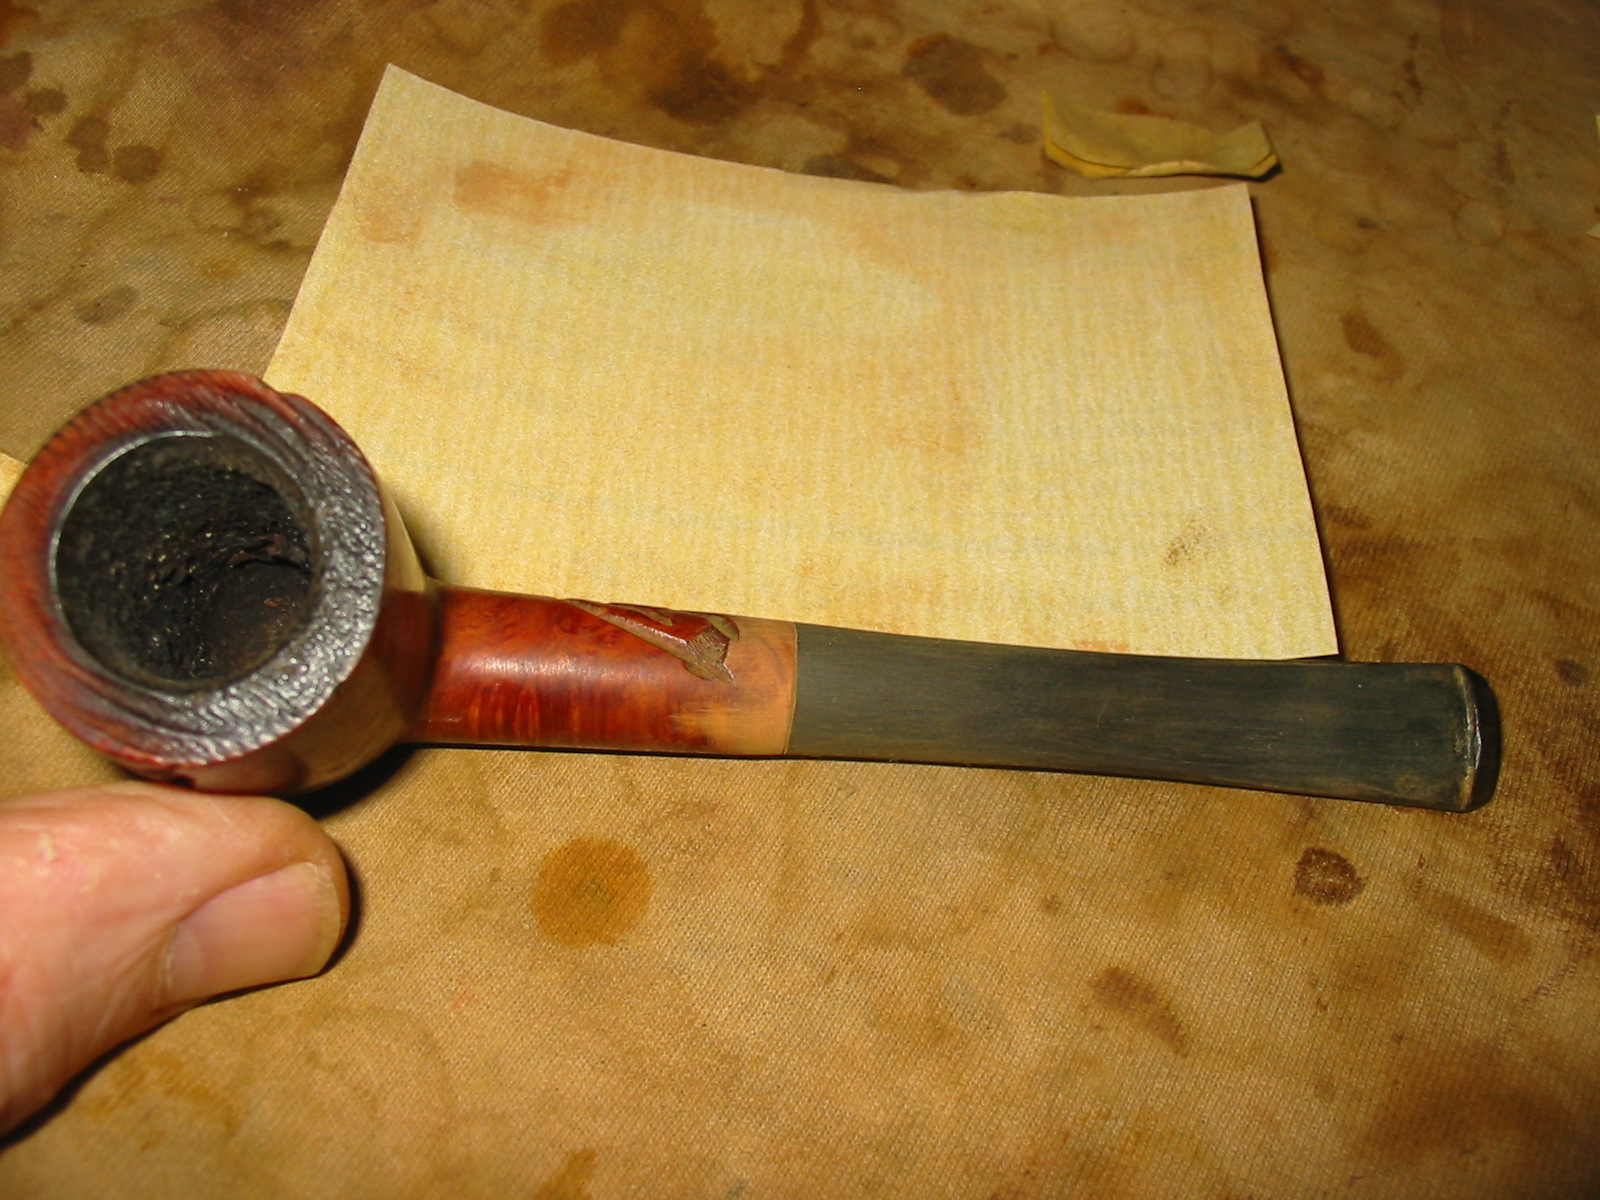
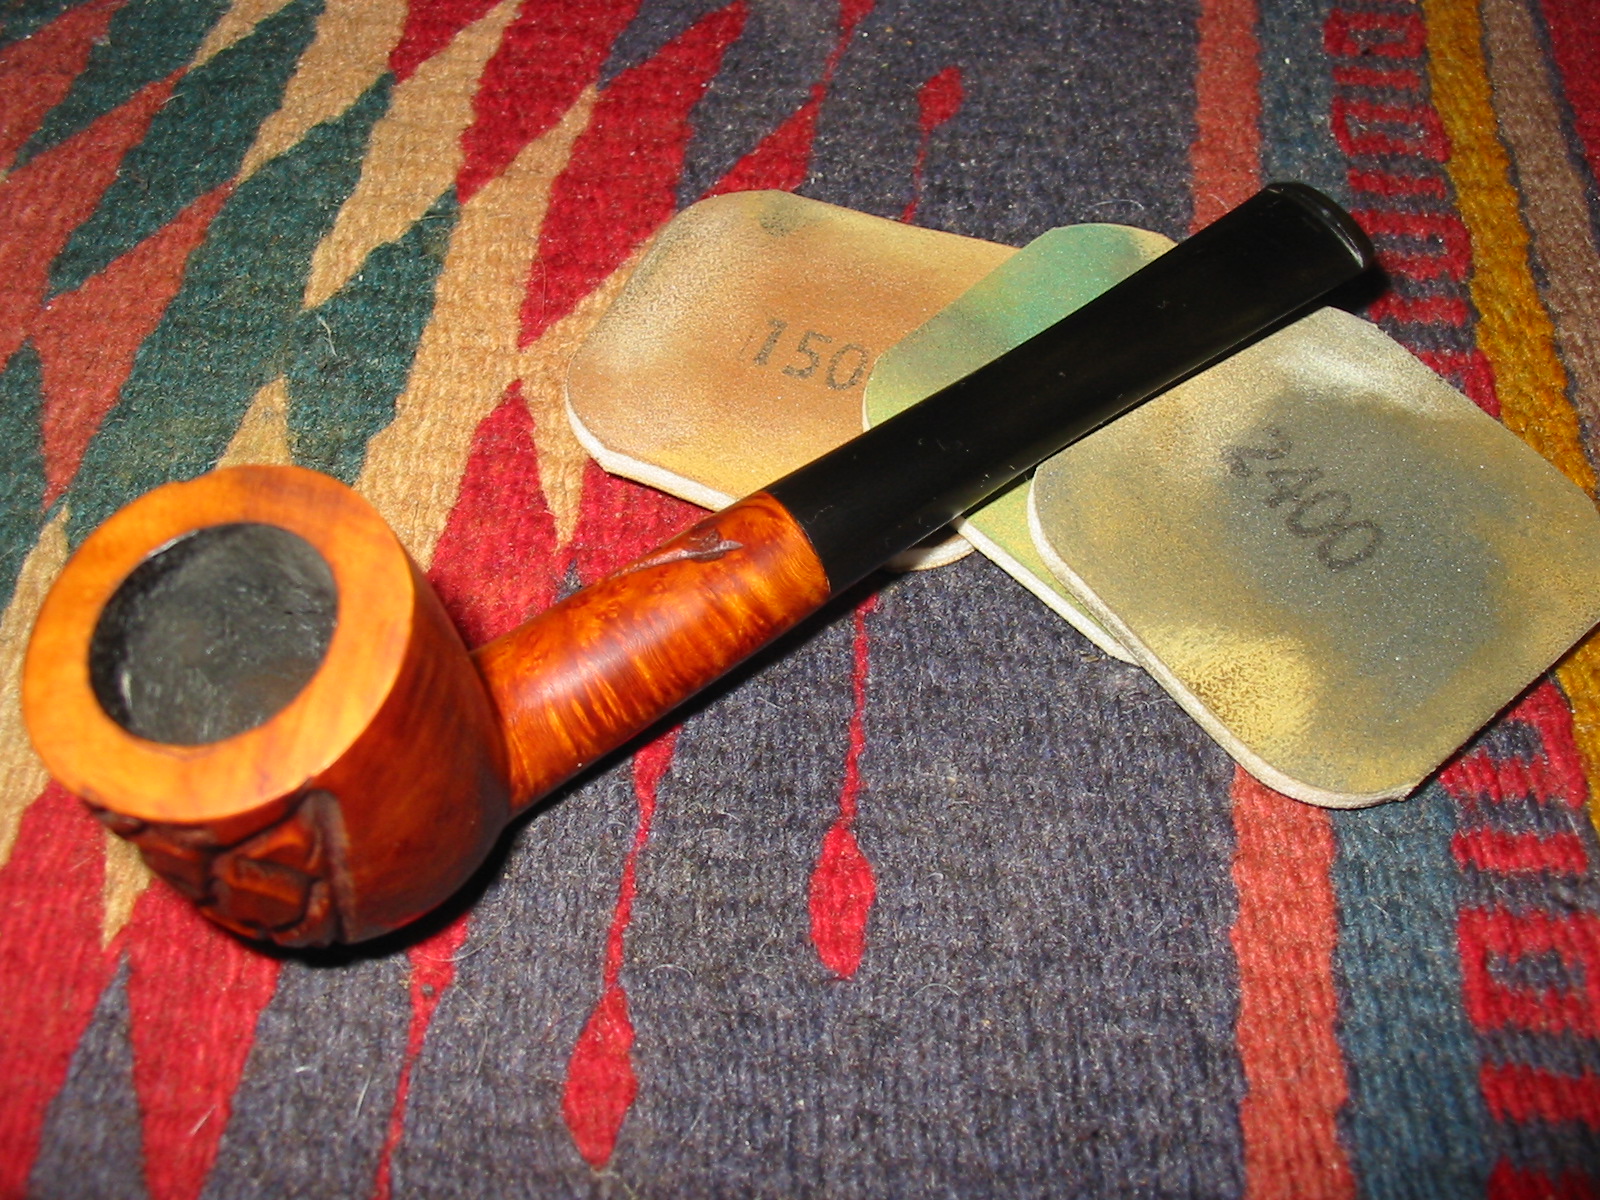
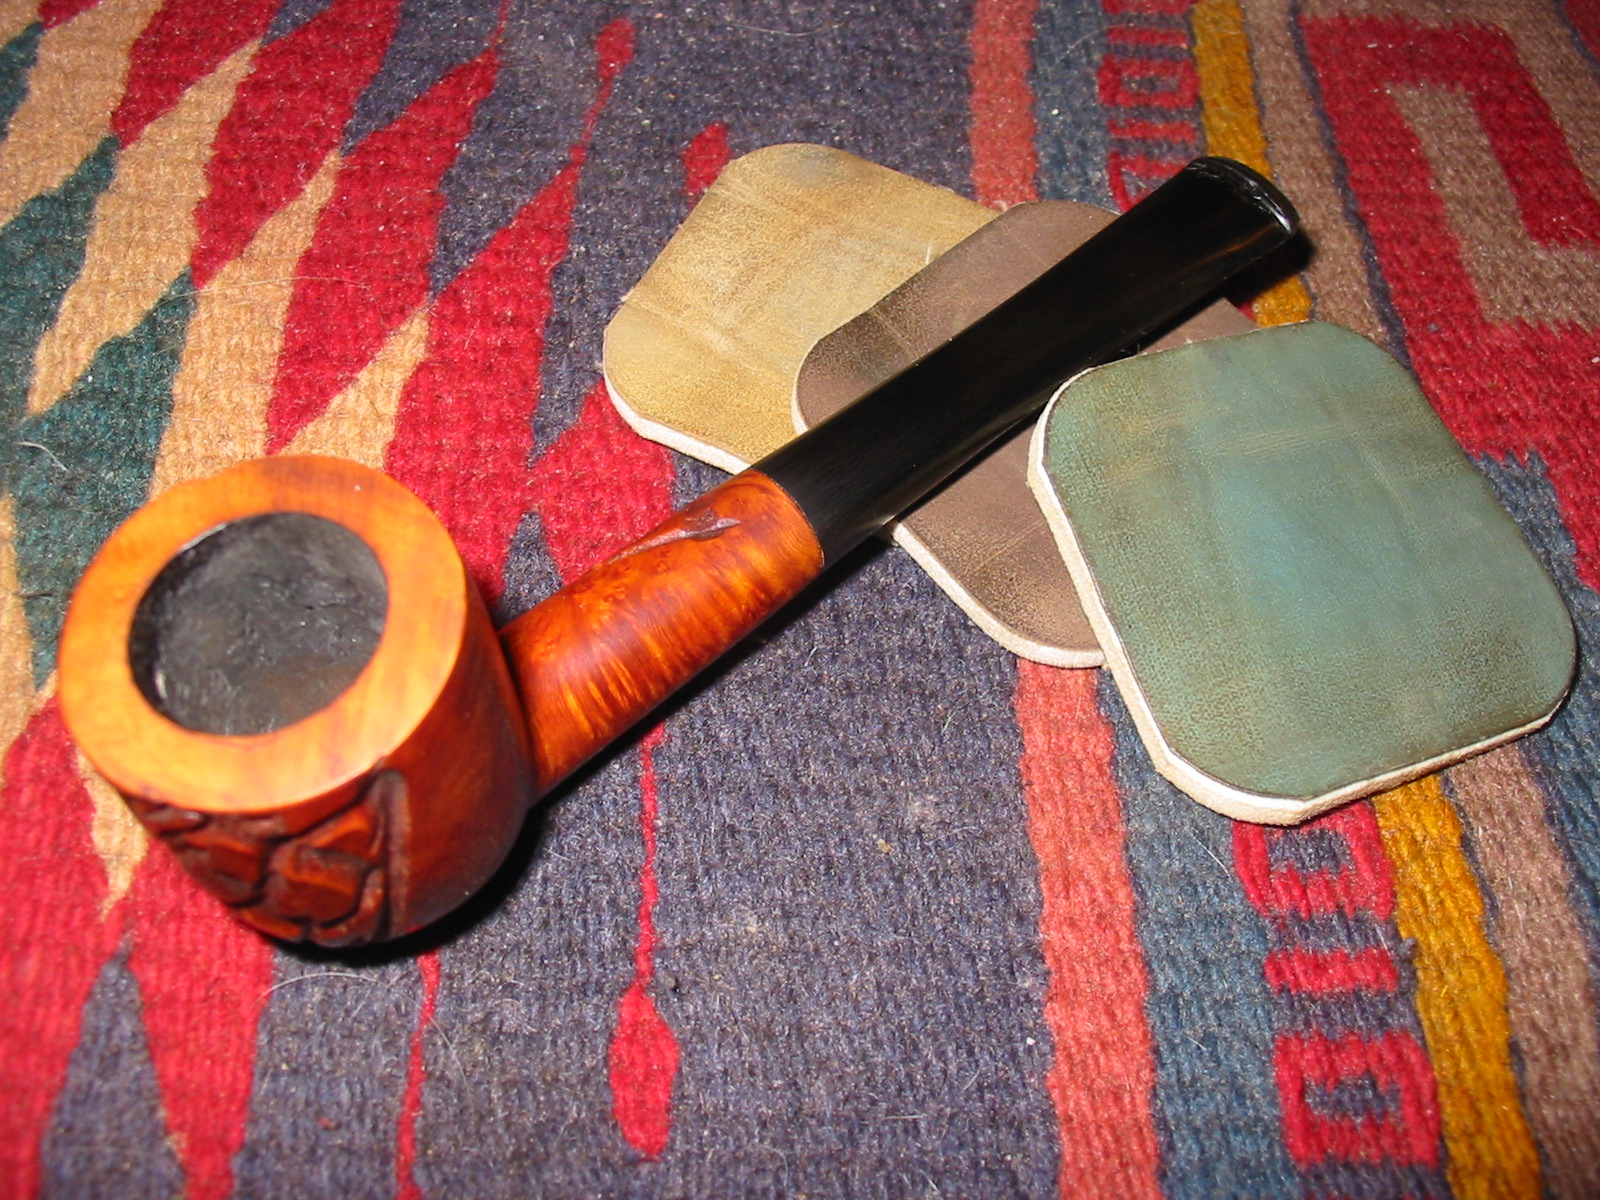
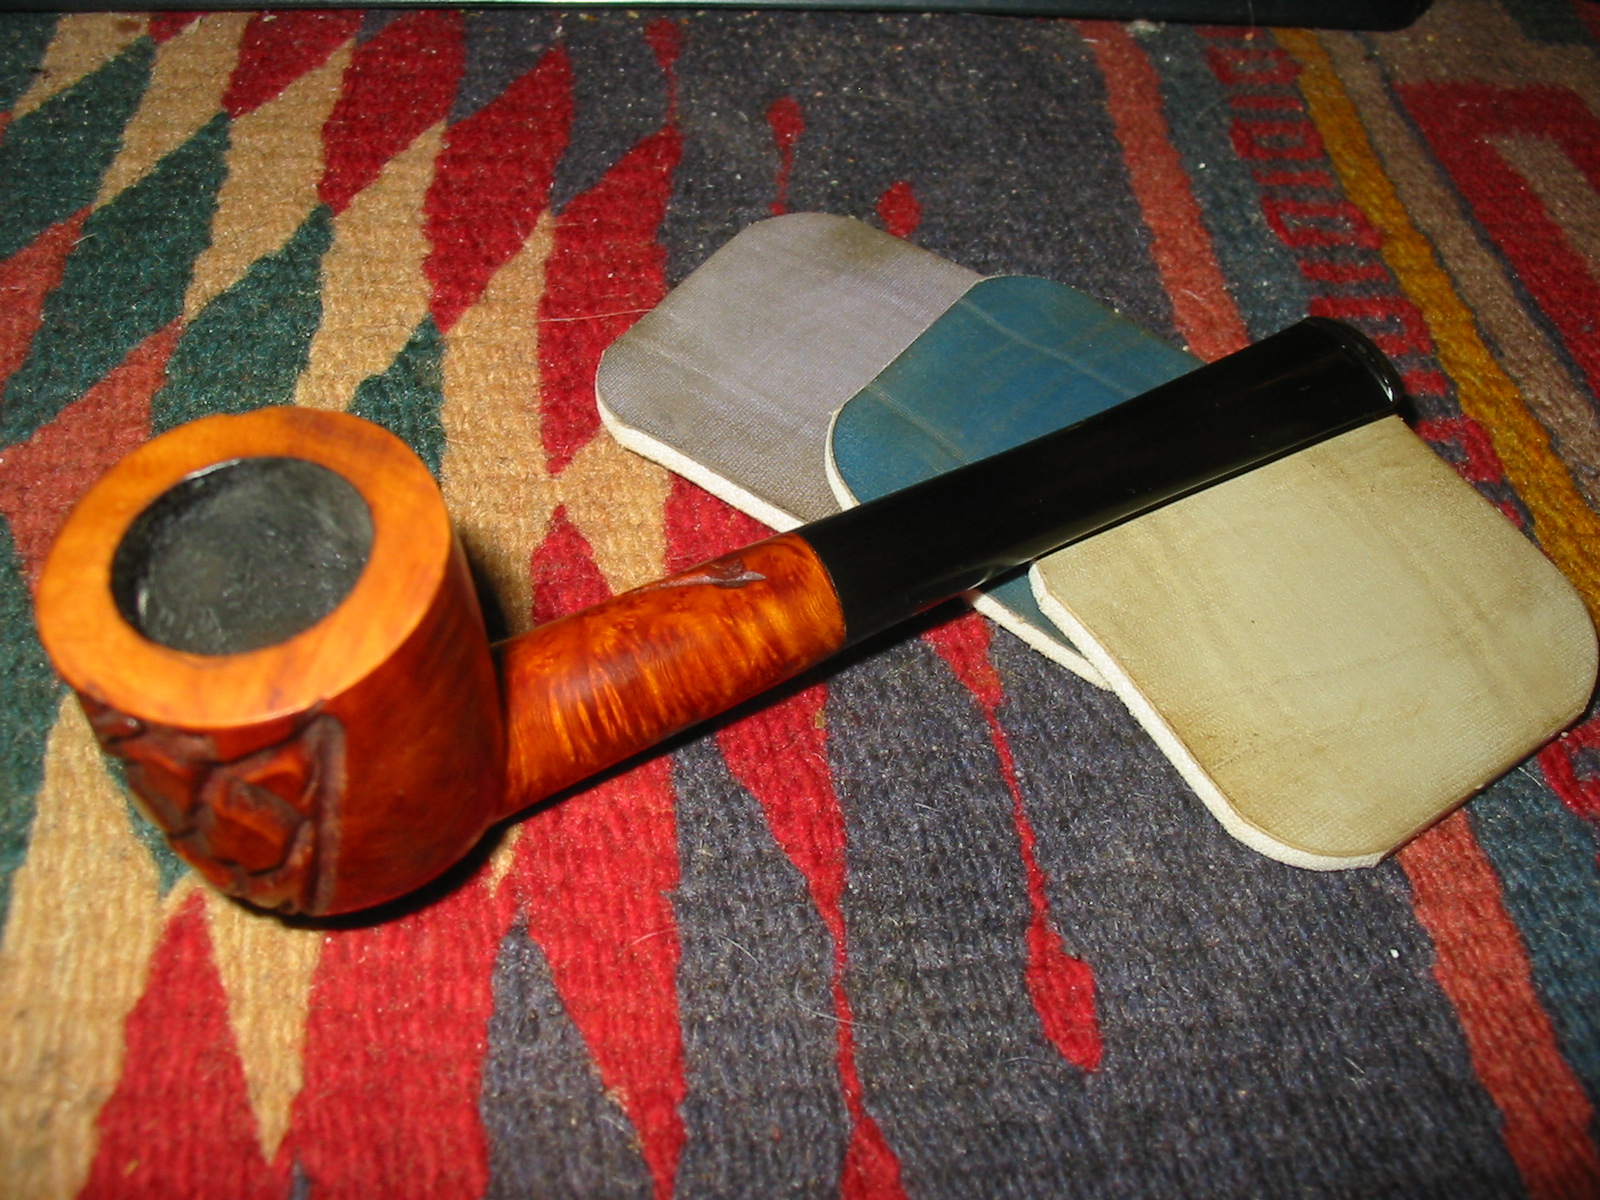
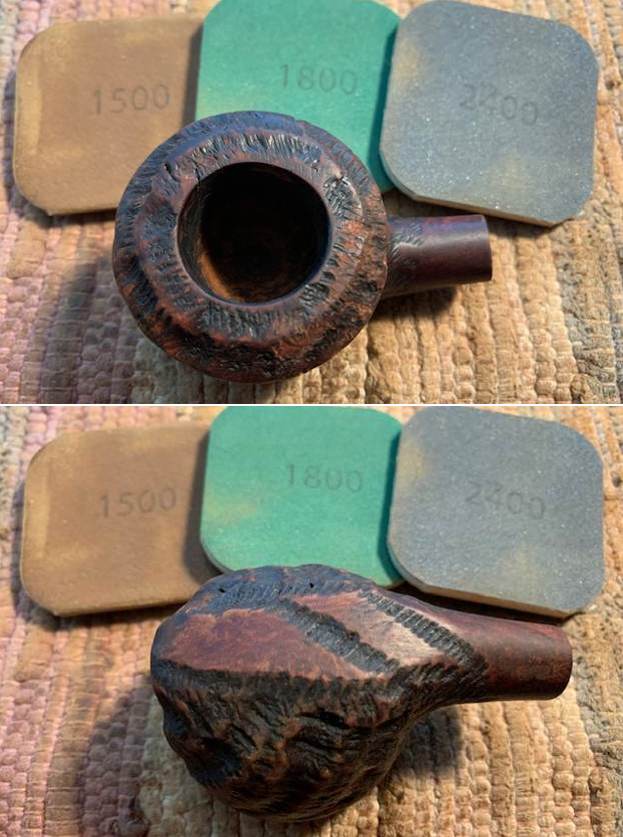
 I started my work on pipe by polishing the smooth high portions of bowl and shank with micromesh sanding pads – 1500-12000 grit pads. I wiped the bowl down between pads with a damp cloth to remove the debris.
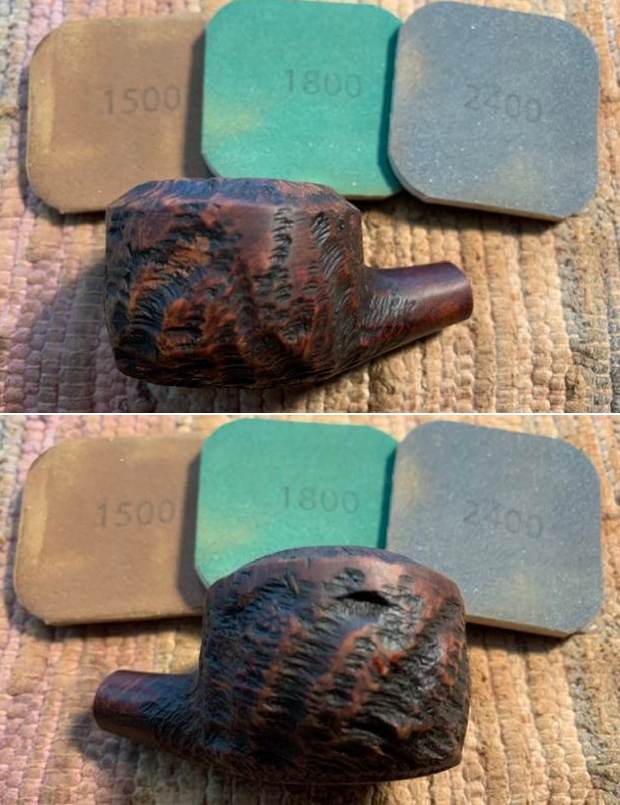


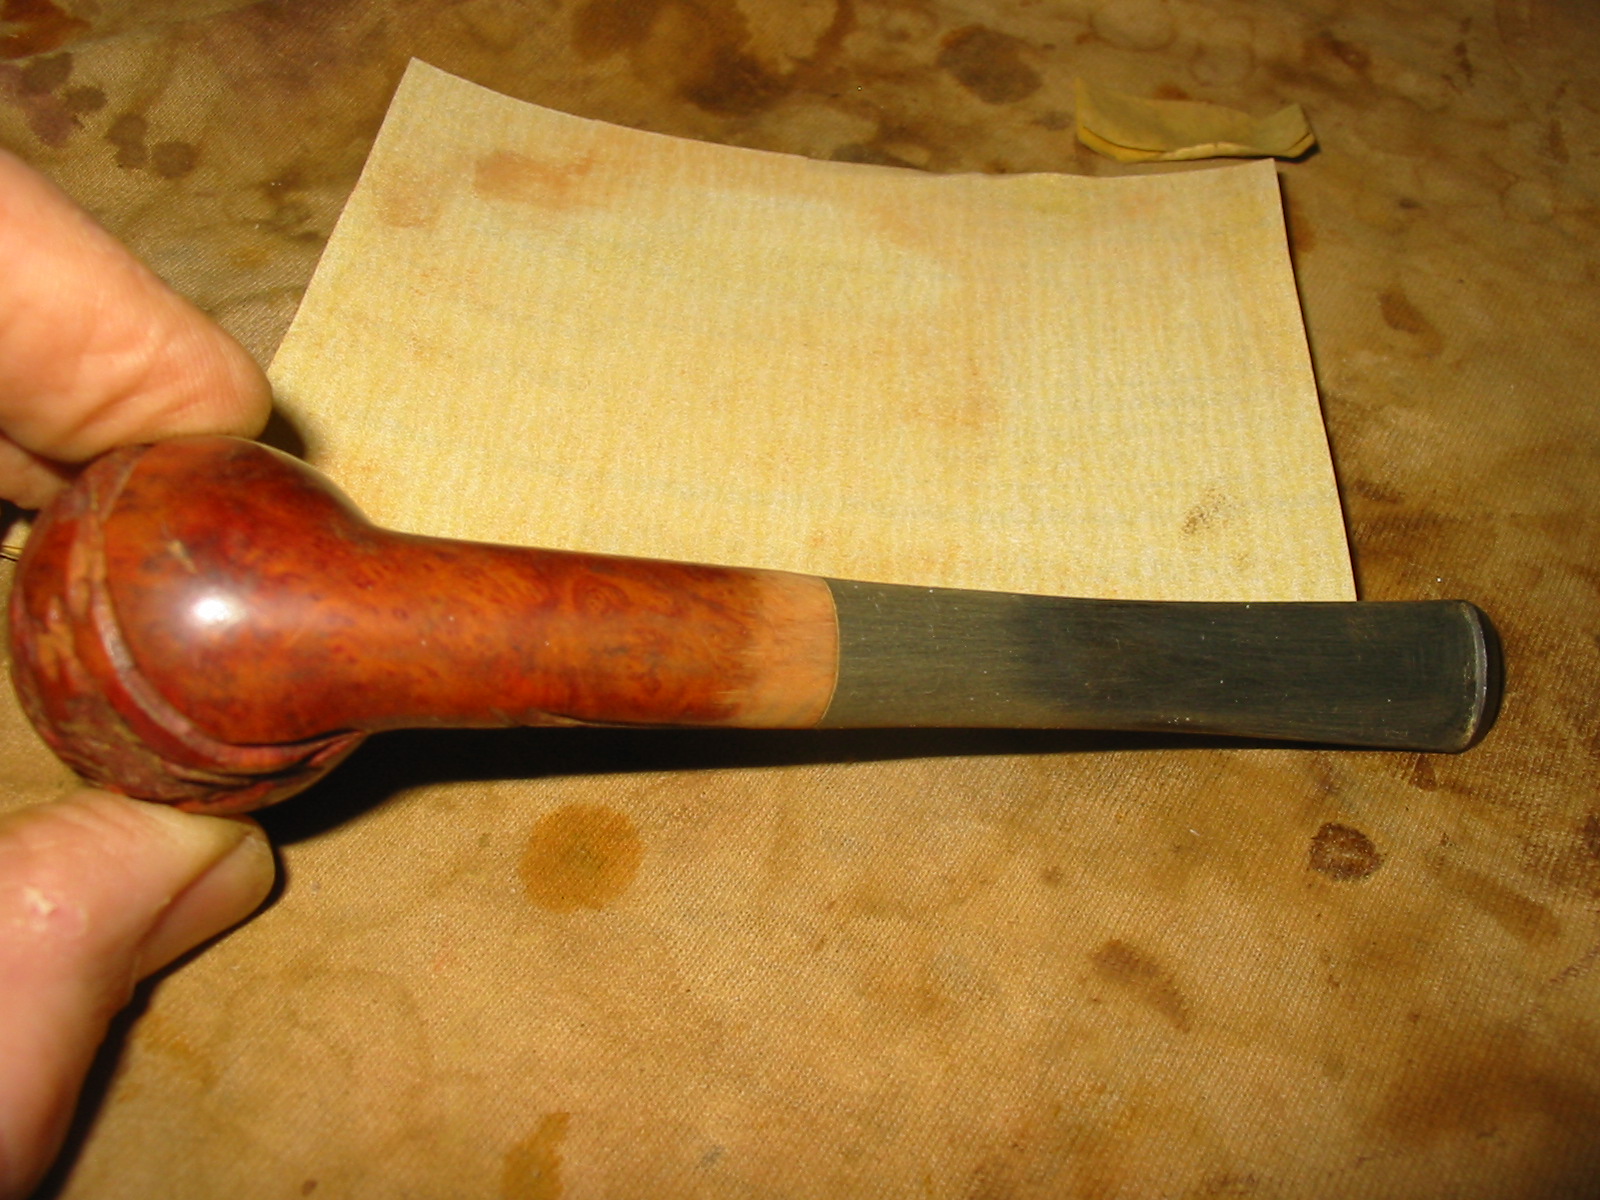
 I rubbed the bowl and shank down with Before & After Restoration Balm. I worked it into the surface of the bowl sides and shank with my fingertips to clean, enliven and protect the briar. I let the balm sit for 10 minutes, then buffed with a cotton cloth to raise the shine. The Balm did its magic and the grain stood out on the briar.
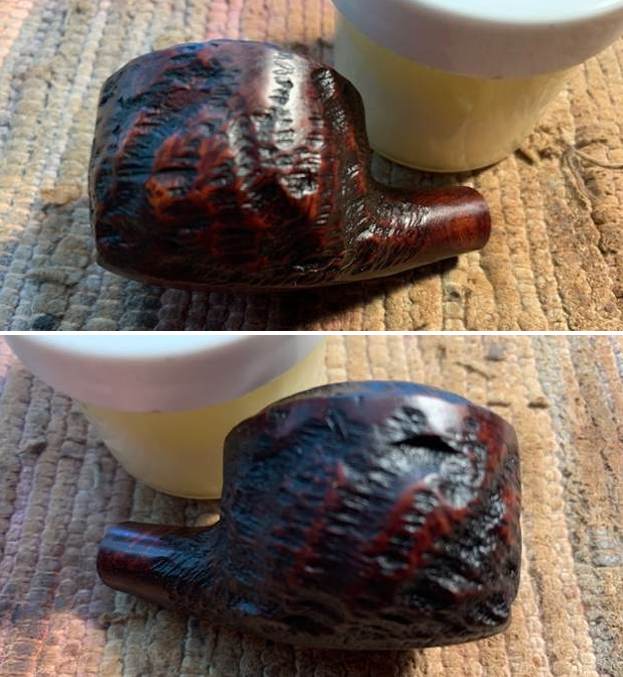
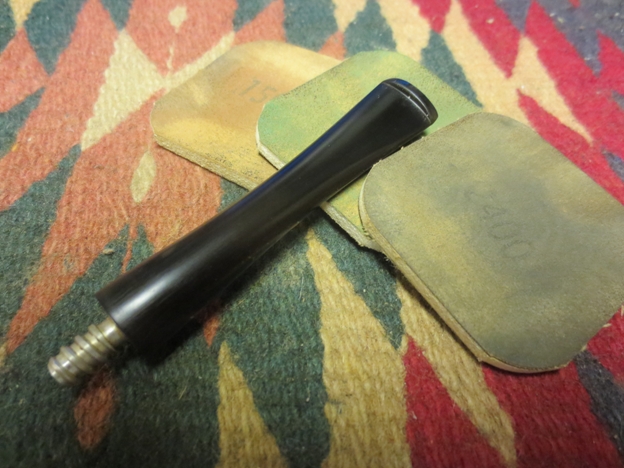
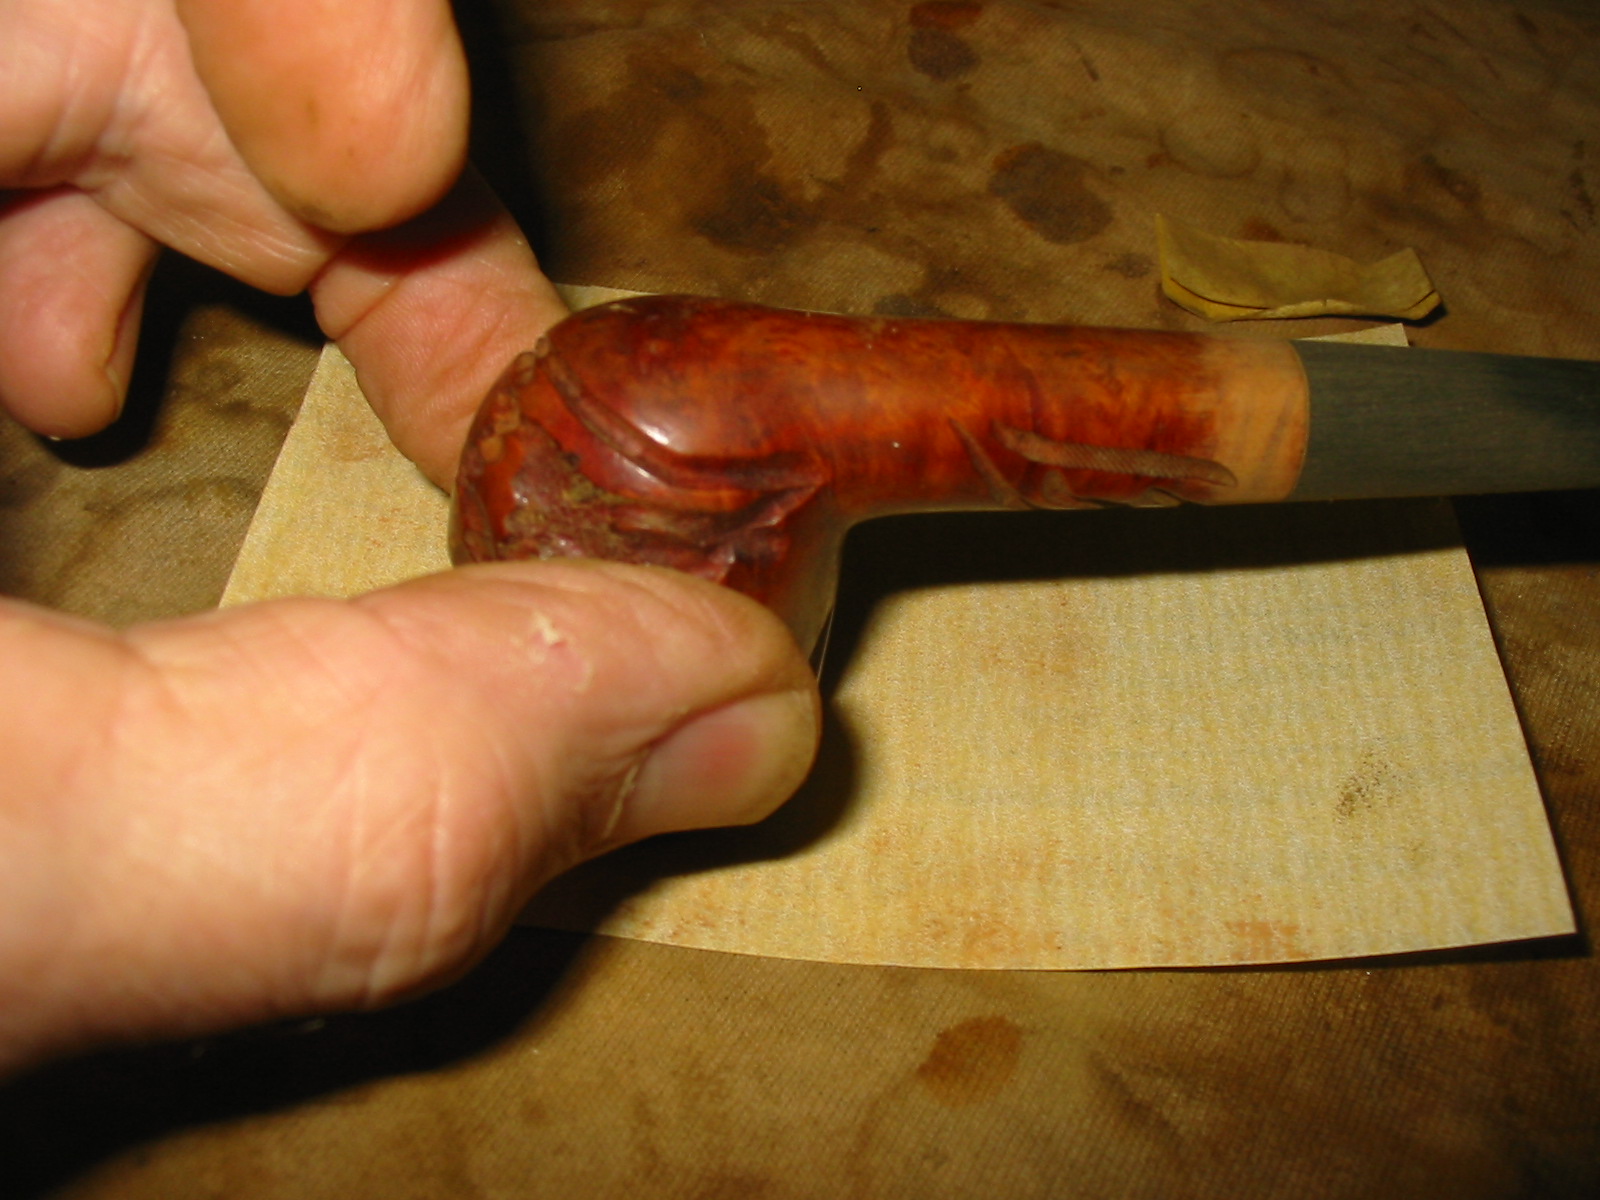
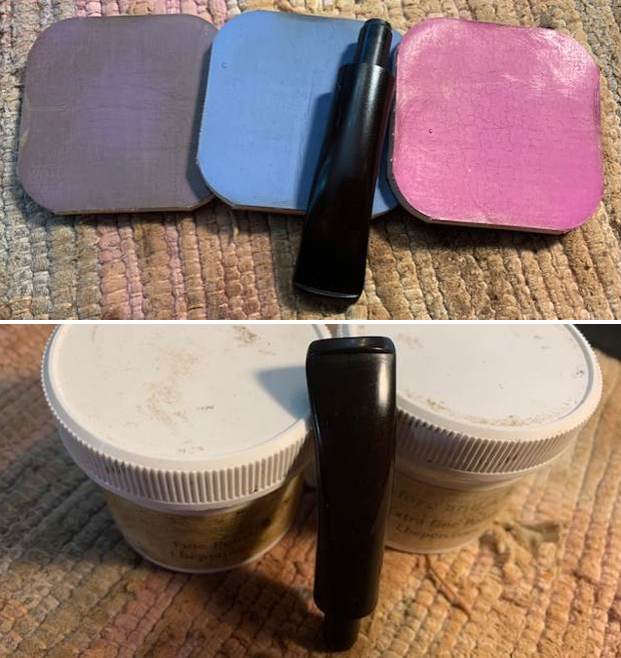
 I set the bowl aside and turned my attention to the stem. I “painted” the tooth marks with the flame of a lighter and was able to lift all of them. I sanded out the remaining chatter with a folded piece of 220 grit sandpaper and then started polishing it with 400 grit wet dry sandpaper.
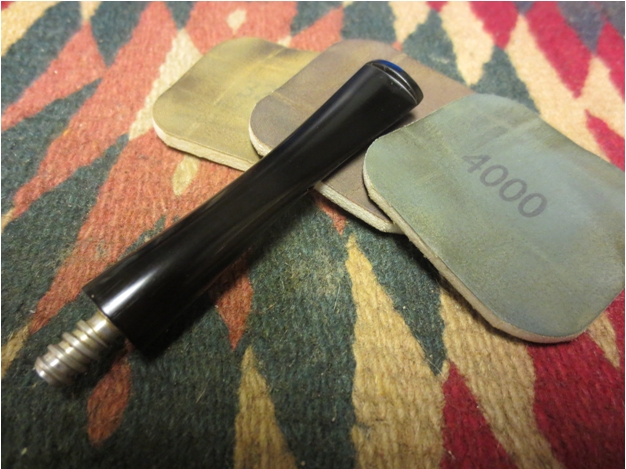
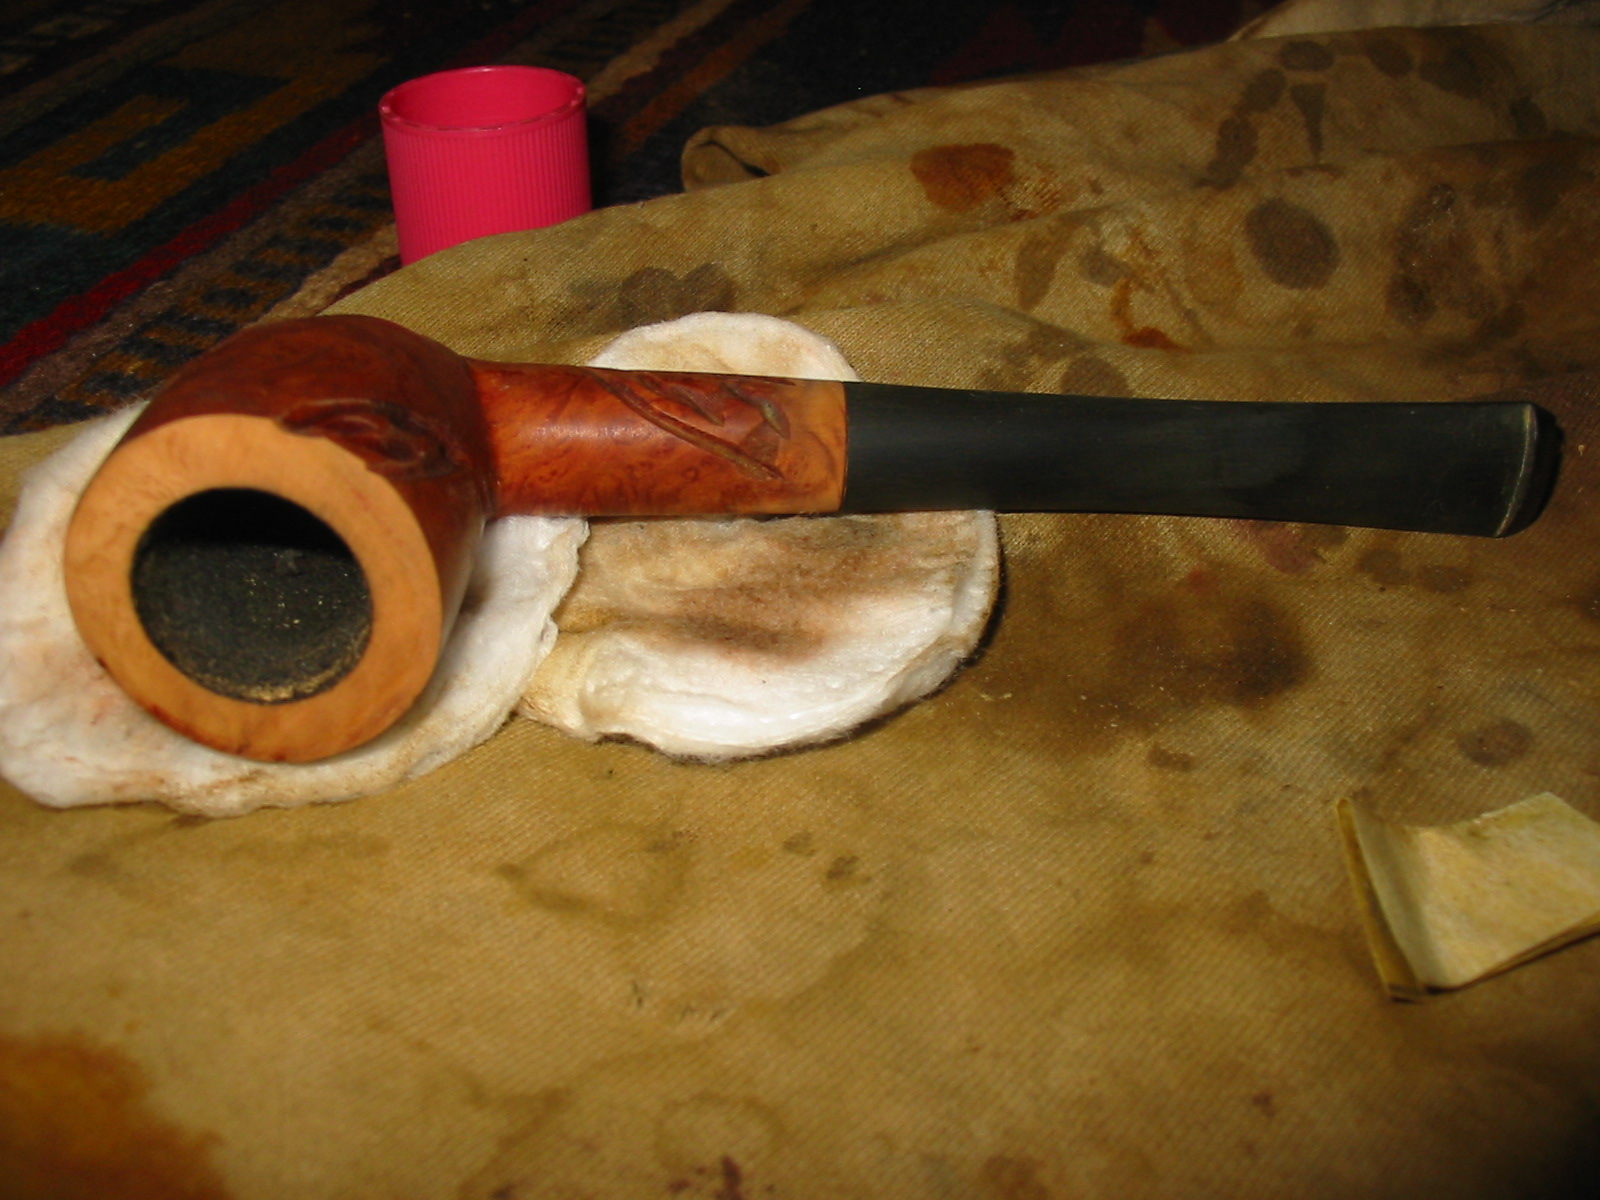
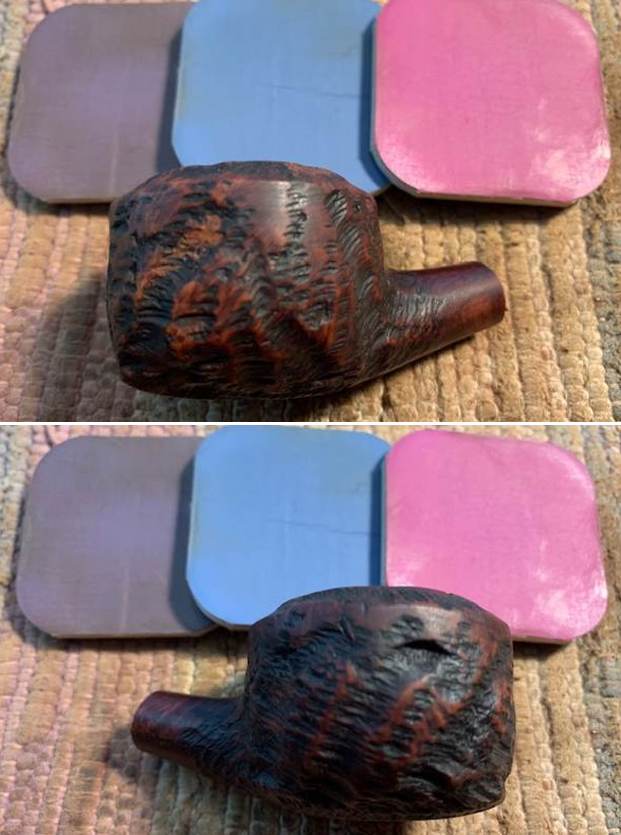
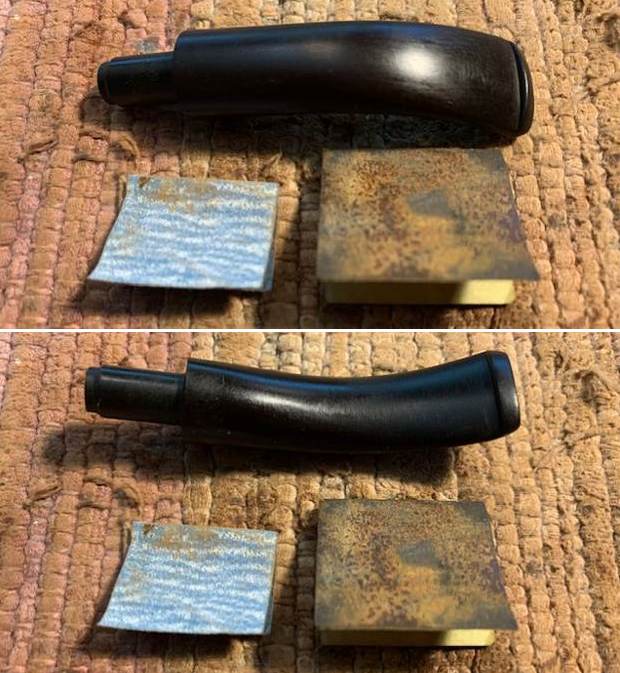 I polished the stem with micromesh sanding pads – 1500-12000 grit pads. I wiped it down with Obsidian Oil after each sanding pad. I finished the polishing with Before & After Polishes – both Fine and Extra Fine. I gave it a final rub down with Obsidian Oil and set it aside to dry.
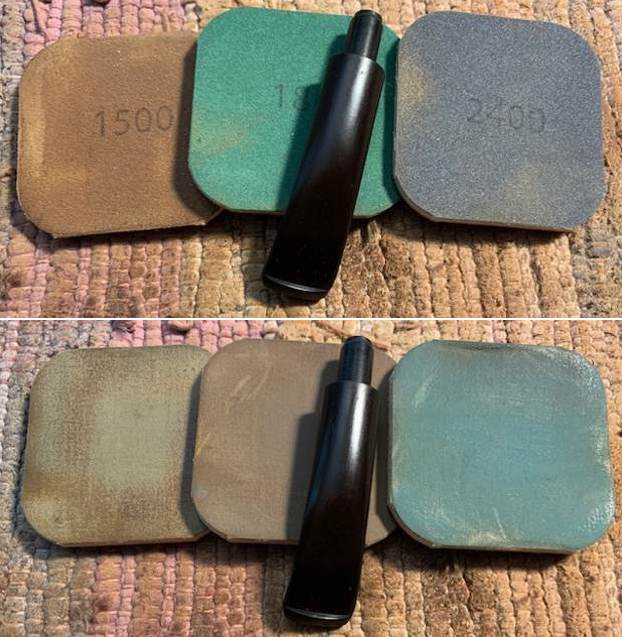
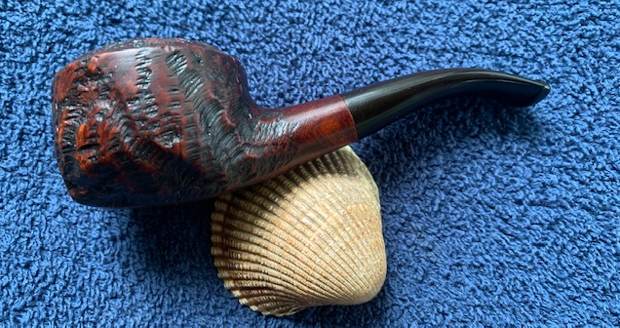
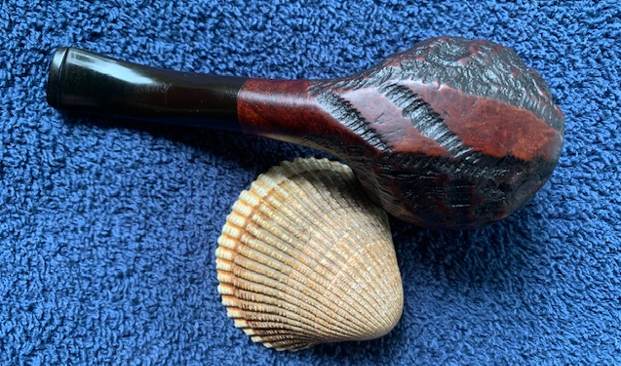
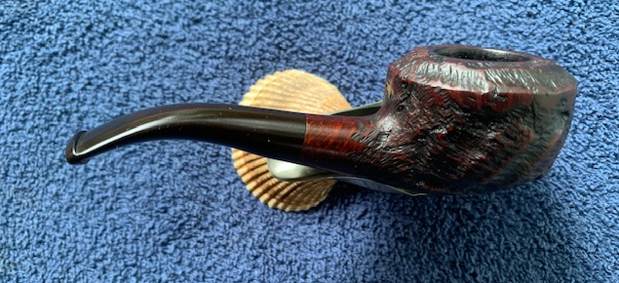
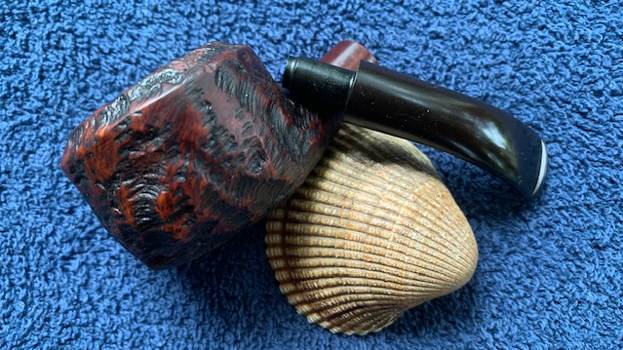
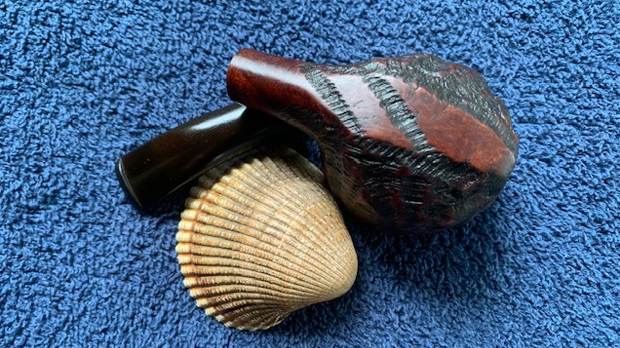
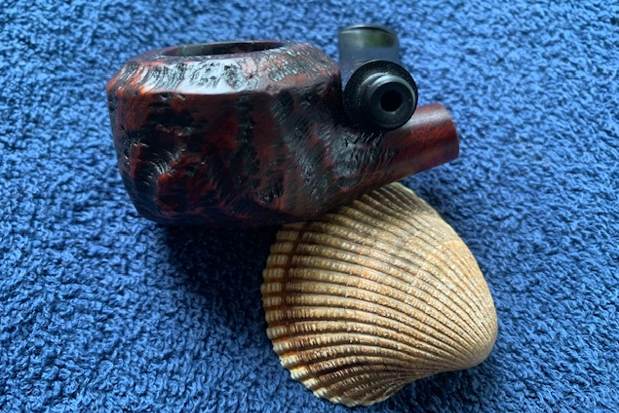
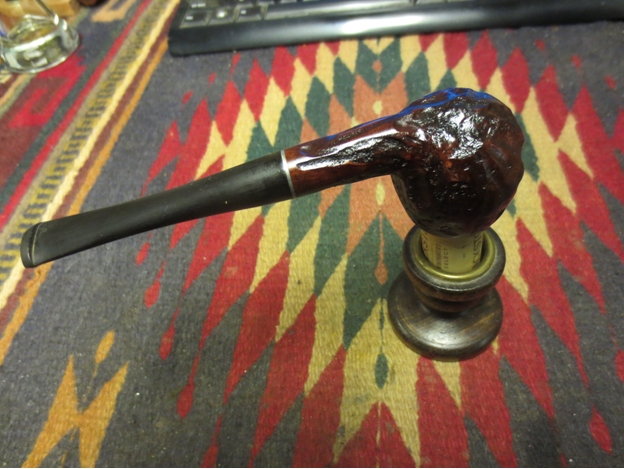
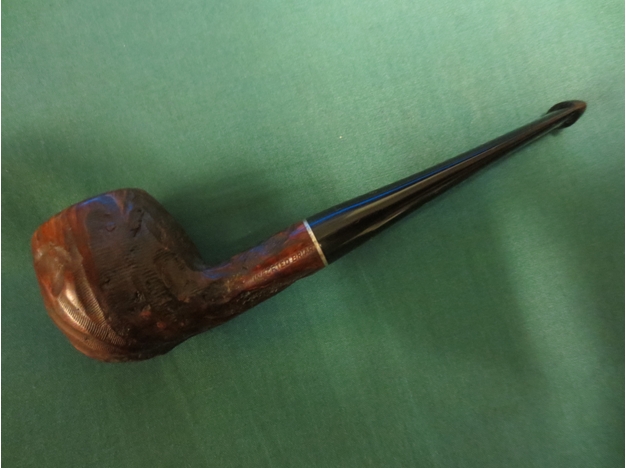
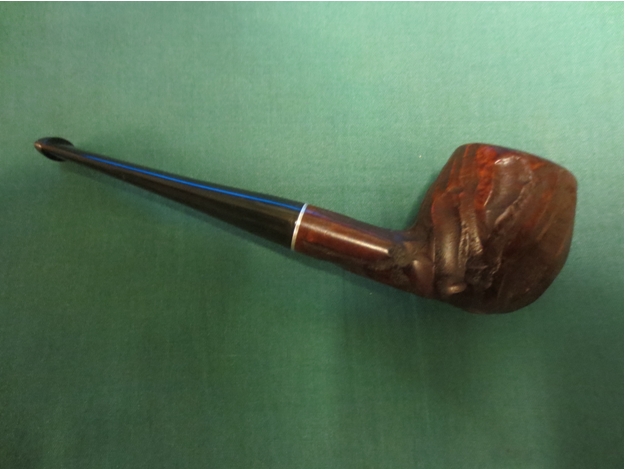
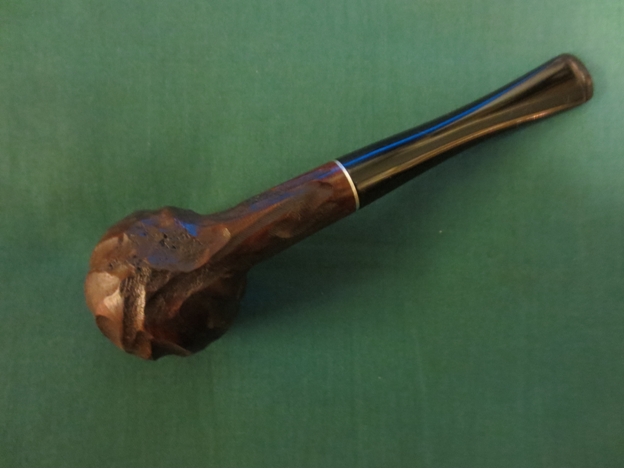
 This IMPORTED BRIAR Scoop/Bullmoose Nose Warmer with a vulcanite taper stem has a rustication reminiscent of a Custom-Bilt pipe. The rich browns and blacks of the contrasting stain makes the grain come alive with the polishing and waxing. I put the stem back on the bowl and carefully buffed the pipe with Blue Diamond on the buffing wheel using a light touch on the briar. I gave the bowl and the stem multiple coats of carnauba wax on the buffing wheel and followed that by buffing the entire pipe with a clean buffing pad. I hand buffed the pipe with a microfiber cloth to deepen the shine. The finished IMPORTED BRIAR BULLMOOSE really is unique looking and fits nicely in the hand and looks very good. Give the finished pipe a look in the photos below. The dimensions of the pipe are Length: 4 ¾ inches, Height: 1 ½ inches, Outside diameter of the bowl: 1 ¾ inches, Chamber diameter: ¾ of an inch. The weight of the pipe is 1.48 oz./42 grams. This pipe will soon be on the American Pipe Makers Section of the rebornpipes store if you would like to add it to your collection. Thanks for reading this blog and my reflections on the pipe while I worked on it. There are many more to come!