by Kenneth Lieblich
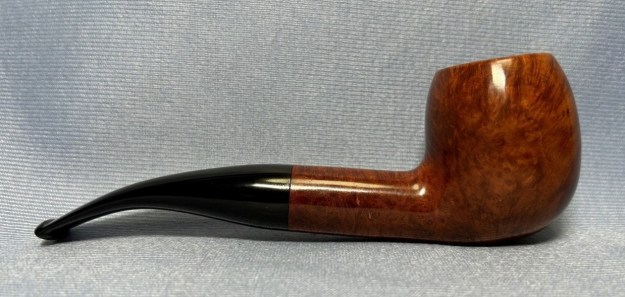
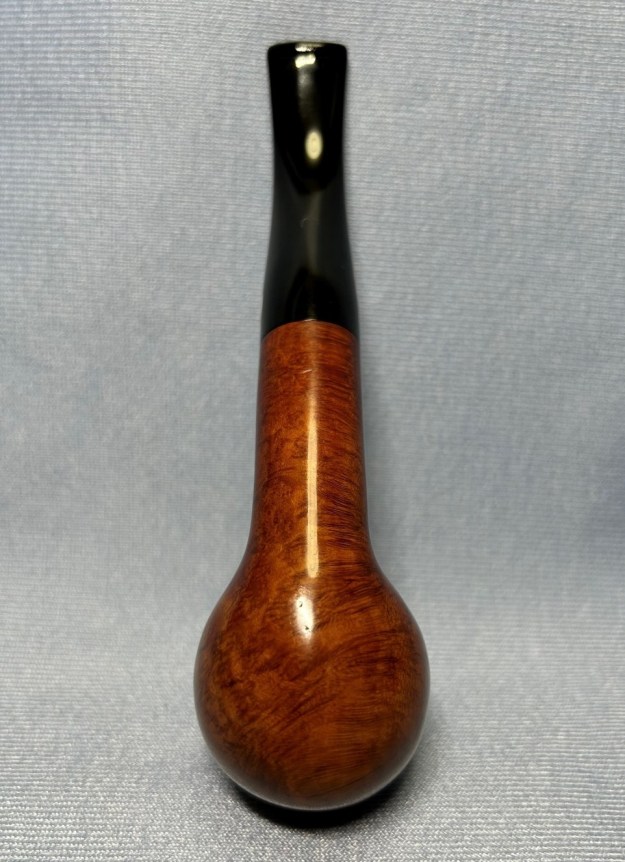
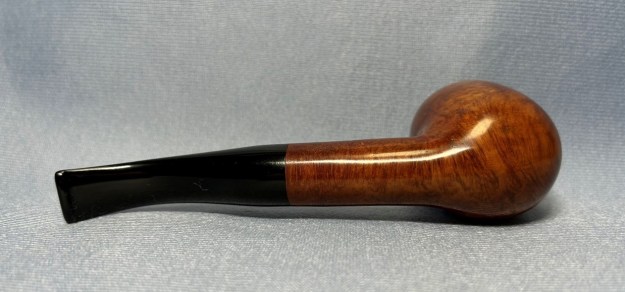
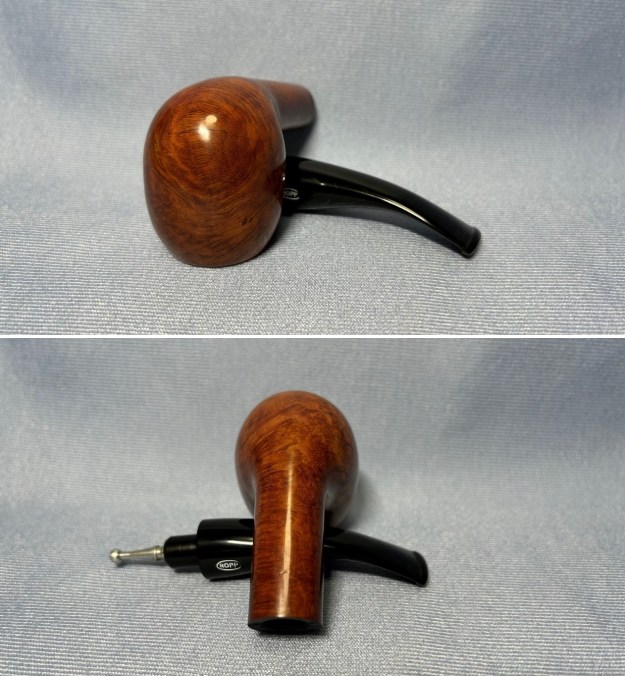
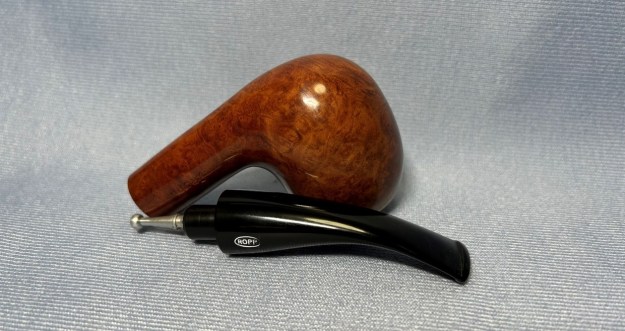
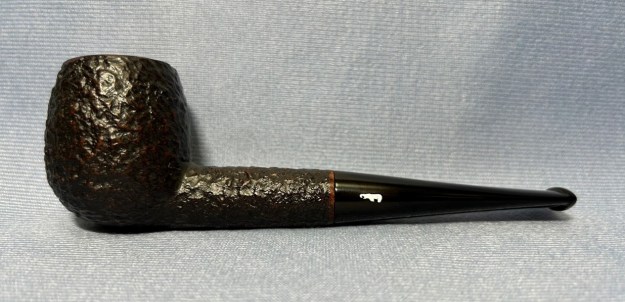
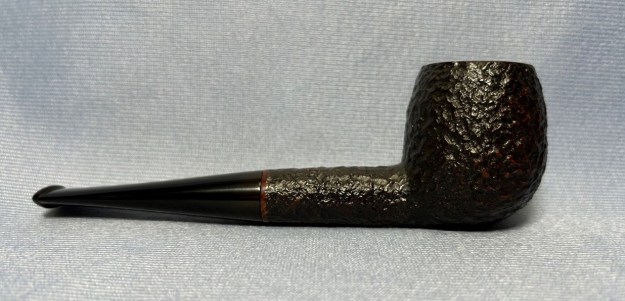
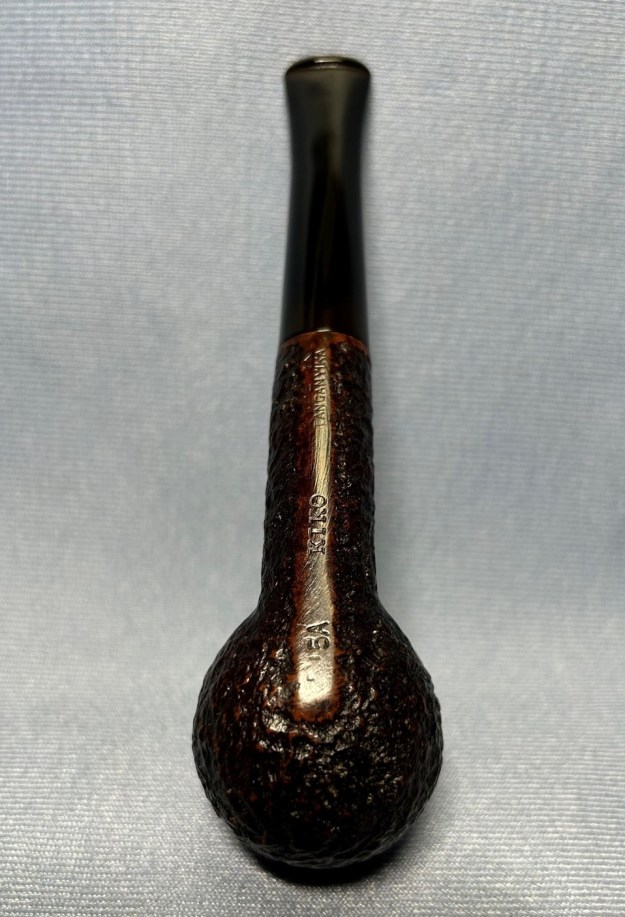
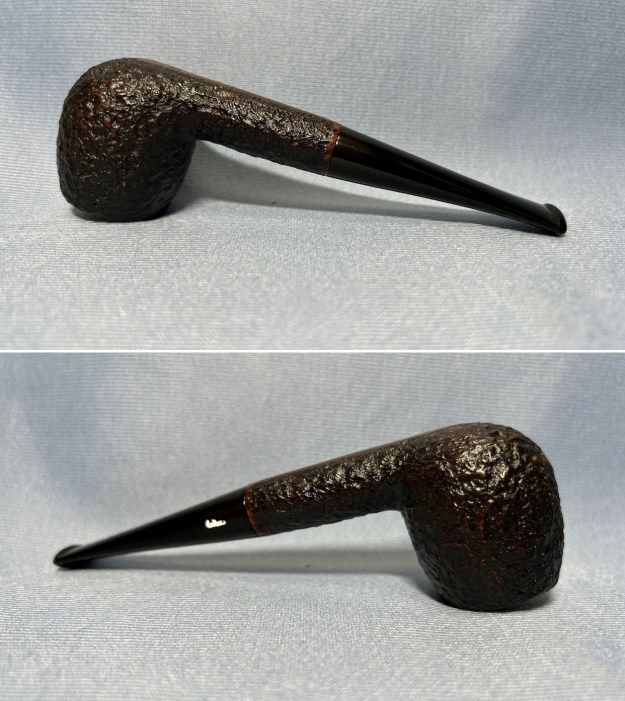
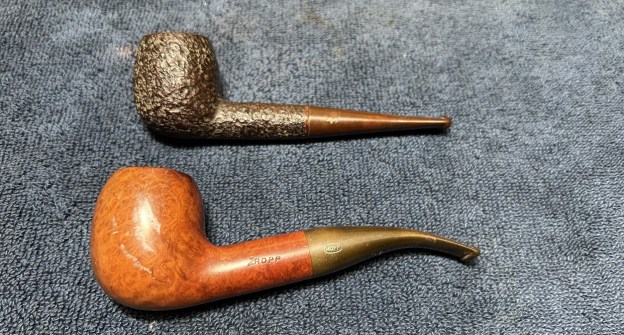
Strap yourself in – this is going to be a wild ride! My cousin-in-law likes to send me pipe projects that are a little off the beaten track. They also usually end up being quite tricky and this one is no exception. He sent me two meerschaum-lined pipes that have been badly damaged and require repair. One pipe is a Kiko, from Tanganyika in eastern Africa, and the other is from Ropp, the venerable pipe-maker of St Claude, France.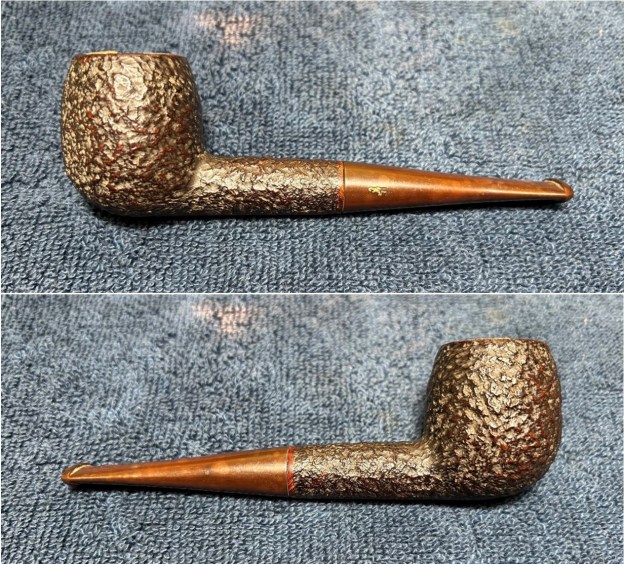

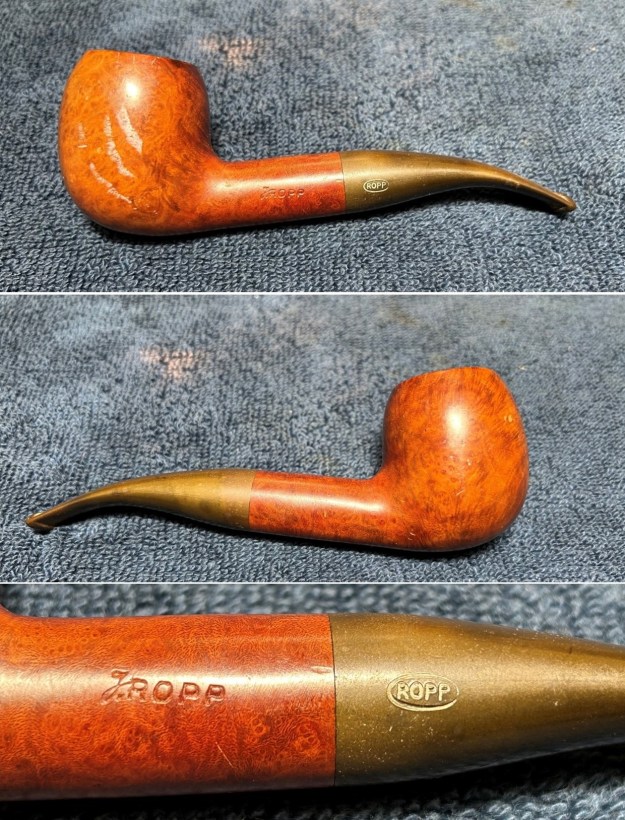 Although the briar exteriors are fine, the meerschaum interiors of the bowls are a complete disaster. The Kiko looks as though it’s probably been dropped at some point. Meerschaum is quite fragile, so no wonder it cracked so badly. The Ropp is equally bad, but I think that’s because it was badly reamed rather than dropped. Who knows and, quite frankly, the answer is of academic interest. They both suffered from having a cake which is not a good idea for meerschaum.
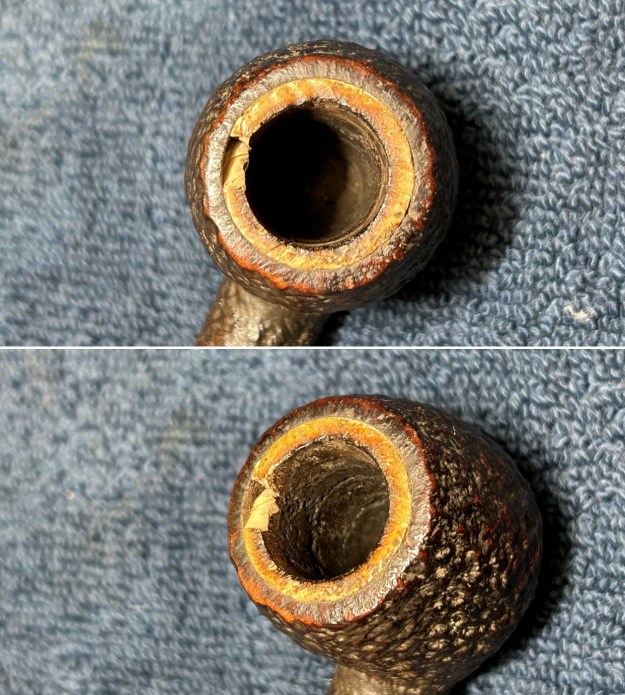
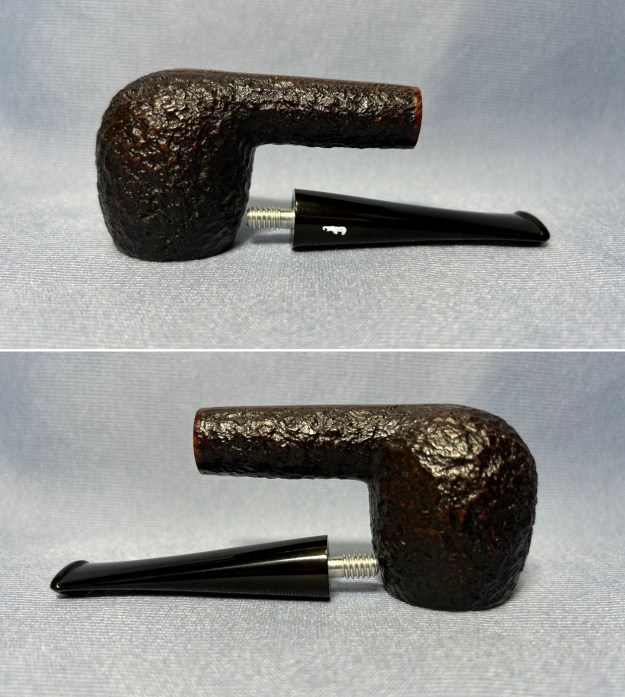
 I subjected these pipes to my usual cleaning procedures – for both stem and stummel – but I’m going to gloss over those details today. To be clear, both stems were deoxidized, repaired, sanded, and polished. In addition, the briar parts of the stummels were thoroughly cleaned, sanded, and polished too. I also did a thorough, but exceptionally careful, cleaning of the insides. I needed to remove as much filth as possible, but liquids like water, alcohol, etc., don’t do well with meer. As an aside, the Ropp had a substantial crack in the briar and this only added to the complexity of the repairs.
 In this blog post, I’m skipping writing about the usual stuff in order to focus on the major issue with these pipes – the busted meerschaum lining and how to fix it. In consulting with Steve, he mentioned a post on a blog from a few years ago that talked about repairing this very thing. The blog is called ‘Baccy Pipes’ and the fellow’s name is Troy W. I want to give him full credit for starting me on my research for this job. Here’s the link to his repair: https://baccypipes.wordpress.com/2017/06/10/old-time-meer-lining-repair-method-on-a-1930s-kaywoodie-shellcraft-5651/. The curious thing about this repair was that Troy used a mixture of egg white and chalk to mend the broken meerschaum. As he writes:
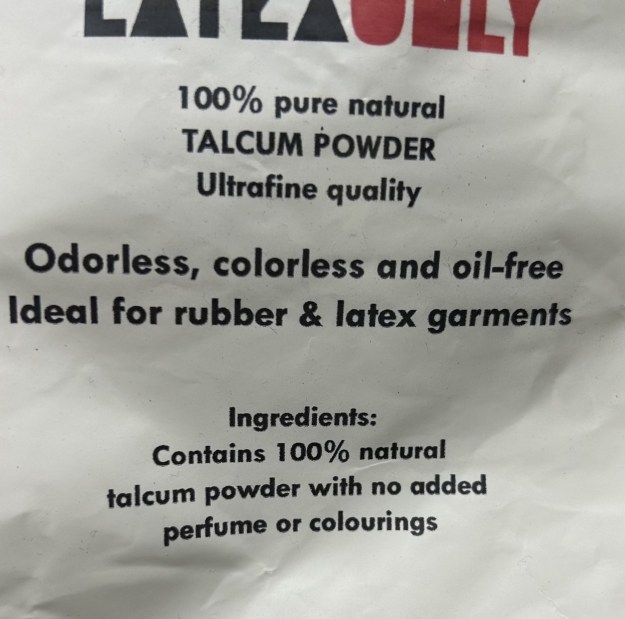
I had read and heard from other pipe restores that a old late 19th-early 20th century druggist recipe for fixing broken meerschaum was egg whites and finely ground chalk, so that was what I was going to try and fix the meer lined rim with. It is said to have about the same porous properties of meerschaum and imparts no taste to the tobacco. I was immediately intrigued and my brain began to ruminate on this. In the past, Steve and I have both used plaster of Paris when repairing meer-lined bowls. What about egg and chalk? Putting together the ingredients would be no problem: chalk, that is to say, calcium carbonate is easy to acquire. And then a thought struck me – I wonder if I could do an experiment on the properties of both calcium carbonate and a product that’s much closer to meerschaum in composition. Meerschaum is a type of magnesium silicate – and so is talc. They are not identical substances, but surely closer than chalk. If I could buy some pure, unadulterated talc, that might prove to be a good option. Well, it turns out that getting pure talc with absolutely nothing else in it was not as easy as I thought. I did eventually find a small package for sale on Amazon and it ended up being shipped from Germany (no idea why) to my home on the west coast of Canada.
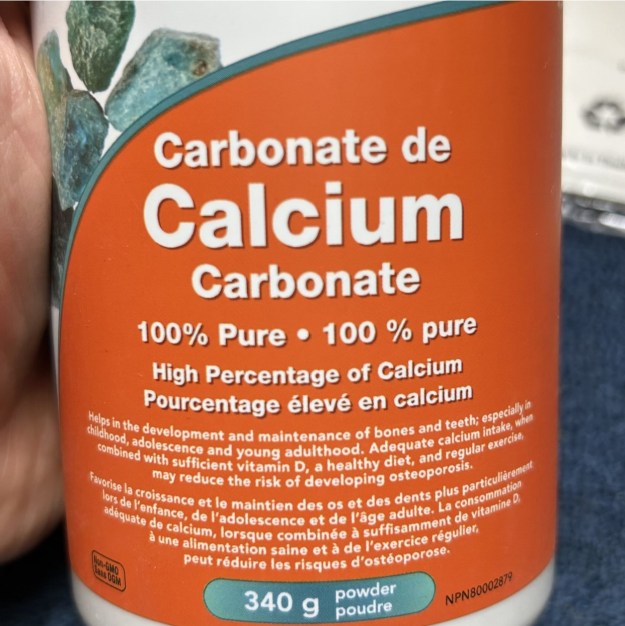
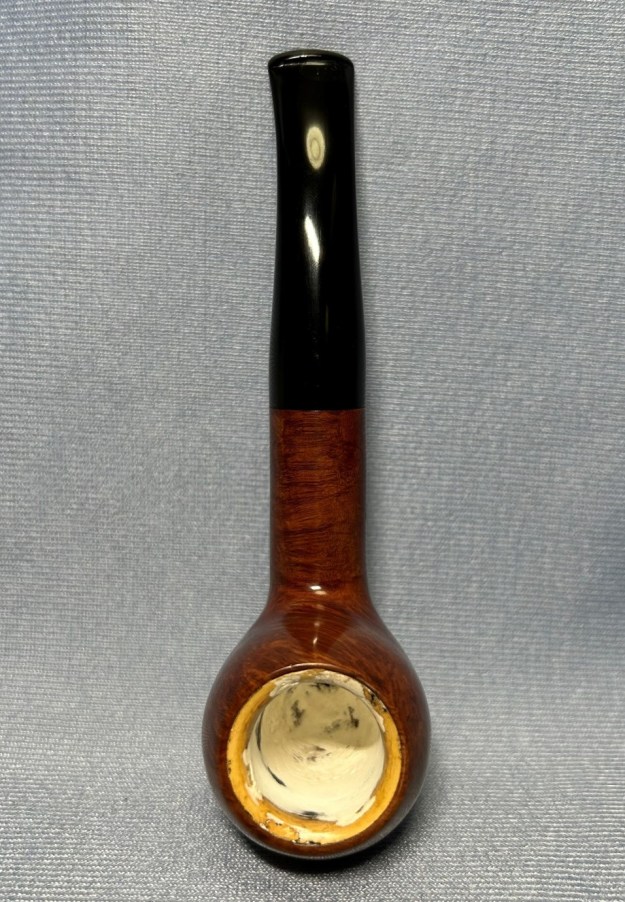
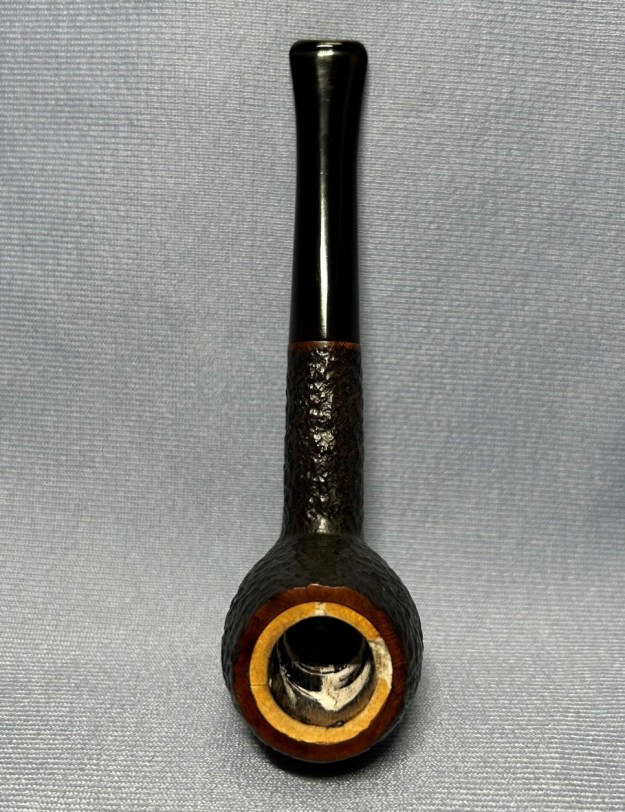
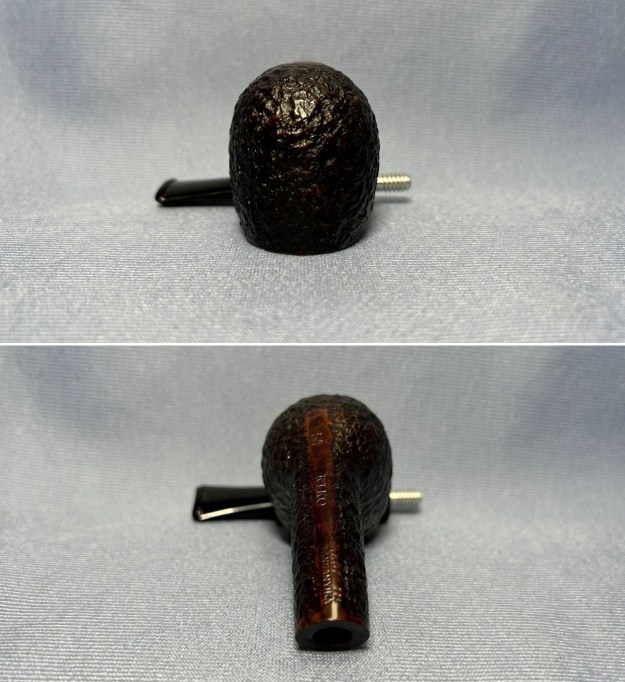
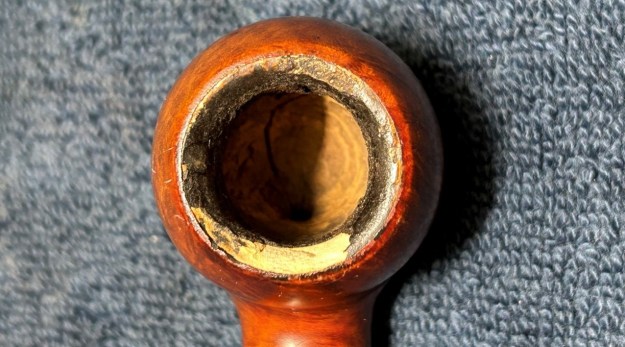
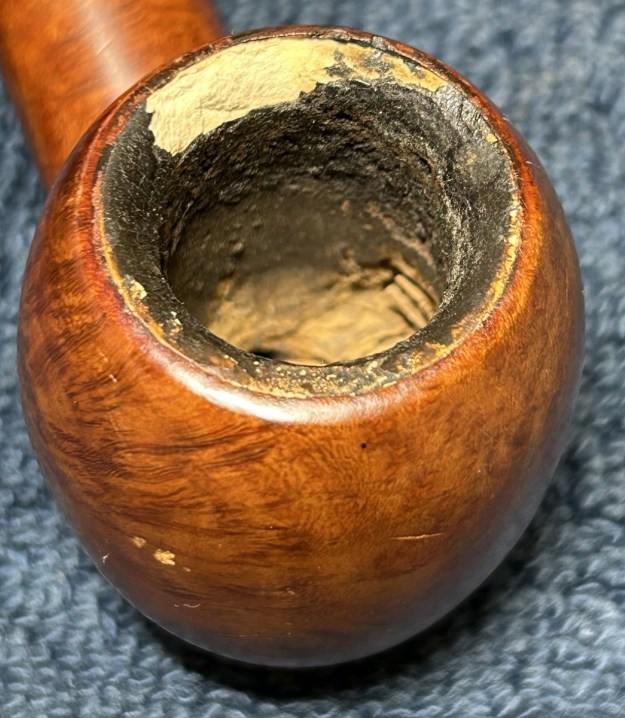
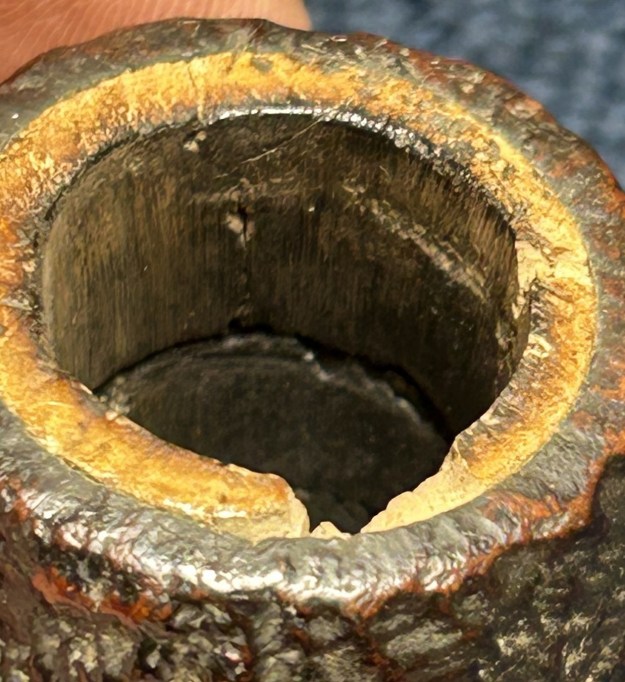
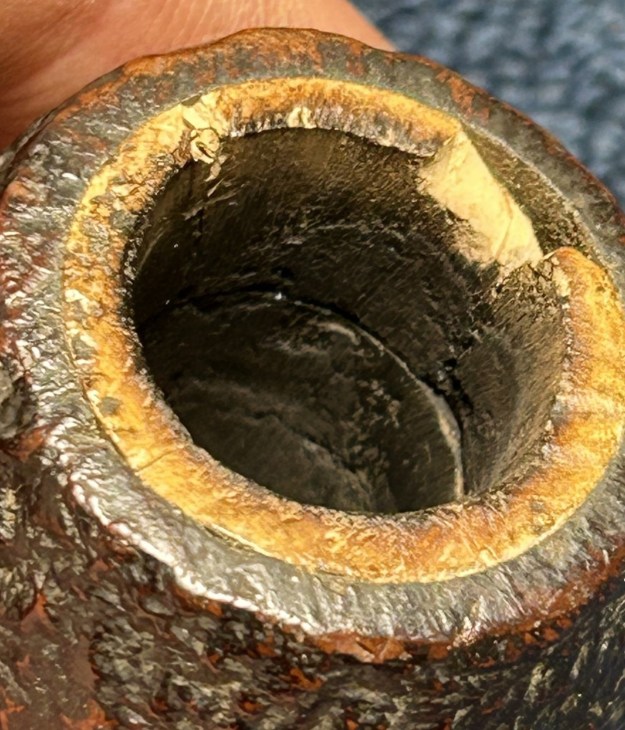
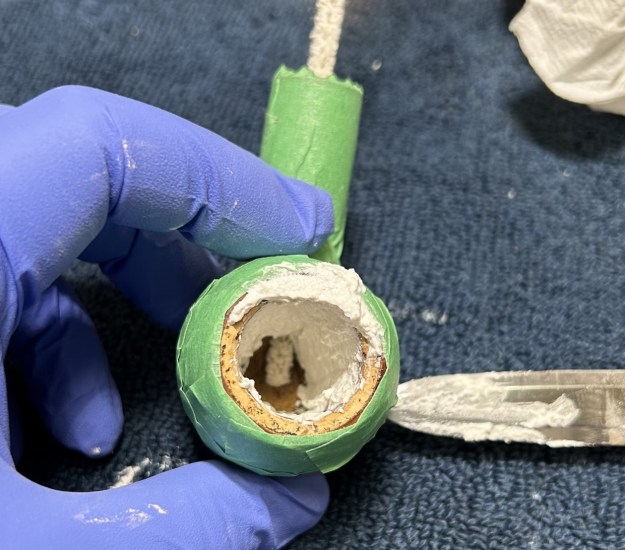
 Let’s have a quick look at the insides of the two bowls, because they have different problems and very different sized apertures. The Ropp had the much larger bowl, and its insides were more damaged at the bottom. There was a surprising amount of meerschaum missing at the bottom and it is difficult to convey this in photos. However, the photos do clearly show the large chuck missing from the rim. I suspected that, although the width of the bowl meant it would be easier to access, it would require the most work and be the most difficult to repair satisfactorily.
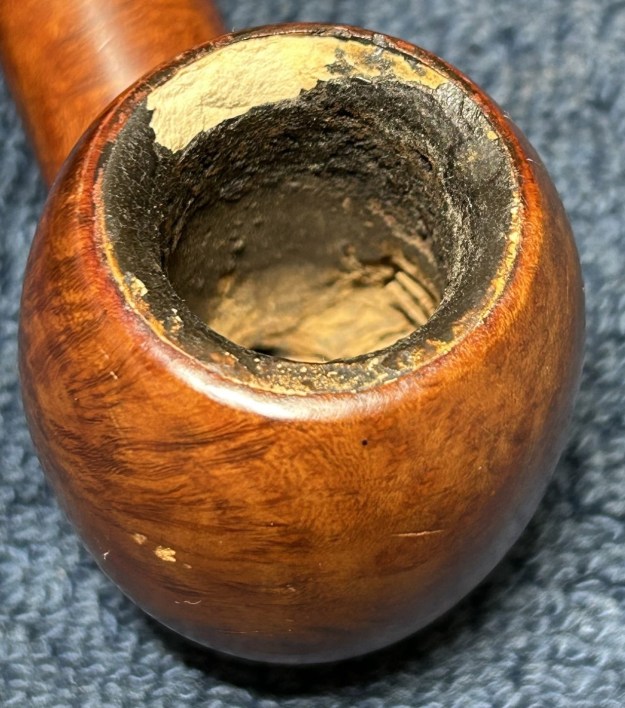
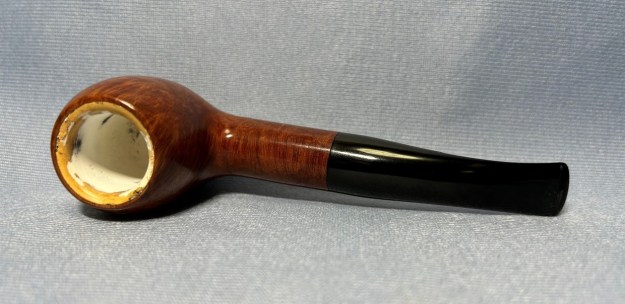
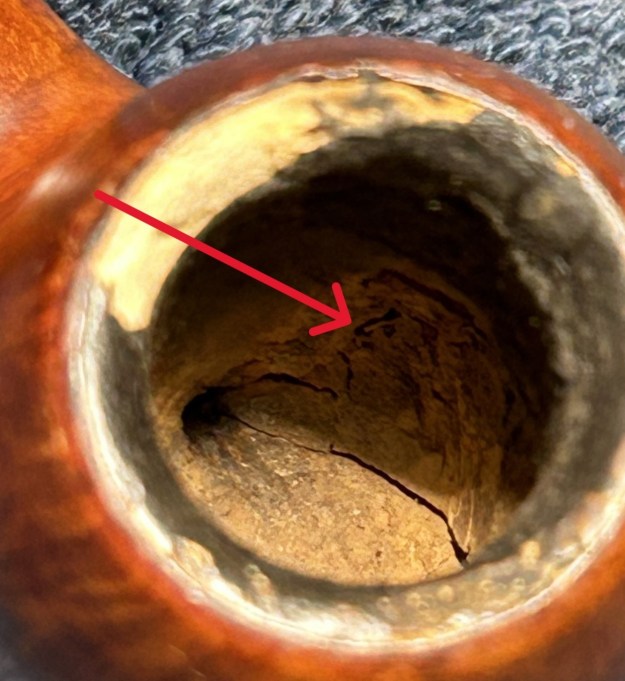 The Kiko had its own set of problems. There were also missing chunks on the rim, but the cracks inside were devastating. The width of the bowl meant that I could get nothing larger than my pinky finger inside. A small piece of broken meerschaum fell out from one of the cracks while I was inspecting it. That didn’t bode well.
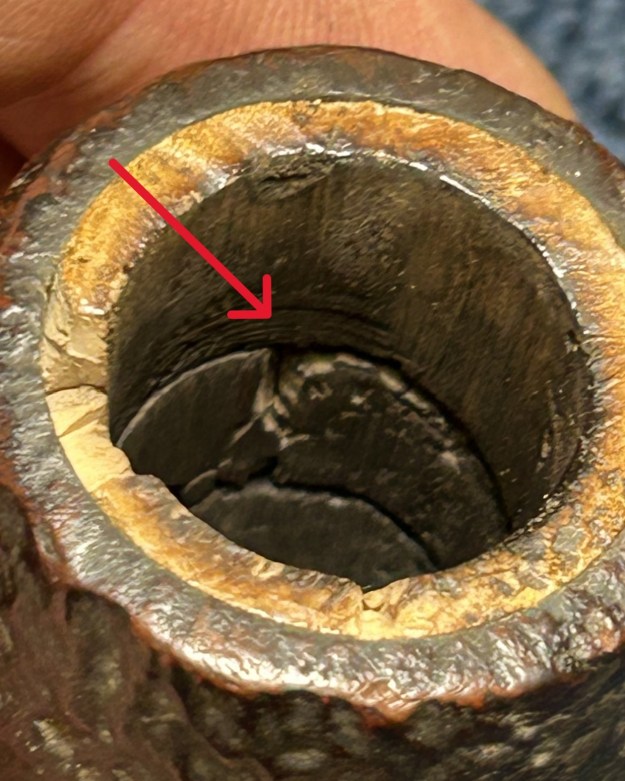
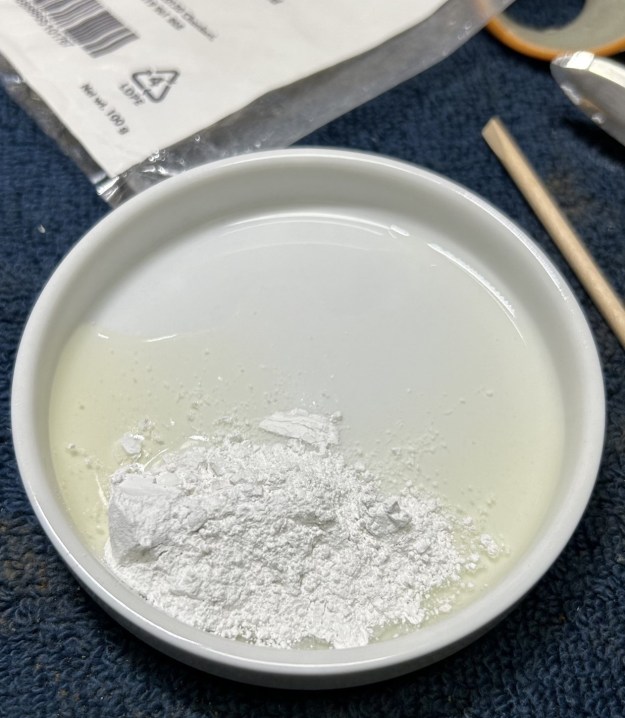
 Now let’s start cracking some egg! Obviously, I took two dishes and mixed up a batch of chalk and egg white in one and talc and egg white in the other. Both materials were powdered, so I had no concerns about overly large particles in either mixture. During mixing, the talc seemed grittier than the chalk, but it was difficult to assess this properly and difficult to know how much to mix into the egg white. I put the two blobs on a piece of cardboard for a couple of days and let them set.
 Once dry, I conducted my own absurdly unscientific compressive strength test on both materials as a way of determining straight away if one material was clearly superior to the other. There wasn’t any obvious difference – and any differences I may have detected could easily have been a figment of my imagination. Both materials seemed about equal. I opted to try the talc first – for no other reason than it was chemically closer to meerschaum.
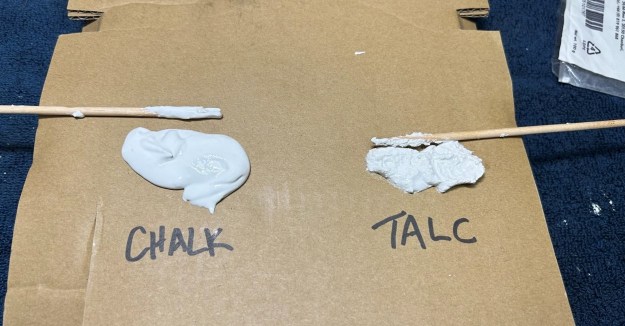 I took both stummels and wrapped all of the wood in painter’s tape. I had nightmarish visions of what could happen to these pipes if I got the eggy goo on them. Better safe than sorry.
 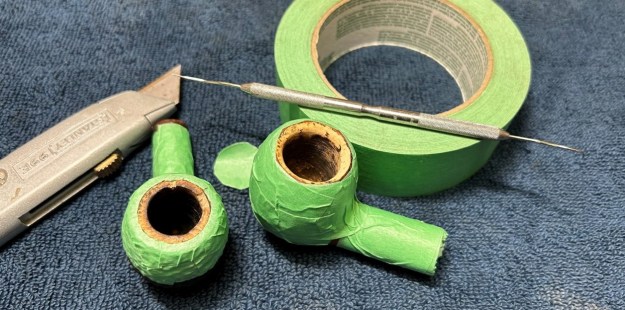 I started applying the egg/talc mixture to the Kiko first. I wanted to make sure than the cavernous cracks were completely filled with the stuff. I needed a good bond and I added more than I needed – assuming there would be some shrinkage in the drying process. Similarly, I smooshed the mix on the Ropp too, hoping for the best.
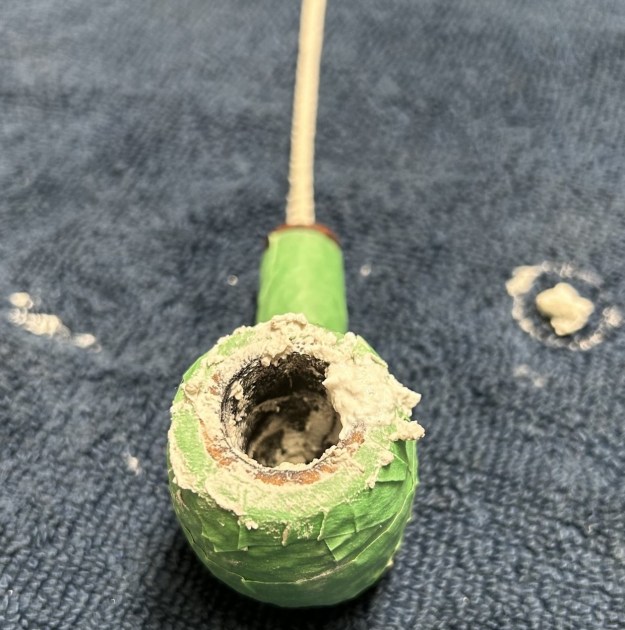
 There’s no way to sugarcoat this: the whole process was a mess. Really a mess. Once the pipes had dried overnight, I took a look and I wasn’t particularly impressed with my work. But a more detailed examination was needed, so I put on a sanding mask and set about removing the excess material. I used sandpapers of various grits on dowels, sandpapers on my fingers, and sandpapers on my topping board. Hmm. The results were ok, but no better than that – and ‘ok’ just isn’t good enough for me.
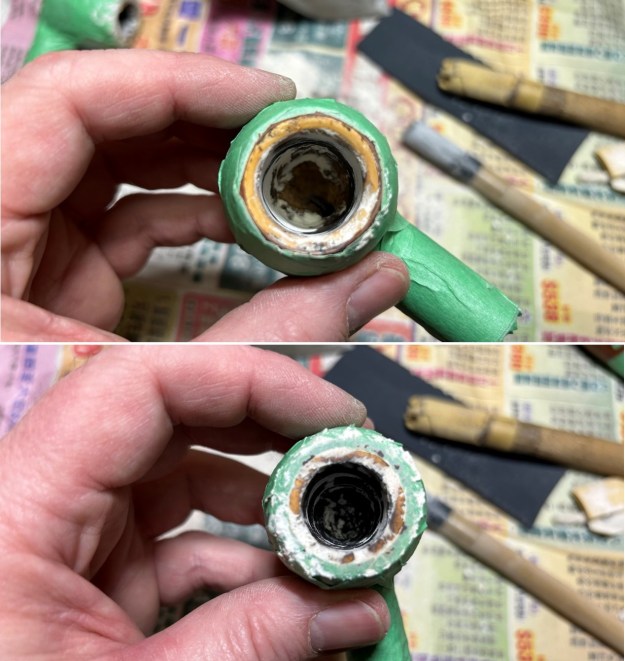 I hadn’t put enough material inside the Ropp – there were still areas that needed to be built up. I also felt that the material on the rims of both pipes was just too brittle – especially on the Kiko. Perhaps I was wrong to try talc.
 Round two. This time I repeated the entire process with egg white and chalk. Old boys in days of yore used it, so why not me? I won’t bore you by rewriting the same slathering and sanding process as above, but, the chalk mixture yielded no better results than the talc. The extra layer of goo was good insofar as it added more protection to the walls – but the results may have been the same if I’d added more talc. Sadly, the chalk did not seem to improve the frangibility of the rim.
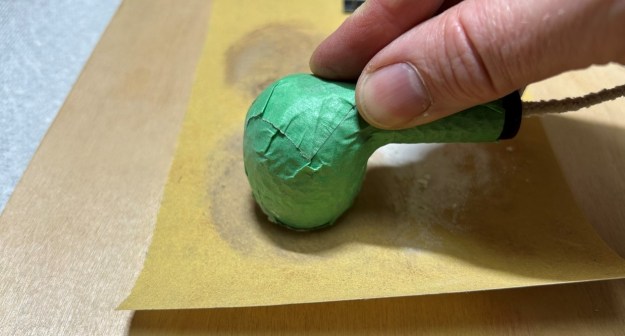 Round three. More slathering and sanding. I added a bit more egg/chalk mixture to bulk up areas that needed it and I hoped that perhaps the rim would somehow magically be improved.
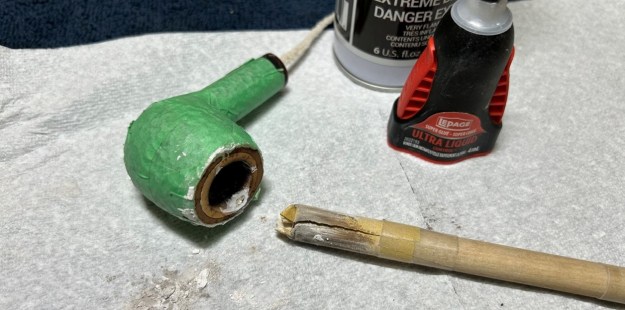 Round four – yes round four. This time – a slight change. I opted to return to the material that Steve and I have both used successfully in the past – plaster of Paris. This was not a complete redo, as before, but merely touch ups (in some cases aided by a drop of glue). At this point, I was placated by the plaster and felt that the results were acceptable – not perfect, but acceptable.
 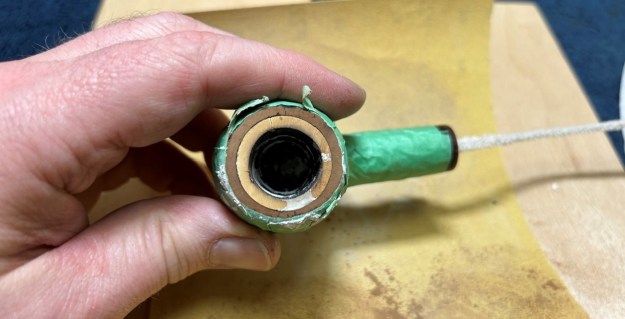 Once the sanding was done, I could remove the painter’s tape and finish the pipes off. The Kiko needed some colour added to the rim after all the topping. I used my furniture pens to match the colour and it came out very well.
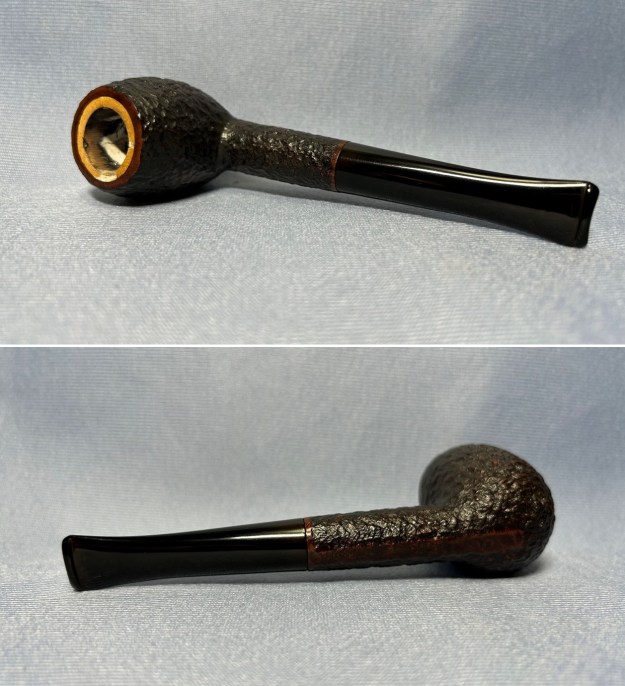
 Both pipes went on the buffing wheel and they look great. This was a very timing-consuming and enormously frustrating process. In the end, I learned quite a few things about the repair of meerschaum. Just like everything else, there isn’t a one-size-fits-all solution. I think egg/talc or egg/chalk is fine for small repairs, where the cracks are small and not structural. But larger repairs require something different: either grafting on a spare piece of meerschaum (which I have done successfully in the past) or using a more reliably solid goo like plaster of Paris.
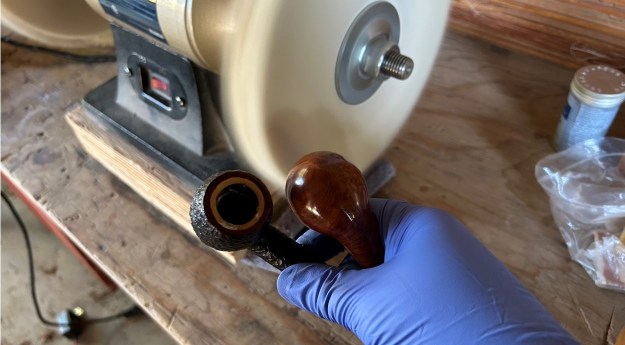 The Kiko and Ropp are much improved and I hope my cousin will like them. I hope you enjoyed reading the story of these pipes as much I as I did restoring them. If you are interested in more of my work, please follow me here on Steve’s website or email me directly at kenneth@knightsofthepipe.com. Thank you very much for reading and, as always, I welcome and encourage your comments.