Blog by Steve Laug
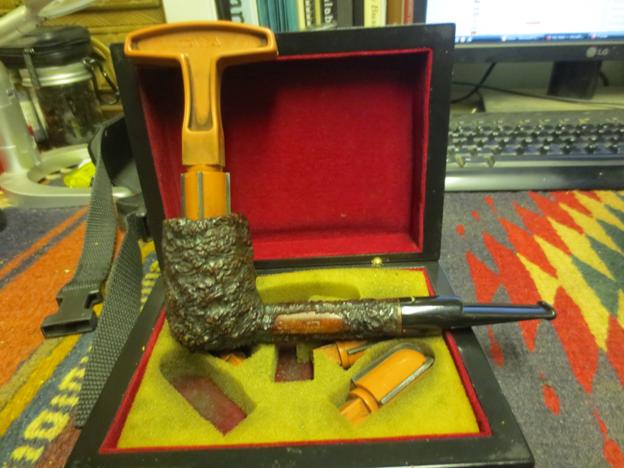
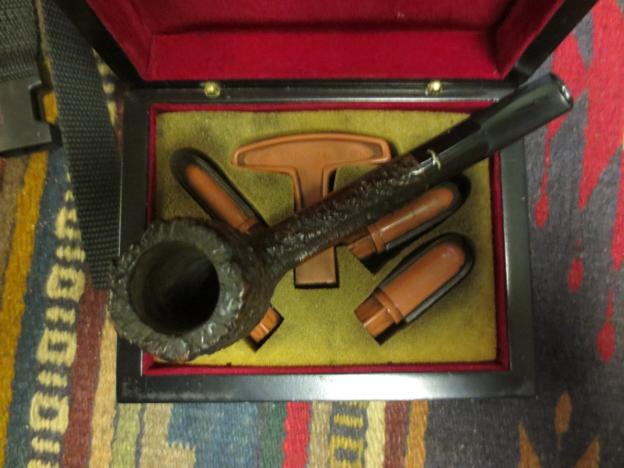
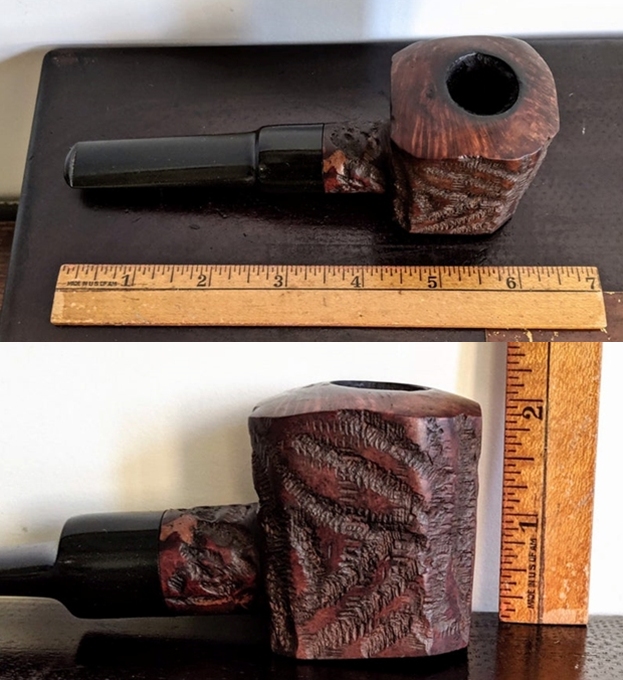
Not long ago I was emailing back and forth with a reader of the blog in Quebec about a pipe that he had purchased online. He said that it was a Marxman Jumbo Bench Made and it was huge. He said the photos of the pipe online were far better than what the pipe looked like when he received it. The pipe was marked on Etsy as follows: 1940s Rustic Tobacco Pipe Jumbo Marxman Carved Briar Root Wood Smoking Pipe OAK Handcarved Vintage Pipe Large Oversize Pipe. You and I know that the pipe was not OAK but Briar. Here are the photos that he sent me the link for. In the photos you can see the unique shape of this War Club/Hammer. It is quite big and I was expecting it to be much bigger than it actually is. The finish looks pretty good in the photos as well. The cake and lava on the rim looks negligible but present. It looks like a great deal but even in these photos you can see the large fills around the shank and bowl.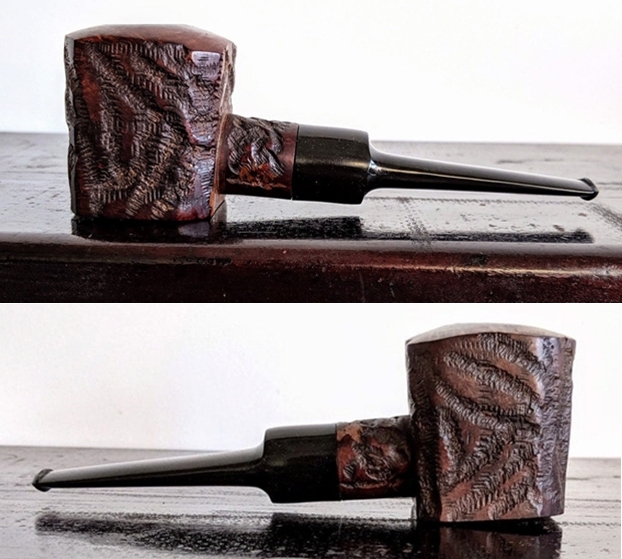
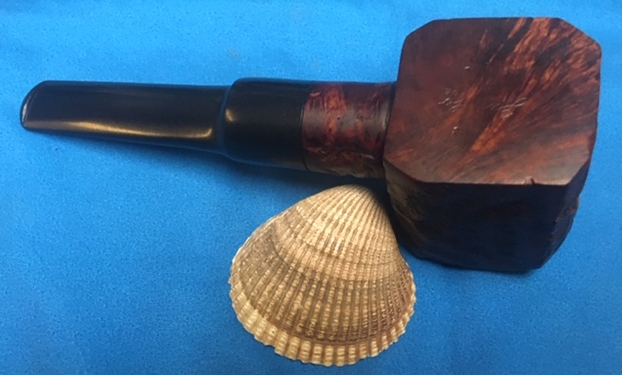
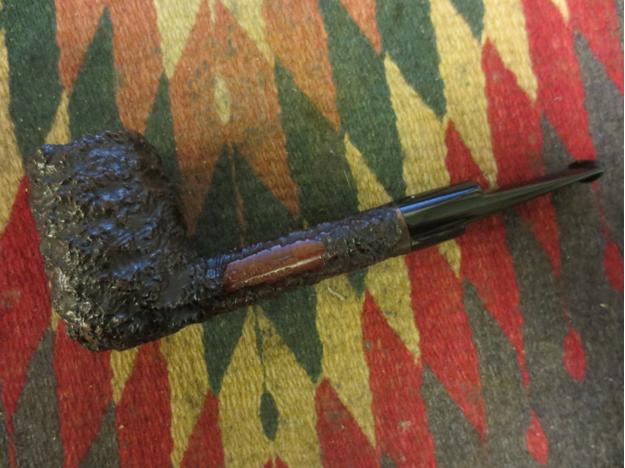
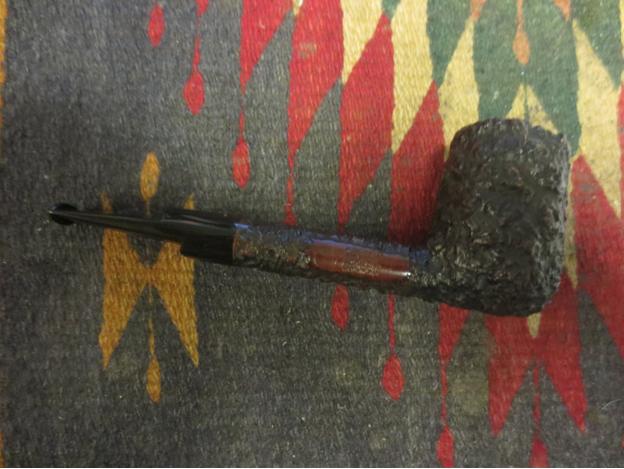
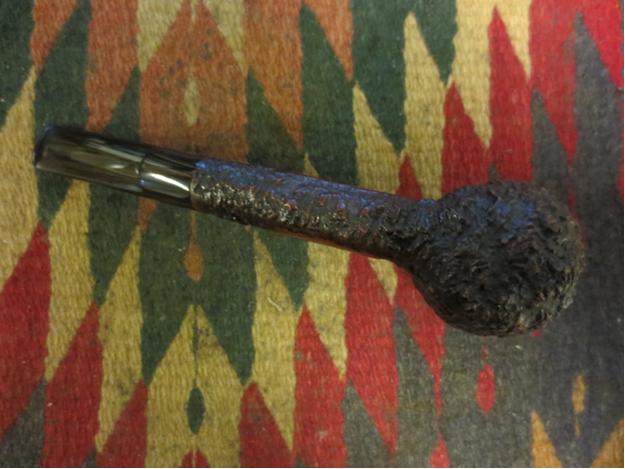
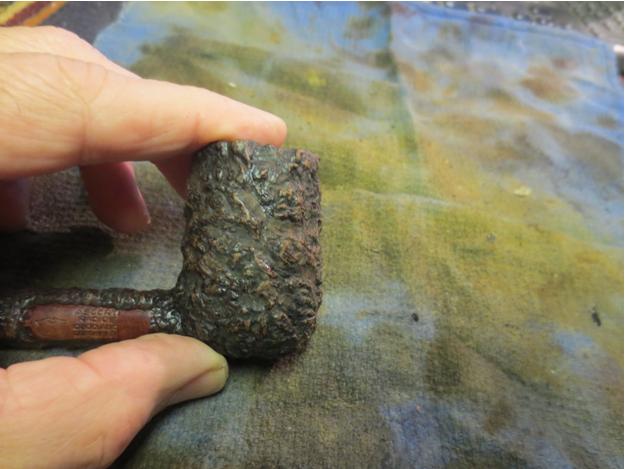
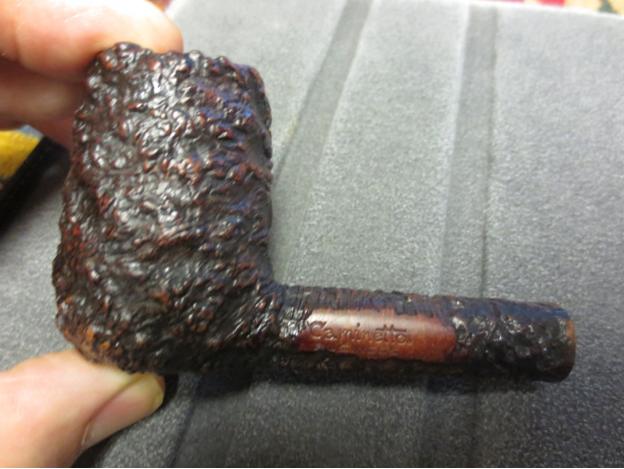
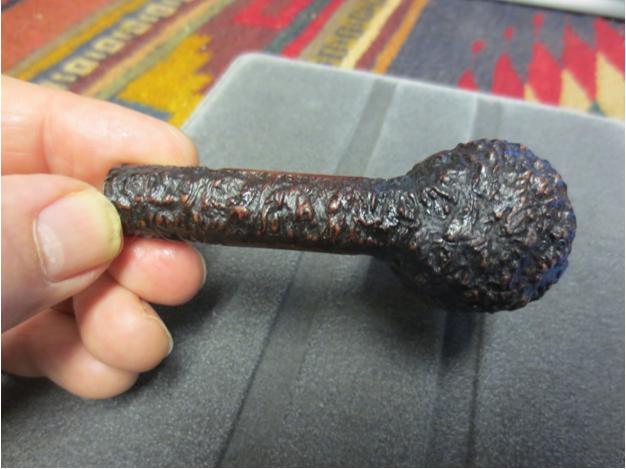
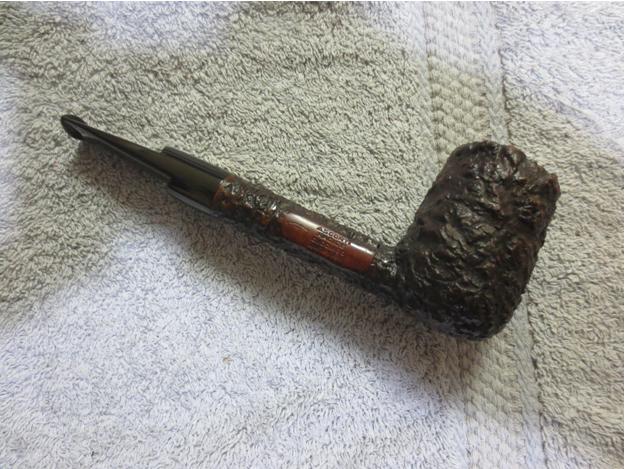
 We talked back and forth a bit and finally decided that the pipe should be sent to me in Vancouver. He wrote in the email that he sent before the pipe was mailed: “The stem seems stuck while the cake is relatively thick in the chamber. Also, the finish of the pipe seems stained and uneven. It’s a massive pipe but I’m confident it will look good”. With that I awaited the arrival of the pipe. Canada Post was efficient and it arrived three days after it was shipped. I opened the box and took photos of the pipe as it was when it arrived. He was right in saying it looked very different from the pipe in the Etsy seller’s photos.
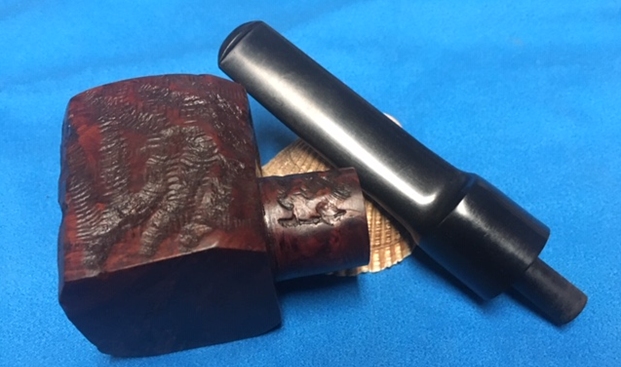
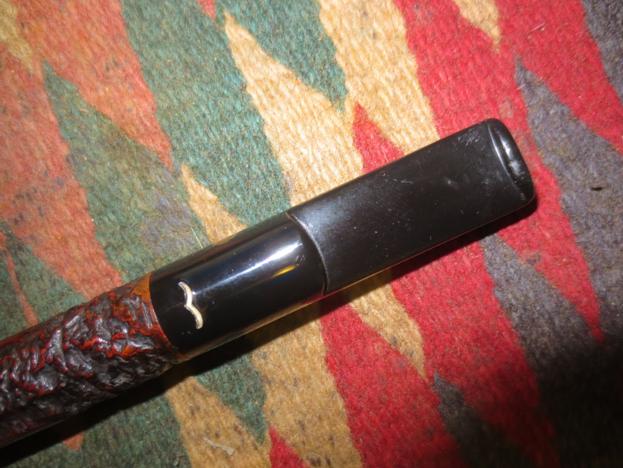
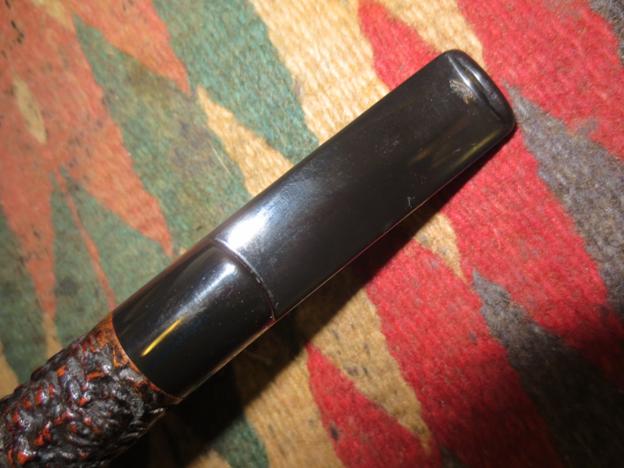
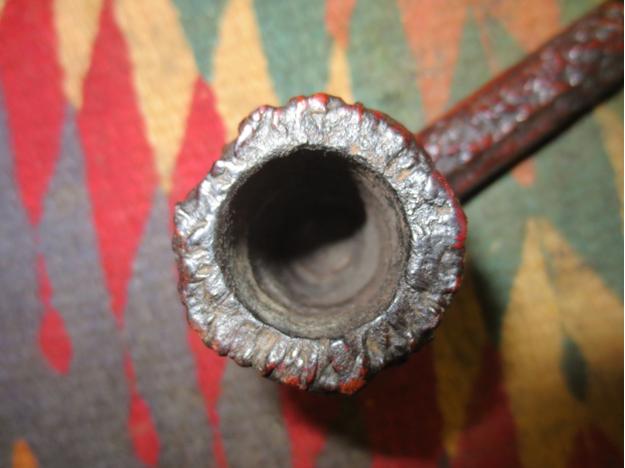
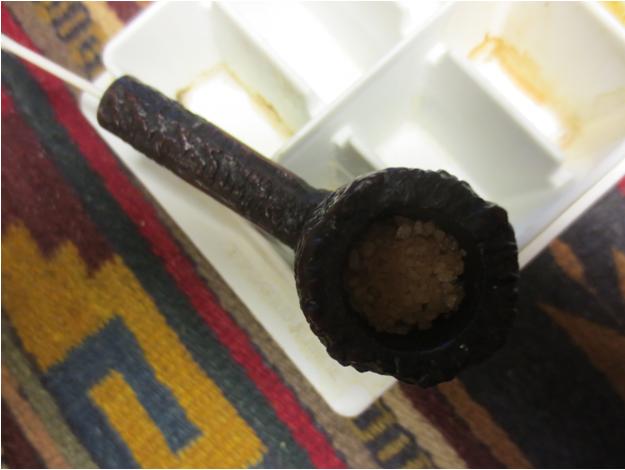
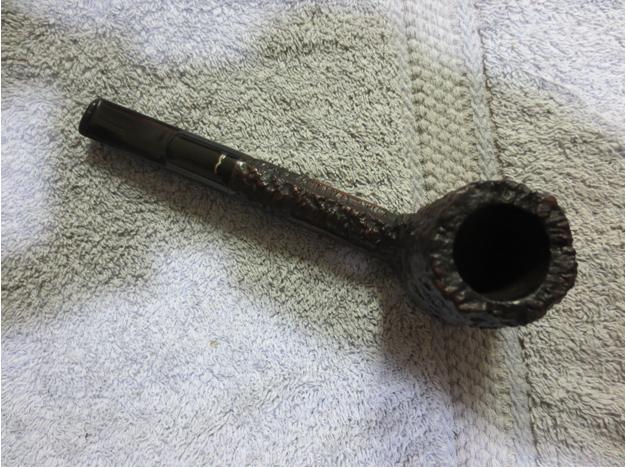
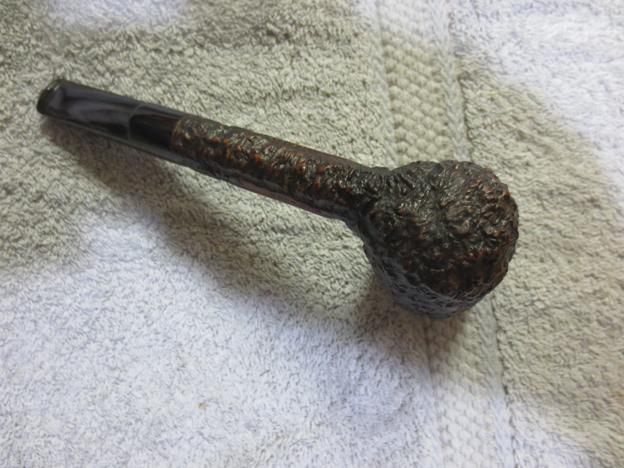
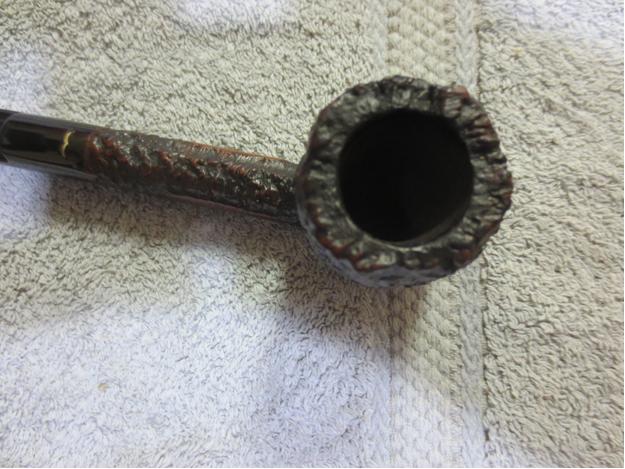
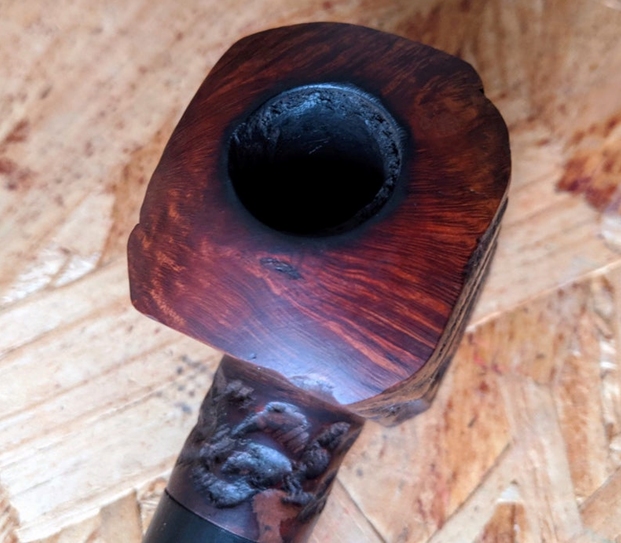
The stem was solidly stuck in the shank and was upside down. The finish was flat and dirty with no life to it. There were large fills on the front and back sides of the bowl and all the way around the shank. The fills were what gave an uneven appearance to the finish on the pipe as they were a light tan/pink. The bowl had a thick, uneven cake and the pipe smelled musty and dank. The rim top had a coat of lava on the top around the bowl and the inner edge of the chamber was out of round and damaged. The stem was high quality vulcanite and had tooth chatter on both sides near the button but there were not any deep tooth marks in the vulcanite. The photos show you what I saw as I examined the pipe.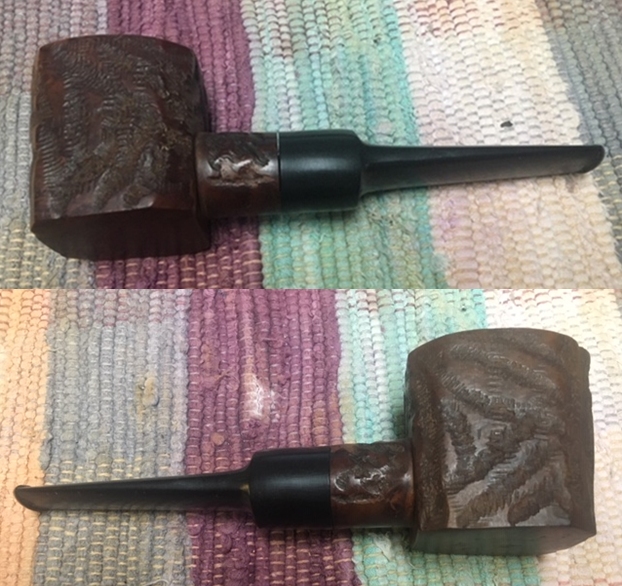
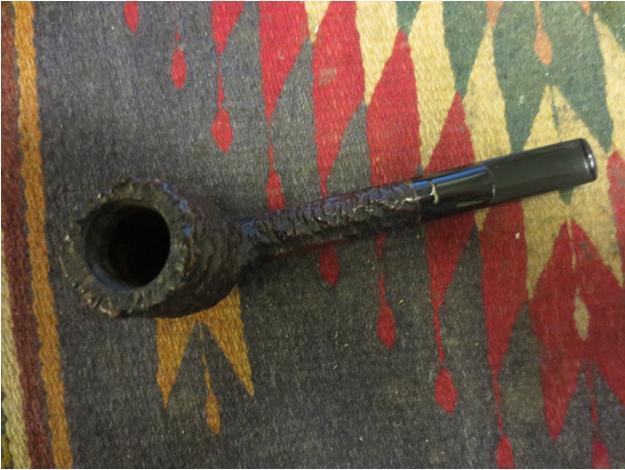
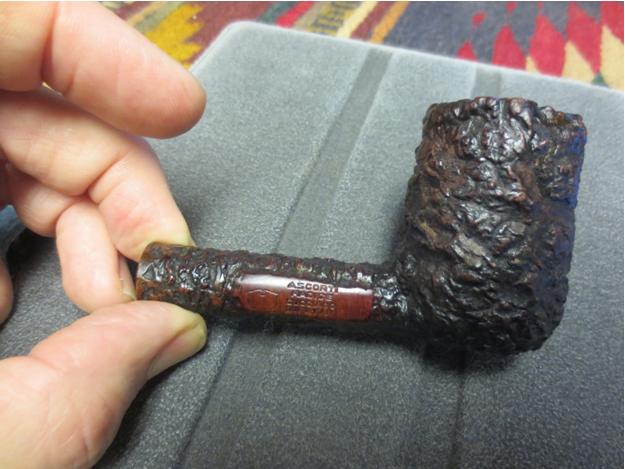
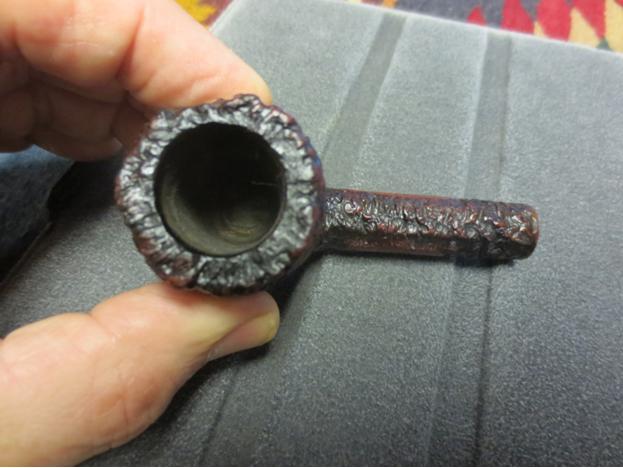
 I took close up photos of the rim top and the stem. The photos confirm the condition of the pipe that I described in the paragraphs above. You can see the damage to the inner edge of the rim top. It had been hacked and damaged with what looked like a knife.
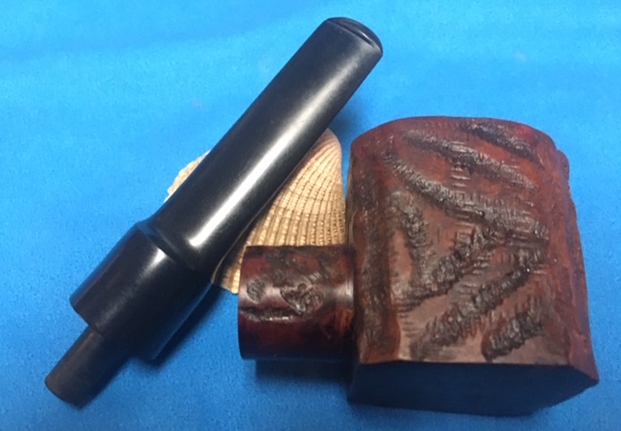
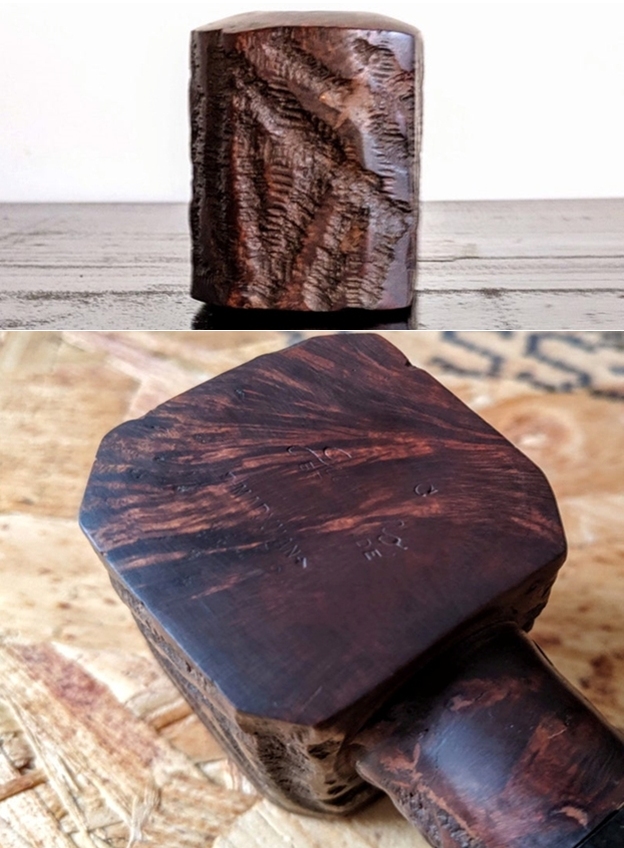
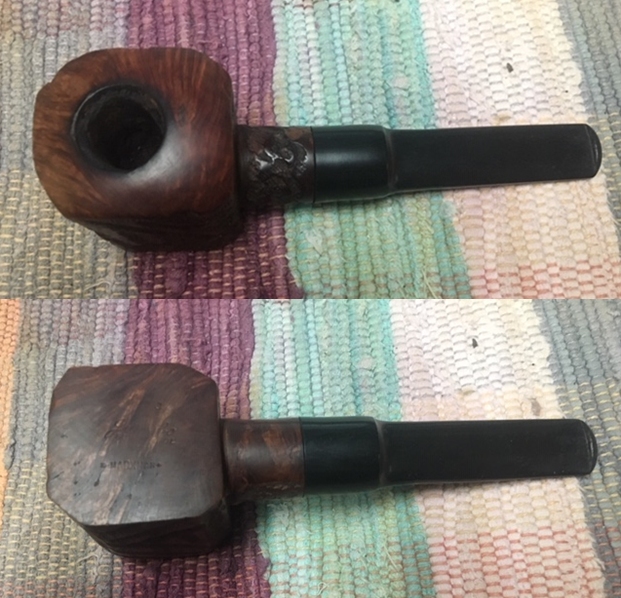
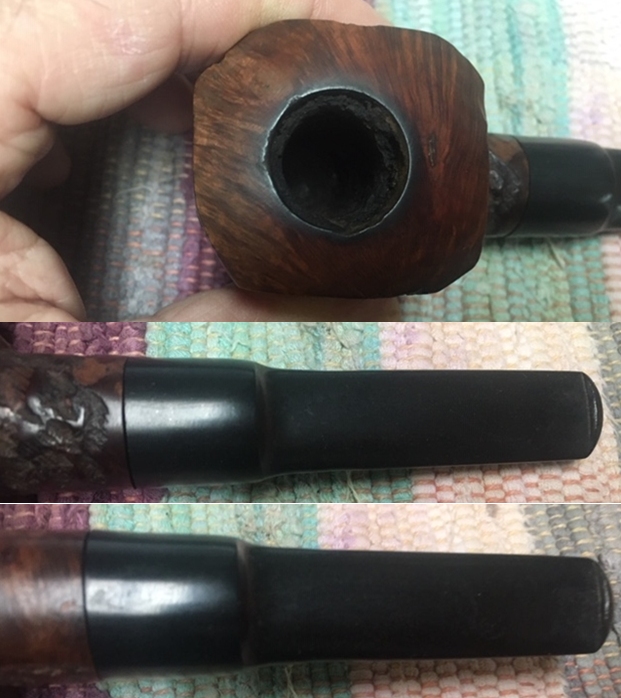 I took a photo of the stamping on the flat heel of the bowl. It is stamped with a letter C at the top of the heel. Under that is reads Jumbo in script over Bench Made. Underneath at the bottom it is stamped with the Marxman logo inside an arrow.
 I wanted to refresh my memory of the brand so I turned to Pipephil first to get a short summary of the history (http://www.pipephil.eu/logos/en/logo-m2.html). The site had a side note that the brand was created in 1934 and merged with Mastercraft Pipes in 1953.
 I then turned to Pipedia to find out a bit more information on the brand and the maker of the pipe (https://pipedia.org/wiki/Marxman). The site quote from Pipes, Artisans and Trademarks, by José Manuel Lopes. I include a portion of that information below.
Marxman (Marxman Pipe Company) was created by Robert (Bob) L. Marx in 1934, when he was 29, and after he had worked for the William Demuth Company. His pipes were not outstanding because of the quality of their wood (probably Algerian), but Bob started making unique sculpted pieces, which brought the brand fame in the World of Hollywood cinema. Actors like Zachery Scott, Dennis Morgan, Jack Carson, Alan Hale, Joel McRae, and Ronald Reagan were some of the faces that appeared on the bowls.
Bob new how to innovate and took full advantage of marketing and press advertising in order to sell the brand–one of his slogans being “Relax with a Marxman”.
From the information on the two sites I learned that the pipe was made between 1934 when the company started and 1953 when the company was taken over by Mastercraft. I have included an advertisement for the Marxman Jumbo that was included on the article (1946 Ad, Courtesy Doug Valitchka).
It includes the following information. “A rare treat for the pipe connoisseur is the Marxman Jumbo, distinguished by a carved bowl that is in perfect balance for easy, comfortable smoking. From the thousands of pieces of briar that flow into our factory we select the perfect and unusual. These are reserved only for the Marxman Jumbo – and are fashioned into truly elegant pipes of exclusive designs – unique in appearance and superior in smoking qualities. Each pipe is an individual artistic creation following the natural shape of the briar. No two pipes are alike. They are priced according to size.” The prices are noted in the ad that I included below.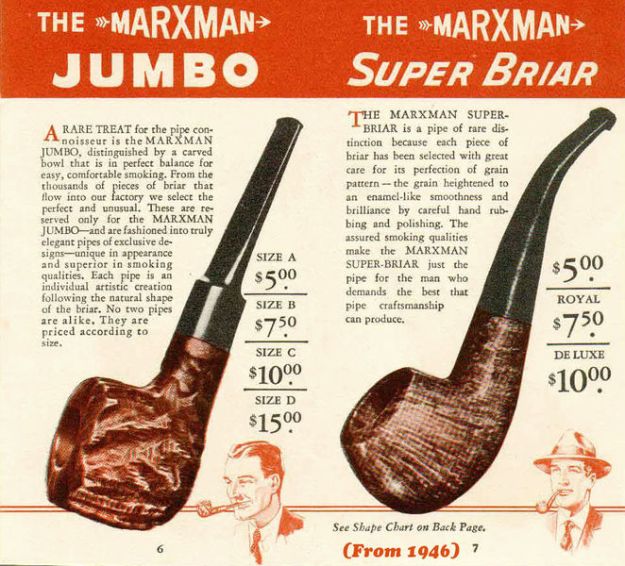 I went on to read the remainder of the article on Pipedia and include the pertinent portion below.
Bob also produced other brands, such as the “Bench Made”. The company lasted until 1953, the year in which it merged with Mastercraft, then the USA’s biggest pipe importer. Marxman Pipes Inc., was located at 27 West 24th St. New York 10, NY.
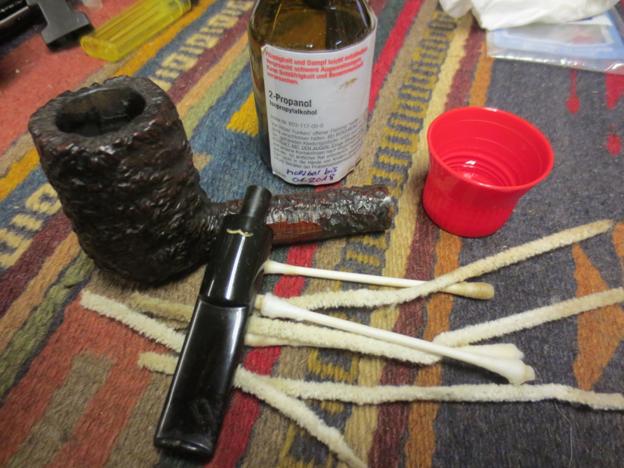
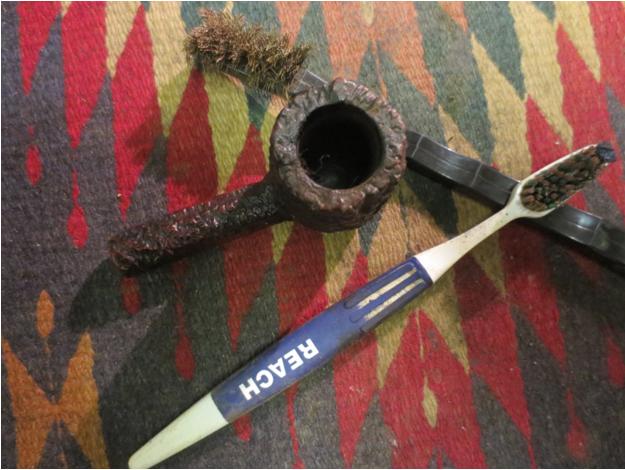
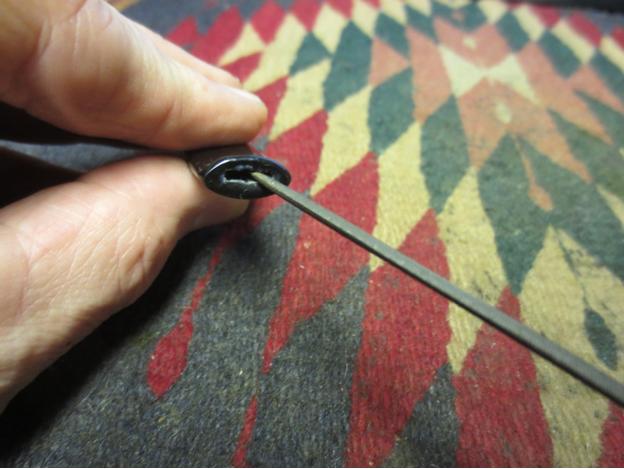
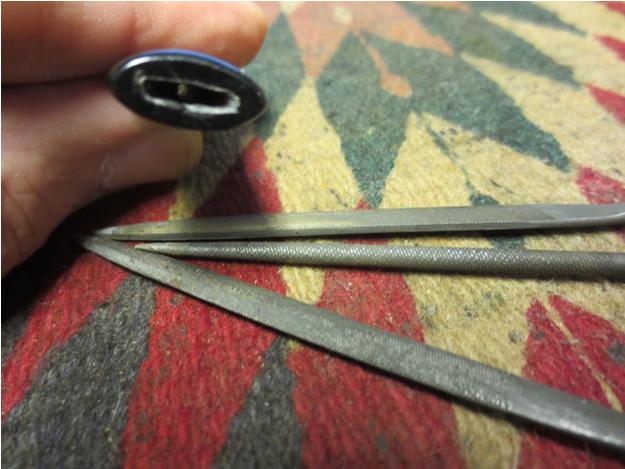
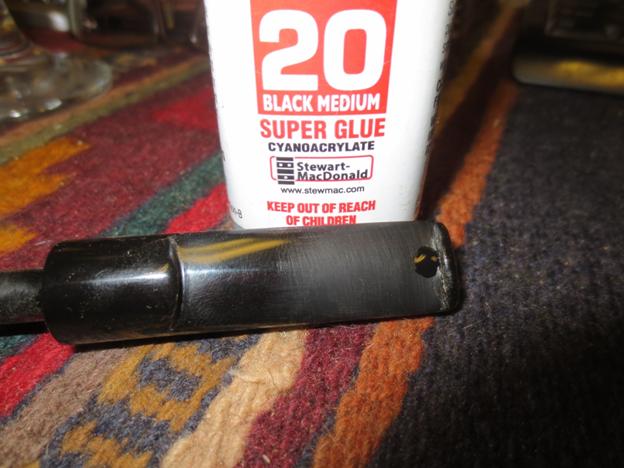
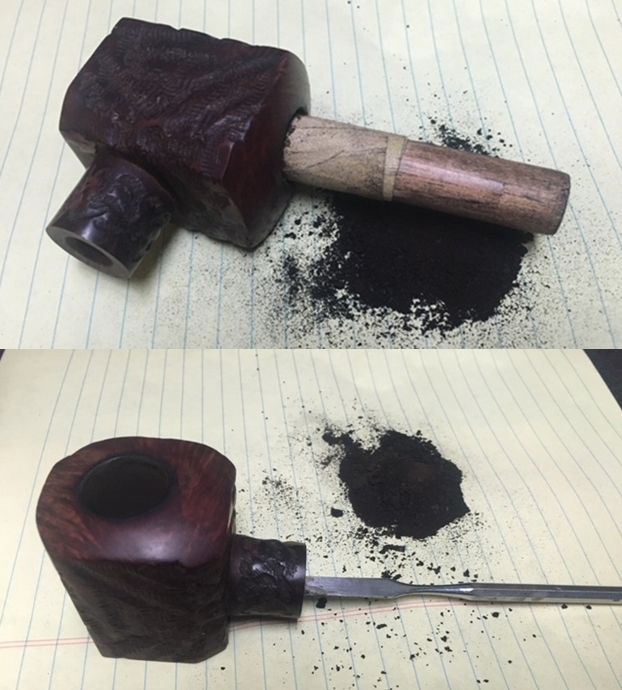
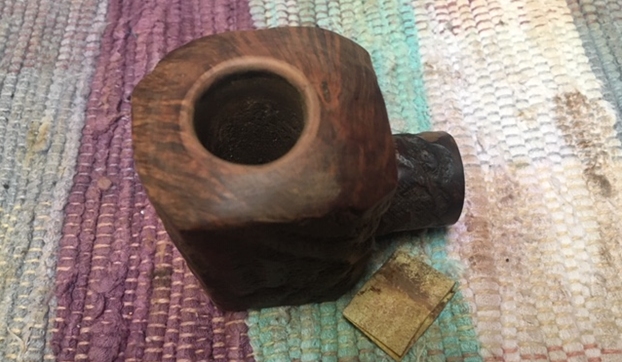
I had put the pipe in the freezer before I went to bed and in the morning I took it out and with a little effort I was able to remove the stem from the shank. It was very tight but it came out with patience.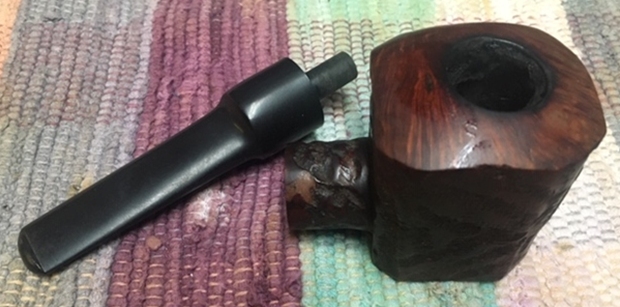 I took the bowl to the work table and reamed it. I used a PipNet pipe reamer with the second cutting head to remove the thick cake in the bowl. I removed the remnants of the cake with a Savinelli Fitsall Pipe Knife and finished the bowl with a piece of 220 grit sandpaper wrapped around a piece of dowel. I used a dental spatula to scrape out the inside of the mortise and remove the thick lacquer that had built up there from much smoking.
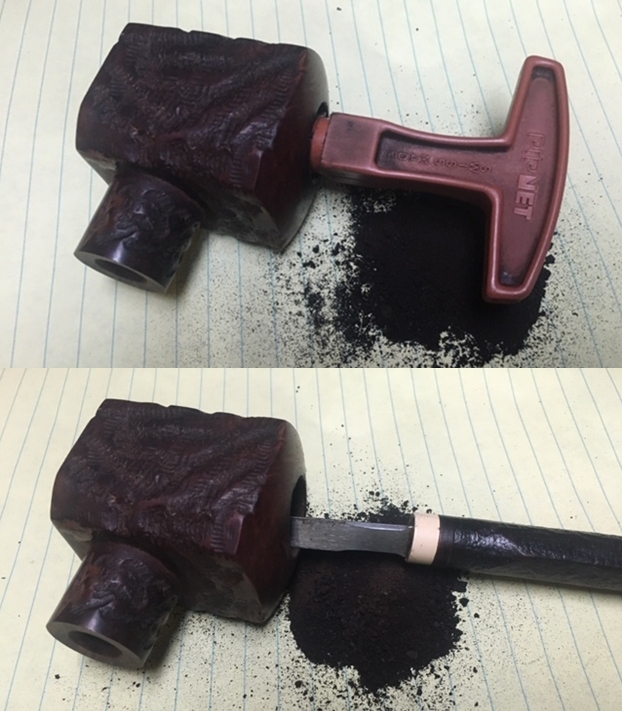
 I cleaned the interior of the shank/mortise and the airway in the shank and the stem with pipe cleaners, cotton swabs and alcohol. They were very dirty and after I had scoured them the pipe was clean and smelled better. I would still need to do a cotton ball alcohol soak to draw out the rest of the mustiness.
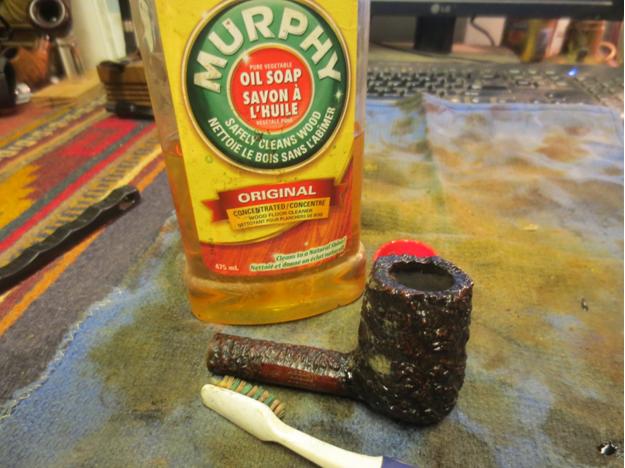
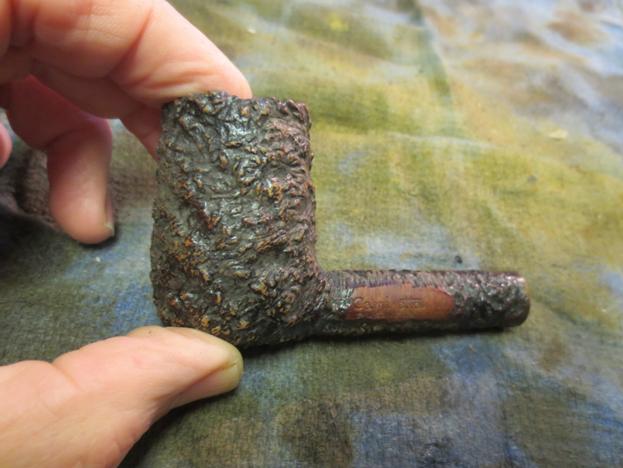
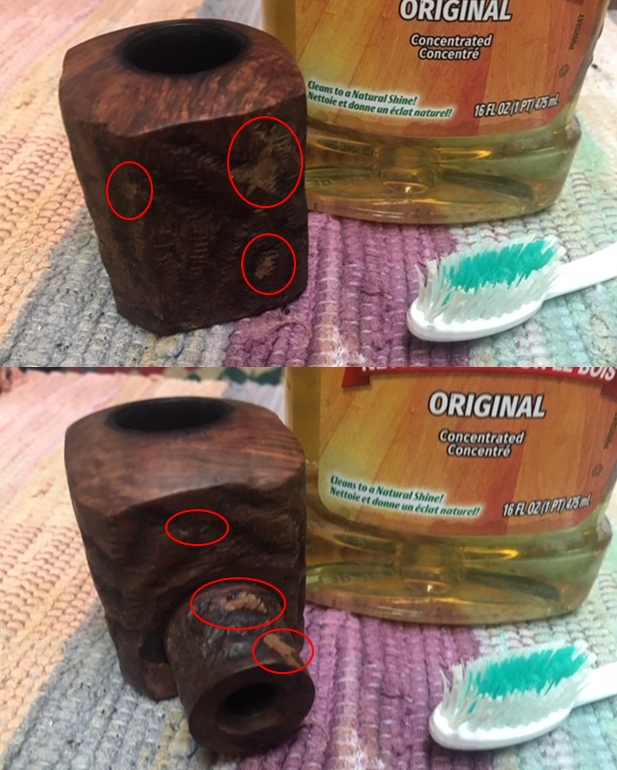
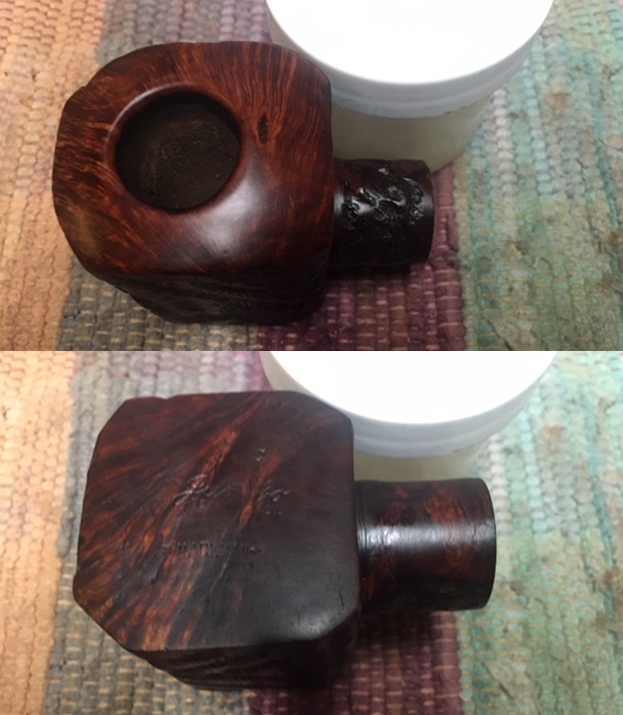
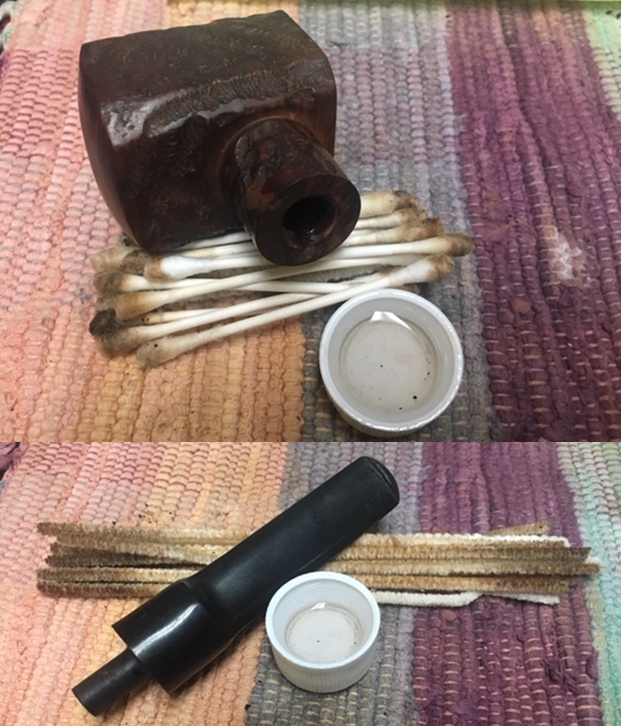 I scrubbed the exterior of the bowl and shank with a tooth brush and undiluted Murphy’s Oil Soap. I scrubbed the grooves of the rustication to remove the grime with the tooth brush. I rinsed the pipe off with warm running water and dried it off with a cotton cloth. The finish looked clean but you could see the fills very clearly now. I have circled them in red in the photos below.
 Now it was time to deal with the out of round bowl edges. I gently topped the bowl. I did not want to flatten the crowned rim just smooth out the top edge of the bowl. I used a folded piece of sandpaper to work a slight bevel to the inner edge to clean up the damaged edge and bring back to round. I also sanded the darkening on the rim edge to remove it as well.
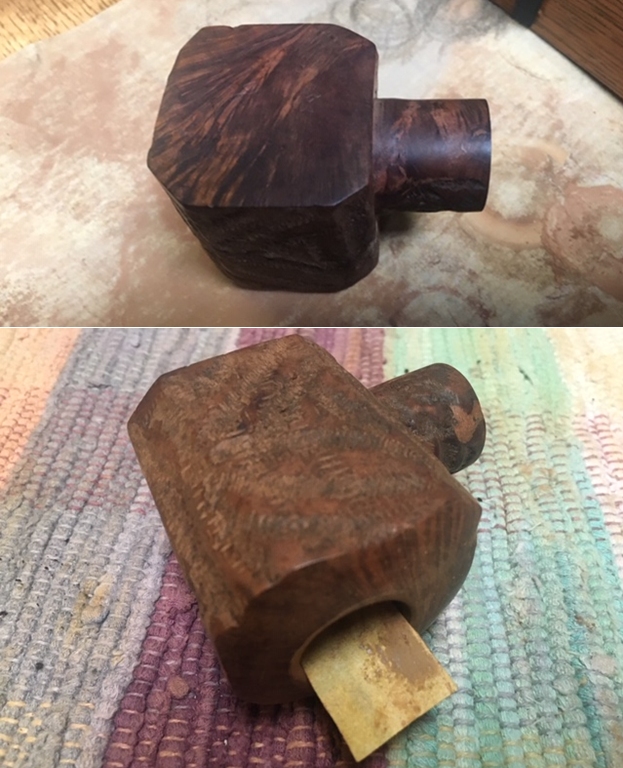
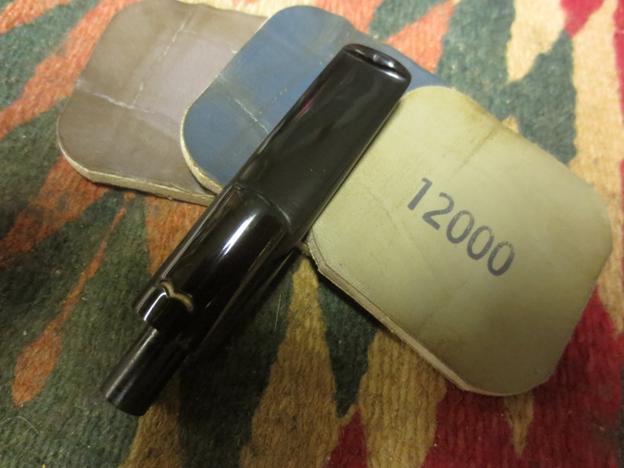
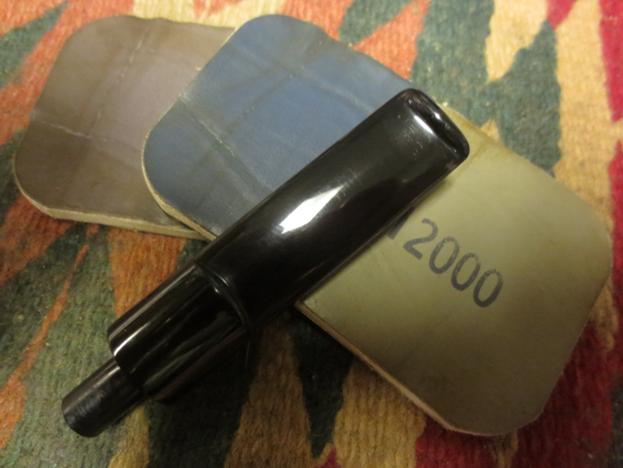
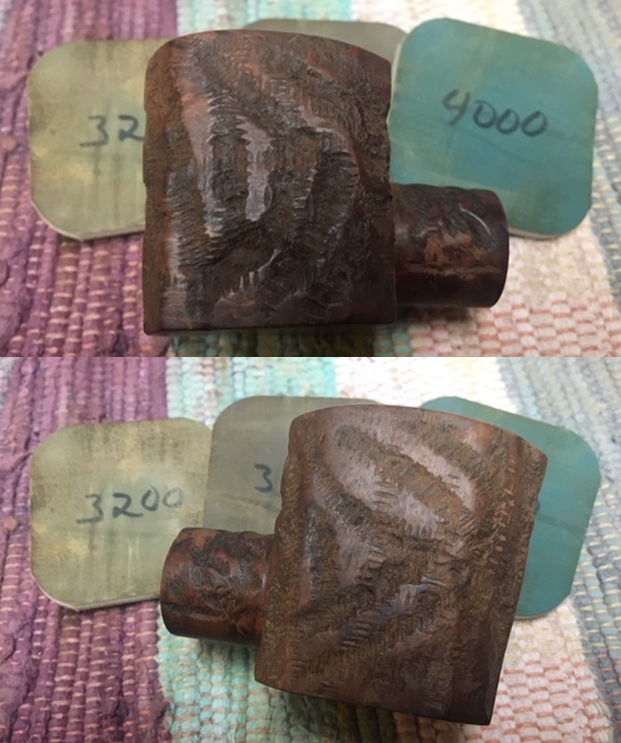
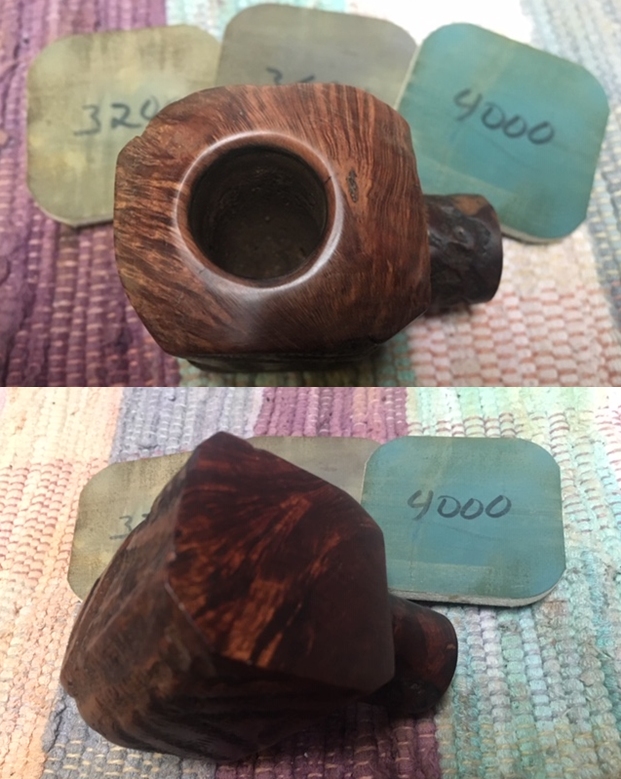
 With that finished I moved on the polishing the smooth portions of the bowl and the rim top with micromesh sanding pads. I polished it with 1500-12000 grit sanding pads and wiped the bowl down with damp cloth to remove the sanding dust.
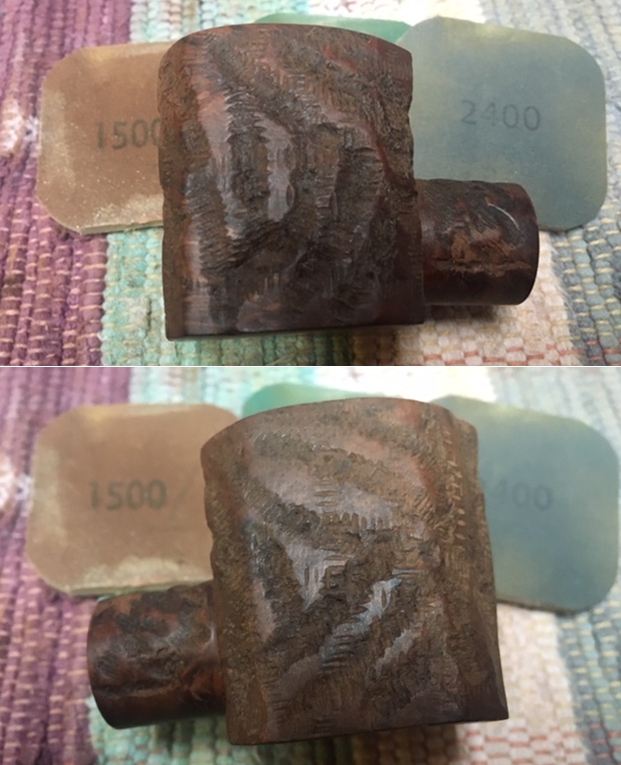

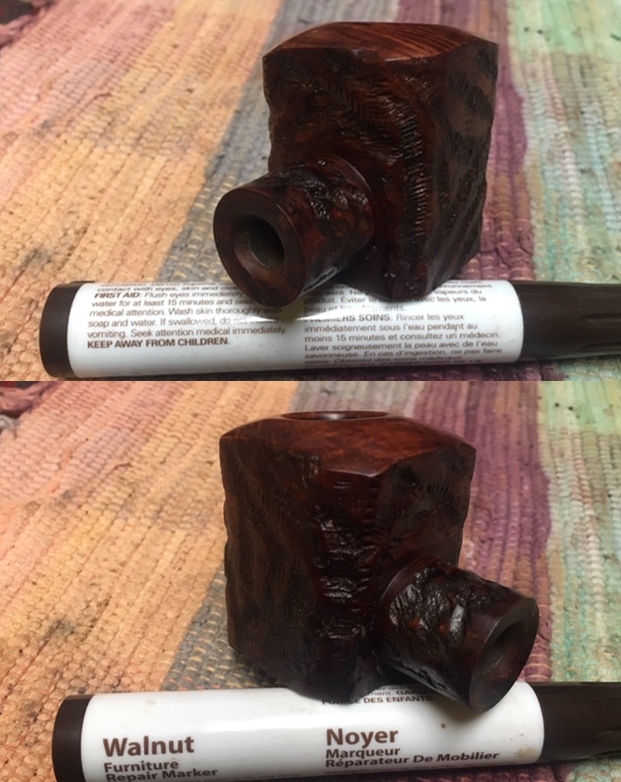
 I used a Walnut stain pen to touch up the fill areas and the lighter areas on the briar bowl. I covered all of them and set the bowl aside to dry. The stain actually hid the fills very well.
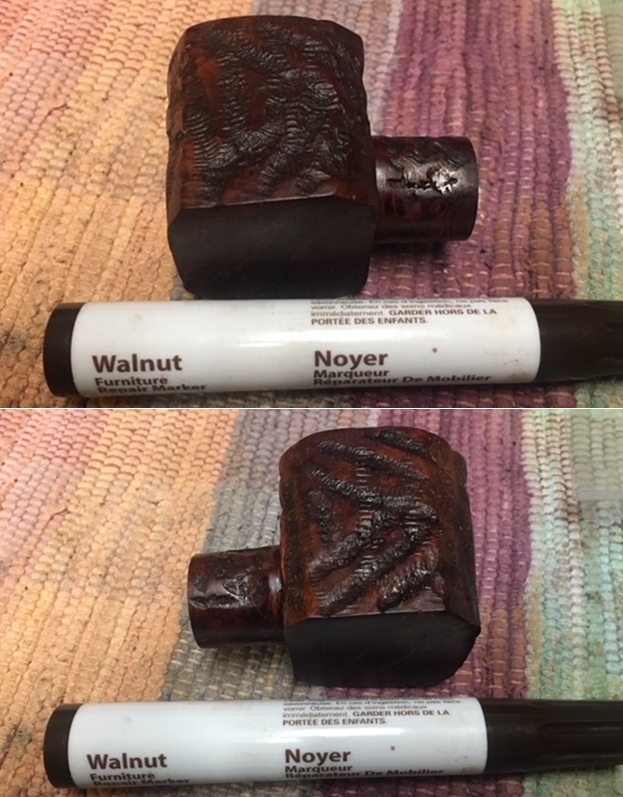

 Once the stain had dried I rubbed the bowl down with Before & After Restoration Balm. I worked it into the grooves of the finish with my fingertips and a horsehair shoe brush. I set it aside to absorb into the briar for ten minutes. Once it had been sitting I polished the bowl surface with a soft cotton cloth. At this point in the process the briar is looking very good.
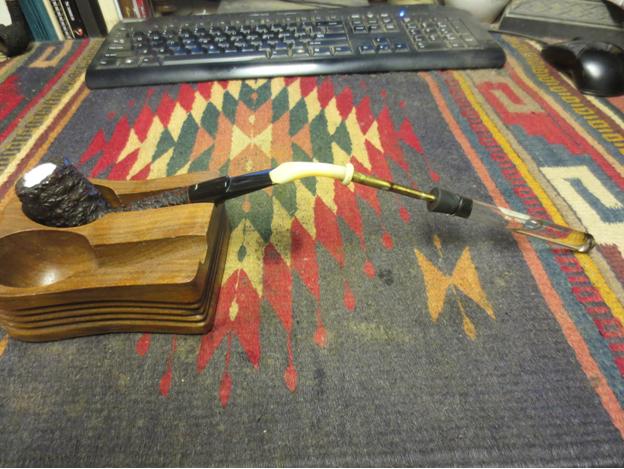
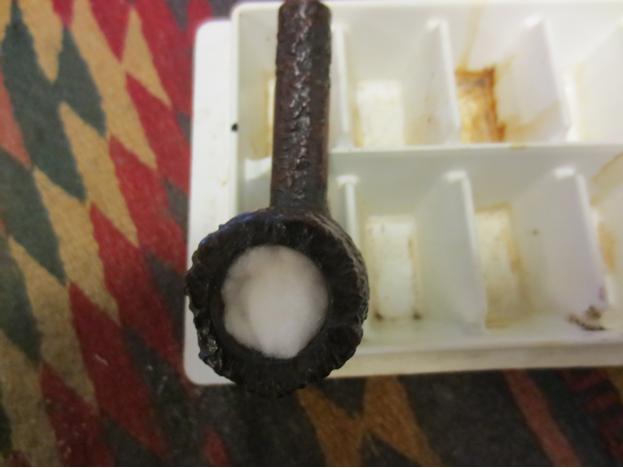
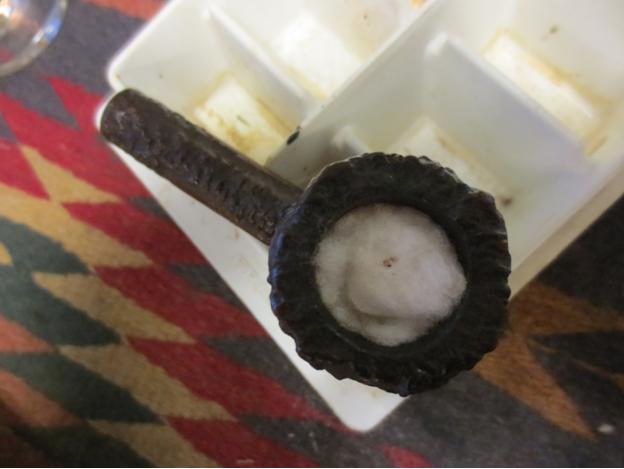
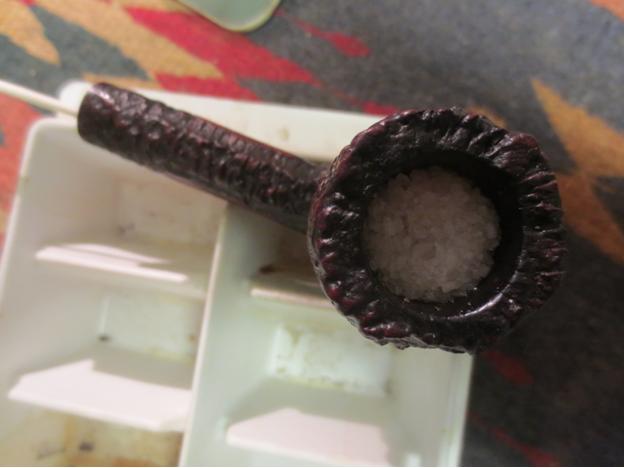
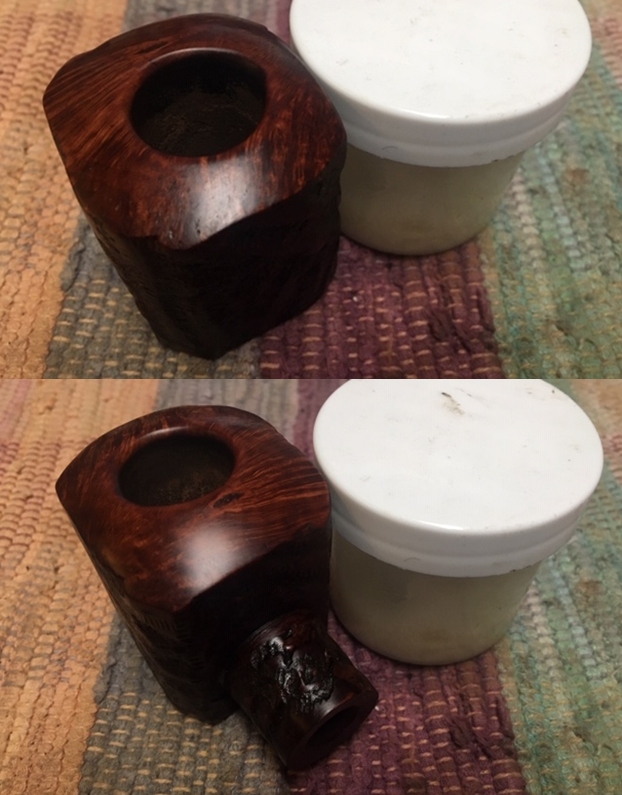 I filled the bowl with cotton balls and used and ear syringe to fill it with alcohol. I fit a folded pipe cleaner in the shank to keep the alcohol in the bowl. I left the alcohol and cotton ball in the bowl while I worked on the stem. It sat for over an hour and then I removed it from the bowl and took the photo of the cleaned pipe.
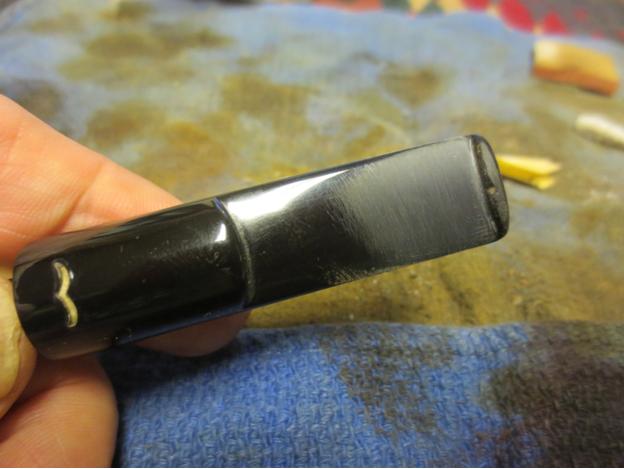
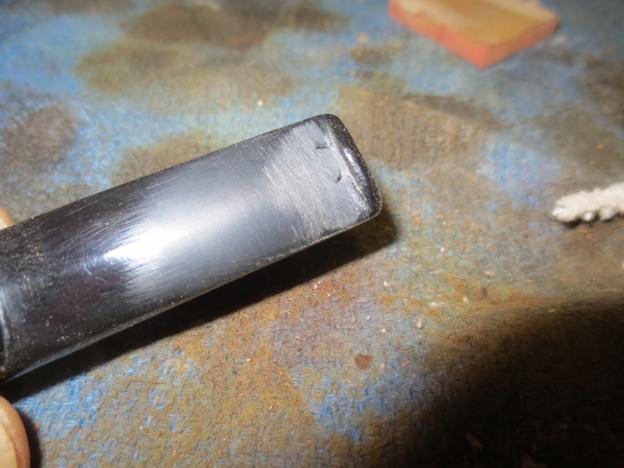
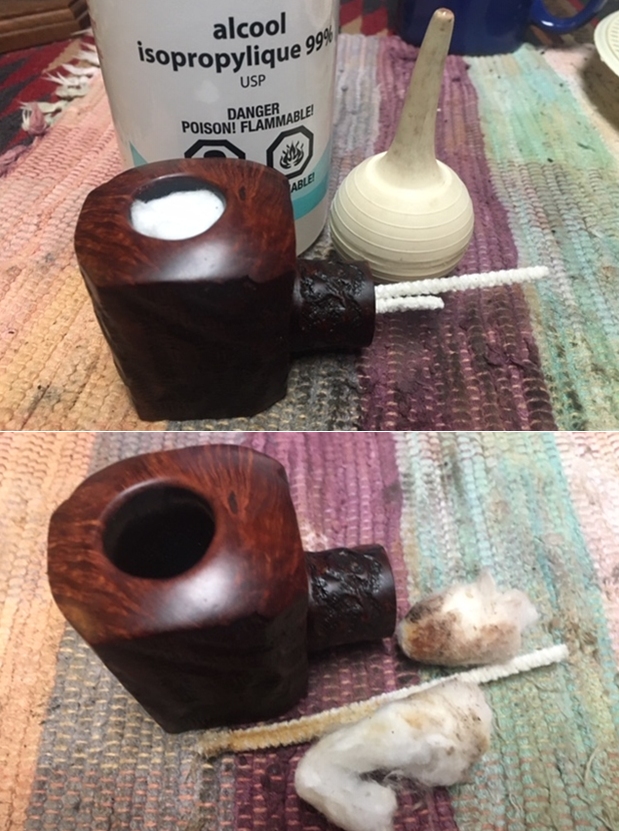 I turned my attention to the stem. I sanded out the tooth chatter and marks with 220 grit sandpaper and 400 grit wet dry sandpaper.
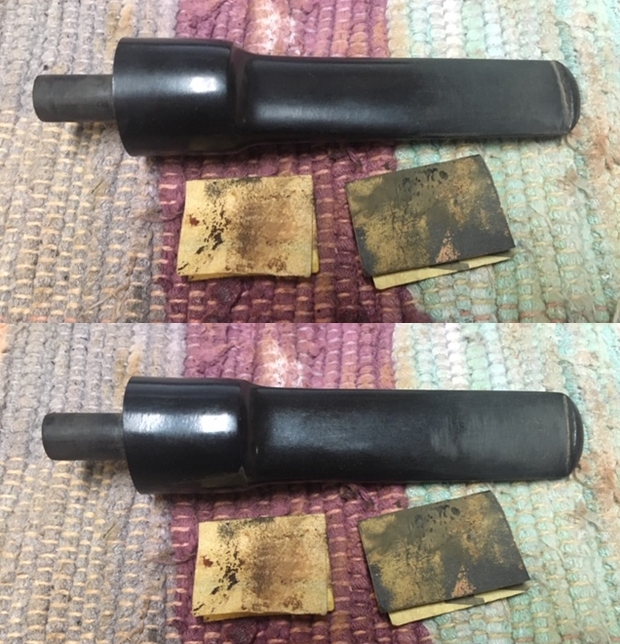 I polished the stem with Denicare Mouthpiece Polish to remove the light scratching and the light oxidation on the stem surface. The product is a red paste that is gritty and when rubbed with a cotton pad it removes many of the scratches and remaining oxidation.
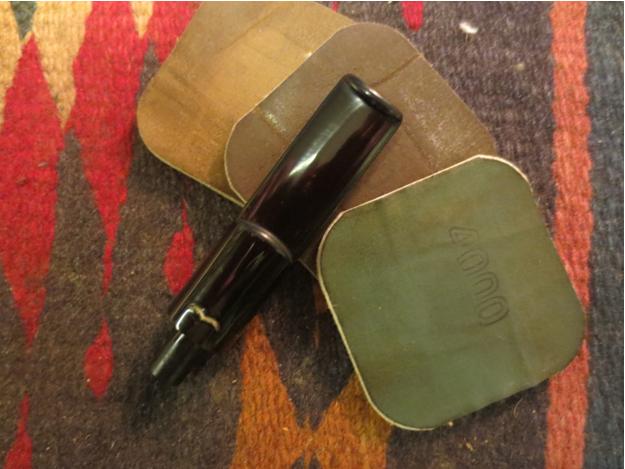
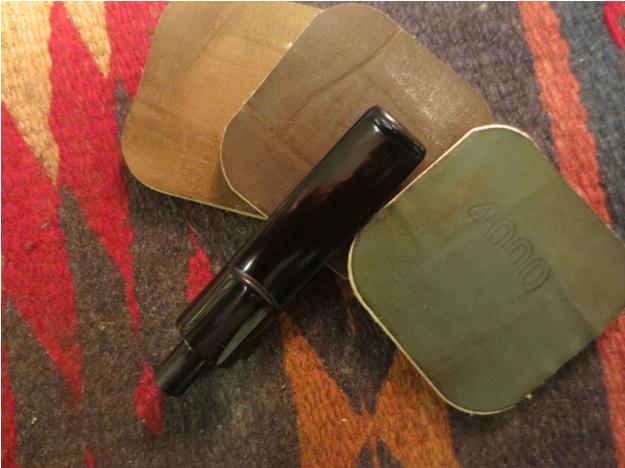
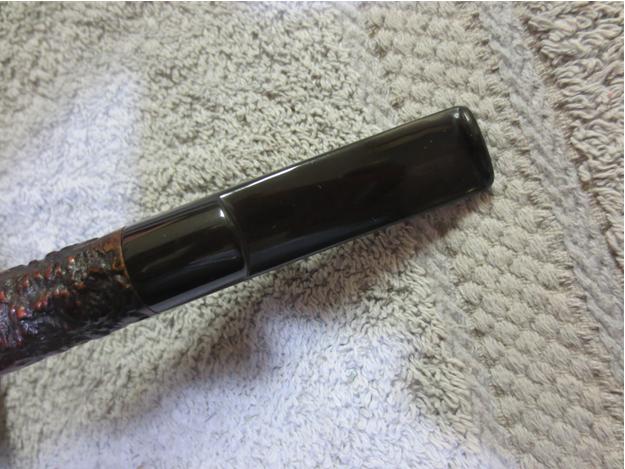
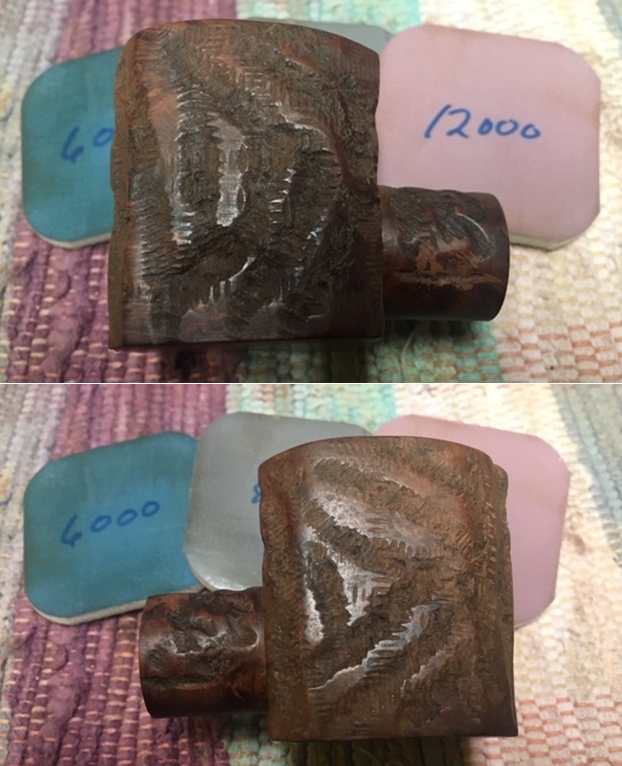
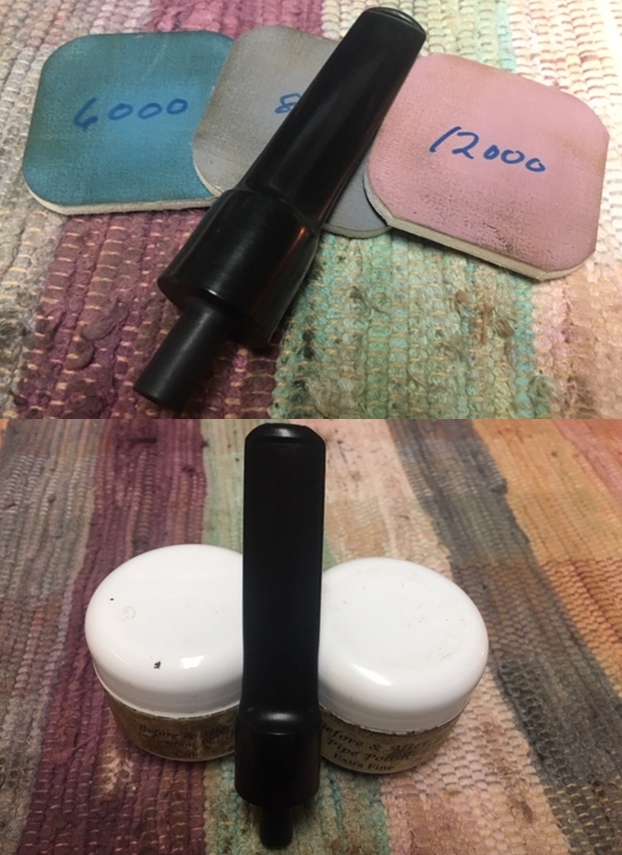
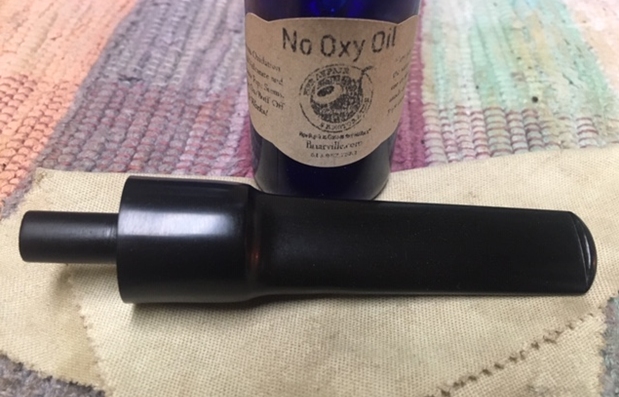
 I polished the stem with micromesh sanding pads – polishing it with 1500-12000 grit micromesh sanding pads. I wiped it down with cloth between each sanding pad. I polished it with Before & After Pipe Stem Polish – both Fine and Extra Fine. I gave it a rub down with Briarville’s No Oxy Oil to protect the stem from oxidizing. It was looking very good at this point.
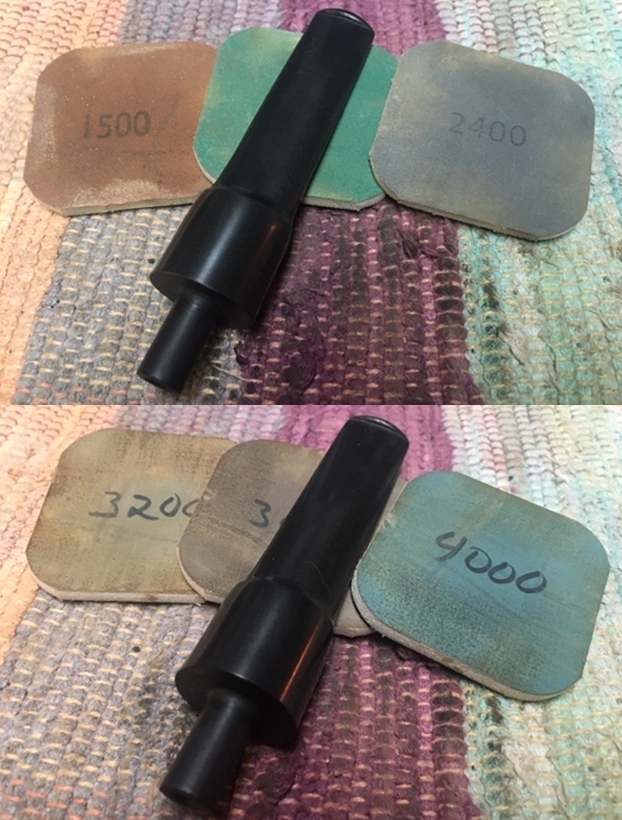
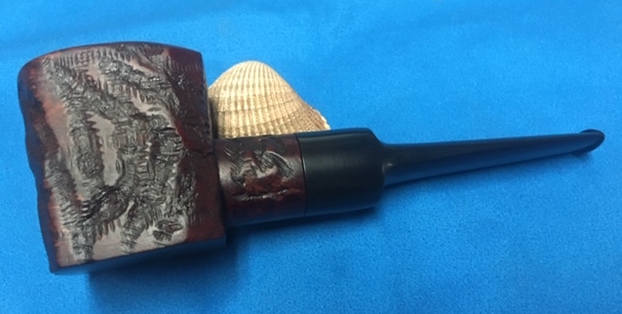
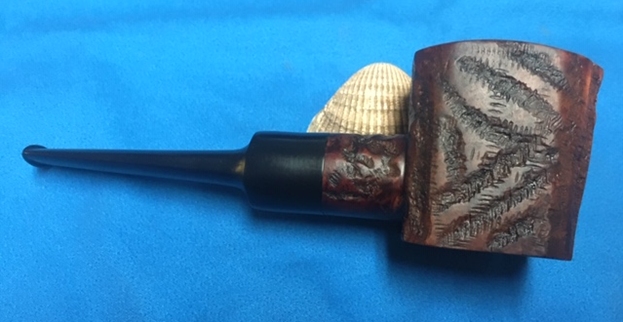
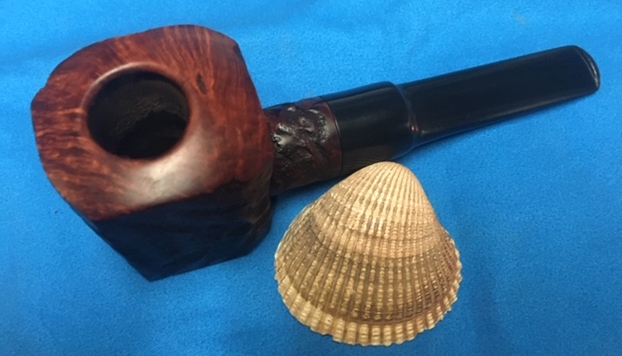
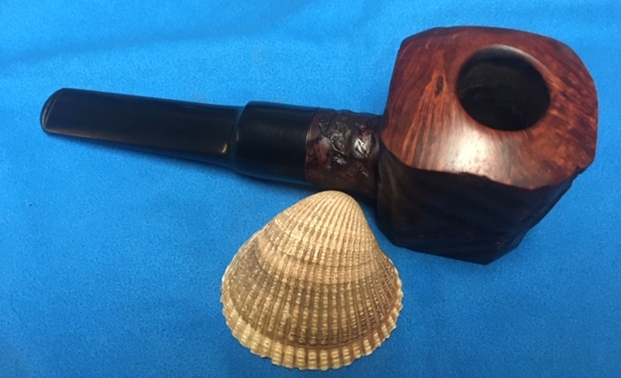
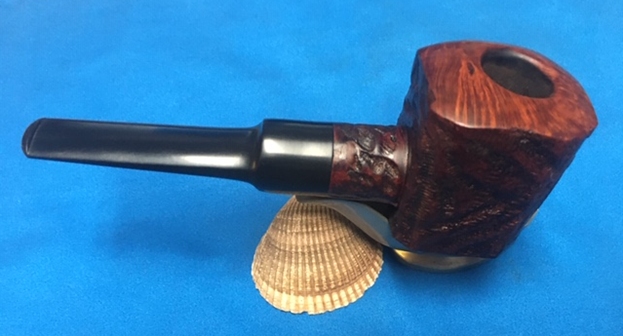
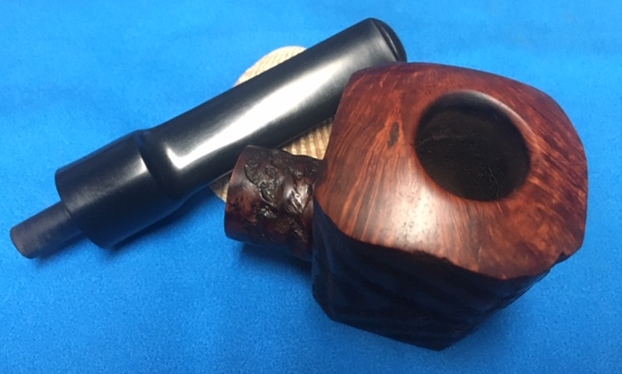
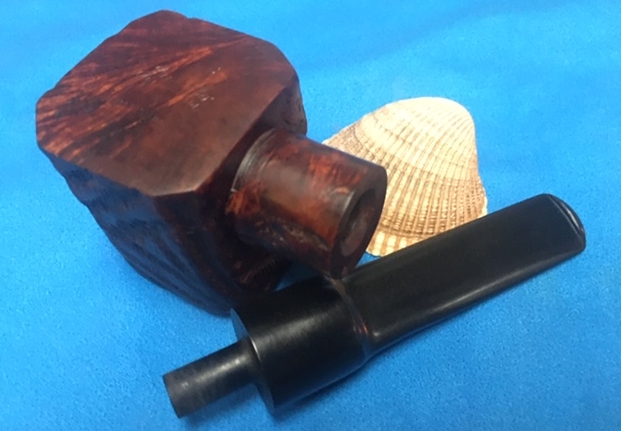
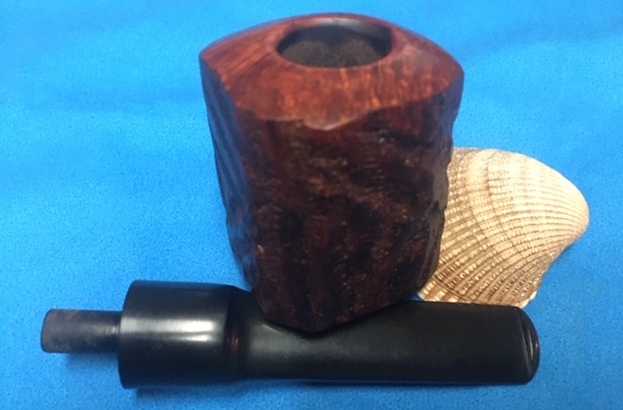
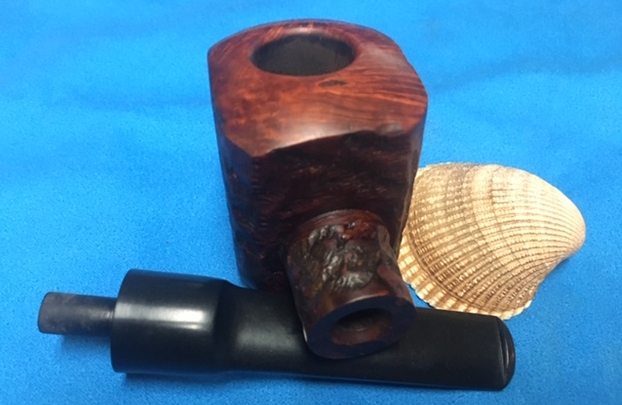
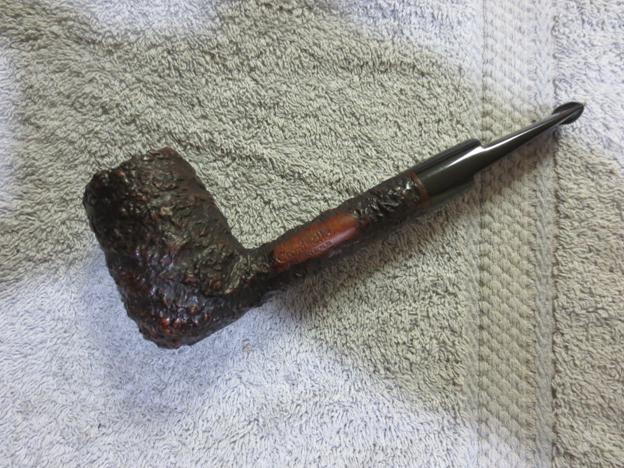
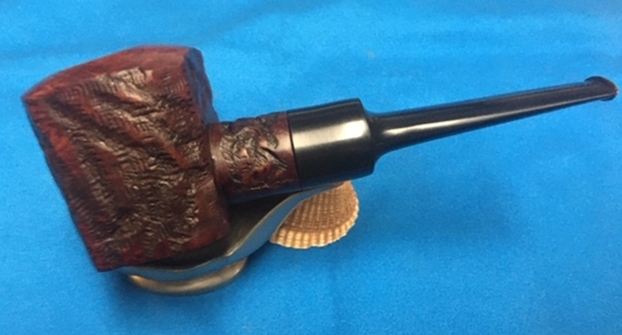
 I was looking forward to this part of the restoration when all the pieces are put back together so I can send a photo back to the fellow in Quebec. I put the pipe back together and buffed it with Blue Diamond on the buffing wheel. I gave the bowl multiple coats of Conservator’s Wax and the stem multiple coats of carnauba wax. I hand buffed the pipe with a clean buffing pad to raise the shine. It is fun to see what the polished bowl looks like with the smooth portion and the rusticated portion contrasting well and added to that the polished black vulcanite stem. This Marxman Bench Made Jumbo looks far better than it did when I started. The fills are present but have blended in very well. The stem fits well in the shank. The pipe is nice looking and feels great in my hand. The pipe is a sitter so that it can be laid down on a desk top while the pipeman is working on something else. Have a look at it with the photos below. The dimensions are Length: 6 inches, Height: 2 1/8 inches, Outside diameter of the bowl: 1 ¾ inches, Chamber diameter: ¾ of an inch. This old Marxman Jumbo is a beauty and I look forward to what the pipeman who sent it thinks of this restoration. Thanks to each of you who are reading this blog. Remember we are not pipe owners; we are pipemen and women who hold our pipes in trust until they pass on into the trust of the next pipeman or woman.