by Steve Laug
The next pipe I decided to work on is one from a Dan in South Carolina. He contacted me several weeks ago now about a pipe that he had come across in his things that was on that his mom had picked up for him. Now 16 or 17 years later he decided it is time to work on it. He wrote me the email below regarding this pipe and how he came upon. It piqued my interest because to be honest with you I love all things BBB.
Hello,
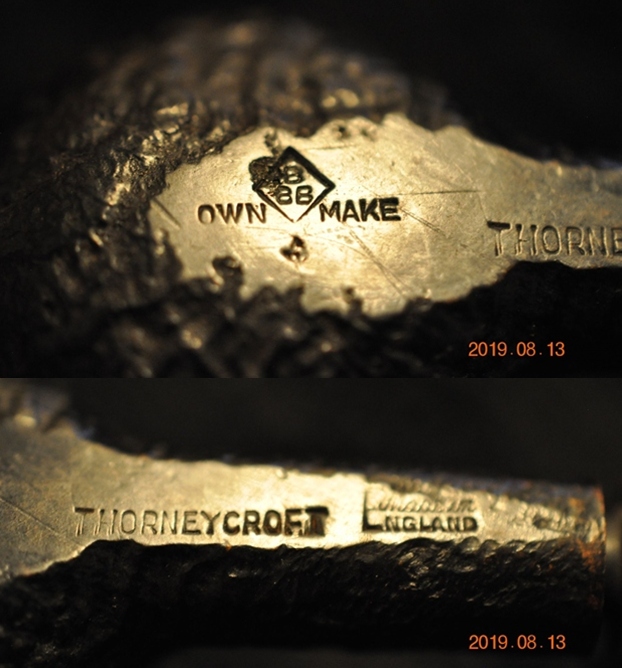
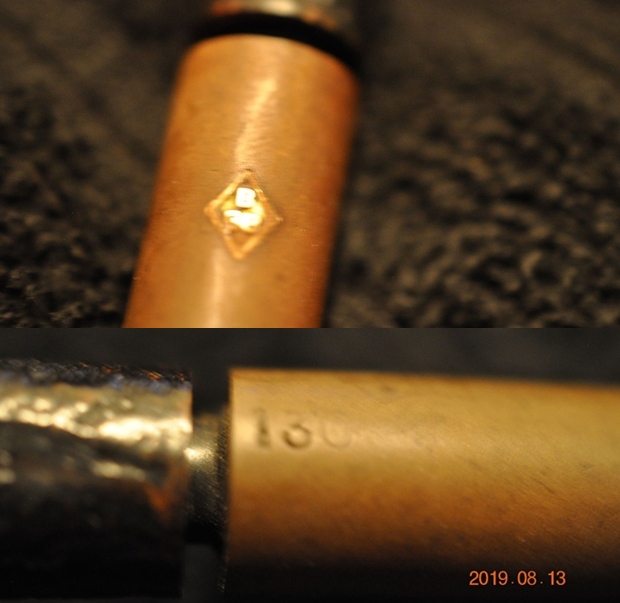
I recently stumbled on an old billiard pipe that my mom had bought me at an antique store while I packing up for a move. I was 16 or 17 at the time so I couldn’t use it and basically forgot about it until now, at 33, I’m starting to get into pipe tobacco more and more. The pipe has the “BBB” inside a diamond with “OWN MAKE” underneath that on the top of the shank, and “THORNEYCROFT Made In ENGLAND” with “506” just below it on the underside of the shank.
The problem is it has no stem, and the end of the shank where the stem would fit into, has many marks that I can’t tell whether they are chew marks or if they are just a part of the grain etc. To my very untrained eye the pipe seems to be in OK condition otherwise.
Being very new to this hobby and not knowing many resources yet or really what to do, and seeing your restorative work, I’d like to ask if you restore pipes for people or if you might be able to point me in the right direction on how I should go about making this pipe smokeable once again, or if it might not be worth it except for sentimentality sake. I’m able to provide pictures of the pipe if needed as well.
Thank you,
Dan
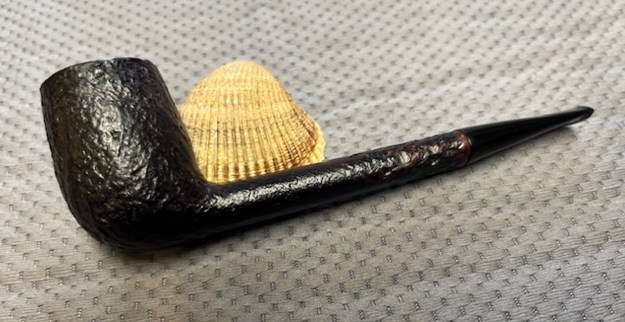
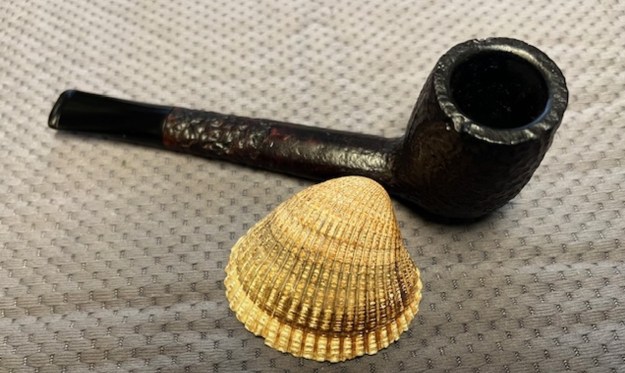
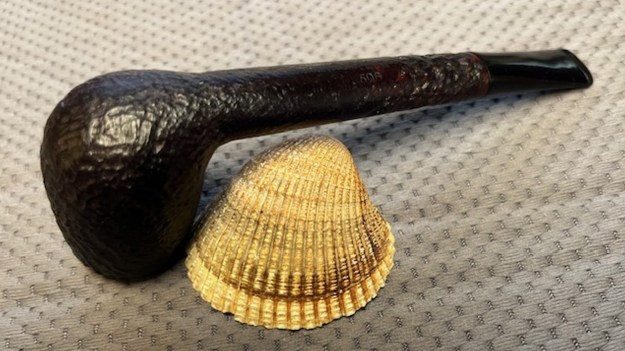
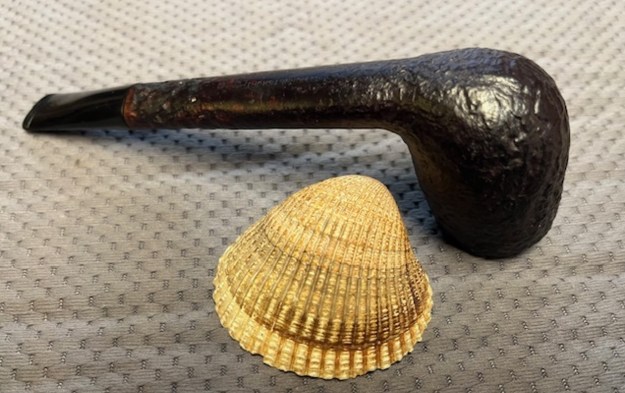
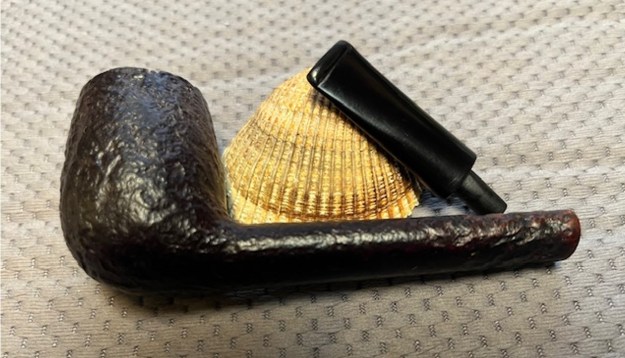
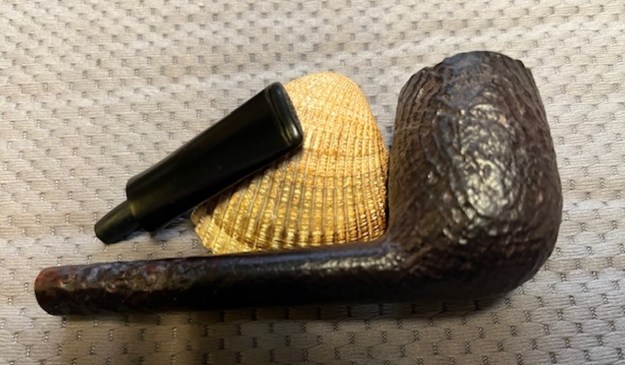
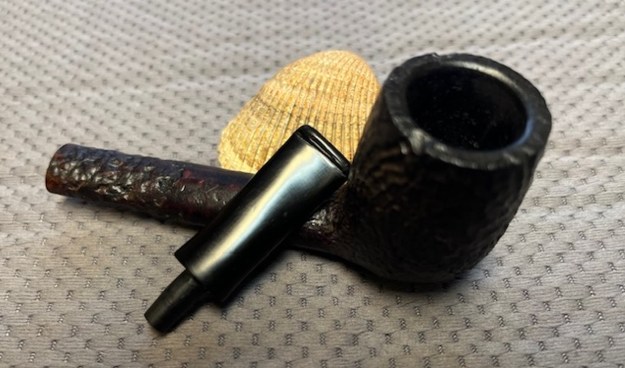
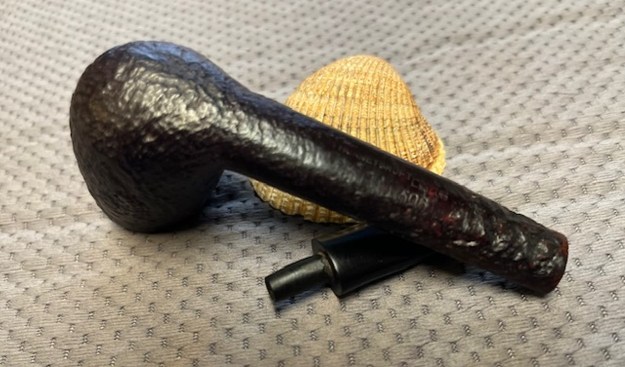
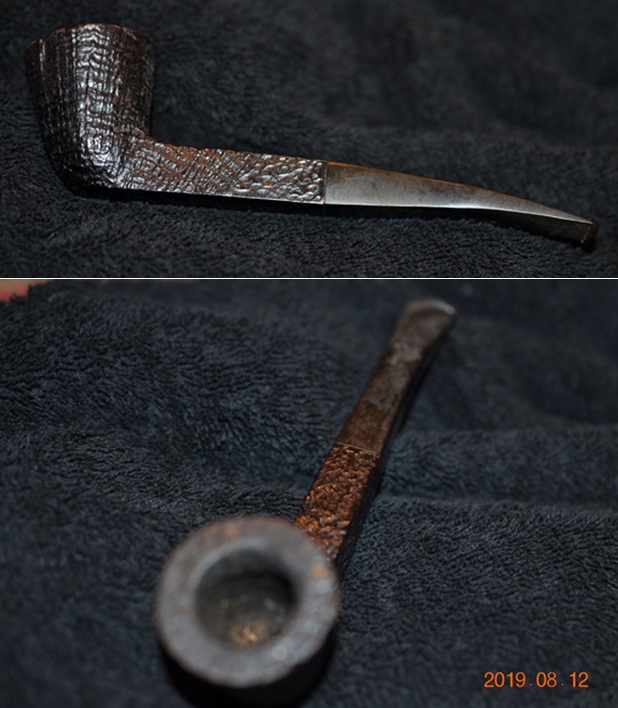
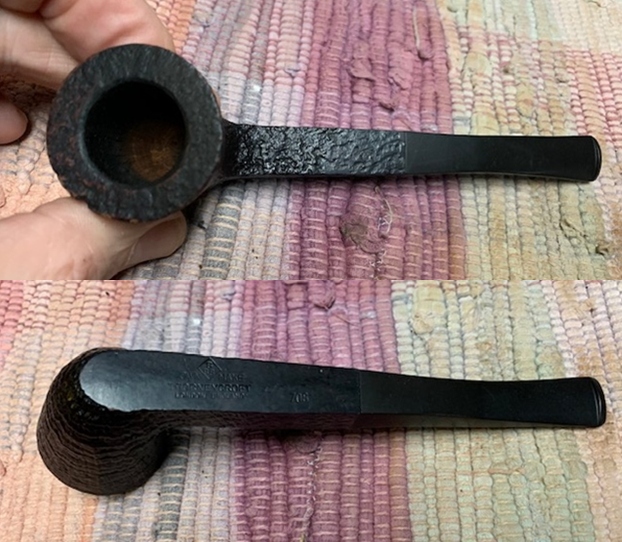
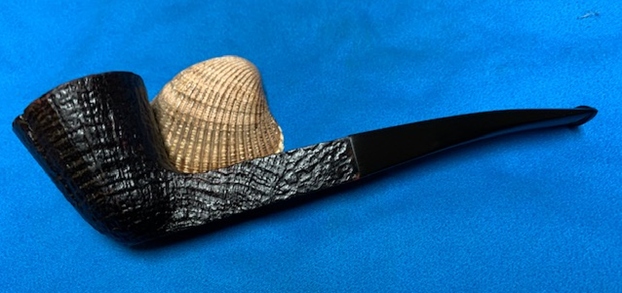
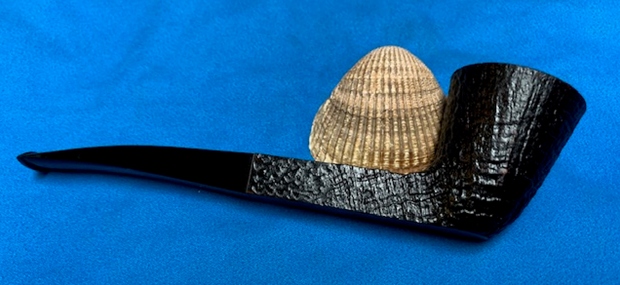
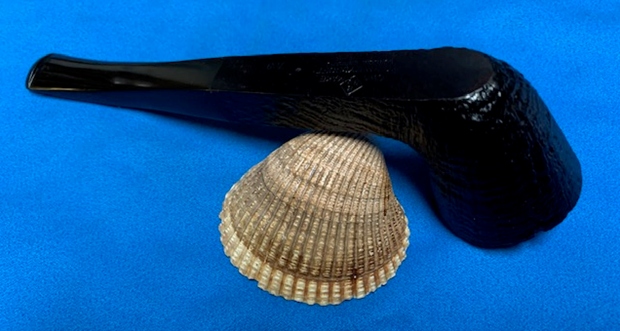
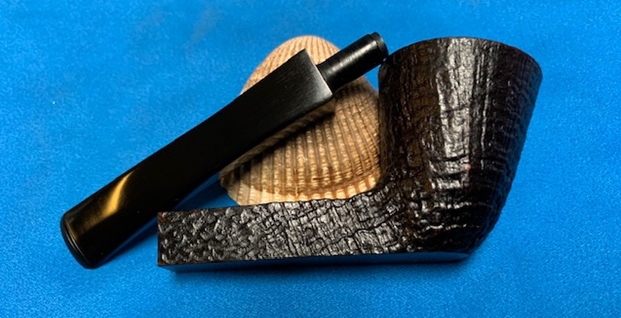
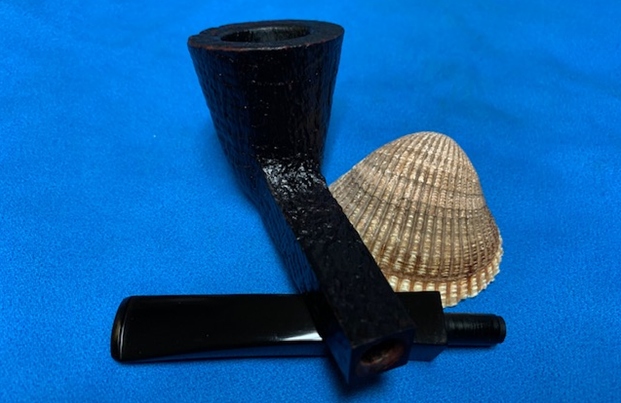
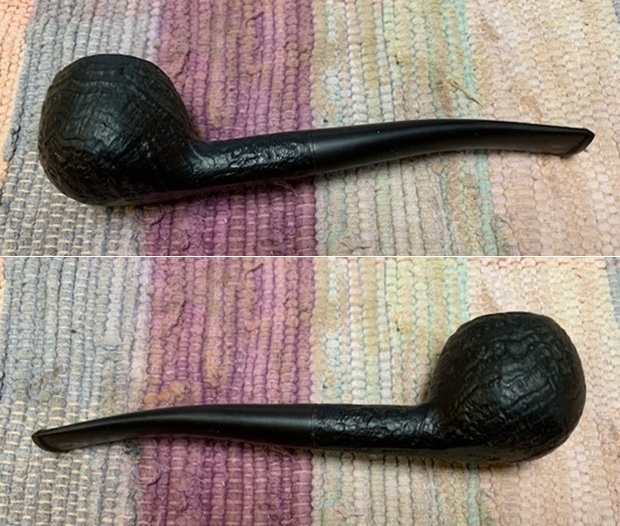
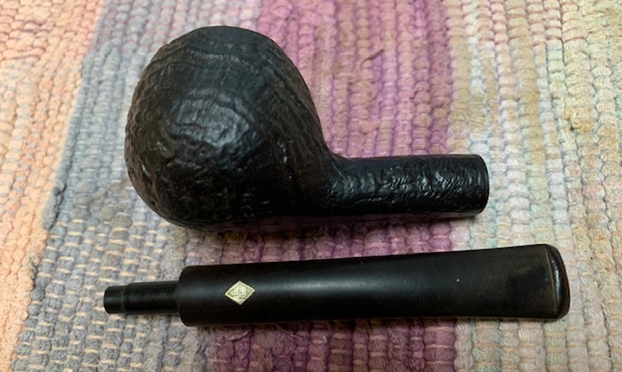
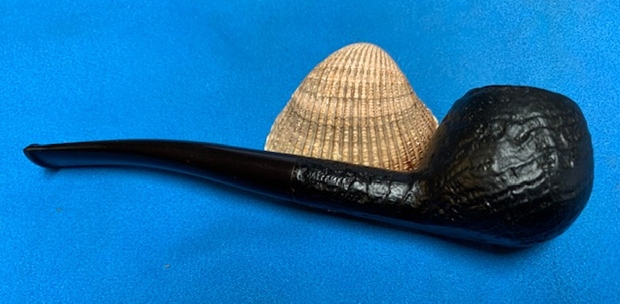
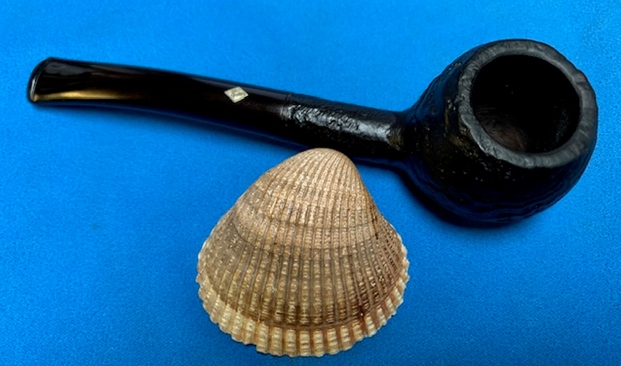
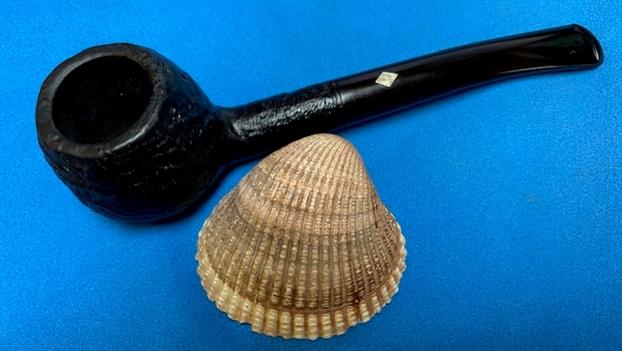
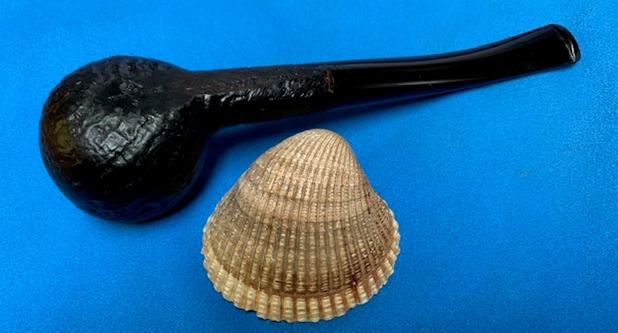
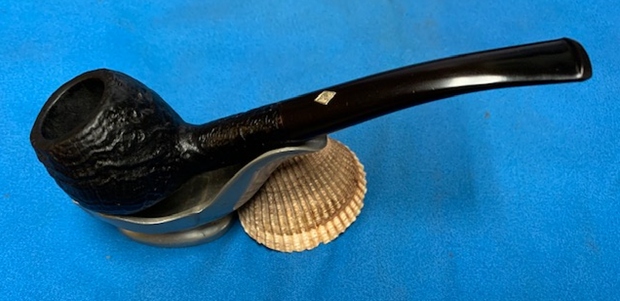
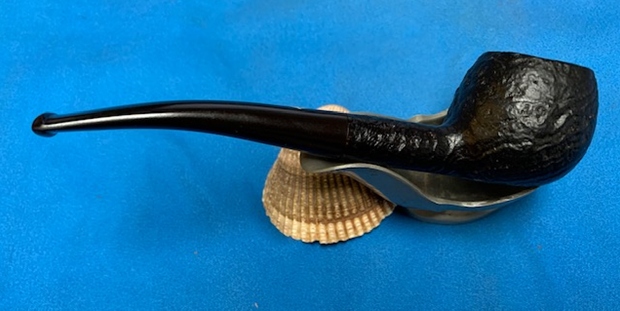
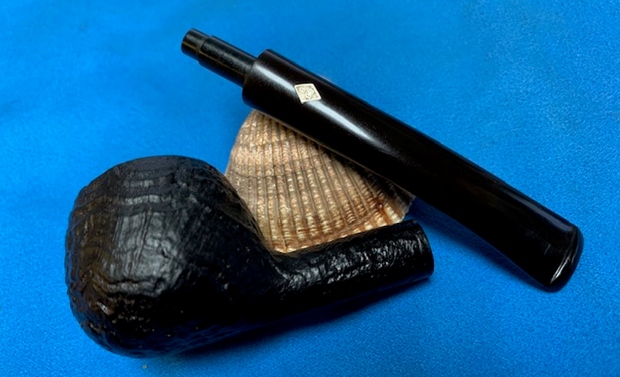
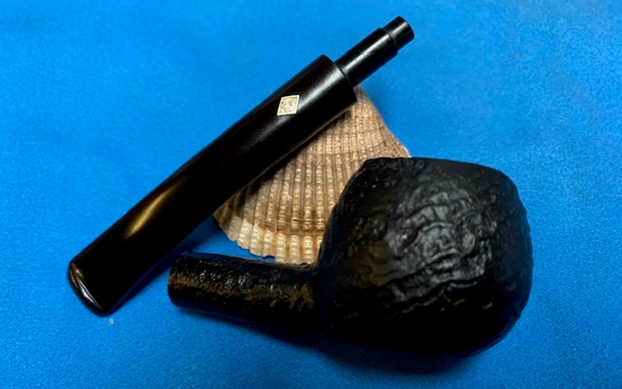
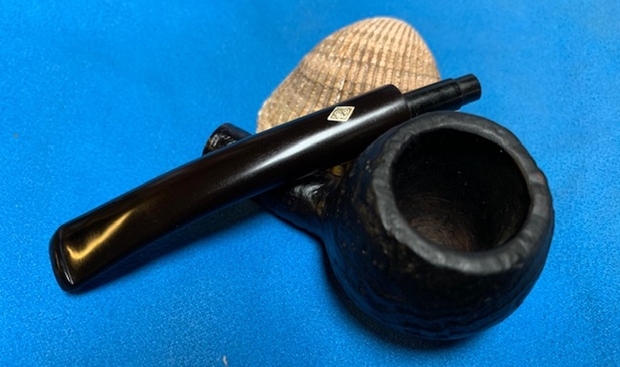
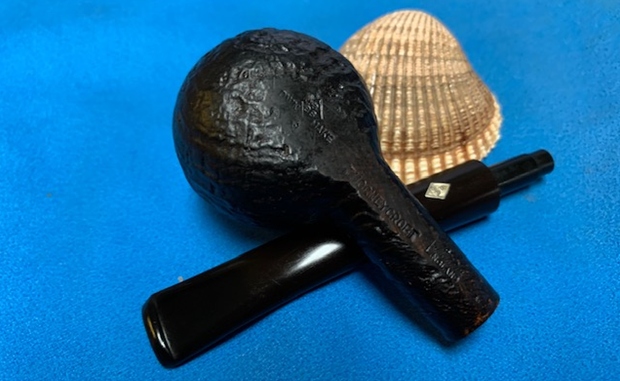
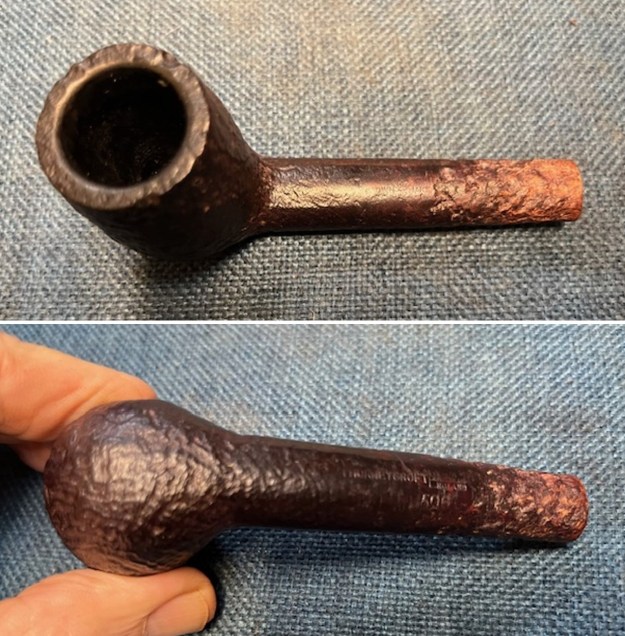
I wrote Dan back and asked him to send me some photos of the pipe so that I could see what I was dealing with in this pipe. He sent some amazing photos of various angles of the pipe and I was hooked. I asked him to send it up and I would restore and restem it for him. Here are the photos that he included for me. The first four photos are overall views of the pipe as a whole. The craggy sandblast, the typical rustication on the shank end that I have seen on most of these Thorneycroft pipes, and the delicate but classic look of a Canadian are all well captured.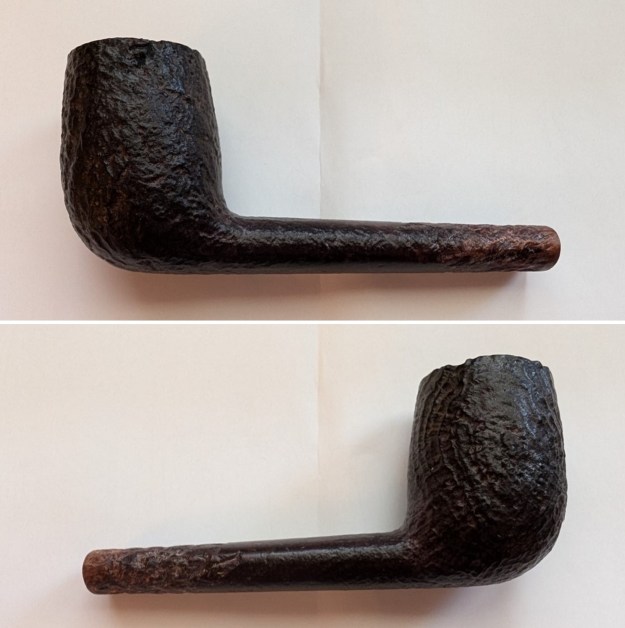
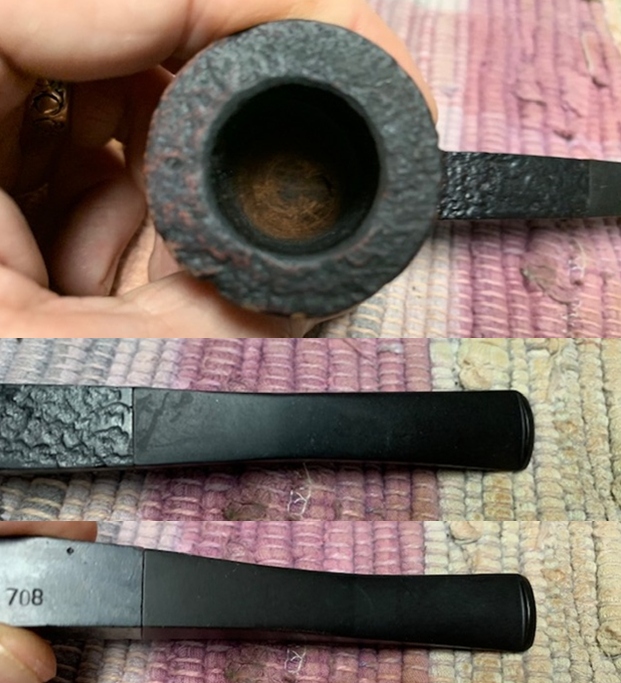
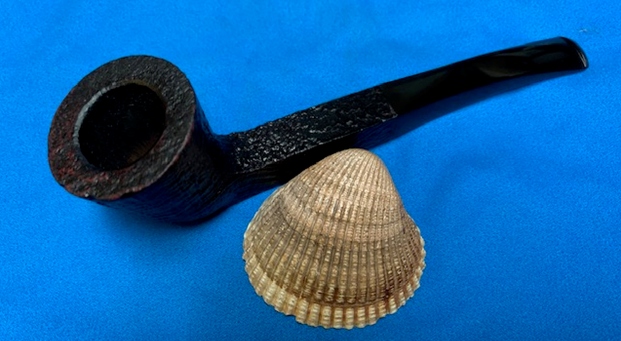
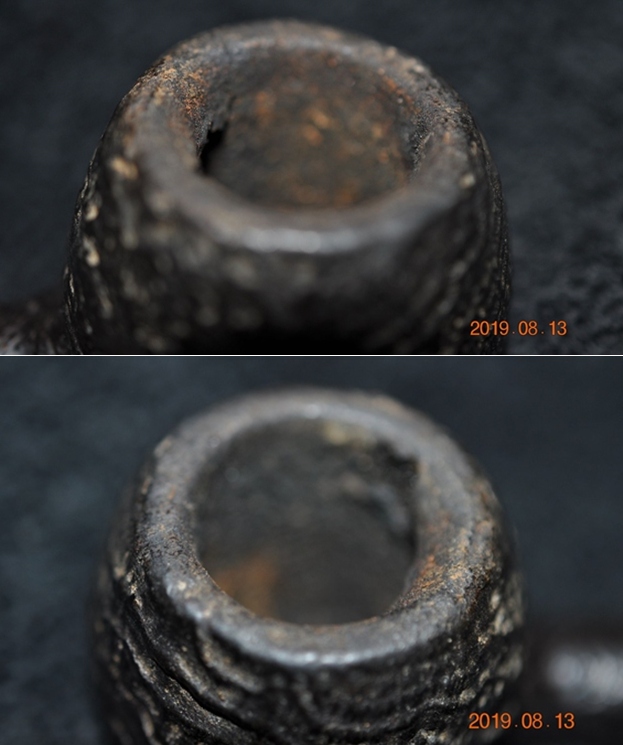
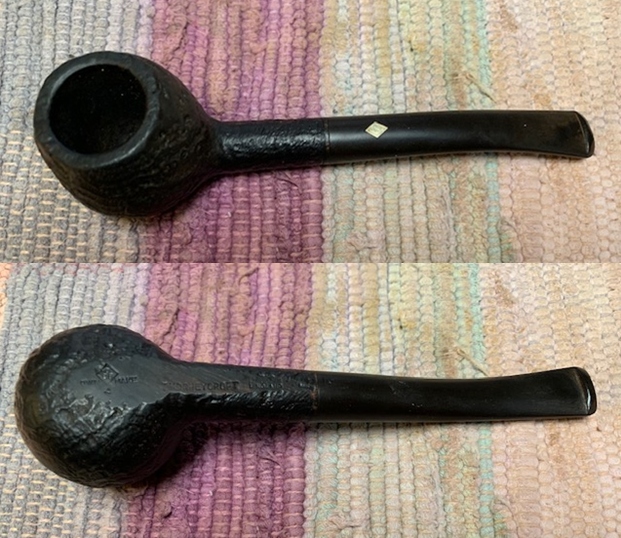
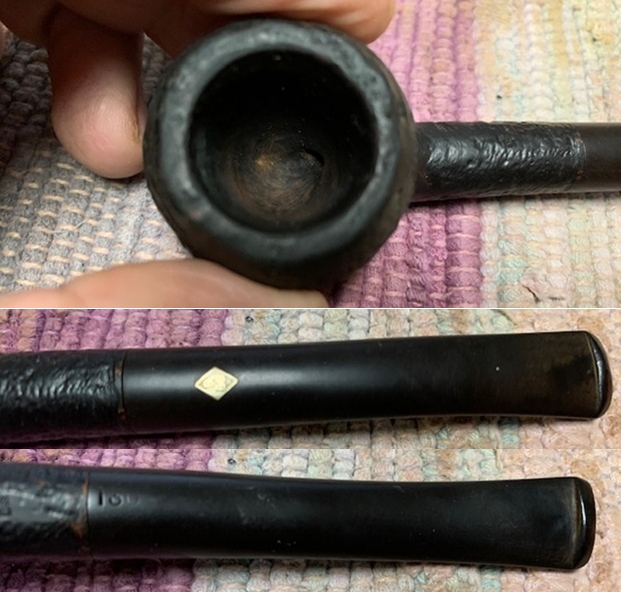
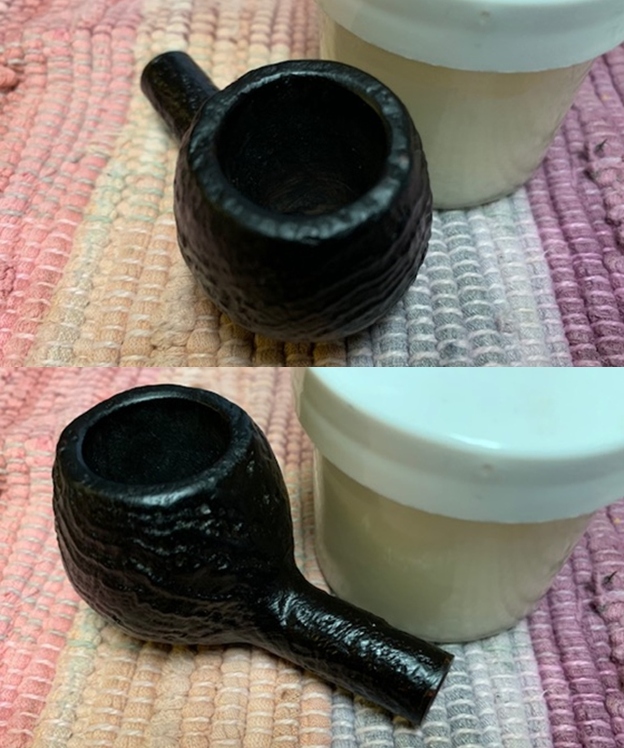
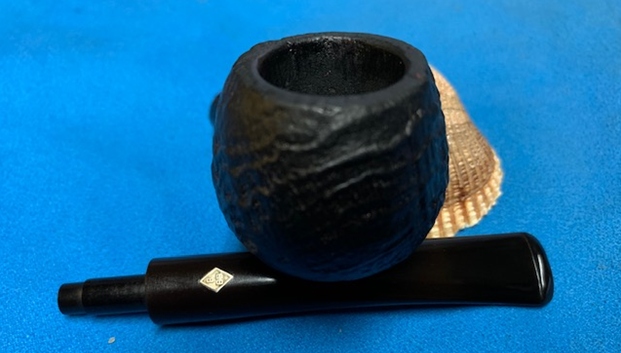
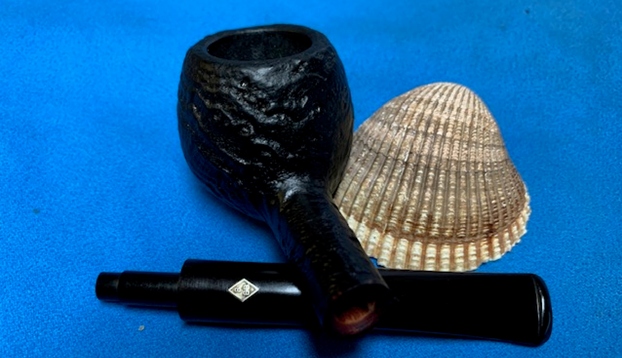
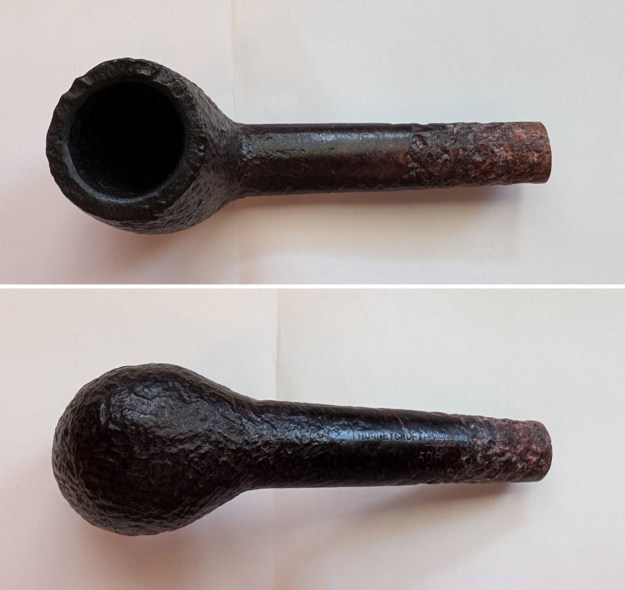 Dan sent photos of the bowl and rim top as well as photos of the sides of the bowl. I appreciate the detail in these photos. The bowl shot shows the tar and cake on the sides and heel of the bowl and the lava build up in the sandblast of the rim top. It should clean up fairly easy. He also notes with a red circle what appears to be a chip on the left side of the bowl on the outer edge of the rim. The more I examine it the more I think it is probably a part of the blast. But I will know more once I have it in hand.
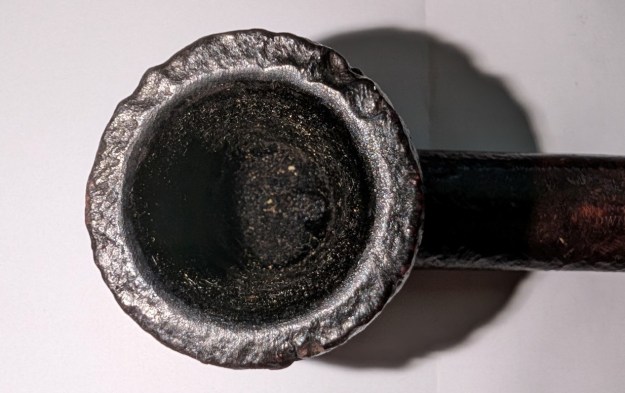

 His close up photos of the shank show the rustication and the washed out stain on the shank end. I think it is the typical BBB rustication that I have seen on the shank end of the Canadians and long shank pipes in the Thorneycroft line.
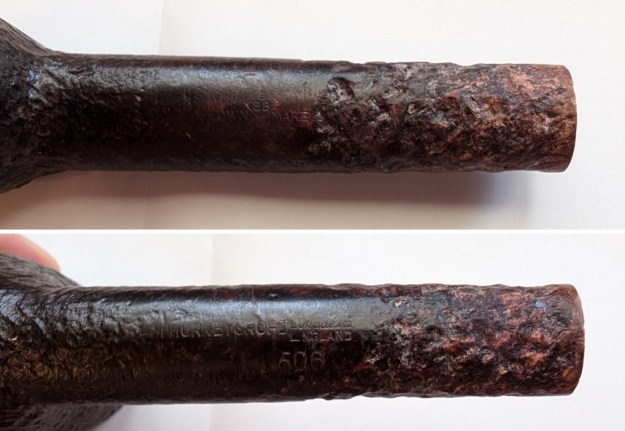 Dan did a great job capturing the stamping on the shank top and underside. It reads as he noted in his opening email.
 He took close up photos of the rustication as well. It is rugged and I have to say that I like it. Once it is restained it will look quite nice. The photo of the shank end shows that there are no crack in the shank. There is a nick on the lower right side that is probably a flaw in the briar.
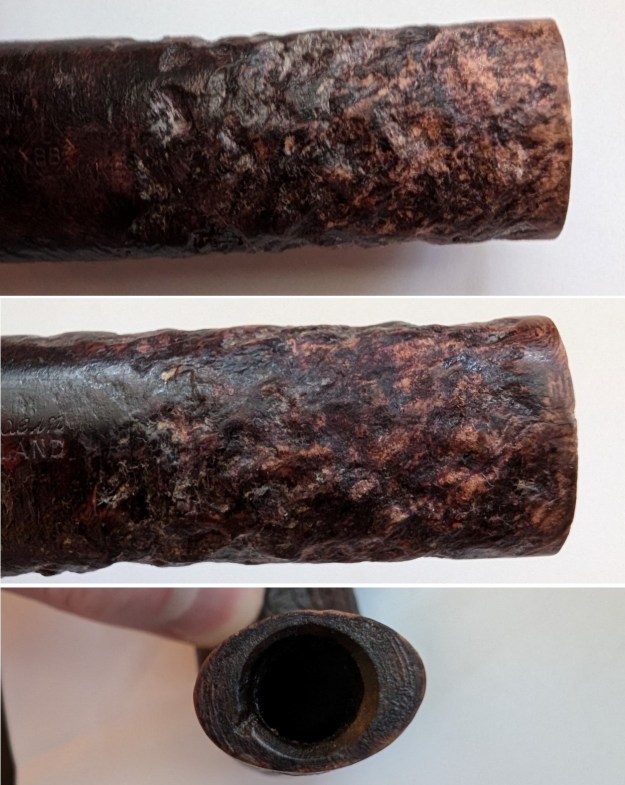 I did a search on Pipephil’s site (http://www.pipephil.eu/logos/en/logo-bbb.html) and looked for the specific Thorneycroft line. The second pipe in the list is stamped the same way as the one that I am working on and the stamping on the stem is the same. The Made in England stamp is identical to the second one.
 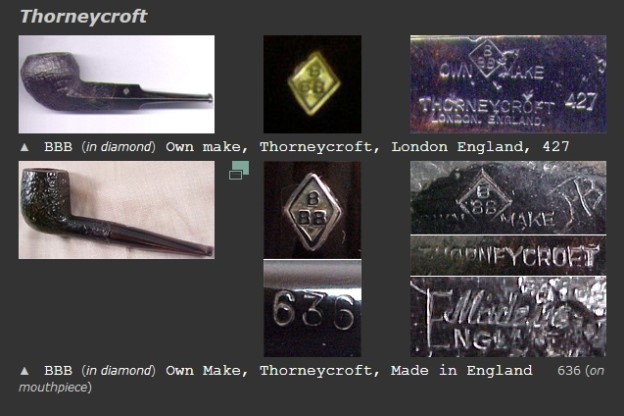 I looked on Pipedia and found several references to the BBB Own Make Thorneycroft pipe but nothing specific (https://pipedia.org/wiki/BBB). I also found an advertisement courtesy of Doug Valitchka from 1957 that had a great description of the Thorneycroft that I include below. It reads as follows:
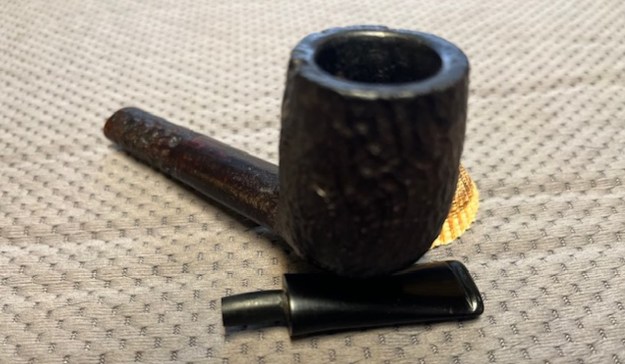
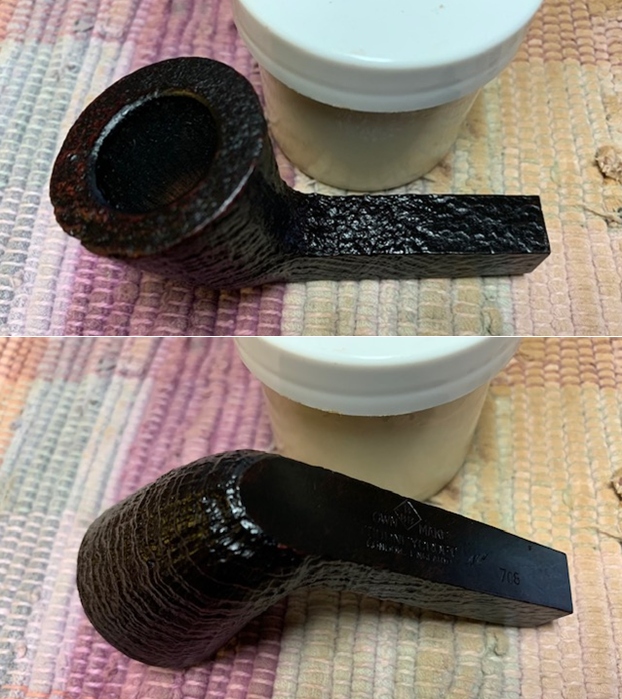
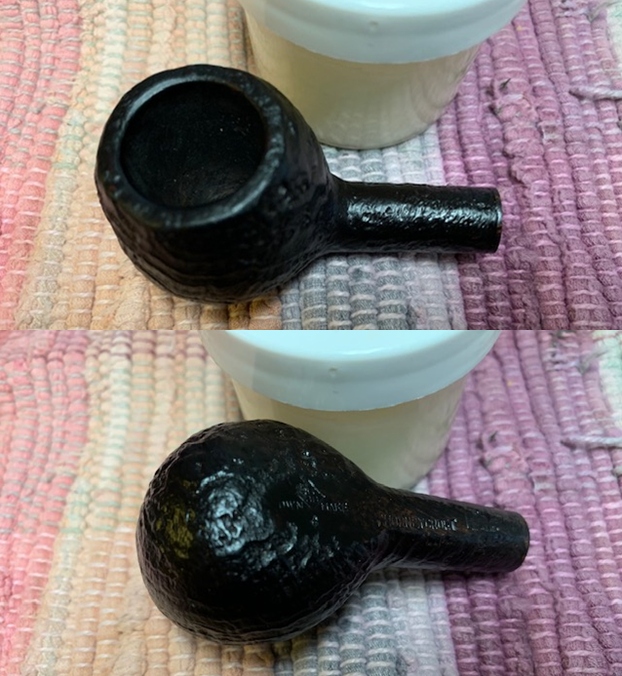
Beautifully balanced, superbly lightweight and mellow smoking… these qualities have made the BBB Own Make Thorneycroft famous. First tough, age-old Algerian briar is carefully selected and cured then the bowls are carefully hand-turned. Now comes the special process of sand- erosion. The soft parts of the briar are literally blasted away leaving a hard bowl of unusual beauty, durability and sweetness. A mouthpiece of finest English Ebionite, inlaid with the famed metal emblem, and a specia dry smoking condenser tube complete the picture. Available in all 24 BBB shapes…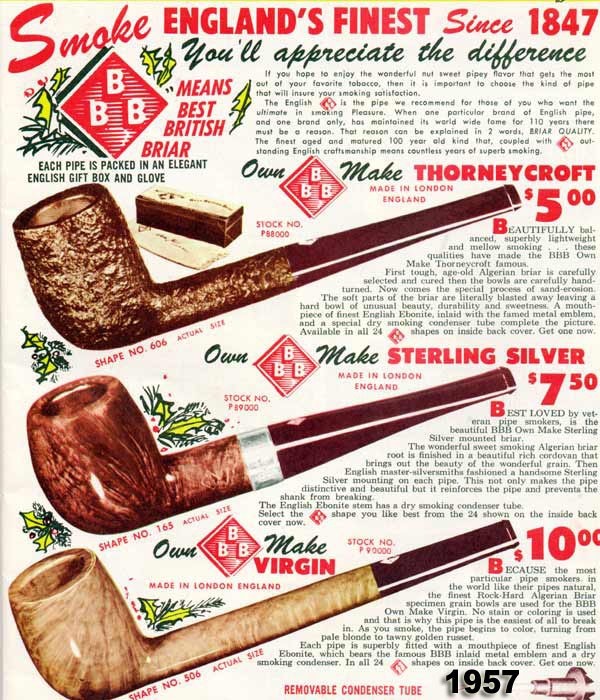 I took some photos of the bowl as it was when I unpacked it. It was stamped as Dan noted above and was clear and readable. The rough shank end of the pipe was not damaged but had lost the stain that had originally coloured it. The little nick in the shank end does not damage the airway in the shank. The nicks that were noted on the edge of left side of the bowl appeared to me to be part of the blast and should be left as is. The bowl had a light cake on the walls and there was a light lava coat on the rim top where it had filled in some of the blast. The inner edge of the rim was in excellent condition with no damage. The outer edge had no damage either but there was some roughness to it due to the sand blast finish on the edge. It looked very good however. I took photos of the bowl to show the condition when I received it from Dan. I have included them below.
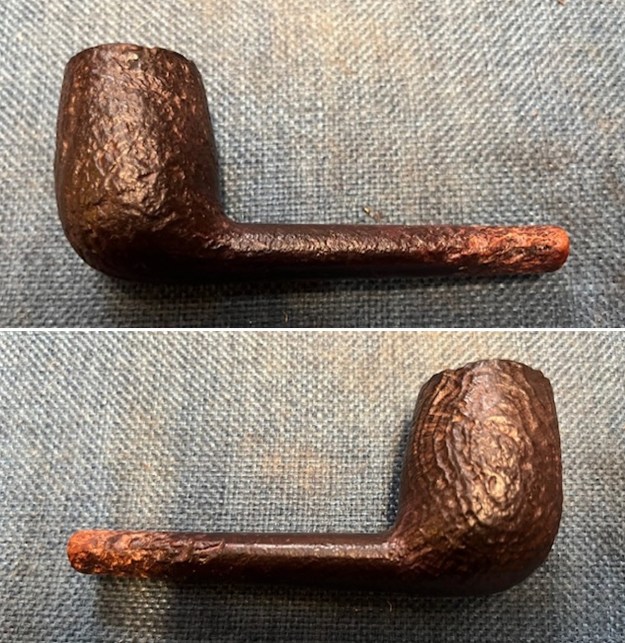
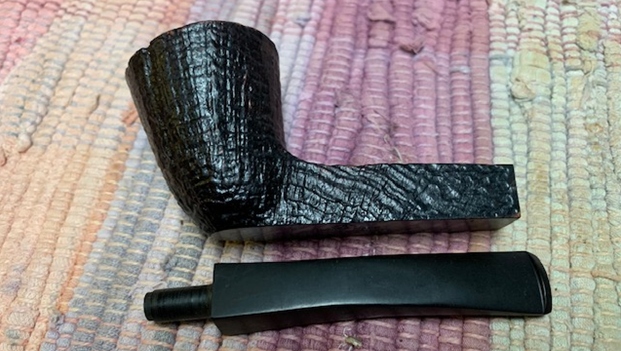
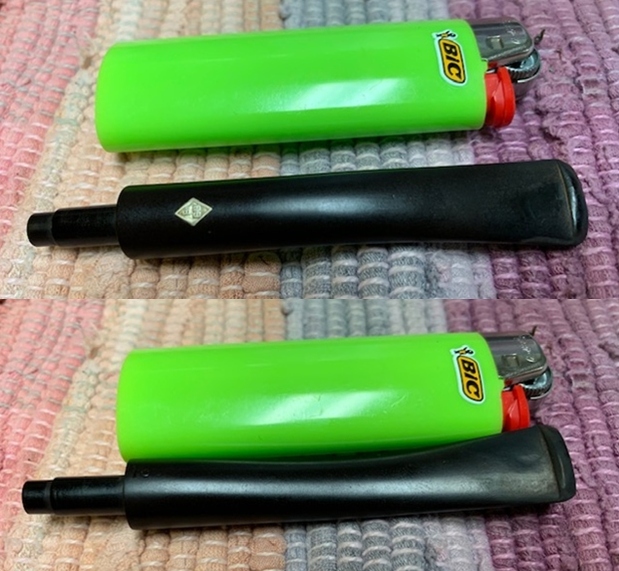
 I was hoping I had a BBB stem for the Canadian but I did not have one with the brass insert. I did have one that was a pretty decent fit. It would need to be adjusted in terms of the top, bottom and sides of the stem to fit the shank dimensions but it was the right length and shape for the pipe. It had a great shape on the slot that would give a good spread to the smoke.
 Now it was time to clean up the bowl. Since the cake was thin I used a Savinelli Fitsall Pipe Knife to scrape out the cake that was in the bowl. I took it back to bare briar and then sanded the walls with a piece of dowel wrapped with 220 grit sandpaper. The bowl walls were in very good condition with no checking or burn damage.
 I wiped off the bowl with a damp cloth and was amazed at how little dust came off the finish. Dan had obviously wiped it down before he sent it. I also wiped down the rim top and it was quite clean as well. I used a black and a walnut stain pen to stain the shank end rustication to match the rest of the briar. It looked very good. Once it was buffed and polished it would be a perfect match.
 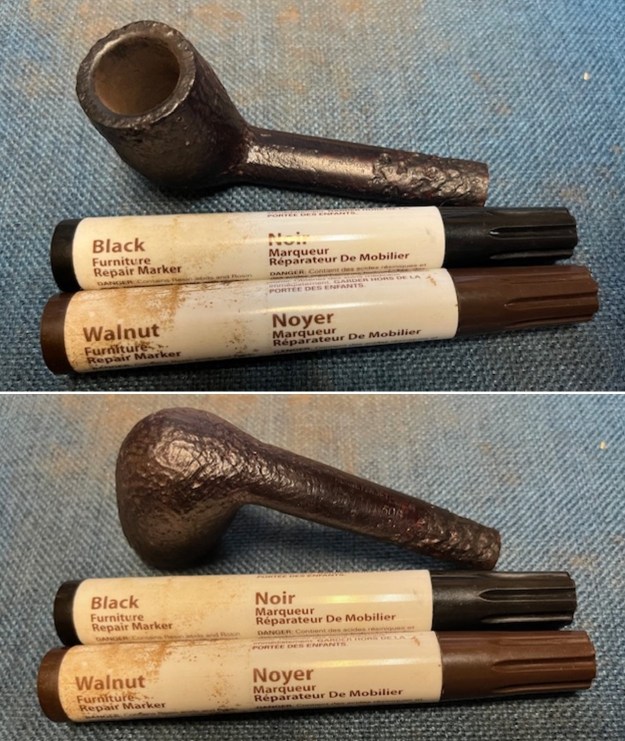 I used a brass bristle wire brush to knock off the remaining debris in the sandblast on the rim top. It looks very good with some deep blast sections on the top right and left. Beautiful blast in all ways.
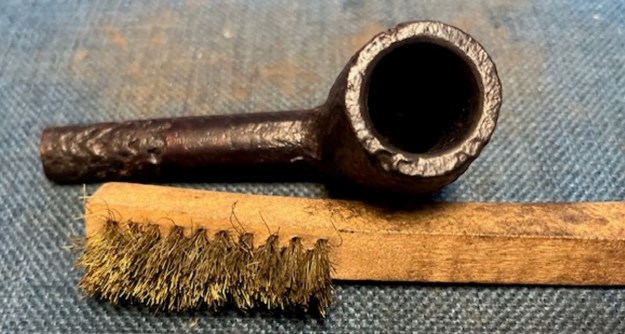 I cleaned out the internals of the shank, mortise and the airway in both the shank and the new stem with alcohol, cotton swabs and pipe cleaners. The pipe smells fresh and ready to smoke again.
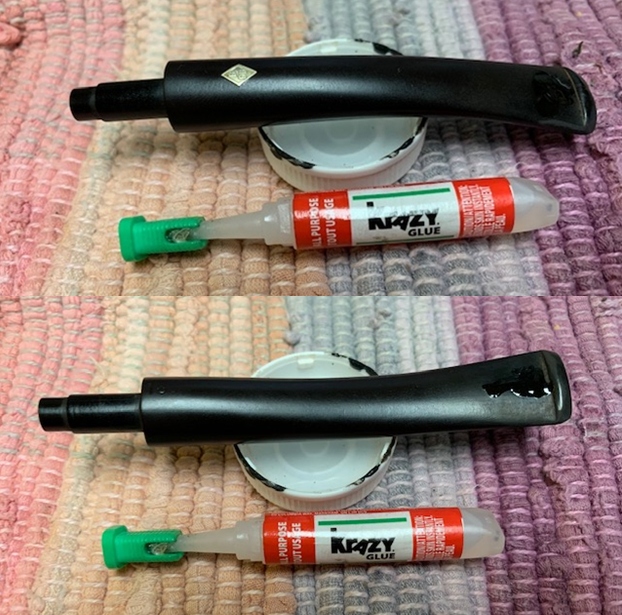
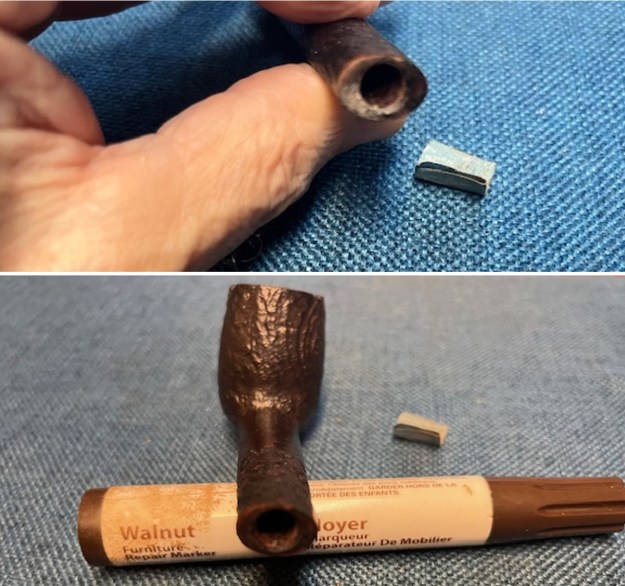
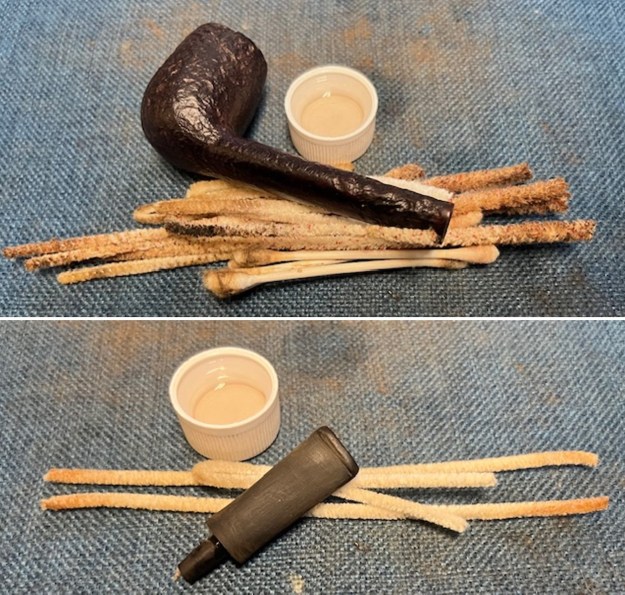 Now that it was clean it was time to do a few minor surface repairs. The first of these was a small repair to a flaw on the shank end on the inner edge of the mortise on the lower left side. I used a tooth pick to put a drop of CA glue in the flaw and smooth it out on the surface. I did the same to the pit on the outer edge of the rim on the right side toward the back. Both were cosmetic rather than structural but it improved the look of the bowl in those spots. I smoothed out the repair on the shank end with a folded piece of sandpaper and touched the paper to the repair on the rim edge as well. I stained both with a Walnut stain pen and blended them into the surface.
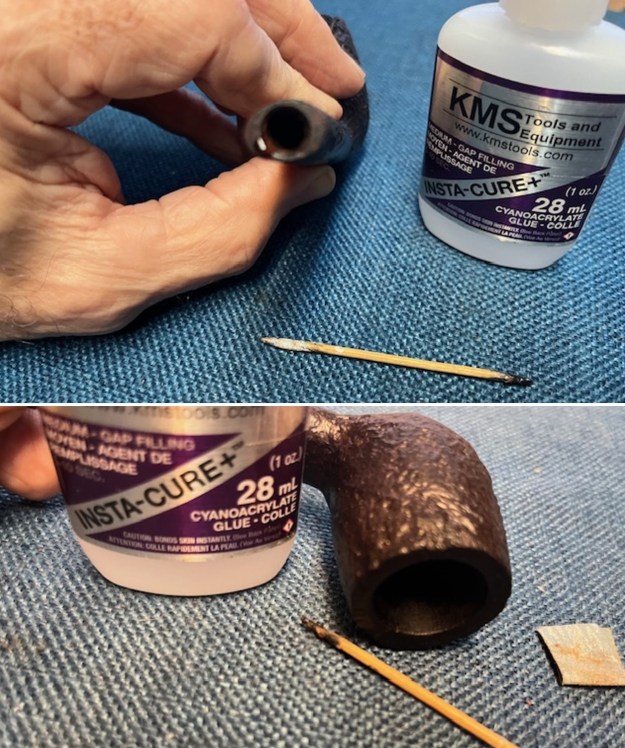
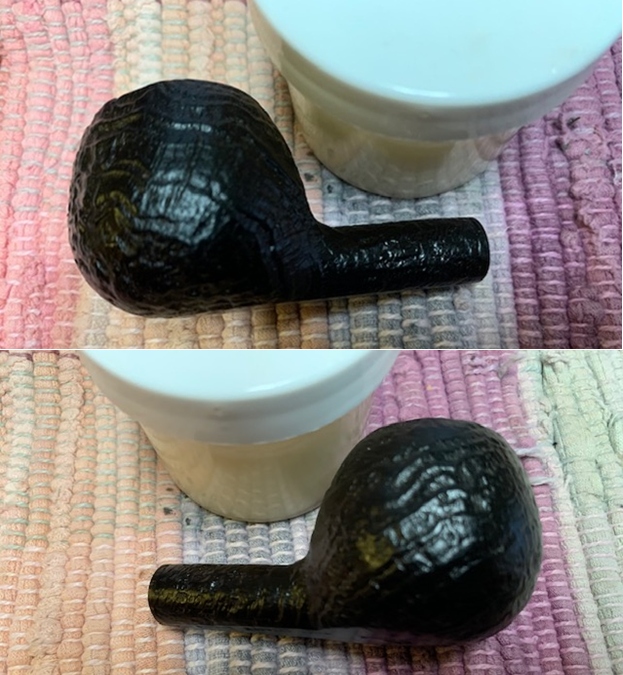
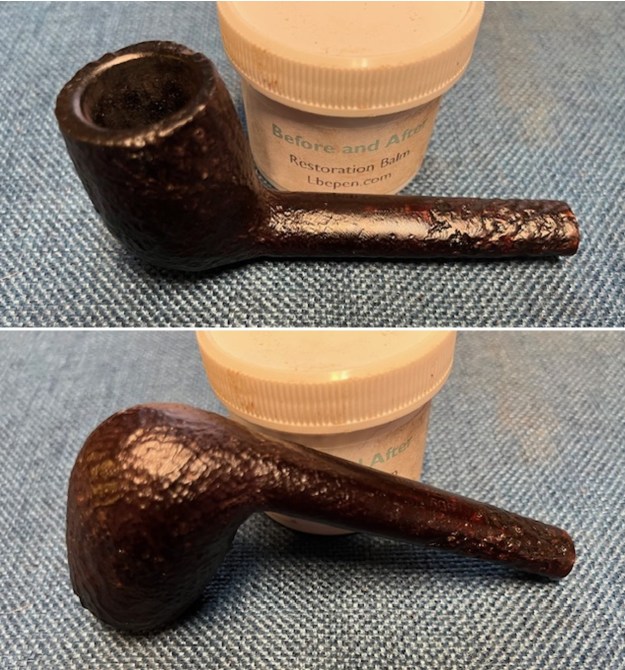
 I rubbed the briar down with Before & After Restoration Balm. I worked it into the briar with my fingertips and a shoe brush to work it into the finish. The product works to clean, enliven and preserve the briar. I let it sit for 10 minutes then I buffed it with a cotton cloth to deepen the shine. The depths of the blast in the briar really comes alive with the balm.
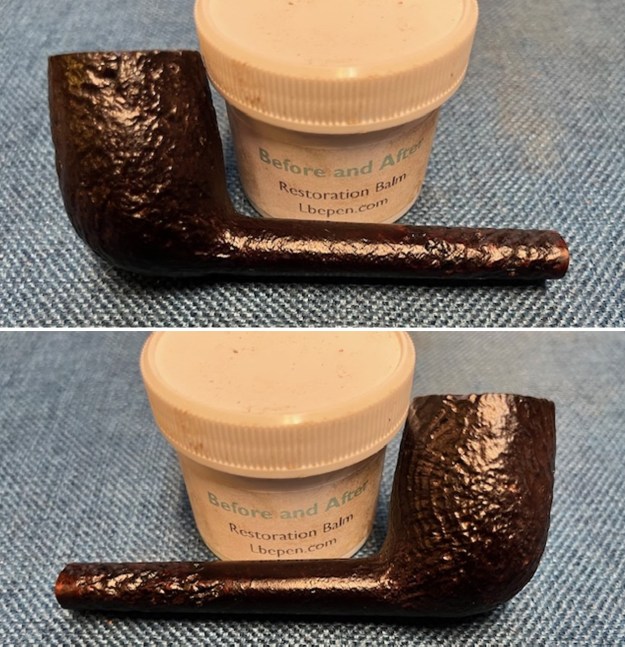
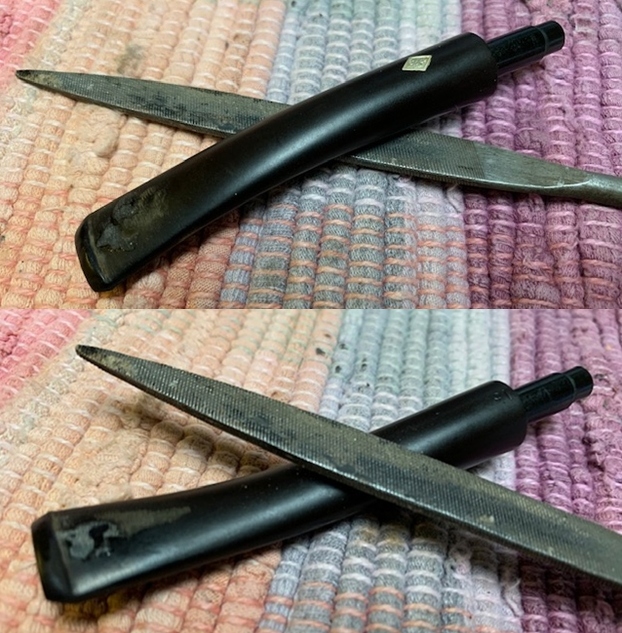
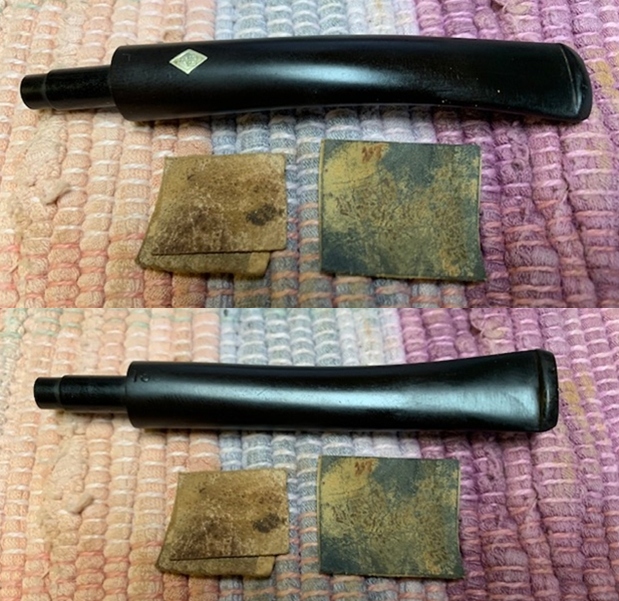
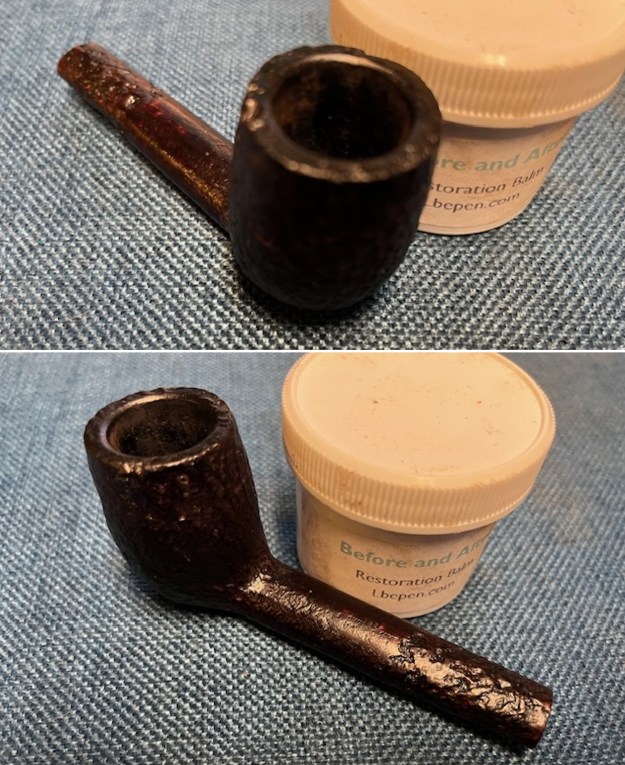 I worked on the fit of the stem to the shank with a folded piece of 220 grit sandpaper. I needed to reduce the diameter of the stem from top to bottom and from right to left. I worked on it for quite a bit of time sanding, sanding and more sanding until the fit to the shank was good and the transition between the shank and stem was smooth.
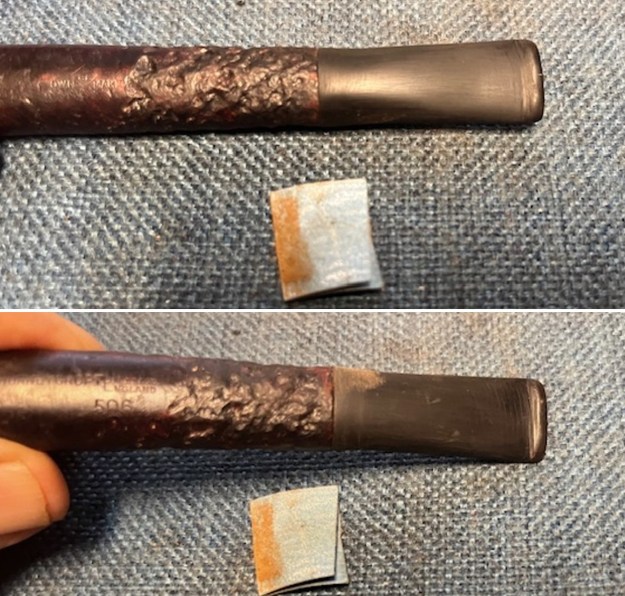 I polished the stem once it fit with 320-3500 grit sanding pads. I wiped it down after each pad with a cloth impregnated with Obsidian Oil. By the end the stem took on a good shine and the fit was very good.
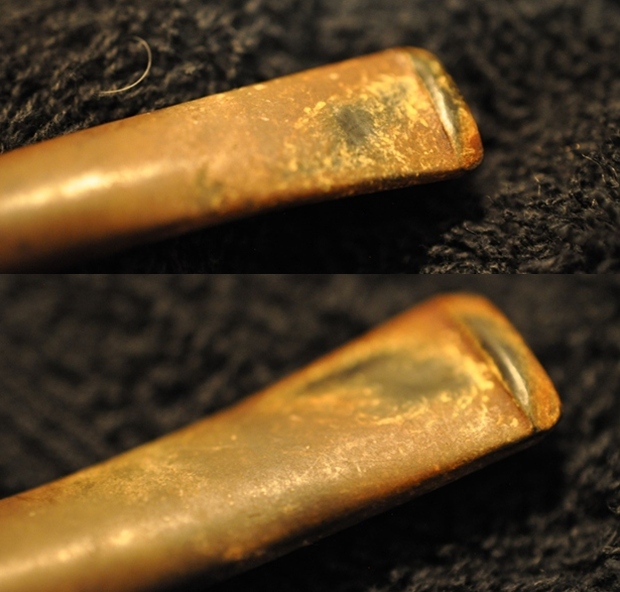
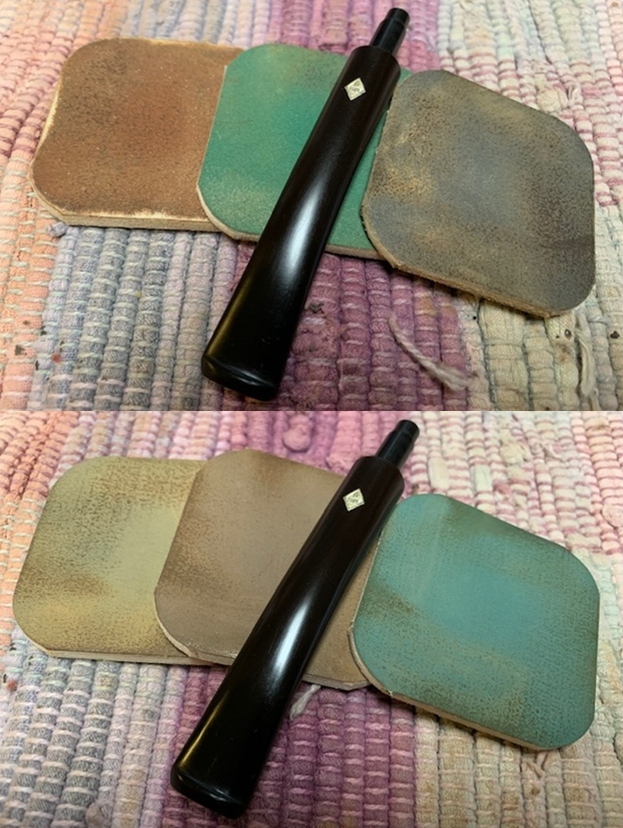
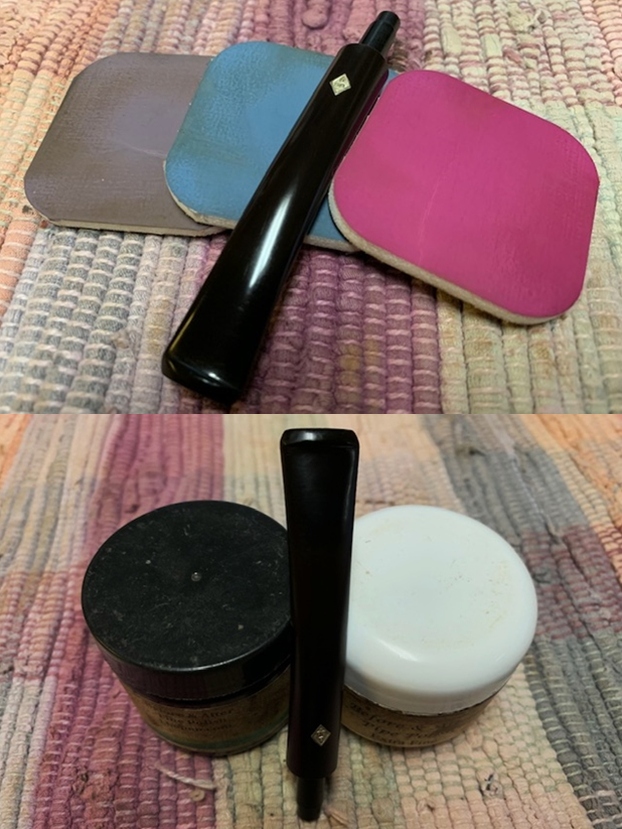
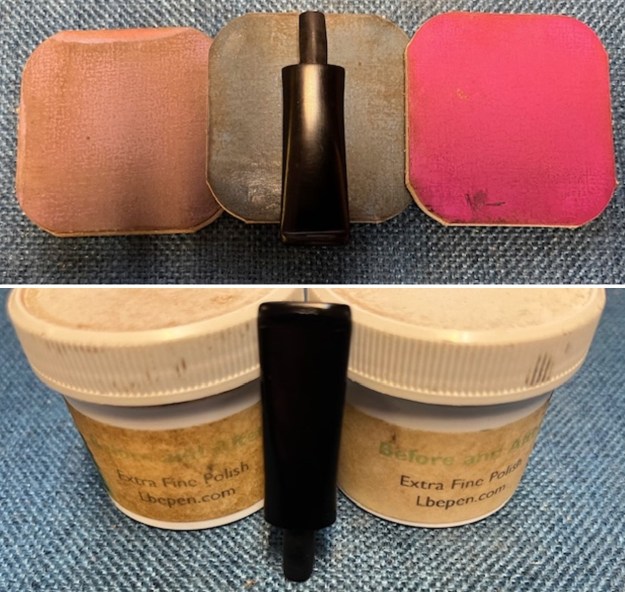
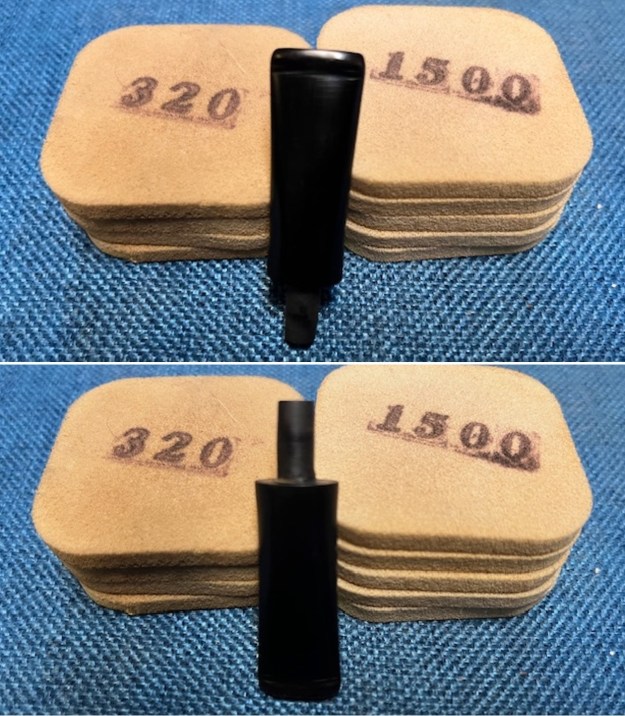 I polished the vulcanite stem with micromesh sanding pads – 1500-12000 grit pads. I wiped it down with Obsidian Oil after each sanding pad. I used Before & After Pipe Polish – both Fine and Extra Fine to further the stem. The photos below show the polished stem.
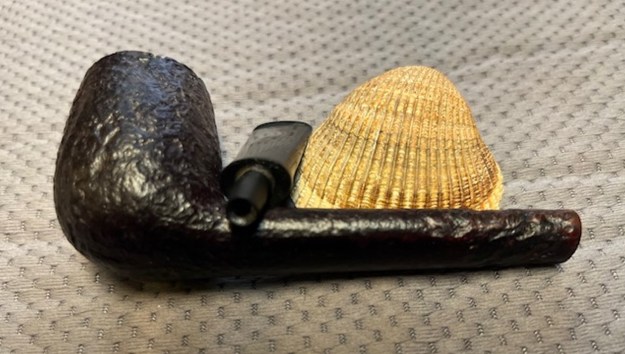
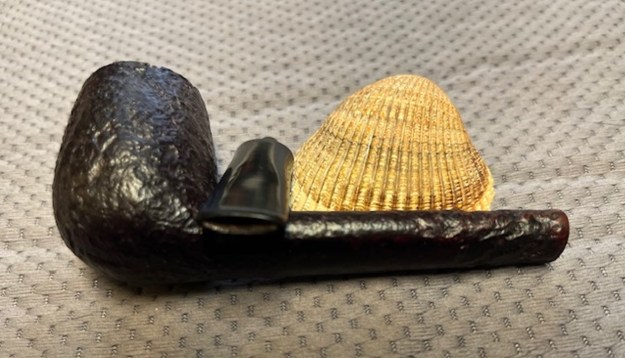
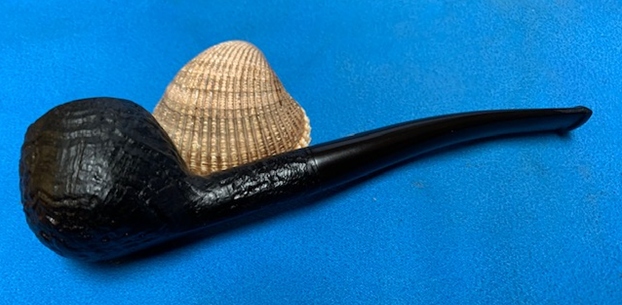
 I am pretty happy with the restoration and restemming of this BBB Own Make Thorneycroft Sandblast Canadian. There is a sandblast finish to the bowl that is rugged and rich looking. The newly fit stem is clean and smooth and looks good on the shank. I put the stem back on the bowl and carefully buffed the pipe with Blue Diamond on the buffing wheel using a light touch on the briar. I gave the bowl multiple coats of Conservator’s Wax and the stem multiple coats of carnauba wax on the buffing wheel and followed that by buffing the entire pipe with a clean buffing pad. I hand buffed the pipe with a microfiber cloth to deepen the shine. The finished BBB Own Make Thorneycroft Canadian fits nicely in the hand and feels great. Give the finished pipe a look in the photos below. The dimensions of the pipe are Length: 5 ¾ inches, Height: 1 ¾ inches, Outside diameter of the bowl: 1 1/8 inches, Chamber diameter: ¾ of an inch. The weight of the pipe was 30grams/1.02ounces. I will be sending it back to Dan shortly. I look forward to hearing what he thinks of it. Thanks for reading this blog and my reflections on the pipe while I worked on it. It is a privilege to be a part of the restoration and preservation of these old timers with a back story!