by Kenneth Lieblich
It’s Eastertide and so, only too fitting that a veritable pipe resurrection is next up. Friends and family often accuse me of taking on some crazy pipe projects. Well, if ever there was a quixotic pipe restoration, it is this one. I found this pipe at an antique shop in our local Fraser Valley and it was in sorry shape. Honestly, I probably should have left it – but then I wouldn’t have this crazy blog to post. This was a very challenging restoration – showing, once again, that any pipe can be restored. Whether any pipe should be restored is quite a different question. This is an uncommon pipe and it deserves respect. But this may be a pipe for your collection, rather than for your regular rotation.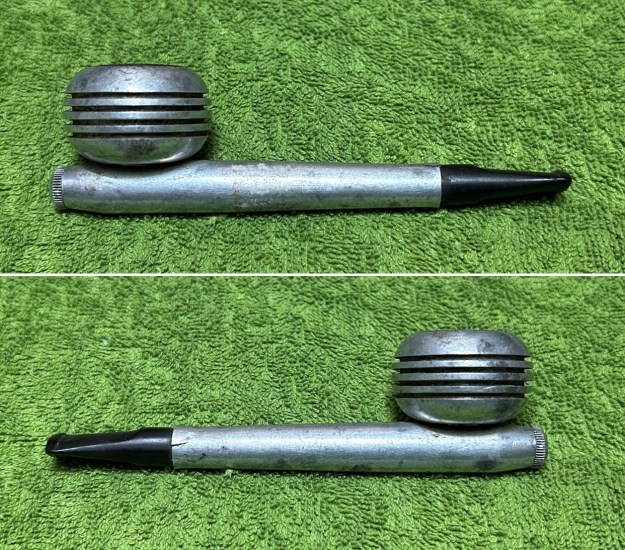
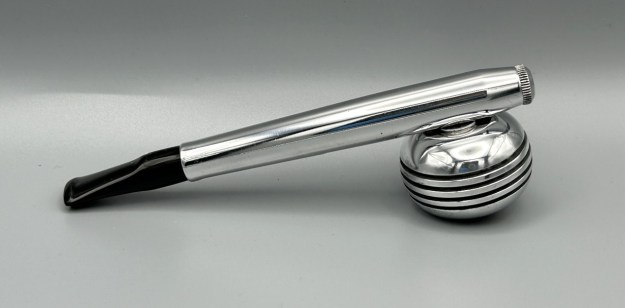
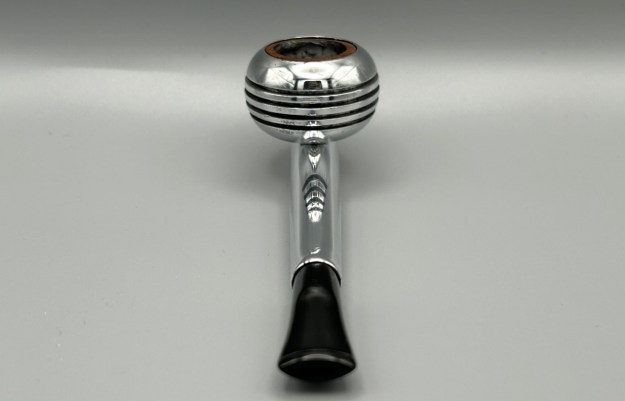
 So, what on earth is this thing? Good news! It’s not from earth – it’s called the Comet. This pipe has no markings, but I already knew the general family this pipe was from. It is related to the Thoro-Kleen, made by the Greenwich House Corporation of New York. When Steve last restored one of these, he described it as reminding him of the Jetsons from Saturday morning cartoons! It certainly does have a futuristic, out-of-this-world look. To me, it is a good example of mid-twentieth-century design.
Our friends at Pipedia have a brief writeup on the Thoro-Kleen, which I copy here in its entirety:
The Greenwich House Thoro-Kleen was a metal pipe system sold with both a metal outer bowl with a briar insert and a full briar bowl. They are from the same family as the Roybrooke, Comet, and Original Gridiron pipes, and parts from all are believed to be interchangeable. The pipes were sold by the Greenwich House Corporation, located in 1947 at 939-M 8th Avenue, N.Y. 19, N.Y. The pipe set sold for $2.50 in 1947.
Similarly, Smoking Metal (a website dedicated to metal pipes) also has a short writeup:
This family of pipes have been seen as Knowles Air Lite (believed to be Canadian version), Roybrooke, Comet, Original Gridiron and the Greenwich House Thorokleen. Seemingly sold in sets that comprised a normal briar bowl as well as the metal outer with a briar insert. The body of the pipe can be hexagonal, square (Thoro Kleen only seen this shape) or circular in cross section. Regardless of variant all parts are interchangeable. The unmarked version tends to be regarded as the COMET, all the others being stamped with a name.
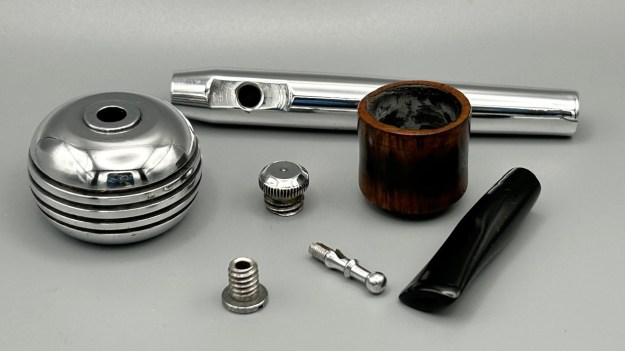
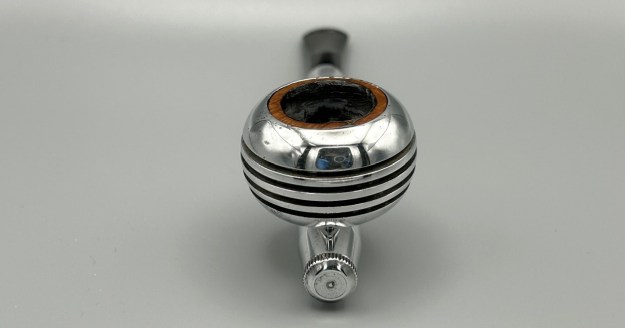
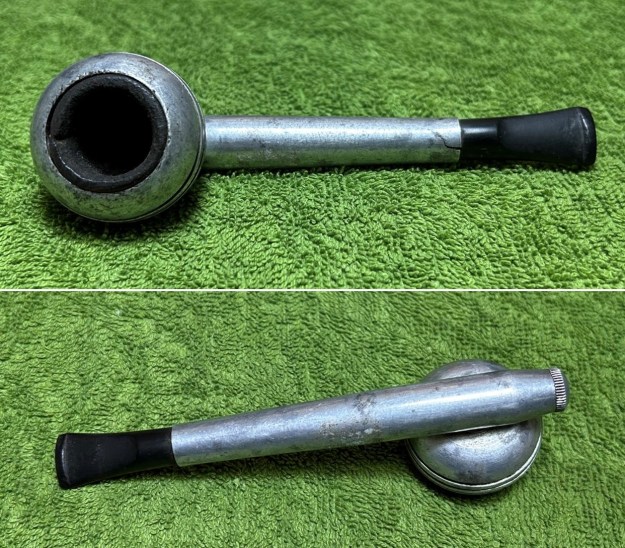
Some instances of this pipe appeared with an entirely briar bowl, and some came with a metal bowl and briar insert. Some sources indicate that the pipes came with both bowls, and you could take your pick, but the one I have has only the metal bowl and briar insert. Here’s a photo of an original: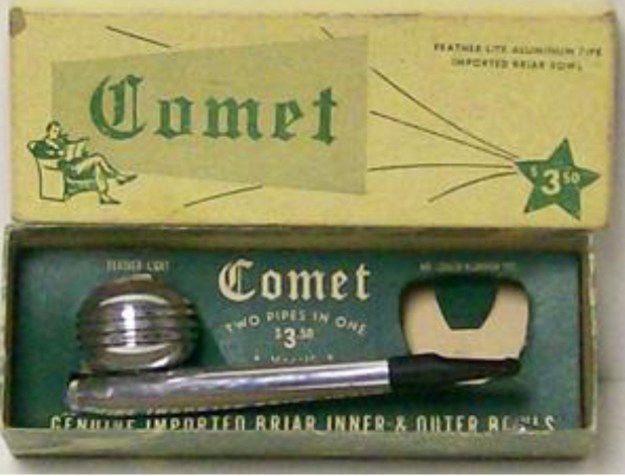 This pipe was a mess from every perspective. The vulcanite stem had some dents in it and was oxidized. The briar bowl insert was broken in half (literally) The metal components were dirty, dull, and scratched. The insides were filthy. There were nicks in the metal and – most significantly – the end of the shank had tiny cracks. This was going to be a tall order.
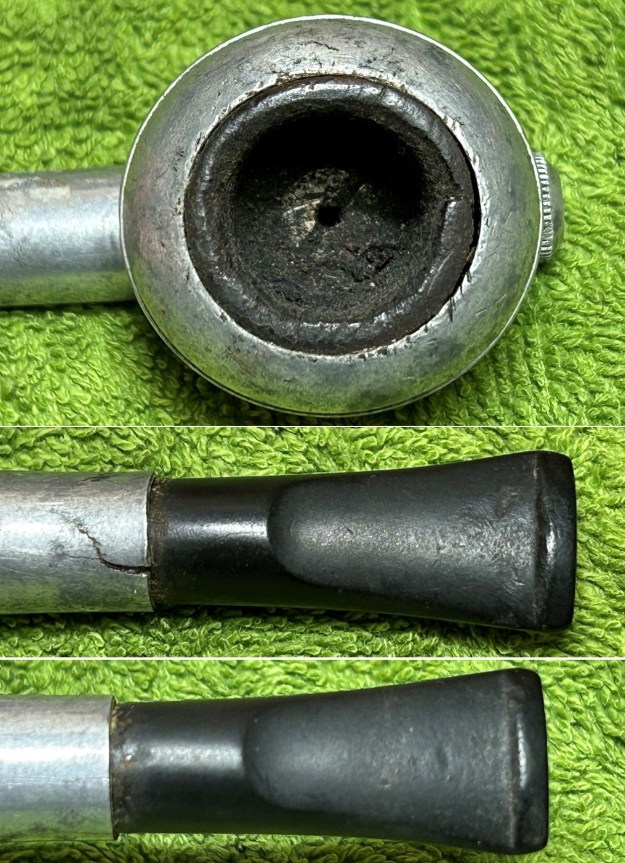
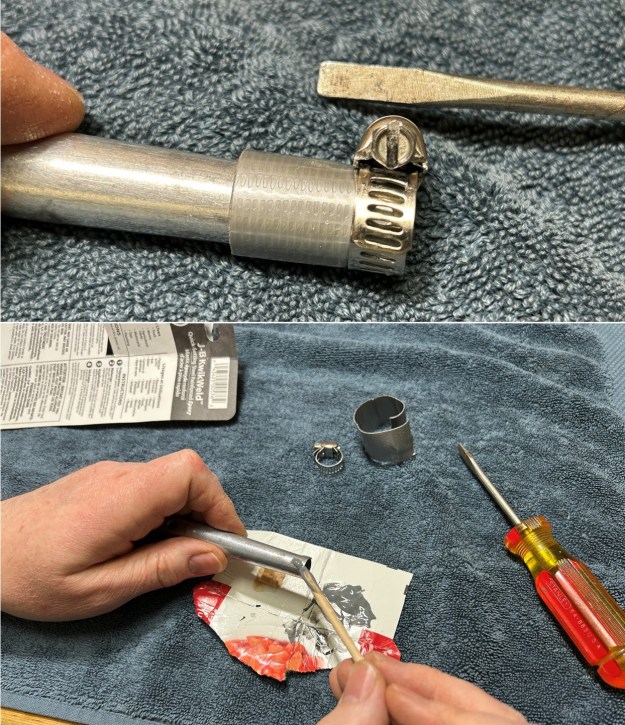
 The first thing I did was glue the two halves of the bowl insert back together. I liberally applied some wood glue and let it set overnight in a bar clamp.
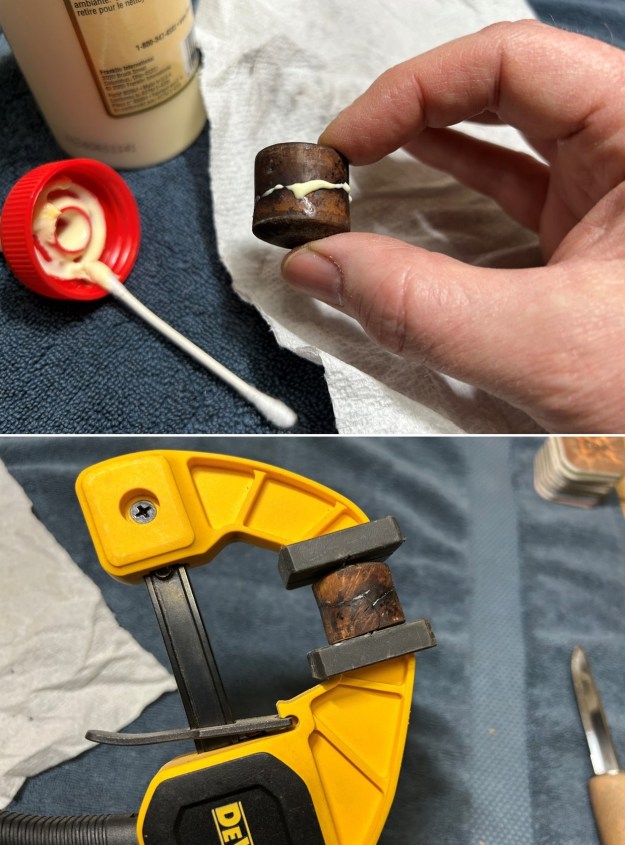 While the wood glue was drying, I moved on to the stem. I used isopropyl alcohol on a few cotton rounds and wiped down the stem to provide an initial cleaning of filth before moving on to the next steps. The primary cleaning came next. I disinfected the inside of the stem with pipe cleaners dipped in lemon-infused 99% isopropyl alcohol. I scrubbed thoroughly to make sure the interior was very clean.
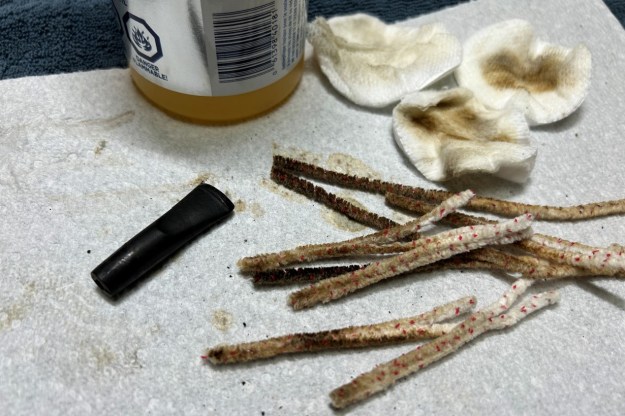 The goal of the next step is the removal (or minimization) of oxidation. Going to my sink, I used cream cleanser, cotton rounds, and a toothbrush, and scoured the stem to remove as much surface oxidation as possible. As the photos show, the result was a hideous mess – but better off the stem than on it.
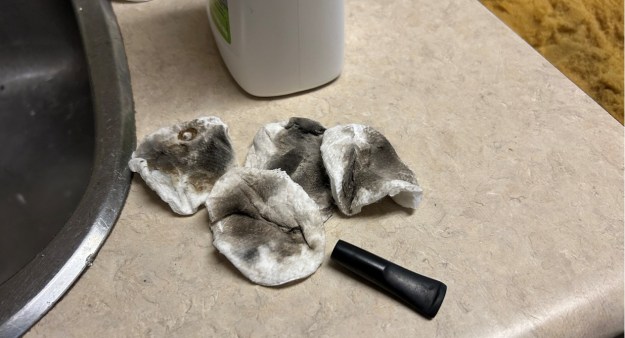 As the stem was now clean and dry, I set about fixing the marks and dents in the vulcanite. This was done by filling those divots with black cyanoacrylate adhesive, impregnated with carbon and rubber. I left this to cure and moved on.
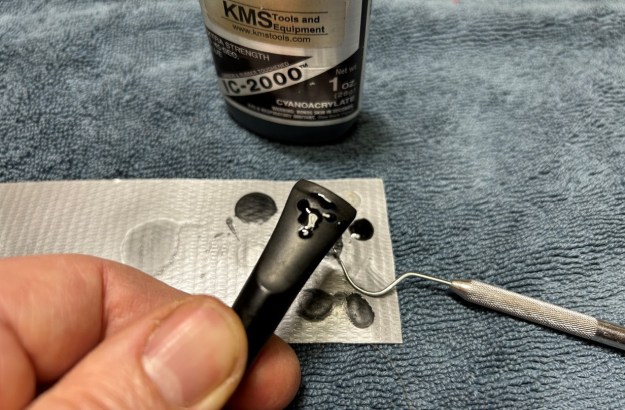 The penultimate step for the stem is sanding. First, with my set of needle files, I reduced the bulk of the cyanoacrylate repairs. I removed the excess adhesive as near to the surface as possible, without cutting into the vulcanite. Following that, I used all nine of the micromesh sanding pads (1,500 through 12,000 grit) to sand out flaws, even out the vulcanite, and provide gentle polishing of the finished surface. I also applied pipe-stem oil while using the last five micromesh pads. There was a wonderful, deep black shine to the stem when I was done.
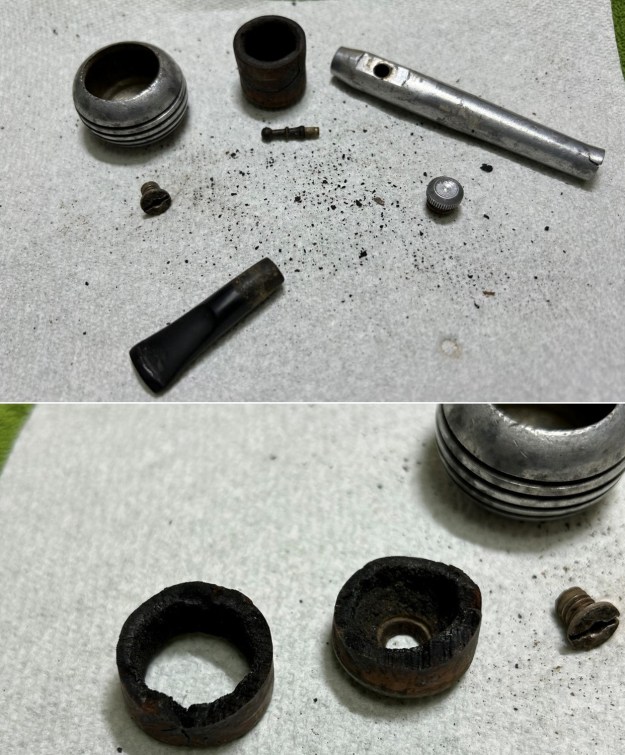
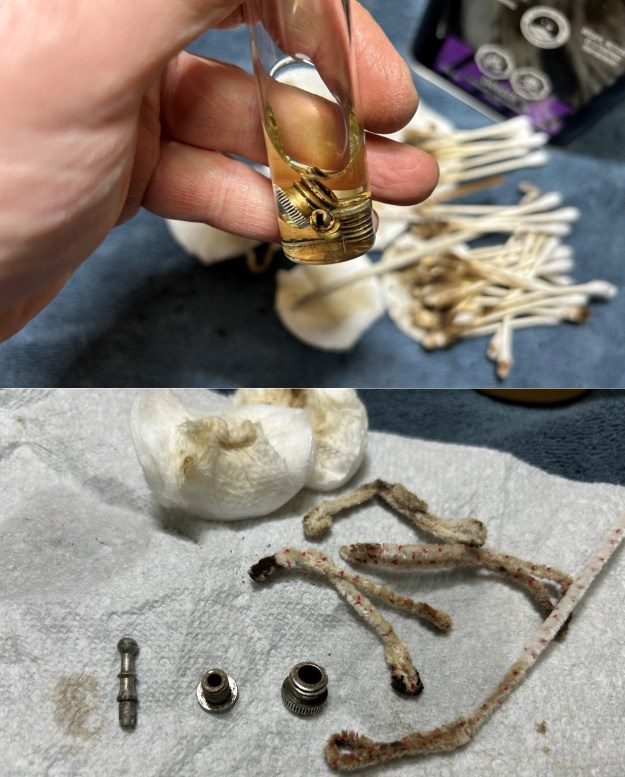
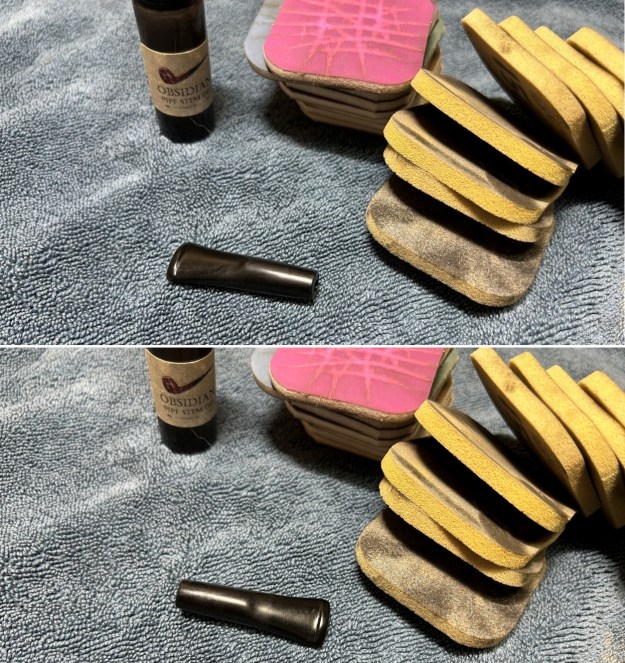 Since most of the pipe was made of aluminum, the cleaning procedures were different than usual. The inside of the shank was much more ‘cavernous’ than normal, too. I started with pipe cleaners and cotton swabs for the inside, but that only worked so well. I ended up using both acetone and isopropyl alcohol (separately) to clean the metal shank, especially the interior – and I made extensive use of some metal tube brushes because the gunk was really tough. The metal bowl was also cleaned with acetone and isopropyl alcohol, but it wasn’t so bad, as it hadn’t been in contact with the burning tobacco. I also soaked the smaller components overnight in acetone. It took a very long time, but I eventually got all of the metal clean.
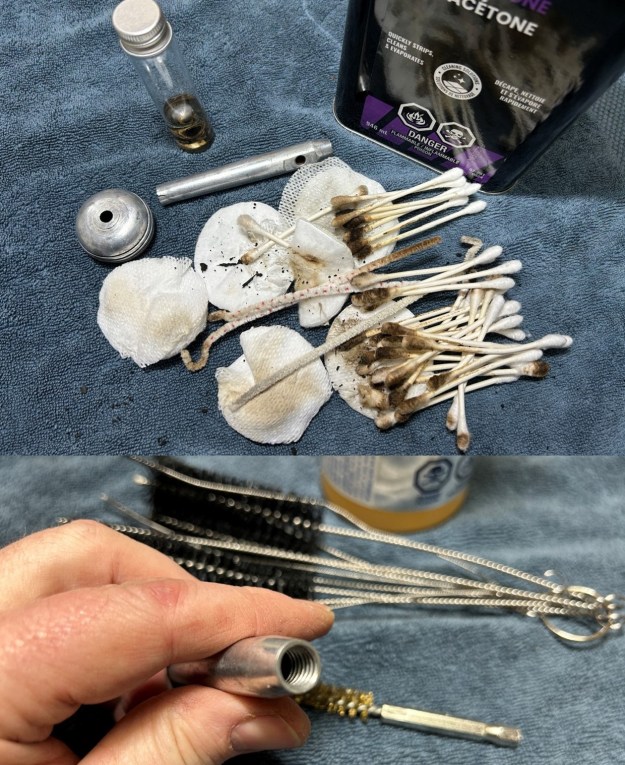
 Back to the briar bowl insert. I scraped and sanded off the excess wood glue. I then reamed out the bowl – that is to say, removed all the cake inside the bowl. This accomplished a couple of things. First (and most obviously), it cleaned the bowl and provided a refurbished chamber for future smoking. Second, when the old cake was removed, I could inspect the interior walls of the bowl and determine if there was damage or not. I used a piece of sandpaper taped to a wooden dowel and got the thing clean.
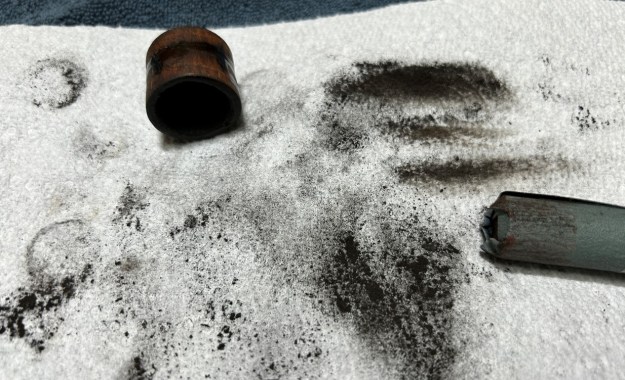 To tidy up the briar, I wiped down the outside, using a solution of a pH-neutral detergent and some distilled water, with cotton rounds. This did a good job of cleaning any latent dirt on the surface of the briar. The damage to the rim was significant. In order to lessen the burns and nicks on the rim, I ‘topped’ the pipe – that is to say, I gently and evenly sanded the rim on a piece of 400-grit sandpaper. This effectively minimized the damage, without altering the look of the pipe.
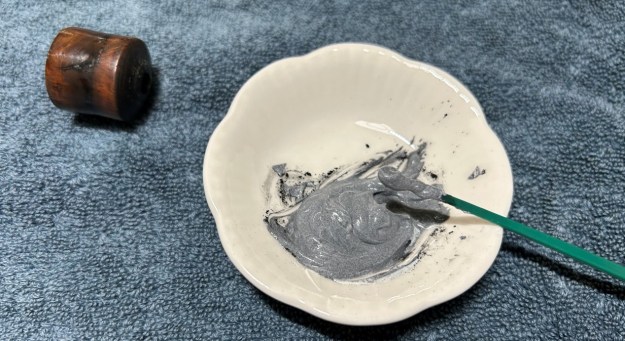
Given the state of the inside of the briar bowl insert, I used an epoxy adhesive that is extremely hard, resistant to high temperatures, and completely inert when cured. It worked superbly. I lined the affected area with the epoxy and let it cure for a full 24 hours. The next day, I roughened up the epoxy’s surface with my rotary tool for the next step. I thinly coated the inside of the bowl with a mixture of my wife’s homemade yogurt and activated charcoal. Once hardened, this provided a good, faintly rough surface for a new cake to build.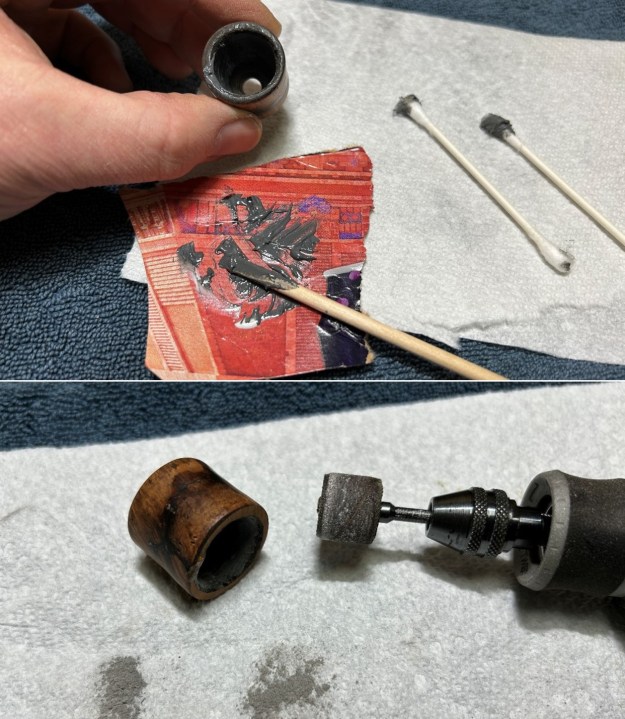
 I used all nine micromesh pads (1,500 through 12,000 grit) to sand the outside of the bowl insert and finish it off. This sanding minimizes flaws in the briar and provides a beautiful smoothness to the wood. This piece was never going to be easy on the eyes, but I did manage to make it look so much better.
 Back to the shank – the main body of the pipe. The end of the pipe had tiny cracks, as I mentioned, but was also slightly out of round. So, I gently adjusted it with pliers to close the gap in the cracks and return the circular shape. To repair the cracks, I decided to try something new: a different kind of epoxy, one specifically formulated for metal repairs and impregnated with steel. For the first step, I applied it on the inside of the shank and held everything tight with a hose clamp lined with duct tape. I used duct tape to protect the metal from scratches and in case the epoxy oozed out. This worked well and I let it cure overnight.
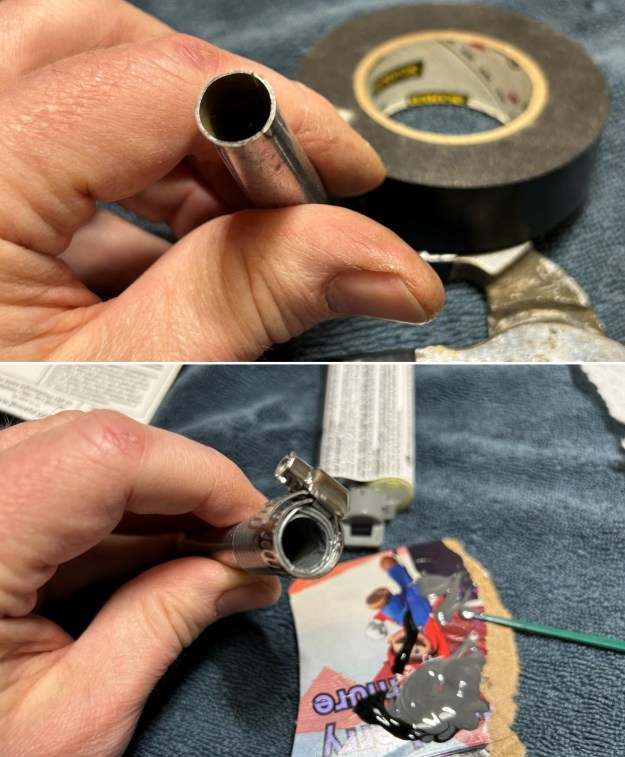 I then moved on to applying the same epoxy to the outside of the shank. Same formulation, just different location. However, a problem then manifested itself. When the epoxy had cured, and I started sanding the metal, a couple of other micro-cracks also appeared. These were not visible before the sanding. Giant sigh. So, I had to repeat the metal epoxy procedure from the beginning to factor in these new, incredibly small marks. Eventually, I got it done.
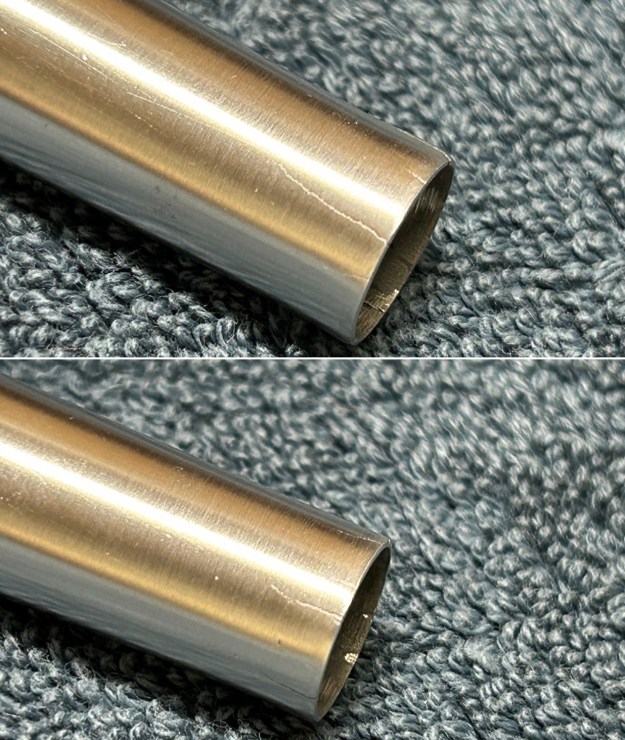
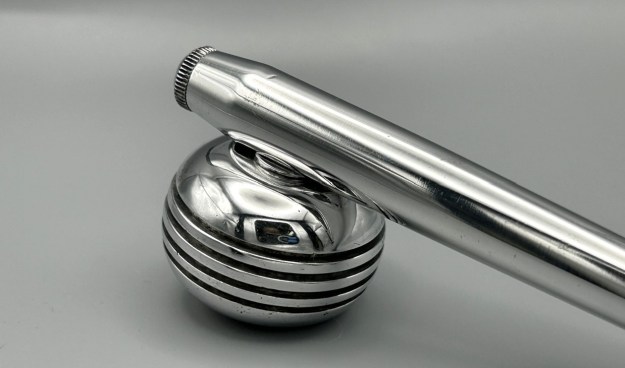
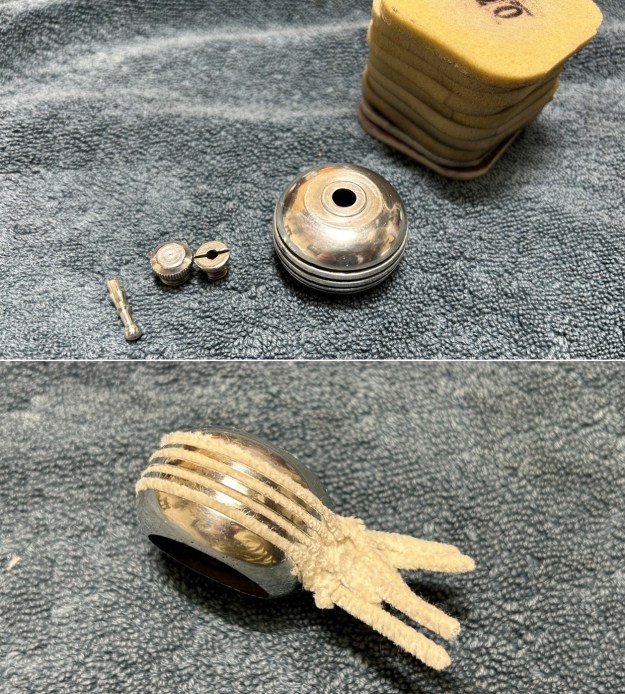
 Once the epoxy had cured again, I sanded it again with my micromesh pads. This time everything looked good. The gleam on the metal was very satisfying. I polished the grooves in the bowl with some pipe cleaners that had been rubbed with red Tripoli compound, then cleaned it up. In preparation for final buffing, I filled those grooves with new, clean pipe cleaners so that compound didn’t get stuck in there.
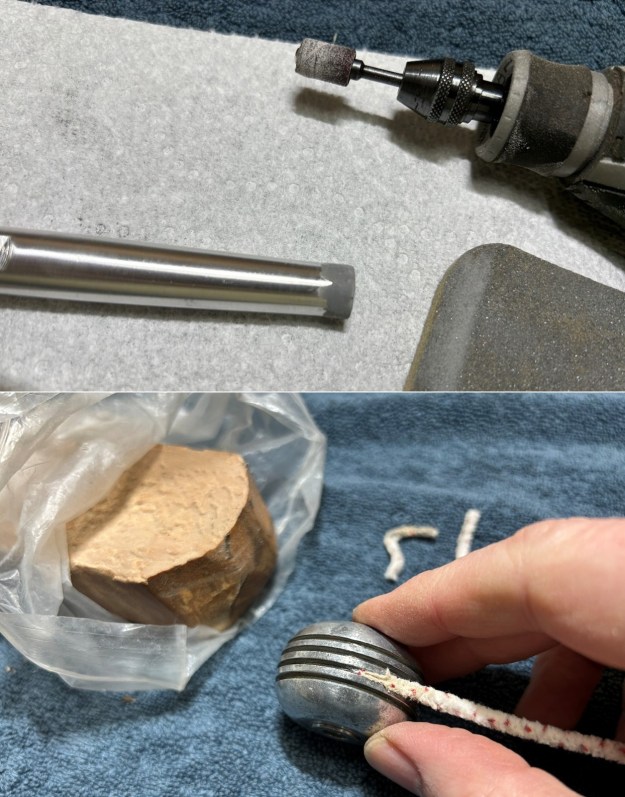
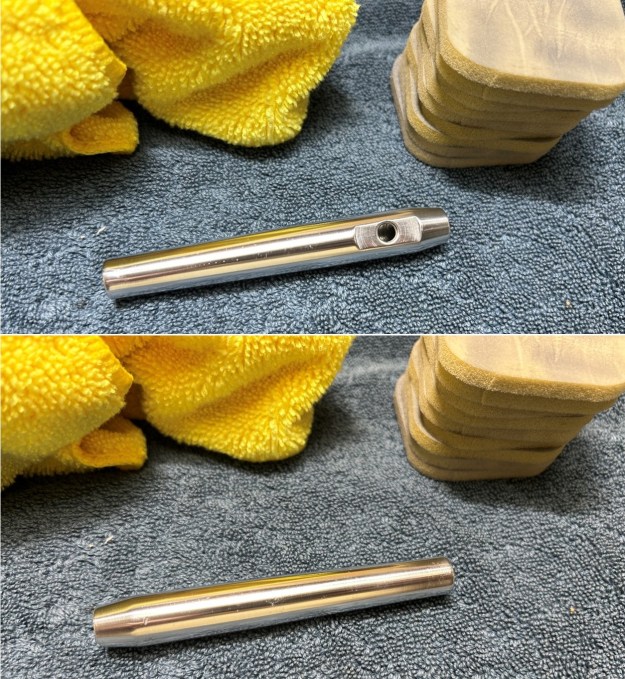
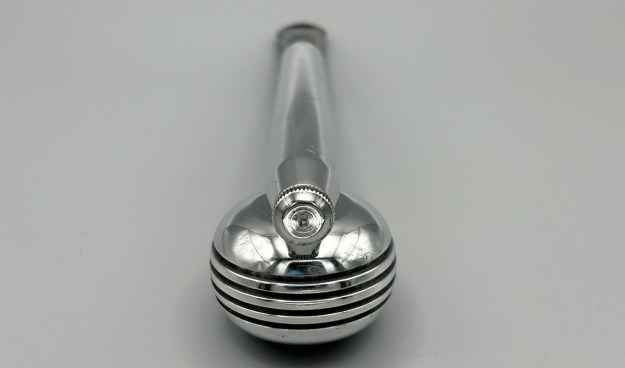
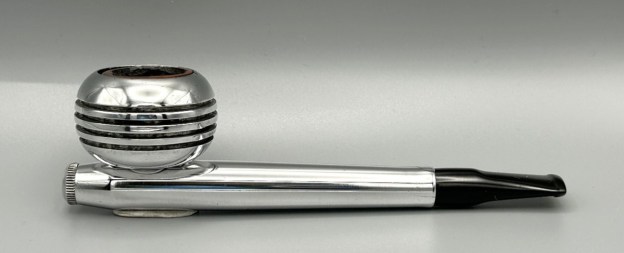
 For the final step, I took the pipe to my bench polisher and carefully buffed it. The stem was done with a blue diamond compound. The metal bowl and shank were done, first, with red Tripoli and then with the blue diamond too. This procedure makes the pipe look its best – the metal really shines and the stem glows.
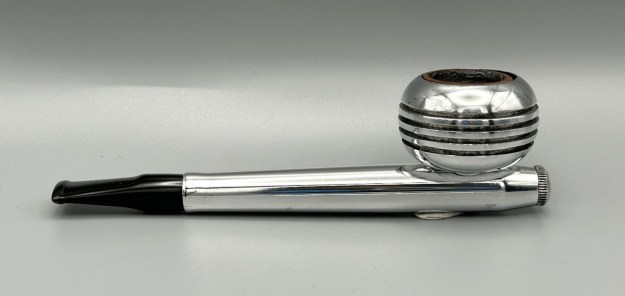
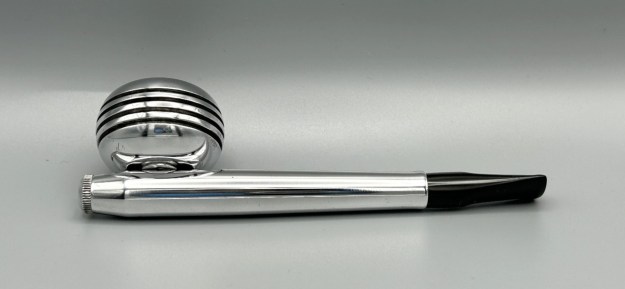
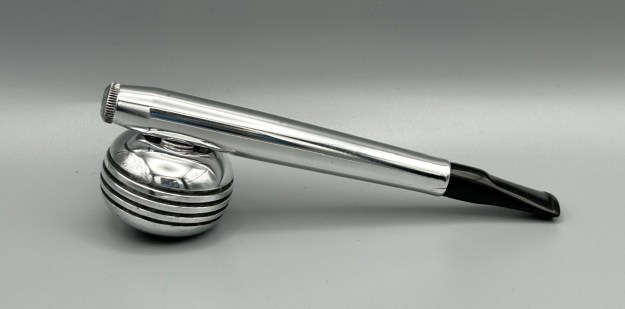
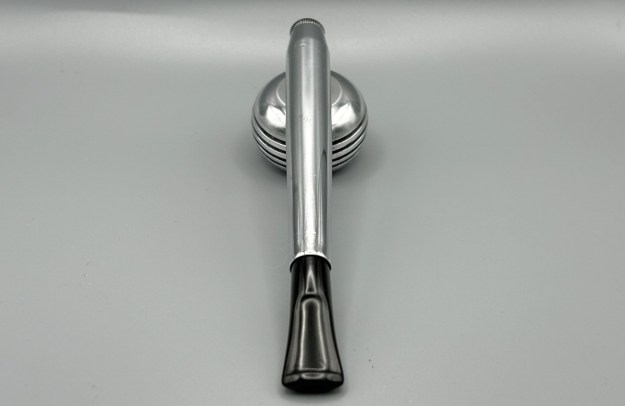
This Greenwich House Comet metal pipe looks fantastic again and is ready to be enjoyed by its next owner. I am pleased to announce that this pipe is for sale! If you are interested in acquiring it for your collection, please have a look in the ‘American’ section of the store here on Steve’s website. You can also email me directly at kenneth@knightsofthepipe.com. The approximate dimensions of the pipe are as follows: length 5⅓ in. (136 mm); height 1½ in. (38 mm); bowl diameter 1½ in. (38 mm); chamber diameter ¾ in. (19 mm). The weight of the pipe is 1⅝ oz. (48 g). I hope you enjoyed reading the story of this pipe’s restoration as much as I enjoyed restoring it. If you are interested in more of my work, please follow me here on Steve’s website or send me an email. Thank you very much for reading and, as always, I welcome and encourage your comments.