by Steve Laug
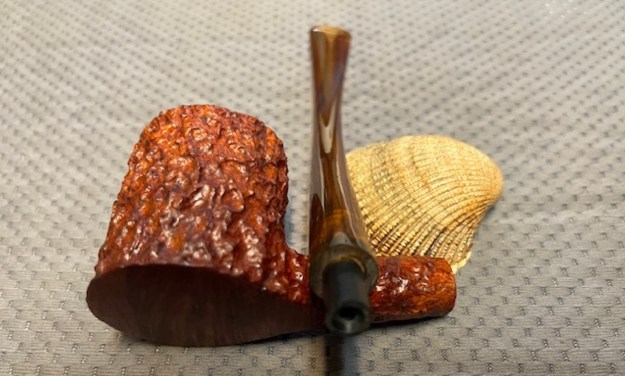
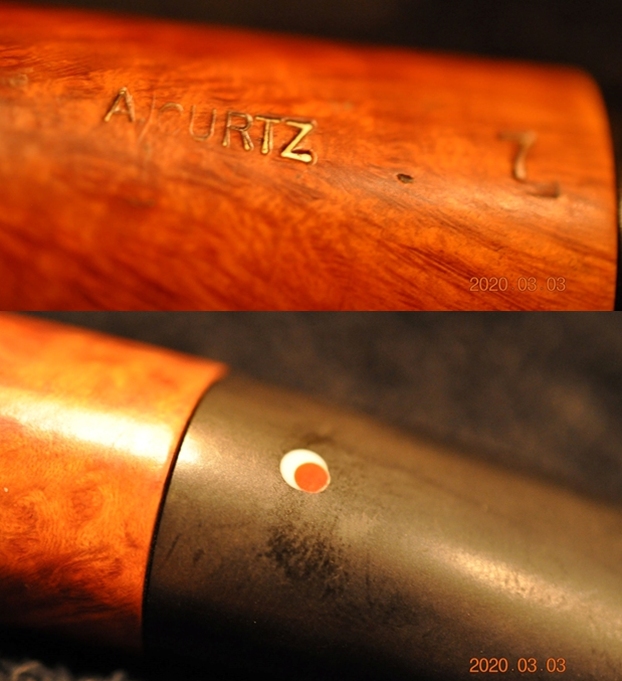
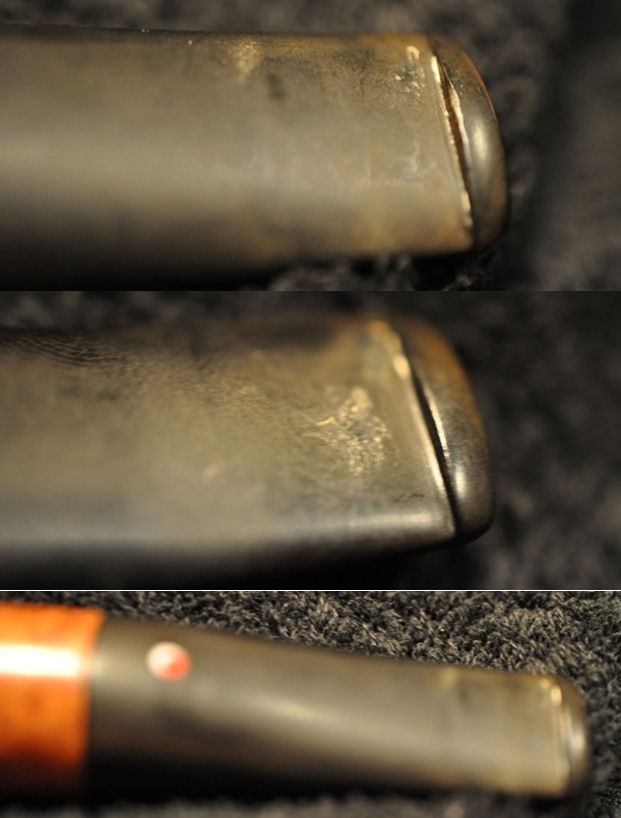
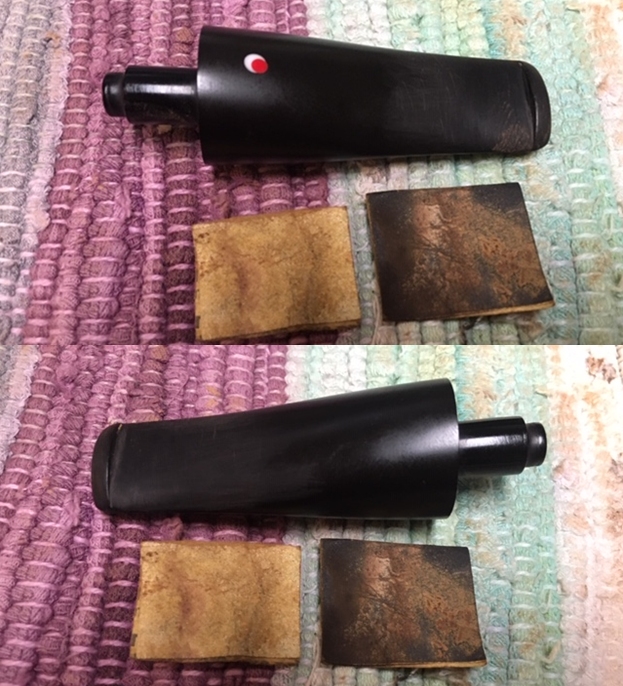
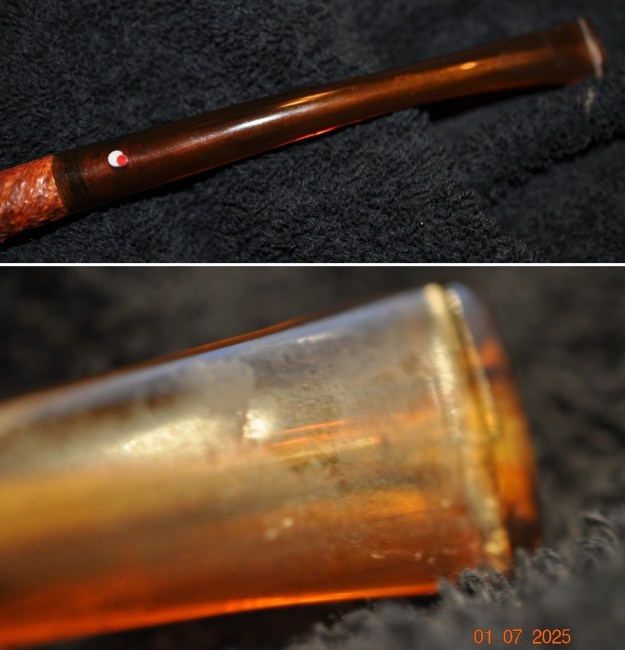
The next pipe on the work table is a long flat-bottomed pipe with a long amber acrylic stem. We picked the pipe up from a seller in Ogden, Utah, USA on 12/12/2024. It is stamped on the underside of the shank and reads A. Curtz 13. I had heard about the name in connection with Jeanie’s Smoke Shop in Salt Lake City when I worked on the brand in the past. The finish is deeply rusticated and has some great grain on the top and bottom of the bowl and shank. It was quite dirty but still had a charm about it. The bowl was caked and there was a light lava coat and spots on the top and the inner edge of the rim. The stem was amber acrylic and was a tapered. There were light tooth marks and chatter on both sides of the stem. There was an interesting 2 circle logo on the topside of the taper that looked like a large white circle with an offset red circle inside of it. Jeff took some photos of the pipe to show the general condition of the pipe before he started his clean up. He took some photos of the rim top and bowl from various angles to give me a clear picture of the condition of the rim top and bowl. You can see the cake in the bowl and the darkening and lava coat. It is hard to tell if there was any damage to the edge at this point. The next two photos show the top and underside of the stem. It is dirty and has calcification on both sides at the button. There is also some tooth chatter and some light tooth marks. The third photo shows the condition of the slot while the final photo shows the curve of the full stem.
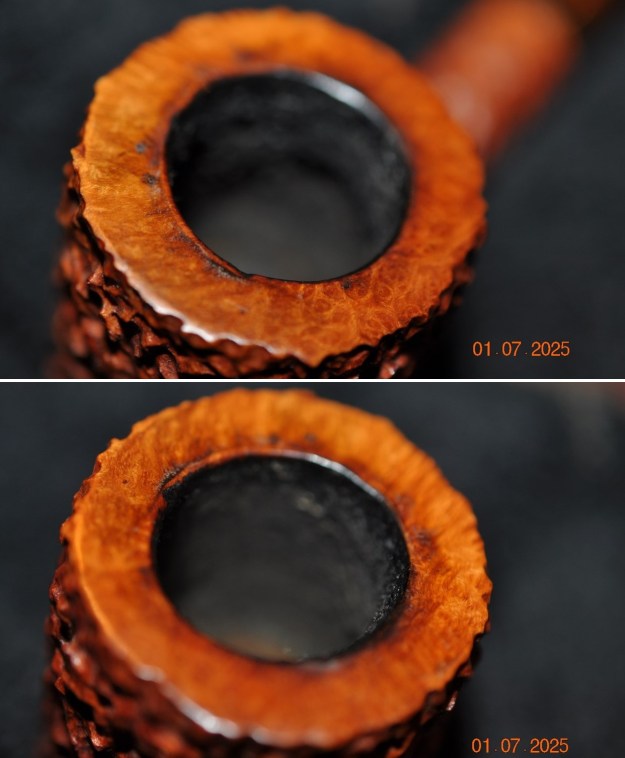
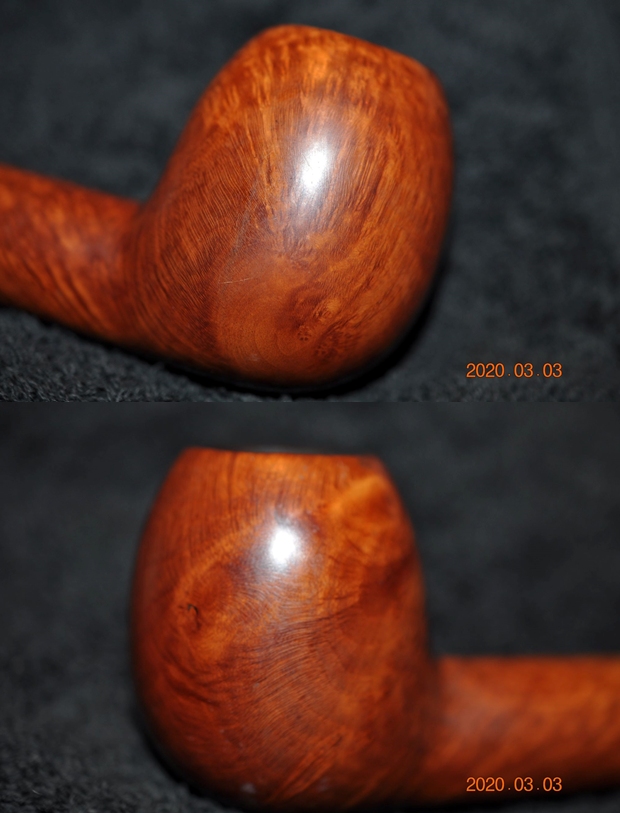
 Jeff took some photos of the sides of the bowl to show the condition of the finish on the pipe. The photos showed deep rustication around the bowl sides. Under the oils and grime it was a nice looking bowl. It is a large pipe with a smooth rim top and heel.
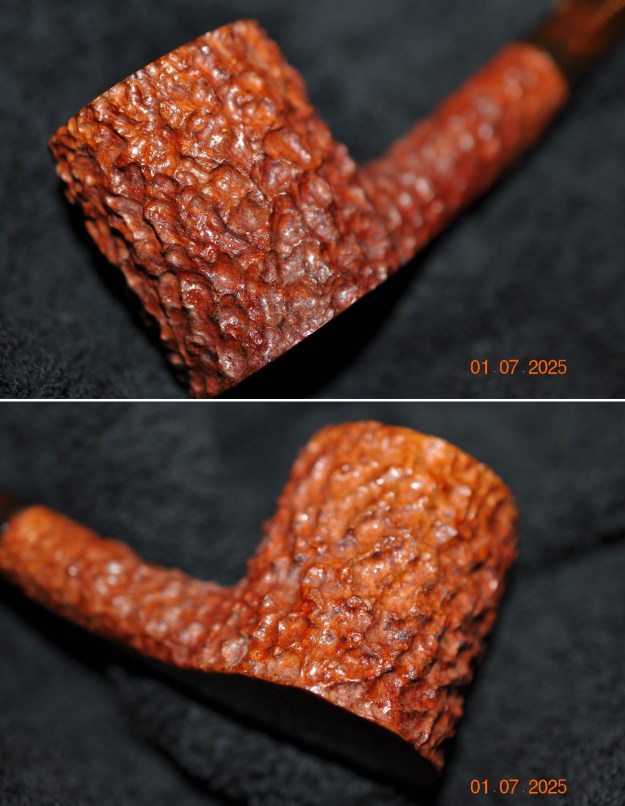 He took some photos of the stamping on the underside of the shank. The stamping was clear and readable. My guess at this point is that the “13” is a grade stamp but I will do some digging into that. He also took a photo of the inset dual circle logo on the stem top.
  To learn a bit more about the brand I turned to Pipephil to see what I could find out (http://www.pipephil.eu/logos/en/logo-c8.html). It turns out the pipe was made by an artisan named Arley Curtz who was from Utah. I did a screen capture of the photo and have included that below. I also included the side bar information below the photo.
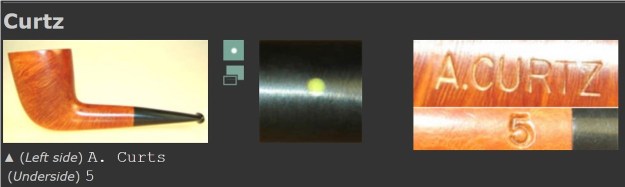 Artisan: “Arley” Curtz, Utah (USA).The stems of the A. Curts pipes are also marked with 2 dots (a red and a white).
I then turned to Pipedia to find out some more dedtail (https://pipedia.org/wiki/Curtz). The information was brief but helpful. I have included that article below.
Arley G. Curtz retired the director of the Bountiful Davis Art Center (Bountiful, Utah) and is now a pipe repairman and pipe maker. He was formerly the pipe repairman at Jeanie’s Smoke Shop, and has been making pipes ever since.
He makes about 70 pipes a year using Greek and Italian briar. His pipes are available at Edward’s Pipe & Tobacco Shop in Denver, CO, at the Tinderbox in Salt Lake City, on the web at The Pipe and Pint, and at Curtz Handmade Pipes and Pipe Repair in Salt Lake City, Utah.
I did a bit more searching to learn more about the repairman/pipe maker. I came across a 2018 article on a site called Utahstories (https://utahstories.com/2018/05/arley-curtz-pipe-making-and-memory-collecting/). The article included a photo of Arley Curtz that I have inserted below. I am also including a short section of the article that makes me want to meet this gentleman.
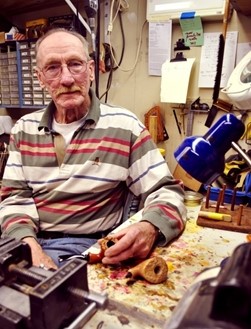
For Arley Curtz, a pipe is more than just a way to smoke tobacco. It summons up a time when pipe smoking was both acceptable and part of a gentler civility in our culture.
Curtz is a pipe maker and collector of smoking pipes. He has over 300, ranging from simple corn cobs to handmade antiques. Each one has a story. As the smoke from a pipe curls upwards, it allows Curtz a time to pause and reflect. “A pipe,” he says, “is a keeper of memories.”
Just as a pipe cannot be smoked in haste, a handmade pipe requires patience to craft. Curtz forms his pipes from briarwood, which grows in countries bordering the Mediterranean Sea.
I only wish I had found this earlier before I met my brother in Salt Lake City and visited Jeanie’s Smoke Shop. I would have certainly made a point to visit Arley at his own shop and gotten to meet him. Until my next trip to Idaho to visit my Dad and brother I will leave this on my wish list. Now to get on with working on his pipe.
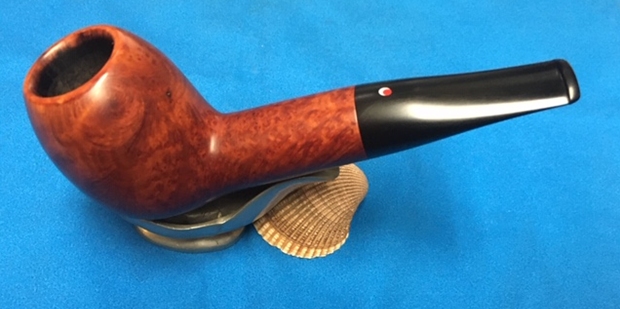
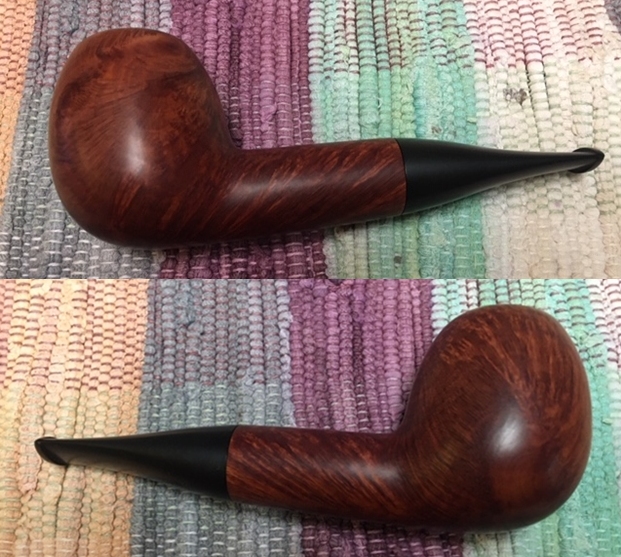
Jeff did his usual thorough job cleaning the pipe which I really appreciate because of the freedom it gives me in dealing with pipes. He reamed it with a PipNet pipe reamer and got rid of the cake. He cleaned up the reaming with a Savinelli Fitsall Pipe Knife so that we could see the walls of the bowl and assess for damage. He cleaned the internals of the shank and stem with alcohol, pipe cleaners and alcohol. He scrubbed the exterior with undiluted Murphy’s Oil Soap and a tooth brush. He rinsed the pipe under warm water. He dried it off with a cloth and then let it air dry. The stem was scrubbed with Soft Scrub and had a soak in Before & After Deoxidizer to remove the oxidation. One it was rinsed off, it came out looking very good. The finish on the bowl and the rim top cleaned up nicely. I took pictures of the pipe to show how it looked when I unpacked it.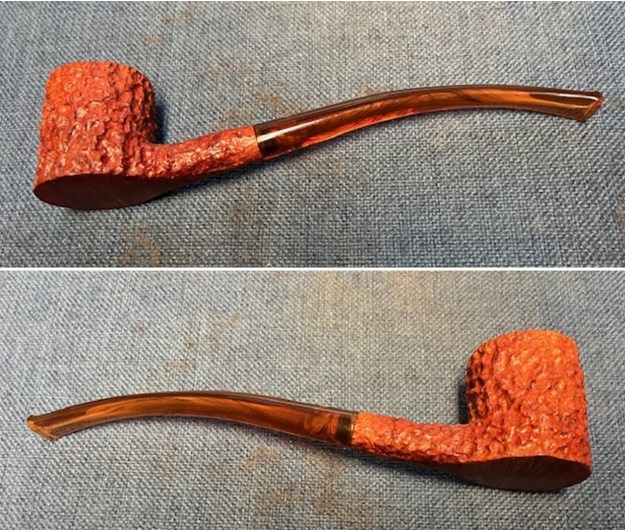
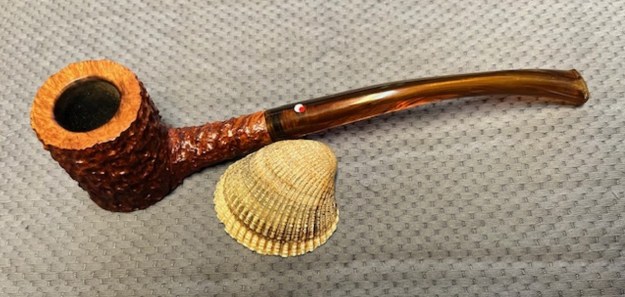
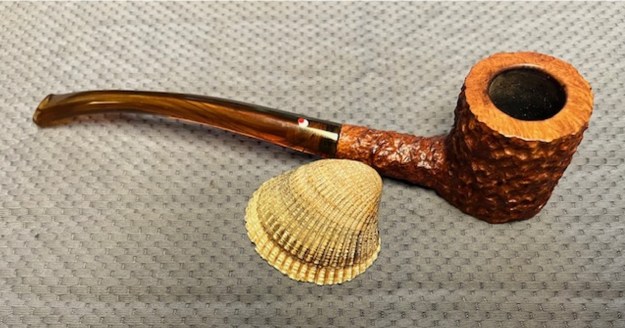
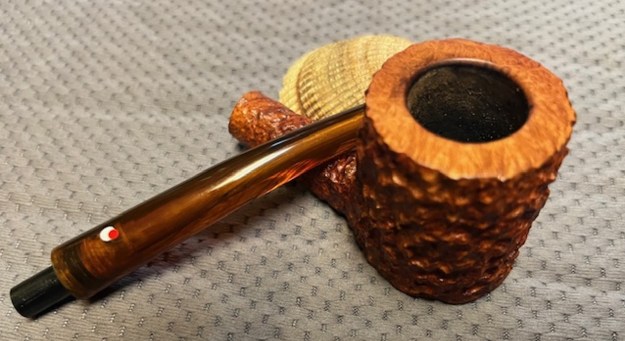
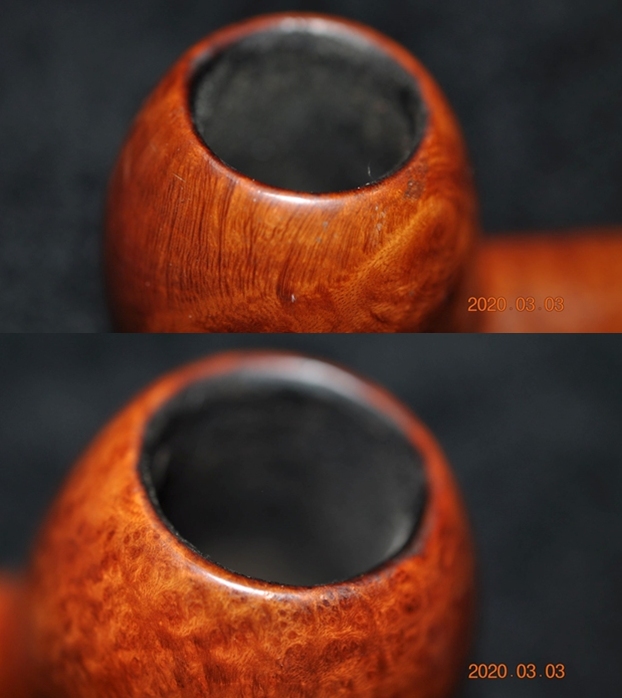
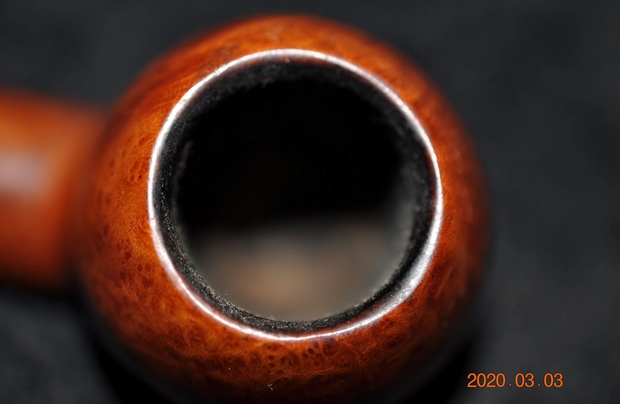
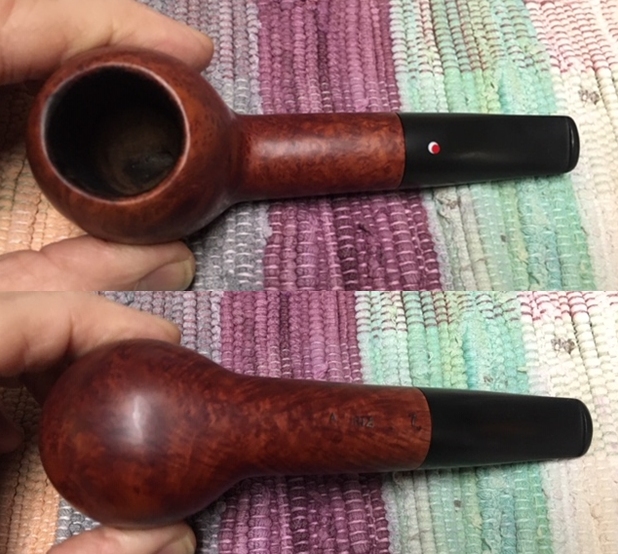
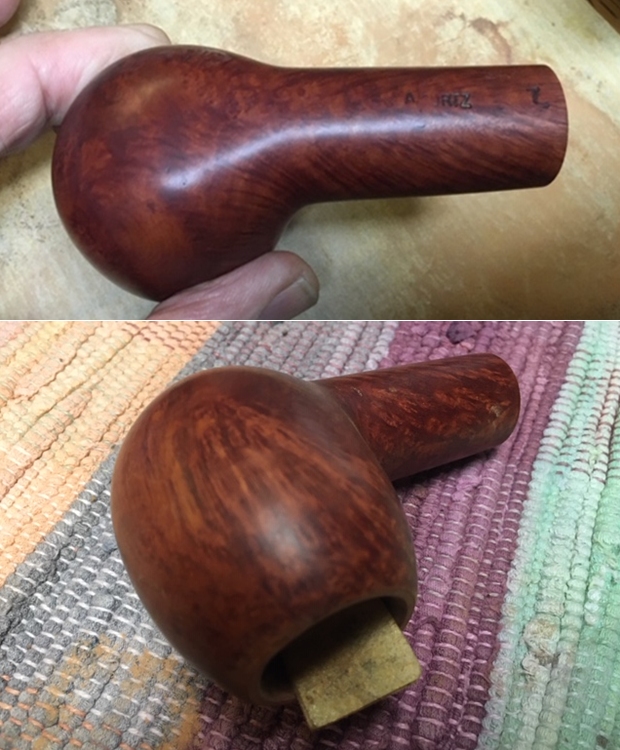
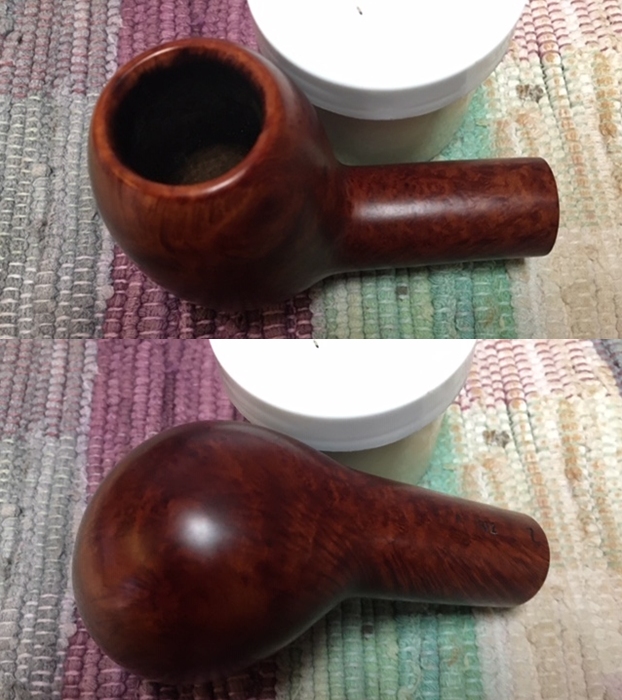
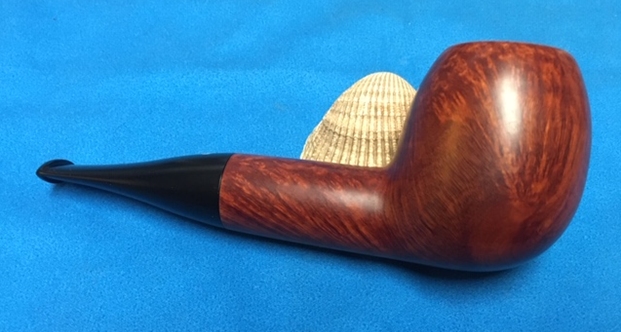
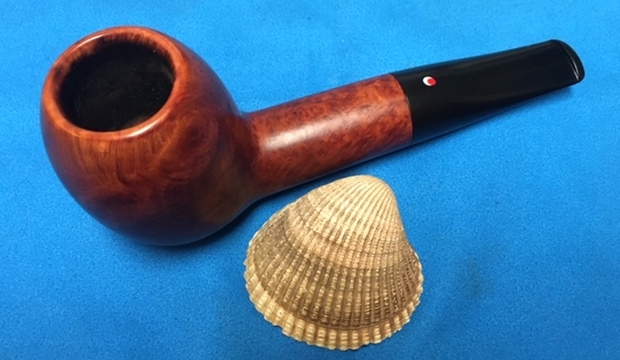
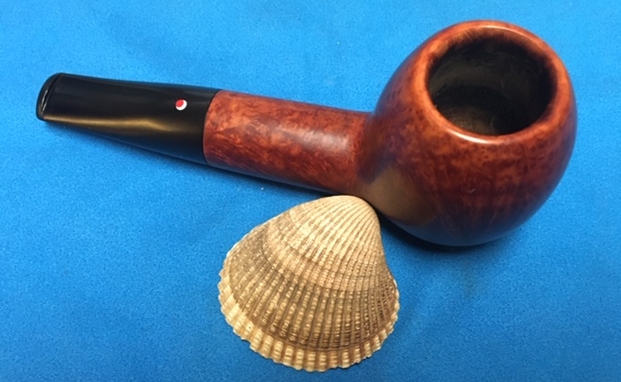
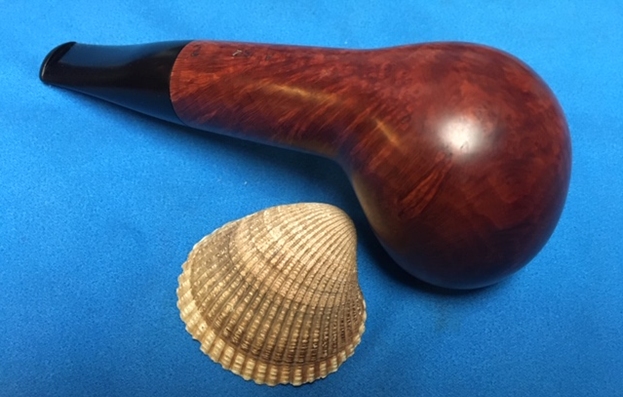
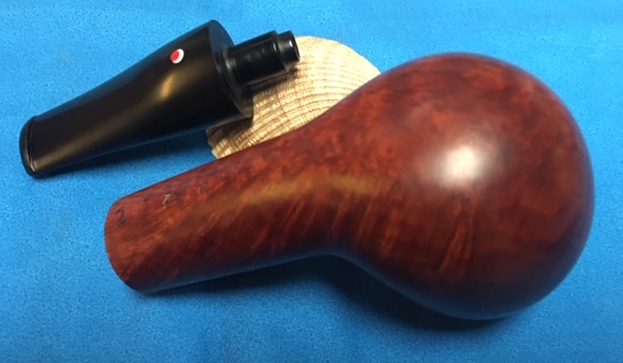
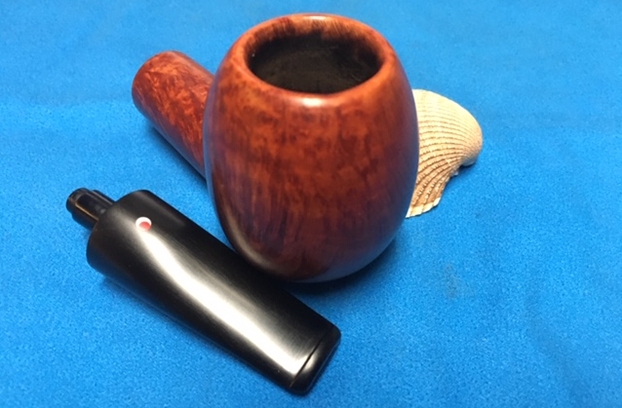
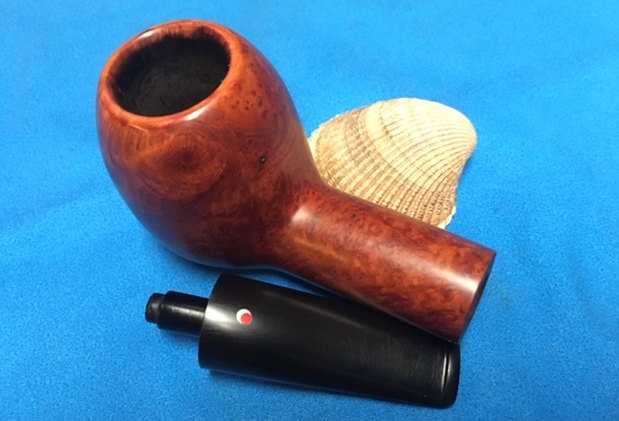
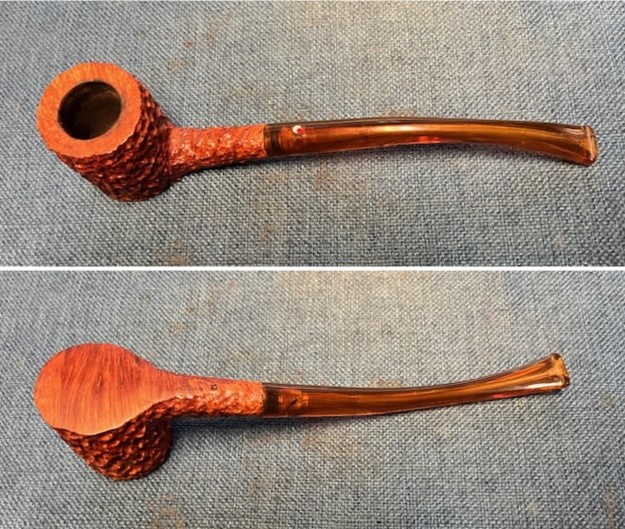 I took a close up photo of the bowl and rim top to show how clean the pipe was. There was some spotty varnish on the rim top and darkening on the inner edge of the rim on the back of the bowl. The stem looked good just some light tooth chatter and marks near the button. Overall the pipe is a beautiful looking piece.
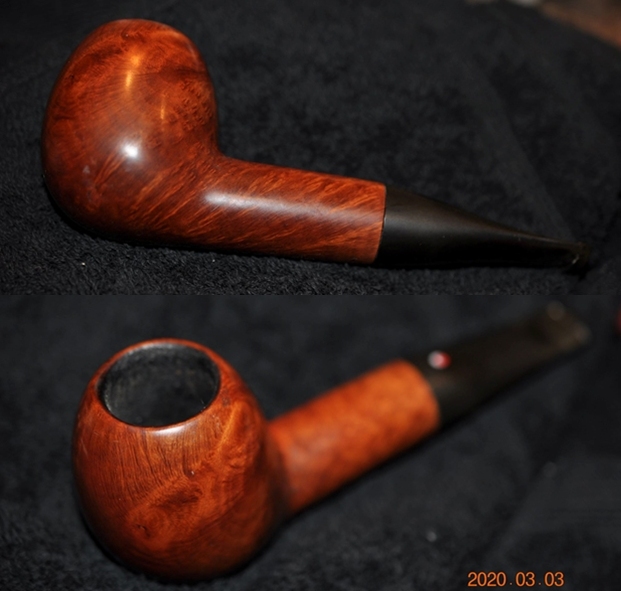
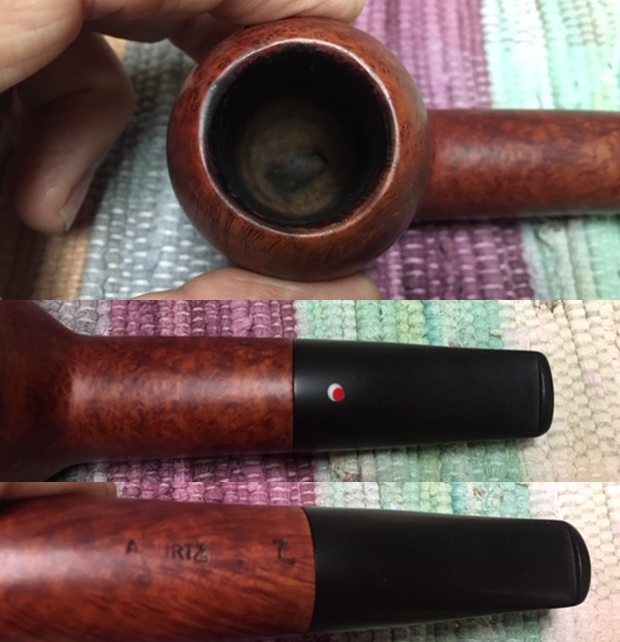
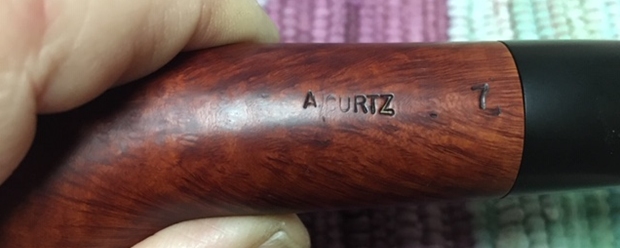
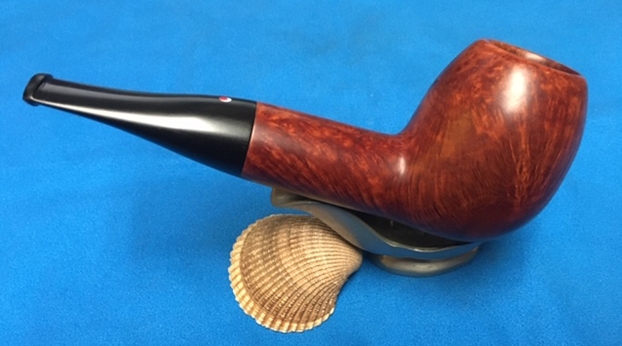
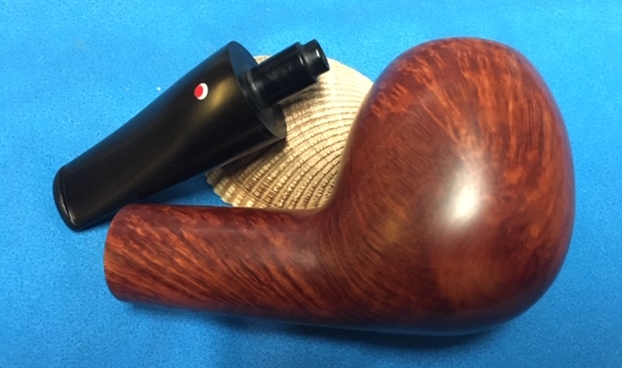
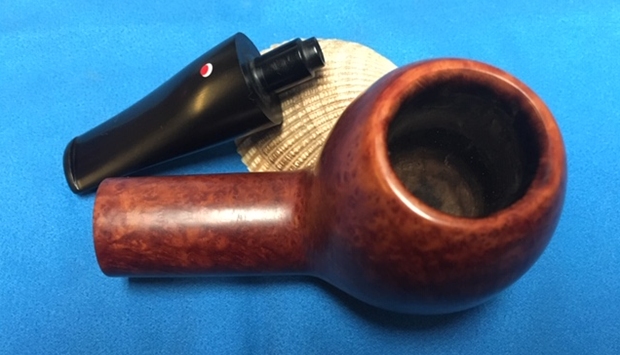
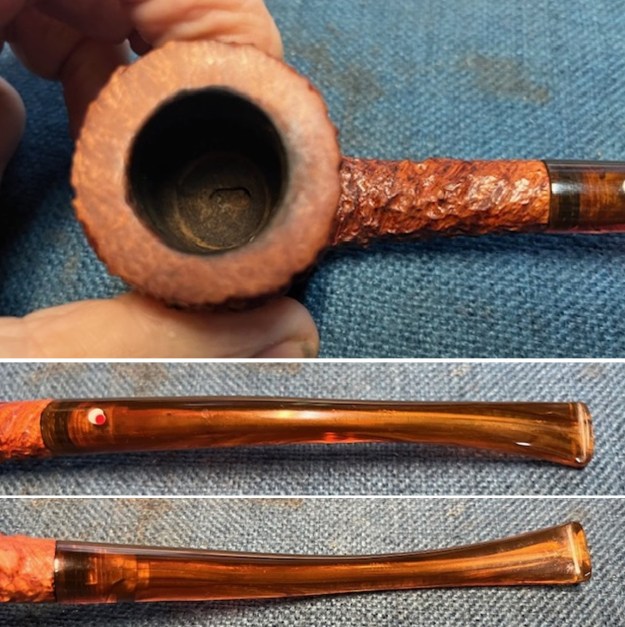 I took a photo of the stamping on the underside of the shank. It read as noted above. It is very clear and readable. I also removed the stem from the shank and took photos of the pipe to show the look of the parts. The stem is long but the pipe is really not a full Churchwarden, perhaps it is a mini warden.
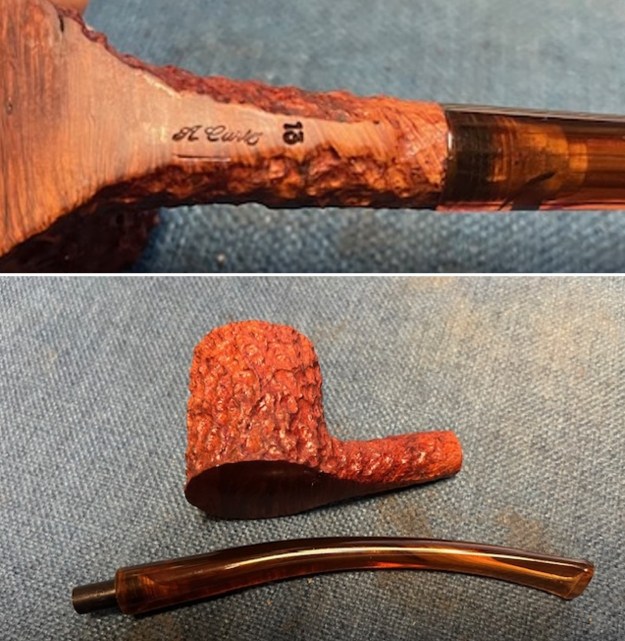 I decided to address the issues with the rim top first. I worked on the darkening on the inner edge of the rim. I worked over the edge to smooth out the rim edge and remove the darkening.
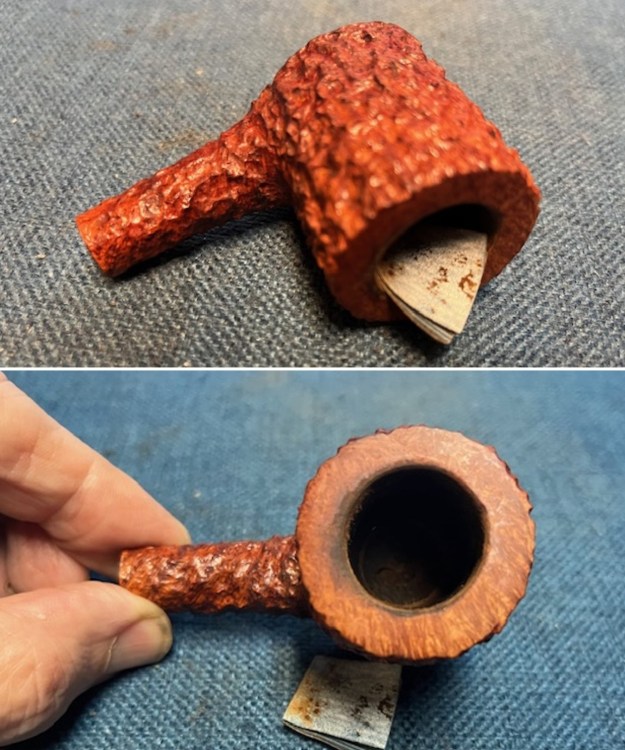 I wiped down the rim top and the heel of the bowl with acetone on a cotton pad to remove the spots of varnish that remained.
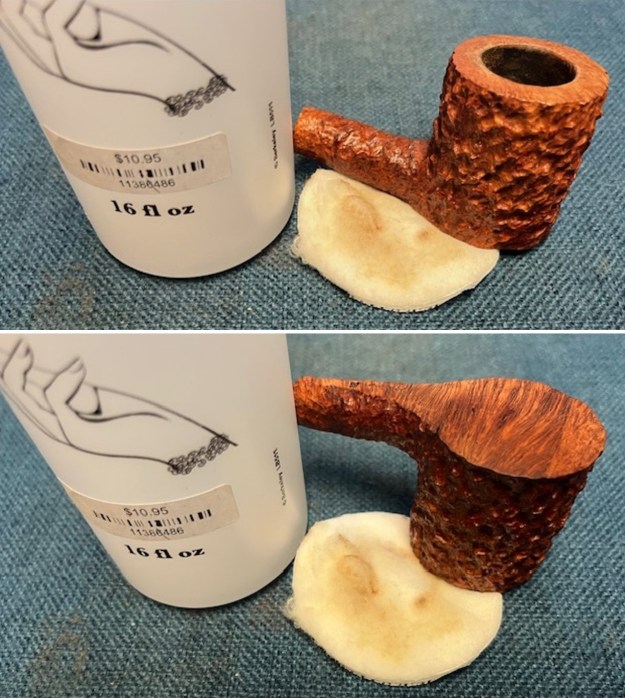 With the varnish removed a flaw in the heel of the bowl. It was a small flaw that followed the grain mid-bowl. I filled it in with some clear CA glue and set it aside to cure. Once cured I sanded it with 220 girt sandpaper to smooth it our and blend it into the surrounding briar.
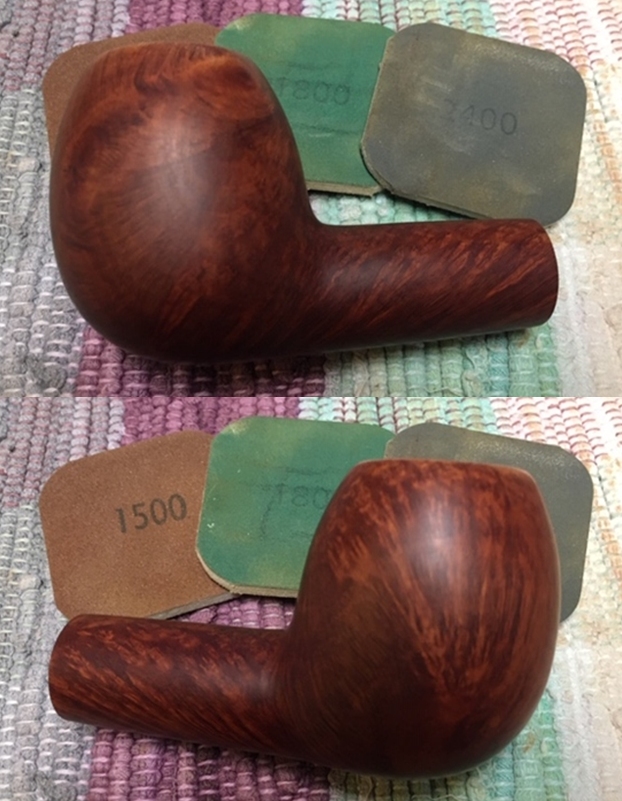
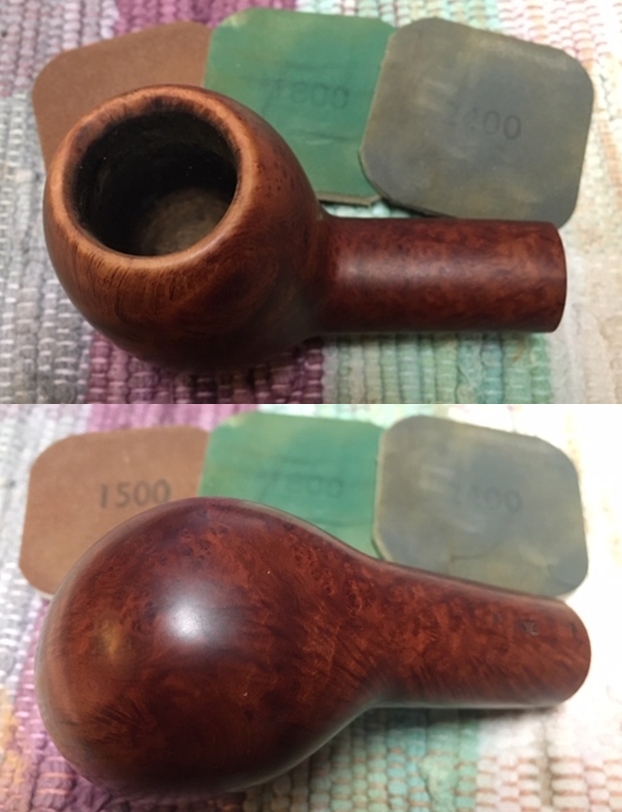
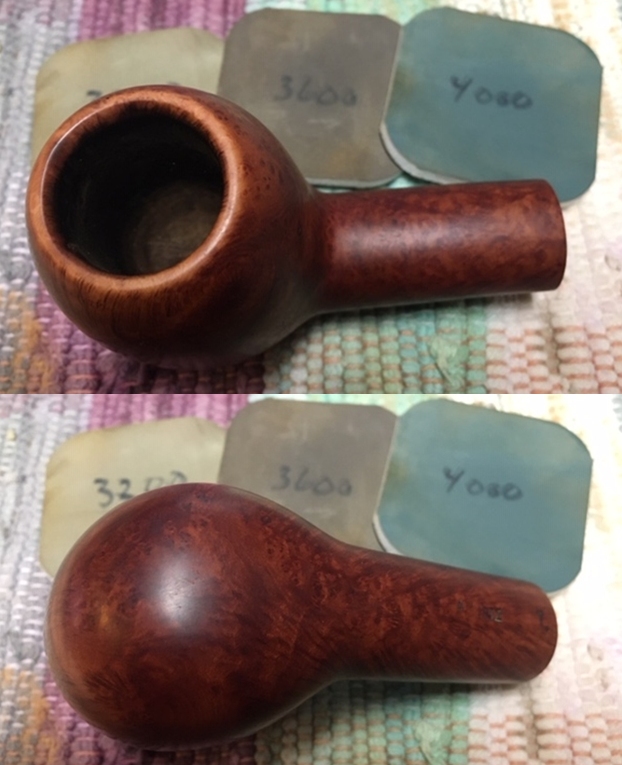
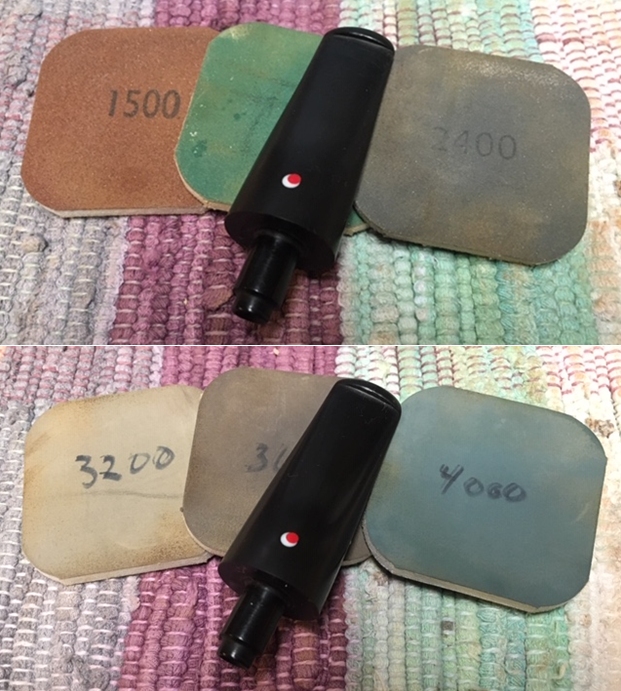
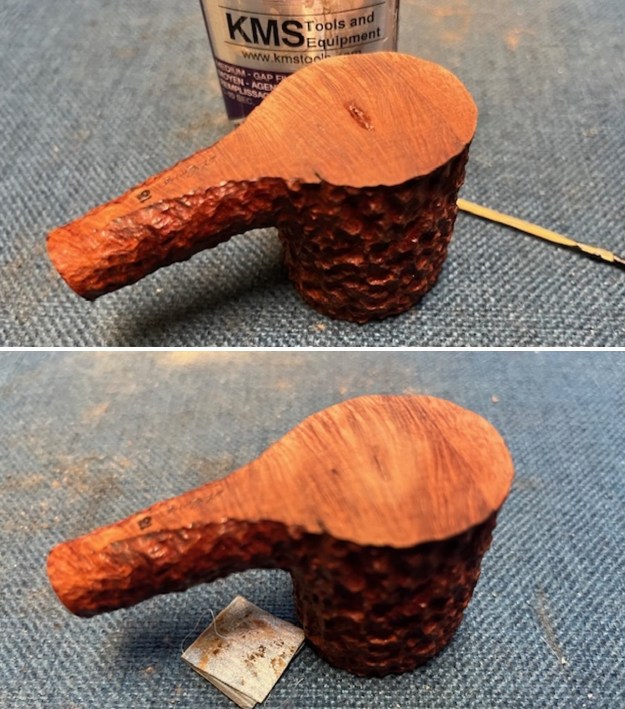 I sanded the smooth portions of the rim top and the heel of the bowl with 320-3500 sanding pads. I wiped the briar down with a damp cloth after each sanding pad. It began to look very good.
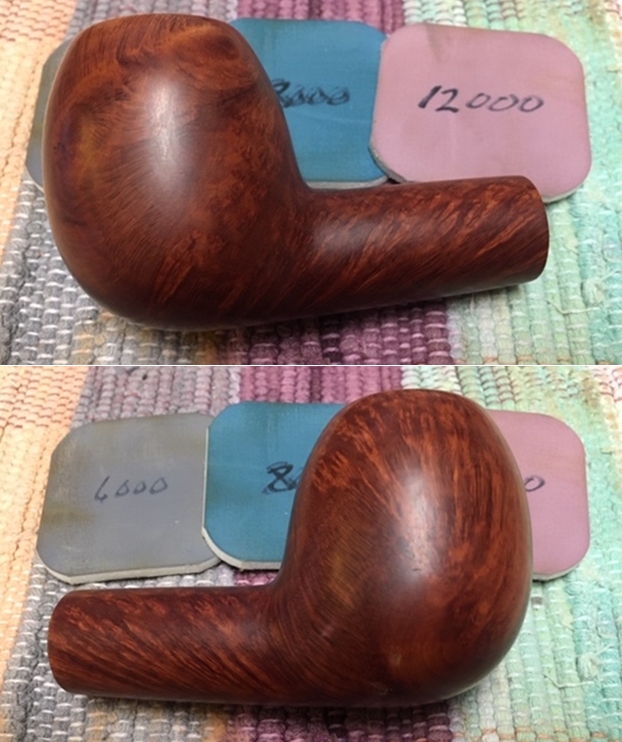
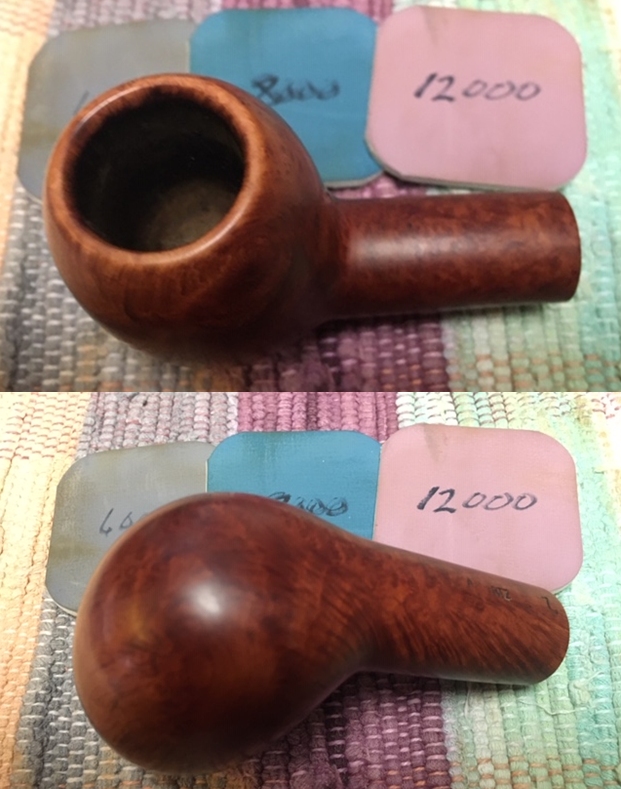
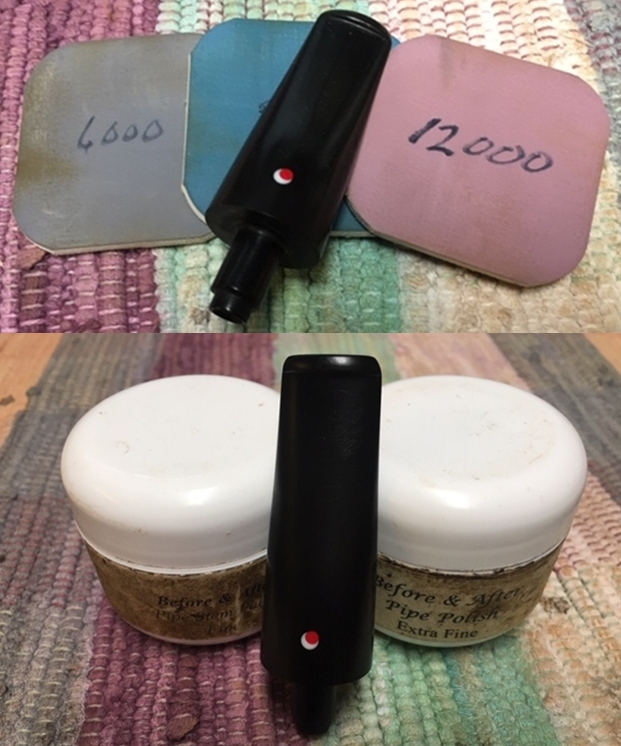
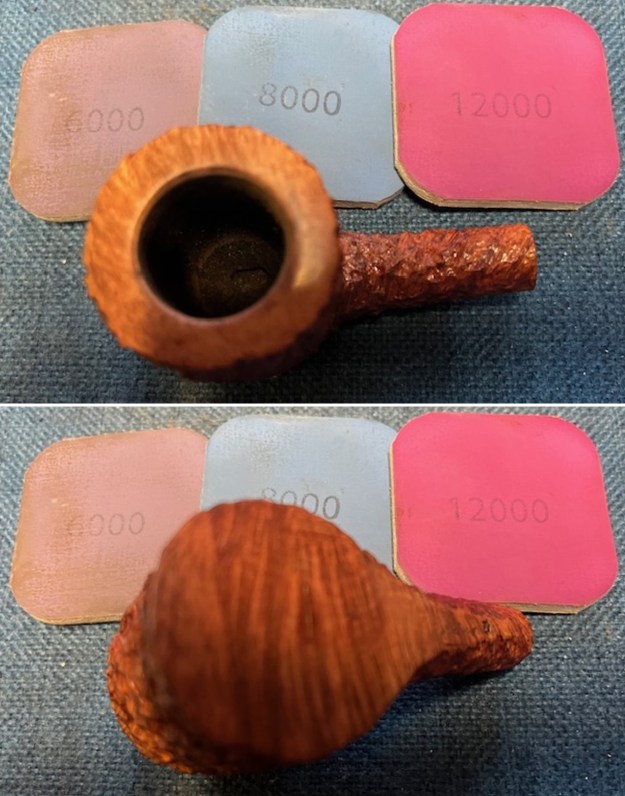
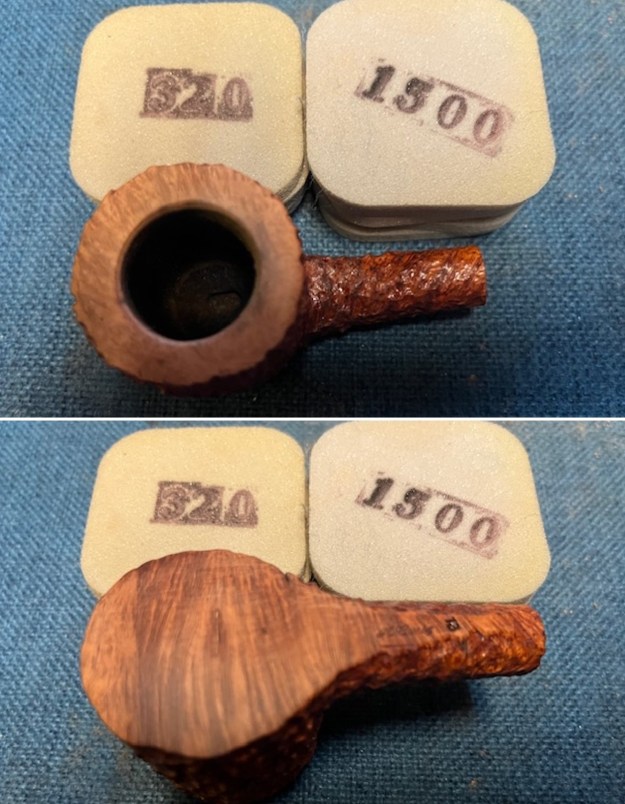 I polished the briar with micromesh sanding pads – wet sanding with 1500-12000 grit pads and wiping down the briar after each sanding pad with a damp cloth. The briar began to shine.
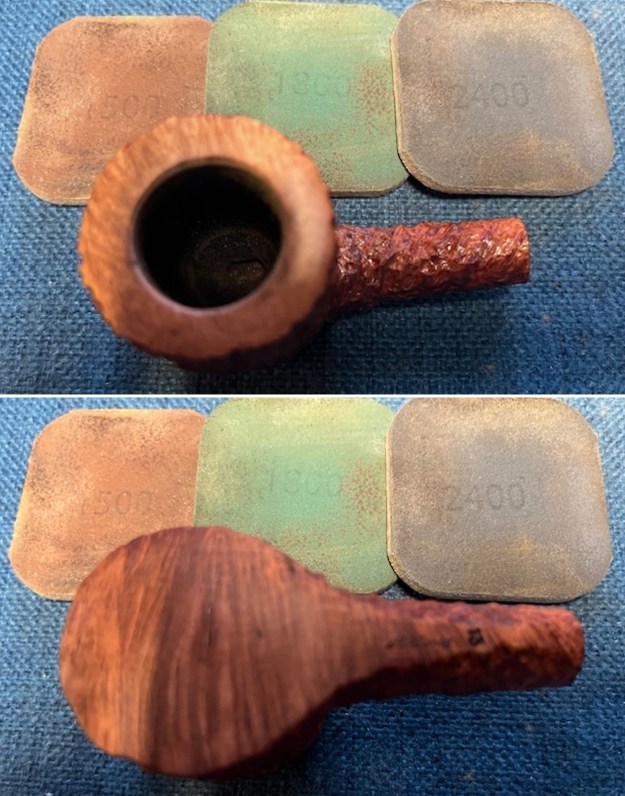

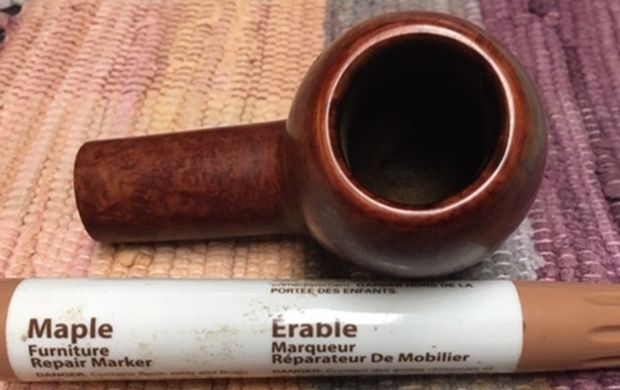
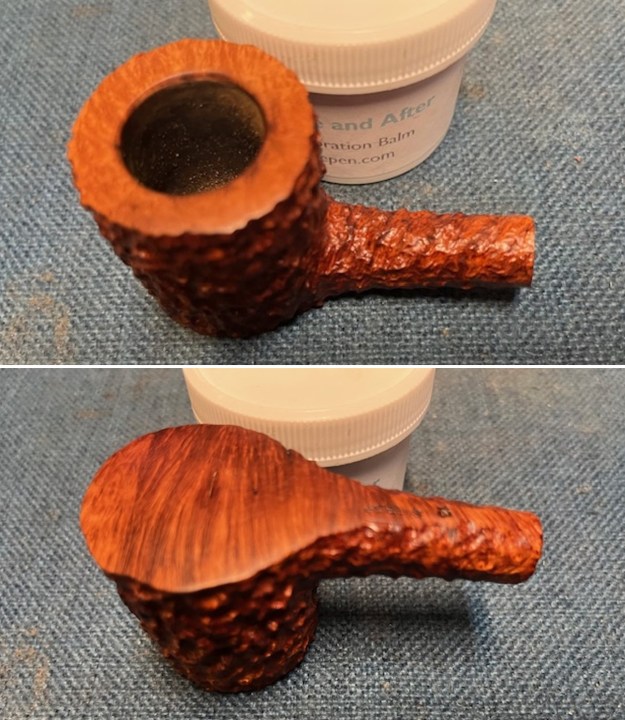
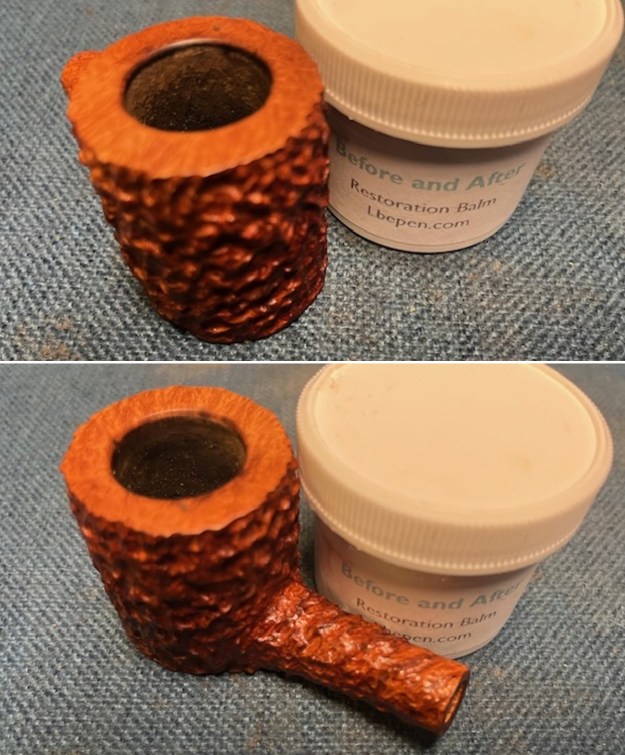
 I worked some Before & After Restoration Balm into the briar with my finger tips and a horsehair shoe brush. I let it sit on the bowl for 10 minutes and then buffed it off with a paper towel and soft cloth. The product is a great addition to the restoration work. It enlivens, enriches and protects the briar while giving it a deep glow. It is a product I use on every pipe I restore.
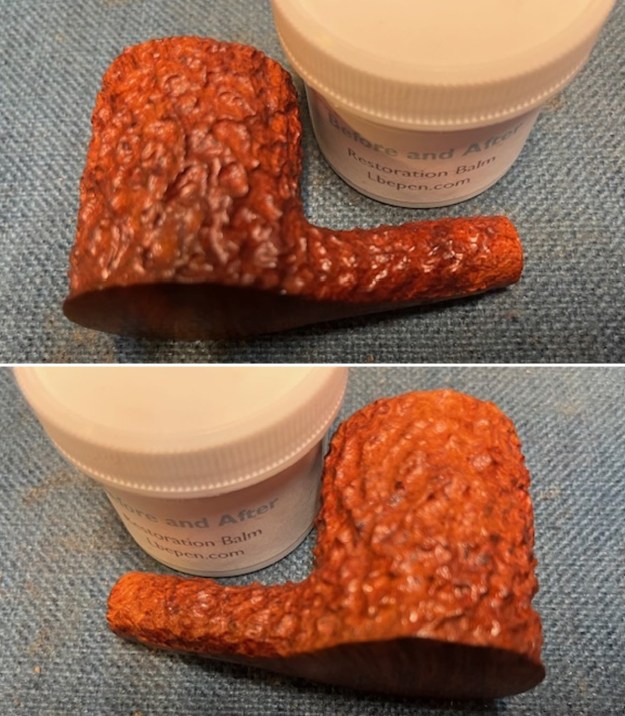
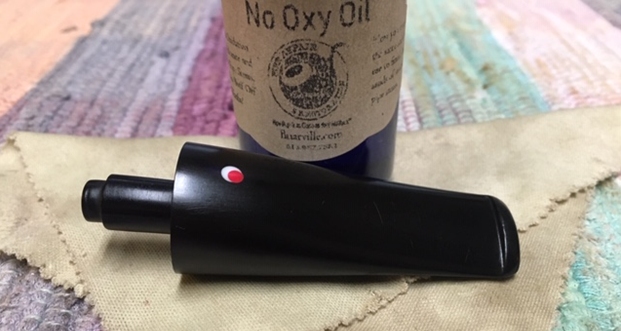
 I set the bowl aside and worked on the stem. I sanded out the light tooth marks and chatter with 320-3500 grit sanding pads. I wiped the stem down with an Obsidian Oil cloth after each sanding pad. The stem looked better at this point.
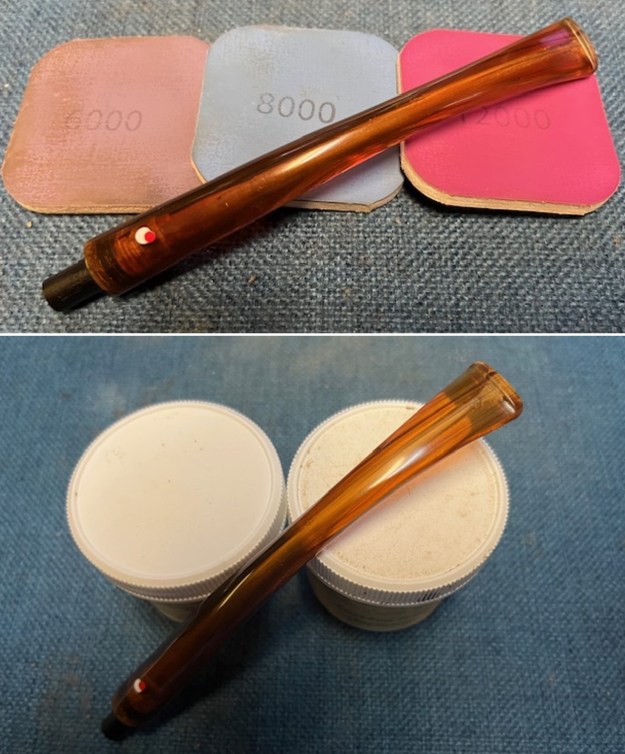
 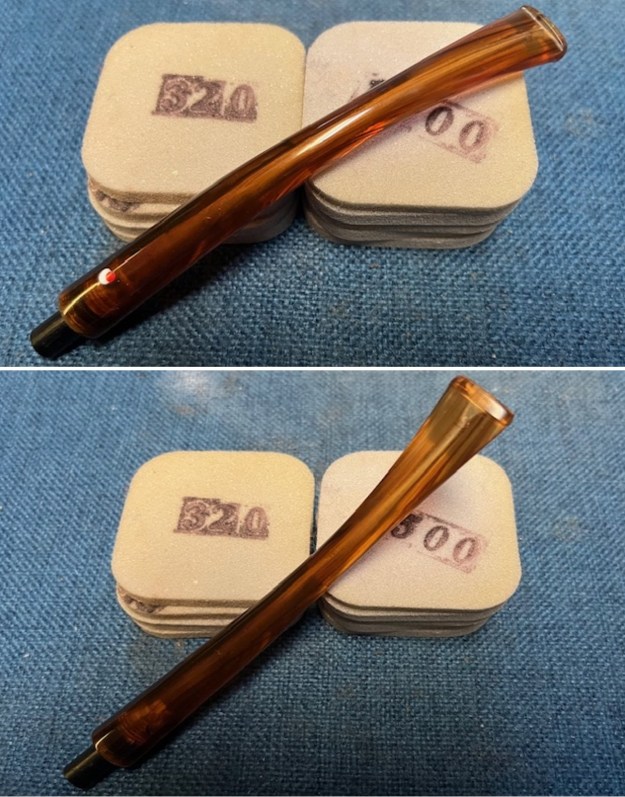 I polished the stem with micromesh sanding pads – wet sanding with 1500-12000 grit sanding pads. I wiped it down after each sanding pad with Obsidian Oil. I polished it with Before & After Pipe Stem Polish – both Fine and Extra Fine. I buffed the stem with a soft cloth to raise the shine. I gave it a final wipe down with Obsidian Oil to protect the stem from UV and slow down future oxidation.
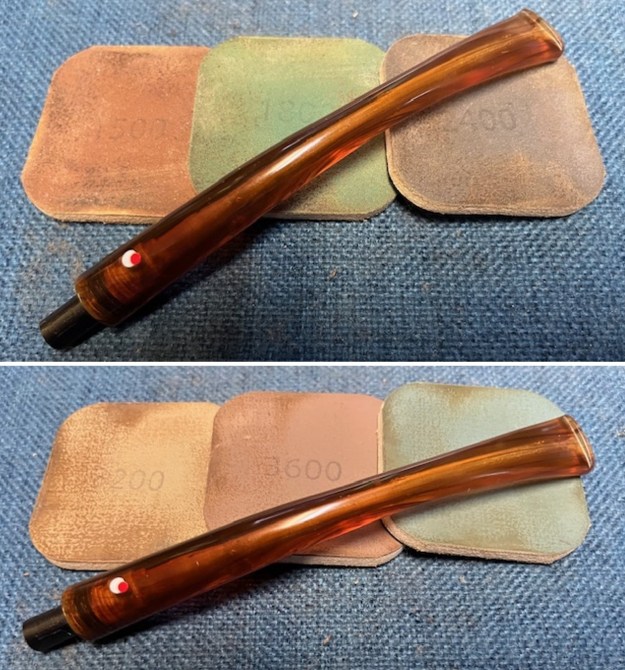
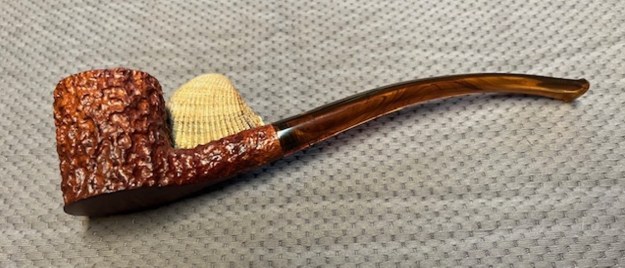
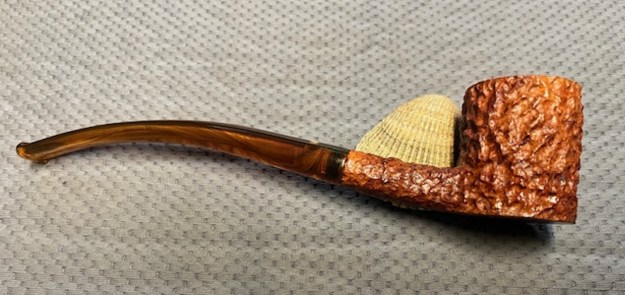
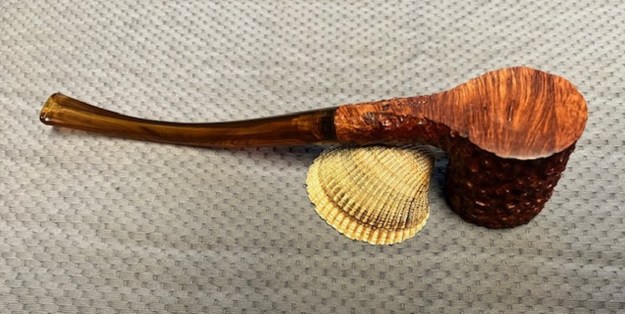
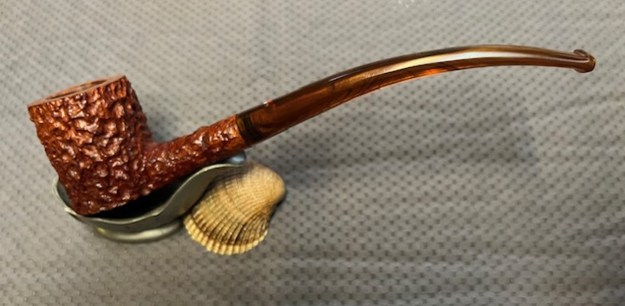
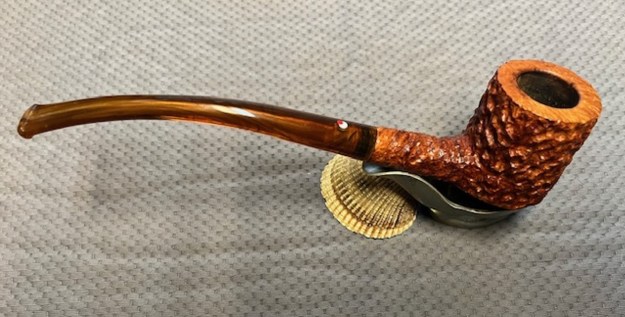
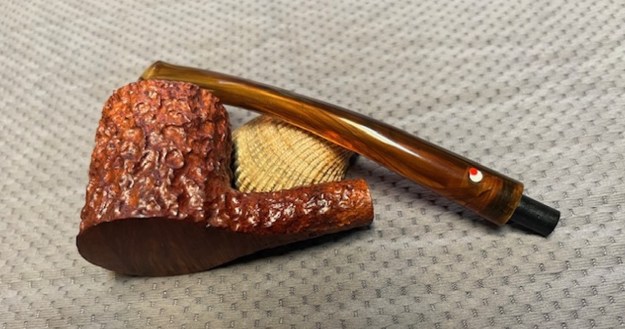
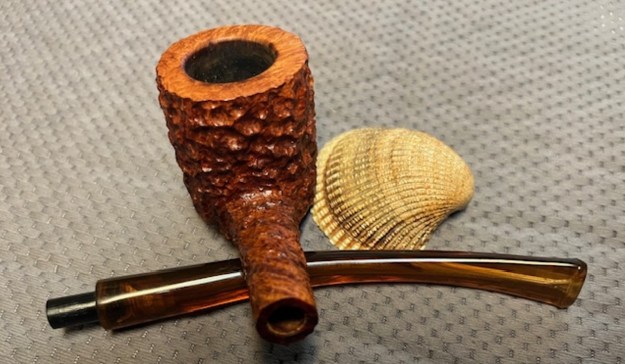
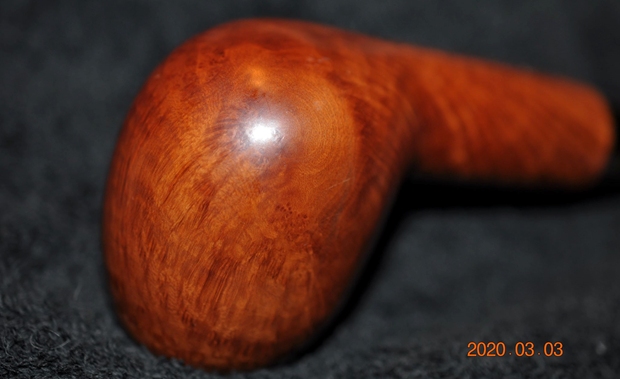
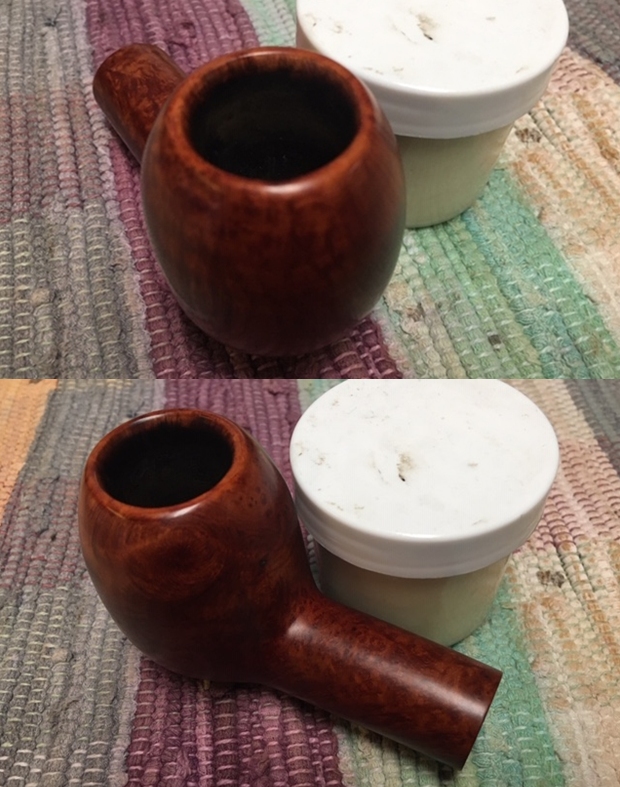
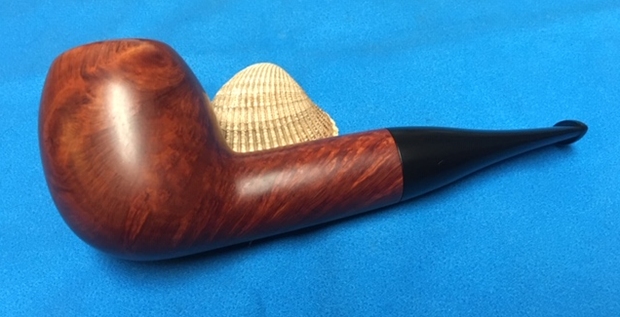
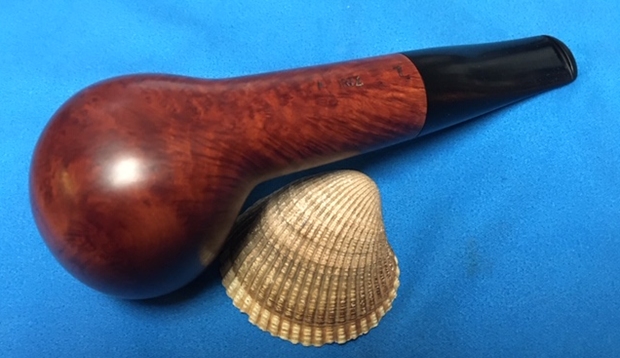
 I don’t know what it is about finishing a restoration but I have to tell you that it is my favourite part of the process. It is the moment when everything that I have worked on comes together. I can compare it to where I started and there is always satisfaction that it does indeed look better than when we picked it up. As always, I put this A. Curtz 13 Rusticated Churchwarden back together and buffed it with Blue Diamond on the buffing wheel. I gave the bowl multiple coats of Conservator’s Wax and the stem multiple coats of carnauba wax. I buffed the pipe with a clean buffing pad and hand buffed it to raise the shine. It is fun to see what the polished bowl looks like along with the polished amber acrylic stem. This Arley Curtz Rusticated Sitter CW is a great looking pipe and I am sure that it will be comfortable in hand when smoking as it is light and well balanced for a pipe of this size. Have a look at it with the photos below. The dimensions are Length: 8 inches, Height: 2 inches, Outside diameter of the bowl: 1 ½ inches, Chamber diameter: 7/8 of an inch. The weight of the pipe is 1.80 ounces/53 grams. It is another beautiful pipe and one that will be on the rebornpipes store soon. You can find it in the section of Pipes by American Pipe Makers. If you are interested in adding it to your collection let me know. Thanks for walking through the restoration with me as I worked over this pipe. Thanks to each of you who are reading this blog.
As always, I encourage your questions and comments as you read the blog. Thanks to each of you who are reading this blog. Remember we are not pipe owners; we are pipe men and women who hold our pipes in trust until they pass on into the trust of those who follow us.