Restoring A Len Payne Twin Bore System Bulldog


Blog by Steve Laug

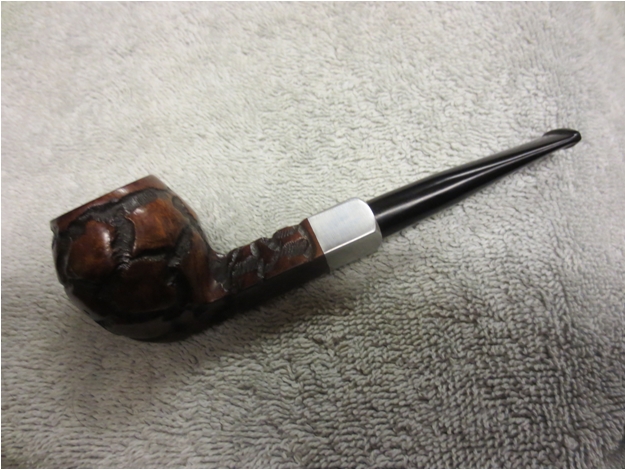
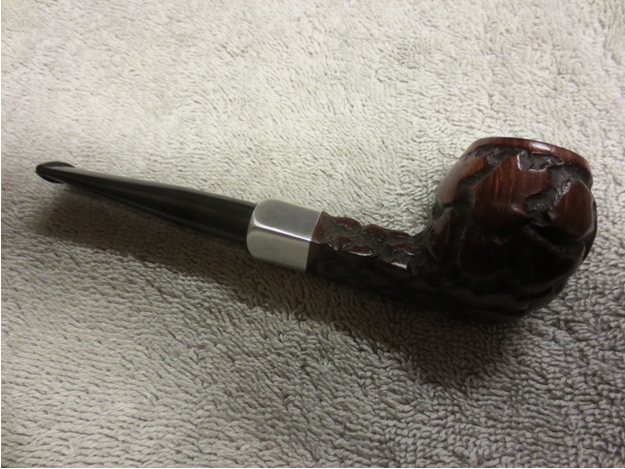
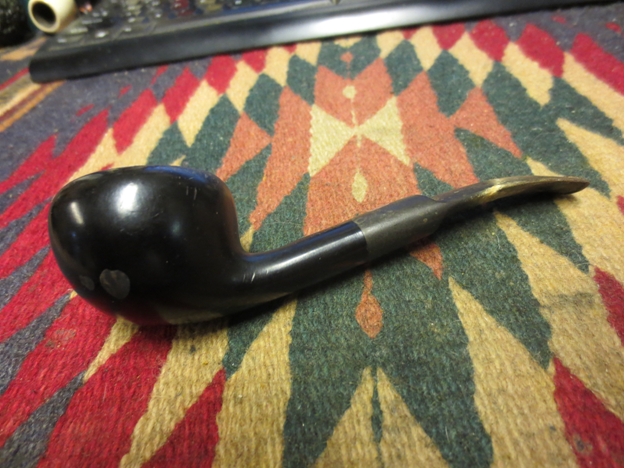
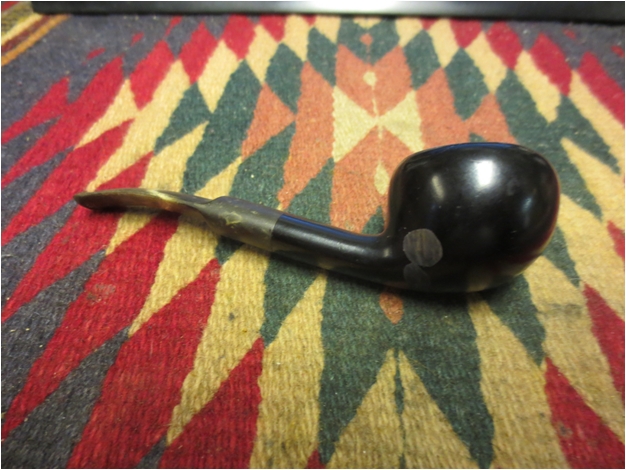
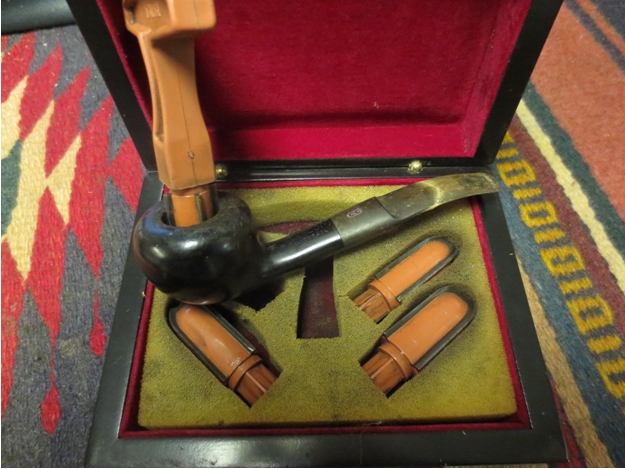
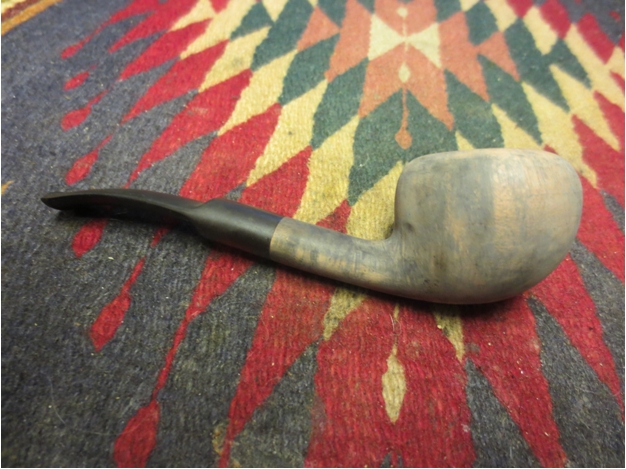
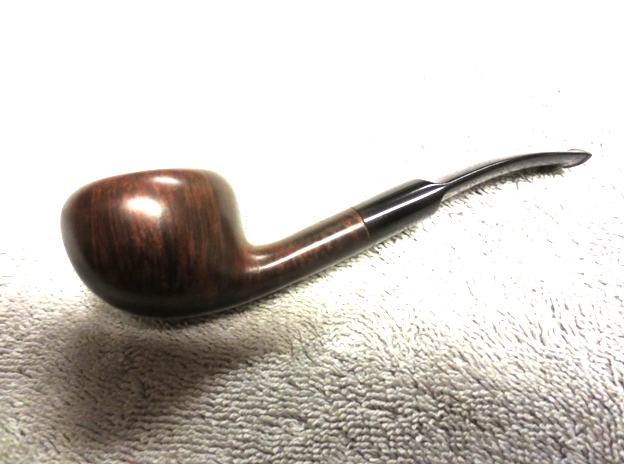
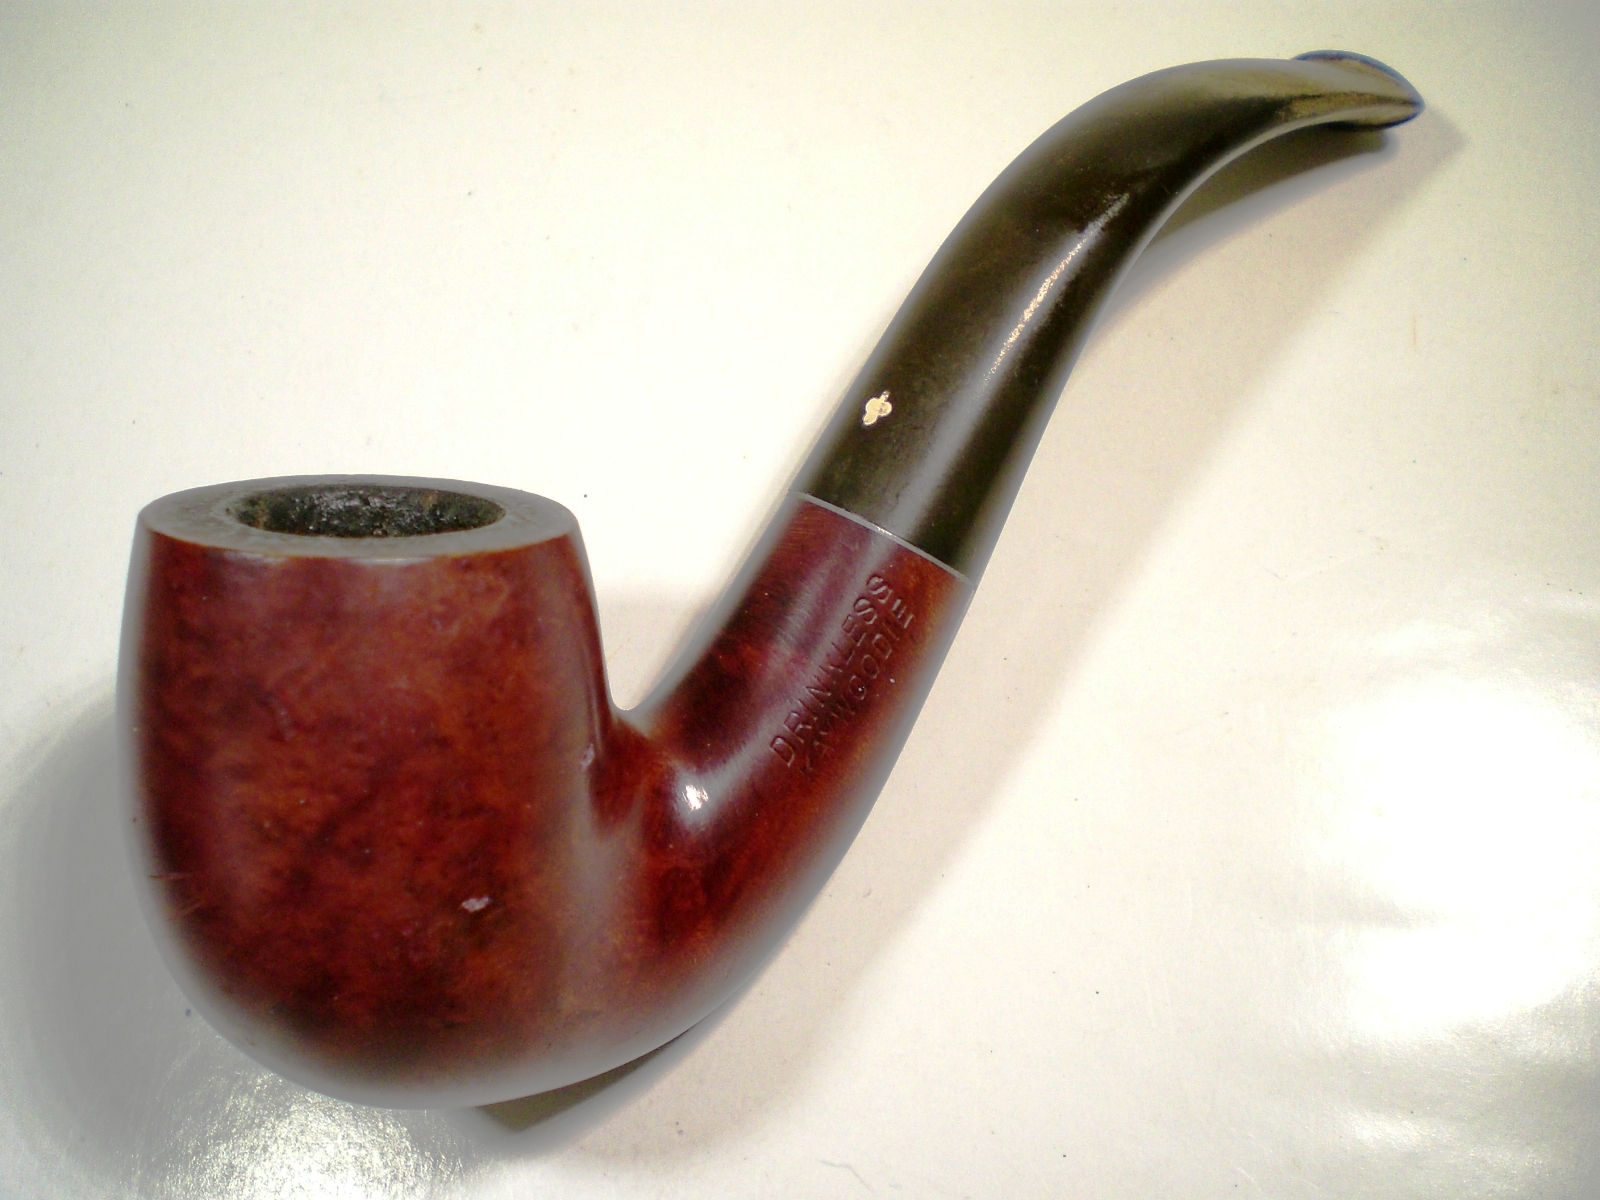
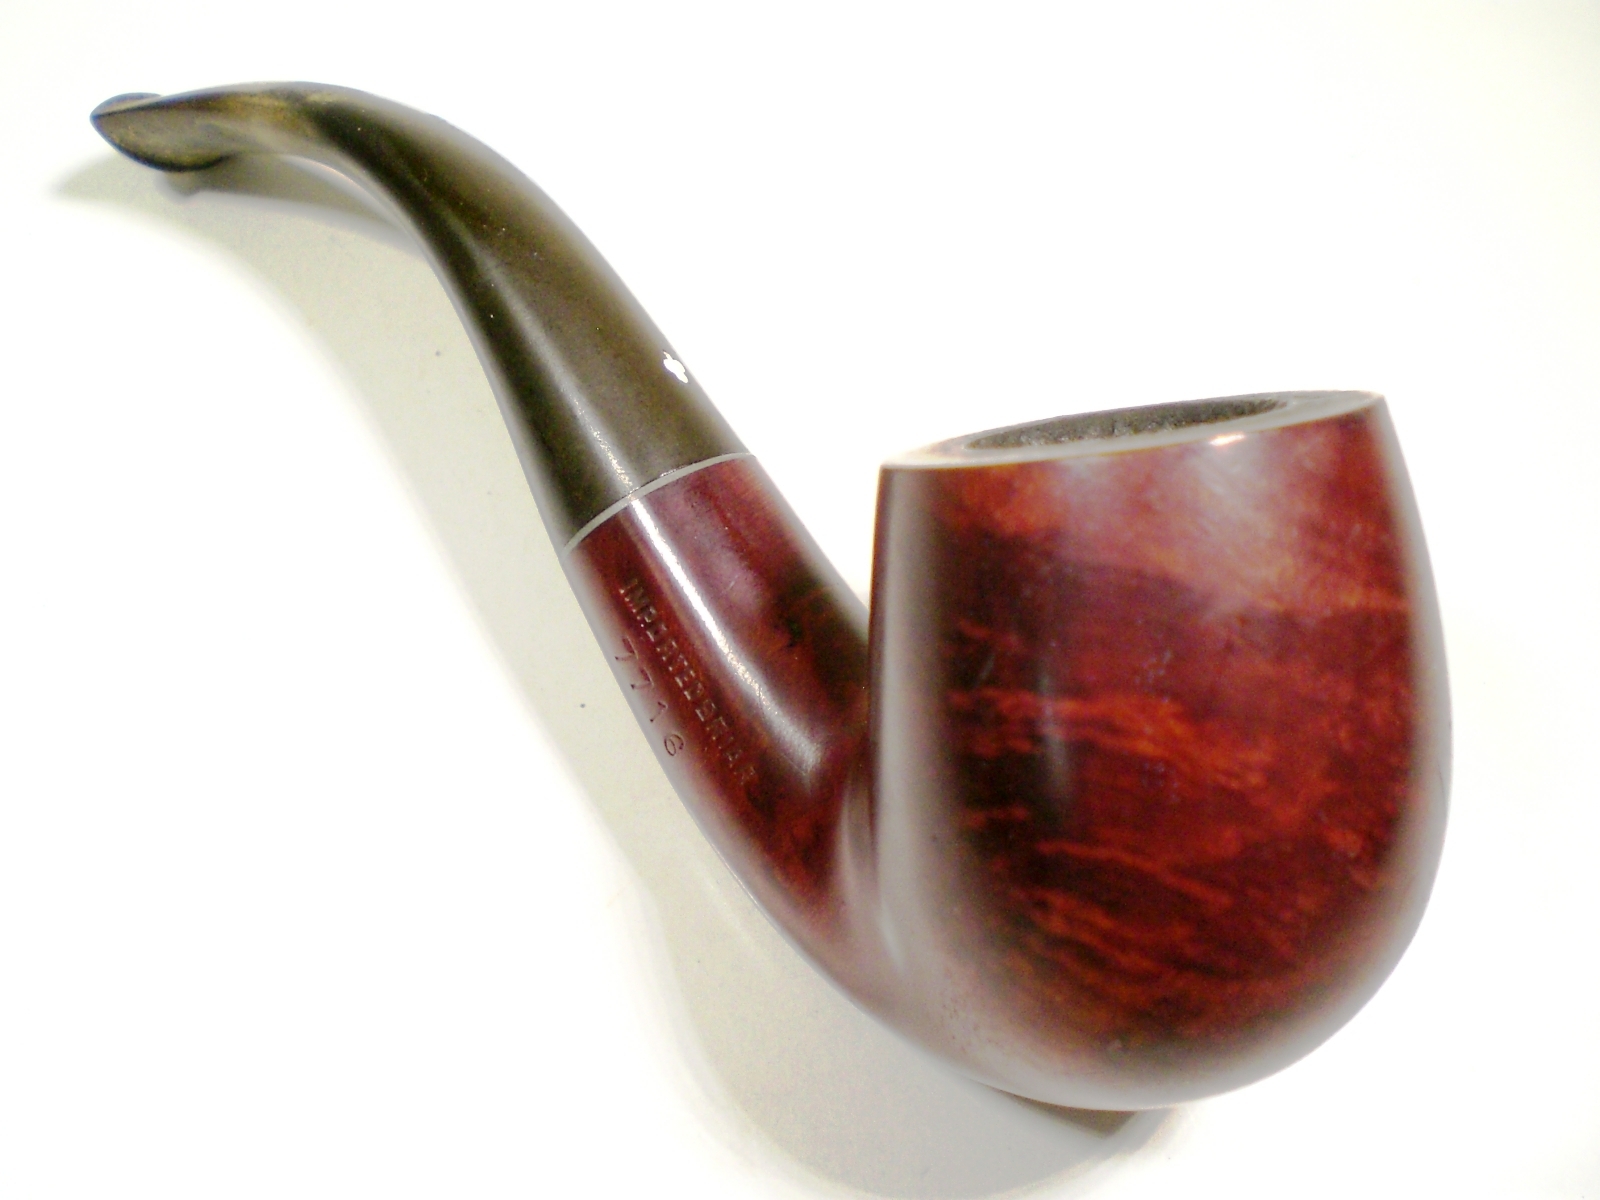
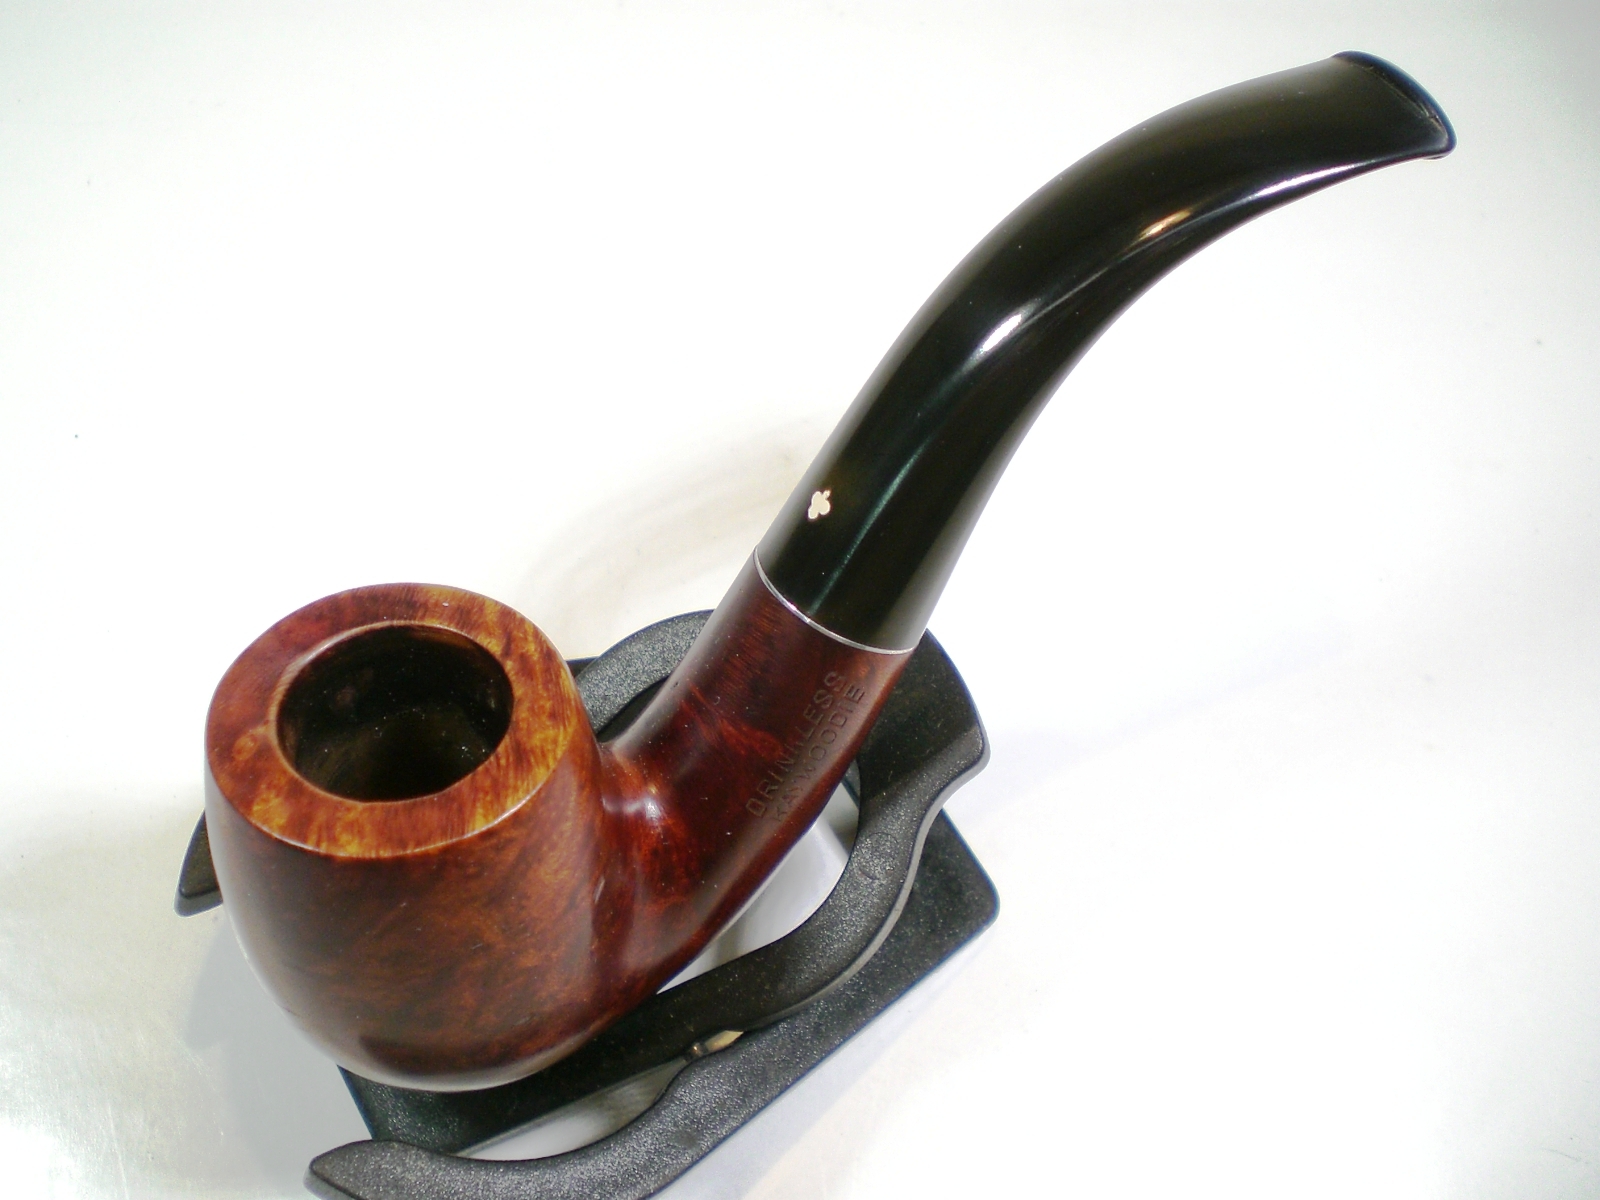
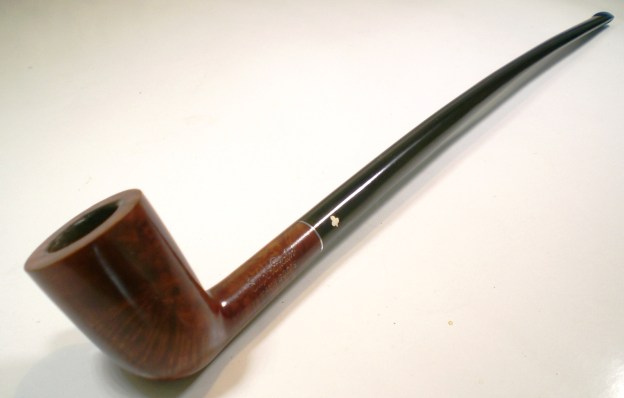
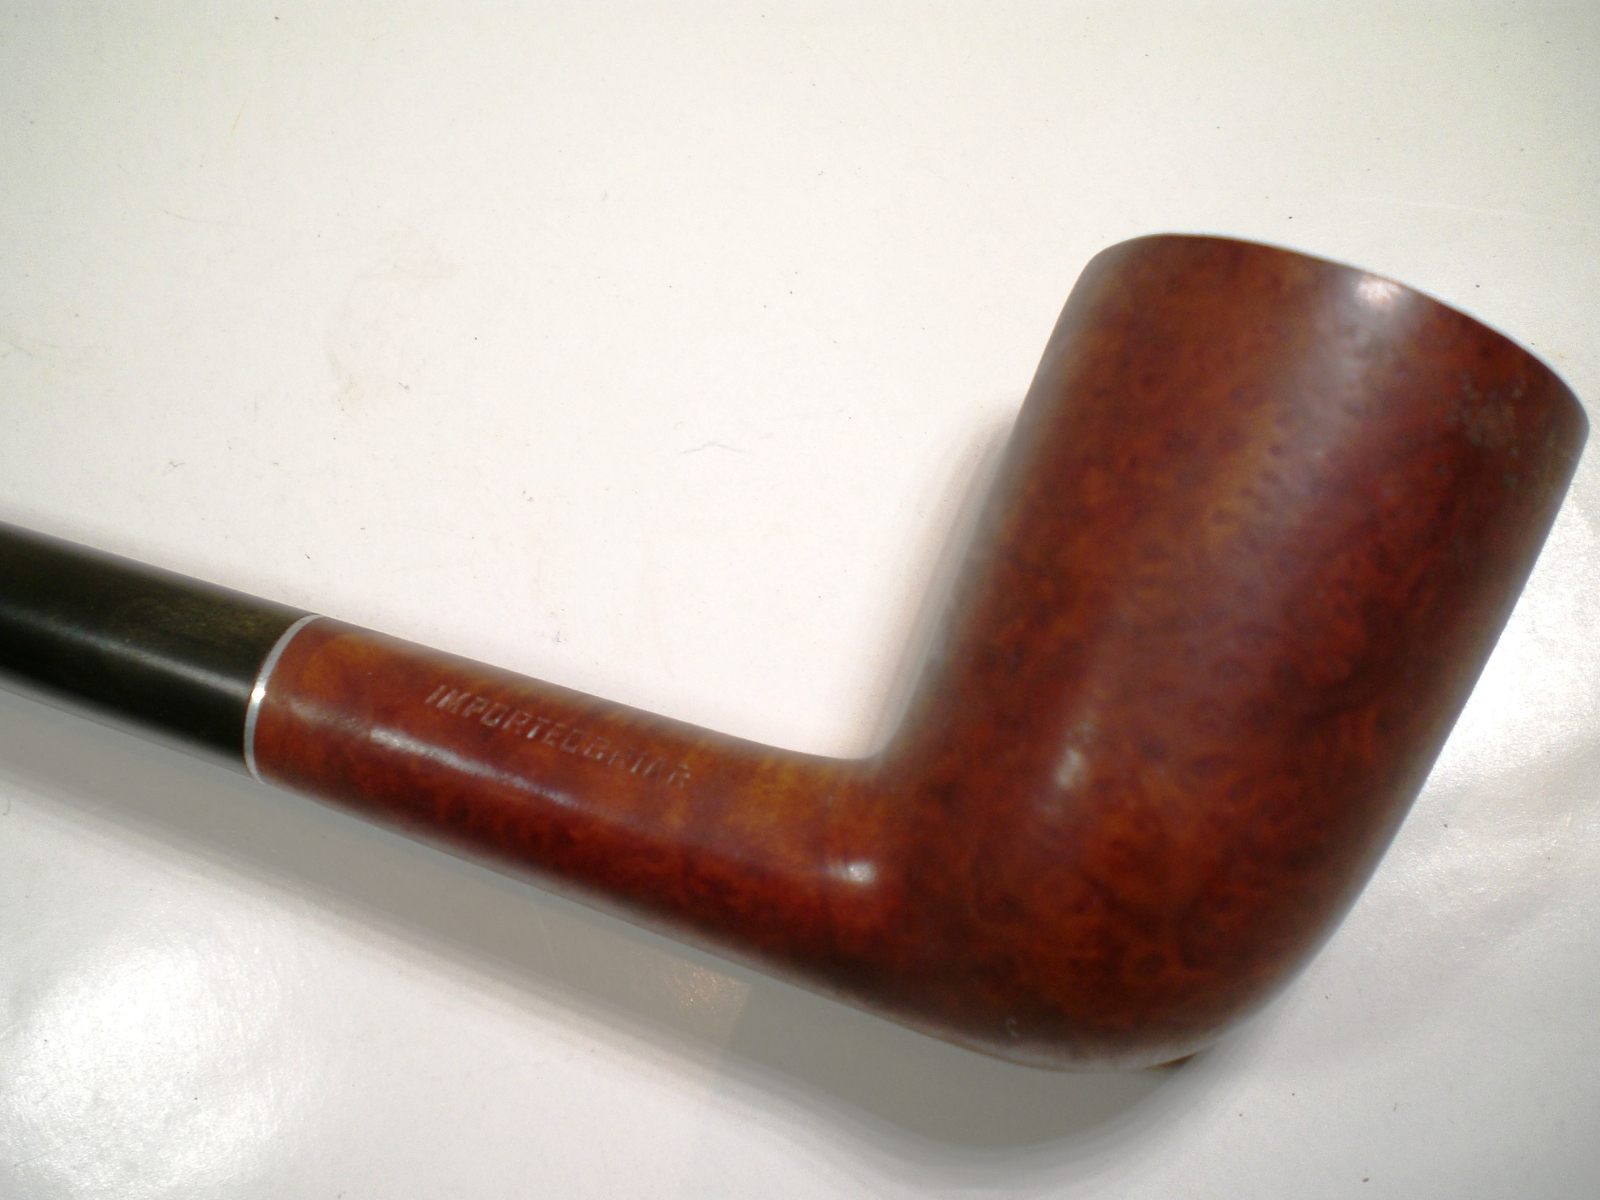
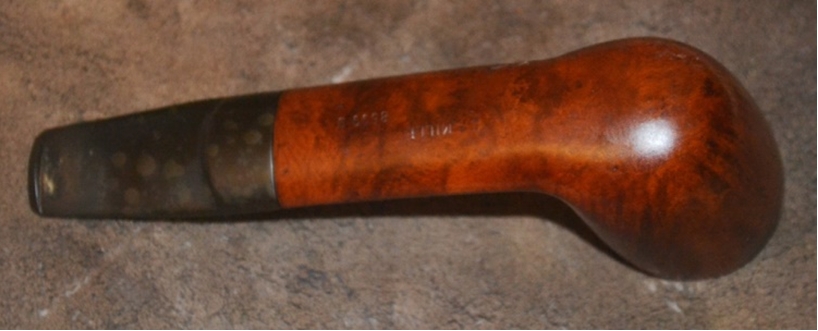
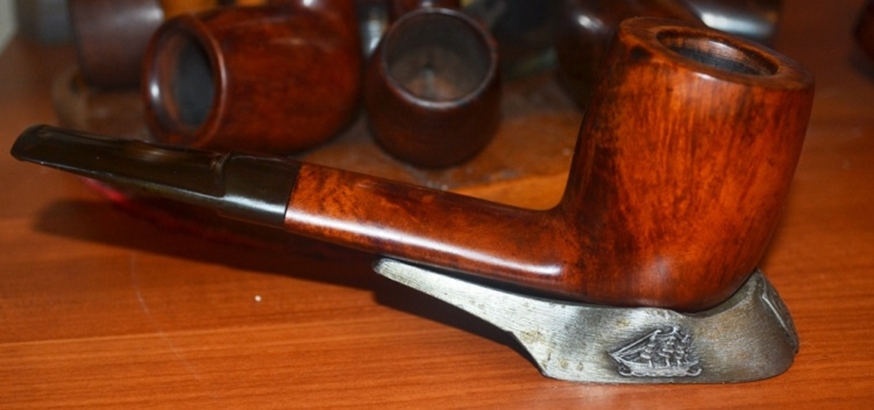
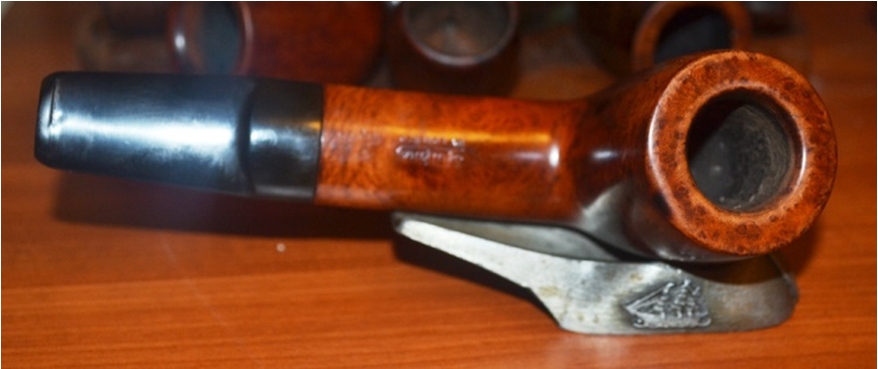
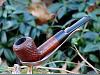
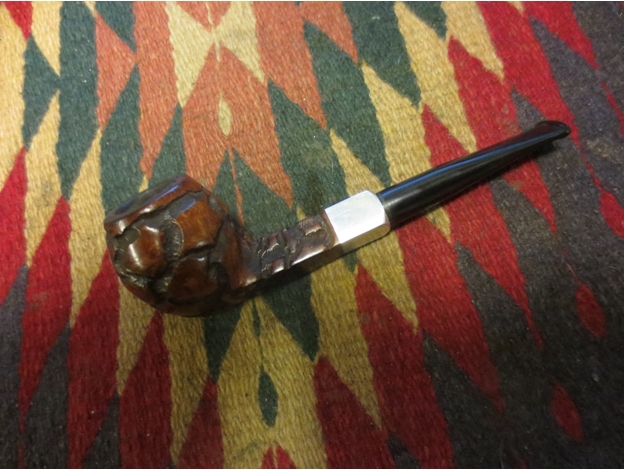
When I saw the rusticated bulldog shaped pipe in the display case at the Alberta antique mall I could not help but want to have a look at it. I asked the clerk to open the display case for me to have a closer look at it. The aluminum shank end look too substantial to be just an end cap or ferrule like Peterson’s and other older pipes have used for years. In fact it reminded me of some of the South African Keyser Hygienic pipes that I have in my collection. It had that kind of weight to the aluminum. The stem also had the same kind of look. It was a large diameter military mount stem that pushed into the shank end opening.

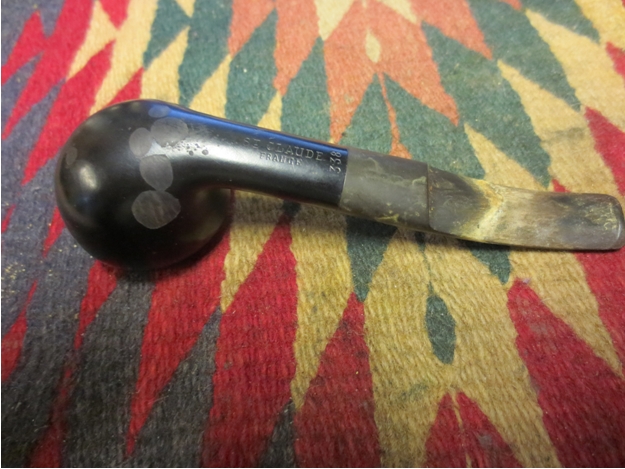
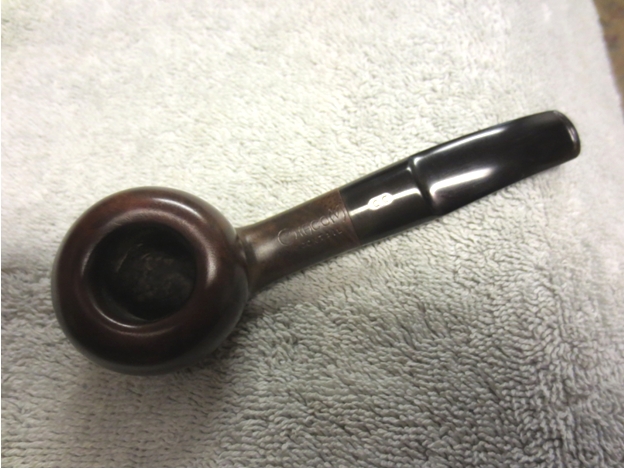
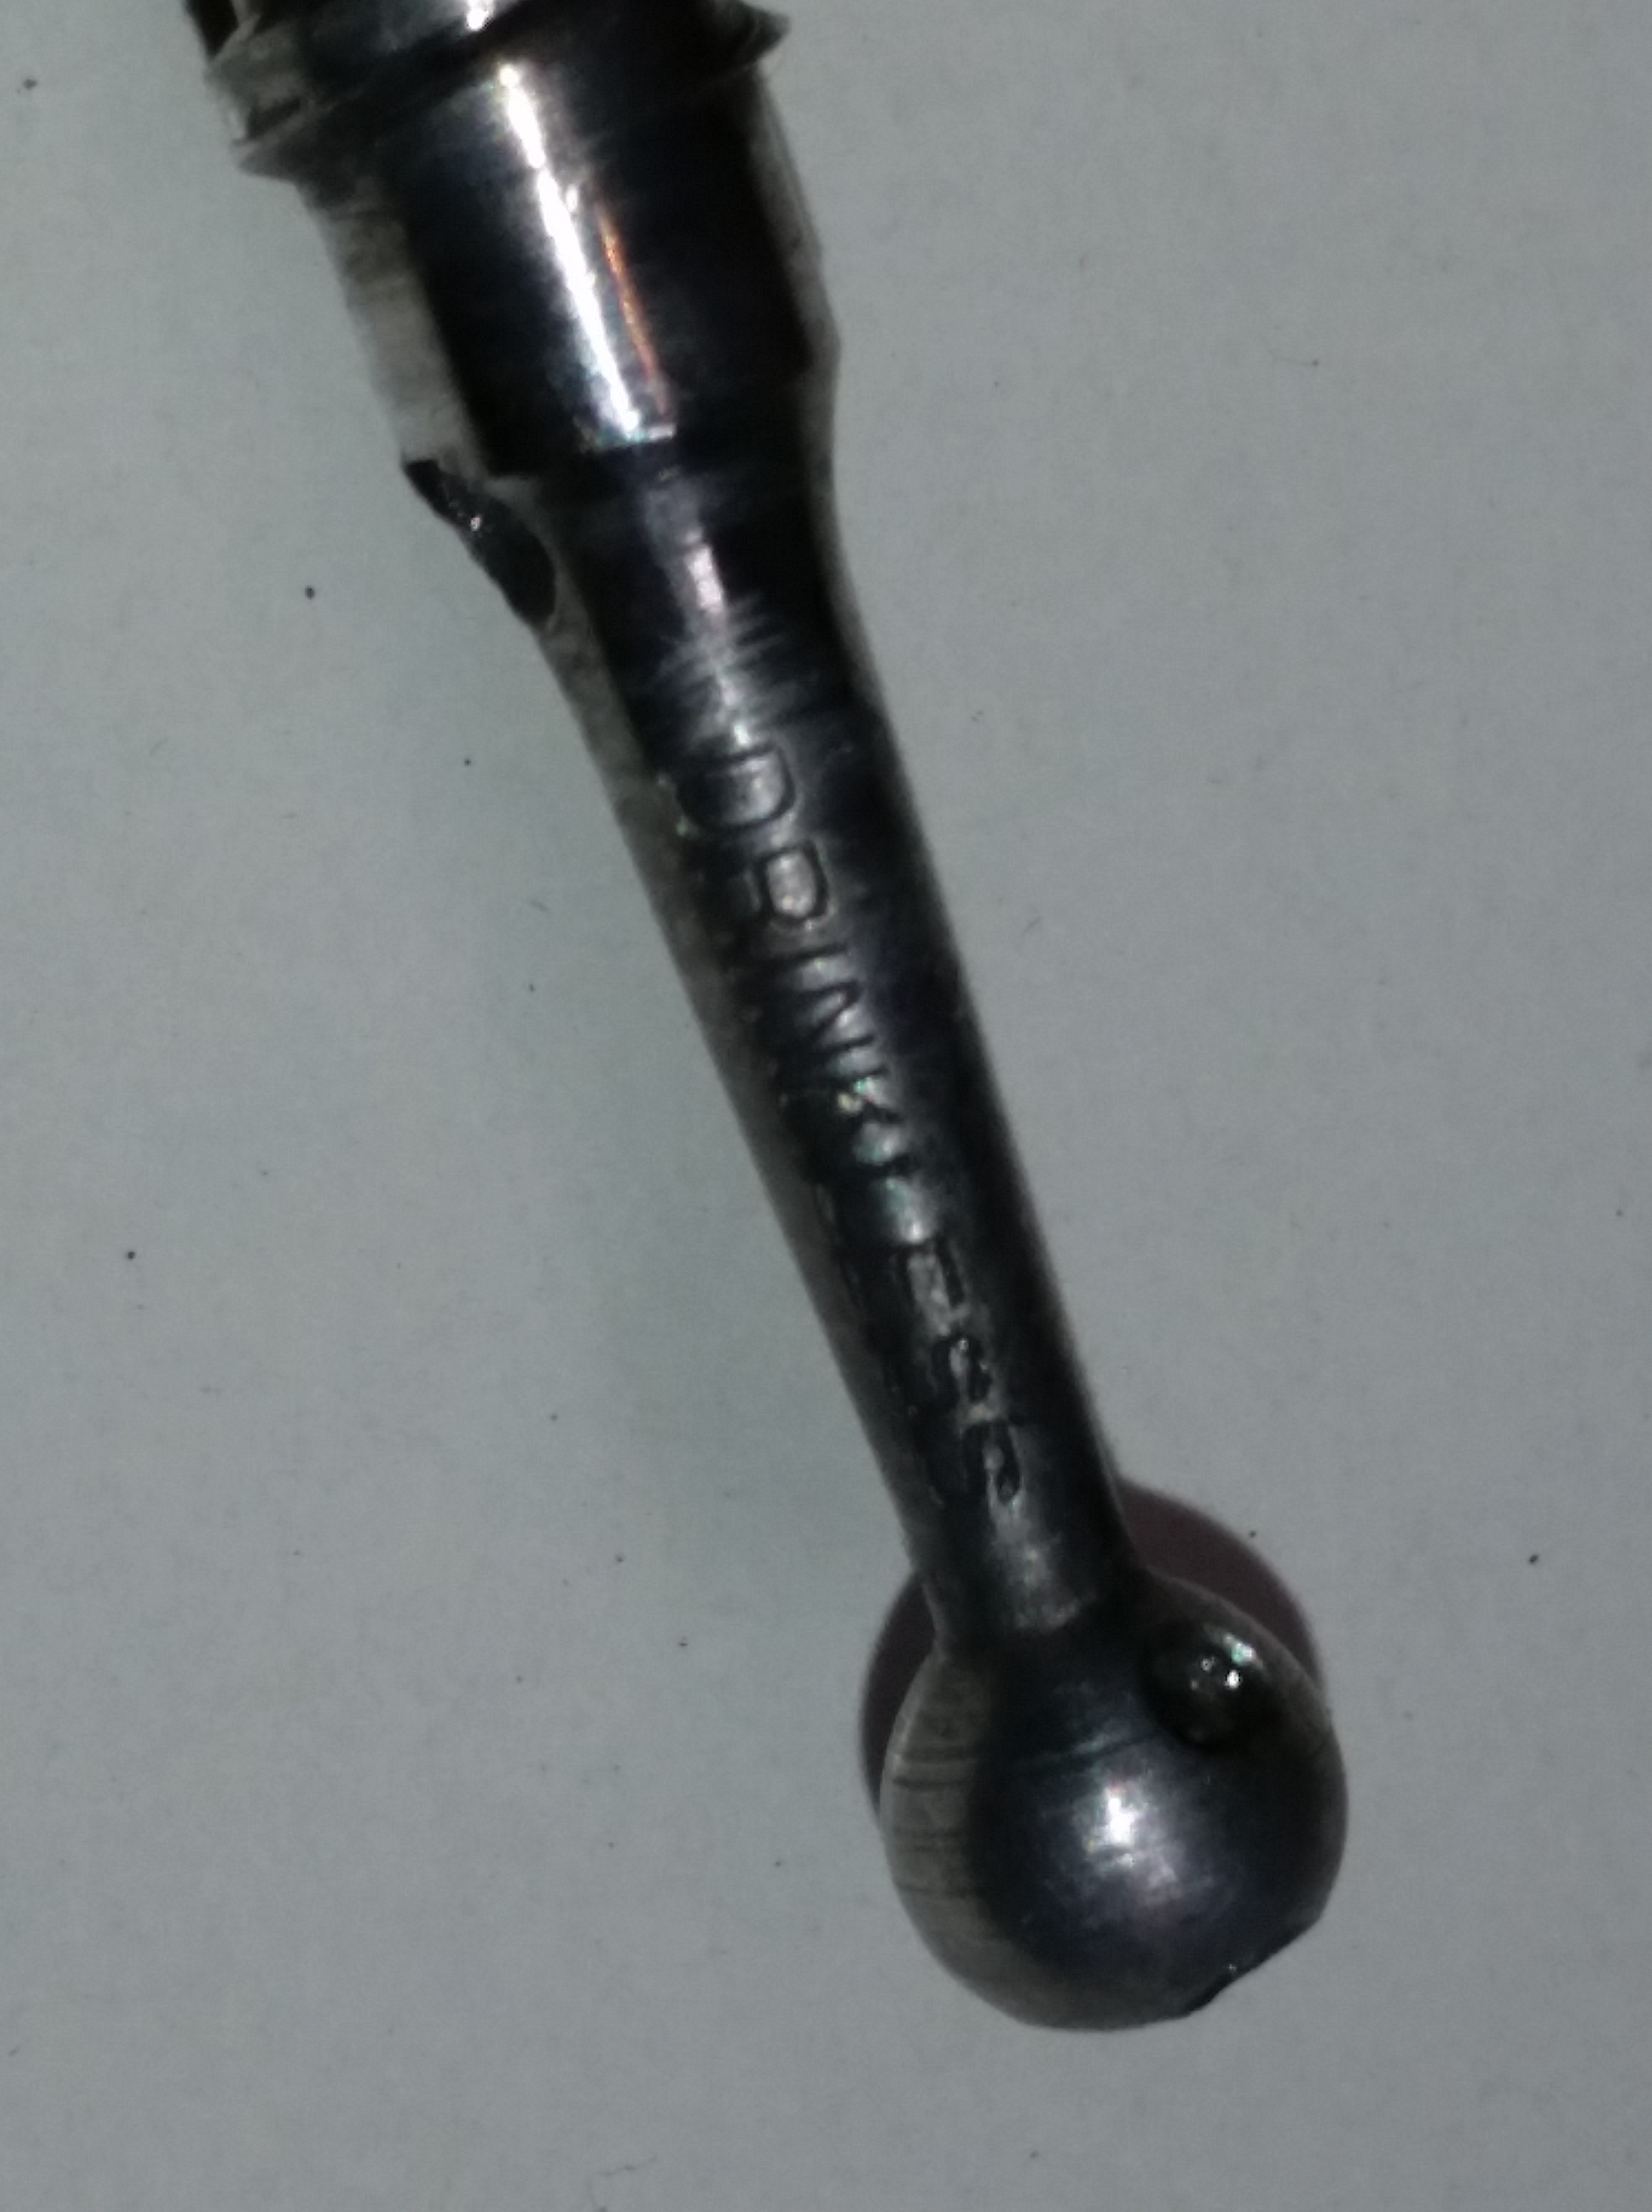
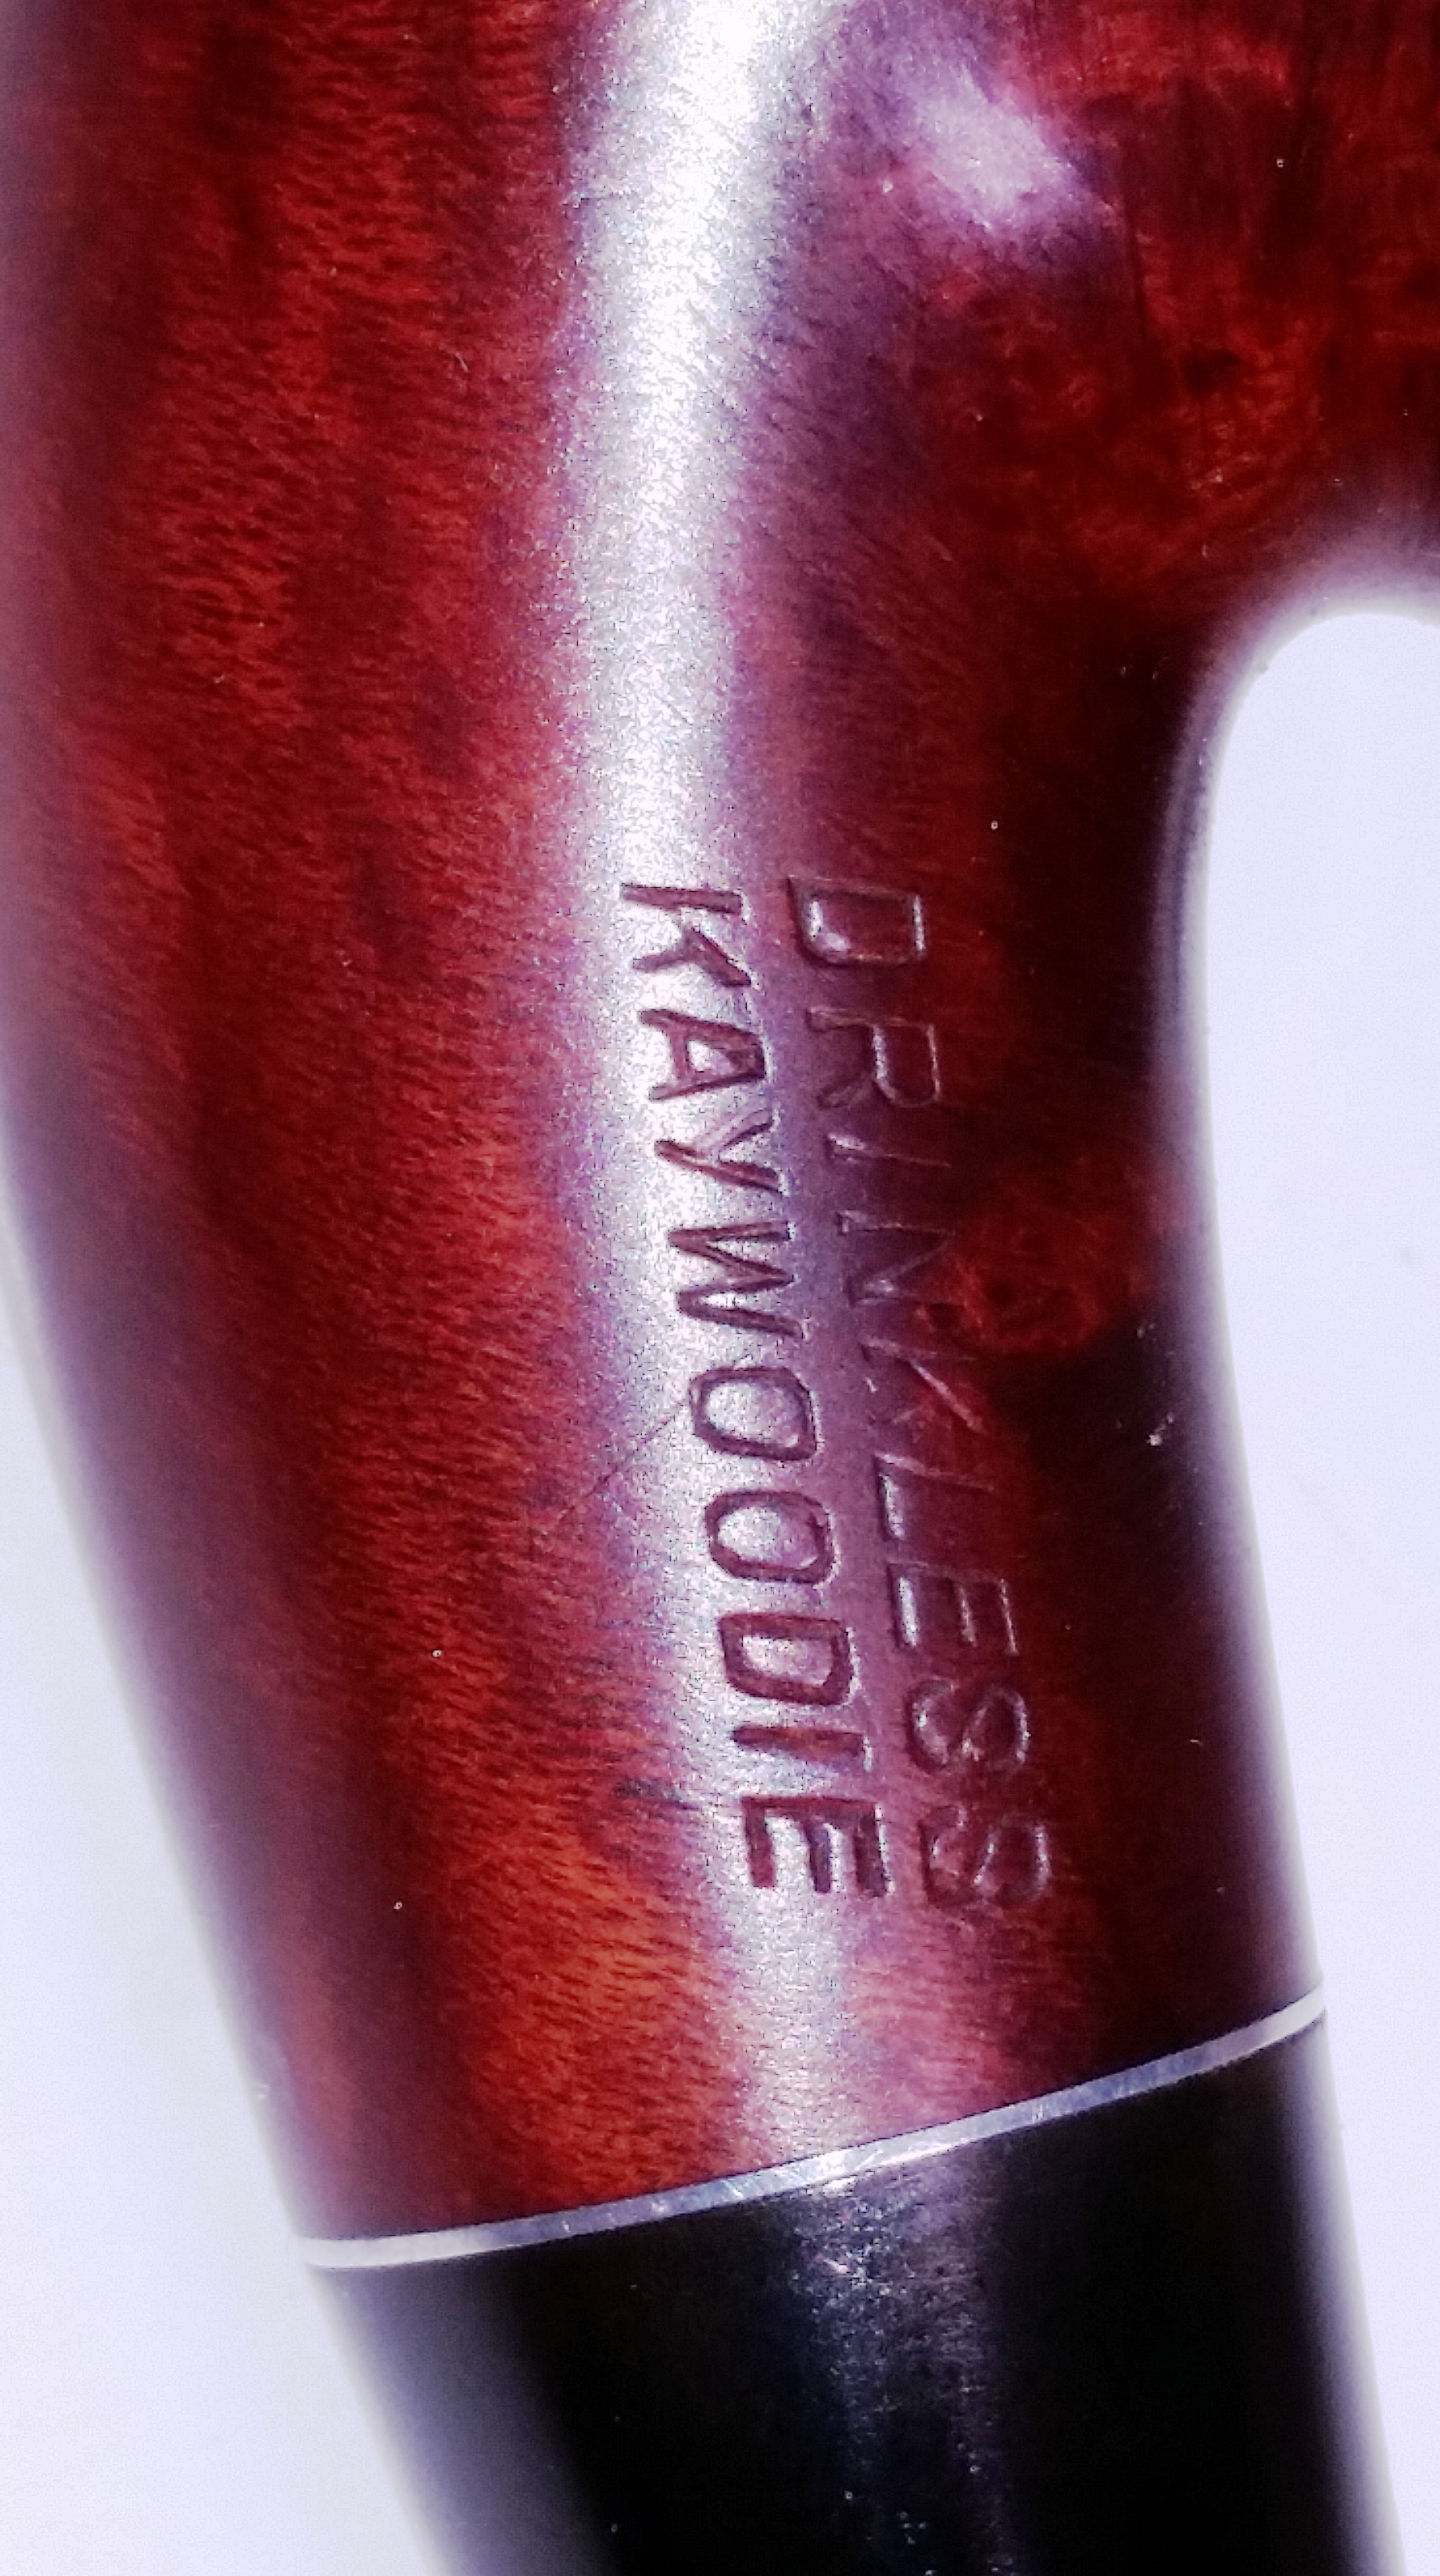
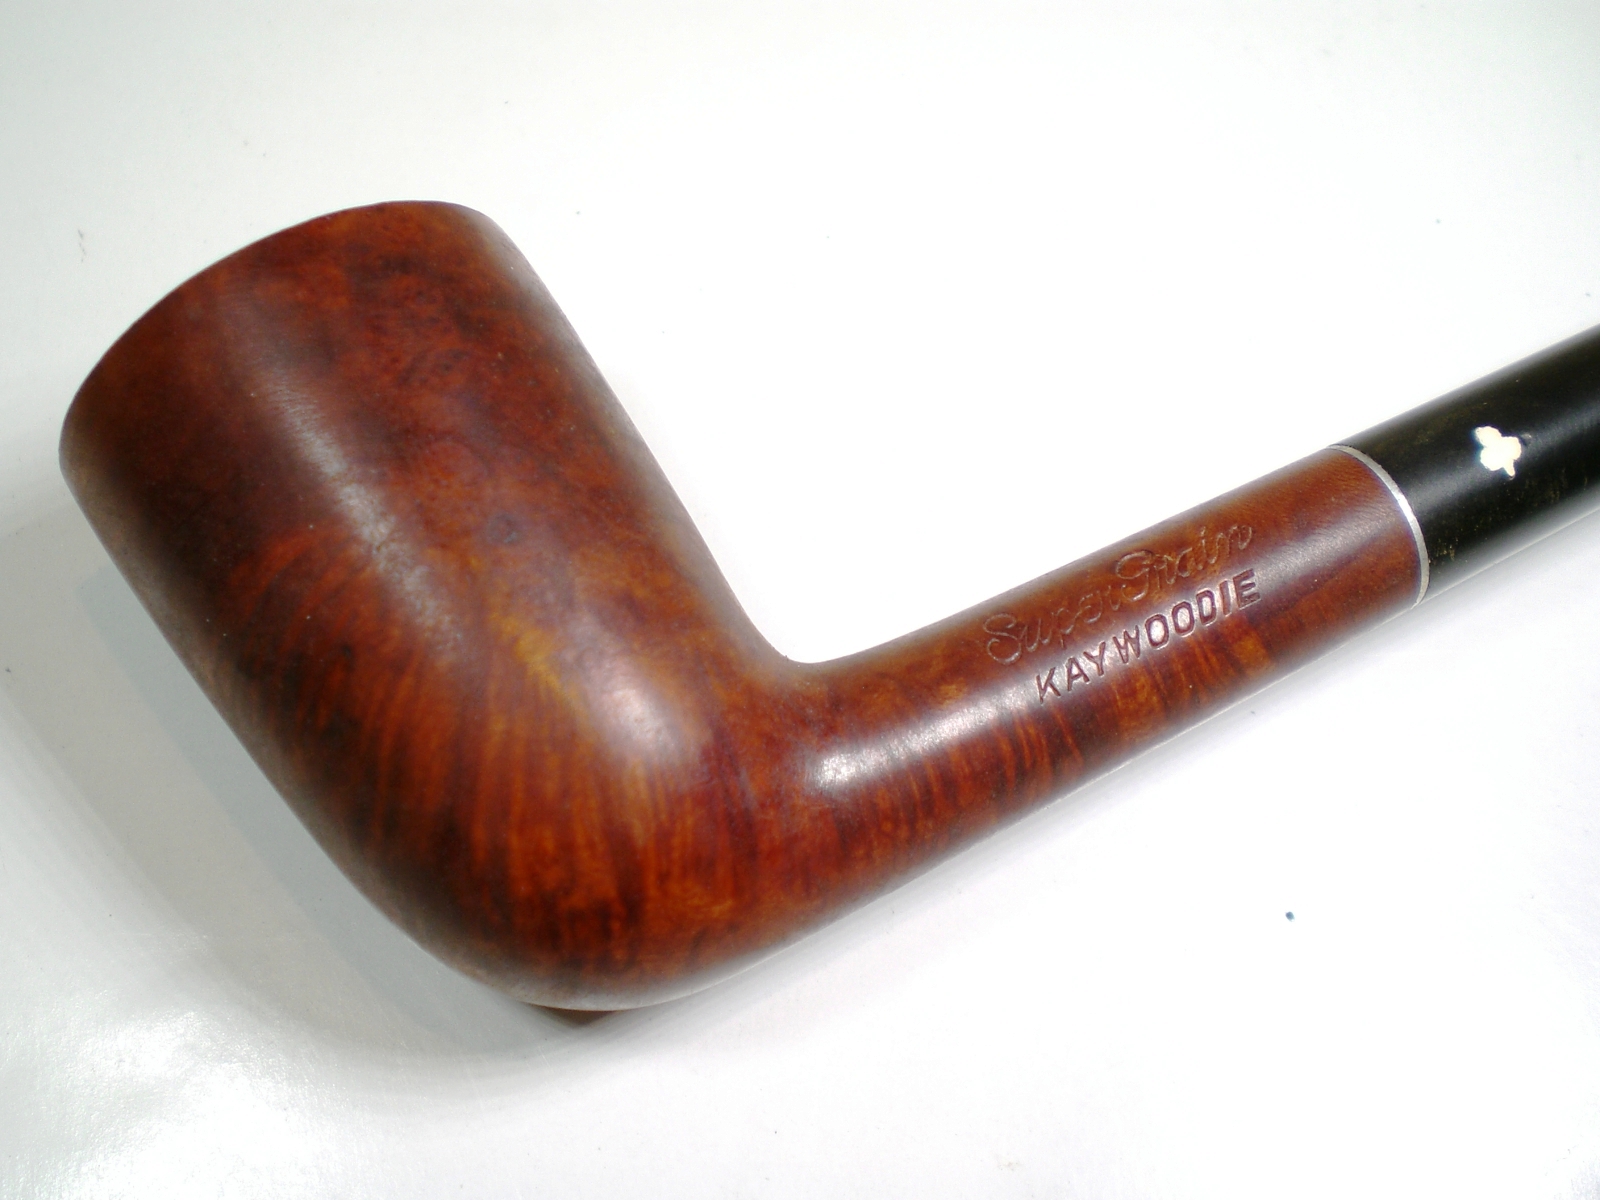
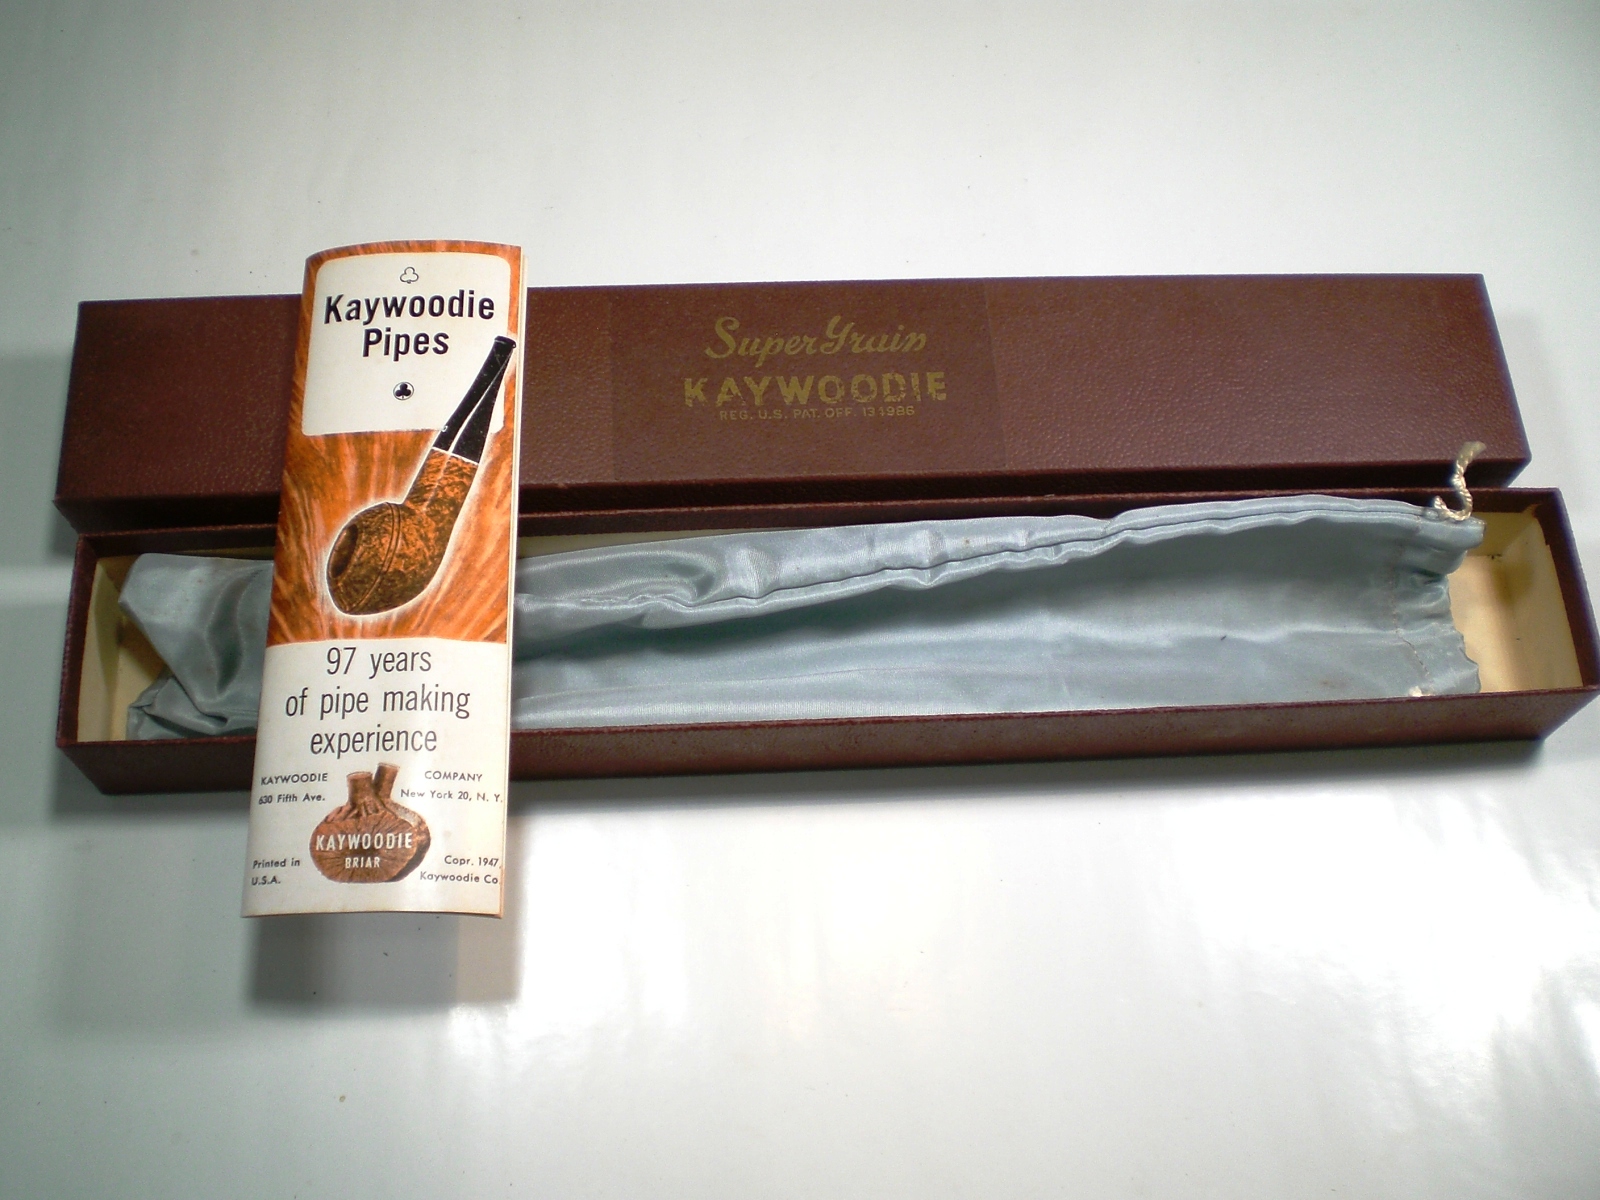
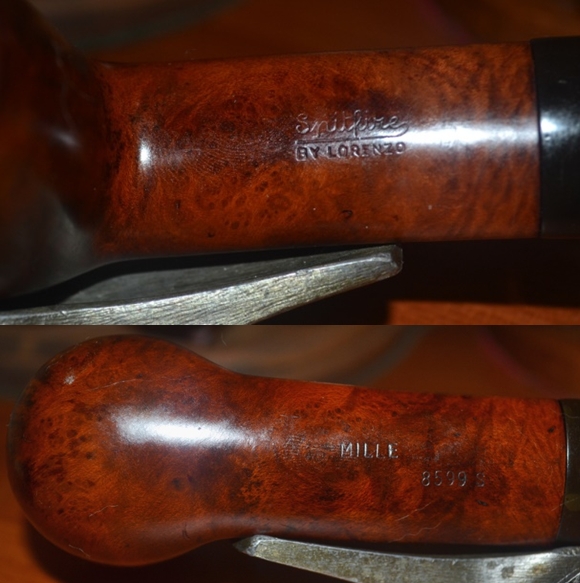
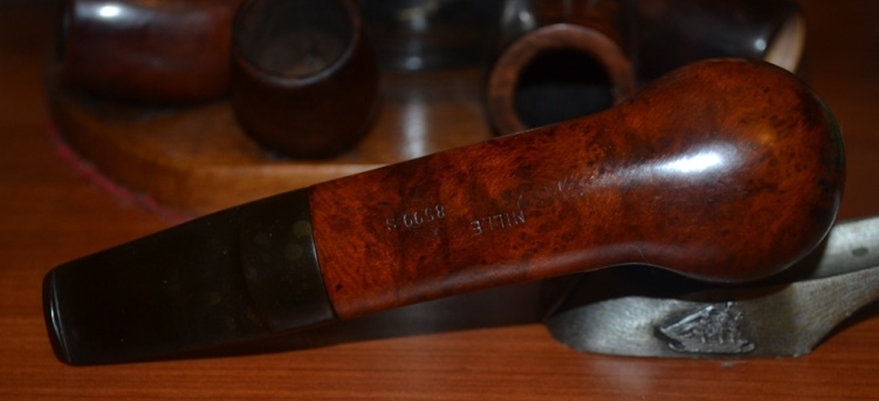
Once the clerk took it out of the case I looked at the underside of the diamond shank to see if it was a Keyser pipe – it wasn’t! It was stamped Len Payne. Now I was wondering. In the past I had written about pipes by Len Payne on the blog https://rebornpipes.com/2013/11/16/a-pipe-maker-i-had-never-heard-of-leonard-payne-pipes/. But I had not seen one with this kind of apparatus on the shank. I am including the quote below from Mike Glukler of Briar Blues that gives a quick summary of the brand. Not the bold italicized sentence in the paragraph below that applies to this pipe.

Leonard Payne was based in B.C. for many years. He came to Canada from England. He had shops in Surrey, B.C. and Kelowna, B.C. Interesting fellow. Gruff as the day is long. When you bought a pipe it was handed to you in a paper bag. No sock, no box. Most of his pipes carried a “carburetor” system at the shank/stem junction. Another Payne idea was his shanks. Almost all his pipes were two pieces. He’d turn the bowl and shank, then cut off the shank and reattach with glue (not always with the same piece of briar, so many did not match grains). His thinking was that the shank being the weakest link, if cut and glued would never break and thus “correcting” the weakest link. You may find his pipes on E-Bay on occasion listed as an L. Cayne. The P in his stamping looks more like a fancy upper case C…- Michael J. Glukler

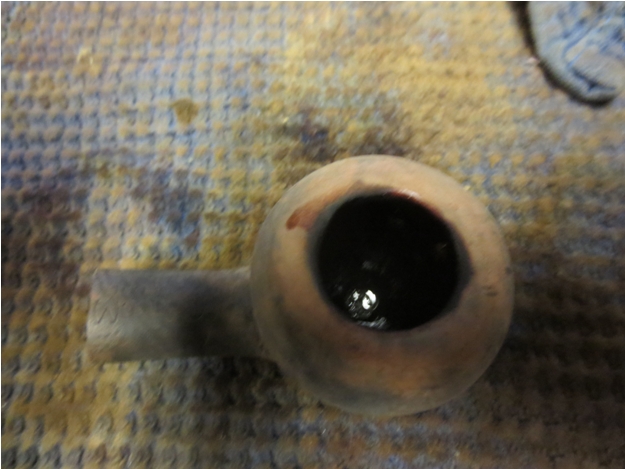
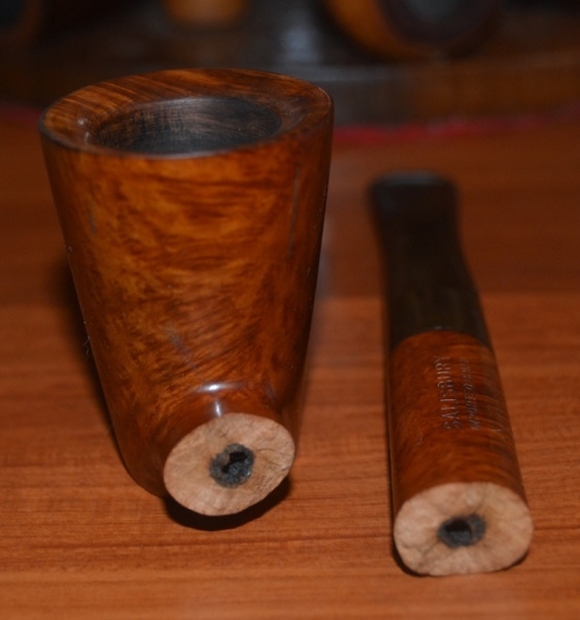
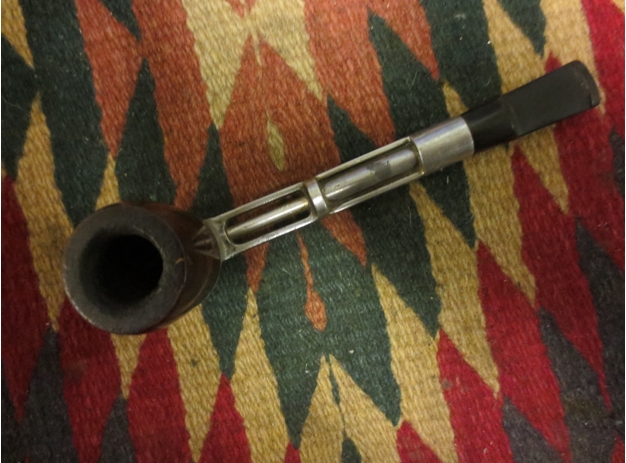
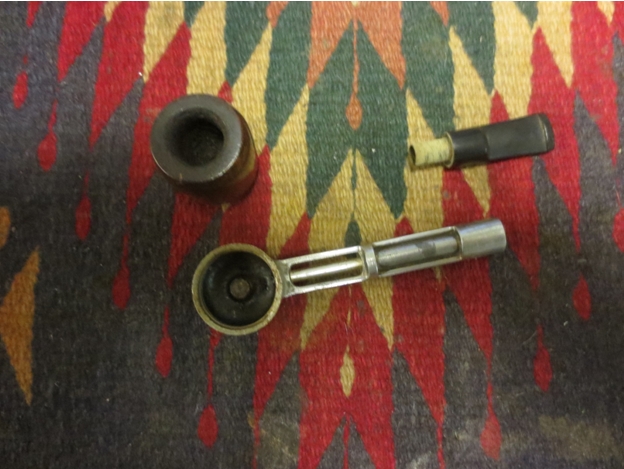
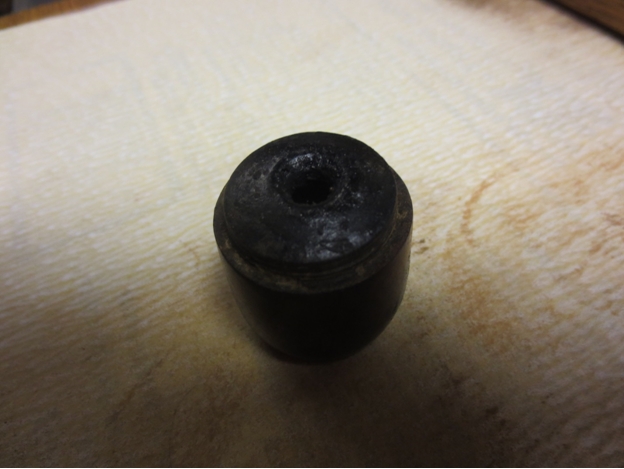
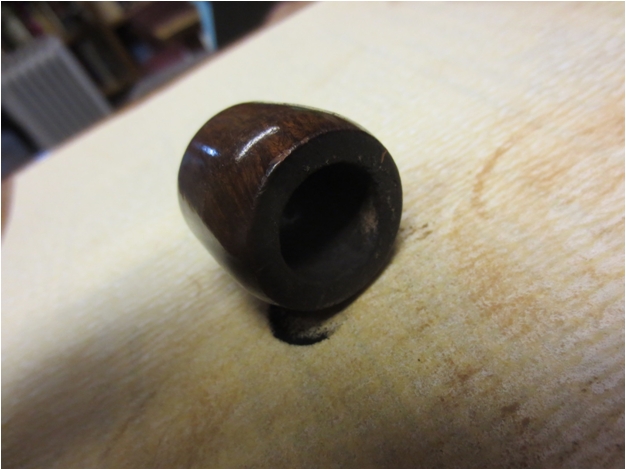
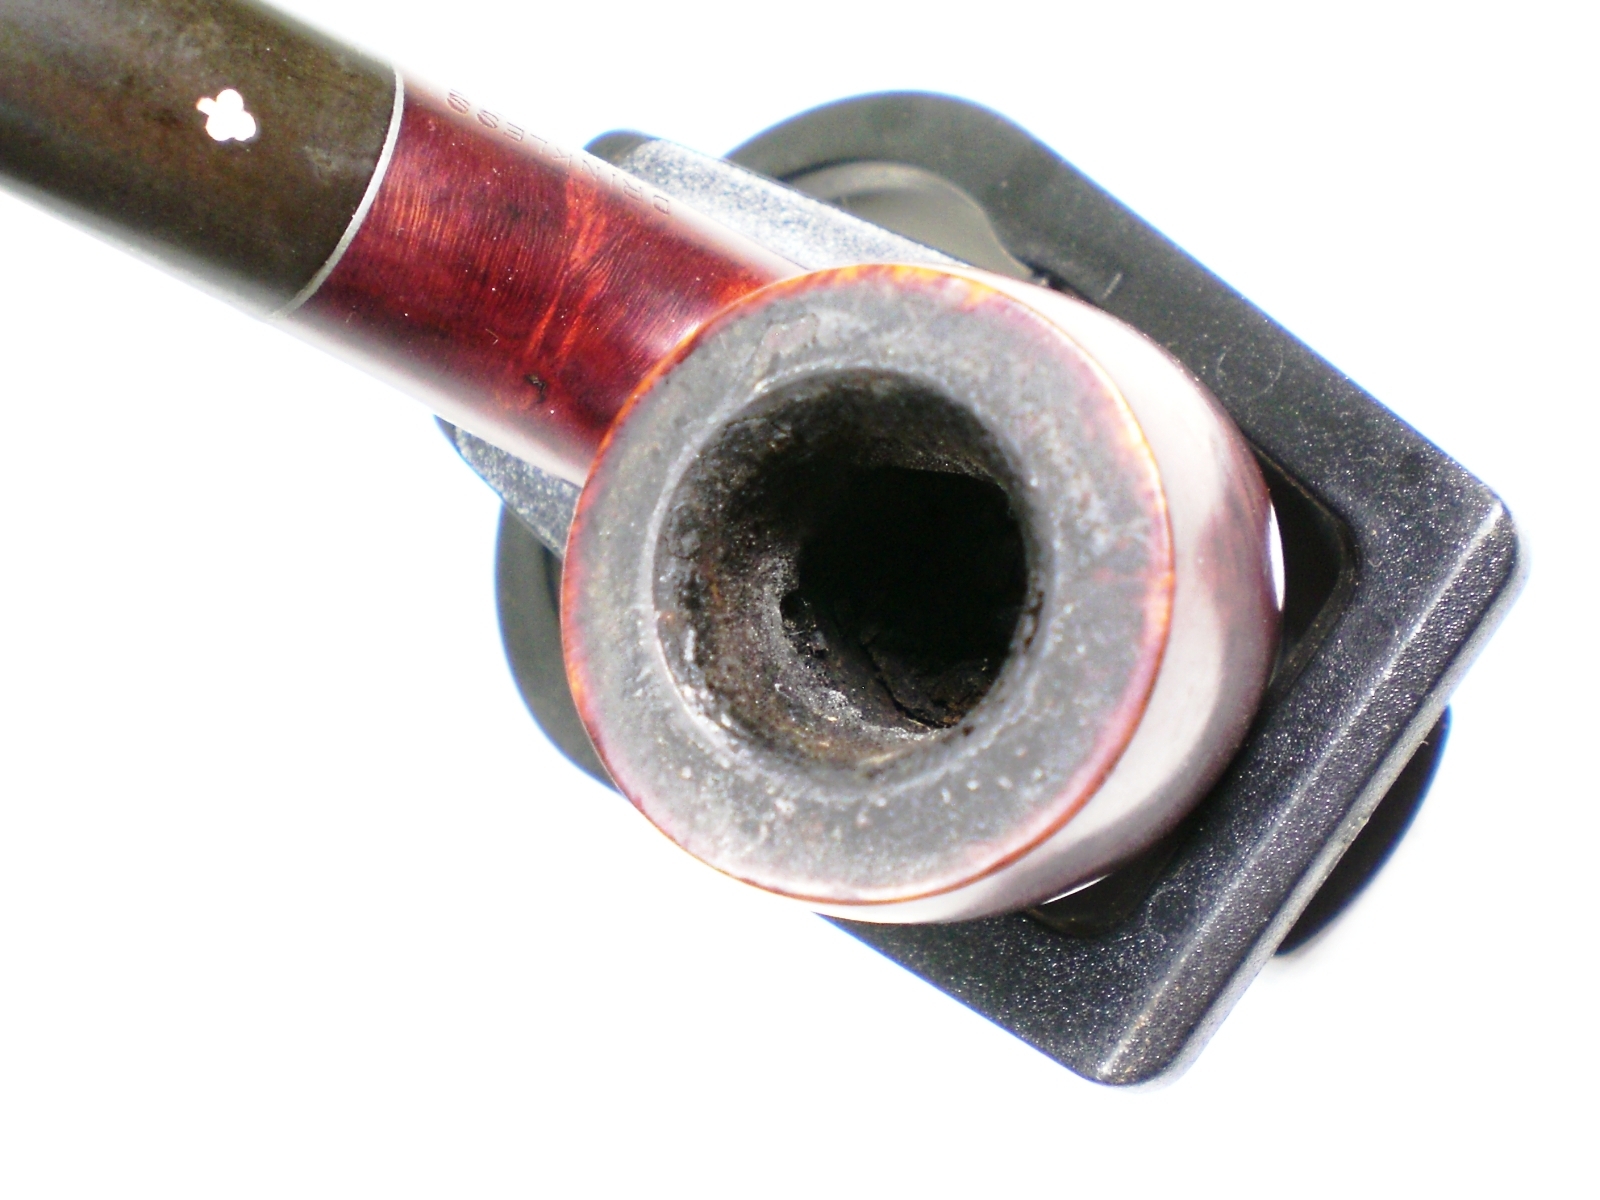
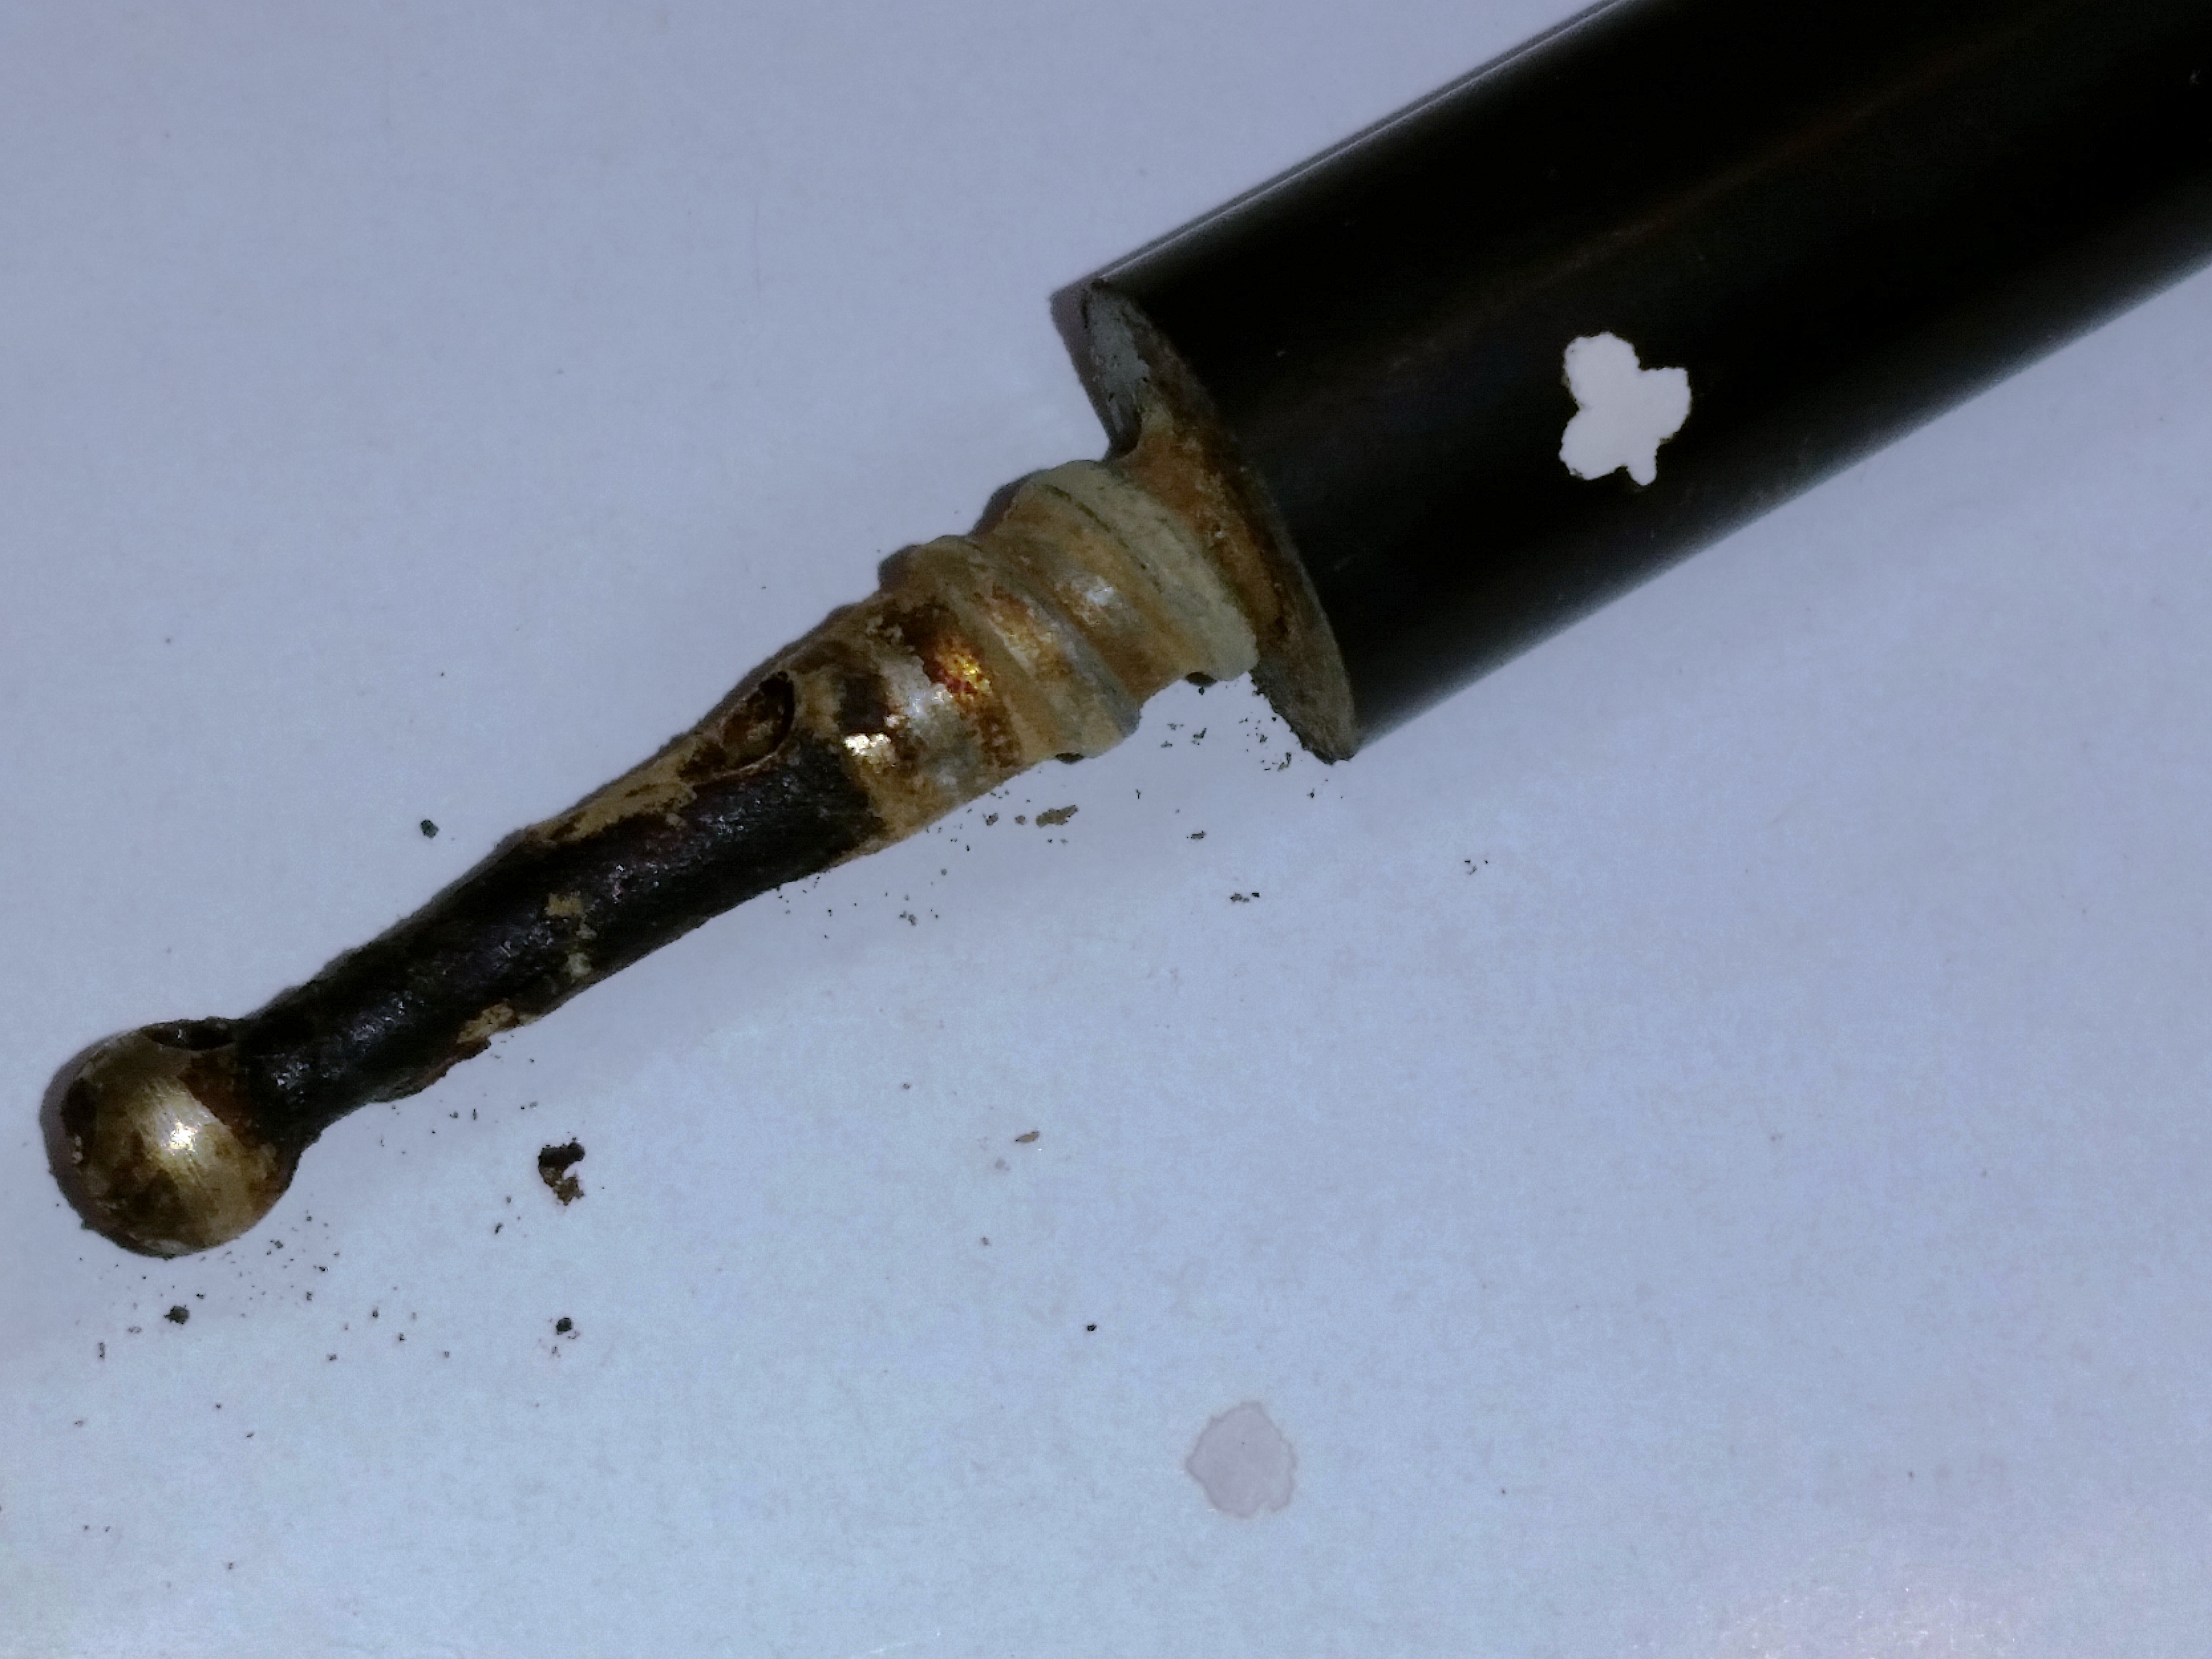
I removed the stem from the shank to look inside and found the carburetor system that Mike refers to in the above quote. The inside of the shank was aluminum so the end cap fit over the outside of the shank and was inset into the interior and formed a collection chamber for moisture. It was dirty with oils and tars. In the centre of the chamber was a tube that extended half the distance up the shank to the end. In the stem was an aluminum tube that was smaller in diameter than the shank tube and when the stem was inserted the stem tube fit in the shank tube. The tube thus formed a straight line from the bottom of the bowl to the end of the stem.Payne1 
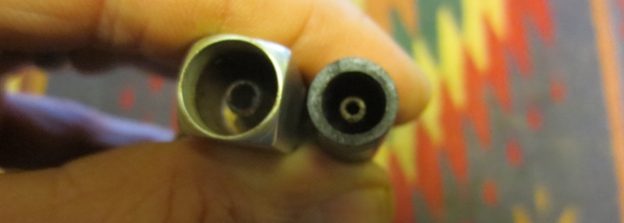
The Payne inner tube system differed from the Keyser system in that the two tubes interlocked and formed a seamless tube from bowl to button. In the Keyser system the tube in the stem had a downward angle and the one in the shank was shorter. The tubes did not meet or join. Rather the air was swirled around the aluminum chamber and then drawn upward into the downward point tip of the stem tube. In the cutaway drawing below you can visualize the Payne stem with the shank tube extended further into the shank and the stem tube inserted into the shank tube when the stem was in place.keyser 
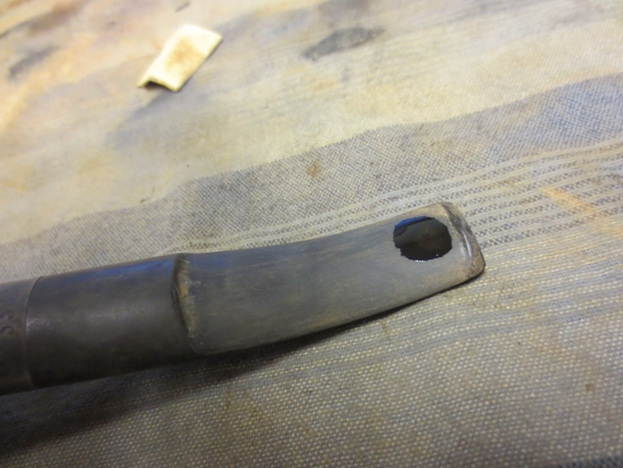
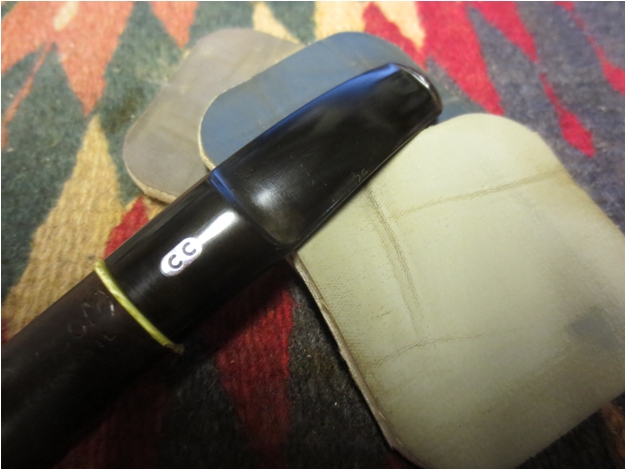
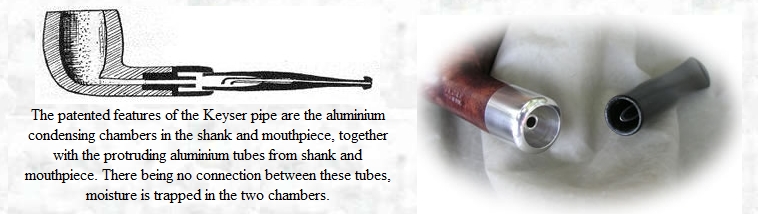
The stem itself in this case was a twin bore stem where the airway split into a Y and ended in the button with two holes – one on either side of the button. The theory was it made a more bite proof stem.Payne2 
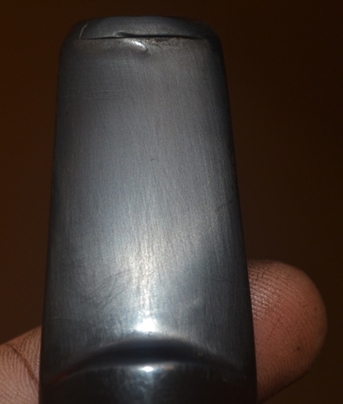
So while the externals and stem appeared to be the same the internals were markedly different in their execution.

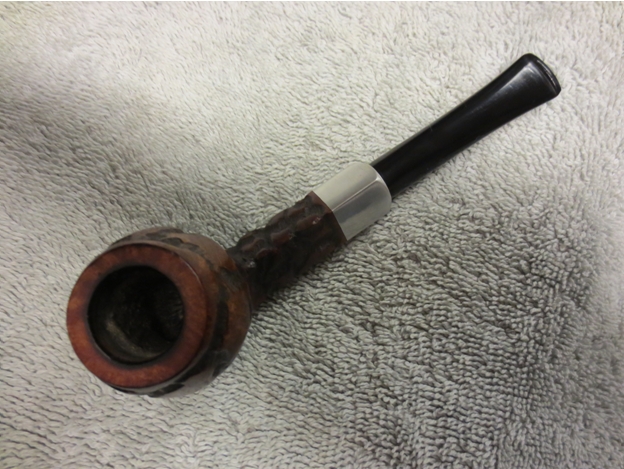
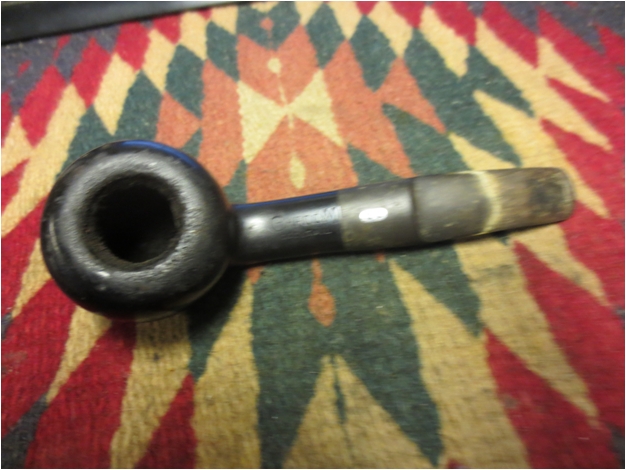
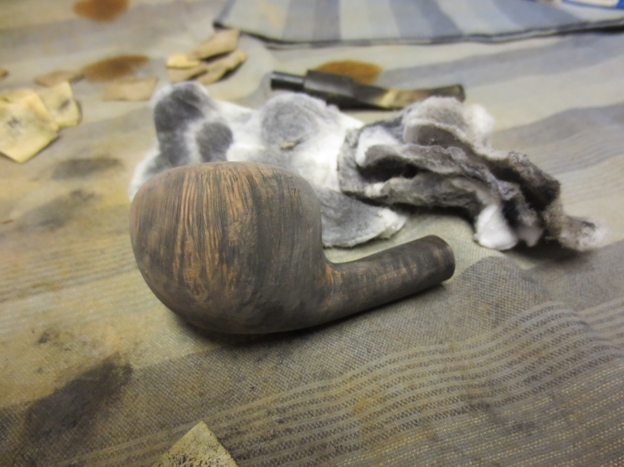
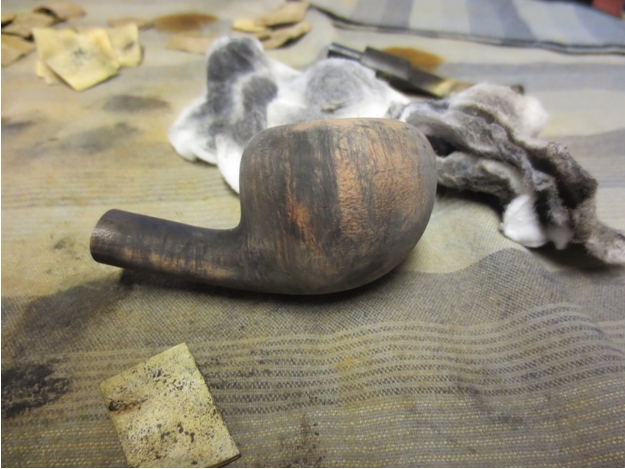
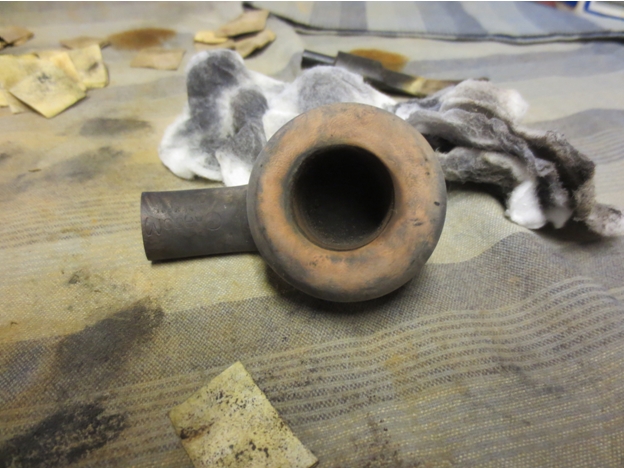
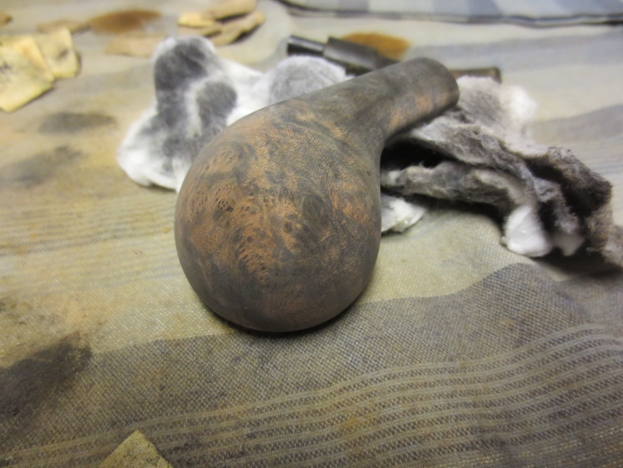
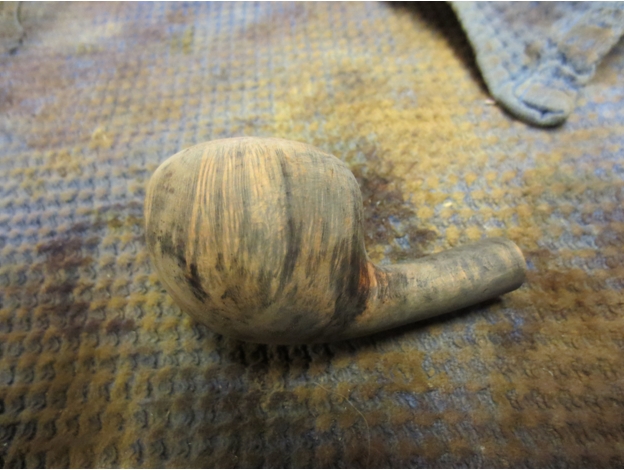
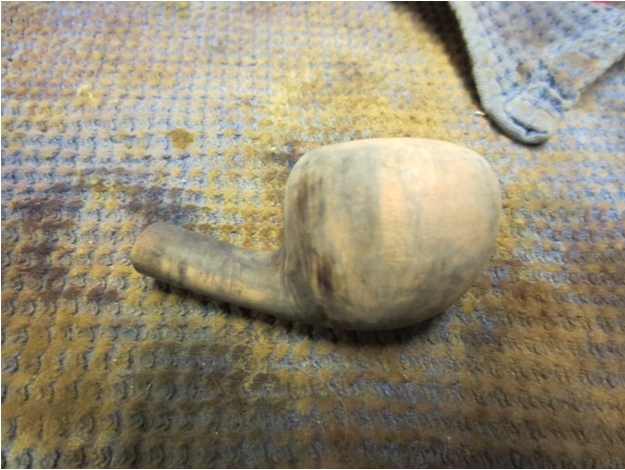
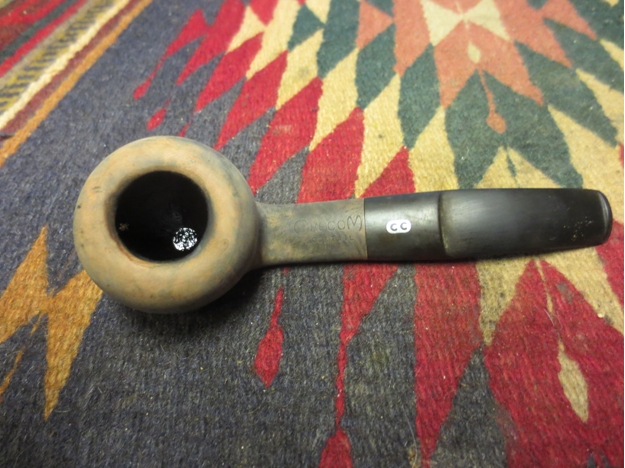
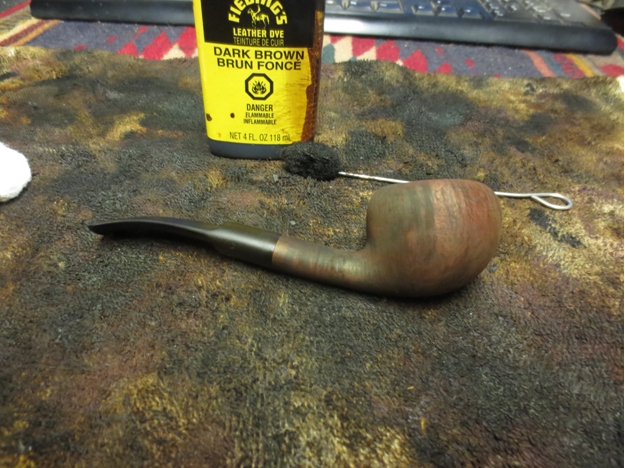
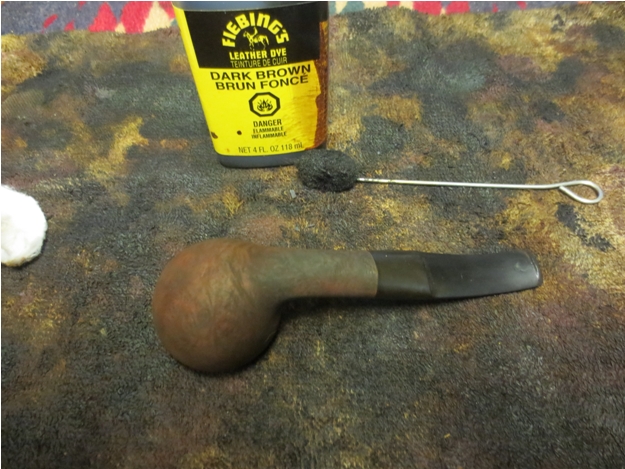
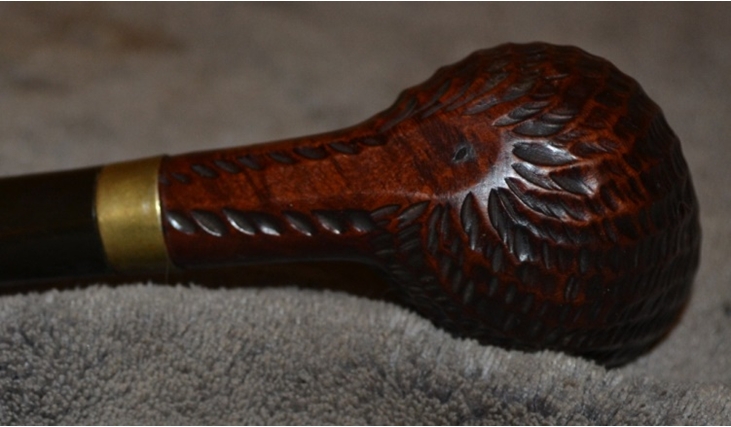
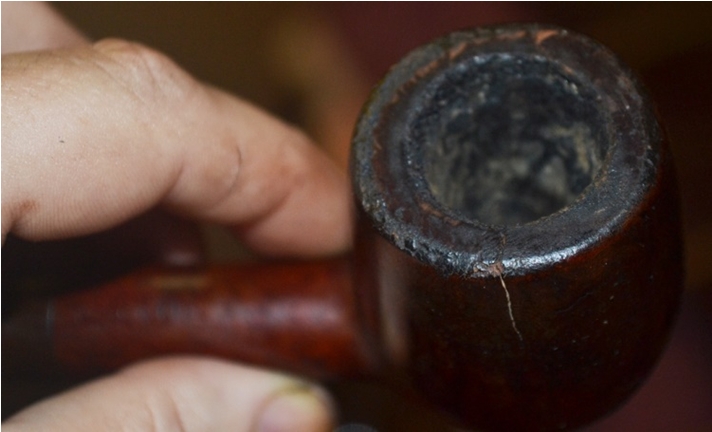
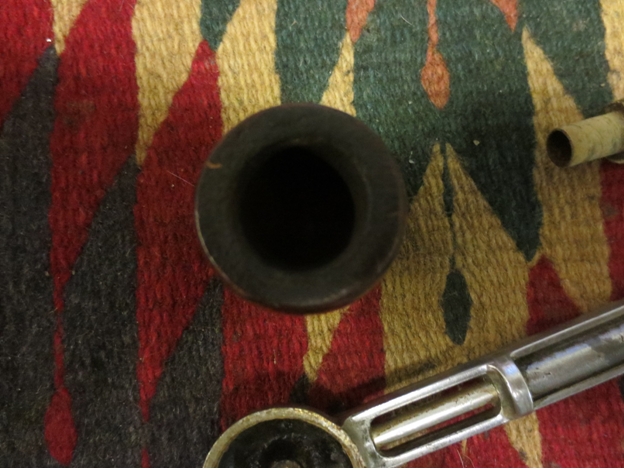
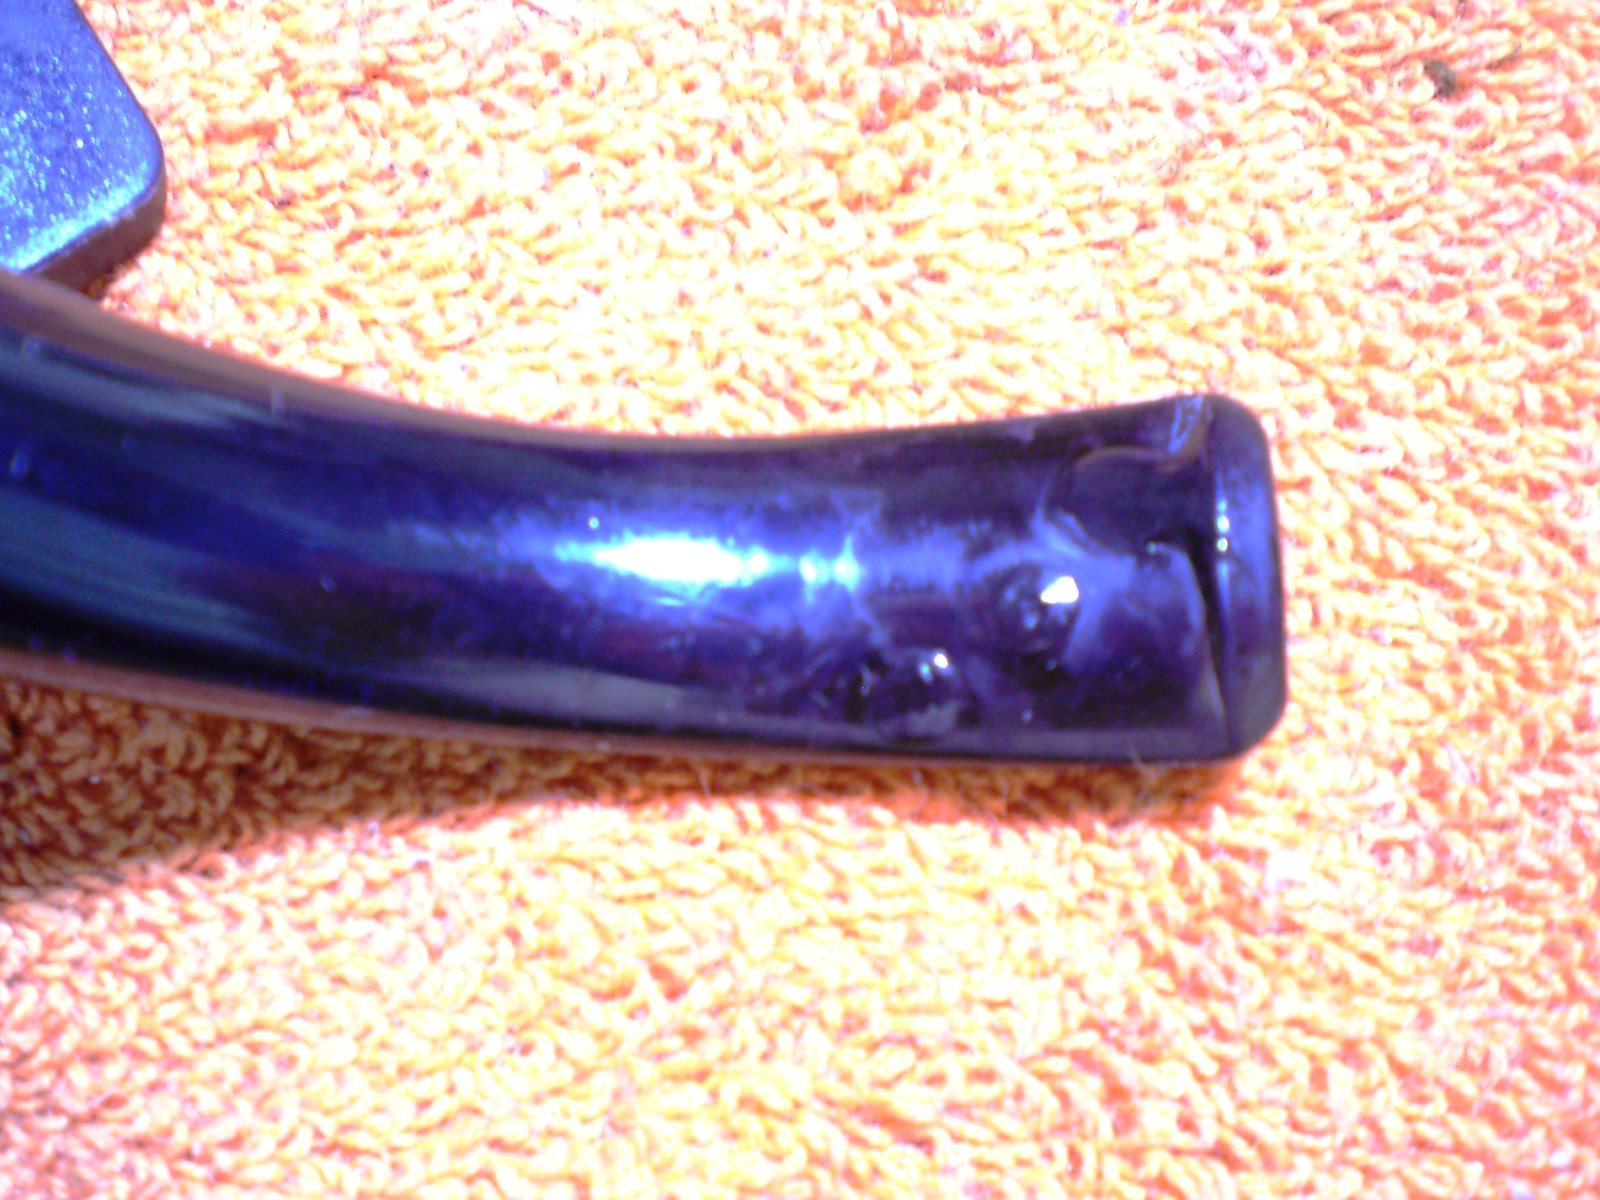
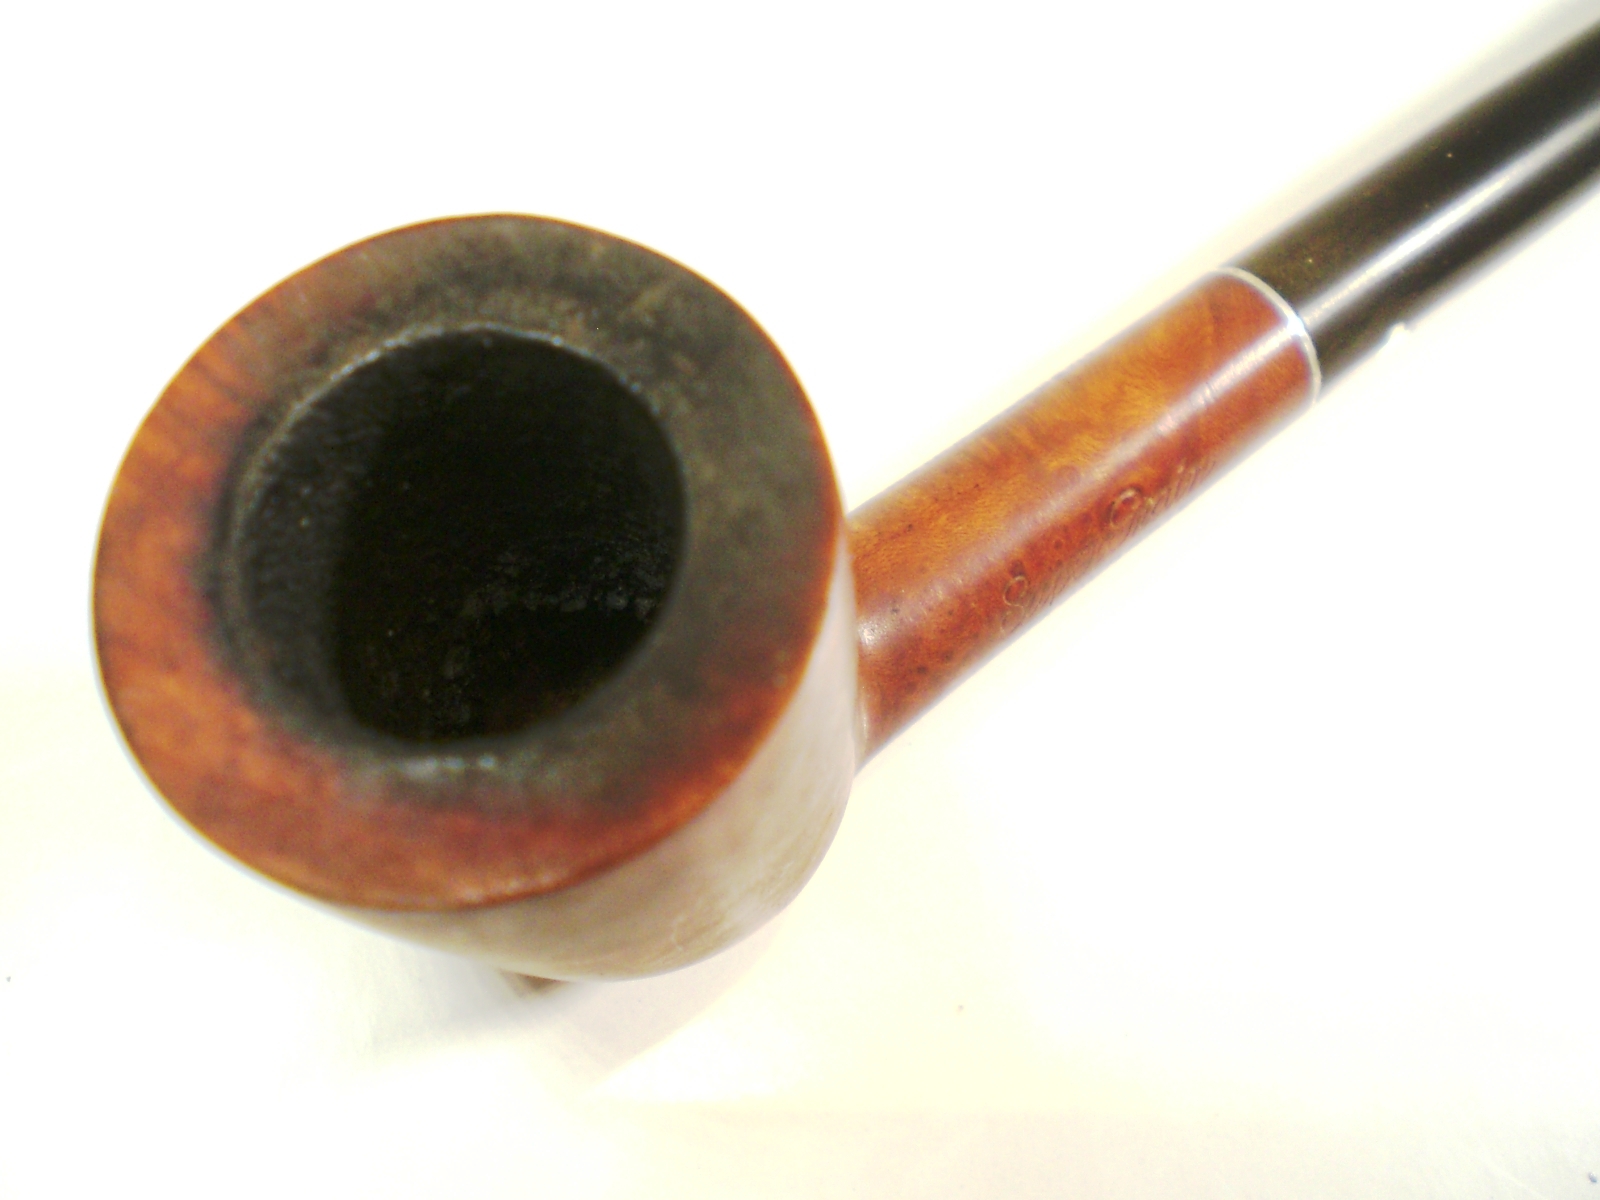
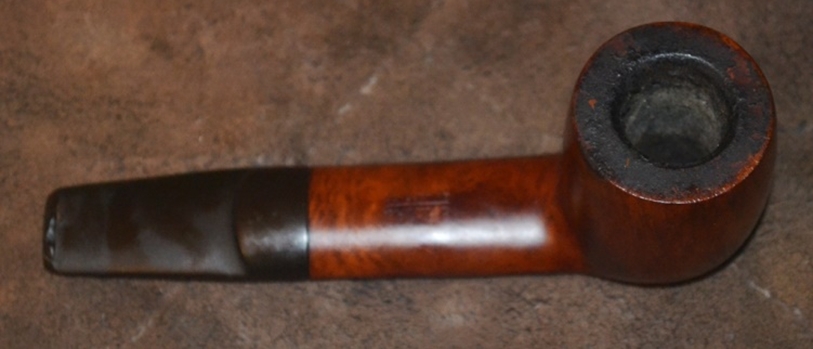
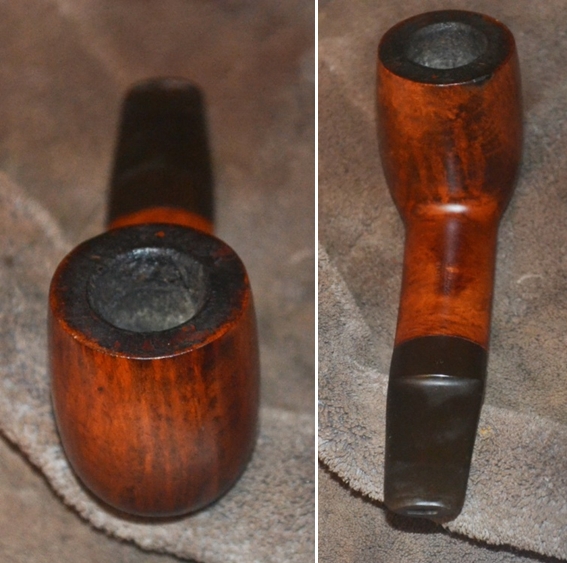
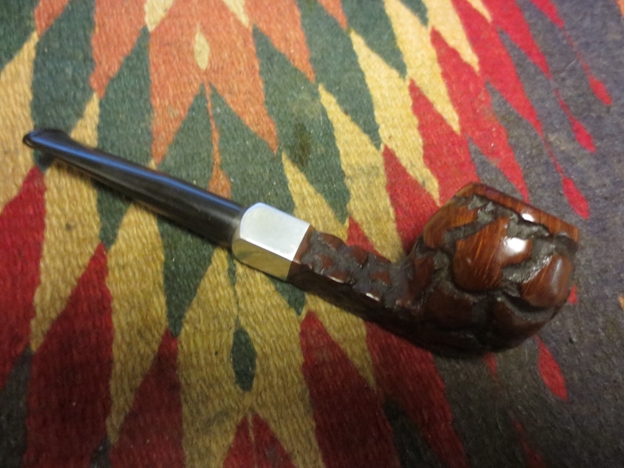
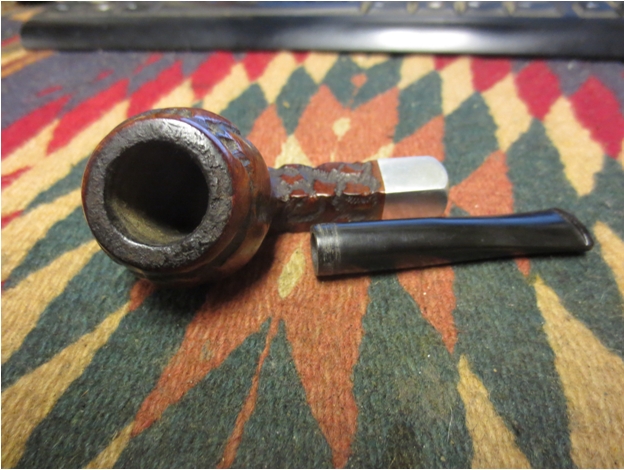
The bowl itself was clean but the rim was dirty and damaged with small dents and places that could not be steamed out. The bowl would need to be lightly topped. The finish on the rusticated bowl was in great shape with little wear. The grooves had been stained with a dark brown and the high smooth parts were stained with a lighter brown stain to make a contrast. The aluminum shank cap was scratched and dull. The interior of the pipe was very dirty. The stem was high-grade vulcanite and was lightly oxidized and coated with a sticky substance like price sticker glue. There were no bite marks in the surface and under the grime it was clean. The button had the twin bore system and was also clean and undamaged.Payne3 Payne4 Payne5 Payne6
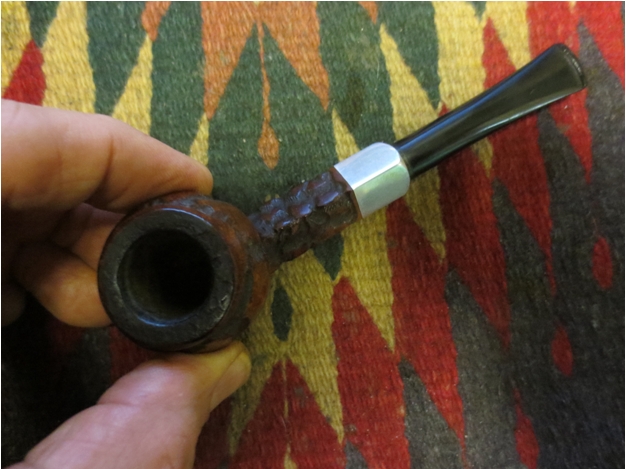
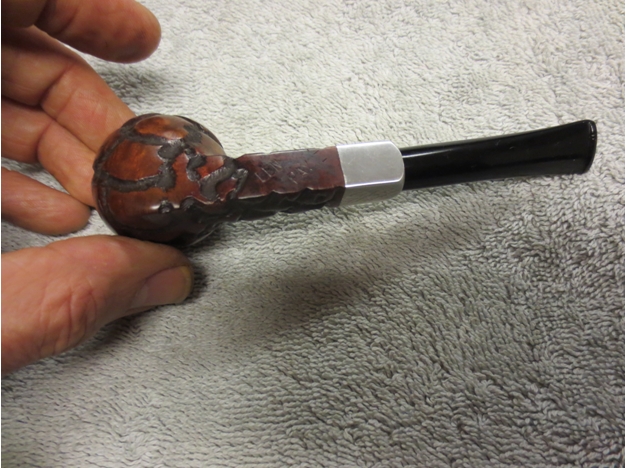
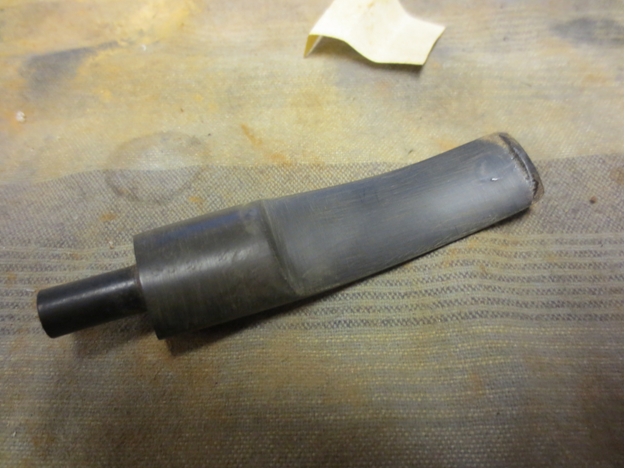
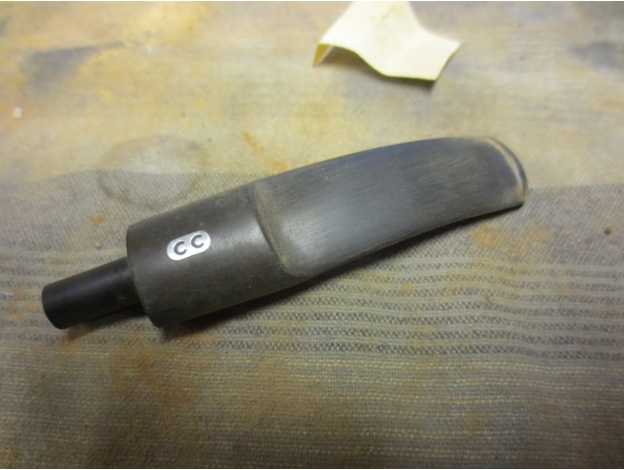
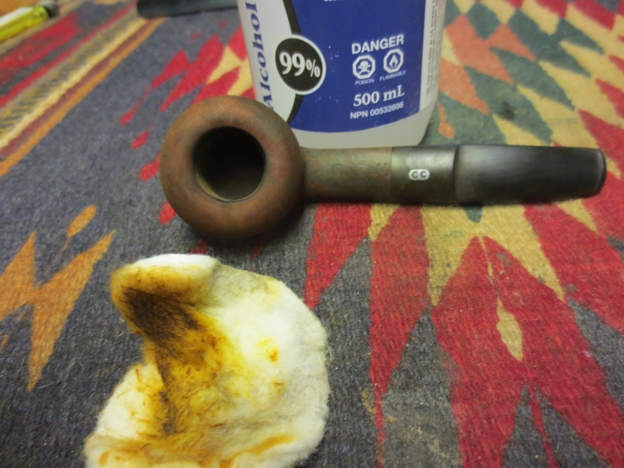
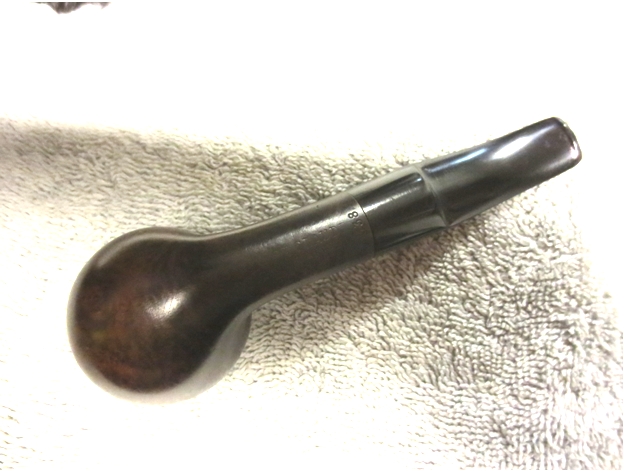
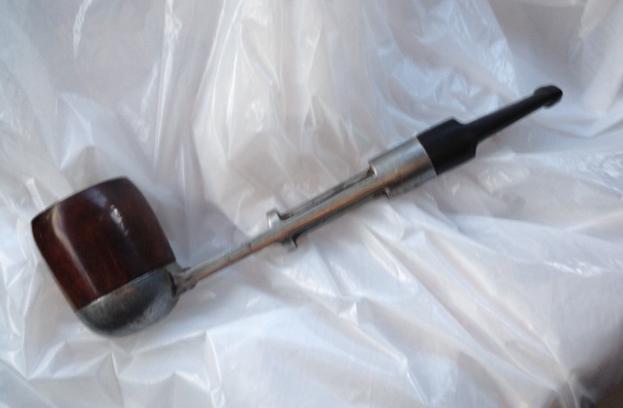
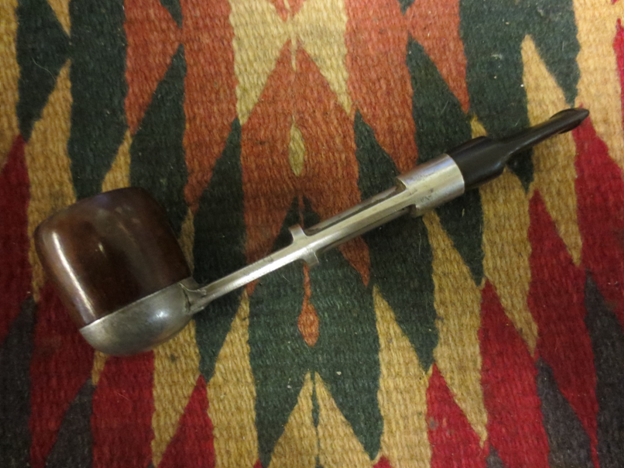
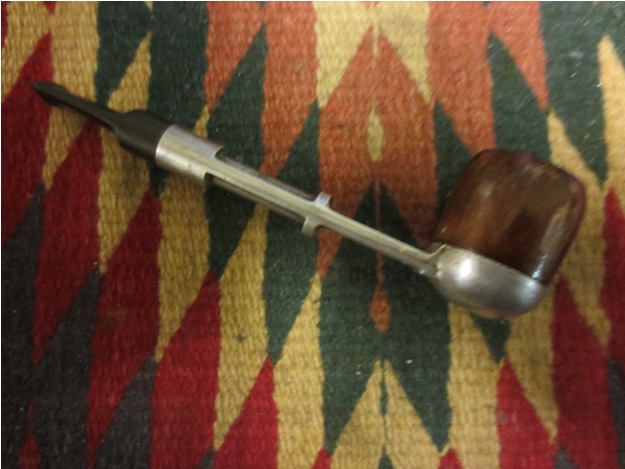
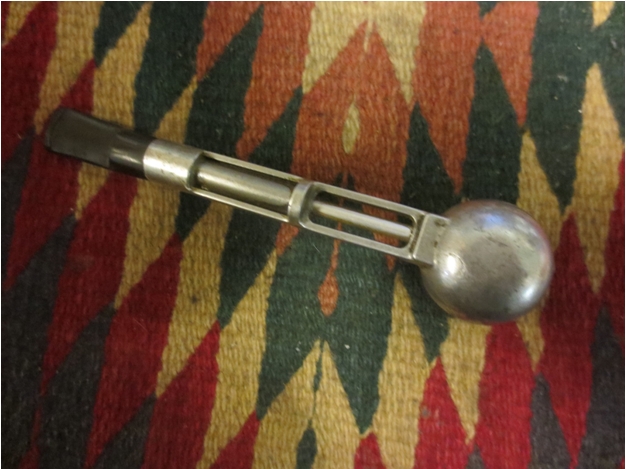
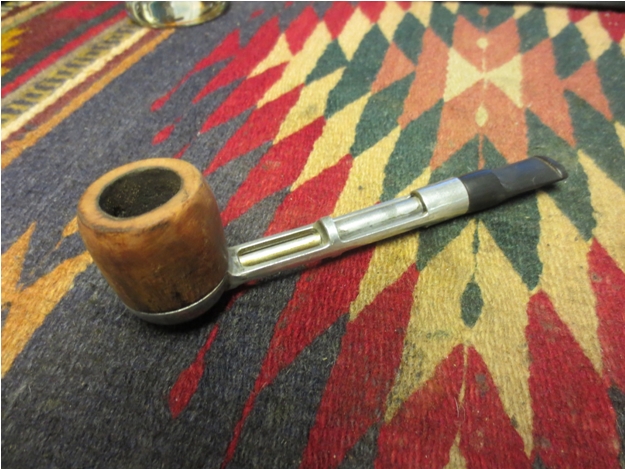
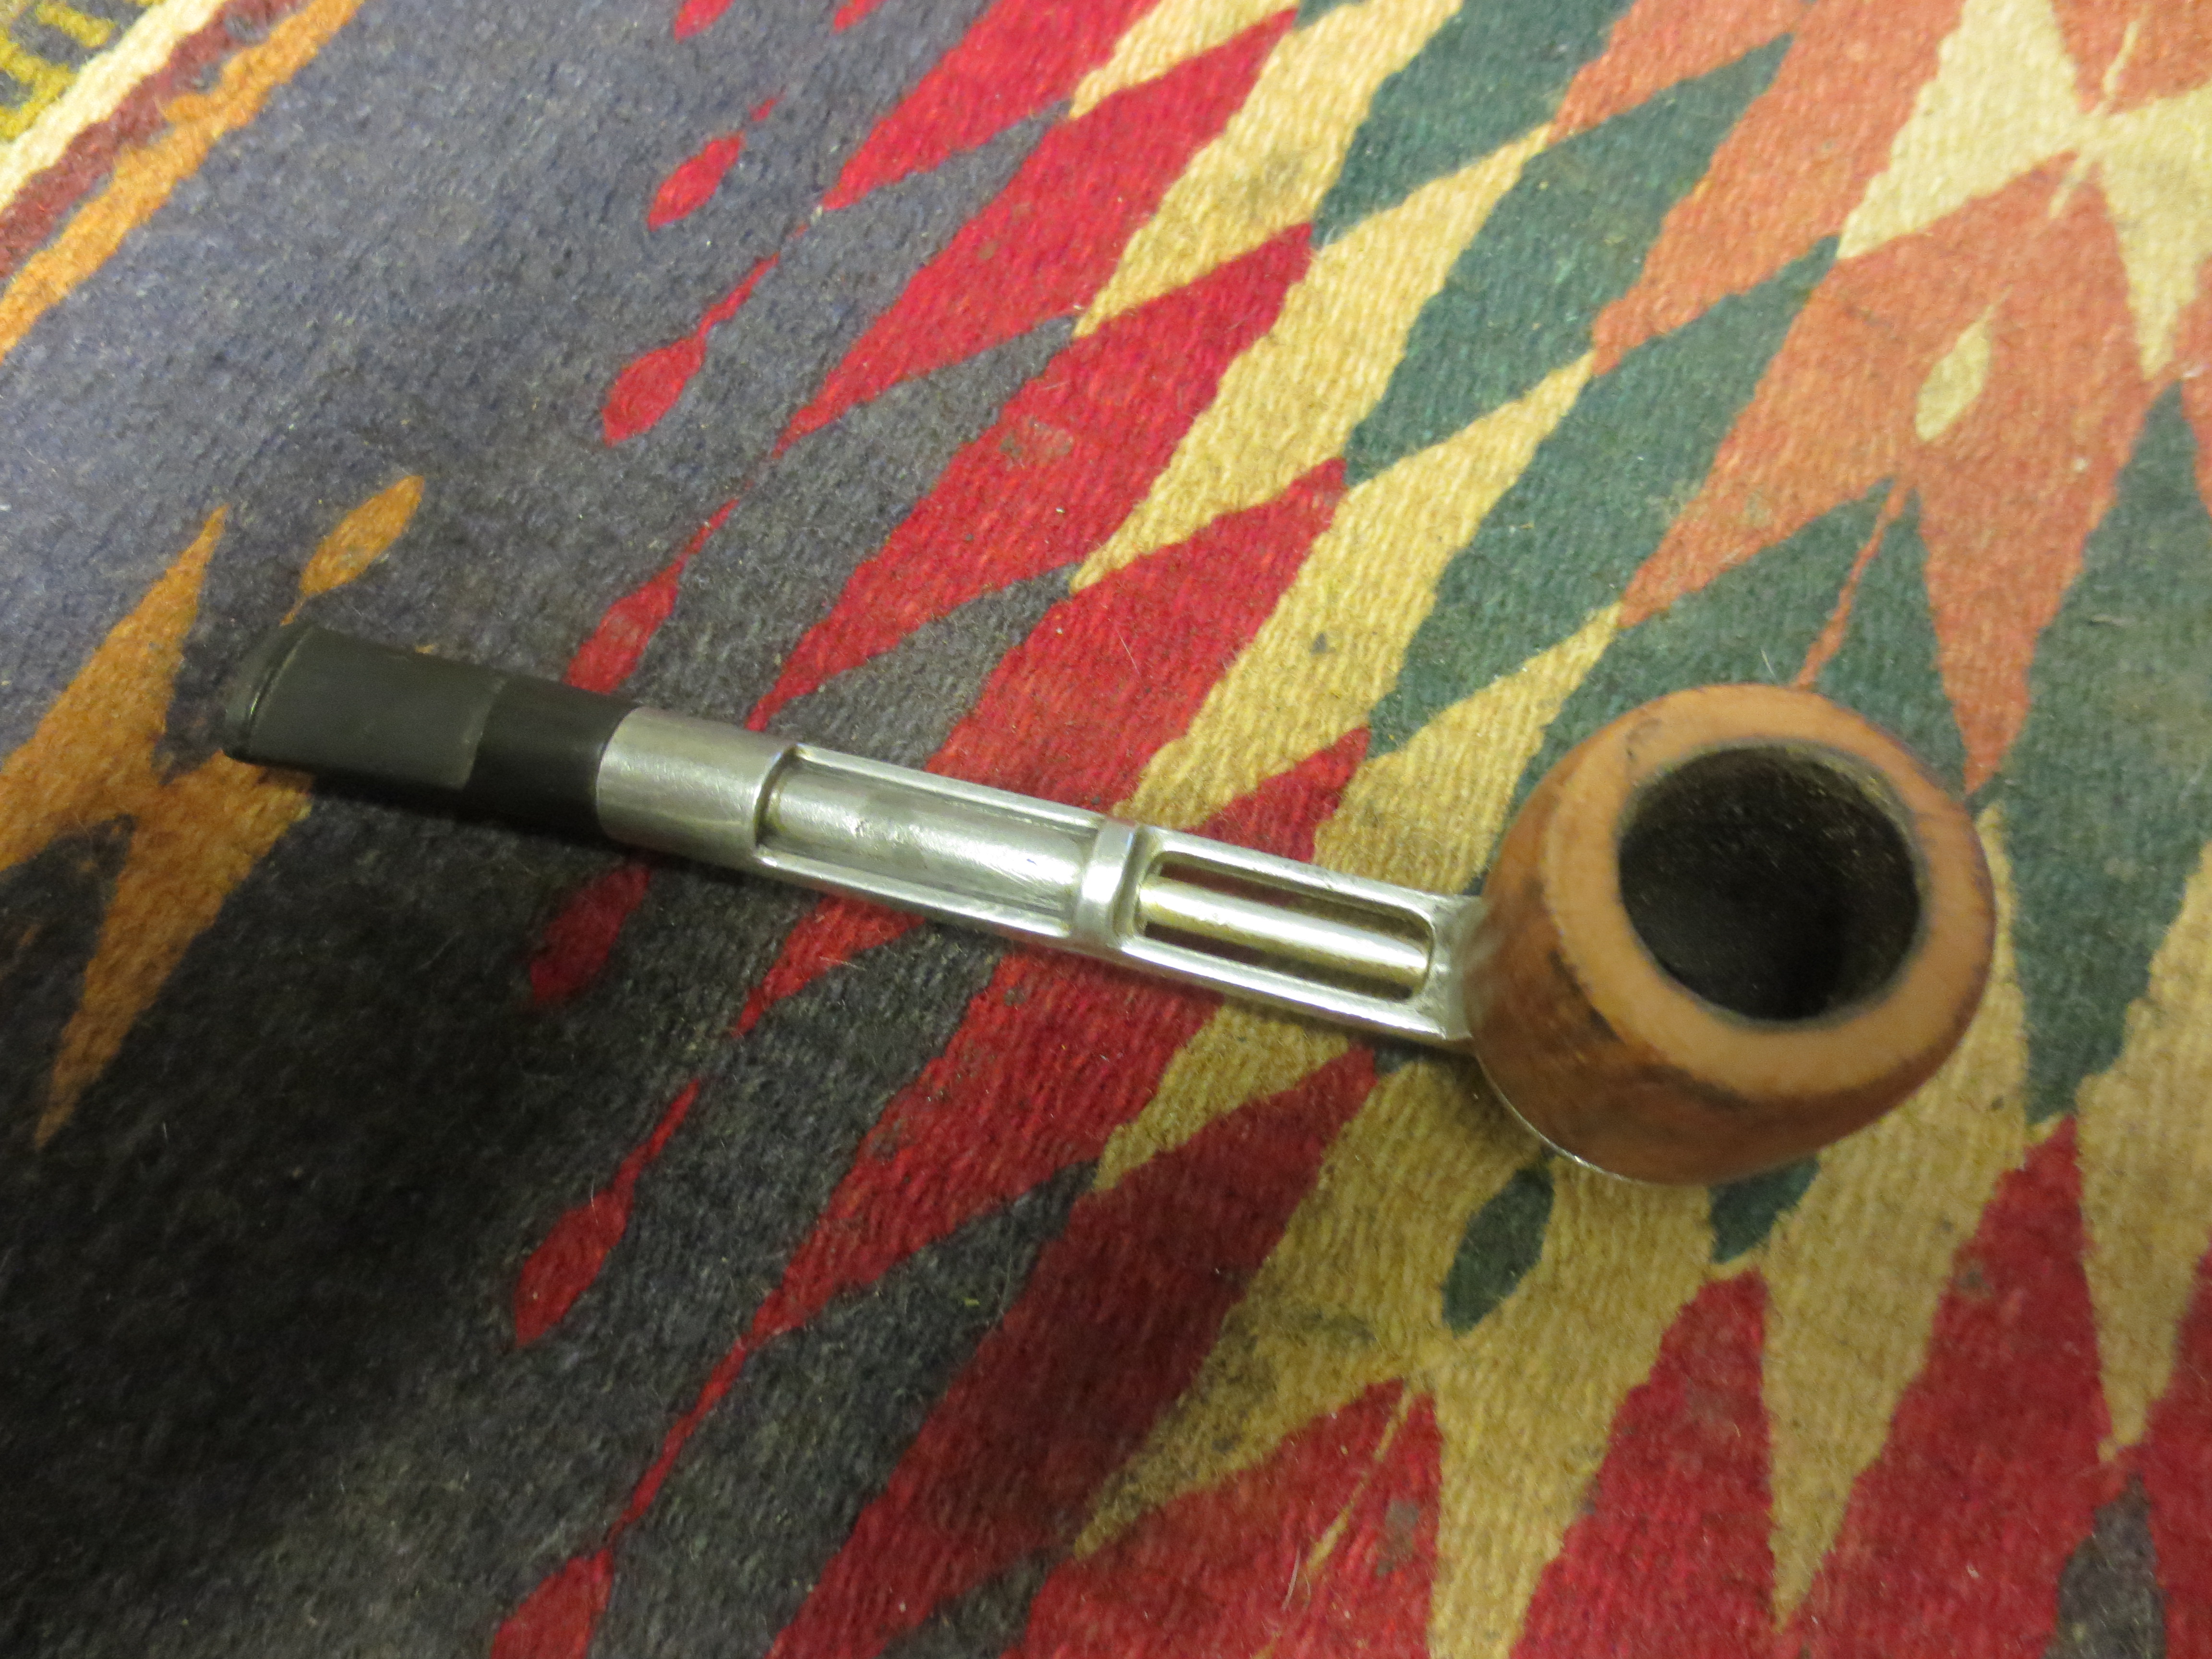
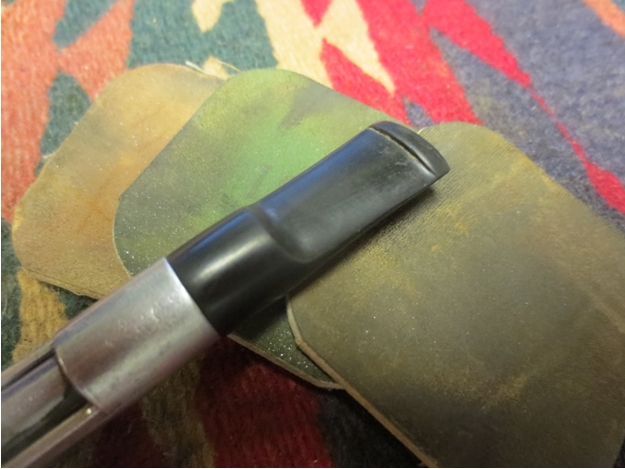
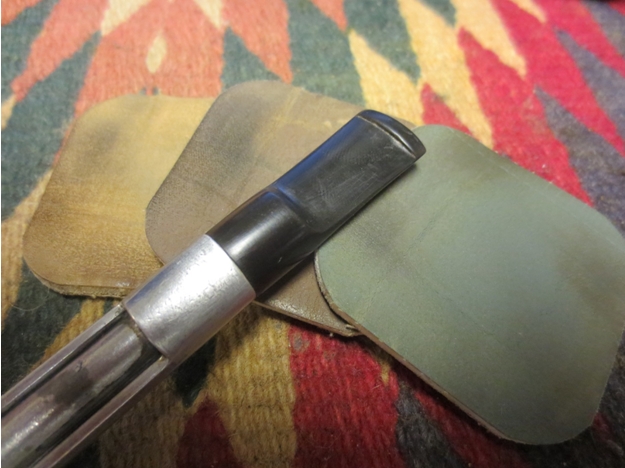
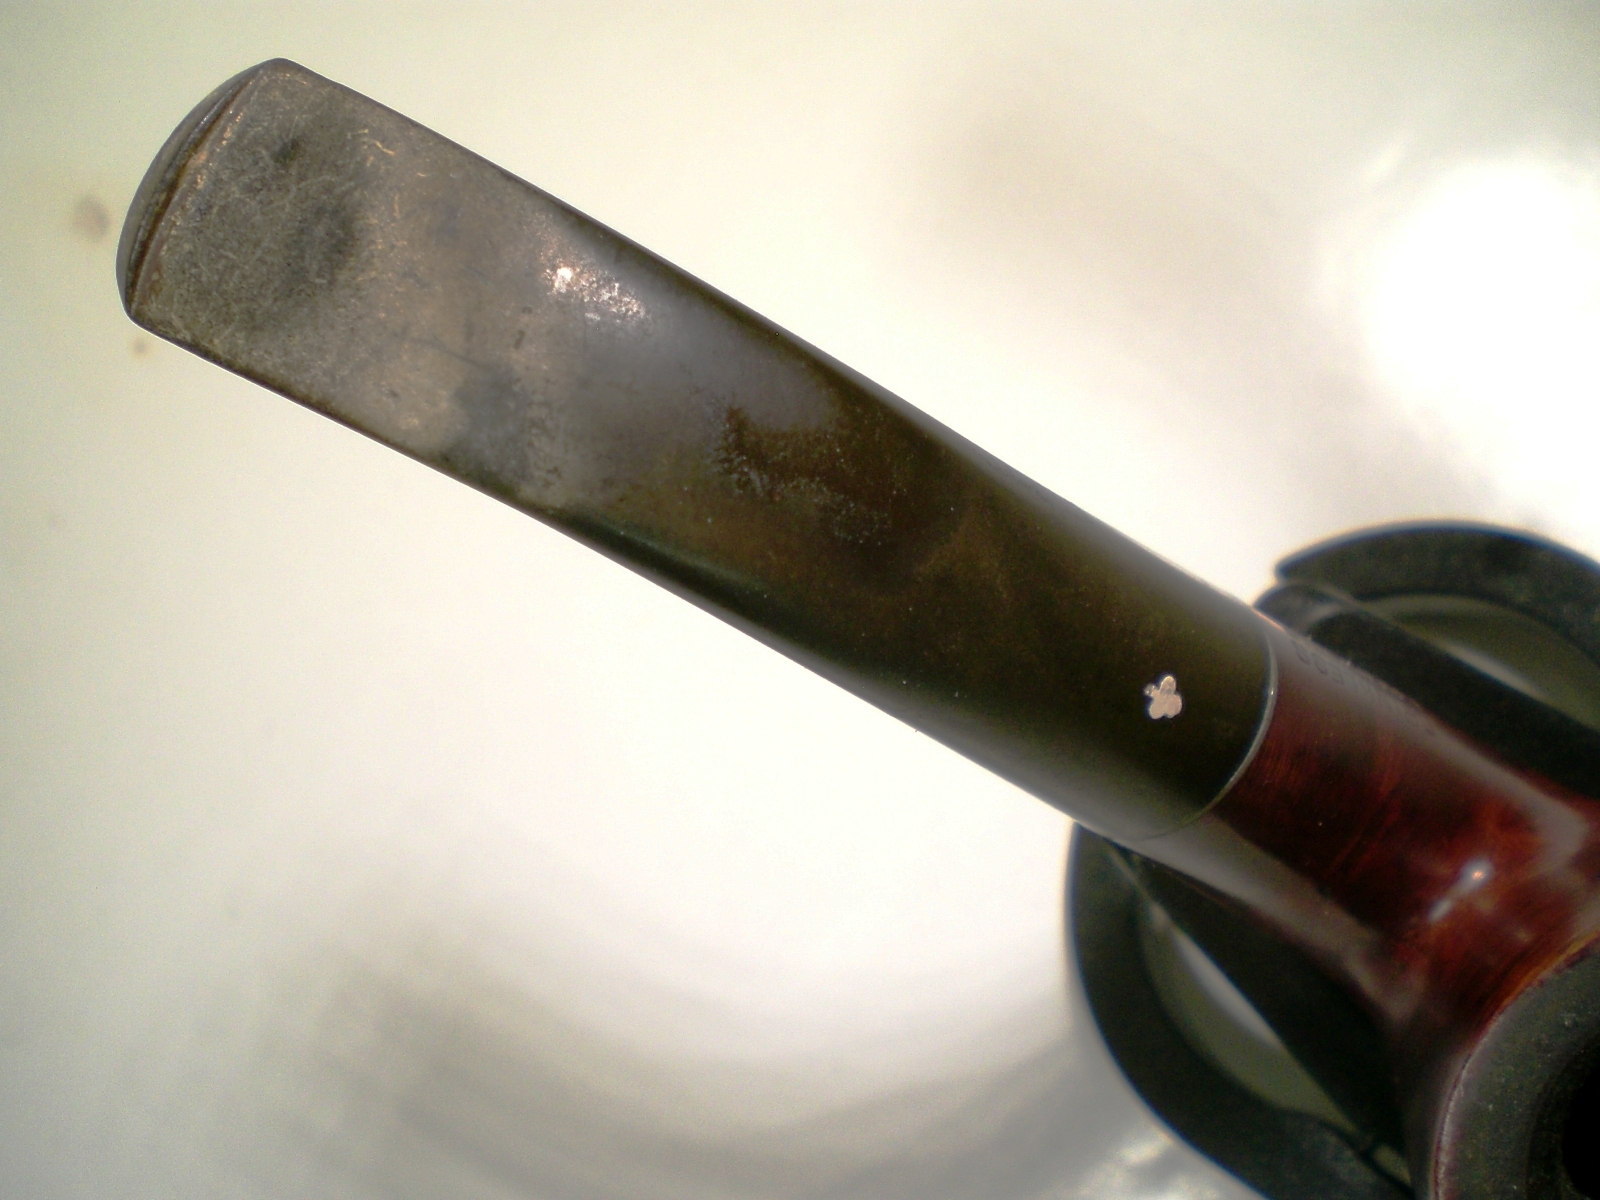
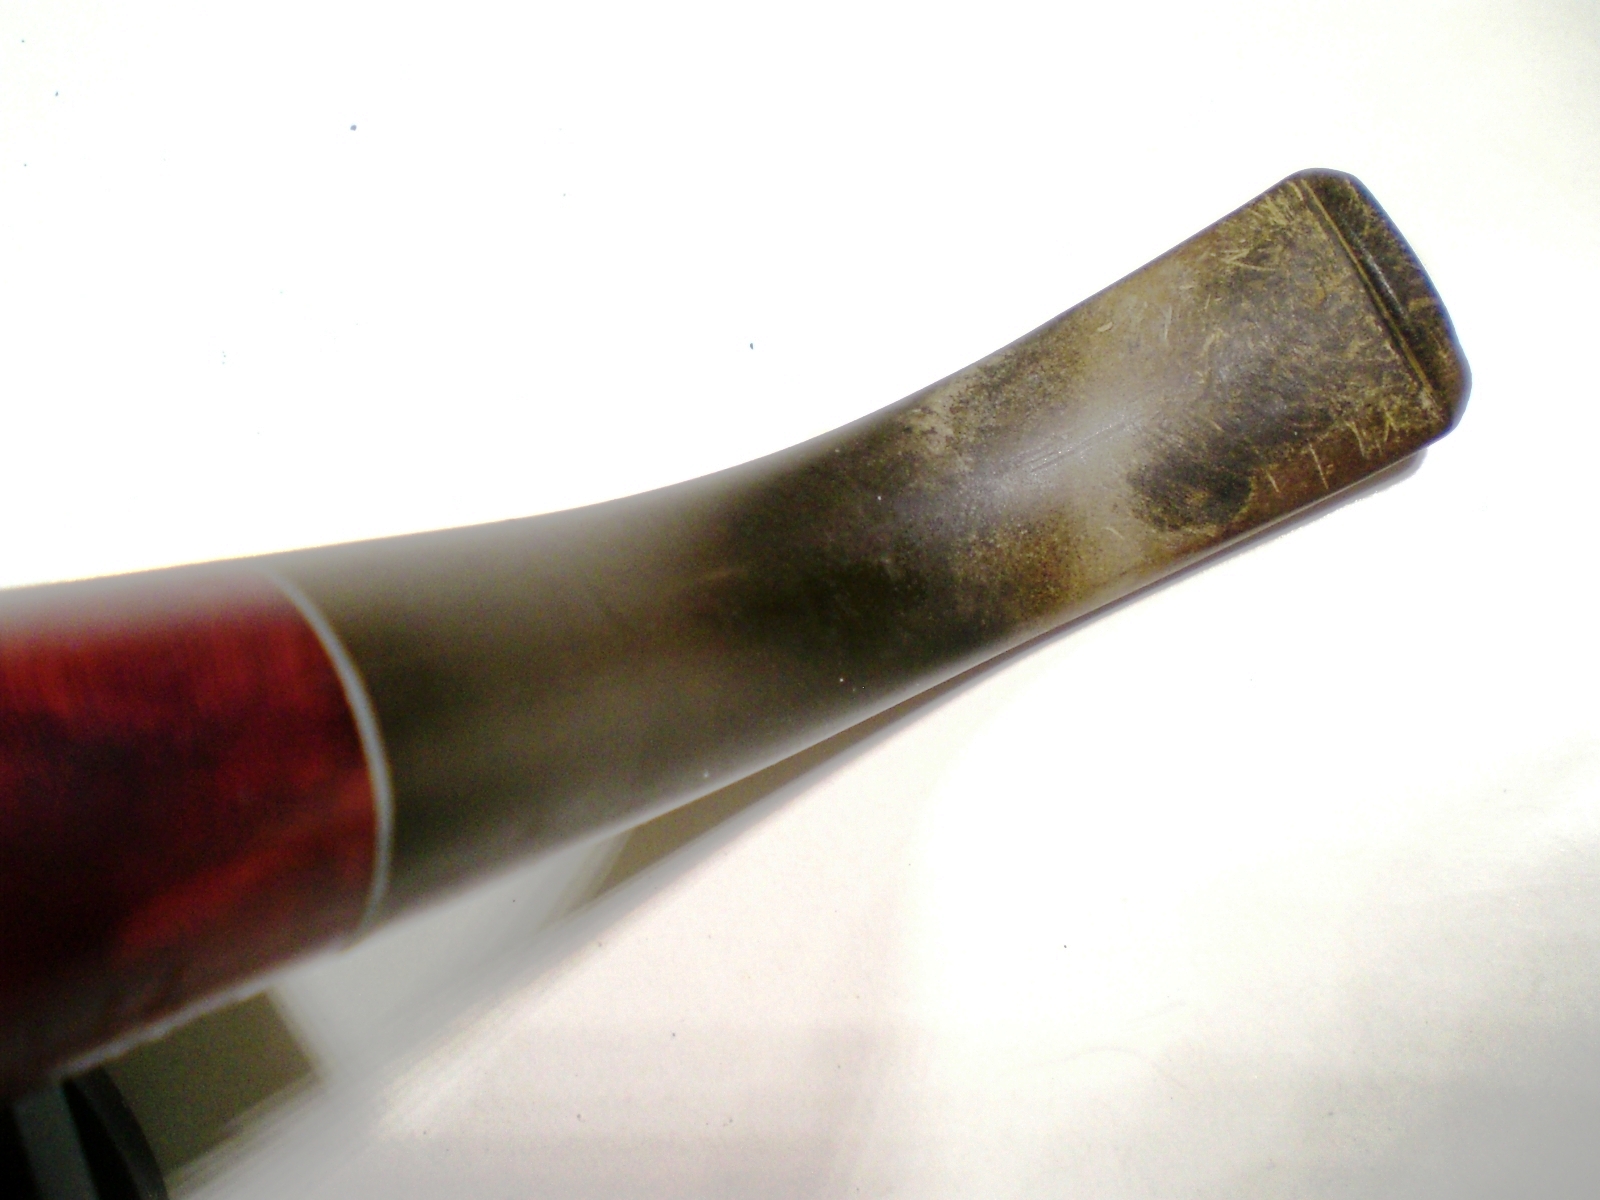
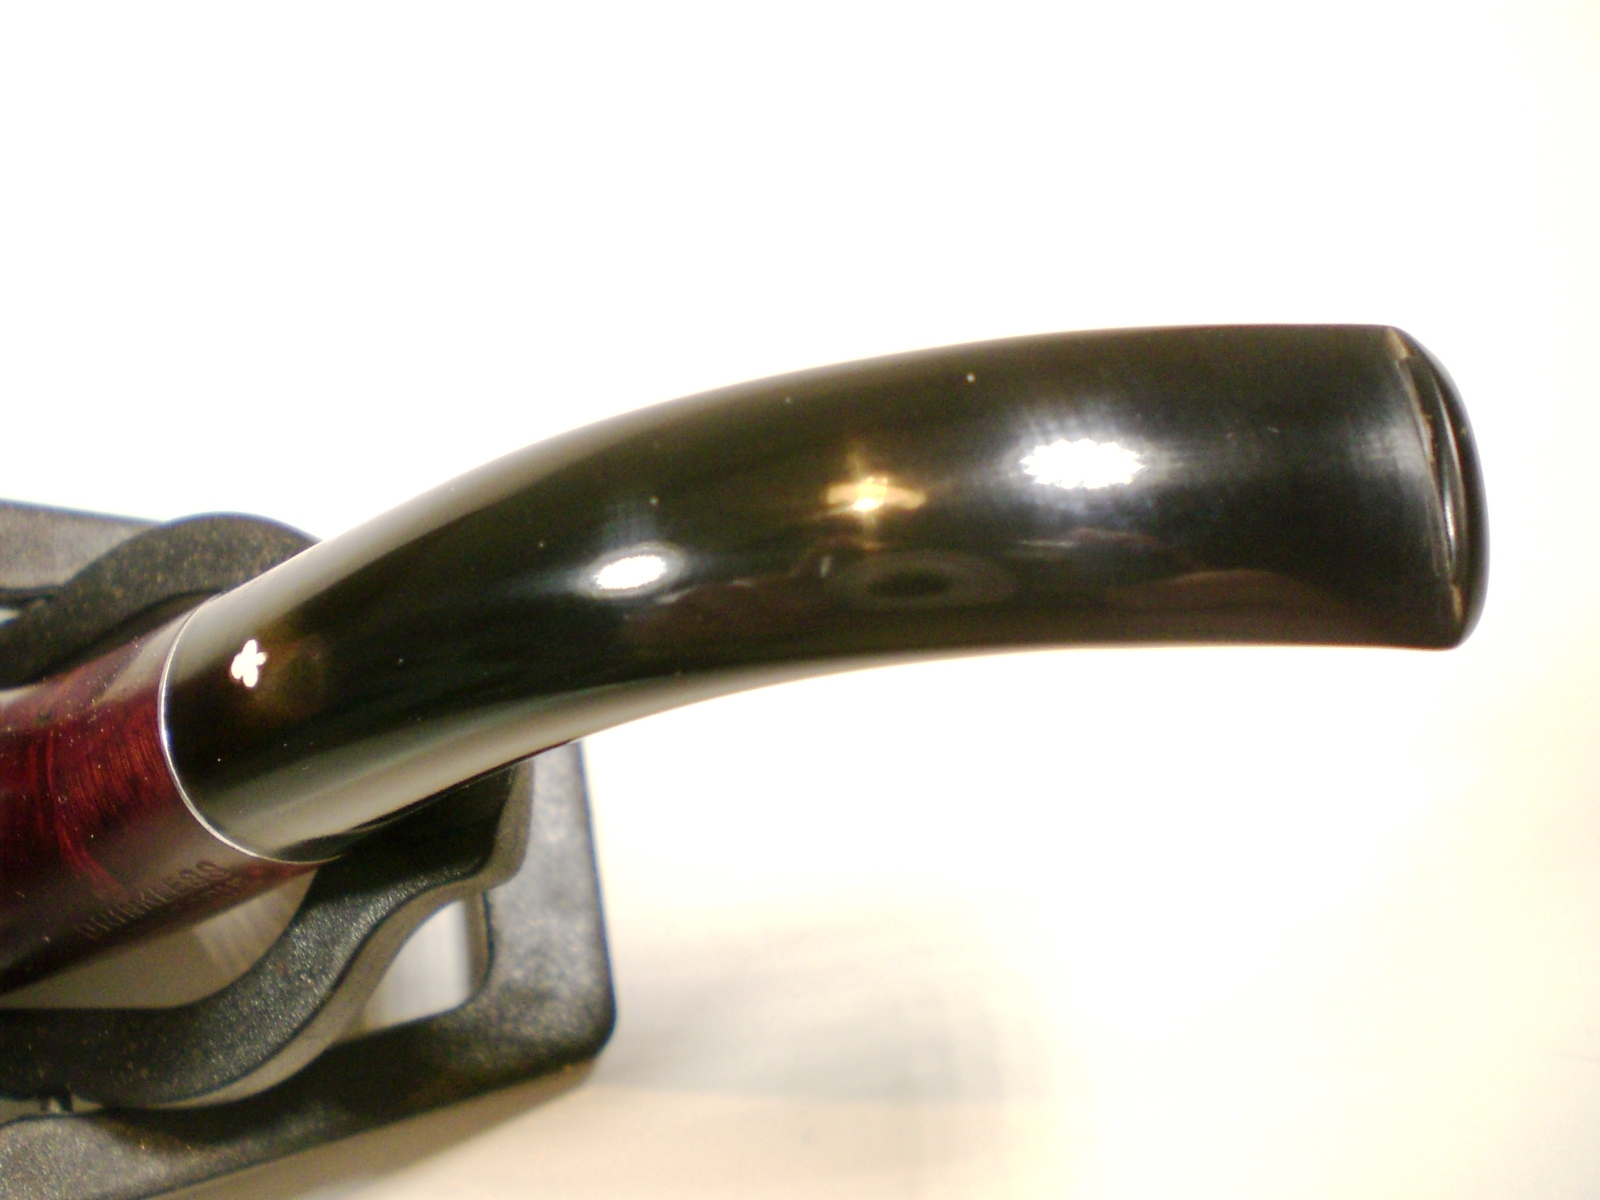
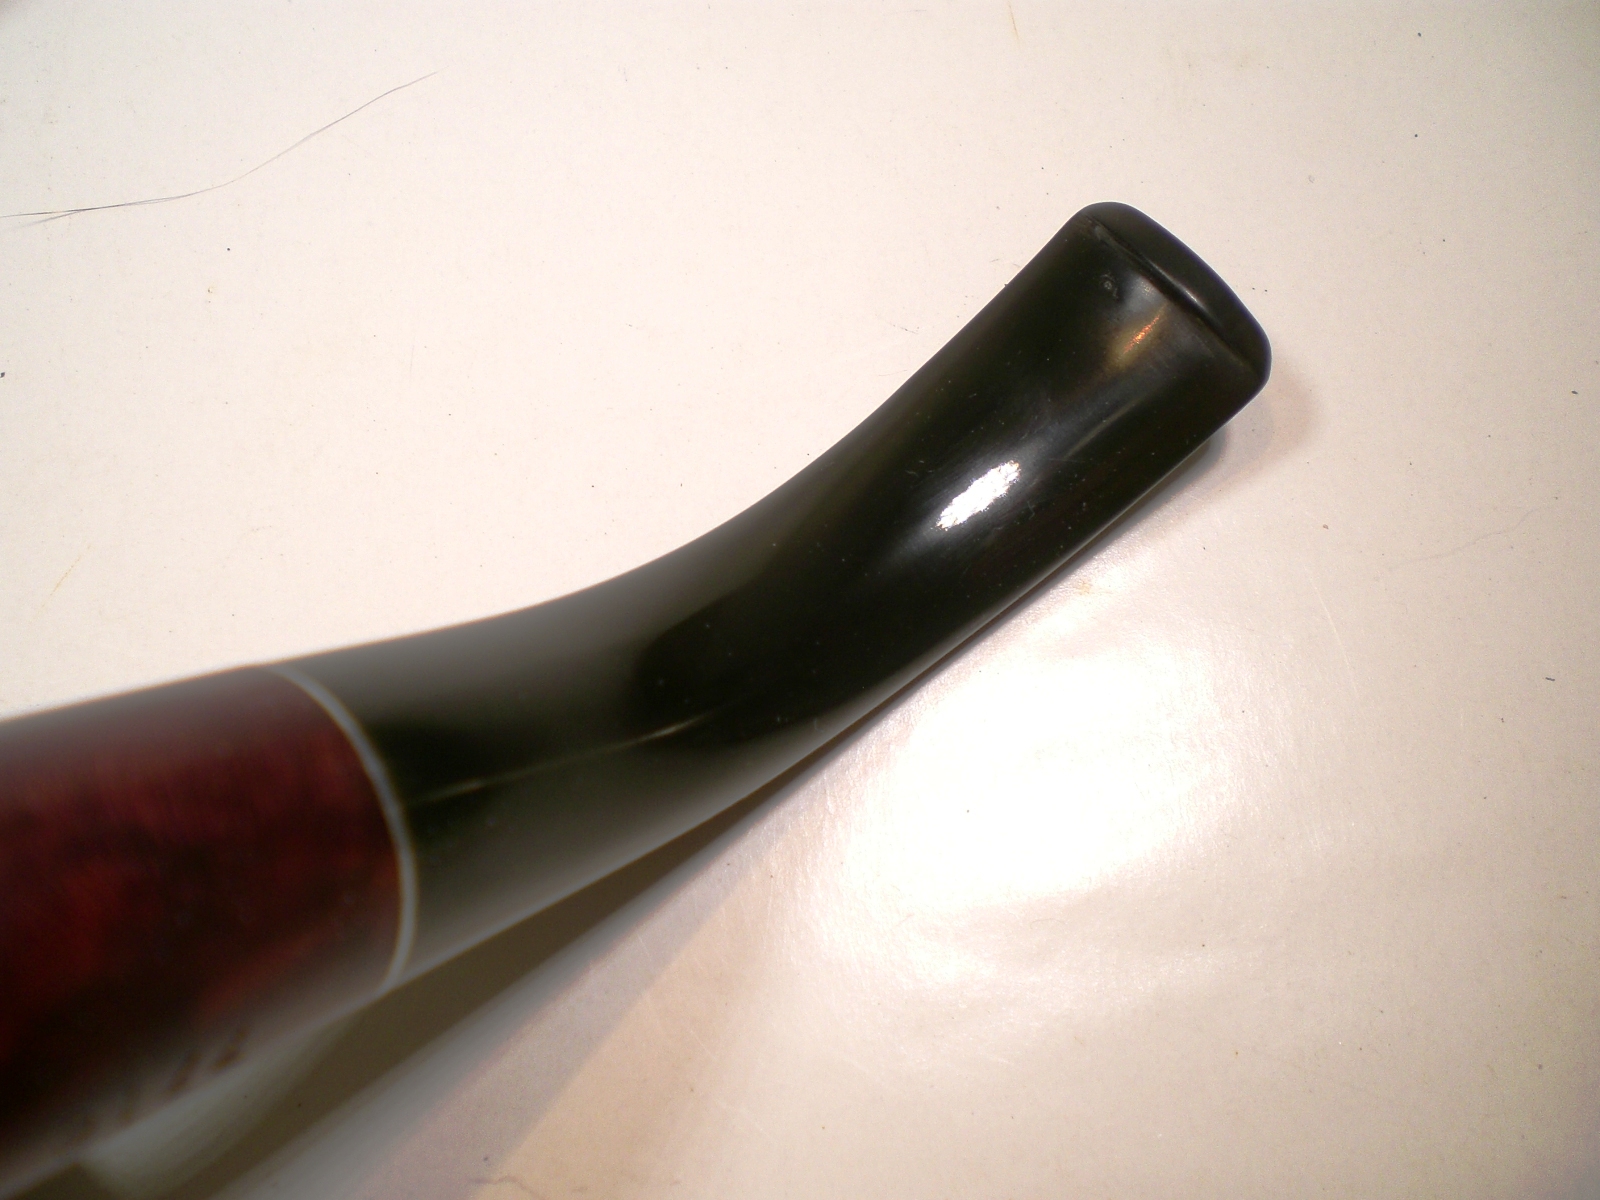
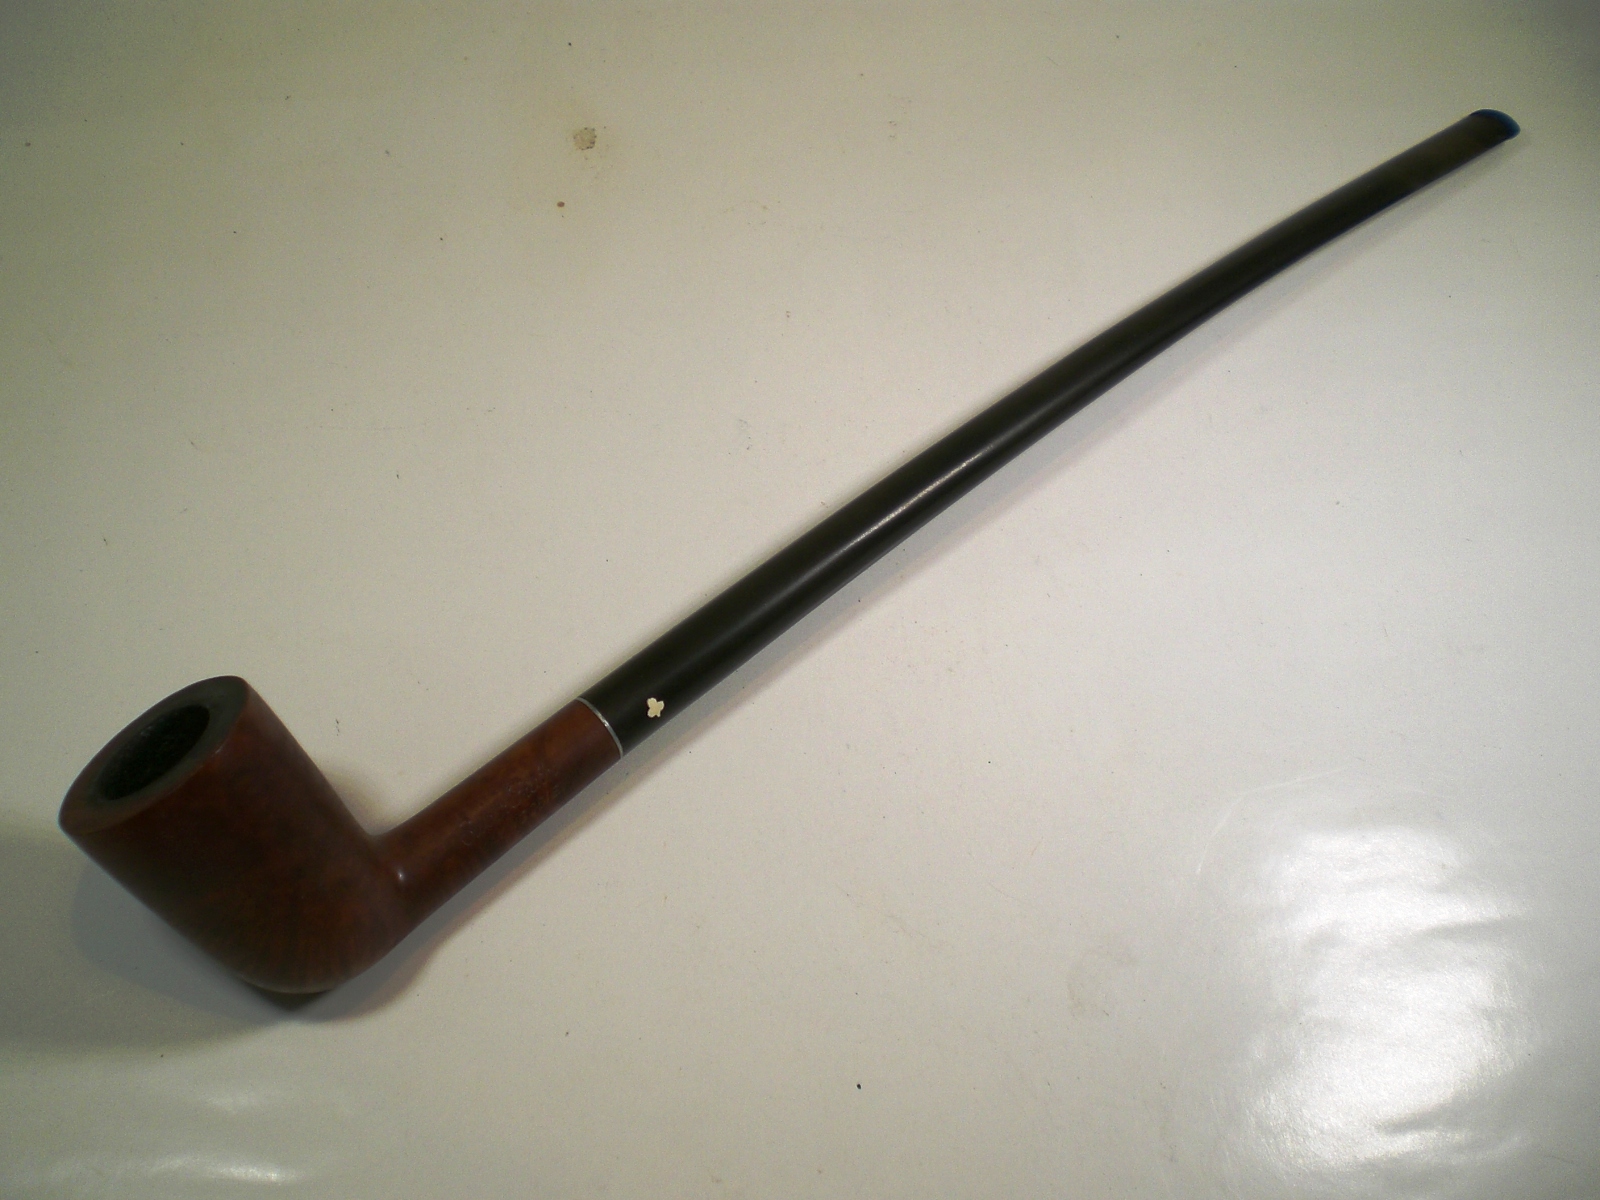
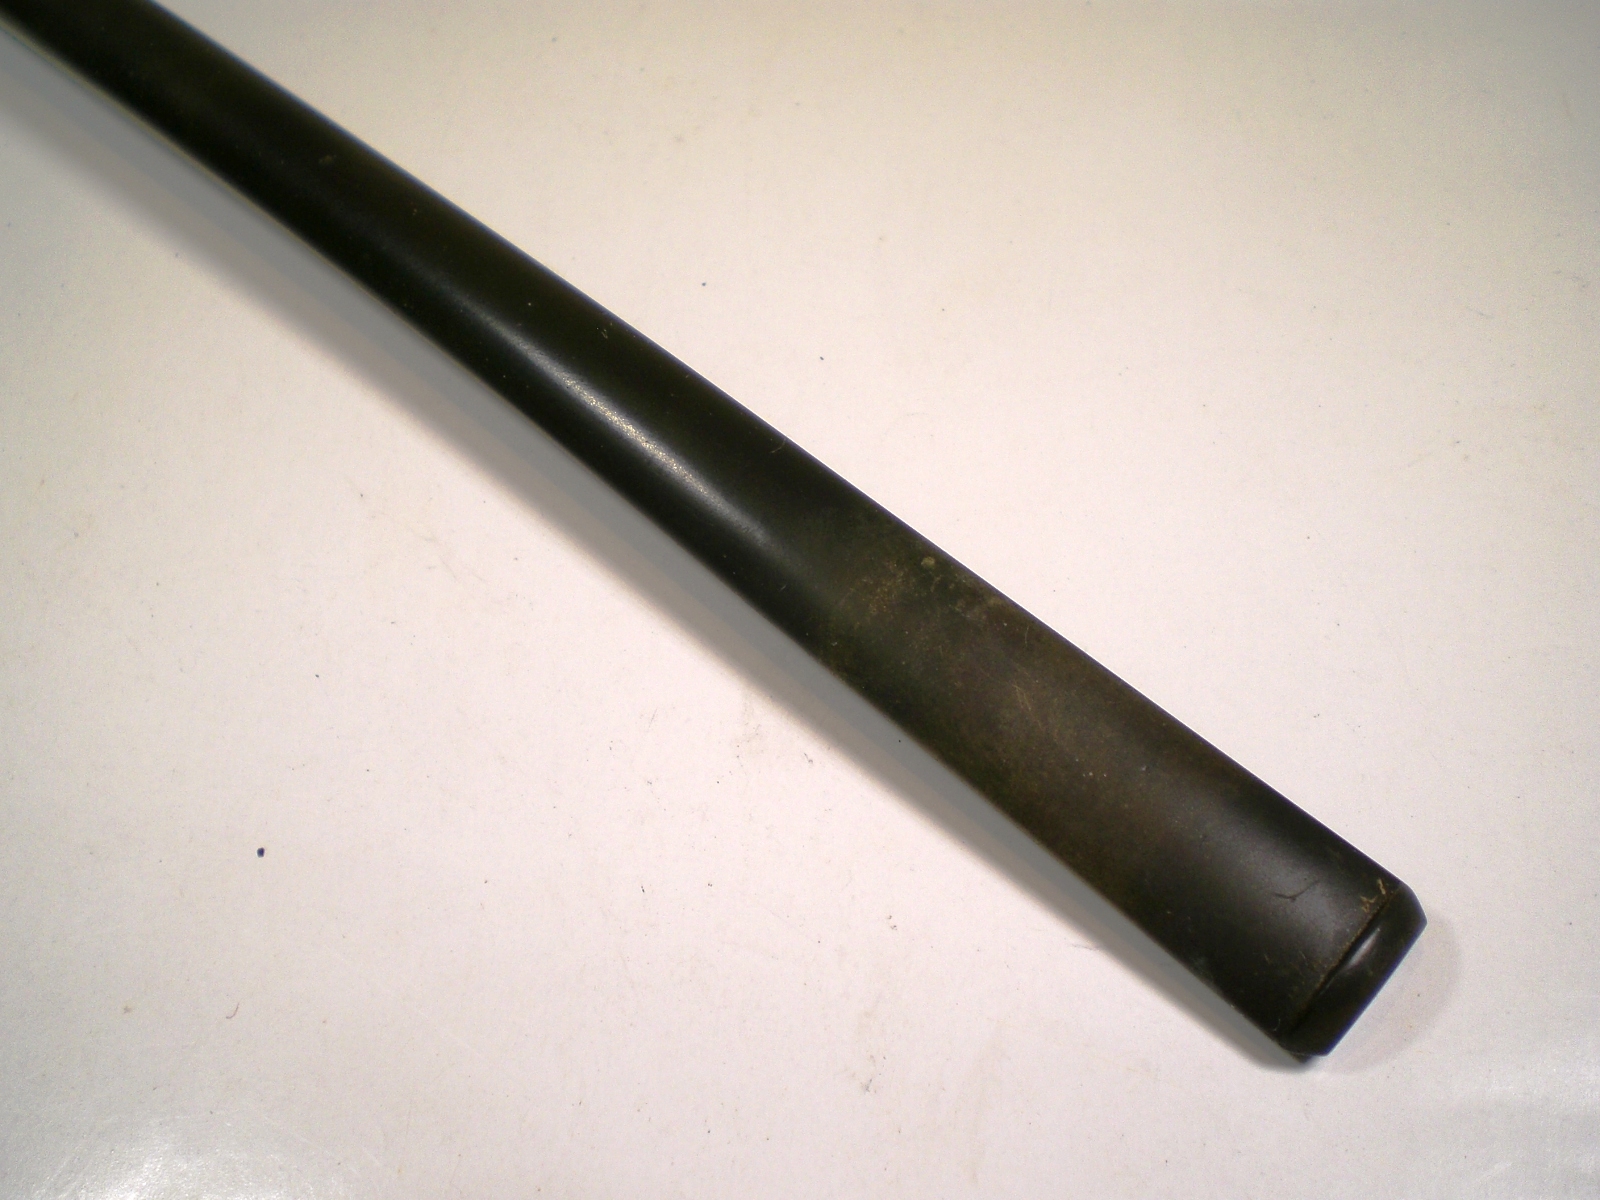
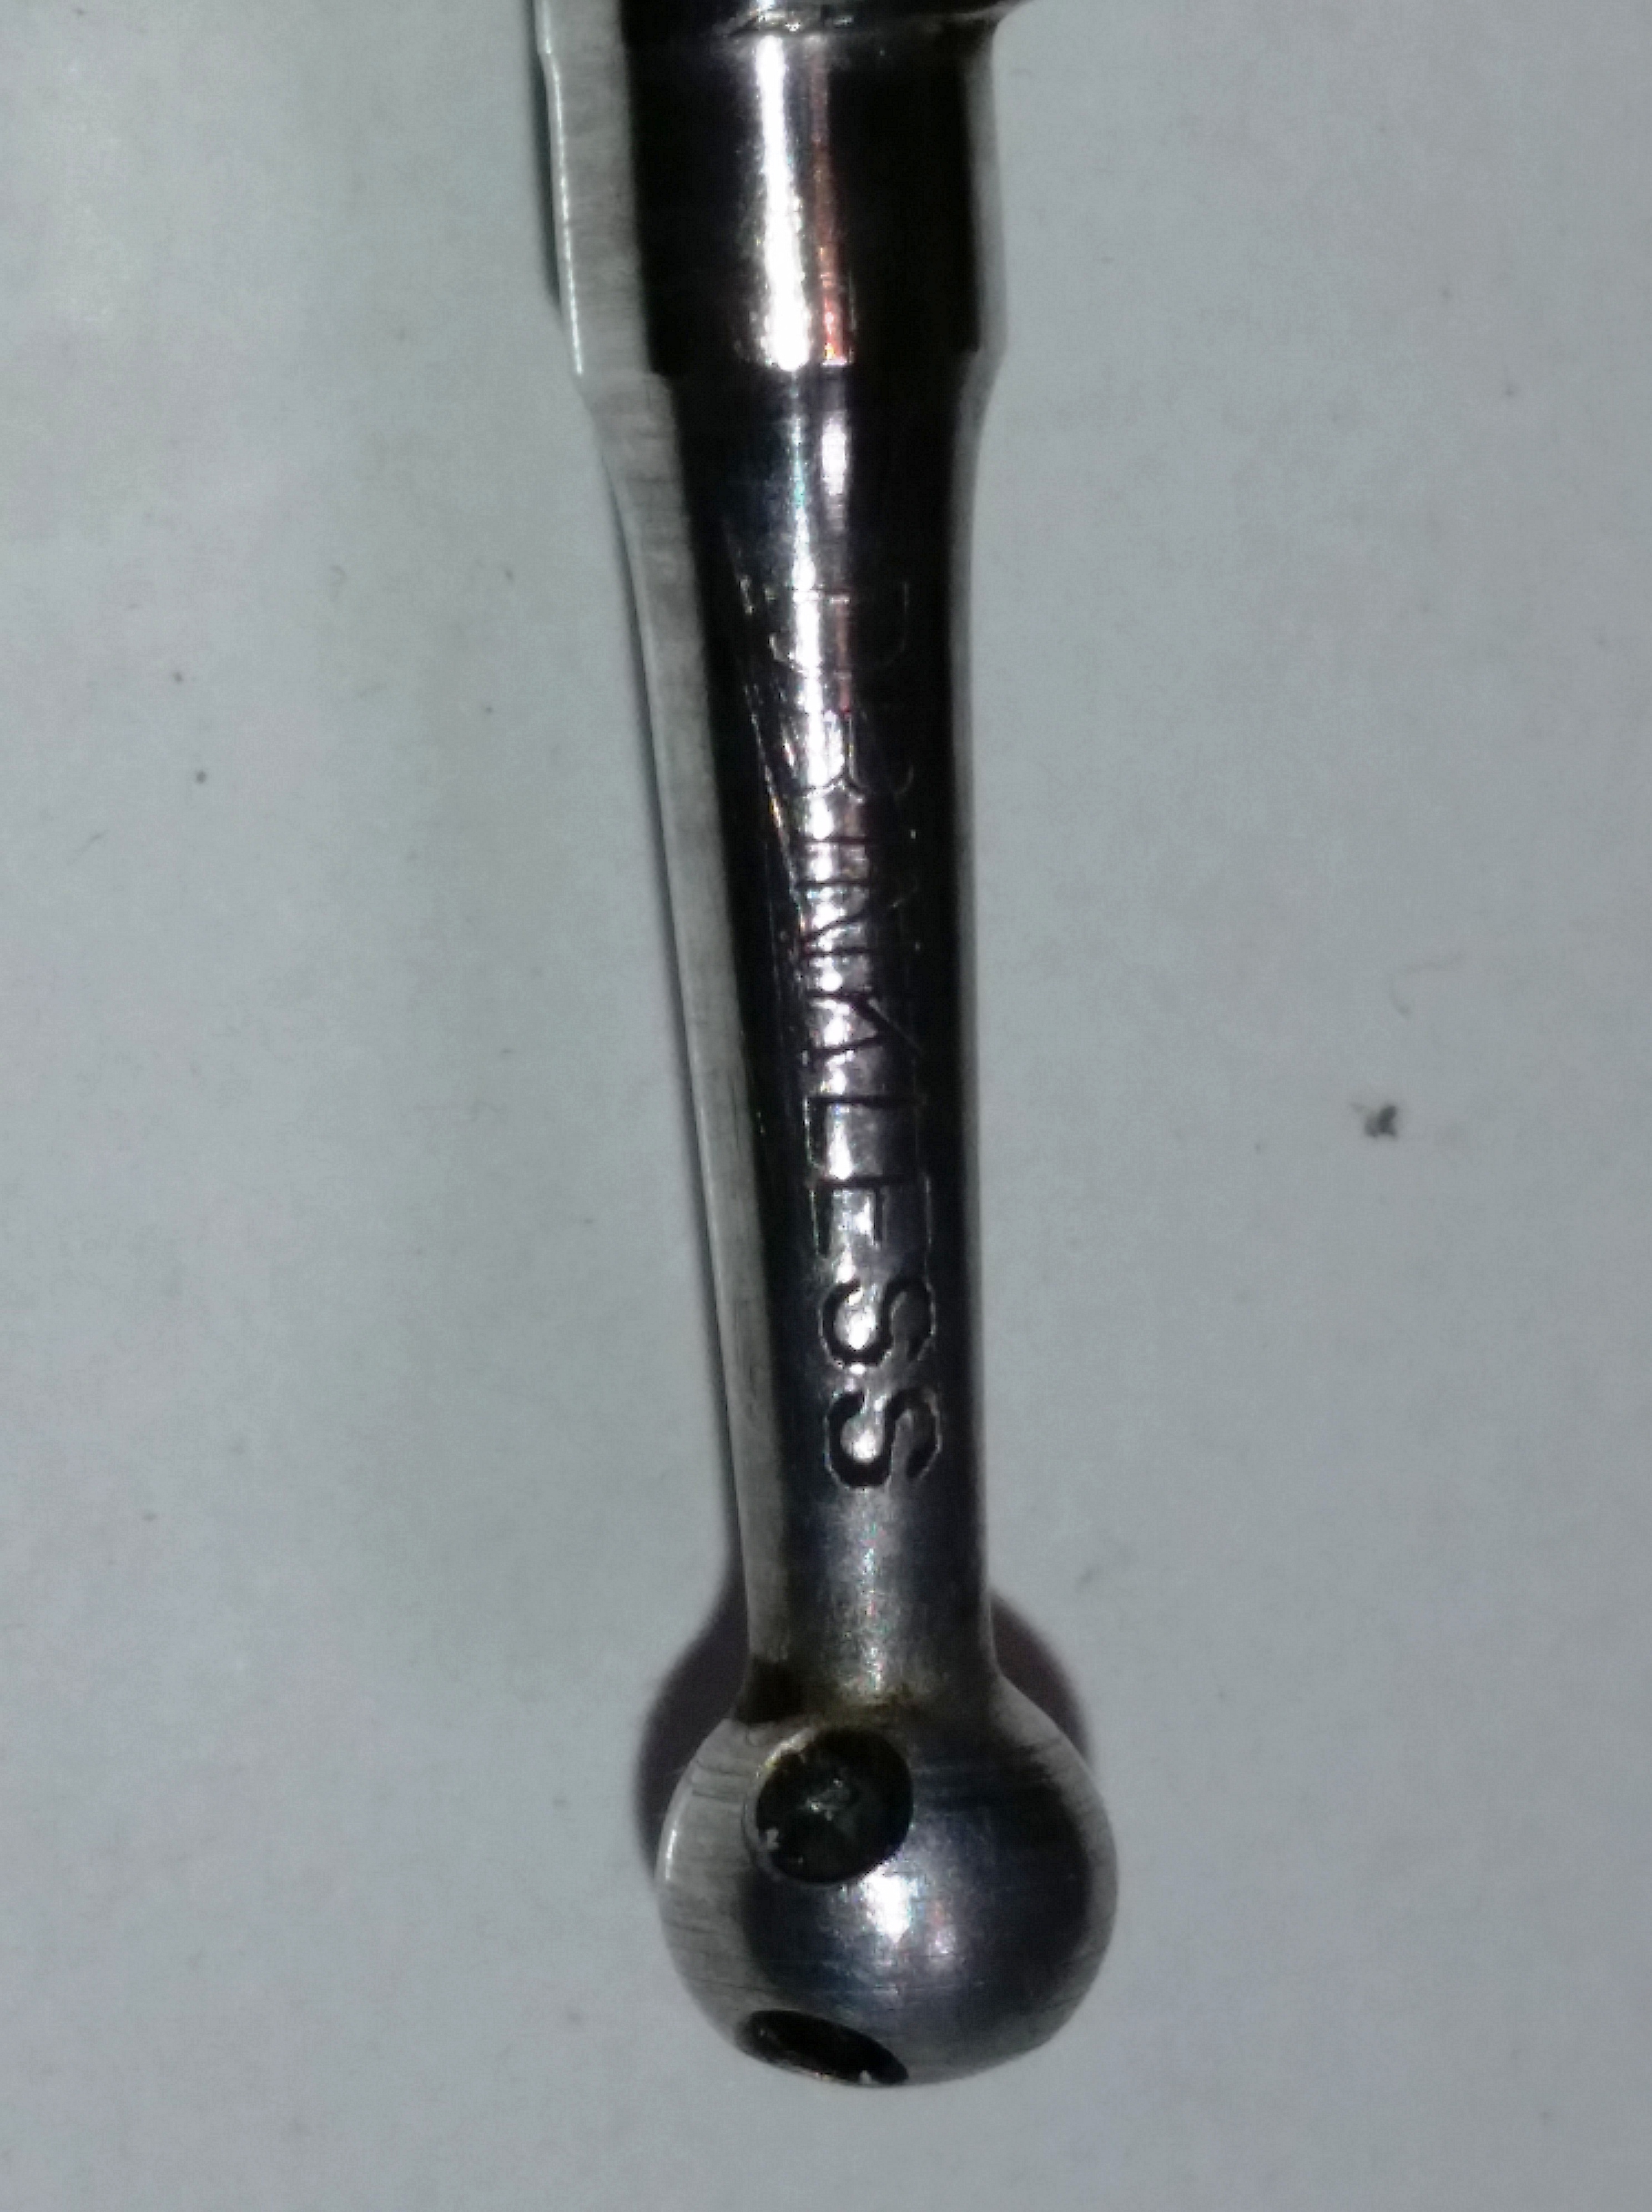
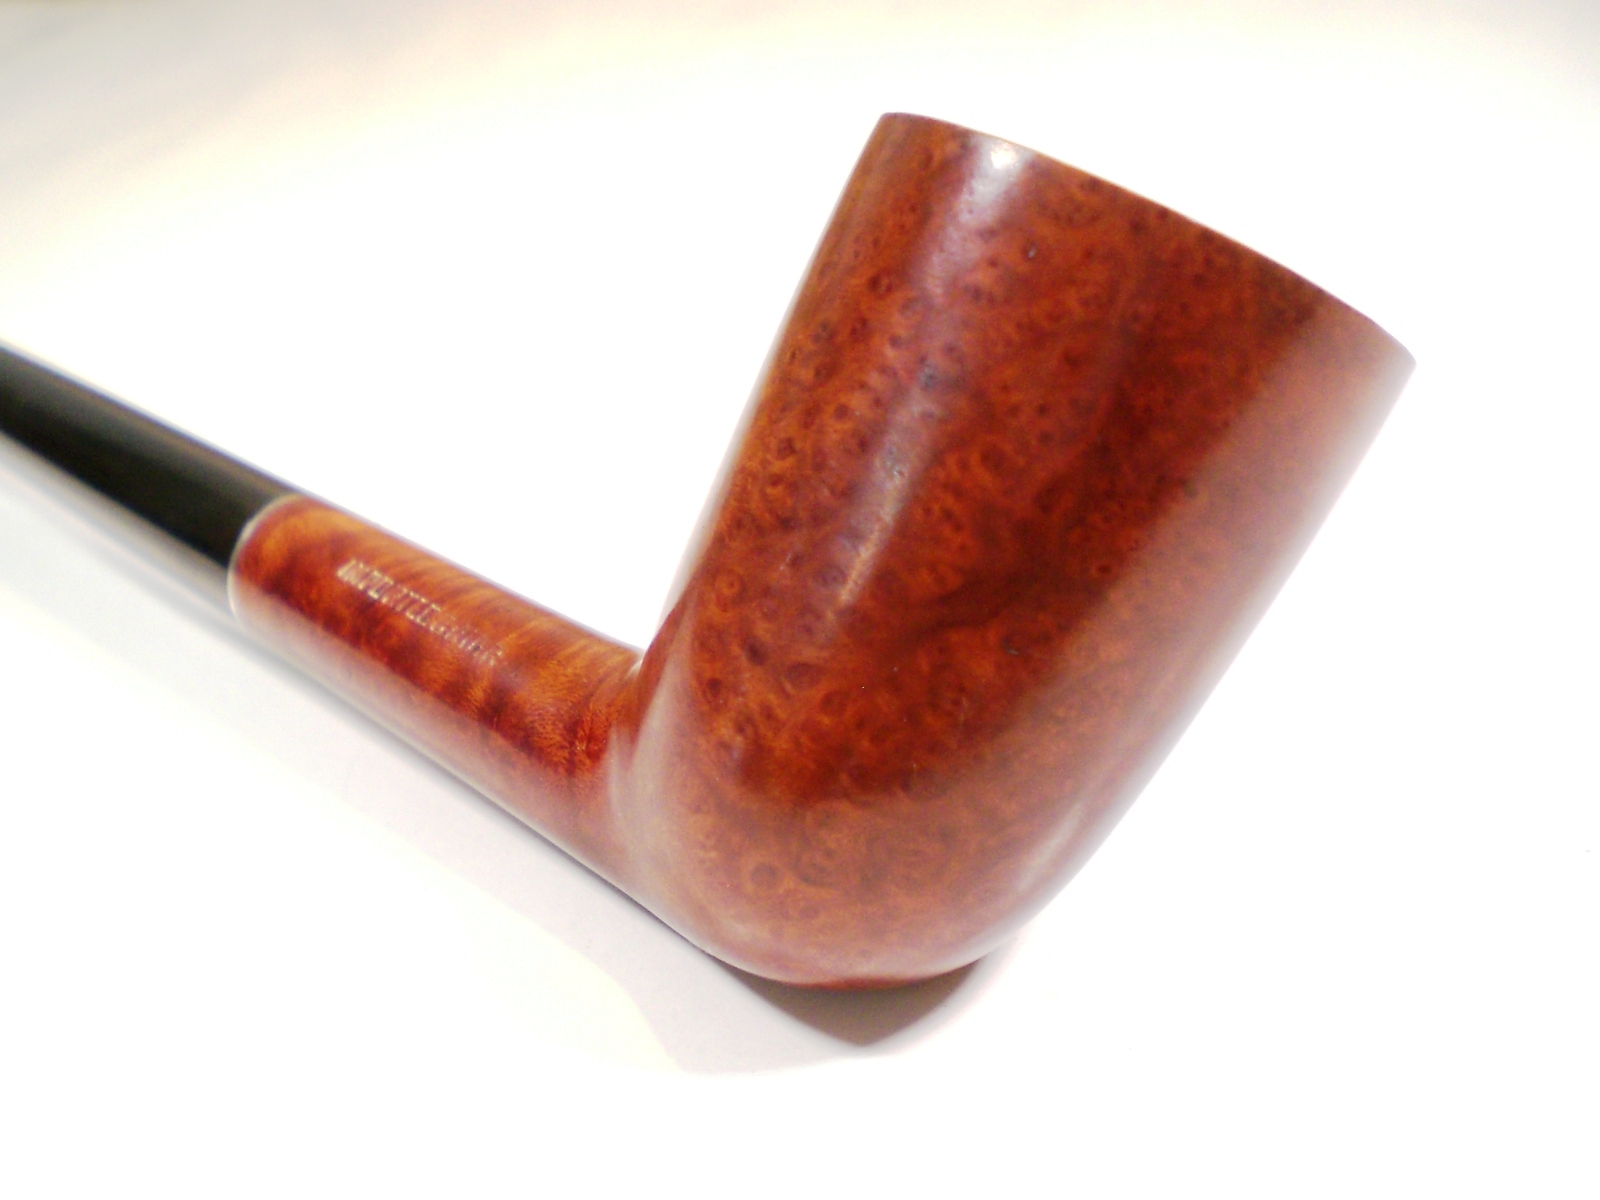
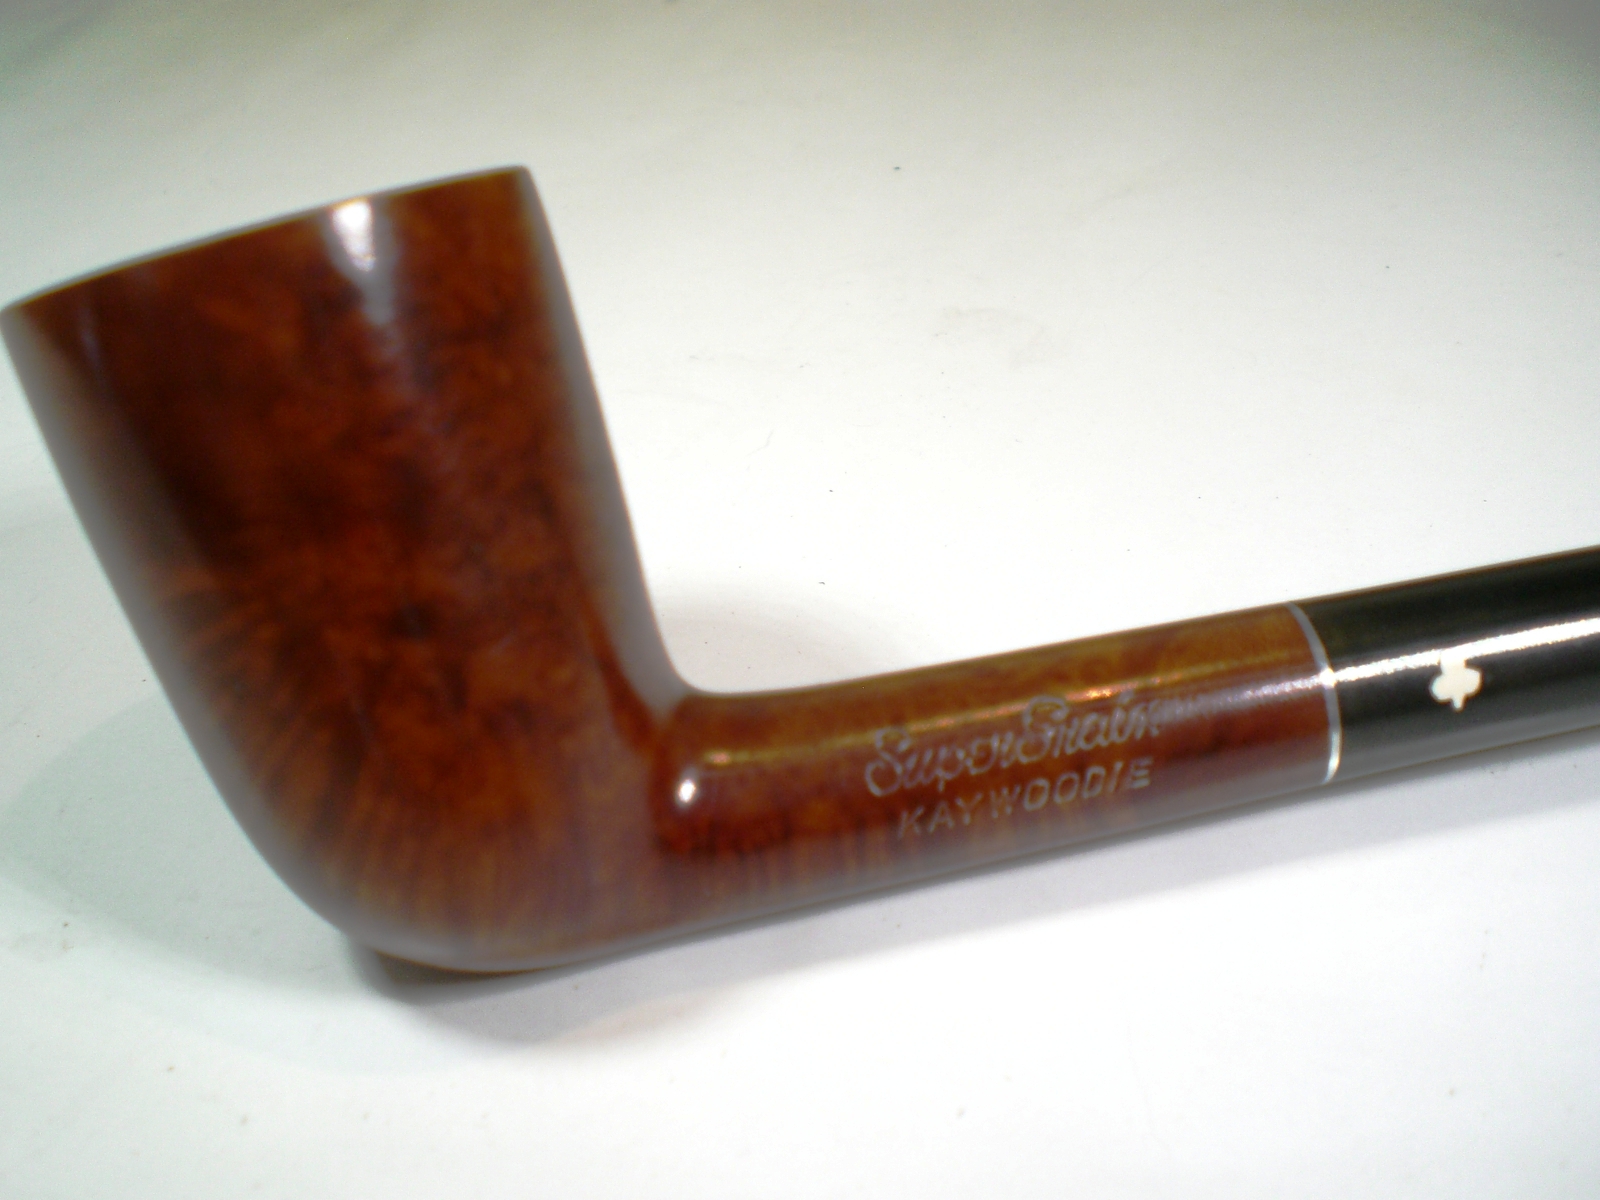
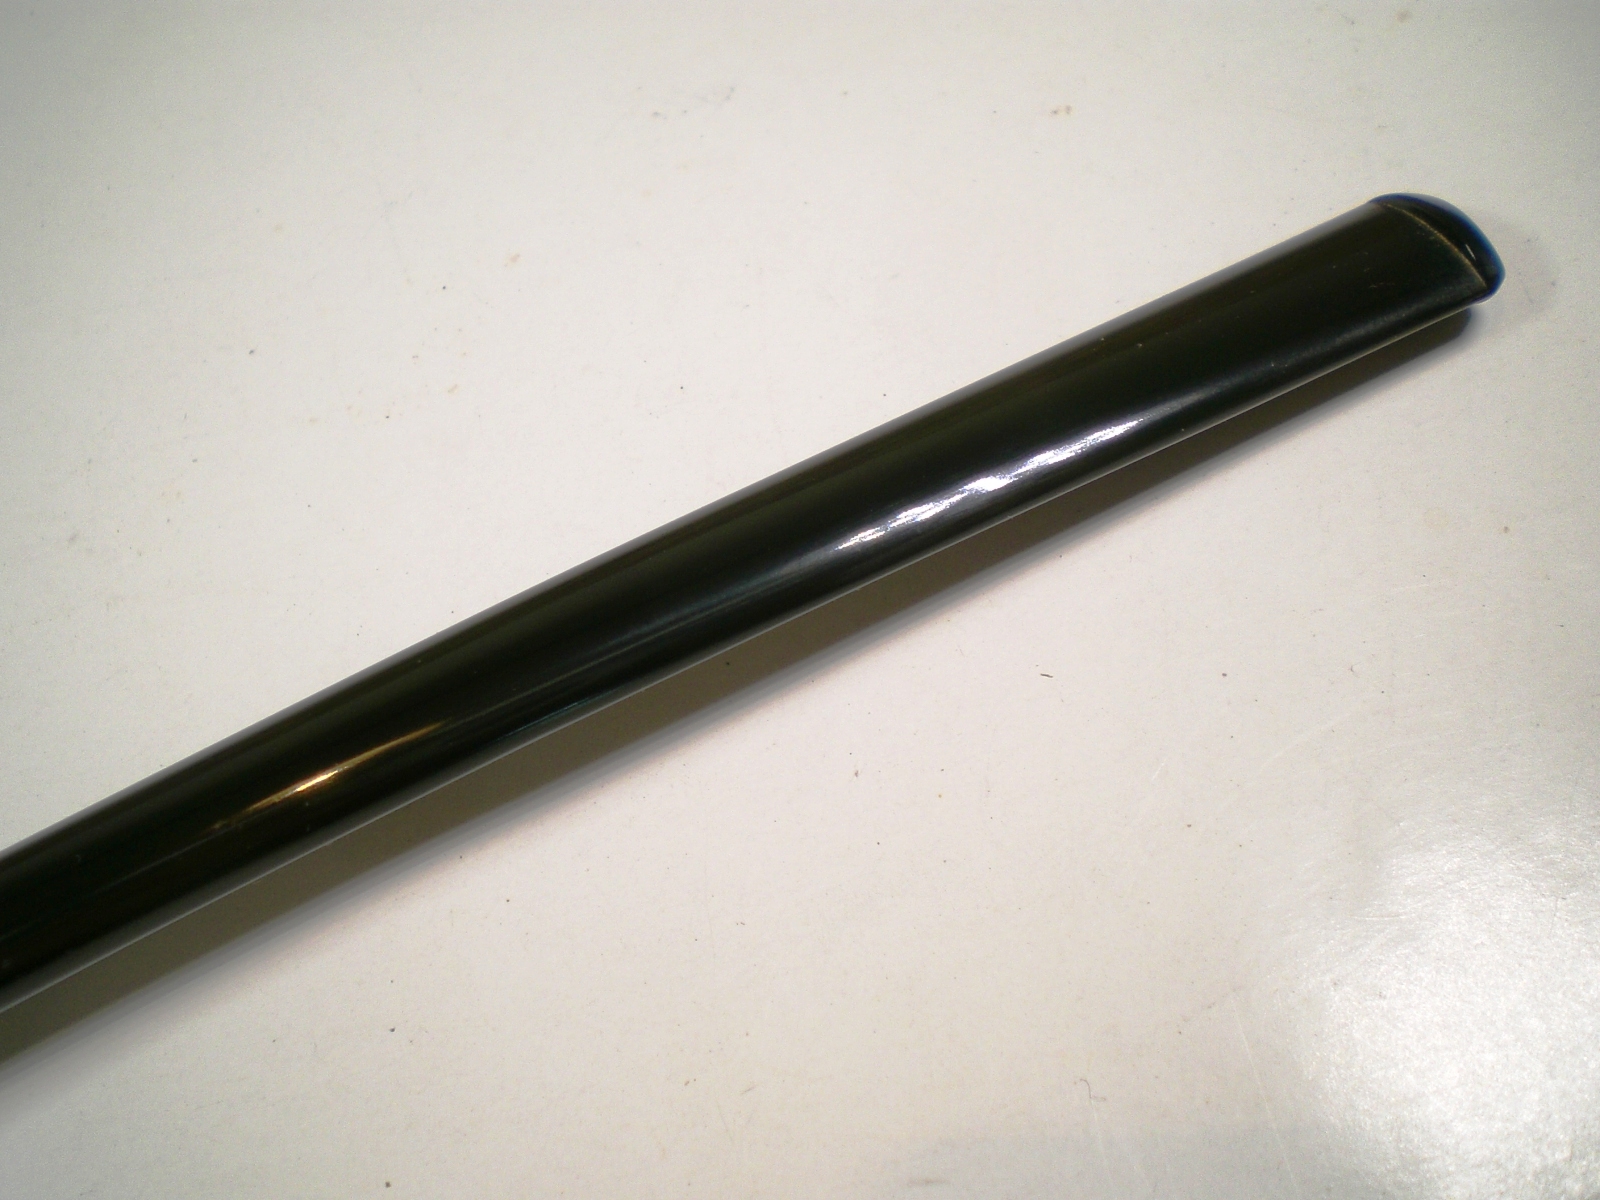
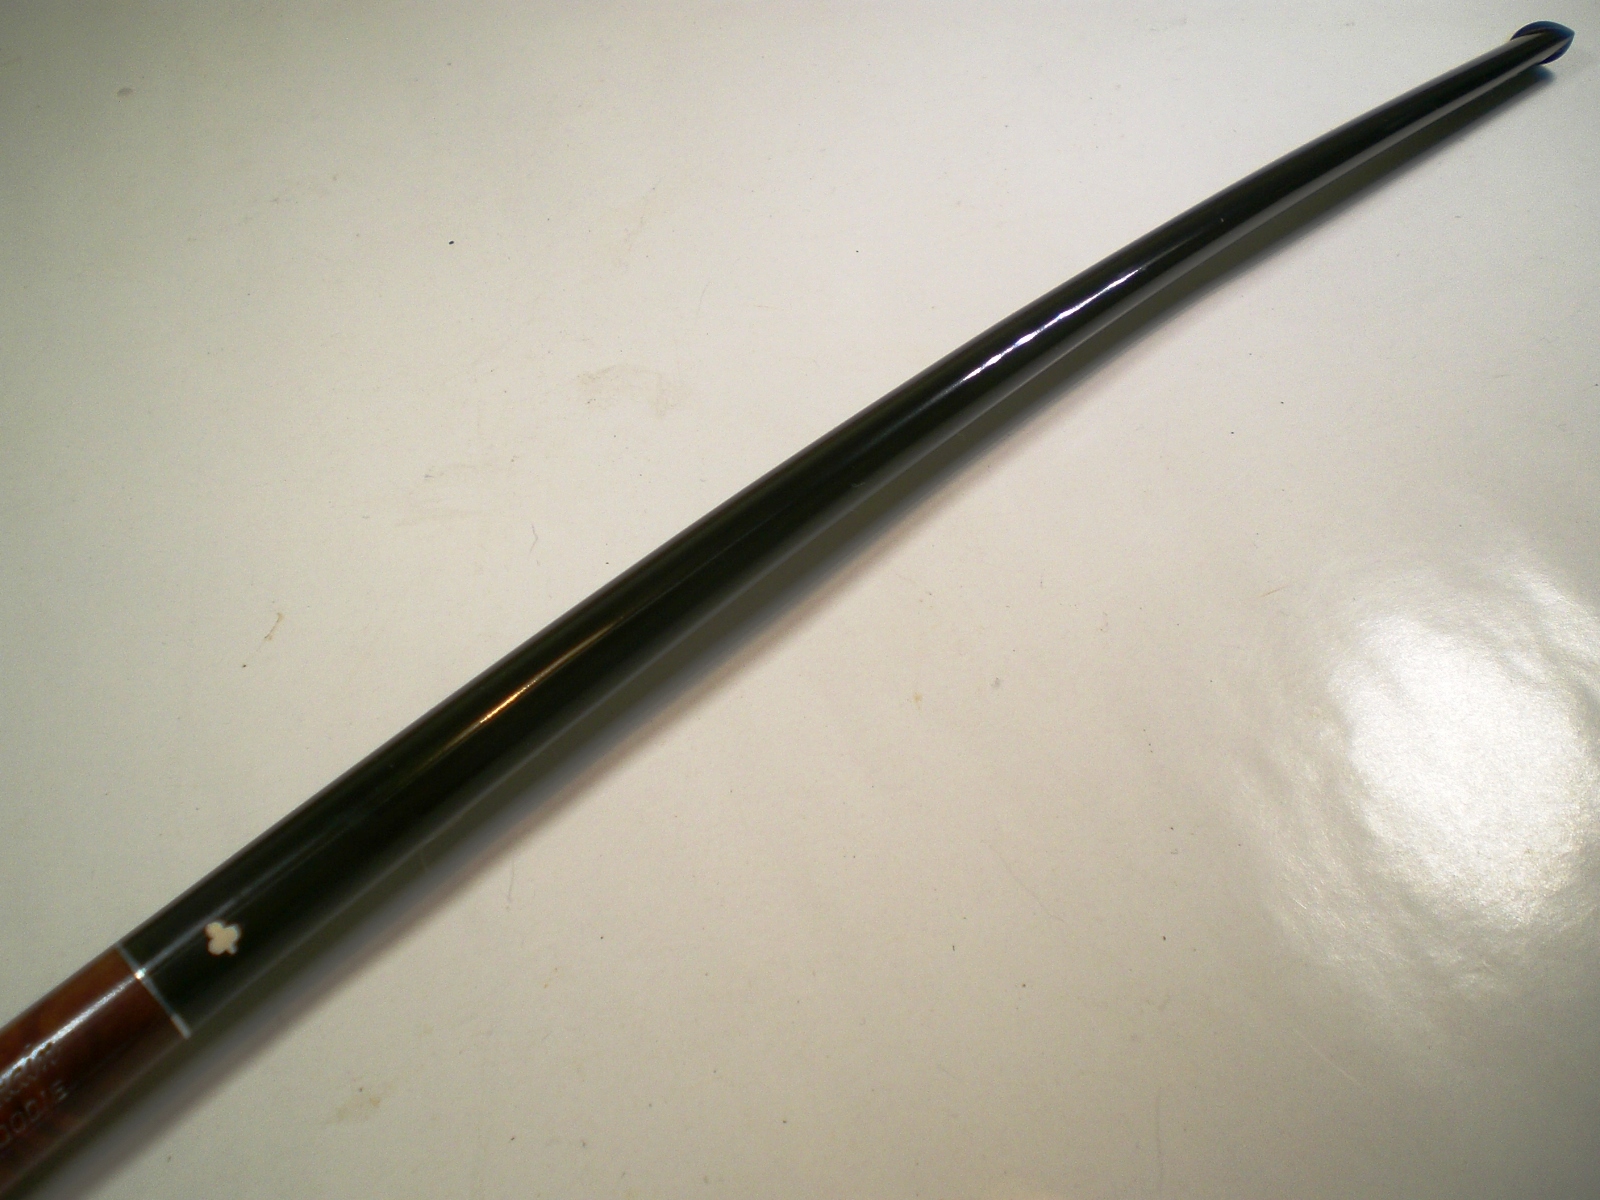
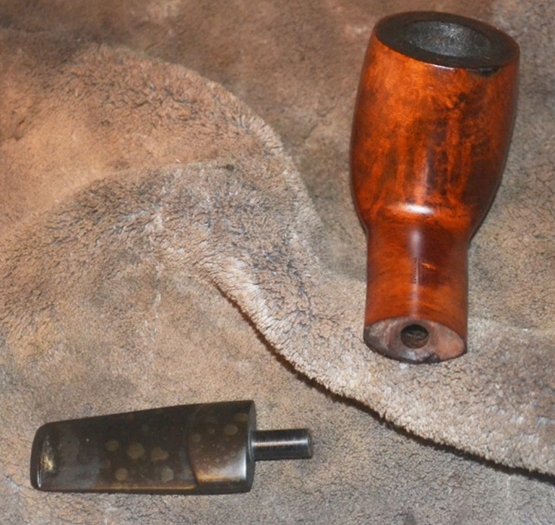
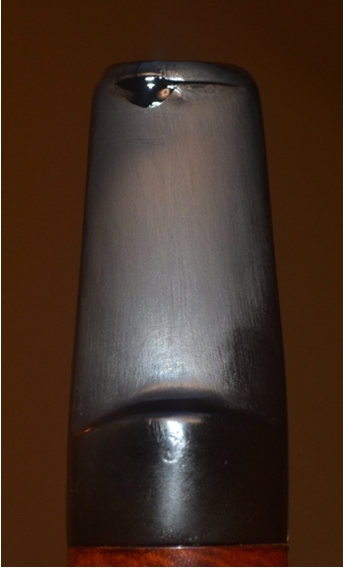
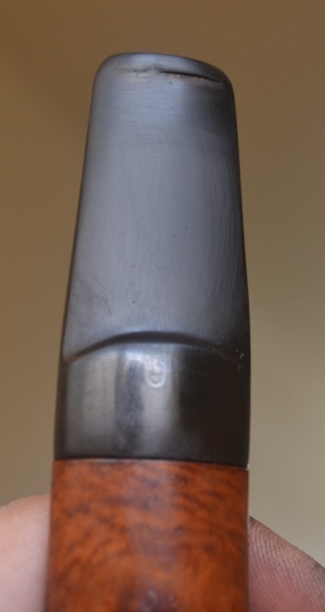
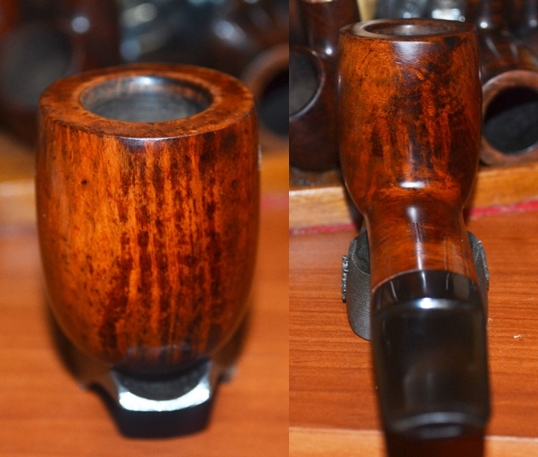
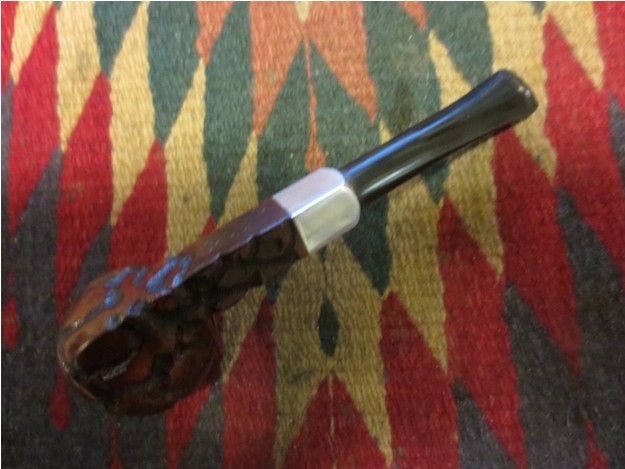
I took the pipe apart so that I could clean the internals and work on the top of the rim. The beauty of this old pipe was that it did not need to be reamed as it was clean inside the bowl. The next two photos show the diameter of the military stem and the overall look of the stem.Payne7 Payne8 
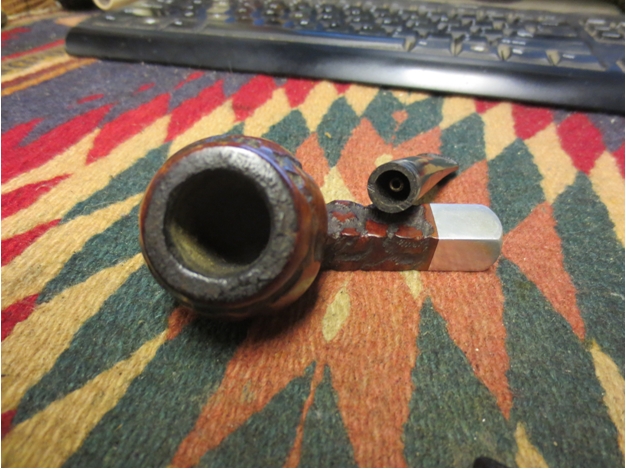
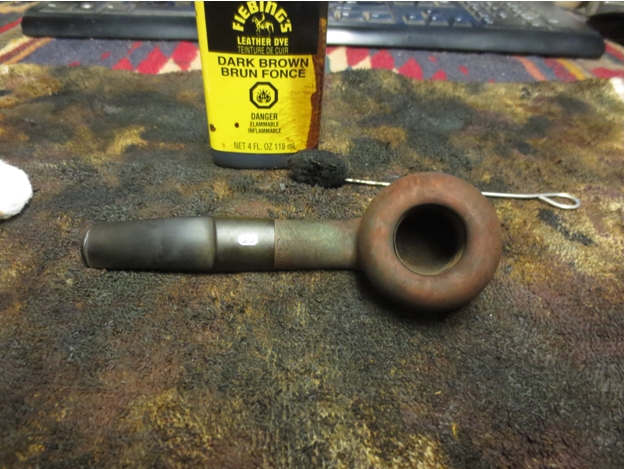
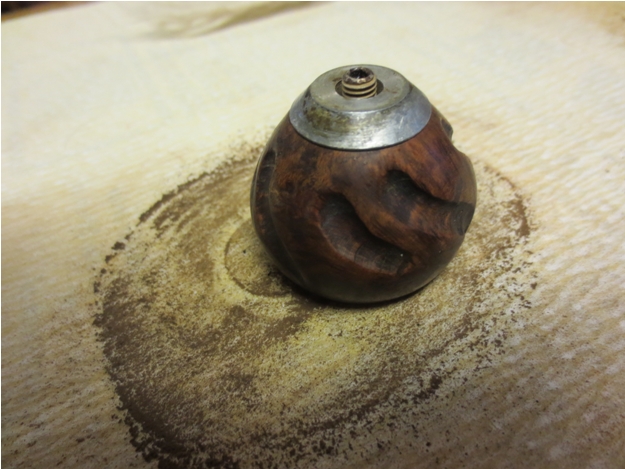
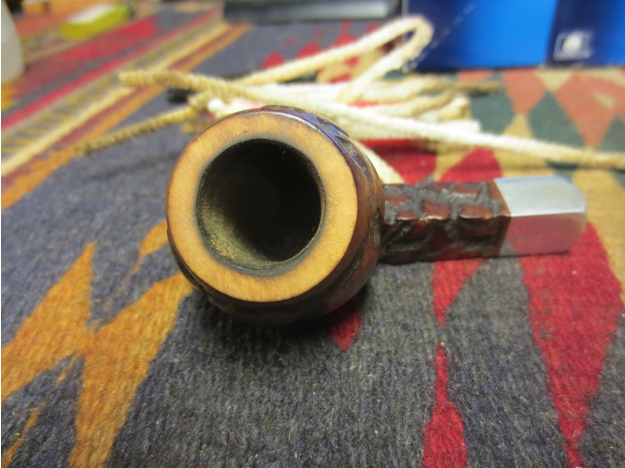
I set up the topping board and the 220 grit sandpaper in order to lightly top the rim of the Payne. I pressed the rim against the board and moved it in a circular motion to remove the damage to the rim and the hard buildup.Payne9 Payne10 Payne11 
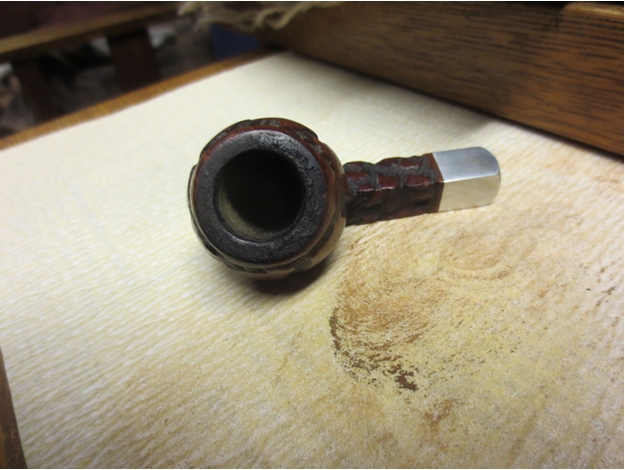
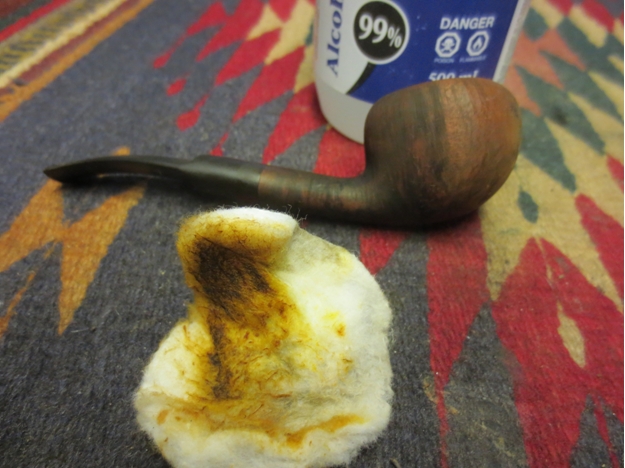
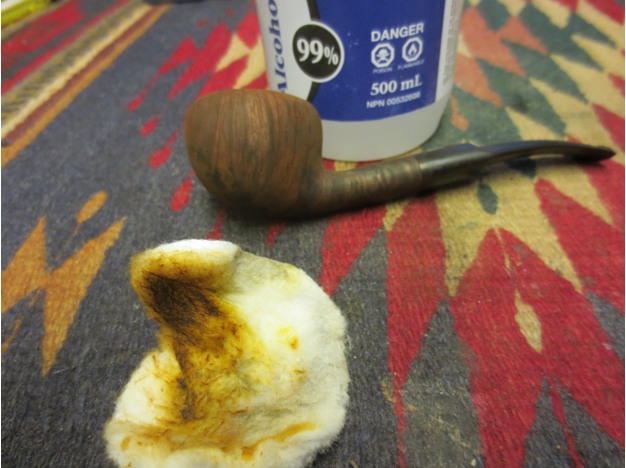
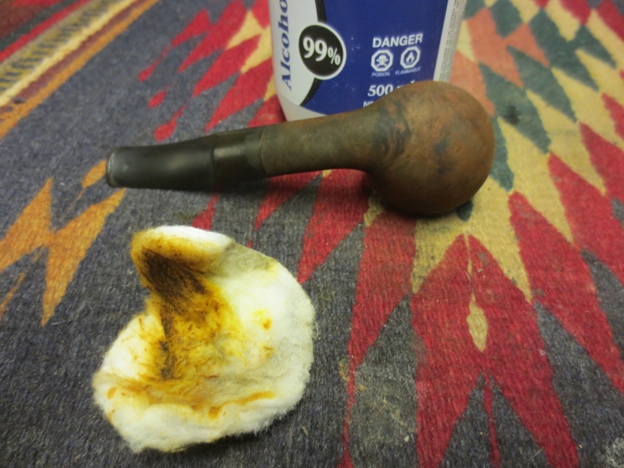
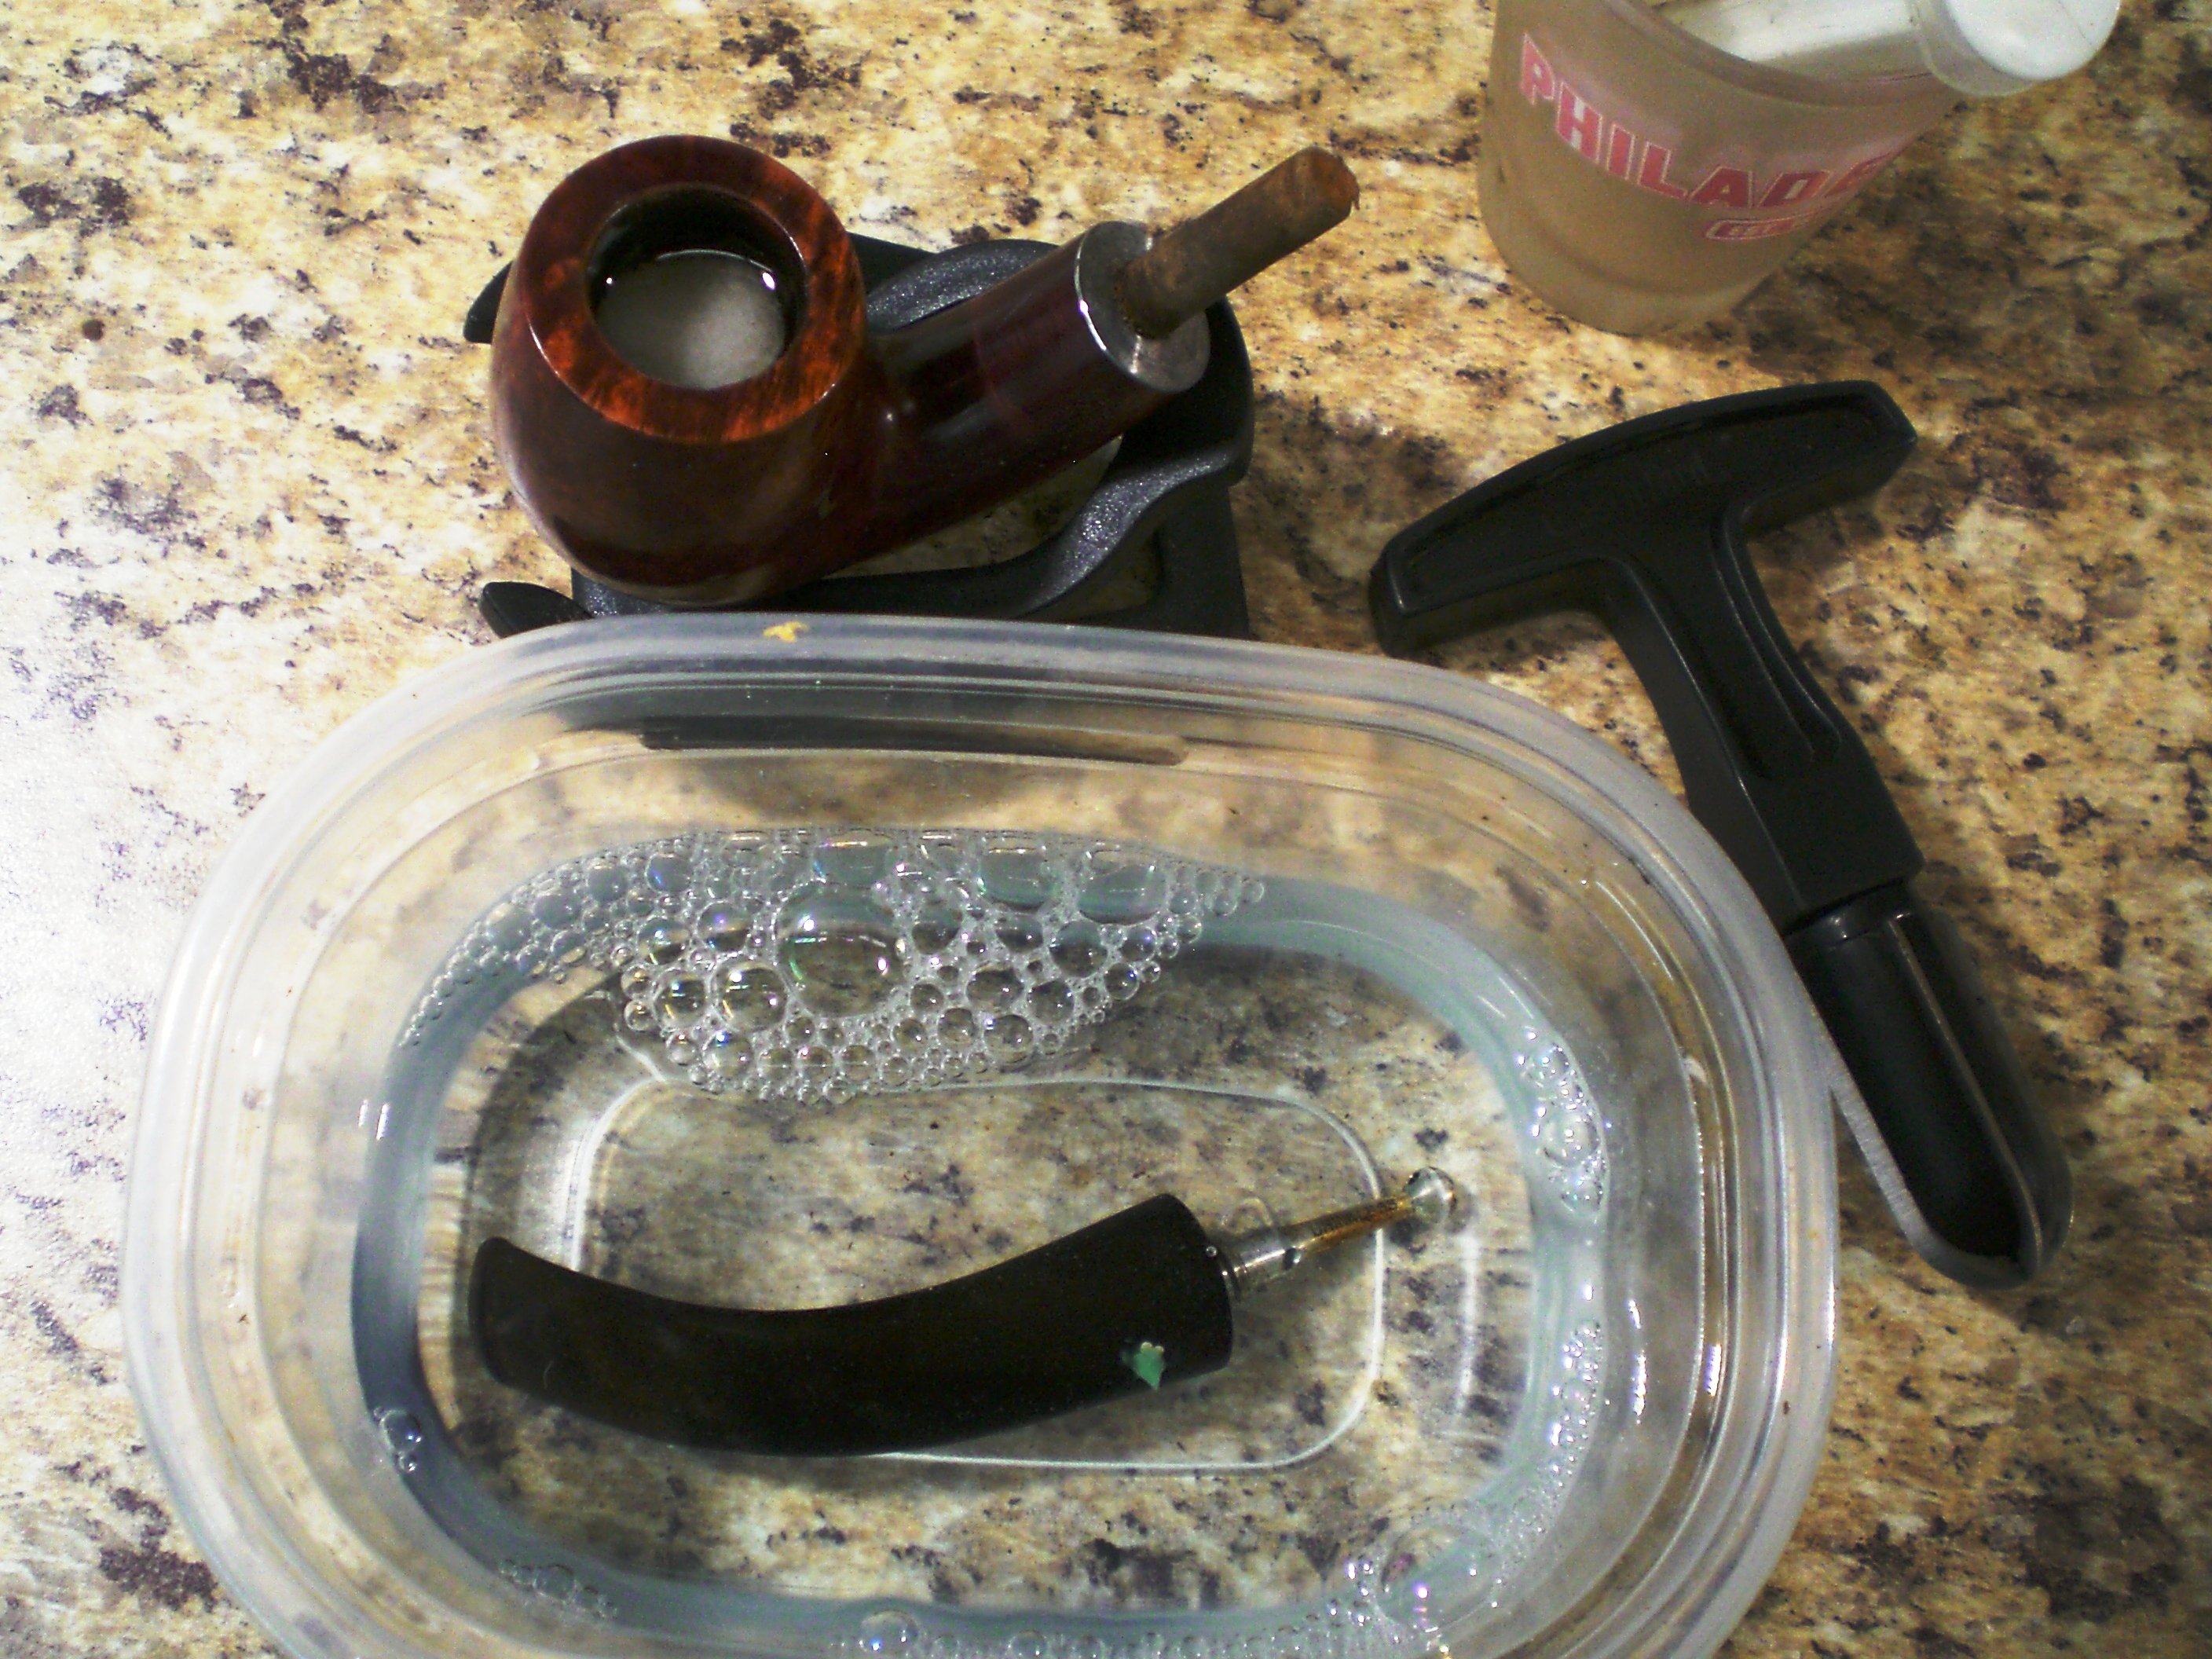
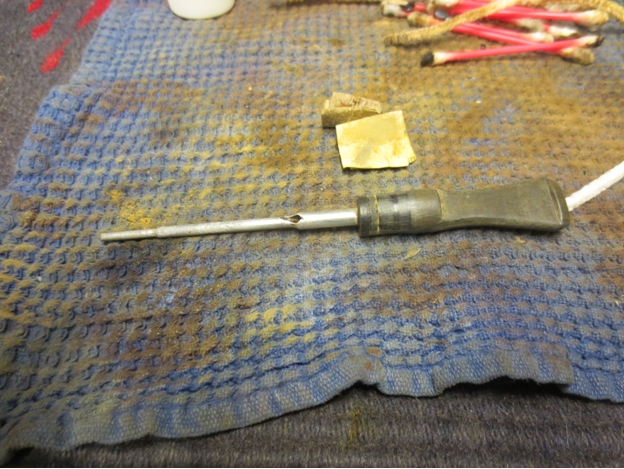
I cleaned out the inside of the end cap insert to remove the tars and oils with alcohol, folded pipe cleaners, and cotton swabs. I cleaned out the airway with pipe cleaners and alcohol.Payne12
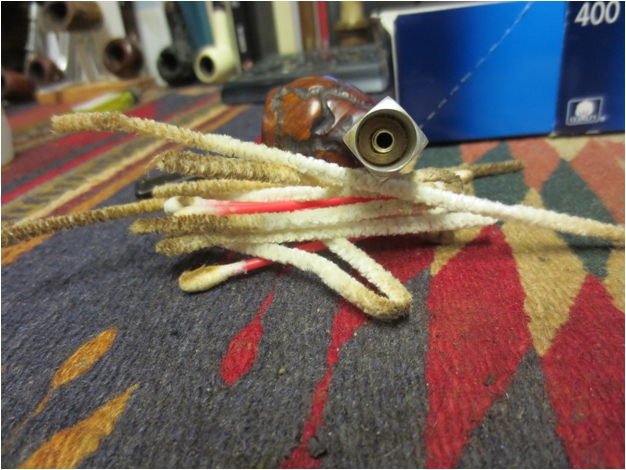
I used the Guardsman stain pens to stain the rim. I started with the lightest stain and moved to the darkest stain. I wanted to match the stain on the rim to the stain of the bowl. Once it was dry I buffed it with White Diamond and then lightly wiped it off with alcohol on cotton pads to lighten it slightly to get a more correct match.Payne13 
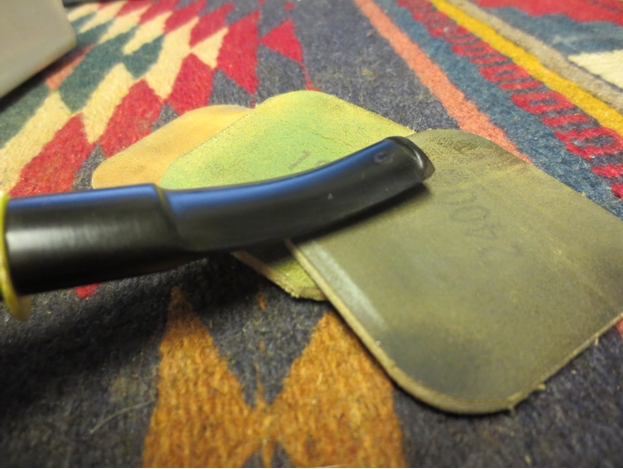
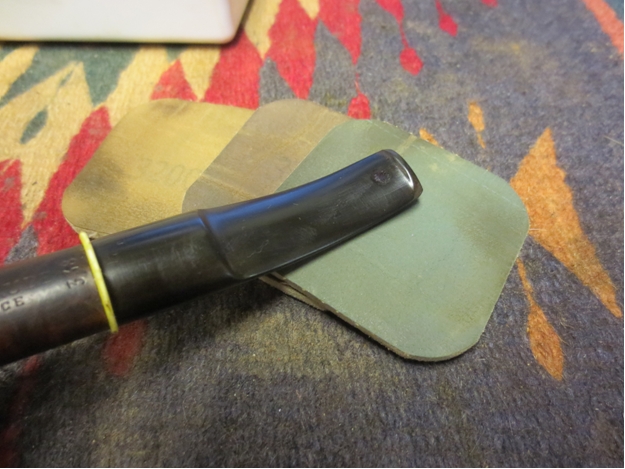
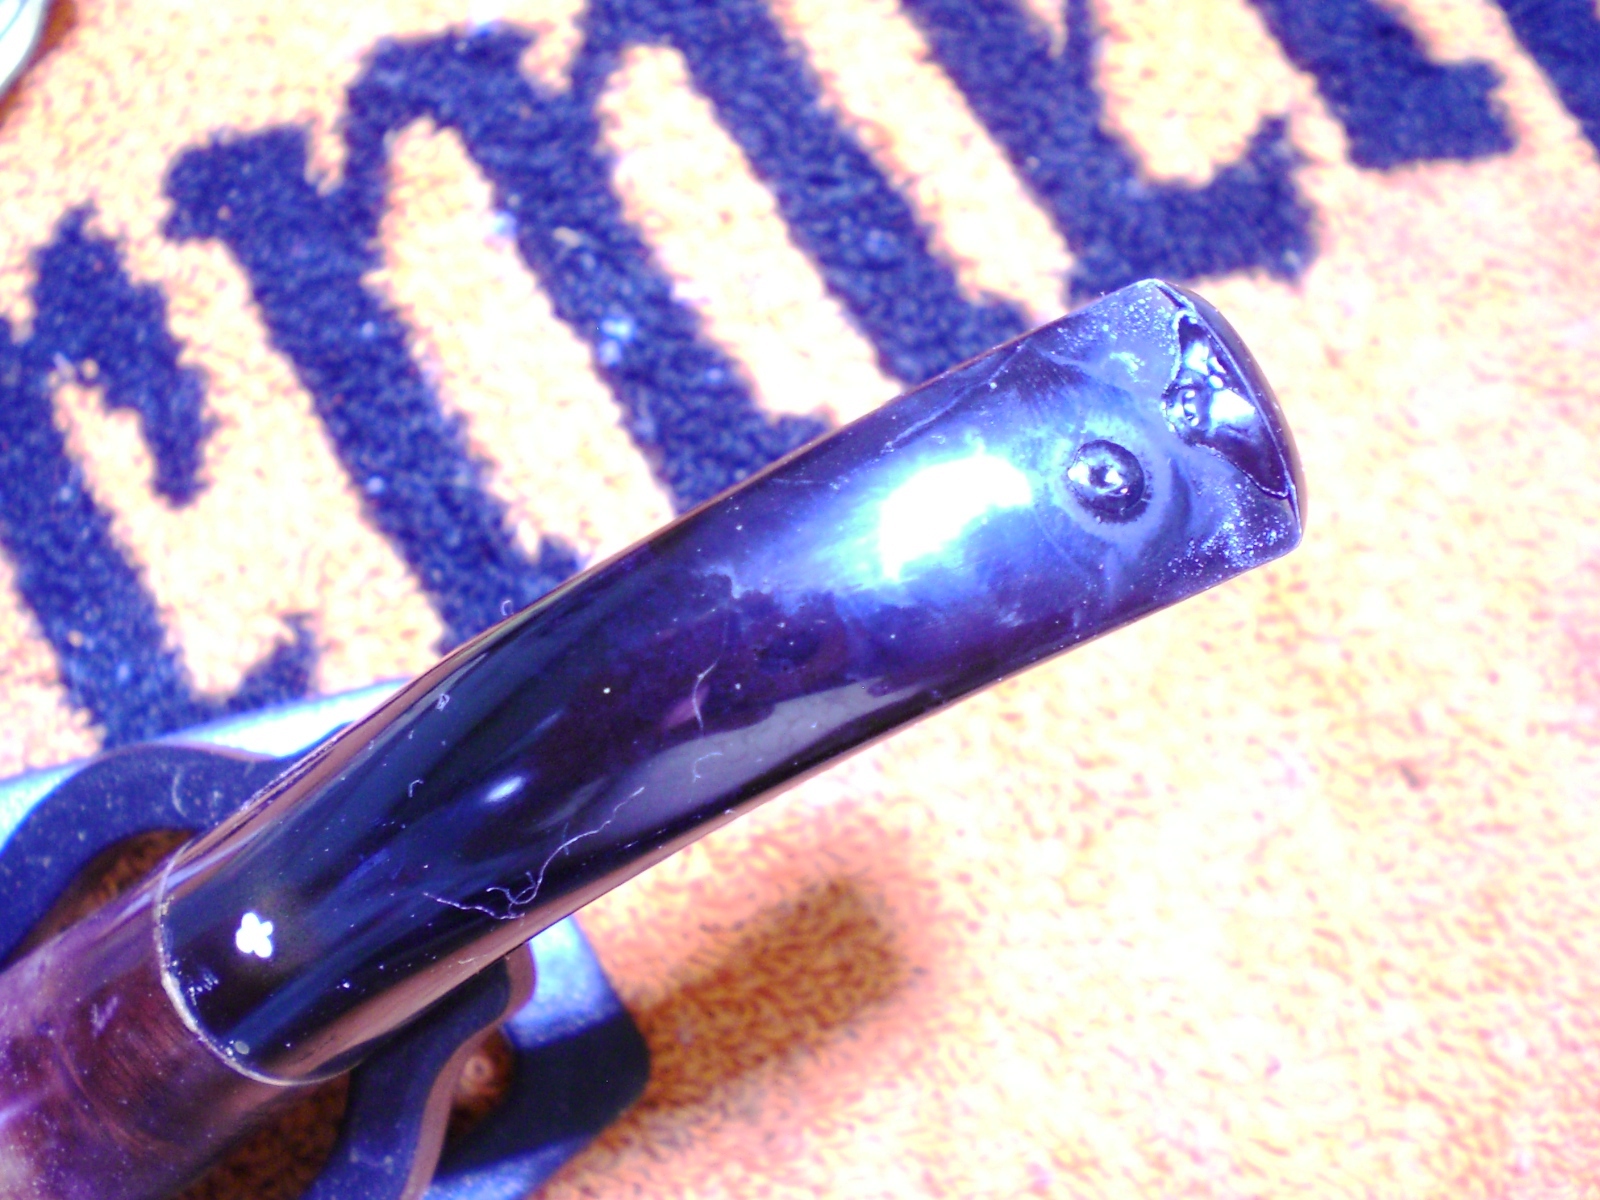
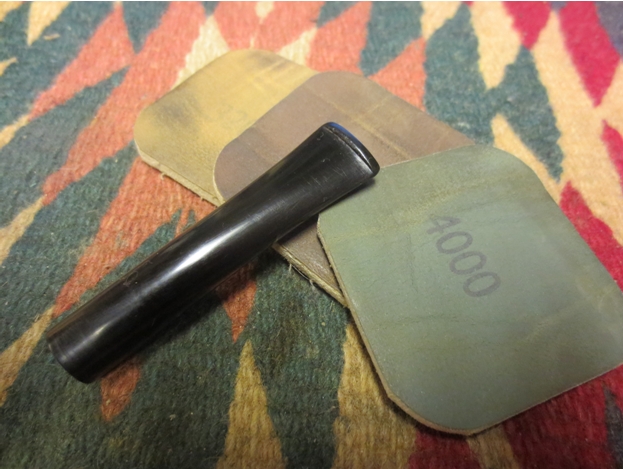
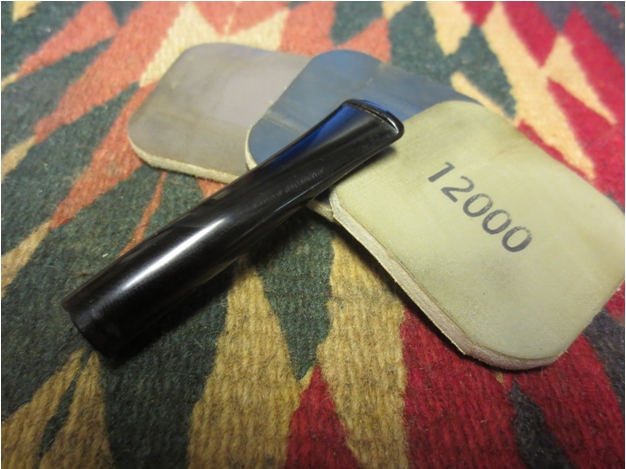
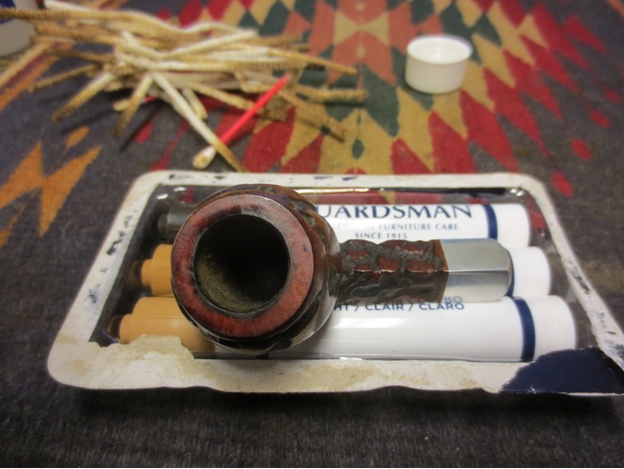
The stem was in good shape and did not have any bite marks or tooth chatter. I sanded it with micromesh sanding pads. I wet sanded it with 1500-2400 grit pads and dry sanded with 3200-12,000 grit pads. In between each set of three pads I rubbed the stem down with Obsidian Oil.Payne14 Payne15 Payne16 
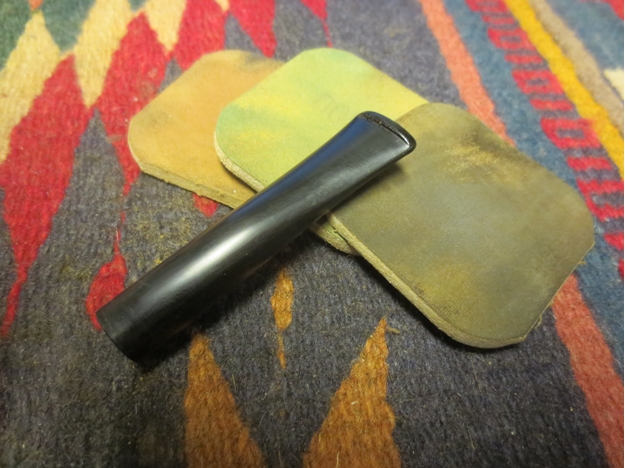
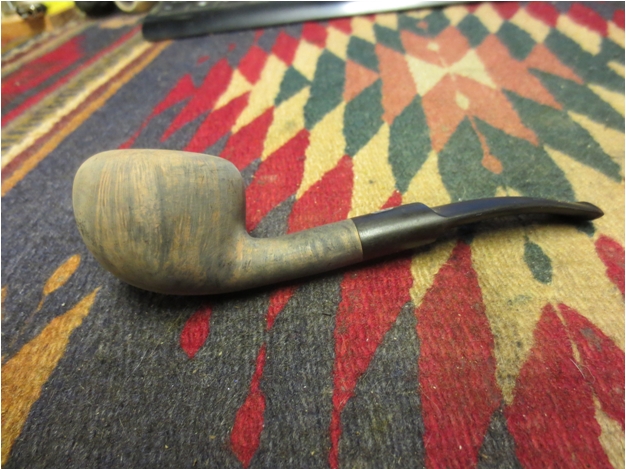
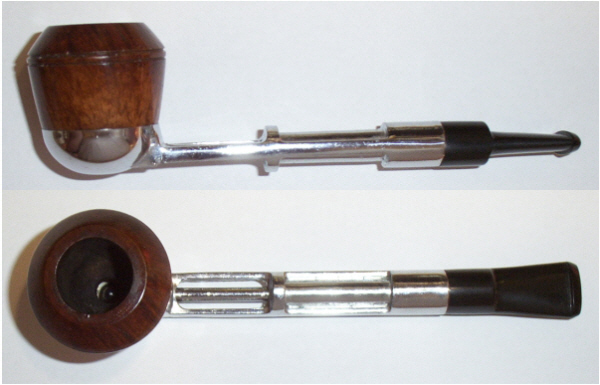
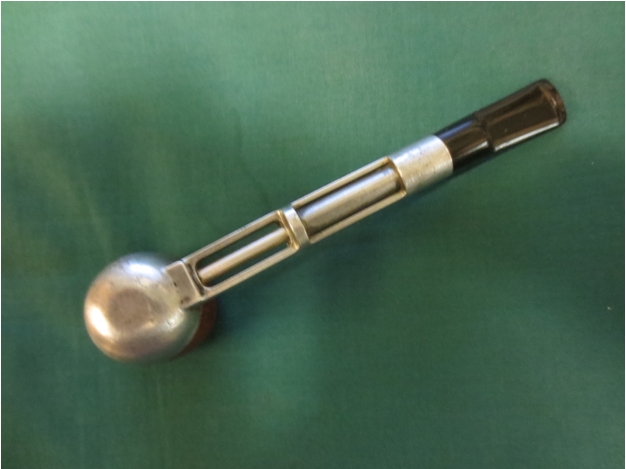
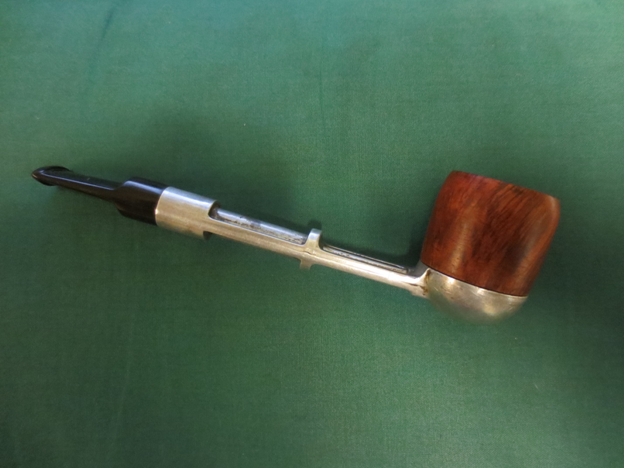
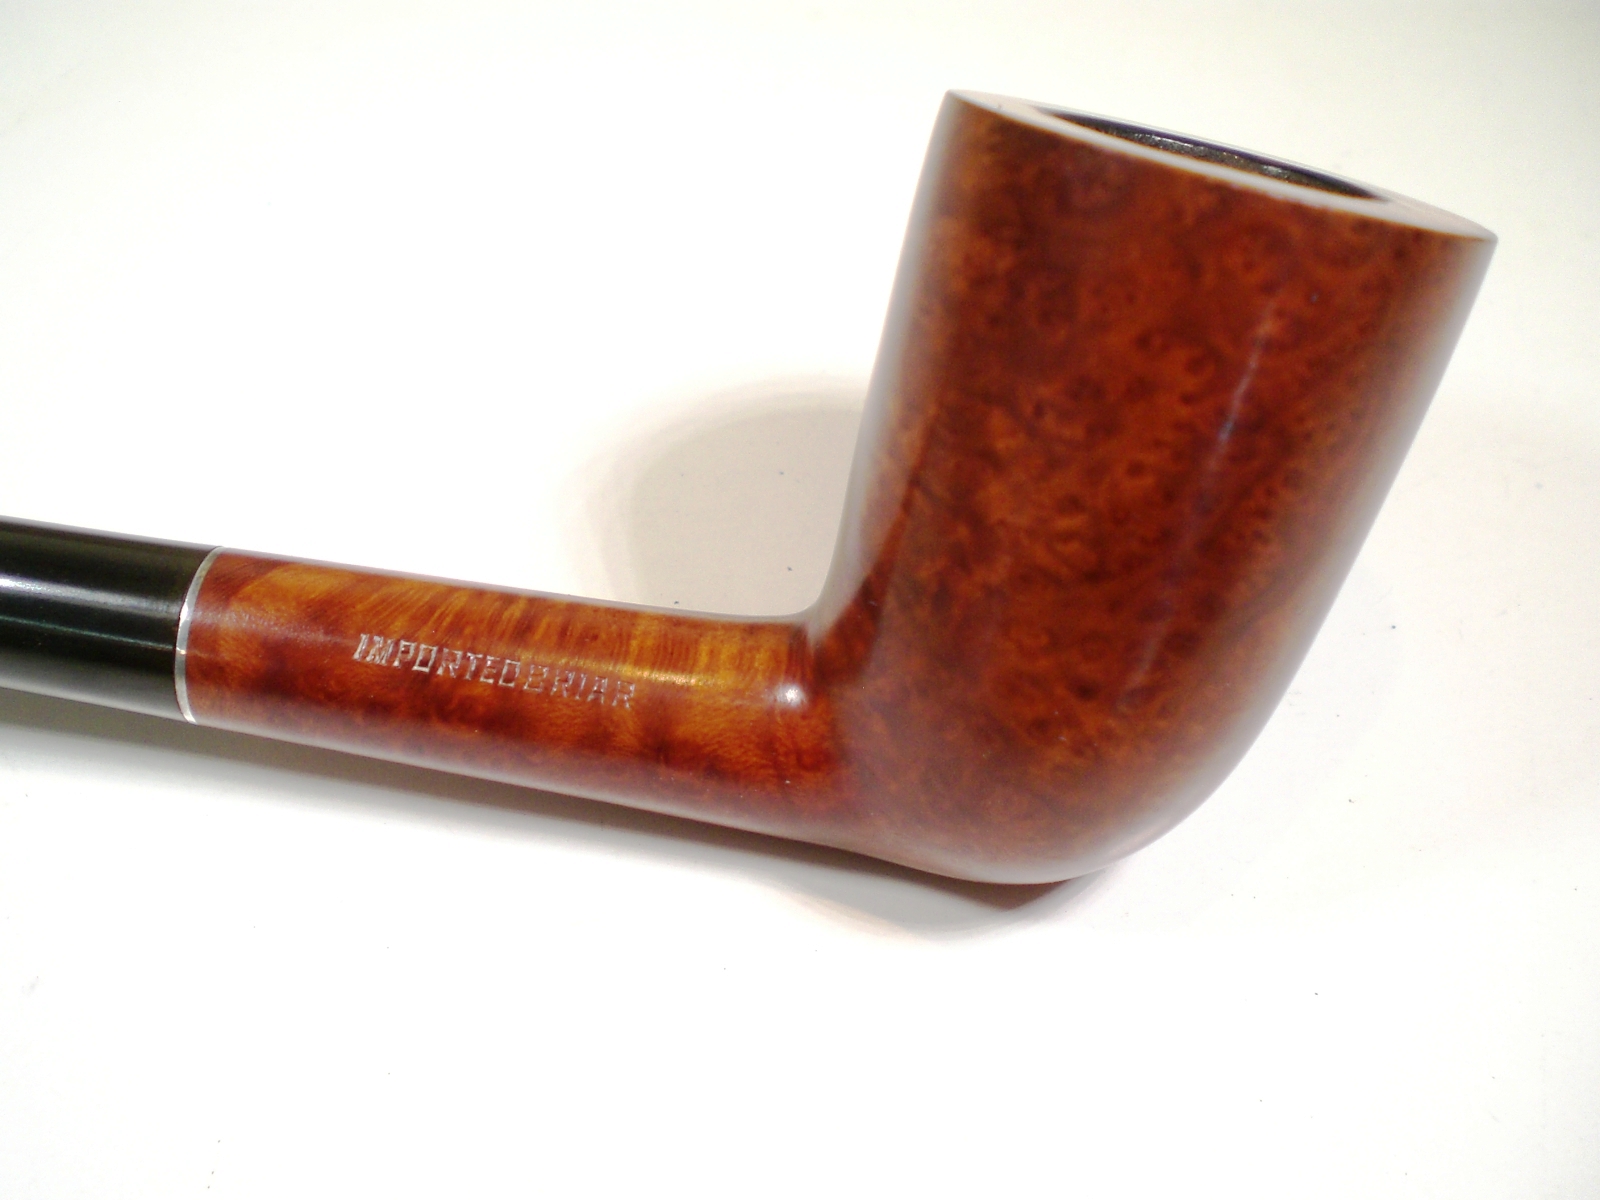
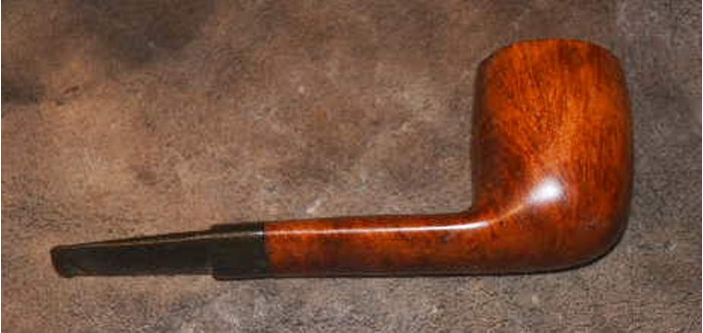
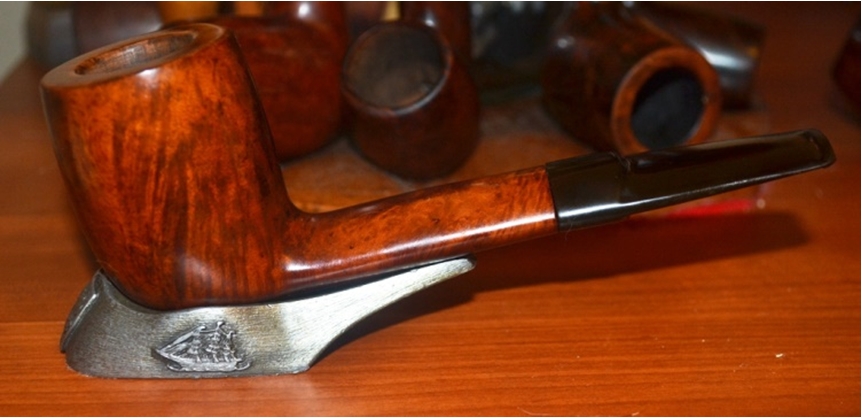
I waxed the stem with carnauba wax and buffed it with a soft flannel buffing pad to raise the shine. I sanded the aluminum end cap with the micromesh pads to polish the metal and remove the scratches. Once the aluminum shone I waxed the bowl and stem with carnauba and buffed it with a soft flannel buffing pad. The finished pipe is shown below. It is ready to load up and smoke with its inaugural bowl of tobacco. I am wondering how the tube system works in delivering a cool smoker and how the smoke compares to the Keyser Hygienic pipes. Time will tell.Payne17 Payne18 Payne19 Payne20

Stripping a Chacom Cocktail Pipe and giving it a new look


Blog by Steve Laug

My son-in-law and I dropped off his wife and two of my other daughters at the shopping mall and made our way to the pipe hunting turf. He found a nice Peterson Dunmore and I picked up this little Chacom. I love the shape of the bowl. It is an oval shanked pipe with stamping on both the top and the underside. On top it is stamped Chacom over Cocktail and on the underside it is stamped St. Claude over France and 338 next to the stem shank junction. The bowl was caked and quite dirty. The top of the rim while undamaged by dents or chips was thickly covered with tars and oils. The finish was shot – the black paint, kind of shiny dress black, was peeling and large spots on the finish were missing. The stem was dirty, oxidize, and covered with a calcification for the first inch of the stem. There was tooth chatter on the top and bottom of the stem and on the underside it had some tooth dents that would need to be addressed.Chacom 1 Chacom 2 Chacom 3 Chacom 4 I reamed back the cake to the bare briar with a PipNet pipe reamer. I used both the first and second sized cutting heads to ream the cake back. This time it was not hard but rather it crumbled when the blades of the reamer touched them.Chacom 5 I put the bowl in an alcohol bath overnight and let it soak. In the morning I took it from the bath and found that the finish was unphased by the soak. I had run out of acetone for removing the finish but I borrowed some fingernail polish remover from my daughter. It was a peach flavoured wash with added vitamin E. I figured that neither the pipe nor I would mine the smell of fresh peaches as I scrubbed down the finish. The peach aroma made the acetone removal of the painted finish not only quick and easy but made it smell like peach cobbler! Wow. I used a lot of cotton pads soaked in the acetone to remove the paint and clean up the finish. I sanded the bowl with 220 grit sandpaper but did not sand the shank as I did not want to damage the stamping on the top and the bottom. I went over the sanded bowl with a medium and fine grit sanding sponge.Chacom 6 Chacom 7 Chacom 8 Chacom 9 I dropped the bowl into an alcohol bath to soak out the deep stain and remove some more of the paint that held on fast. While it soaked I worked on the stem. I sanded it with 220 grit sandpaper to remove the calcification and oxidation and then wiped it down with alcohol. I was able to remove the tooth chatter from the top side but the bottom side still had a deep tooth mark. I sanded it and opened up the edges of the mark. I wiped it down with alcohol and then filled it in with black superglue and sprayed it with accelerator.Chacom 10 I sanded the patch with 180 and 220 grit sandpaper and then with the sanding sponges to blend it into the surface of the stem.Chacom 11 Chacom 12 I removed the bowl from the alcohol bath after it had soaked for about an hour. I dried it off with a soft rag and took the following four photos to give a clear idea of where it stood at this point in the process of removing the finish. The peach flavoured acetone and the isopropyl alcohol had done their magic and the paint was gone!Chacom 13 Chacom 14 Chacom 15 Chacom 16 I let the bowl dry and continued to work on the oxidation on the stem. I sanded the bowl lightly with a medium and fine grit sanding sponge and then wiped it down with a cotton pad and alcohol to remove the dust. I put the stem back on the bowl and took the pictures below to show the progress toward the new look of this old dress pipe.Chacom 17 Chacom 18 Chacom 19 I used a folded piece of 220 grit sandpaper to rework the inner edge of the rim. It had originally had a slight bevel toward the bowl and I wanted to clean that up and redefine it. Once that was completed I wiped the bowl down a final time with the alcohol and prepared it for staining. I decided to use a dark brown aniline stain to work with the black highlights on the grain. I applied the stain, flamed it and reapplied and flamed it again.Chacom 20 Chacom 21 Chacom 22 Chacom 23When the stain dried I wiped it down with isopropyl alcohol on a cotton pad to remove some of the opacity of the colour and to try to make it more transparent. The next four photos show the pipe after the wipe down.Chacom 24 Chacom 25 Chacom 26 Chacom 27I took the pipe to the buffer and buffed it with White Diamond, being careful to avoid buffing the stamping on the shank. I am careful not to damage that in the process of the restoration. Once buffed the stamping really shows up again. Now it was time to work on the stem some more and get rid of the oxidation and scratches. I use a plastic spacer between the shank and the stem to protect the shank and to allow me to sand the stem without rounding the shoulders. I sanded with 220 grit sandpaper, medium and fine grit sandpaper and then used micromesh sanding pads. I wet sanded with 1500-2400 grit pads and dry sanded with 3200-12,000 grit pads. I rubbed it down with Obsidian Oil between each set of three pads.Chacom 28The tooth repair on the underside of the stem is smooth and even. However, when I sprayed it with the accelerator it left a white centre to the patch. I have not had that happen before but it is all the way through the patch. I will live with it for now, but one day may pick it out and redo it to remove that aspect of the patch.Chacom 29 Chacom 30 Chacom 31 Chacom 32I continued to sand the stem as the photos highlighted areas that still showed oxidation. Once I had that removed I buffed the stem with White Diamond and gave it multiple coats of carnauba wax. I wiped the bowl down once again with isopropyl alcohol on a cotton pad to further lighten the brown stain and highlight the contrast with the remaining black stain in the grain. I buffed it with White Diamond and then gave it several coats of carnauba. I buffed the entire pipe with a soft flannel buff to give it a shine and set it aside for an inaugural smoke – either later today or early this week. The finished pipe is shown below.Chacom 33 Chacom 34 Chacom 35 Chacom 36

A Few Words on Pipe Care, Whether for Your Eight-Dot Saseini or a No-Name – Robert M. Boughton


Guest Blog by Robert M. Boughton
Member, North American Society of Pipe Collectors
http://www.naspc.org
http://www.roadrunnerpipes.com
http://about.me/boughtonrobert
Photos © the Author

Originally blogged by Roadrunner Restored Pipes, http://www.roadrunnerpipes.com, November 2, 2014

“Unfortunately, some of our greatest tribulations are the result of our own foolishness and weakness and occur because of our own carelessness and transgression.”
—James E. Faust (1920-2007), U.S. religious leader, lawyer and politician

These are just a few ideas concerning how to care for our good friend, the tobacco pipe, which I put into a blog on my Website

The following list is aimed for the most part toward complete or relative newcomers to pipe enjoying, but even experienced readers may find it useful. Although these guidelines may seem obvious when read in cold, hard type, so to put it, I have witnessed people with years of experience committing many of the Dont’s without a thought, and by the same token first-time enjoyers who grasp all of the Do’s as if by second nature. To be fair, I have at times made some mistakes that drew cringes from some of those “perfect pipe people” out there, who really think they exist. But first for a few definitions that are necessary to continue.

• Stem:The part of the pipe, mostly made of black vulcanite or different forms of acrylic that are colored and often translucent, that goes in the mouth and through which the tobacco smoke is drawn back to the taste-bud before exhaling
• Bit:The part of the stem with top and bottom ridges used for the teeth to hold onto
• Tenon:The narrow end of the stem made of vulcanite or acrylic and/or metal that turns or screws into the shank and acts as a sort of filter
• Shank:The hollow extension from the bowl — in general round, triangular or almost flat — connecting the stem and bowl
• Bowl:The area of the wood or other material used to fashion this primary part of the pipe, the inside of which is placed the tobacco
• Chamber:The formal name for the inside of the bowl, where the tobacco is loaded
The following are the basic Do’s and Don’t’s of pipe care.

DO: Try to fill the chamber with tobacco, leaving a small area at the top empty, using this three-step method. First place enough tobacco into the bottom third of the chamber and tamp it down enough to make it firm but not tight; second, place a bit more than a third of the tobacco in the middle, using slightly less force to tamp it, and third, top off the load with loose tobacco to form a beginning with which to achieve a good initial light. This approach should result in a thorough, even burning of the tobacco throughout the smoke, although re-lighting is often necessary due to the contemplative nature of enjoying a pipe.
DON’T: Never stuff or cram all of the tobacco into the chamber. Doing so can cause the tobacco to stop burning due to lack of oxygen and if forced to light often results in a wet, acrid taste and a backwash of unpleasant spittle.

DO: Always light the tobacco with matches or a special lighter, designed for pipes, that aims the flame directly into the chamber.
DON’T: Never, ever use a cigar lighter, also known for good reason as a torch, to light pipe tobacco. The chamber will develop burnouts, or holes through the bowl, as a result of the intense heat of the cigar torch.Robert1 DO: Holding the pipe upside-down by the stem with one hand, gently tap the shank against the other hand to release the ash and unsmoked tobacco into an appropriate receptacle, such as an ashtray. A blunt pick for the purpose of loosening remaining contents of the chamber is often needed to complete the task and is inexpensive.
DON’T: Never tap the rim against a hard object. This can and often will leave chips and dings on the rim and upper bowl and also lead to cracks in the bowl and even more serious damage such as bending the tenon. Also, never empty the spent ash and tobacco into an unsafe receptacle, including trash cans and paper bags, because of the risk of resulting fire.Robert2 DO: Clean the pipe’s chamber as well as the inner shank and stem regularly with pipe cleaners. They come soft and bristled and cost about $2 for a pack of 35. I recommend the bristled cleaners, as they tend to break away more unwanted cake buildup and clear out more moisture and tobacco bits. Remove the stem from the shank before cleaning. In general, this is only necessary every two or three times the pipe is enjoyed.
DON’T: Failing to clean the pipe in this way regularly can cause the stem to become stuck to the shank not to mention an unpleasant pipe enjoyment experience and, ultimately, the need for professional cleaning.

DO: Remembering that the tobacco pipe is a fragile but durable object of beauty and utility, regardless of the price, always store and transport it with care. If it came with a cloth sleeve and/or box, keep it there and in a safe place when not in use.
DON’T: Do not store or carry without protection a pipe anywhere that can result in chafing, scratching, dirtying, overheating or unintended falling to the ground. Like DVDs, pipes are easily damaged, in particular if left near a home heating device or in a motor vehicle.Robert3 To summarize, always love and protect your pipe by taking the above simple precautions. It will serve you long and well if you do the same, and the pleasure and enjoyment you will receive are priceless.

I am in the business of selling, cleaning, refurbishing and restoring neglected pipes and see more than anyone should of the abuses that befall these wonderful works of craftsmanship. Therefore, I have nothing to gain by promoting the constant care of potential customers’ pipes…except for the satisfaction of seeing well-maintained examples.

Cleaning up a Unique No Name Metal Pipe – It turned out to be a Stirling


Blog by Steve Laug

When I found this old metal pipe on a recent trip to Alberta it had no markings and at first glance appeared to be similar to both Falcons and Vikings. There was a difference though from those other metal pipes that I have in my collection. The tube in the base was thicker in the section next to the stem. The tube actually was normal sized from the bowl to the first joint and thicker from the joint back to the end of the shank. The shank itself was also round instead of the oval ones found in the previously mentioned pipes.It was the shape that caught my eye and I had to take it apart to see what made it different. I was surprised that the stem was actually removable and came out very easily when turned. The stem was also vulcanite rather than nylon and seemed to be of a good quality as it did not have signs of oxidation on it. When I removed the stem I was surprised to see that it had a metal tenon like those found in Medico pipes – slotted on each side so that it can be adjusted for a tight fit in the shank. Obviously this tenon was made to accommodate a filter by all appearances. I was hooked so I paid for it and added to my pipe hunt “treasures” that I would restore when I got home from the road trip.
f634b1970596b4b85986ec05fb585e1cWhile I was travelling I posted pictures of the pipe on the PSU Pipe Smoker Unlimited Forum and got a response that what I had was probably a Stirling pipe. The response included a link to the Smoking Metal website http://www.smokingmetal.co.uk/pipe.php?page=285. The site had pictures of the pipe and it matched mine precisely. It stated the following: “STIRLING, no markings on pipe or bowls, only the box is marked as Stirling, as Foreign Made, but no idea by whom. There are several similar pipes, none of which have a name on them. Arcadia (on this website) is one, differing only in the fact that whereas this Stirling has an all vulcanite push fit stem, the Arcadia has a vulcanite stem with a metal threaded insert. The “Park Lane” has no facility for a filter like the Stirling. This one accepts some Dr. Grabow Viking Bowls as well. Its overall length is 5 7/8 inches or 149mm. I have included the photos from the Smoking Metal site for comparison sake.Stirling2Stirling3Stirling 1From the above photos I conclude that the pipe I found is indeed a Stirling Air-Cooled Briar. It evidently had originally come with interchangeable bowls. From the information found on the site I was able to ascertain that Grabow Viking Bowls would fit the base. I had several of those at home so I when I got home earlier this week I checked it out and found that they did fit well. While this information is helpful it still leaves a lot shrouded in mystery for me. I would love to figure out who made the pipe. I have written to Ed on the Dr. Grabow forum and Bill Feuerbach from KW to see if they have any information on the pipe. If any of you readers have any information please let me know.

Now it was time to clean up the pipe. The bowl was thickly caked and the insides of the base were black with tars and oils that had hardened. The stem had some tooth chatter on both the top and bottom near the button. The finish on the bowl was flaking and the varnish coat was peeling off the briar. The rim was black with tars and also had some damage from the bowl being tapped out to empty it. The aluminum was oxidized and dirty as well. The next four photos show what the pipe looked like when I started to work on it.IMG_2559 IMG_2560 IMG_2561 IMG_2562 I took the pipe apart to clean the interior of the base. I used pipe cleaners, cotton swabs, cotton pads and alcohol to break through the hardened oils and tars in both the shank and the base. The tenon was metal (brass?) and was thickly caked as well. The two slots on the side of the tenon were covered so it was not clear that they even existed.IMG_2563 I reamed the bowl with a PipNet reamer and took it back to the briar. I started with the smallest cutting head and worked my way up to the size that fit the bowl.IMG_2564 IMG_2565I set up a topping board with 220 grit sandpaper and sanded the top of the rim to remove the damage.IMG_2566 IMG_2567 I scrubbed the finish off of the bowl with alcohol and also cleaned the bottom of the bowl. I sanded it with 220 grit sandpaper to break the finish and then used medium and fine grit sanding sponges to remove the scratches left behind by the sandpaper. I finished sanding it with micromesh sanding pads – wet sanding with 1500-2400 grit pads. The next series of three photos show the bowl at this point in the process. I was not sure whether I would stain the bowl or leave it natural and just polish it.IMG_2568 IMG_2569 IMG_2570I sanded the tooth chatter on the stem with 220 grit sandpaper to remove the damage and then followed that with medium and fine grit sanding sponges. I finished the stem by sanding it with micromesh sanding pads. I wet sanded with 1500-2400 grit pads and dry sanded with 3200-12,000 grit pads. I rubbed the stem down with Obsidian Oil between each set of three pads.IMG_2571 IMG_2572 Once the stem was done I buffed it with White Diamond and gave it several coats of carnauba wax. I cleaned the aluminum and polished it with a silver polish and polishing cloth then set it aside to figure out what I was going to do with the bowl. I finally decided to leave it natural but to also wipe it down with a light coat of olive oil to darken the finish slightly. I buffed it with White Diamond and then gave it several coats of carnauba wax and buffed it with a soft flannel buff to bring out the shine. The pipe was finished in terms of the cleanup. I put a Medico filter in the shank for the inaugural smoke though I will probably not keep it there for future smokes. The finished pipe is shown below.IMG_2573 IMG_2574 IMG_2575 IMG_2576

Kaywoodie “Drinkless” 7716 Restored


Blog by Al Jones

I found this “Drinkless” grade Shape 7716 at a Pennsylvania flea market a few weeks ago.  I believe this four-digit shape code pipe was made between 1936 and 1938.   I’ve learned that the Drinkless grade was introduced in 1935.  Kaywoodie didn’t begin using the “Imported Briar” stamp until 1936.  The four digit shape codes were not used after 1938.    This pipe has an intact, large-ball, 4-hole “Drinkless” stinger.

I also learned that the 77 indicates “Screw in Drinkless, dark finish, black vulcanite stem”
The 16 indicates “Curved (Full Bend) Medium Billiard”.

The pipe was in decent shape, with some tars on the bowl top and an oxidized stem.  The screw in stem was slightly out of alignment and would need to be “re-clocked”.  The nomenclature was in perfect condition.

Kaywoodie_7716_Drinkless_Before Kaywoodie_7716_Drinkless_Before (1) Kaywoodie_7716_Drinkless_Before (3)  Kaywoodie_7716_Drinkless_Before (4) Kaywoodie_7716_Drinkless_Before (5) Kaywoodie_7716_Drinkless_4-Stinger

I reamed the bowl and soaked it with some alcohol and sea salt.  The stem was immersed in a mild Oxy-Clean solution.

Kaywoodie_7716_Drinkless_Before (7)

I used some of the Oxy-clean solution on a cloth to rub off the bowl top tars.  There was a little rim scorching and I used a worn 8000 grade sheet of micromesh to remove those marks.  The bowl was then buffed lightly with White Diamond rouge and several coats of Carnuba wax.

Les Young passed on to me a tip from Bill Feuerbach on re-clocking a stem, which worked well.  On our glass-top stove, I turned a burner to high.  I put the metal end of the shank square down on the burner for about 20 seconds.  This loosened the glue of the screw-in stem insert. I then quickly screwed the stem onto the pipe and gently moved it into the correct orientation.  From this shot, you can see that the stem has been moved into the correct position.

Kaywoodie_7716_Drinkless_Before (6)

Next up was to clean the step, which had already been soaked (with a dab of grease on the stinger and stem Cloverleaf logo).  I started with 800 grit wet paper, than moved to 1000, 1500 and 2000 grades.  This revealed that under the oxidation, there were several tooth indentions that I could not lift with heat.  I applied a drop of black Super-Glue to each spot and spritzed on some of the Hobby-Lobby accelerator.

Kaywoodie_7716_Drinkless_Before (8)


Kaywoodie_7716_Drinkless_Before (9)

After the glue was dry, I sanded the bumps flush with some 600 then 800 grit paper.  I then worked back thru the 1000, 1500 and 2000 grade wet sandpaper.  The next step was to polish the stem with the 8000 and 12000 grades of micromesh paper.  The stem was then buffed lightly with White Diamond.  There is still a little dimple of a tooth indention on the bottom of the stem, but the others filled in nicely.

The briar has two nicks that could be either handling marks or spots where fills came out.  I decided the finish of the rest of the pipe looked too good to try to repair these spots.  So they were left as character marks.

Kaywoodie_7716_Drinkless_Gallery Kaywoodie_7716_Drinkless_Finished (11) Kaywoodie_7716_Drinkless_Finished (12) Kaywoodie_7716_Drinkless_Finished (18) Kaywoodie_7716_Drinkless_Finished (14) Kaywoodie_7716_Drinkless_Finished (15) Kaywoodie_7716_Drinkless_Finished (17) Kaywoodie_7716_Drinkless_Finished (3) Kaywoodie_7716_Drinkless_Finished (4)


Kaywoodie Supergrain Churchwarden (Shape 95)


Blog by Al Jones

I’ve never owned or smoked a Churchwarden style pipe.  Last year I added finding the right one to my pipe wish list.  When I started investigating vintage Kaywoodie options, I learned they are somewhat rare and that I would face some fierce competition.  I had just about given up hope on finding one and I did a generic search on Ebay for a Churchwarden pipe.  I thought that it would be necessary to settle for Savinelli or Peterson.  To my surprise, in the middle of my 100+ pipe search list, was this Kaywoodie Churchwarden, complete with box and bag.   I had somehow missed this pipe on my daily Ebay search results.

The pictures show some promise, but the bowl top had seen some abuse.  I didn’t know at the time if the pipe had the stinger intact.  I won the auction and waited in anticipation for the pipe.  When it was delivered, I was pleasantly surprised as the stem and briar looked to be in terrific condition.  And the icing on the cake was an intact 4-hole “Drinkless” stamped sting with a small ball.    The pipe is just under 12 inches long and weighs a svelte 32 grams.   Cleaning the briar and stem was a little nerve wracking as I didn’t want to damage the fragile looking pieces.

After the pipe was delivered, I exchanged some communication with the seller.  I learned that original owner was the Great uncle of the sellers wife.  His name was Harvey Shue and he was from Spring Grove Pennsylvania. Harvey worked for the PH Gladfelter Paper Mill. He passed in 1971 at the age of 64. His wife Florence held on to the pipes. Florence passed away in 1996 and the family found 50 pipes in a dresser drawer from their home.  It’s pretty rare to find out the history of a pipe.  Now I know a little bit about this one.  Harvey lived pretty close to where my brother currently lives in Pennsylvania.

This is the pipe as it was delivered.  The box is in great shape and a literature piece was also included.  The stem only had light oxidation and the nomenclature was like new.

Kaywoodie_Supergrain_95_Before Kaywoodie_Supergrain_95_Before (1) Kaywoodie_Supergrain_95_Before (2) Kaywoodie_Supergrain_95_Before (4) Kaywoodie_95_Supergrain_4-Stinger (1) Kaywoodie_Supergrain_95_Before (3) Kaywoodie_Supergrain_95_Before (7)

I used some alcohol to remove the build up from the threads on the stem fitment.  This allowed the stem to fully seat in the correct position.  I reamed the bowl, which still had some remnants of tobacco inside.  The bowl was then soaked with some alcohol and sea salt.  A little Mag & Aluminum auto metal polish took the rest of the oxidation off the stinger.  This one has the smaller ball and no Registration number, a style used by Kaywoodie after WWII.

I learned thru the Kaywoodie Forums that the side placement of the stem logo was used in the late 1940’s.  The brochure included with the pipe advertises “97 Years of Pipemaking” Kaywoodie was founded in 1851, which would place the brochure as being used in 1948.  Kaywoodie also placed the grade of the pipe (Supergrain) above Kaywoodie until 1955.   Thanks to the forum feedback, an educated guess is that the pipe was made sometime in the late 1940’s to early 1950’s.  I haven’t yet learned why this one does not have the Shape number stamped on the pipe.    Below is a page from the 1947 Kaywoodie catalog, showing the Shape 95.

1947_Kaywoodie_Catalog_Shape-95

This picture shows the detail of the “Drinkless” 4-hole stinger.  Earlier 4-hole stingers used a larger ball.

Kaywoodie_95_Supergrain_4-Stinger

After the bowl soak was complete, I scrubbed the inside of the slender shank with some bristle cleaners soaked in alcohol.  I also ran some cleaners with alcohol thru the long stem and stinger.

The scorched material on the bowl top was removed with a mild solution of Oxyclean and distilled water.  The lighter used had damaged the inner portion of the bowl but a worn sheet of 8000 grit Micromesh removed most of the scorch marks without removing the stain.   The rest of the bowl only required a light buff with White Diamond (staying away from the nomenclature) and some Carnuba wax.

Kaywoodie_Supergrain_95_Finished (3)

I mounted the stem onto the shank and stared with a sheet of 800 grit wet paper to remove the oxidation.  I proceeded thru 1000, 1500 and then 2000 grit paper to bring back the shine.  The button was amazing like new.  Finally, I used 8000 and 12000 grit sheets of Micromesh.  The stem was then buffed lightly with White Diamond rouge.

I always chose a unique pipe to smoke on Christmas Eve and I’ll save this one until that special night.  Here’s the finished pipe.

Kaywoodie_Supergrain_95_Gallery

Kaywoodie_Supergrain_95_Finished (10) Kaywoodie_Supergrain_95_Finished (9) Kaywoodie_Supergrain_95_Finished (4) Kaywoodie_Supergrain_95_Finished (2)

Kaywoodie_Supergrain_95_Finished (5) Kaywoodie_Supergrain_95_Finished (6)


Restoring a Frozen Kirsten Companion K Straight Pipe


Blog by Steve Laug

The last pipe I picked up on my recent Alberta trip was a Kirsten style straight pipe. The metal shank is stamped on the left side Companion and on the underside it is stamped Made in U.S.A and then K. On the top of the shank the previous owner scratched in his initials FWE. The bowl was stuck on the shank. The finish on the bowl was worn and dirty. The rim of the bowl had a thick tarry buildup and had some deep dents in the surface. There was a thick cake build up on the inside of the bowl that was shaped like a cone – the bottom was very narrow and the top was wide open. Normally the bowl on Kirsten pipes are more U-shaped with the walls similarly open to the bottom of the bowl where the drilled screw goes through. The stem had a tooth mark on the top and the bottom side near the button. The stem was frozen in the metal shank and I could not twist it at all. The airflow adjustment end cap that normally twists to either open or dampen the airflow was also frozen in place. The metal barrel and end cap had scratches and marks on it. The end cap ridges were worn and looked like someone had used a pair of pliers on it to try to break it free.IMG_2531 IMG_2532 IMG_2533 IMG_2534 I was able to twist the bowl off the barrel by carefully turning it back and forth slightly to break it free. The tars in the barrel threads and on the drilled out screw in the bowl were really gummed up and dirty.IMG_2535I put the barrel in the freezer and left it there during dinner. After dinner I took it out and was able to twist the stem from the barrel. Once I removed the stem and the metal tube plunger it was extremely tarred and sticky. The second photo below shows the black tars of the interior of the barrel and plunger.IMG_2536 IMG_2537The end cap was still frozen in the barrel. I filled the barrel with alcohol and set it in an ice-cube try to let it soak. I knew that the tars on the plunger were also what held the end cap in place binding the metal of the barrel and the cap to each other. Typically the end cap had a rubber grommet on it that held it in place with a friction fit. In this case it appeared that the rubber grommet was compressed against the metal on the inside of the barrel and bound it in place.IMG_2538I cleaned the plunger and sanded the stem with 220 grit sandpaper to remove the hard tarry build up on it. I wiped it down with alcohol and then sanded it until the plunger was shiny and clean. I cleaned out the inside of the stem and the plunger with both bristle and regular pipe cleaners.IMG_2539 IMG_2540I reamed the bowl with a PipNet reamer and used all sizes of the cutting heads to ream back the carbon build up in the bowl.IMG_2541 IMG_2542 IMG_2543The bowl was badly dinged and hammered leaving some deep denting. I topped the rim with a topping board to clean up the damaged top edge.IMG_2544 IMG_2545I wiped down the bowl with alcohol on cotton pads and then used a flat blade screwdriver to remove the screw from the bottom of the bowl and remove bottom cap on the bowl. I wiped down the inside of the cap and cleaned the screw with a brass bristle tire brush. I wiped it down with alcohol and then sanded the outside of the cap and screw with 1500-2400 grit micromesh sanding pads to polish them.IMG_2546 IMG_2547The rim had two rather large fills that needed to be hidden with stain. I used the stain pens to restain the rim and the bowl. I started with the lightest colour pen and finished with the darkest colour.IMG_2548I buffed the bowl with White Diamond and then gave it several coats of carnauba wax. I put the metal cap back in place and turned the screw into the bottom of the bowl.IMG_2549 IMG_2550The end cap still did not come off after I had soaked it with alcohol. I used a Robertson head screw driver with a long shank and inserted it in the barrel. I hammered the end with a hammer and tried to drive it out of the barrel. It cam half way out but I could not budge it further. I boiled a cup of water and let the barrel and end cap sit in it to see if I could loosen the tars. I repeated this three times with the cooling of the water. I then inserted the screw driver and was able to drive out the cap. It was covered with a black tar build up and the inside of the barrel was also thickly coated. I cleaned out the inside of the end cap and the barrel with cotton swabs, pipe cleaners and alcohol. I rubbed down the rubber grommet on the stem and the end cap with Vaseline to soften them again and then inserted them in place in the barrel.IMG_2551I sanded the stem with 220 grit sandpaper and then medium and fine grit sanding sponges to remove the tooth marks and the oxidation. I then sanded it with micromesh sanding pads – wet sanding with 1500-2400 grit pads and dry sanding 3200-12,000 grit pads. I rubbed the stem down with Obsidian Oil between each set of three pads. I gave the stem a final buff with White Diamond and then gave it several coats of carnauba wax to give it a shine.IMG_2552 IMG_2553 IMG_2554The finished pipe is shown below. I rubbed the stem down with some Conservator’s Wax – a microcrystalline wax and hand buffed it with a shoe brush. I avoid using the buffer on metal as it turns the pads black and does not shine the metal. I put it back together and it is ready for its inaugural smoke. I have two other Kirstens that are great smokers and this one with be added to that number until the day I pass it on to someone along the way.IMG_2555 IMG_2556 IMG_2557 IMG_2558

Some Interesting Notes on Jobey Pipes – Chris Chopin


Blog by Chris Chopin

jobeylogoChris emailed me this piece while I was traveling and thought I would be interested in it. He was correct. Chris seems to dig up some interesting information when he goes on the information hunt. Thanks Chris.

Very interesting pipe! I’ve never seen a Jobey without the link. Apologies in advance for the wall of text to follow, I’m a Jobey fan.

Immediate thought is that it must be made before 1969, which I believe is when Wally Frank got the patent on the Link. Before that, the Jobey Company is a bit of a fun mystery. They made pipes, as Pipedia will tell you here: http://pipedia.org/wiki/Jobey for a lot of different companies but the origins seem to be shrouded in mystery, and most people claim that the origins were in England, followed by American production, and then a later move to St. Claude. I think that’s wrong. Jobey’s Brooklyn Briar is present at least as of ’69. That’s where they patented the Link, that’s where the roots are.

There’s not a lot of chatter about it, but if you can lay your hands on a copy of “The Tobacco World”, Volume 61, from 1941, there is a brief mention that reads “Norwalk Pipe Expands” and in the body states that Norwalk Pipe Corporation, “manufacturers of Jobey and Shellmoor pipes”, is moving to larger offices at 218 East Twenty-Sixth Street, NYC, as announced by Louis Jobey, president of that company. Norwalk is listed as one of the alternate distributors for Jobey on Pipedia, but without mention of Louis actually working there at the time.

Before that, the first mention of Jobey seems to be back in 1915, when two guys named Ulysses and Louis Jobey of Brooklyn, New York had a neat patent for an odd sort of cavalierish pipe in 1915, here’s the link: http://www.google.com/patents/USD46998

But less than four years later, in 1918, there’s a notice in the Brooklyn Daily Eagle on November 6th to the effect that Louis Jobey declared bankruptcy in the District Court, with final hearing scheduled for December 1918. And in an even sadder turn, that same month sees a funeral notice for Lorraine Jobey, the daughter of Mr. and Mrs. Louis Jobey, formerly of Brooklyn but now living in Moline Illinois at the home of Mr. and Mrs. George E. Hutchinson. The little girl evidently died in a fall.

I never found anything else on Ulysses Jobey except that he evidently had a “junior” after his name or a son by the same name. Because Ulysses Jobey, Jr. was listed as the vice president in New Jersey of Lakewood Pipe Company Inc., a maker of smoker’s articles, in the 1922 New York Co-partnership and Corporation Directory for Brooklyn. Given the timing I’m guessing Ulysses, Jr. was the brother.

Now this is just too much Brooklyn to be coincidence, so here’s my take on the real Jobey history. I think the company was started by two brothers in Brooklyn in the teens with a new idea for a pipe, and failed amidst terrible tragedy. I think one brother went to one company and another to the other, but it was Louis who continued making Jobey pipes through the 40s under that name, despite (I am guessing) no longer owning the company. And I think it was the Norwalk Company that was bought out by Wally Frank in the pre-link days. To my mind it’s always been American.

Now again, there’s a lot of speculation here. But I think it’s leaving too much to coincidence to read the history of Jobey without mention of those two brothers, I think they’re the actual Jobeys. Sorry for the wall of text, hope this was interesting and not excessive, lol.

A Spitfire by Lorenzo Mille Billiard – My First Dabble with Black Super Glue – Robert M. Boughton


Guest Blog by Robert M. Boughton
Member, North American Society of Pipe Collectors
http://www.roadrunnerpipes.com
http://about.me/boughtonrobert
Photos © the Author

“There is nothing insignificant in the world. It all depends on the point of view.”
—Johann Wolfgang von Goethe (1749-1832), German author, playwright and poet
Robert head INTRODUCTION
Perspective is the key to everything, from the incredible diversity of the daily activities to the personal, often unique worldviews of everyone on the planet. Take, by way of an extraterrestrial example, the Sombrero Galaxy shown above, an edge-on spiral 50,000 light years from one side to the other (half the size of our own) and 28 million light years from Earth. Discovered hidden within the constellation Virgo in 1781 and named by French astronomer Charles Messier because of his point of view at the time, the Sombrero seen head-on would have a much different appearance. In other words, looks can be deceiving.

And so I present the initial side view (somehow I neglected to photograph the left side) of the Spitfire by Lorenzo Mille – which, compared to Starbuck’s Venti, meaning 20, translates in the same Italian to 1000 – that lives up to its name in terms of its huge size, and lasts far longer than any of the aforementioned coffee chain’s drinks.Robert1 The massive, gorgeous billiard (measuring 5-3/4″ x 2″ in length and height with an outer rim diameter of 1-3/8″ and chamber dimensions of 7/8″ x 1-7/8″), as seen in this photo side angle as I received it in a pipe lot I bought online, is nothing less than gigantic all around. Even the relatively flat shank leading into the stem is an inch across. But, as will be shown in the next part of this blog, from other angles the pipe, which at least on my screen is the actual size, had its share of problems.

RESTORATION
Here it was from those other views.Robert2 Robert3 Robert4 Robert5 The blackened rim and badly caked chamber were easy enough to fix. I started on the chamber with my reamer and took out the majority of the carbon buildup, then switched to 150-grit paper followed by 400 before finishing with 800. The rim came clean with super fine steel wool before 1500 micromesh, then 2400, 3600 and at last 8000. So far, that is the finest grade of micromesh I have used, and it worked well.

Most of the stem cleaned up with 1500 micromesh and some 400-grit paper on the lip followed by 1500 again, and then 2400 to smooth it out.Robert6 Still, the tooth marks remained, and since my recent order of Black Hyper Bond, a.k.a. Super Glue, had arrived, I was presented with my first opportunity to try it on a stem. The hard part proved to be not squirting out too much.Robert7 A couple of hours later, long after I had prepared the nice hunk of briar for buffing, I returned to the stem and tried 2400 micromesh to remove the dried glue bump. After that, I finished it with 3600. Robert8 As I noted, this was my first time filling in a hole, so the result is not perfect, but I think it looked much better than before.

Every inch of the wood, to my continuing amazement, was as pristine and unblemished as the first side angle shows. This is the only pipe I have ever restored that had not even a single scratch on it, except for the rim, which ended up fine as I described. This was also one of the few times (all of the others on meerschaum restorations) where I only needed to buff the rim to make it shine again with its natural color, not needing to re-stain it.

This brings me, with rather unusual speed, to the final buffing, which I accomplished using my standard methods: red and white Tripoli followed by White Diamond on the stem, and white Tripoli, White Diamond and carnauba on the fine, already lustrous wood just for the sake of it.Robert9 Robert10 Robert11 Robert12 Robert13 Robert14 CONCLUSION
I was a little giddy trying out the Black Hyper Bond to repair the bite mark in the stem, and as I wrote before, the result is not as well done as I hope to achieve in the future and returning to some of my previous restores that some of you with excellent memories may recall needed similar work. But from my perspective, it’s a good start – better than government work at least, as the saying goes.

Grazzie Mille for your time and patience!

Pipe Mentoring and the New Pipe Smoker – BillyPM


Blog by Billy PM

When I read Billy’s original post on Pipe Smoker Unlimited I immediately wrote him and asked if I could post his piece here. It is a well written article that gives some basic startup advice to the beginning pipe smoker in a clear and manageable manner. I think that many of us have similar beginner pipe smoking stories like Billy’s. I asked Billy to write a bit of an introduction of himself to the rebornpipes readers. Thank you for letting me put this on the blog. I appreciate your willingness to let this be posted here. Without further adieu here is his article:

Introduction

I’ve been a pipe smoker twice in my life. The first time was in college and I certainly gave it the old college try. I saved up for what I thought were reasonably good pipes, but that was the only thing I did right. I made it up as I went along, smoking fast and furiously. Years of tongue bite later I simply gave up. Nothing this painful, no matter how cool, could be worth continuing. Broke my heart.

Years later, around 2000, I came out of the cigar craze and decided to try pipes again. But THIS time I had the internet, which included a sweet little newsgroup called ASP. What a difference! There were dozens of experienced pipers more than happy to help me get my act together and tell me what I had been doing wrong. Which was just about everything. 14 years and many online forums later I’m a happy smoker, with a small collection of great performing pipes and a small cellar of my favorite tobaccos.

When I recently helped a good friend get started with a pipe and some tobacco, I thought I’d just set down some basic truths that I wish somebody had told me way back when. There’s always more to learn in our gentle art, but there’s no need to reinvent the wheel, either.

Pipe Mentoring
downloadI recently hooked up a good friend of mine, who expressed interest in our gentle art, with a sweet-smoking old Czech billiard, some Carter Hall, BBF, Pembroke, pipe cleaners, and a pipe tool, and the following start-up advice. There’s no need for any veterans to slog through this, but I thought I’d post it here in case it was of any use to anybody.

I emailed him this:

Pipe smoking is the only kind of smoking you have to actually learn. It’s an art and will reward you many times over once you get the hang of it. Trial and error is the way to go and plenty of both. It’s amazingly subjective, meaning that what works for me may or may not work for you. But here’s some good starting points.

— Packing a pipe properly is pretty crucial. Too tight a pack and the draw will be difficult and the burn a problem. Too loose a pack will burn way too hot and will taste nasty. Pack your pipe in thirds or so, smallish pinches that you push down with your pipe tamper (that metal tool) or your finger. Then draw air through the pipe. Too loose will feel like no resistance and too tight will feel like too much trouble. It should draw like sucking on a straw- a bit of resistance, but not a lot. Trial and error.

— Light the entire top surface of the tobacco with your trusty bic. Three or four good draws to get the top all charred. Then tamp down the surface gently, just to even it up (some tobacco may have risen up from the flame). Then light again. Don’t honk on it, just slow gentle draws.

— Here’s the fun part. You’re now smoking the son of a gun. The slower you smoke the better. Remember, you’re sucking on a fire through a 4 inch tube. Don’t burn your tongue if you can help it. If you do, wait til it heals up to try again. Slow smoking is the best flavor by far, and it means the smoke should be entering your mouth VERY slowly and gently. Just a mere trickle really. Novice pipers want to see a lot of smoke, but veterans want to see as little as possible. Keep the pipe barely lit. When it goes out, and it will, relight it. Do NOT try to keep it from going out by drawing rapidly. This leads to tongue bite.

–Use your tamper to very lightly press down the ashes on top of the embers. Maybe once every 5 or 7 minutes is enough. Don’t compress the tobacco much, just keep the embers in contact with the rest of the tobacco. And if and when the pipe starts to gurgle a little just run a pipe cleaner through the stem and rock on. No need to smoke all the way to the bottom at this stage unless you want to. Just use the spoon part of the pipe tool and dig the remaining baccy (called the dottle) out of the pipe. Don’t knock it out on your heel unless you want to break the pipe. Run one last cleaner through to dry it a bit and Bob’s your uncle.

— A briar pipe needs to be broken in when it’s new, and it’ll taste pretty heinous til it gets some cake built up on the walls of the chamber. The one I gave you is already broken in and is a pretty good, though cheap, pipe. Once smoked it’s a good idea to rest your briar and let it dry out — maybe a day or two minimum. So if you want to smoke a pipe more often than every couple three days, guess what? More pipes!!! If you get to that stage holler at me and we’ll go through that stuff. It won’t ruin your pipe if you smoke it a lot right now, but long term it’s not a good idea.

— There are like a bazillion pipe tobacco blends in the known universe, and finding your faves is part of the fun. I gave you three different blend from some of the basic categories. Sweet aromatics are OK, but not really the best tasting to most confirmed pipers, so I didn’t include any– don’t think I HAVE any. If you wanna try some I can recommend a few. But Virginia tobaccos are my fave, although they can be the hardest to smoke, being hotter burning and sometimes bitier than most. So don’t try the Best Brown Flake for a while. Carter Hall, a time-honored old burley blend should be your first pipeful. And your second, third, and fourth. It burns easily, tastes nice and won’t fry your mouth. The Esoterica blend I included is what’s called an “English” blend– meaning it’s got Orientals and Latakia along with some Virginias. Those first two are smoky, incense-like and delicious to those of us who like that sort of thing, but will send most women and small animals screaming from the room. Smoke at your own peril. I could go on and ON about various tobaccos. Be patient.

— Any tobacco you may buy should probably be dried out a bit before smoking. It’s generally sold too moist and needs to be air dried until it feels pliable but dry to the touch. Trying to smoke wet tobacco is frustrating. It won’t get lit, stay lit, and will fry your tongue. Steam is not what you want, both for best flavor and comfort. Oh, and don’t inhale unless you really want to. The smoke is alkaline and harsh to the lungs (which ain’t got no taste buds anyhow).

OK that’s enough for now. You should visit http://www.tobaccoreviews.com — a GREAT site with thousands of blends reviewed by hundreds of smokers. Also, try to find Pipe Smokers Unlimited forum (Google it). It’s a fabulous bunch of guys (and one girl) from all over the world yakking about this stuff. And I have been one of the regulars there for a while.

I hope he enjoys his new pipe. I’ll keep you posted if he checks in.