Visiting an Historic Utah Pipe Shop in Salt Lake City – Jeanie’s Smokeshop


Blog by Steve Laug

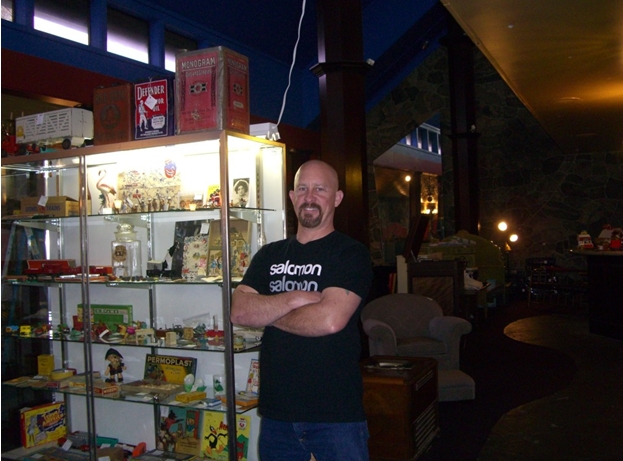
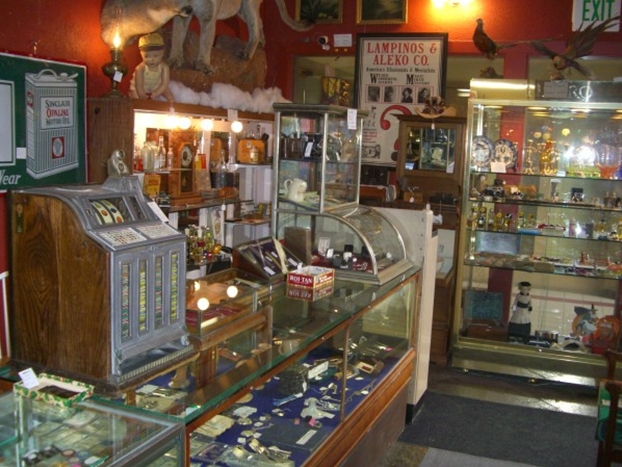
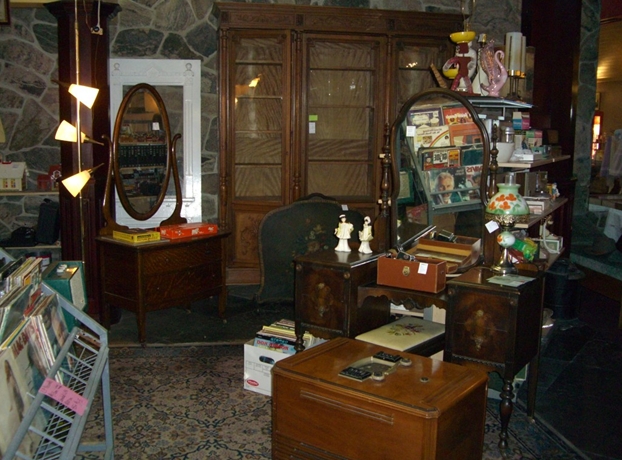
Two weeks ago Friday I flew in to Salt Lake City, Utah and met my brother Jeff to do a bit of pipe hunting and visiting a tobacco shop. We were on our way to my Dad’s 91st Birthday the next day, June 29 in Idaho Falls, Idaho. Jeff picked me up at the airport and the first stop we made was to Jeanie’s Smoke Shop. I had heard about the shop on various online forums but had never had the opportunity to visit. So I googled the location and found that it was not too far away from the airport. It was located at 156 State St, in downtown Salt Lake City. It said the shop was open from 7am until 10pm that night. We put the address into Google maps and let the voice direct us to the shop. When we had parked in a next door lot and walked to the front door this is what we saw.
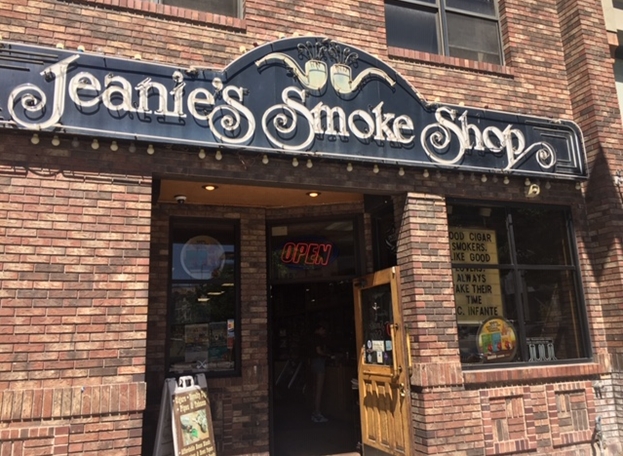
The shop itself was an older two story brick building with a false front on a busy Salt Lake street. It was a hot day and the shop door was open inviting folks to enter. It was a long shop with the walls lined on both sides and what looked like a smoking lounge in the back of the shop. Come on into the shop with me.
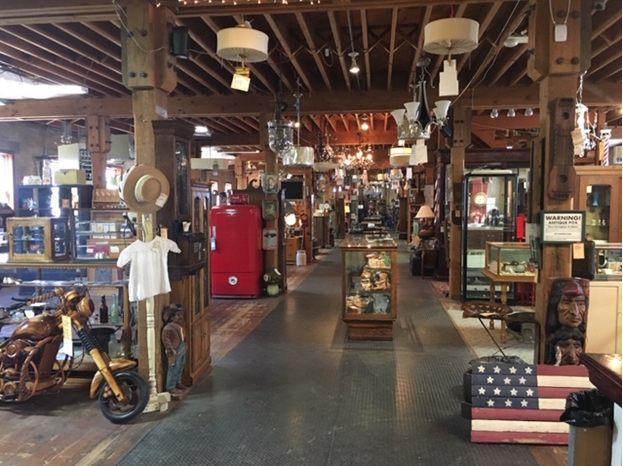
When we walked in the shop I started taking photos to give an idea of the layout of the shop and the sheer volume of tobacco products they carried. The first photo shows the general look of the shop. On the right by the door was the cash register and flowing down the wall were display cases of packaged cigars and a various pipe and cigar accessories. On the wall behind them were cabinets with cigarettes, cigars and eventually about mid store tinned tobacco. On the end of the right side were the pipes that were for sale from a variety of sellers. On the opposite was a cooler with pop and water and assorted soft drinks for sale as well as a coffee pot. Next to that was a built in wall of bulk pipe tobaccos (their own blends and standard bulk blends from Stokkebye and Lane). Next to that was a case with RYO cigarette shag tobaccos. The rest of the left side wall was line with humidor cabinets with a wide variety of cigars sold either individually or by the box.
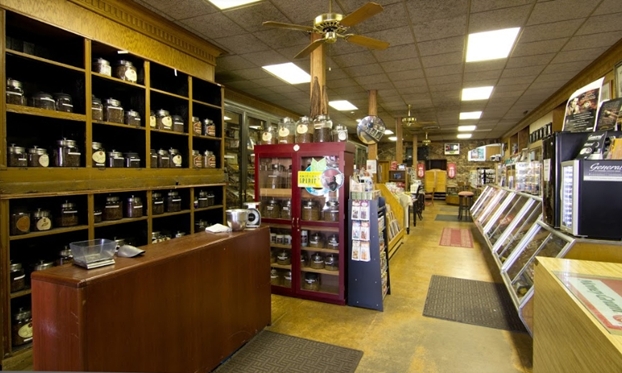
I took some photos of the right side of the shop as I made way down the center aisle. The freist of these looks toward the back of the shop and the second looks back toward the front of the shop. Have a look at the case of tinned tobaccos, the wall of photos above the case and the on counter displays of pipe accessories such as Colibri Lighters. Just past the lighters there were display cases of pipes – Petersons, Chacom, Meerschaum, Dunhill as well as Stanwell and other brands too numerous to not. 
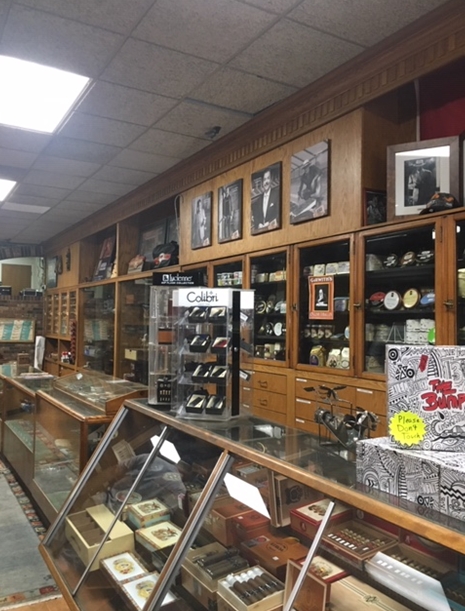
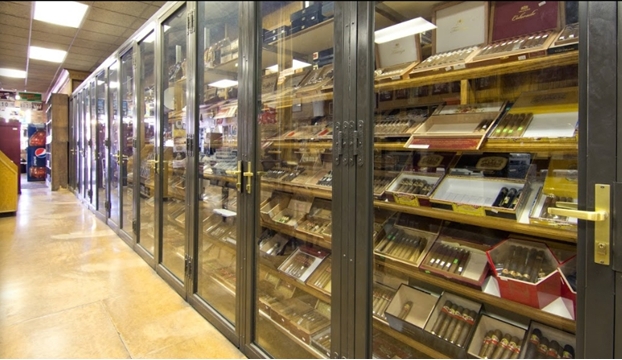
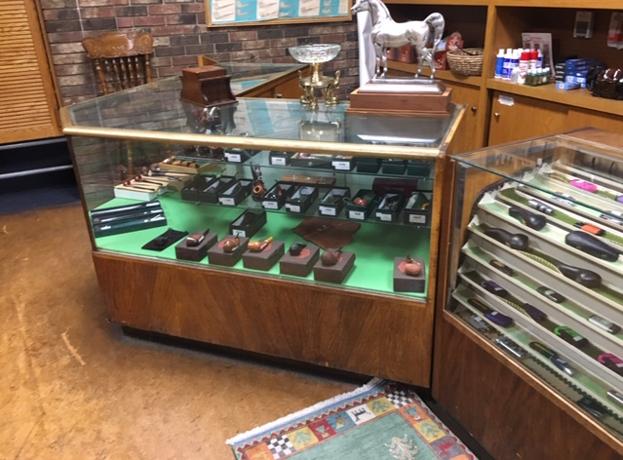
Looking up the left side of the shop the wall is lined with cigar humidors. The first photo shows the wall looking toward the back of the shop. The second one shows the wall looking back toward to front. 
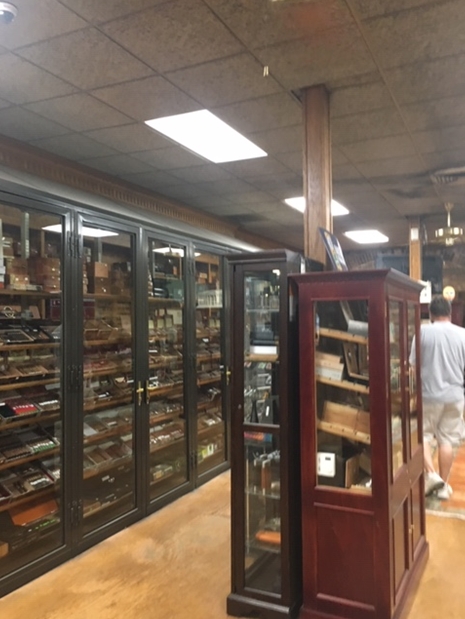
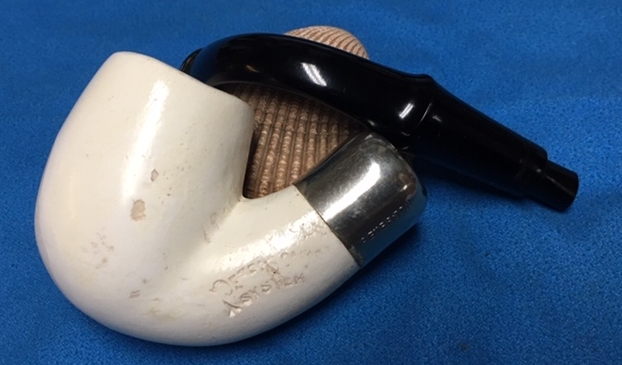
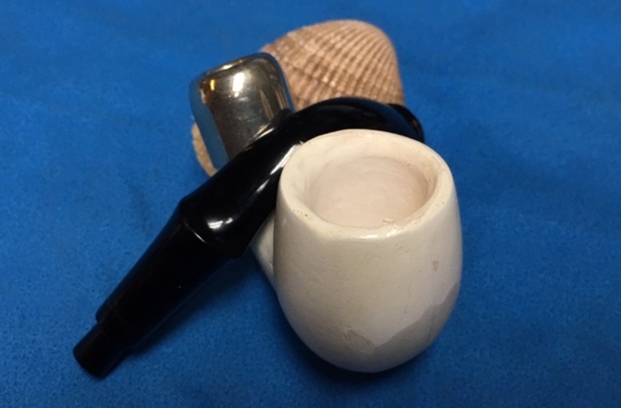
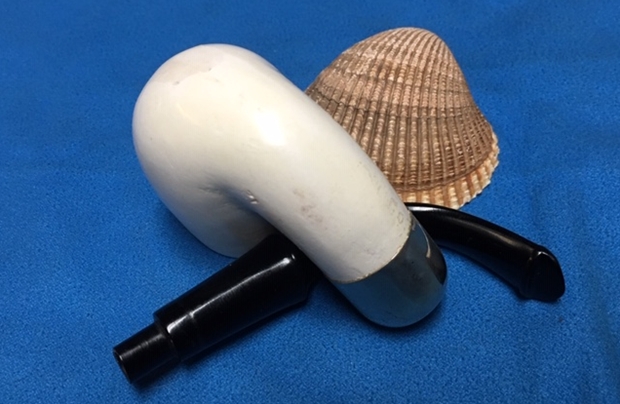
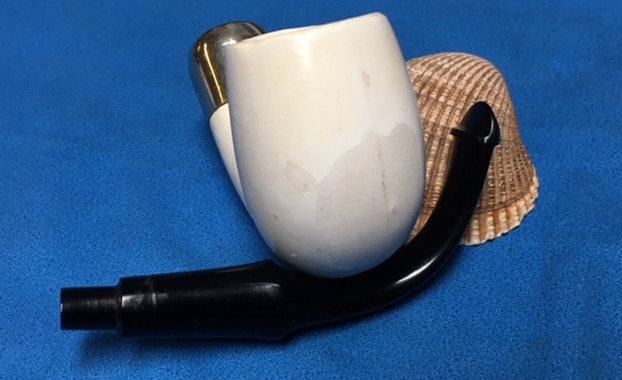
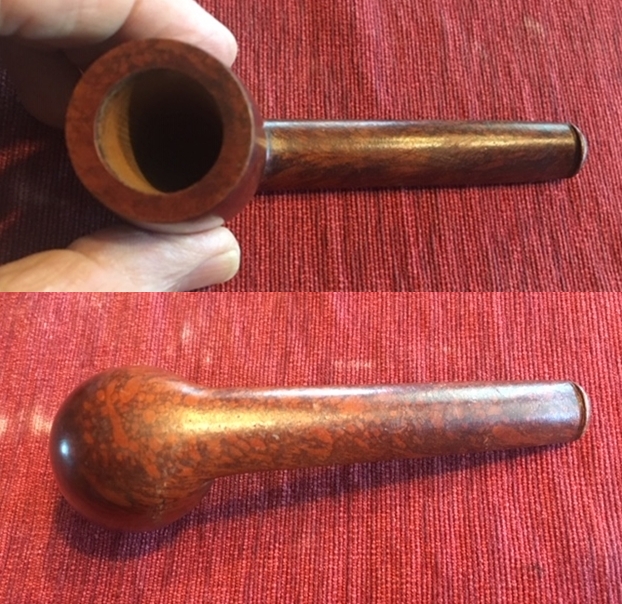
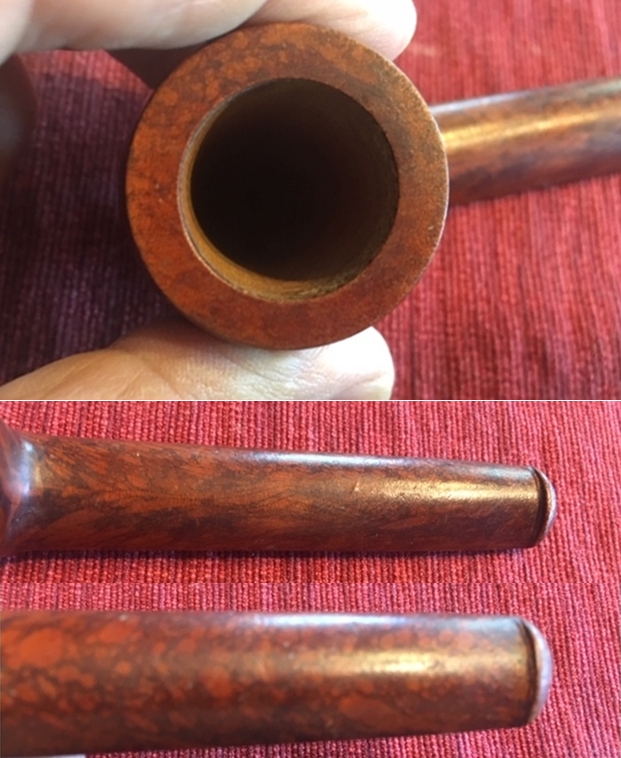
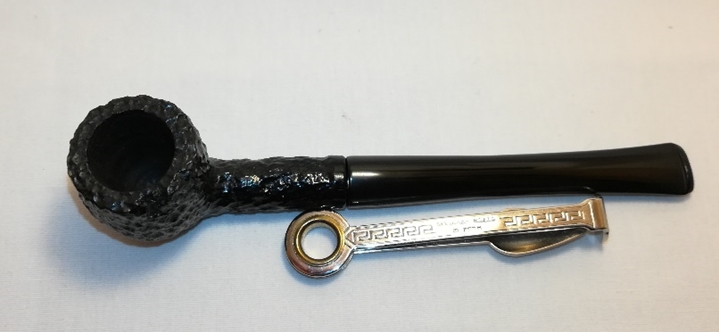
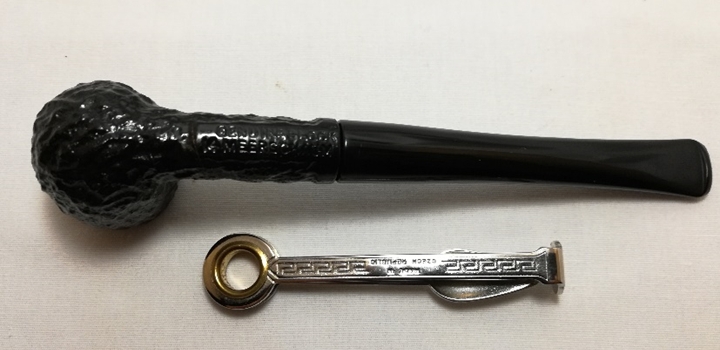
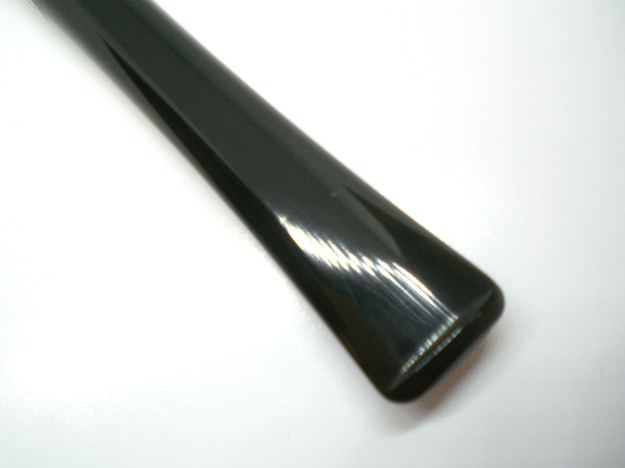
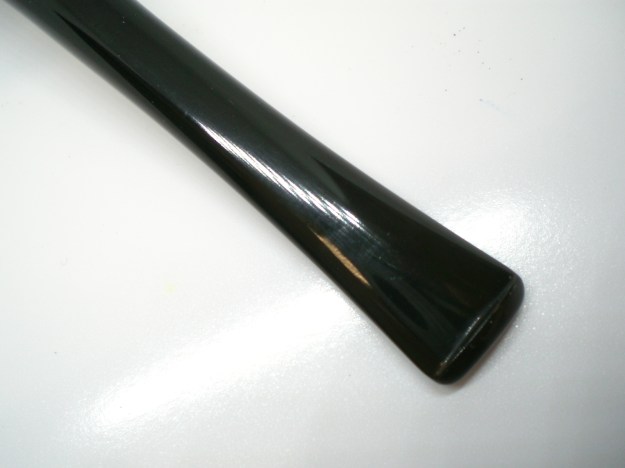
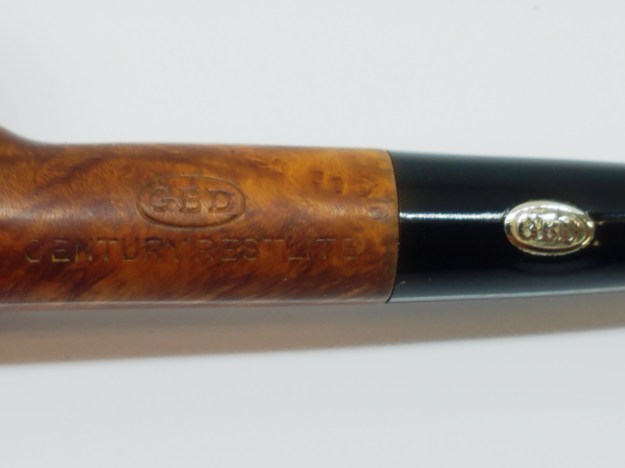
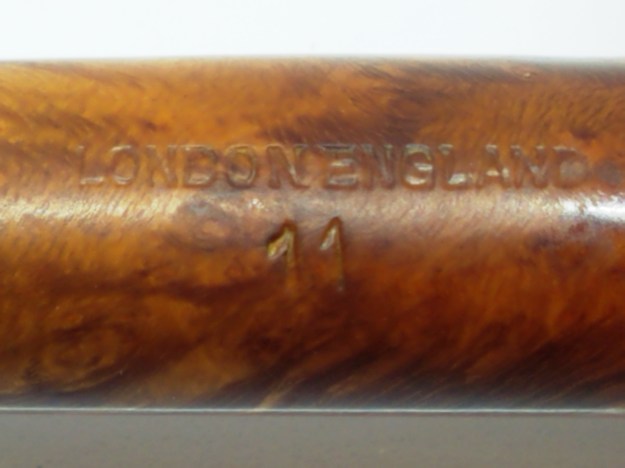
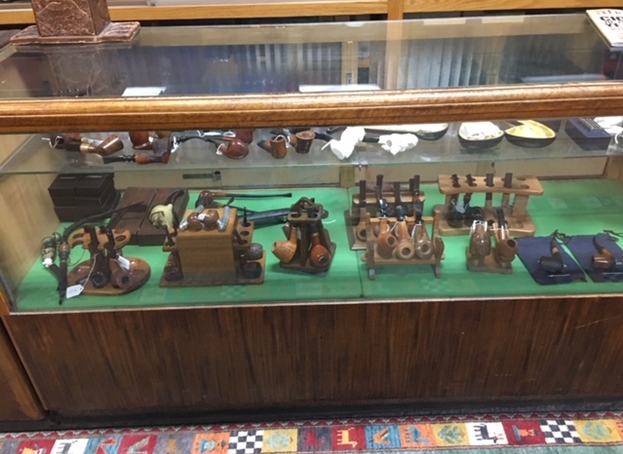
I took some close up photos of the pipe area. The display cases housed both pipes and racks. The first photo shows a variety of boxed pipes of various brands. On the wall behind are humidors and hygrometers and chargers for the humidors. The second photo shows the pipes in a collection of older style pipe racks. All pipes were marked for sale. The third and fourth photo shows the final display at the back corner as well as the pipes on the wall behind the display. 
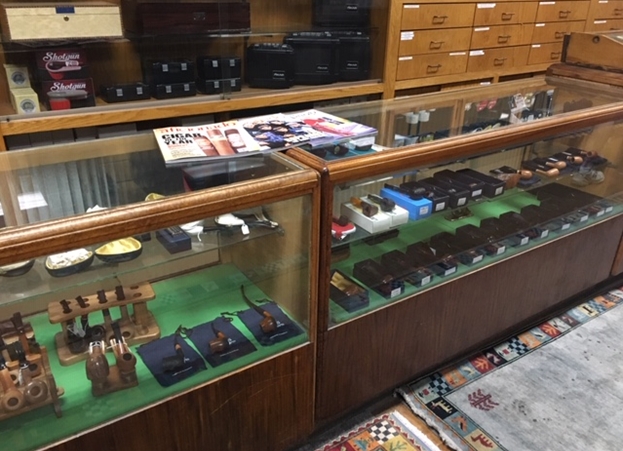
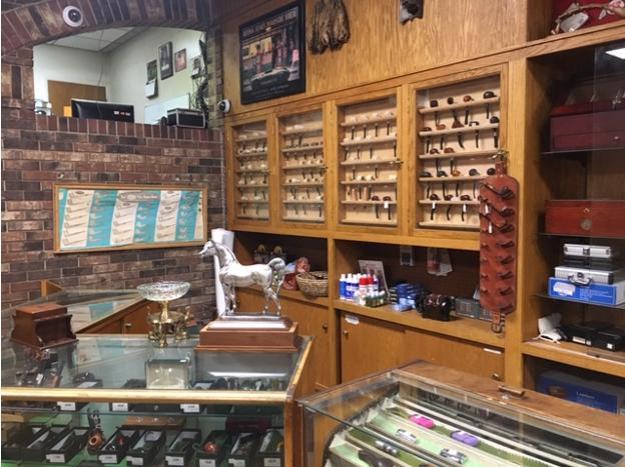
I took a photo of the GBD shape chart that was framed on the back wall. It was a unique piece that I had not seen before.
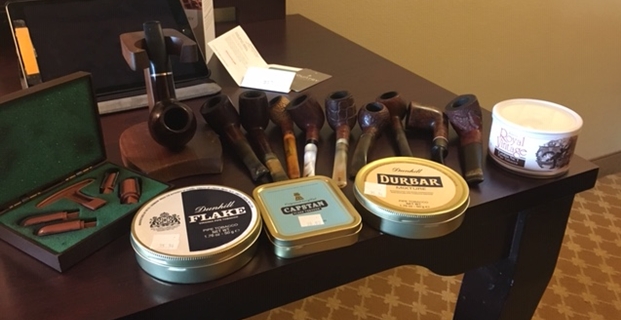
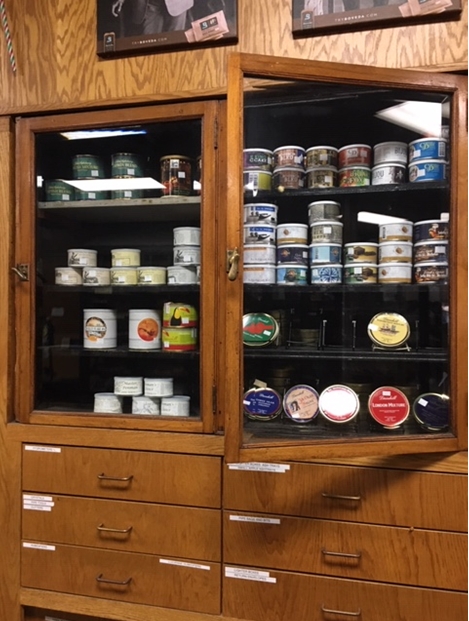
From the corner I looked back up the pipe cases past the humidor on shelves on the wall to the cabinet on the wall where the tobacco tins were displayed. I walked up the aisle to that place in the store – really mid-way between the front and rear of the shop. It took a while to get the disinterested shopkeep to come over and open the cupboard so I could have a look and he more or less put the tins I was interested in on the counter and walked away. The selection was quite large for a shop this size. There were a lot of Cornell & Diehl blends, a few Royal Vintage and Nording Hunter Blends both made by Mclellands, some Hearth and Home blends, some Davidoff blends and few Dunhill tins. All were priced pretty high but for the ones that were no longer in production the price was still lower than can be found online. I picked up four tins of tobacco from the shop before leaving. 
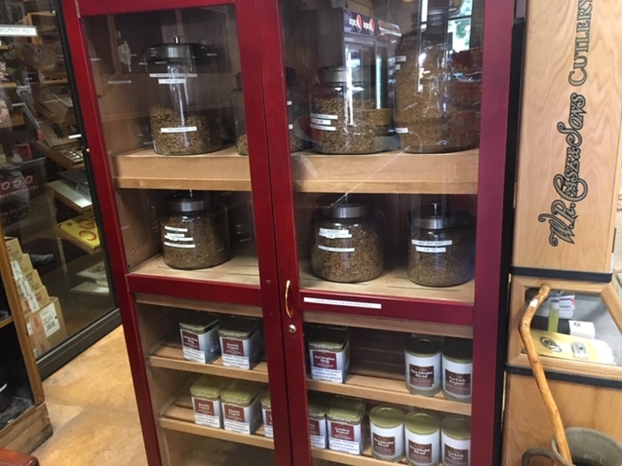
I walked back to the front of the store with my choices of tobacco and set them on the counter by the cash register – once again no comment from the shopkeep – an older man who seemed thoroughly disinterested in engaging us as customers. I turned to the left side of the store where the bulk tobaccos and cigarette shag tobaccos were displayed. There was nothing special there – just the usual bulk blends with shop names. Most of them came from Peter Stokkebye. There were some Dunhill knock offs but nothing that called my name so I took the photos and walked away. 
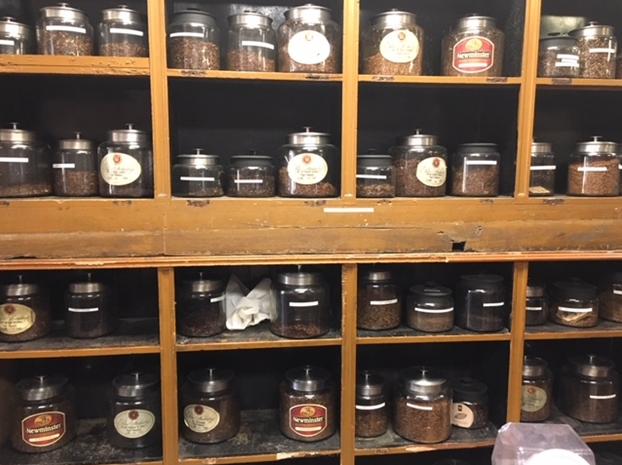
After my ramble through the shop I took time to try and talk with the shop keeper. He was pretty disinterested in conversation. He did a bit of whining about taxes and the idiocy of the government trying to protect us but really had no interest in much. I told him about the blog and what I do here but even that he did not seem too keen about. I paid him for my tobacco purchases and headed out the door to begin the day’s pipe hunt.

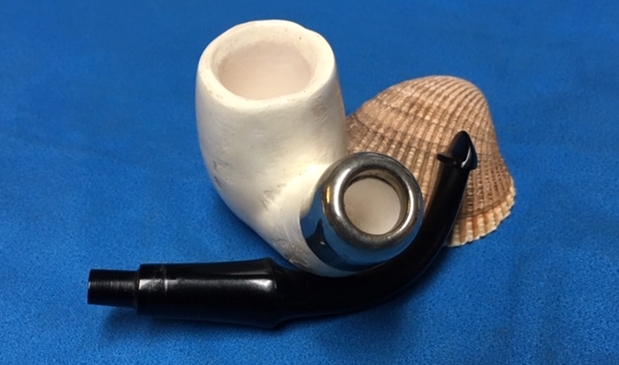
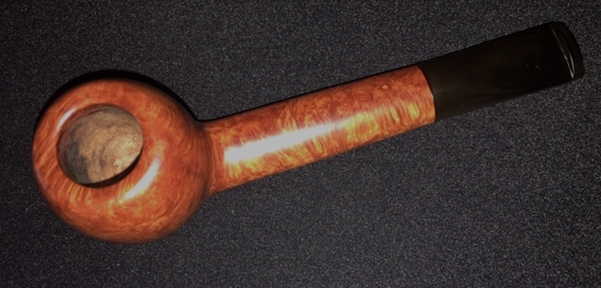
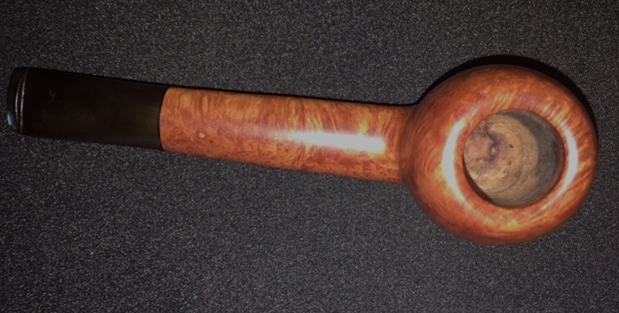
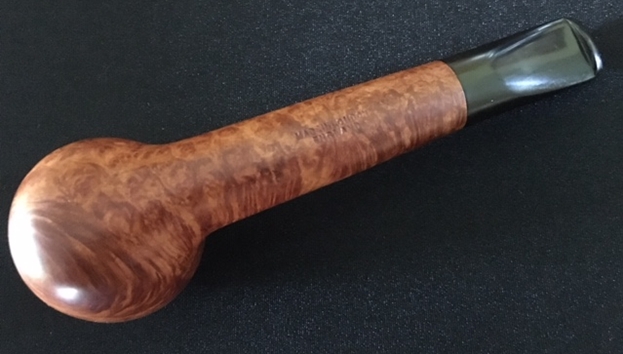
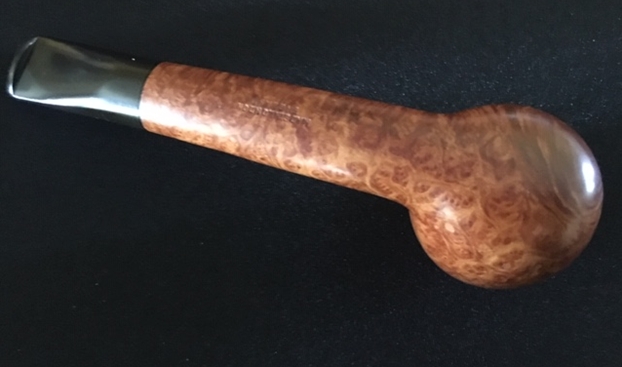
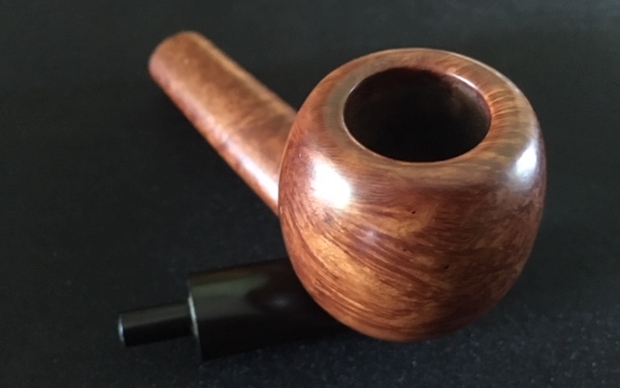
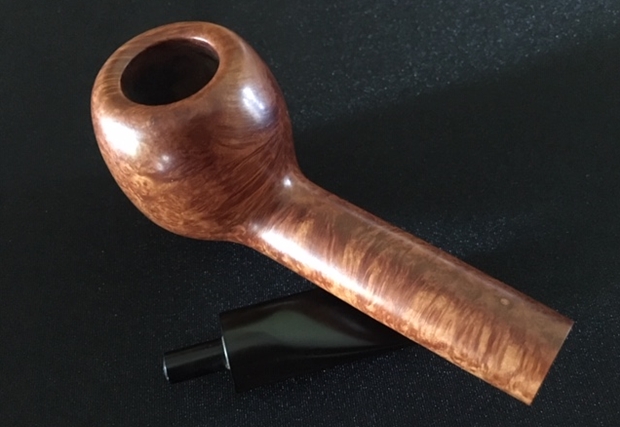
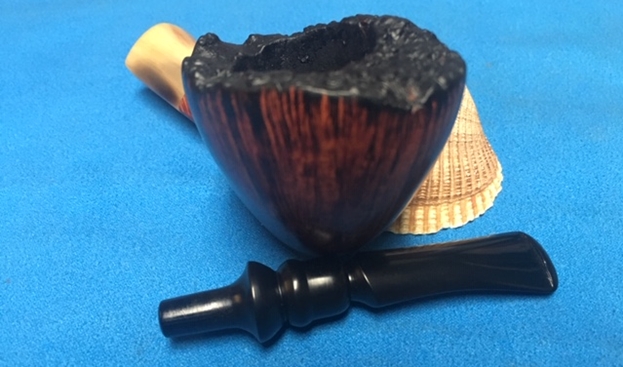
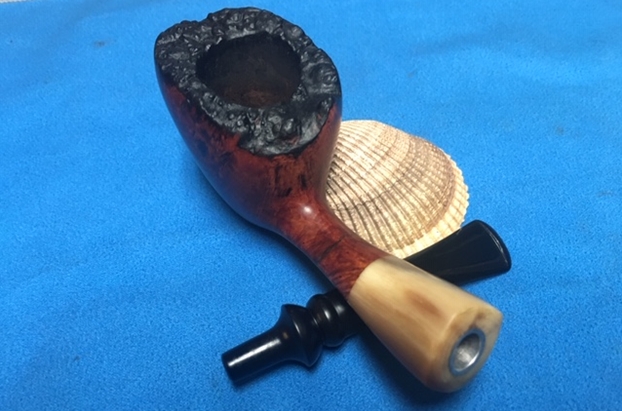
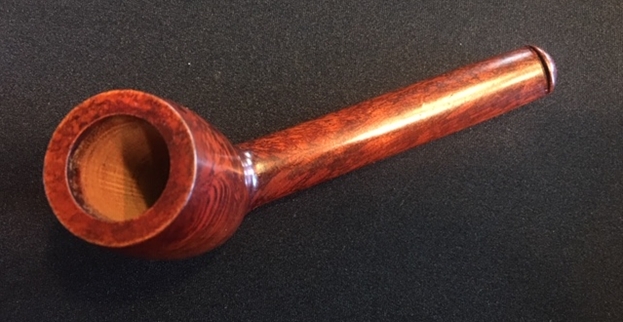
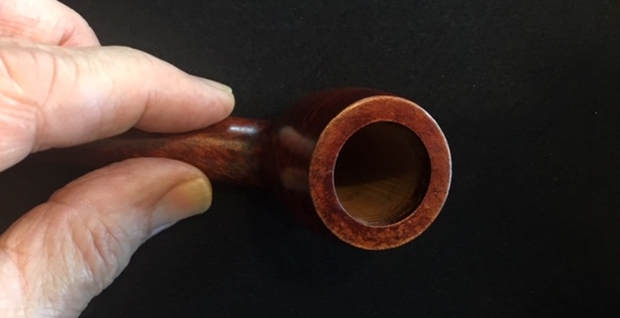
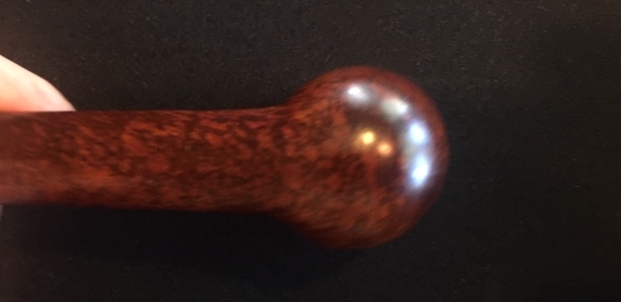
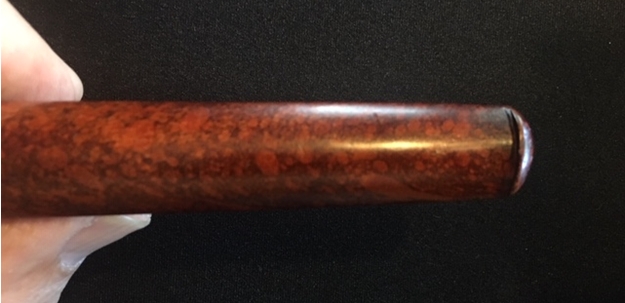
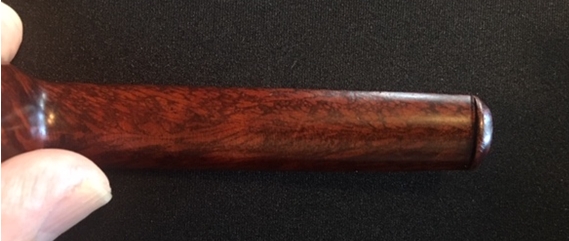
I have to say to you that if you find yourself in Salt Lake City, Utah I would recommend that you stop by the shop and have a visit. It is one of the few remaining old time tobacco shops. Don’t expect a lot of enthusiasm from the gents that work there if they are the old timers because you will not get it. However if a young guy is managing the shop when you stop he is a great guy to talk with and I only wish that he had not had the day off when I stopped by. They have a good selection of new pipes but no really good deals, a few estate pipes that are overpriced in my opinion and some good tinned tobaccos that have some age on them but also have a high price. The bulk selection is pretty decent but also pretty common place. Their cigar stock is very good and seems to come from well managed stock. If nothing else give the shop a visit to see what probably an amazing old pipe shop in it’s heyday before all of the government regulations and taxes made it a bit of a museum instead of a shop. Thanks for giving the blog a read!

A long awaited pipe hunt in Salt Lake City & Surrounding Communities


Blog by Steve Laug

In May, in talking with my wife, Irene it was decided that I would travel to Idaho Falls from Vancouver Canada for my Father’s 91st Birthday at the end of June. I began to search for flights that were both affordable and would not require a lot of transfers to other airports and planes to get to Idaho. The prices were crazy and all included significant layovers on the way there and back. I talked with Irene and pretty much decided this trip was not going to happen this year. I was a bit sad as every visit could well be the last one with age and distance. I went to bed and woke up with a plan. I decided to check on the cost of a flight to Salt Lake City, Utah (about a 3 hour drive from Idaho Falls). The price was literally a third of the cost of everything else I had checked. I called my brother Jeff to see if he would be willing to drive there and pick me up. As we talked we decided to take some time include a pipe hunt! I booked the earliest flight I could which gave me a whole day in Salt Lake and another day to drive through the neighbouring communities back to Idaho Falls – all the while stopping by antique shops and malls scavenging for pipes. We hung up and I booked the ticket. It was set for June 28th which was perfect all the way around. The wait for the date to arrive seemed to take forever.

The morning of the flight arrived and I was on the way! The flight was a short 1 hour and 40 minutes and I was on the ground. Jeff picked me up and he had a plan of attack for the pipe hunt. We decided to visit Jeanie’s Smoke Shop first as it was close to the airport. From there were would visit the antique shops in Salt Lake City and Ogden that day. The following day we would visit Brigham City and Logan. We also would visit small communities between the major stops noted above. We were off on the hunt. I have written about Jeanie’s in a previous blog (include the link here). So I will focus only on the antique shops. We found the Salt Lake shops empty of any pipes that caught our interest and manned by sales staff that had no desire to help us out in our hunt. In fact they were almost offended that we would expect them to have such “filthy” items as estate tobacco pipes. It was like they were saying, “You are in Utah after all and we don’t do such things.” What is funny is that in all the shops we visited we came away from SLC with just one pipe – little Dublin with a red, white and blue band and stamped St Claude, France. We laughed and continued our hunt.

We finished the last of the shops and malls in Salt Lake and headed to Ogden. There was a great shop there that Jeff had previously found some great pipes at. So we set off to see if there were more. The shop was called “The Estate Sale Antiques” and it advertises itself as Ogden’s best antique mall. The Estate Sale Antique Mall was nearly 6,000 square feet in size filled with some of the finest and most unusual antique and collectible items anywhere. The owners Lance and Becky are both life long collectors with a wide variety of knowledge including advertising items, coins, bottles, country store antiques, toys, western memorabilia and jewelry.Lance greeted Jeff like a long lost friend and we were made to feel very welcome in the store. In Googling the shop here is what I found and I have to concur with the description: “Estate Sale Antiques brings together a fantastic group of antique vendors under one roof in the heart of Ogden. With convenient accessibility and plenty of parking, The Estate Sale is a must-see stop on any antique shopping quest in Ogden or even from Salt Lake City!”  The next photos are from theire website and give a pretty good idea of the size and diverse contents of the shop. It was a great place to visit and contained two floors of treasures. Jeff lead me to a corner near the cash register and not far from the front door where he knew there were pipes (It is shown in the second photo above). In fact not only were there ones that he had looked over previously but there were also new pipes as well. We found 8 pipes that we wanted including some real beauties and some old timers. We also found a walnut pipe rest made specifically for holding a gourd calabash pipe and a PipNet pipe reaming set.

We settled out bill and went for a visit to the town of Layton where we found one more pipe. It was an interesting Italian made pipe with a rusticated finish that had been sandblasted over the rustication. It had an oval shank and an unusual shape. The shop was managed by a group of very friendly seniors (meaning a bit older than my 65 years). We enjoyed the stop even if all we took away was one pipe. There were lots of others there but nothing that caught our collective eyes and called out for restoration. We called it a day and headed back to Salt Lake City for dinner at the Red Iguana – a restaurant that is famous for its Mole dishes.We had a great meal and waddled to our hotel. I spread out the haul on the desk top and took some photos. It was a good day pipe hunting. I included the day’s haul along with the tins of tobacco I had picked up at Jeanie’s Smoke Shop for the photo. These included a tin of Dunhill Flake, Capstan Blue, Dunhill Durbar and a tin of Royal Vintage Latakia No. 1 made by Mclellands. The pipes included from left to right – a Rossi Rubino, Schoenleber billiard, Irwin by GBD Canadian, a no name Meerschaum Apple, 2 Duncan Aerosphere Billiards with pearlized stems, a Kaywoodie Relief Grain 18S, an Ansells of Washington DC Prince, a St Claude Americana Dublin, and an Italian Made unique.Not a bad haul for the day.The next morning we got up early and after a good breakfast at the hotel continued the pipe hunt. We drove to Brigham City and went to several shops. There was an interesting mall in an old Residential School that was well laid out. Despite the horrendous history of the treatment of aboriginal peoples the place had been cleaned up and redeemed. There were aboriginals working in the shop and it seemed to be a great place to work. We found one pipe in the cabinet toward the front of the shop. The first photo shows the layout of the shop. Jeff found the meerschaum in the display case in the centre of the photo. The second photo shows the pipe that Jeff picked up – a nicely carved lion’s head meerschaum that was in the original box and in pretty decent condition. We left the shop with pipe, put it in our bag of finds and headed to our next stop in Logan, Utah. Logan is a nice looking town with wide boulevards and several antique shops. Other than finding an old Medico Brylon pipe we almost came away empty handed. However we went into a large Antique Mall on the main street and talked with the seated clerk. He did not seem interested in helping much until we got talking about pipes and I gave him a source for tobacco. He said they did no have any pipes in the shop and then I happened to see a pipe case over his shoulder. I asked about it and he said he thought it was empty. I reached for it and low and behold it was not empty after all. Inside was strange looking pipe like nothing I had ever seen before. The inside of the cover had a sticker that read Oriental Frischen Socket Pipe. I turned it over in my hands and found that the pipe had a screw in meerschaum bowl that was threaded into the base. The base appeared to be made of Bakelite and the stem seemed to be cast into the shank of the pipe. We made and offer and added one last pipe to our collection.We went back to the car and headed to a final shop that had no pipes. We were a bit hungry so we decided to visit a cheese factory nearby. We bought some cheese curds to snack on and something to drink. The pipe hunt came to an end and we headed for Idaho Falls. It was a great time pipe hunting with my brother. It has been a long time since I took a trip for the sole purpose of stopping at every antique shop on the journey and sleuthing through their stock for the hidden or not so hidden pipe treasure. I thank my brother for taking time out of his “busy” retirement to come and pick me up and take me to some of his favourite hunting spots. We had a ball. Thanks for giving this a read.


Cleaning up an unsmoked NOS Peterson’s System Clay 12


Blog by Steve Laug

The next few blogs I am writing are about pipes that I worked on with Jeff on a recent visit to Idaho for my Father’s 91st birthday. The next and last of these was a pipe that came from one of the pipe lots Jeff picked up on his travels. It was in a group of old, unsmoked pipes. The pipe is a bent clay Billiard stamped Peterson’s System on the left side of the clay and 12 on the right side of the shank. The nickel ferrule is a classic Peterson ferrule with Peterson’s stamped on the left side. The stem is a military bit with a P-lip. The clay bowl and shank are quite nice with casting marks from the front of the bowl all the way down to the ferrule on the underside. It is a seam where the two halves were joined together. The seam looks almost like a crack but it is not. The there is some wear and tear on the pipe from sitting around as NOS (New Old Stock in some pipe shop). There are typical imperfections in the clay bowl. The rim top is a bit rough and there were some casting marks on the inner edge of the bowl. The bowl itself was unsmoked and the inside was very clean. The finish was dirty and somewhat lifeless. The P-lip stem was flawless with no tooth damage or marks. I took the following photos to show what pipe looked like before I started. I took some close up photos of the bowl top and the stem. You can see the roughness in the surface and edges of the rim top – pretty typical of a cast clay pipe. You can also see the dust in the bowl – even a small cobweb in the bottom of the bowl. The P-lip stem is flawless with no oxidation or chatter and tooth marks.I took some photos of the stamping on the pipe. The first photo shows the left side of the shank with forked P of Peterson arched over System. You can also see the Peterson stamp on the nickel ferrule. The second photo shows the 12 shape number on the right side of the shank. Each evening before going to bed, I have been reading the new Peterson book and came across a section on the clay system pipes. If I had not been reading it I would not have been even aware of them. I had left the book at home in Canada as it is large and heavy. So I wrote to Mark Irwin about dating this pipe and getting some information. Mark graciously sent me the information that I needed. Mark wrote as follows:

… What you have is one of the final generations of the Peterson clay System, made in the 1950s-early 60s. The ferrule no longer says “Brevet,” indicating its manufacture has shifted from France to the UK. I forget the name of manufacturer, but I’ll dig around for it. This was still a fair smoking clay, just not the epitome of Peterson’s work with the French. The final iteration would follow in the 70s–which was more of a pipe to blow bubbles with than to actually smoke! A shame really, as the ones from 1896-1940 were absolutely phenomenal.

When I came home on the weekend I look up some information from the late Jim Lily who was a Peterson Collector par-excellence. Jim maintained a Peterson Collector Blog for years and it is still online. Here is the link to the specific page on the Peterson Clay pipes – http://thepetersoncollector.blogspot.com/2012/04/peterson-clay-pipes.html. It confirms what Mark Irwin included above.

I am often asked about Clay pipes made by Peterson and why they are so rare and few.

Peterson made clay pipes during the Patent Era with two shapes being depicted as can be seen in their 1905 Patent Pipe catalogue. It shows shape numbers 8A and 12A. During this period their clay pipes were stamped “Peterson Patent” and could be purchased with either a silver or nickel band. During the Second World War, Peterson again started making clay pipes, due to the shortage of briar. The clays of this period are stamped “Peterson System” and were only offered with nickel bands. They continued making their clays until their London shop finally closed in the 1960s. Examples of which can be seen on page 9 of the 1962 &1965 catalogues, priced seven shillings and six pence!!.

 As to why they are few in number, I suspect that the brittle nature of the clay meant that mortalities would be high.

Both Mark and Jim confirmed that the pipe was from the 50s-early 60s. They were made in the London Shop until the shop closed in the 60s. Now I knew a bit more about the pipe.

For a wrap up on the clay pipe I turned to one of my go to sources for information – Pipedia. From there I learned a bit mofe about the pipes. Here is the link to the section on the clays – https://pipedia.org/wiki/A_Peterson_Dating_Guide;_A_Rule_of_Thumb#Peterson_Clay.2C_Bog_Oak_and_Cherry_Wood_Pipes

Peterson Clay, Bog Oak and Cherry Wood Pipes

(Peterson Clay, Bog Oak and Cherry Wood pipes were offered in the Patent Era with or without a formed case, as also offered with their briar and meerschaum pipes.)

Peterson made clay pipes during the Patent Era with only two shapes being offered and depicted in their 1905 catalogue. During this period their clay pipes were stamped/molded “Peterson Patent” and could be purchased with either a silver or nickel band. How long and in what years Peterson made these clays is not known but as stated above two shapes were offered in their 1905 catalogue. Then during World War II, Peterson again made clay pipes due to the understandable shortage of briar. The clays of this period are stamped “Peterson System” and were only offered with nickel bands. This later production of clay pipes ended with the closing of Peterson’s London Shop in the late 1950s or early 1960s…

Now that I had some background and a potential day for this 60-70 year old pipe it was time to work on it. I polished the bowl with micromesh sanding pads. I had ordered several sets of them before I left Canada and had them shipped to Idaho to arrive while I was there. I wet sanded with 1500-12000 grit pads and wiped the bowl down with a damp cloth after each sanding pad. The only issue that I found was that the seam on the underside and up the front was not glazed like the rest of the bowl. I polished it with the micromesh to try to bring a shine to the area. It worked fairly well. At least I feel like I did not make it worse!! I polished the stem with Mark Hoover’s Before & After updated Fine Polish. It did a great job in bring back the shine and rubbing out the fine minute scratches in the vulcanite.I finished the pipe by buffing it with a microfiber cloth to raise a shine in the clay. The clay took on a rich shine with the buffing and almost glowed. The area around the seam had a shine but was slightly different from the rest of the bowl… This is one of the frustrations of refurbishing and one that still catches me off guard. The finished pipe is shown in the photos below. It is a petite pipe measuring 5 1/4 inches in length, 1 3/4 inches in height. The outside diameter of the bowl is 1 1/8 inches and a chamber diameter of 5/8 of an inch. It is a beautiful little Peterson’s System Bent Billiard that is going to be a fun pipe to break in and enjoy. This is the final pipe that I worked on while I was in Idaho. With the strange stripe on the front and underside of the bowl – where the seam shows clearly and even polishing made stand out more – this pipe will stay with me. Thanks for reading the blog.

GBD Granitan Bent Billiard Restoration


By Al Jones

Here’s another GBD from that collector in Ohio, who owned the Century finish pipes I posted recently. This one is a Granitan finish in the Shape 508. This one also came with a carefully preserved box and bag. Below is the pipe as it was received. The stem was in great shape, with some heavy build-up on the bowl top. Like the others, the GBD rondell was a bit oxidized as well.

I don’t see too many Granitan finishes, which is a sandblasted briar, then polished. The finish description on the Pipepedia page says this about the finish. The reference to Virgin finish seems a bit of a stretch and perhaps some creative marketing from GBD. When did the Granitan first appear or when did it end? This information is seemingly lost to time.

Granitan — England, unknown if also made in France: sandblasted, then partially sanded smooth, resulting in a pebbley texture, stained light yellowish brown. -TH: “An acceptable concept in a finish which combines the light weight of a sandblasted pipe, the beauty of a Virgin finish and the attractiveness of two-tone brown coloring.” -catalog ( 1976 )

Like the others, this one also came with a carefully preserved box and bag.

I reamed the bowl, then used a piece of worn scotchbrite to remove the build-up. This lightened the bowl top stain a bit, but some carnuba wax restored the original color. The briar was soaked with alcohol and sea salt. The Scotch-brite piece also successfully removed the oxidation from the rondell, without damaging the fragile coating. After the soak the stem was mounted and oxidation removed with 800, 1,500 and 2,000 wet paper, than 8,000 and 12,000 grade micromesh sheets. It was then buffed with White Diamond and Meguiars Plastic Polish. The briar was buffed lightly with White Diamond to bring back the finish, than hand rubbed with several coats of Halycon wax.

Below is the finished pipe.

Pipe Meditation


Blog by Norman Skiba

As someone with a long history of Zen meditation practice in my younger days called zazen, there is also a moving/walking/working meditation called kinhin.  I find myself doing kinhin autonomically while working in my garden.  Whether picking weeds, hoeing, or planting.  Call it ‘In The Zone!’  It appears to be a non-focused ‘focused’ experience for me at times; even though it probably should be a focused dynamic.  When you have a large bed of serious weeds it is daunting; but you put your head down and you start at the beginning and somehow work your way to the end.  Your back and hands suffer tremendously – yet you get it done.  You cannot think – Oh my God, what a nightmare – it is a nightmare, but you tune it out and you focus on the here and now and it all works out.  Your Mind tends to ramble on into many thoughts and for me that is good since it is not after the formal Zazen focused mind thing I am after, rather than trying to do a tough job and not being worried about the actual hassle of the task.  I get the same thing driving the garden tractor cutting grass or driving my farm tractor moving chips and firewood etc.  Though with the farm tractor you have to be a bit more diligent as such.  This non-focused focused meditation is another type of meditation and it can get creative and also very deep in pondering many different things in your life and also in your head.

Well similar processes go on while I smoke my pipe – usually in the early A.M. with a pot of good coffee!  It gives me some time to be peaceful, listening and watching the birds, listening to other ambient sounds, and to enjoy a pipe and think of things I need to do for the day, and also just random thoughts that appear.  Once you light the pipe and start to enjoy the pipe and the tobacco, your mind seems to open up to a myriad of thoughts and observations.  Nothing else seems to matter in the moment.  Very early in the morning, most people are not even awake and this is my time.  I do feel guilty not getting a jump on stuff early in the morning with so much to do here on the small homestead; yet the idea of some peaceful time to enjoy a bowl or two seems like a worthy act and a nice way to get the day started.  More guilty when it gets unbearably hot – one needs to get stuff going early on before the old body poops out and the heat wastes you and the mind away.  Winter does get cold in the shed so it can be a bit trying, but it is nice to enjoy a bowl with coffee and get back in to throw more wood in the woodstove and warm up a bit before going back out to get work done.  In my old age guilt seems to way heavy – just too much to do with one person (and my best friend, my dog).  Heh! Heh!

In another sense – after 50 years, I am starting to learn to be a more calm puffer and trying to not rush through bowls. I have always been a faster smoker, but I have finally begun to learn about the ‘Art of Pipesmoking’.  (Can I help I am a slow learner…)  Many thoughts about this ‘Art’ too, also come into being while smoking and actually is the stimulus for the few short little articles I have written which Steve has posted here on his Reborn Pipes site.  I am not a writer and do not pretend to be.  These articles or little ditties as Frank Zappa would say are from my ruminations while smoking my pipes.  They are a result of the various meditations that occur in my head/Being.  Probably 99% of the time I smoke alone in these 50 years.  So it is not a social ‘thing’, rather than a personal thing.  In the past with 2 huge pipe collections I find I probably got caught up into the acquisition of pipes – and that ‘keeping up with the Jones’ mentality was unsettling , uneconomical in my situation, and a distraction of the actual enjoyment of pipesmoking.  I also have found that the various forums online are also a drag to my economic state, and also sidetrack one from the actual pipesmoking dynamic.  The various people and their trips and their egos and psychological agendas were a letdown.  Sorry for my critique and honest thought. Staying away from such environments also gives me more time to smoke another bowl or two and to get my work done.  As I said to Steve a while back – I smoked alone before there was an internet and there is no need for me to have to be a part of some smoking group to be able to enjoy my pipes and tobacco.  Lastly, I also have totally downsized my extensive collection to 5 and may get a 6th; but that is all I need.  Each one is unique and special and each one smokes wonderfully, with a new meer from Steve blowing all others out of the water.  I really can enjoy the extra time per pipe and I also can only work on decently coloring so many meers in the little time I have left on Mother Earth.  In addition the limited supply of tobacco is an issue and having more pipes and no tobacco seems a bit like ‘peeing in the wind’ as the expression goes.  So I enjoy the pipes and tobacco and the special time I have in peace smelling the Latakia, admiring the pipes – both briar shapes and grains and meer carvings – and see what evolves in my head in the form of various thoughts, observations, and ideas, letting my Mind wander on the Journey into Bliss!

Rejuvenating an Oval, Long Shank Apple


Blog by Steve Laug

This is the next of the blogs I am writing about the pipes that I worked on with Jeff on a recent visit to Idaho for my Father’s 91st birthday. This was a pipe that came from one of the pipe lots Jeff picked up on his travels. It was barely smoked and not even broken in. It was stamped Made In London England on the underside of the shank. The briar is quite nice with a mix of grain around the sides and shank. There were quite a few fills in the briar that stood out against the dry briar. The rounded crown of the rim top is in perfect condition and there is no damage to the inner or outer edges of the bowl. The bowl itself was lightly smoked and very clean. The finish was dirty and somewhat lifeless. There were dent marks mid bowl on the left side and nicks in the briar on the right. The black vulcanite stem had no tooth marks or chatter on either the top side of the underside. I took the following photos to show what pipe looked like before I started. It is a very striking long shank apple that combines some of the qualities of a Canadian and an Apple together. I took some close up photos of the bowl top and the stem combination. The rim top is perfect and smooth – a little dusty but otherwise clean. The stem is flawless with no bite marks or tooth chatter.The stamping on the underside of the shank is clear and readable. It reads Made In London over England.I received a package with some more Restoration Balm from Mark Hoover while I was in Idaho. He included a sample of a new product that he was experimenting with called Briar Cleaner. It is to be used prior to scrubbing (possibly instead of scrubbing) and to be followed up with the Balm. I decided to give it a try on the pipes I was working on with Jeff. I rubbed the Briar Cleaner into the bowl and shank with my finger tips and scrubbed it off with a cotton pad. It left behind some grit that I rinsed off with some warm water. I worked well to lift the dirt and grime from the grain. I am still not sure if it a necessary extra step for me or not but I am working with it on the next few pipes. The photos below show the pipe after cleaning with the product. After cleaning the briar with Mark’s new product I polished the bowl with micromesh sanding pads. I had ordered several sets of them before I left Canada and had them shipped to Idaho to arrive while I was there. I wet sanded with 1500-12000 grit pads and wiped the bowl down with a damp cloth after each sanding pad. I rubbed Before & After Restoration Balm into the briar and worked it in with my fingertips. I let the bowl sit while the Balm did its work on the briar. Once it had been sitting for a few moments I buffed it off with a soft cotton cloth. The photos show the bowl after the Balm had worked. I set the bowl aside and worked on the stem. I polished it with 1500-12000 micromesh sanding pads. I wiped the stem down after each pad using a small bit of Balm. I finished the polishing with Before & After Fine Polish and wiped it down again with some balm. I finished the pipe by buffing it with a microfiber cloth to raise a shine in the briar. The briar came alive with the buffing and the grain just popped. The finished pipe is shown in the photos below. It is a chunky pipe measuring 6 inches in length, 1 3/4 inches in height. The outside diameter of the bowl is 1 1/2 inches and a chamber diameter of ¾ of an inch. The briar shows some cross grain, birdseye and flame grain around the bowl. It is a beautiful, long shank Apple with an oval stem. It will be a fun pipe to break in and enjoy. I will be adding it to the rebornpipes store shortly. Thanks for reading the blog. Keep an eye open for the next few blogs that follow showing the other pipes that I worked on while I was in Idaho. Enjoy.

New Life for a Broken Nording Danmark F Freehand


Blog by Steve Laug

In one of the bags of parts Jeff purchased there was a bowl and there was a piece of shank with a stem in place. We took all the parts out of the bag and were able to see that these two parts actually went together. The shank piece is stamped on the underside as follows: F over NORDING over DANMARK near the horn extension/shank union. The bowl shape follows the grain of the block of briar very well. The break in the shank was not a clean one – it was a mess. The inside of the airway was plugged with lava and tar. Someone had tried to repair the two parts by gluing them together with epoxy. As expected the repair did not hold. Jeff took photos of the pieces to show the extent of the damage to the pipe – it really was a stunning pipe originally. The shank was thin but the briar was thick enough. The nice piece of striated horn that made a shank extension was in excellent condition. There was a steel tube in the end of the horn where the stem sat in place to protect it from splitting when the stem was repeatedly inserted. The turned fancy stem was in good condition with some tooth marks on both sides but otherwise it was undamaged. There was a thick cake in the bowl and a heavy overflow of lava on the rim top.The next series of photos shows the two parts of the shank and the thick buildup of tars and oils in the shank interior and the broken briar around the shank. The next photos show the rim top and the thick cake in the bowl and the lava build up on the plateau top. The valleys and high spots are almost filled smooth with lava.Jeff also took photos of the sides and heel of the bowl to show the grain on the pipe. The finish is very dirty but the grain is quite beautiful. There are nicks and dents in the briar.The stamping on the shank portion of the broken pipe is readable but worn. The joint between the shank and the horn extension is very good – solid. The metal tube in the shank end provided the internal strength to hold this joint tight. It is interesting to note that the shank broke just ahead of the tube inside the shank. The stem appeared to be in good condition. The button was worn with tooth marks on the topside. There was some oxidation and wear on the surface near the button.Jeff reamed the bowl and cleaned up the plateau top with Murphy’s Oil Soap and a tooth brush. He scrubbed it until it was clean. He cleaned out the inside of the two parts of the shank with pipe cleaners, cotton swabs and alcohol until the airway was clear. He cleaned up the broken ends of the shank with a tooth brush and the soap. He rinsed off the bowl and shank and the airway with warm water. He dried it off and set it aside. He cleaned up the stem and let it soak in a bath of Before & After stem deoxidizer. He took it out of the bath and rinsed it off and cleaned out the airway with pipe cleaners and alcohol. When I arrived he showed me the parts. They were incredibly clean. I was excited to get started on the repair of the broken shank… so much so that I forgot to take pictures of the cleaned up parts of the pipe.

I picked up some tubing at Hobby Lobby and cut off a piece that was close to the length I needed to join the two parts of the shank together. I used a Sawsall blade and a hacksaw to cut a length from the tube. I used a metal rasp to flatten the end of the piece of tube and shorten it enough to fit into the two parts of the shank. I used the small blade on a pocket knife to open up the airway in the bowl end of the shank and to flare the end of the tube in the stem end of the shank.I used the hacksaw to rough up the surface of the tube so the glue would have a surface to bond to between the briar and the tube. I used some Testor’s Metal and Wood Glue to insert the tube into the bowl end of the shank. I used a tooth pick to press the glue into the area around the tube. I filled in the remainder of the gap with clear Gorilla glue.I used the tooth pick to put Gorilla Glue on the open ends of each piece of the shank. I coated the tube with some glue as well. I aligned the two parts and pressed the pieces together. I held them tightly in place until the glue set and the two parts were bound together. I filled in the repaired area with Gorilla Glue to smooth out the repair. I set the bowl aside to let the repair cure. Once the glue had cured and the shank was solid, I smoothed out the repair a medium and fine sanding block. I sanded the repaired area and glue with 1500 and 1800 grit micromesh sanding pads to remove the excess glue. I smoothed out the finish. I decided to use Mark Hoover’s Briar Cleaner at this point in the process to clean off the briar. It works to remove the dust and debris in the briar and leaving behind a clean piece of briar. I polished the bowl and horn shank extension with micromesh sanding pads – wetsanding with 1500-12000 grit sanding pads. I took photos of the pipe at this point in the process. It is a nice looking pipe for sure. At this point in the process I brought the pipe back to Vancouver. I sanded the repaired area with a folded piece of 220 grit sandpaper to blend it into the surrounding briar. I wanted to remove some of the darkened area around the repair so that I could polish it further and restain the shank to match the rest of the pipe.I polished the repaired area with micromesh sanding pads – wet sanding with 1500-2400 grit pads to polish out the sanding scratches. I polished it further with 3200-12000 grit pads. Once it was smooth I stained it with a Cherry stain pen to blend it into the rest of the pipe. The photos tell the story of the repair. I rubbed the bowl and shank down with Before & After Restoration Balm. I worked it into the briar and set it aside to dry. Once the Balm had been doing its work for a while I buffed it down with a microfiber cloth. The Balm cleaned, protected and enlivened the briar. The repaired shank was looking very good at this point in the process. I cleaned the pipe stem with a new version of Mark Hoover’s Before & After Restoration Balm that he had designed to work well on both the briar bowls and the vulcanite stems. I rubbed it into the surface of the stem with my fingertips and buffed it off with a microfibre cloth. I polished the stem with microfibre pads – wetsanding with 1500-12000 grit pads. I wiped it off with Obsidian Oil after each sanding pad. After the 12000 grit pad I polished it with Before & After Fine Polish and gave it a final coat of Obsidian Oil. I put the stem back on the pipe and took the pipe to the buffer. I carefully buffed the bowl and stem with Blue Diamond to polish the briar and the vulcanite. I wanted to get a shine but not risk damaging the pipe by having it fly off the wheel. Blue Diamond does a great job on the smaller scratches that remain in both briar and vulcanite. I gave the bowl and the stem several coats of carnauba wax and buffed the pipe with a clean buffing pad to raise the shine. I hand buffed it with a microfiber cloth to deepen the shine. The pipe polished up really nicely with a great contrasting stain look to the briar. The finished pipe is shown in the photos below. This is a beautiful Eric Nording F Freehand – the fancy turned stem and the horn shank extension give the pipe a great look. The polished black vulcanite stem looks really good with the rich browns standing out in the grain and the blacks of the plateau rim. The dimensions of the pipe are Length: 7 inches, Height: 2 inches, Outside diameter of the bowl: 1 ½ inches wide and 2 inches long, Chamber diameter: 7/8 of an inch. This pipe is truly a rebornpipe. The shank repair and inside tube that binds it together should last a long time. Thanks for walking with me through the repair and the restoration of this beauty!

Rejuvenating an All Briar Oval Shank Billiard


Blog by Steve Laug

The next few blogs I am writing are about pipes that I worked on with Jeff on a recent visit to Idaho for my Father’s 91st birthday. The first of these was a pipe that came from one of the pipe lots Jeff picked up on his travels. It was a group of old, unsmoked pipes form the early 1900s. The pipe I am working on now is an all briar pipe with the stem part of the shank. It bears no stamping or identifying marks at all. The briar is quite nice with a mix of grain around the sides and shank. The rim top is perfect and there is no damage to the inner or outer edges of the bowl. The bowl itself was unsmoked and very clean. The finish was dirty and somewhat lifeless. There were dent marks mid bowl on the left side and nicks in the briar on the right. The briar bit was flawless with no tooth damage or marks. I took the following photos to show what pipe looked like before I started. It is a very striking little all briar pipe. I took some close up photos of the bowl top and the solid briar shank and stem combination. The rim top is perfect and smooth – a little dusty but otherwise clean. The shank/stem combination is flawless. There are some small nicks in the shank but otherwise the shank and stem are perfect.I received a package with some more Restoration Balm from Mark Hoover while I was in Idaho. He included a sample of a new product that he was experimenting with called Briar Cleaner. It is to be used prior to scrubbing (possibly instead of scrubbing) and to be followed up with the Balm. I decided to give it a try on the pipes I was working on with Jeff. I rubbed the Briar Cleaner into the bowl and shank with my finger tips and scrubbed it off with a cotton pad. It left behind some grit that I would need to deal with but otherwise lifted dirt and grime from the grain. I am still not sure if it a necessary extra step for me or not but I am working with it on the next few pipes. The photos below show the pipe after cleaning with the product. I wiped it down with a wet cotton cloth and prepped the briar for steaming out the dents on the left side of the bowl. I heated a steam iron and wetted a cotton cloth. I put the wet cloth on the dent in the side of the bowl. I put the hot iron on the wet cloth and the steamed the dents out of the briar. I repeated it until the steam had lifted the dents to the surface. Once I had steamed out the dents in the briar I polished the bowl with micromesh sanding pads. I had ordered several sets of them before I left Canada and had them shipped to Idaho to arrive while I was there. I wet sanded with 1500-12000 grit pads and wiped the bowl down with a damp cloth after each sanding pad. I rubbed some Before & After Restoration Balm into the one piece All Briar pipe. I worked it into the grain with my finger tips and let the bowl sit while the Balm did its work on the briar. Once it had been sitting for a few moments I buffed it off with a soft cotton cloth. The photos show the bowl after the Balm had worked. I finished the pipe by buffing it with a microfiber cloth to raise a shine in the briar. The briar came alive with the buffing and the grain just popped. The finished pipe is shown in the photos below. It is a petite pipe measuring 4 ½ inches in length, 2 inches in height. The outside diameter of the bowl is 1 ¼ inches and a chamber diameter of ¾ of an inch. The briar shows some cross grain, birdseye and flame grain around the bowl. It is a beautiful little All Briar Billiard that is going to be a fun pipe to break in and enjoy. Thanks for reading the blog. Keep an eye open for the next few blogs that follow showing the other pipes that I worked on while I was in Idaho. Enjoy.

Family Relic: My Great Grandfather’s Meer Pipe


Blog by Kumayl Rashid

Kumayl tells the story of how I met him and my invitation to him to write a blog on the pipe that he wanted to restore as a part of his heritage. I do not need to repeat any of that for the readers as he does a great job introducing the pipe and himself. I am glad to welcome him to the rebornpipes family with this first blog that he has written for us. Give it a read and you will get a sense of the man and his work. Welcome Kumayl. It is a pleasure to have you here. – SteveDifferent views of the pipe (post-restoration).

June 27, 2019:

Some background and an apology – It was July 2017 that I met Steve. He was kind enough to carve some time out of his day to educate me (in person!) on pipes and the art of restoration. I had recently come into the possession of my great grandfather’s pipe – a beautifully rusticated, black meerschaum. Steve kindly requested that I write a short piece about the pipe’s history and I gladly accepted. I did some research and put together a few paragraphs before work and school dominated my life. Well, two years have passed by way too quickly and needless to say, I didn’t submit that article. An apology to Steve for taking so long, but hopefully you appreciate this little bit of family and pipe history. As I already wrote a good chunk of the article two years ago, I kept any time references relative to July 2017. Note, this isn’t too much of a restoration article as it is a history lesson. Enjoy!

July 2017:

I only recently got into pipe smoking, collecting, and minor restoration and it didn’t take long before I learned that my great grandfather (paternal grandmother’s father or, father’s mother’s father) was also a pipe smoker. It came up in a conversation with my parents where my father was reminiscing memories of his grandfather. The whereabouts of any of his pipes, if they still existed, were unknown. The only logical step was to visit my great uncle – family historian, storyteller, and keeper of relics.

I went over to my great uncle’s place to inquire about the existence of any of my great grandfather’s pipes. Almost immediately upon asking, my great uncle lead me through his humble rancher to a bedside table. A small black pipe, in all its glory, lay there among assorted knick-knacks; set aside, but seemingly never completely forgotten. I held the pipe in my hands, lost for words. Knowing my great grandfather had held and smoked this very pipe was astounding to me. I hadn’t had the pleasure of meeting him but was always reminded of his mannerisms and life story. My great grandfather was Hassanali Nasser Virji – son of a merchant prince, heir to a business empire, businessman, first Mayor of Mwanza, pioneer, and an immigrant. Born in Bagamoyo (the then capital of German East Africa) on November 3, 1905, he spent the greatest portion of his life in Mwanza, later becoming the first mayor of the town in 1957. He immigrated to Vancouver, BC with his family in 1977. He passed away just three years later on December 29, 1980.(Left) My great grandfather wearing the mayoral collar, circa 1957. (Right) A headshot from later in life, date unknown.

Once my running mind had returned to the present, I continued to marvel at the pipe – its in-hand feel and rustication. As habit now has it, I inspected it for any possible markings or indication of manufacturer and origin. On the bottom of the shank was inscribed “GENUINE block meerschaum 14”. There was a faded inscribed logo on the side of the stem, which I gathered could represent an elephant. Perhaps the most astonishing thing about the several-decade-old pipe was its condition. Apart from some oxidation of the stem, it was perfect. The exterior of the meerschaum bowl still held a shine with no chips or cracks to be seen. The inside of the bowl was clearly used, but still smooth and free from any debris. It was clear that my great grandfather cared for this pipe meticulously. From a very particular man who often preached to his children things like “a place for everything and everything in its place”, this was no surprise.(Top) Inscription on the bottom of the shank. (Bottom) The pipe bowl in pristine condition.

The feeling of holding this family relic, that was seemingly frozen in time, was absolutely indescribable. After showing so much interest in the pipe, my great uncle passed the trust on to me. To this day, my great grandfather’s pipe is one of my most prized possessions.

After I was made the next steward of the pipe, I had to find out more about it. As soon as I got to a computer, I searched through some of the trusty reference sites that Steve had provided me – pipedia.org and pipephil.eu. A few clicks and I was able to postulate that the pipe was most likely a Kiko Countryman – this, based on some similarities of posted pictures, descriptions, and most notably the elephant logo. Kiko was a brand of Amboseli Pipes from the Tanganyika Meerschaum Corporation.

Tanganyika was the mainland part of modern-day Tanzania and was a colony of German East Africa from 1885-1916. In 1916, during World War 1, the territory was seized by the United Kingdom and placed under British rule. It wasn’t until December 9, 1961, that Tanganyika gained independence from the United Kingdom and was named Tanzania (later merging with Zanzibar to form the United Republic of Tanzania). It’s in this territory that the Tanganyika Meerschaum Corporation was formed in 1955 after a Kenyan businessman discovered a meerschaum mine close to Mount Kilimanjaro. This meerschaum deposit along with a few others were all in the Amboseli region at the foot of Mt. Kilimanjaro.

The meerschaum mined from this area is usually brown, black or yellow, is tougher, less porous, and considered to be of a lower quality compared to the Turkish variety. East African meerschaum was exported worldwide for use in the pipe industry. A subsidiary, Amboseli Pipes (also referred to in some sources as the Kilimanjaro Pipe Company Ltd.) produced several brands: Caveman, Countryman, Huntsman, Hillbilly, Kiko, Kilimanjaro, Kudu, Makonde, Merlin, Sportsman, Townsman, and others. Each sub-brand sharing or carrying unique animal logos (elephant, rhinoceros, bird, antelope to name a few).(Top) Faded elephant logo. (Bottom) A profile shot of the pipe used to compare with online sources.

After comparing pipe descriptions, pictures, and the logo found on my great grandfather’s pipe, I settled on the hypothesis that it was a Kiko Countryman (perhaps model #14, from the number found on the shank). Kiko literally means “pipe” in Swahili (Tanzania’s national language). The Tanganyika Meerschaum Corporation was eventually closed after an attempt to keep it running by a Belgium firm. East African meerschaum has been used in pipe manufacturing as recently as 2001 according to Pipedia. For more history and background, I highly recommend checking out Pipedia’s writeup at the following link: https://pipedia.org/wiki/Kiko.Some pictures of the pipe, pre-restoration. Note the slight oxidation (brown tint) on the mouth-end of the stem.

After completing my research, I picked up the pipe once again, now with a greater appreciation of its origins and perhaps rarity (though it remains priceless to me). It was a truly special piece as it was mined, manufactured, and likely purchased in my family’s native Tanzania. At this point, I was torn as to whether I wanted to touch the pipe at all considering its history, meaning, condition and how pristine it looked for its age. However, the stem was showing some age, so that’s where I decided to focus my restoration efforts.The disassembled pipe. This was my first encounter with a threaded tenon system.Close-up details of the buildup and oxidation on the tenon and stem, respectively.

As with previous stem restorations I’d done, I started with sanitization – some bristle pipe cleaners dipped in 91% alcohol did the trick. I ran the soaked pipe cleaners through the stem until one came out near white. I then cleaned the threaded tenon system with a medium bristle toothbrush and some more alcohol just to get rid of any debris and minor buildup. The next step was to clean the outside of the stem with cotton pads and yet more alcohol. This gets rid of any dirt adhered to the surface.The stem, post-sanitization. Oxidation still present.

It was then time to soak the stem in a solution of oxi-clean and warm water to loosen up the oxidation. After a 30-minute soak and one more pass through with a pipe cleaner, the stem was ready for sanding.(Left) The stem after an oxi-clean soak; uniform, matte black finish. (Right) Micro-Mesh sanding pads.

I turned to my trusty Micro-Mesh sanding pads. I worked through from a 1,500 to a 12,000-grit pad, sanding the stem while trying to avoid removing the elephant marking completely. Patiently working through all the pads ensures a deep shine that’ll last. A quick wipe/buff with a dab of oil (I had almond oil on hand) and a microfiber cloth and the stem was nearly finished.

At this point, I attempted to re-ink the elephant logo using some fine implements (toothpick and a sewing needle) and some white acrylic paint. Unfortunately, even though the logo was still visible, it’s far too shallow to re-ink given my very limited experience.The finished and re-assembled stem. The shallow elephant logo can still be made out.

That’s all there was to the restoration aspect of this pipe. I reassembled the pipe and gave it a quick wipe with a microfiber cloth. Finished pipe.

I still have mixed feelings about actually firing it up. Perhaps on my great grandfather’s birthday and/or death anniversary, I will honour his memory with a smoke (likely an English blend as he would’ve enjoyed) through this great little meer pipe. I’m currently looking into getting a display case for the pipe so that I can have it out for my family to view and enjoy. The pipe will stay with me from here on out and will be passed down along with my great grandfather’s autobiography for generations to come. Finished pipe.

Web Sources: pipedia.org, pipephil.eu, wikipedia.org

GBD Century Restlite Bullcap Restoration


By Al Jones

This GBD came from via a seller who was selling her fathers pipes. He passed away at 101 years of age, and was apparently a big fan of GBD pipes, particularly the Century line. The seller remembers her father purchasing these pipes at a downtown Cleveland, Ohio shop between 1957 and 1958, when her Aunt owned a nearby candy shop. Her father would drop them off at the candy store, disappear for an hour, then come back with a new GBD and feeling very pleased for himself. When she would ask to go along, she was told “This is not a place for you”. Too bad, as I would have loved to learn the name of that shop. The pipes from this collection also came with the original box and bag, which were in mint condition. I wish that I knew more about this pipe smoker, as he really seemed to value his GBD pipes.

As I wrote on my previous Century related blog entry, the origin of that finish is a bit mysterious. Mike Hagley tells me that he has catalogs with the Century finish, but I’ve never personally seen one featured in any of the scanned catalogs that I have. Pipepedia says it was made to celebrate the 100th year of GBD, so a 1950’s purchase makes sense. Even more of a mystery is the “Restlite” stamp on this pipe The few Restlite stamps that I found were also in this shape 11, which is pretty rare by my experience. It is nearly identical to the Peterson 411 shape, which was known as the Bullcap. I found absolutely nothing about the Restlite option (as it appears to be). Mike remembers it being advertised as smaller and lighter and indeed, this pipe only weighs 29 grams.

The pipe was definitely enjoyed, but care was shown on the button/stem with no teeth marks. There was some build-up on the pipe bowl top and a slight scorch mark. Another pipe I bought from the same estate showed the same marks, so I guess that was his habit. Here is the pipe as received.

I reamed the slight cake from the bowl, and used a worn piece of Scotch-brite to remove the bowl top build-up. I diminished the scorch marks with some 2000 grit wet paper, taking care not to alter the bowl top shape. A few light marks remained, a fitting testament to the original owner. The bowl was then buffed lightly with White Diamond and several coats of Carnuba wax.

The GBD rondell on the stem has some oxidation (rust?) that I removed also with the Scotch-brite pad. The oxidation was removed with 800, 1,500 and 2,000 grit wet paper, than 8,000 and 12,000 micromesh sheets (while mounted on the bowl). It was then buffed with White Diamond and Meguiars Plastic Polish.

Below is the finished pipe.