by Steve Laug
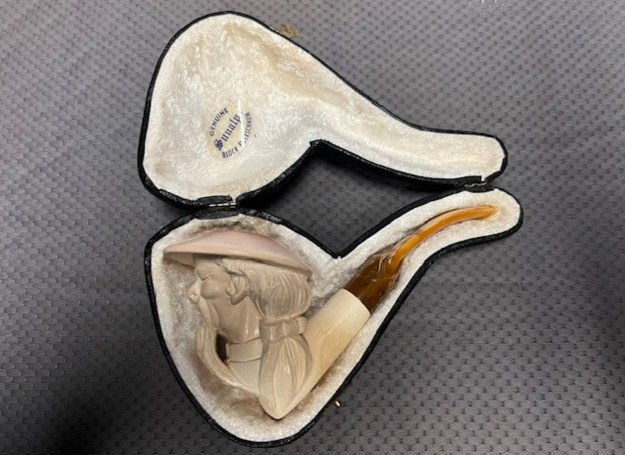
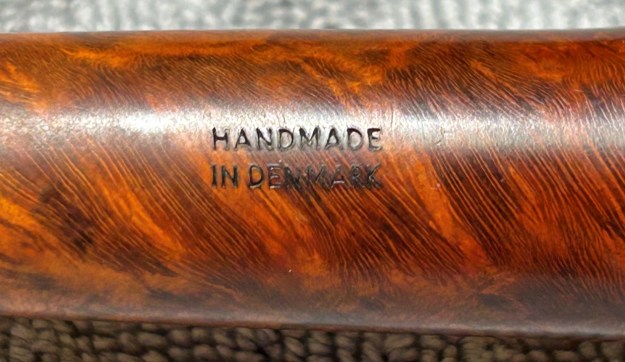
The next pipe on the table is another one that came to us from the seller in Caldwell, Idaho, USA on 07/12/2025. It is a nicely carved Block Meerschaum Figural with a variegated gold/brown acrylic saddle stem. It is in a black leatherette covered case with a cream velour liner. It is in slightly dirty but in good condition as can be seen in the photos below. There is no stamping on the stem or shank. The inside of the case has two stickers – one on the inside of the cream coloured velour lined case that reads Genuine [arched over] Sunalp [underneath it arched] Block Meerschaum. The second sticker reads Sunalp [over] Turkey. 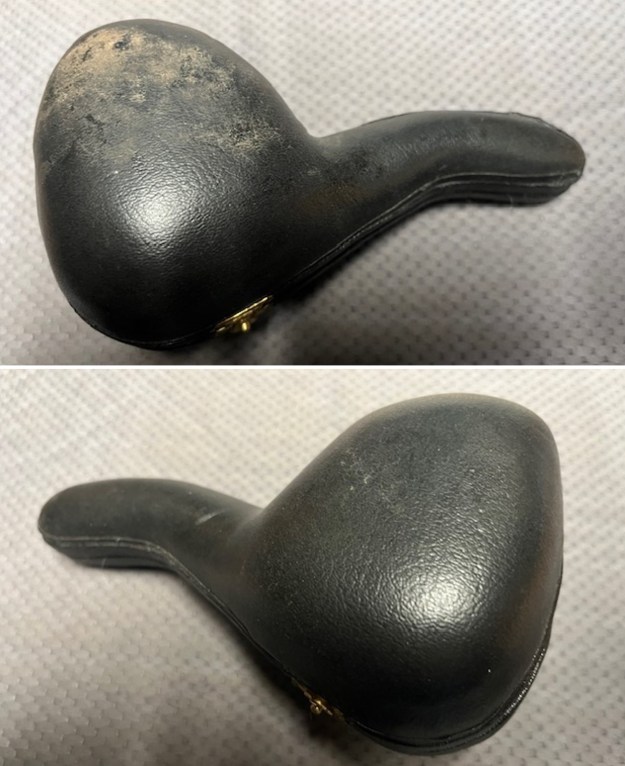
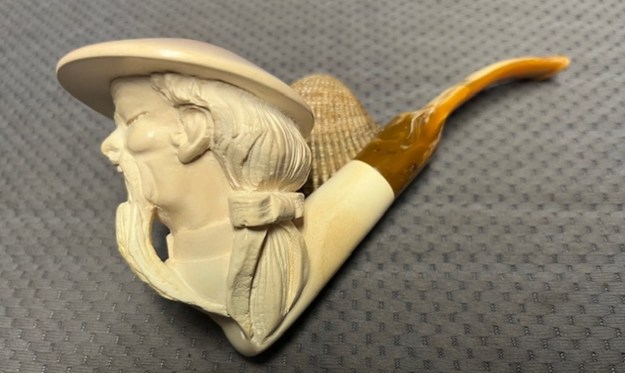
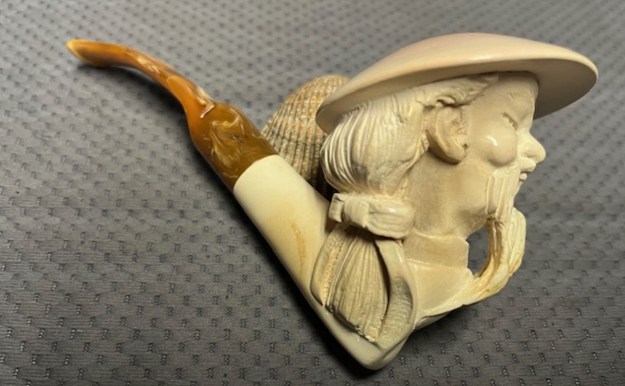
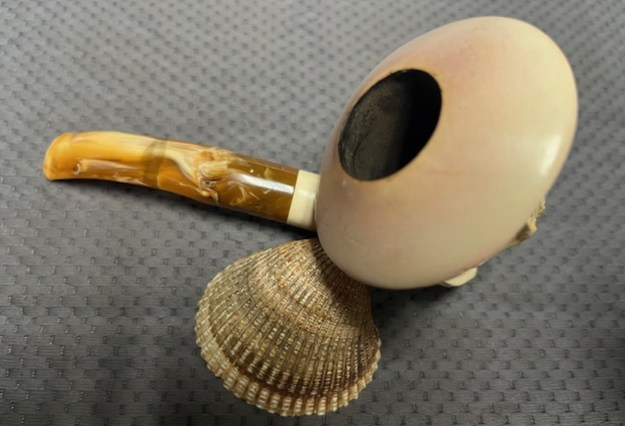
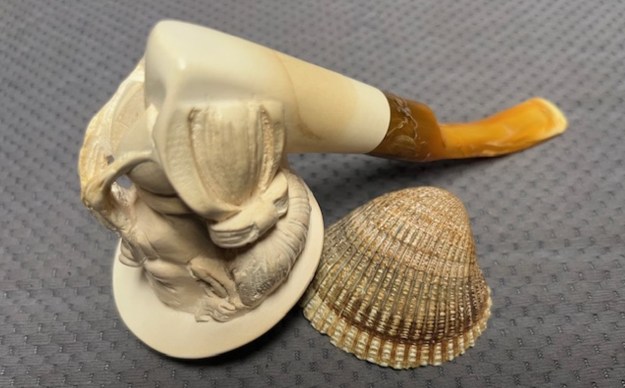
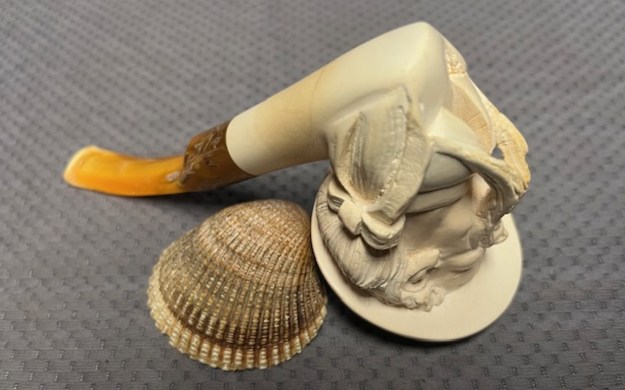
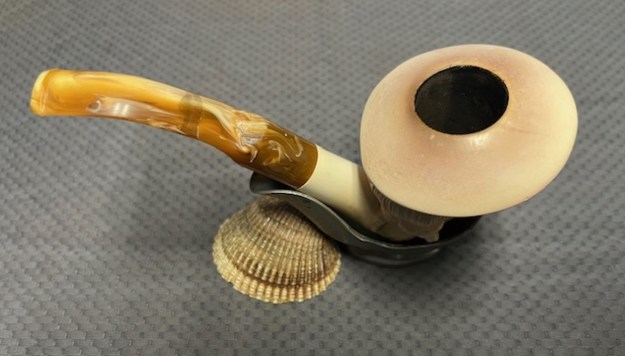
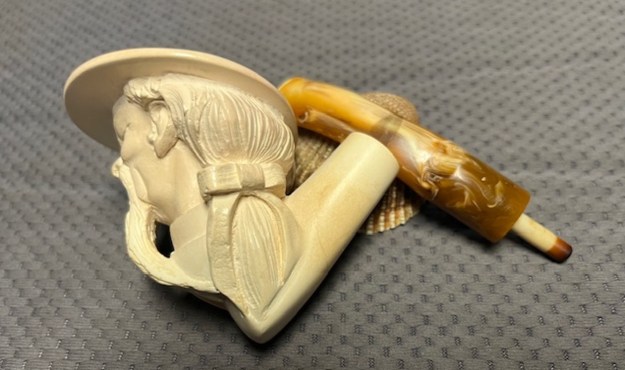
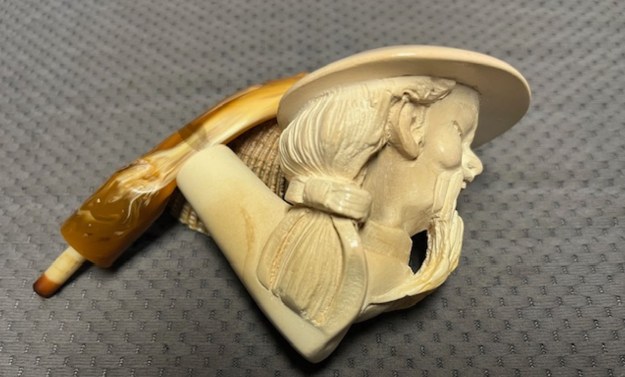
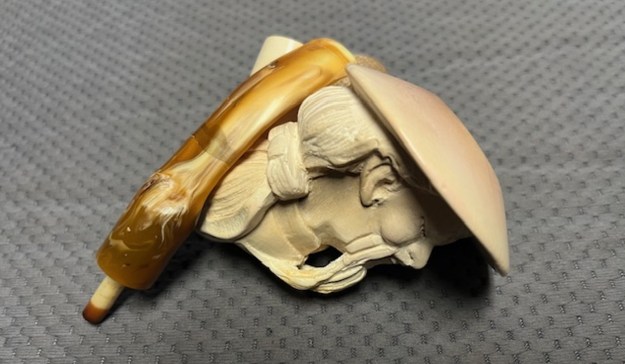
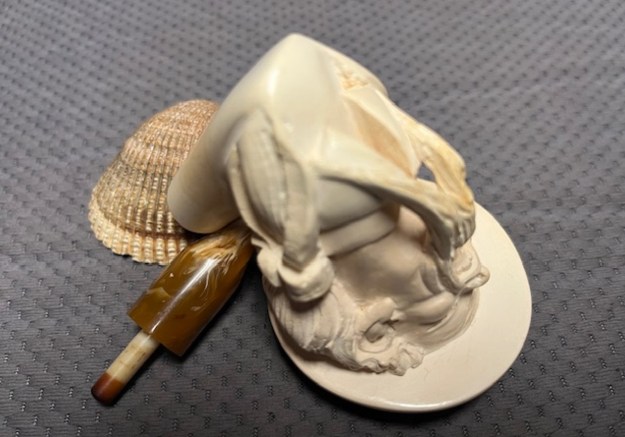
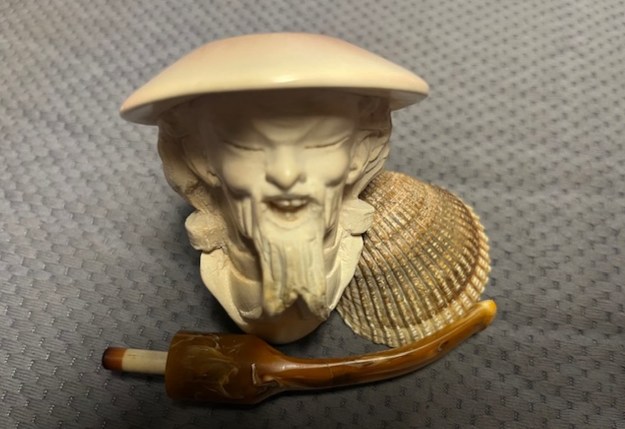
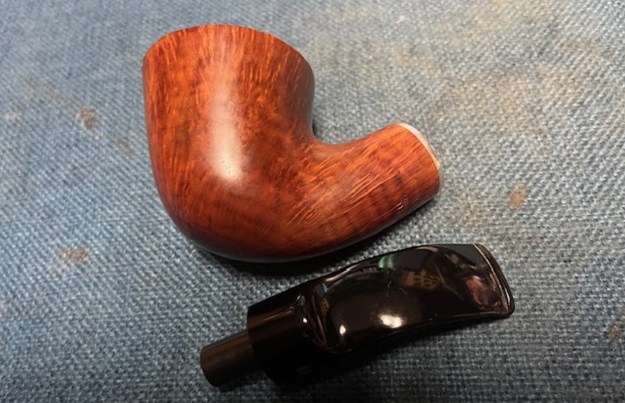
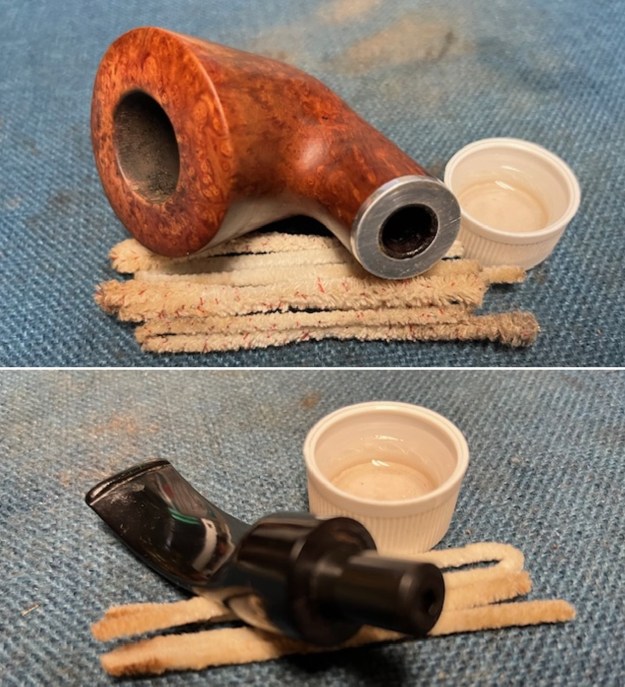
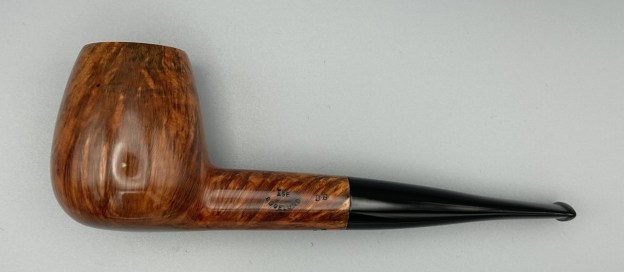
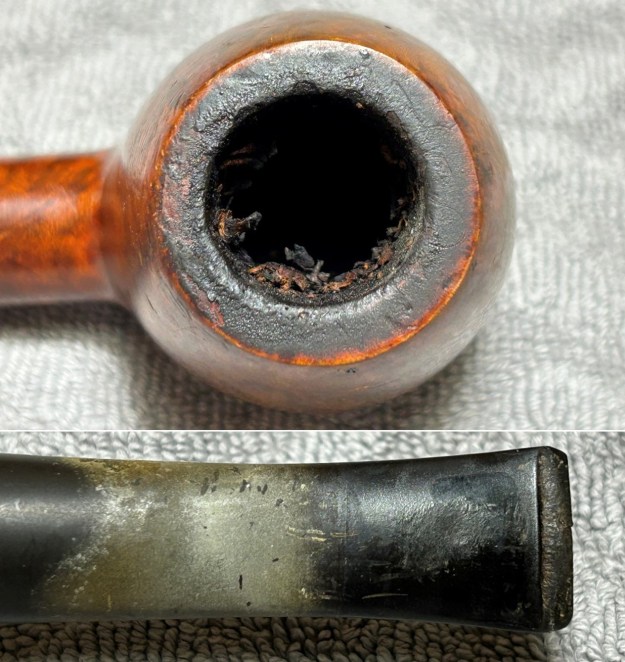
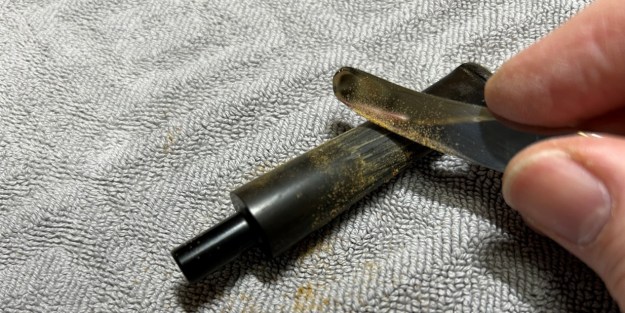
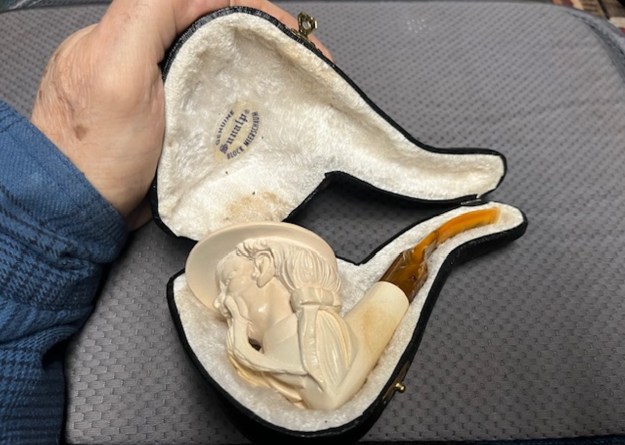 I took the pipe out of the case. It has some patina developing on the shank, face and the rim top. The well-carved face looks like a Chinese singer with his mouth open and joyful. The finish was dusty and lightly dirty with grime in the nooks and crannies of the carved features. The bowl had a moderate cake and there was tobacco debris in the bowl. The rim top had a lava coat on the inner edge of the rim top. There is a thin “x” shaped hairline crack on the underside of the shank. It is visible but it is not deep and should not causing any problems. The variegated saddle stem had been broken sometime in its travels but had been well repaired. It is inside and out. I took photos of the pipe before I started working on it.
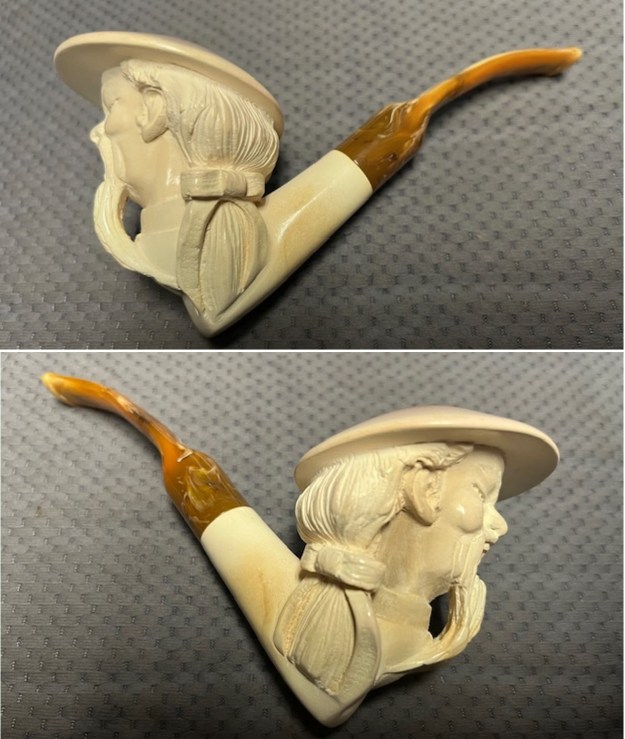
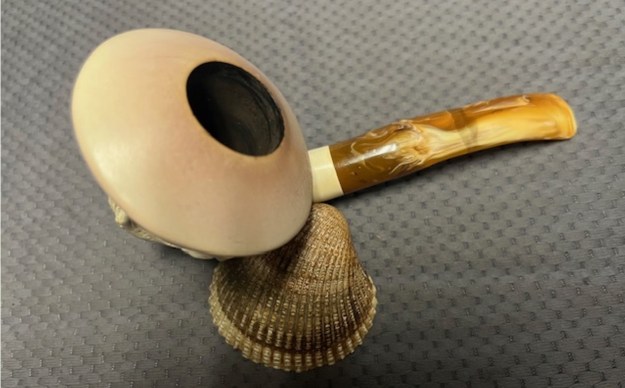
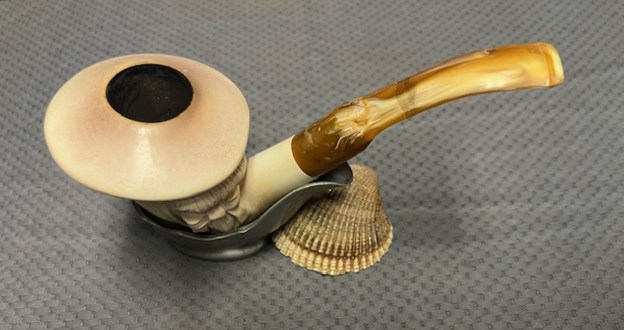
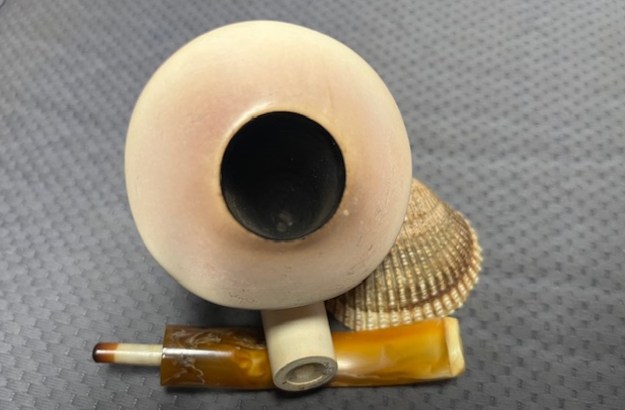
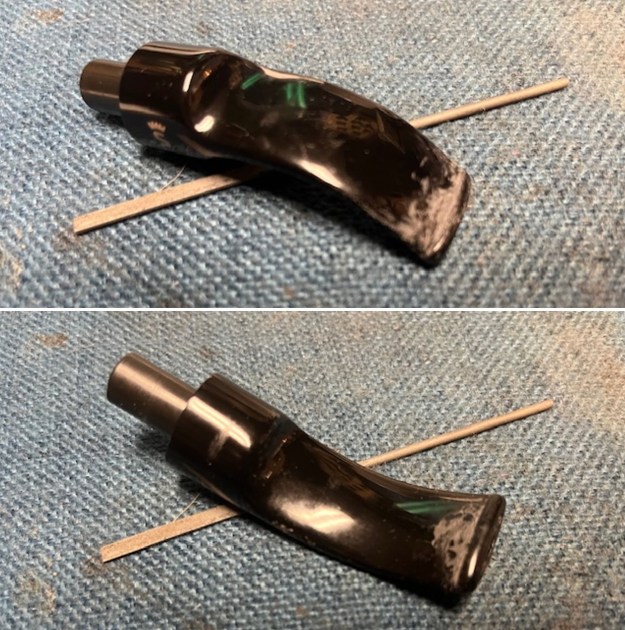
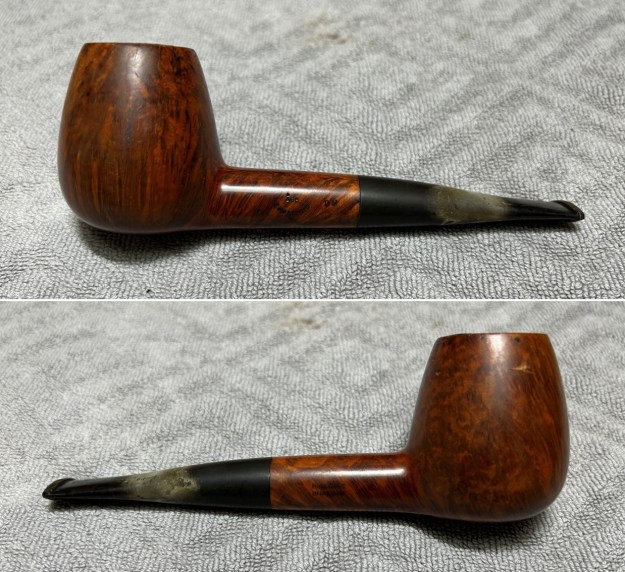
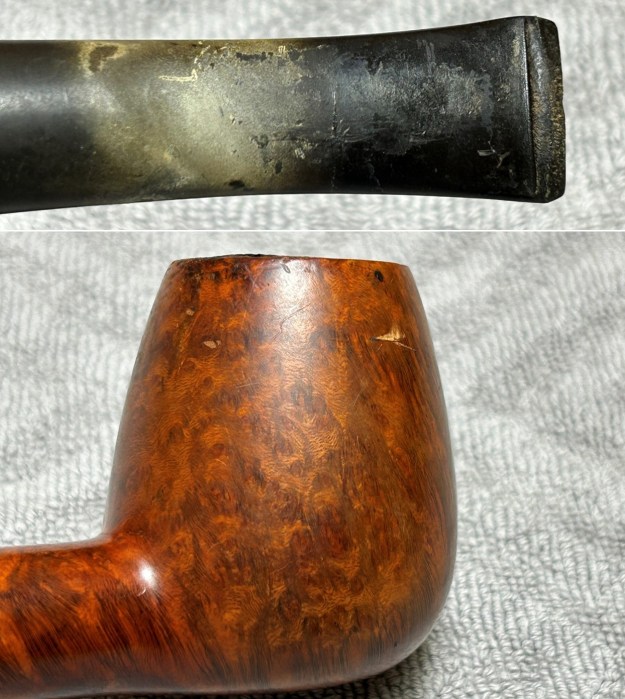
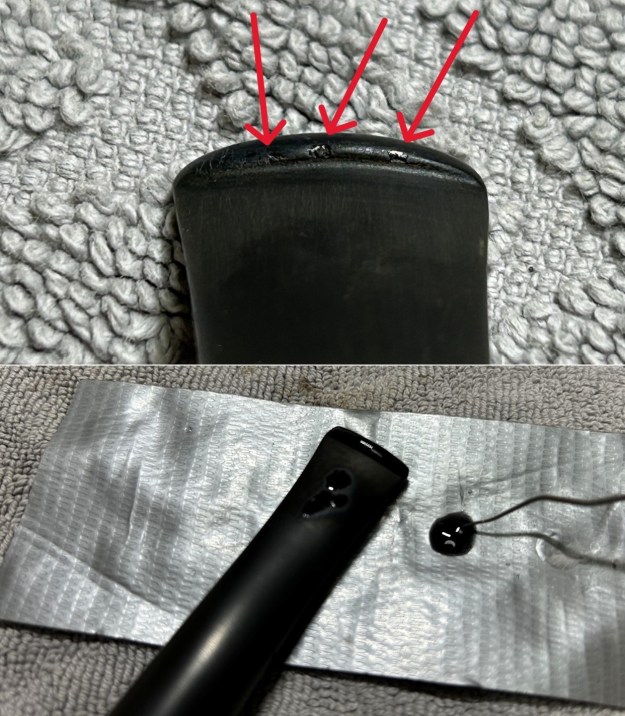
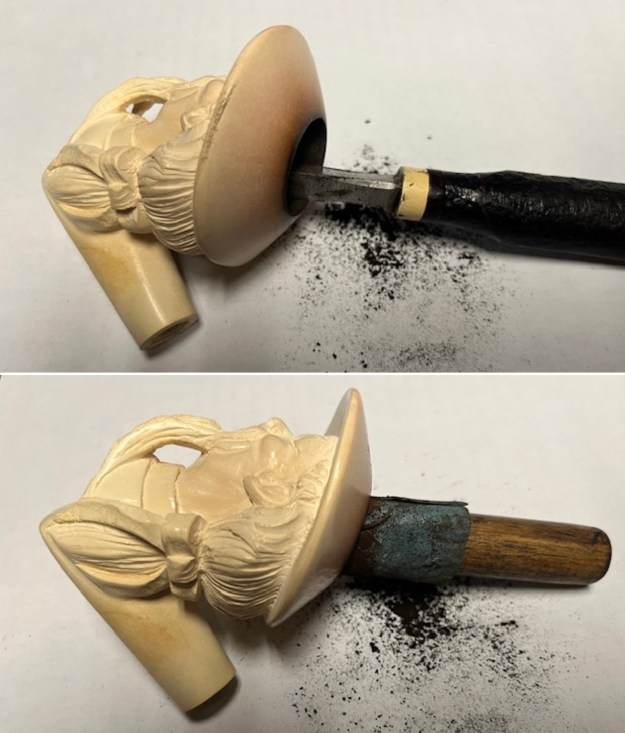
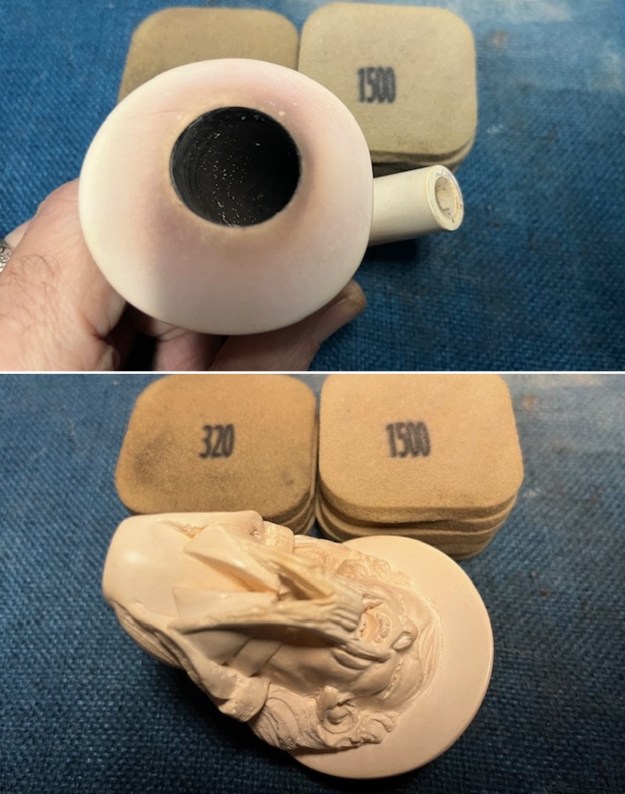
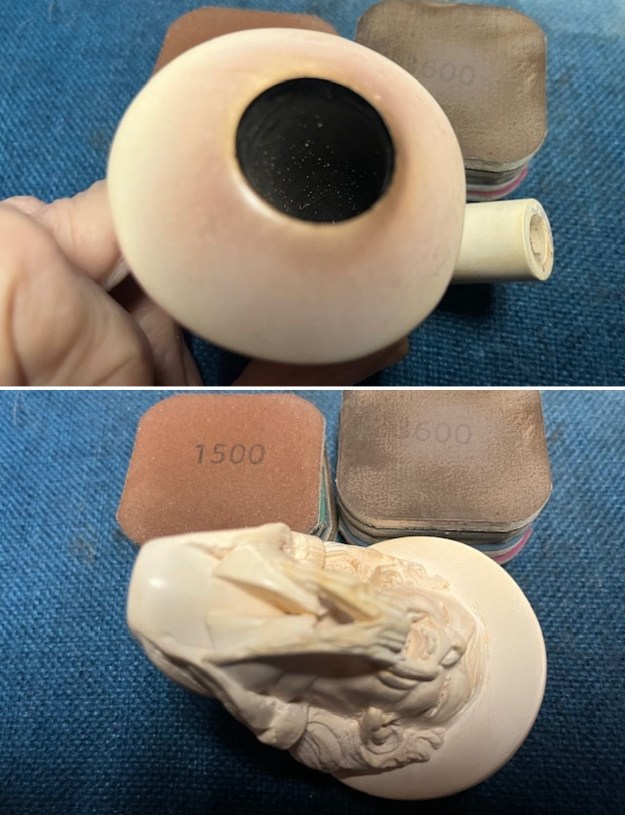
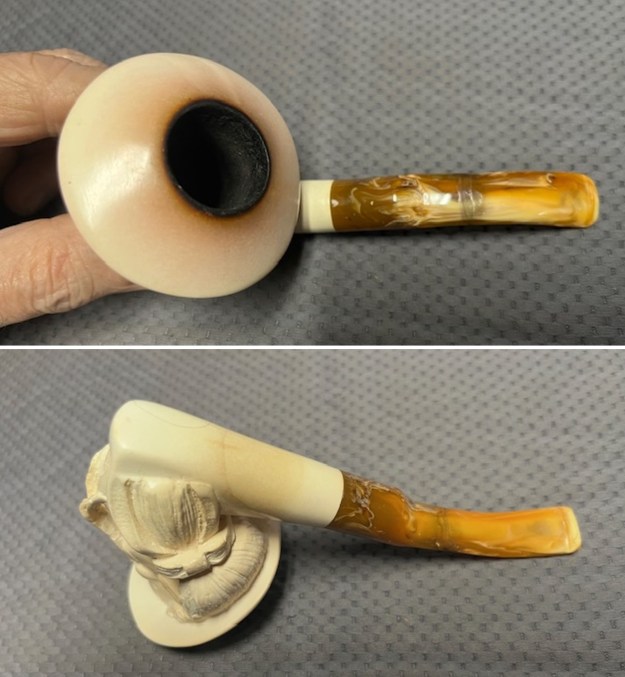 I took photos of the bowl and rim top to show the thickness of the cake and the lava coat on the rim top. The stem photos show the condition of the acrylic saddle stem ahead of the button. You clearly see the repairs on the stem mid stem. It is a solid repair and is has dealt with the damage.
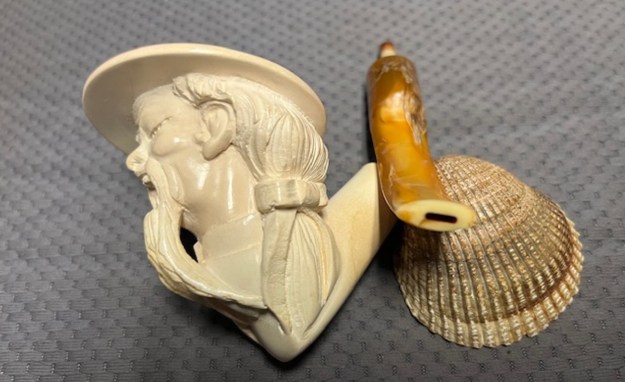
 The stamping on the sticker on the inside cover of the case is clear and readable as noted above. I took a photo of the pipe with the stem removed to give a sense of the proportions of the pipe.
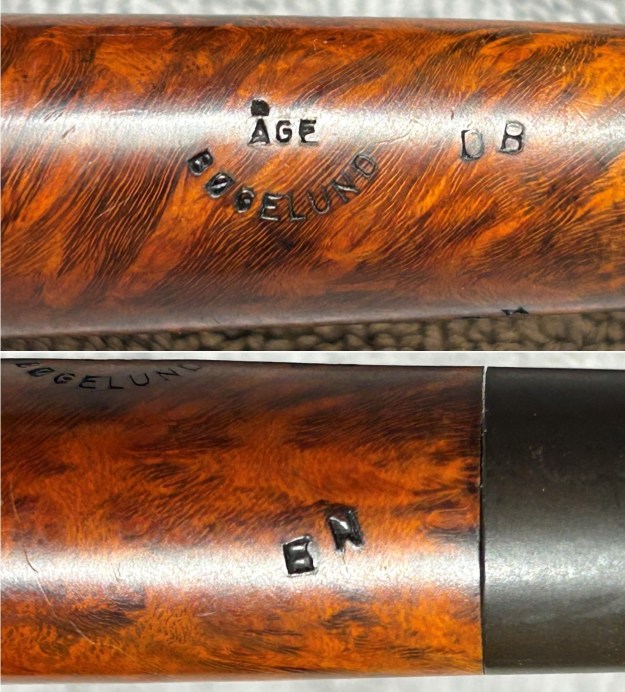
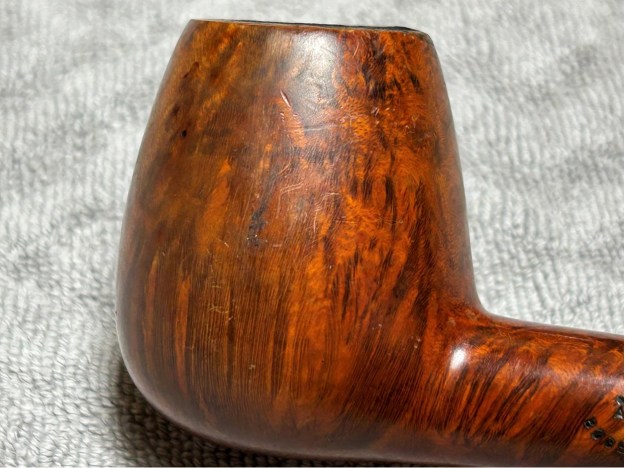
  There was nothing listed on either Pipephil’s site or on Pipedia regarding the Sunalps brand. I did a quick google search for the brand and the first item that came up was on the online forum, PipesmokersDens (https://pipesmokersdens.com/threads/sunalp-meerschaum-pipes.1332/). It was taken from vkpipes and this might be the best guess
…our investigations guided us to the US trademark “SUNALP” registered by Erdal Sunalp in Los Gatos, CA. And according to this application filled in 1978 the business was related to “smoking pipes, lighters, and cigar humidor cases”. Also you may find both quite expensive meerschaum block pipes bearing the SUNALP tm and a bit more affordable “SUNALP France” artifacts. Unfortunately, the trade mark is not active since 1990. It woud be hard to believe that this is just an coincidence. It seems we’ve found a quite luxury tobacconist who ordred products from diffrenet countries including such amazing Danish works of art.
Google also provided an AI summary of the information on the Sunalp brand. I have copied the following information from that summary below.
“Sunalp” Meerschaum refers to high-quality, carved pipes sold under the Sunalp brand, a US trademark associated with Erdal Sunalp from Los Gatos, CA, known for sourcing exquisite Turkish block meerschaum, often featuring intricate carvings of figures or animals, making them collector’s items valued for their craftsmanship and smoking properties.
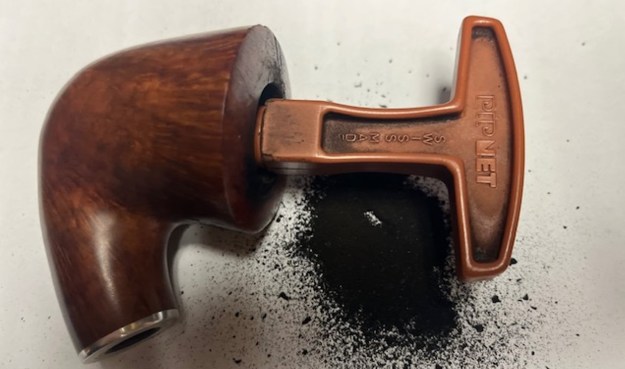
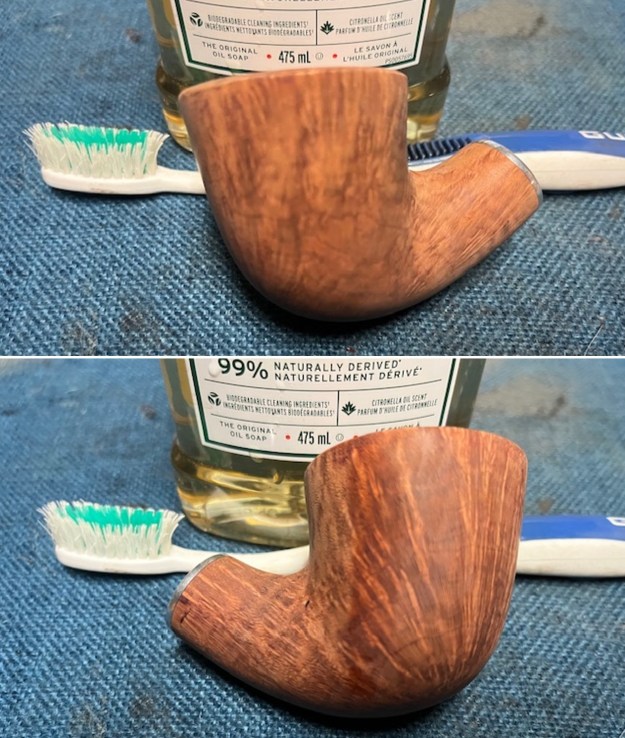
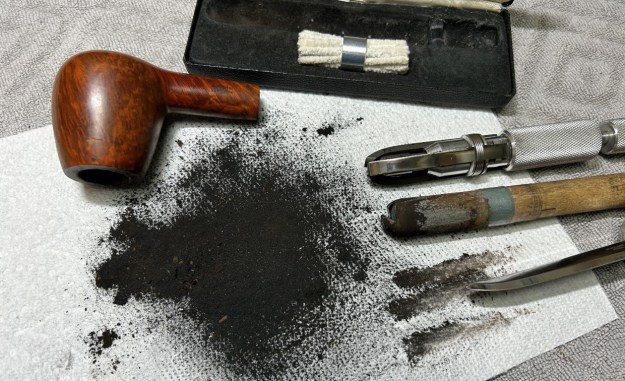
Now it was time to work on the pipe itself. I reamed the bowl with a PipNet pipe reamer using the cutting heads 2 and 3. I finished the reaming with a Savinelli Fitsall Pipe Knife. I sanded the walls of the bowl with 220 grit sandpaper wrapped around a piece of dowel.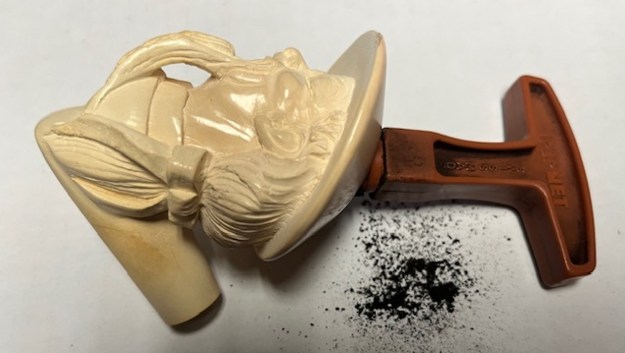
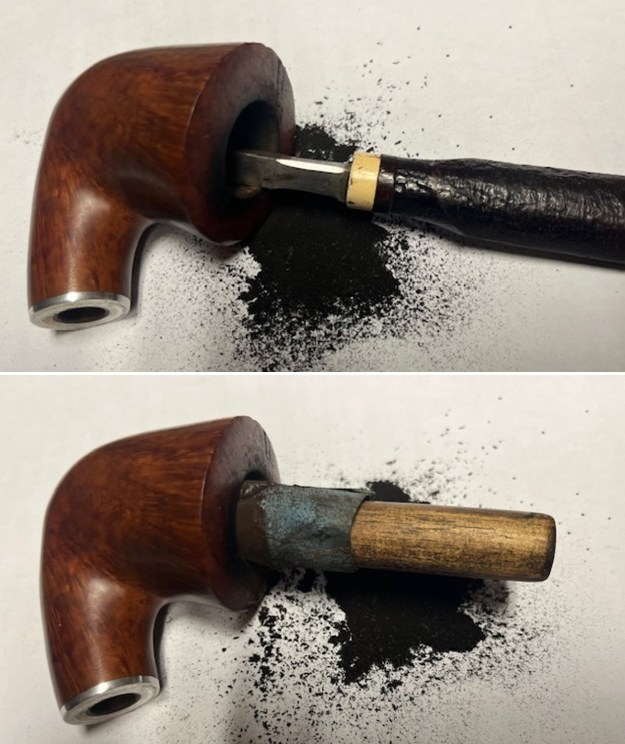
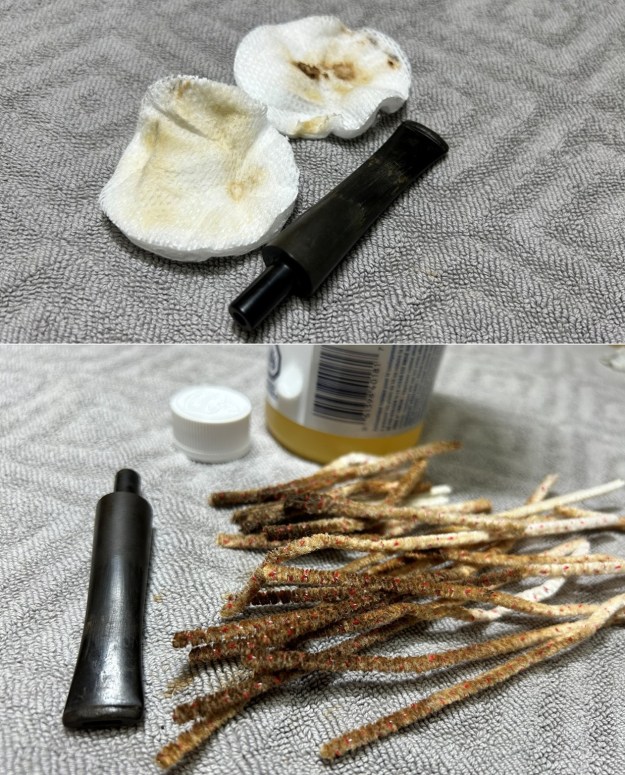
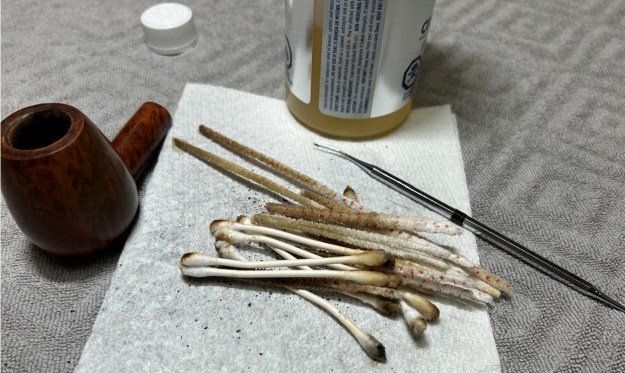
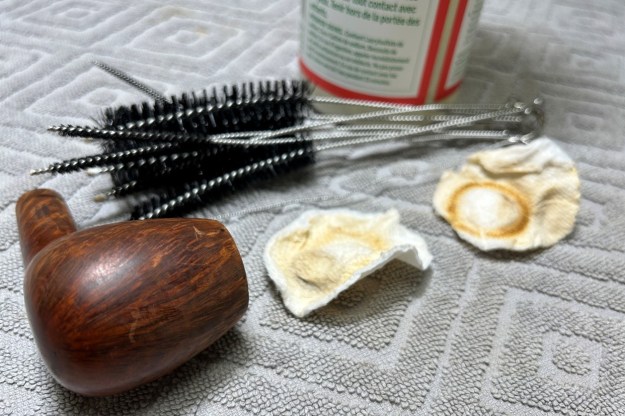
 I cleaned out the inside of the shank and the airway in the stem with alcohol, cotton swabs and regular pipe cleaners.
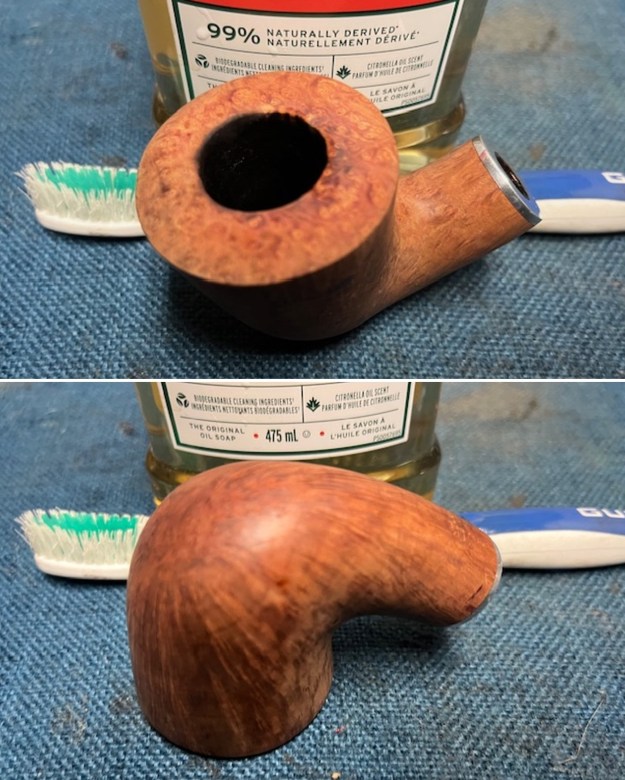
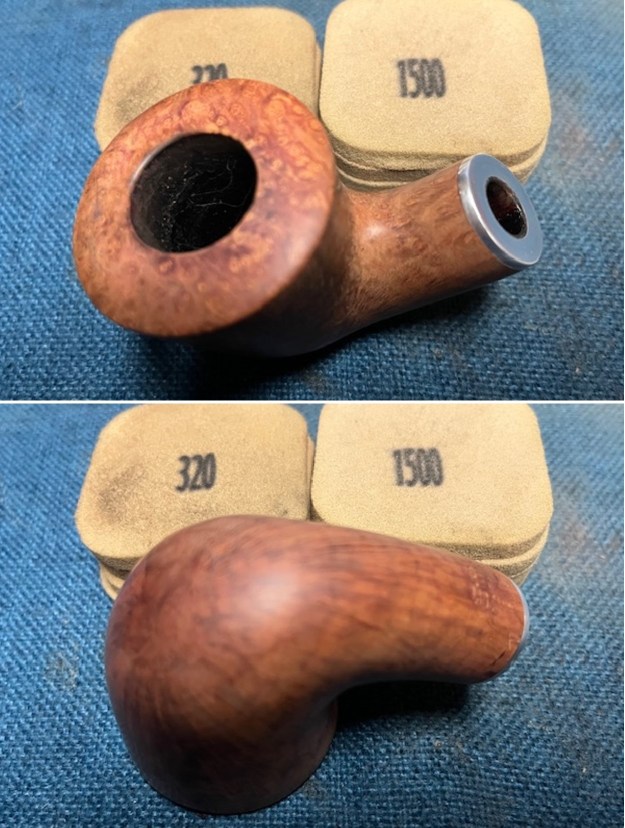
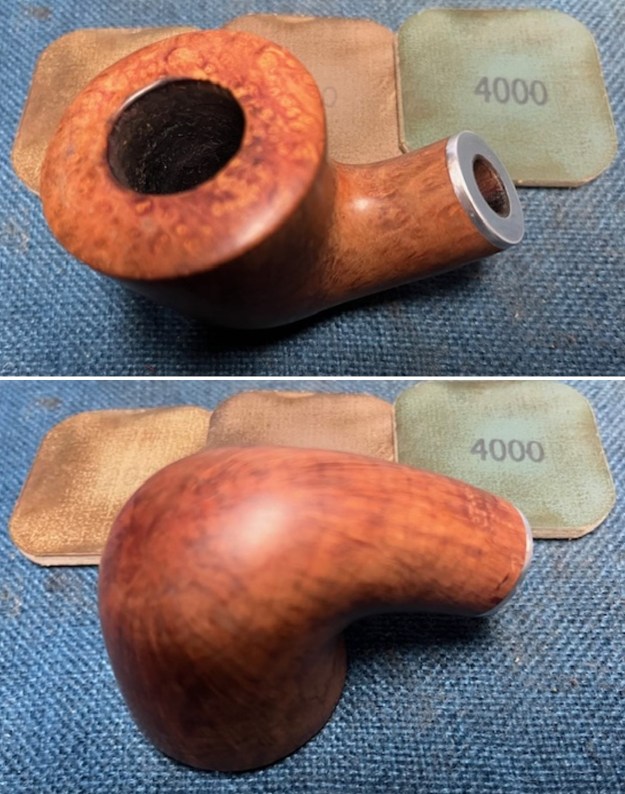
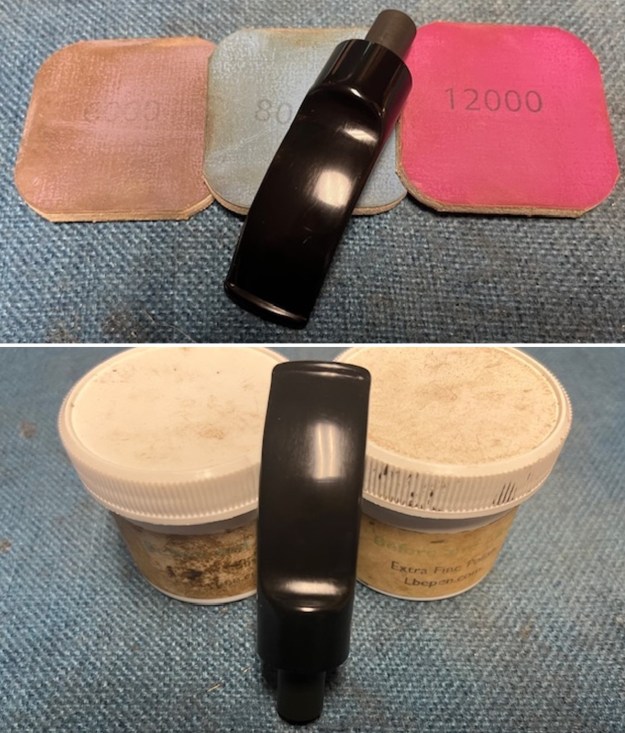
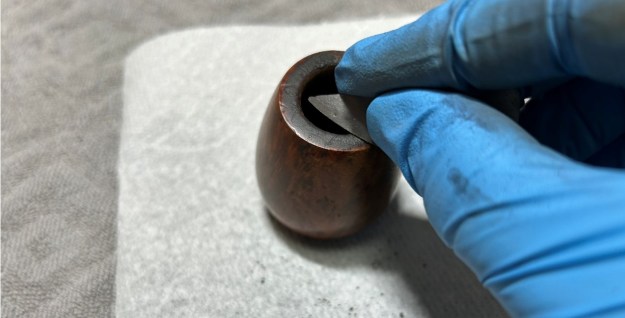
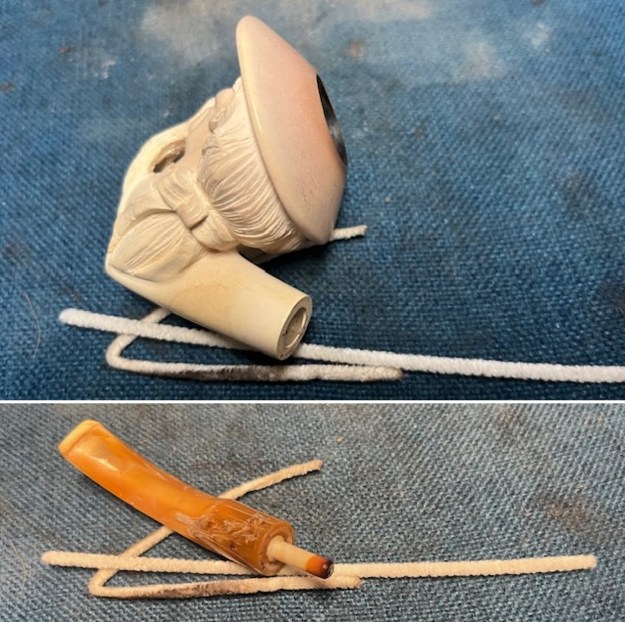 I dry sanded the bowl and the light lava on the rim top and edges with 320-3500 grit 2×2 inch sanding pads to remove the remaining scratches and marks on the rim top. I wiped it down with a damp cloth after each sanding pad to remove the sanding dust and debris. It started looking better.
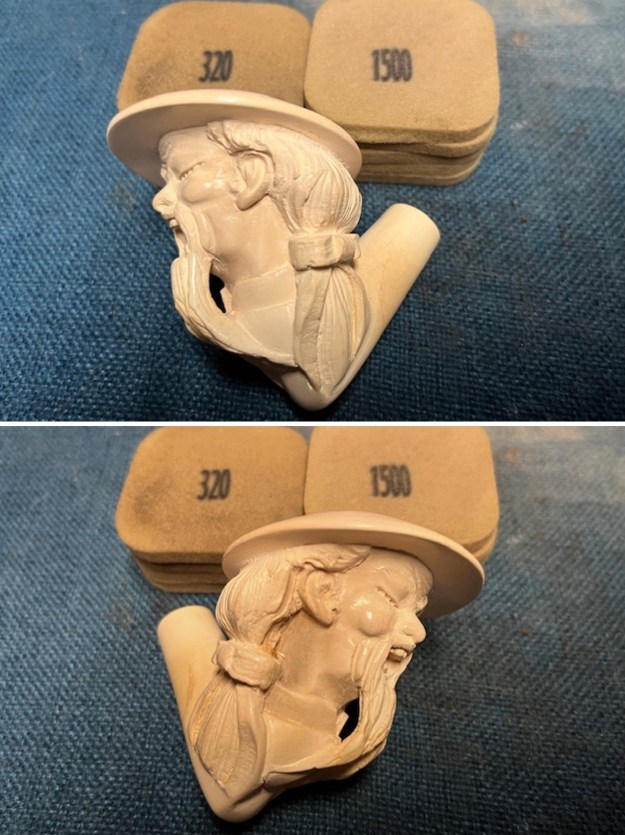
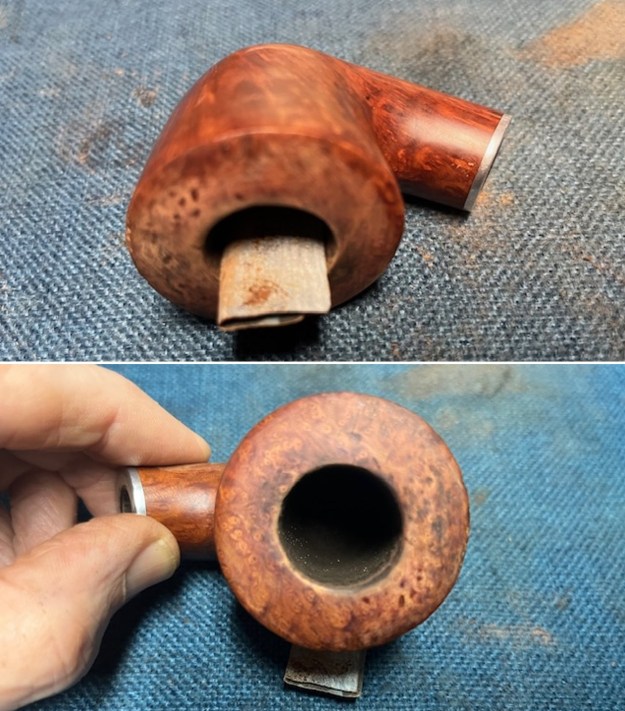
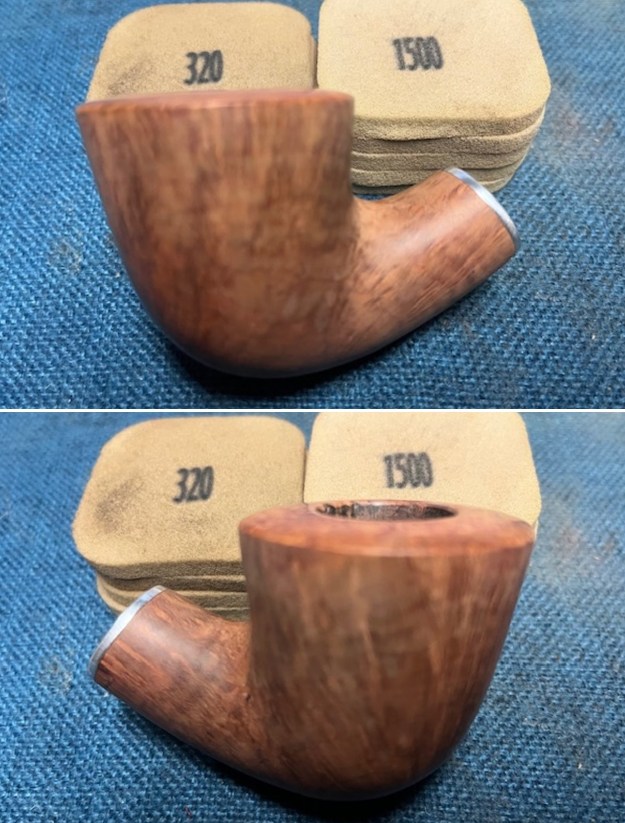
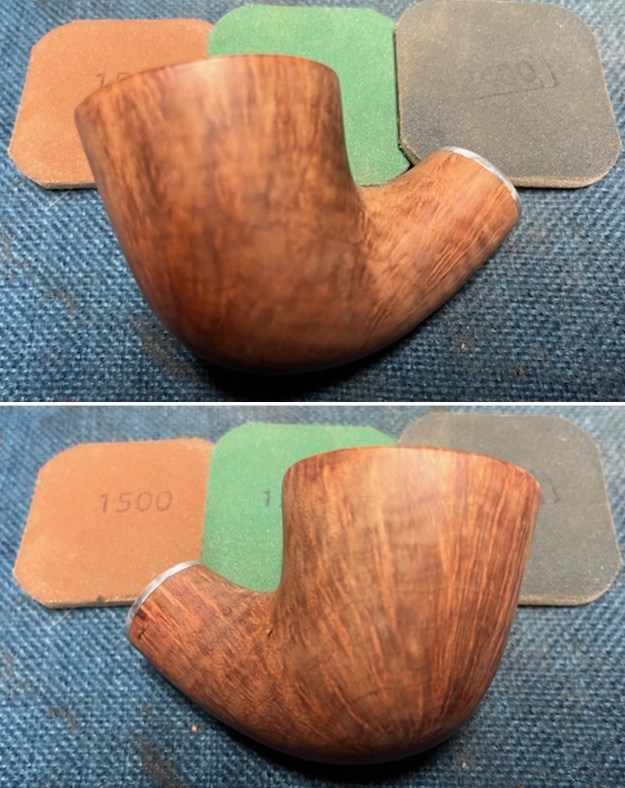
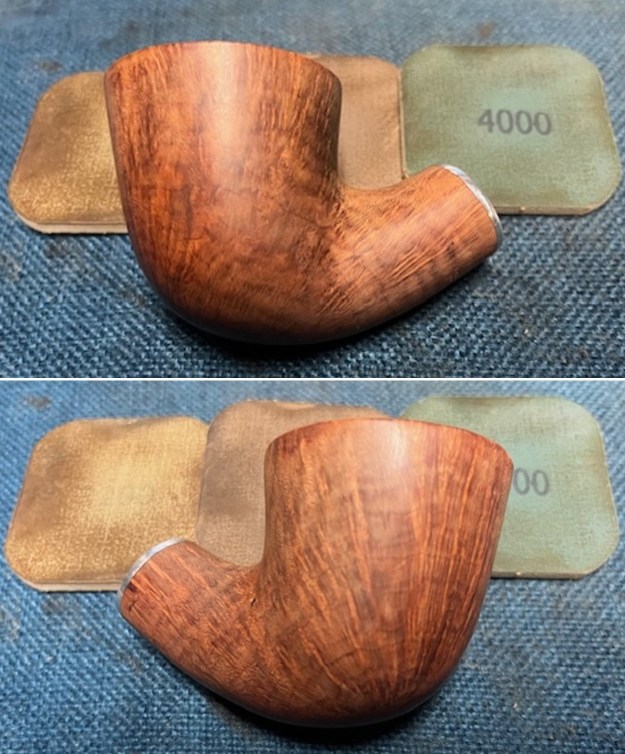
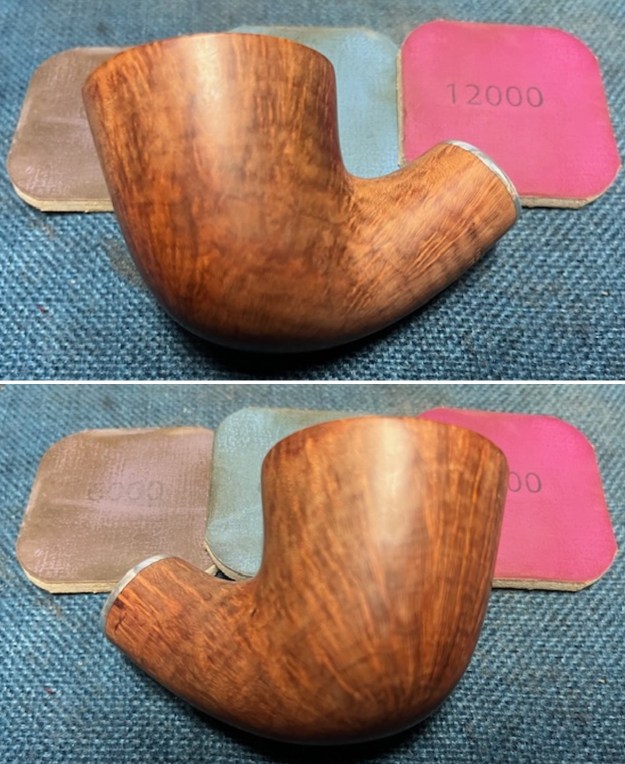
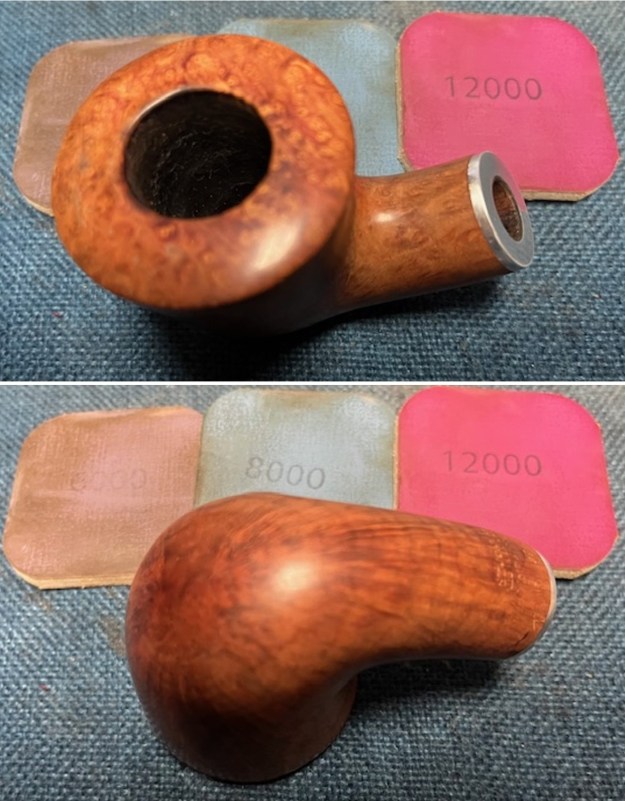
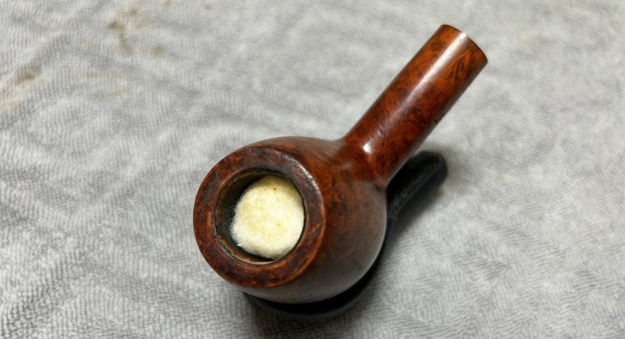
 I polished the meerschaum with micromesh because it was in such good condition. I dry sanded it with 1500-12000 grit micromesh sanding pads. I wiped the bowl down after each sanding pad with a damp cloth.
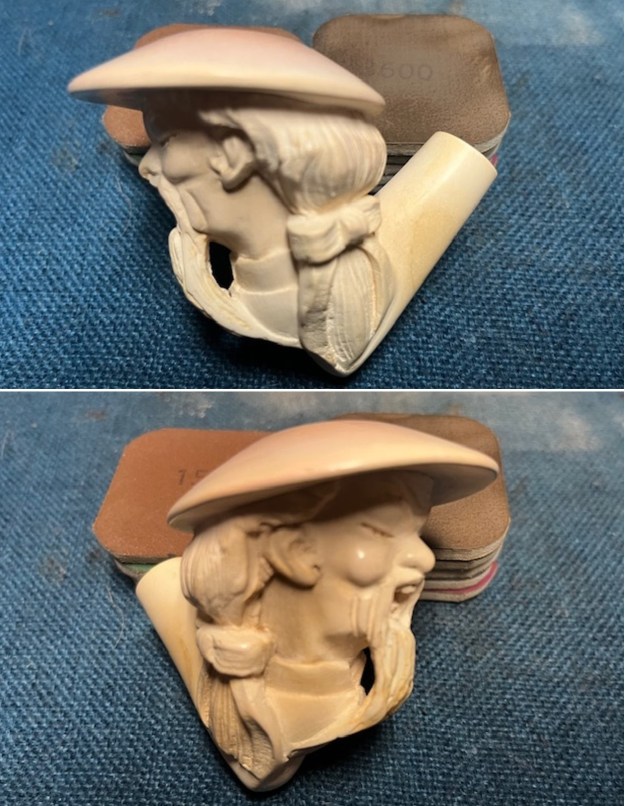
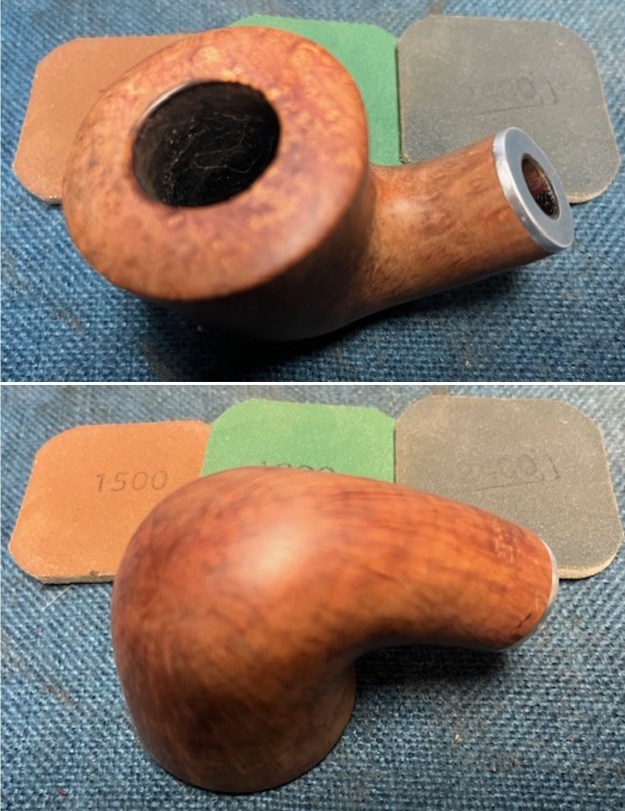
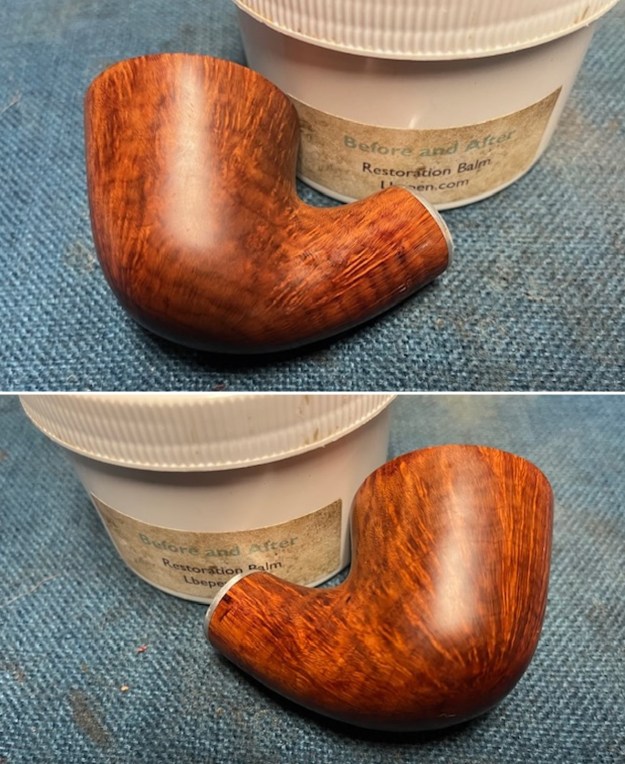
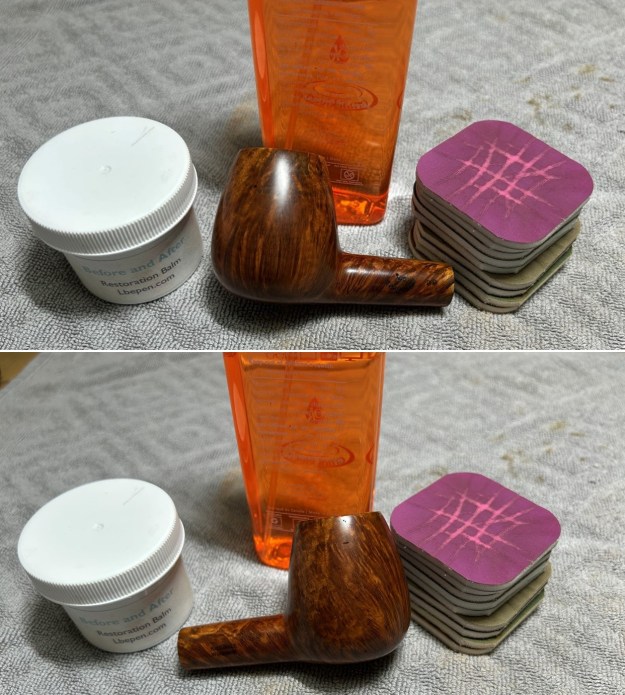
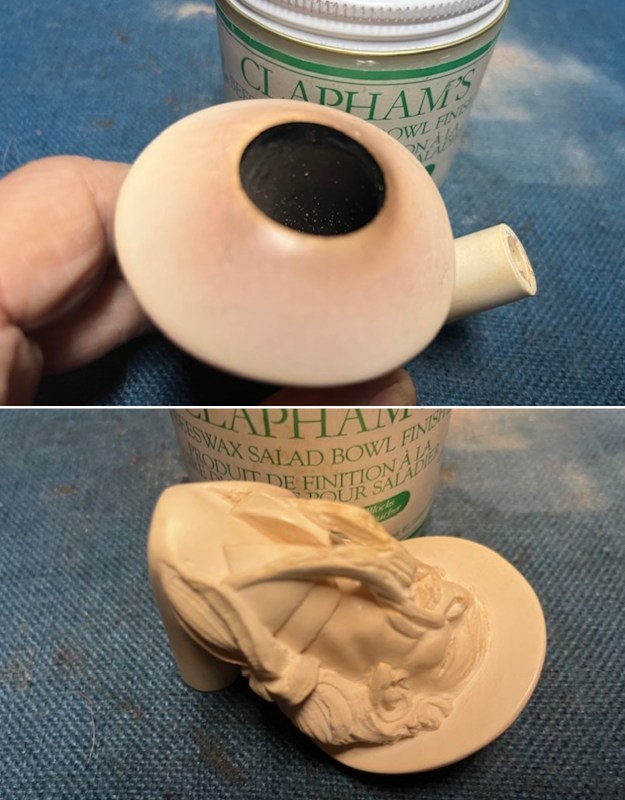
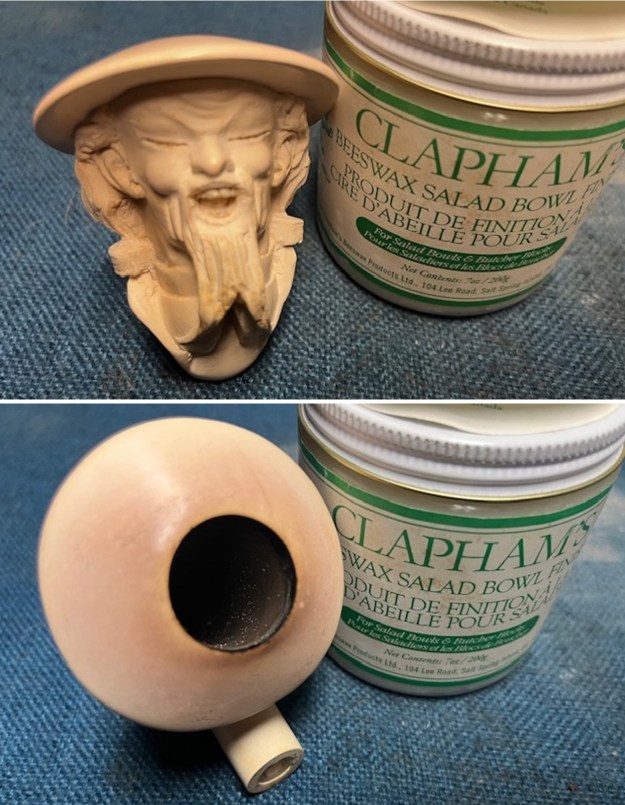
 I rubbed the briar down with Clapham’s Beeswax/Carnauba Wax. I worked it into the grooves with qtips and into the smooth portions with my fingertips. The product works to clean, enliven and raise a shine in the meerschaum. I let it sit for 10 minutes while I worked on the stem. After the time passed I buffed it with a cotton cloth to deepen the shine. The bowl took on a rich shine.
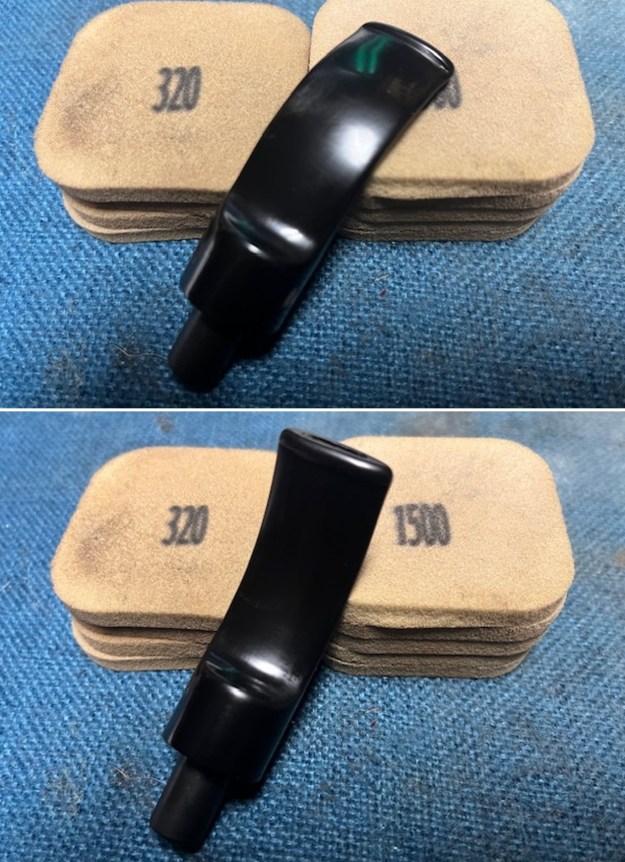
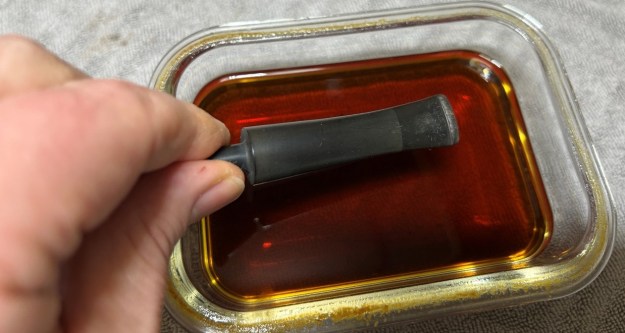
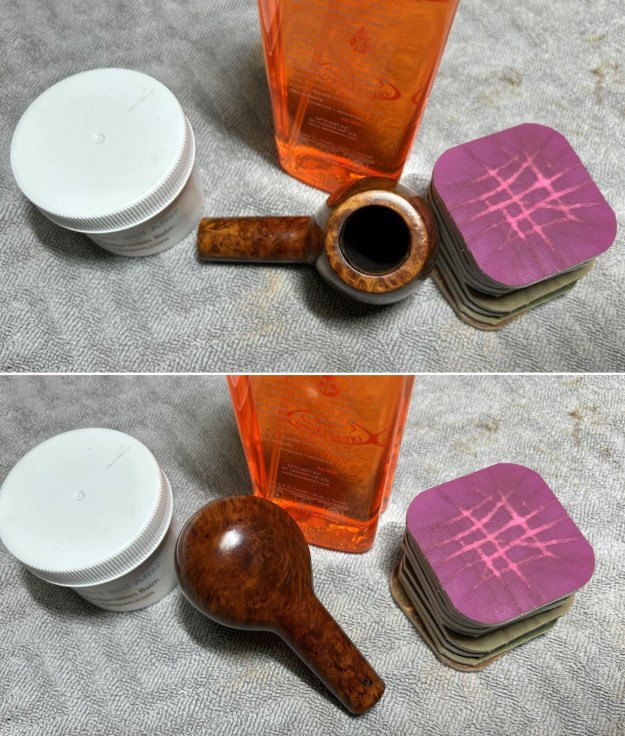
 I set the bowl aside and turned my attention to the stem. I dry sanded the surface with 320-3500 grit 2×2 inch pads to further blend in the repairs to the acrylic surface. I wiped the stem down with an Obsidian Oil cloth after each sanding pad. It began to take on a rich shine.
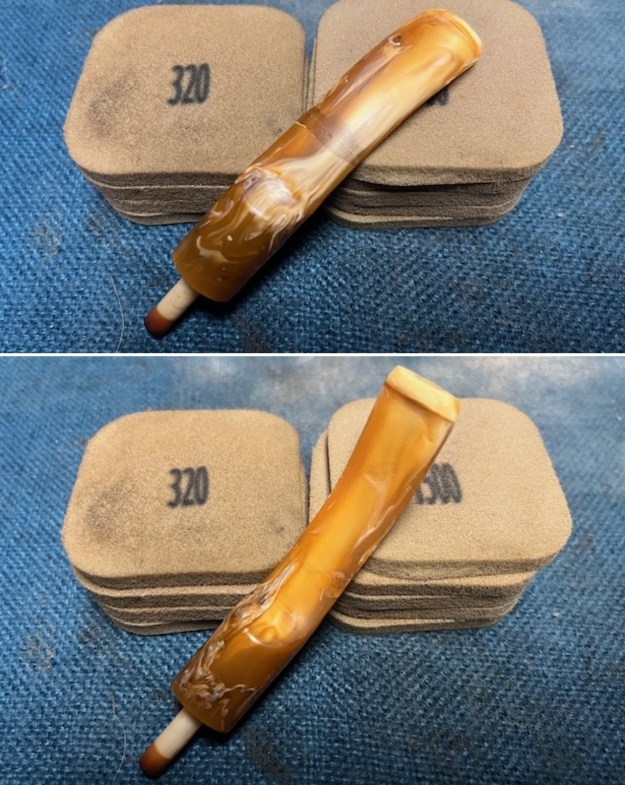 I set the bowl aside and turned my attention to the stem. I polished the stem with micromesh sanding pads – dry sanding with 1500-12000 grit pads. I wiped the stem down after each sanding pad with Obsidian Oil. I polished it with Before & After Pipe Stem Polish – both Fine and Extra Fine. I gave it a coat of Obsidian Pipe Stem Oil. It works to protect the stem from oxidizing. I set it aside to dry.
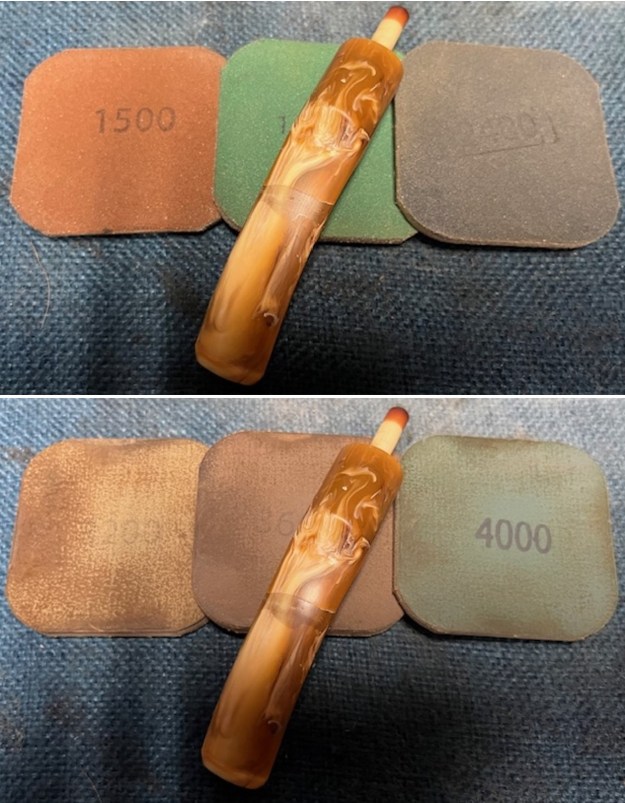
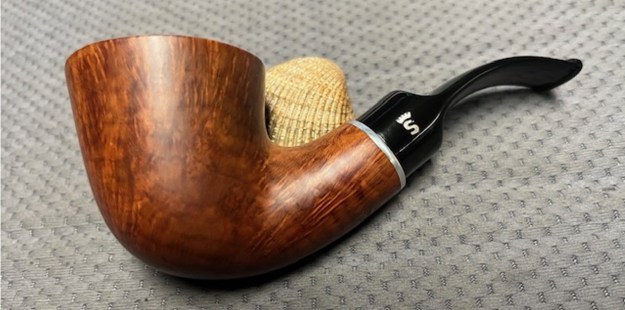
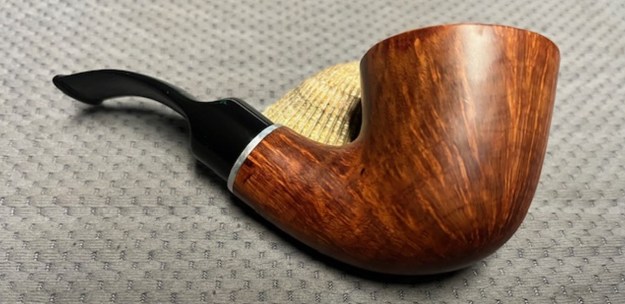
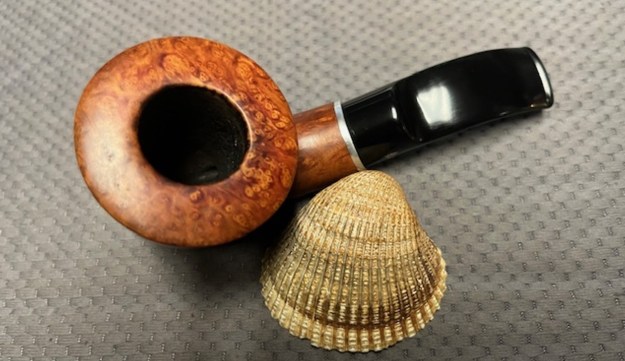
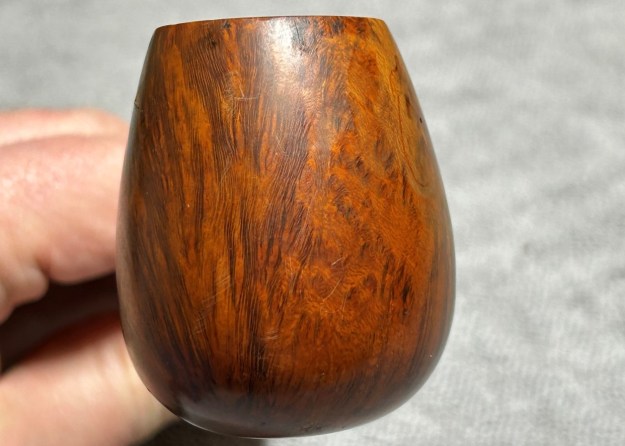
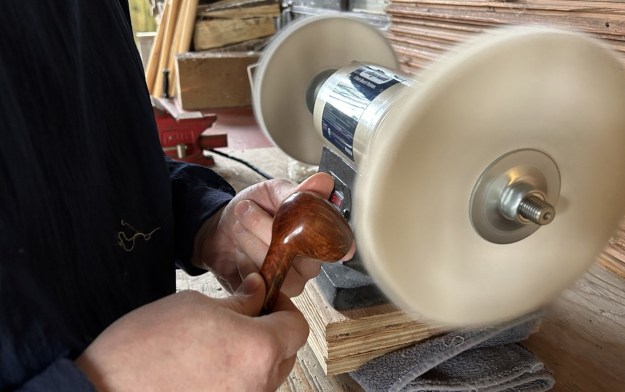
 I am excited to put the finishing touches on this Sunlap Block Meerschaum Chinese Singing Worker. I put the pipe back together and buffed it with Blue Diamond on the buffing wheel. I gave the bowl and the stem multiple coats of carnauba wax. I buffed the pipe with a clean buffing pad to raise the shine and hand buffed it with microfiber cloth to deepen the shine. It is fun to see what the polished bowl looks like with the polished black, fancy turned vulcanite stem was beautiful. This Sunlap Meerschaum Chinese Singing Worker is nice looking and the pipe feels great in my hand. It is light and well balanced. Have a look at it with the photos below. The dimensions are Length: 5 ½ inches, Height: 3 inches, Outside diameter of the bowl: 2 ½ inches, Chamber diameter: 7/8 of an inch. The weight of the pipe is 1.6 9 ounces/49 grams. It is a beautiful pipe and one that I will be putting in the Meerschaum Section on the rebornpipes store. Thanks for walking through the cleanup with me as I worked over this pipe.
As always, I encourage your questions and comments as you read the blog. Thanks to each of you who are reading this blog. Remember we are not pipe owners; we are pipe men and women who hold our pipes in trust until they pass on into the trust of those who follow us.