by Kenneth Lieblich
I’ve mentioned several times that I have an interest in French pipes and pipemaking. In recent decades, French pipes have received a fair amount of derision – and deservedly so. However, old French pipes are often very beautiful, well-made, and wonderful models of early pipe history. In my own small way, I am aiming to resurrect the reputation of early French pipes. There are superb pipes to be had from France. This blog post is about the restoration of a pipe that really attracted me and is going into my ‘French Collection’.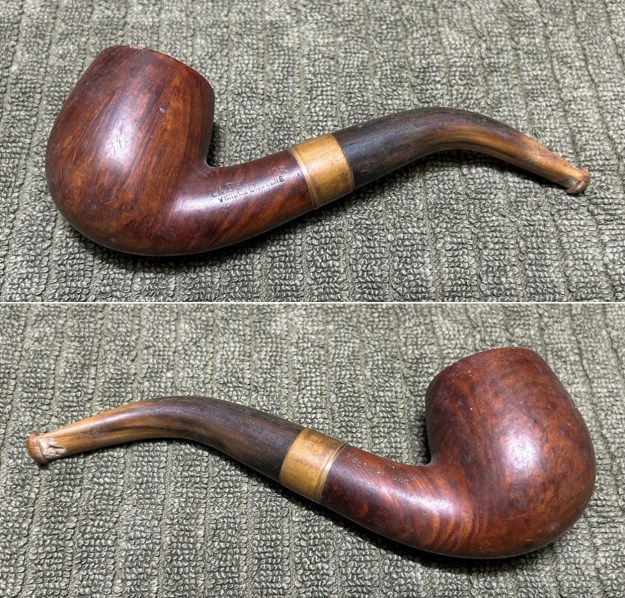
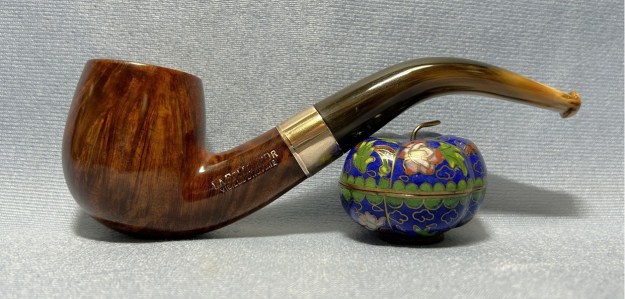
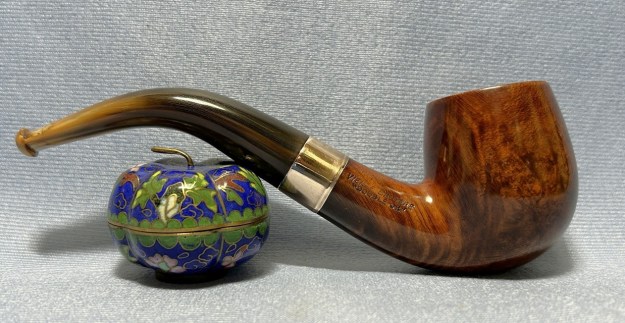
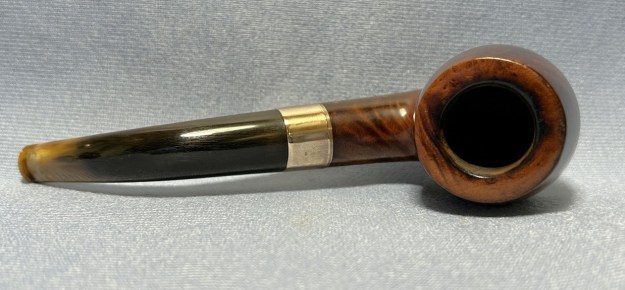
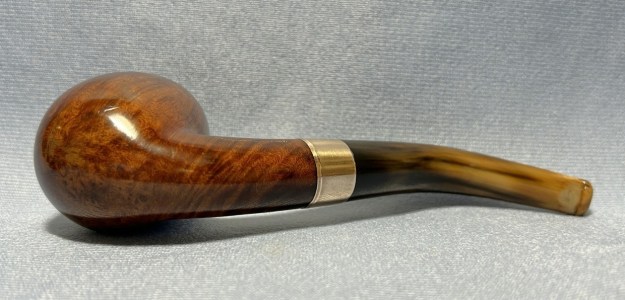
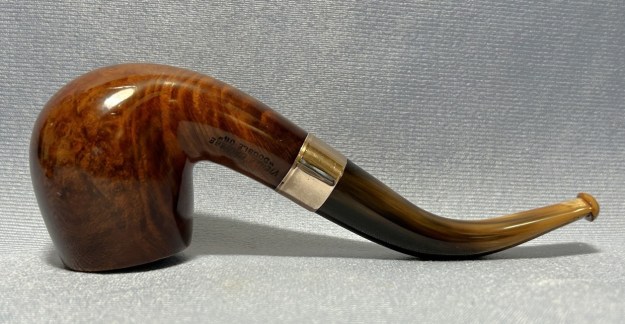
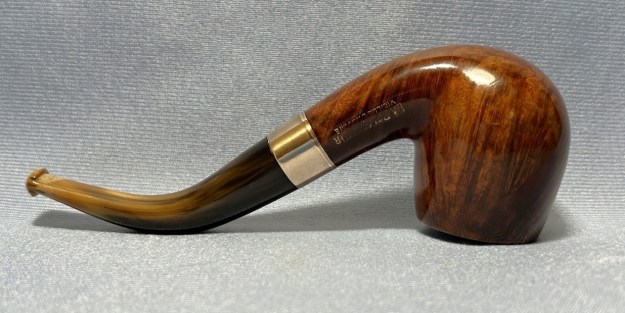
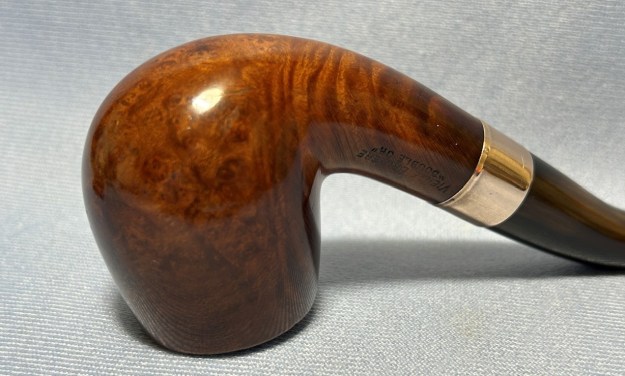
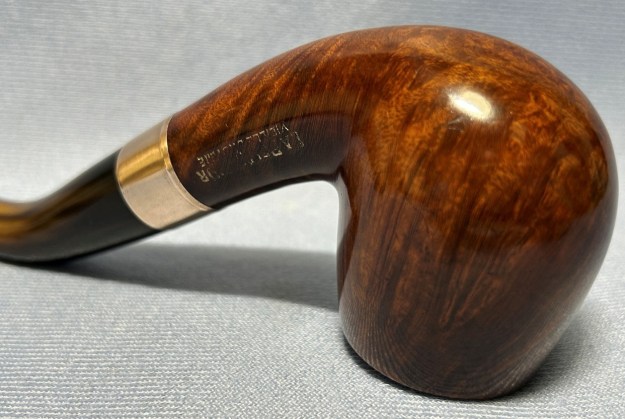
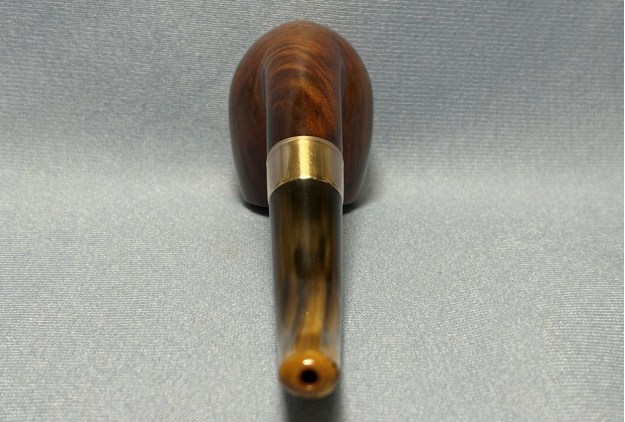
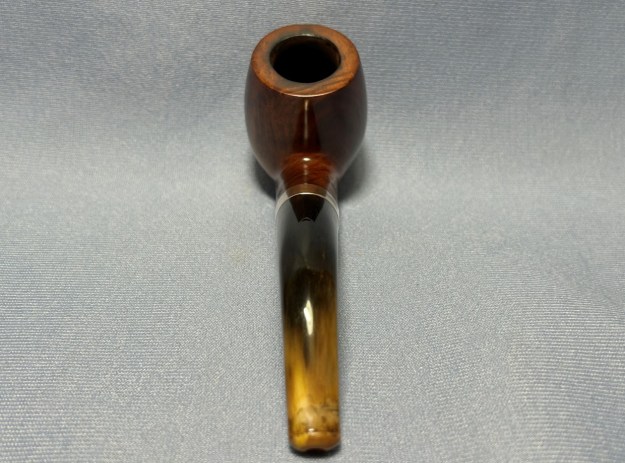
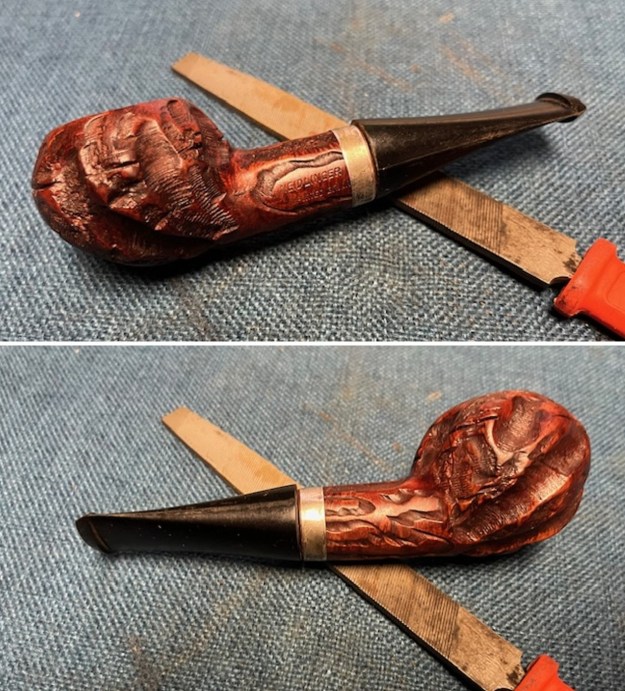
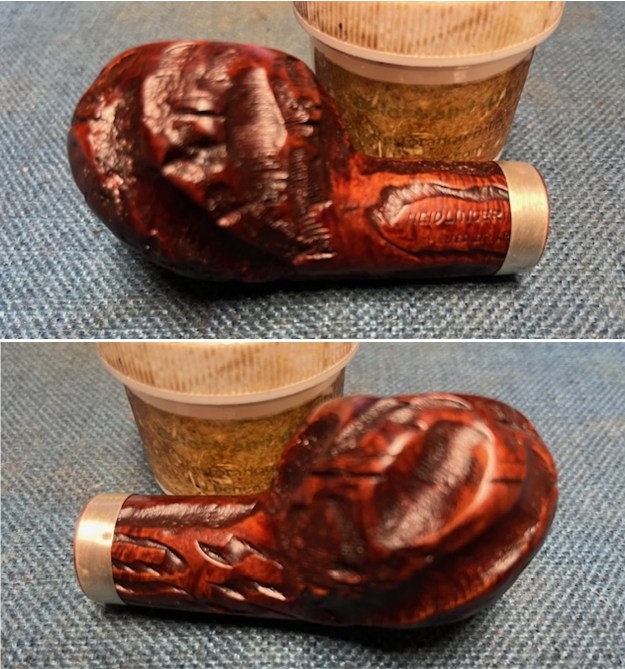
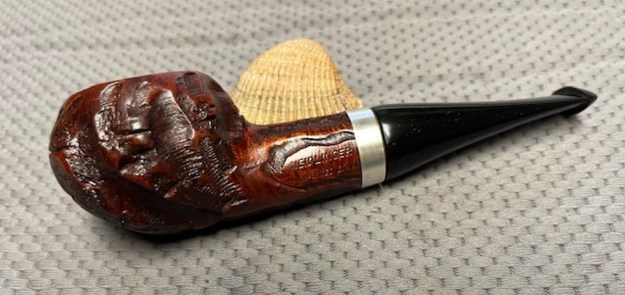
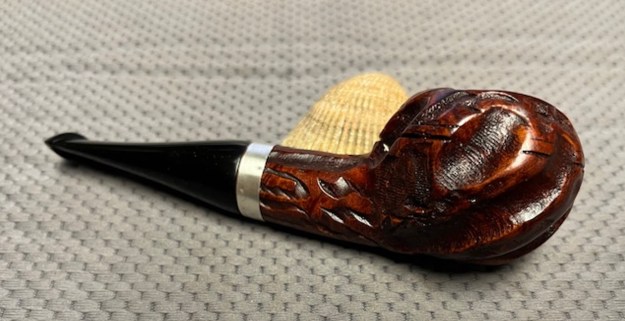
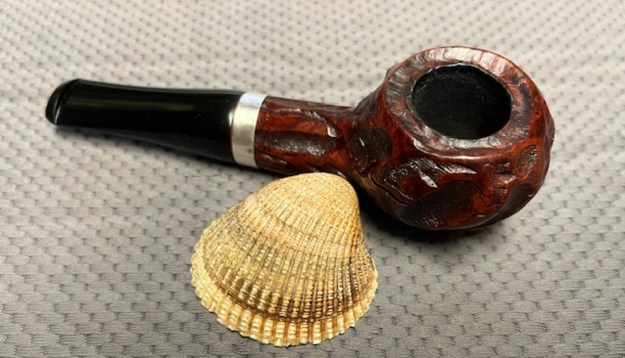
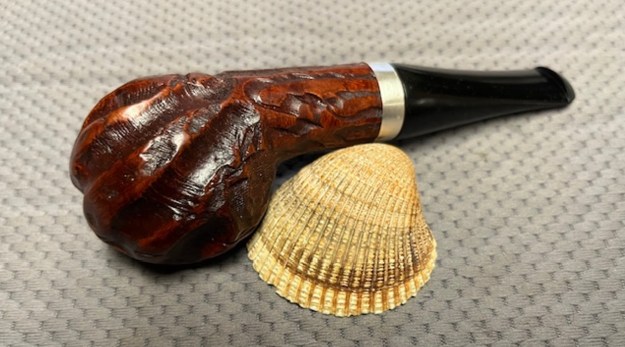
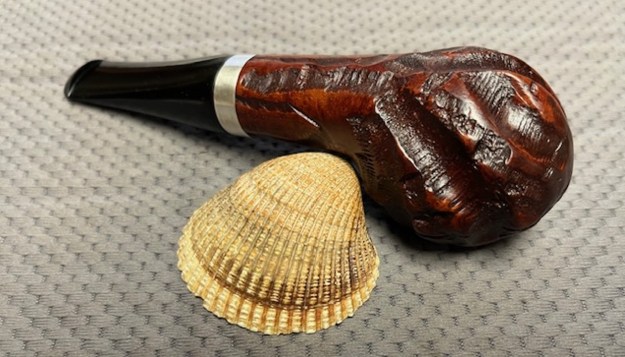
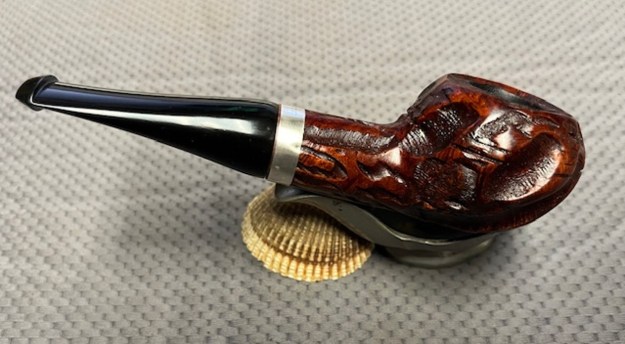
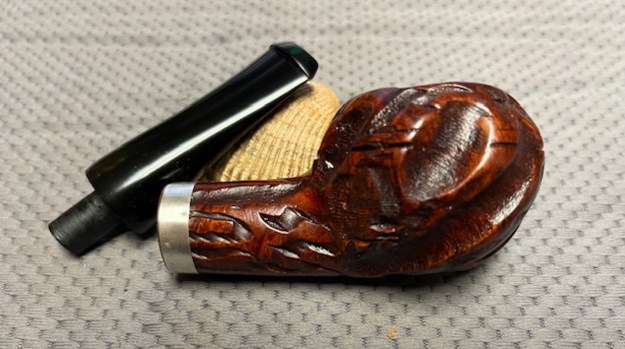
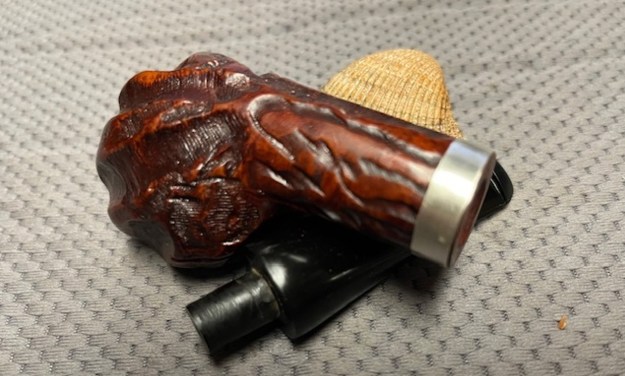
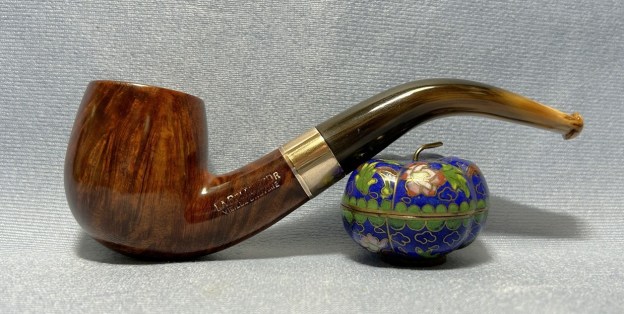
 This is an attractive bent billiard, with the brand name La Belle d’Or – which literally means ‘The Beauty of Gold,’ but is better translated as ‘The Golden Beauty’. It has strong, thick, briar walls, a classic, brass ferrule, and a long, luxurious, horn stem. The left side of the stummel’s shank reads, La Belle d’Or [over] Vieille Bruyère. The stamping is clear, albeit a bit worn through the middle. The right side of the stummel’s shank reads, Vieille Bruyère [over] “Double Or”. The words vieille bruyère can be literally translated as ‘old briar,’ but are probably best understood as ‘aged briar’. Why those words are mentioned on both sides of the pipe is unknown to me. The words double or literally mean ‘double gold’, and this phrase is meant to imply something extra special – not just gold, but double gold.
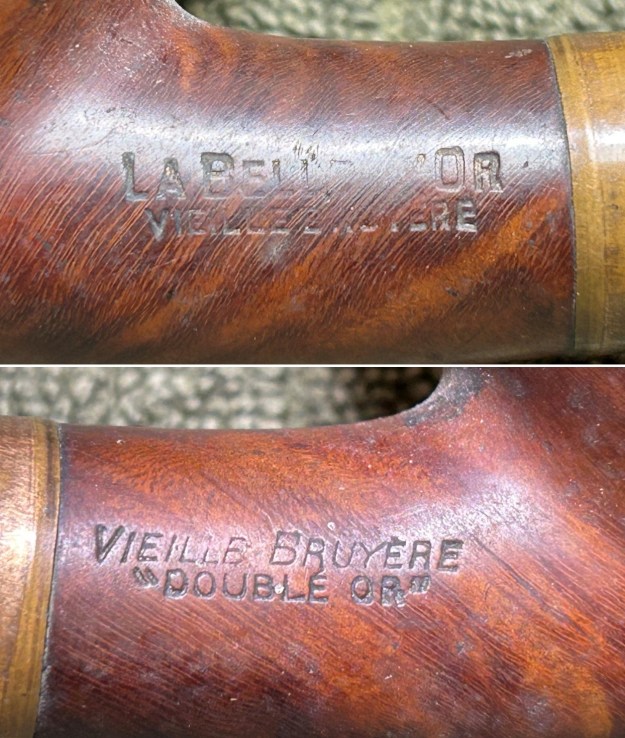 Before examining the background of this pipe, I want to take a moment and reflect on its aesthetics. To my taste, this pipe is just sublime. The shape is an admirable exemplar of what a bent billiard should be. The proportions are right. The curves are alluring. The grain in the wood is lovely. The brass ferrule complements the thick briar perfectly. The size is comfortable (around a Dunhill ④, for comparison). The draught hole is perfectly drilled. In short, whichever pipemaker made this, he did an excellent job.
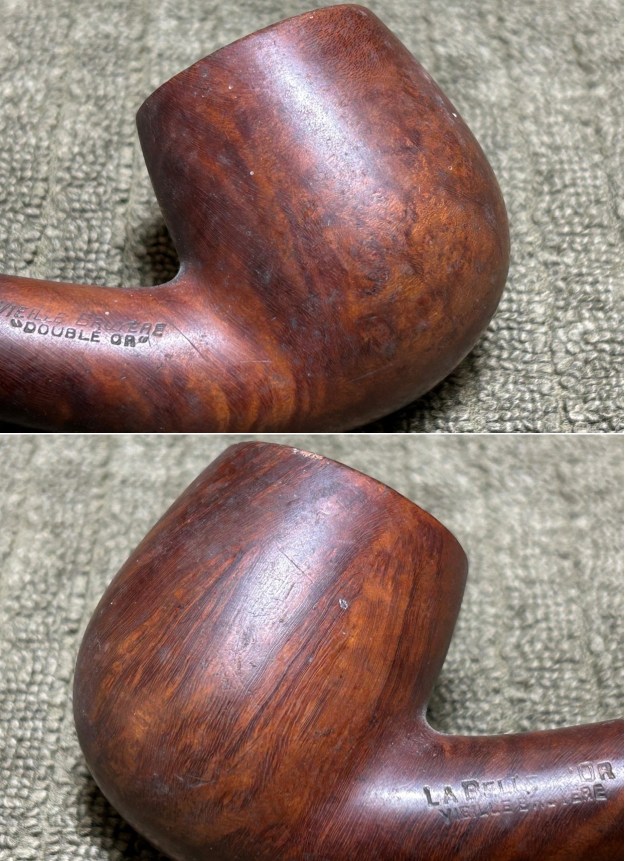
 As is the case with so many early French pipes, there is next-to-no information about the name, La Belle d’Or. I have access to quite a few resources on French pipes – books and websites – and I could not establish any definitive information on the brand. I do know that the pipe dates to approximately 1900, so it’s about 125 years old. I know this because the Amsterdam Pipe Museum has a pipe of the same brand, with similar features, that they date to 1900. Back in 2021, Steve restored a La Belle d’Or pipe (to my knowledge, the only one he’s done) and, unfortunately, he didn’t find any background information either. I have to assume that, based on the ample size of the bowl and the quality of the construction, this was probably an expensive pipe in its day.
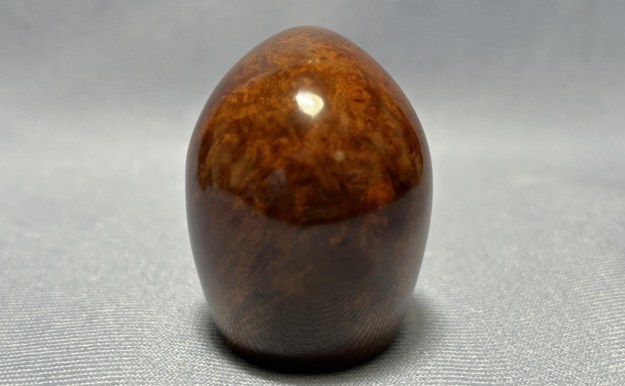
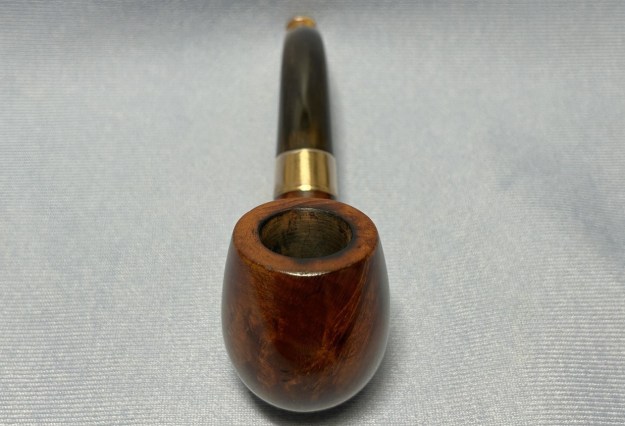
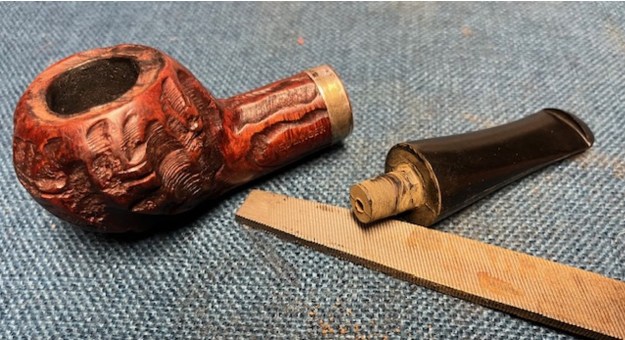
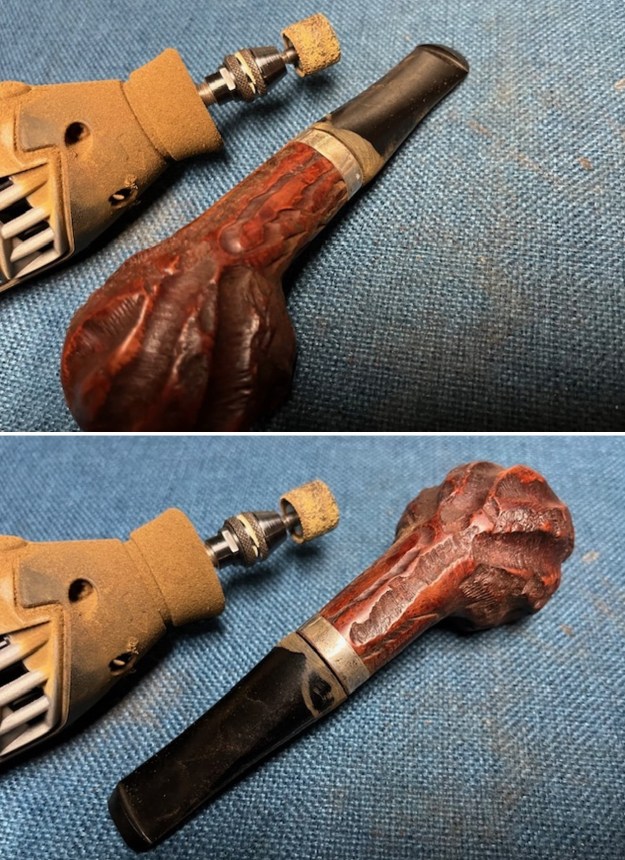
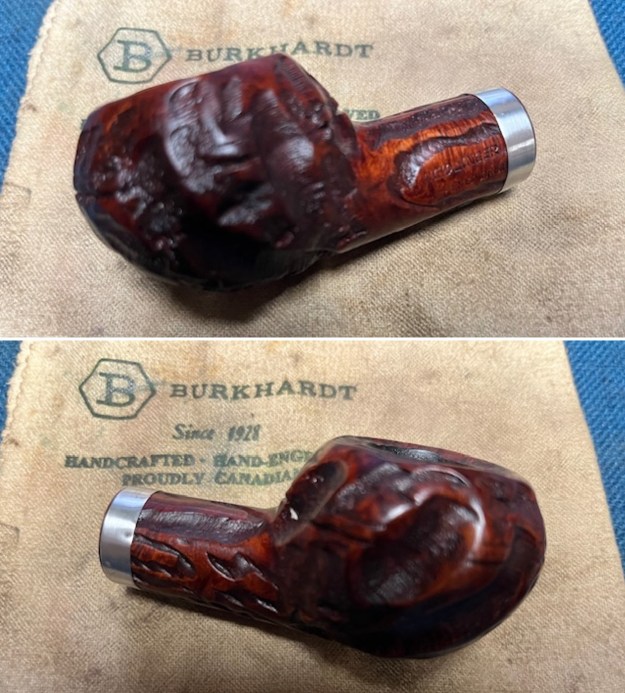
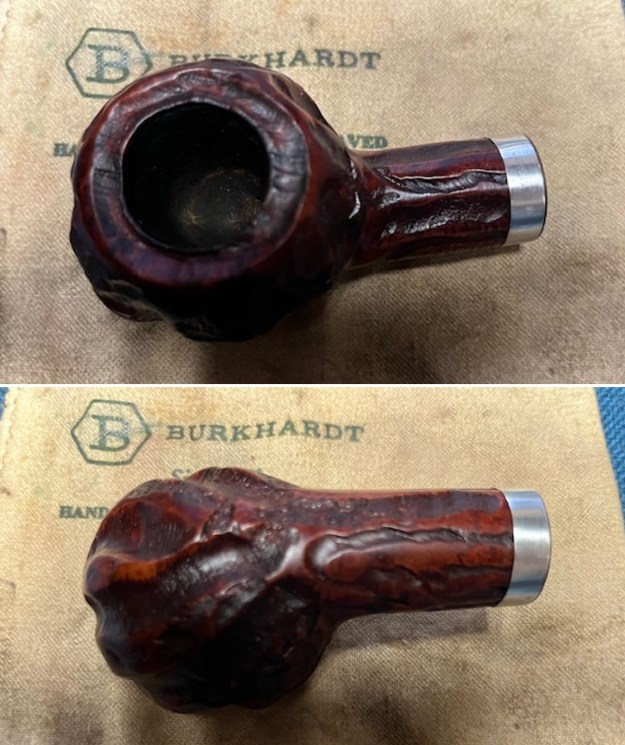
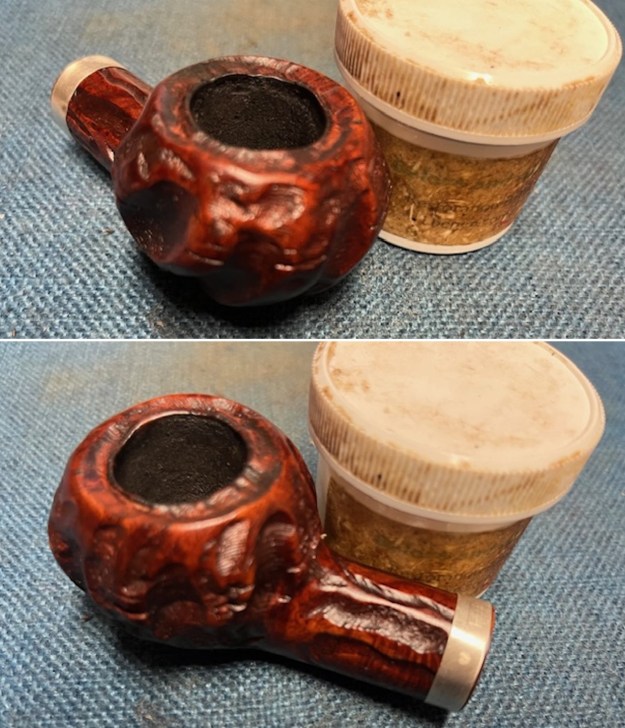
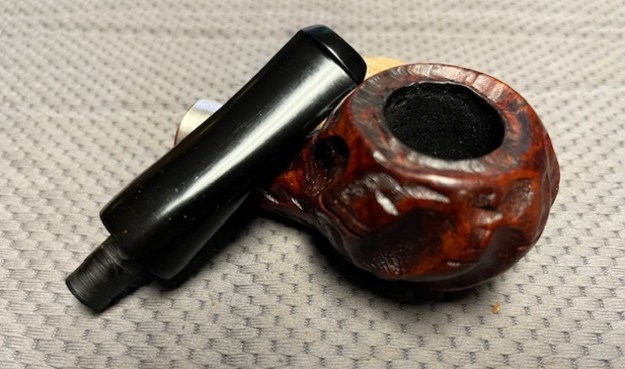
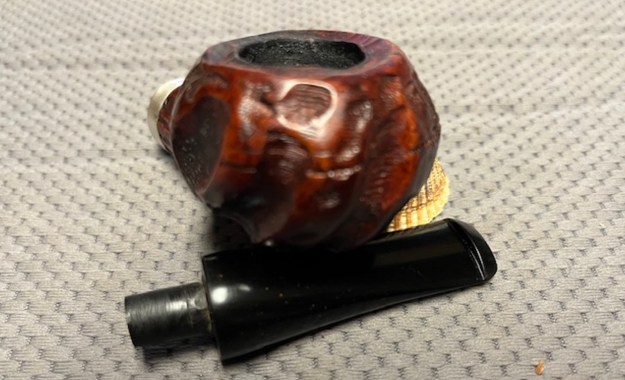
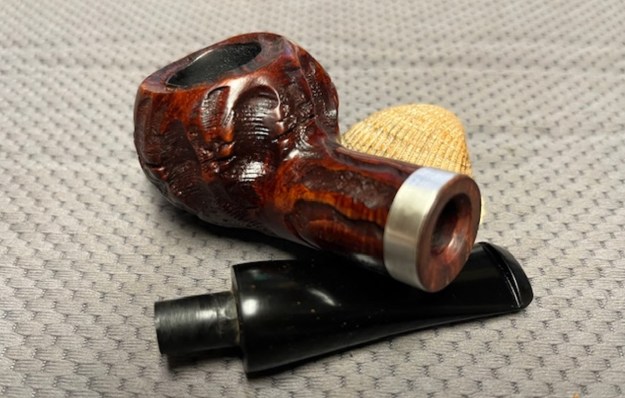
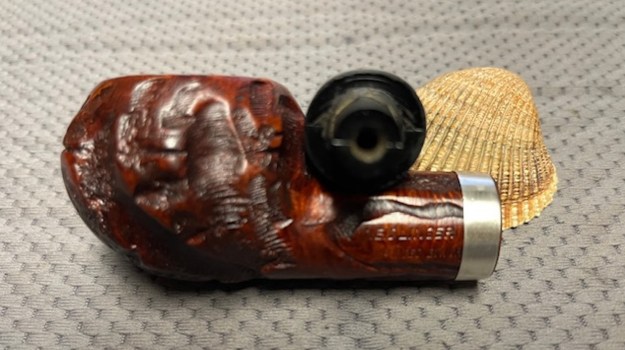
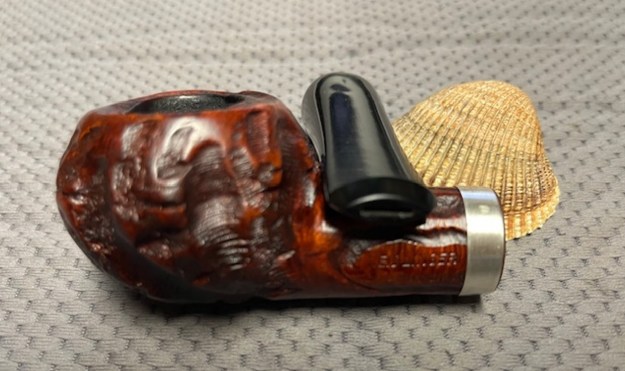
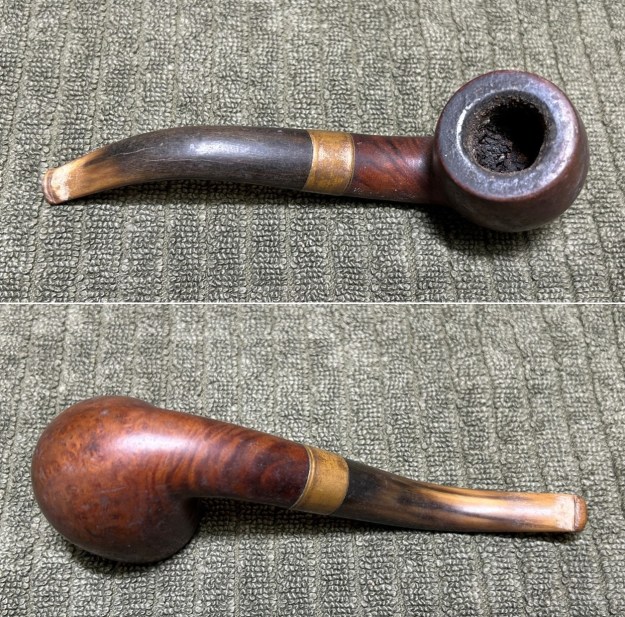
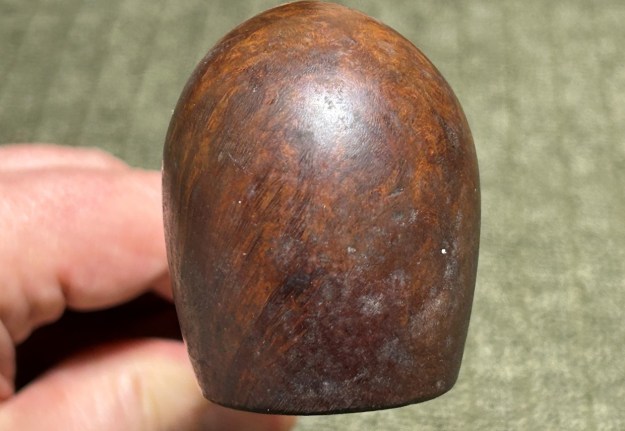
This pipe was clearly well-loved by its historic owner. The horn stem is solid, but thoroughly chomped by teeth of ages past. The stem has a bone tenon which is sound, but dirty. It also has an orific button. For more information on the orific button, please take the time to read Steve’s interesting article on the subject. The stummel is charming and dirty. As I mentioned, one can see the wonderful wood grain peeking through the grime. The bowl is thoroughly caked and obviously hasn’t been cleaned in aeons. There is also some light burning to the rim. I am excited to get this pipe cleaned up and back to its best.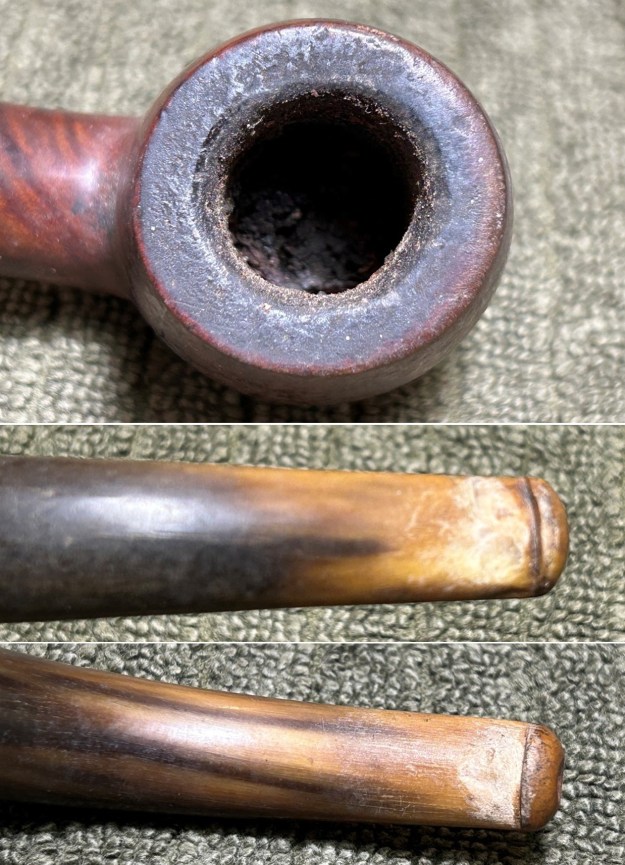 I used isopropyl alcohol on a few cotton rounds and wiped down the stem to provide an initial cleaning of filth before moving on. The primary cleaning came next. I disinfected the inside of the stem with pipe cleaners dipped in lemon-infused 99% isopropyl alcohol. I scrubbed thoroughly to make sure the interior was very clean. I used a lot of pipe cleaners!
 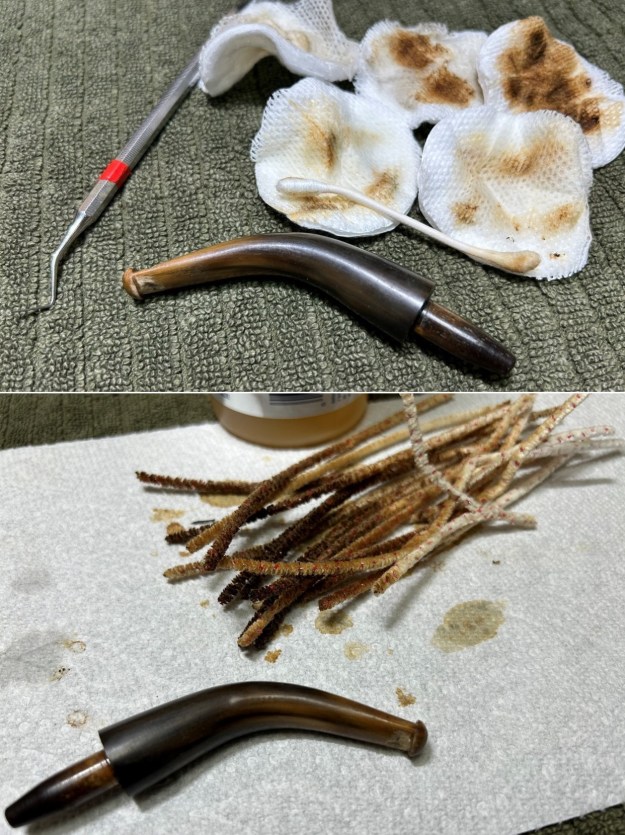 As the stem was now clean and dry, I set about fixing the dings and nicks in the surface of the horn. This was done by filling those divots with clear cyanoacrylate adhesive. I left this to cure and moved on.
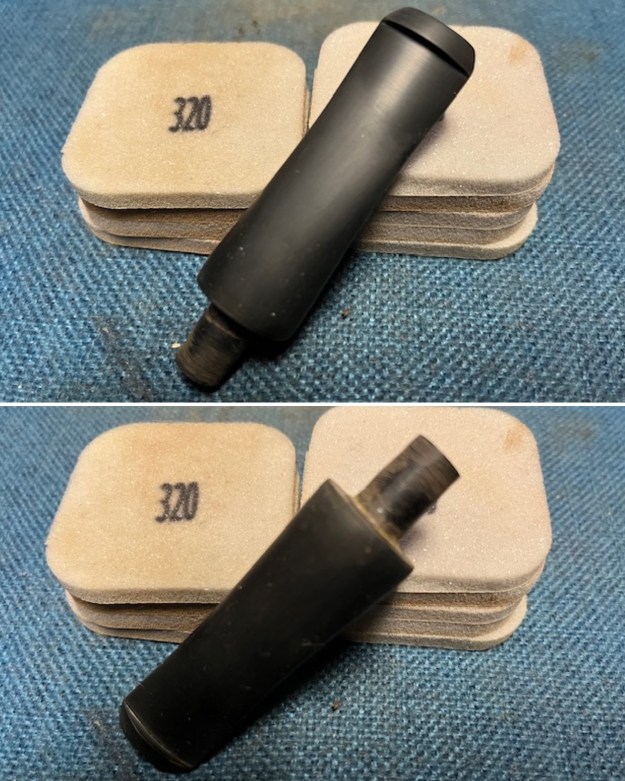
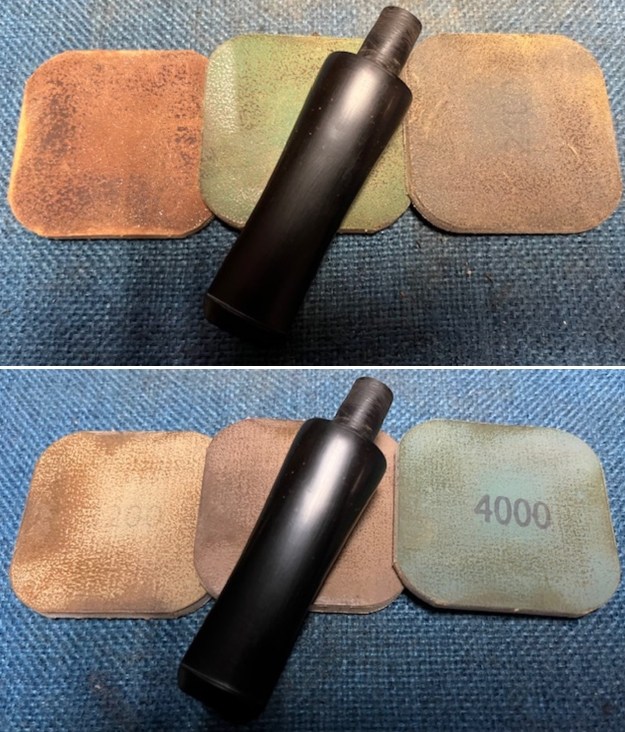
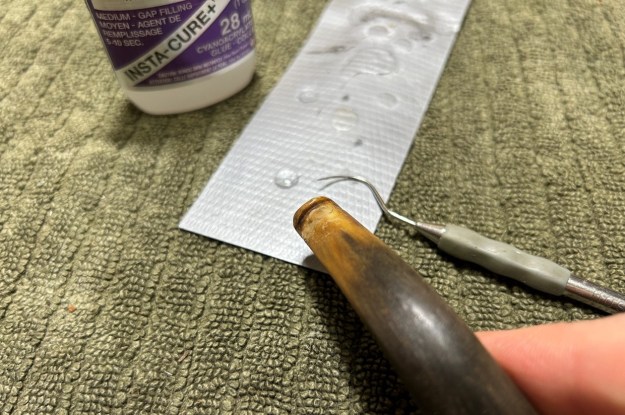 The penultimate step for the stem is sanding. First, with my set of needle files, I reduced the bulk of the cyanoacrylate repairs. I removed the excess adhesive as near to the surface as possible, without cutting into the horn. Following that, I used all nine of the micromesh sanding pads (1,500 through 12,000 grit) to sand out flaws, even out the horn, and provide gentle polishing of the finished surface. I also applied pipe-stem oil while using the last five micromesh pads. There was a wonderful, variegated shine to the stem when I was done.
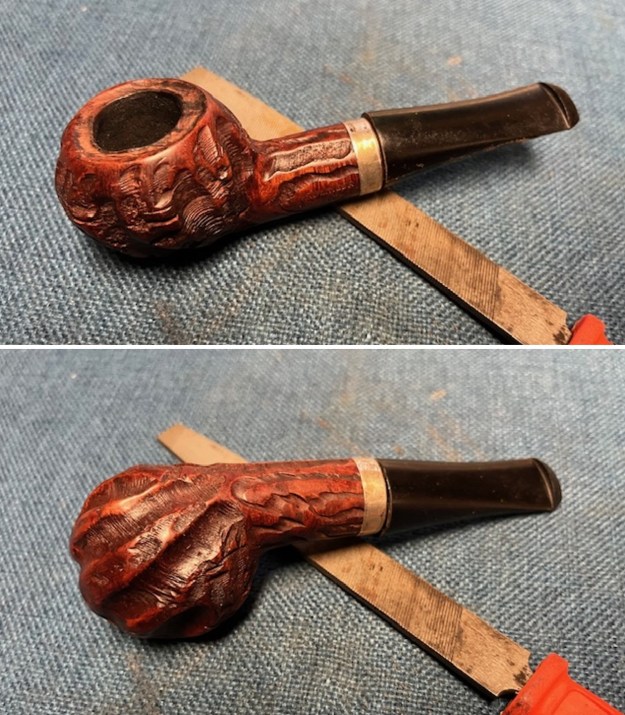
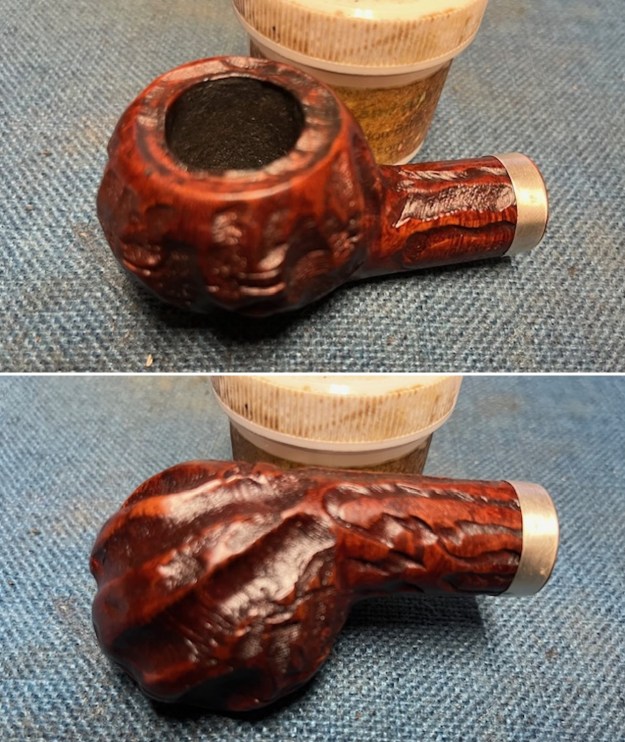
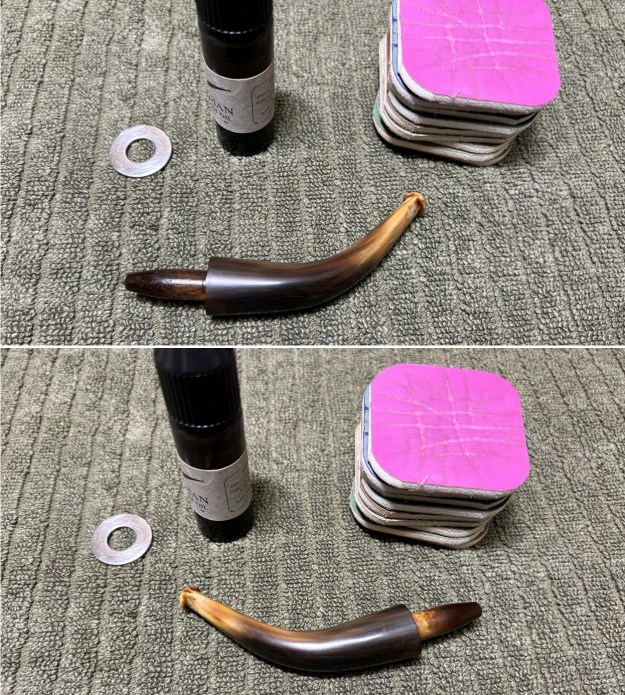 As the stem was (nearly) complete, I moved on to the stummel. The first step was to ream out the bowl – that is to say, remove all the cake inside the bowl. This accomplished a couple of things. First (and most obviously), it cleaned the bowl and provided a refurbished chamber for future smoking. Second, when the old cake was removed, I could inspect the interior walls of the bowl and determine if there was damage or not. I used a reamer, a pipe knife, and a piece of sandpaper taped to a wooden dowel. Collectively, these ensured that all the debris was removed. Fortunately, the inside walls looked very good.
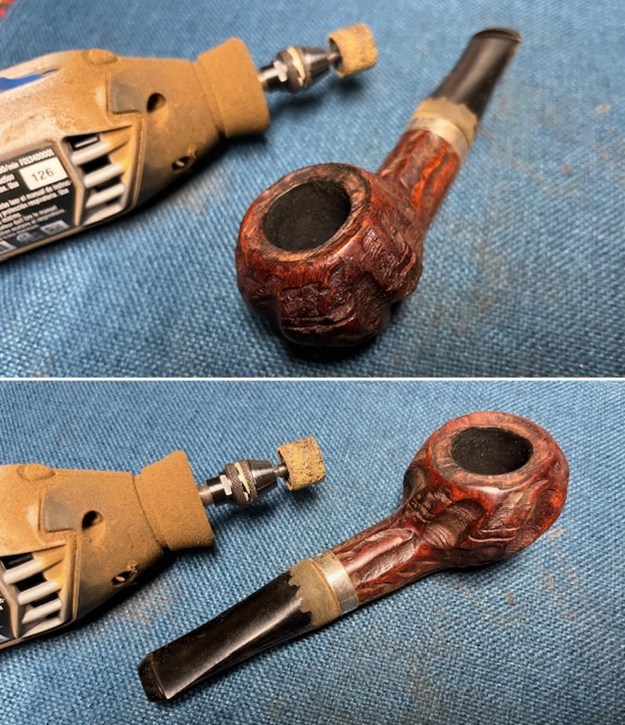
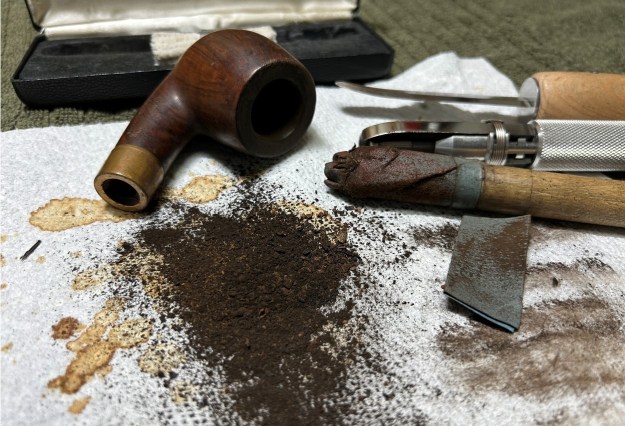 The inside of the stummel needed to be cleaned thoroughly. However, this pipe was so clogged, that I first needed to open the horribly occluded airway. So, I took a long drill bit, held in a drill chuck, and hand-cranked it to dislodge the dreadful detritus inside. Hand cranking is essential because it provides a precision and caution that a power drill cannot provide.
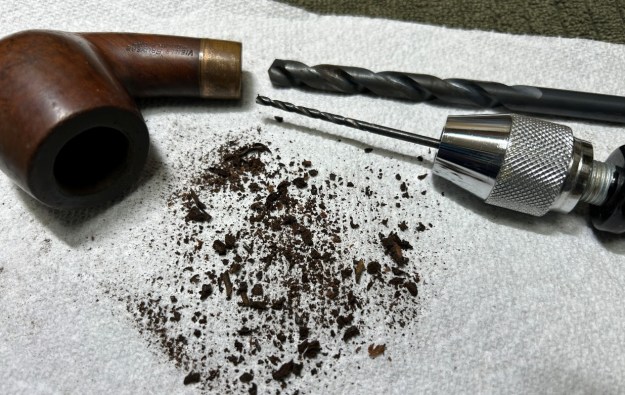 My next step was to remove the lava on the rim. For this, I took a piece of machine steel and gently scraped the lava away. The metal’s edge is sharp enough to remove what I need, but not so sharp that it damages the rim.
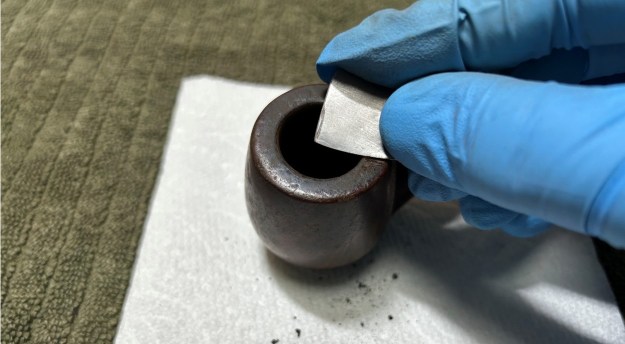 Similar to the stem, I then cleaned the stummel with both pipe cleaners and cotton swabs dipped in lemon-infused 99% isopropyl alcohol. With a pipe this dirty, it took quite a while and much cotton to get clean.
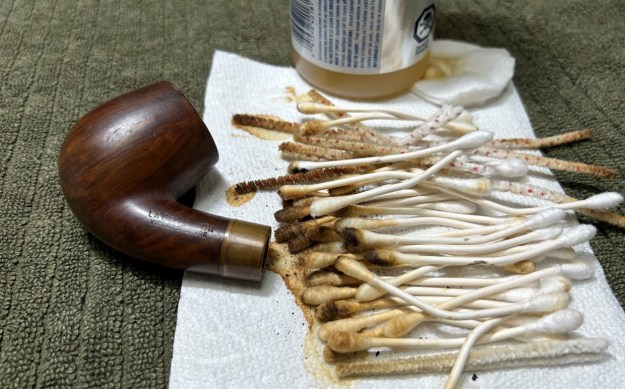 I then decided to ‘de-ghost’ the pipe – that is to say, exorcize the remaining filth from the briar. I filled the bowl and the shank with cotton balls, then saturated them with 99% isopropyl alcohol. I let the stummel sit overnight. This caused the remaining oils, tars and smells to leach out into the cotton.
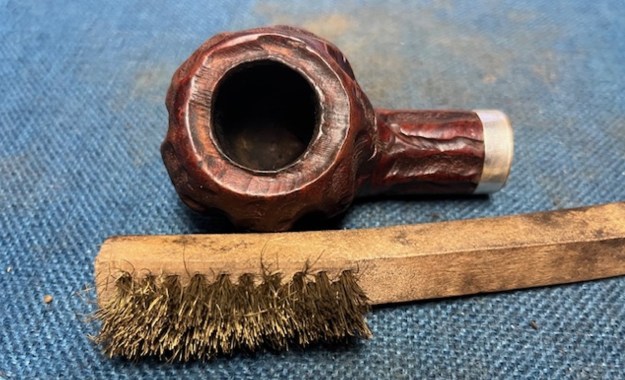
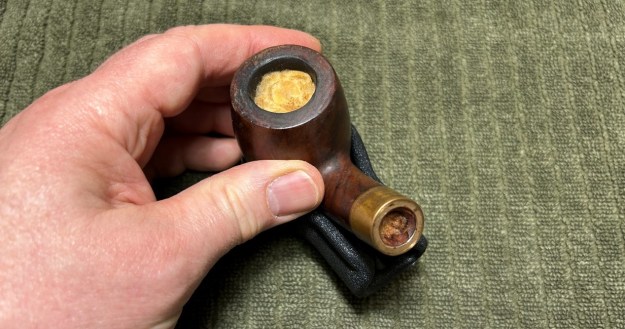 To tidy up the briar, I wiped down the outside, using a solution of a pH-neutral detergent and some distilled water, with cotton rounds. I also used a toothbrush in the crevices. This did a good job of cleaning any latent dirt on the surface of the briar. The last step of the cleaning process was to scour the inside of the stummel with the same mild detergent and tube brushes. This was the culmination of a lot of hard work in getting the pipe clean.
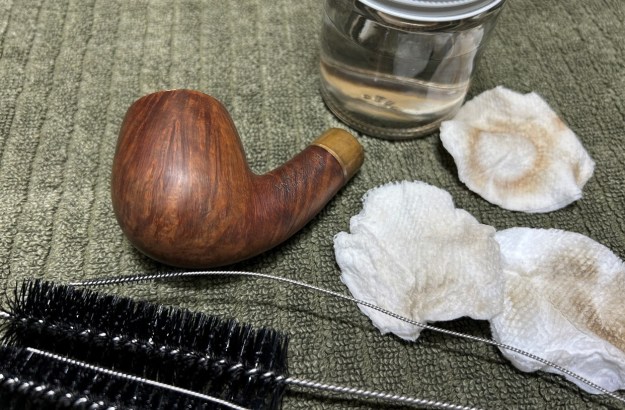 The brass ferrule is quite tarnished and needs to be cleaned up. In order to protect the wood, I taped the shank off and then created a paste of powdered salt and lemon juice. This worked very well and the metal cleaned up nicely.
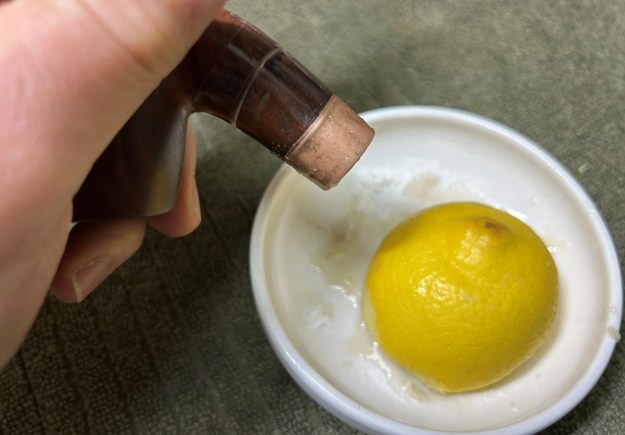 Next, I took a closer look at the markings in the briar. Most of them are deep and sharp, but there’s a substantial part which is thin and rubbed out. I used some Rub’n’Buff, a wax metallic pigmented finish, to recreate the original gold colour of the markings.
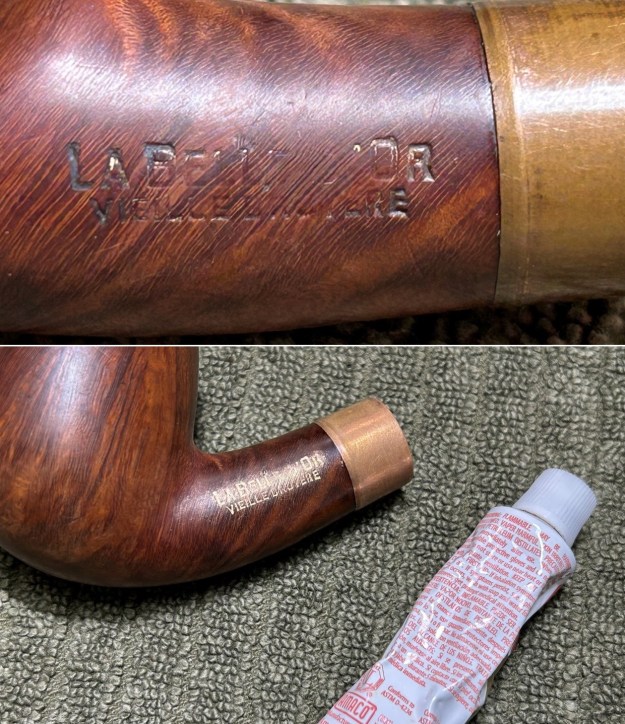 I then used all nine micromesh pads (1,500 through 12,000 grit) to sand the outside of the stummel and finish it off. This sanding minimizes flaws in the briar and provides a beautiful smoothness to the wood. I then used some micromesh pads that I have saved solely for metal work and buffed the ferrule up to a lovely shine. I rubbed some LBE Before & After Restoration Balm into the briar and let it sit for 30 minutes or so. The balm moisturizes the wood and gives a beautiful depth to the briar. I then buffed the stummel with a microfibre cloth.
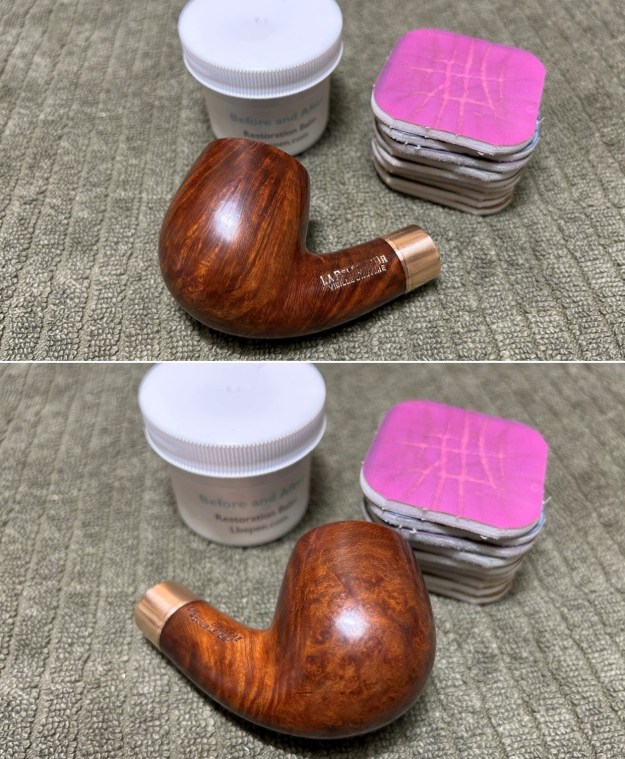
 For the final step, I took the pipe to my bench polisher and carefully buffed it – first with a blue diamond compound, then with three coats of carnauba wax. This procedure makes the pipe look its best – the stummel sings and the stem glows.
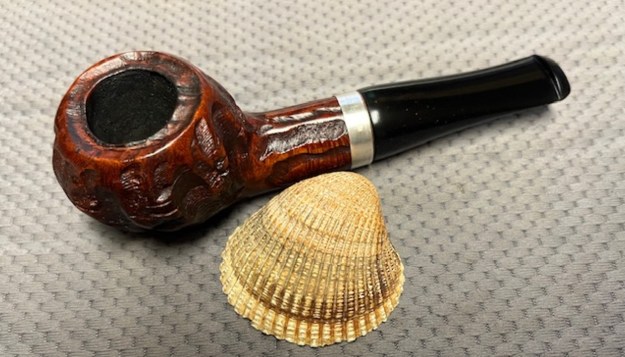
This La Belle d’Or Vieille Bruyère bent billiard is a beauty and has been added to my collection. It was a pleasure to work on. The approximate dimensions of the pipe are as follows: length 5⅞ in. (150 mm); height 2¾ in. (70 mm); bowl diameter 1⅔ in. (42 mm); chamber diameter ⅞ in. (21 mm). The weight of the pipe is 2⅛ oz. (61 g). I hope you enjoyed reading the story of this pipe’s restoration as much as I enjoyed restoring it. If you are interested in more of my work, please follow me here on Steve’s website or send me an email at kenneth@knightsofthepipe.com. Thank you very much for reading and, as always, I welcome and encourage your comments.