by Steve Laug
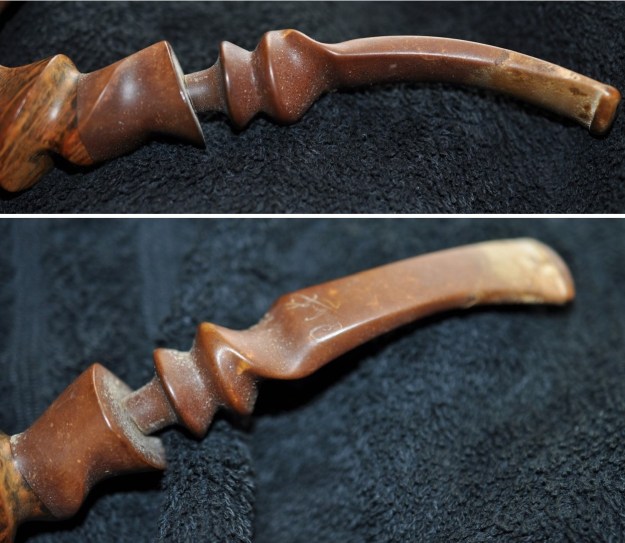
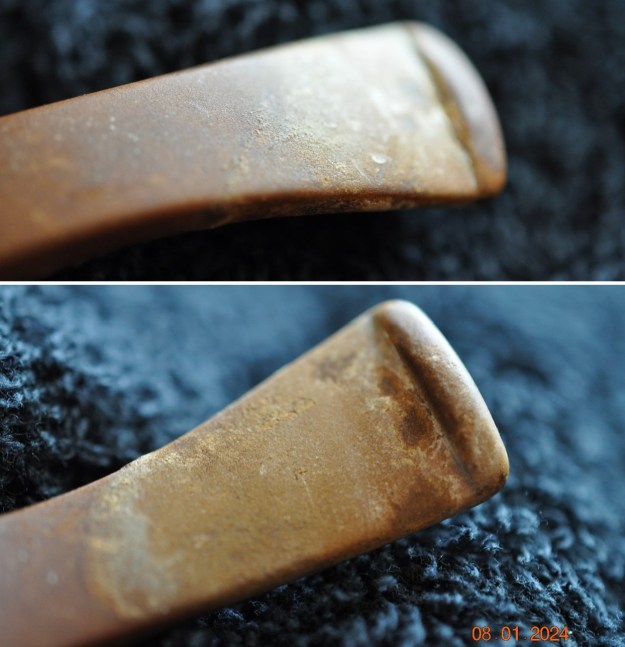
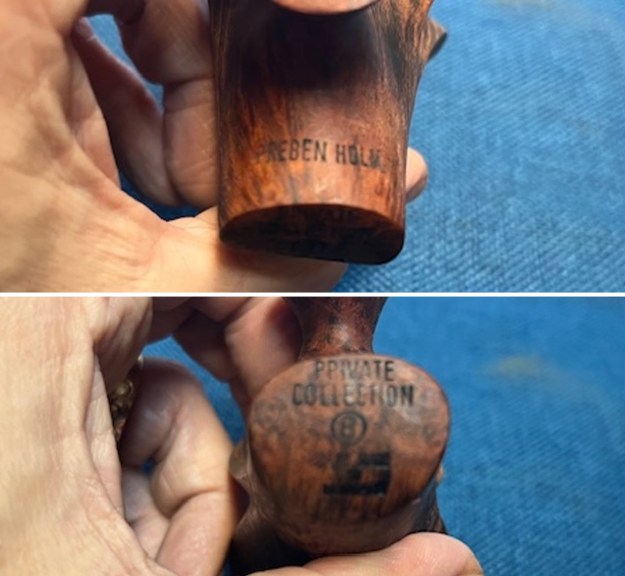
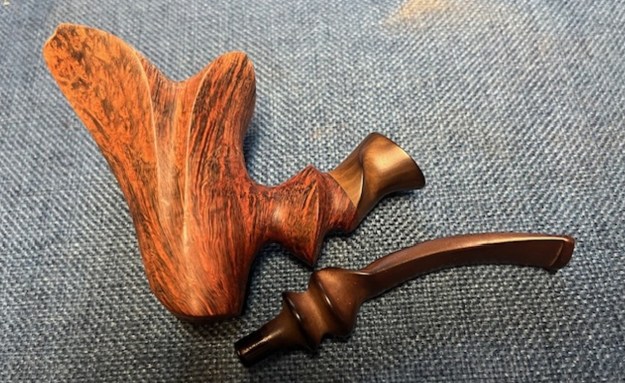
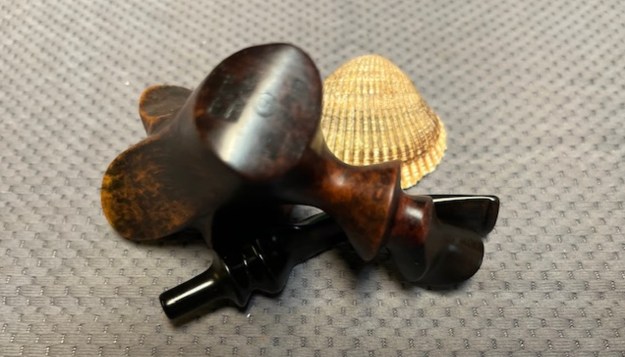
This particular Freehand pipe was purchased from an auction seller in Sylacauga, Alabama, USA on 04/08/2024. It really is a very Preben Holm style Freehand pipe that is almost flower like in its shape. It has a twisted shank and a twisted vulcanite shank extension. It is stamped on a heel of the bowl and the lower backside of the bowl and reads Preben Holm on the bottom edge at the back of the bowl. On the heel it is stamped Private [over] Collection [over] B enclosed in a circle [over] Hand Made [over]In [over] Denmark. The smooth floral shaped pipe is dirty but the grime does not hide the beautiful looking combination around the bowl and shank. The stain is a black understain that brings out the grain highlighted by a top coat of walnut stain. The pipe had a moderate cake in the bowl and a thick lava overflow on the backside of the smooth rim top and inner edge of the bowl. There was grime ground into the smooth and sandblast finish and dust and debris in the valleys and turns on the flower petal shaped carving around the bowl and the shank end. The top edge of the petal on the left front of the bowl had a chip. There was also a darkened spot mid bowl on the right mid bowl toward the back of the bowl. The fancy vulcanite saddle stem and the vulcanite shank extension were oxidized. Added to that the stem surface was also calcified and had light tooth marks and chatter on both sides near the button. The pipe must have been a great smoker judging from the condition it came it. Jeff took photos of the pipe before he started his work on it.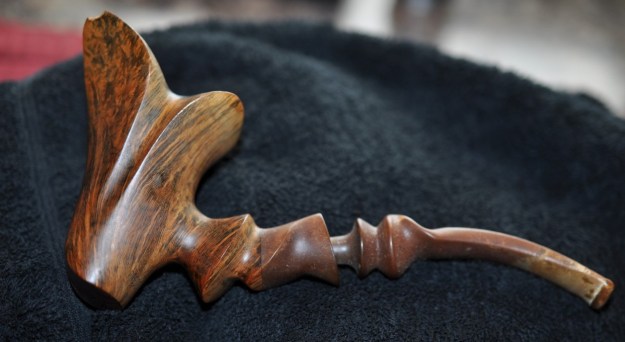
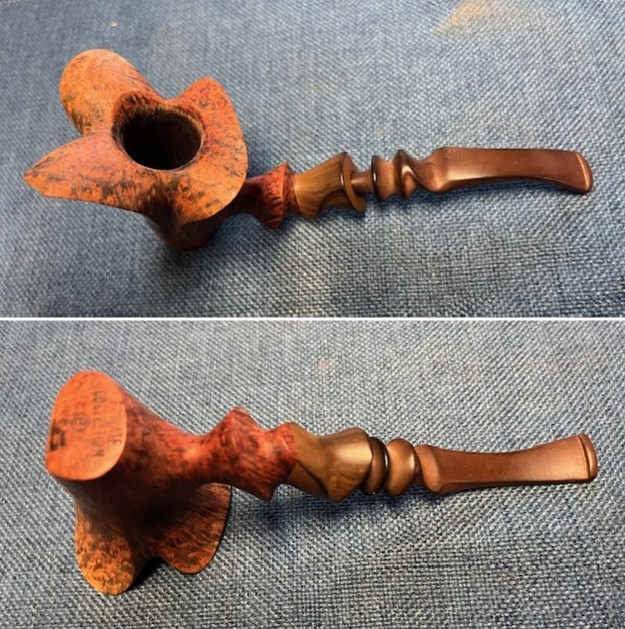
 Jeff took photos of the rim top and the stem to show the condition of the pipe when we received it. You can see the moderate cake in the bowl and the lava on the rim top and inner edge of the bowl. The turned and twisted vulcanite shank extension and stem were dirty and had light chatter and tooth marks on both sides near the button.
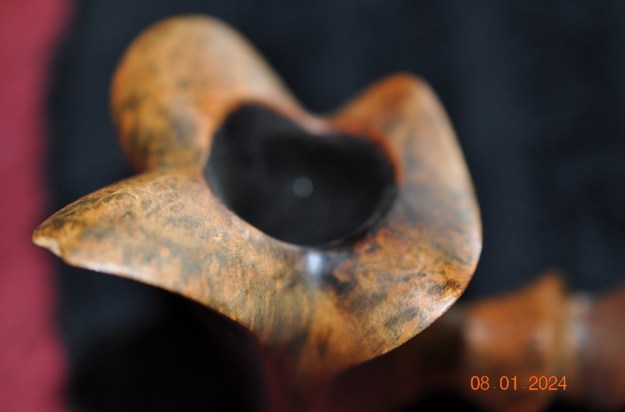
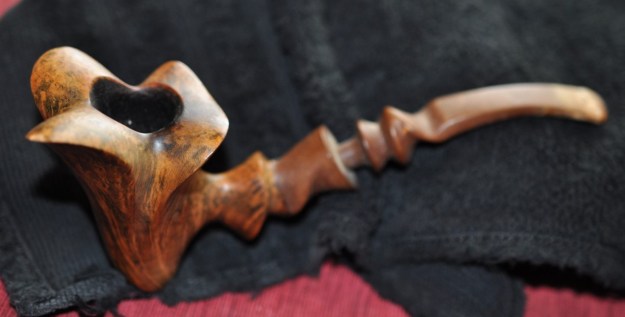
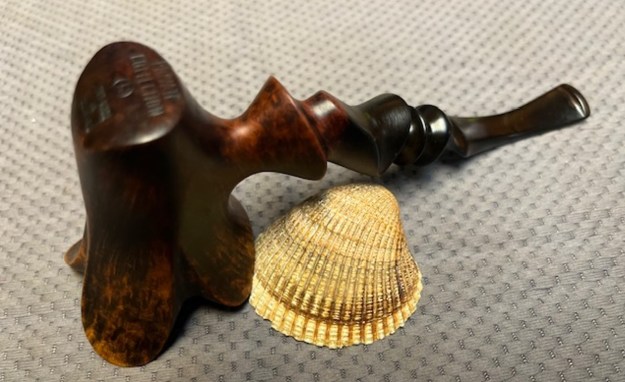
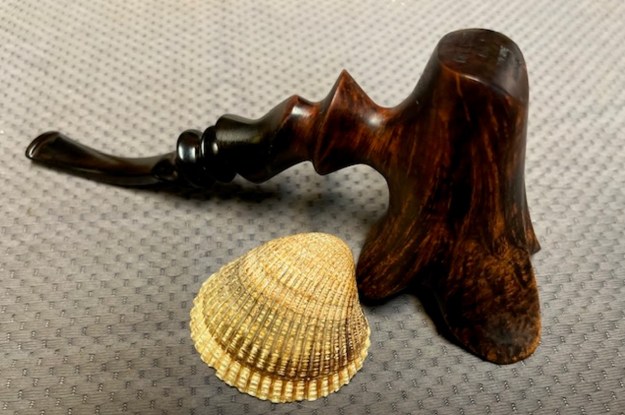
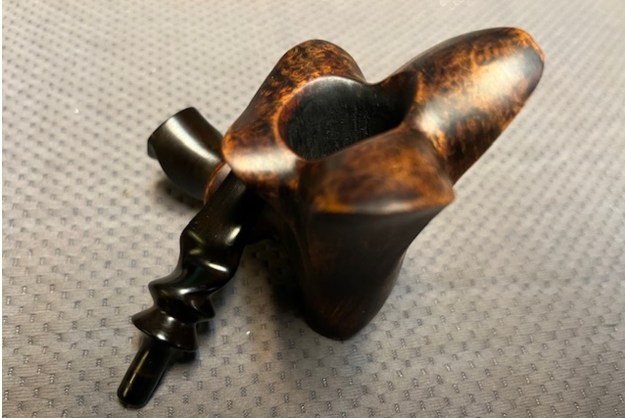
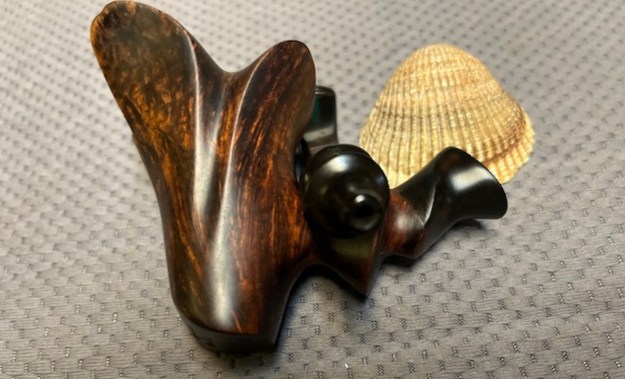
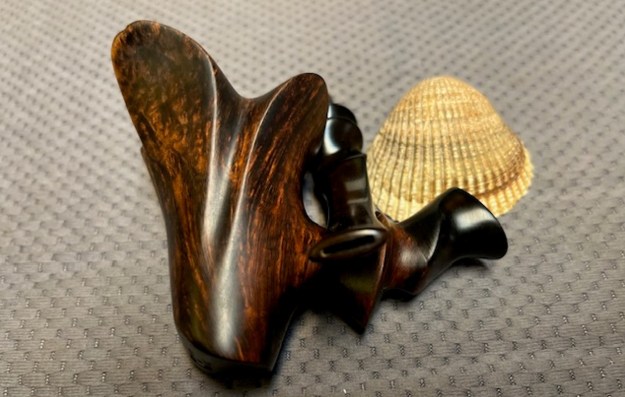
 He took photos of the sides of the bowl and the heel to give an idea of the shape and the condition of the briar around the bowl. You can see the chip on the top of the front flower petal in the first photo. You can also see the darkened spots on the right side of the bowl in the second photo. It really is a nicely shaped pipe that has the classic look of a Freehand carved by Preben Holm.
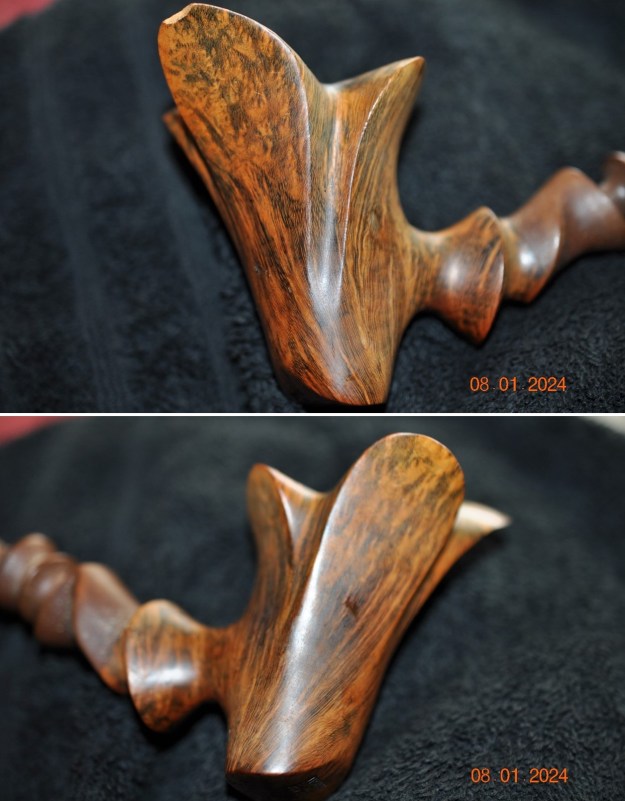 The next photos Jeff took shows the stamping on the back side of the bowl and the underside of the shank. It is clear and readable as noted above. I took the stem off the shank and took a photo to give a sense of the proportion of the pipe.
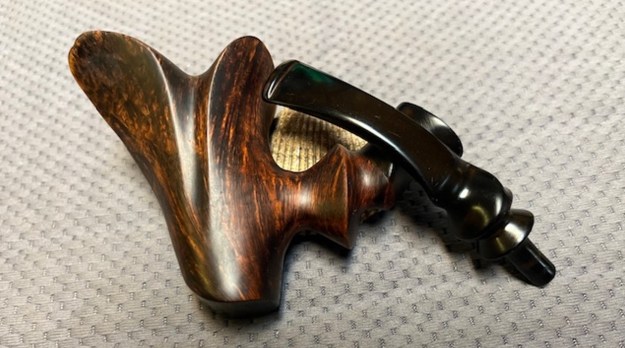
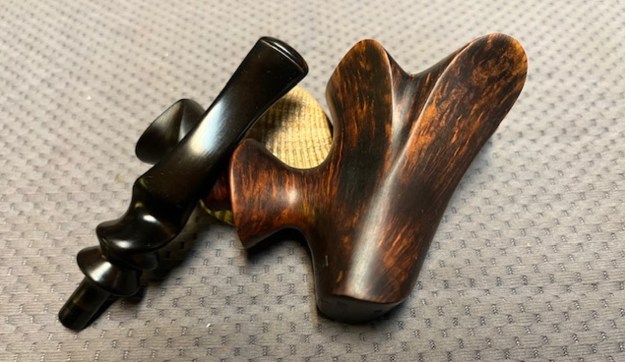
 I had vague memories about the Private Collection line being a unique and special line of pipes made by Preben Holm but I had no idea what it meant and how it came to be so designated. It would take a bit of digging to ferret our that information on the web. I turned first to Pipephil’s site and there was an additional page on the Private Collection line that gave me a lot of detailed information on the line (http://www.pipephil.eu/logos/en/infos/prebenholm-pc1.html). I quote the extra page in full below with the inserted graphics.
 The “Private Collection” pipes are Preben Holm’s most coveted pieces. They were crafted by the artisan himself from the late 1970’s to the end of his career in 1986.
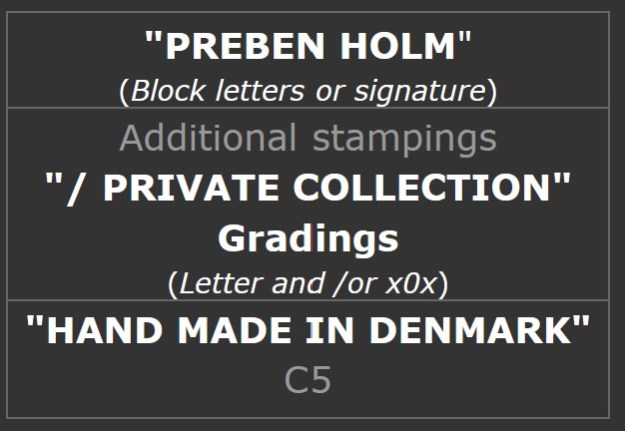
The stampings on the shanks are always displayed in the same order (see right). Information in white is systematically stamped, the one in grey is optional.
“Additional stampings” may sometimes occur under the carver’s name (ie: “Traditional”, “Fancy”, “9m/m”, …)
The “C5” stamping appears on pipes distributed in the USA by CAO who took over distribution from Lane Ltd. in 1985. This distinguishing stamping was to avoid warranty issues with pipes that were not of CAO’s distribution.
 Gradings: The early Private Collection series were graded with 4 letters (ascending): A, B, C and D. Those letters may be encircled (older markings) or not.
Later, a “x0x” 5 tiers grading system was introduced (ascending): 101, 202, 404, 606 and 808. Letter and x0x systems may coexist on the same pipe.
 Signature stem logo
Nearly all pipes of Preben Holm’s Private Collection sport the carver’s signature on their stem. It may sometimes be worn and in a very few cases it may be missing (replacement stem?). But Preben Holm’s logos with the PH initials do not originally occur on Private Collection pipes.
So now I knew that the pipe was a part of the unique Private Collection that were crafted by Preben Holm himself. I learned that the pipe was made between the late 1970s and the end of his career in 1986. Now it was time to work on the pipe.
Jeff had cleaned up the pipe following his normal cleaning process. In short, he cleaned up the reaming with a Savinelli Fitsall Pipe Knife. He scrubbed the bowl with undiluted Murphy’s Oil Soap with a tooth brush. He worked over the lava and debris on the plateau rim top and shank end and was able to remove it. He rinsed it under running warm water to remove the soap and grime. He cleaned out the inside of the shank and the airway in the stem with alcohol, cotton swabs and pipe cleaners. He scrubbed the stem with Soft Scrub and cotton pads to remove the debris and oils on the stem. He rinsed it with warm water and dried it off. I took photos of the pipe once I received it. You can see the burn marks on the right side of the bowl. It is very visible in the second photo below at midbowl. The one toward the back of the bowl had a very fine micro crack in the bowl. The second one was just darkened not damaged. The stem was still oxidized in the grooves after Jeff’s work but it was definitely better. The pipe really looked good.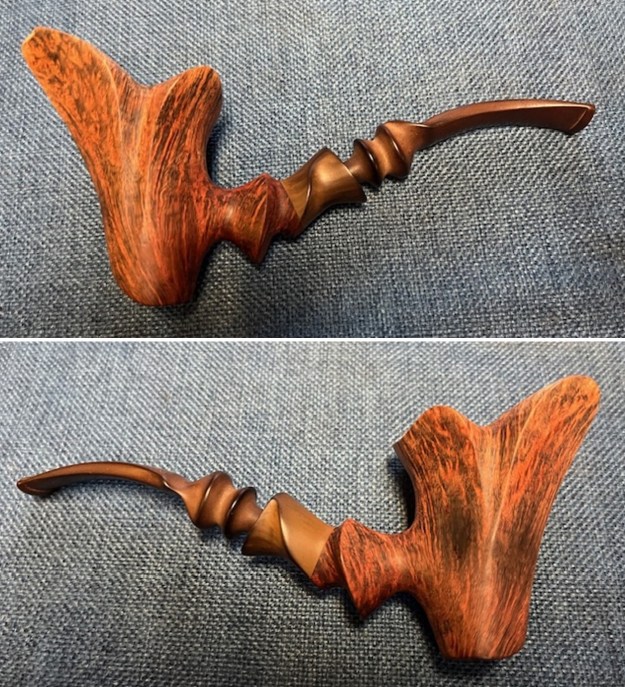
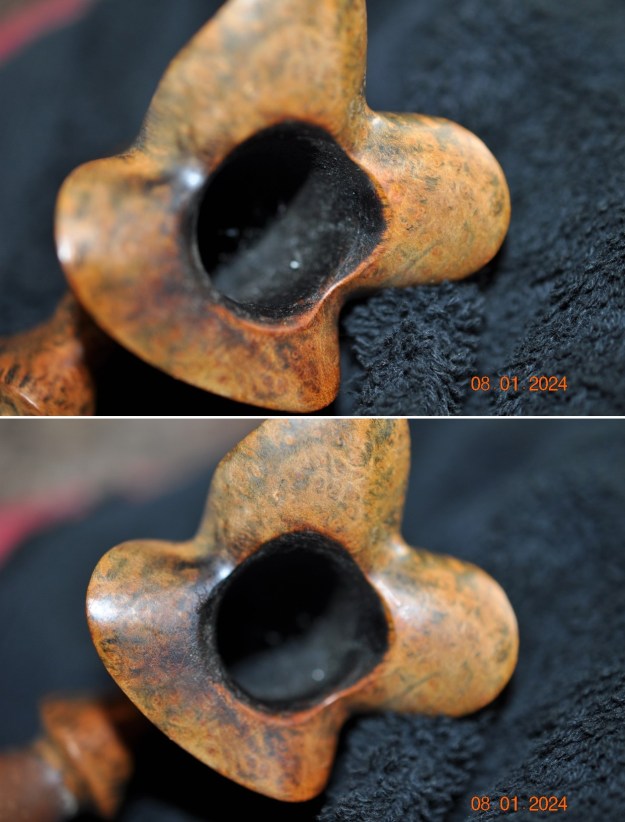
 I took close up photos of the stem and the rim top to show both how clean they were and what needed to be addressed with both. The rim top and bowl still had some darkening and what looked like some hard lava in the plateau inner edge. The stem looked better and the tooth marks and chatter though light were still present. I would need to remove those to bring the stem back.
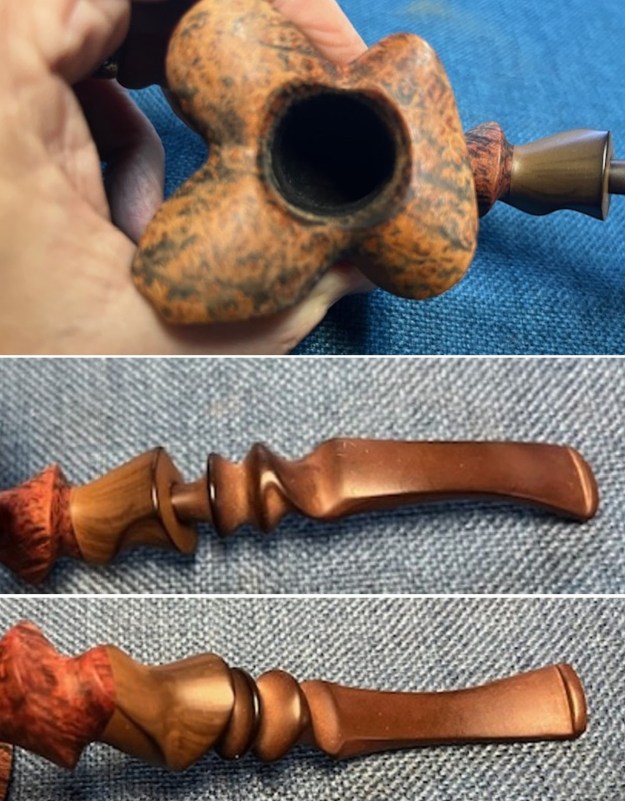 I took photos of the stamping on the back bottom of the bowl and the heel of the bowl. You can see from the photos that it is clear and readable. I removed the stem from the bowl and took a photo of the parts to give a sense of the beauty of the pipe.I started my work on the pipe by using clear CA glue to fill in the burn areas on the bowl. The one toward the back of the bowl had a tiny micro crack in it. The one toward to front of the bowl was merely darkened. I shined a light in the inside of the bowl and checked it out for burn damage or cracks in the bowl sides. That would help explain if there were flaws on the inside or potential burn out or pointed to that potential in the bowl. Thankfully there was not any burn damage on the inside of the bowl. There were no burned areas behind the damage on the outside of the bowl. Once the glue cured on the bowl side I sanded it smooth with a folded piece of 220 grit sandpaper.
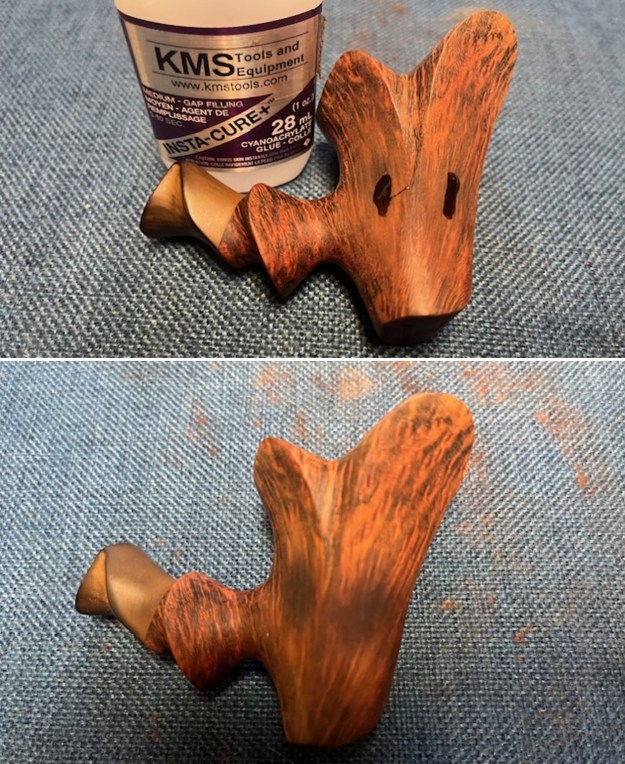 I scrubbed the oxidized vulcanite shank extension with Soft Scrub on cotton pads. I was able to remove a lot of the oxidation with the product but there was still work to do on it.
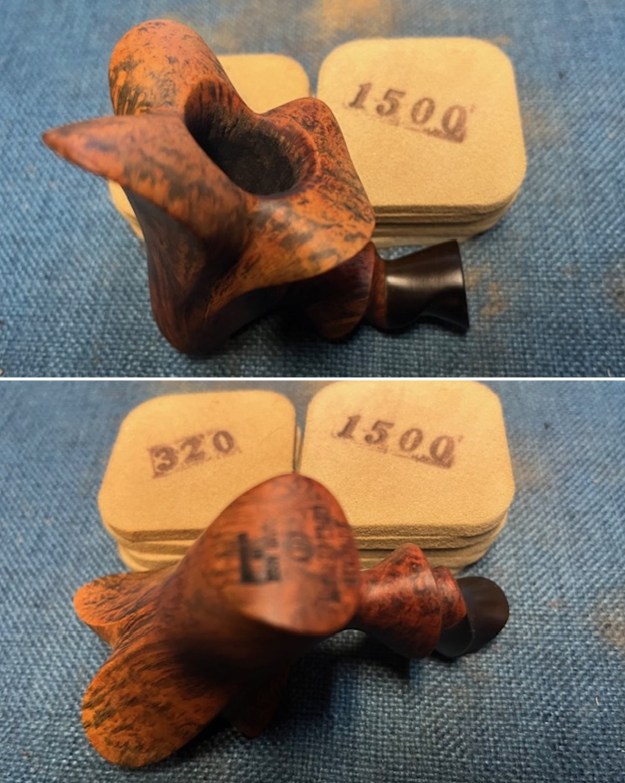
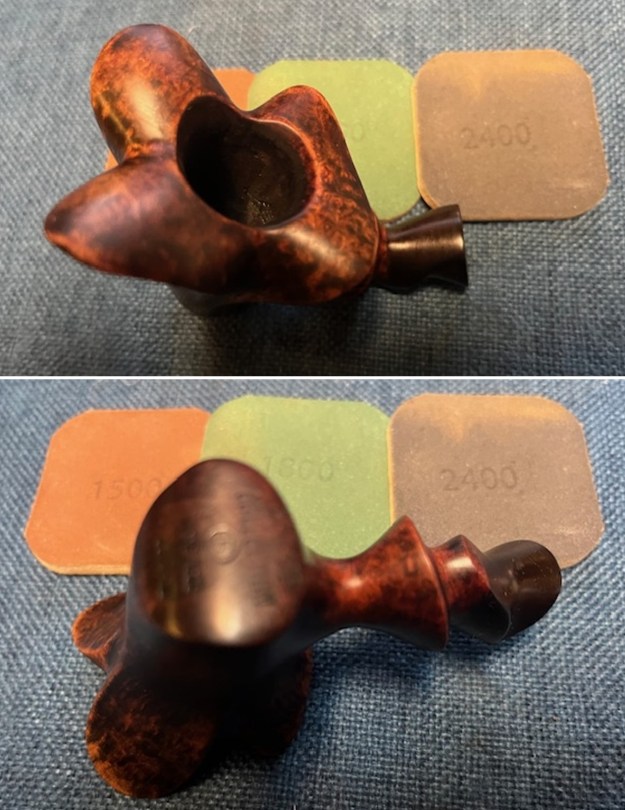
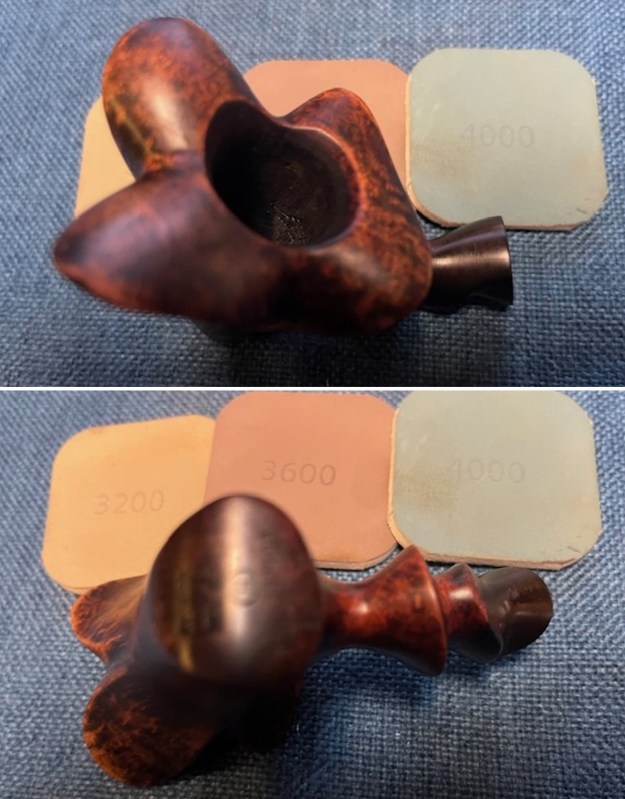
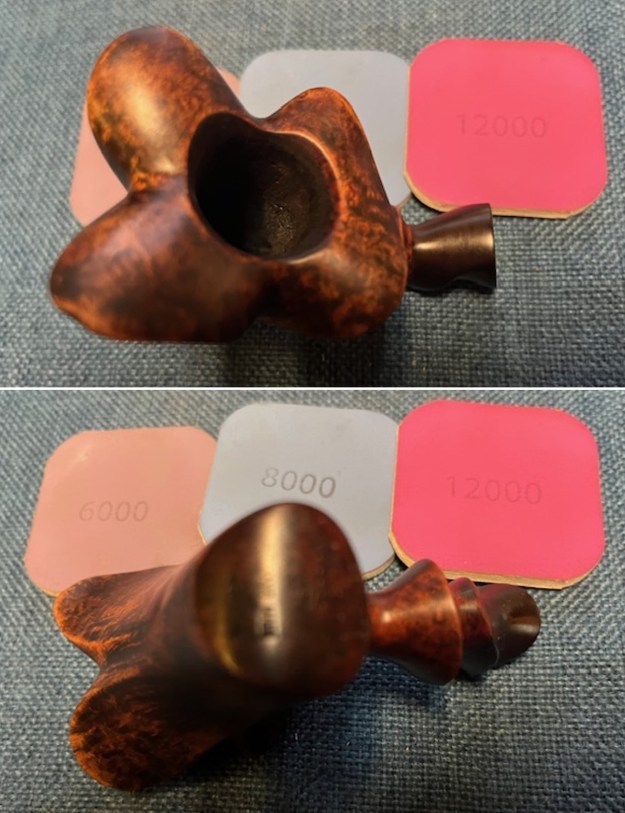
 I sanded the bowl sides, reshaped the chipped petal edge on the left front outer edge and sanded the vulcanite extension with 320-3500 grit sanding pads. It worked very well. I wiped the bowl down with a damp cloth after each pad to get a sense of the progress in the process.
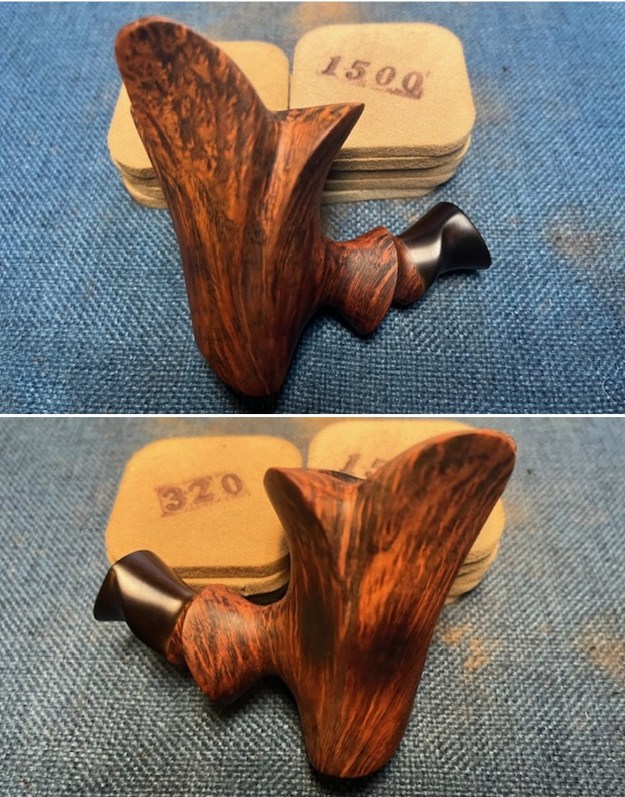
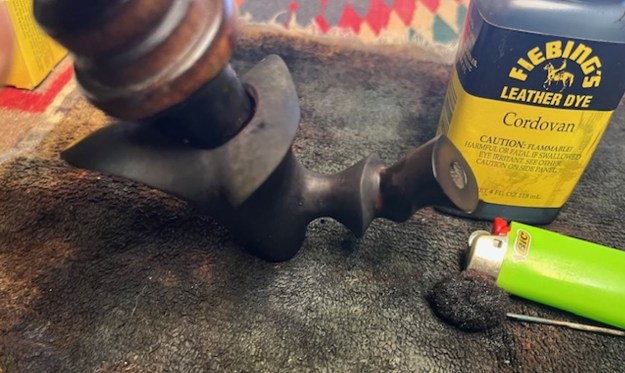
 To minimize the burn marks on the side I decided to stain the bowl with a Cordovan stain. I applied it with a wool dauber, flamed it with a lighter and repeated until I was happy with the coverage around the bowl and rim.
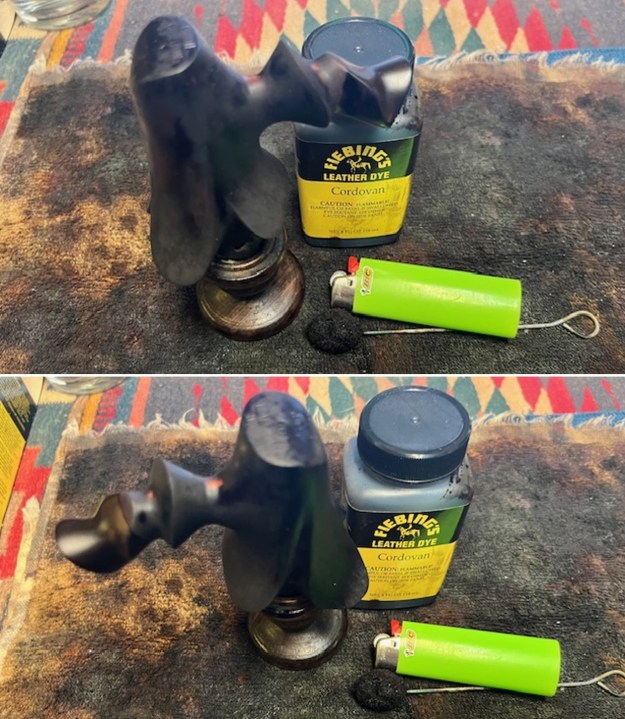
 Once the stain had cured I wiped the bowl down with cotton pads and acetone to make the stain on the bowl more transparent. It looked better but sanding and buffing would take off the remainder and leave it like I was aiming for.
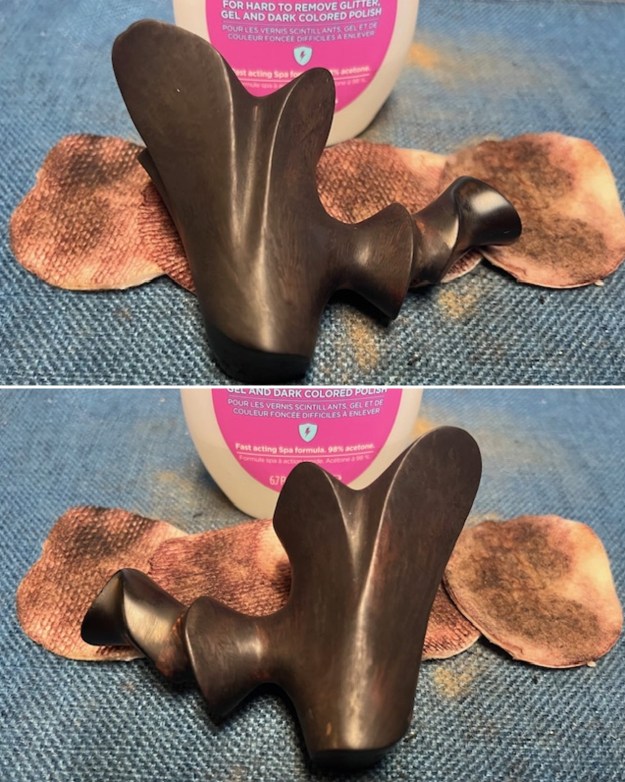
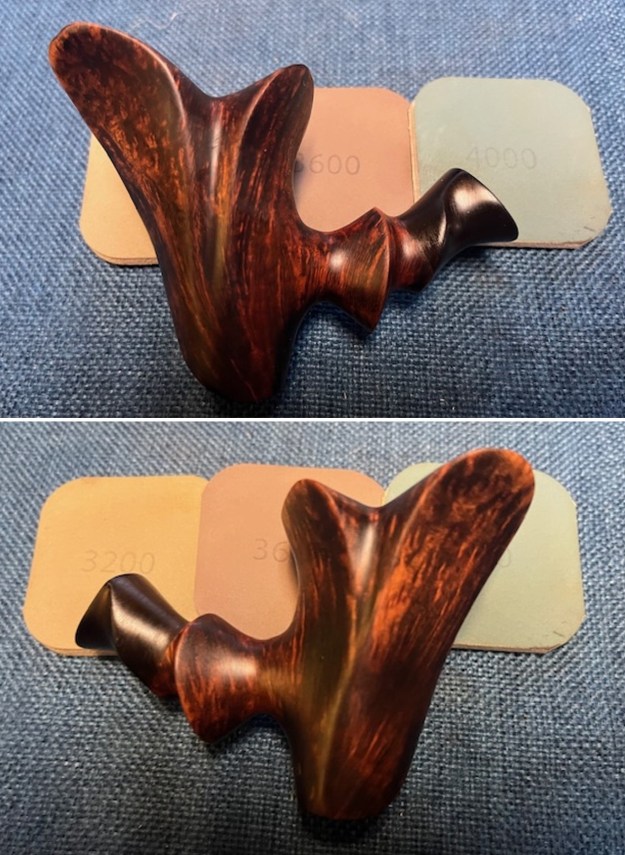
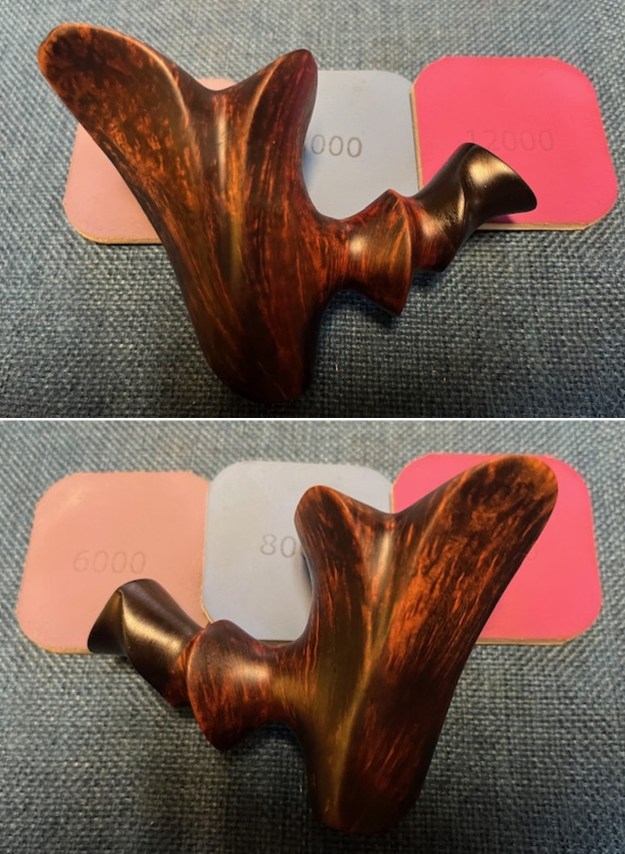
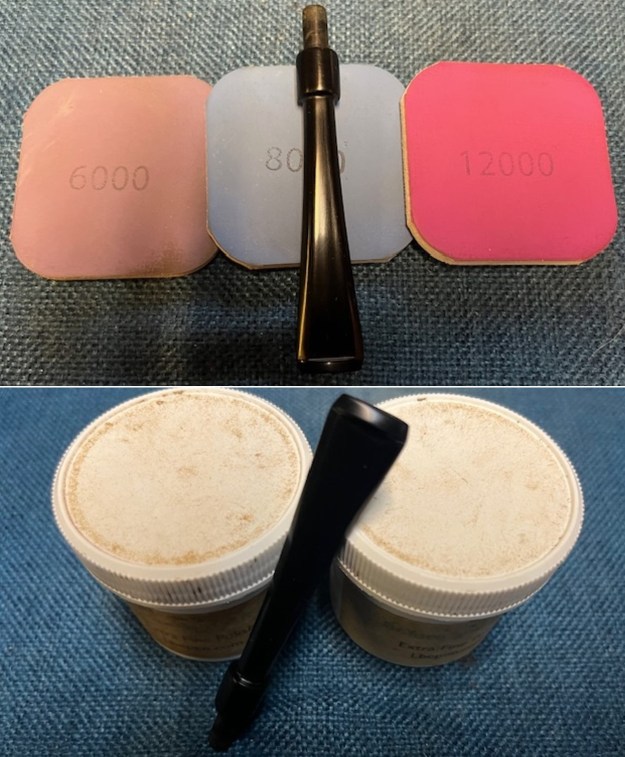
 I set aside for the evening. In the morning I buffed the pipe with Blue Diamond to work toward more transparency in the stain coat. I wanted to see grain showing through but still disguise the burn marks a bit. It worked. I then sanded it with micromesh sanding pads – dry sanding with 1500-12000 grit pads. I wiped it down after each pad with a damp cloth. I finished by another trip to the buffer and finally I had it where I wanted it! Note: the stamping is untouched. I carefully avoided both buffing and sanding it. The stamp is on a curve so it is out of focus.
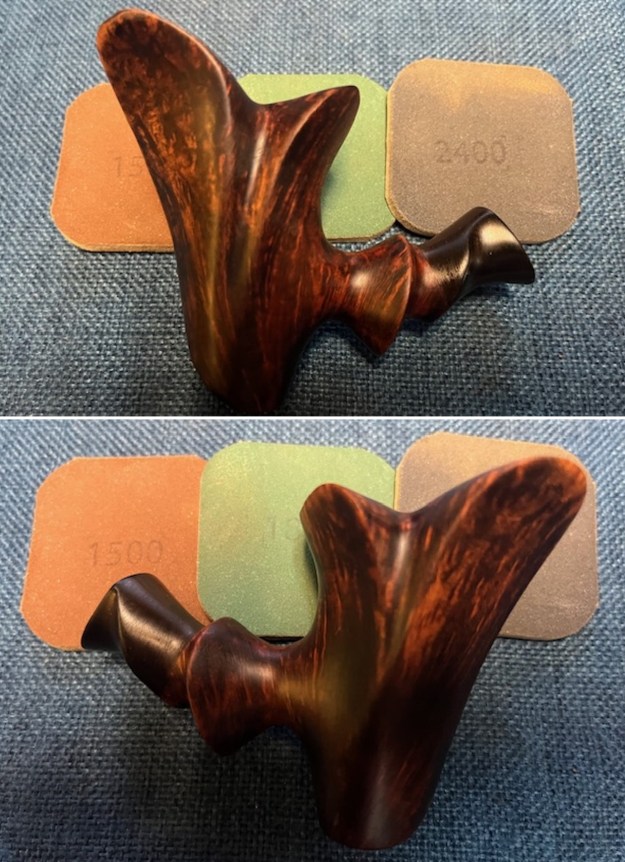
 I rubbed down the briar Before & After Restoration Balm. I worked it into the surface with my fingertips. The product works to clean, enliven and preserve the briar. I let it sit for 15 minutes then I buffed it with a cotton cloth to deepen the shine. The briar really comes alive with the balm.
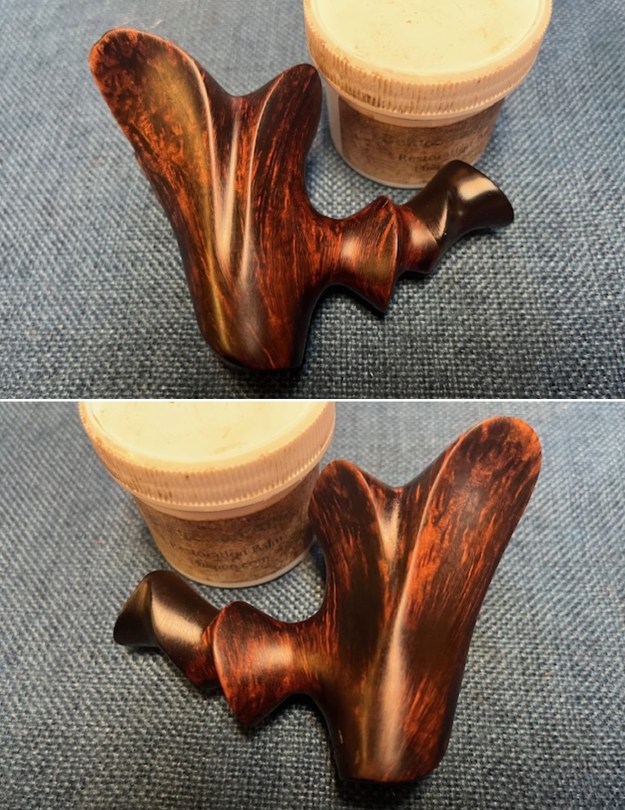

 I set the bowl aside and turned my attention stem. I scrubbed the surface of the stem with Soft Scrub cleanser to begin to break through the remaining oxidation on the stem.
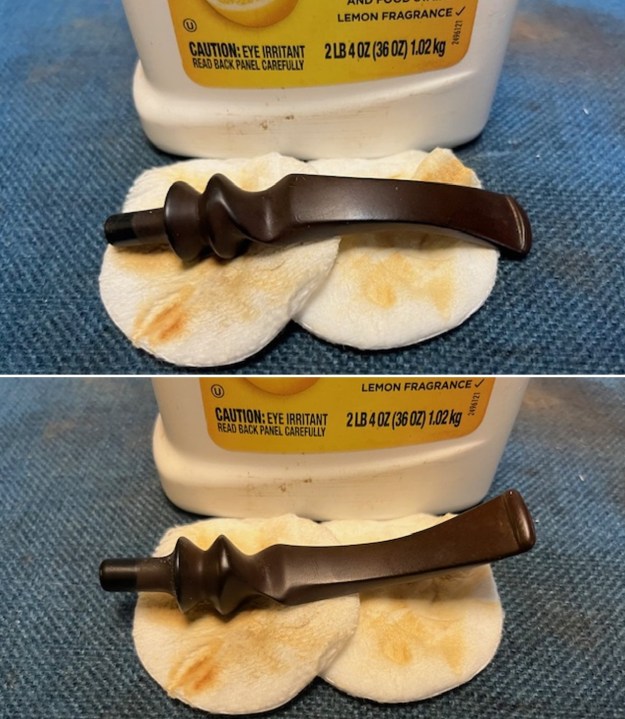 I sanded out the scratches in the horn with 320-3500 grit sanding pads. I wiped the stem down after each sanding pad with a cloth impregnated with Obsidian Oil. It started to take on a deep shine.
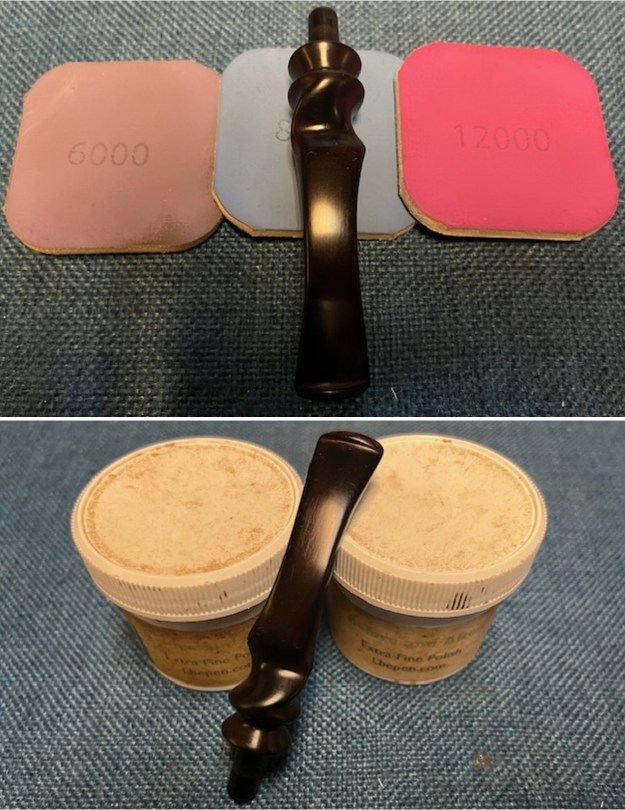
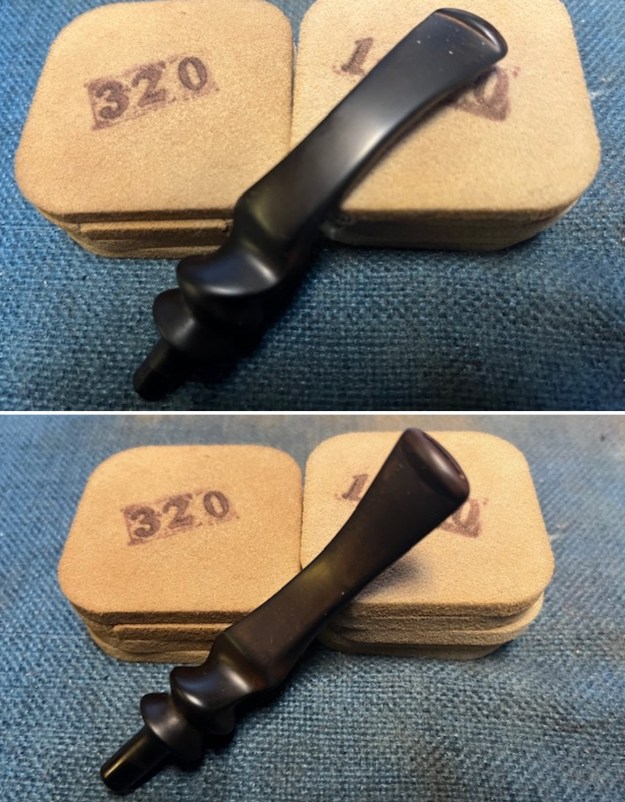 I polished the stem with micromesh sanding pads – 1500-12000 grit pads to remove them. I wiped the stem down with Obsidian Oil after each sanding pad. I used Before & After Pipe Polish – both Fine and Extra Fine to further polish the stem. I rubbed it down with a final coat of Obsidian Oil and let it dry.
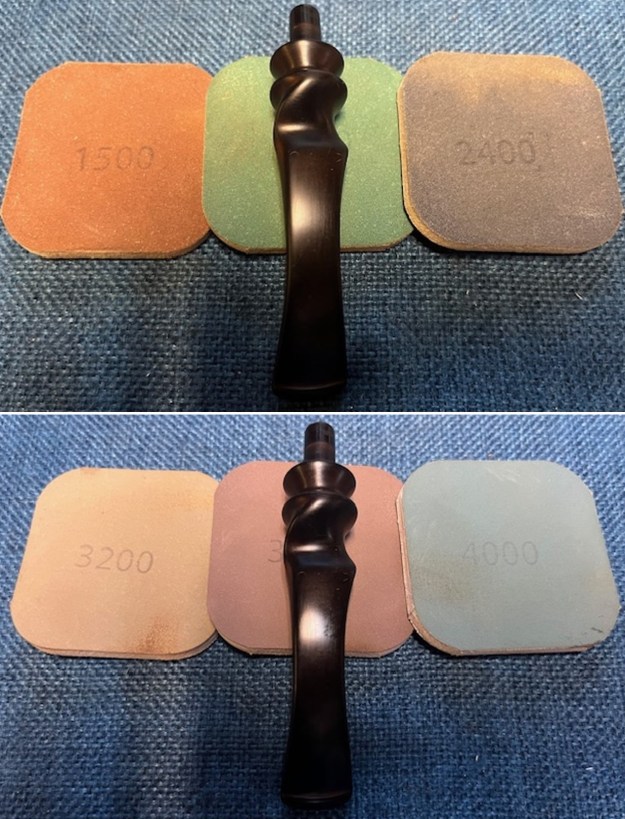
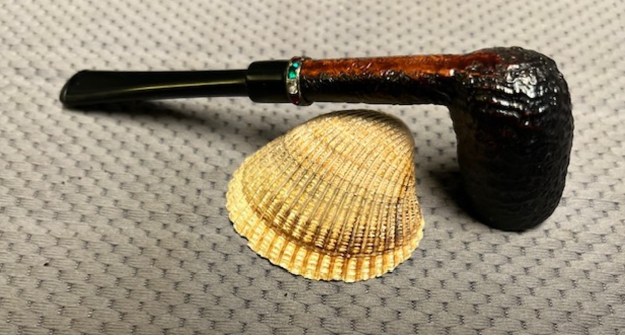
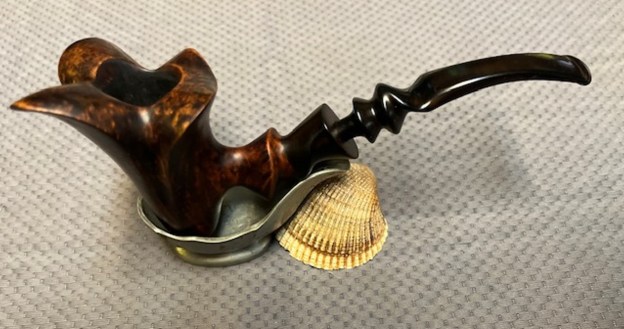
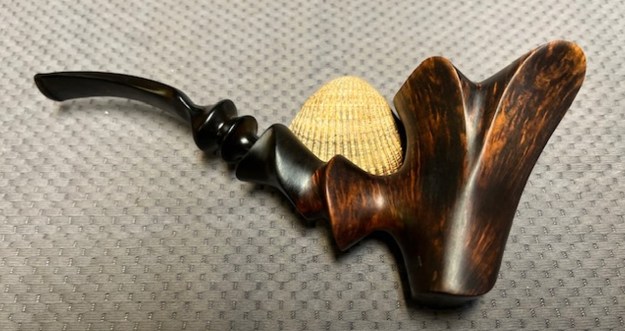
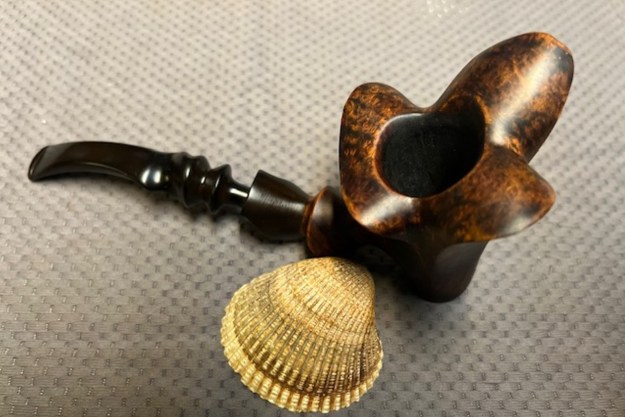
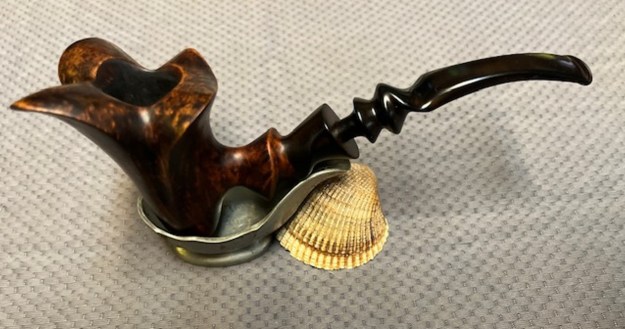
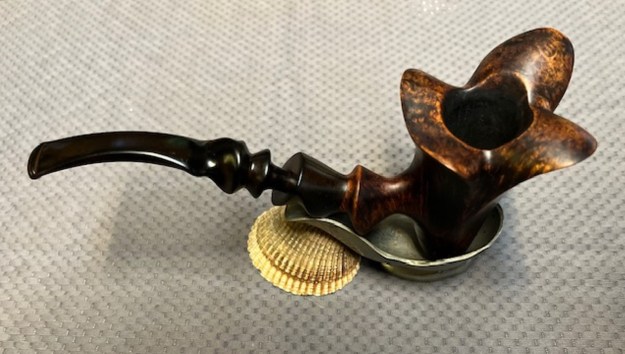
 I am really happy with the way that this Preben Holm Private Collection Circle B Hand Made in Denmark Freehand turned out. It really is a beautiful looking pipe with a great shape and smooth finished bowl and rim and vulcanite shank end. The fancy original acrylic saddle stem is really nice. The black vulcanite colour of the stem works well with the briar. The briar really came alive with the buffing. The rich cordovan and brown stains of the finish gave the pipe a sense of depth with the polishing and waxing. I put the stem back on the bowl and carefully buffed the pipe with Blue Diamond on the buffing wheel using a light touch on the briar. I gave the bowl and the stem multiple coats of carnauba wax on the buffing wheel. I buffed the pipe with a clean buffing pad to raise the shine. I hand buffed the pipe with a microfiber cloth to deepen the shine. The finished Preben Holm Private Collection B Grade really is a beauty and feels great in the hand and looks very good. Give the finished pipe a look in the photos below. The dimensions of the pipe are Length: 7 inches, Height: 3 inches, Outside diameter of the bowl: 2 inches long x 2 inches wide, Chamber diameter: 7/8 of an inch. The weight of the pipe is 48 grams/1.76 ounces. In all my years of working on pipes I have never seen a Preben Holm Private Collection pipe and this one is a beauty. I intend to hold onto it for my own enjoyment. Thanks for reading this blog and my reflections on the pipe while I worked on it. It was a fun one to work on!
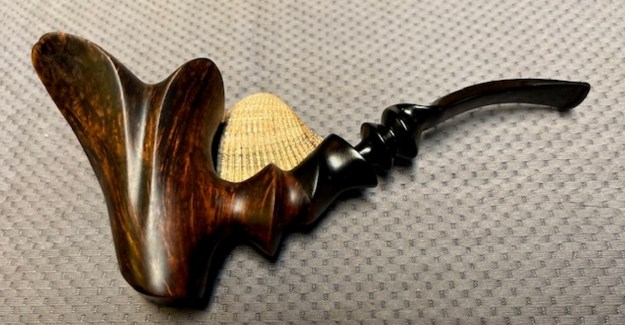


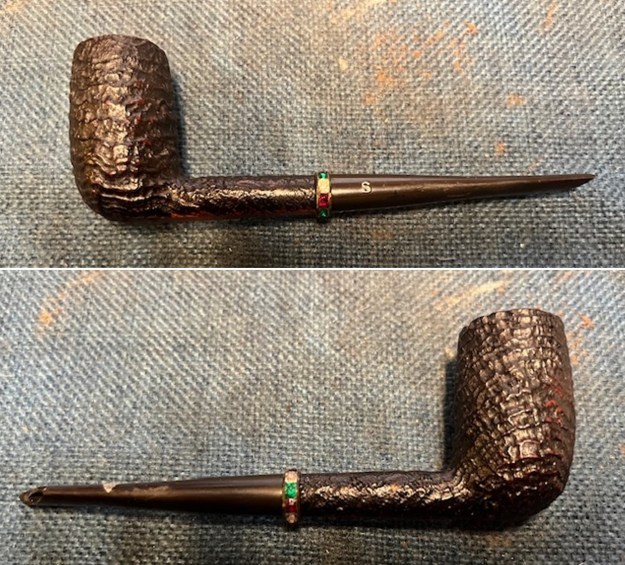
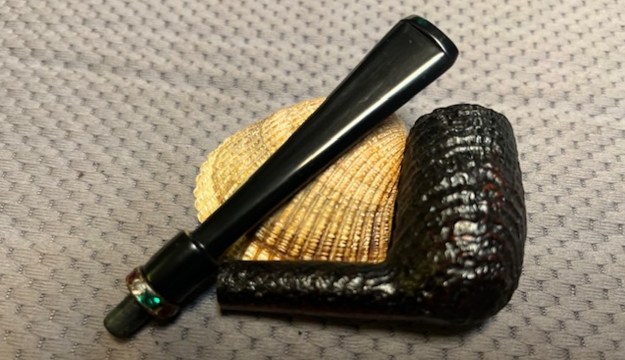
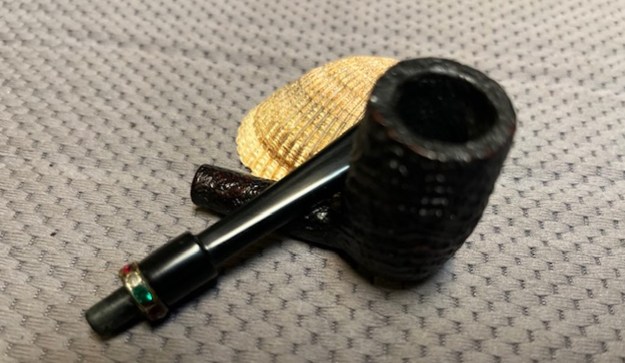
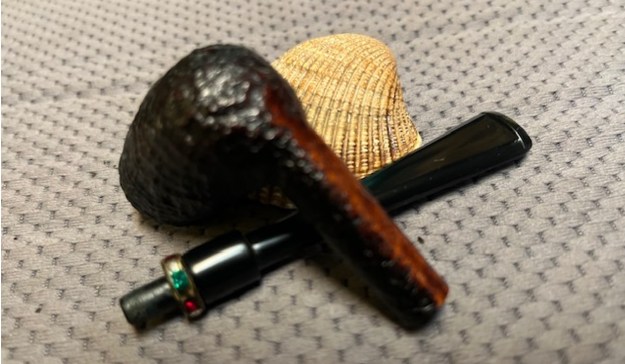
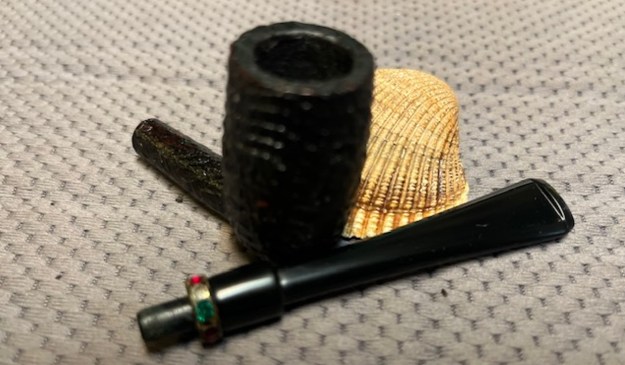
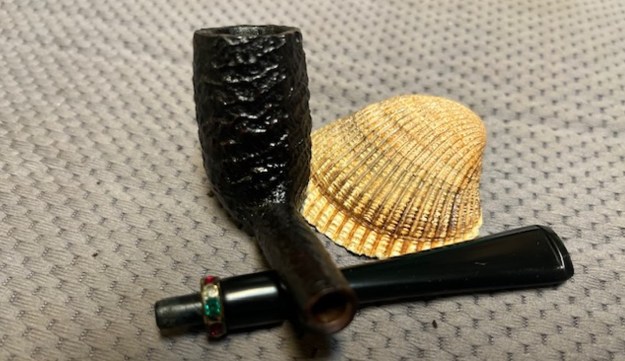
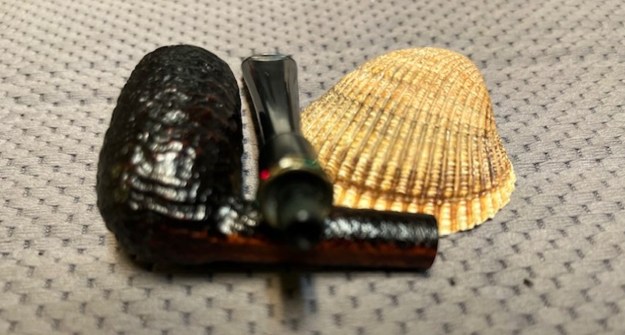
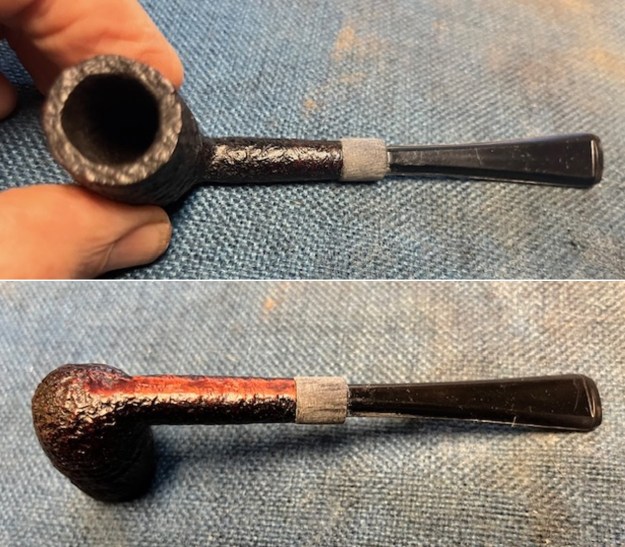
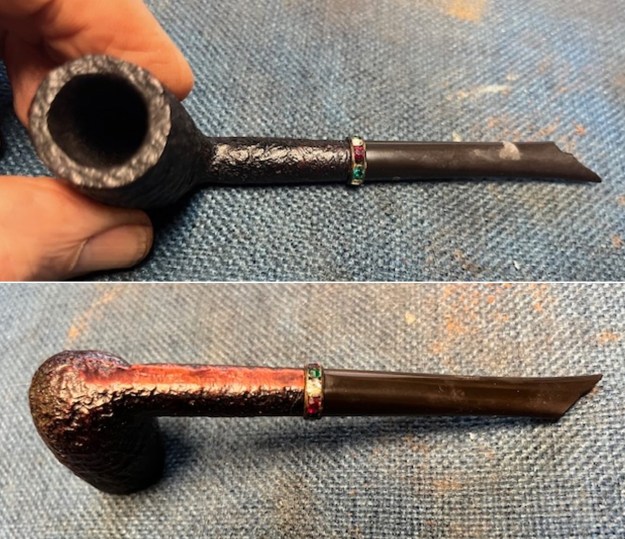 I took a photo of the rim top and bowl to show the condition of the bowl when I started working on it. It was clean and appeared to be unused/unsmoked. I did not bother taking photo of the stem as its condition was obvious in the above photos and I would need to replace it. I also took a photo of the bowl without the stem to give a sense of what the pipe looked like. It is also clear that the band with glass “jewels” was on the tenon not the shank.
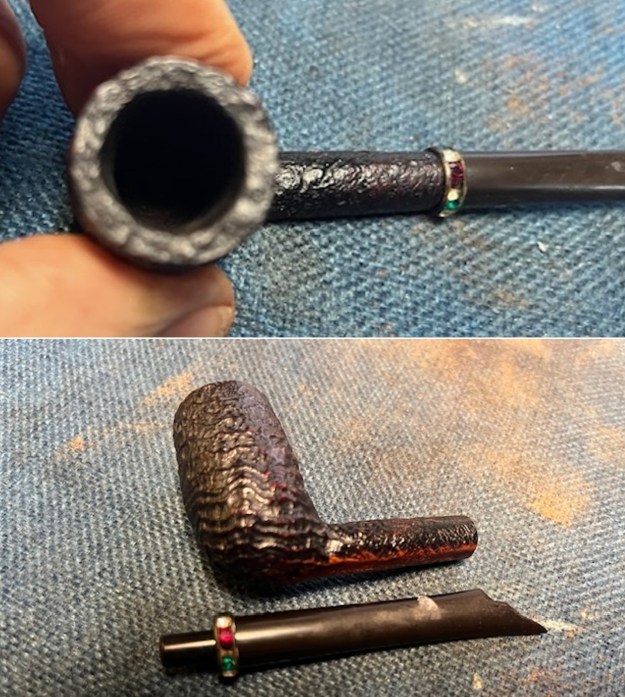 I went through the can of stems here and found a thin stem that was a saddle stem with a flared blade in a fishtail style. The tenon actually was very close to the original and would take very little adjusting to get a solid fit.
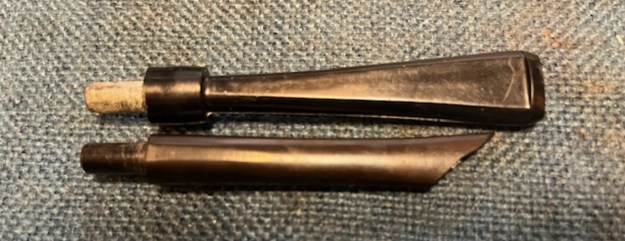 I used a Dremel and sanding drum to reduce the diameter of the saddle to fit the diameter of the shank. I also used a flat file to further shape and reduce the fit to the shank size. I fit it to the shank to do the work on the fit. It did not take too much work to get the fit correct.
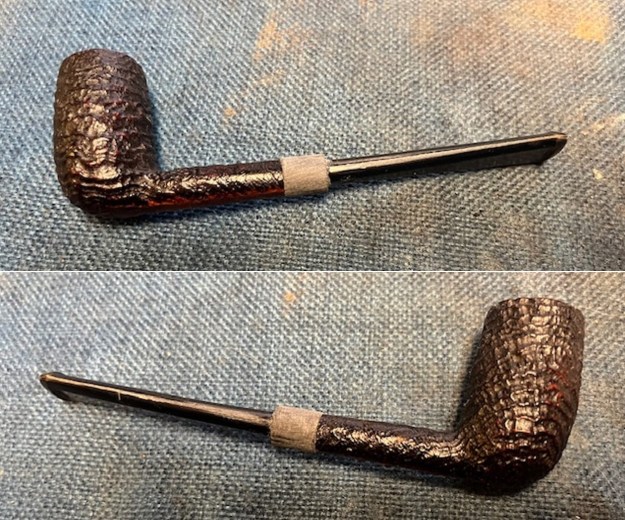
 The slot in the stem was small and thin. I sued a flair and an oval needle file to open the slot. I also used a slot saw to give it angle /Y shaped slot opening. When I was finished a pipe cleaner easily slid in and out.
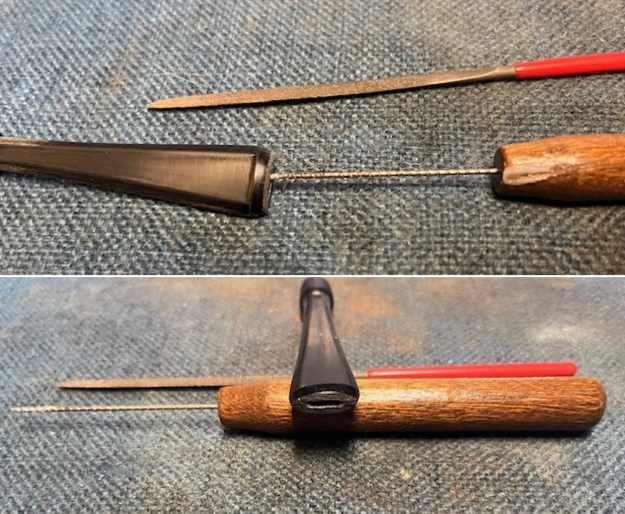 I sanded the saddle portion of the stem with 220 grit sandpaper to smooth out the file and Dremel marks on the saddle and also to remove the casting marks on the sides of the stem blade. I slid the brass/jewelled band on the tenon so that it fit against the saddle. I put the stem on the shank and took a photo of the look of the newly restemmed pipe.
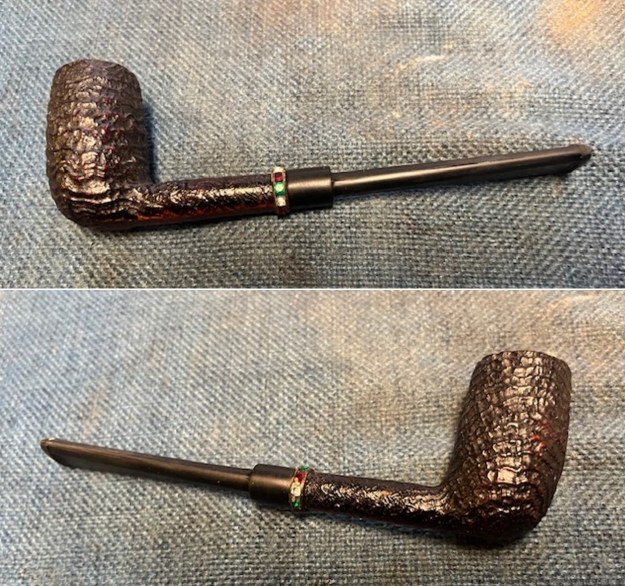
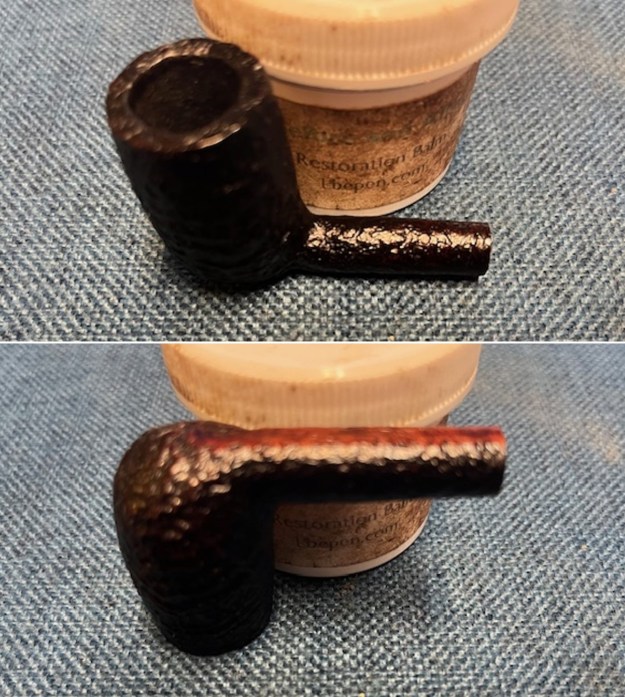
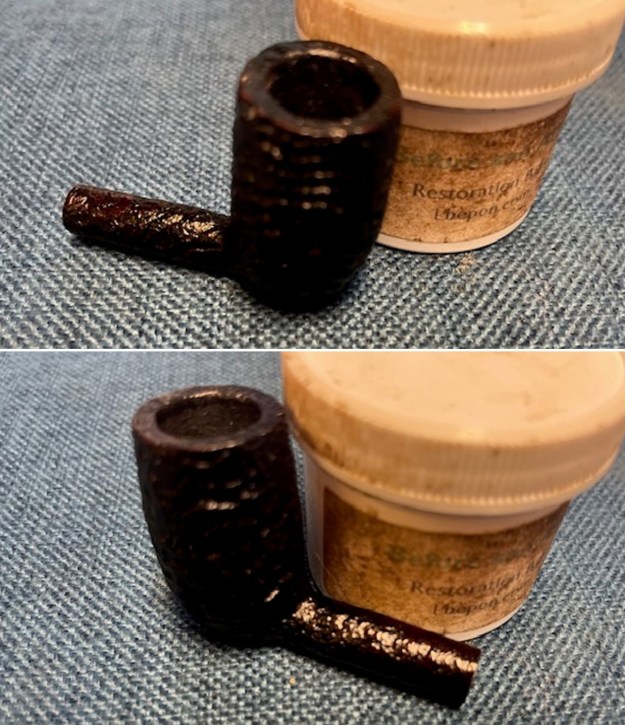
 I took the stem off the shank and turned my attention to the bowl. I rubbed the stem down with Before & After Restoration Balm. I worked it into the sandblast surface of the bowl with my fingertips and a shoebrush. The product works to clean, enliven and preserve the briar. I let it sit for 15 minutes then I buffed it with a cotton cloth to deepen the shine. The briar really comes alive with the balm.
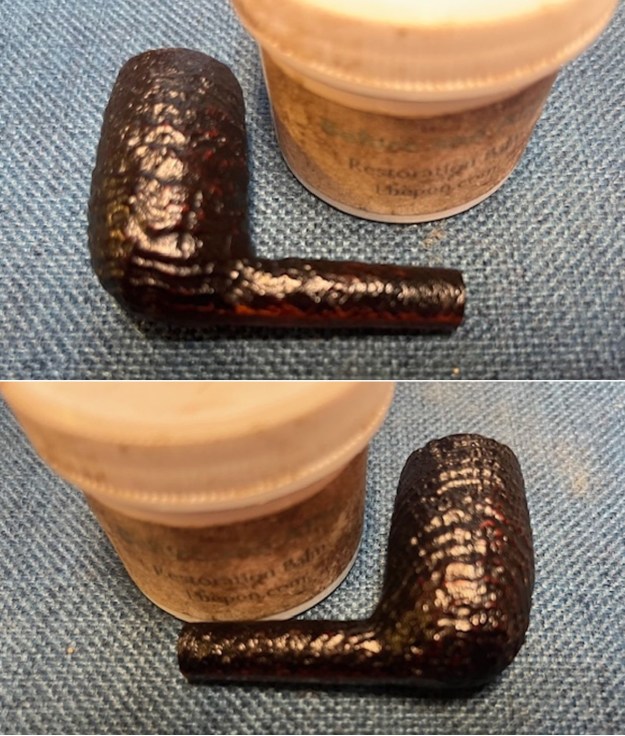
 The bowl was finished and now I needed to go back to polishing the stem. I sanded it with 320-3500 grit sanding pads. I dry sanded it and wiped it down with Obsidian Oil to protect and clean it. I sanded out the casting marks and the scratches in the surface. It looked much better with each sanding pad.
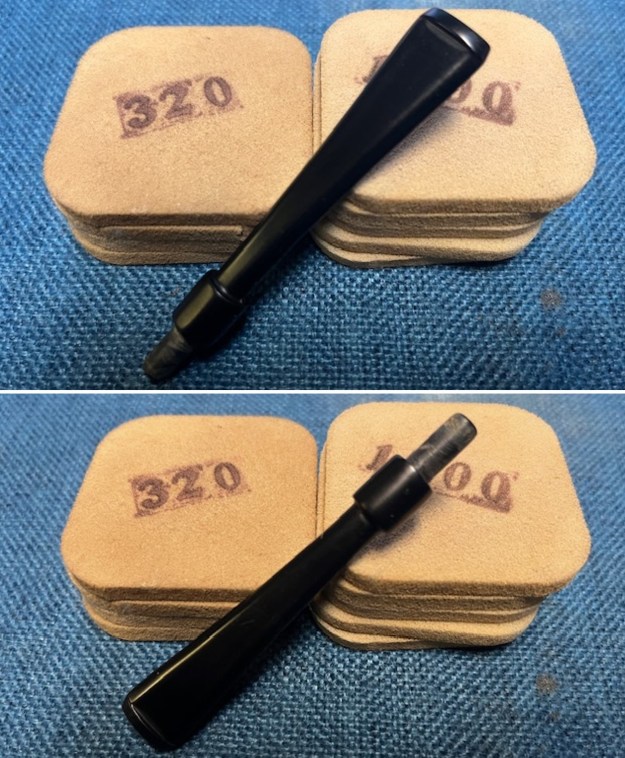 I polished the stem with micromesh sanding pads – wet sanding it 1500-12000 pads. I wiped it down with a damp cloth after each pad to remove the dust and polishing debris. I polished it with Before & After Pipe Polish – both Fine and Extra Fine.
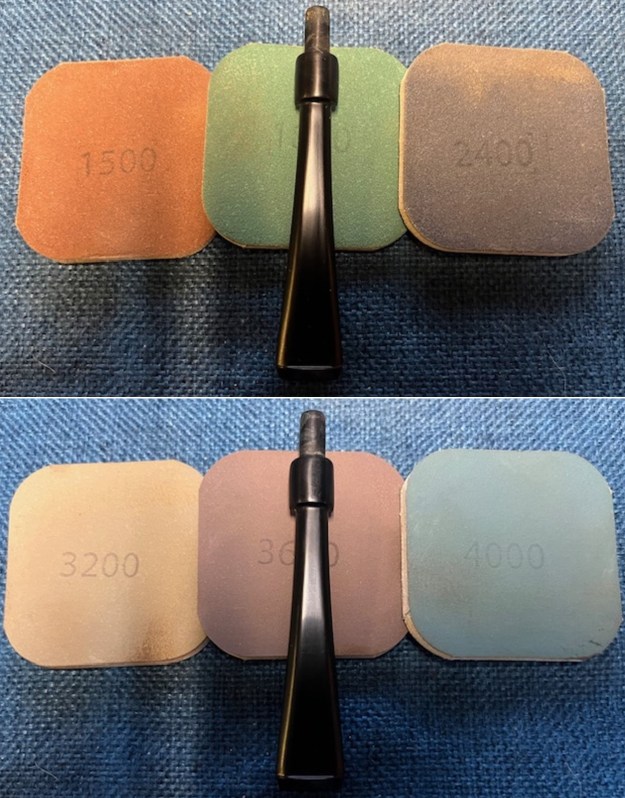
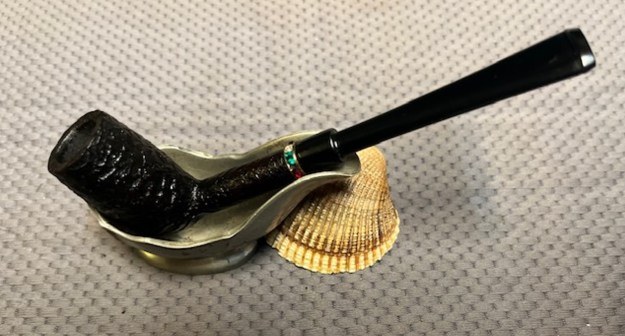
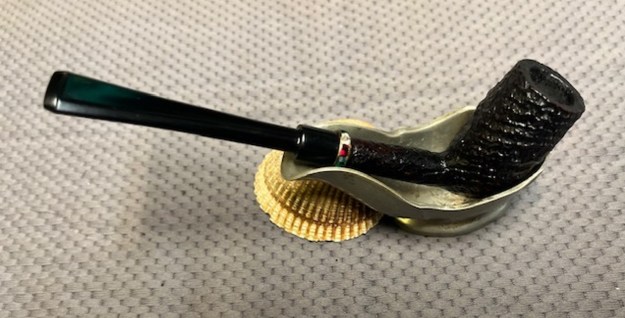
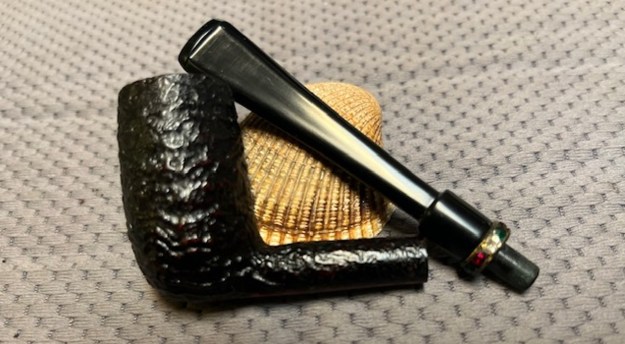
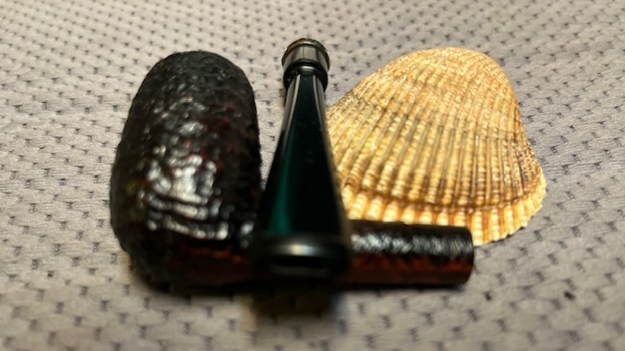
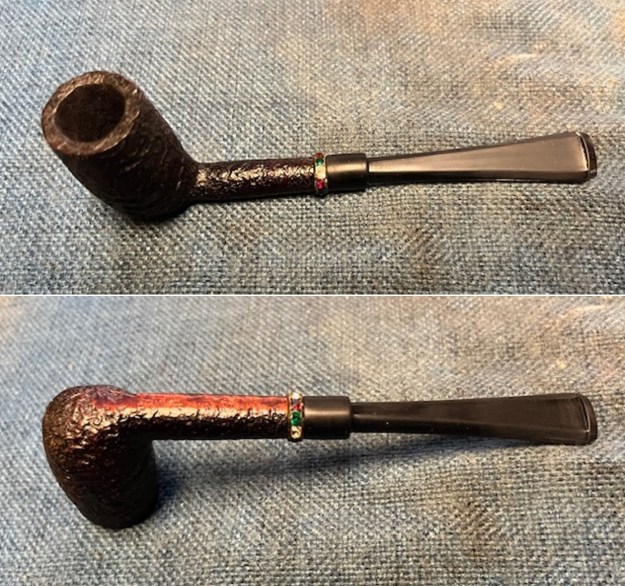
 I placed the brass ring with the inlaid glass gems on the tenon. It was made to slide on the tenon easily and stopped against the saddle of the stem. I took photos before and after.
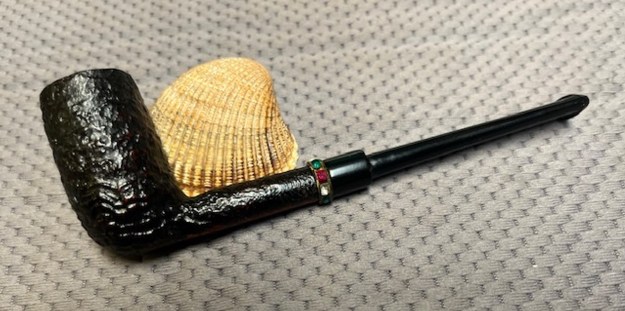
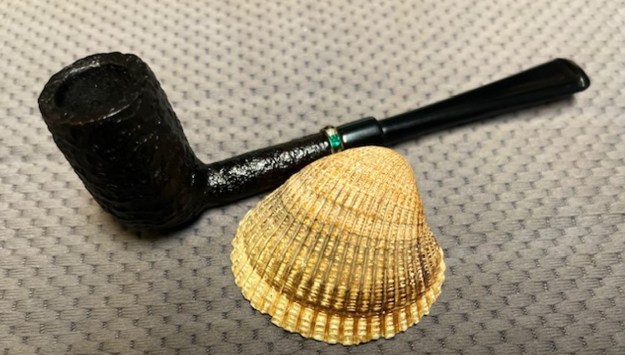
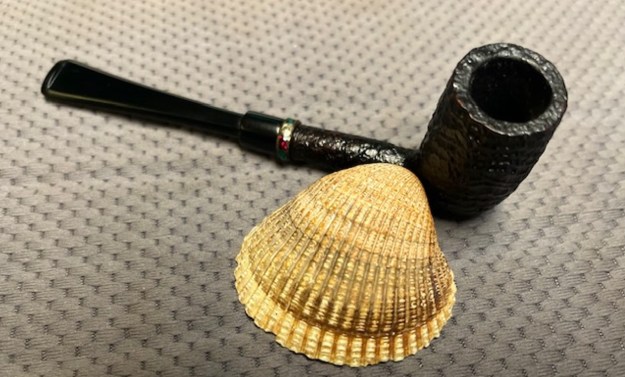
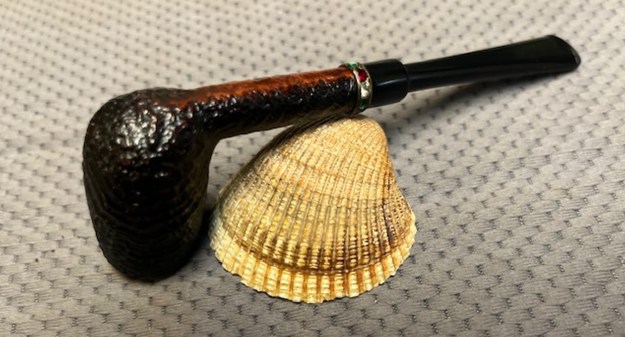
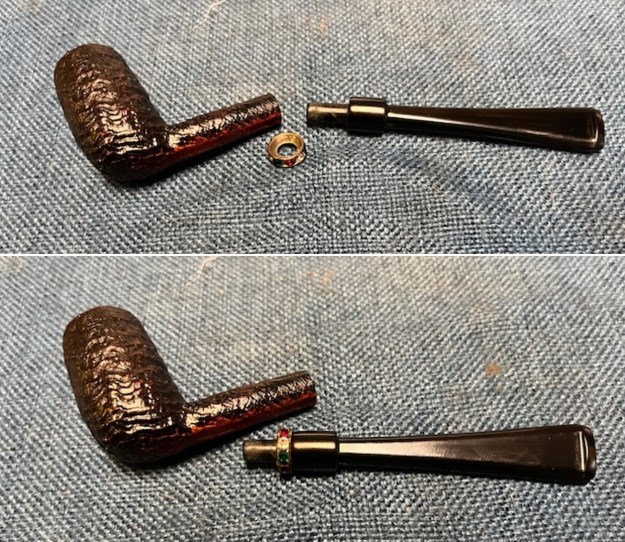 I am really happy with the way that this Small Sandblast Stanwell 7451 Tiny Stack turned out. It really is a beautiful looking pipe with a great shape sandblast finished bowl and rim. The new vulcanite saddle stem is really nice. The brass band on the tenon is inlaid with cut glass jewels. The briar really came alive with the buffing. The rich dark brown stains of the finish gave the pipe a sense of depth with the polishing and waxing. I put the stem back on the bowl and carefully buffed the pipe with Blue Diamond on the buffing wheel using a light touch on the briar. I gave the bowl and the stem multiple coats of carnauba wax on the buffing wheel. I buffed the pipe with a clean buffing pad to raise the shine. I hand buffed the pipe with a microfiber cloth to deepen the shine. The finished Stanwell 7451 Lady’s Pipe really is a beauty and feels great in the hand and looks very good. Give the finished pipe a look in the photos below. The dimensions of the pipe are Length: 5 ¼ inches, Height: 1 ½ inches, Outside diameter of the bowl: ¾ of an inch, Chamber diameter: ½ of an inch. The weight of the pipe is 17 grams/.56 of an ounce. The pipe will be going on the rebornpipes store soon. It will be in the section on Danish Pipe Makers if you would like to add it to your collection. Thanks for reading this blog and my reflections on the pipe while I worked on it. It was a fun one to work on!