Blog by Steve Laug
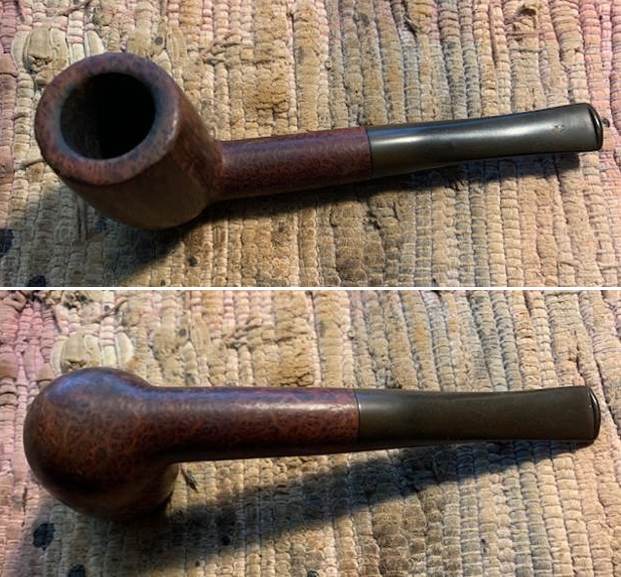
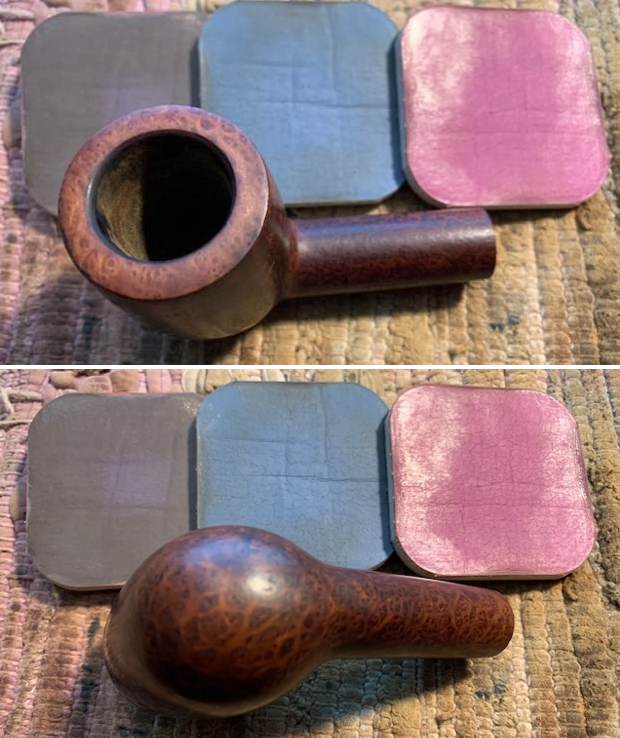
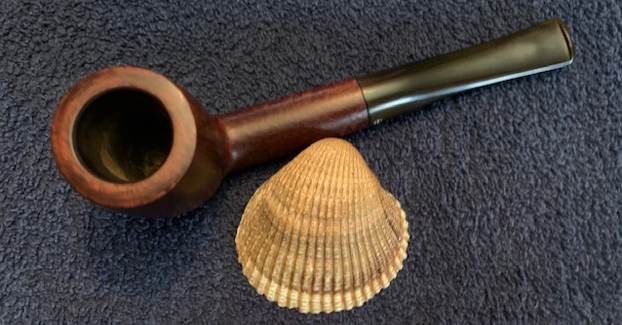
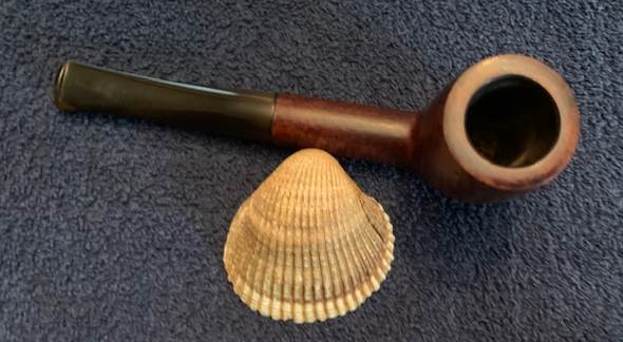
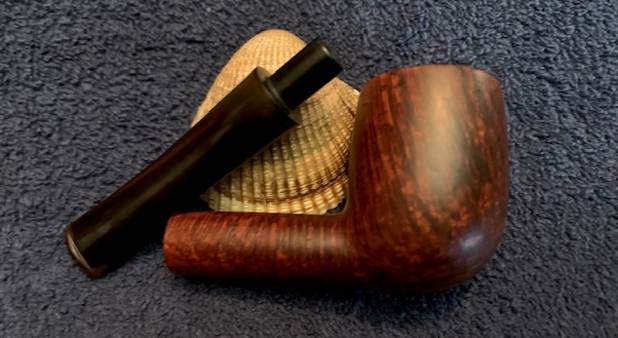
The next pipe I have chosen is another Peterson’s pipe that has been sitting here in Vancouver for a while. It is a nice, beautifully grained Billiard. It came to us from an online auction 08/05/19 in Westville, Indiana, USA. This pipe was obviously a favourite of the previous trustee. It had been well smoked and there was a thick cake in the bowl and lava overflowing onto the rim top. The rim top had damage on the top and outer edge of the bowl. The well grained briar was dirty with grime and dirt ground into the finish and some small dents and scratches on the bowl sides and heel. There was straight grain all around the bowl and shank with birdseye on the rim top and heel of the bowl and top and underside of the shank. The stamping on the shank is clear and readable. The left side is stamped faintly Peterson’s [over] Straight Grain. On the right side it was stamped Made in the Republic of Ireland (3 lines) and near the bowl it is stamped with the shape number X105. The number 12 is stamped on the underside of the shank. The “P” stamp on the left side of the taper stem is readable and faded. It was oxidized and had light tooth marks and chatter on both sides ahead of the button. There was also a white mark on the top of the stem that looked like a repair to me. Jeff took photos of the pipe before he started his clean up work on it.
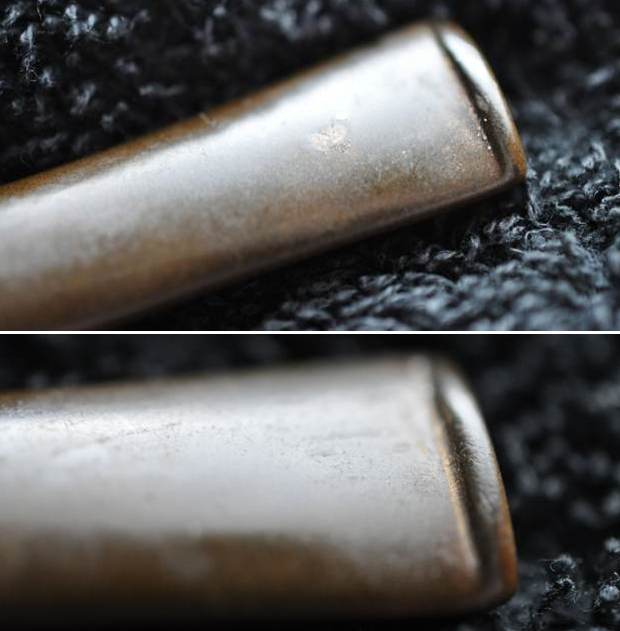
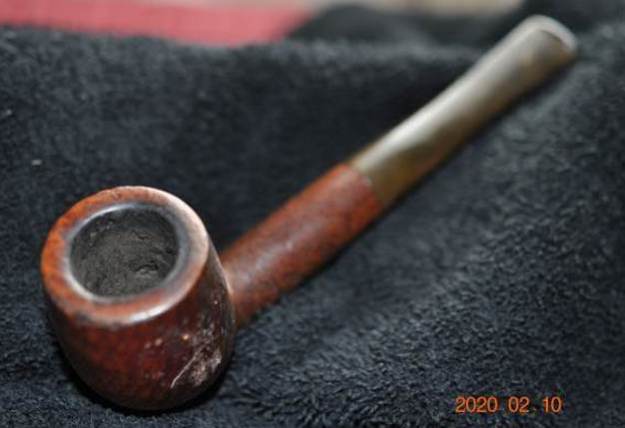 Jeff captured the thick cake in the bowl lava overflow onto the rim top and inner edge in his photos. You can also see the damage to the outer edge of the rim in the photos. The heavily oxidized and calcified stem surface had a lot of tooth chatter and marks on the stem and on the button surface and edges. There was also a white spot on the top about an inch ahead of the button that looks like a repair.
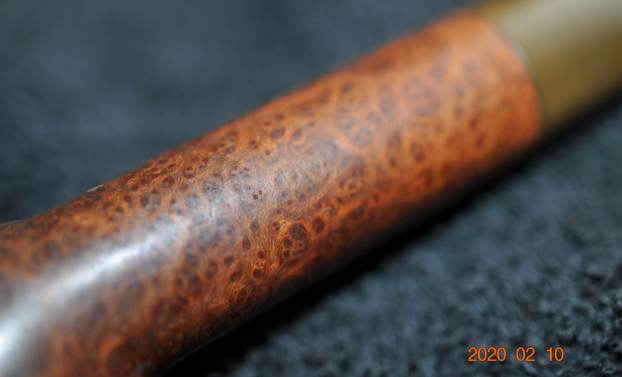
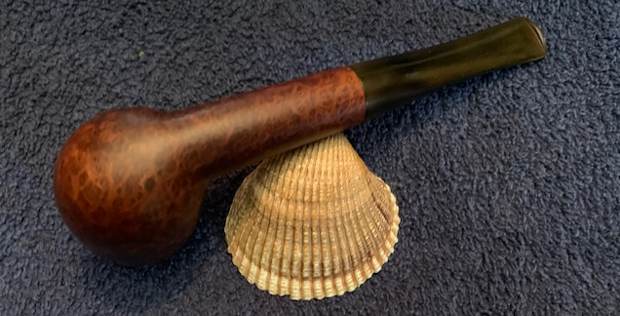
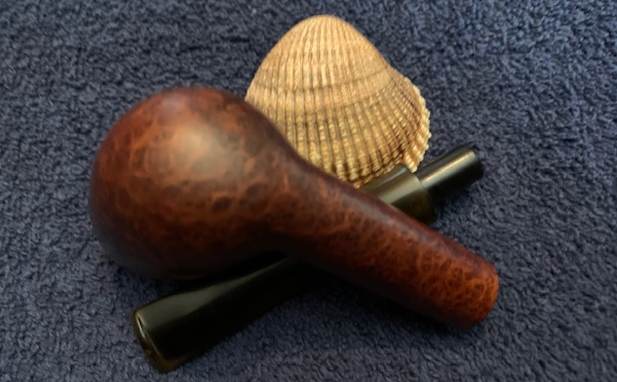
 He took photos of the heel and sides of the bowl to show birds eye grain on the heel and shank and the straight grain on the sides. It was quite beautiful.
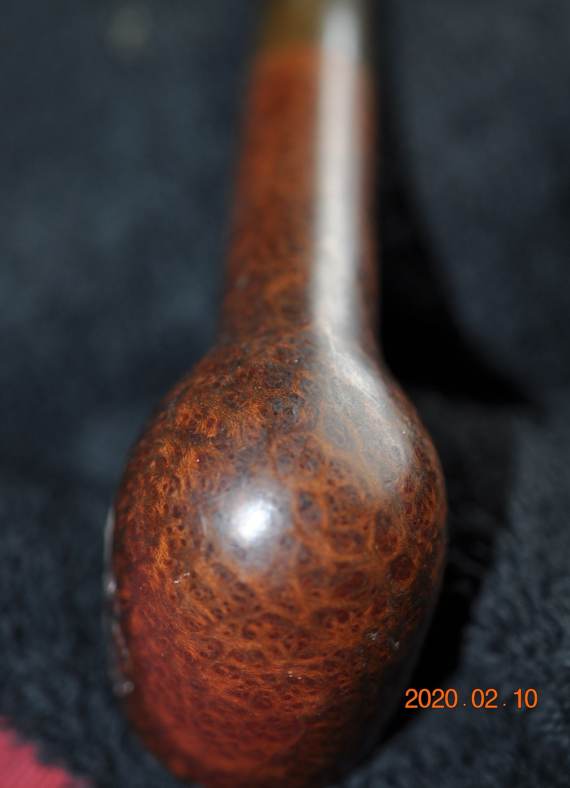

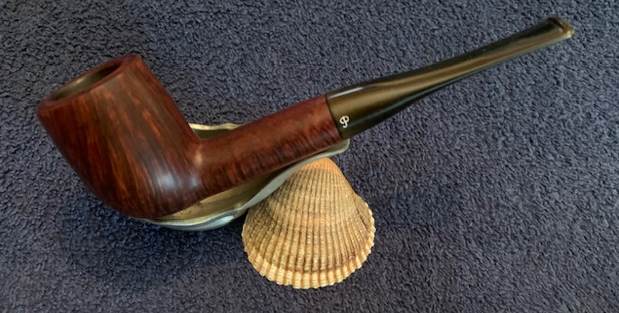
 He took photos of the stamping on the sides of the shank and stem. It is readable but faint in places.

 I am including the information from Pipedia’s article on Peterson pipes. It is a great read in terms of the history of the brand (https://pipedia.org/wiki/Peterson). I have included a bit of the pertinent history here.
1950 – 1989 The Republic Era – From 1950 to the present time, the stamp for this era is “Made in the Republic of Ireland” in a block format generally in three lines but two lines have been used with or without Republic being abbreviated.
During the 1950’s and 60’s the Kapp & Peterson Company was still in the ownership of the Kapp family. However 1964 saw the retiral of the company Managing Director Frederick Henry(Harry) Kapp.
There was also a section on the Straight Grains on the site:
Straight grains: Peterson’s catalogue states that these pipes have Briars which are carefully examined for imperfections and have selected Briars of exceptional grain, known as Straight Grains, they are carefully selected, hand crafted and the increasingly rare skill required to make them is unique. Craftsmen shape, turn, sand and polish 150 year old roots of the Erica arborea tree/shrub. Only a very limited quantity of Straight Grains are available in any twelve month period. To my mind the sight of a beautiful natural straight grain bowl is truly a sight to behold. Pure class, they can be spotted a mile off! When coupled to the traditional high class Peterson gold or silverwork, these pipes are in a different quality league. Considering that such quality pipes when available, can be bought for prices starting at around $400 and upwards, they are to my mind a real bargain.
I turned to “The Peterson Pipe” by Mark Irwin and Gary Malmberg to get some background on the Peterson’s Straight Grain. On page 314 it had the following information.
Straight Grain Scarce premium grade stamp on models with exceptional Straight Grain, P-lip or fishtail mouthpiece as a line, appears in 1997, 2000 and ’05 catalogs. Specimen documented with bone-tenon extension indicating availability of such pipes before 1963, indeed, the ’40 catalog notes that ‘Hundreds of grosses of pipes may be made before even one STRAIGHT GRAIN bowl comes to hand.
A further reference to the line is found on Page 240 of the above book. I quote:
Grain – But what if the first choice a pipeman makes has to do with grain, if, for example he is only  interested in pipes stamped STRAIGHT GRAIN? This is the top category in Peterson’s grading system, where availability is wholly dependent upon chance, with fewer than 2 percent of all bowls being so graded and stamped. While Peterson was stamping pipes STRAIGHT GRAIN as far back as the 1940s, so few of them have been made that they didn’t appear in the catalogs until 1997. Finding a Straight Grain in a desired shape can thus take years. If, however, the smoker is willing to bump his expectations down a notch to A-quality bowls, he can still find some spectacular grain choices, but his other choices are now much wider, since all current De Luxe and Natural finish pipes are made from A grade bowls, which are always free of fills.
Judging from the description above I believe that I am working on a rare Republic Era (1950 – 1989) Straight Grain Billiard with beautiful grain and a matte-finish and a fish tail stem. Now it was time to work on the pipe.
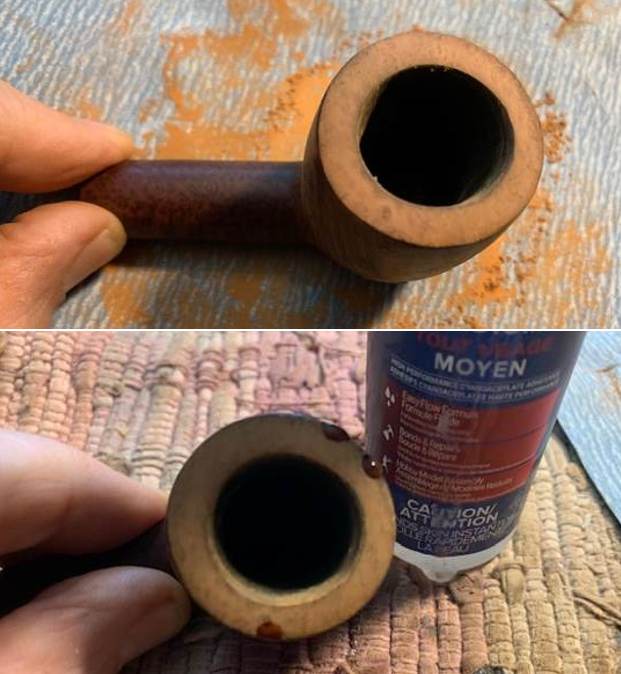
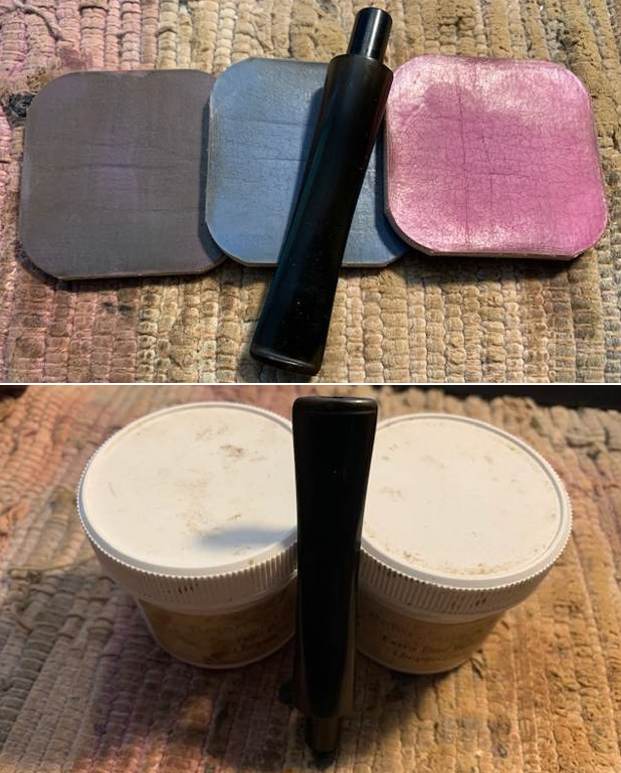
With that information at hand I turned to work on the pipe itself. Jeff had thoroughly cleaned up the pipe. He reamed the pipe with a PipNet Pipe Reamer and cleaned up the remnants with a Savinelli Fitsall Pipe Knife. He scrubbed the bowl with undiluted Murphy’s Oil Soap with a tooth brush. He rinsed it under running warm water to remove the soap and grime. He cleaned out the inside of the shank and the airway in the stem with alcohol, cotton swabs and pipe cleaners. He scrubbed the exterior of the stem with Soft Scrub to remove as much of the oxidation and calcification as possible. He soaked the stem in Before & After Deoxidizer and rinsed it off with warm water. I took photos of the pipe once I started to work on it. 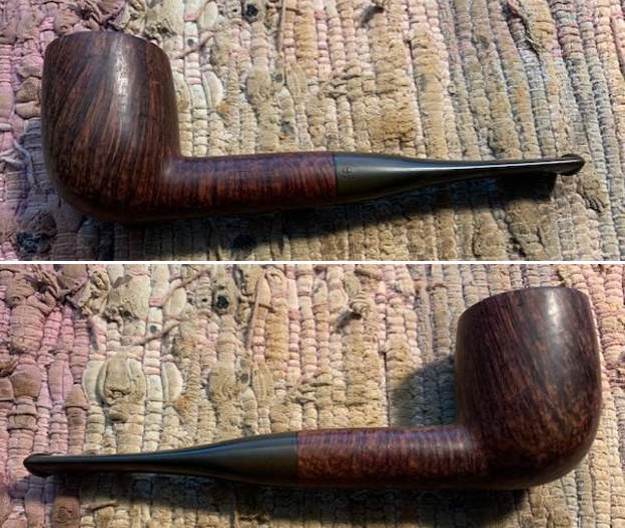
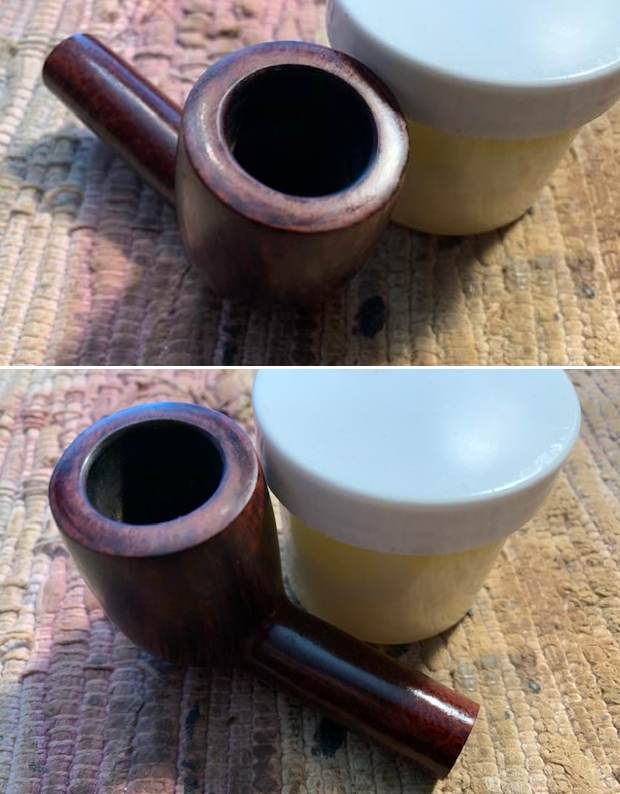
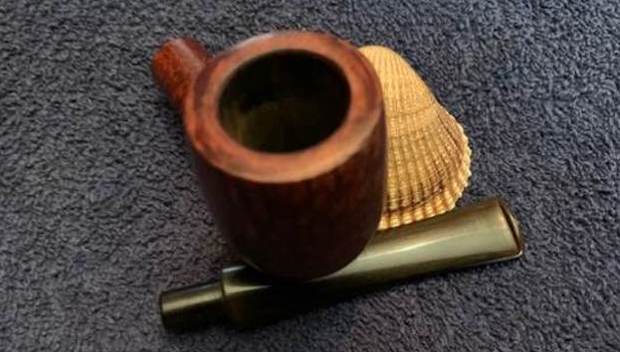
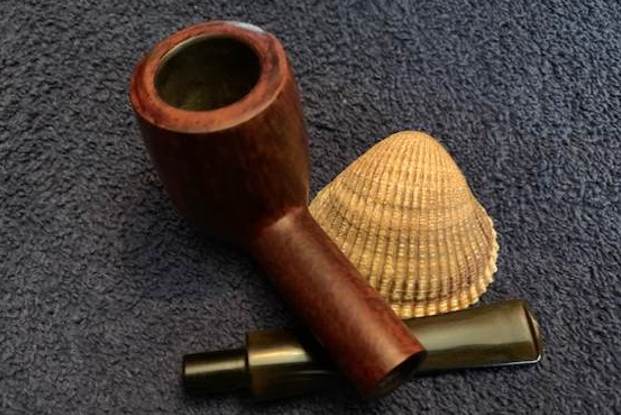
 I took close up photos of the bowl and the stem. You can see the reamed bowl and the darkening and damage on the rim top and the edges. The stem surface was clean but there are light tooth marks and chatter on both sides on and ahead of the button. There was a white spot on the top side of the stem that looked like a repair to me.
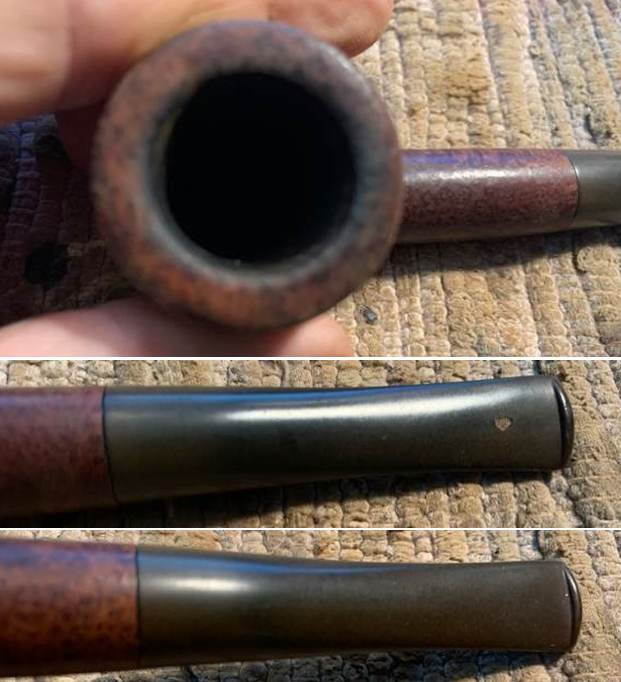 I took a photo of the stamping on the sides of the shank. It is clear and readable as noted above. There is also a “P” stamp on the right side of the taper stem.
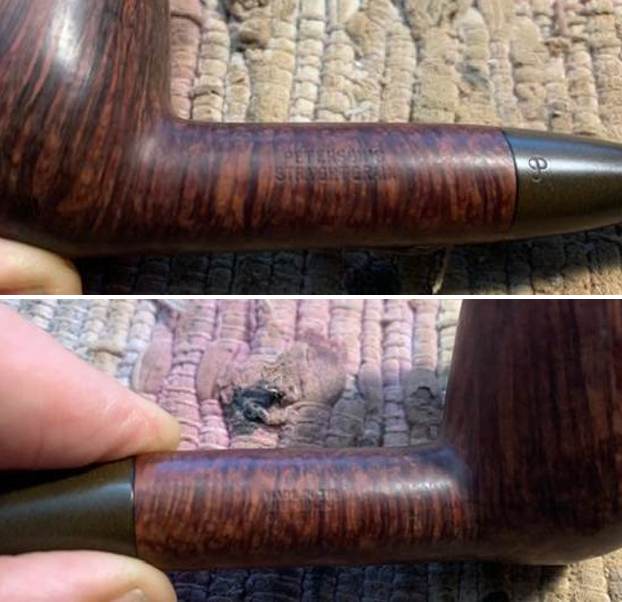 I removed the stem from the shank and took a photo to give a sense of the proportions of the pipe. It is really quite nice looking. You can also see the white spot on the top of the stem that I think is a repair.
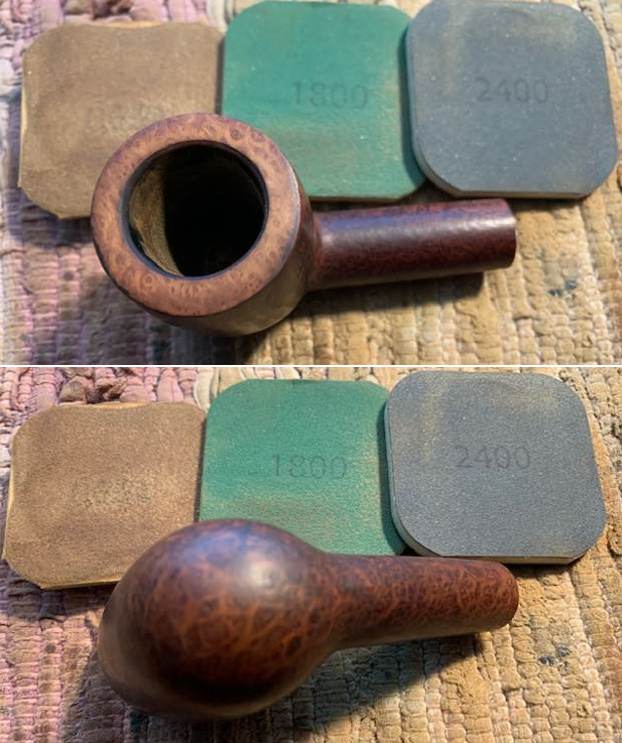
 I decided to address the damage to the rim top and inner edge of the bowl first. I cleaned up the inner edge and gave it a light bevel. I lightly topped the bowl on a topping surface with 220 grit sandpaper to remove the damage to the rim top. The rim looks much better at this point. I filled in the damaged areas on the outer edge of the bowl with clear CA glue.
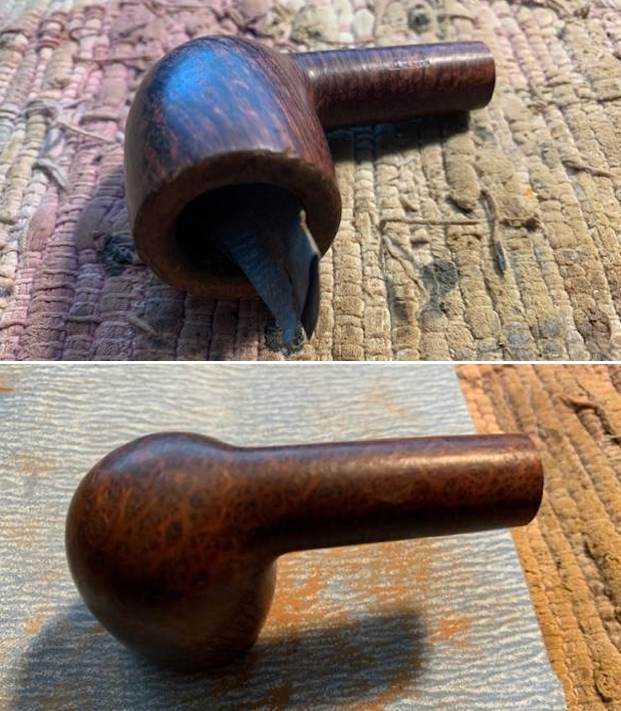
 I topped the rim again and cleaned up the bevel on the inner edge and the repairs on the outer edge with 220 grit sandpaper. Once I finished the rim top looked significantly better. I stained the rim top with a Cherry stain pen.
 I polished the rim top and the rest of the briar with micromesh sanding pads – dry sanding with 1500-12000 grit sanding pads. I wiped the bowl down with a damp cloth after each sanding pad. The briar began to come alive. The bowl looked very good.
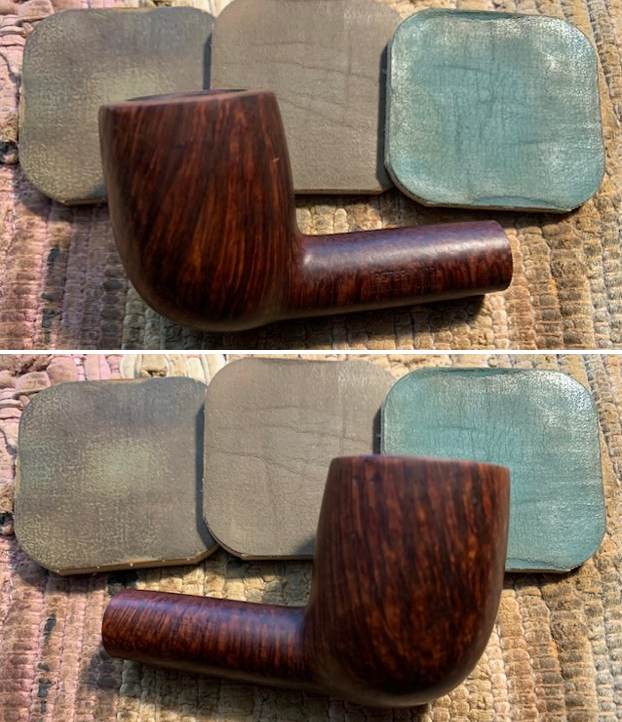


 I worked some Before & After Restoration Balm into the surface of the briar with my fingertips. It works to clean, enliven and protect the briar. I let it sit for 15 minutes then buffed it off with a soft cloth and raised the shine. The bowl looks great at this point.

 I set the bowl aside and turned my attention to the stem. I used a dental pick to push the white repair patch out of the hole. I greased a pipe cleaner with Vaseline to keep it from sticking in the airway. I used some black CA glue to refill the hole. I sprayed it with an accelerator to harden the repair, removed the pipe cleaner and set it aside to cure.
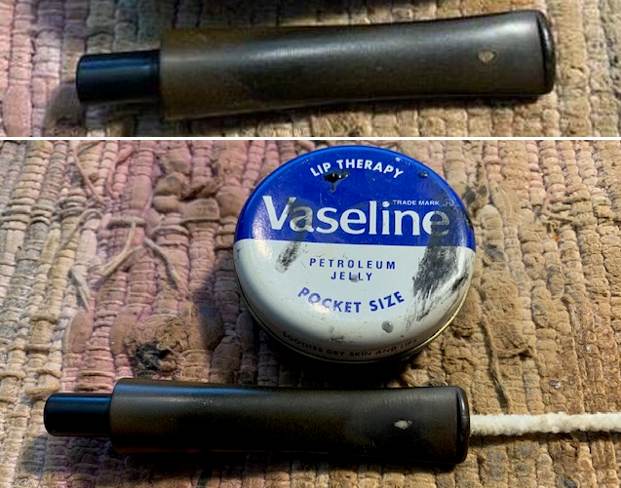
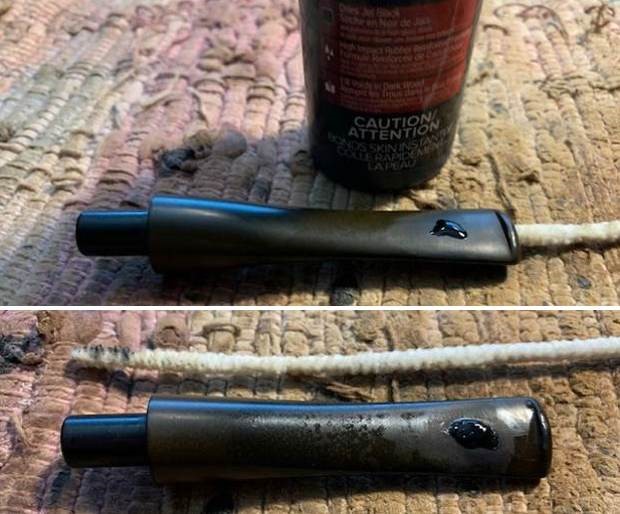 Once the repair cured I used a small needle file to flatten the surface of the stem. I sanded it smooth with a folded piece of 220 grit sandpaper to blend it into the surface of the vulcanite. I started the polishing it with 400 grit wet dry sandpaper.
  I touched up the “P” stamp on the stem with white acrylic fingernail polish. I pushed it into the stamp with a tooth pick to get it deep in the stamp. I scraped off the excess acrylic and polished the stamped area with a 1500 grit micromesh sanding pad. The curve of the “P” is weak but the stamp looks much better.
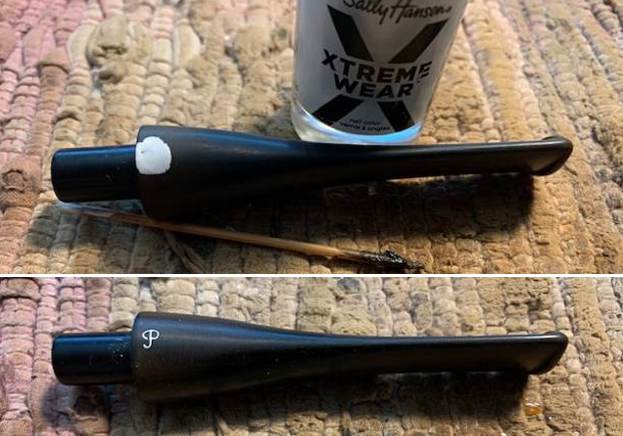 I polished the stem with micromesh sanding pads – dry sanding it with 1500-12000 grit pads. I wiped the stem down with Obsidian Oil after each pad. I polished it with Before & After Pipe Polish – both Fine and Extra Fine and gave it a final coat and set it aside to dry.
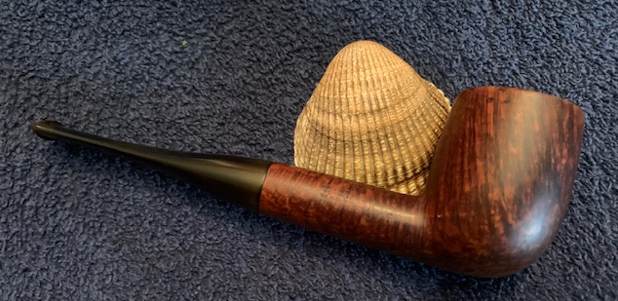
 I am excited to finish this Republic Era Peterson’s Straight Grain X105 Billiard. I put the pipe back together and buffed it with Blue Diamond on the buffing wheel. I gave the bowl and the stem multiple coats of carnauba wax. I hand buffed the pipe with a clean buffing pad to raise the shine. It is fun to see what the polished bowl looks like with beautiful straight and birdseye grain all around it. Added to that the black vulcanite stem was beautiful. This Peterson’s Straight Grain X105 Billiard is great looking and the pipe feels great in my hand. It is light and well balanced. Have a look at it with the photos below. The dimensions are Length: 5 ¾ inches, Height: 1 ¾ inches, Outside diameter of the bowl: 1 ¼ inches, Chamber diameter: ¾ of an inch. The weight of the pipe is 40 grams/1.41 ounces. It is a beautiful pipe and a rare one that I will be adding to my own collection. Thanks for walking through the restoration with me as I worked over this pipe. Thanks to each of you who are reading this blog.
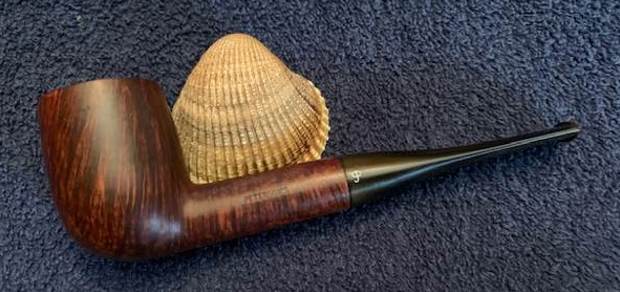


 I used a small hammer to reattach the nails that were sticking out on the back of the frame. It tightened both the backing and the corners of the piece. Each block had a screw through the backing into it holding it in place. I took the pipe out of the bracket at the bottom of the shadow box and sure enough there was a threaded hole in the back of it. That told me that it was the missing piece in the last spot in the third row in shadow box. I used some wood glue and a tooth pick to anchor the blocks to the back board. I set it aside to cure. The photo below shows the newly glued in place blocks.
  I talked to my friend about the missing pipe and he said he remembered that the display was originally a Butz-Choquin display. The missing sticker/logo at the top would have been a Butz-Choquin logo. He also believed that the finished pipe was in a box that he had dropped off for me to clean up. I went through the box and sure enough, in a Stanwell pipe sock was an unsmoked Butz-Choquin Billiard that was a perfect match to the size and shape of the block. I put it in place in the clamp at the bottom of the frame and it looked complete. I also knew that I was dealing with a Butz-Choquin display so I would need to print a BC logo for the top area of the box. I did a quick Google search and found exactly what I wanted. I cut it out with scissors and used a glue stick to attach it to the felt back board. I took a photo of the shadow box at this point in the process to show how it looked.
  We are in the process of having my basement office restored after flooding. My daughter and I chose the gray charcoal paint for the walls with a white ceiling and white trim and doors. There will be an oak desk and oak bookcases coming back in place. I chose a spot over my desk for this shadow box and hung it on the wall. It was the very first picture I have hung since the painting and restoration work. The finished shadow box looks amazing on the wall and the contrast with the paint is perfect.
  The piece will hang above my work desk that I also use for working on pipes. It is a silent witness to the process of birthing a pipe from a block of briar. It also links my restoration work of rebornpipes to the ongoing life of a briar. Thanks for taking time to read this.
