Monthly Archives: June 2014

A Set of Twins – Bent Royal Coachman Billiards by Comoys


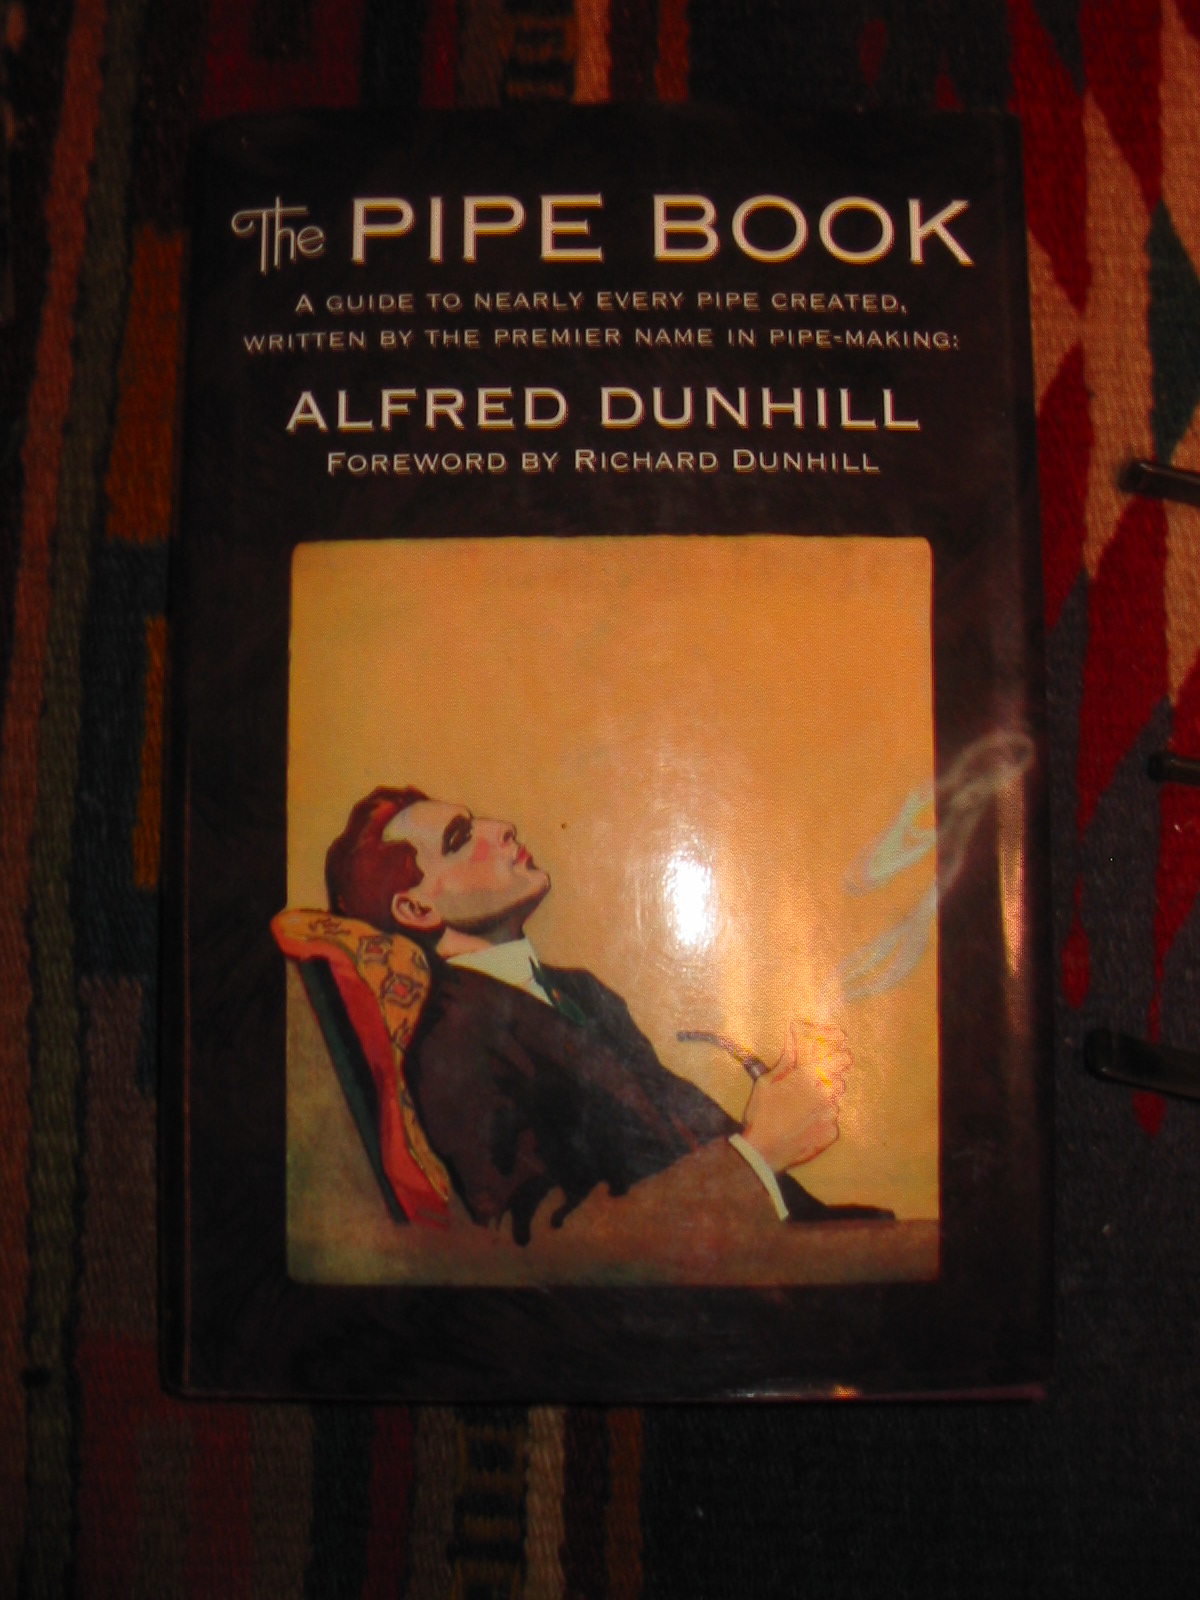
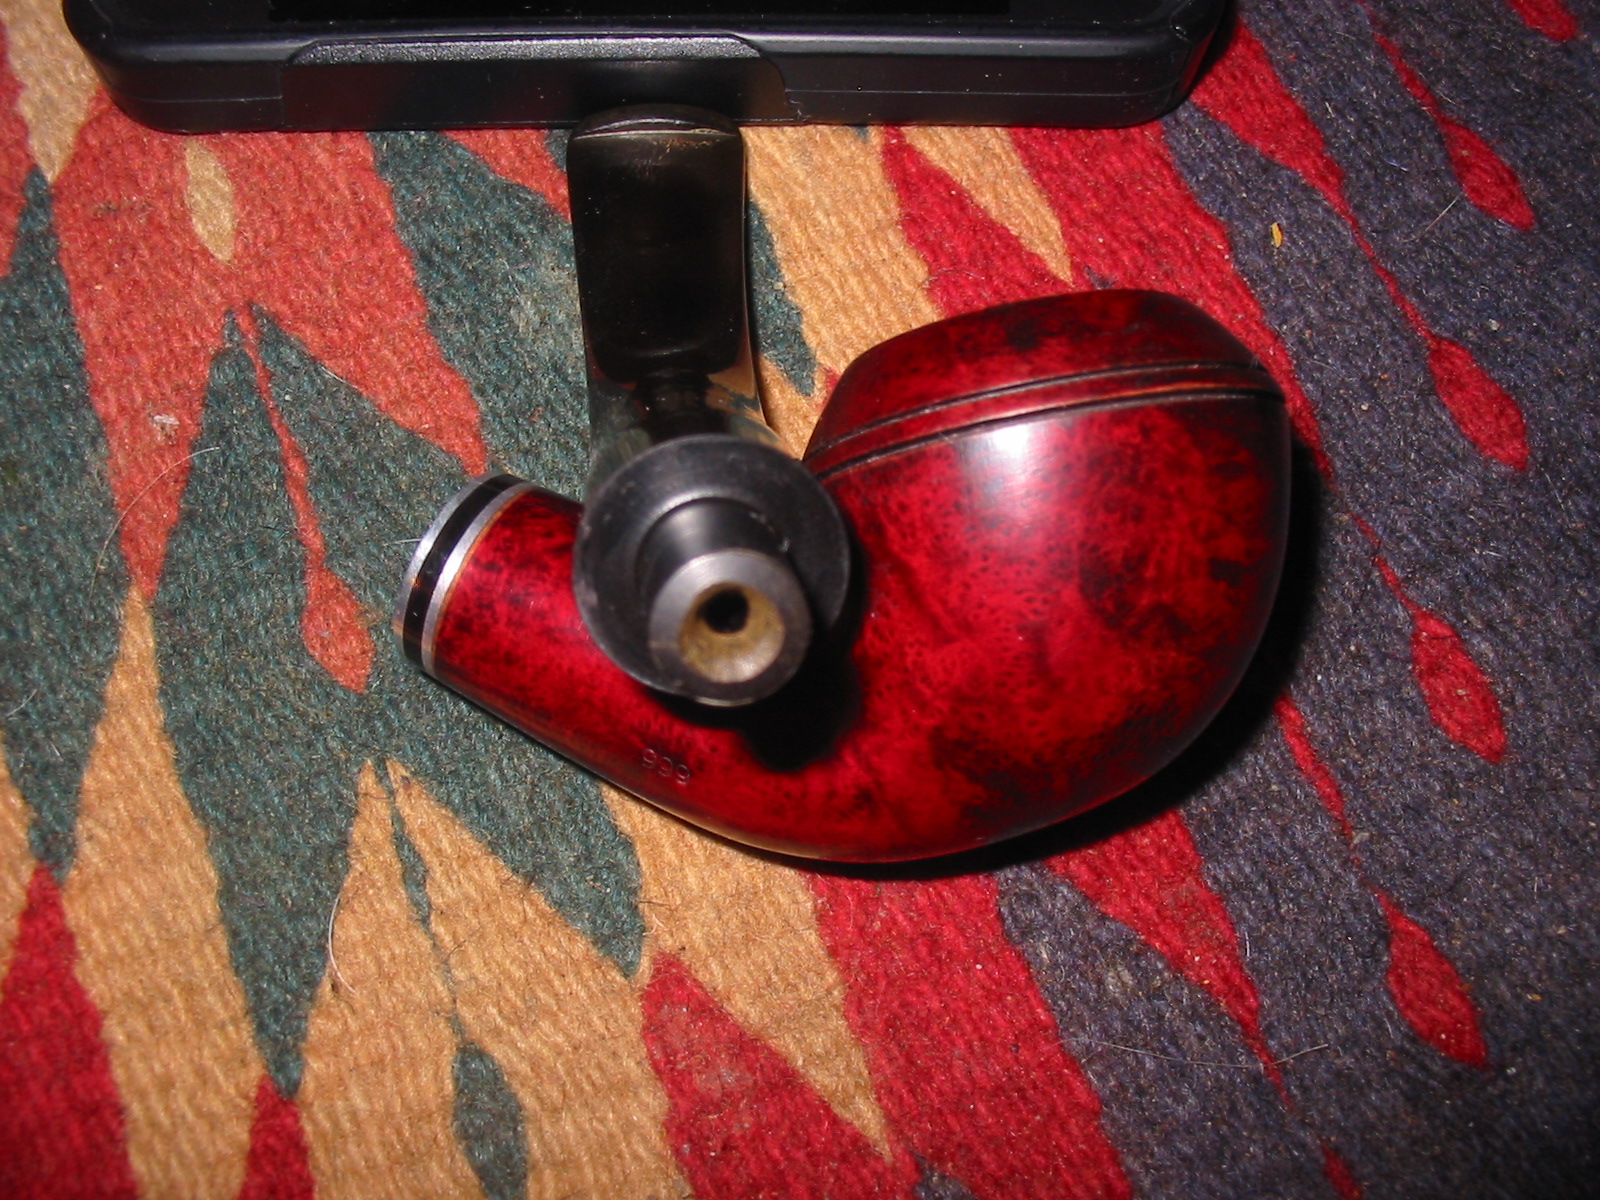
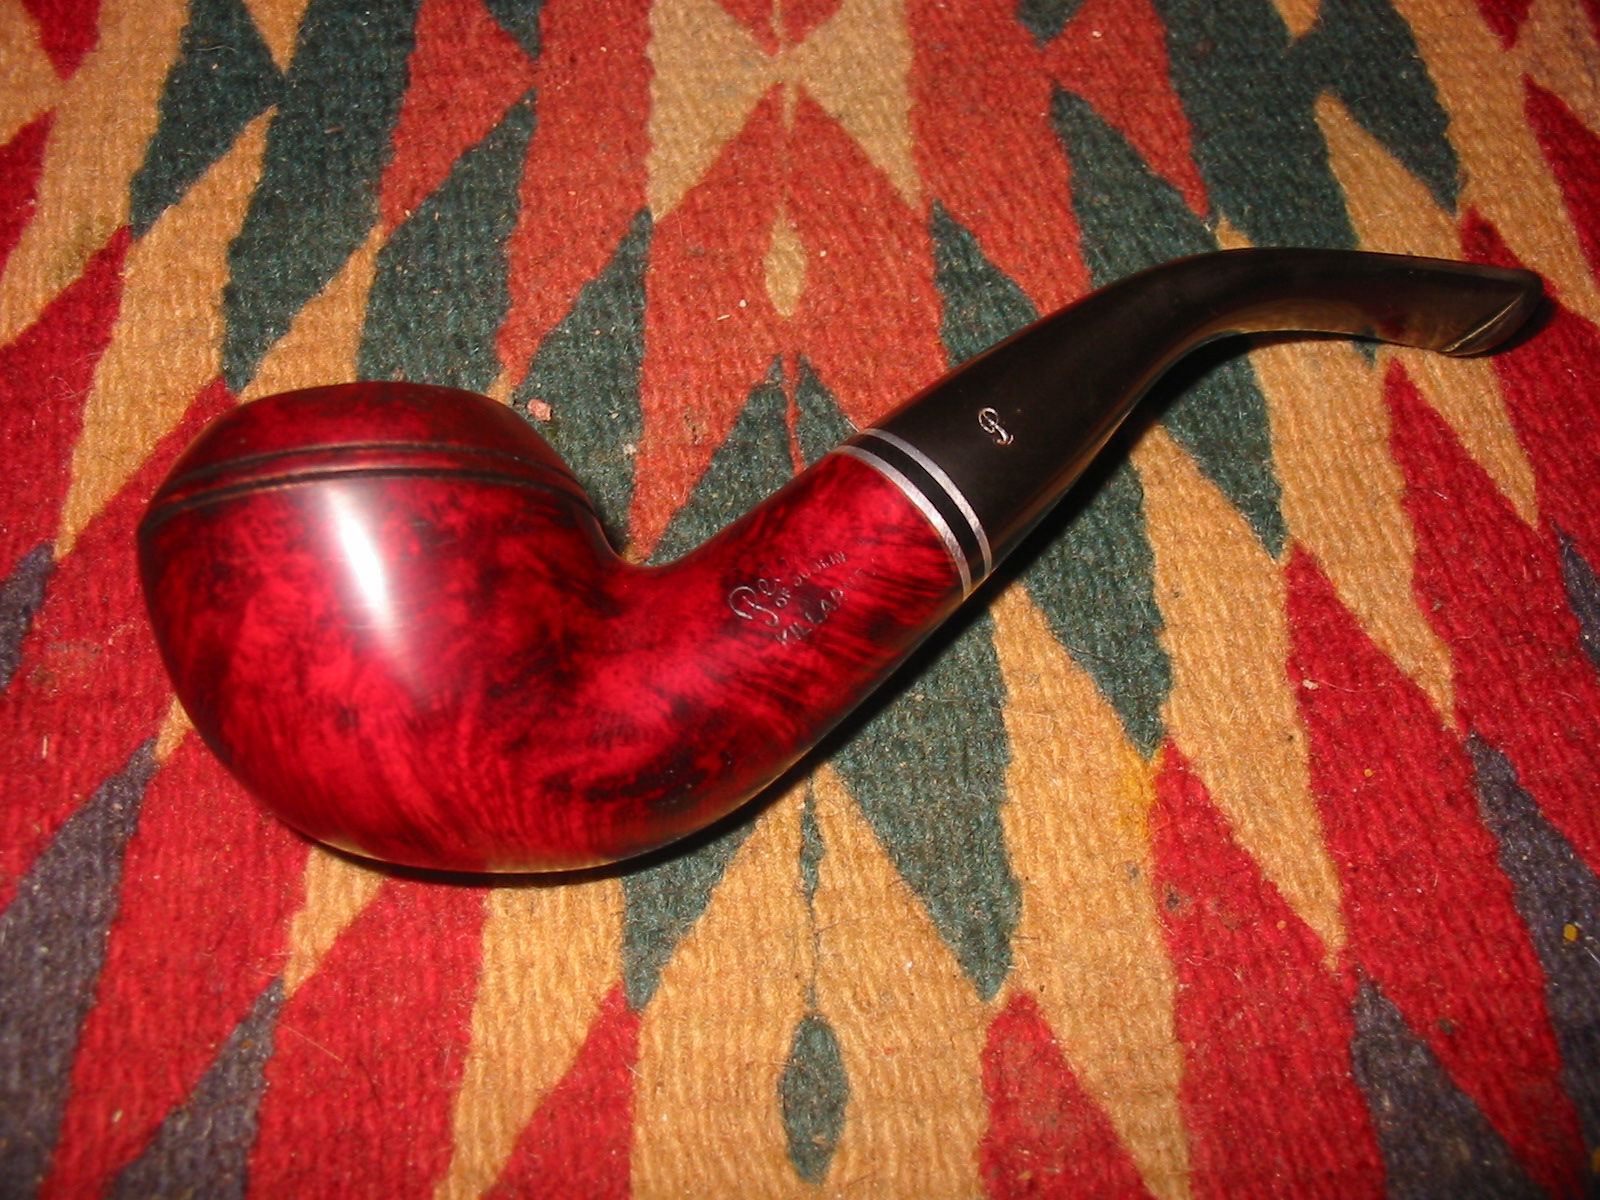
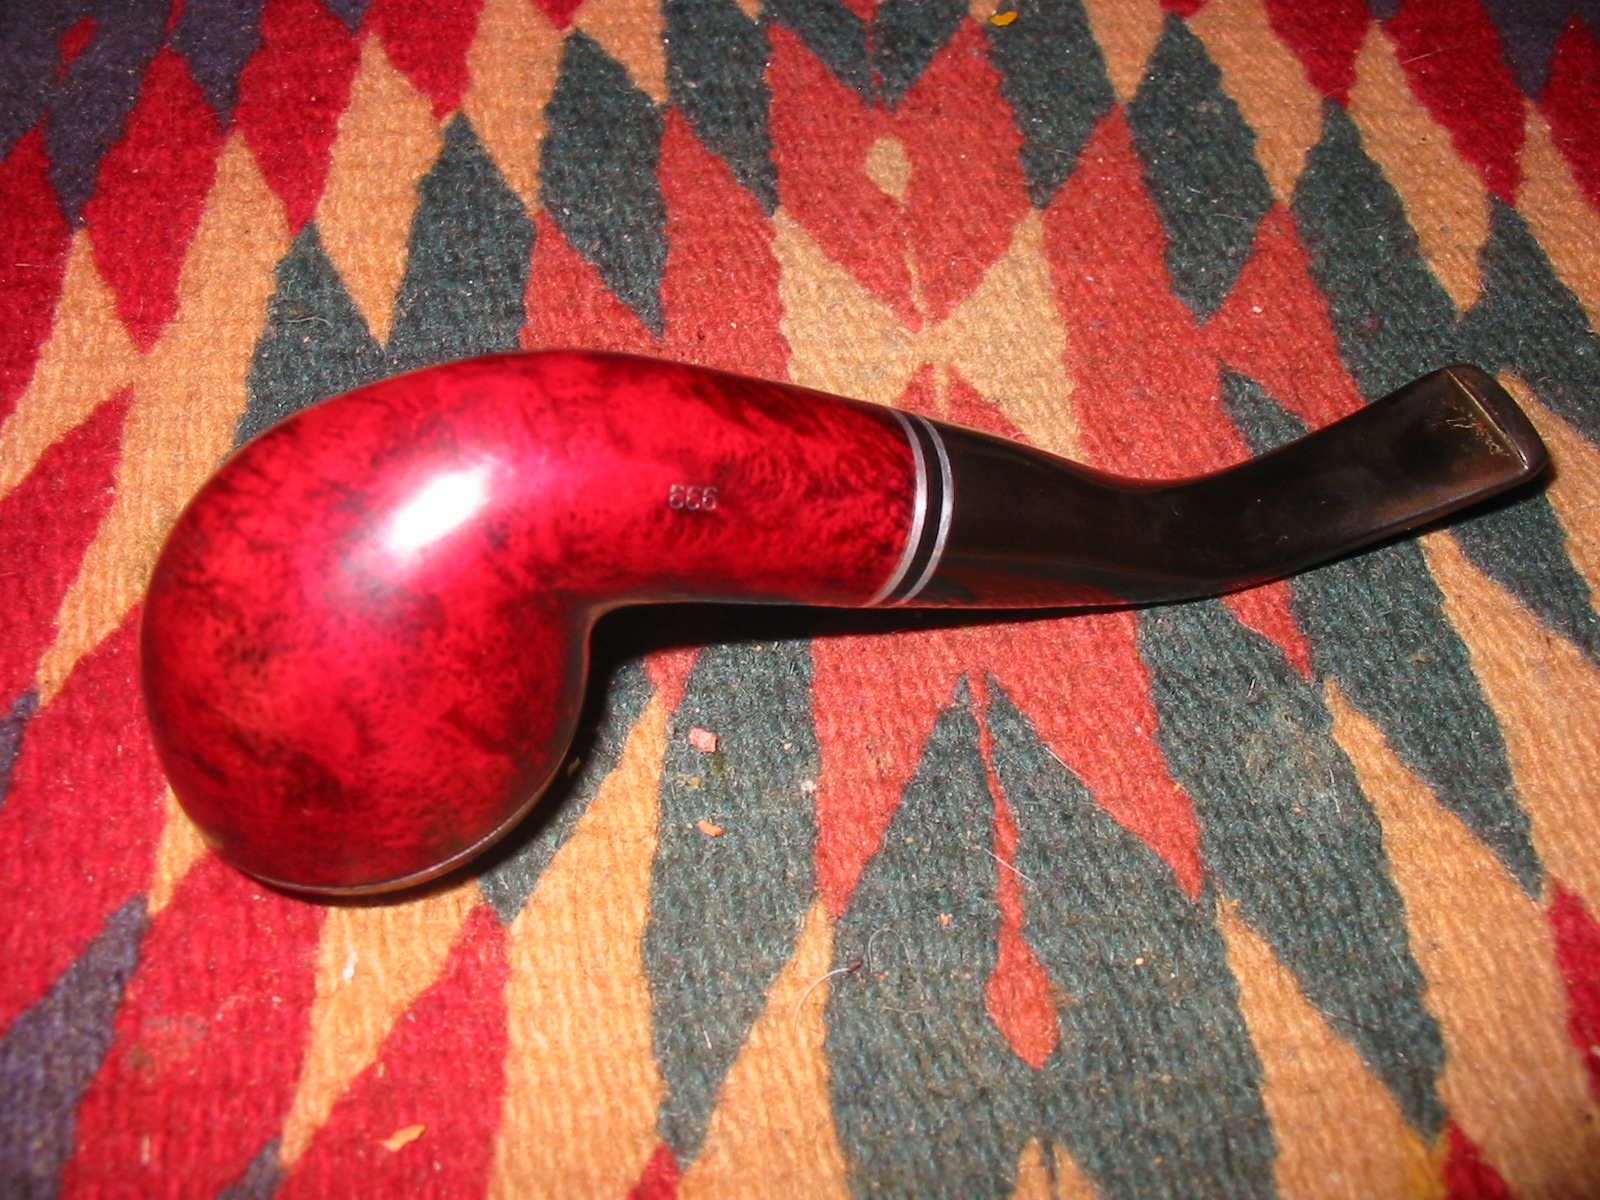
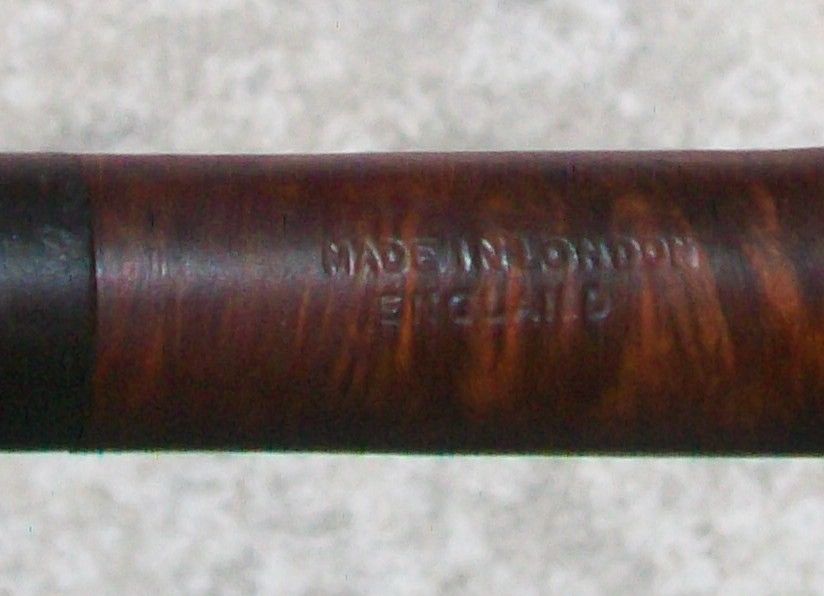
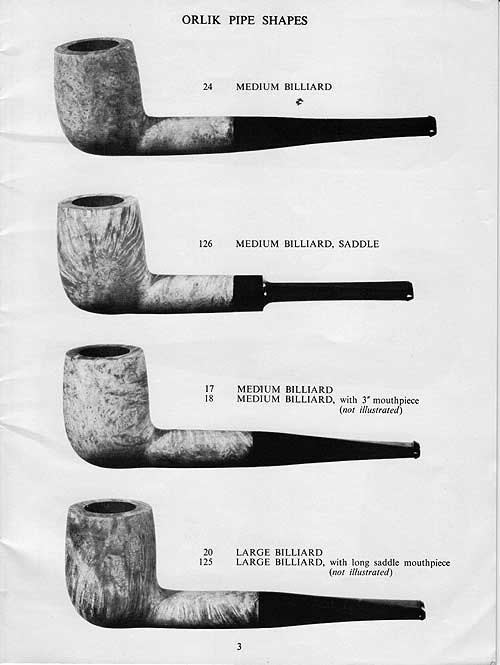
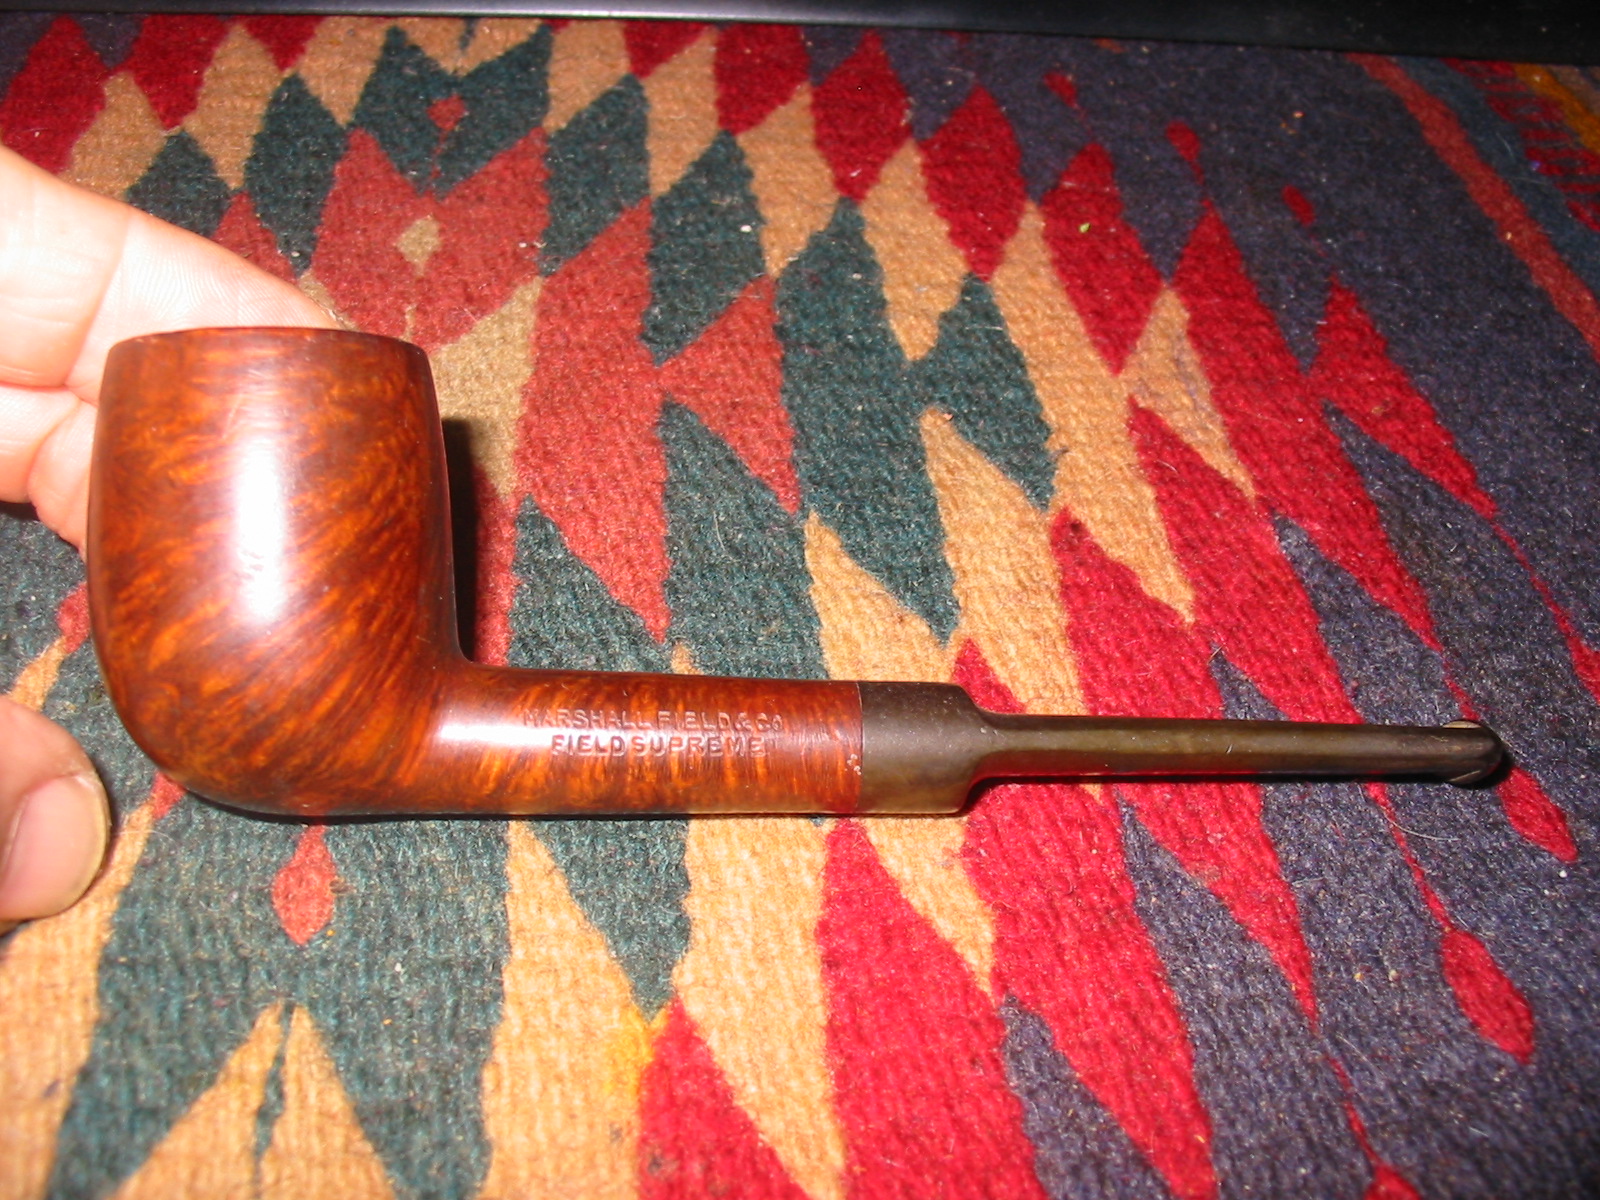
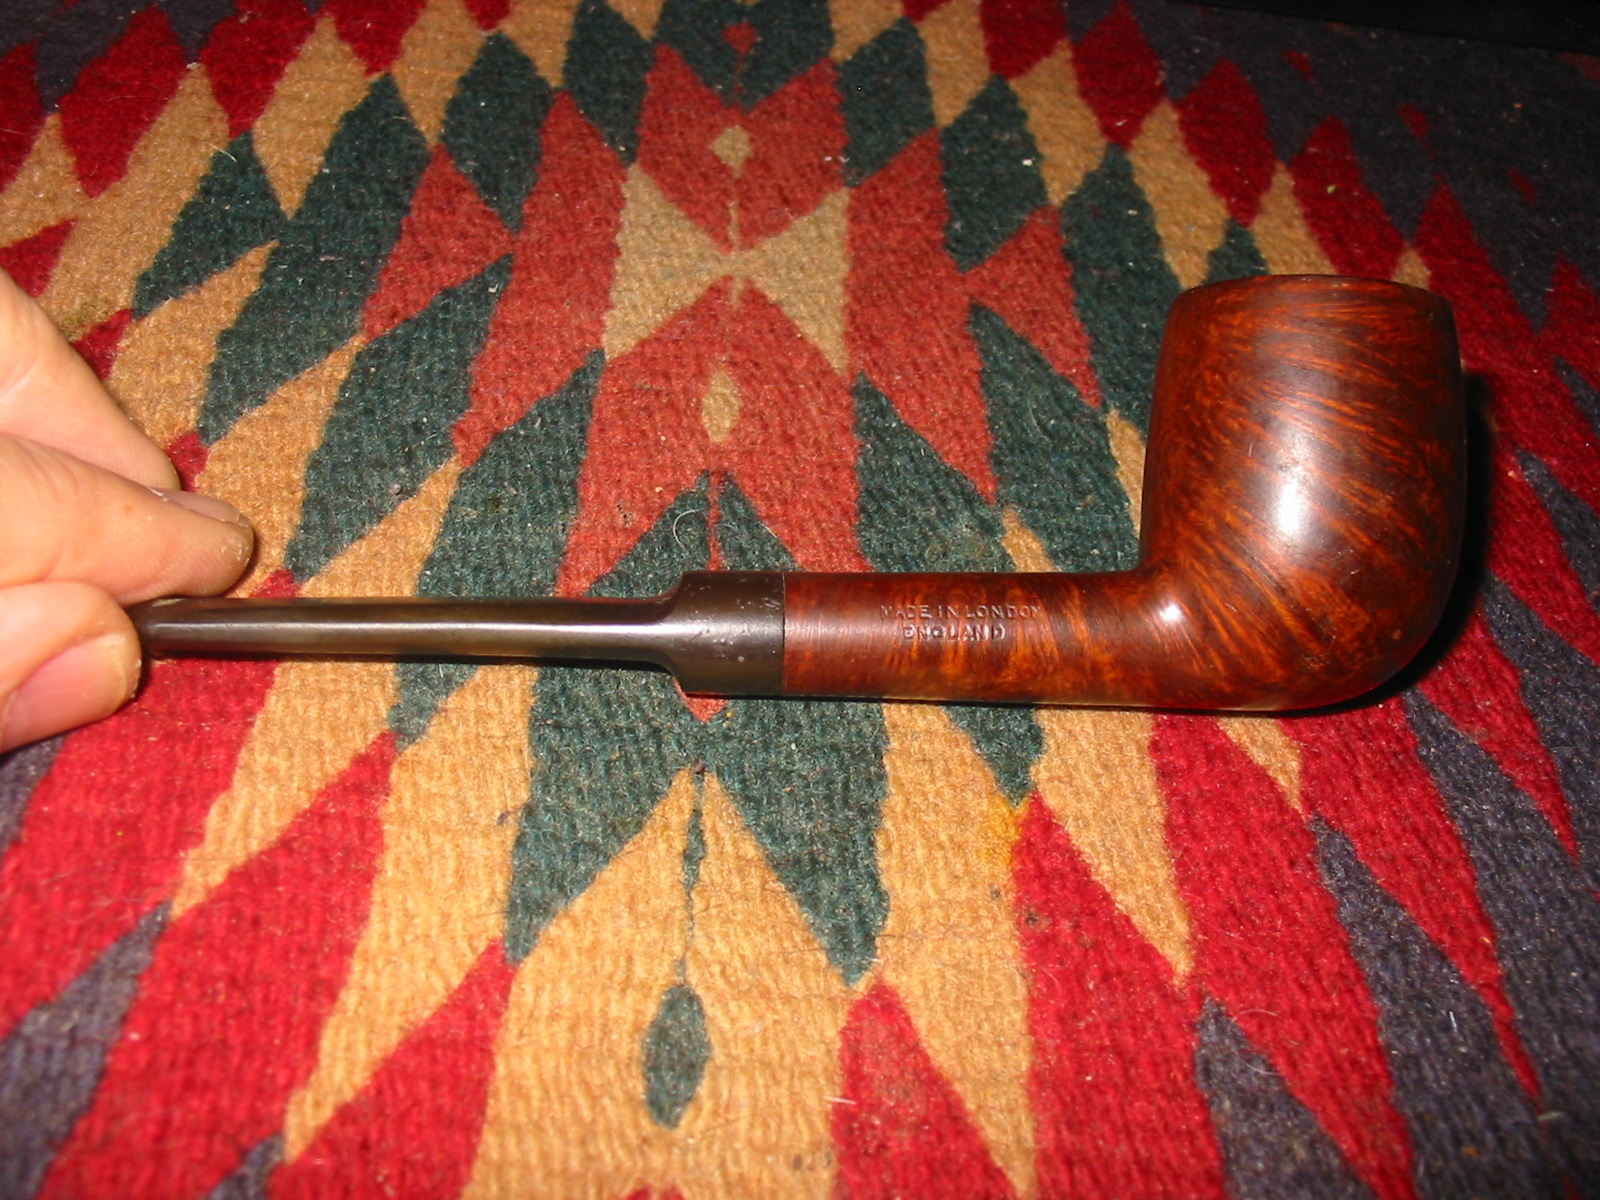
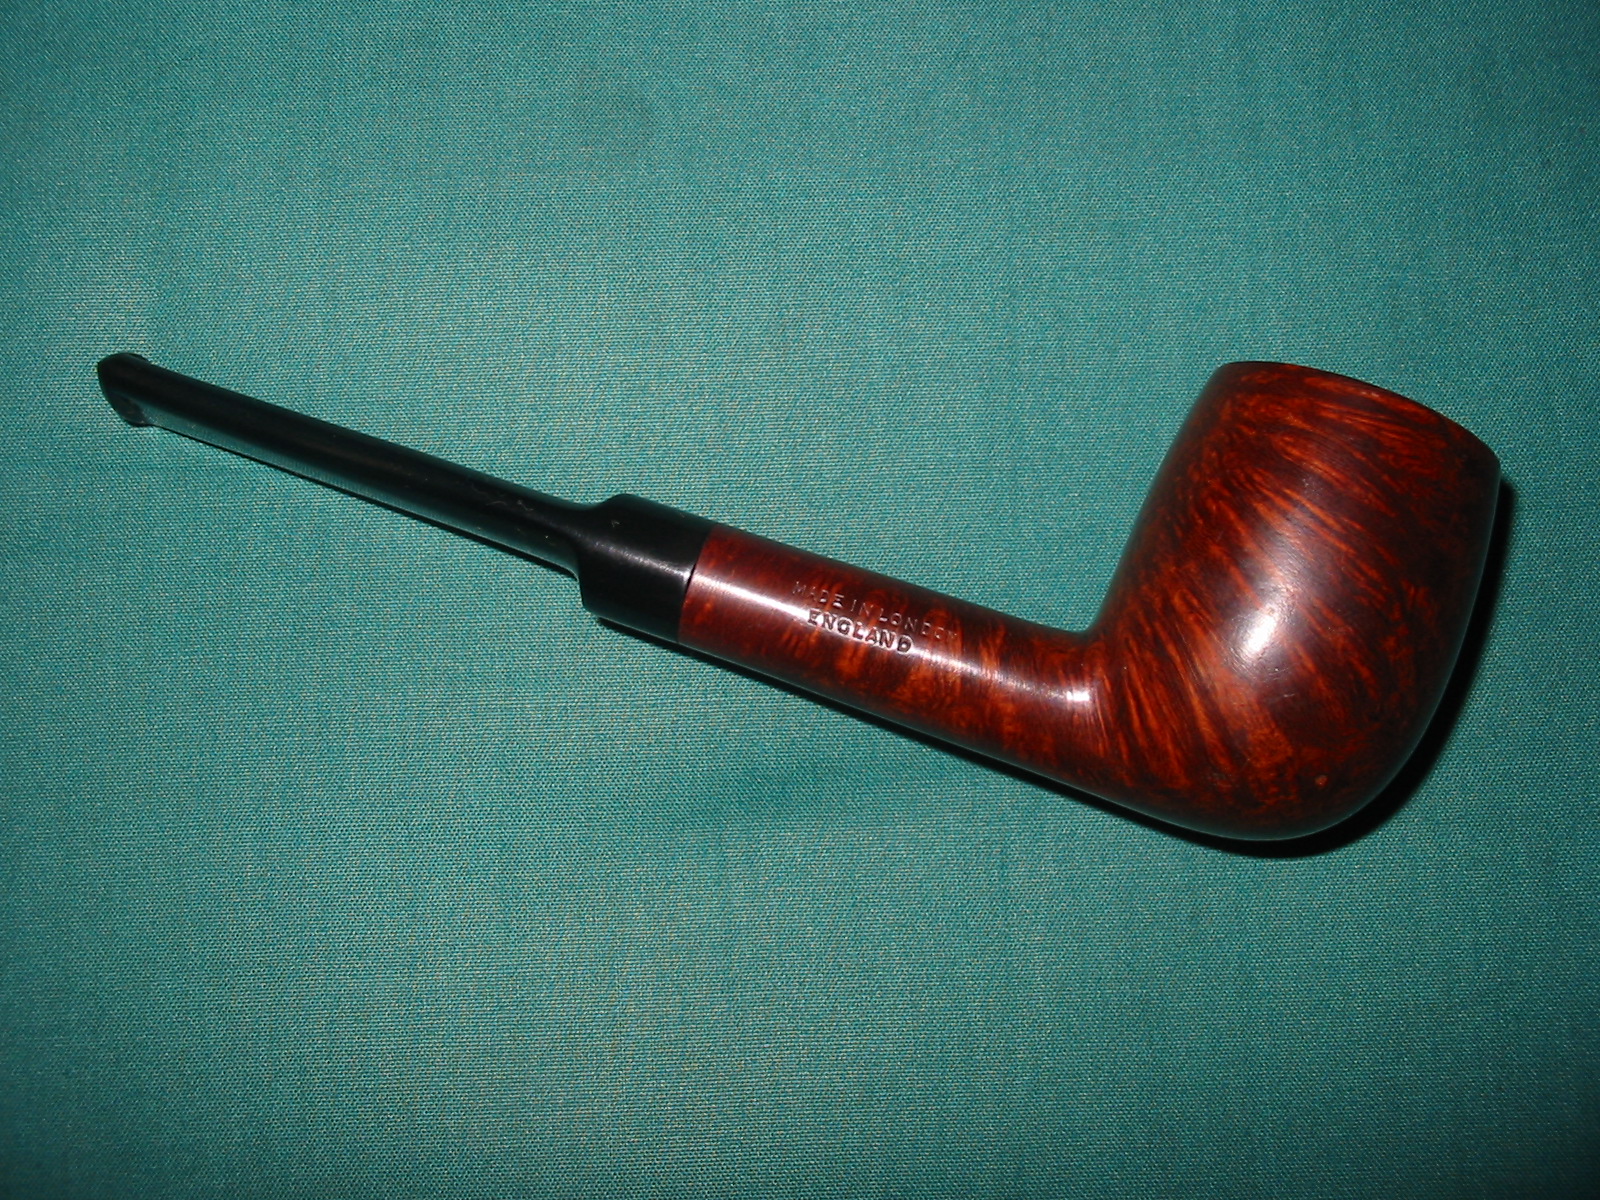
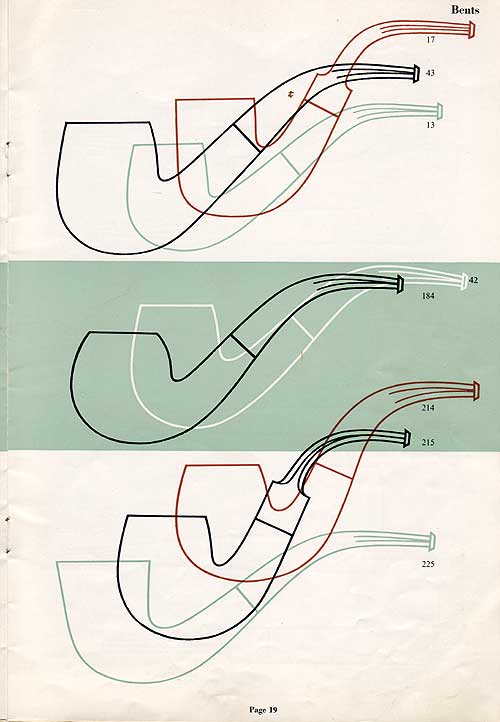
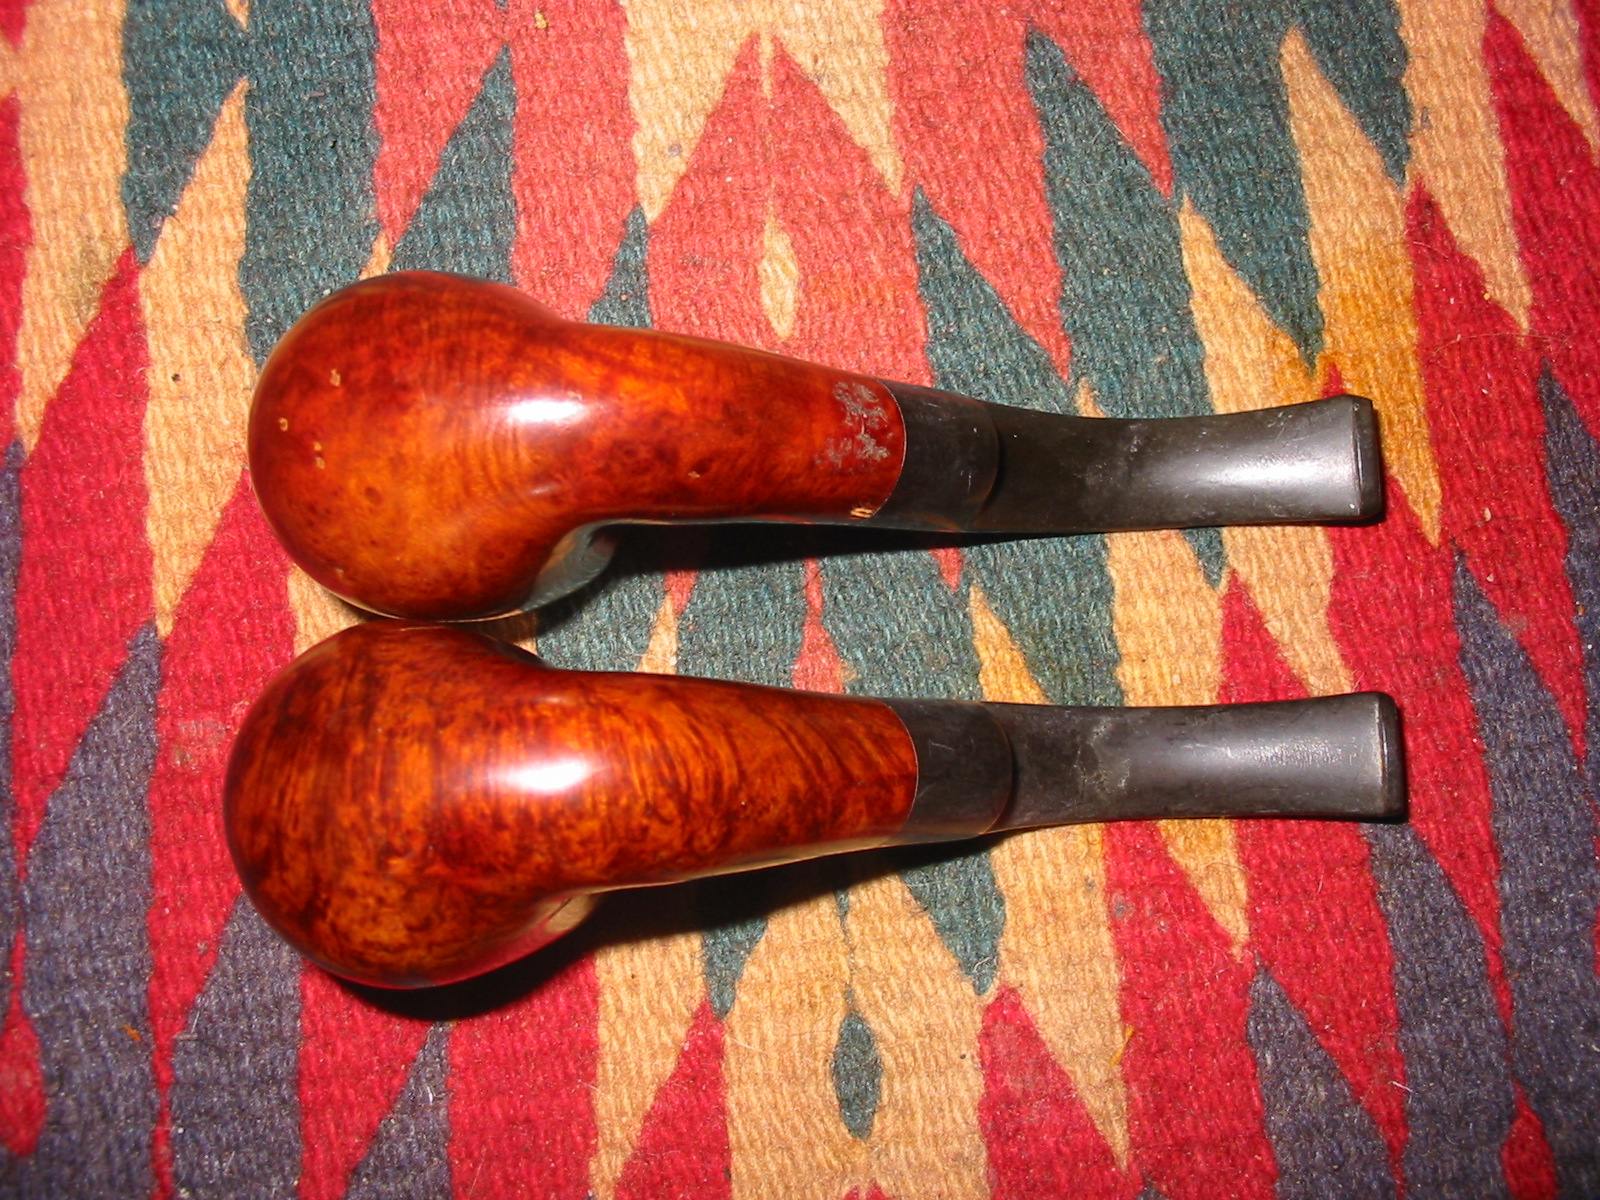
On a recent adventure I found a pair of bent billiards that had the Made in London England circle stamp on the right side of the shank and the Germanic script stamping, Royal Coachman on the left side of the shank. They were also stamped with a shape number 215. I did a bit of research to see if I could identify the maker. From the markings I was pretty confident that I was dealing with a Comoy’s seconds line but wanted to make certain I was right. The circle stamp on the right side of the shank was a giveaway to that identification. The shape number looked very familiar to me and the overall look said Comoys. So I looked in two the places that I always go to when beginning a hunt for info. The first is a website set up by Pipephil called Logos and Stampings. There I found that the Royal Coachman was indeed a Comoys brand. The site showed that the pipes were made by Chapuis-Comoys. The second site I looked at was Chris’ pipe pages http://pipepages.com/64com19s.htm . Chris has collected old catalogues and documents that give shape charts and many historical materials that cannot be found in other places. I have copied a page from the shape chart below and you can see that the 215 shape number matches not only the Comoys number but also the shape.
64com19
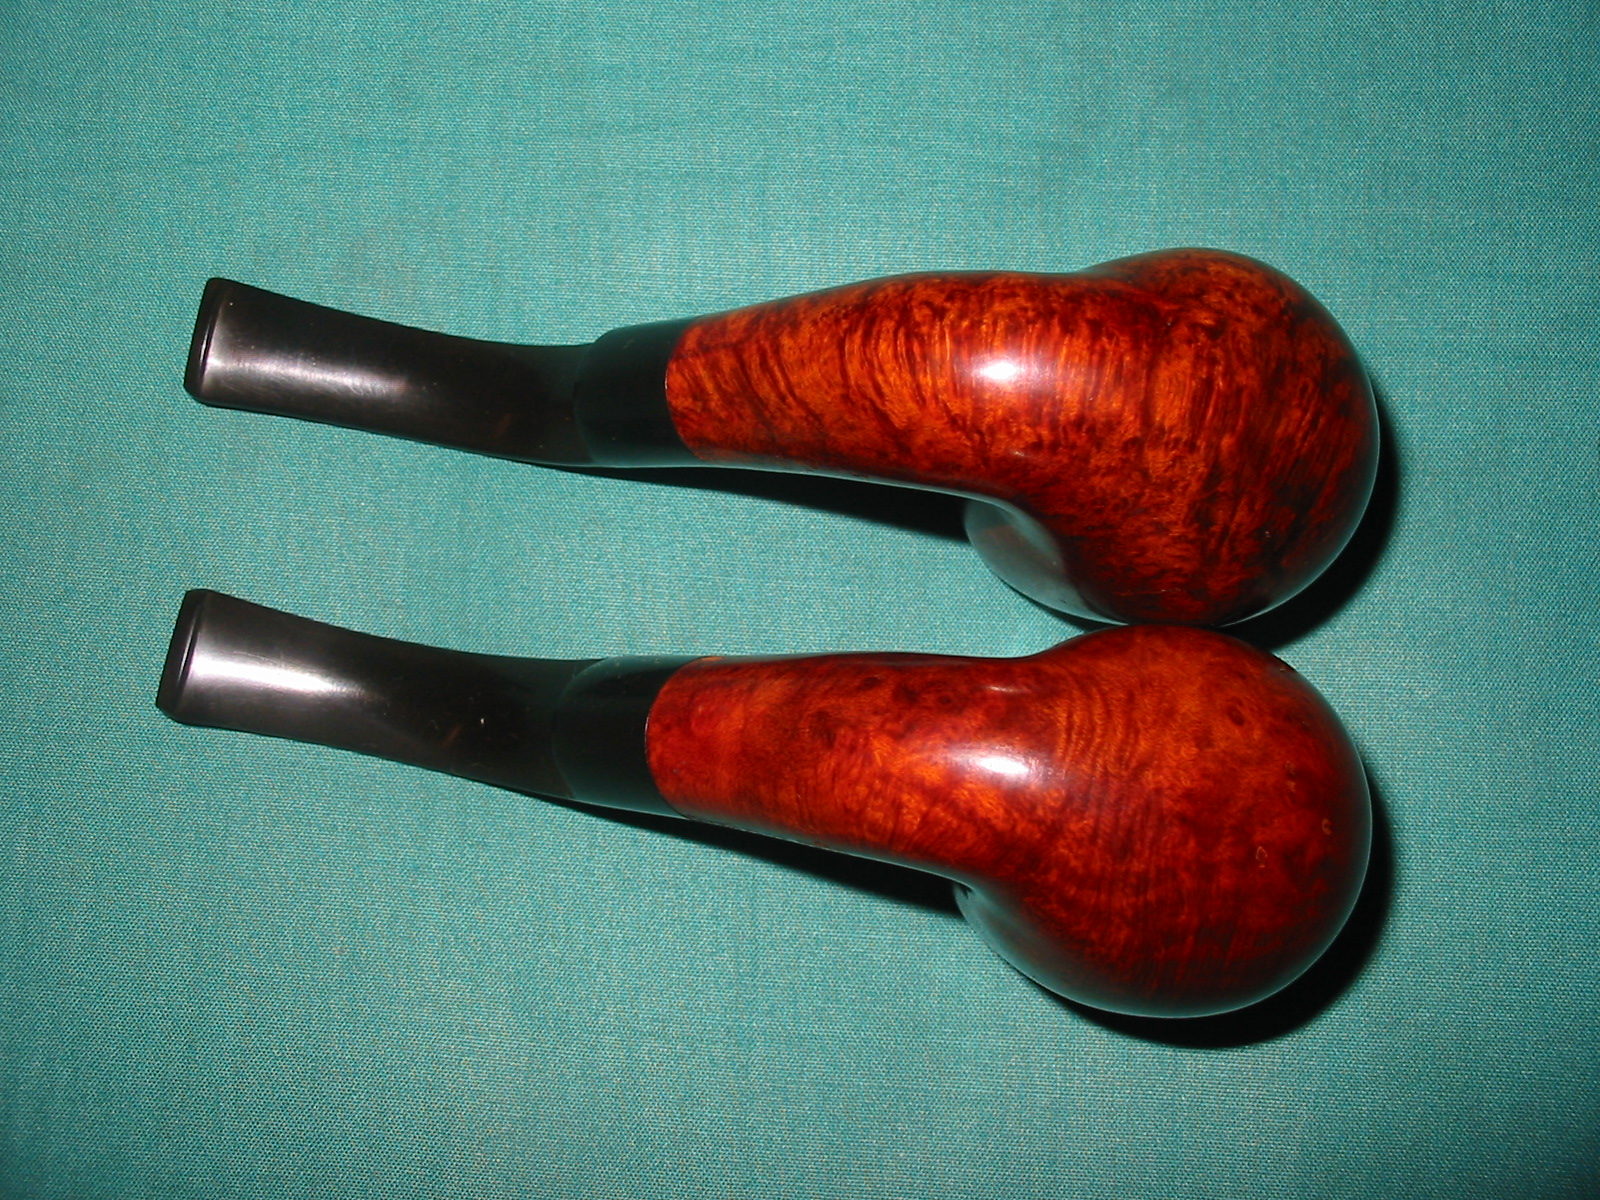
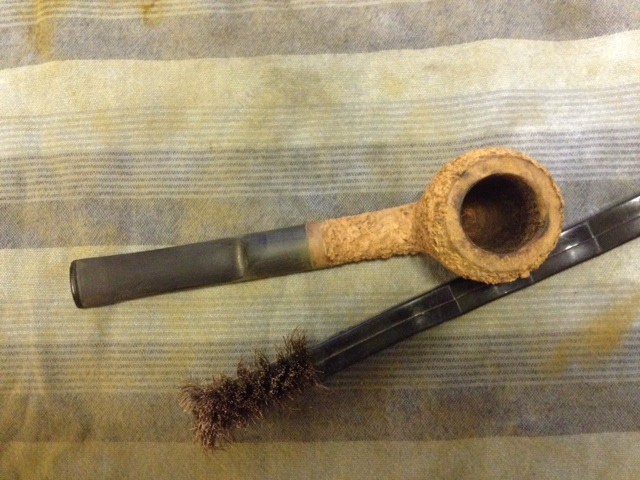
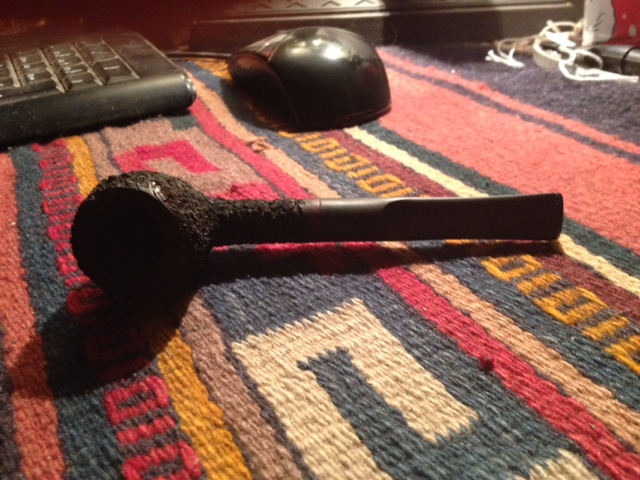
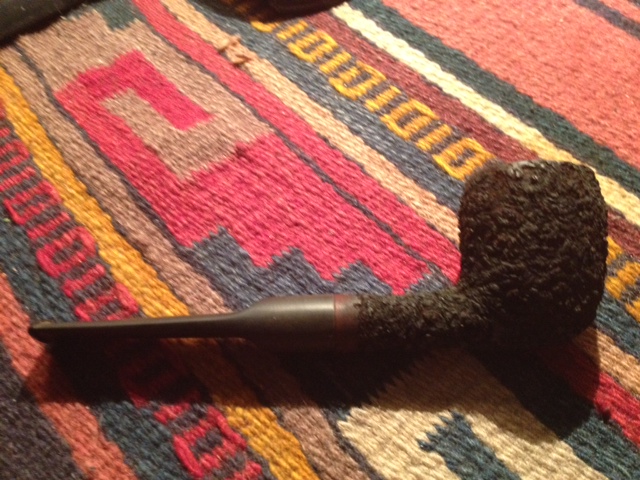
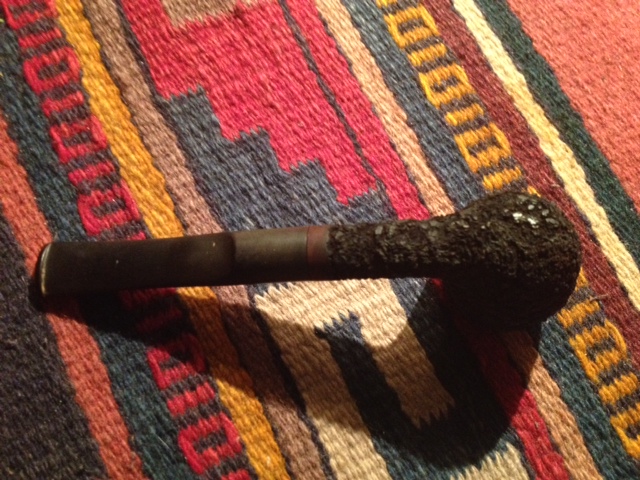
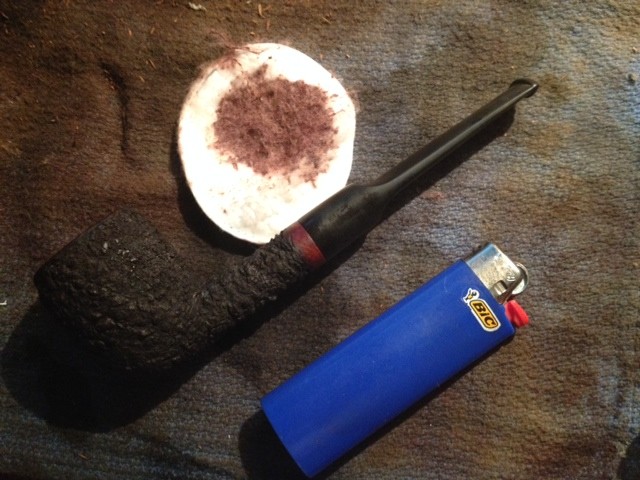
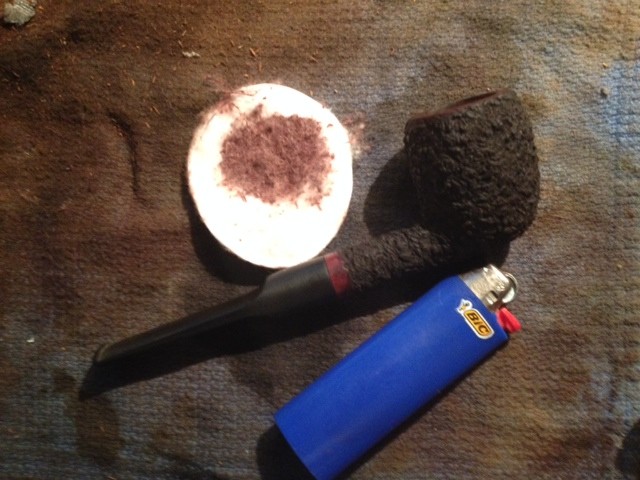
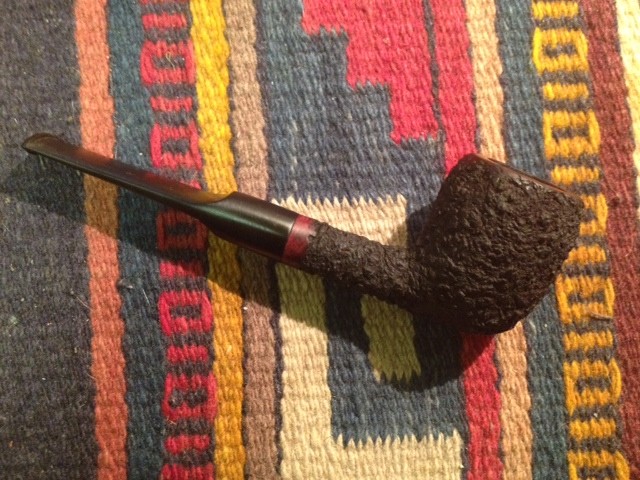
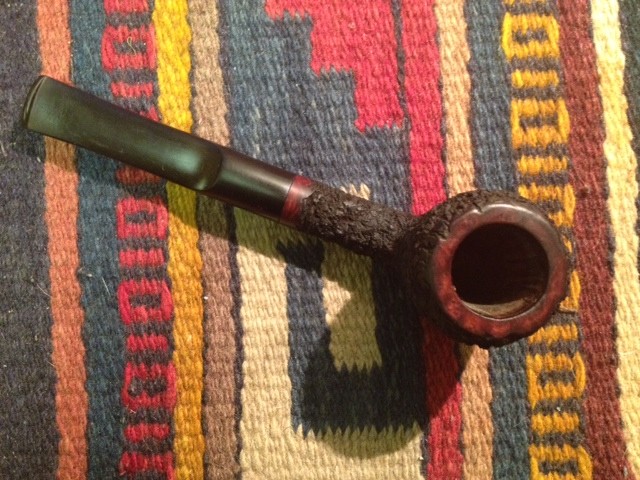
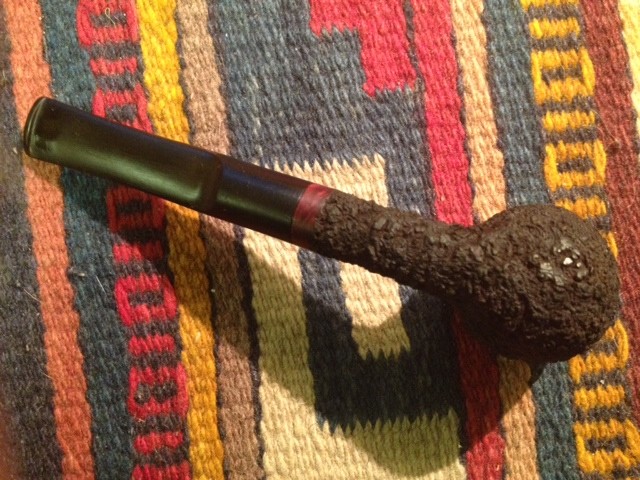
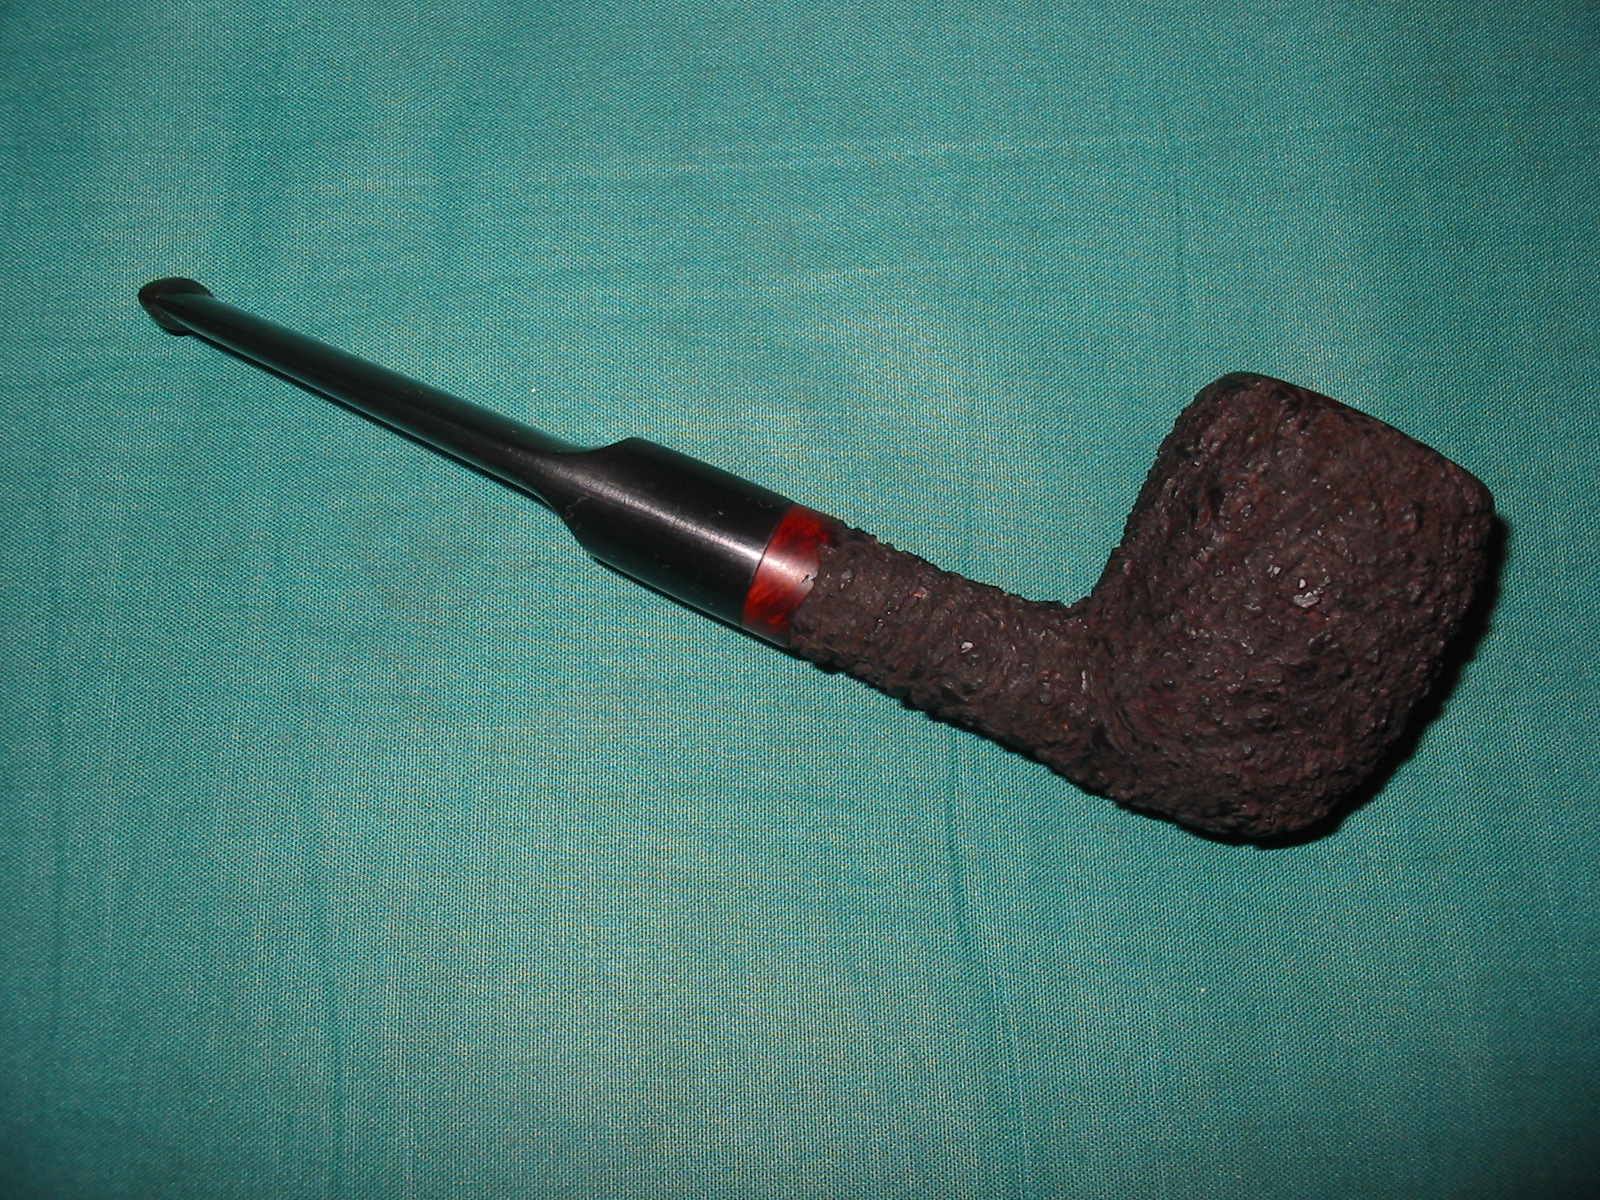
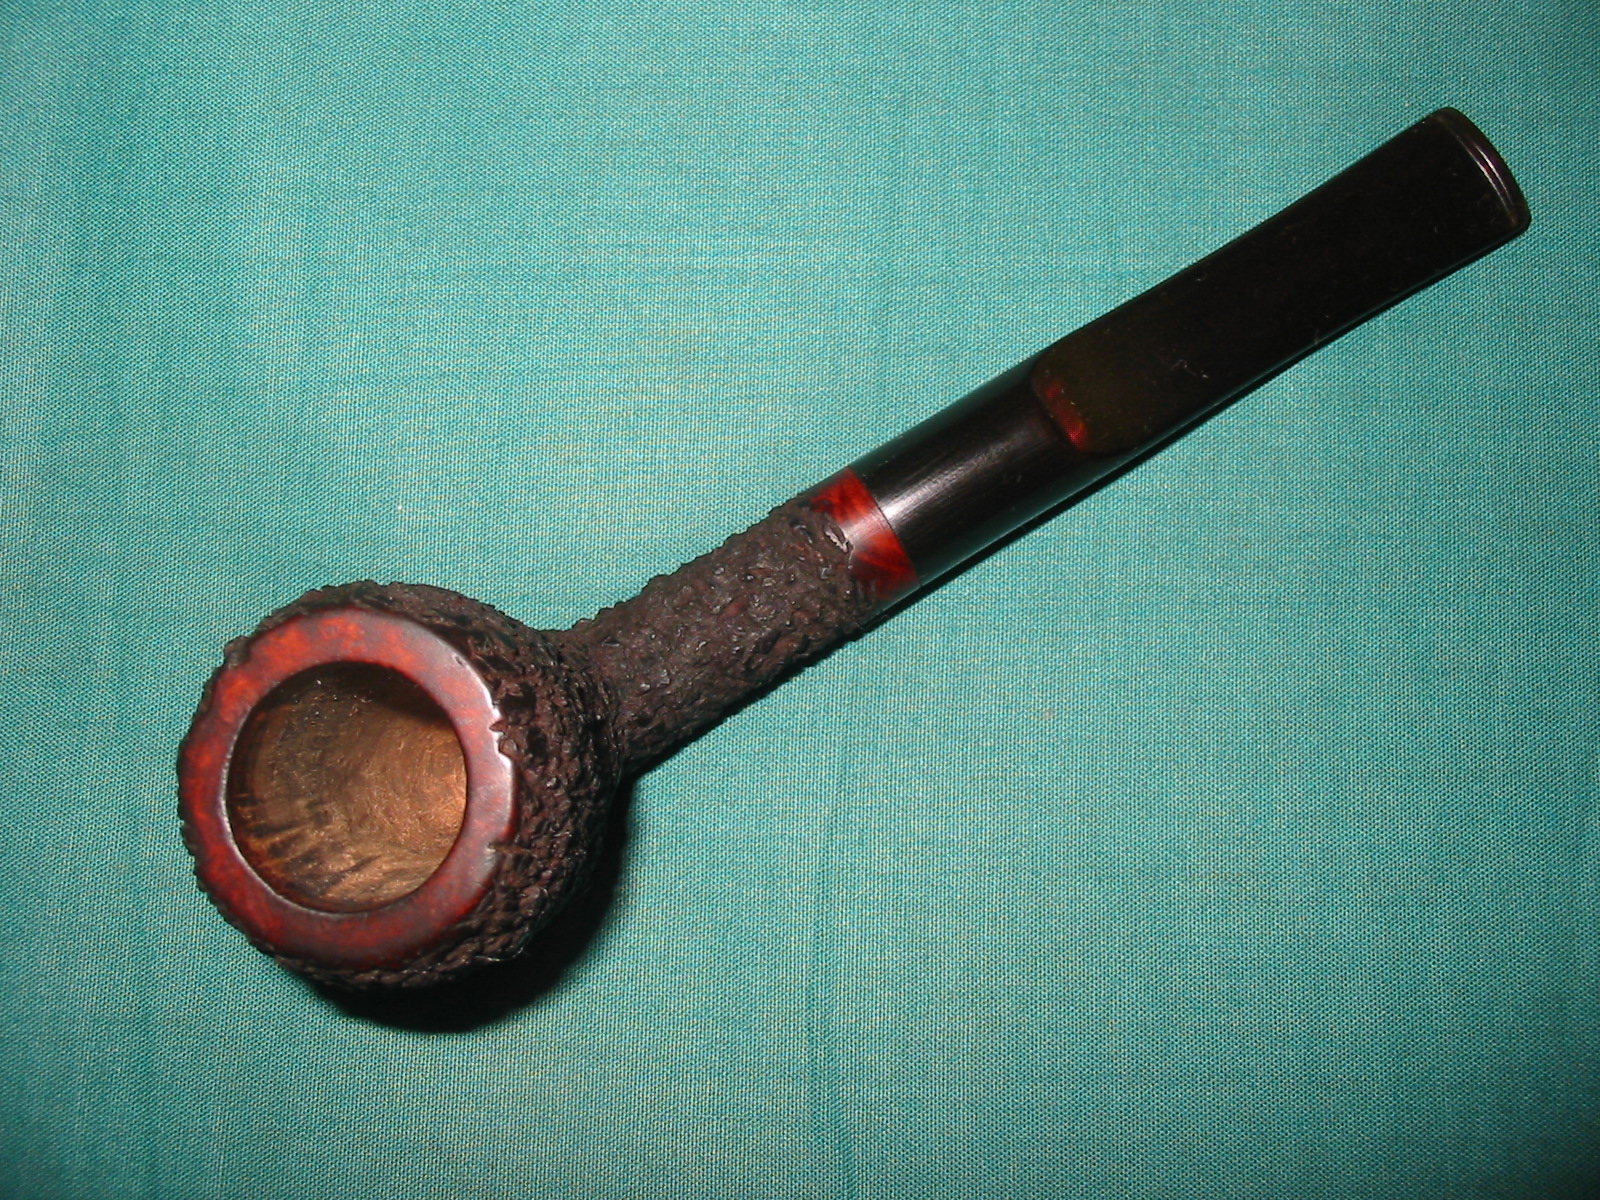
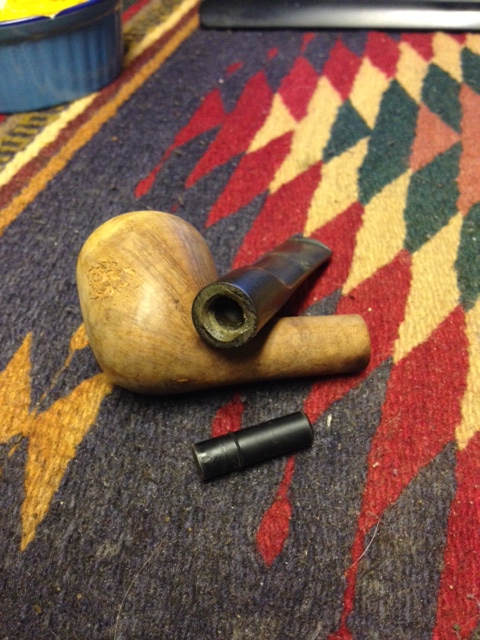
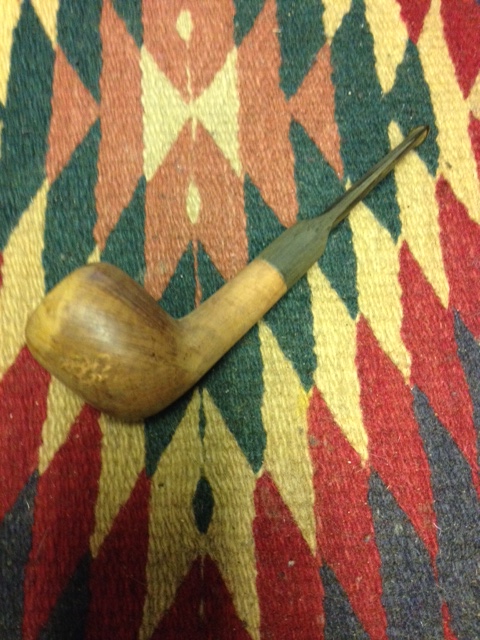
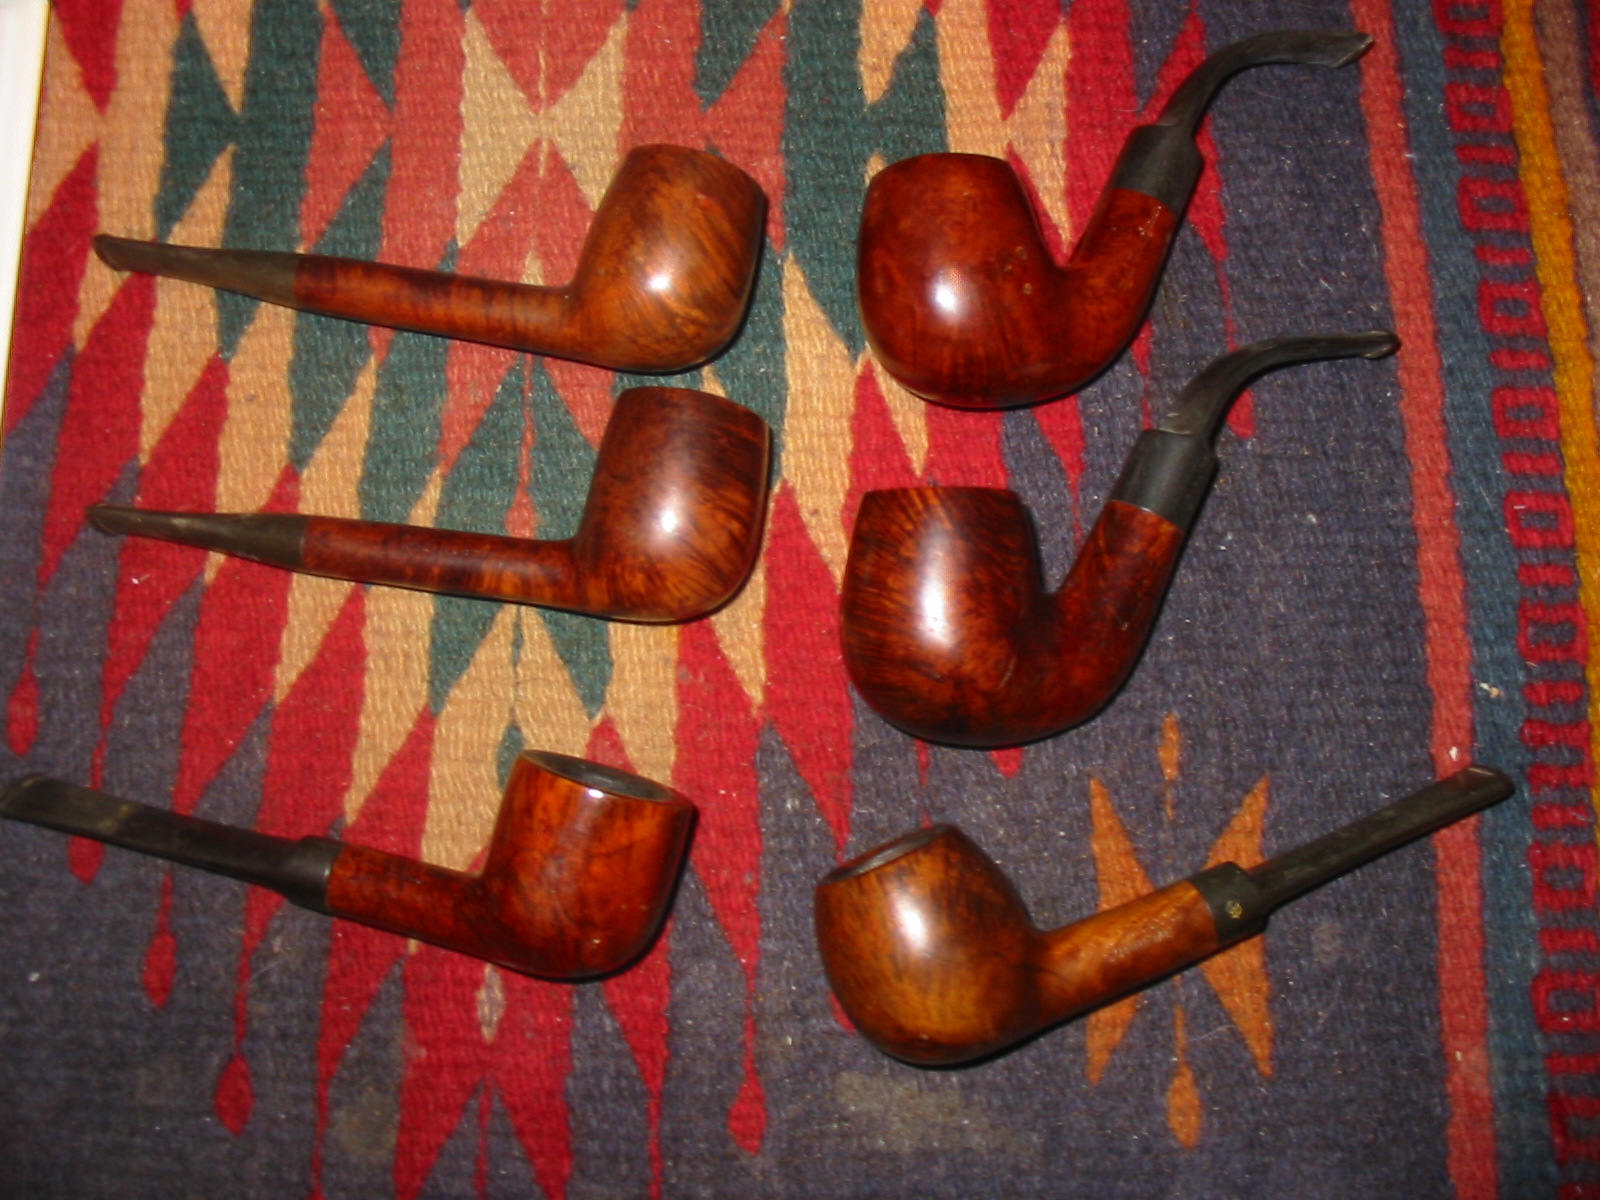
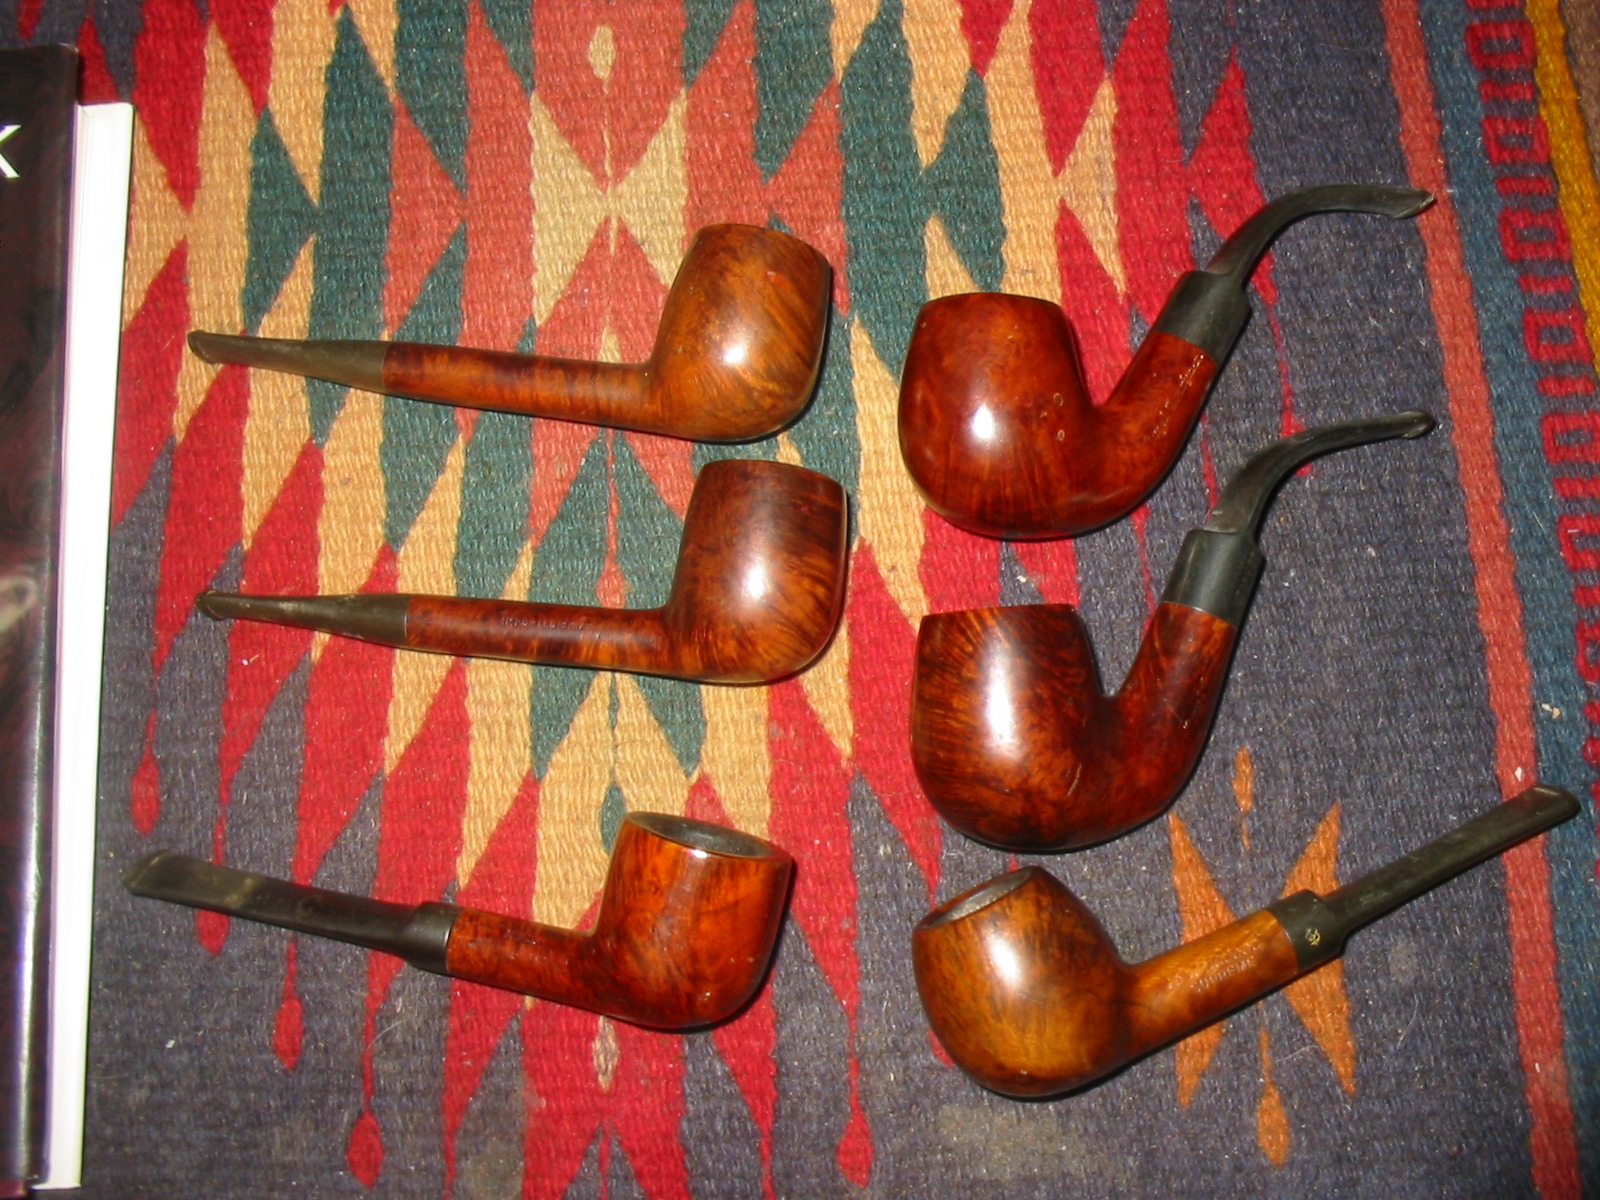
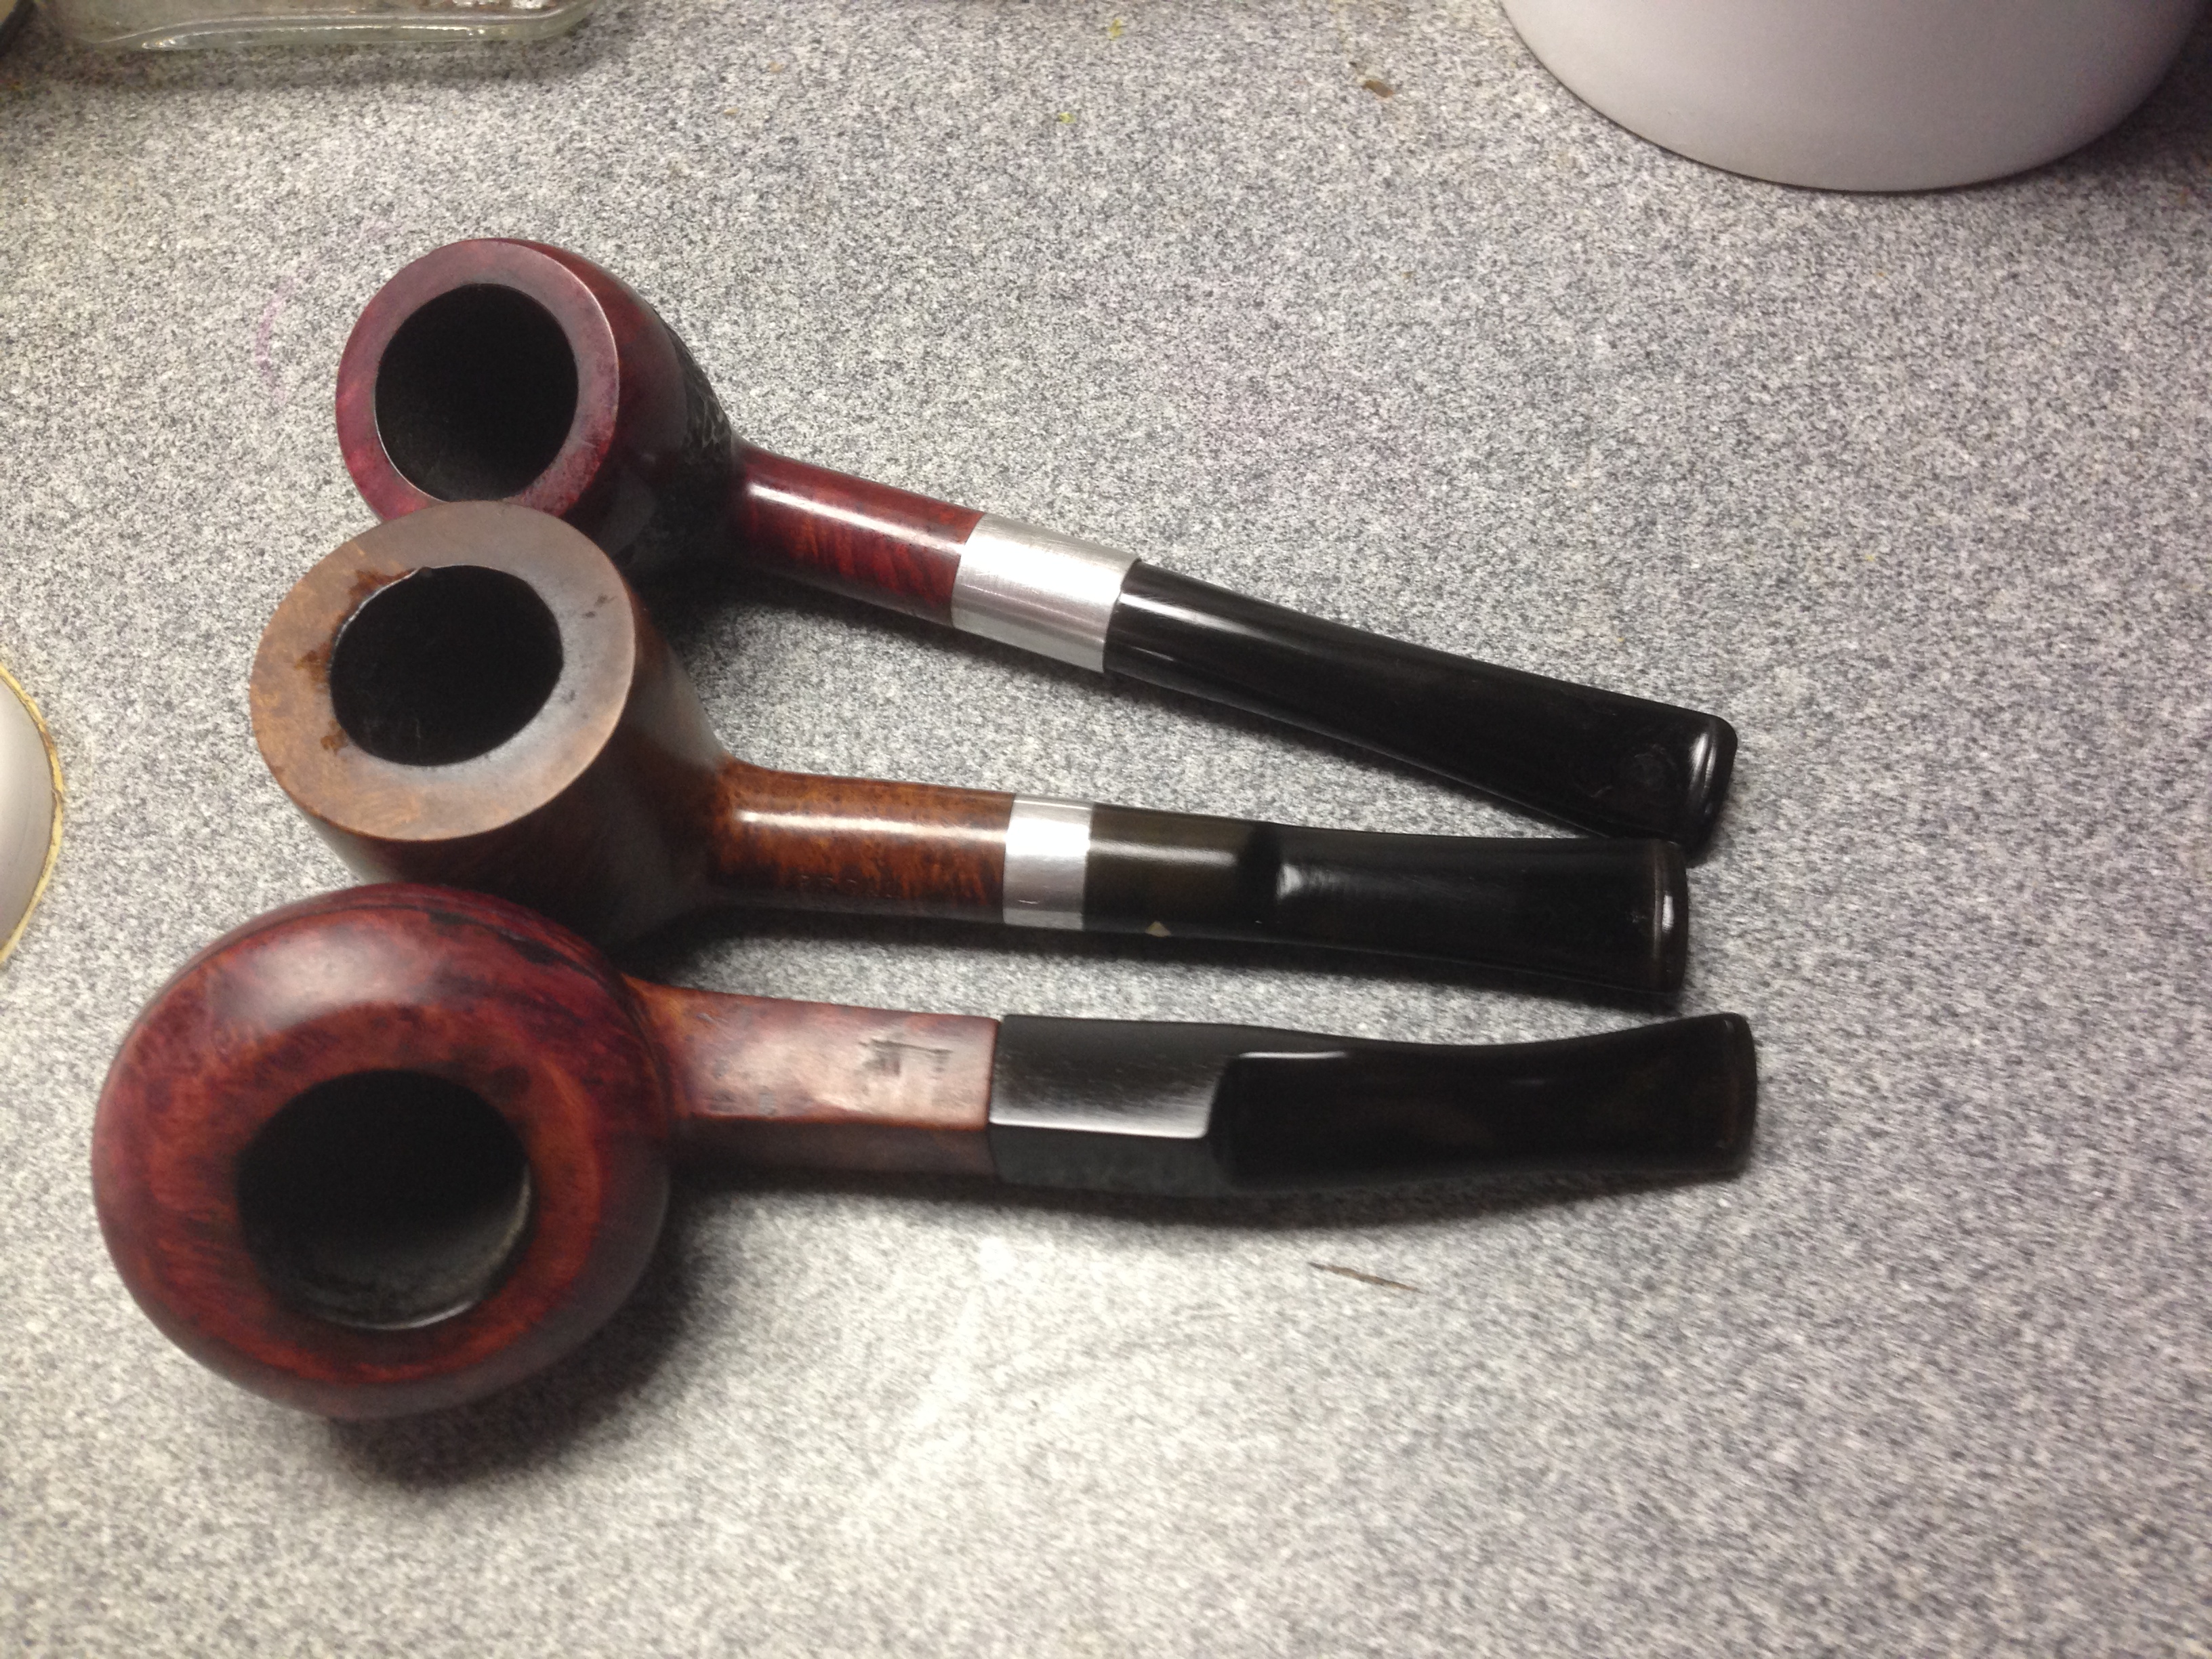
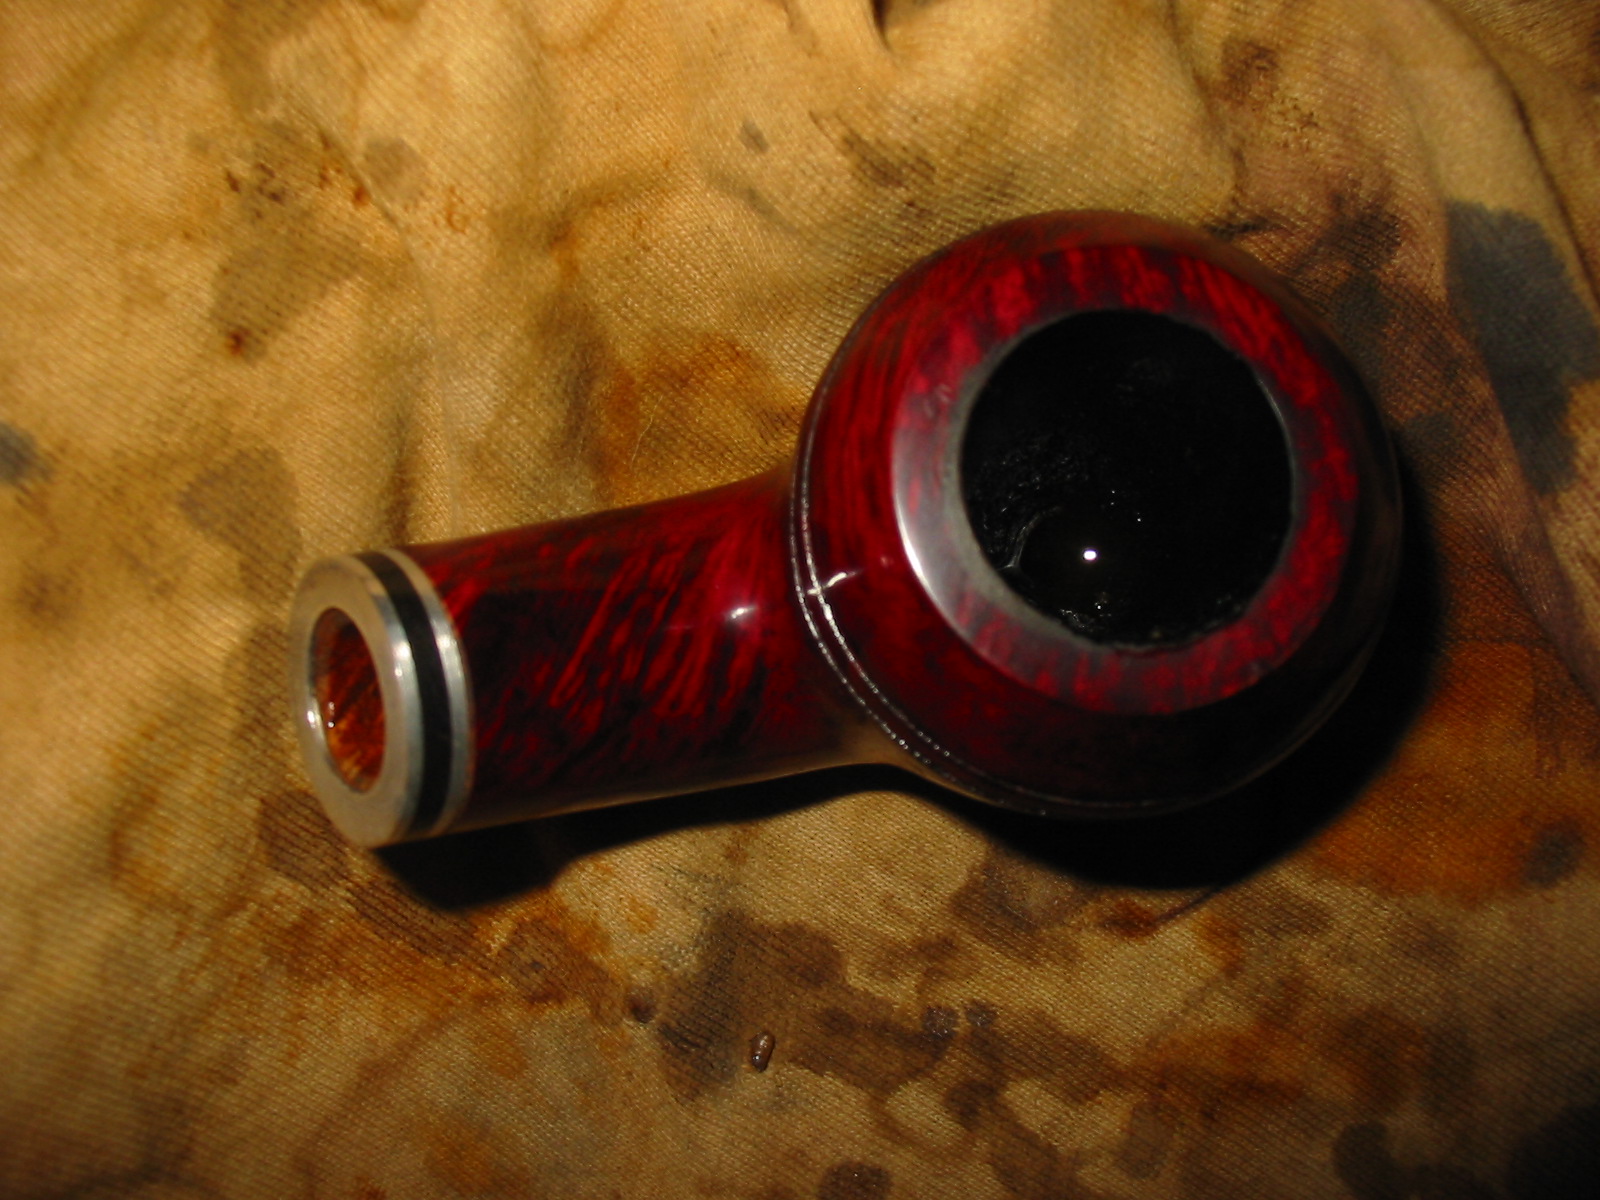
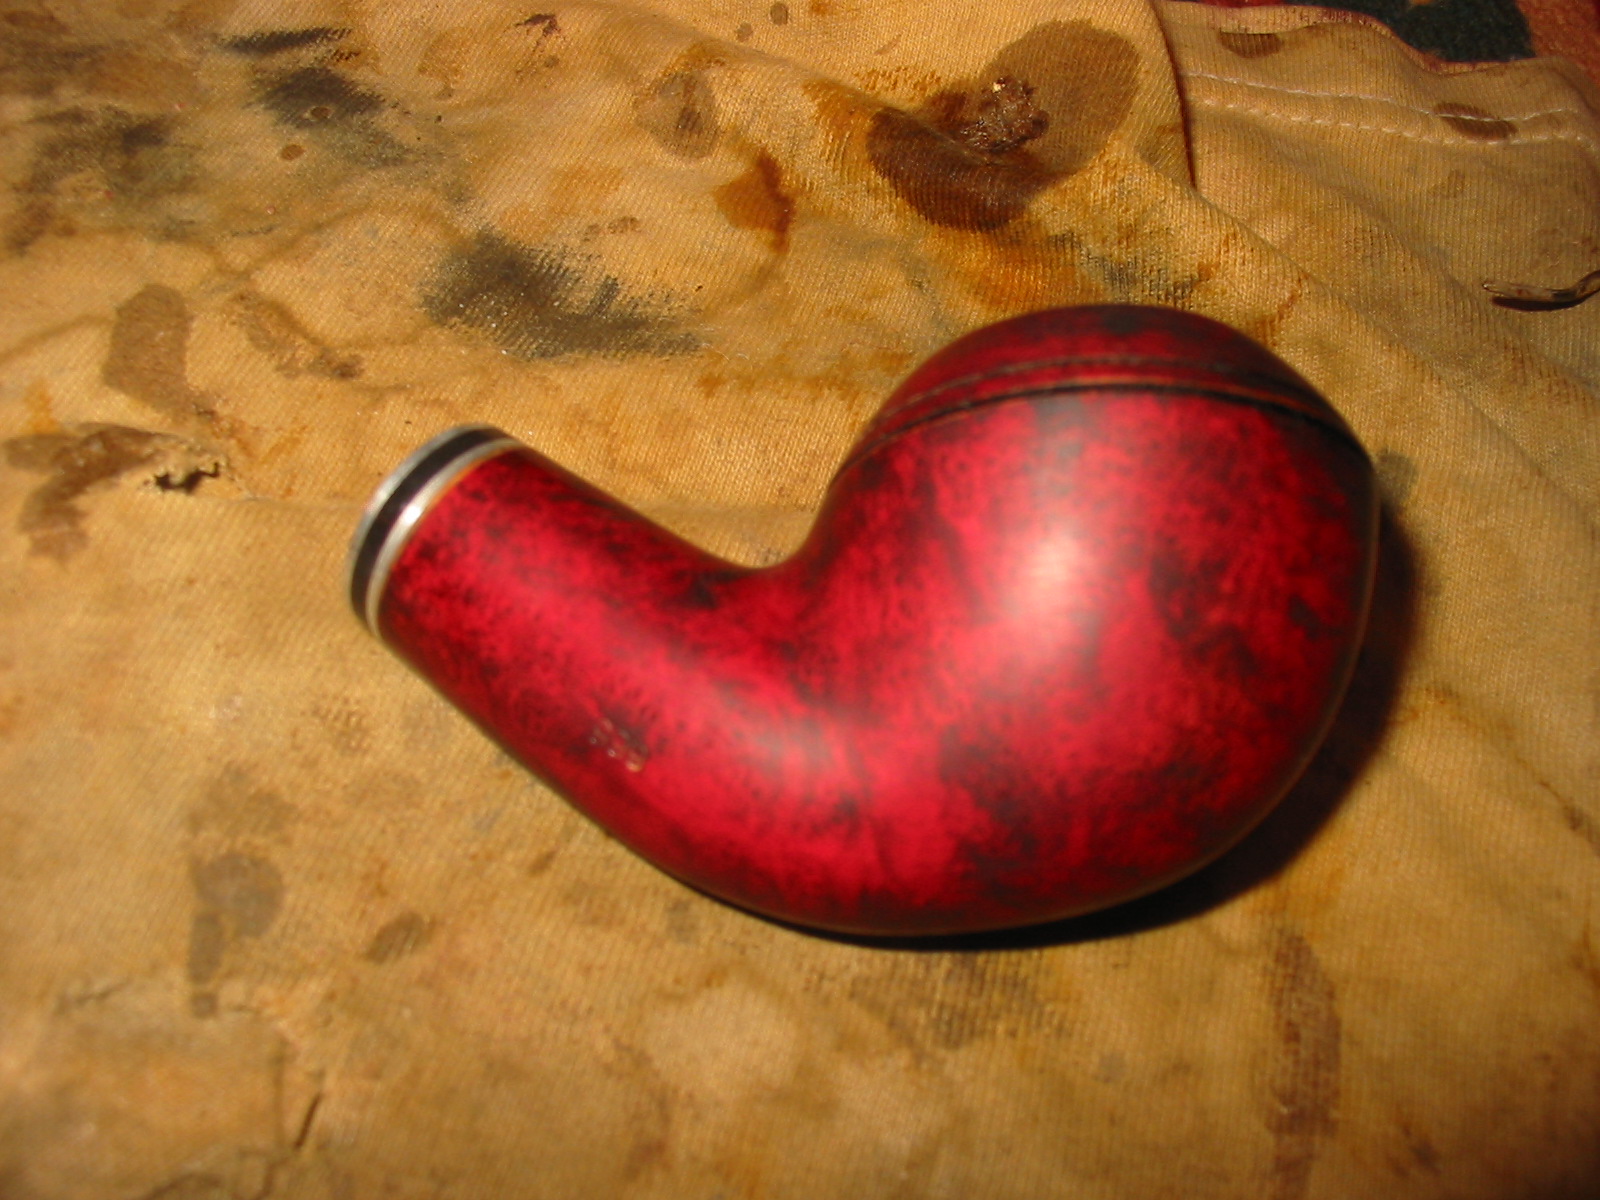
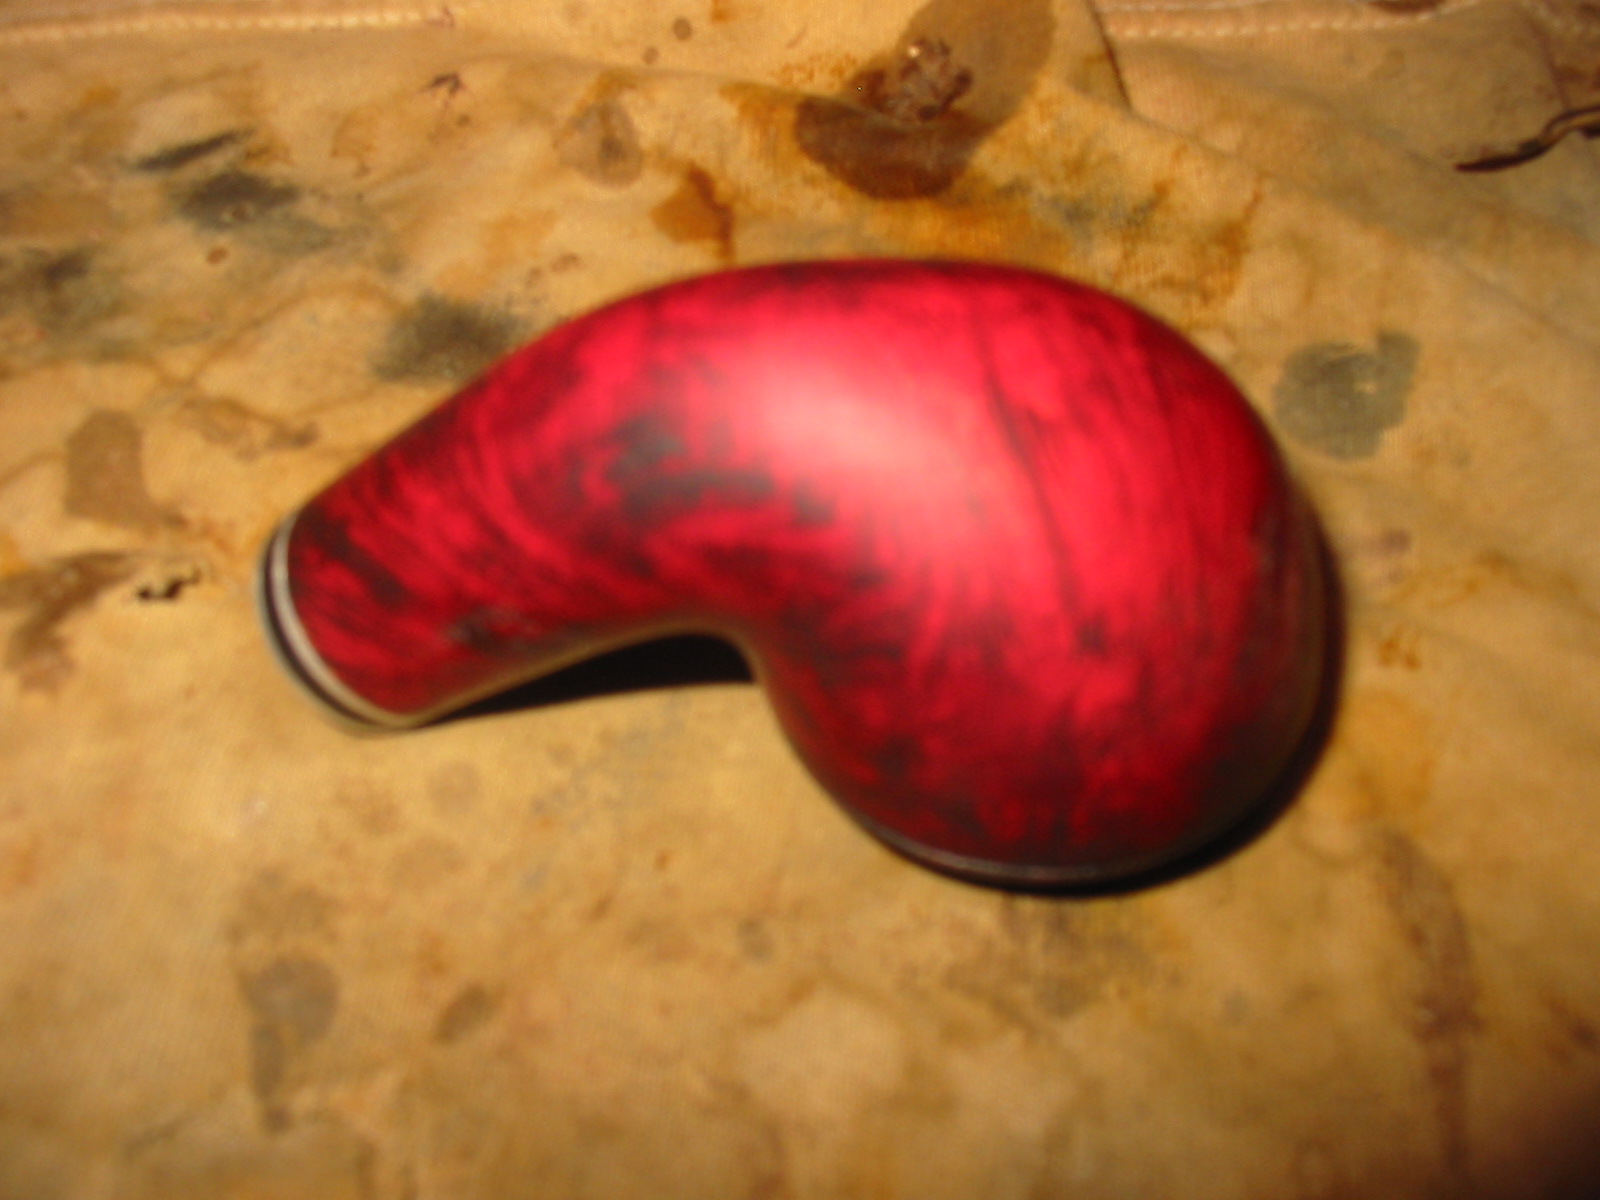
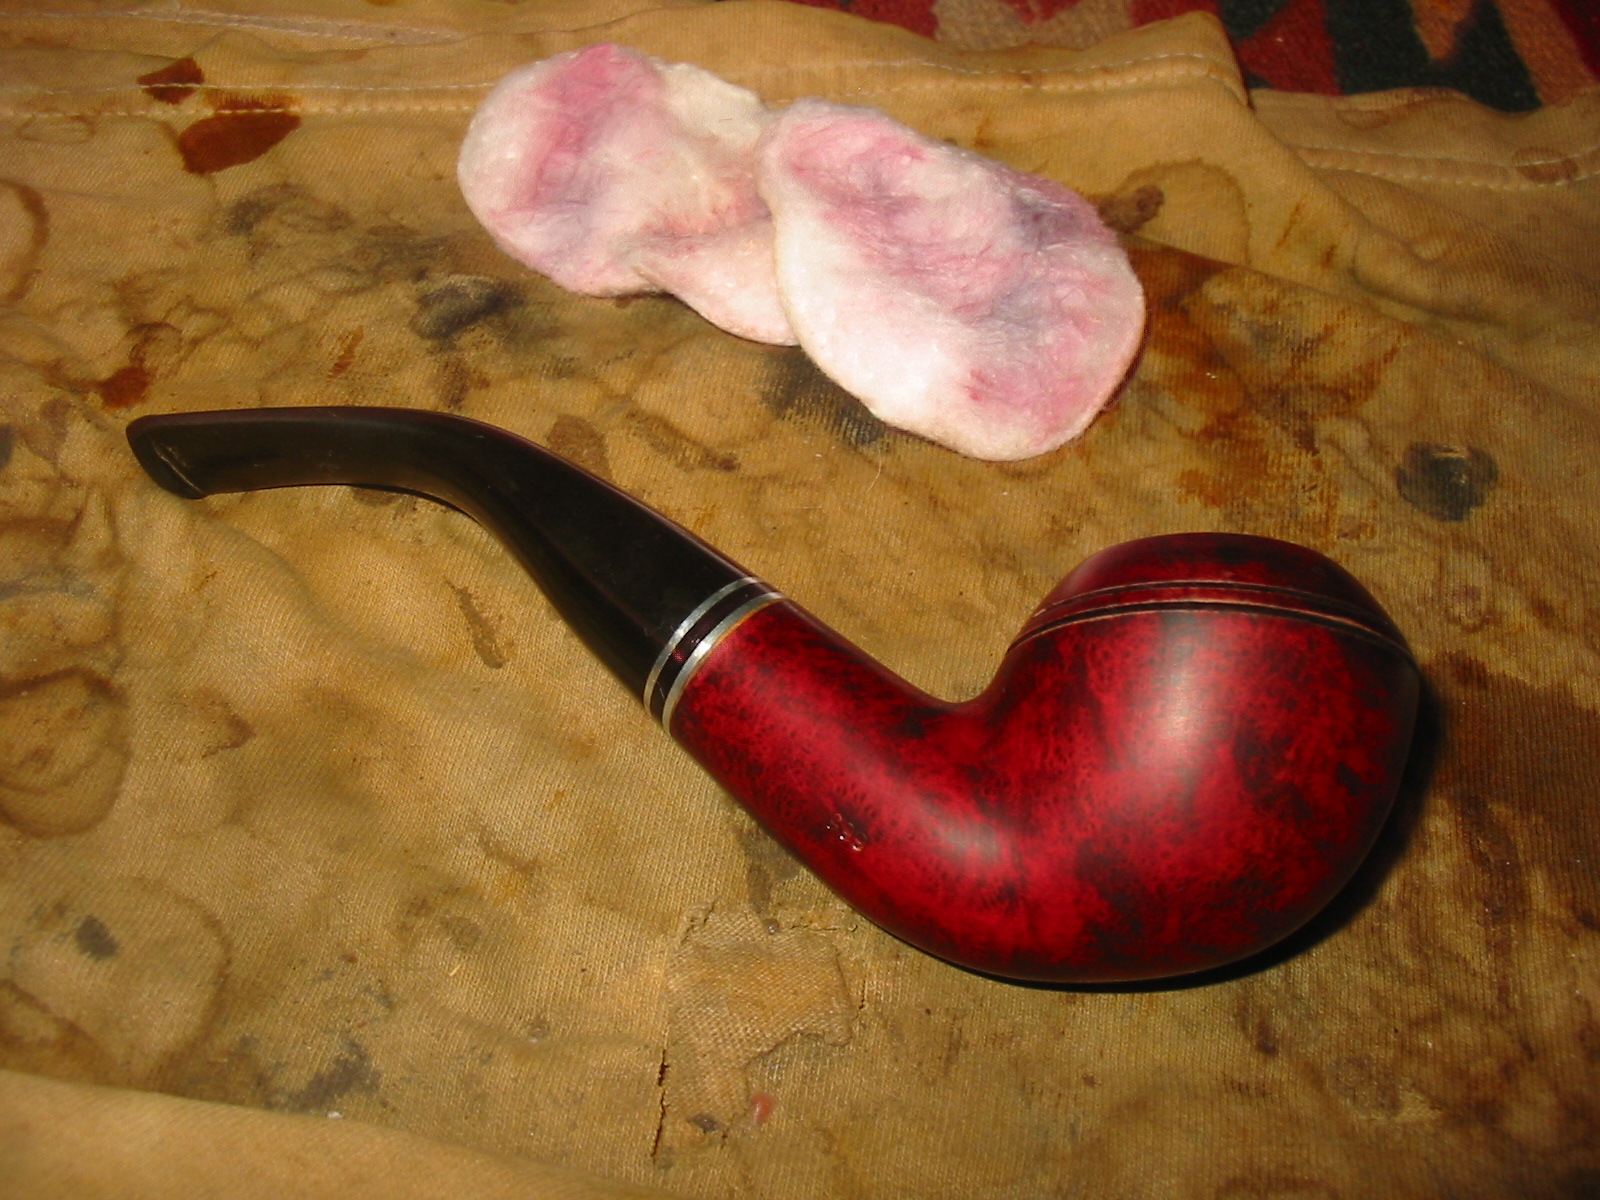
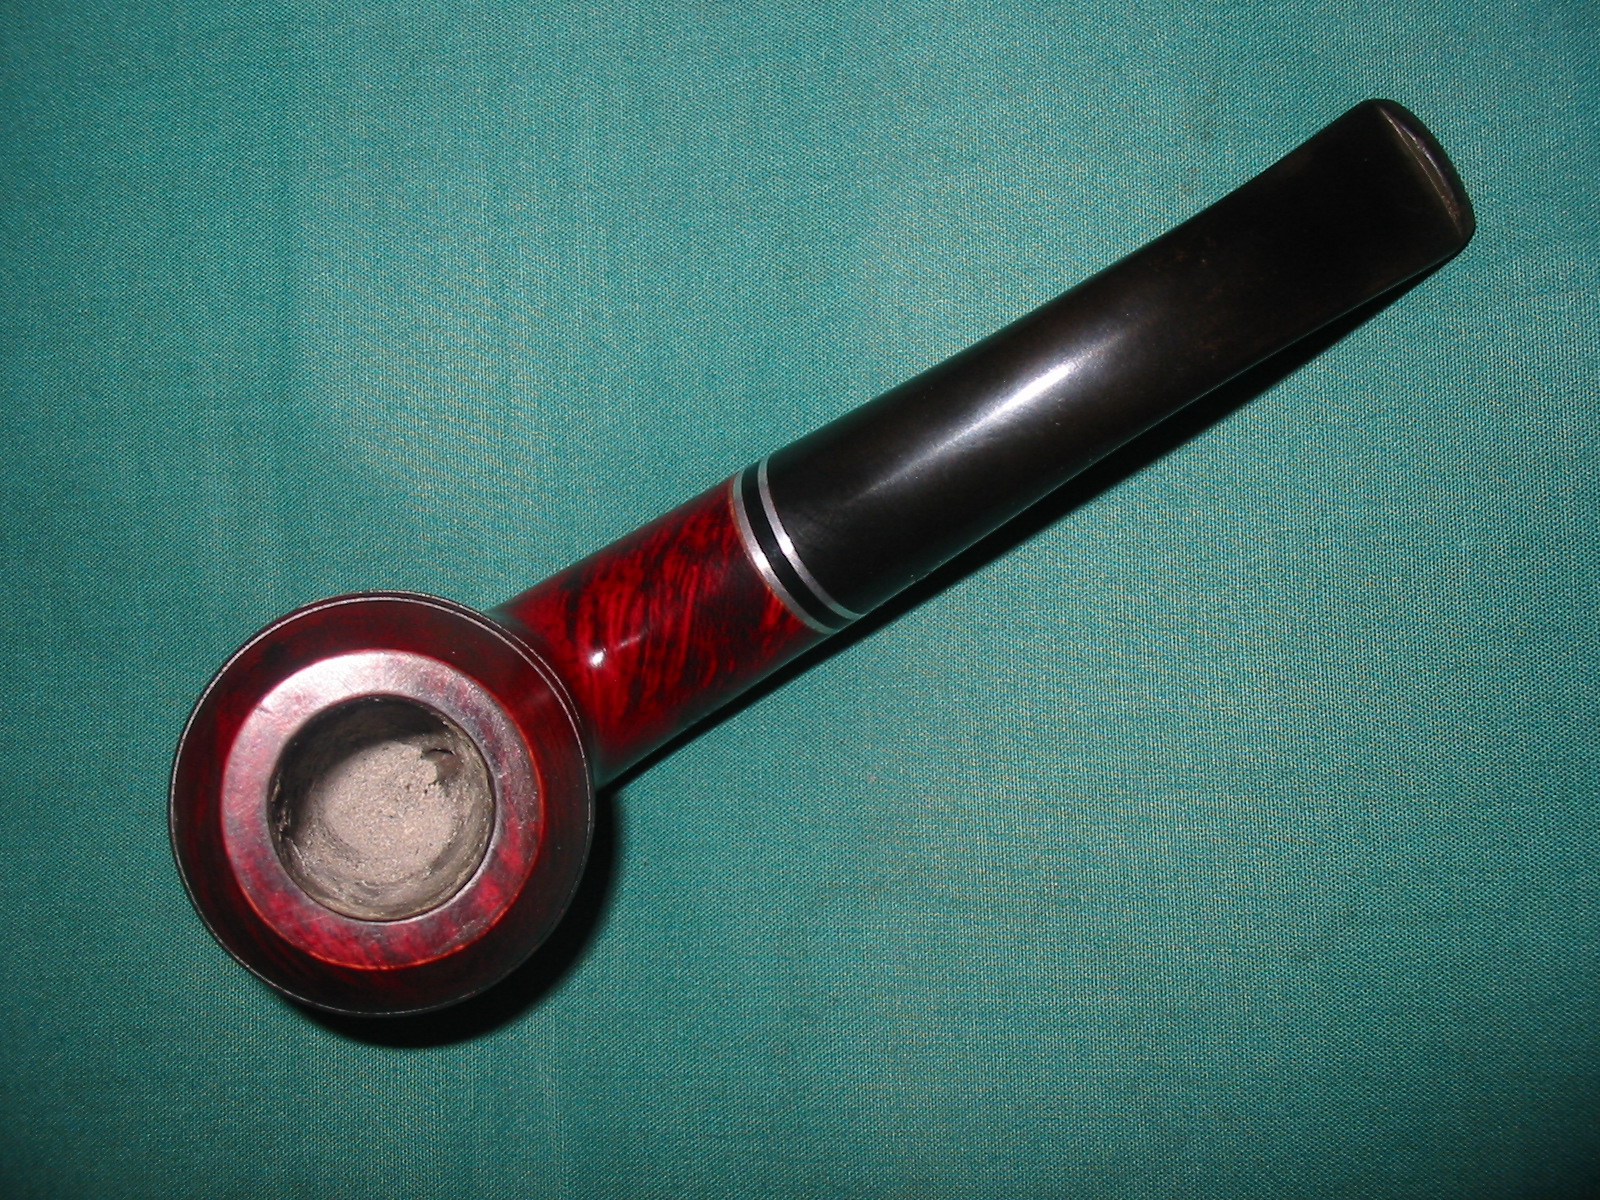
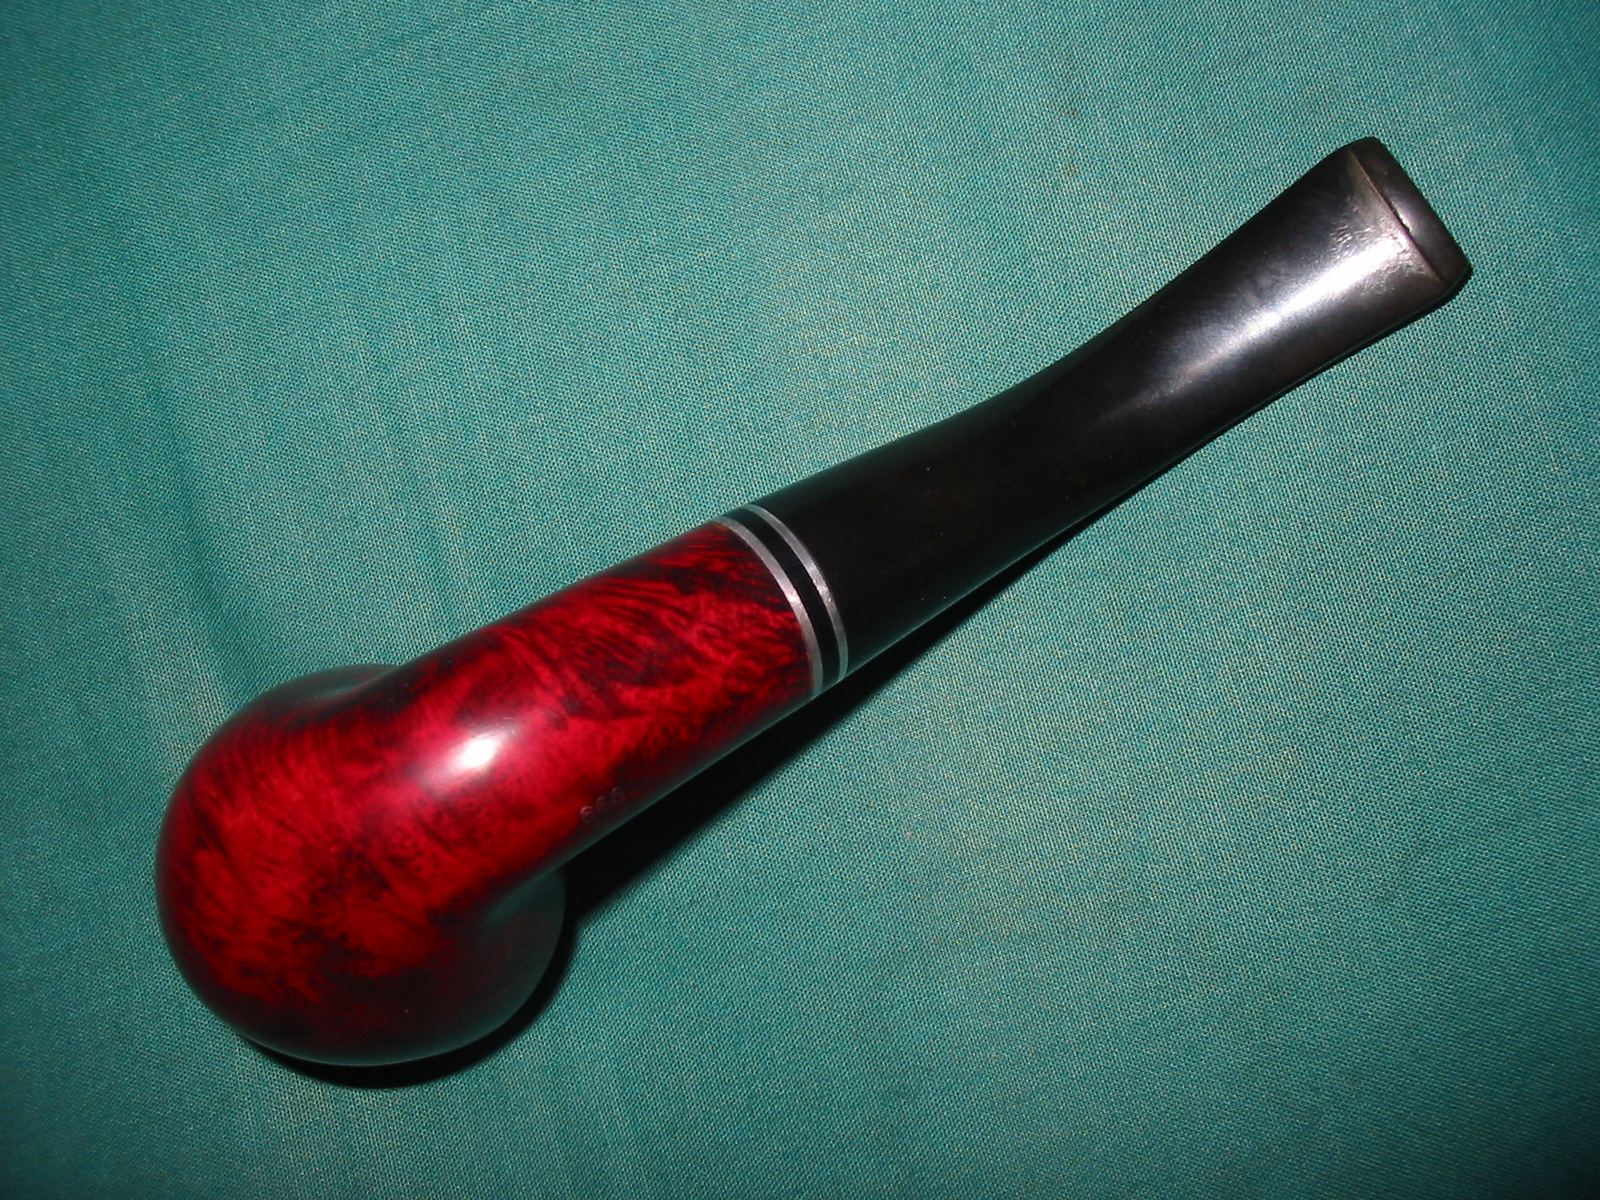
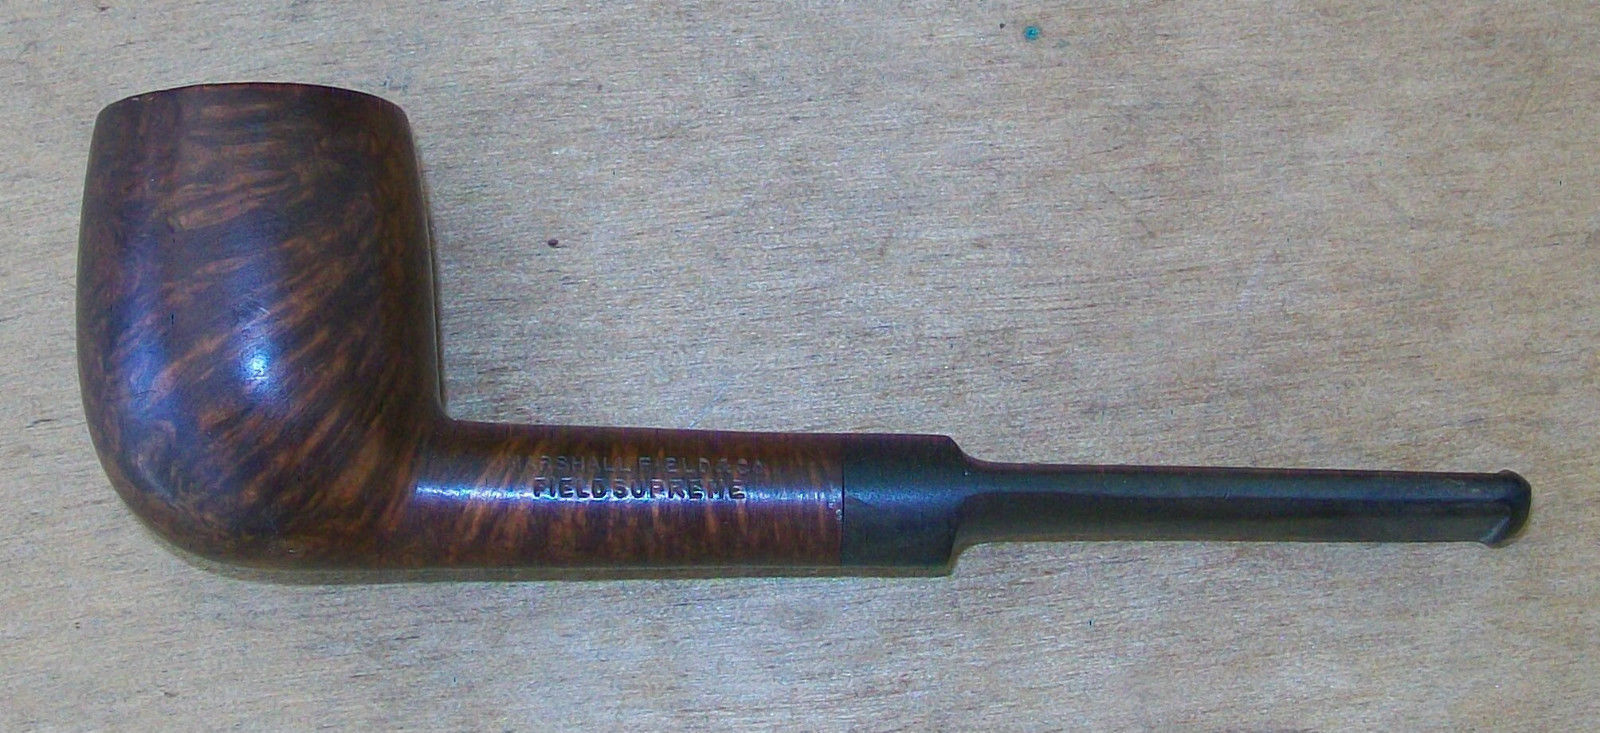
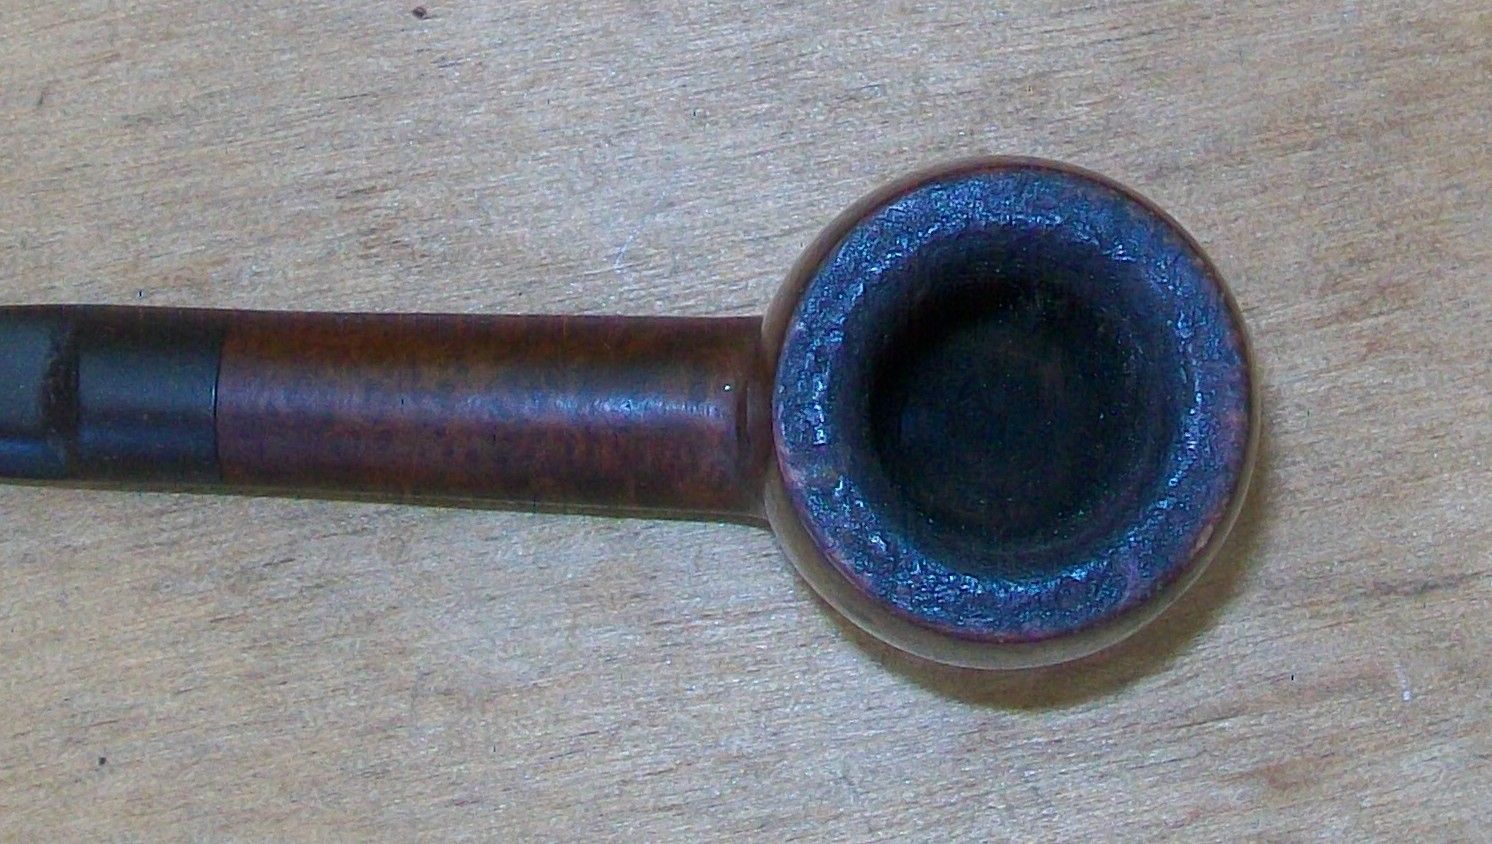
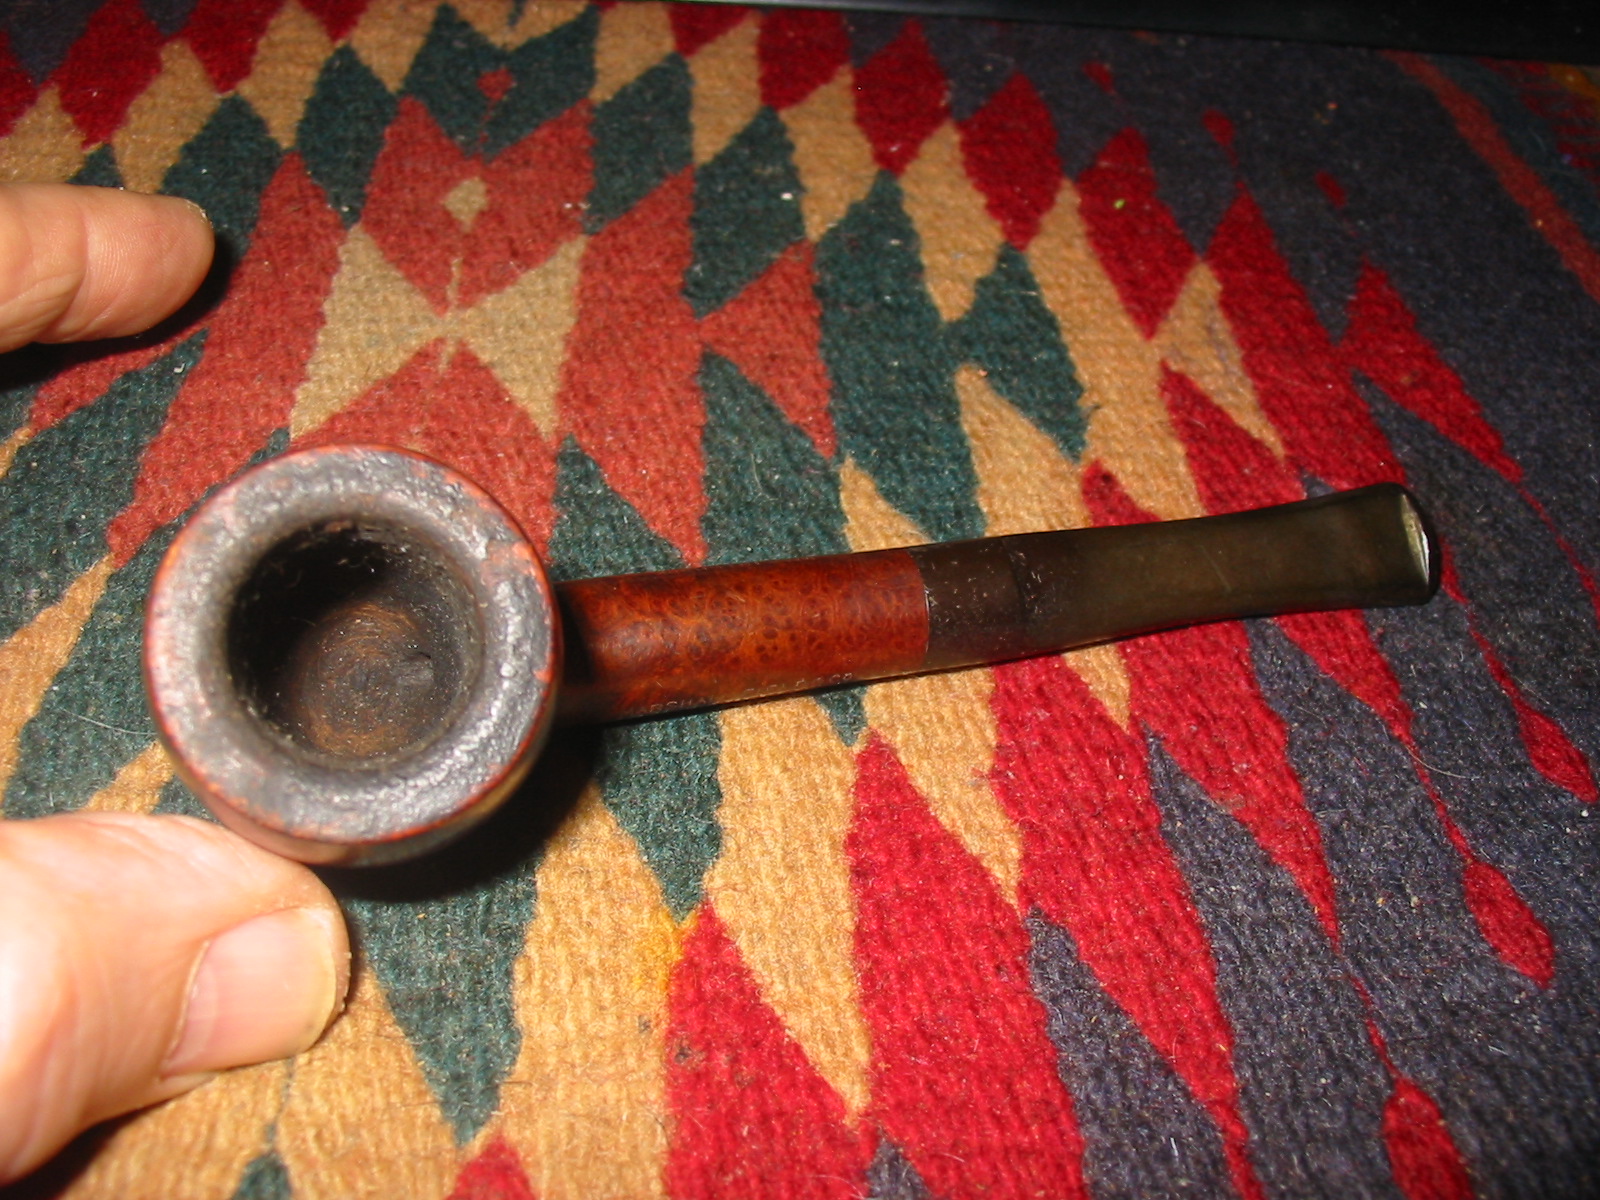
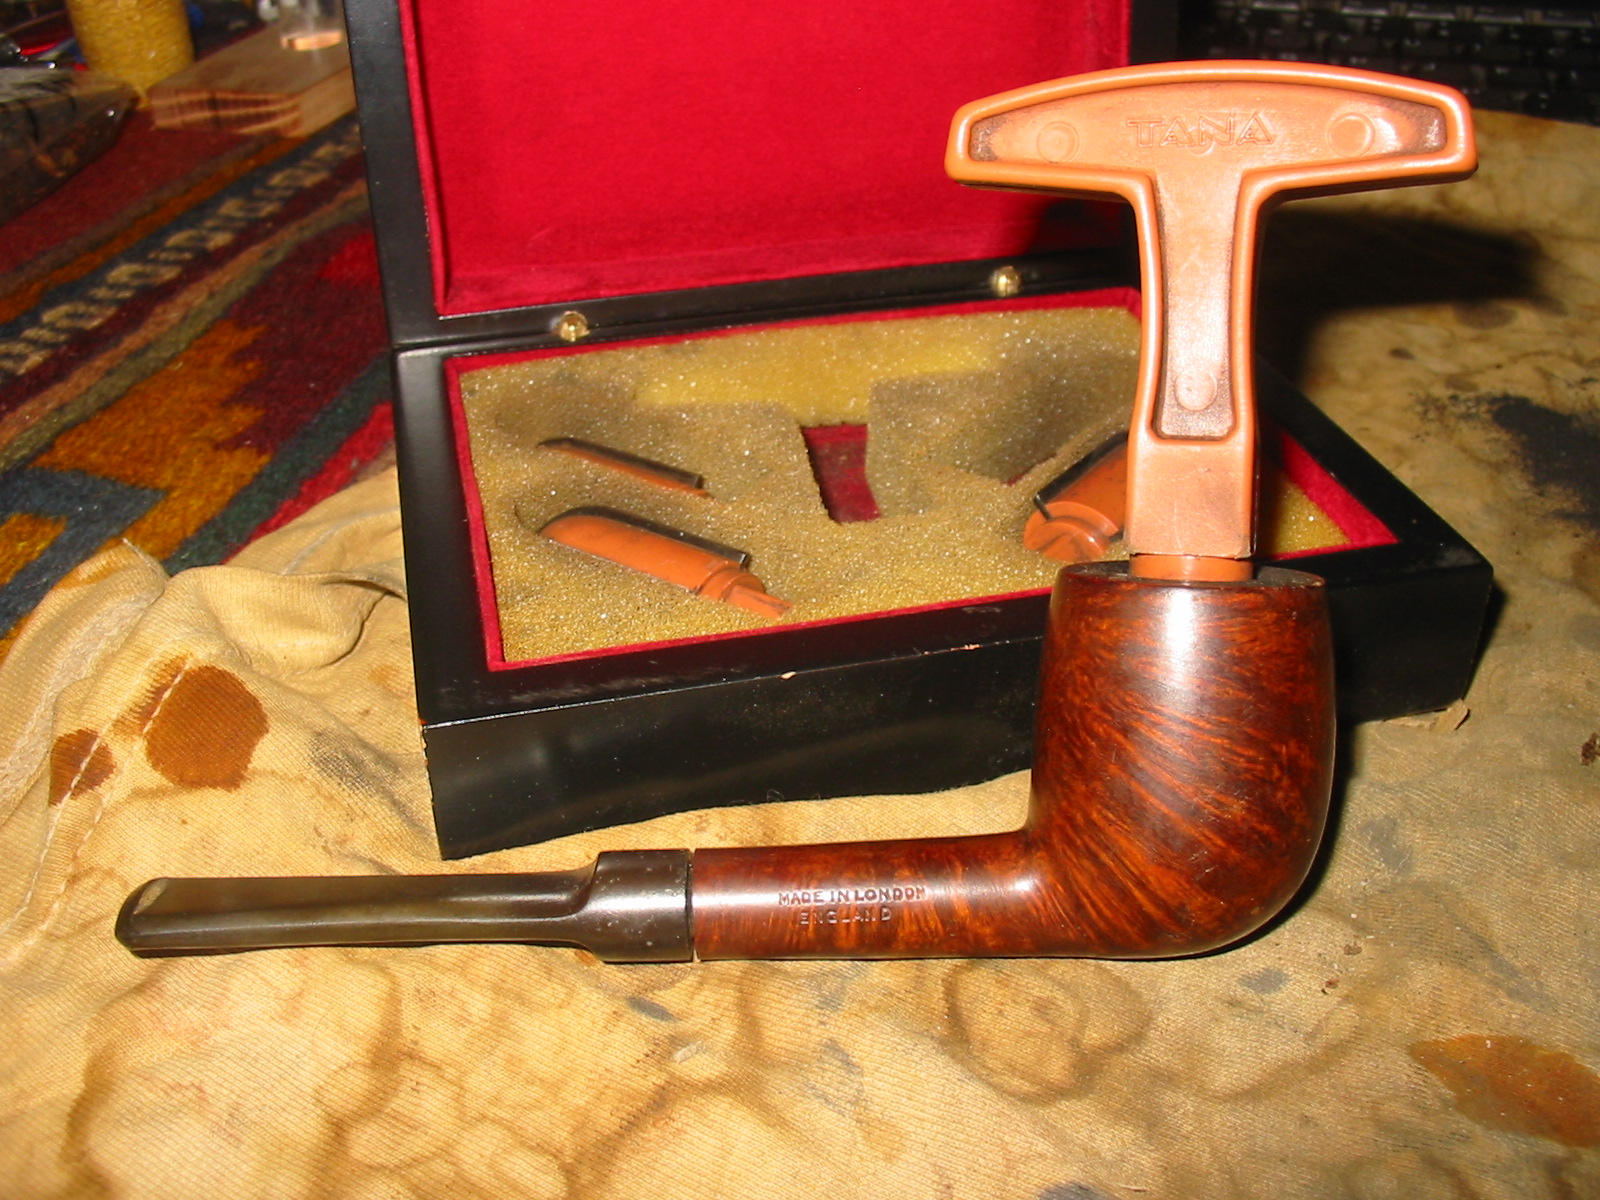
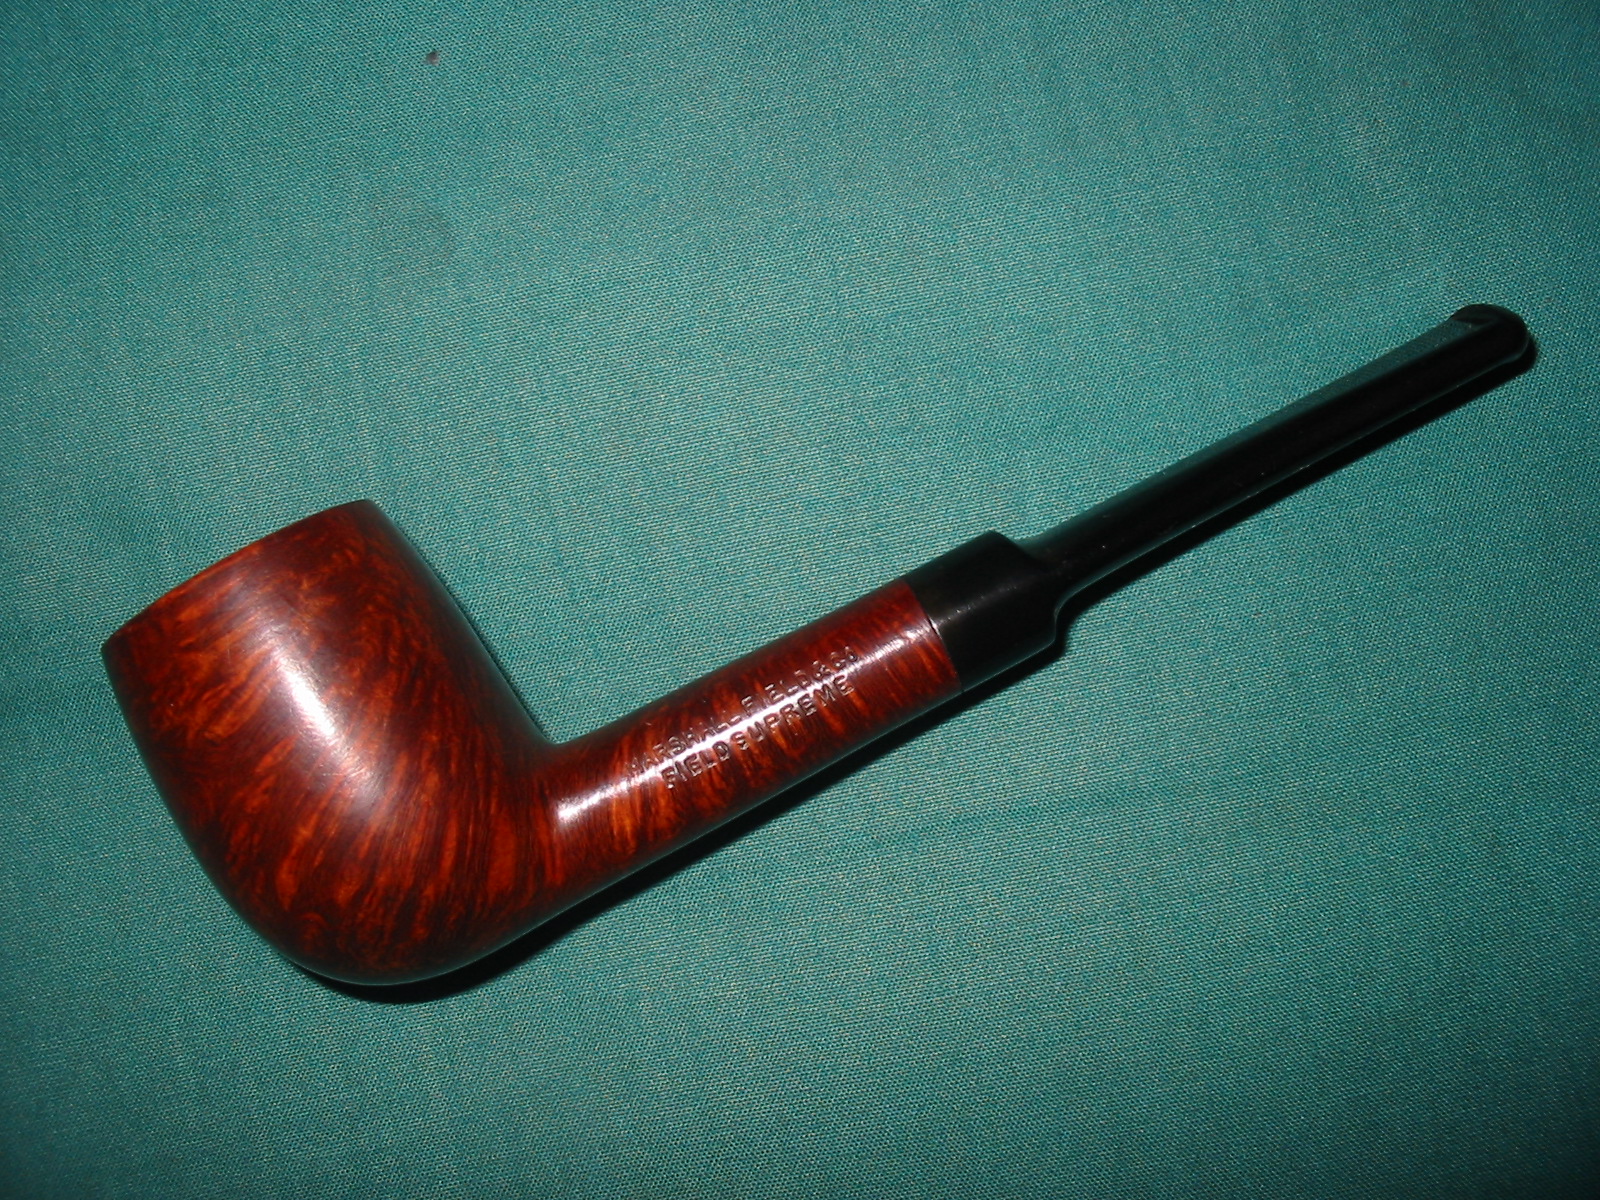
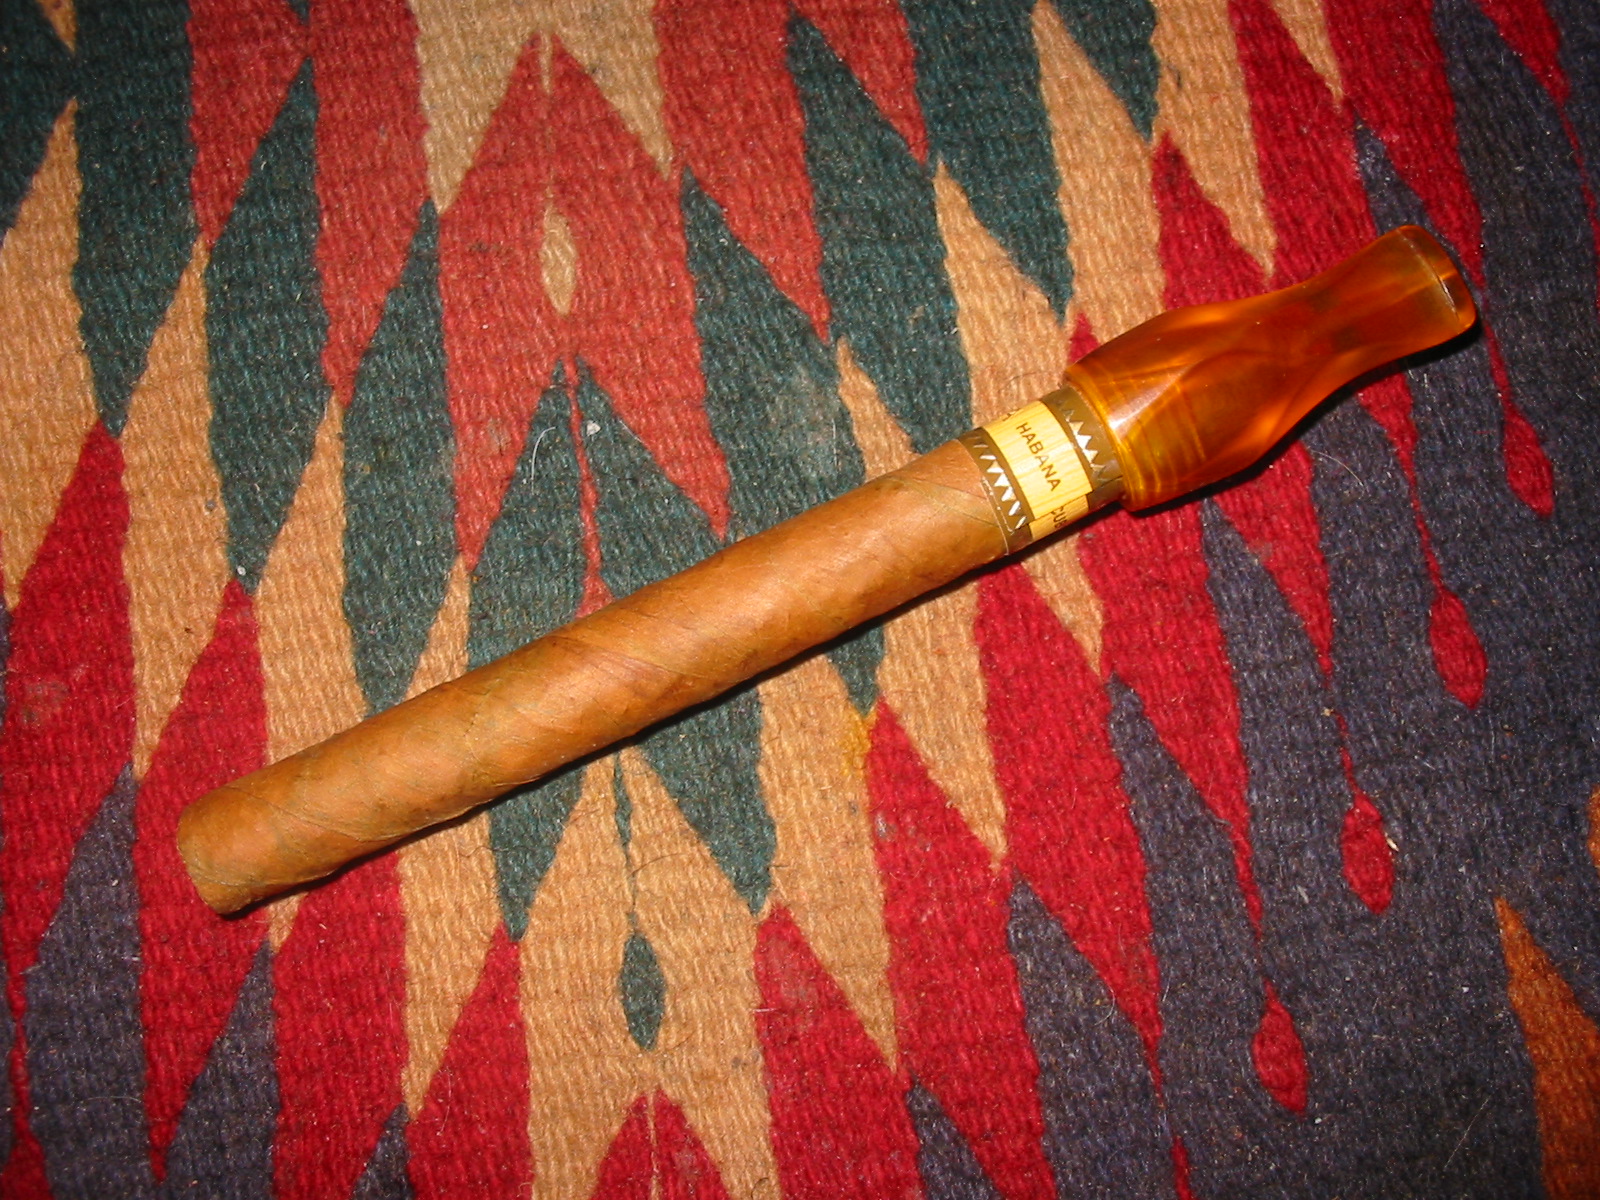
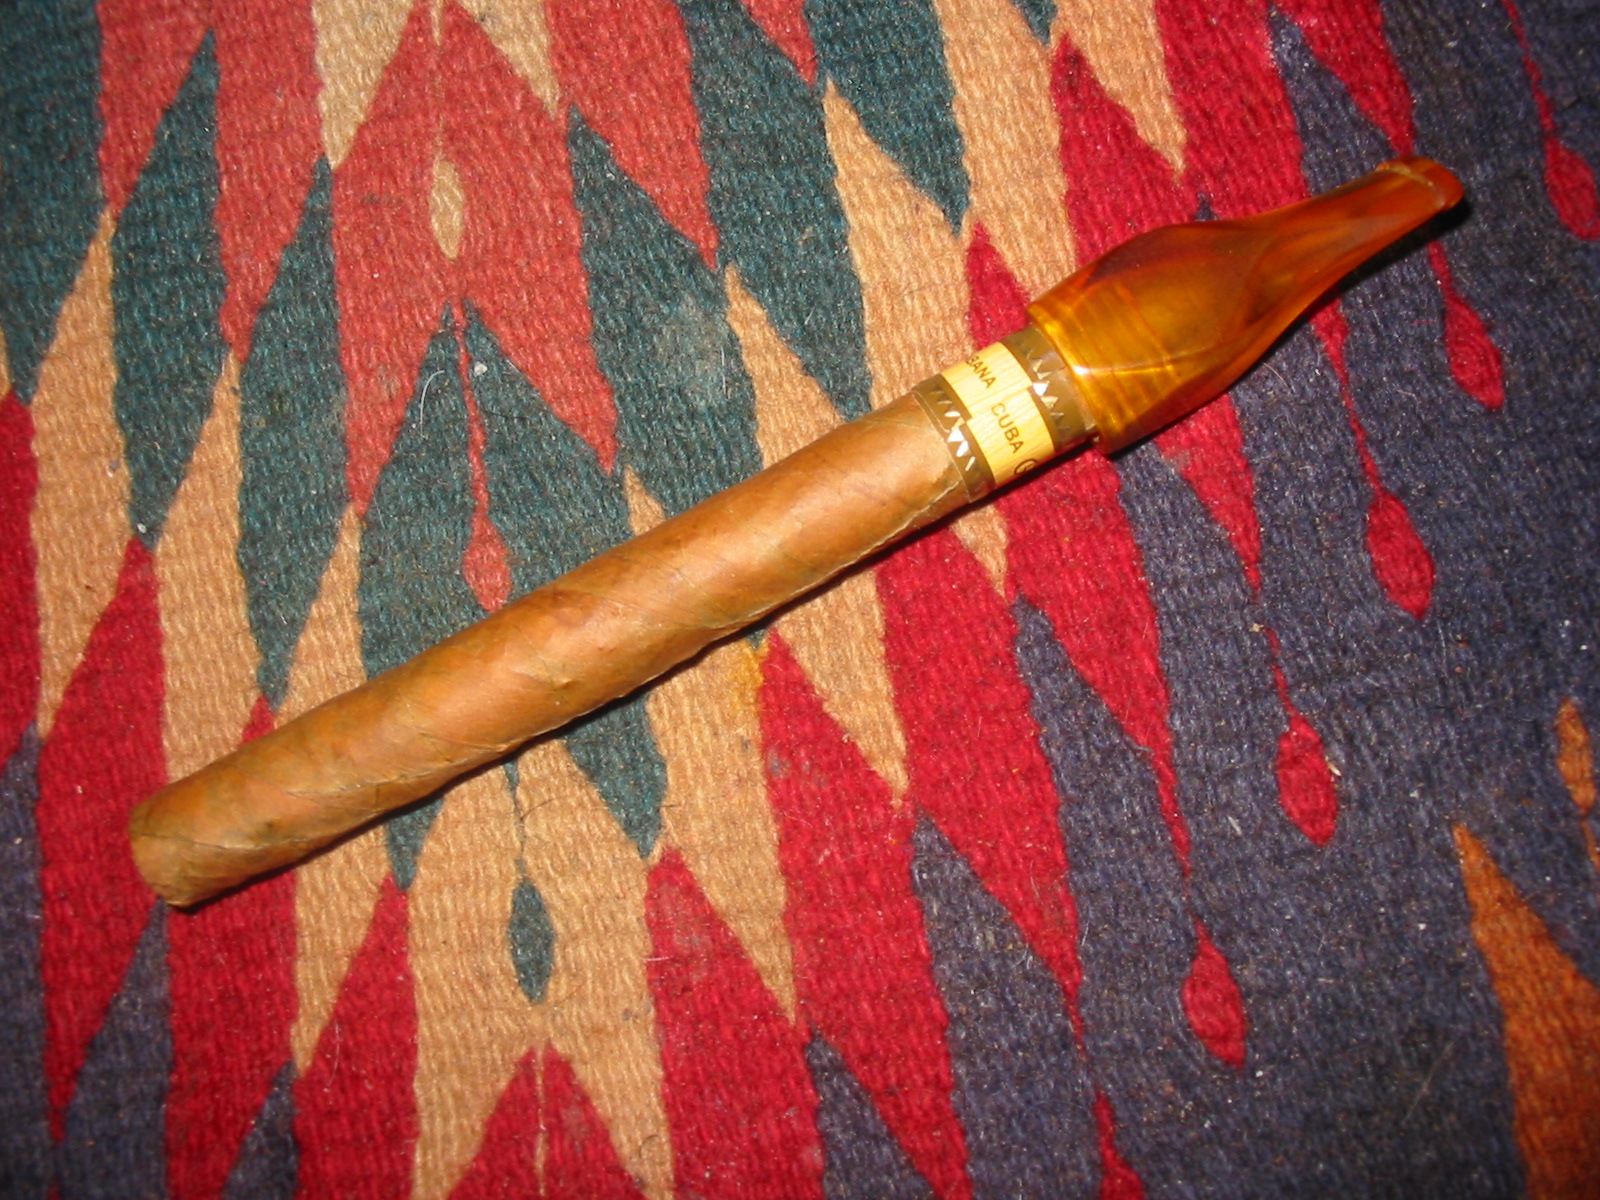
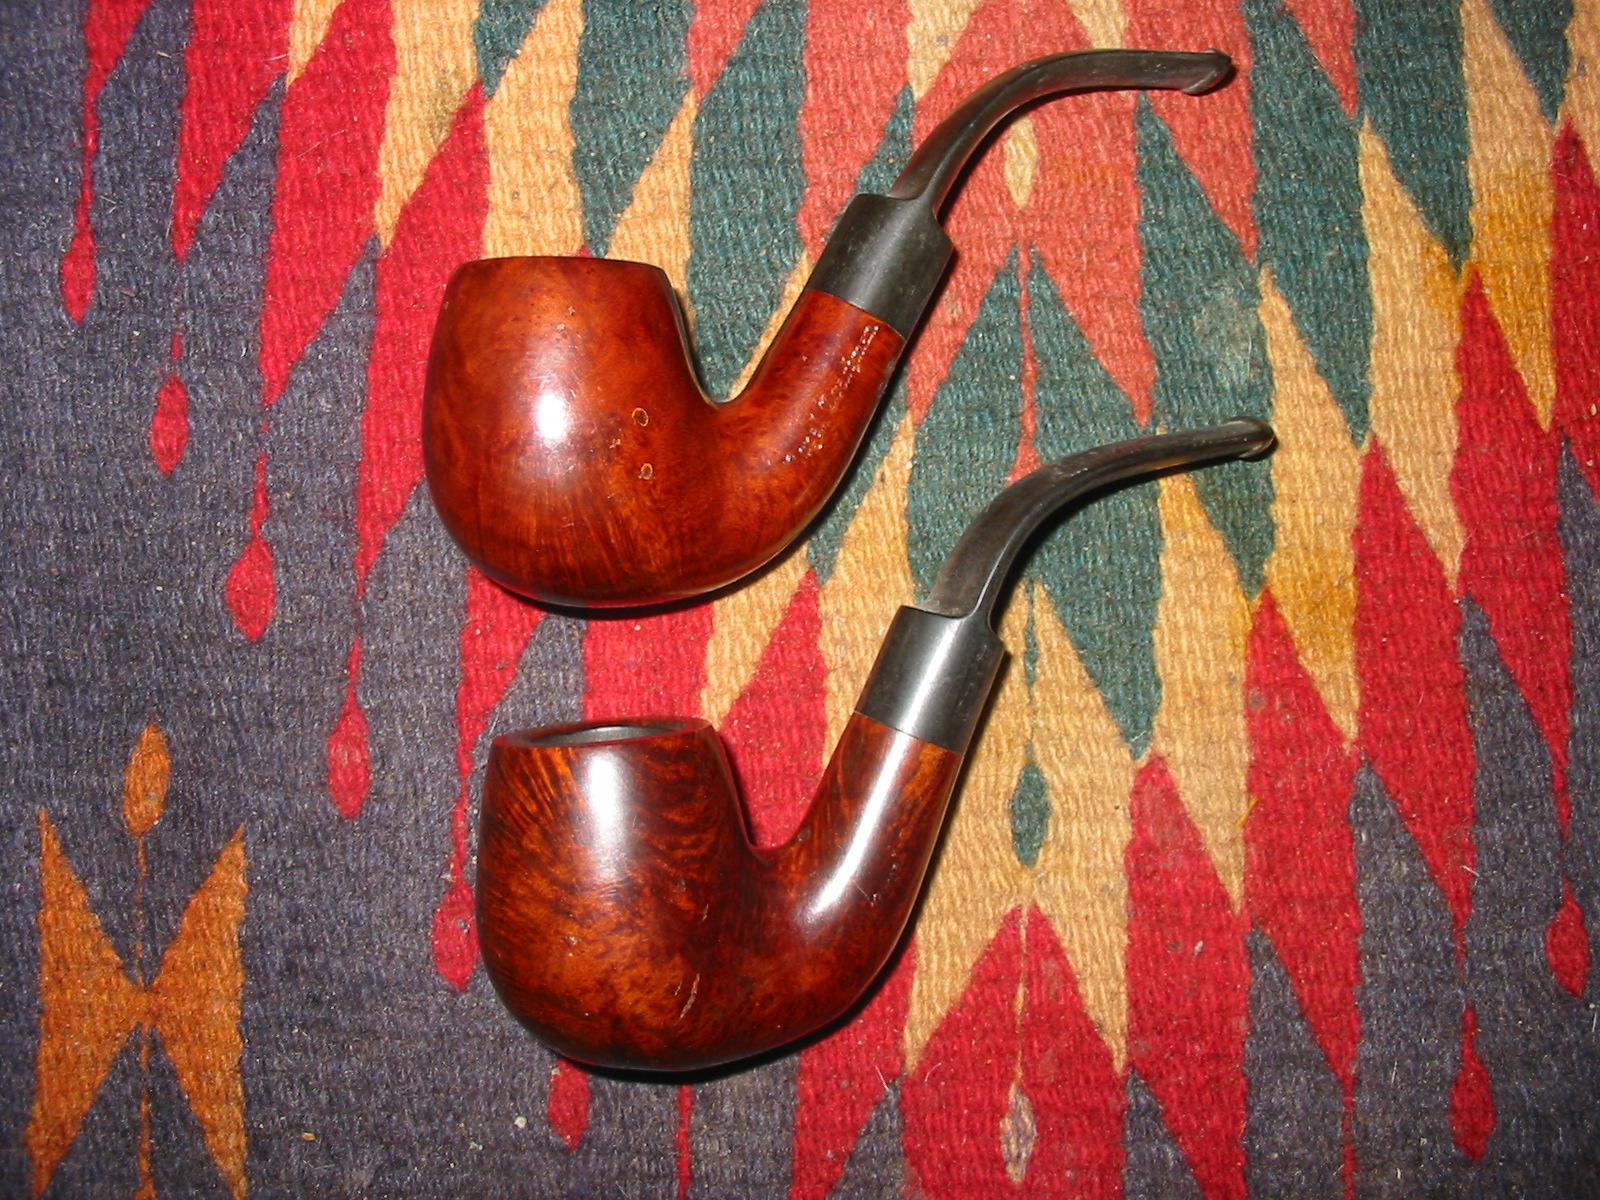
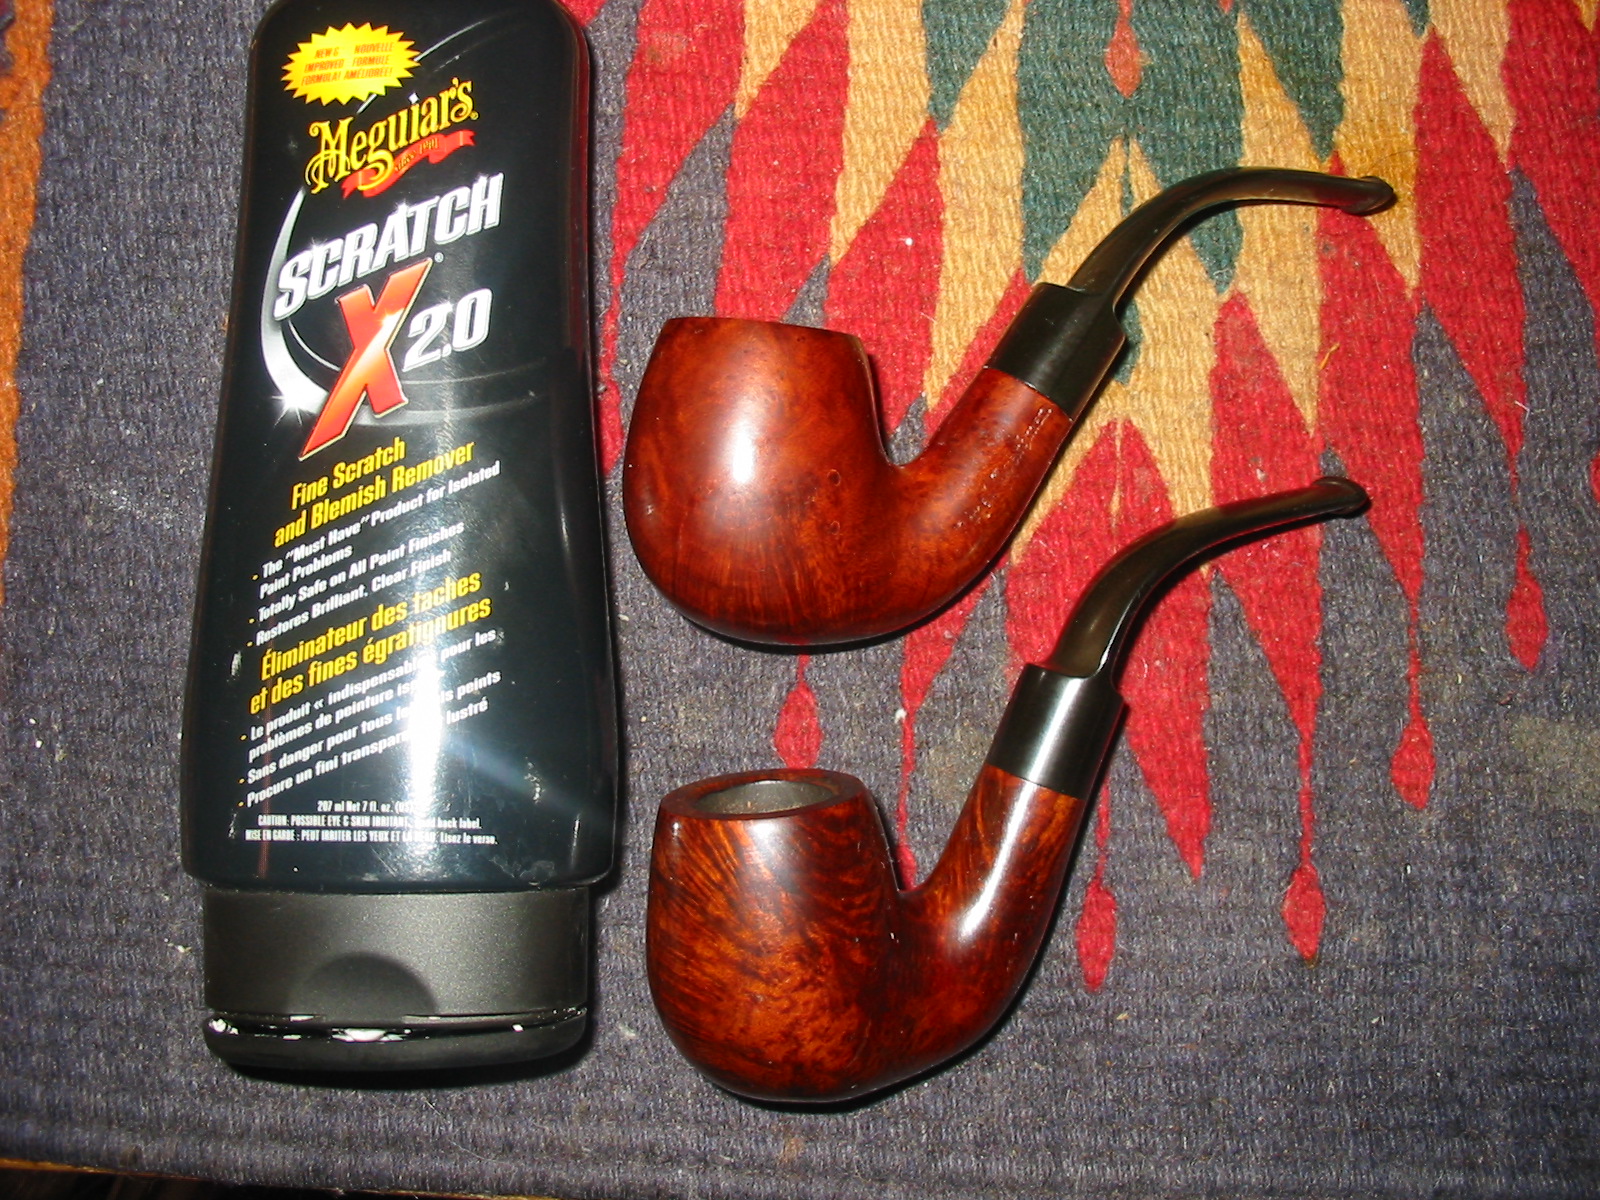
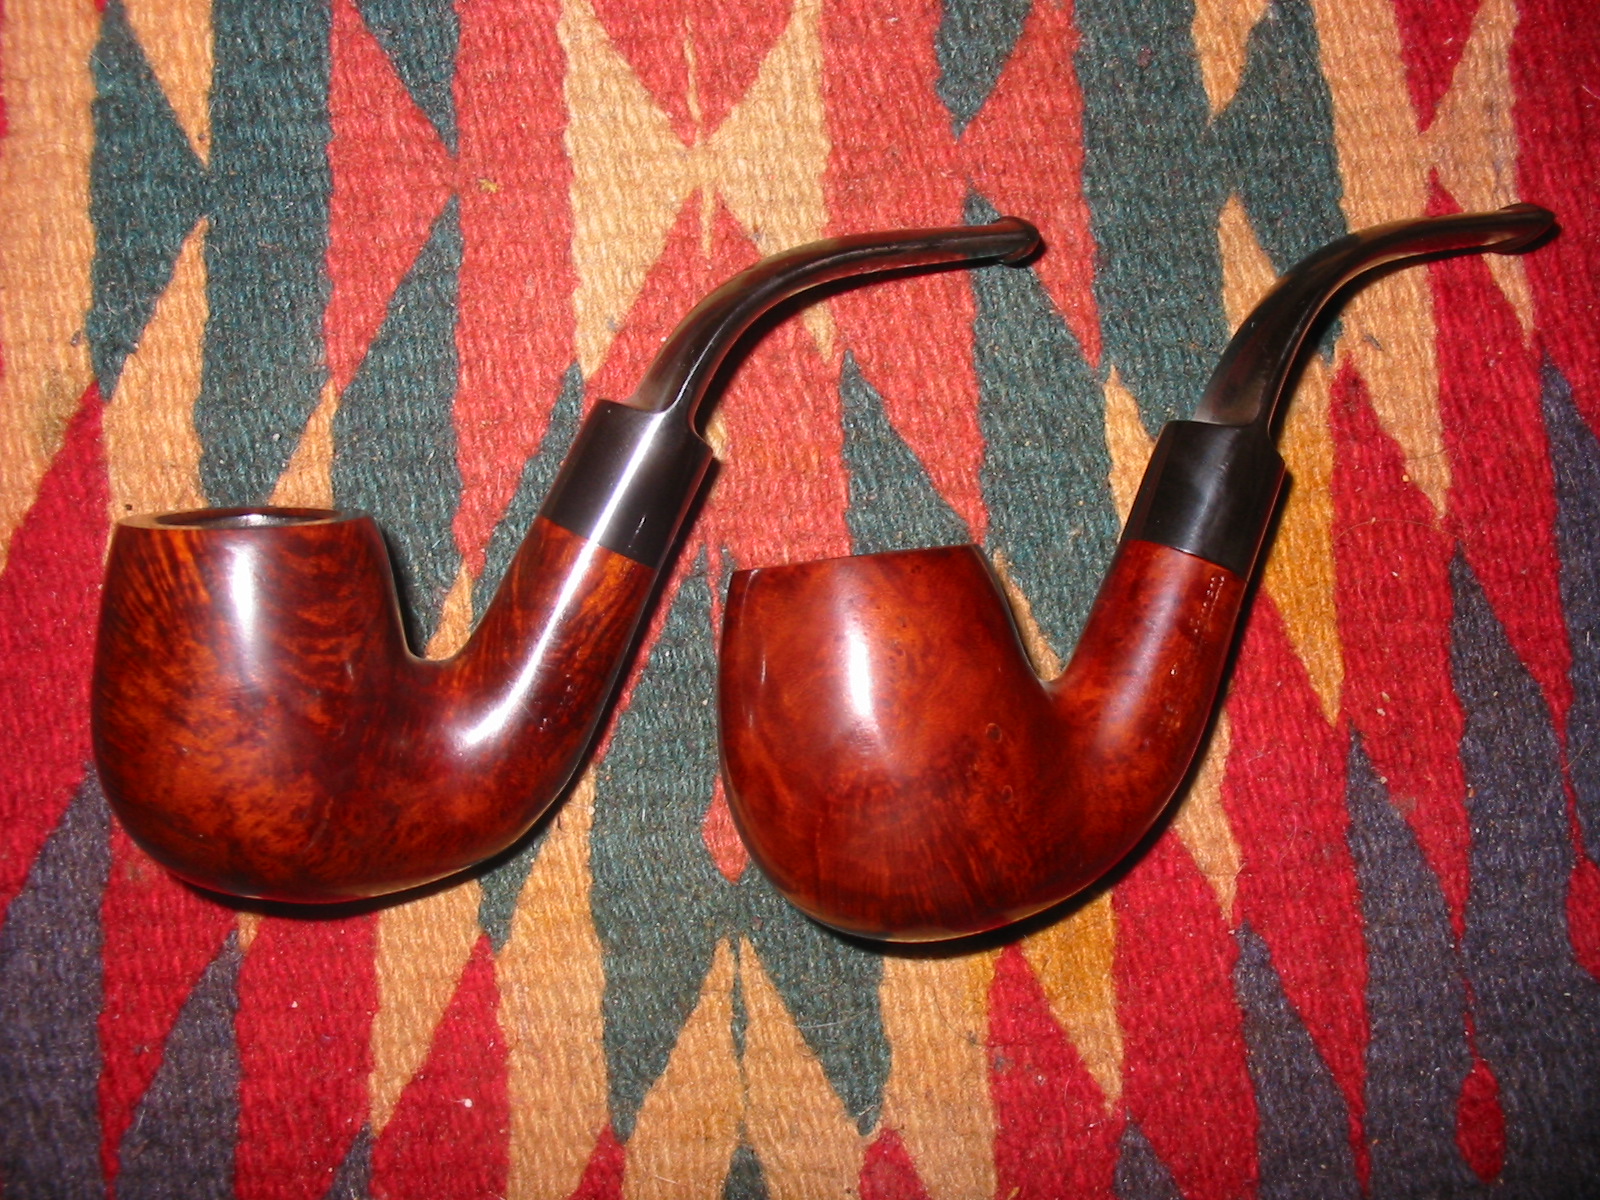
When I brought the pipes home from the antique shop they looked like the photos below. There were actually in pretty good shape for their age. The dealer said that he bought these along with 20 other pipes from a widow who was selling off her late husband’s estate. He had some interesting old pipes and I was able to pick through them and brought six of them home with me. These are the first pair of the bunch. The bowls were lightly smoked with a bare minimum of cake. The top pipe in the picture below was less smoked than the bottom one. Both pipes were grimy on the outside of the bowl and had some oxidation on the stems. There were no tooth marks on the top pipe and only a little tooth chatter on the underside of the bottom pipe. The top pipe has three small fills that are visible in the first photo below and a slight nick in the shank on the right side near the stem. The second pipe has a few fills as well with the largest of them visible low on the left side of the bowl in the photo below. The rims on both were clean and undamaged and showed no tar build up. On the right side of the bowl of both pipes there was a small spot of white paint.
IMG_6852

IMG_6853

IMG_6854

IMG_6855
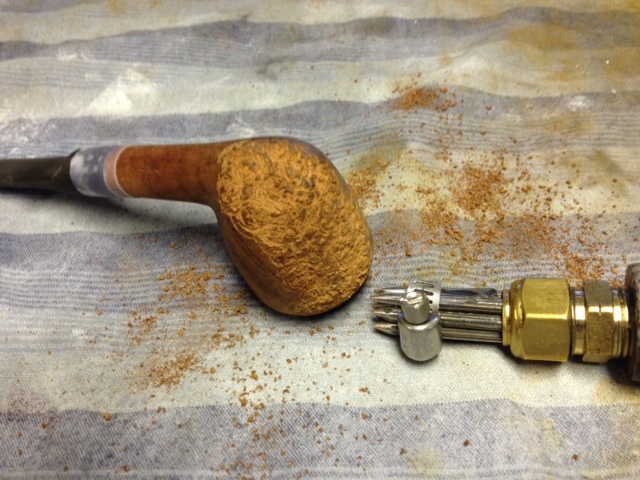
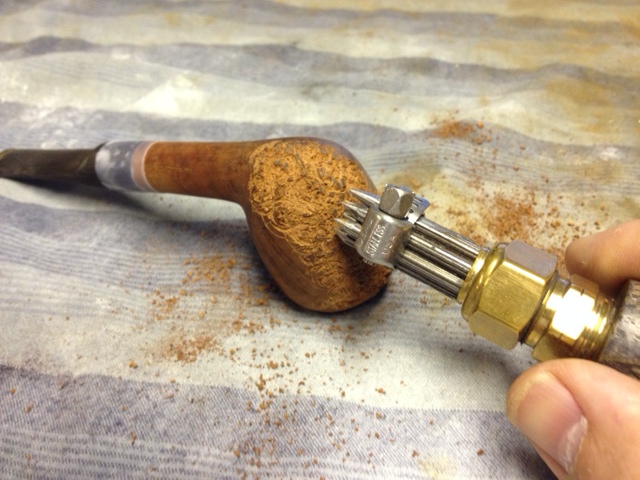
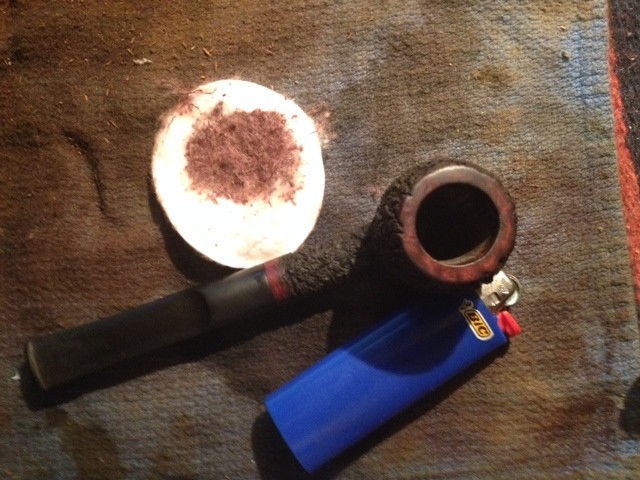
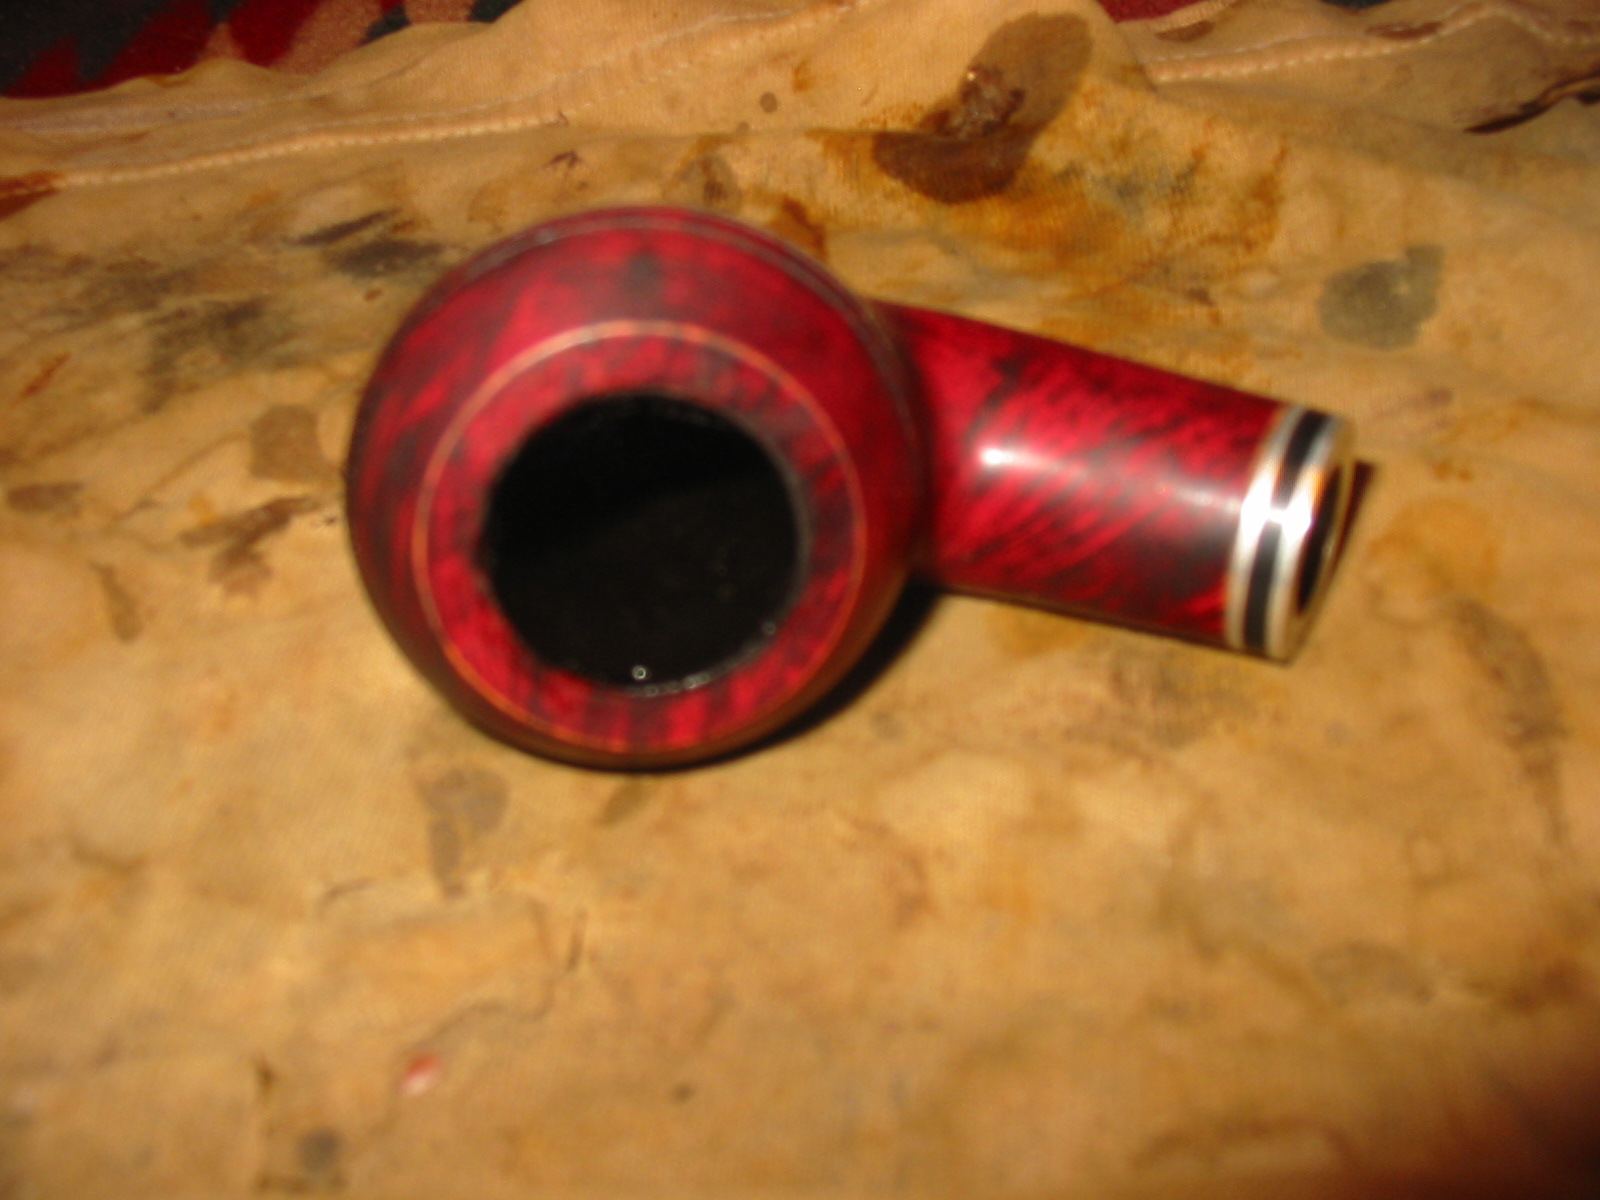
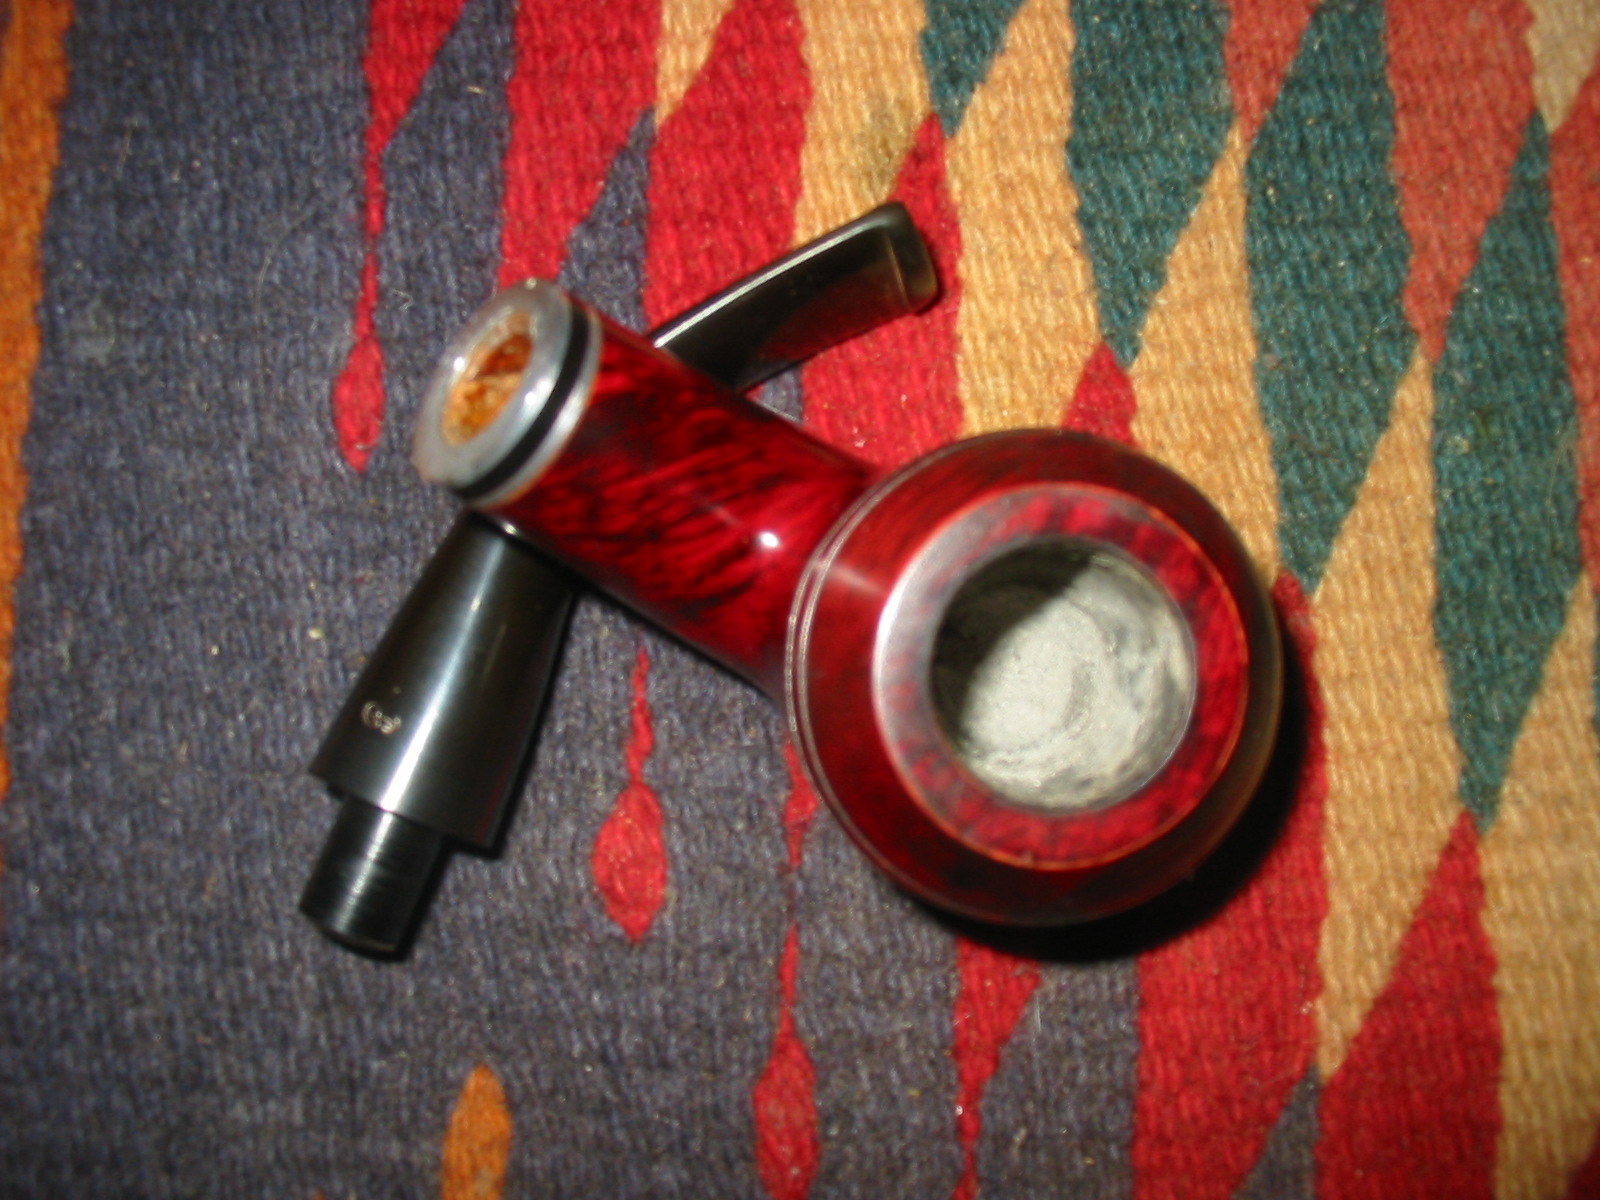
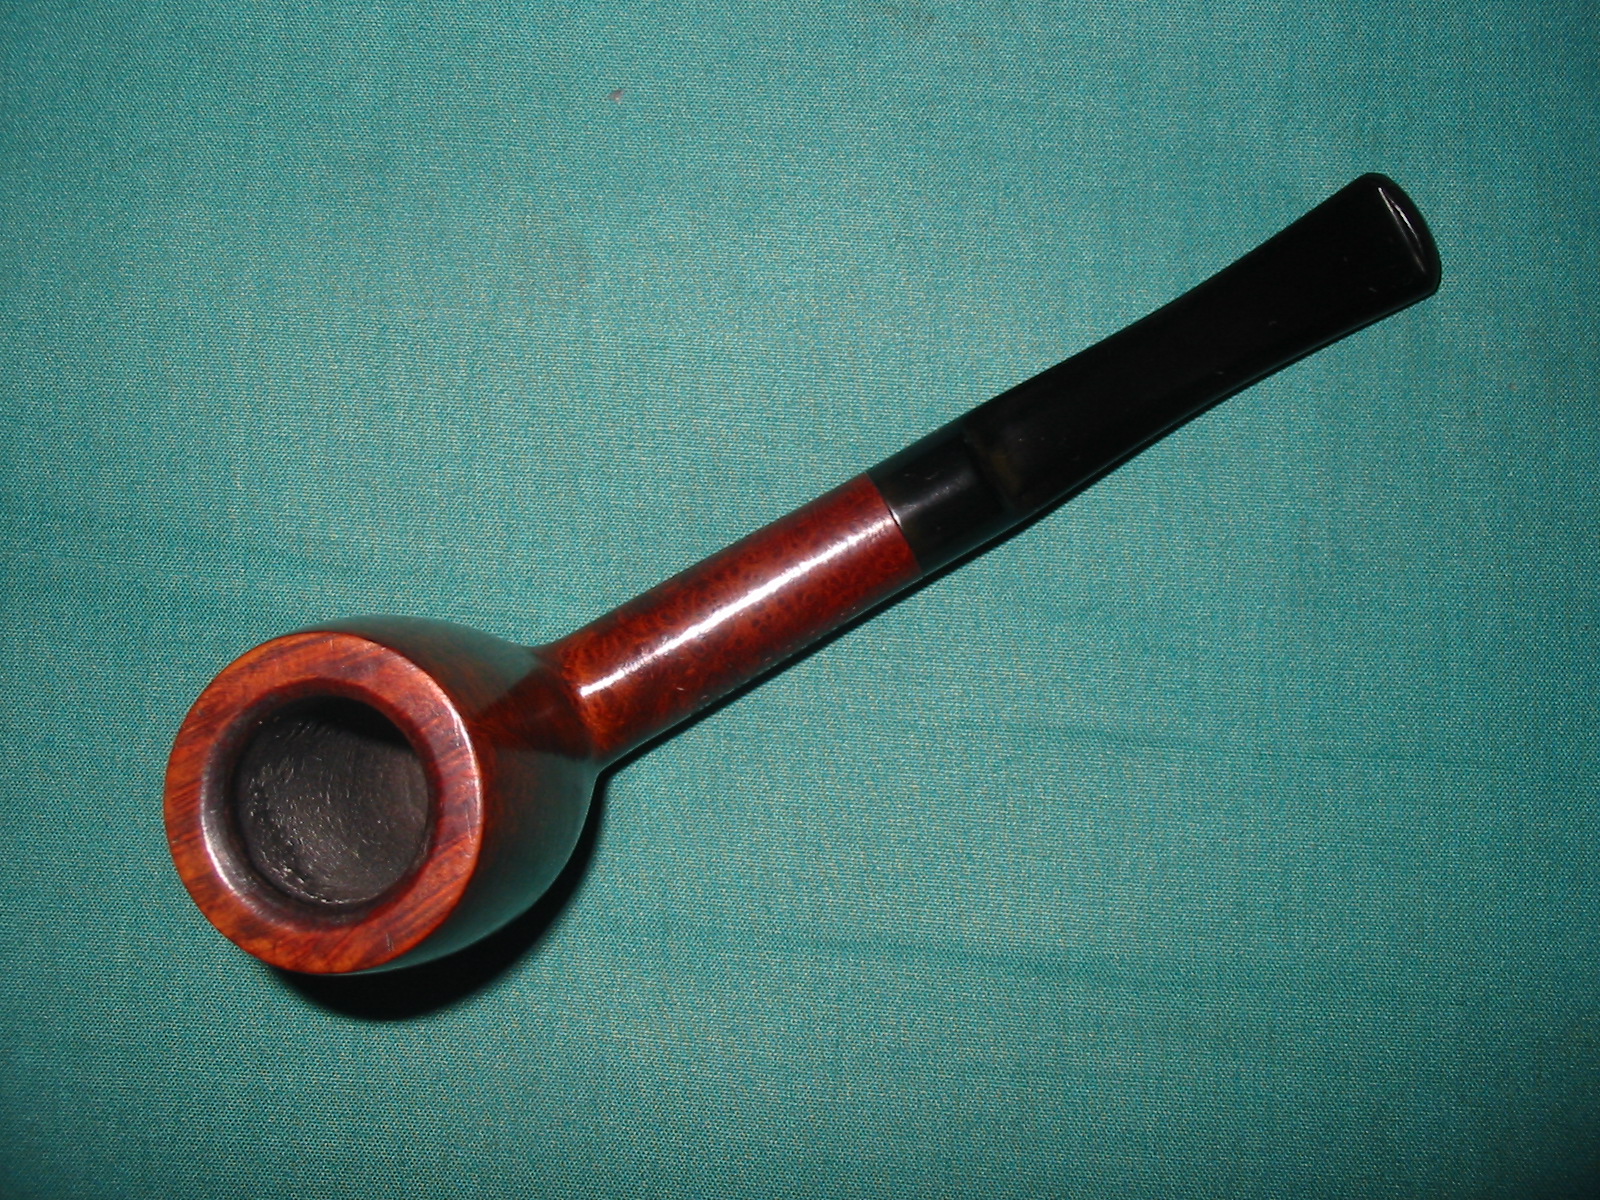
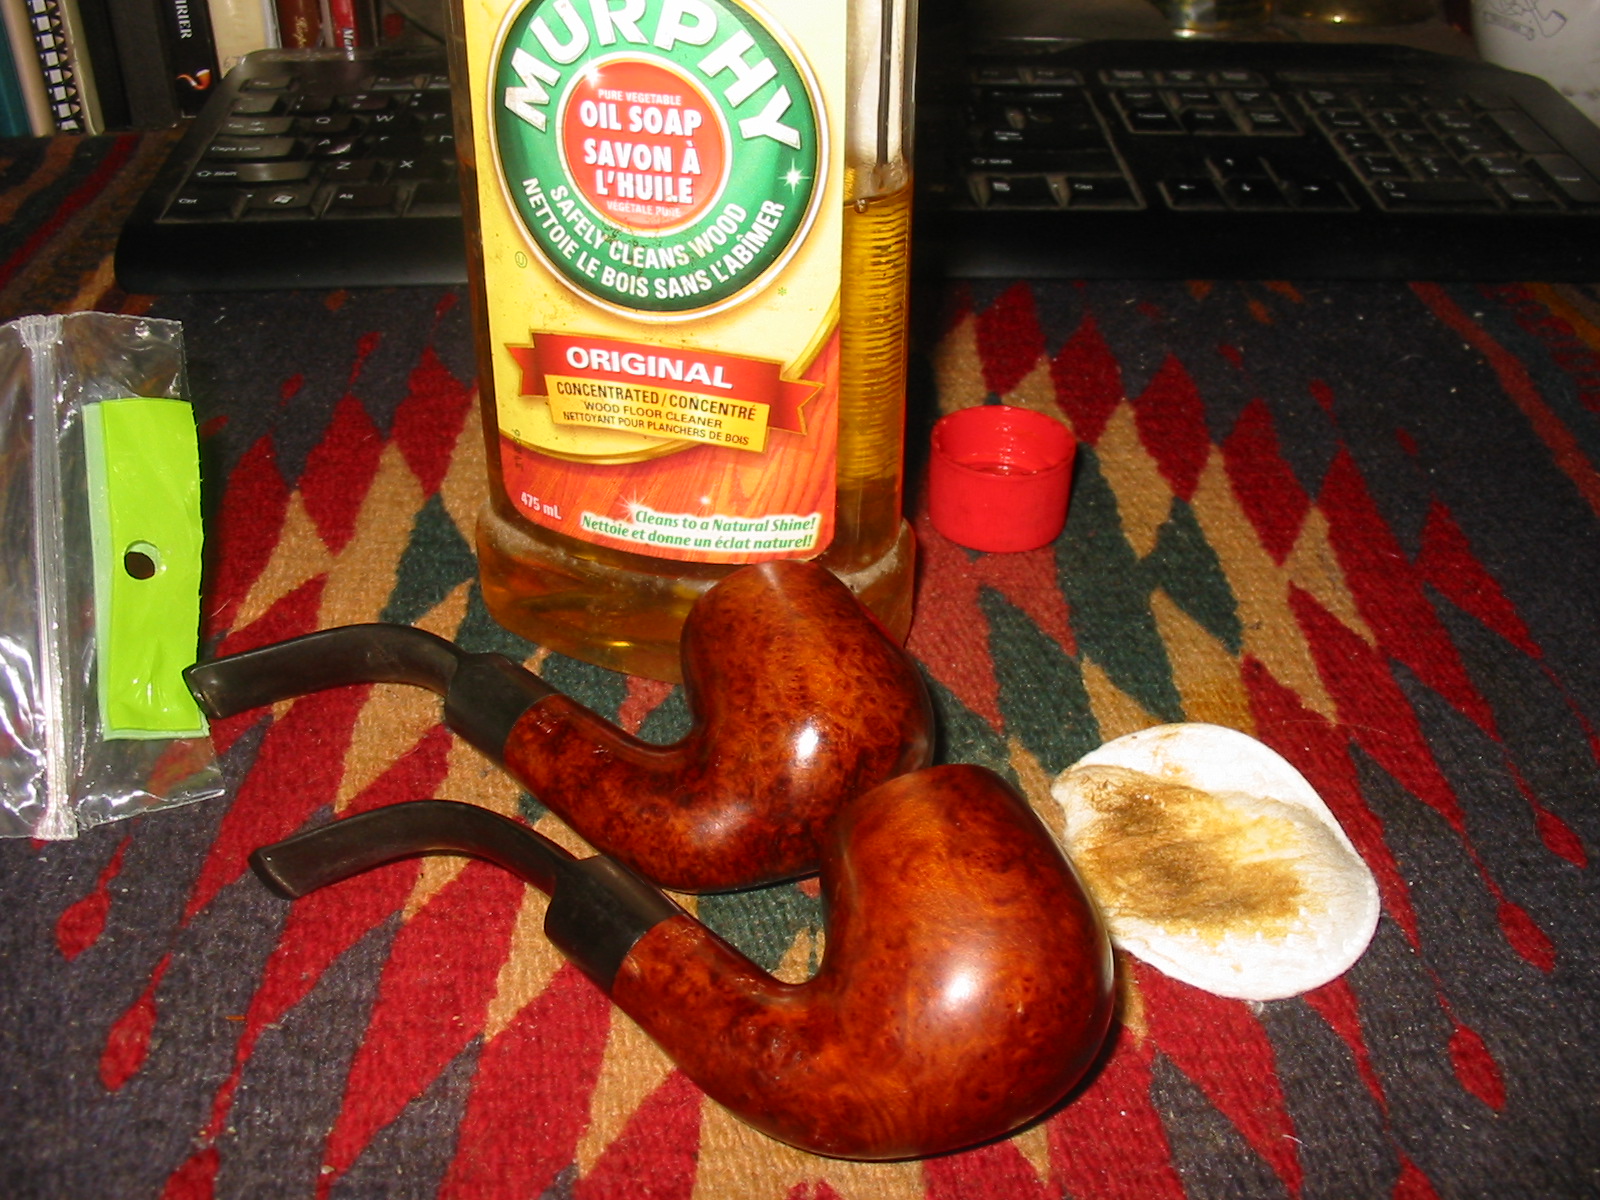
I reamed the bowls with a PipNet reamer to remove the slight cake build up and clean out the bowl. I wiped down the exterior of the bowl with Murphy’s Oil Soap to remove the grime and grease build up. It also took off the paint spots on the right side of the bowl. I use the soap undiluted as I find it does not remove the finish on the bowl as much as when it is diluted with water. I rubbed it on and scrubbed it with cotton pads and wiped it off with the same pads.
IMG_6856

IMG_6860
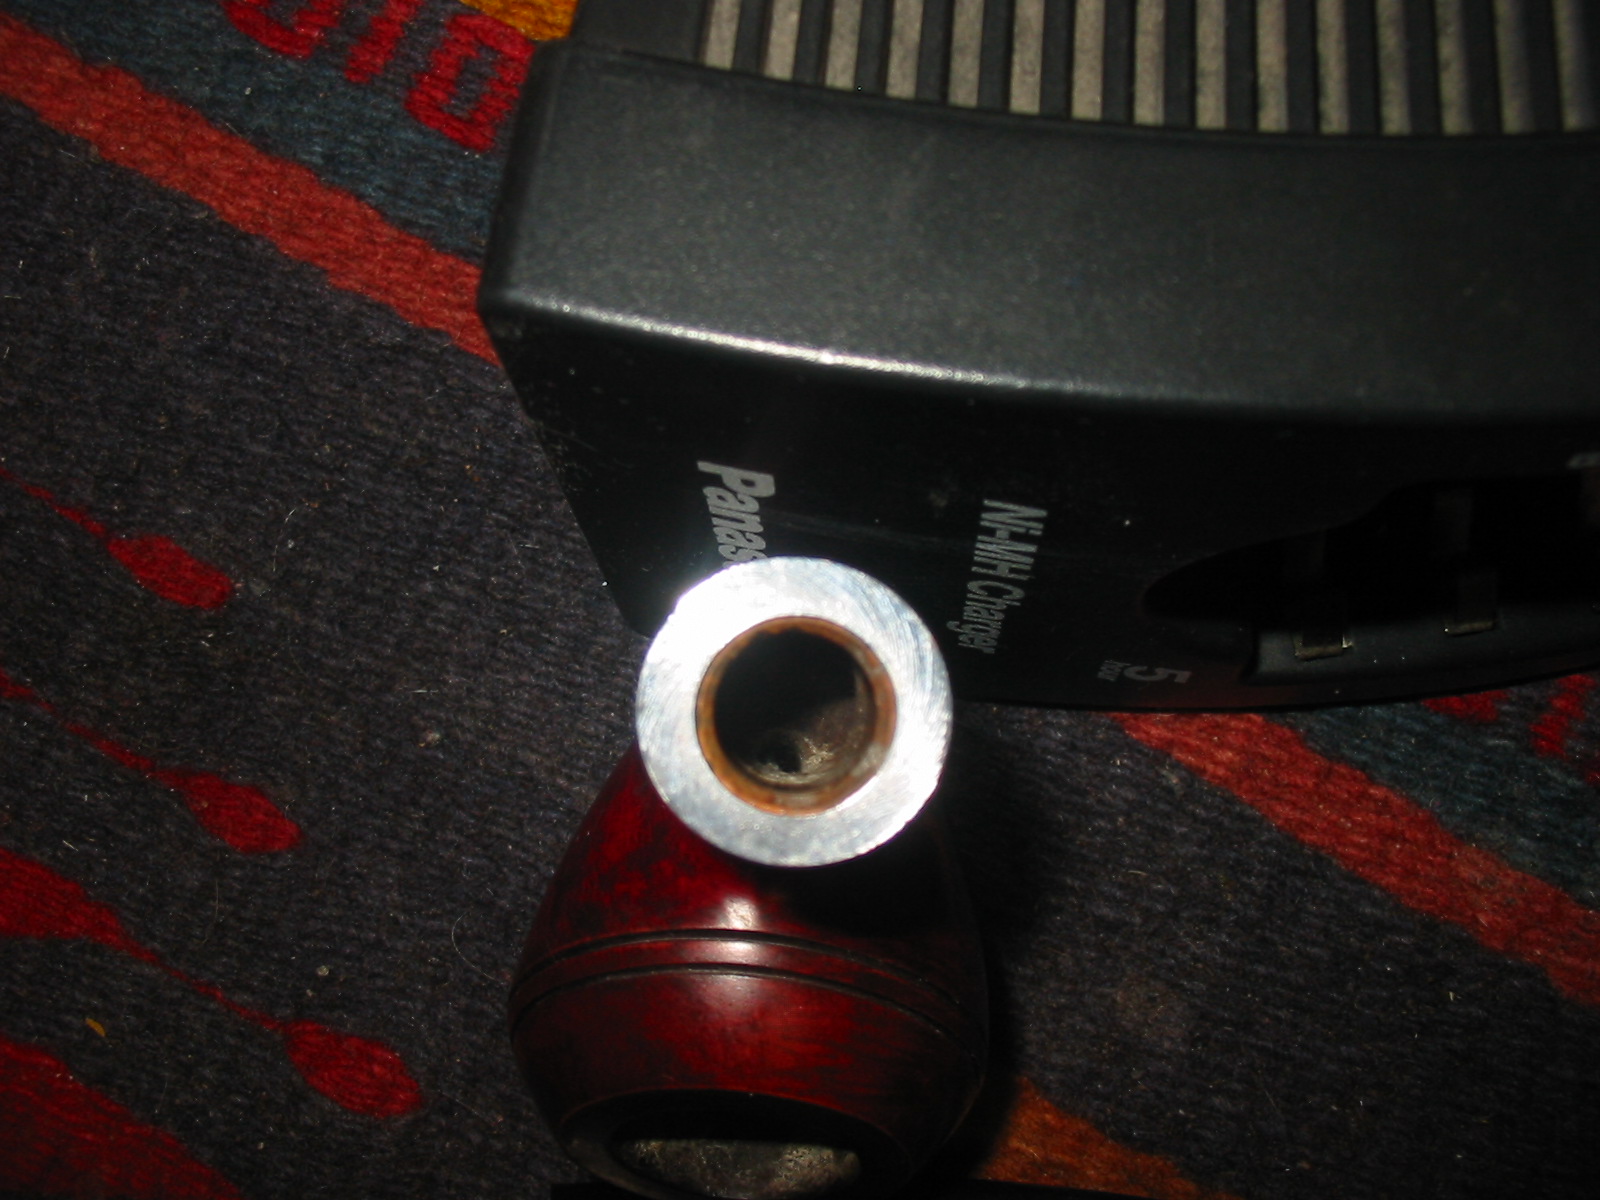
I cleaned out the inside of the shank on both pipe using cotton swabs and isopropyl alcohol. Both had a slight reservoir in the shank with the drilling being quite high in the shank to accommodate the bend in the shank to bowl junction. I cleaned out the airway with pipe cleaners and then the inside of the bowl with folded pipe cleaners and cotton swabs.
IMG_6861

IMG_6862
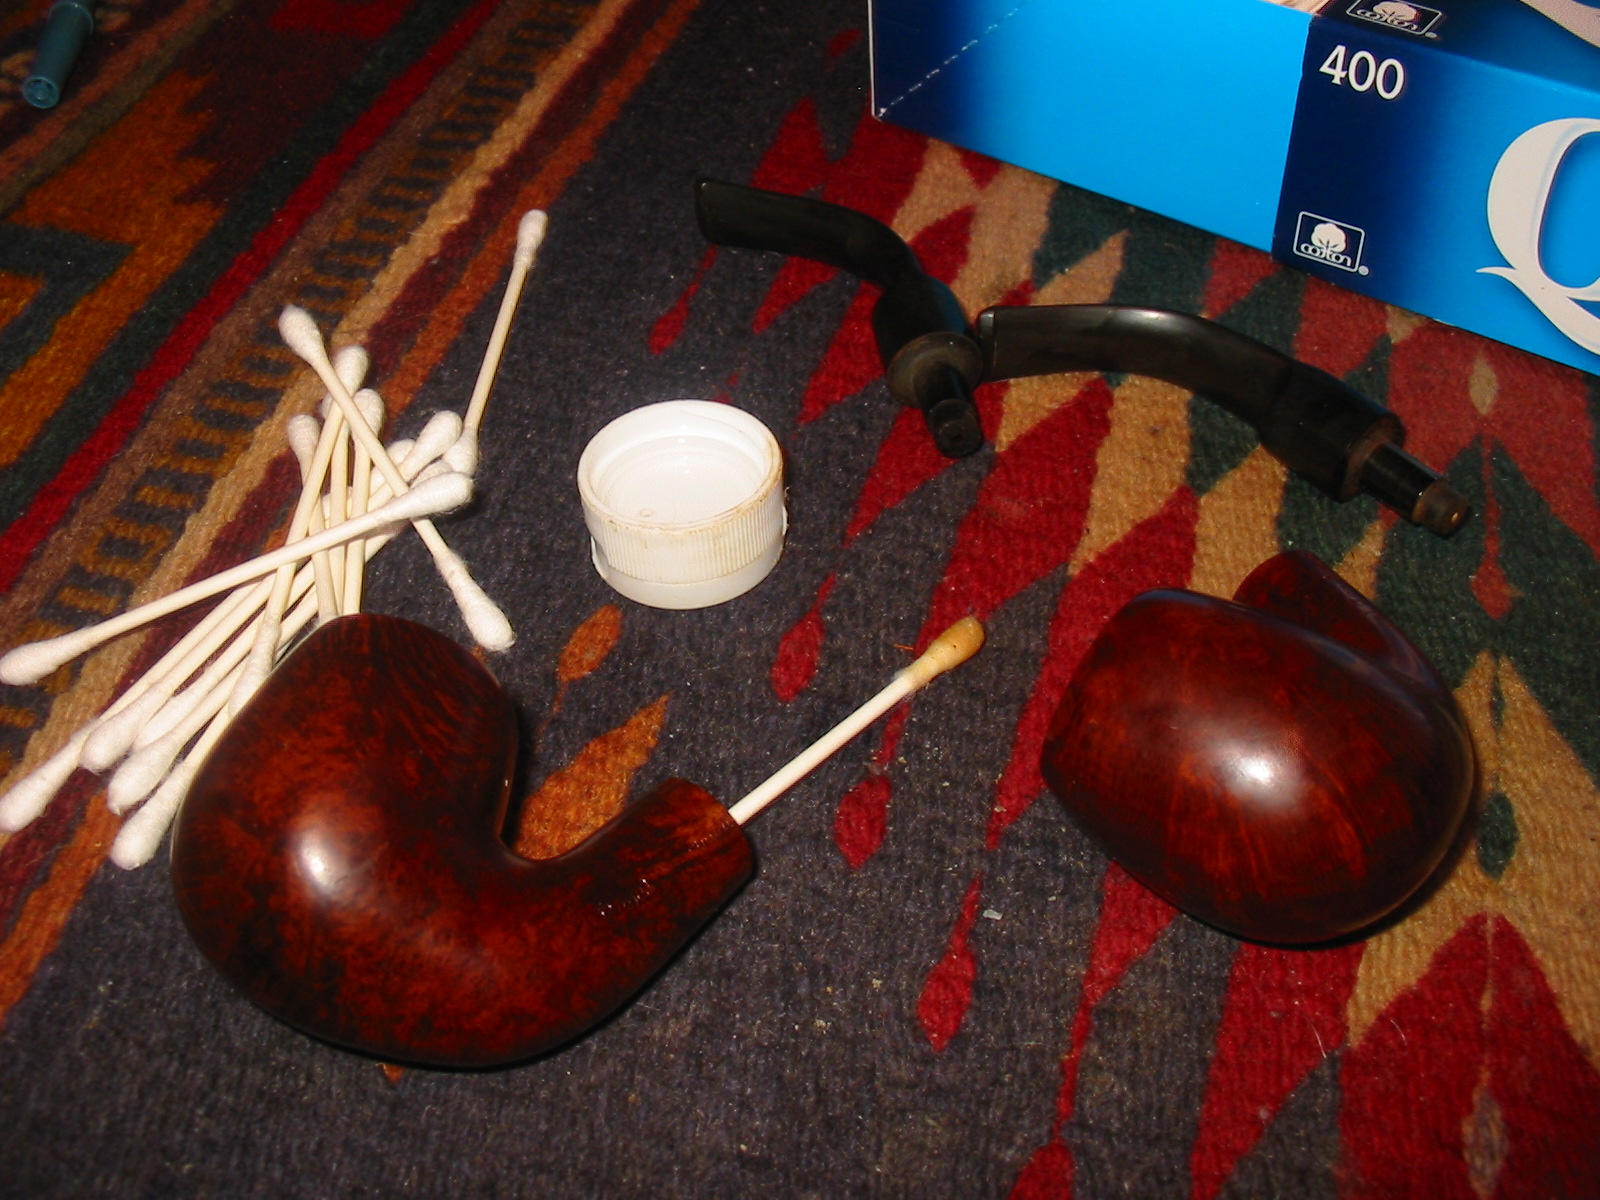
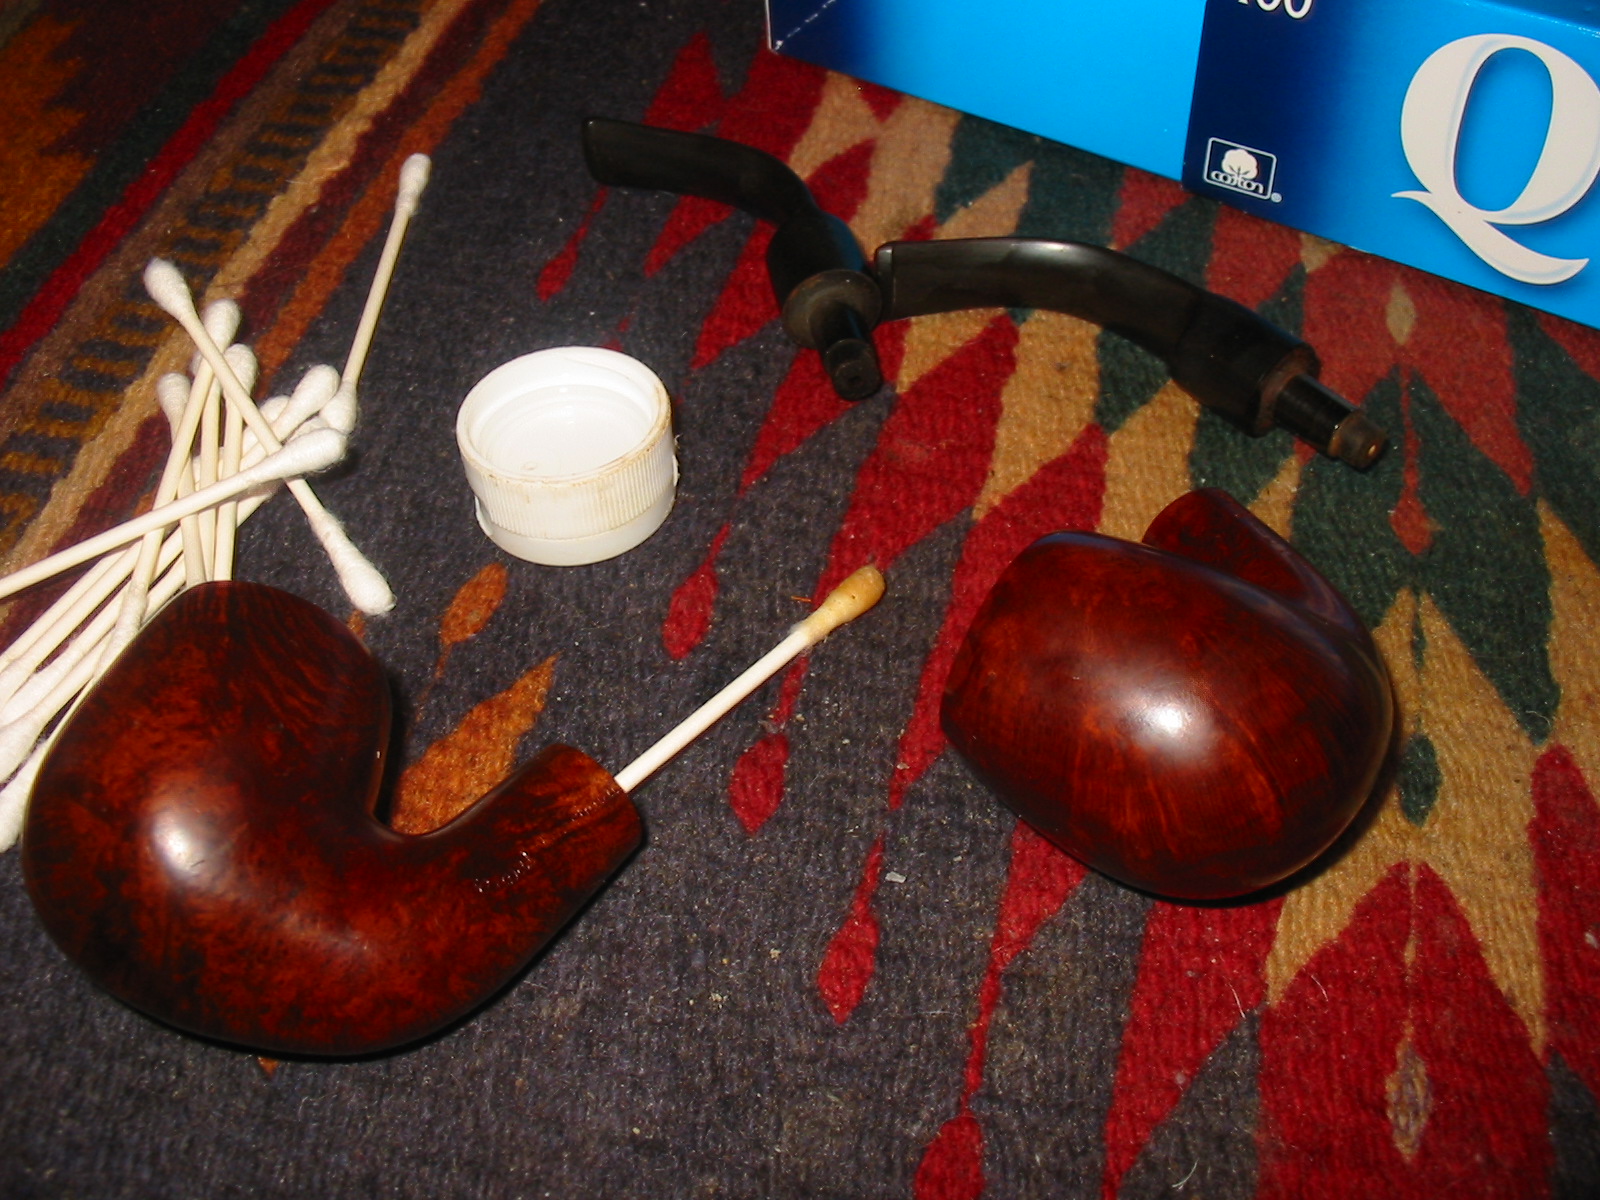
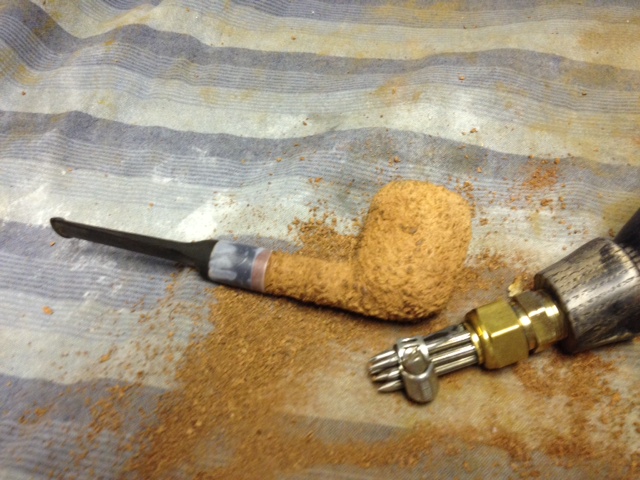
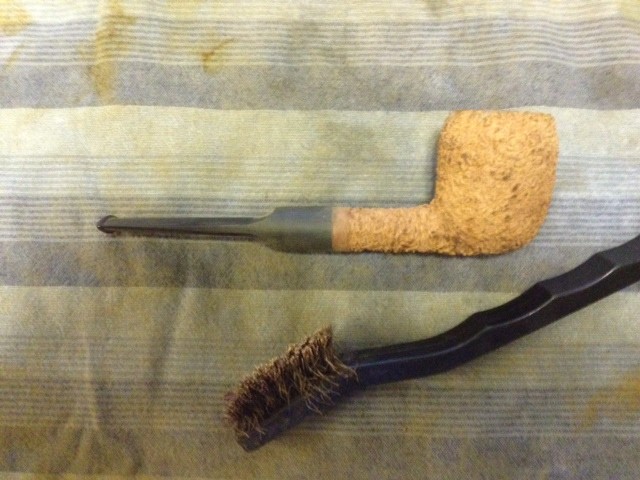
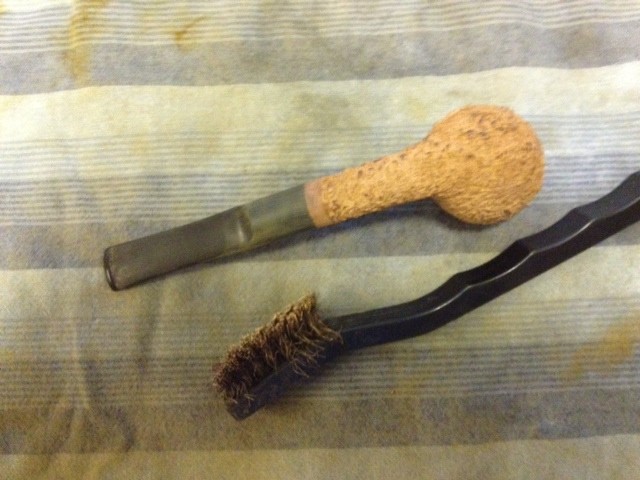
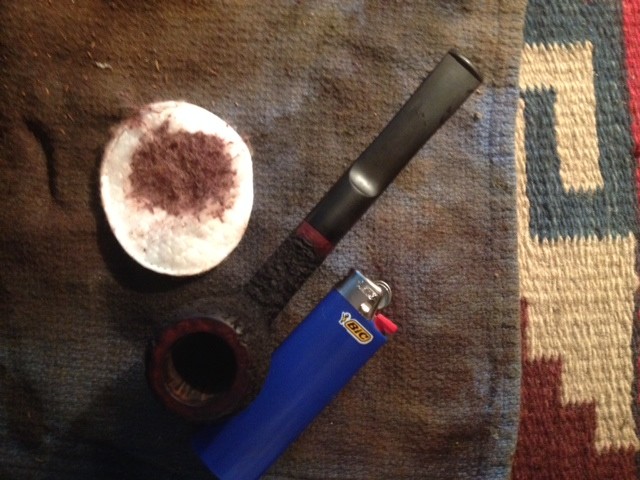
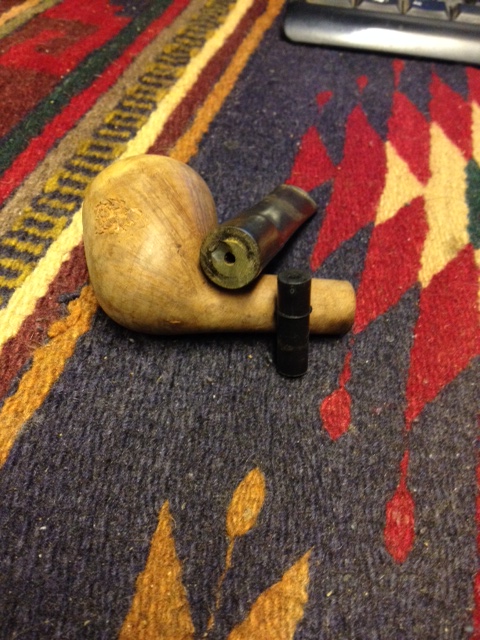
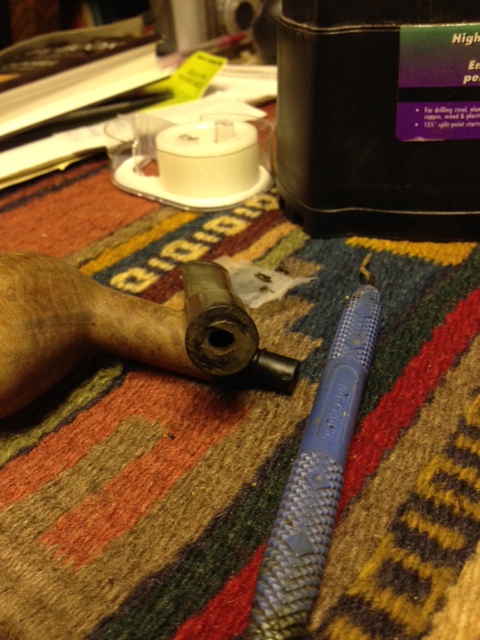
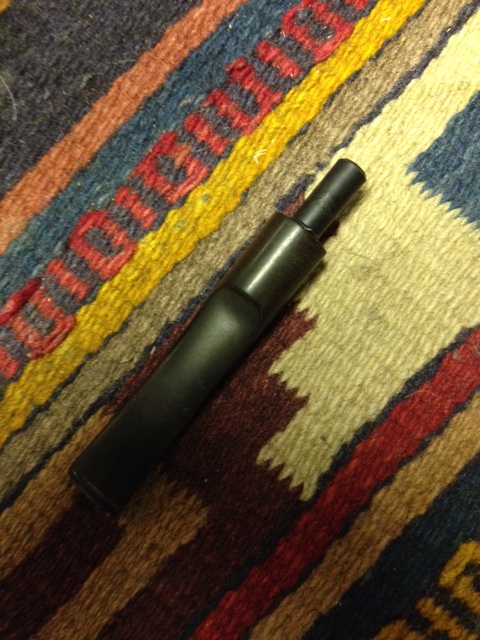
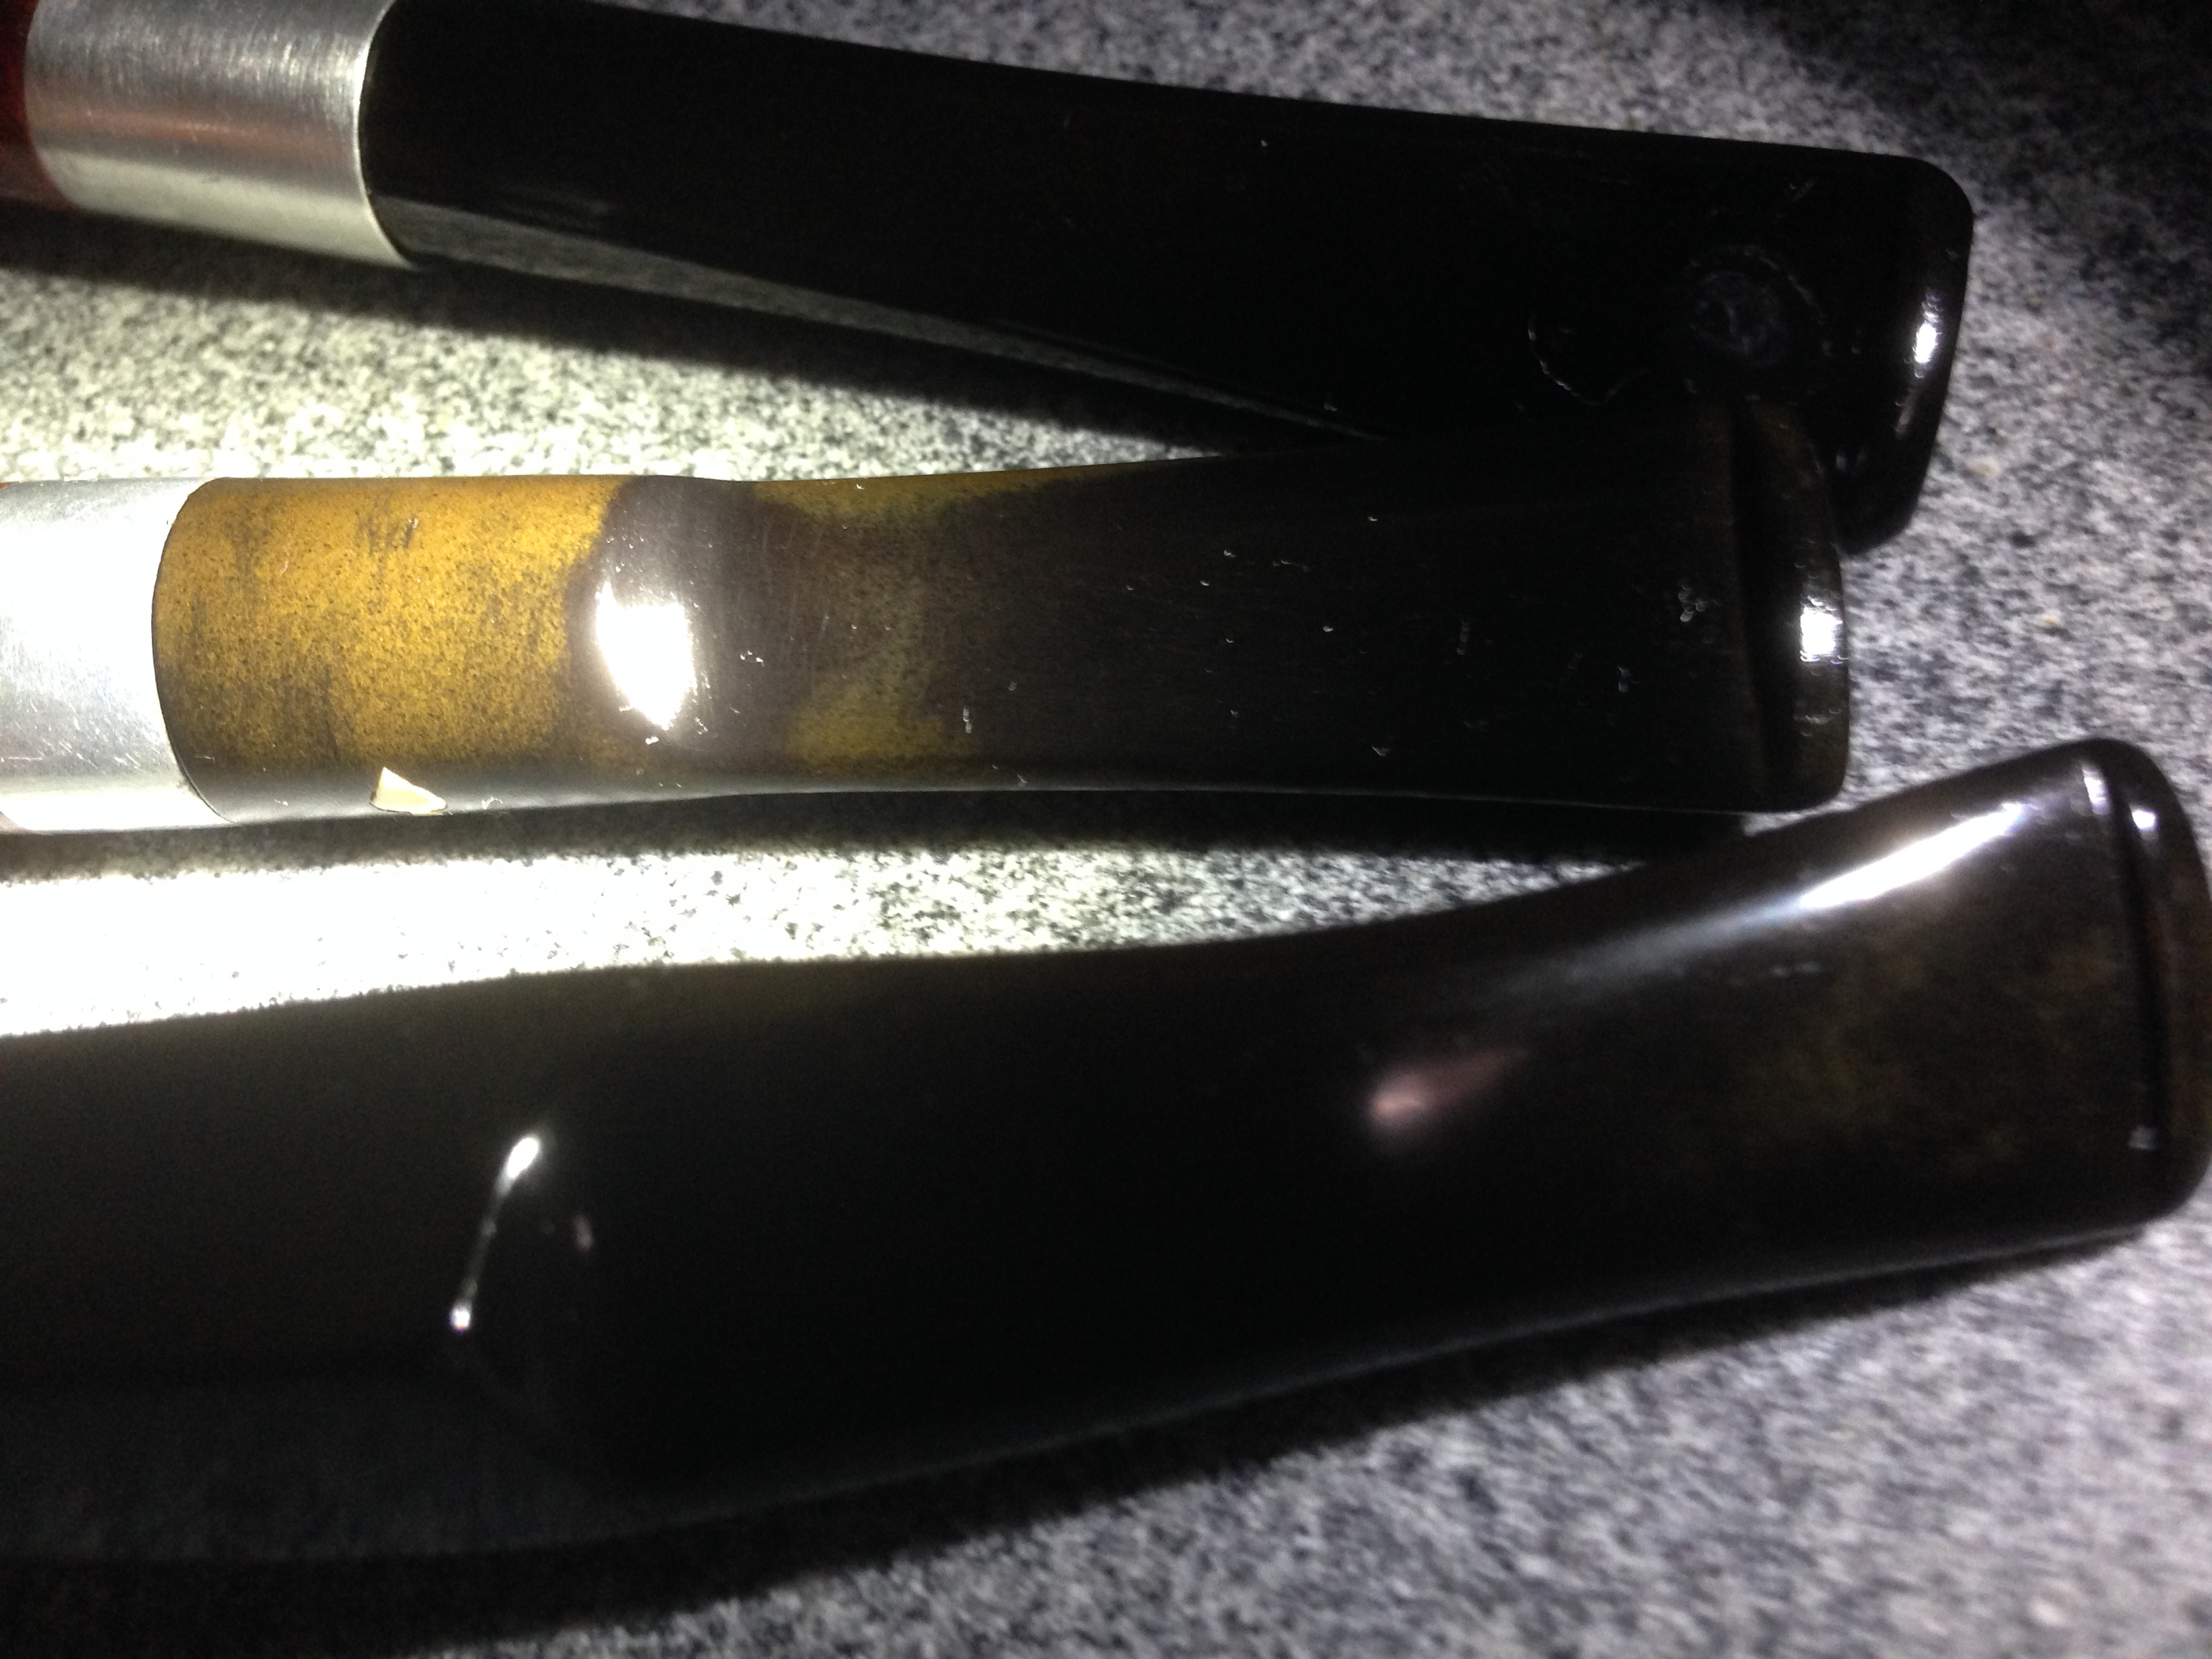
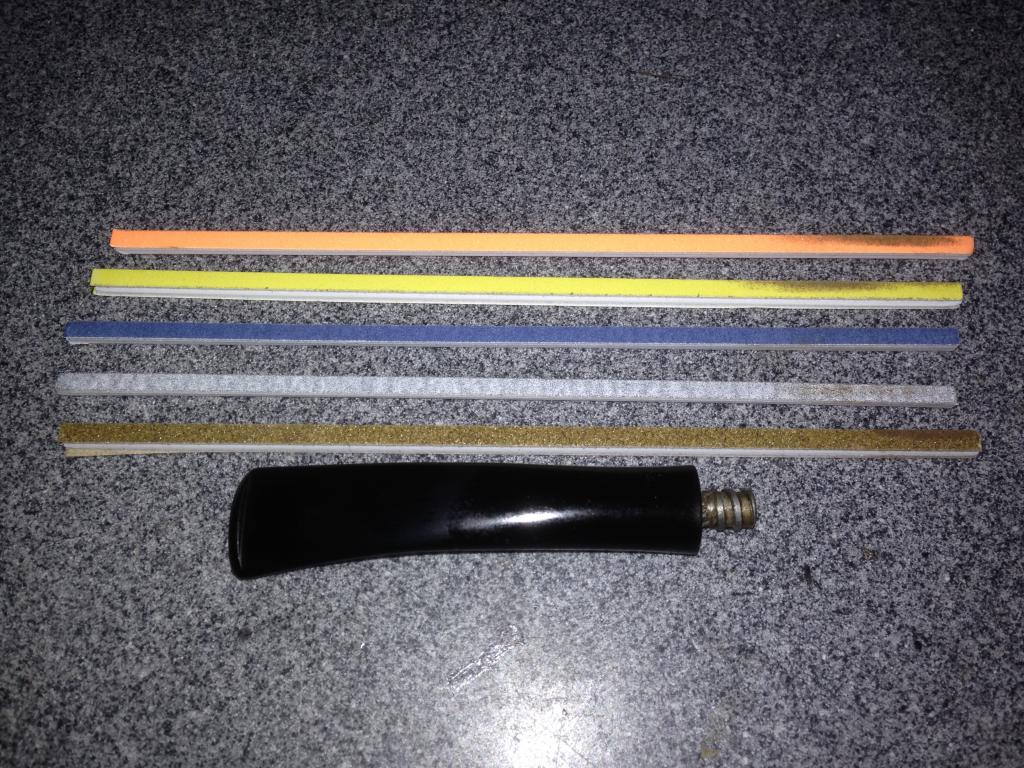
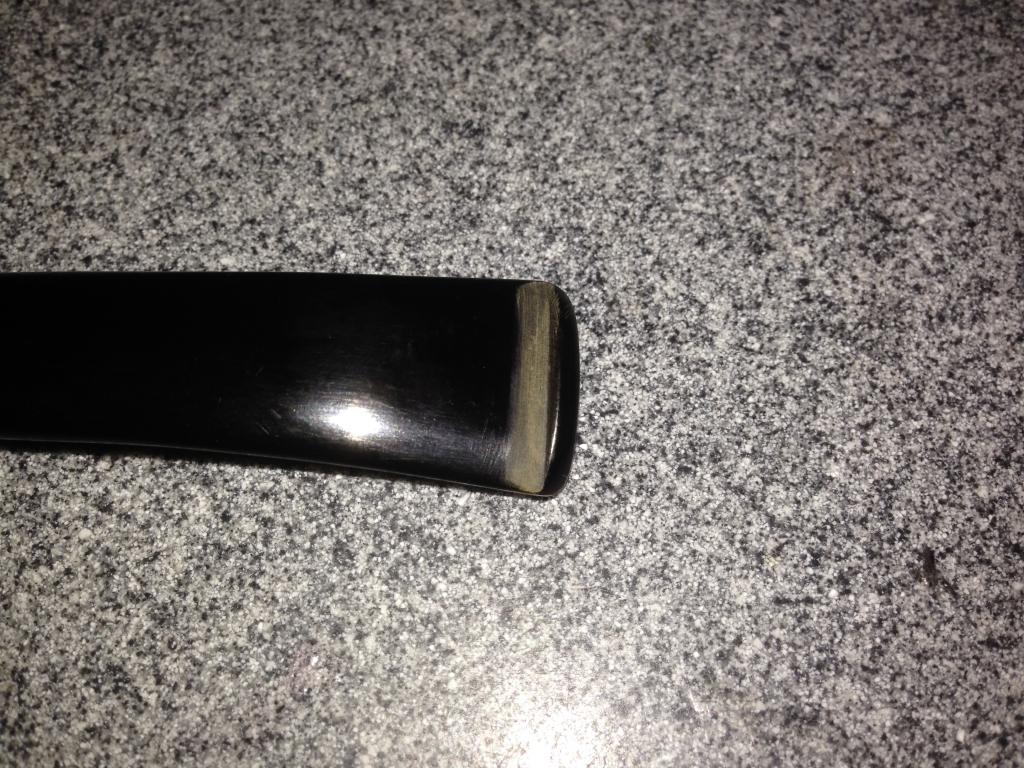
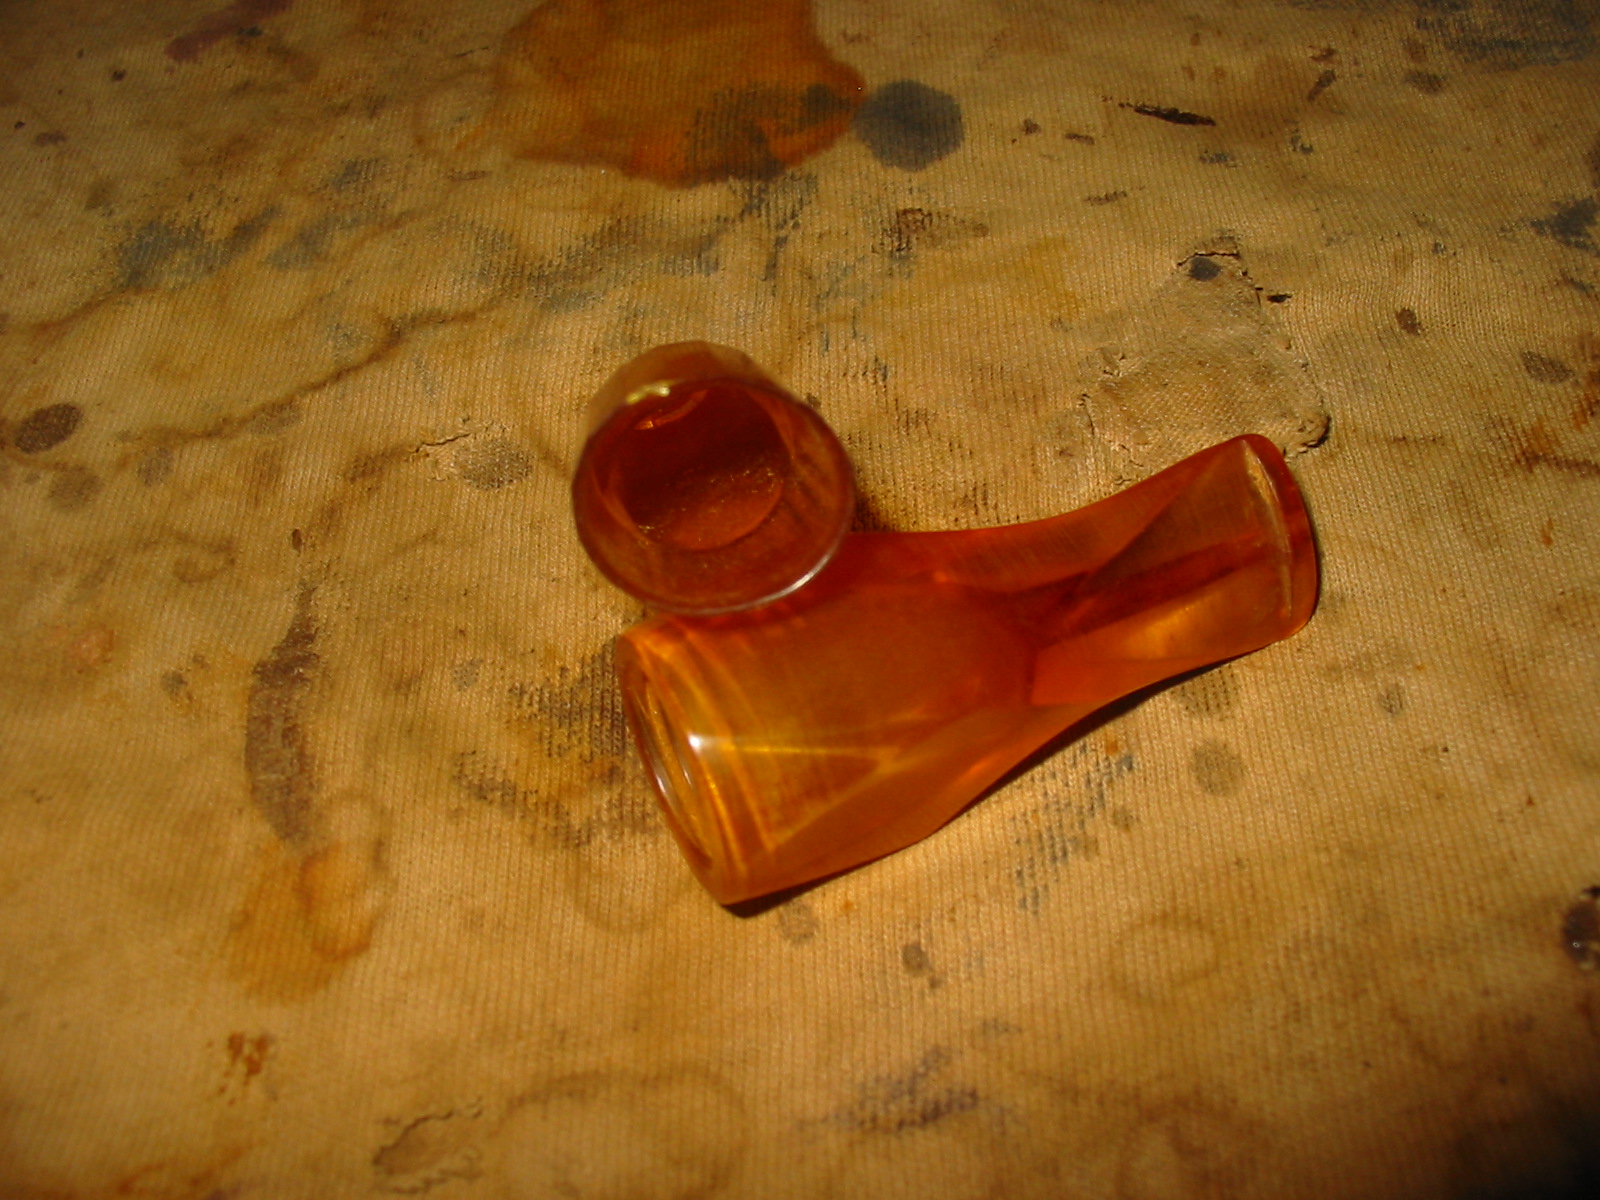
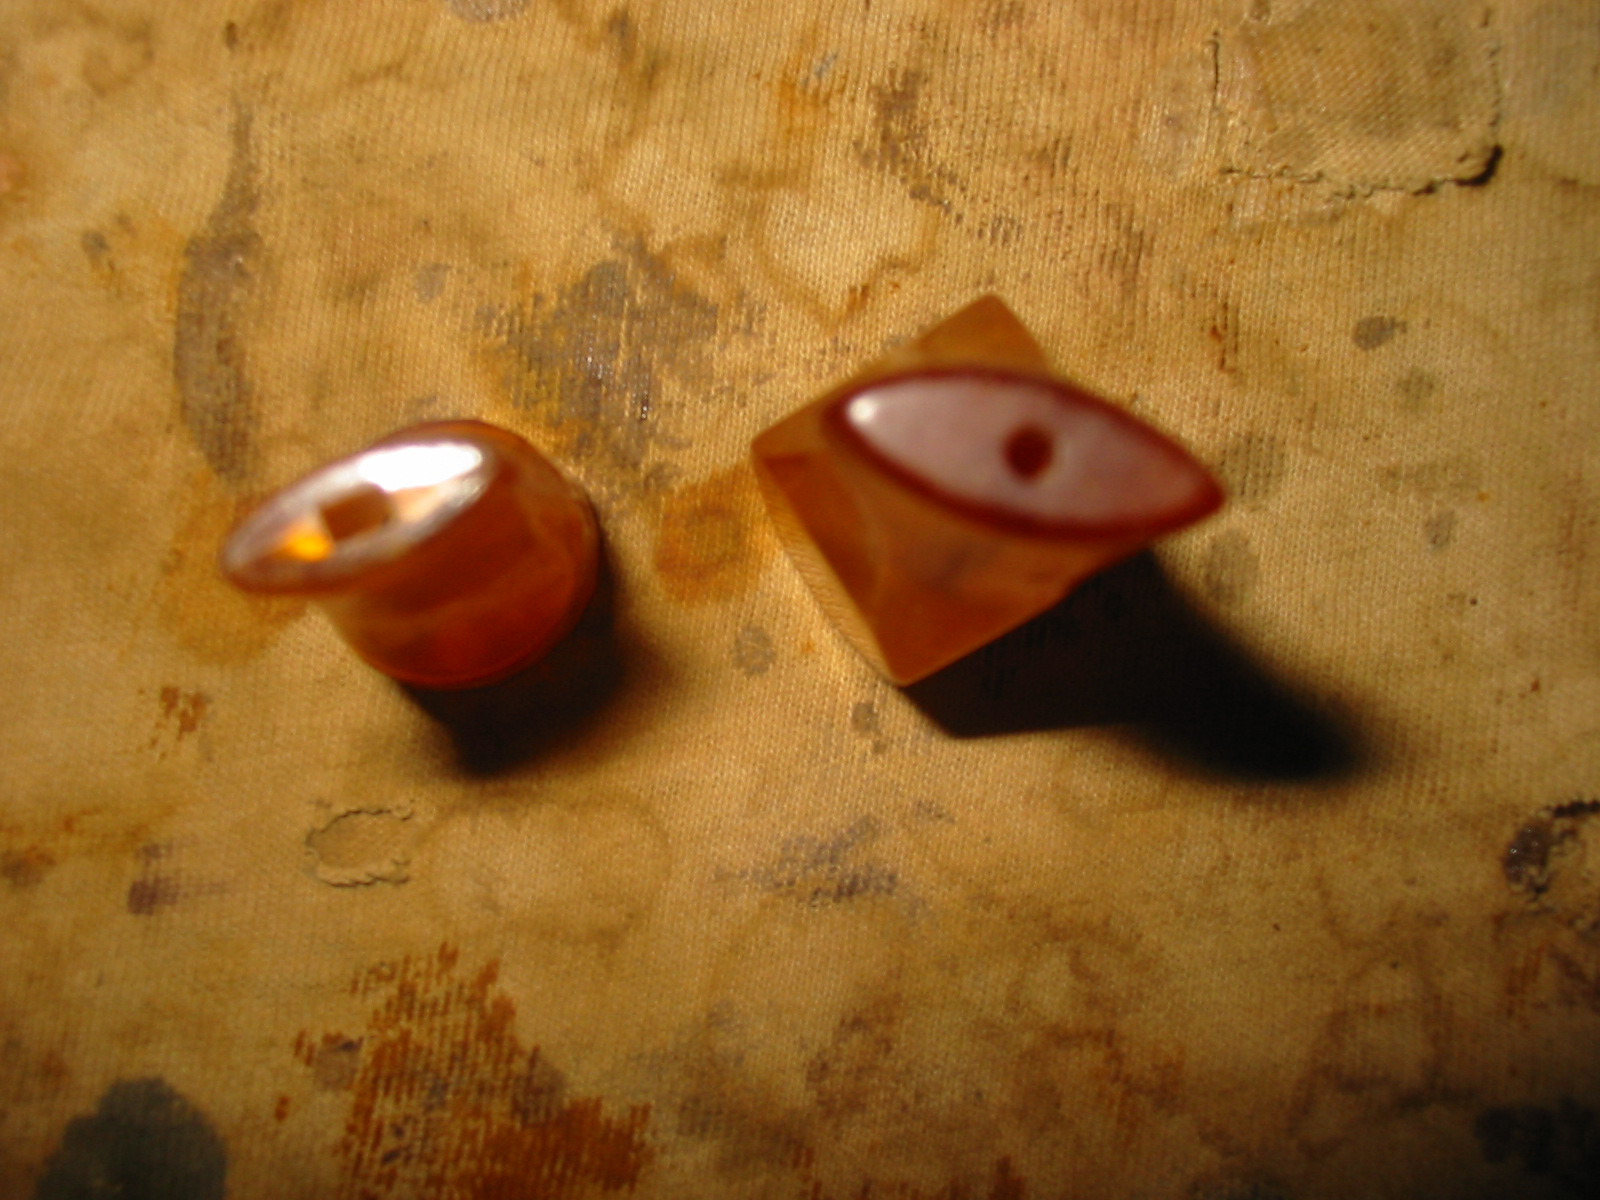
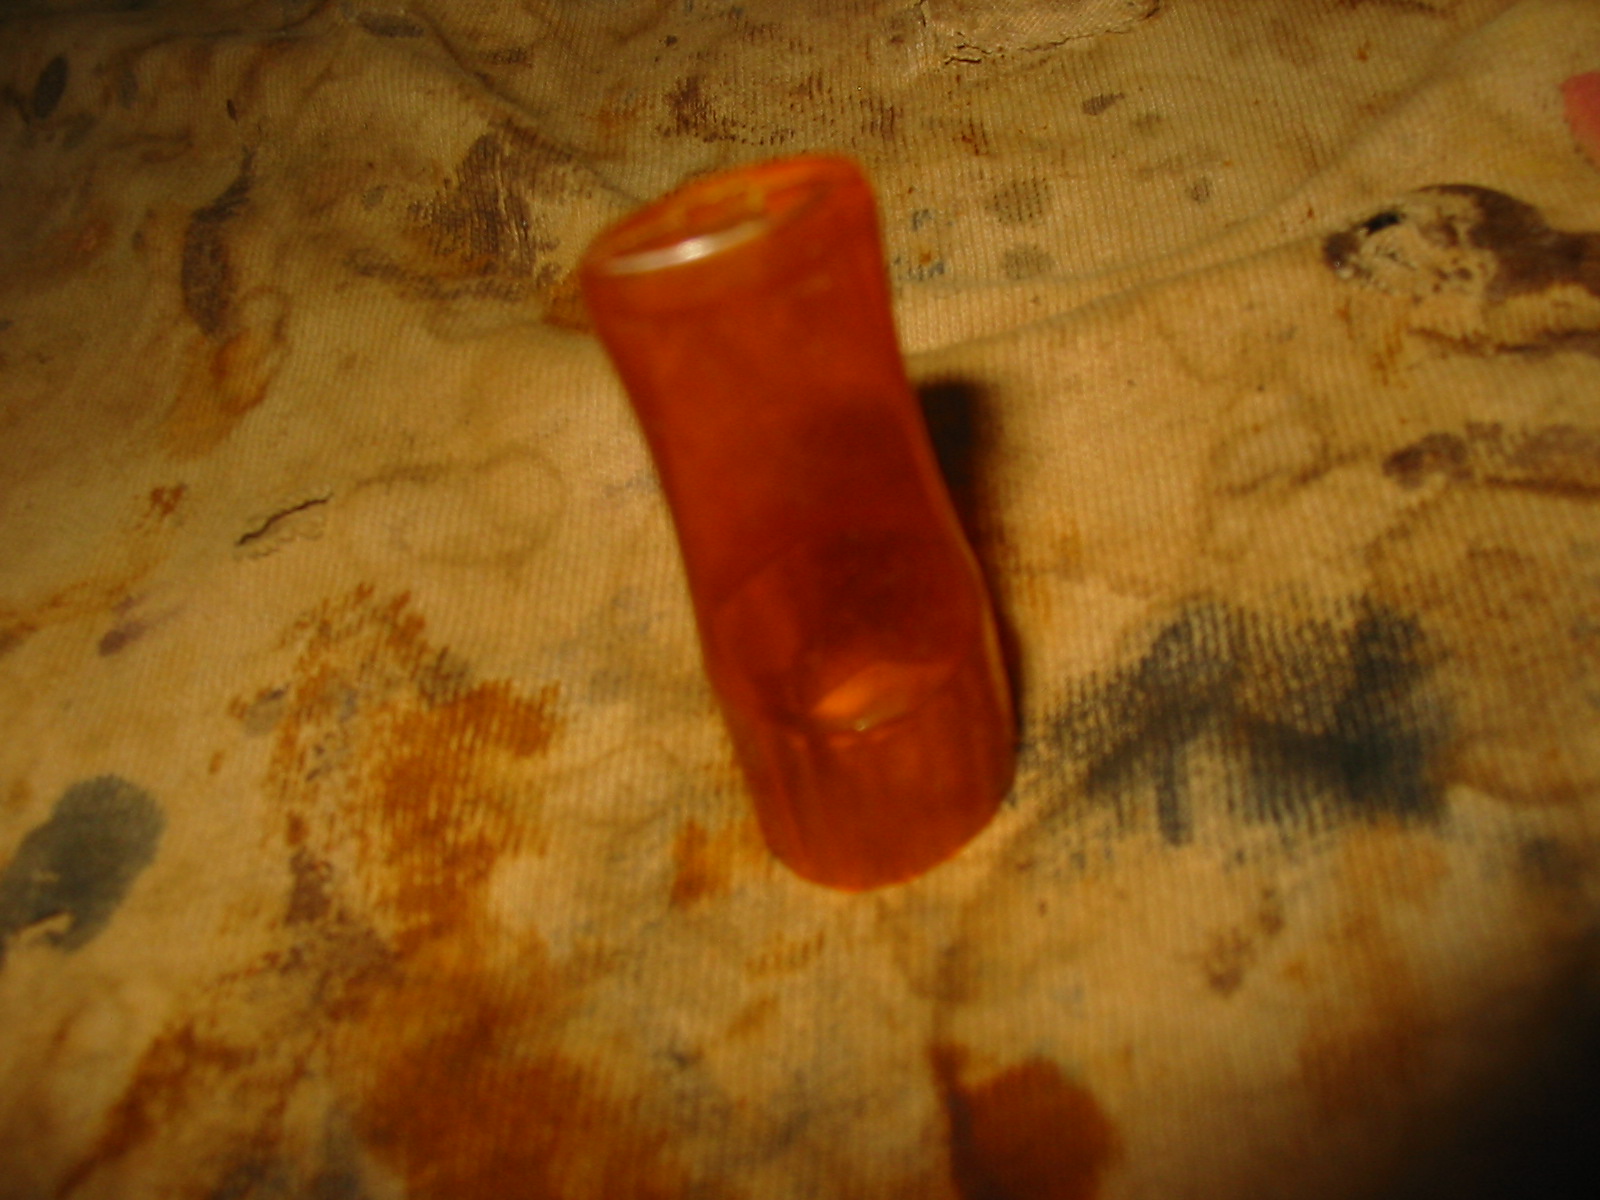
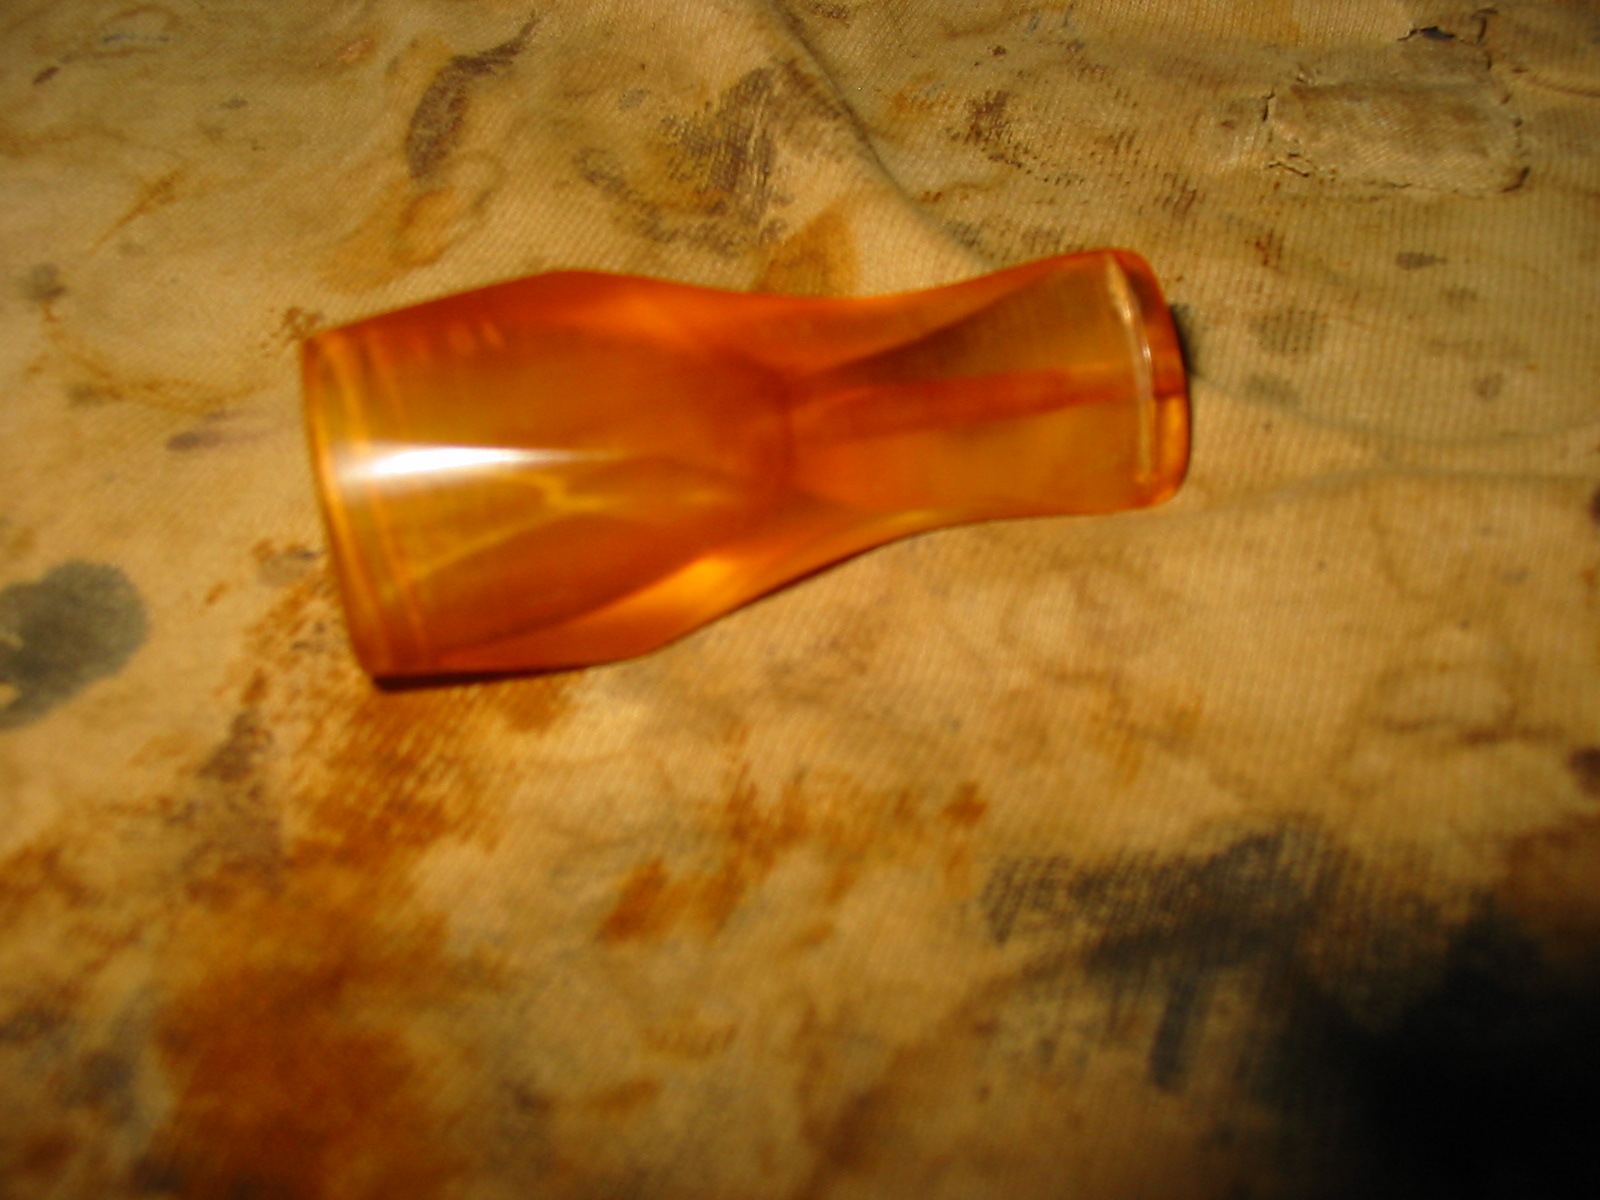
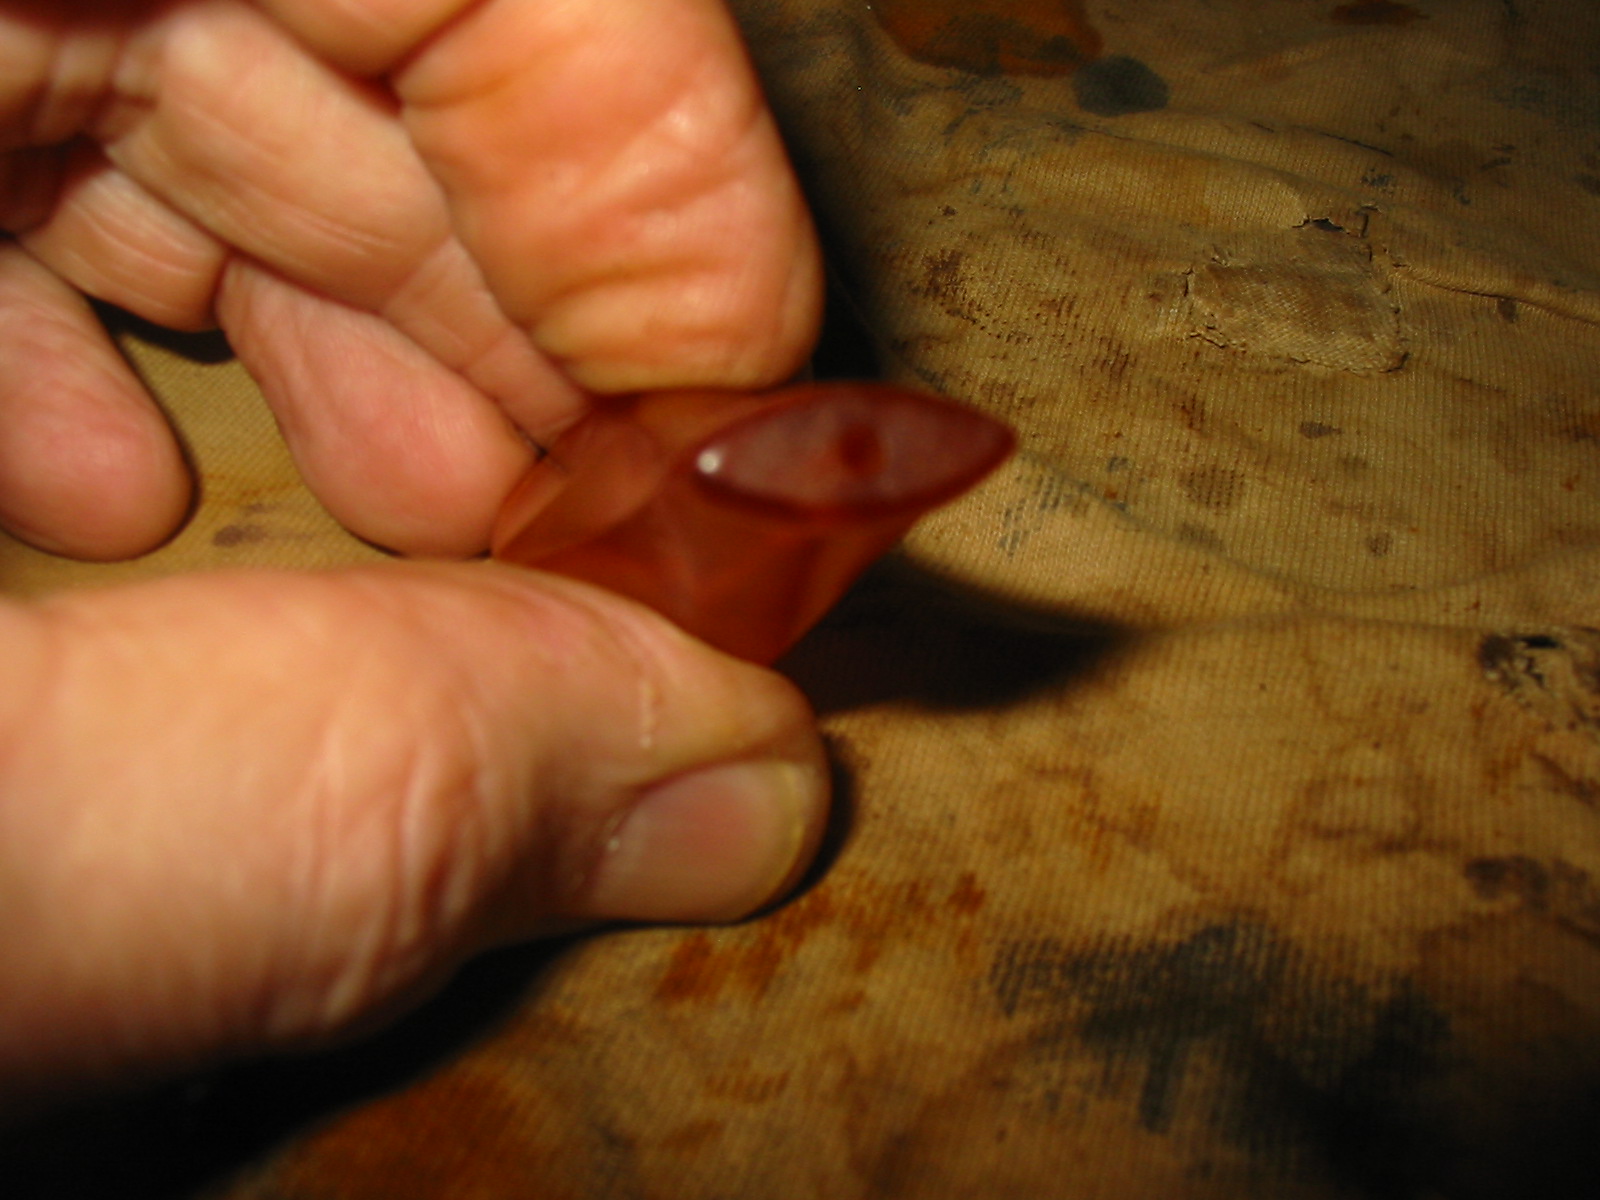
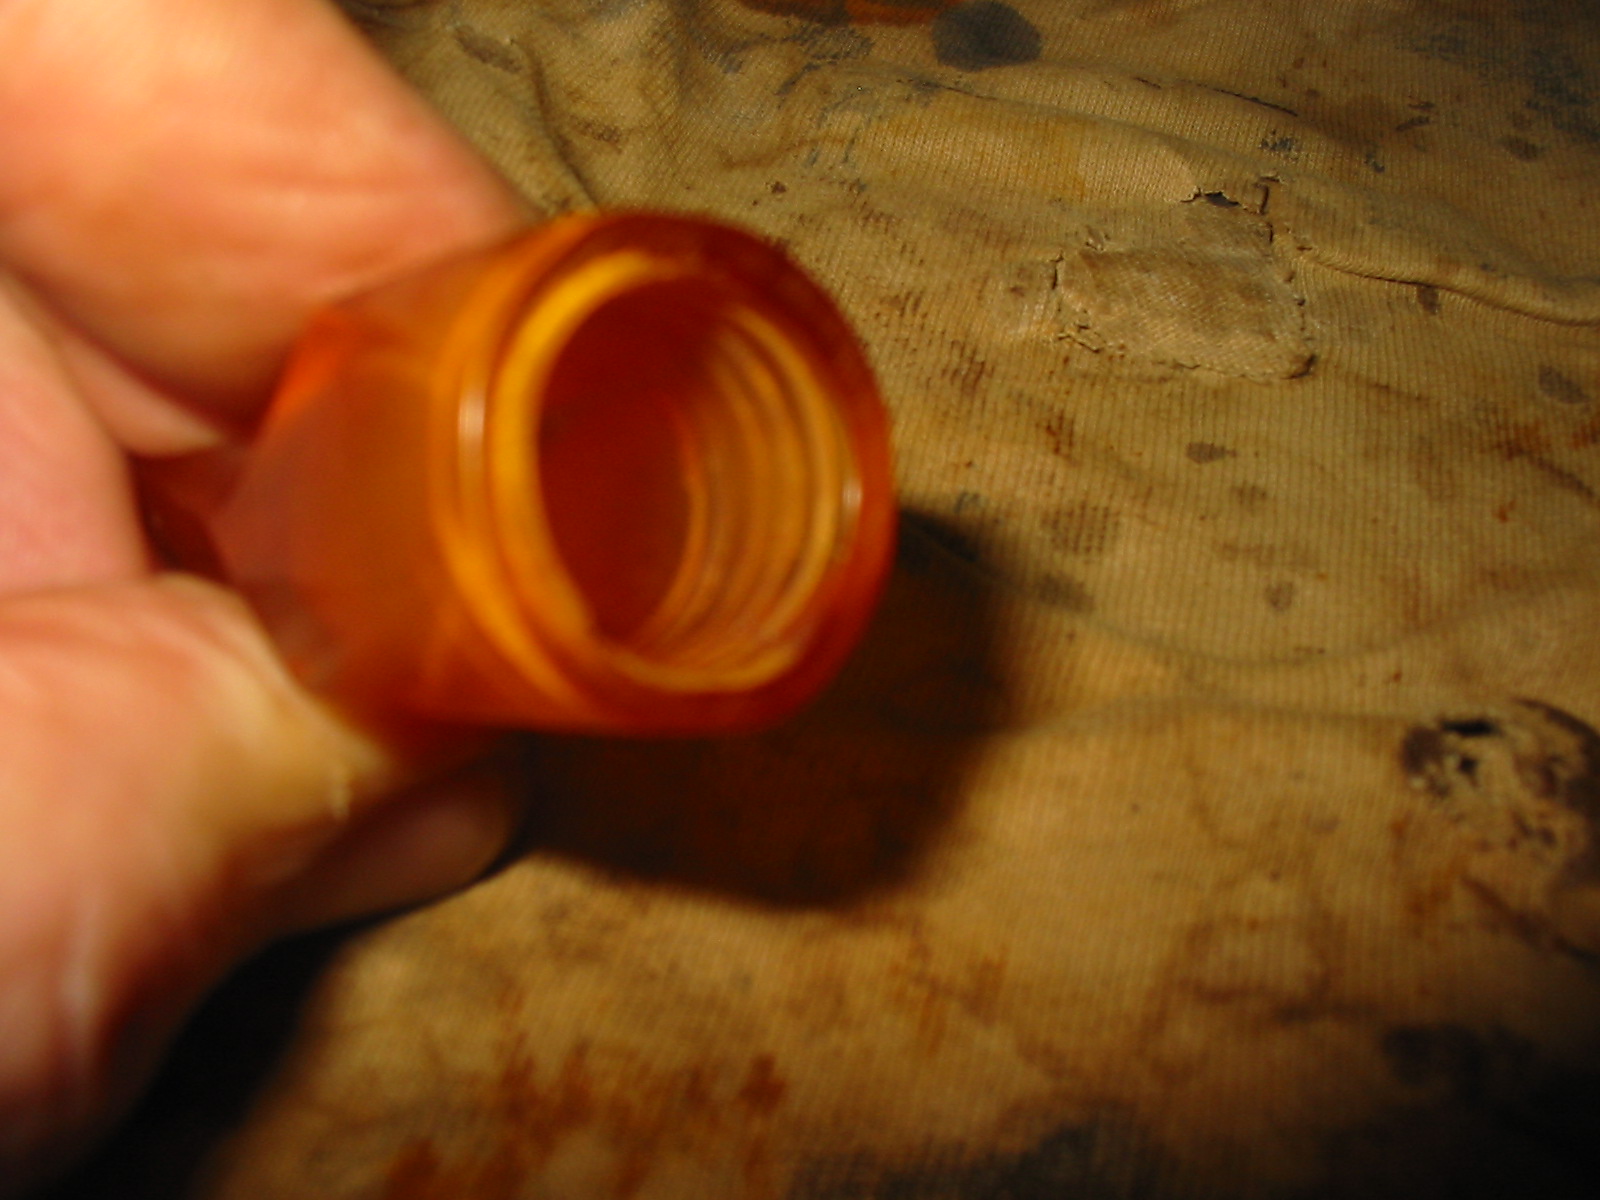
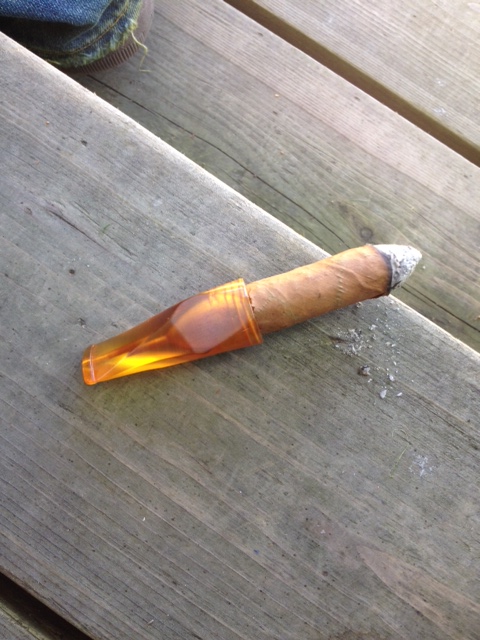
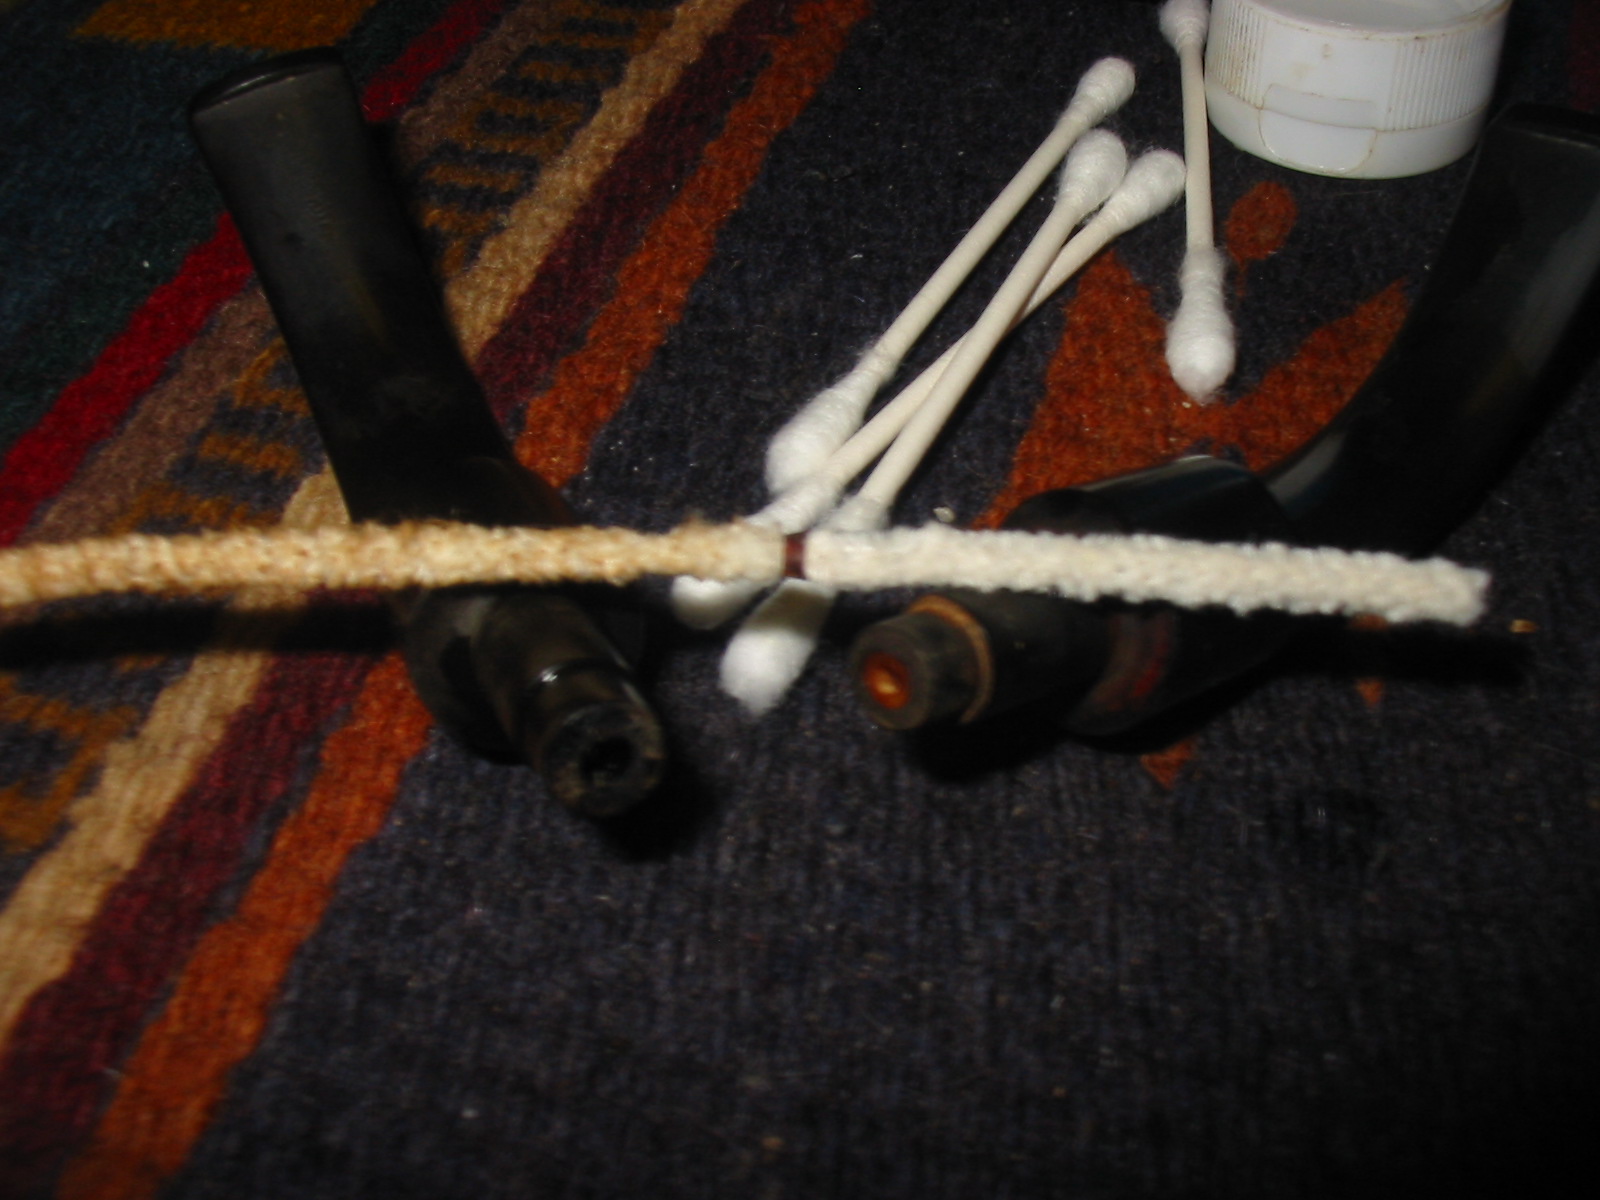
I wiped down the stems with isopropyl alcohol on a cotton pad and then cleaned out the inside with pipe cleaners. The opening/airway on the end of the tenon was very small so I had to work to push the pipe cleaner into place. I had not seen an airway this constricted in a long time. The draw on the pipe was very tight; it was like pulling air through a coffee stirrer. When I pulled the pipe cleaner out a small ring came out with it. It is visible in the photo of the pipe cleaner below. The stem on the left is the one that the ring came out of and the stem on the right still has the ring. It appears to be made of brass and is a thin ring that constricts the airway for about 1/16th of an inch. With the ring removed the draw was very open. I continued to clean out the stem and airway until it was spotless and the pipe cleaners came out clean. I cleaned the end of the tenon with cotton swabs and isopropyl alcohol.
IMG_6863
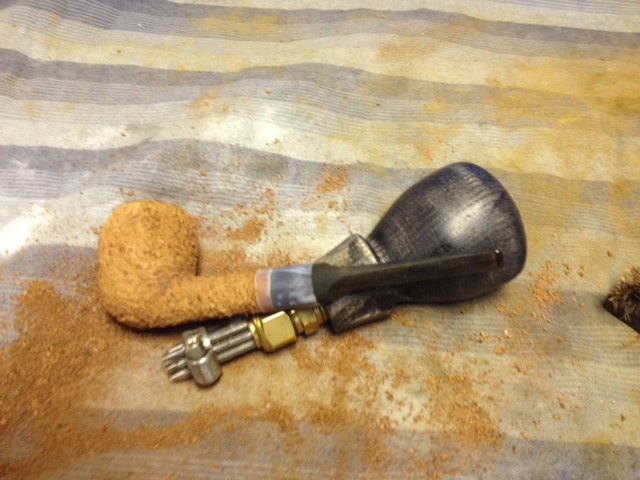
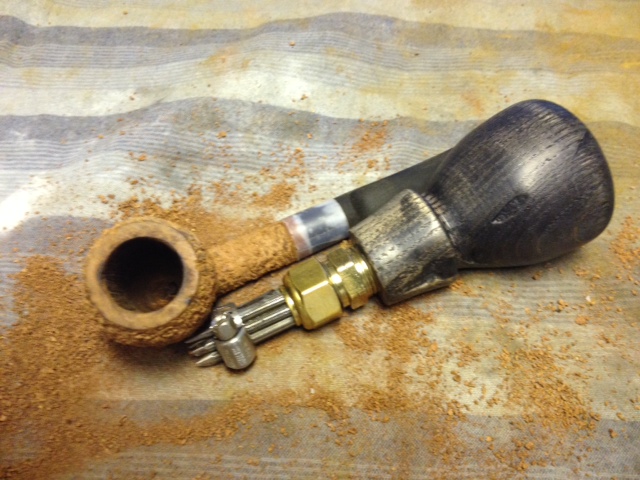
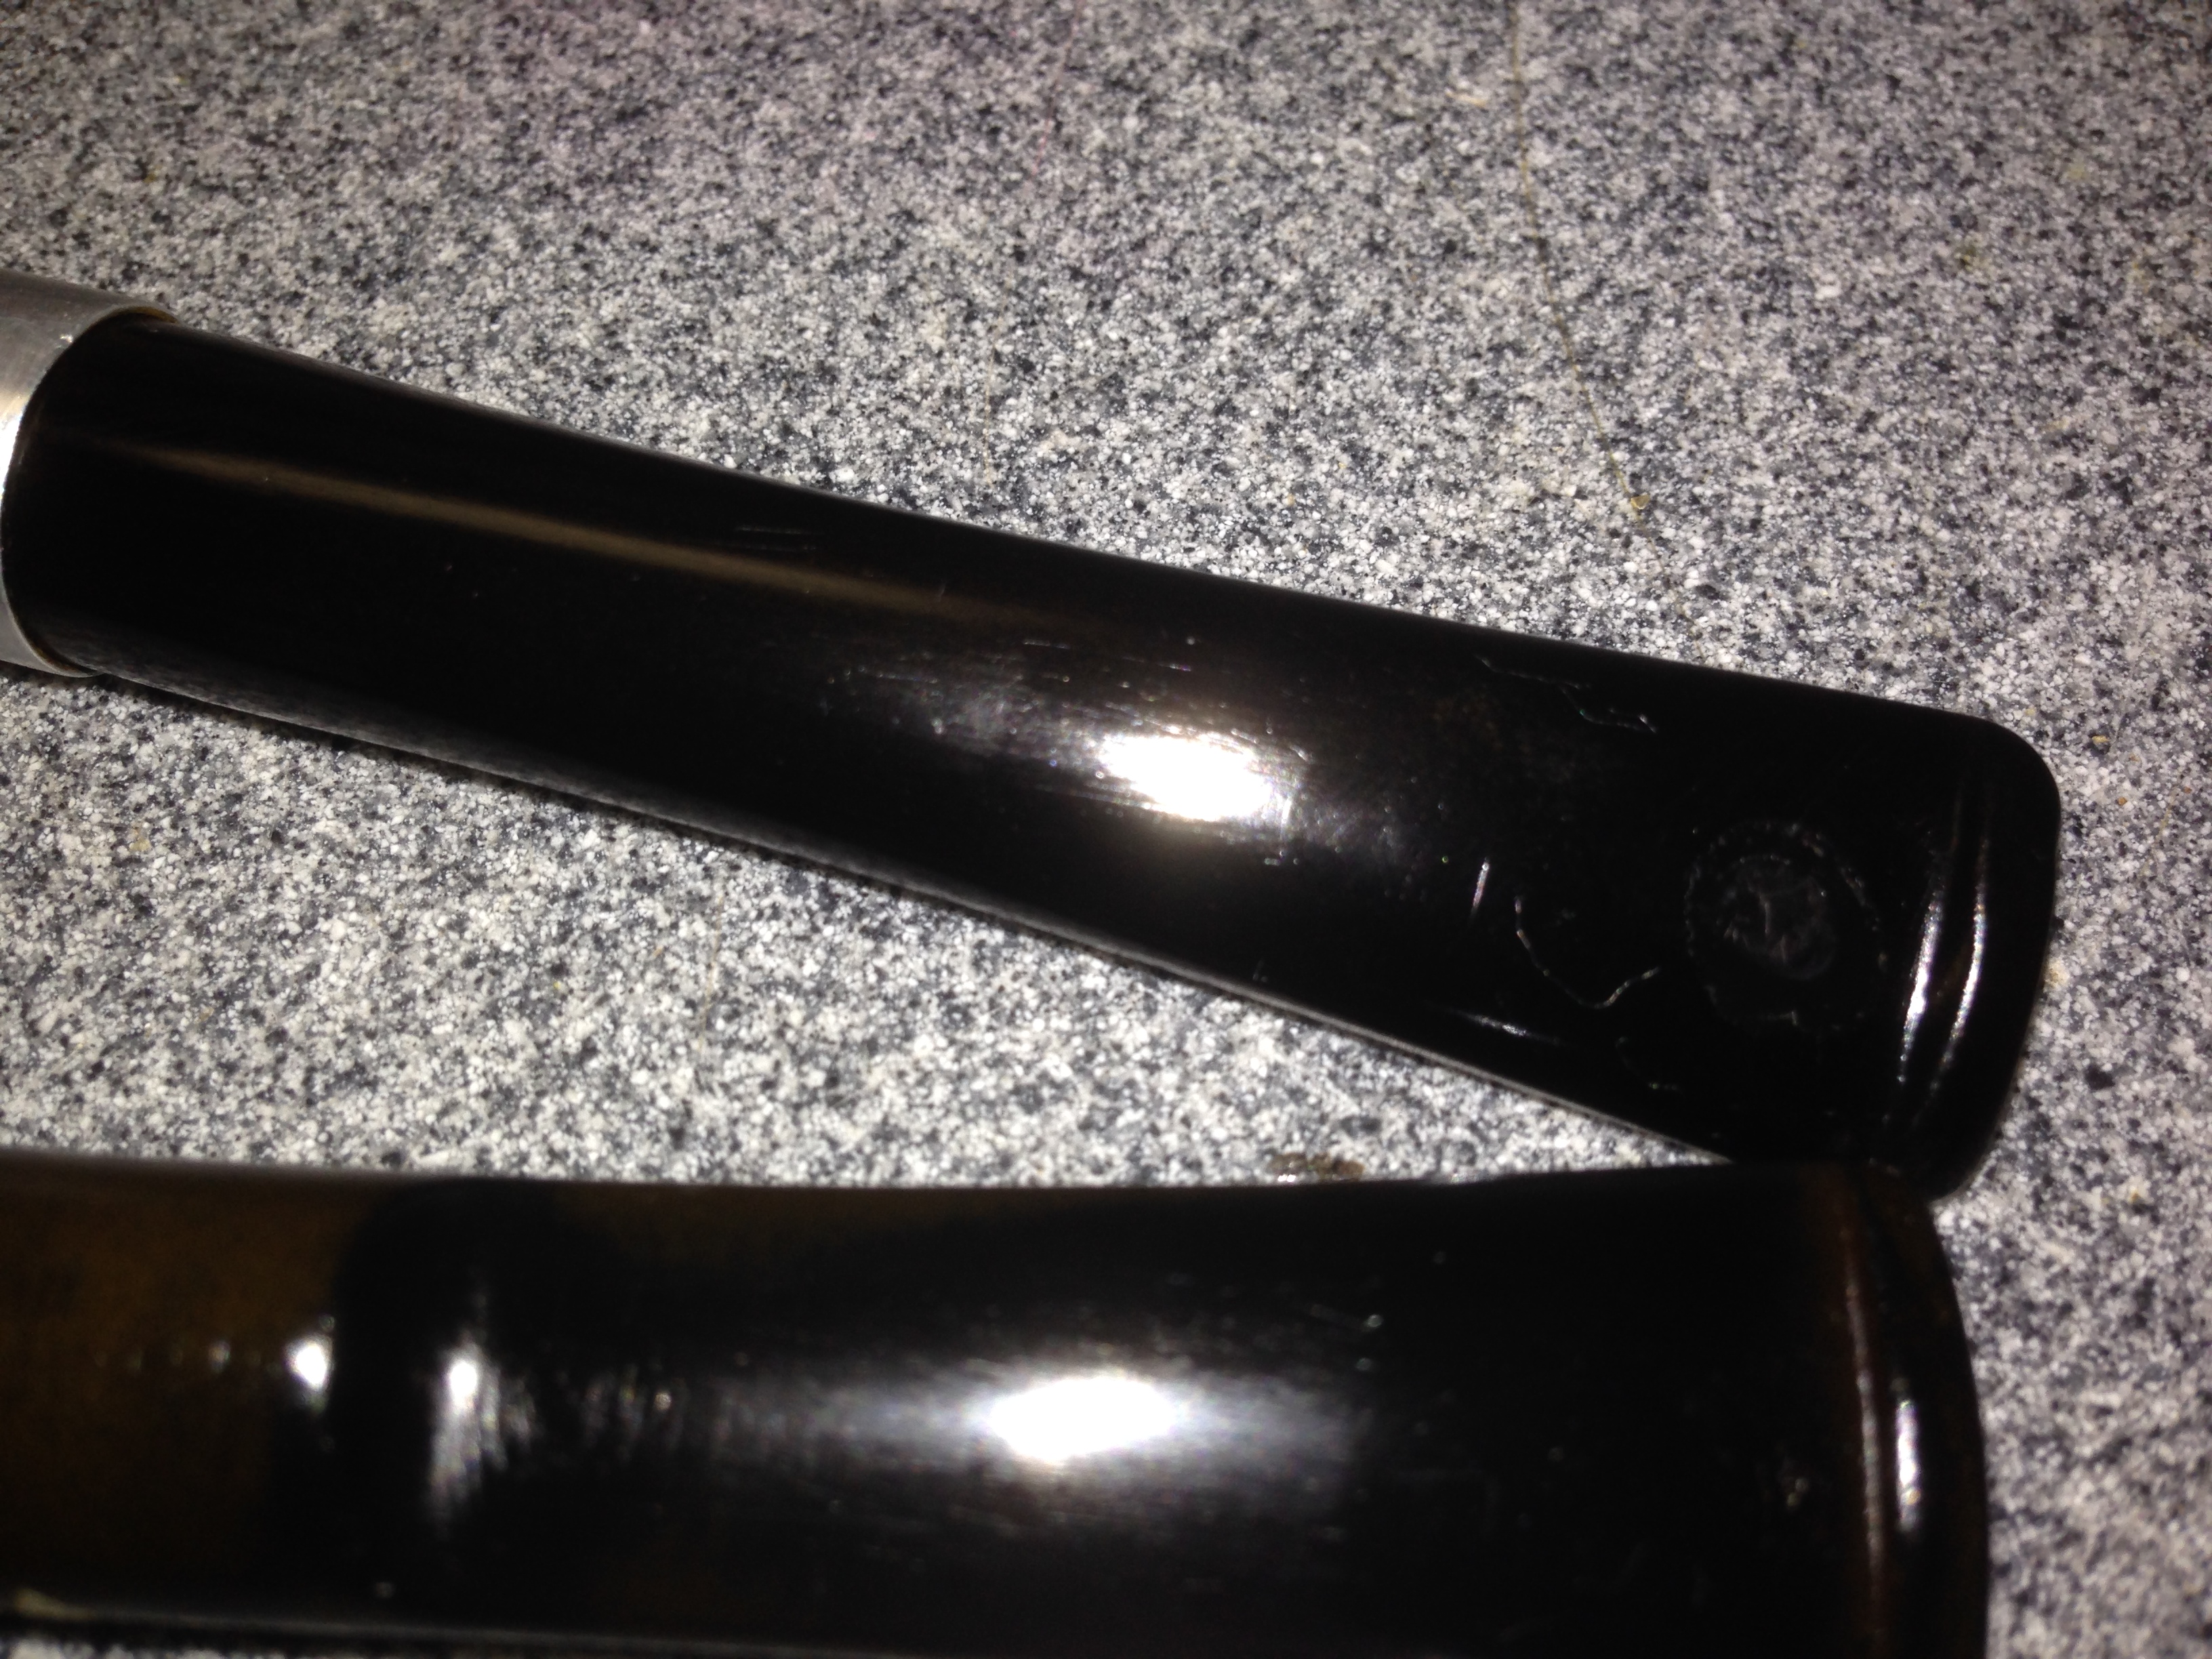
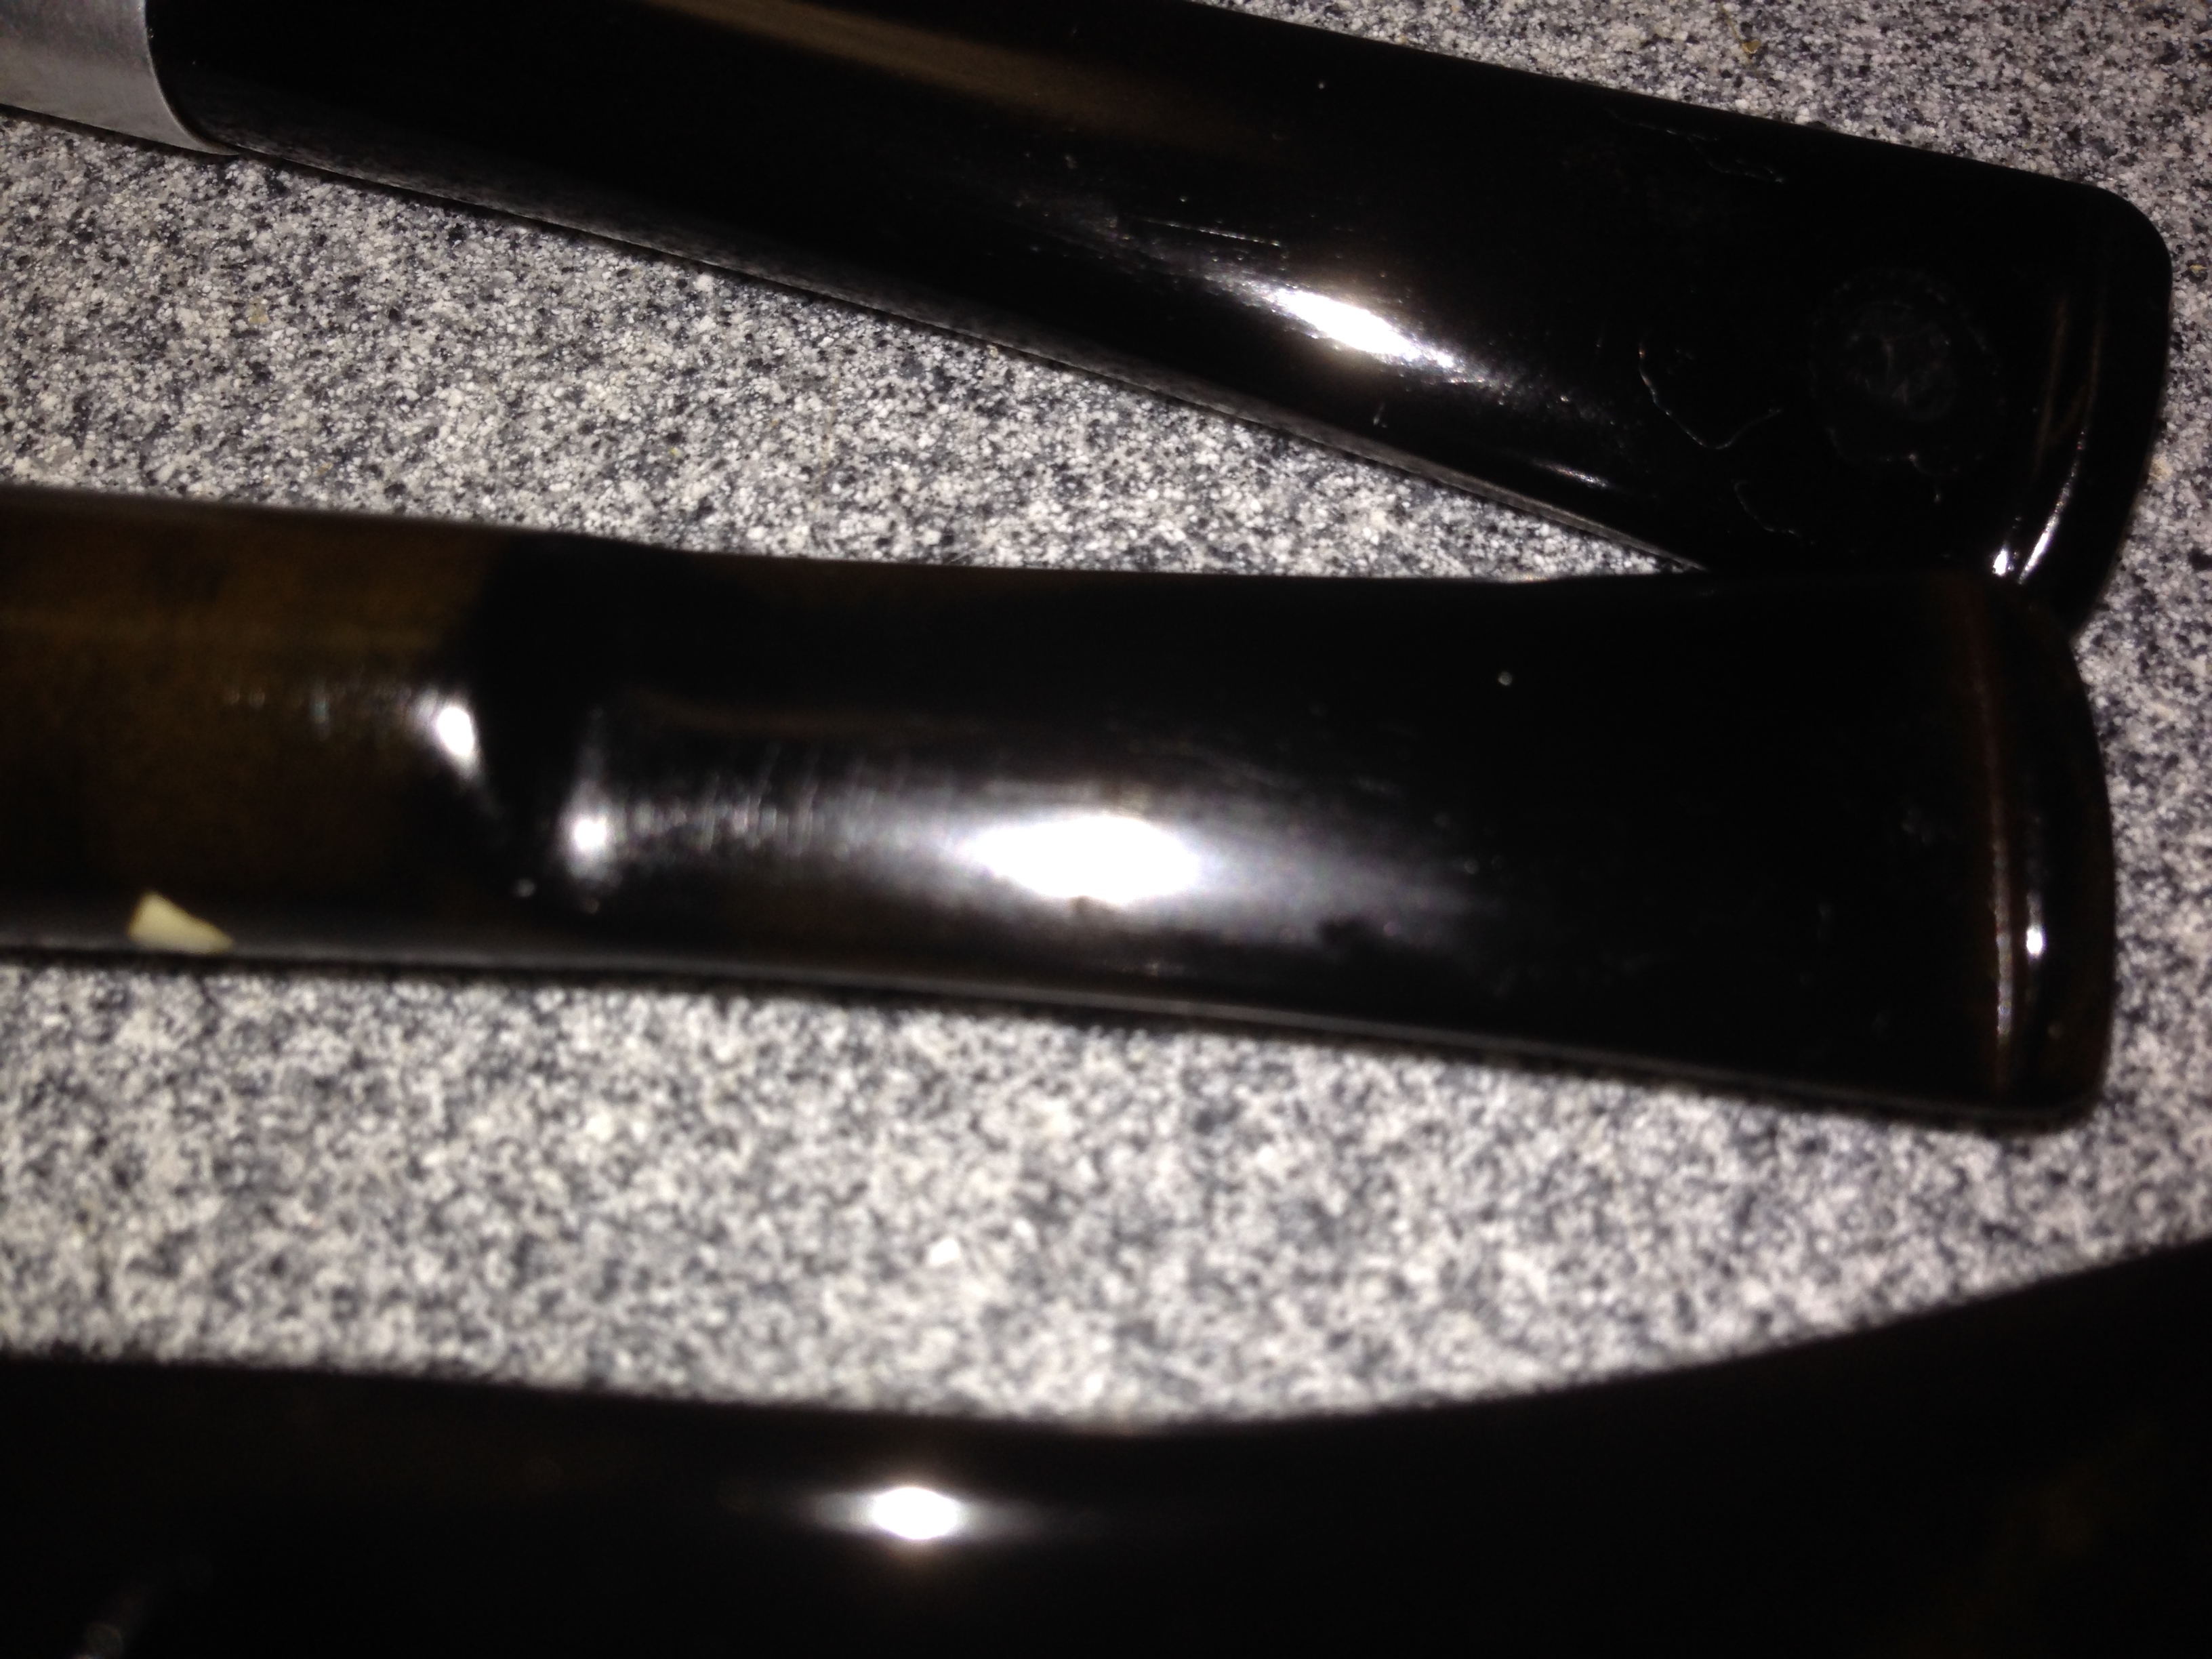
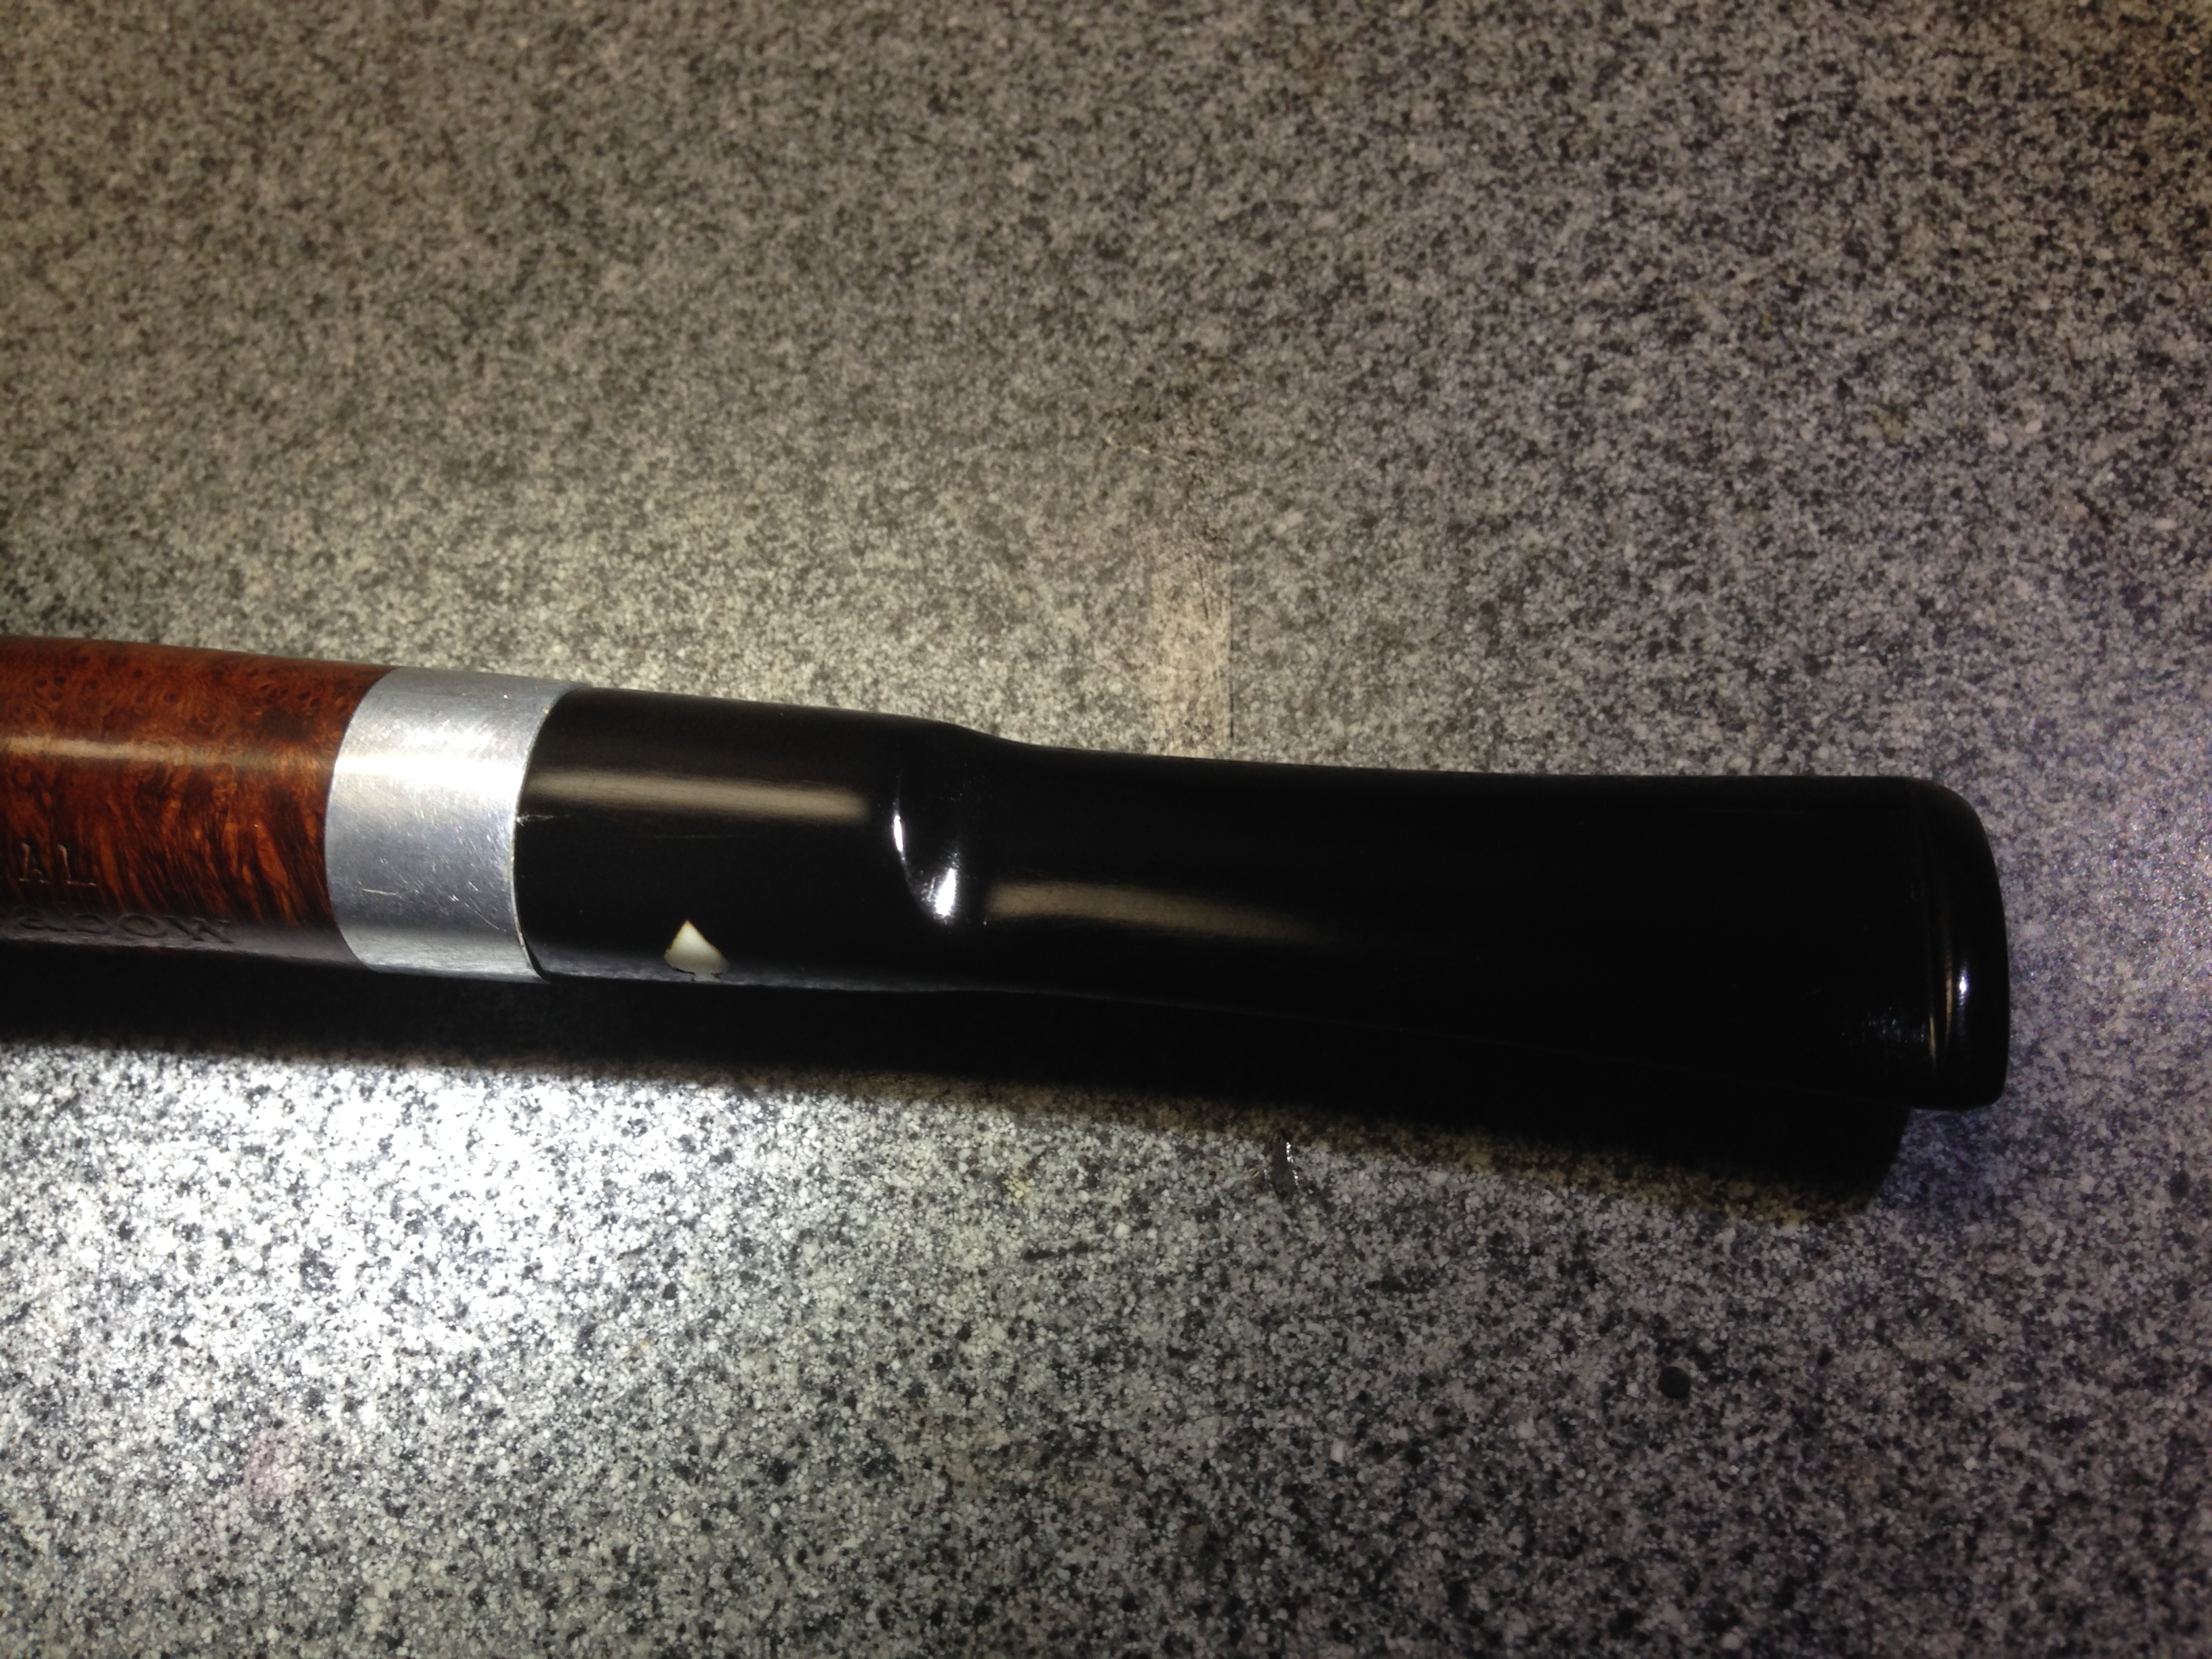
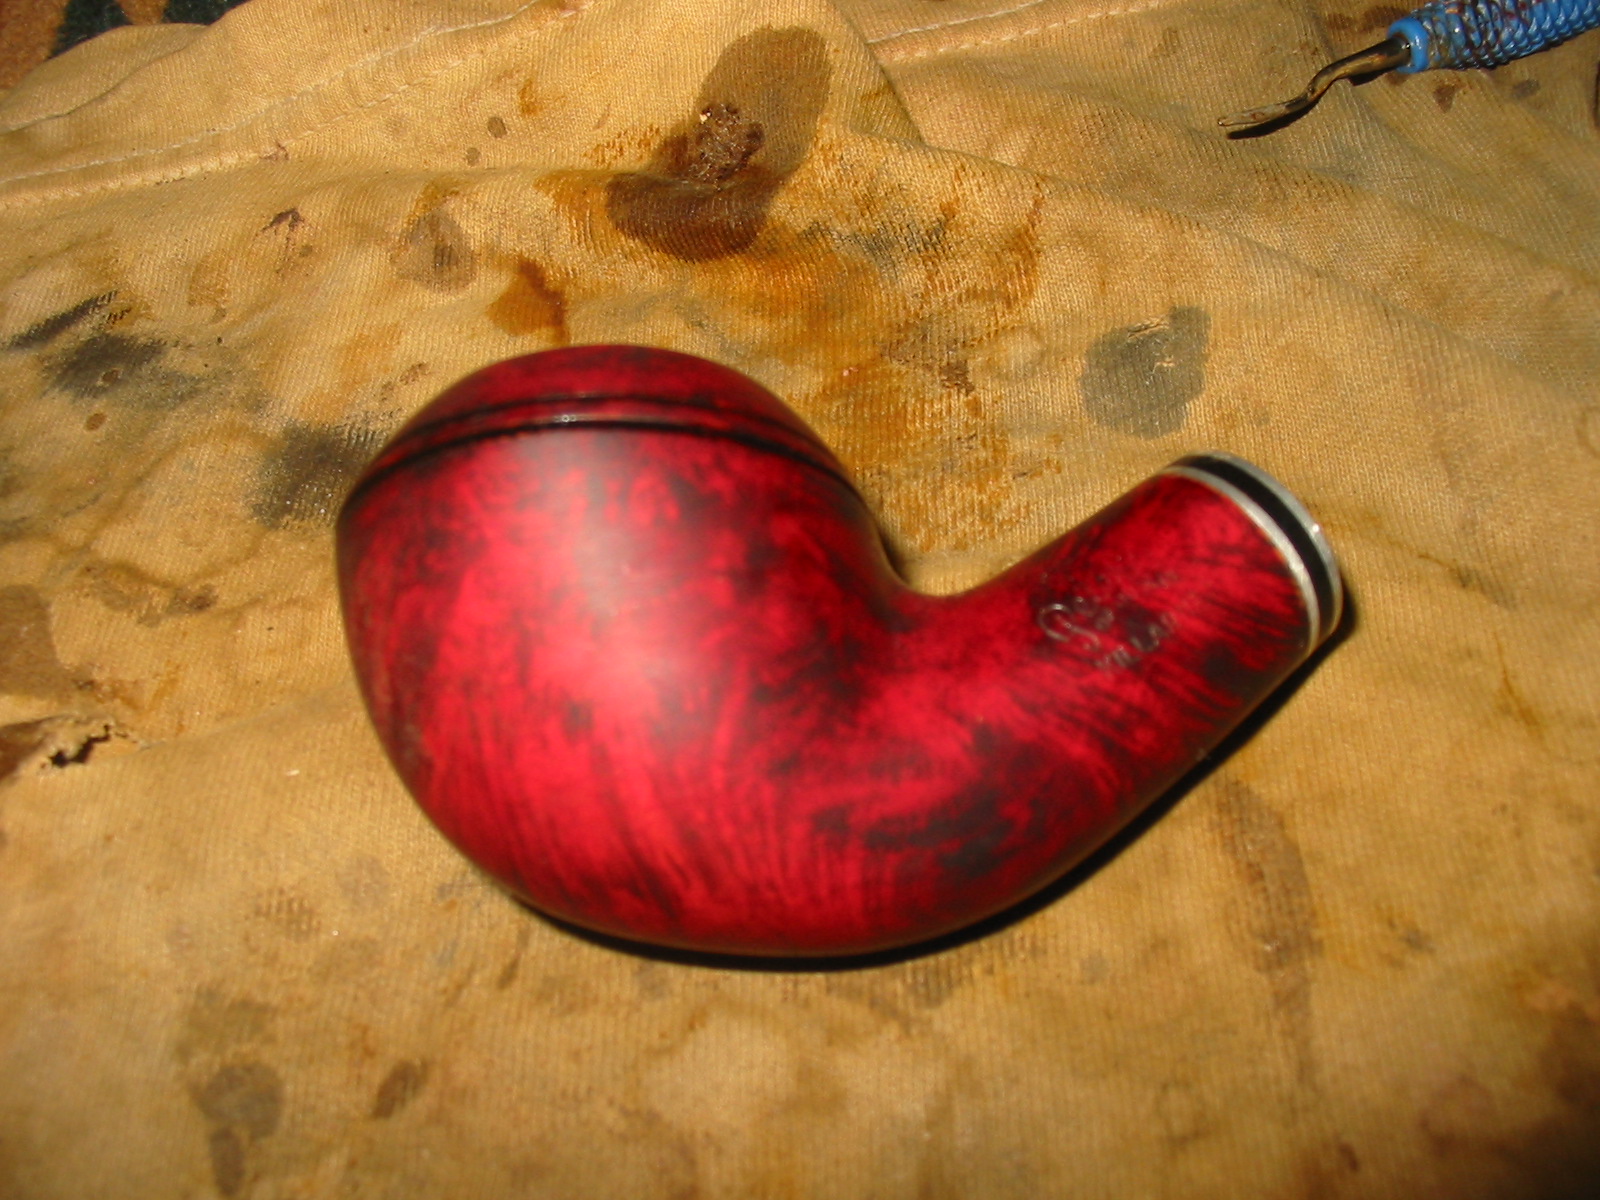
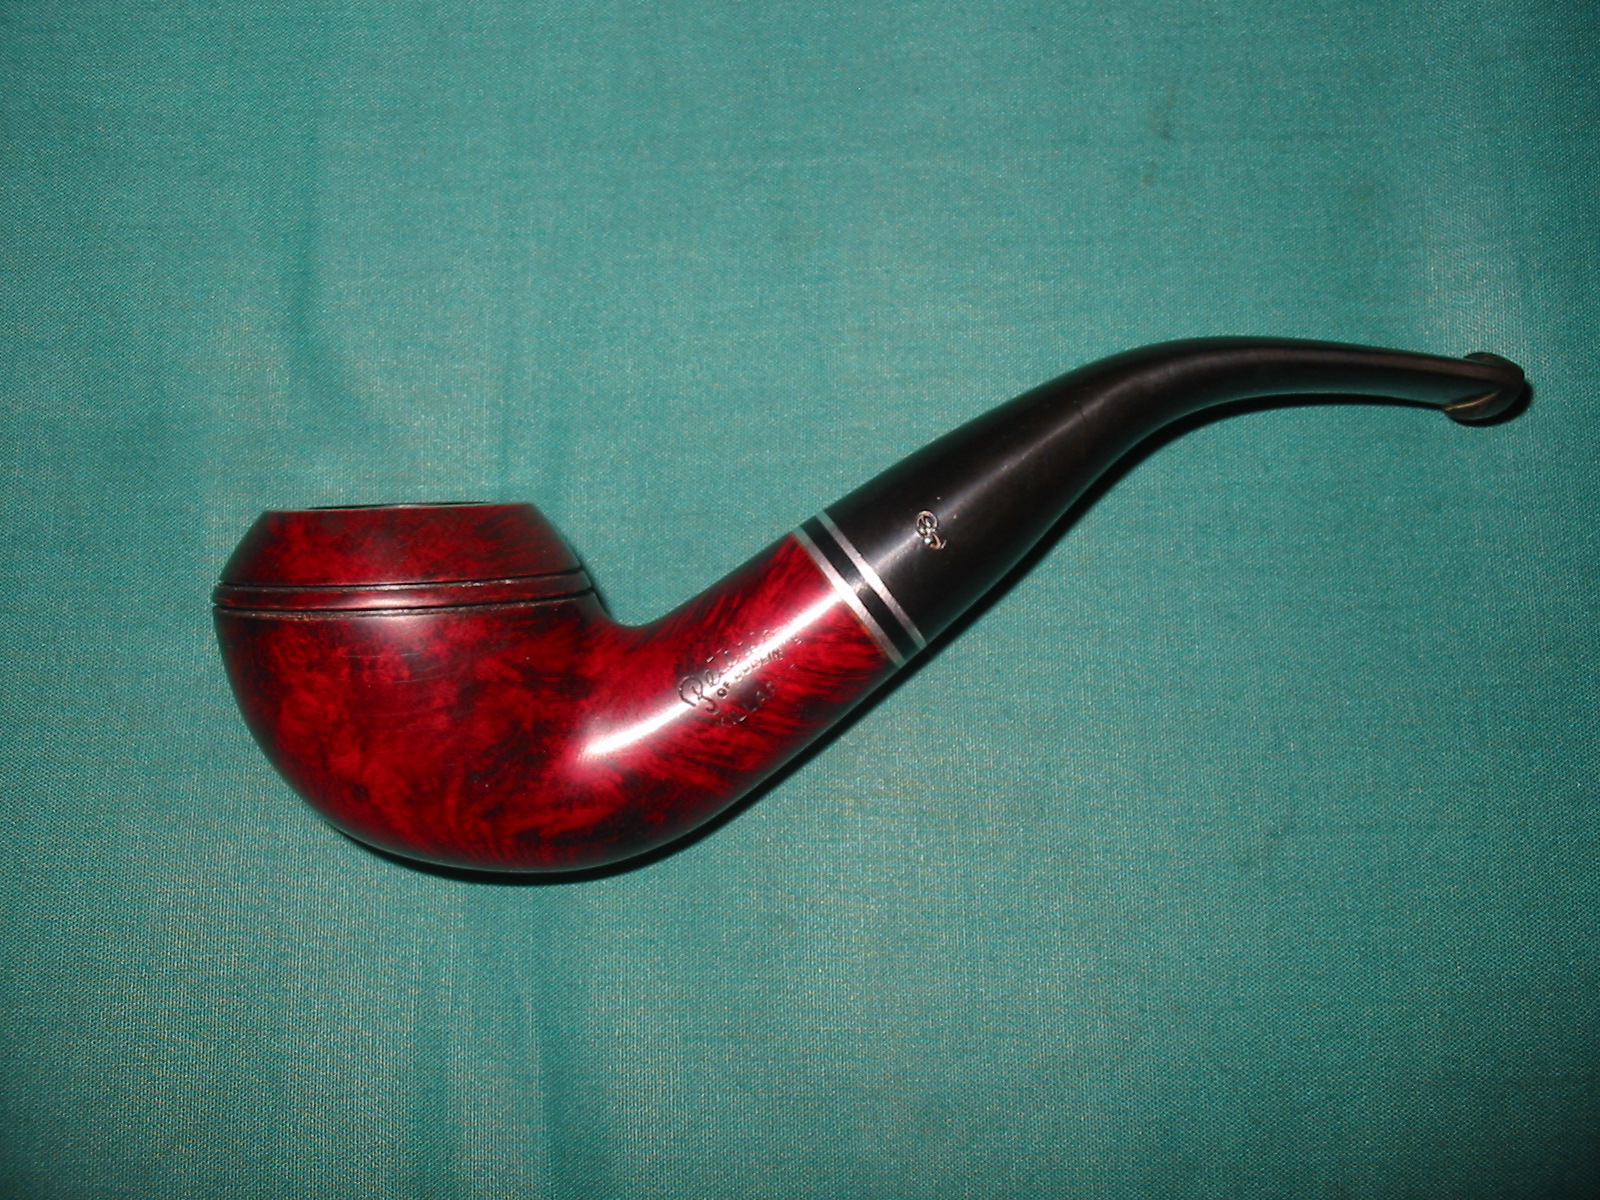
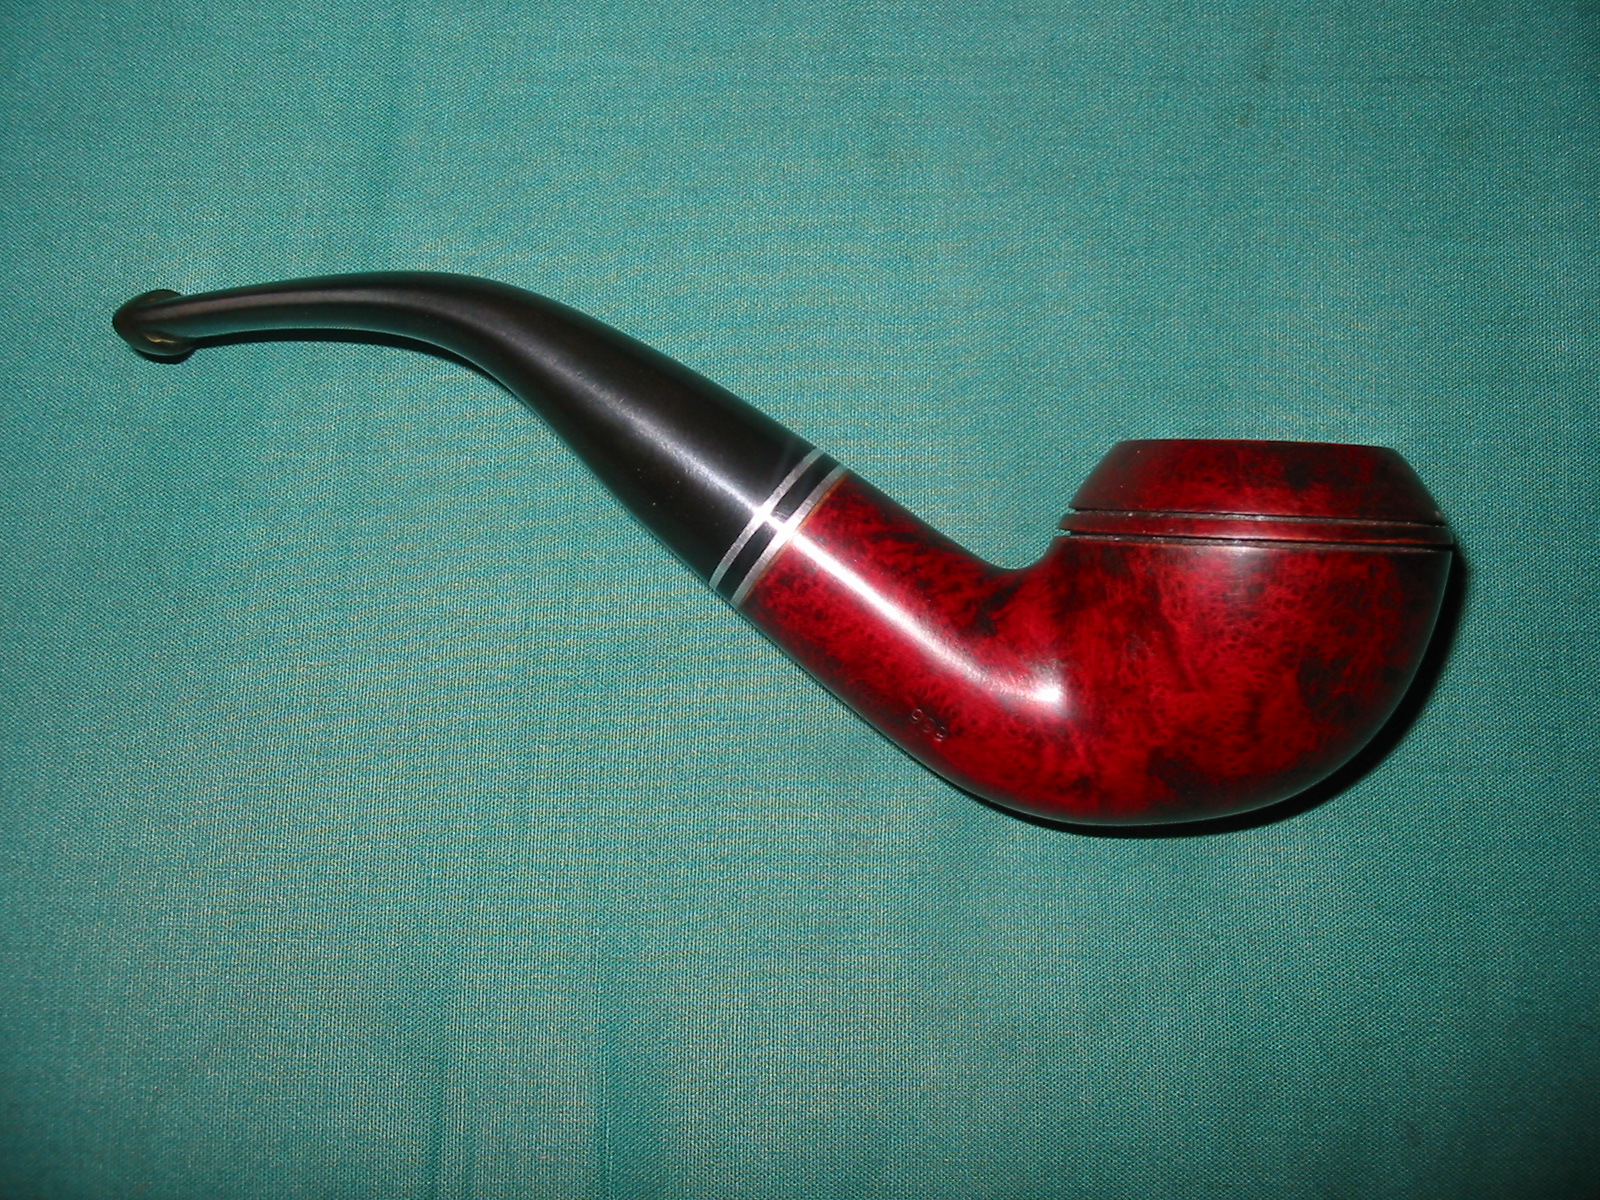
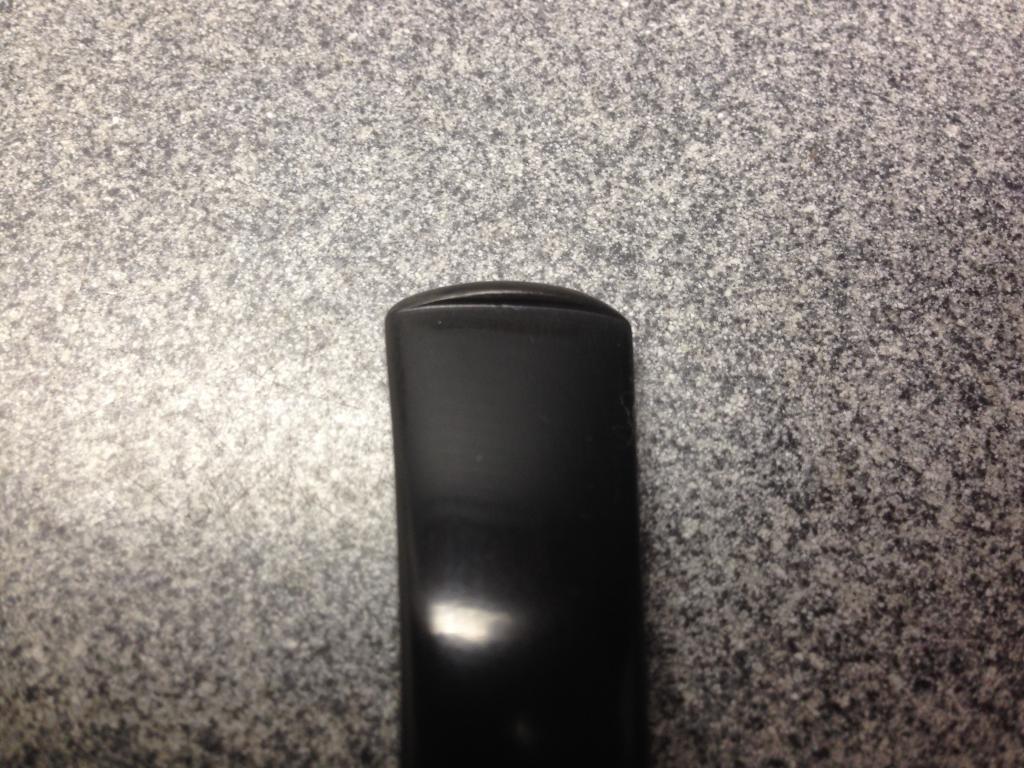
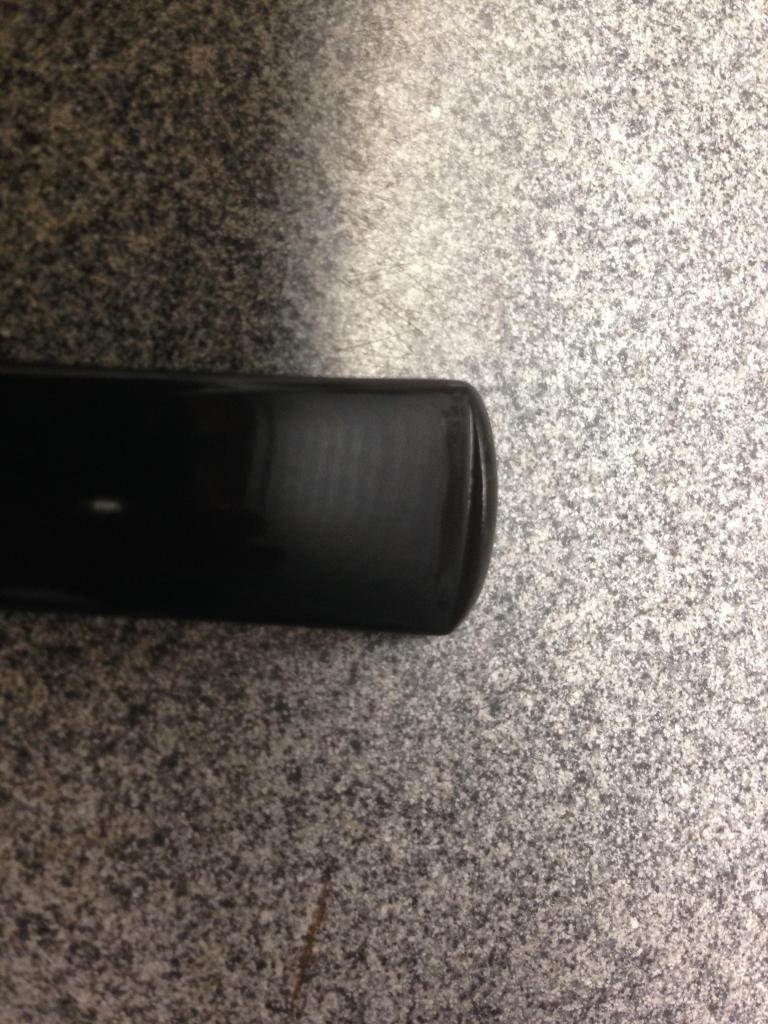
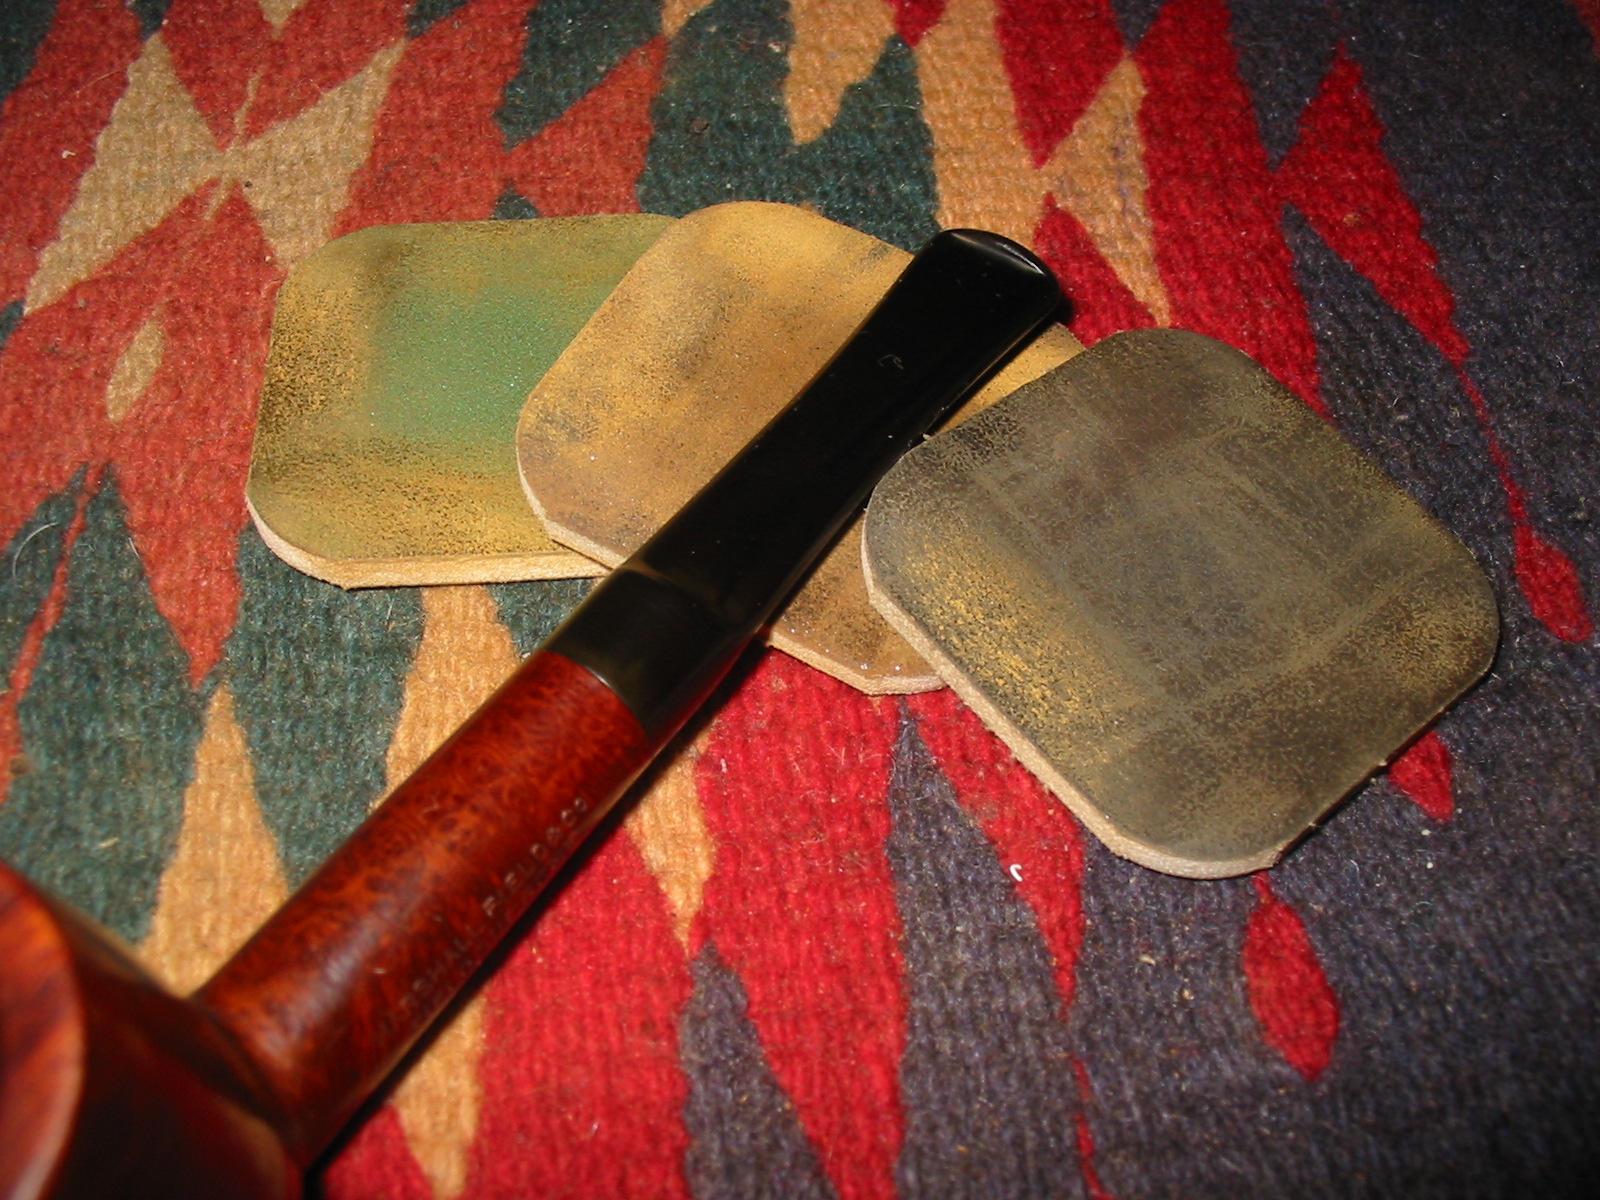
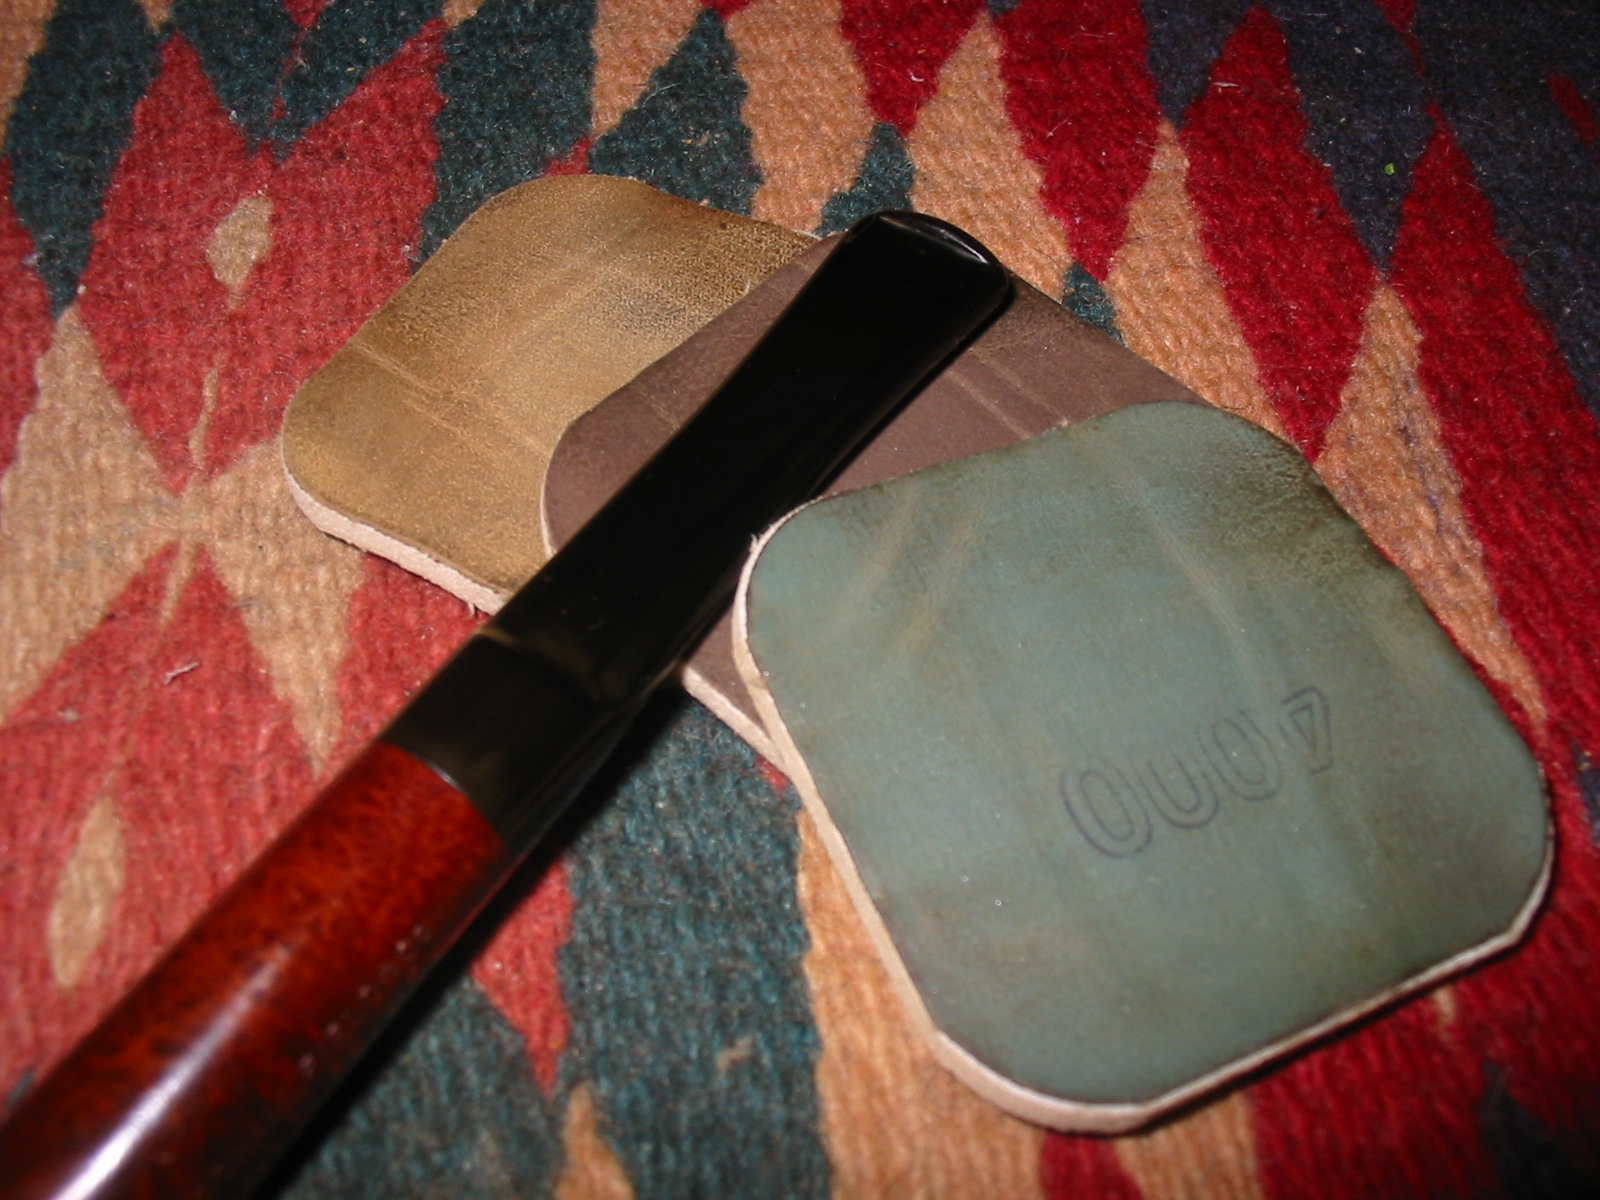
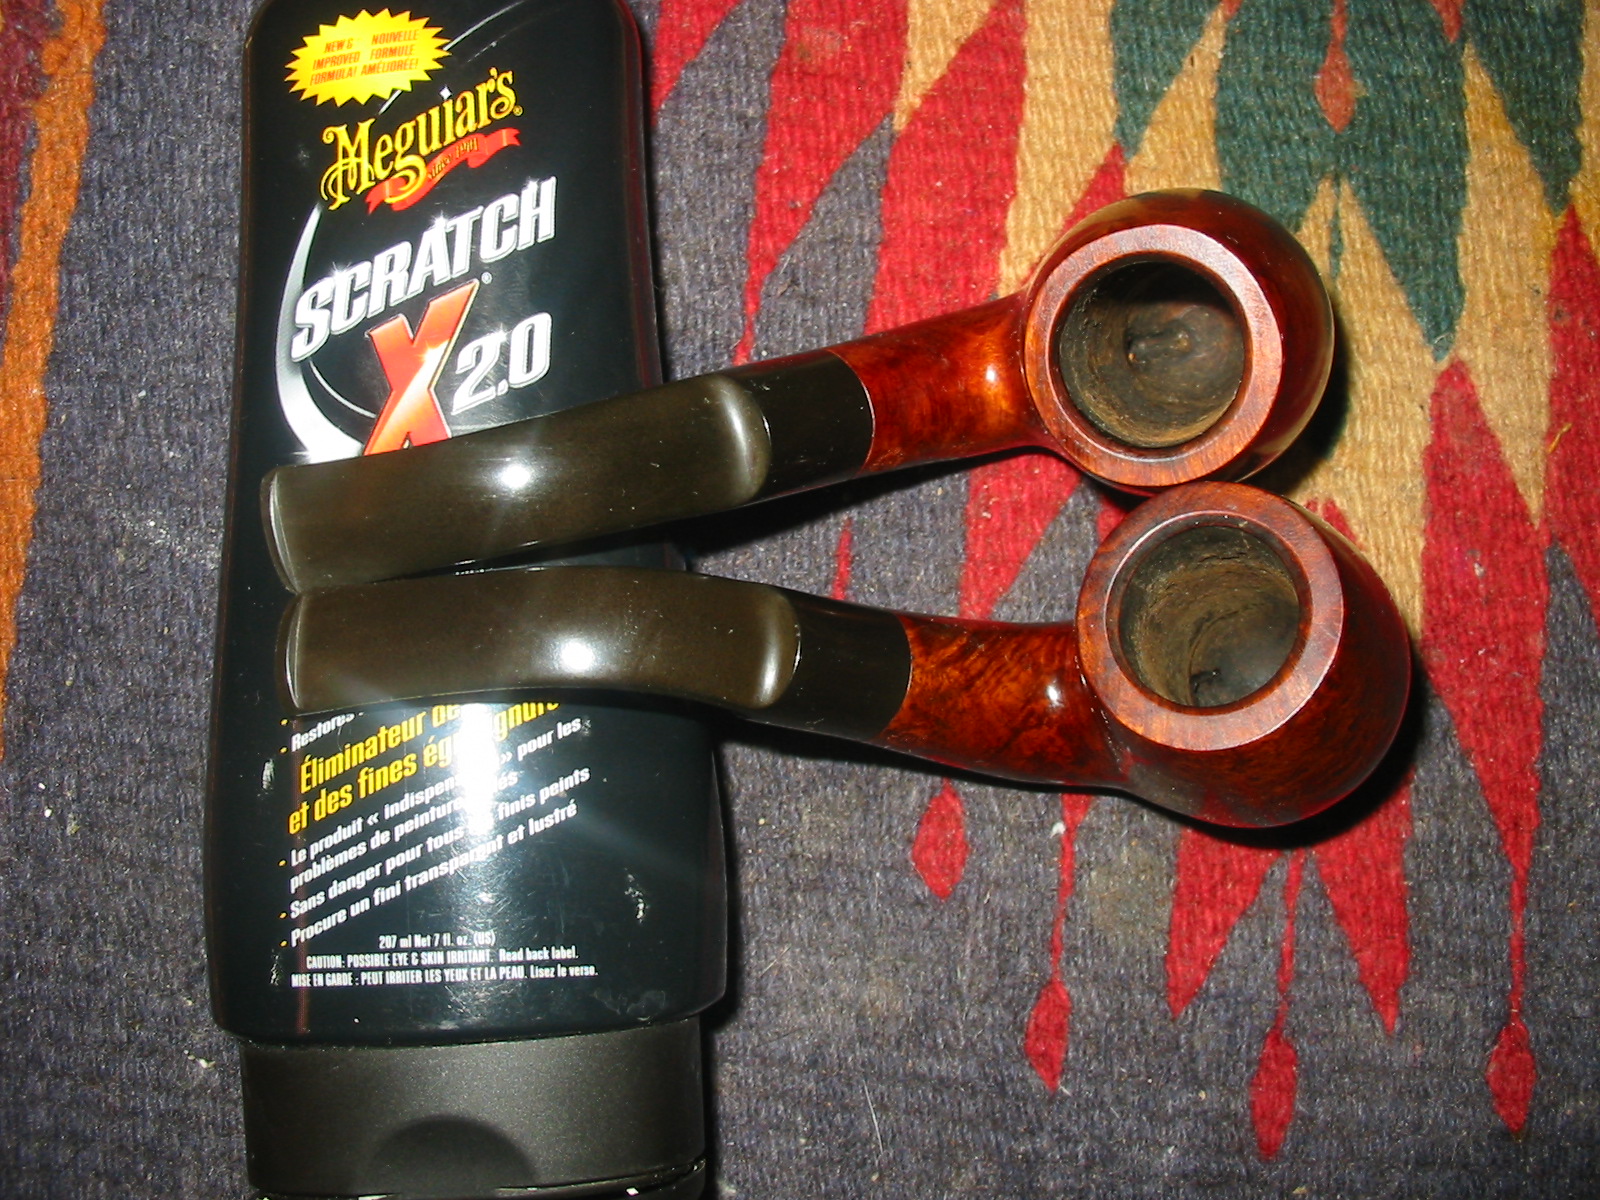
I then used some Meguiar’s Scratch X2.0 on the stems to scrub the scratches and polish the stems. I applied it with a cotton pad and scrubbed and rubbed it off. The photos below show the stems after the polishing. There was some deep seated oxidation that came to the surface of the stems. There was more oxidation on the top of the stems than on the underside.
IMG_6866

IMG_6867

IMG_6868

IMG_6869
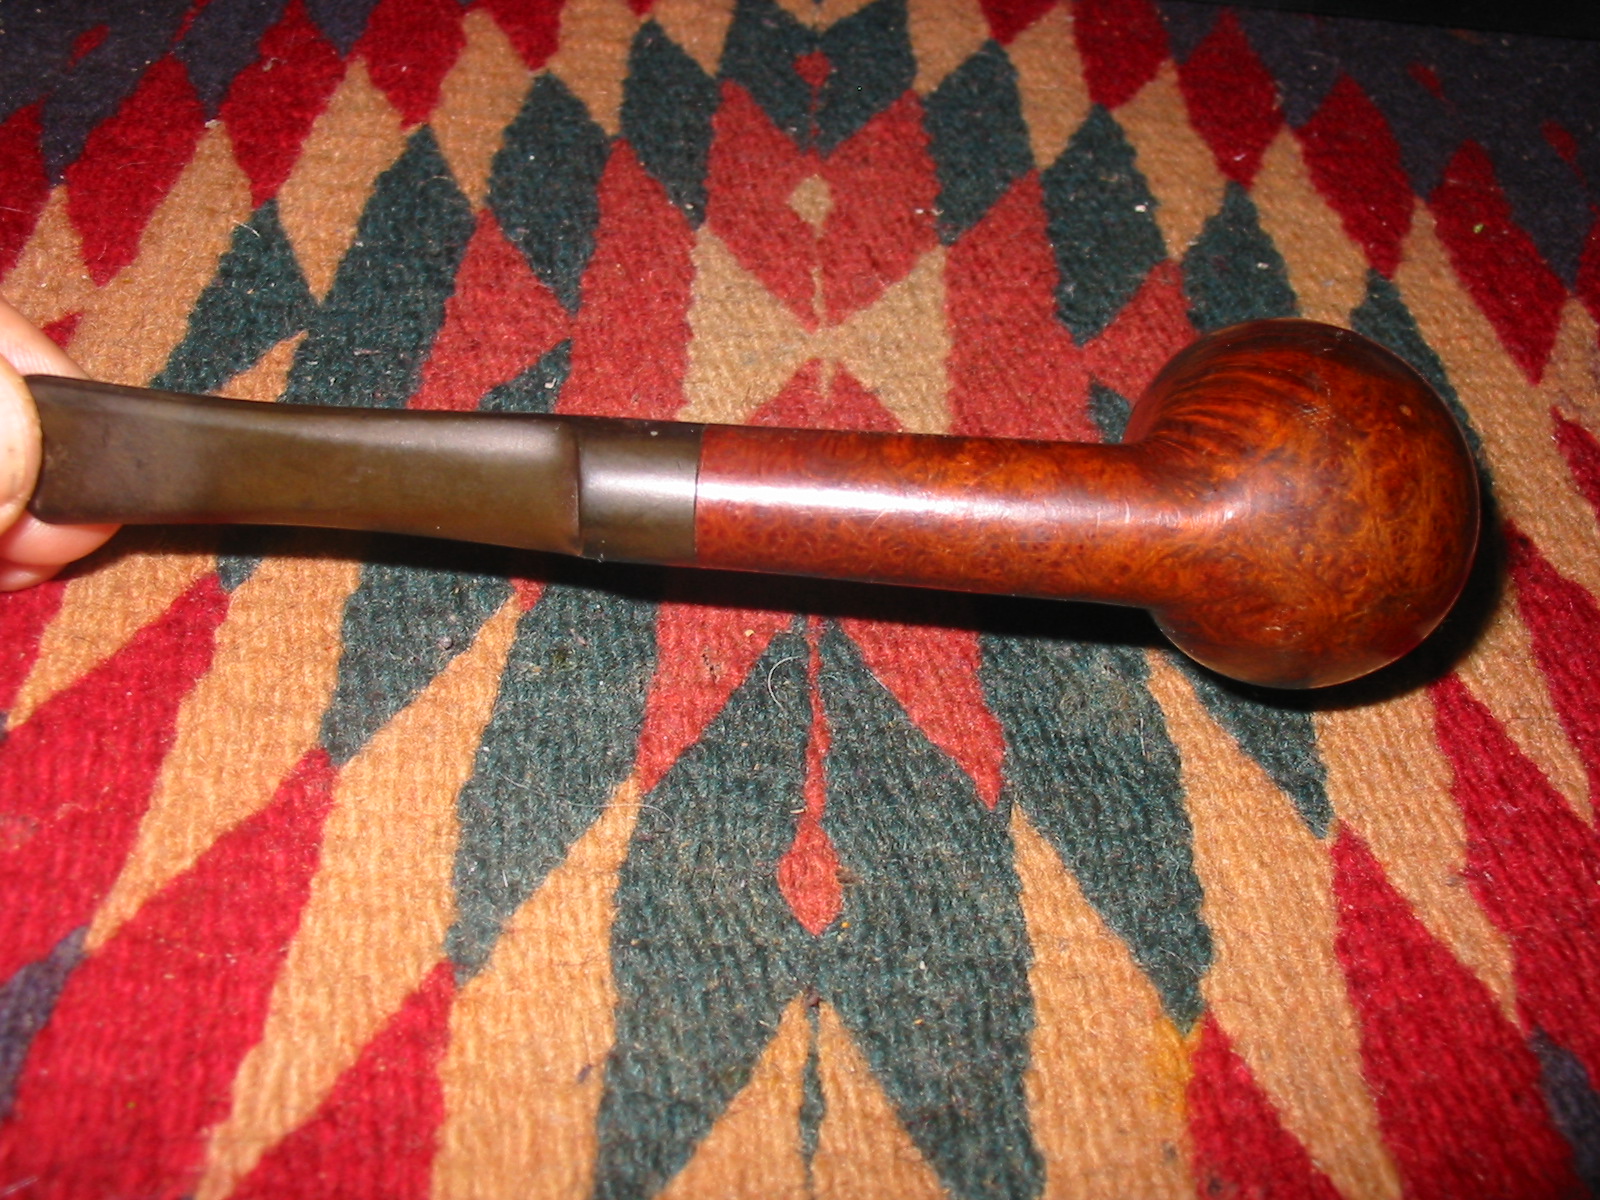
I buffed the stems with red Tripoli on my buffer to remove more of the oxidation. I followed that up with White Diamond polish on the buffer as well. I also buffed the bowl with White Diamond. The shine really came out.
IMG_6870

IMG_6871
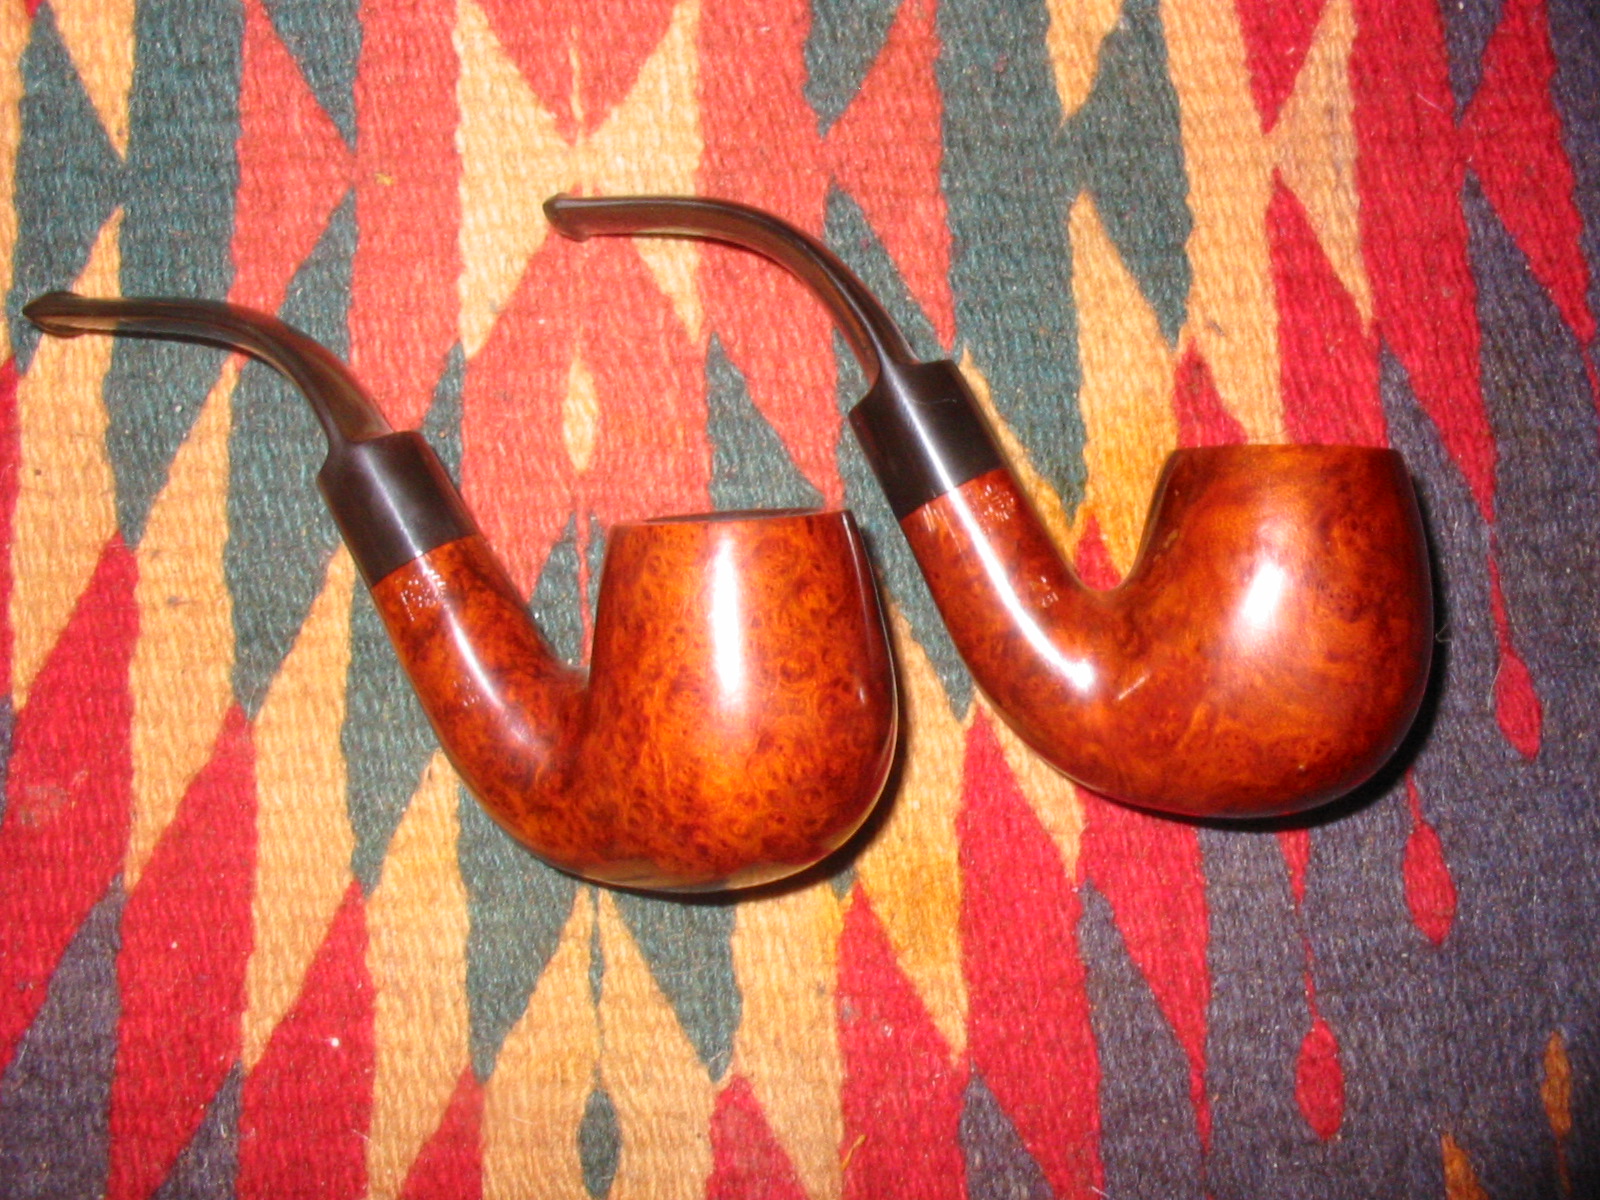
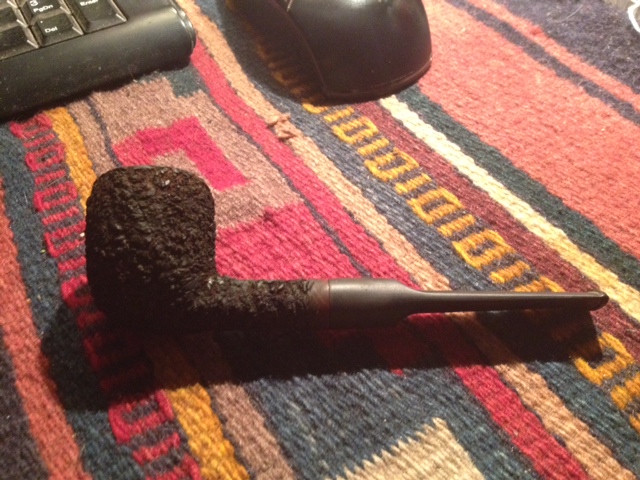
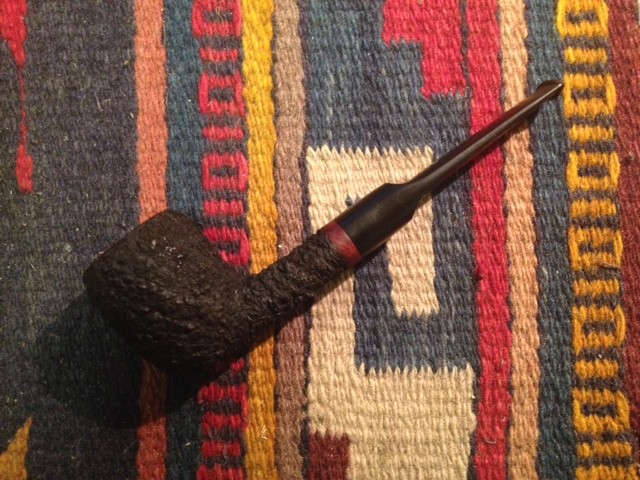
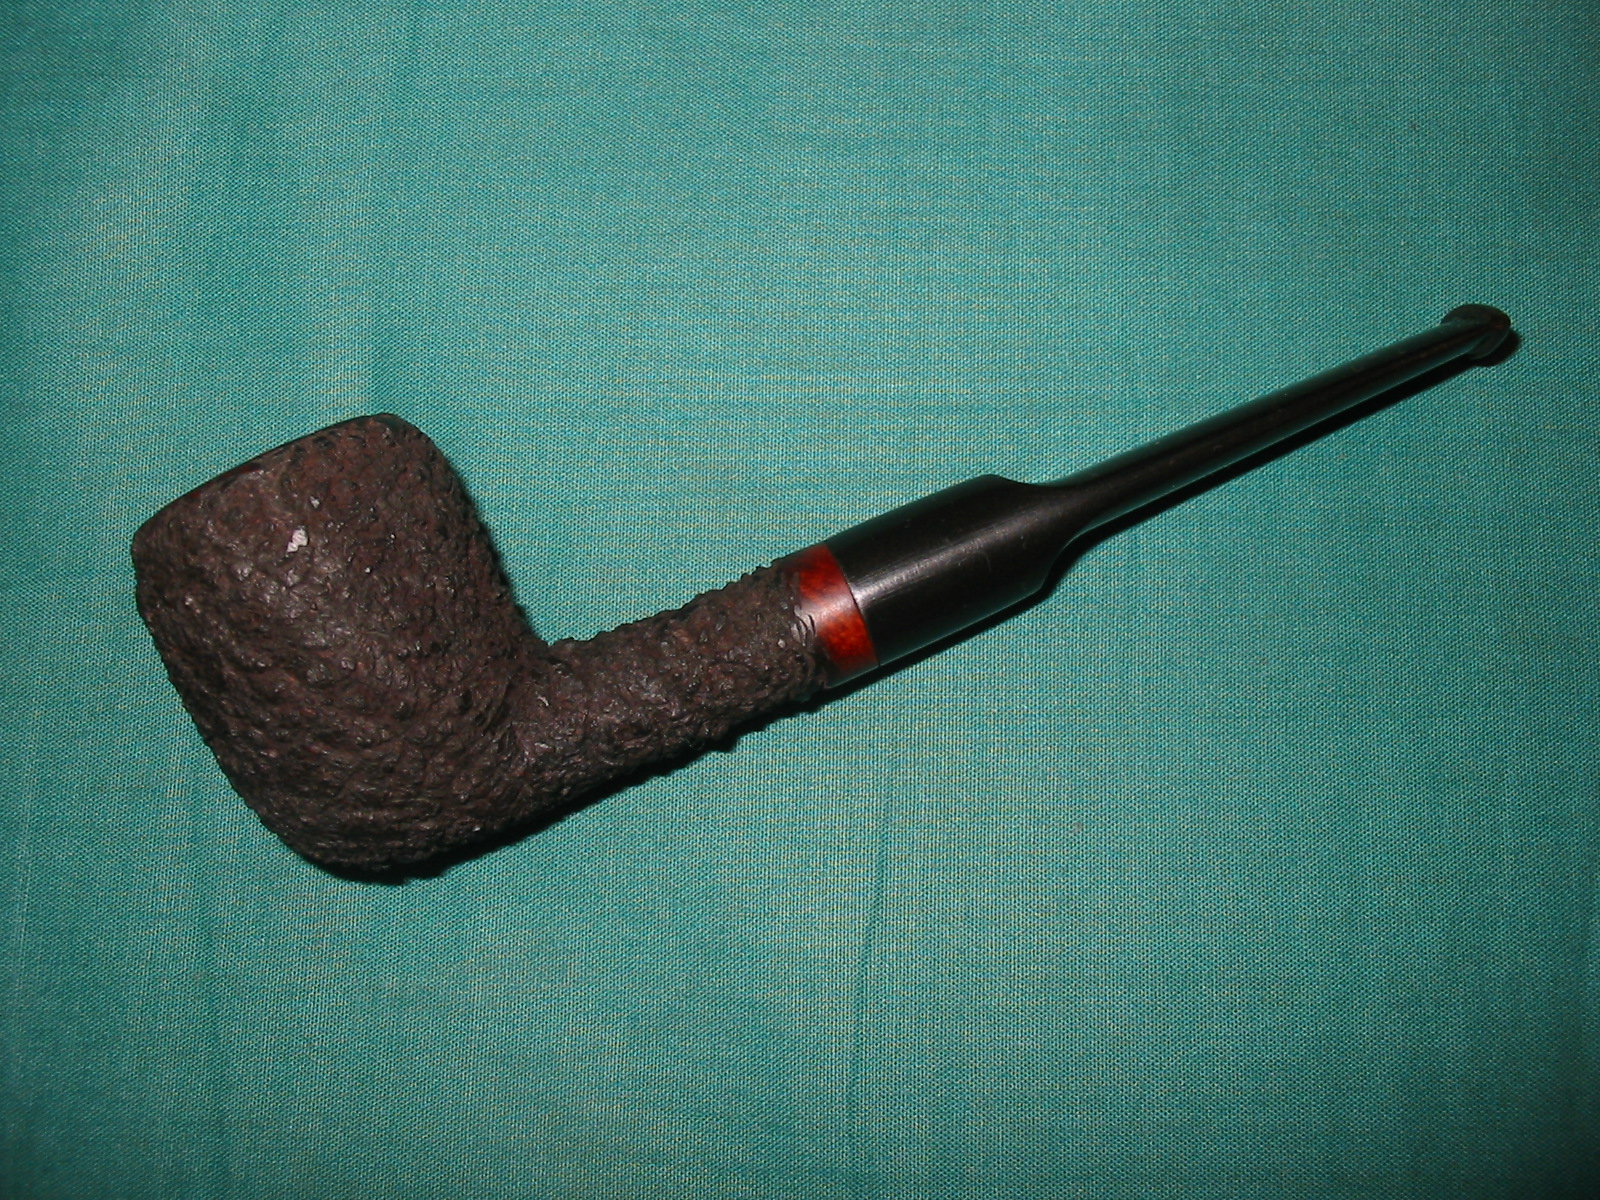
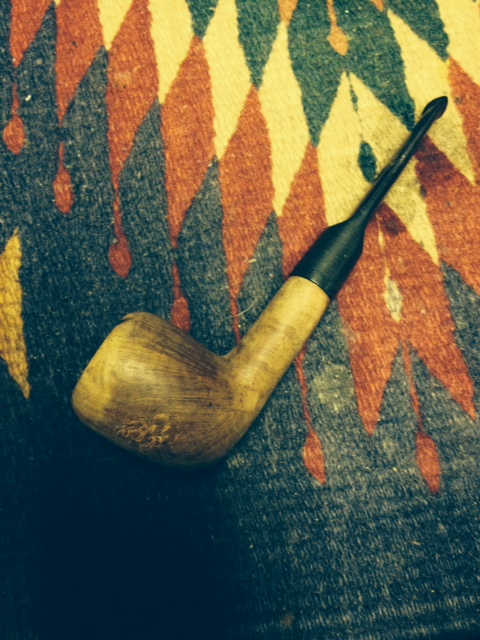
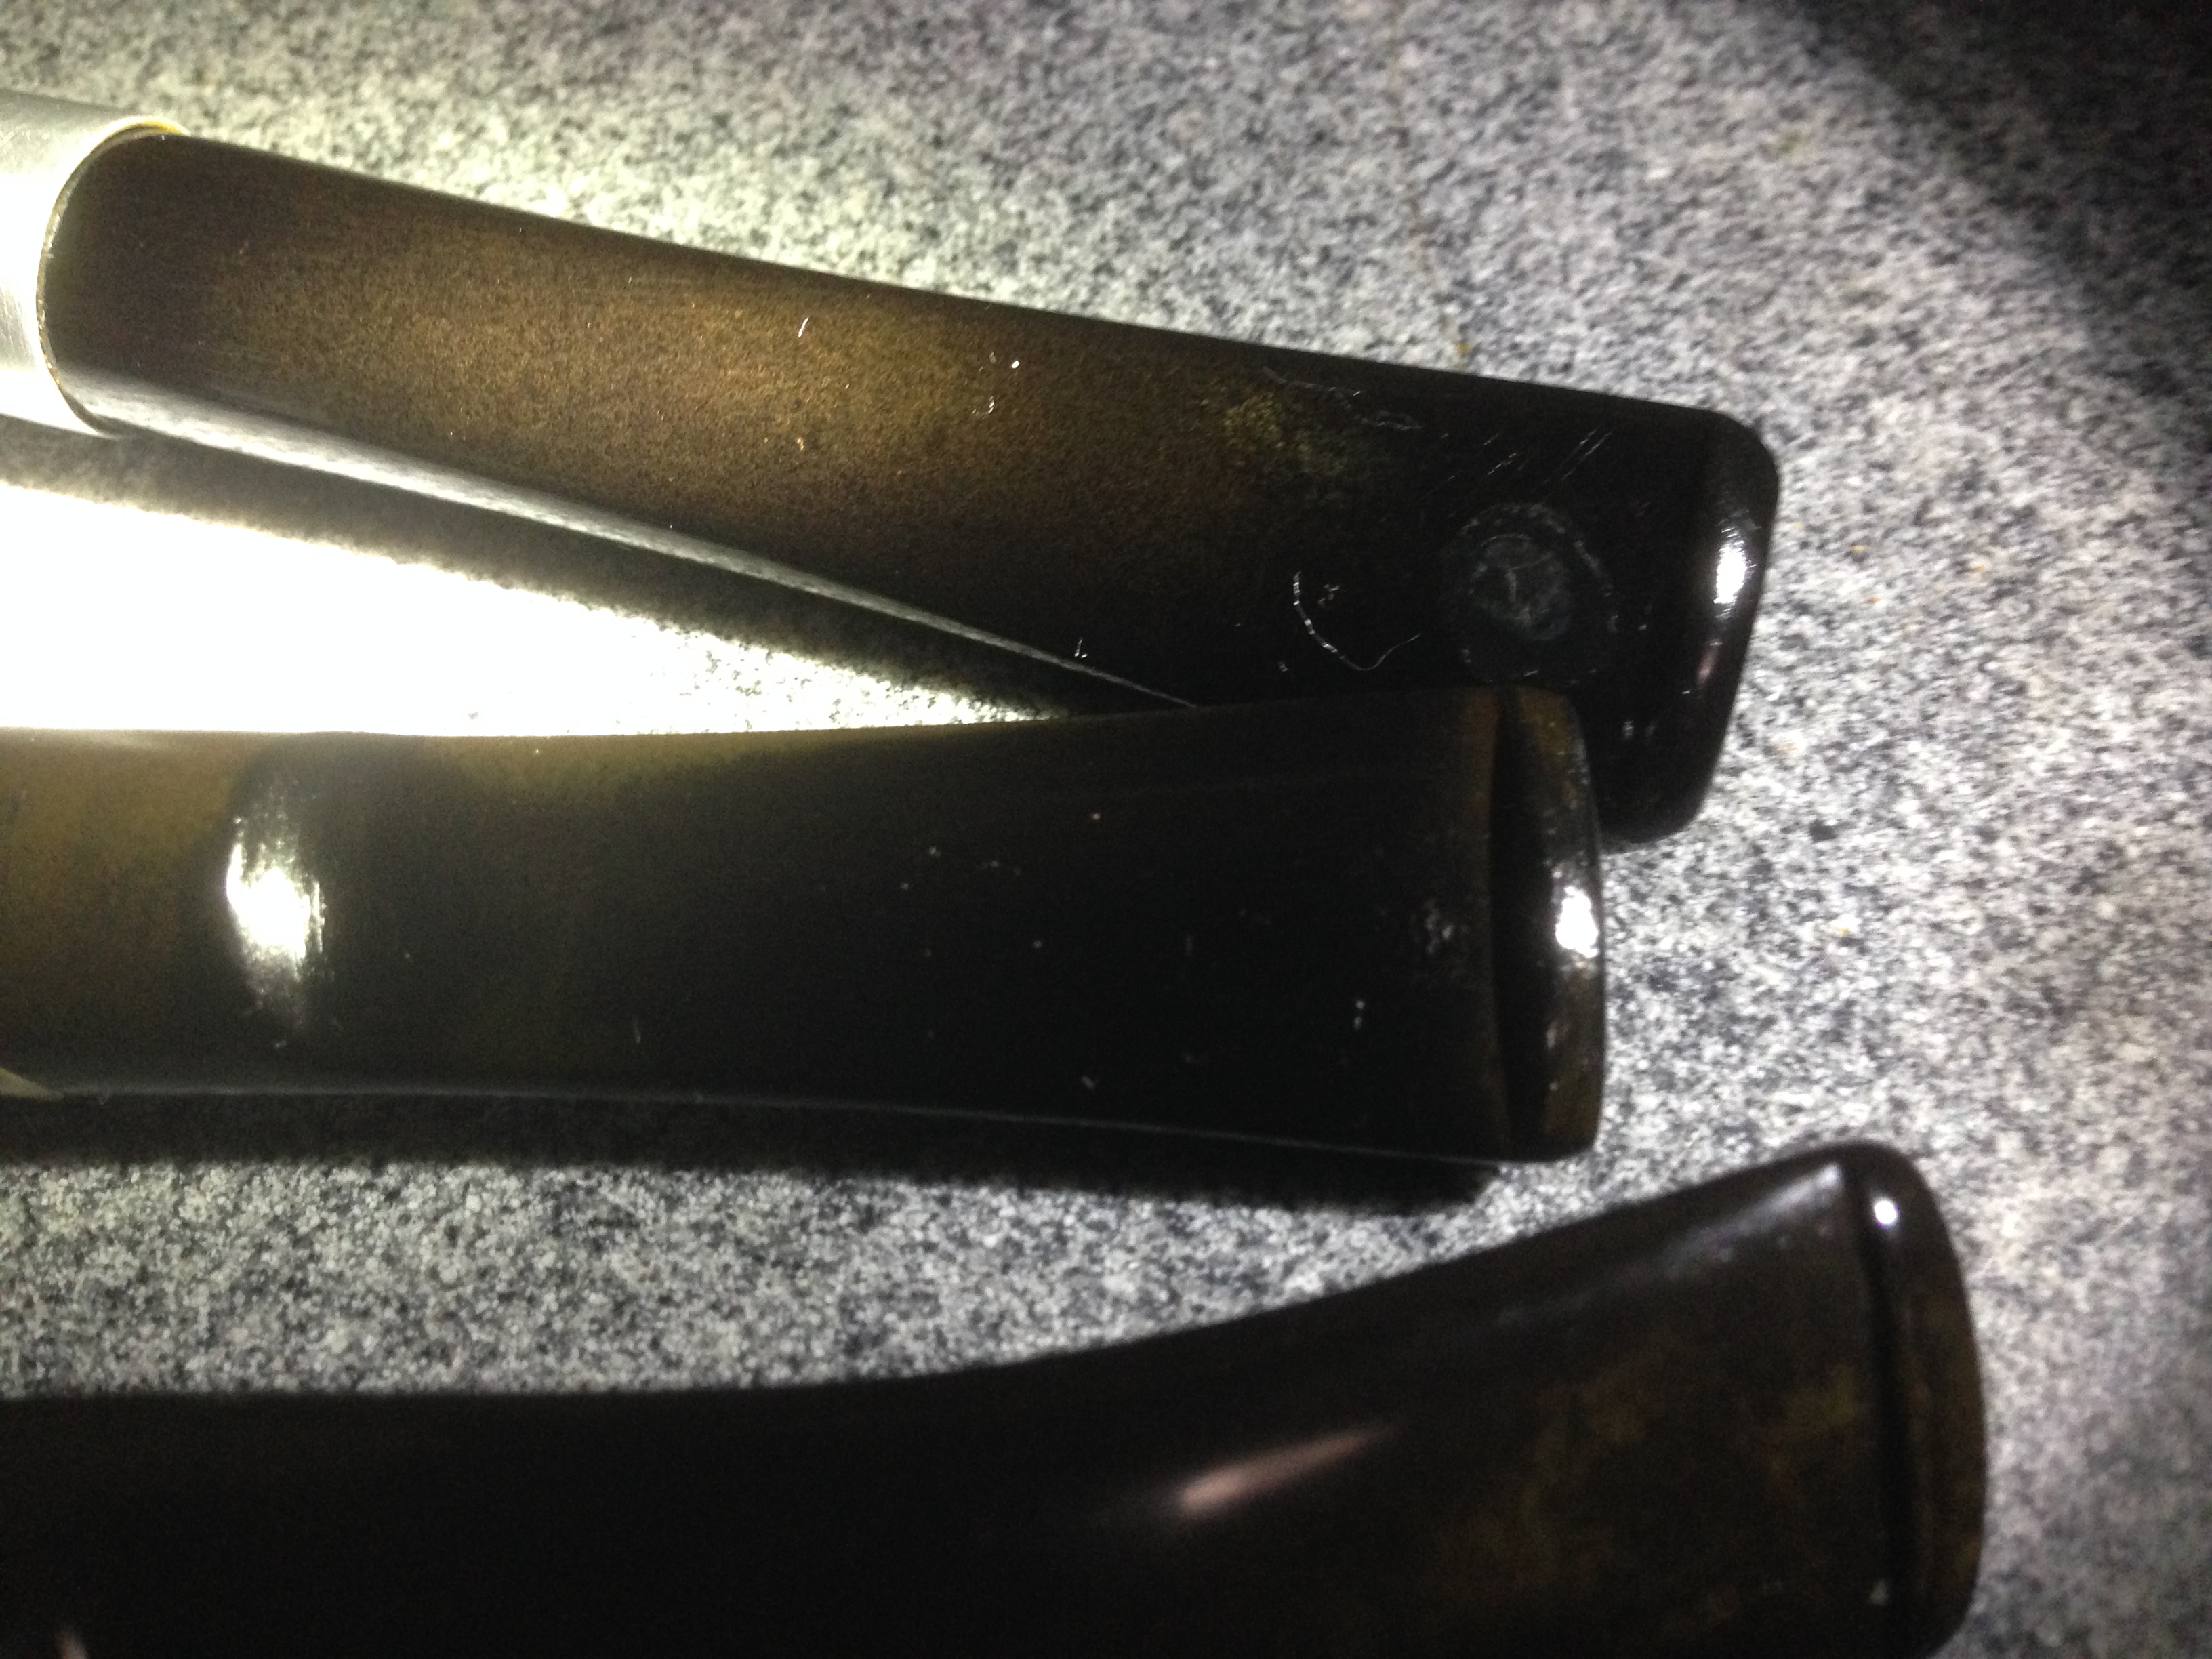
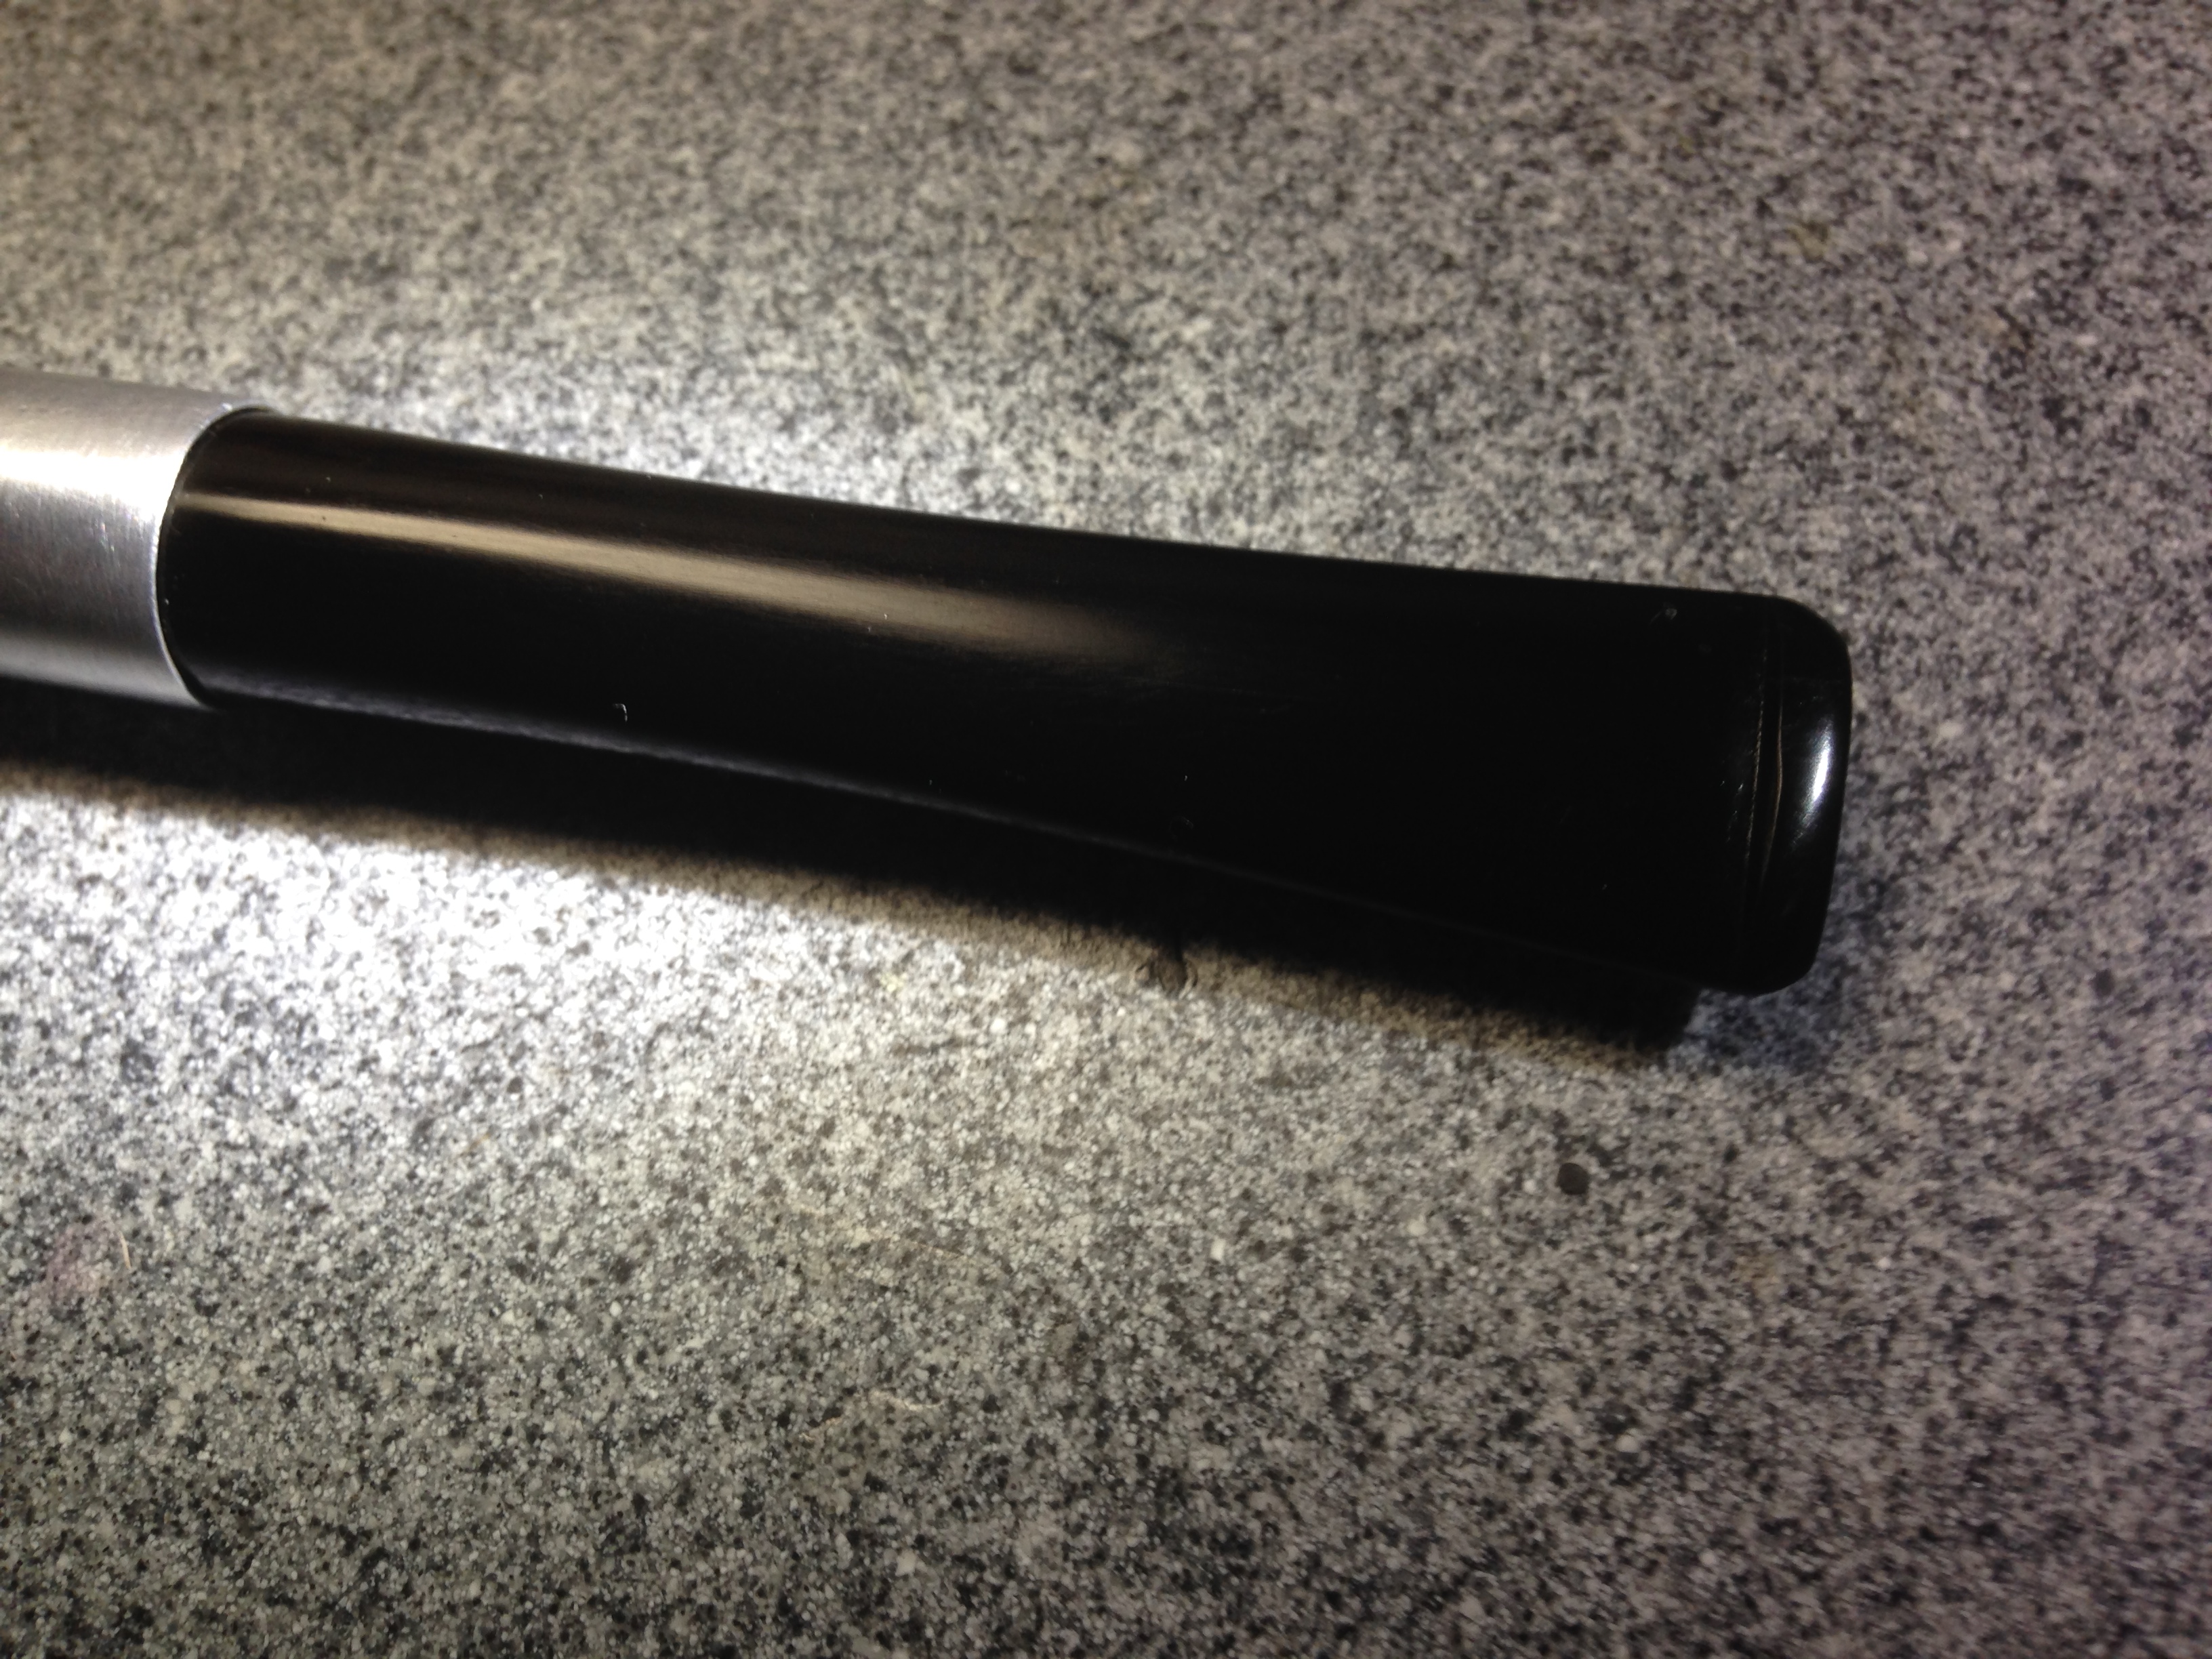
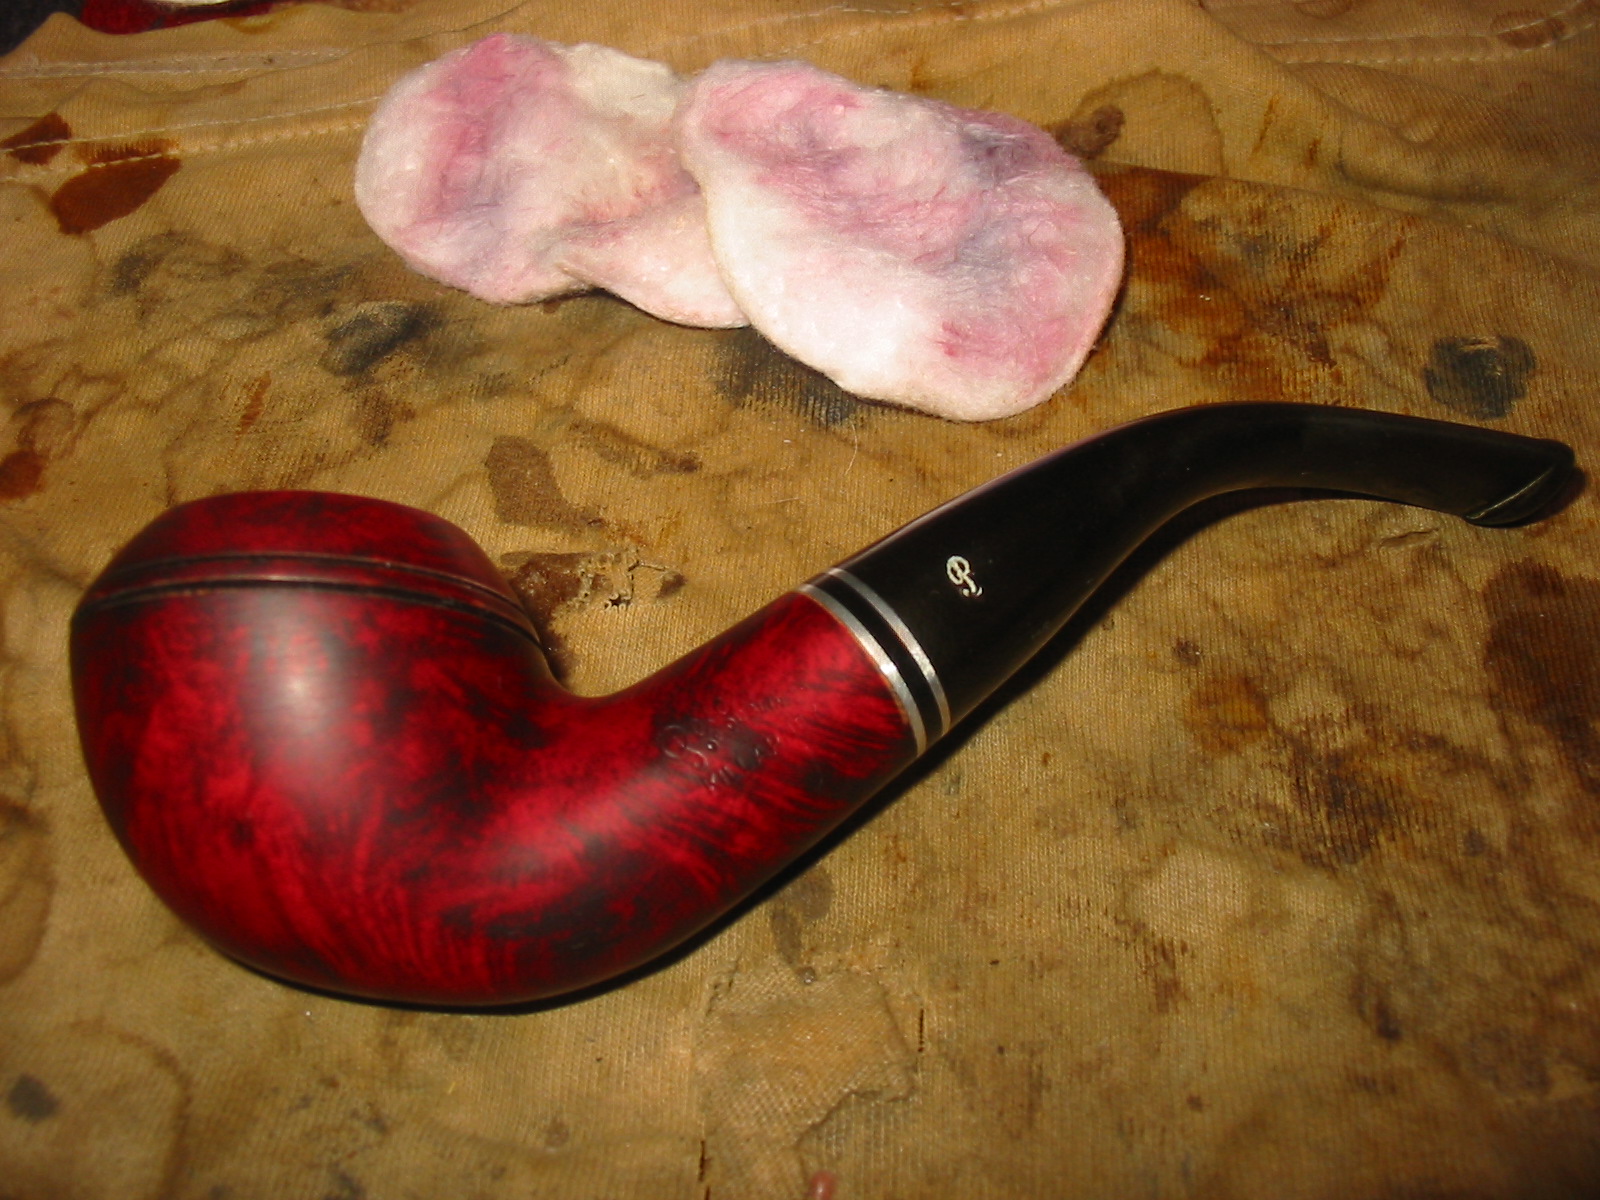
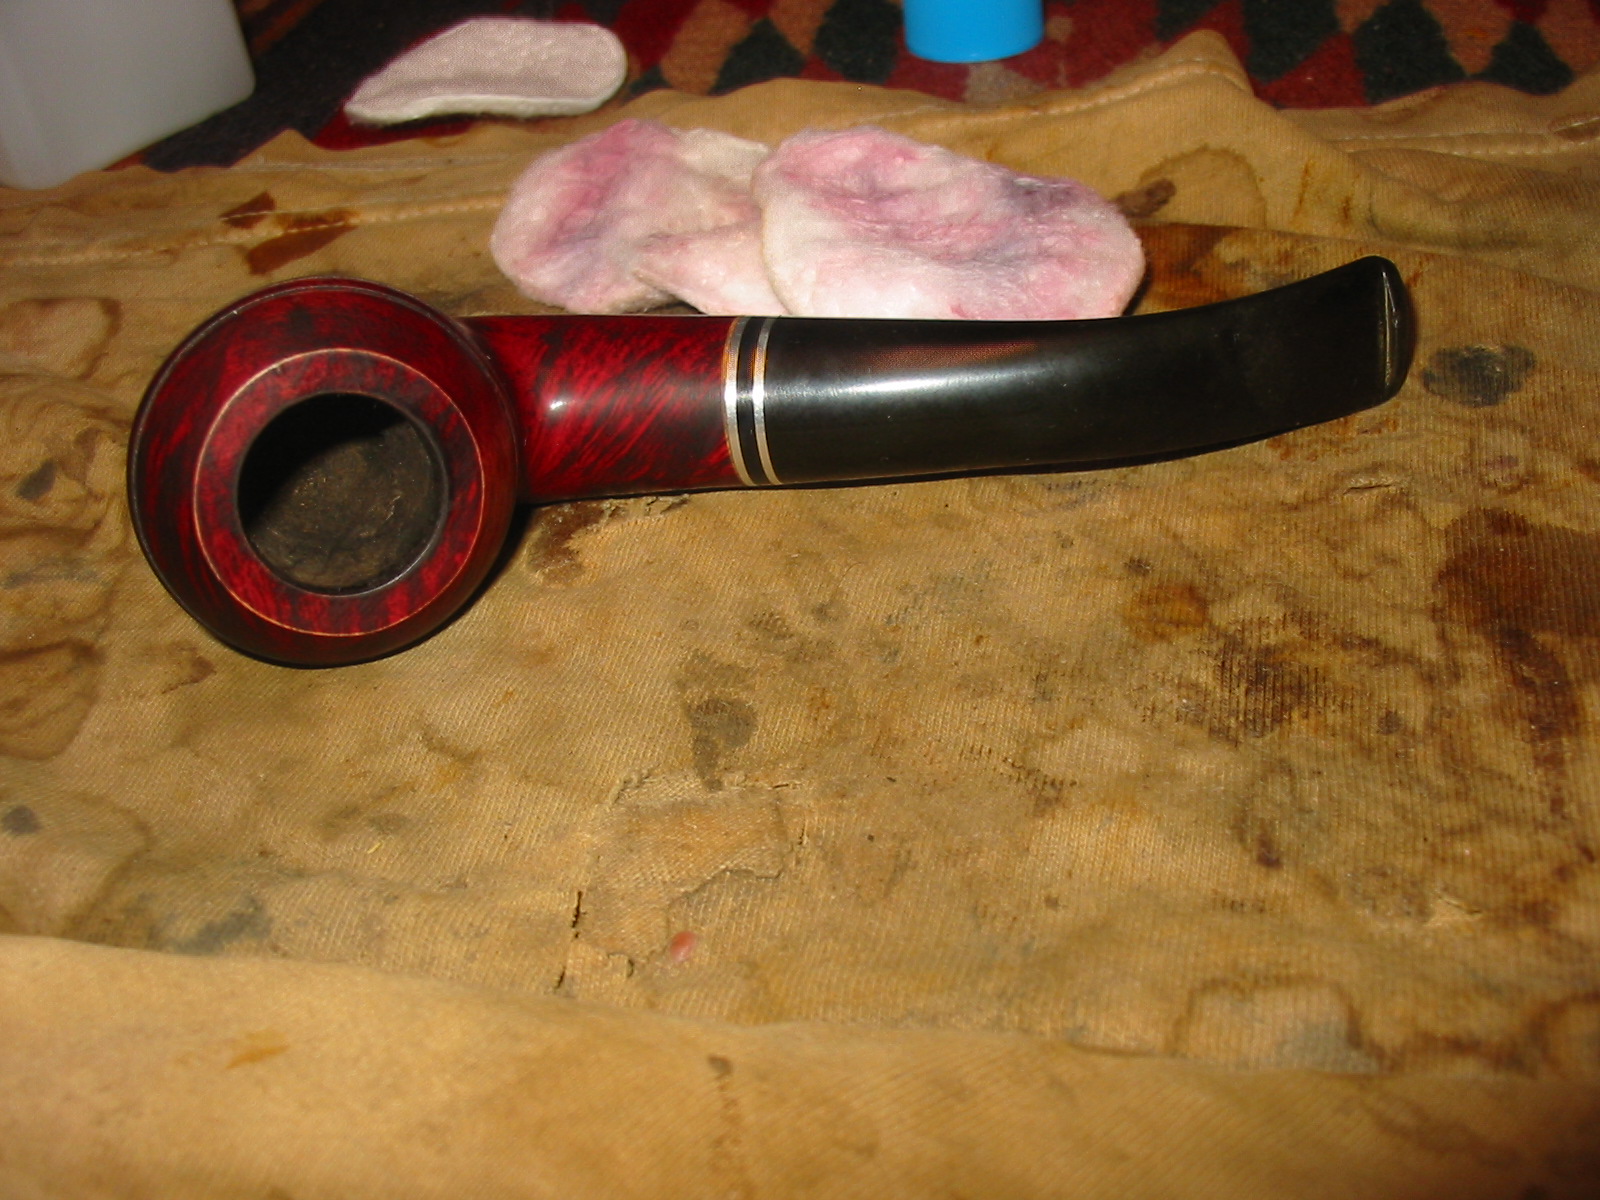
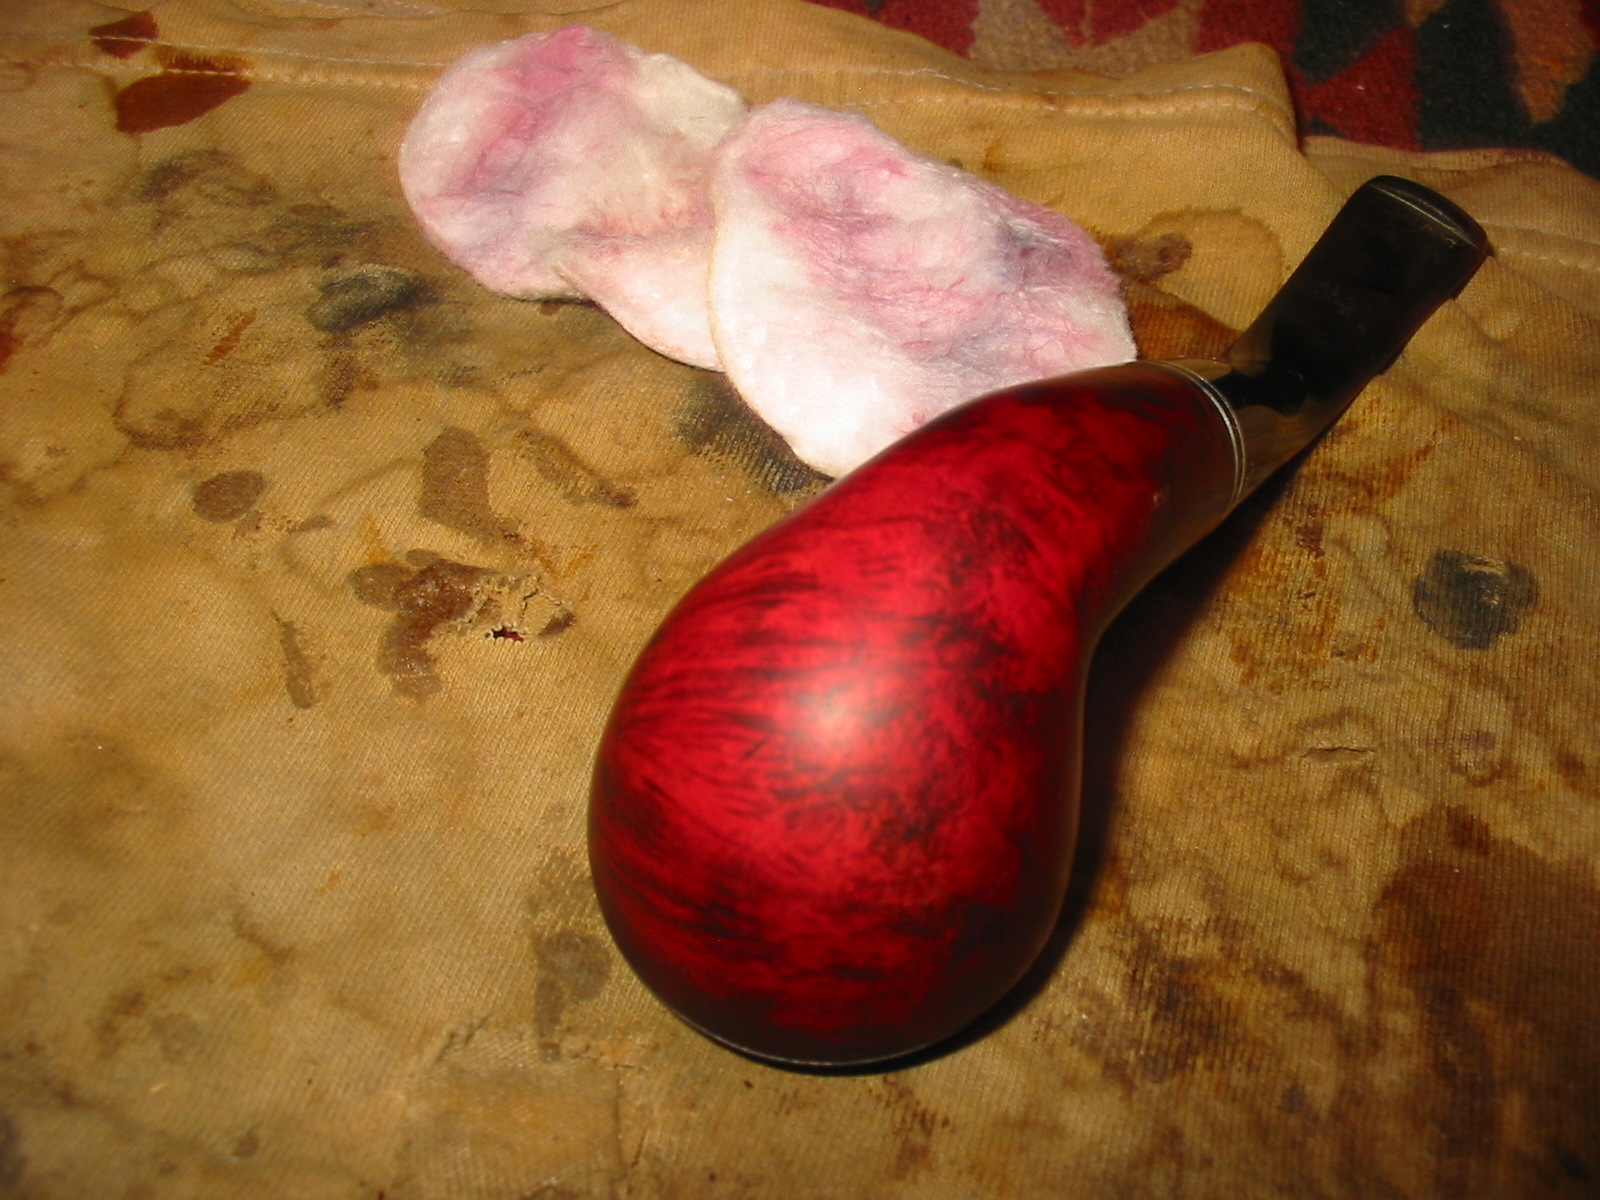
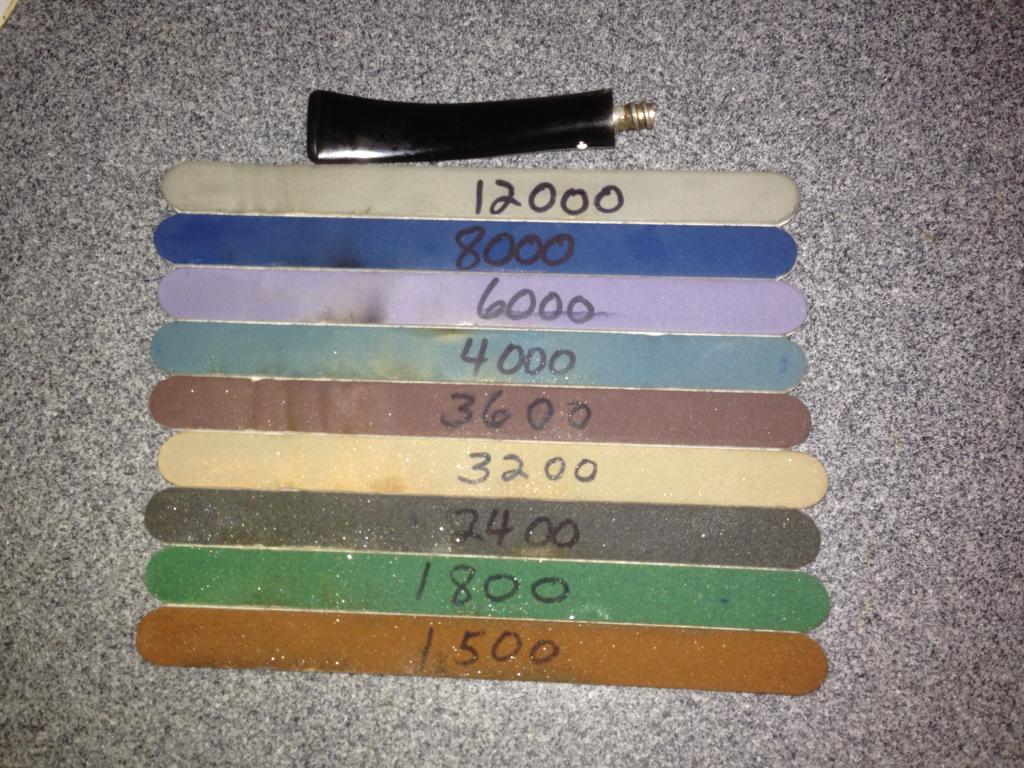
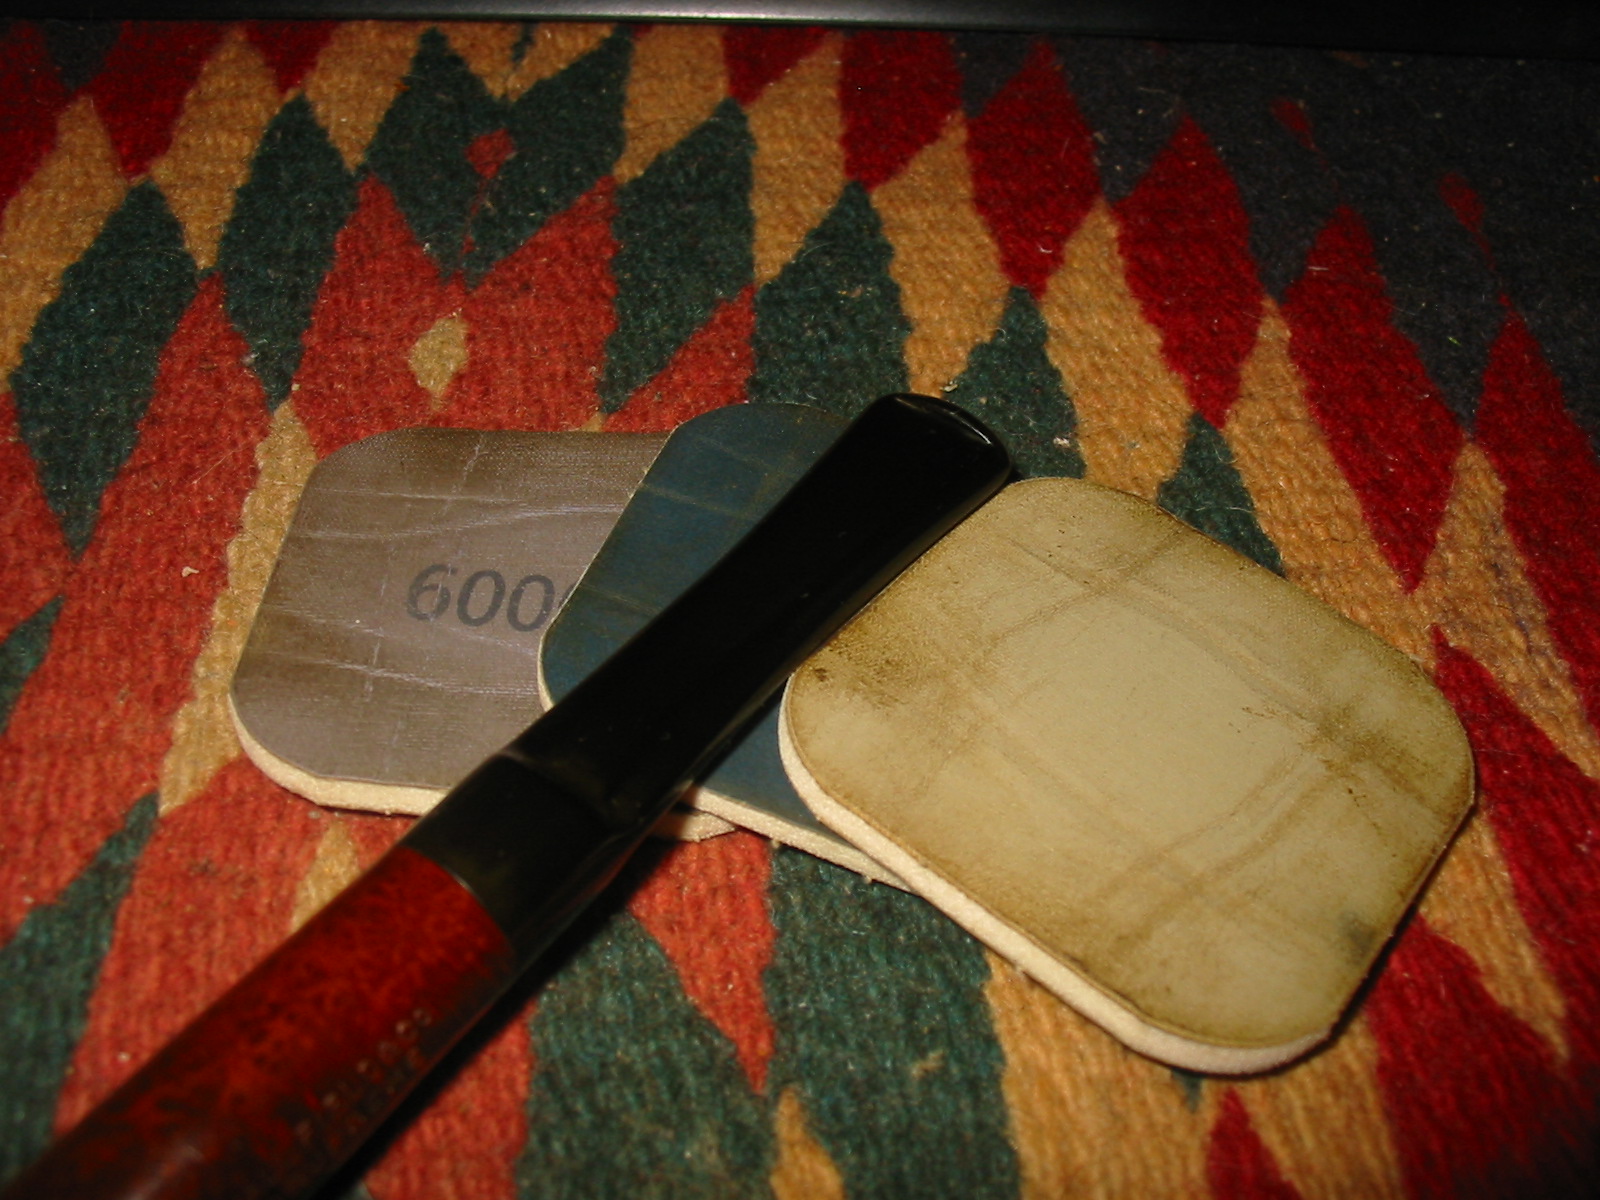
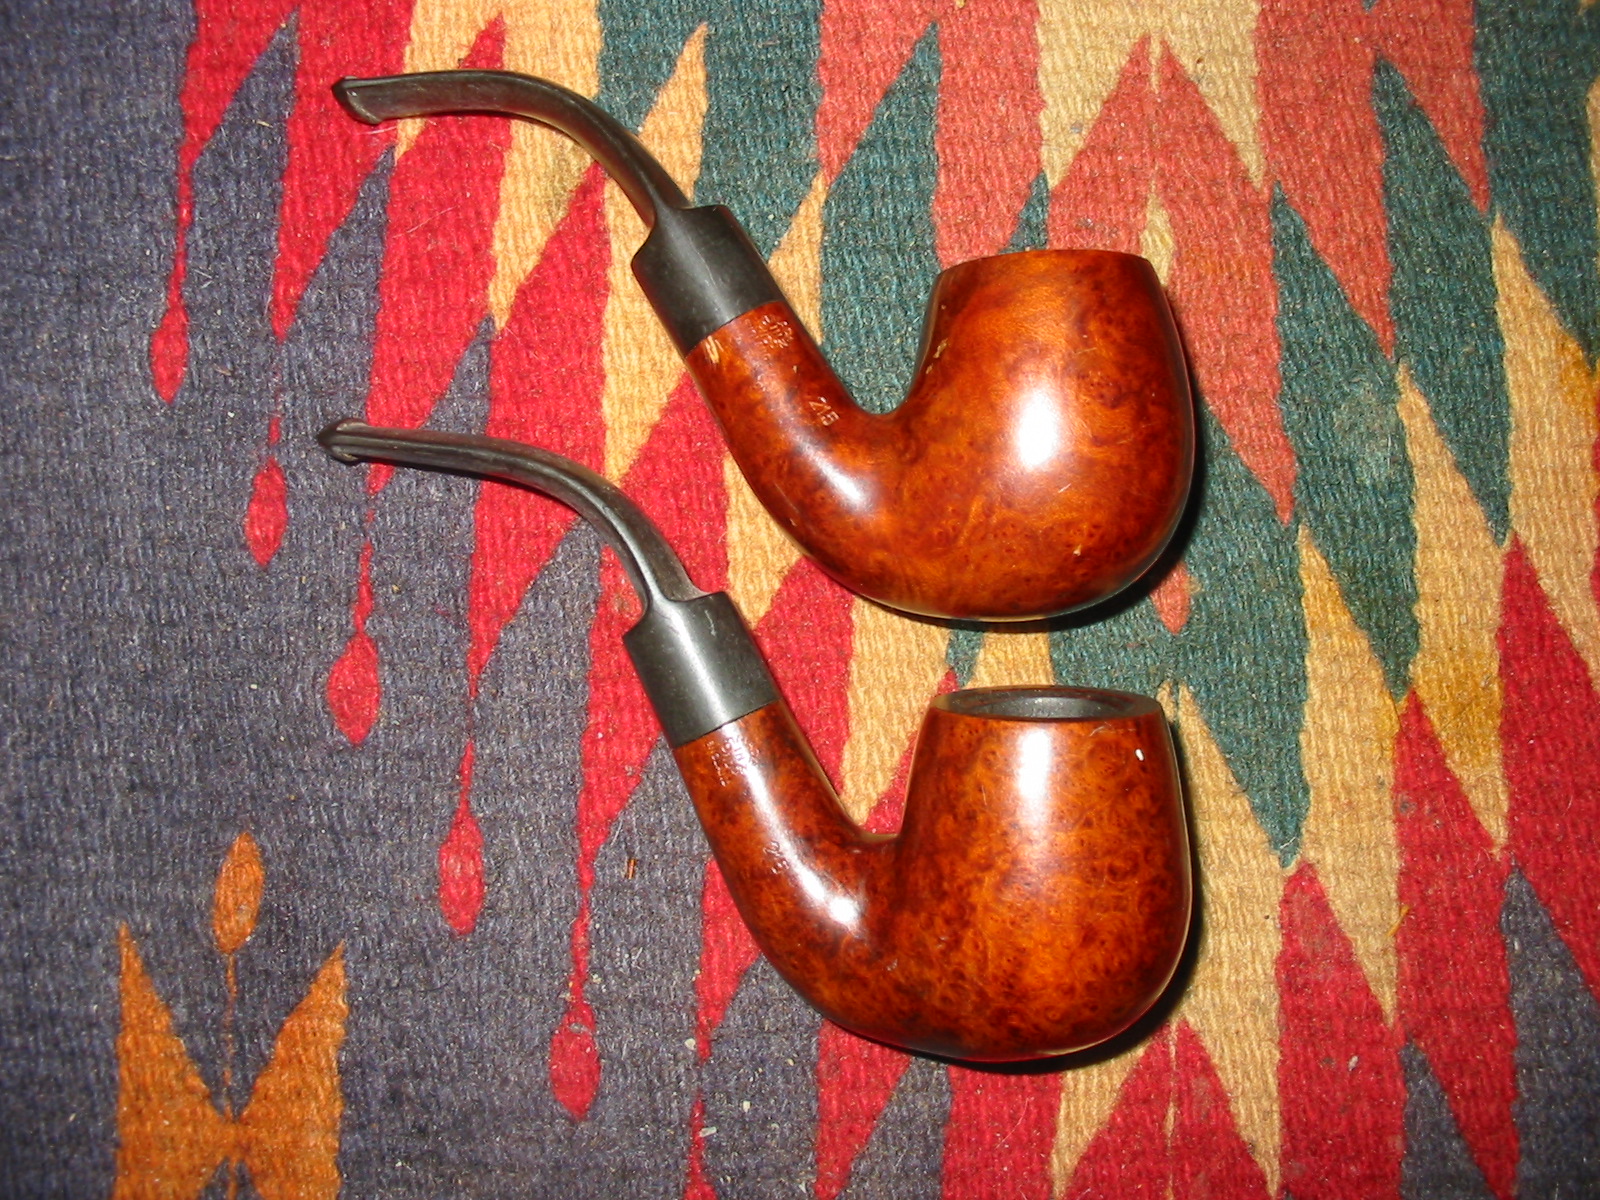
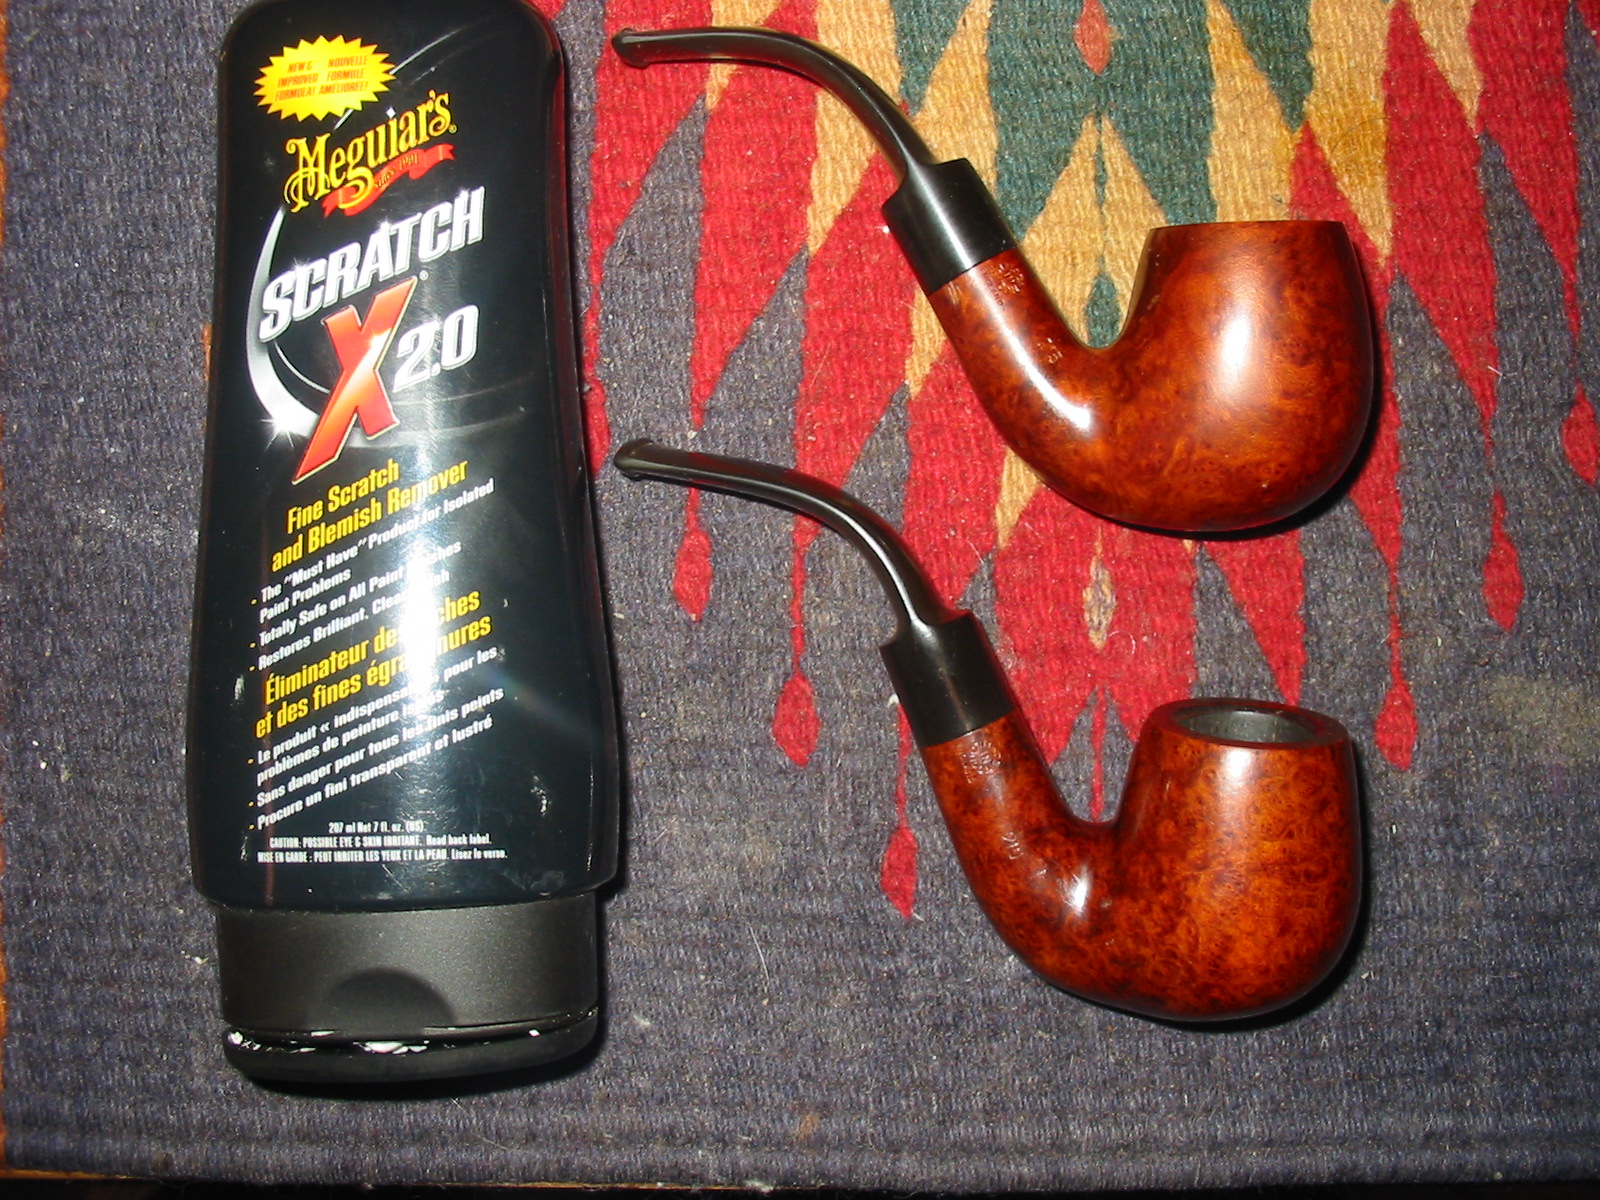
There was still oxidation that came up on the stems. I sanded it with a medium and a fine grit sanding sponge and then wet sanded with 400 and 600 grit sandpaper. This removed the remaining oxidation in the stem. I then wet sanded them with 1500-2400 grit pads. I dry sanded them with 3200-12,000 grit pads. I rubbed the stems down with Obsidian Oil and when it had dried I buffed them with White Diamond and then gave both the bowls and stems multiple coats of carnauba wax and buffed them with a soft flannel buff on the buffer. The finished pipes are shown below. They are ready to enter the next phase of their lives.
IMG_6877

IMG_6878

IMG_6879

IMG_6881

Now that the pipe has been restemmed it is time to rusticate it


I wrote about restemming this pipe in the post on Replacing a tenon in a stem with a minimum of tools (https://rebornpipes.com/2014/06/15/replacing-a-tenon-in-a-stem-with-a-minimum-of-tools/). The thing I forgot to mention is that the bowl originally had a threaded metal stem and a metal insert in the shank. I was able to remove the insert from the shank with no trouble and craft a push stem for the shank as a replacement. The stem came out great and with some work came out looking like new. In figuring out how to finish the bowl I was faced with a few choices. The briar was not terrible, I have seen worse but there were fills in the bowl. I could have picked them out and refilled them as I have done on many occasions but somehow that just did not attract me with this bowl. I had been given a rustication tool by Chris and had not used it yet so that was very attractive to me for this bowl (https://rebornpipes.com/2014/06/07/a-handmade-rustication-tool-gifted-by-a-friend-and-reader-of-rebornpipes/). The stamping on the shank was virtually buffed away so it was not something that needed to be preserved. So the decision was made. I would get to try out the new tool and see what kind of rustication pattern it would make on the briar and how comfortable it was in the hand as I pressed and twisted it into the wood. I also wanted to see if I could use it in tight spots up against the bowl and shank and close to the stem/shank junction.
rustic1
I started on the front of the bowl and pressed and turned the tool into the briar. It worked like a charm. The nails were sharp, the grouping tight and workable on the pattern, the handle was extremely comfortable and spread out the pressure across my palm. This was going to be a piece of cake. It would be no problem to finish rusticating this pipe with a lot less pain in my hands. I wrapped a strip of scotch tape around the shank to make a protective line to work toward on the shank. I wanted to leave a smooth band on the shank so this would remind me where to quit twisting the tool into the wood. The next series of eight photos show the process from start to completion. It probably took me the better part of an hour and a half to rusticate the bowl and shank. I worked it over several times during that time to get a rough finish. I wanted it to be very tactile and rough kind of like a sea rock finish so I pressed hard when I worked over the wood. I left the rim smooth as I wanted to stain it to match the band I was leaving around the shank. The two would provide some contrast to the rustic finish on the rest of the pipe.
rustic2

rustic3

rustic4

rustic6

rustic7

rustic8

rustic9

rustic10
When I finished rusticating the briar unwrapped the scotch tape from the shank. The line was fairly straight and provided a nice contrast of finishes between the stem and the rustication. Then I used a brass tire brush to knock off any loose pieces of briar on the bowl. I find that using the tire brush evens out the finish and cleans up the briar once I have finished with the hard work.
rustic11

rustic12

rustic14

rustic15
I sanded the band on the shank and the rim with a medium and a fine grit sanding sponge and a fine grit sanding sponge to prepare them for staining. I decided to use two different stains on the bowl to get some depth to the finish. I began with a dark brown aniline stain. I applied it with a wool dauber and let the stain permeate deep into the briar. I flamed it to set it. Reapplied the stain a second time and then flamed it again.
rustic16

rustic17

rustic20

rustic21

rustic22

rustic23
I wiped the bowl down with acetone and isopropyl alcohol on a cotton cloth to remove the stain from the highpoints on the bowl finish and on the band and the rim. I repeated the wash until I had the stain coat the colour I wanted. The dark brown sat deep in the grooves and the high spots were lighter in colour. I then stained the bowl with the second colour, a oxblood or cherry coloured aniline stain. I applied it with a cotton pad and daubed it onto the band, the rim and the high spots on the bowl. I flamed it, reapplied it and flamed it again. Once it was dry to the touch I hand buffed it with a soft cotton cloth.
rustic25

rustic27

rustic29

rustic30
The cherry/oxblood stain worked well on the band and the rim. It made them stand out against the darker brown of the rustication. In the light the texture of the rustication has both a dark brown look in the crevices and a reddish tint on the high spots. The contrasts in the stain on the rustication came out well and the smooth band and the rim work well with the rest of the pipe. Interestingly, and this does not always happen for me, the stain came out exactly the way I was hoping it would when I started the process.
rustic31

rustic32

rustic33

rustic34
At this point all I had left to do was to work over the stem with the micromesh sanding pads and then give it a buff to polish it. I followed my normal process on the stem. I wet sanded it with 1500-2400 grit micromesh sanding pads and dry sanded with 3200-12,000 grit pads. I rubbed the stem down with Obsidian Oil and then took it to the buffer to give a light buff with White Diamond and a blue plastic polish. I finished by giving the rim, the band and the stem multiple coats of carnauba wax and a final buff with soft flannel buffing pad. The finished pipe is shown below. It has come a long way from the neglected bowl that sat in my refurbishing box for a long time with no stem. Now it is ready to fire up and enjoy.
IMG_6848

IMG_6849

IMG_6850

IMG_6851

Replacing a tenon in a stem with a minimum of tools


Last evening I was looking at the lone pipe bowl in my refurbishing box and decided I wanted to do something with it. I wasn’t sure if I would refinish it or rusticate it with the new tool Chris sent me. Either way though, it needed a new stem. I went through my can of stems and found that I did not have any that would fit the shank without a lot of work. I did have one with a broken tenon that was the right diameter for this pipe. I looked at it for a while and then found a Delrin tenon that I had on the work table. The tenon was the right size for the shank! The stem was the right diameter for the shank. Now all I had to do was wed the two of them and I would have my new stem.

I have drilled out broken stems in the past and inserted a new tenon. I have used a tap and then screwed in a threaded tenon that I purchased from Pipe Makers Emporium. Either way it was work that I did by hand. By hand means that I do not have a drill press, I do not have a vise to hold the stem. I have my two hands and a cordless drill. This takes steady and slow work to keep all the angles straight and get things properly aligned. It is one of those processes that will either work really well or not at all. There is no in between. You cannot redrill a crooked hole to straighten it out without making it too large to fit the piece. So really the fact of the matter is that it all comes down to whether I can drill the stem out straight!

To begin the process I needed to square up the end of the stem and remove the broken pieces of the tenon that still remained. The end needed to be flat and even for the drilling. I sanded down the end of the stem flush using a sanding board (like the one used when topping a bowl). In the photo below you can see that the end of the stem has a divot out of it due to the breakage. I did not worry too much about that as the drilling would take most of that area out of the equation. I only worked on flattening out the rest of the stem. When finished I pressed it against the end of the shank to see if it was a flush fit or if there were any high spots. The fit was perfect. Now it was ready for drilling.
tenon1
I took out my cordless drill and found that the battery was dead. I put the battery on the charger and sat thinking for a bit about how to best drill out the stem. I measured the diameter of the new tenon and found that it was 15/16 inches. To make sure I did not crack the stem or break it in the process I would drill it out in stages. I would mark the depth on each drill bit I used with a piece of tape so that I would not over drill or under drill the depth of the hole. I used the tenon as the measure for this. The tenon I had came with a slight lip on it so I would need to countersink the end of the stem once the hole was drilled in order to accommodate the lip.

I decided to try something different this time and not wait for the battery to charge. I stood the drill on my desk, inserted the drill bit and hand turned the stem onto the drill bit. I started with the 11/64 inch bit which was slightly larger than the airway in the stem. I turned the stem onto the stationary bit to the depth that I had marked on the drill bit. I lined up the stem and the angles making sure the line was straight and the hole stayed centered throughout the process. I worked my way through 7 bit sizes up to the 17/64 inch bit. Each time I turned the stem onto the bit in increments and cleaned out the hole with a dental pick. I continued to turn it on and off the bit until the drilling was smooth before moving onto the next sized bit.
tenon2

tenon3

tenon4

tenon5

tenon6
I found that when I got to the larger sized bits from 19/64, 5/16, 21/64 inches it was hard to turn them on by hand. I could get them started but they quickly bound up on the bit and I could not turn them further. I turned them back and forth but it was not working well. I put the battery back on the drill and drilled the stem using a very slow speed. It worked well. When I had finished drilling it with the 5/16 inch bit the tenon pressure fit very nicely in the hole. There was not enough room for epoxy to be applied and still fit in the hole, so I drilled it with the 21/64 bit to give it the amount of room for the epoxy. To countersink the end of the stem I used a slightly larger drill bit and then a sharp knife to bevel the inner edge to accept the ridge on the tenon.
tenon8

tenon7

tenon9
In the morning the tenon was firmly in place and dry. I cleaned the face with a dental pick and removed the excess epoxy from the stem. I pushed the stem into the shank of the pipe to see the fit. This was the final test. Did things align properly? Did I get the angle square and straight? Would there be a gap in the stem and shank joint? In case you are wondering I have had all of those issues in the past and had to do a lot of adjustments to get a clean fit. But this time things worked well. The fit was perfect and the alignment was absolutely correct. The pipe now had a new stem and it was time to make a decision on what to do with the finish of the bowl. That will be another story however. The photo below shows the fit of the stem and the shank. I am very pleased with the fit.
tenon12
I sanded the stem and the shank to get a smooth transition between the stem and shank. I wanted the fit to be seamless so it took some sanding with 220 grit sandpaper followed by a sanding sponge to fine tune the fit. Here is the pipe as it stands now. Later today I will rework the bowl and finish the entire stem. But for the purpose of this post the tenon replacement and fit of the stem to the shank is complete.
tenon13

Not a Bad Day’s Hunt – 14 June 2014


This morning my wife, daughters and I got up early and drove down to Bellingham, Washingto for the day. It was my number two daughter’s 30th Birthday so she wanted to do a bit of shopping and then celebrate with a Mexican dinner. Typically I take them to the shopping mall and then leave for two hours and hit my favourite antique malls and pipe shop. We sat at the border for an hour and a half and then went to breakfast together. Afterward I left them at the mall and headed to my shops.

The first stop was the Senate Smoke Shop. I always try to stop by and support the owner Mike. He has become a good friend so I like to support him when I can. Besides I wanted to pick up a bunch of pipe cleaners and some supplies for my humidor. I also wanted to see if he had any estate pipes in and some new tobaccos. We talked for about an hour while customers came and went. I added items to my pile – pipe cleaners and some humidor supplies. He had taken his estate pipes home so I would have to check back another time.

I did find some well aged Peter Stokkebye Luxury Twist Flake. It was in one of his bulk jars so I picked some up. It is a pure Virginia blend from the best fields of Zimbabwe and southeastern United States. Rolled twist flake. The blend is handrolled into spun cakes; thereafter Cavendish pressed and cut – one of a kind. The descriptor says that it is lightly aromatic, with medium strength but I cannot taste any topping on it. I settled my bill and put the stash in the car. It was now time to check out my antique malls.
dark twist The first shop had some pipes on display with a rack and jar but the $50 price for what was included – a broken Falcon, a cracked Dr. Grabow, a nylon Falcon style pipe and a bowl without a stem – precluded my purchase. I tried to bargain with the seller for just one of the pipes – a nice little bulldog sans stem but she would not break up the set. That was it for that shop. It has been a great source in the past but it did not deliver today.

The second shop had one pretty burned out Viking for sale and nothing more. The price was not too bad for that one but I did not want another Viking to clean up. I walked around the shop and looked deep within the display cases and under boxes and in cans but found nothing more to catch my eye. It was beginning to look like I was going to strike out. I don’t think I have ever gone home completely empty handed. Generally I find something to add to the refurb box. This time I really needed to find a few pipes as the box is down to the last two pipes and one bowl to refurbish. None of them are particularly exciting so I have procrastinated working on them.

I left the second shop and made my way to the third shop. It was incredibly busy inside with a lot of folks looking at the stock and filling the narrow aisles of the store. I called out my greetings to the owner who has become a familiar friend to me – I have bought a lot of pipes from him over the years. He immediately responded that he had purchased 20+ pipes from a widow recently who was cleaning out her late husband’s pipes and tobacco. I have to say I got a little excited at that point. He took out the pipes and put them on the counter for me to go through. He knows my habits by now and stood back to watch as I assessed what he had purchased.

A cursory glance told me that there were some keepers in amidst the junk. There were several newer Kaywoodies, some newer Williards that were badly burned and chipped with many fills all over the bowls. There was a strange rusticated cherrywood with a metal insert in the bowl and shank. There were some bowls that needed stems but none that really caught my eye. I separated the ones that I did not want from the pile and he returned them to the display.

When I was finished there were six pipes in my pile. The old gent whose collection these came from must have liked certain styles of pipes. There were several pairs of pipes. The first pair that I pulled out was English Made Tinderbox, Liverpool shaped, Meerschaum lined, thin shank pipes with remarkable grain. The second pair was also English Made (the stamping on the right side of the shank is the Comoy’s Circle. They are ¾ bent billiards, shape 215 and are remarkably clean for their age. Both are stamped Royal Coachman Other than a few small nicks they are very clean. The last two pipes are distinct. The first is an apple that is stamped Brentwood Supreme and on the right side London England over 335.The second is an American made Mastercraft pot with a chamfered rim and nice grain. All should clean up nicely and the stems are unchewed.
IMG_6834

IMG_6837
The shop normally marks the pipes at $15 each but as I was looking over my pile and making decisions about them the shop keeper wanted to know if I was interested in pipe books. I said of course and he directed me to a pile of books that had two pipe books in the stack. The first was Jean Rebeyrolles, Collectible Pipes a book I already had so I passed it up. The other was The Pipe Book by Alfred Dunhill. Though I already had this book I picked up another copy because I tend to give them away to friends over time. It is a good read for pipemen. It was in new condition and was marked at half the $25 price inside the cover. I quickly did the math – 6 pipes at $15 each was $90 and the book for $12.50 made the total $102.50 and add to that the Washington sales tax and I was looking at $110 for the lot.
IMG_6835
That was not too bad a price for what was there on the counter but as I was busy calculating the price, the shop keeper said he would take $70 for the lot. I was stunned and did not respond immediately and he looked at me and explained the cost per pipe etc. I quickly mumbled a thank you as I was quite pleased. That meant that the pipes and the book were a mere $10 each. I returned home with the six pipes, a pipe book, six bundles of pipe cleaners, some tobacco and the humidor supplies. I was set for awhile. I had some more pipes to refurbish, a gift book and some tobacco to enjoy while I worked. Not too bad a day at all. It is days like these that keep me going out on the prowl for estate pipes and tobacciana. It never ceases to amaze me what I come home with.

Oxidation – Warning. You’ll Wish You Hadn’t Seen This – by Joyal Taylor (aka holymolar)


Blog by Joyal Taylor

This is the second article by Joyal (known online as holymolar). It is with pleasure that I put this on the blog. Joyal does some great work in restoration and in his own words “You’ve probably realized already that I particularly like restoring stems”. Thanks Joyal for your take on the process of cleaning up deeply oxidized stems. I look forward to more articles on your work. Without further introduction here is Joyal.

Check out the stems on these 3 restored estate pipes. They look OK, don’t they? Polished, shiny, no obvious oxidation.
001
Let’s look closer.

The upper stem seems OK.
002
On the middle stem, is that oxidation near the shank end and also in the bit crease?
003
On the lower stem, how did I miss that oxidation toward the bit end?
004
Let’s turn out the lights and shine a flashlight (at an angle) onto the stems.
005

006

007
HOLEY MOLEY, BATMAN!

Where did all of that oxidation come from?

I’ve got to start all over on these stems.

That deep oxidation can be removed – if you’re willing to spend a lot of time sanding, especially with the coarser grits. Start with a 2 hour Oxyclean bath to soften the oxidation. Then 220 grit wet/dry sandpaper with water. Then follow with 400, 600, maybe 800 and 1000 grit. Finally micro mesh pads (1500-12000), then final polish and buff.

Is it worth it to go after that deep oxidation? Maybe, maybe not. That’s up to you.

Followup on removing the oxidation on the stems.
Since I had already used Oxyclean on these stems, I got more aggressive the second time around. I put the stems in a bleach bath (50% diluted with water) for 1 hour. One of the stems wasn’t done so it went back in the bleach (at full strength) for 2 additional hours. Then I soaked the stems in an alcohol bath for 1 hour to neutralize the bleach smell and taste. Then I spent about 1 hour, on each stem, wet sanding (220, 400, 600, 800 grit) and micromesh (1500-12000). The following photos were taken before carnauba wax polishing/buffing. It was a lot of work but time well spent because the stems feel as smooth as satin to my lips and tongue.
Photo #1

Photo #2

Photo #3

rebornpipes Celebrates Two Years


Two years ago in May when I started this blog I literally had no idea how it would go or what its life expectancy might be. The only thing I dreamed of was to provide a spot online to gather the refurbishing posts and experiments that I was doing in a central place to lessen the number of “Look at this refurb” posts that I was putting on Smokers Forums and Pipe Smokers Unlimited Forums at that time. I know that there are only so many ways that folks can say nice job. My purpose in posting was not to hear the kudos but to disseminate information on an aspect of our hobby that I had come to love. I also wanted to build a community of amateur refurbishers that could share experience, hope and joy with each other in the midst of a common hobby. I remember how hard it was to find the information I sought on how to do some aspect of the restoration of an estate pipe. I would post on the forums, send emails to repair people and generally make a nuisance of myself to find out how to do things.

I truly wanted to have a web spot that provided helpful experiential and experimental information for the people seeking to do their own restoration work. I wanted it to become a place that people turned to for help and ideas but more importantly I wanted it to be a place where more people than just me wrote about my work. I wanted to see a broad range of writers from around the globe share what they were learning and new methods that they had tweaked or developed in the work of refurbishing pipes. I had little or no idea on how to achieve that. One of my daughters had set up blog on WordPress so I had a look and just started posting some of my earlier work. It was pretty much a one note trumpet the day I started it – just me posting what I had learned.

Over the two years I have invited others to post their work as well. Some of them were individuals I had met online or in person and enjoyed reading about their work. Others were readers of the blog who wrote to thank me for what I had posted. I always appreciate the thanks but also am fairly quick to invite submissions for posts. From its early days on the blog has added contributors to the list of writers. I think some of the earliest were Al Jones and Fred Bass. I so appreciate their willingness to step out “where no one had walked before” and submit articles to the blog. Over the years others have joined them on the list. The list of thanks to contributors has grown and continues to grow even today. I have included a screen capture of the list below just to give you an idea of the growth. What originally started with me grew to Al and Fred and I and now the list includes 25 individuals from a broad representation of countries. There are writers from Canada, the US, England, Ireland, Scotland, Netherlands, Germany, South Africa and Poland. The age of the writers is also broad from younger pipemen to old timers who have been pipemen for many years. They represent many walks of life and levels of skill in the practice of refurbishing but they share a common love for the pipe and hobby.
Contrib1

contrib2

contrib3
Since I last updated this list several other contributors have been joined. Sometime very soon I need to update this list and show the new additions. But even with the growing list of contributors there is still room for more practitioners of our art to write up their work and share their processes with the community at large. I hope that in the coming year many more of you will consider sharing what you have learned as you practice our hobby.

While hearing from other refurbishers and reading about their work is something that I have enjoyed through the blog it is not the only aspect that has been a great pleasure for me. I have found that many more people read the posts than contribute either through comments or articles. In the statistical part of the WordPress interface it has been fun to watch the growing readership and see where they come from. The readership of the blog is growing globally. People from nearly every continent are reading and responding to the articles. That has been exciting to see. It is amazing to me to see articles from the blog translated into many languages and see people in the national forums interacting with the methods and tips. It only makes me wish I could spend the time to interact on each of the online communities and enjoy the fellowship of the pipe more broadly.
stats1
The numerical growth in readers that rebornpipes has experienced has been something that I truly never imagined the day in May 2012 when I started it with a few of my articles on refurbishing. I am glad that we seem to have reached a niche that was not tapped before. To show some of that growth, I have included the screen capture below showing the growth in readership/visits over the past two years. In summary, the first year (starting in May 2012) there were 39,646 readers/viewers of the blog. In 2013 there were 131,441 readers and this year, 2014, in the first sixth months the number of readers/viewers is 84,633. It is mind-boggling to me to try to comprehend the extent of the readership of the blog.
stats
It has been great to hear from quite a few of the readers over the years. I am thankful that many of you have taken time to send me an email and let me know what you enjoy and what you would like to see covered. I appreciate the notes of thanks and encouragement that continue to come to me. It has been a pleasure to work on rebornpipes. I am thankful to the readers and all of the ongoing and one time contributors for their willingness to take the time to write about what they have learned and to be willing to pass it on. I only ask that you continue to do so.

In terms of my own work, I don’t think that I will ever stop hunting for and finding estate pipes to refurbish. I am continually on the lookout for pipes needing the attention. Even when my box of pipes for refurbishing is almost empty it seems to almost magically fill up again. Lately even friends in the city drop by for a visit with pipes for me to have a look at or repair. It is something that is now a part of my leisure life, one in which I find rest and pleasure.

Once again, I thank you all for your support. The past two years have flown by so quickly that I can hardly believe they have passed. It seems like only yesterday I was sitting with my daughters dreaming up a name for a blog that they encouraged me to write and now we celebrate two years. Wow. I raise my pipe today and say to you all, “Here’s to yet another great year ahead as we work on the pipes that come our way. Take time to read about, write about and smoke the pipes you are reworking”.

Trying to Remedy a Hot Smoking Peterson Killarney 999


I recently received an email from a friend here in Vancouver about a new Peterson Killarney 999 that he had purchased. He said that though it was a beauty and was quite a good smoking pipe it smoked so hot that he did not enjoy smoking it. He explained to me that when he smoked it the pipe became too hot to hold. He has been a pipeman for many years and never has this issue with his pipes so I knew it was not a technique issue. He explained to me that he had posted about it online seeking advice and everyone told him that it had to be the finish on the pipe. Many suggested that he needed to strip the finish off the bowl, restain it and it would be better. I have learned that there are other causes for a pipe smoking hot. All of them can conspire against a cool smoke. A thick coat of varnish or sealer could possibly be one of those contributing causes but I was just not sure if removing that would cure the issue. We emailed back and forth with questions that I had on the drilling of the pipe, the depth of the bowl, the thickness of the walls etc. He patiently responded to them and finally dropped the pipe by for me to look over. When I got it on the work table and took it apart to have a look I could see that there were multiple issues that would need to be dealt with. Hopefully as each part was addressed the end result would be a cooler smoking pipe.
IMG_6810

IMG_6811

IMG_6812

IMG_6813
The first thing I saw was that the bowl had been over drilled and the entrance of the airway was high on the side of the bowl. This left the bottom of the bowl and bottom sides quite thin. This would need to be addressed. Then I removed the stem and shone a light down the shank. It too had been drilled very high in the shank and the briar on the top of the shank was also quite thin. I know that on the Peterson pipes there is often a reservoir left for collecting moisture but this was not for that. The end of the mortise was smooth and drilling was very high. I had taken a draw on the pipe and found that it was quite restricted so I was not surprised to see the high drilling. The airway in the tenon was significantly below the airway in the mortise. The way the tenon sat in the shank very little of the airway in the stem contacted the airway in the mortise. Finally I looked at the finish on the pipe. The stain was a dark cherry red. The bowl seemed to have a coat of varnish or something on it. Examining it carefully it became clear that it was more of a plastic coat than just varnish – possibly a urethane finish. To my thinking each of these contributed toward making it a very hot smoking pipe. I was not certain that I could do a lot to change that but I could address each of the issues and see if combined the reworking would make the pipe smoke cooler.
IMG_6826
I started with the stem and beveled or chamfered the end of the tenon with a wide funnel. I used a knife to do this rather than a countersink. I wanted to control the angle of the funnel and widen the opening without thinning down the walls of the tenon. I have found in the past that when the airway is high in the mortise, that a funneled end on the tenon can open up the air flow. I believed that in this case the restricted draw could be relieved. Once it was finished I sanded the newly opened funnel to smooth things out and then pushed the stem back in place on the shank. The draw was significantly improved. By opening the airway the flow of air from the bowl would not require as much puffing and pulling by the smoker. The first step in the process was complete.
IMG_6827
I then worked on removing the plastic finish on the pipe. This turned out to be far more difficult than I had expected. I wiped the bowl down with alcohol on cotton pads to see if I could break through the top coat. That did absolutely nothing to break the finish. In fact the cotton pad came away clean other than removing the slight oil build up on the bowl. Once the alcohol evaporated the shiny surface still gleamed unscathed. I wiped it down with acetone to see if that would break through. This time I expected the surface to yield to the acetone. If you guessed that this would do nothing in breaking the surface you guessed correctly. The pads came away white –the finish was not even marred by the acetone. It continued to gleam brightly!

With neither of my previously proven ways of removing the finish working I resorted to a more intrusive measure. I sanded the surface with a fine grit sanding sponge to try to break through the shiny surface of the finish. This took time and care, particularly around the stamping on the shank. The sanding dust that came off was a fine white powder – plastic powder not unlike what I get when I sand a Perspex or Lucite stem. I did not want to sand the briar just the topcoat. I sanded until the whole surface was covered with a fine white dust. I wiped it down with the acetone once again. This time the cotton pad came back with a pink wash. Yes! I had finally broken through the finish. I washed the bowl down and then sanded it again and washed it again – repeating the process until the shine was gone. The acetone worked well after that to remove the remaining topcoat. At this point I dropped the bowl in an alcohol bath and left it for the day while I went to work. In the past when I had done this I would return in the evening and find the finish gone and the briar had a nice clean patina to it so I was hoping for the best.

When I got home I took it out of the alcohol bath and dried it off. The finish was gone! The shiny coat had finally given up. The stain had lightened slightly but the grain was nicely visible. I was surprised to find that there were not any highly visible fills under the plastic coat.
IMG_6814

IMG_6815

IMG_6816

IMG_6817
I sanded the bowl with micromesh sanding pads to remove the minute scratches in the briar left behind by the fine grit sanding pads. I had been fairly careful in my sanding to only break through the top coat of plastic so these were not significant. I wiped the bowl down with acetone on cotton pads after sanding to remove the sanding dust and see where the finish was now. I put the stem back in place and took the following photos to get a look at the pipe at this point in the process.
IMG_6818

IMG_6819

IMG_6821

IMG_6822
I like the way the grain was beginning to poke through the stain. I wiped it down several more time with the acetone and then buffed the pipe with Tripoli and White Diamond to polish and further remove some of the finish. The pipe was looking very good. I touched up the finish with a dark cherry stain to even out some of the light spots on the finish. I lightly buffed it with White Diamond when the stain was dry. I liked the look of things at this point.
IMG_6823

IMG_6824

IMG_6825
I mixed a batch of pipe mud and packed it into the bottom of the bowl to raise the bottom to meet the entrance of the airway in the bowl. I painted the mud around the bottom portion of the bowl to protect it where it was the thinnest. I set the bowl aside to cure overnight. This morning I took the following photo to show the new look of the inside of the bowl.
IMG_6828
With all of the renovations complete the pipe was ready for a final buff and polish with carnauba wax. I took it to the wheel and put multiple coats of wax on it. I wanted it to shine but not have the high gloss shine that it had previously. I finished by buffing it with a soft flannel buffing pad. The new look was good in my eyes – the grain shone through nicely and the stain was more transparent than before. The contrast between the black that had been used to highlight the grain and the red topcoat was nice. The wax gave it just the right glow. Now I am hoping that when my friend fires it up that it will smoke cooler than it did before. Here are some photos of the finished pipe.
IMG_6829

IMG_6830

IMG_6832

IMG_6833

UPDATE:
I returned the Pete to its owner at lunch today. He took it with him to smoke a bit later. I was curious to know if the problem had been solved. I asked that he email me once he had smoked it. I just received and email from him. He reports as follows: “The revision is a HUGE improvement!! It smokes much better — not super cool, but quite acceptable. The draw is definitely better and I think once it breaks in it will be a good smoke! Many thanks again for your work!” So while it is not super cool is not as hot as it was before. Enjoy your “new” pipe.

Cleaning/Polishing the Stem Crease Area by Joyal Taylor


Blog by Joyal Taylor

It is a pleasure to be able to introduce this first blog post by Joyal here on rebornpipes. I read with interest several of Joyal’s posts on Pipe Smokers Unlimited online forum. His love of refurbishing and his abilities were something that I immediately resonated with. When I read the post he made about the use of the sanding sticks and micromesh sanding sticks to clean up the crease on a stem I was hooked. I thanked him for the research and creativity that lead to these new to me tools of the trade. I asked if he would mind writing this up for the blog and this afternoon I received the post. Thanks Joyal. I look forward to reading many more of your posts here and on the forums. Without further introduction here is Joyal’s post.

I’ve smoked pipes for about 30 years. A few years ago, I semi-retired and started looking for hobbies. Fishing is great but not for an everyday activity, at least for me. One day I looked at some of my pipes and realized that they were looking beat up and abused. I tried restoring one but quickly realized that I didn’t know what I was doing. So I began researching pipe restoration and tried again and again. Soon I was fully into it with various tools and dyes. It has become an everyday activity that gives me things to do with all of my semi-retired free time.

I find that the most frustrating area to clean up, on an oxidized stem, is the 1-2 mm in front of the bit. Sometimes oxidation and dirt gets in that area and it’s difficult to get it out. I’m always trying to find better, quicker, and easier ways to do various aspects of pipe restorations. If you don’t need to use needle files and dead edge files to reshape the bit, here’s an alternative to cleaning up the crease area in front of the stem bit, without really altering it.

Before photo of a stem that needs a little cleaning/polishing in front of the bit. There are more dramatic examples but this is the only one I had at this time.
Photo #1
I found some small thin sanding sticks that fit nicely into the area (100,180,240,320,400 grit) http://www.billingboatsusa.com/803-flx0101-mini-hobby-and-craft-sanding-sticks.html
Photo #2
Here’s what the area looks like after using all of the sticks – gently.
Photo #3
Next I polished the area with micro mesh sticks (1,500-12,000). I find that these are easier to use in this small area than the micro mesh pads. http://www.woodcraft.com/Product/2080764/29708/Micro-Mesh-12-x-5-34-Colored-Sanding-Sticks.aspx
Photo #4
These final two photos were taken before wheel polishing/buffing because the shine doesn’t allow for a good photo.
Photo #5

Photo #6
This entire cleaning/polishing doesn’t take as long as it may seem – probably less than 10 minutes.

Refurbishing a Piece of History – A Marshall Field Co. Supreme – English Made


The grain on this one really caught my attention before I even noticed the name on the pipe. It has some amazing grain on the bowl and shank. The sides of the bowl and shank some stunning cross grain that has been highlighted with a contrast stain to make it stand out. The front and back has some quality birdseye grain. The carver did a great job laying out the shape of the pipe to highlight the grain, though I suppose it may merely be a fluke as blocks were turned and cut in the factory. After admiring the grain I turned to look at the stamping on the pipe. It looked like and English made pipe and my mind thought immediately of Comoys both by the shape and the contrast stain on it.
MF1

MF2

MF5
The pipe is stamped Marshall Field & Co. over Field Supreme on the left side of the shank and on the right side it is stamped Made in London England. There is no shape number stamped on the pipe. Since I paid $16 and change + $8 to ship it to Canada, I think I did well on it! The pictures below were included by the EBay seller and caught my eye.
MF3

MF4
Once I won the bid on EBay, I posted a question on Smokers Forums and Pipe Smokers Unlimited, two online pipe forums that I frequent, to see if anyone knew who made the pipe. I had hunches about who I thought were possible makers. But I wanted to see what others thought. I got several responses that confirmed my thinking.

Bill, a reader of the blog and an online friend sent this reply: “Not saying this will help but go to this page and click where it is highlighted”click here” and you can go through the Comoy’s pages and see the shapes. http://search.getitnext.com/beta/mar…arshall+fields Edit: My link didn’t work. It’s funny I clicked on it the first time and there was a write up about a guy who wrote an article about a Made in London Marshall Field pipe. He wrote to the Marshall Field Co. historian and was sent a link to a Comoy’s catalogue with shapes that were very similar. Now when I go back in my search history to click the link it won’t come up.”

Several others commented that Who Made that Pipe should a French Company name Marshal that made pipes. However, this was one made for the department store so I am pretty certain that the French company was not the manufacturer.

Dave, another reader of the blog and an online friend also replied: “I’m going to tack away from Comoy’s and go in a different direction. Here is my thinking, most of the off label pipes I’ve seen by Comoy’s still have the Comoy’s style COM stamp, be they pre-war or post war, and also retain a shape number in the very distinctive Comoy’s font. I’m going to focus on the word Supreme.

Charatan’s, no, Orlik, maybe. Here is a catalog image of the Medium Billiard, Saddle. The “Medium” works out to a grp 3 size pipe. Also the sans serif type font is the type Orlik used. Is this definite, of course not, it’s what makes trying to figure out English pipes a challenge!”
orlmedbill
In searching the web for information I came across an interesting post by the late Mike Leverette who wrote on the Grabow Forum in response to a post on L.L. Bean pipes as follows: “… By the way, all of the big chains carried pipes at one point in time, such as Sears, Marshall Fields, M. Ward, etc. Did any of these carry pipes made by the different Grabow owners? …The only Marshall Fields I have was made by Comoy and takes a paper filter.”

Either Comoy’s or Orlik. That was the overarching thought of others as they looked at this pipe. It also concurred with my thinking. If I put the Comoy’s shape chart up on the screen and compare it to the pipe it could well be a Comoy’s and when I look at the chart Dave shows it could well be an Orlik. Dave’s comments about stamping are interesting to me as I think about the maker. The typeface used in the stamp is certainly very similar to that used by Orlik while the Comoy’s stamping is a typical Serif font. Some of the pipes I have found on EBay have shape numbers that fall in the range of shape numbers for Orlik pipes. None of them fall in the Comoy’s shape numbers that I can find. A definitive answer may be a long time coming but for now I am leaning toward Orlik as the maker of these pipes.

While I may not be 100% certain of the English maker of the pipe it is indeed a Marshall Field pipe. These were sold by the Chicago based department store and chain at least through the 60’s if not longer. Field’s was a huge department store chain that in its Chicago location had reading, writing and rest lounges, restaurants, men’s departments and a broad range of the features of the good life. I still remember my mother taking me there when I was little.
Noname
The pipes seemed to have been graded in a variety of ranges or lines. I am still trying to hunt down information on the various lines of pipes that they sold. I have found several pipes on EBay that bear different line stampings. All have the same style stamping and all have the MADE IN LONDON ENGLAND stamping. I have included the list below to show what I have found so far. I have arranged them in what appears to be in the order from highest to lowest grade as I can determine. I have also found two leather covered pipes that were stamped Marshall Field Smoke Shop and appear to have been made by Ropp. They were identical to the Ropp leather clad pipes that have seen.

1. SUPREME (I have seen both a billiard and a pot with this stamping. Both have a smooth finish and exhibit beautiful straight, flame or cross grain.)
2. SPECIAL GRAIN (The first one I saw on EBay and was a bent billiard shaped pipe, stamped 85. The second on EBay was a straight apple shaped pipe. Gary, an online friend responded on Smokers Forum and posted a picture of a bent billiard that was stamped Special Grain. All were smooth finishes but did not have the same density and grain consistency as the Supreme.)
3. FIELD DELUXE (This was also seen on EBay and was a Zulu or yachtsman shaped pipe, stamped 87. The Marshal Field stamping was in a script which was different than any of the other pipes that I found. The grain was a mixed pattern.)
4. FIELD GRAIN (These were seen on EBay was as well. The first was a smooth billiard with a saddle stem (bearing the shield logo) and stamped with the #6. The second was a sand blast billiard version. On the smooth one the grain was mixed and on the blast it was a deep craggy blast.)
5. STORE FOR MEN 3 GROUP 2 (There was one of these on EBay for sale as well. It was a smooth finish, square shank pot. The grain was mixed and clean.)

All of the smooth pipes were decent briar with no visible fills or sand pits. All the English made pipes that I have seen online were well made and all had the same style of saddle stem. The French made ones all had taper stems and were leather clad.

I will continue to hunt down these pipes to build a picture of the various lines. Any information you may have will be greatly appreciated.

I took the billiard that I purchased to my work table this morning. Before I worked on it I examined it for what needed to be addressed. The bowl had an uneven cake on the inside and did not extend to the bottom of the bowl. The bottom was still clean briar and it went up the sides about ¼ inches. The rim was clean but had a tarry buildup. The inner bevel on the rim was undamaged and showed no sign of over reaming or damage. The finish on the outside of the bowl was clean and undamaged. There were no dings or dents in the surface of the briar. There was an oily buildup on the surface of the pipe. The stamping was crisp and distinct. There were two slight marks on the left and the right side of the shank next to the stem. The stem itself was clean but oxidized. There was tooth chatter on the top and bottom of the stem next to the button. The inside of the stem and the shank were very clean.
IMG_6796

IMG_6797

IMG_6798

IMG_6799
I reamed the bowl with a PipNet reamer and took it back to bare briar. I wanted to remove the buildup on the upper portion of the bowl and provide a clean surface to rebuild the cake. I scrubbed the rim of the bowl with spit on a soft cotton pad to remove the tarry buildup. I also had to wipe it down with alcohol until the tars were gone and the rim and bevel were clean.
IMG_6800

IMG_6801

IMG_6802
I sanded the stem with a medium and fine grit sanding sponge to remove the tooth marks and chatter and to remove the oxidation on the surface. I followed that up with my usual habit of sanding with micromesh sanding pads. I wet sanded with 1500-2400 grit sanding pads and then dry sanded with 3200-12,000 grit pads. I polished the stem with Meguiar’sScratch X2.0 polish and then buffed with Tripoli and White Diamond. I rubbed the stem down with Obsidian Oil and when dry gave it a final buff with White Diamond.
IMG_6803

IMG_6804

IMG_6805
I gave the pipe and stem multiple coats of carnauba wax and then buffed it with a soft flannel buffing pad. The pipe is finished and ready to break in. The grain stands out because of the contrast finish on the pipe and the stem is like glass with the buffing and polishing. To me it looks like it must have the day its previous owner purchased it at Marshall Field’s. If only I had the box and the pamphlets that must have come with it when it was new, it would be an even more amazing pipe.
IMG_6806

IMG_6807

IMG_6808

IMG_6809

A Tale of Two Cigar Holders


Blog by Steve Laug

It was the best of times and the worst of times. I apologize for the literary reference but I could not help myself as I typed the title to this post. It took me to one of my favourite novels. Ah well, my post is nowhere near as interesting a read as that. It involves two of the finds in my recent antique mall grab bag – two very different cigar holders. Upon first glance, looking through the walls of the plastic bag they could have been easily confused as being similar in age and style. They both were amber coloured and mixed among the pipe bowls and stems they look similar.

But once I had taken them out of the bag it became very clear that they were two very different cigar holders from two widely separated times in history. The amber colour was all that they had in common. One was thick and heavy – probably made of Bakelite and showed the signs of age and antiquity while the other was a lightweight plastic obviously from a more recent time in history.
IMG_6562
The differences will become clearer as I enumerate them in the next lines. On the inside they are different. The thick walls of the older one, shown clearly below, show a threaded look and feel for gripping the end of the cigar. They hold the cigar tightly in place and as the cigar is smoked the leaf swells and holds tightly to the holder.
IMG_6564
The second, newer holder pictured below, has much thinner walls on the sides and tip. It is a pressure fit that is not that different from the plastic tips found on inexpensive cigars. It does not have the heft and feel of the first holder. I think it was probably designed as a cheap throw away tip.
IMG_6565
Looking at the two holders from the end the difference is also clear. The tip on the left is the newer one and has a straight slot cut in the plastic. The seams of the pressed plastic cut straight across the sides of the slot. They are rough to the touch and no care was taken to sand them down and smooth them out. The exterior is also thinner and more squashed in shape. The older one, on the left has an orific slot – a round hole in the button that is smooth and does not show signs of the casting. The shape of the oval is fuller and the walls are thicker. The other obvious difference is in the shape of the holder itself. The newer one is round while the older is diamond shaped. The overall effect of the shape is one of substance. The round one can be seen as an extension of the cigar while the diamond shaped one makes a statement – the old holder is not just an extension of the cigar it is an elegant holder of the cigar and will last beyond the cigar it holds.
IMG_6563
In the next paragraphs let’s examine each holder in more detail and measure what each has to offer. The newer holder is made of a thin plastic and is quite flimsy. It is easily squeezed between the fingers and the material is quite flexible. It reminds me of the plastic tips that come on Panatelas or Colt Cigars. It makes me wonder if it was some novelty that came with a box of cigars as a gift to provide them with a tip that kept the end of the cigar from getting soggy in mouth. On the interior of the holder that slips over the cigar there are vertical ridges that run from the saddle on the bit to the opening where the stick sits when it is inserted. These grip the cigar and keep it from turning in the holder. Because of the design the cigar is pressed into place and the ridges cut into the outer wrapper. The diameter of the hole is 5/8 of an inch so it will not hold big stogies. In the mouth it has a very plastic feel – similar to plastic cutlery that is made to be used and thrown away. To my thinking this is a disposable tip meant to be replaced often and lends credence to the idea that it came in a box of cigars. A new tip would be included in each new box.
IMG_6567

IMG_6568

IMG_6570
The second holder is more substantial. It is heavy and seems to be made of Bakelite or some kind of older amberoid substance. It has the look of amber but not the fragility or weight. It too is a saddle stem but instead of being at the end of a round saddle it is diamond shape flattening out to a taper on the bottom and the top portions. It cannot be squeezed between the fingers and the material solid and inflexible. On the interior of the holder that slips over the cigar there are threads, like the inside was tapped. They run around from the saddle for the first ½ inch of the holder. These grip the cigar and keep it from turning in the holder. Because of the design the cigar is turned or twisted into place and the threads turn into the outer wrapper. The diameter of the hole is 3/4 of an inch so it will not hold big stogies. In the mouth it has a very different feel from the other one. It is similar to some of the older pipes in my collection that have Bakelite stems. It is hard like newer Lucite stems and is cool to touch. It is substantial between the fingers and has the feel of a fine holder like some of the older smooth meerschaum cheroot holders. It is meant to be kept in the humidor and reached for again and again.
IMG_6571

IMG_6572

IMG_6574
This afternoon I opened the humidor and took out a cigar that would fit in the holder. It was a Guantanamera Habana. The stick was a perfect fit in the holder. I moistened the end of the cigar, cut off the end cap and then turned the holder on to the cigar. It was a perfect fit.
IMG_6794

IMG_6795
I had just finished the yard work for the weekend and set up a set of chairs on my front porch. I went out and sat down. I toasted the cigar with the lighter and drew the flame into the centre of the cigar. Once I had a good burn going I sat back to relax and enjoy the smoke. I find that a cigar that size can last me up to an hour so I was in for the duration. The tip certainly is older than me though today it may not look like it. It feels good in the mouth, a lot like a Bakelite pipe stem. It keeps the end of the cigar intact and the smoke that drifts into the mouth seems to be slightly cooler than that drawn directly through the stick. It is comfortable to hold and to clench. This one will be a keeper for me.
image2

image (2)

image (5)
I set the cigar down for a moment on the steps of the porch while I moved the chair out of the sun. It was getting to the end of the smoke. It still was cool and tasteful; it had none of the residual moisture that collects in the end of a cigar normally when I smoke it. I smoked it to within a ½ inch of the holder and then took it out and stubbed it out. I was impressed with the dry cool smoke that the mouth piece delivered. I am first and foremost a pipe smoker so the occasional cigar that I have is not something that I really enjoy. I tend to smoke one when I am in need of pipe mud so I collect the ash for that purpose. I don’t often reach for a cigar even though I have a humidor with quite a few good Cuban cigars in it. But I can see that with the holder I may well reach for one more often. Smoking it was more like smoking a pipe. I am sure I will give it some more tries in the future. As for the other holder- I think I will probably end up throwing it away. There is no need to keep the cheap imitation around when I have this good old timer.
image (6)