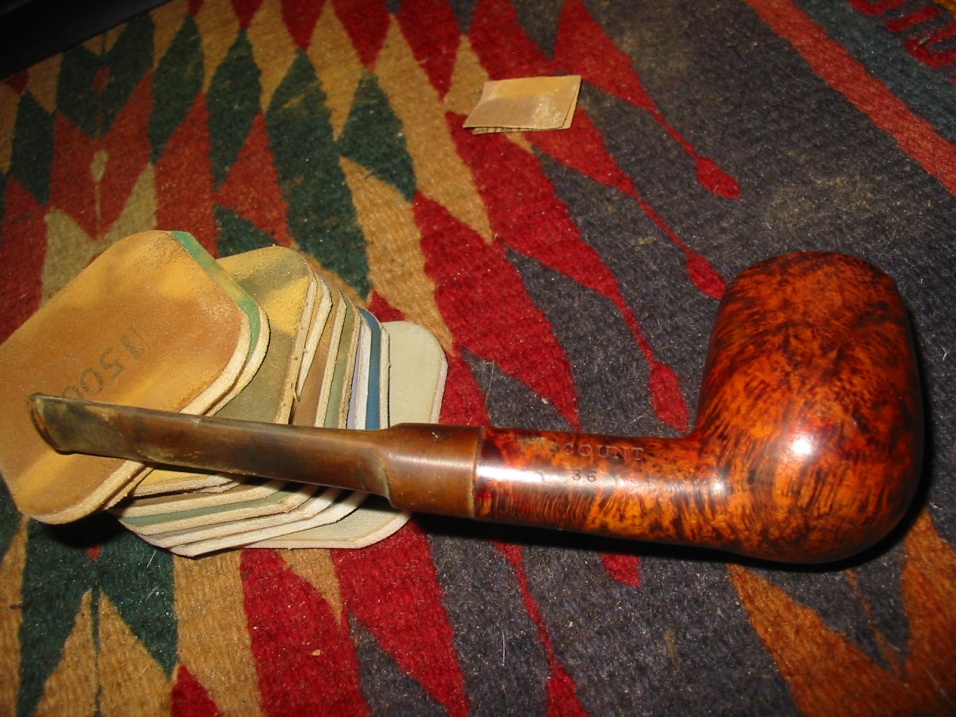
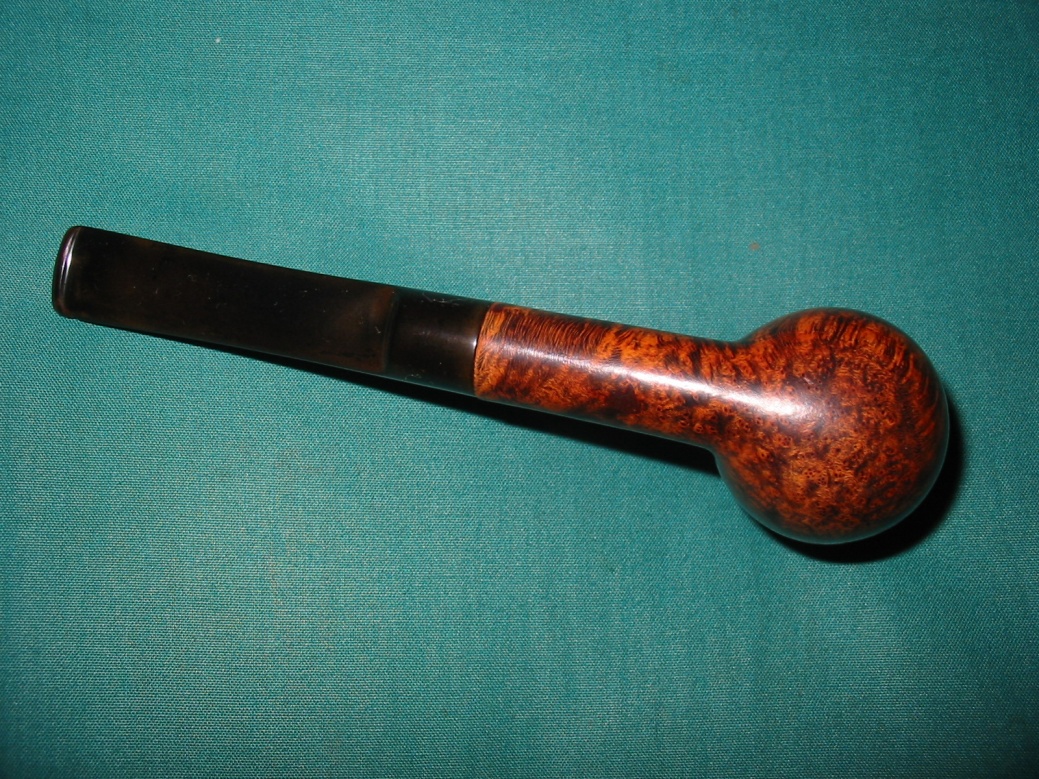
I had this old bowl in my box of pipes to refurb. It needed a stem and it needed a good cleanup. When I took it out of the box to match a stem to it, I noticed that it had some pretty nice grain under the cherry red stain. It seemed like it had a nice dark contrast stain added to bring out the grain and then the red stain was over that. On top of the red stain was a coating of varnish or lacquer of some sort. That topcoat was peeling and the red beneath it was also rubbed off. It seemed like the red stain was more of a wash on top of the bowl rather than one that permeated the bowl. I went through my can of stems and found an old saddle stem that fit quite well. It was badly oxidized but I liked the overall look of the pipe with the saddle stem.
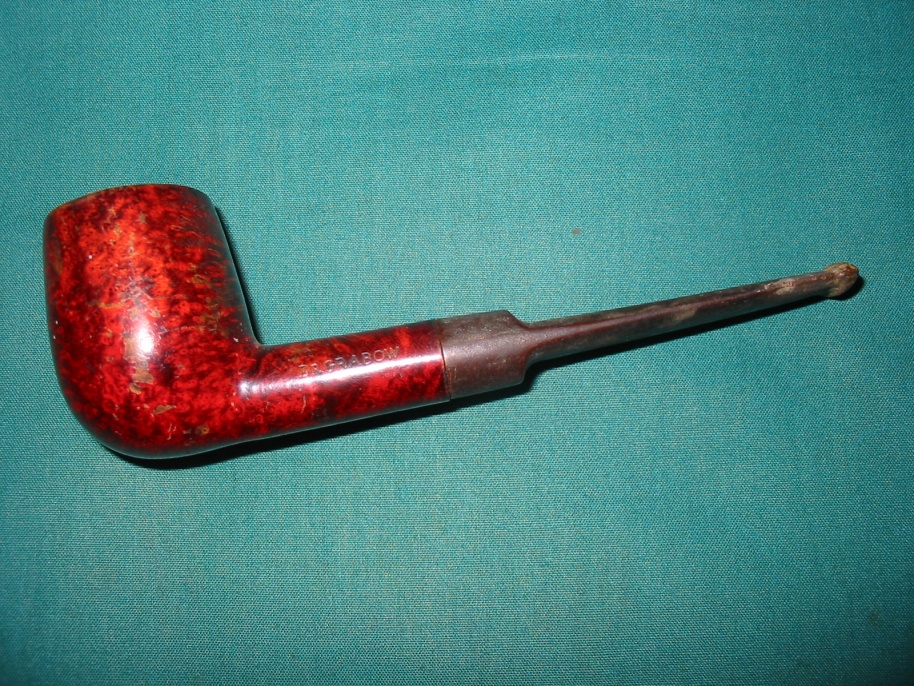
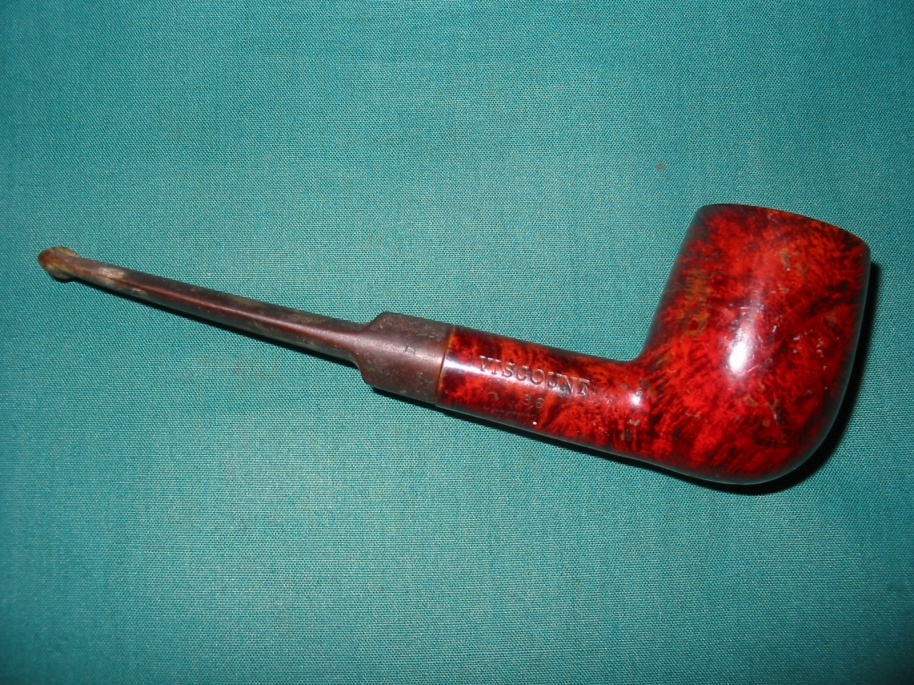

With the state of the finish I decided to wipe it down with acetone to remove the varnish/lacquer finish and see what I could do with the stain. I was not overly concerned as I figured I would need to remove the red topcoat and start over. The wiped off portions of the finish would require a restain. I just was not sure what was underneath the topcoat. Sometimes on these older Grabows there are a lot of fills hidden under the opacity of the topcoats. I was hoping that this would not be the case with this one. I used a cotton pad wet with acetone to wipe down the finish on the bowl. The rim took a bit more work to remove the tars and build up. I used a fine grit sanding pad and carefully removed the grime while leaving the finish intact. I wipe the bowl down with about three pads and acetone. The result is seen in the photos below. The grain and the stain on this one was beautiful. It has a great contrast stain that makes the grain pop and the lighter reddish brown stain provides a soft canvas to highlight the grain. Once the red finish was removed I left the bowl as it was. I buffed it with White Diamond to polish and remove any remaining red portions of the stain. Then I waxed it with multiple coats of carnauba wax. I put the stem in an Oxyclean bath to soak while I continue to polish the bowl and finished cleaning out the interior of the shank and bowl.
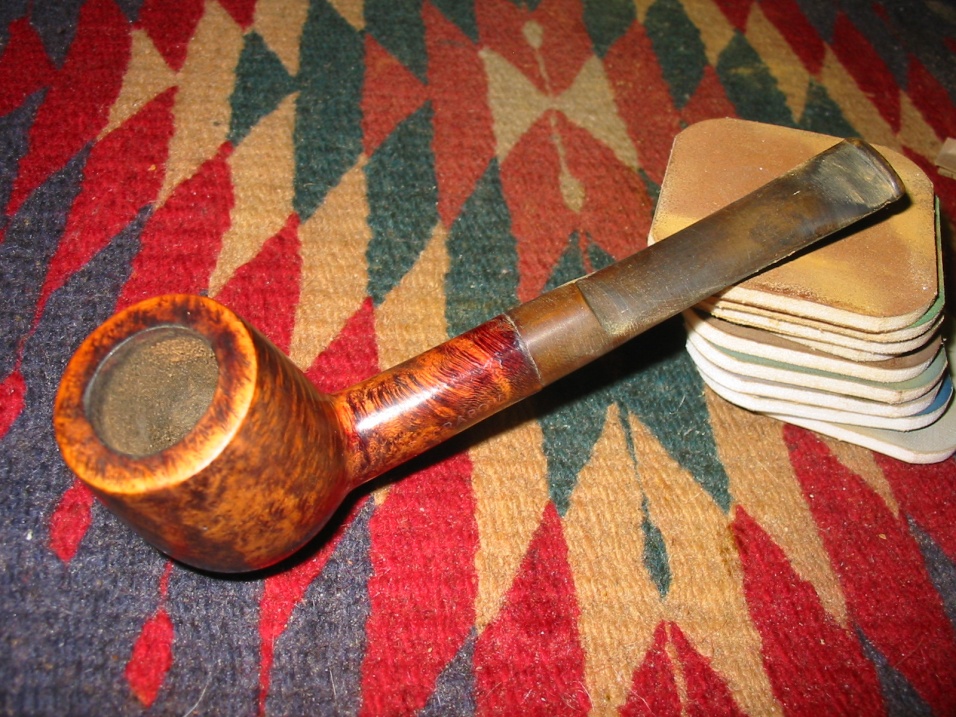

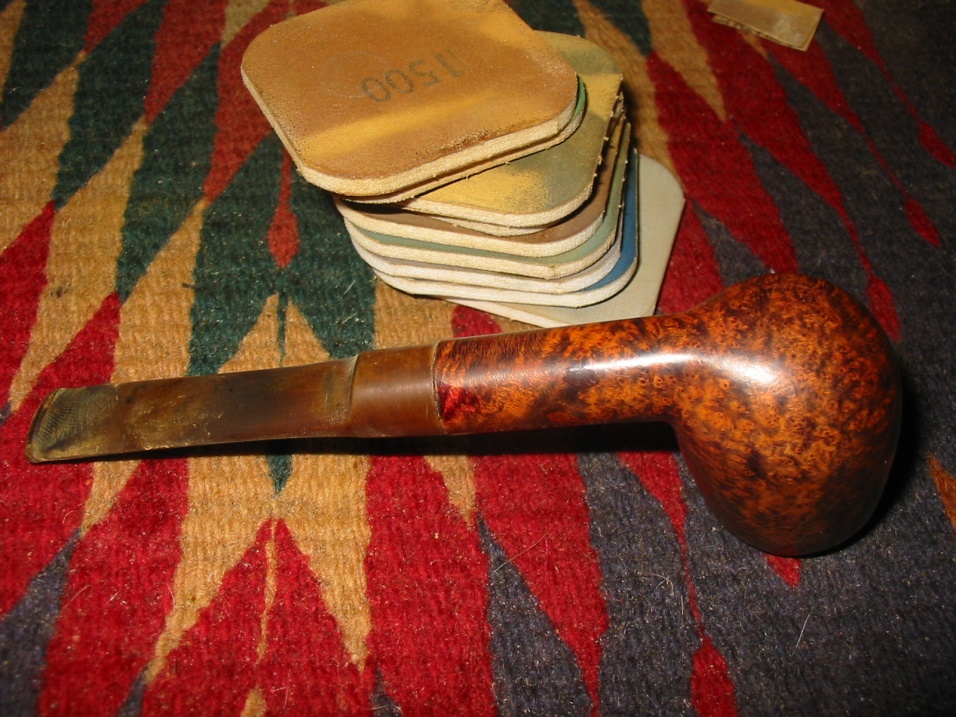
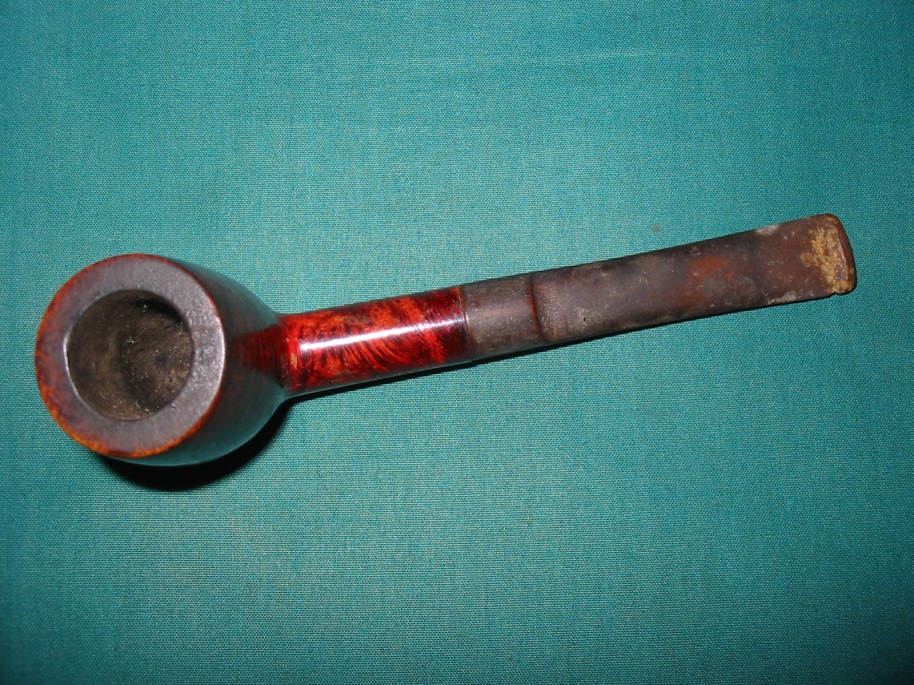
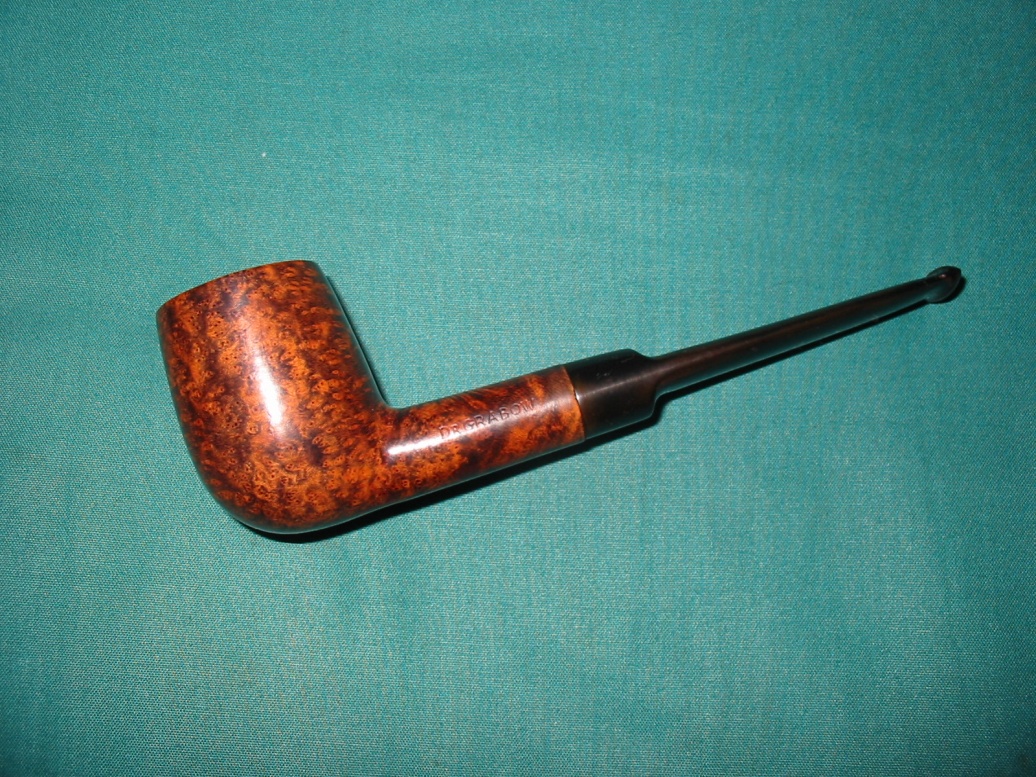
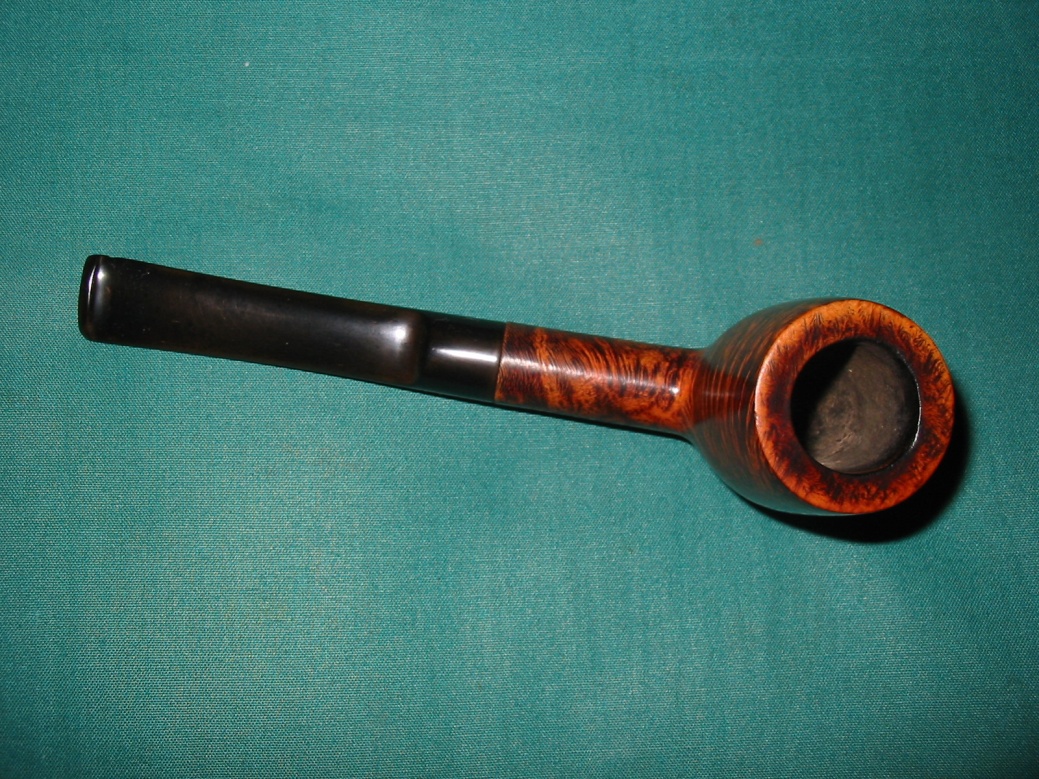
The stem took a lot of work as the oxidation was very deep. I soaked it twice in the Oxyclean bath and sanded it with micromesh 1500 and 1800 grit sanding pads between soaks. There was some deep, stubborn oxidation on the flat portion of the blade – about mid stem. It was very hard to remove. I sanded it with 2400-3600 grit micromesh and then polished with Maguiar’s Scratch X 2.0 polish repeatedly. Eventually the stubborn oxidation came to the surface and I was able to remove it. I then continued to sand on the stem with the higher grits of micromesh sanding pads – 4000-12,000 grit. I find that the higher grits really deepen the shine of the stem. Each successive grit of micromesh pad brought more of a polish to the stem. The hardest spot at the end was the saddle area. In the photos below there still remains a bit of oxidation that I am still working on – this is particularly clear in the photo of the underside of the pipe.
Ah well – here is the reworked Dr. Grabow Viscount. It is ready to load up a bowl for its new inaugural smoke.


Neat grain on that one, another keeper and a job well done!
LikeLike
Super RefurbYou Made The Grain On This Pipe Pop,Classic Look On Finished Pipe,Keep Up The Beautiful Work.
LikeLike