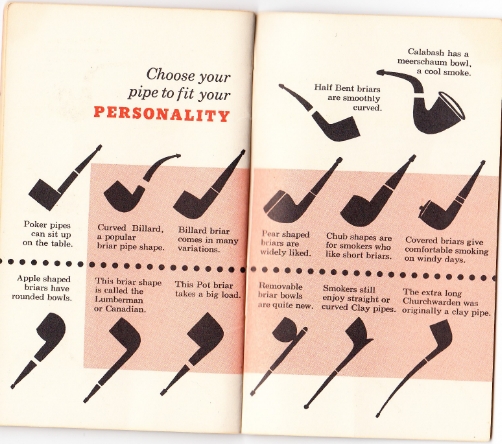
Monthly Archives: August 2012

Pipe Gadgets: A Bakelite Pipe Cleaner Ash Tray


by Steve Laug

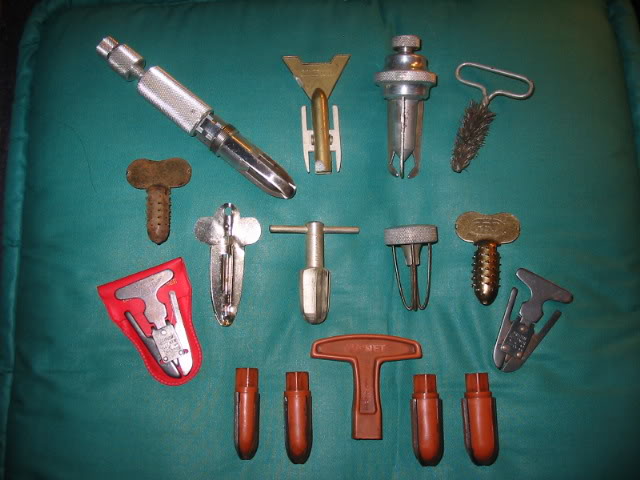
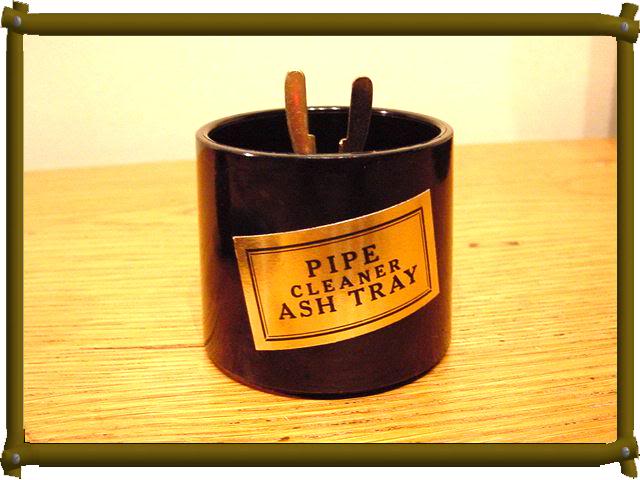
One of the side hobbies that comes with being a pipe smoker and pipe accumulator is the collecting of pipe smoking ephemera. I am always looking for old pieces that go along with pipes whether they be Bakelite pieces such as Wunup Baccyflaps, ash trays or tobacco jars or other interesting pieces of pipe paraphernalia. Something about these old pieces brings to mind quieter times. It makes me wonder if I am just an old soul born in a wrong era! Ah well, I continue to pick up interesting pieces along the way and enjoy having them in my pipe cupboard in my office. The one that I wish to show you all today is a great little piece – a Pipe Cleaner Ash Tray made out of Bakelite.

Image

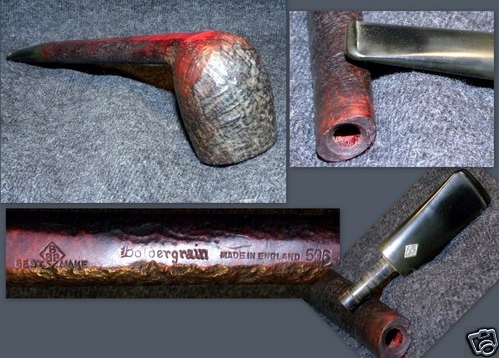
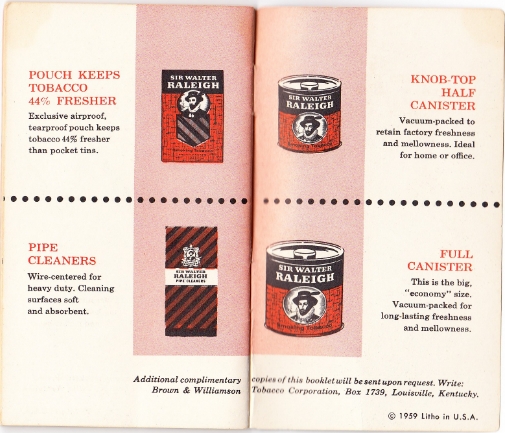
On the bottom of the ashtray there was a patent number cast in the Bakelite. I used that number to research the patent information on this interesting piece of ephemera. One of the beauties of the internet is that you can quickly do a patent search of the United States Patent Office Database. This website is your entry to a world of historical information on some of the pieces that you may have in your pipe cabinet or on your desk. http://www.uspto.gov/patents/process/search/ Once you are on the site you can search for information either by patent number or by the company name that is on the product. Quite quickly you are taken to a Quicktime picture of the patent information. It is there for you to read on line or you can copy it and save it for later reference. Image

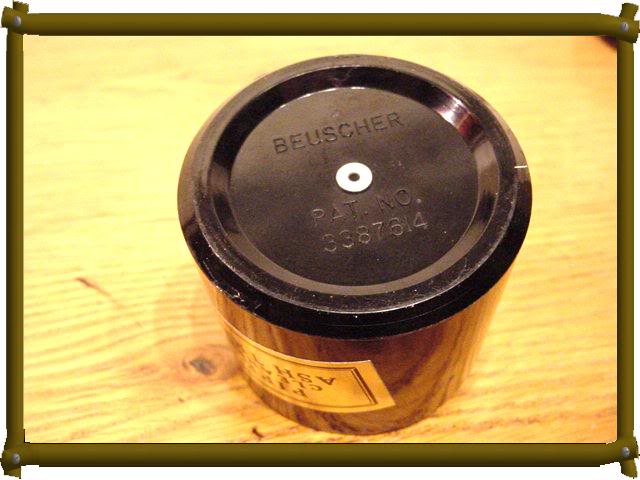
In this case there was indeed a patent taken on the piece by W.B. Beuscher. The patent information included drawing of the invention and also a great verbal description of the piece. I have included them below because they are fascinating information to have at hand for these old pieces. I have used that US Patent Office database for a lot of different patent information from pipes to reamers and always am intrigued by the inventiveness of pipe smokers who are on the hunt for the best tools of the craft for cleaning and smoking their pipes! Have a look at the drawings and the description of this 1966 item.  ImageImageImage

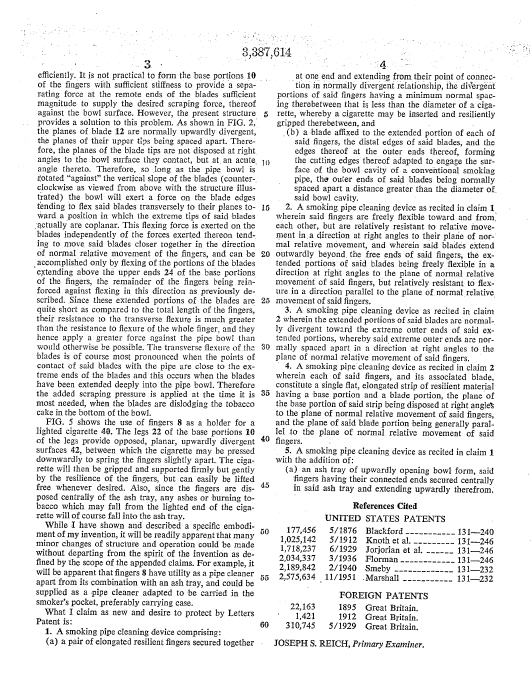
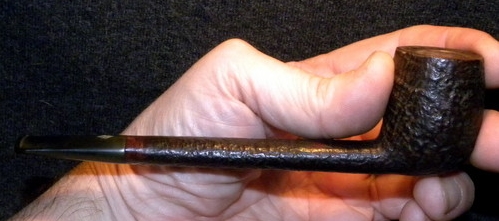
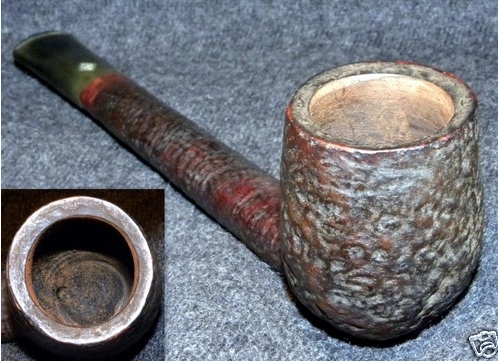
The particular piece that I have is a Beushcer and it is about the size of a coffee or tea mug. It is different from the drawing above only in terms of the ash tray itself. In mine it is a cup and anchored to the bottom of the cup are the patented pair of blades that can be squeezed to adjust to the width of a pipe bowl. The picture below shows the inside of the bowl and the blades a bit more clearly so that you can see the details. Image

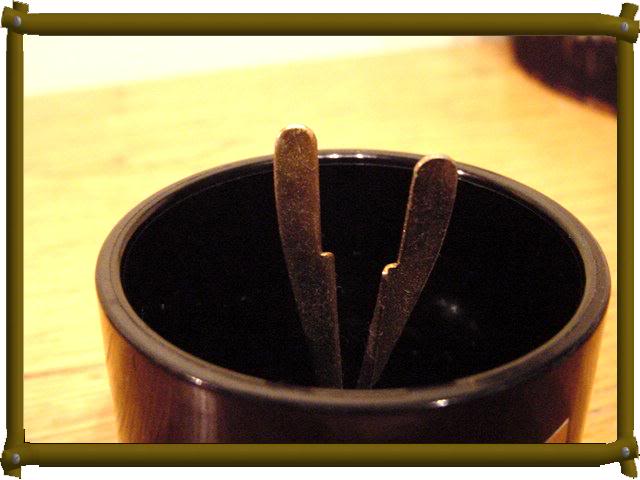
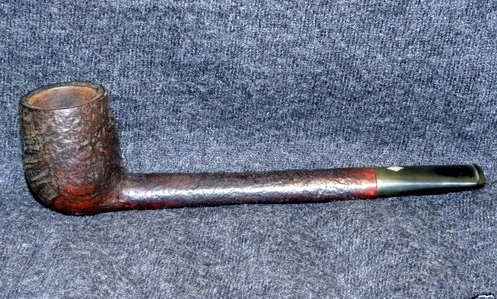
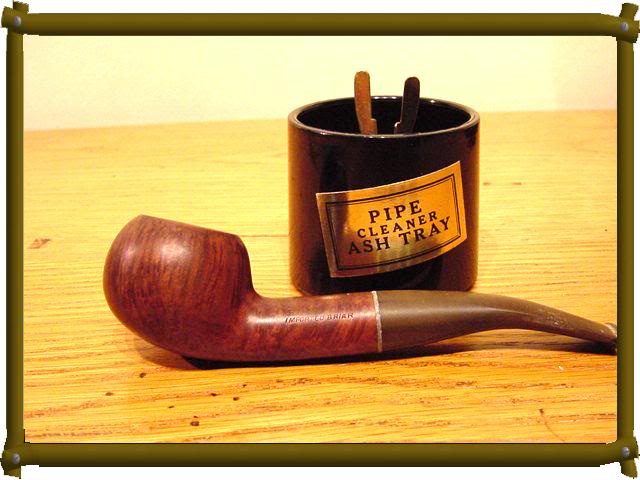
The next series of photos show the ash tray with a pipe that has been fit on the blades. The basic concept of the gadget is that after smoking a bowl of tobacco you turn your pipe over on top of the blades and give it a twist or two and the dottle and remainder of your tobacco is quickly removed into the ash tray for easy disposal. Then is a folded pipe cleaner is used to give the bowl a quick swab, another is run through the shank and stem and you are ready to reload your pipe for another enjoyable bowl in a clean pipe. ImageImage
Image

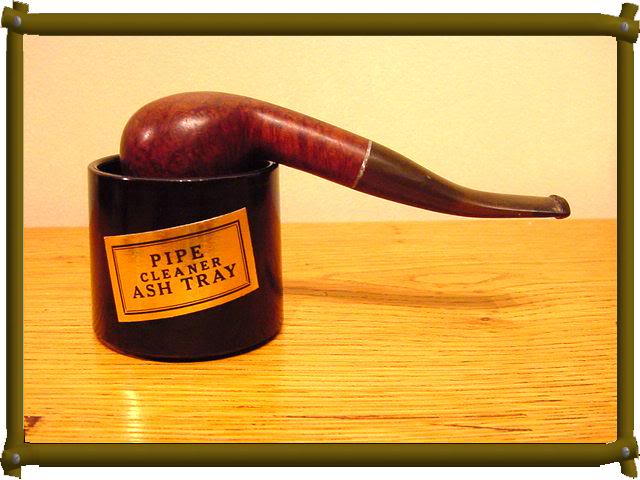
The inventiveness and creativity seen in these gadgets never ceases to amaze me. I don’t think I will ever use this one but it is a great piece of pipe history to have around. The patent data gives a intimate glimpse into the mind of its creator. It gives me the ability to see what the basic idea was and what the inventor hoped to achieve with his invention.

A surprise awaited me when I opened the package and looked at this BBB Boldergrain Canadian


Blog by Steve Laug

When I saw this one show up on EBay I had to have it. Multiple reasons made it one that I wanted to own. The first is that I love the older BBB pipes. I like the way they look and smoke. I like the classic shapes and the old patinas that grace them. Then of course for me was the fact that in my reading and buying estates I had not come across this line of BBB pipes. It was new to me. So I placed a bid on it and won it – it turns out that I was the only bidder so no surprise really.

The first series of four pictures show the pipe as it appeared on EBay. The finish looked to be very worn, the stem oxidized but it did look promising to me. It looked like it would need a bit of work to bring it back to life. The stain would probably have to be redone. The stem cleaned and polished and who knows what the inside would be like. The second picture gave me a bit of hope that maybe the pictures were not quite the whole story. The final picture of the bowl looked like it may have been over reamed and I wondered if there was not a crack in the bowl. But I would know more when it arrived.

Image

ImageImageImage

When the box arrived from England I opened it to see what would await me in terms of cleanup and restoration. You can imagine my expectations and what went through my mind as I cut the tape and the wrapping paper to open the box. When I took the bubble wrap off of the pipe and stem I was amazed at the pipe. It did not even look like the one in the pictures above. The three pictures below show the pipe just after I took it out of the box. The stem was slightly oxidized but the finish was actually not too bad at all. It was nothing that a good buff with some carnauba could not take care of.

ImageImageImage

The next series of photos show what the pipe looked like once it was buffed and the stem polished and the oxidation removed. This probably took the least amount of effort to clean of any of my EBay purchases. Even the inside was very clean. The shank and bowl were clean. I ran a few pipe cleaners through to check it out and they came out spotless. There was no old tobacco smell to the pipe at all – it smelled new. I loaded it up and smoked some older Three Nuns that I had around and enjoyed what appeared to be a very clean pipe. The first smoke was clean and flavourful with no hints of ghosts or residual flavours that I have come to expect from old estate pipes. This one was like smoking a well broken in pipe that had been thoroughly cleansed and exorcised of previous ghosts. It has since become a favourite of mine!

ImageImage

Charles Rattrays of Perth Catalogue


Blog by Steve Laug

I came across this catalogue from Rattrays of Scotland some time ago. I thought I would post it here so that you can share in the history of the great tobacco blends that came out of Scotland.

ImageImageImageImageImageImageImageImageImageImageImageImageImageImageImageImageImageImageImageImageImageImageImageImageImageImageImageImageImageImage

I Guess I Collect Pipe Reamers


Blog by Steve Laug

One of the side hobbies that came with collecting pipes was the collection of pipe reamers. I love the creativity and inventiveness that went into each one in my collection. I use many different reamers in the process of refurbishing pipes. It seems like I always need one that is shaped a bit differently than the one I am using so I reach into my box of reamers and almost certainly I will have one that fits the bowl size and shape.

Image

In the top row from left to right – a KleenReem reamer, an Atlas Rocket, A Rogers Rocket, and bristle brush on a handle. The KleenReem is one of the reamers that I use almost all of the time. It is adjustable and has a built in drill bit that work well in cleaning out the shank. The Atlas Rocket is spring loaded and work in both conical bowls and U shaped bowls. I use it on lightly caked pipes that I am cleaning. The Rogers Rocket is a bit of overkill but works well on U shaped bowls as the blades are adjustable. The steel bristle brush is very good for just knocking off lightly coated bowls and as a finish to bowls that I have reamed.

The second row from left to right – A Hedgehog Reamer, a no name folding reamer, a Dunhill T handle reamer, a spring steel blade adjustable reamer, a GBD reamer. The Hedgehog and the GBD reamer are similar – they are a steel bullet shaped end with a key top that has sharp metal spikes all around it. These two I rarely use as they just seem too brutal. The no name reamer is really nice for narrow conical bowls and reaches to the bottom of the bowl. The spring steel bald reamer is great as an initial field ream of the pipe. The Dunhill T handle reamer I have used to finish a reaming of many pipes. It seems to be sharp and is capable of smoothing out the cake and bowl walls to a nice finish. The spring steel blades adjust to fit any bowl size or shape.

The bottom row from left to right – In the red package is a British Buttner reamer and on the far right bottom is a second one. These two I generally have with me when I am travelling and on the prowl for estate pipes. They work great on pretty much any pipe bowl to give me a good cleaning before I bring them home to the shop. Care must be exercised as they can easily make a bowl lose its round shape if you do not hold it vertically when you turn it. In the centre at the bottom is my favourite reamer – a PipNet reaming set. It includes a T handle and four heads of different sizes that each has four blades embedded in the plastic. These can quickly be changed from size to size and any bowl is easily reamed. They do work best on U shaped bowls.

I think since I took this picture I have picked up several more reamers for the collection but these give the basic idea of what I use in the process of a refurbishment. Keep an eye open for reamers while you are out and about in the shops looking for estate pipes or on EBay looking for pipe lots. You never know what kind of great tool you are going to find. If you have some that are not in the picture above and want to part with them drop me a line or comment on this post. We can work something out!

Restoring a Pair of Old Yello Bole Bamboo Pipes


This refurbishment involved two old Yello Bole Bamboos and it was a pleasure. There was a time I did not like bamboo shanks on pipes. They seemed to always be clunky and cumbersome to me. However I have picked up several old ones lately – these two older Yello Boles and Kaywoodie Mandarin. They have changed my opinion of the older bamboo pipes. These old timers have a patina and a spider webbing in the bamboo that lends them age and an aura of being ancient.

The first one came to me in dire need of a thorough cleaning. The bowl was heavily caked and dirty. The finish was bubbled and spotty. The bowl literally had cob webs in it. I wiped out the cobwebs and reamed the bowl. I cleaned out the airway in the bowl and shank with many pipe cleaners and a shank brush dipped in isopropyl alcohol. I scrubbed the outside of the bowl and the bamboo with Murphy’s Oil soap. I wiped off the grime. I then carefully wiped down the bowl with acetone and a cotton cloth to remove the ruined finish and clean the surface of all varnishes and stains. Once done I restained the bowl with a medium brown aniline stain and buffed the bowl and shank. I coated the bowl and the shank with several coats of carnauba wax and buffed with a flannel buff to bring out the shine.

The stem was pretty oxidized and brown. I soaked it in Oxyclean while I worked on the bowl. When I had finished the bowl I took it out of the soak and used micromesh pads to remove the oxidation. I used my normal regimen of pads from 1500-6000 grit and then put it back on the pipe and took it to the buffer to be buffed with Tripoli and White Diamond. The black of the stem came back very well. I coated the stem with Obsidian Pipe Oil and then wiped it off and buffed it with several coats of carnauba wax.

ImageImageImage

The second one is a darker bowl and a bit different shaped pipe. The one above was more of a pot shape while this one is a billiard in shape. The first had a three knuckle piece of bamboo and this one had a two knuckle piece. The bowl on this one was also in rough shape. It needed a thorough cleaning as well. I removed the grime from the outside of the bowl and scrubbed it and the shank down with Murphy’s Oil Soap as I did the previous one. The bowl was reamed and cleaned along with the shank and airway with pipe cleaners, shank brushes and isopropyl alcohol.

The finish on this one was not in as bad shape so I merely washed it down with isopropyl and then polished it with the buffer using White Diamond and then I gave it several coats of carnauba wax. The bamboo also had a darkening patina on it that I did not want to damage or change so I carefully wiped it down with the undiluted oil soap (not leaving it on the bamboo but merely wiping it down with a soft cloth). I then waxed the bamboo with several coats of wax.

The stem was also pretty oxidized and brown. I soaked it in Oxyclean while I worked on the bowl. After I had finished the bowl I took it out of the soak and used micromesh pads to remove the oxidation. I used my normal regimen of pads from 1500-6000 grit and then put it back on the pipe and took it to the buffer to be buffed with Tripoli and White Diamond. The black of the stem came back very well. I coated the stem with Obsidian Pipe Oil and then wiped it off and buffed it with several coats of carnauba wax.

ImageImageImageImageImage

Demuth’s of Lancaster, PA History


This is another older pipe booklet that I have a copy of here. I wanted to post it as well to give more data and pipe history to those of us who enjoy reading that kind of thing. Demuth’s must have been an amazing store in its day! Anybody know if it is still with us?

ImageImageImageImageImageImageImageImageImageImage

Astley’s Pipe Catalogue


Blog by Steve Laug

This is an older Astleys of Jermyn St. London pipe catalogue that I had around. I thought I would post it here so you all could enjoy a bit of the history of our hobby. Note the many shapes and shape names that are in the catalogue.

ImageImageImageImageImageImageImageImageImageImageImageImageImageImageImage

Reflections of an amateur refurbisher


This week after seeing George Dibos’(of Precision Pipe Repair) three part post on cutting a stem from rod stock that he shared on Smokers Forums I have to say that I am left to confess that I am truly an amateur refurbisher. I am not downplaying the work I do or the pleasure I get out of my craft but only wish to acknowledge that there are true masters of the craft. George is truly a master at what he does. His careful attention to minute details of repairing pipes makes his refurbishments some of the best in the business. He is able to replicate stems that are incredibly matched to the originals. I am in no way negating the value of doing the work ourselves but it is acknowledging those who are leading the craft and creating beautiful work. I stand in awe of him and others like him who make this work look so easy. I must say that in comparison to them I feel a lot like a bush mechanic in the company of truly gifted mechanics.

I have no trouble acknowledging the fundamental difference between the work I do and what these gifted individuals in the pipe restoration/repair community do. It is truly no different than recognizing the difference between artisans who carve pipes as a livelihood and those who do it as a spare time hobby. Both are artists in their own right. To a varying degree there is a difference in the skill level, if not by natural gifting, certainly by sheer volume of practice. The same is true with pipe refurbishment. Those who have well developed shops, days focused on the process of pipe refurbishment, and skill and gifts in using the tools that they have will certainly have more carefully honed skills than the armchair or weekend hobbyist. This in no way makes light of either one. Both are integral parts of the hobby we enjoy.

I don’t have the tools, the space nor the skill set to do the kind of work that George and others like him do. I will probably never be the kind of individual who does what they do because, bottom line, to me it is a hobby and something I do for relaxation and not a vocation. I use what I have to do what I can and invent what I need as I go along. Part of the joy of the hobby for me is not just doing the work in the best way I can, but always learning new and better ways of doing things. I am a committed lifelong learner who has a hungry mind that is never satisfied with what I know and is always looking for new ways and new information. I love the creative process of refurbishment in that I can continually be challenged to work “magic” on new pieces that come across my desk. But another important part of the joy for me is the task that I have taken on willingly and freely to pass on what I learn to others in our hobby. It is a joy to see others take what I have learned and surpass me in their skill and expertise. To learn tricks from those who have learned from me is part of why I started the reborn pipes blog. I don’t just want to share what I have learned, I also want others to pass on what they have learned and their own refinements on the processes they experiment with. That is why I invite others like Al, Chuck, Fred, Rob, Ed, Bryan and more who share the love of reclaiming old briar and giving it new life.

For me the blog is a way we all can continue to learn from one another, share common ideas and issues and seek to understand how to address them as we work on the pipes on our desks. We can write about what we do and have others try it, refine it and pass on their knowledge. Thus, we create a living “school” in which to continue to develop our craft. It is a place for those of us who are amateur refurbishers, who love to tinker, love the process and the pipe, to continue to learn from each other. Lately I have been using Skype, an online web communication tool, to meet with individuals and work on pipes together. It is quite amazing to talk and work real time with another person on a pipe that they have on their work bench. It works with video and audio so that you can literally look at the pipes you are talking about. Worst case scenario Skype has an instant messaging component that you can type communications between several who are working on pipes. In my work I have used it with groups to have virtual meetings and can see that working really well to have a shop time gathering. I have written an article on one such experience and Part 1 of it was printed in the August issue of Pipe Smoker Unleashed Magazine – http://www.pipesmokerunleashed.com/magazine/august2012.html and is on the blog as a post. The second half of the article will be in the September issue and will soon follow on the blog. Skype provides a real time tool that we can also use to consult with each other on pipe repairs before and as we do them. This is a venue for us to use that is rich with possibilities. I am aware that others use “You Tube” and make videos of their work, but I am reticent to venture into that arena. I don’t know why, as I am sure it is helpful, but it just is not something I am interested in doing. Others may want to do videos and I can easily add them to the blog or they can start their own blogs.

As I close these reflections I have to say that when I look ahead at the future of pipe restoration and refurbishment I am excited to think of all the possibilities and all that there is yet to learn from one another. I also remain in awe of the calibre of work and craftsmanship of those like George. I delight to see the product of their skills and observe so that I can learn as much as I can in the process from them. I will always have to personalize their methods to work on my smaller scale of refurbishing but that too is part of the process I enjoy. I tip my hat to the masters and know that I will probably not live long enough to even come close to that kind of workmanship. However, I take my place proudly in the company of those who tinker at refurbishing and share their love of all things pipes with one another. My plan for the near future is quite simple, I will continue in my tinkering until I am no longer able. Why? Because it gives me pleasure!

Image

A Quick Refurb – Yello Bole Dublin


I picked up this older KBB Yello Bole Dublin on eBay. It was stamped KBB in a cloverleaf, then Yello Bole over cured with real honey and then Imported Briar. I am working on the assumption that it was made shortly after WW2 with the imported briar stamp to differentiate it from the old Yello Boles made during the War from Manzanita or Mountain Laurel. http://pipedia.org/index.php?title=Yello-Bole

It was in far better shape than the pictures on the auction showed. It was dirty from dust on the outside. The bowl was dusty and cob webbed on the inside but it had been only smoked part way down the bowl. The old Yello Bole Honey Cured coating was still visible in the bottom half of the bowl. I removed the stinger apparatus, cleaned the stem inside and out (small tooth dent on the underside of the stem). Reamed the upper half of the bowl just gently to remove the bits of tobacco and beginning cake on the top half of the bowl and swabbed it out with a pipe cleaner dipped in alcohol. I scrubbed the outside of the bowl with Murphy’s Oil Soap, dried it off and gave it a light coating of stain add a bit of depth to the pipe. Here is the finished product.ImageImageImage

Sir Walter Raleigh Pipe Care Booklet 1959


Blog by Steve Laug

I was given a copy of this little booklet that used to be given out by Sir Walter Raleigh with their tobacco or with coupon pipes I believe. It is a great little piece of history so I scanned it and have posted it here for you to read and enjoy. All the pages are scanned so they are pictures instead of text.

ImageImageImageImageImageImageImageImageImageImageImageImageImageImage