by Steve Laug
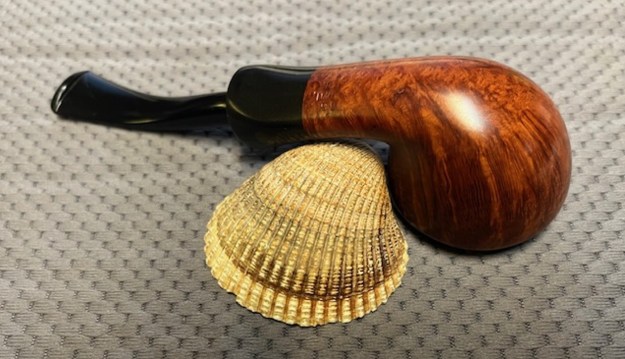
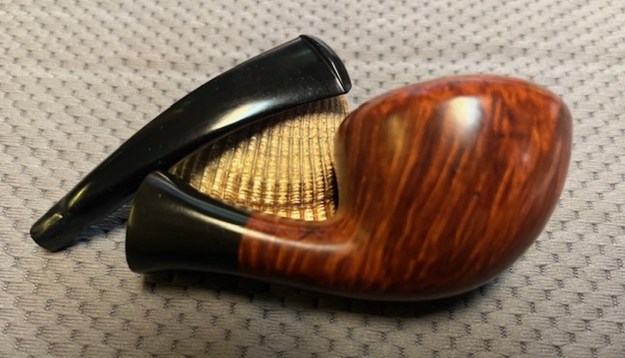
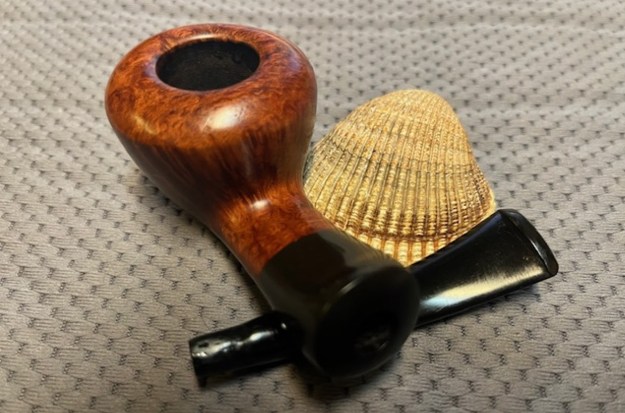
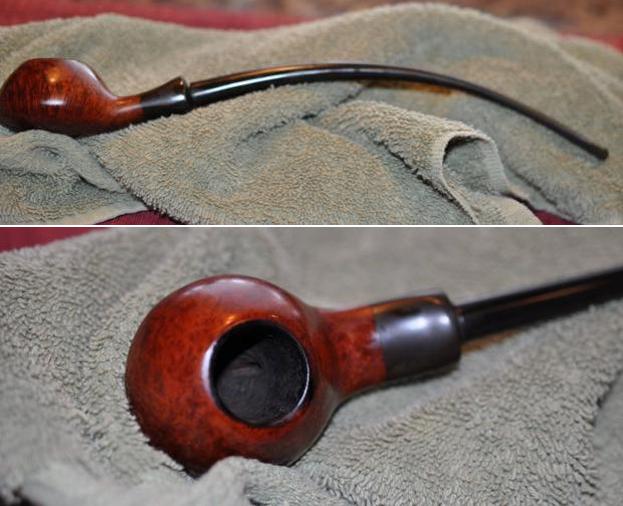
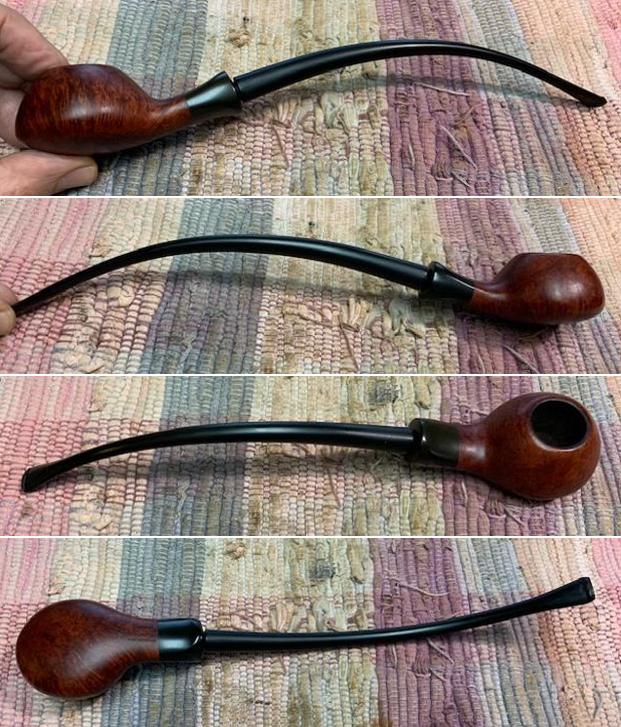
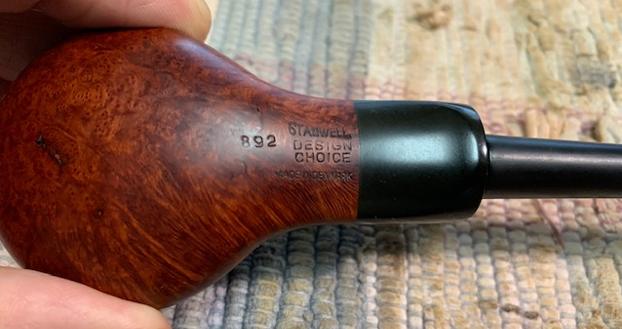
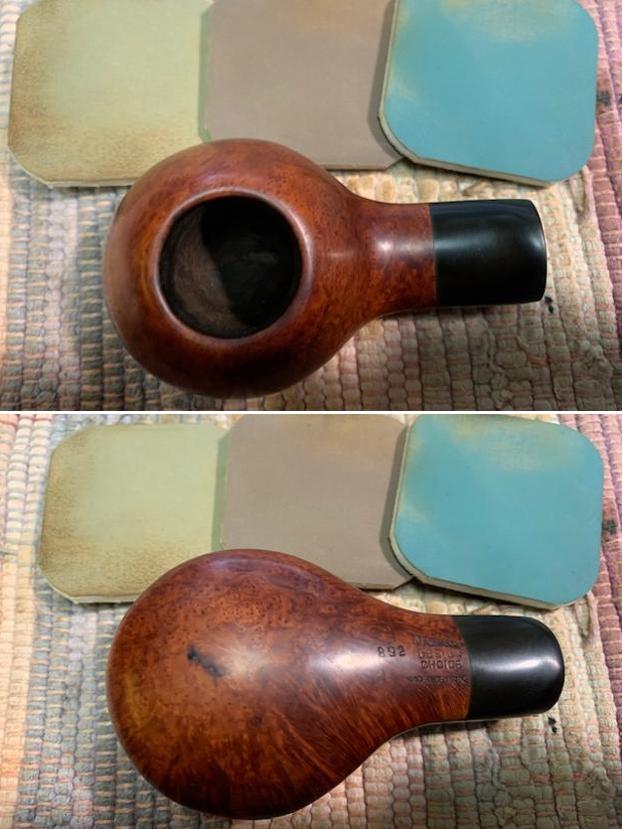
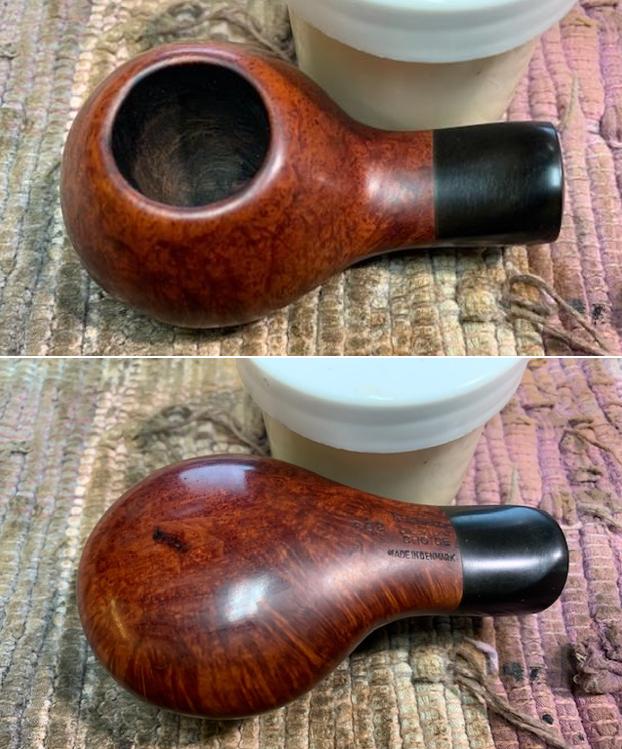
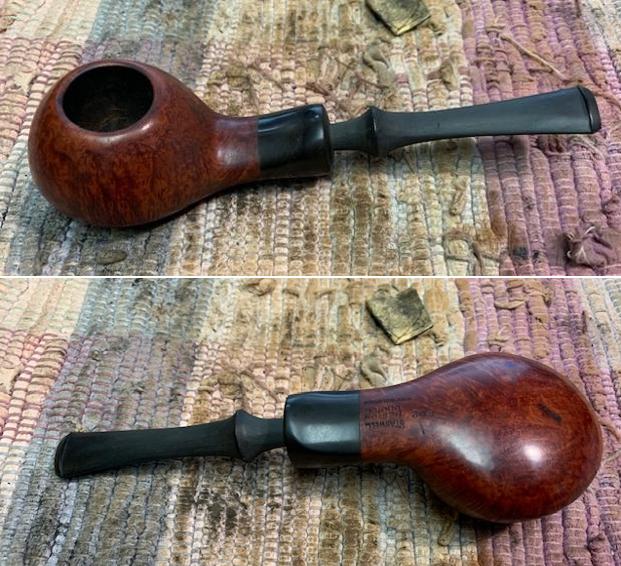
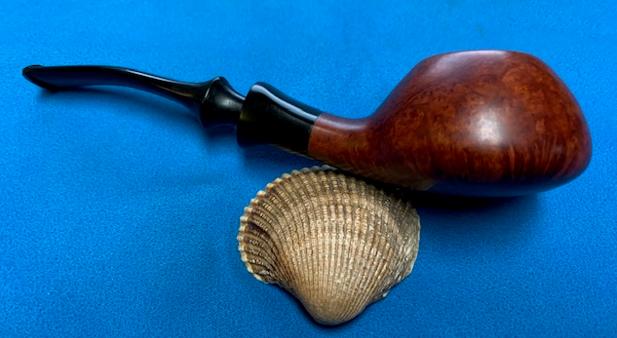
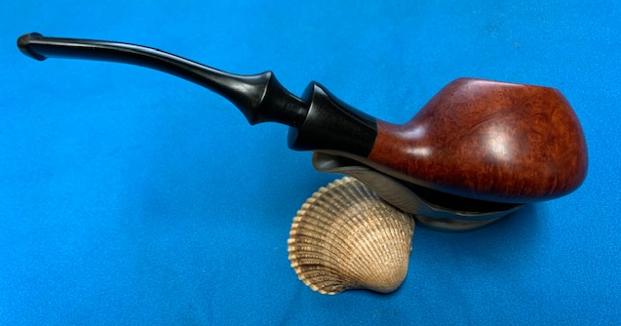
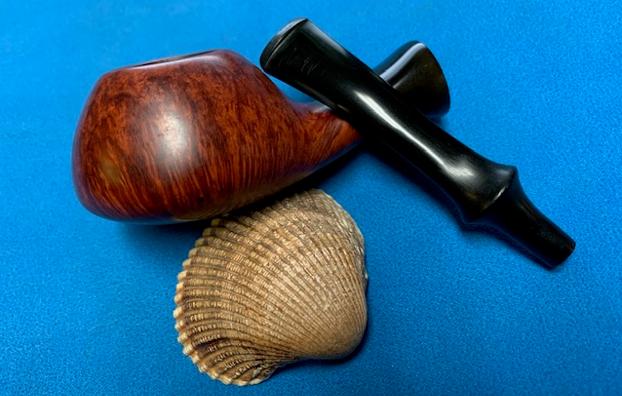
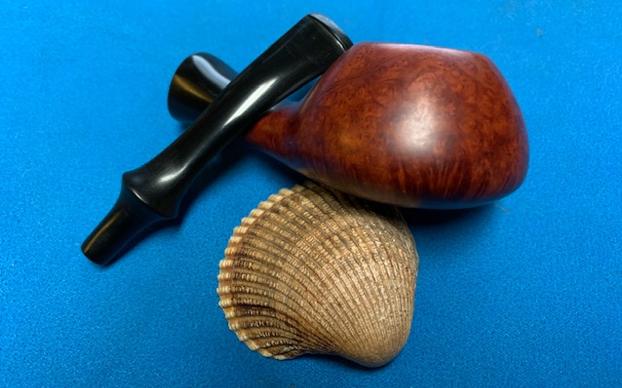
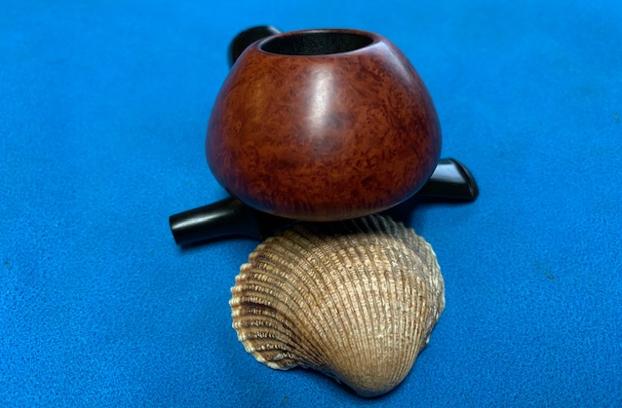
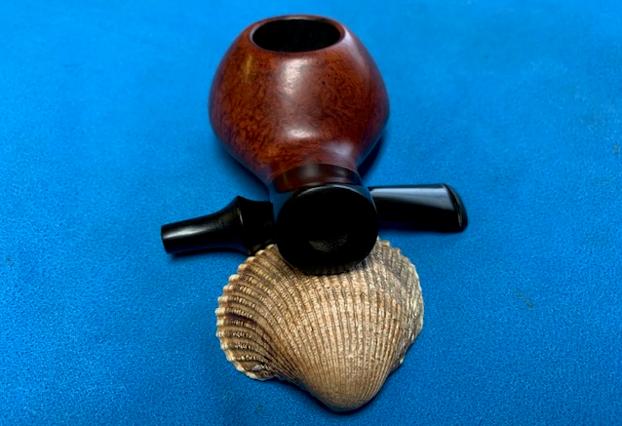
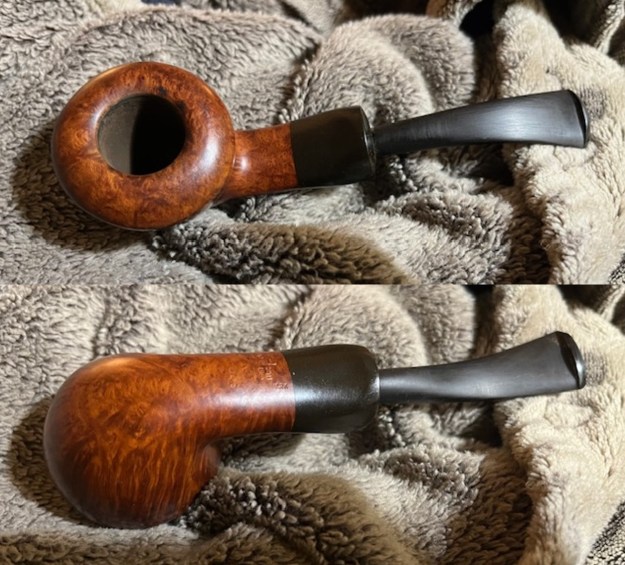
The next pipe on the table is nice looking Stanwell Danish style Pot that I decided to restem. I cleaned up the bowl and matched a stem with briar bowl and vulcanite shank extension. It is a cleanup and restore and gives me a break from the routine of my other work on pipes. This bowl has a classic Stanwell look from the 1960s and 1970s. The finish was a bit dull and lifeless. It showed promise under the grit and grime of the years. It was stamped on the underside of the shank and read 866 [over] Stanwell [over] Design Choice [over] Made in Denmark. The bowl had a thick cake and some lava overflow on the crowned rim top. The bowl also had some dust and oils ground into the finish of the bowl. The vulcanite shank extension is lightly oxidized. It is a pretty pipe with some great grain and I am hoping to match a nice stem to it. I took some photos of the bowl before I started my work on it.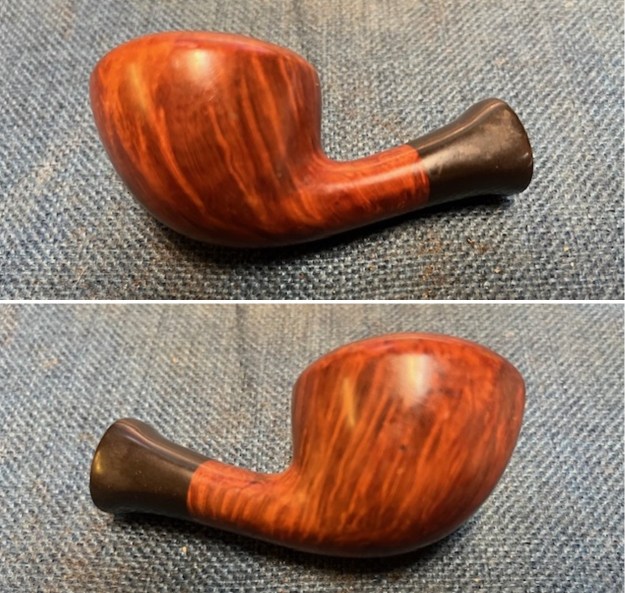
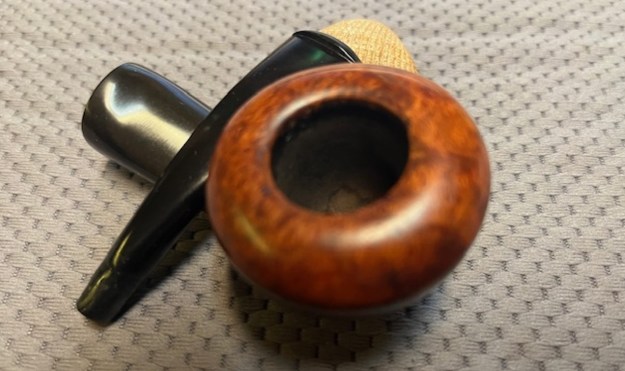
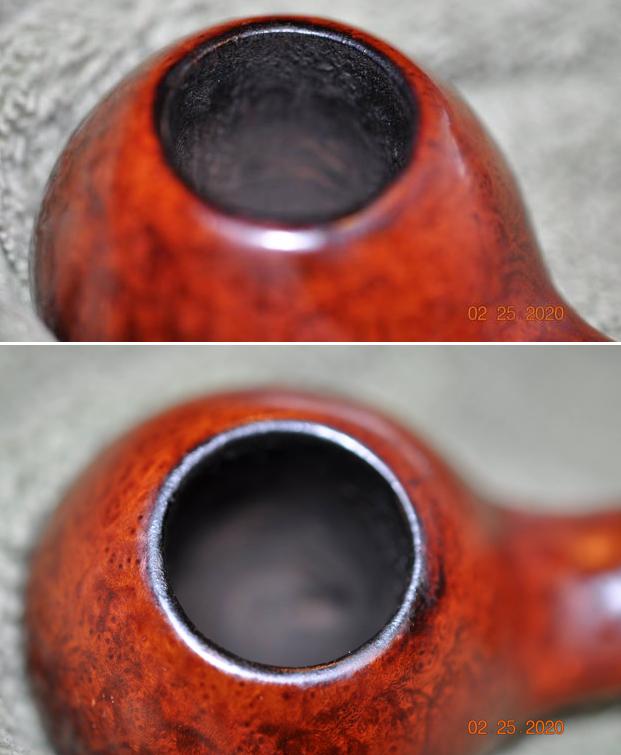
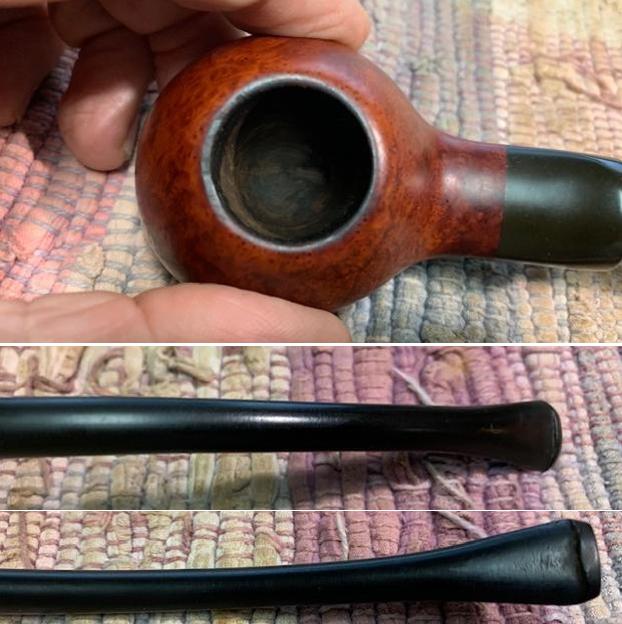
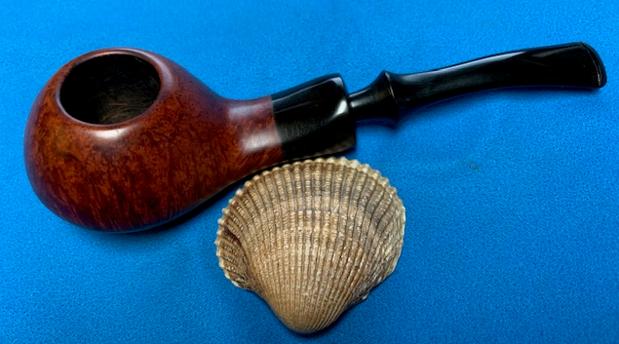
 I took a close up photo of the rim top and bowl to give more of a sense of what I see and noted above. It is a dirty pipe but seems to have no damage on the rim top or edges.
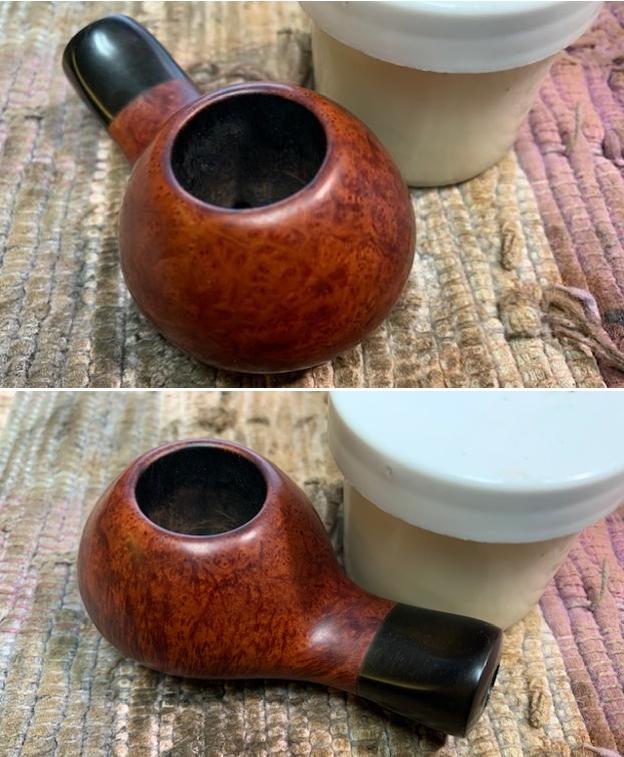
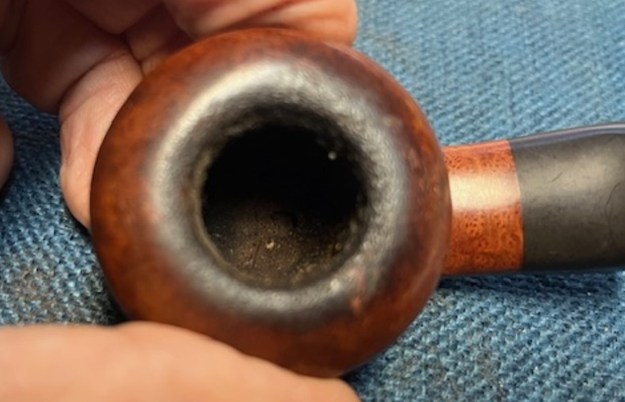 I tried to capture the stamping in a photo. It is clear and readable as noted above. There are some faint spots on them but they are still readable.
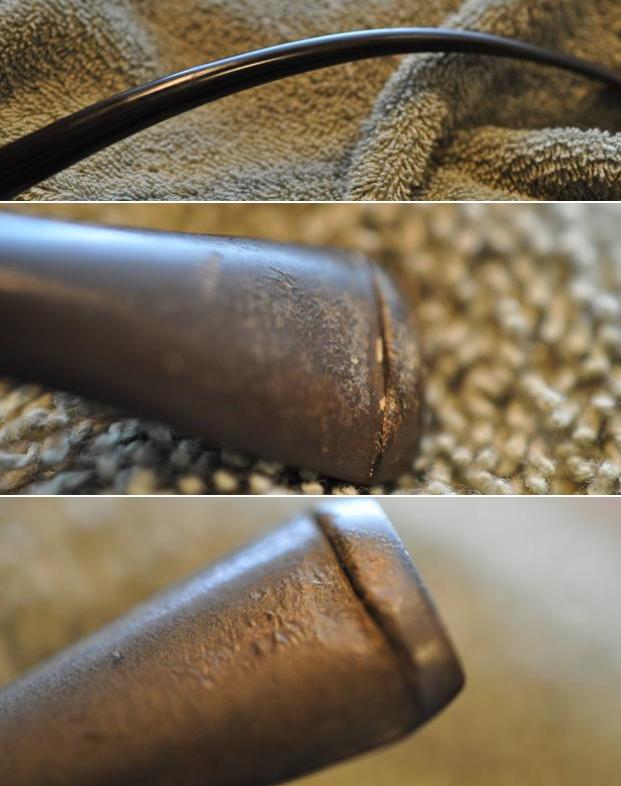
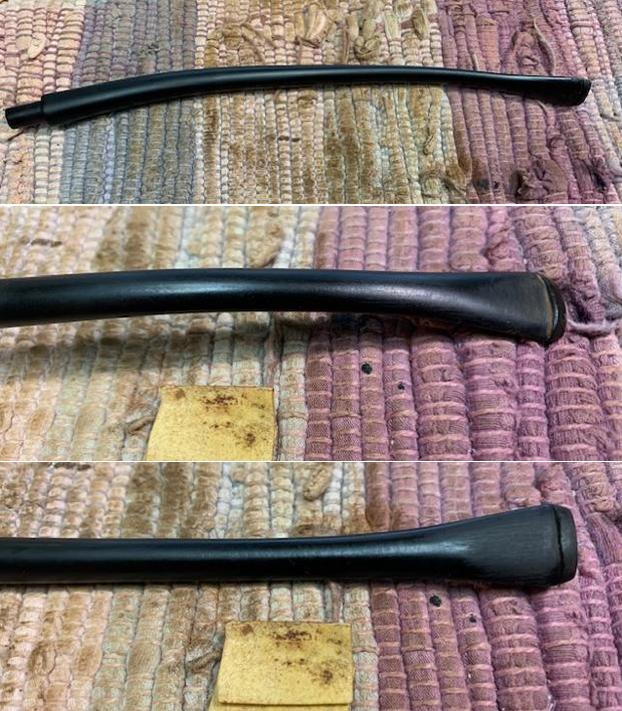
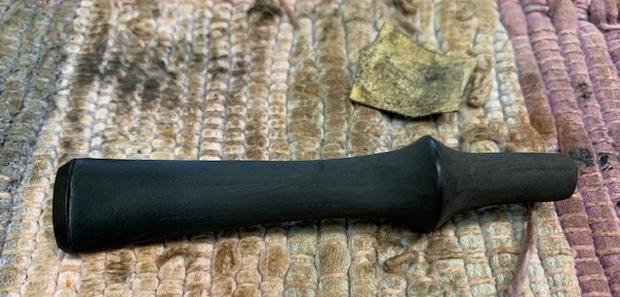
 I found a stem in my cans of stems that would work well with the pipe. I would need to clean up the tenon end a bit and smooth it out for a clean fit but I think it would look good!
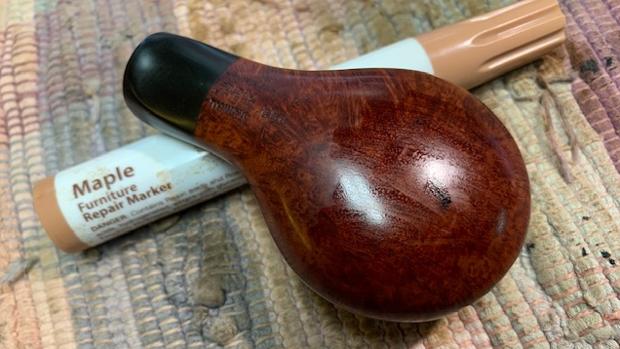
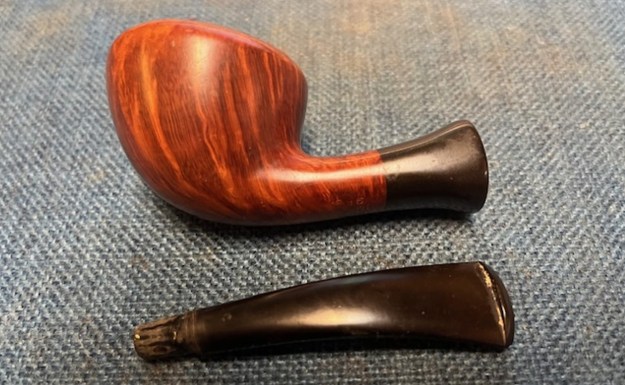 I did some hunting on both Pipephil’s site and also on Pipedia for both the shape number and also the Design Choice series. While both sites were very helpful neither one gave information specific to the Design Choice.
I then did a general Google search for a Stanwell Design Choice 886 six pipe and came up with several pipes with info. Two were on Worthpoint auction site and gave me little that I did not have by just looking at the pipe. However, Smokingpipes.com had a listing for an 886 that gave a little more data to me. Here is the link and a quote from the description on the site for this shape (https://www.smokingpipes.com/pipes/estate/denmark/moreinfo.cfm?product_id=302469). I quote:
Spanning a length of time between the 1960s and 1970s, Stanwell’s “Design Choice” series of variations on the marque’s shapes all predominantly featured the presence of a typically flared ferrule (which this “886” has). Likely based on a shape designed by Sixten Ivarsson himself, this Danish bent Pot also sports a pretty sweet cross-cut grain pattern. There are some dings on the bowl, and a touch of rim darkening, but otherwise condition is good. – Daniel Bumgardner
From the information I learned that the line featured a lot of Stanwell’s classic shape with the addition of a flared ferrule made of vulcanite. The pipe came out between the 1960 and 1970s and was probably based on a design by Sixten Ivarrson. Now it was time to work on the pipe itself.
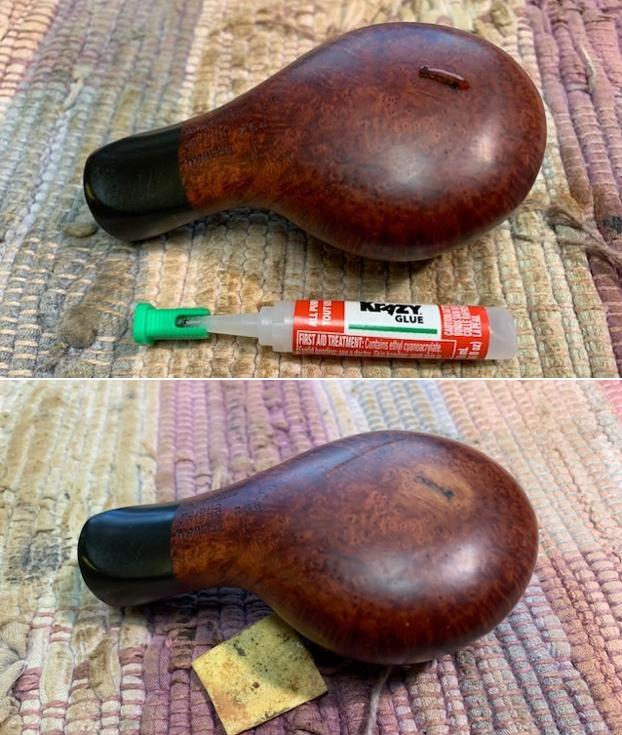
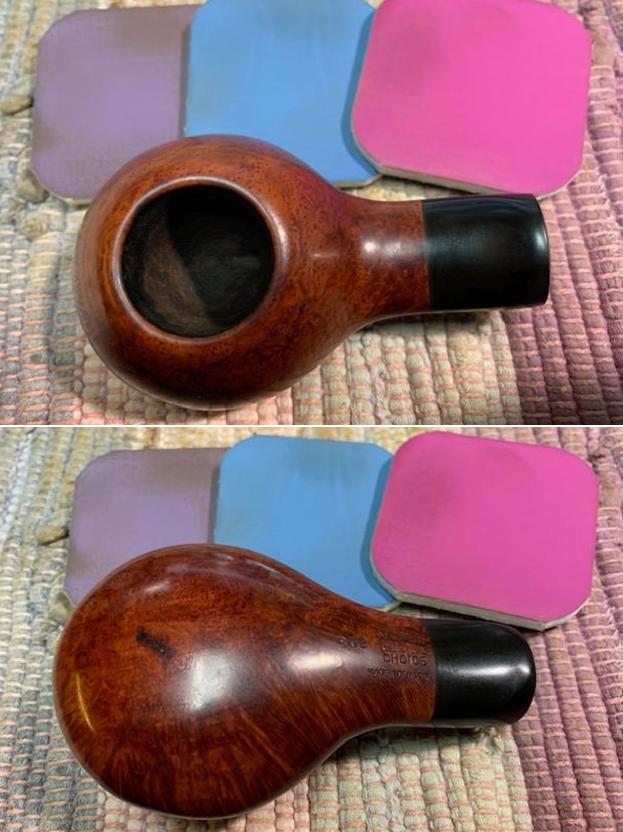
I began by reaming the pipe. I used a PipNet Reamer with the first and second cutting heads to take back the heavy cake to bare briar. I cleaned up the reaming with a Savinelli Fitsall Pipe Knife and finally sanded the bowl walls with 220 grit sandpaper wrapped around a dowel. I like to remove all the cake to examine the walls for damage and checking. Great news is that this one is free of any damage!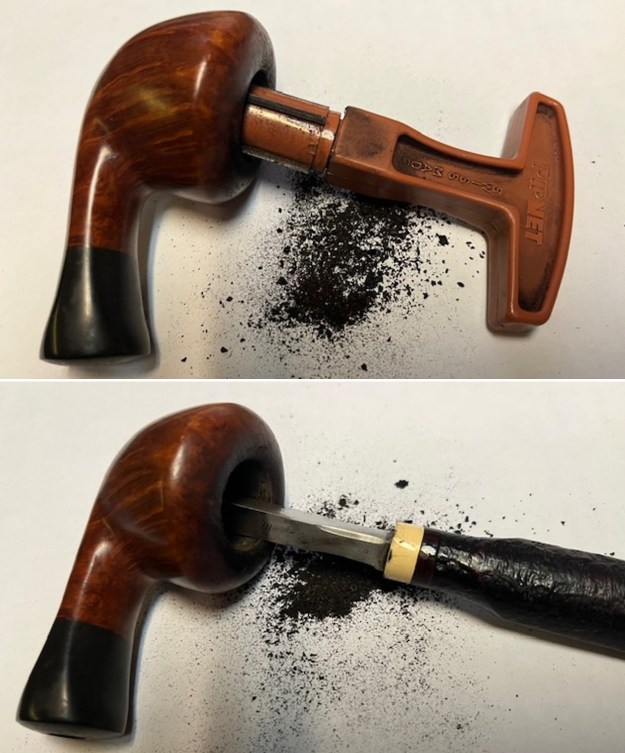
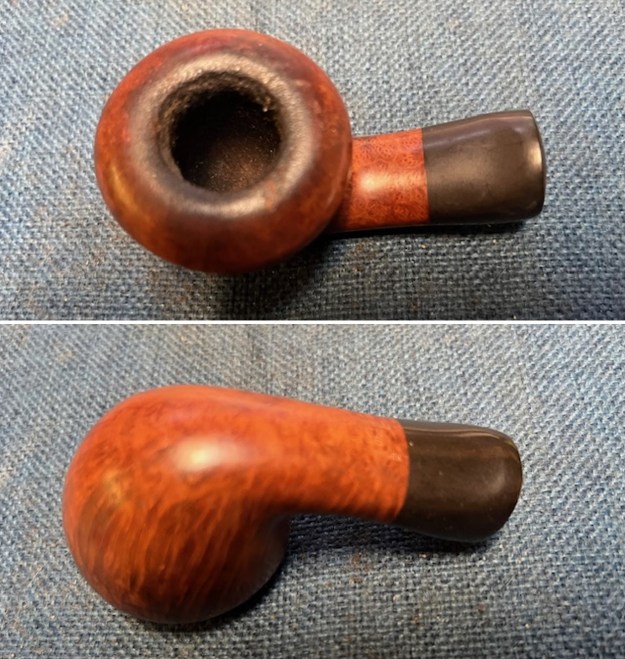
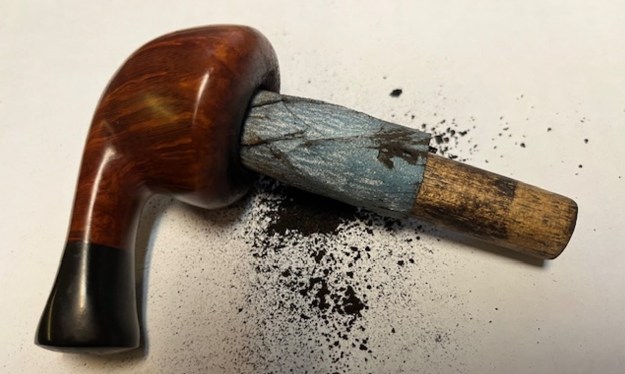 I scraped off the rim top and edge of the bowl with the Savinelli Fitsall knife aand started the clean up of the debris with a folded piece of 220 grit sandpaper. The inner edge and the top looked to be undamaged.
 I moved on to using the folded sandpaper to clean up the rim darkening on the pipe as well as further addressing the build up on the rim top. I was definitely looking better when I finished.
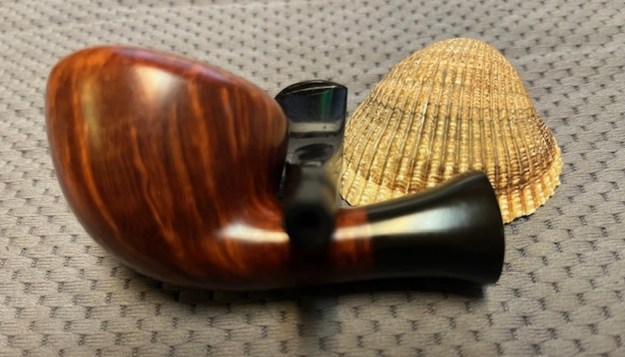
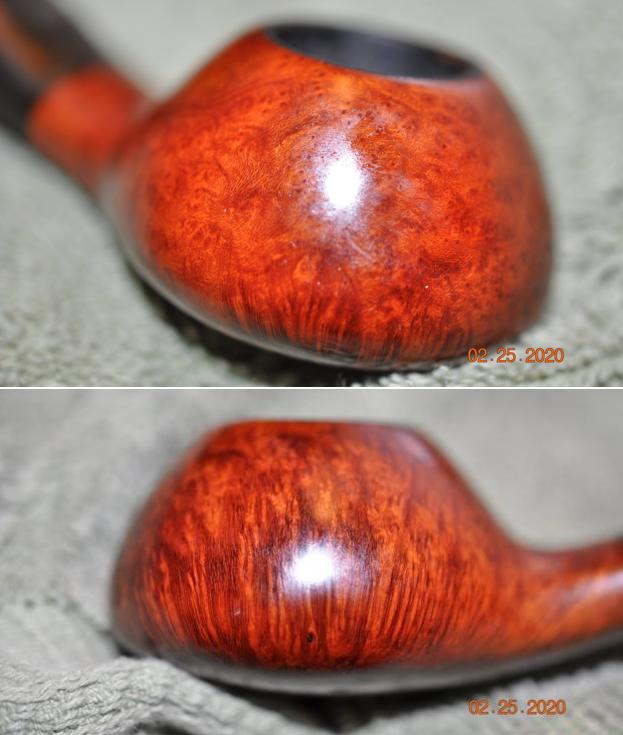
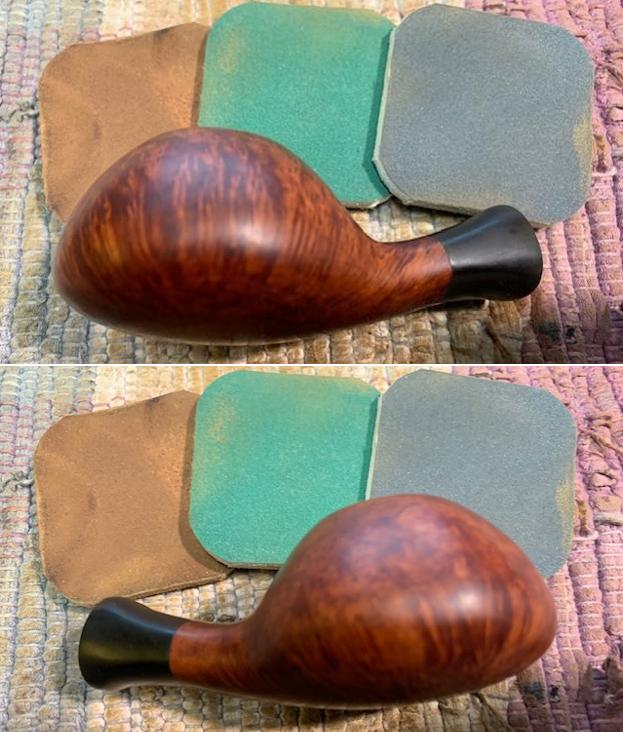
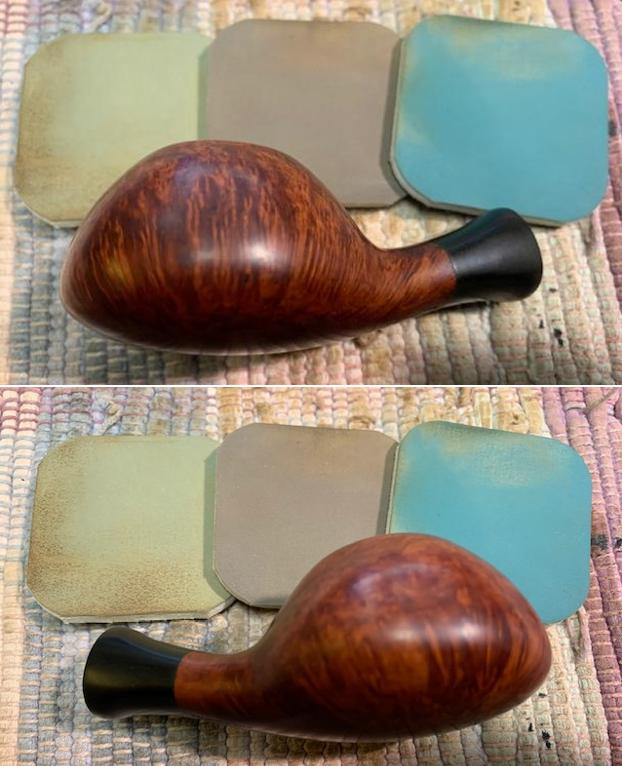
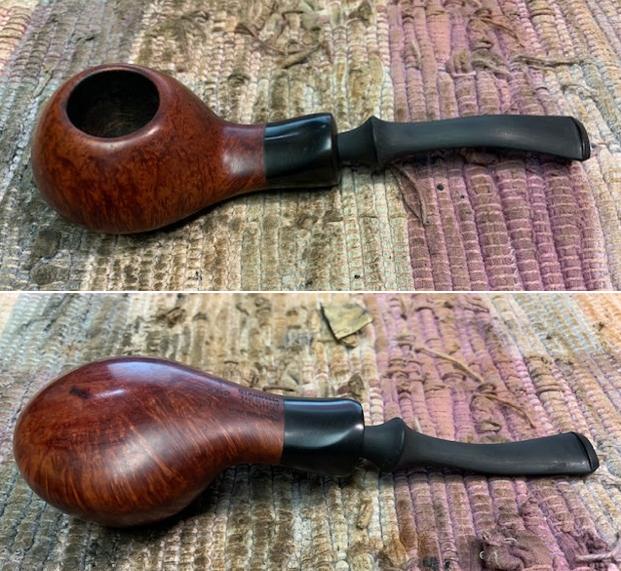
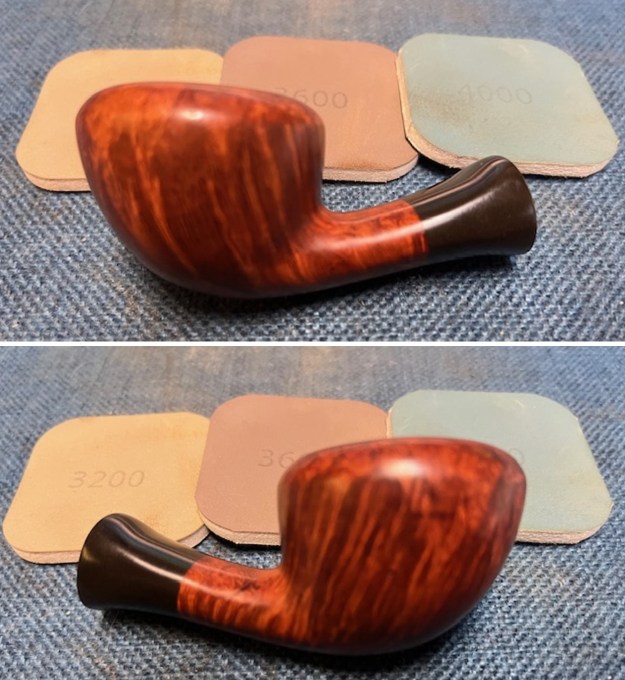
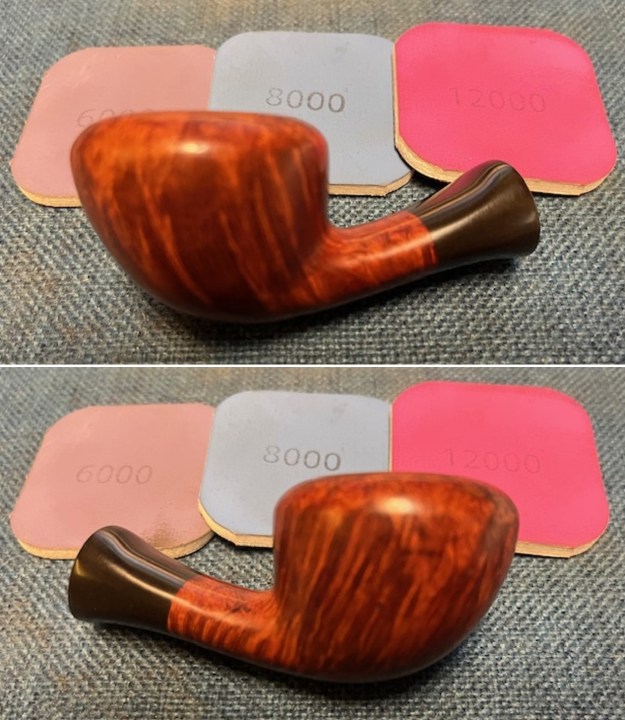
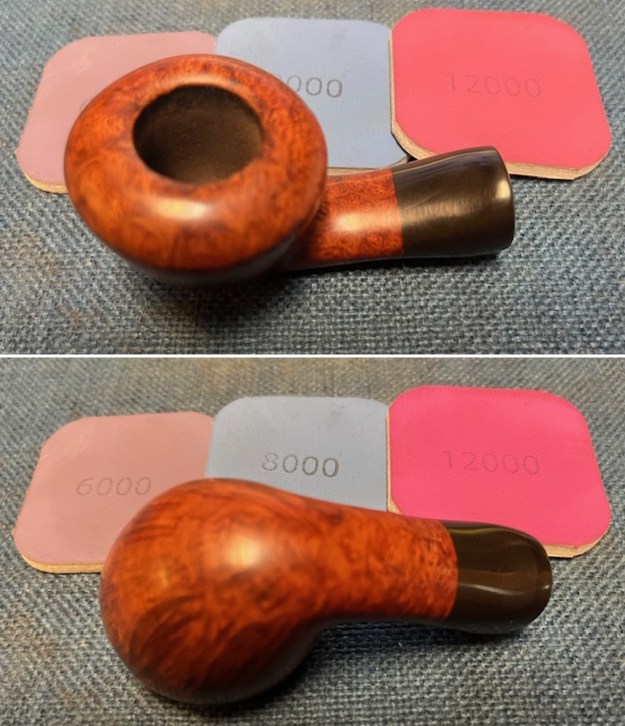
 I polished the briar bowl and vulcanite shank extension with micromesh sanding pads – dry sanding with 1500-12000 grit sanding pads. I wiped it down with a damp cloth after each pad to remove the debris. The bowl took on a rich glow.
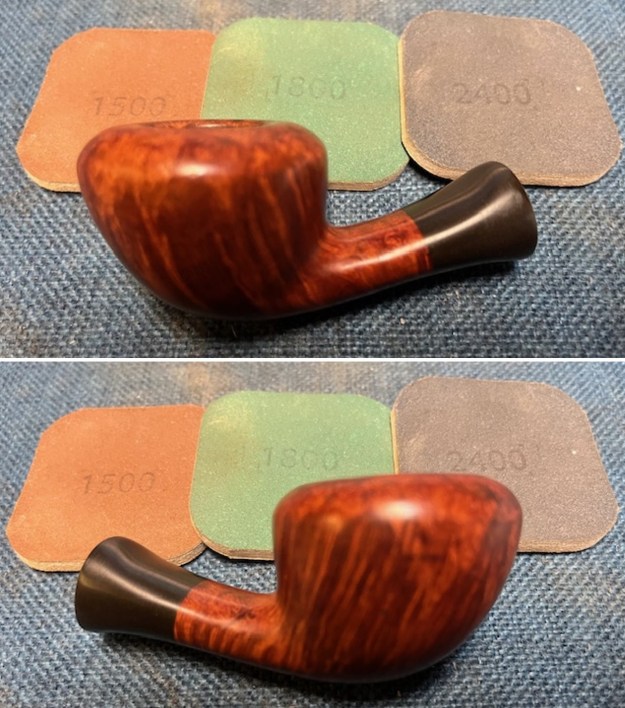


 I was enjoying the beauty of the bowl when it suddenly dawned on me that I had not cleaned the shank or the airway in the bowl or stem. I went back and did so now. I had to be careful with the alcohol so as not to drip on the shank extension of the briar. I used alcohol, cotton swabs and pipe cleaners to clean out the internals and it is now clean on both the inside and outside.
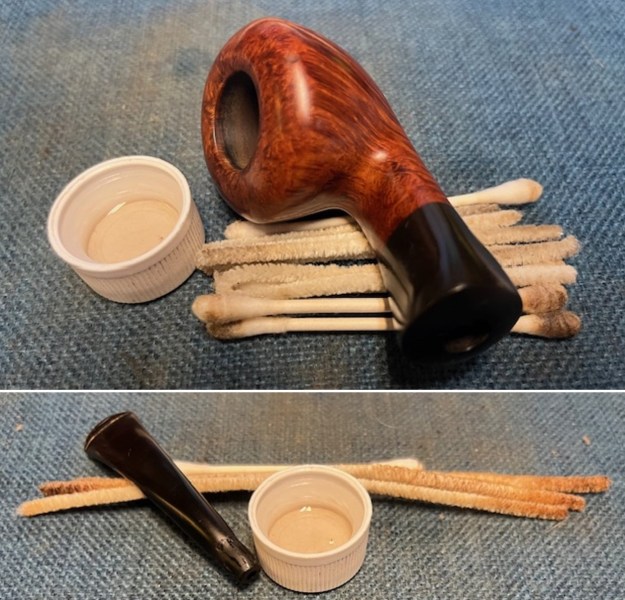 Now I could go back to my normal process. I rubbed down the briar and the vulcanite shank extension with Before & After Restoration Balm. I worked it into the surface with my fingertips. The product works to clean, enliven and preserve the briar. I let it sit for 15 minutes then I buffed it with a cotton cloth to deepen the shine. The briar really comes alive with the balm.
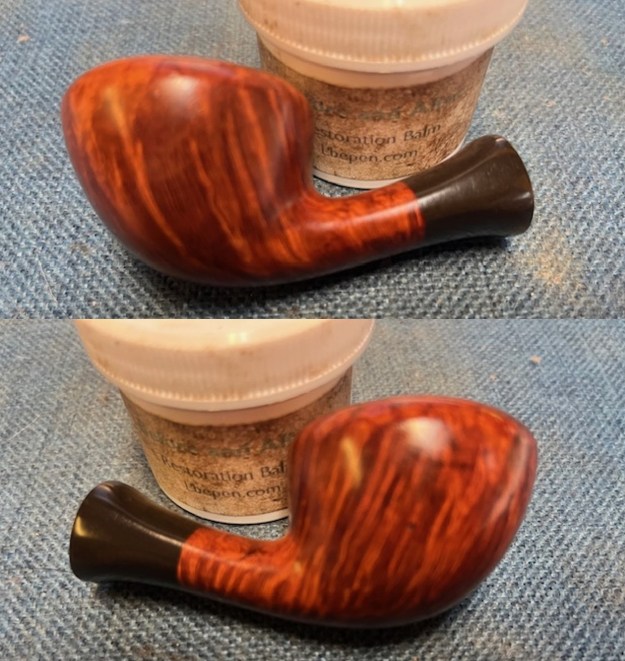
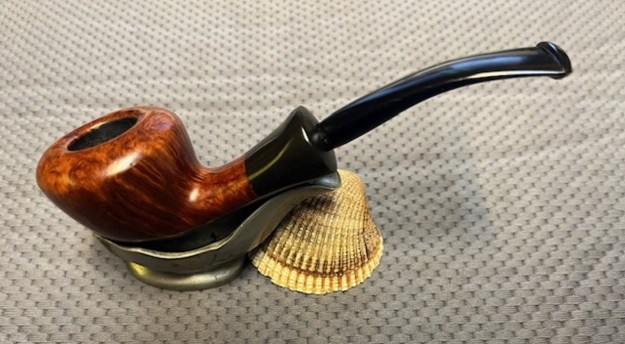
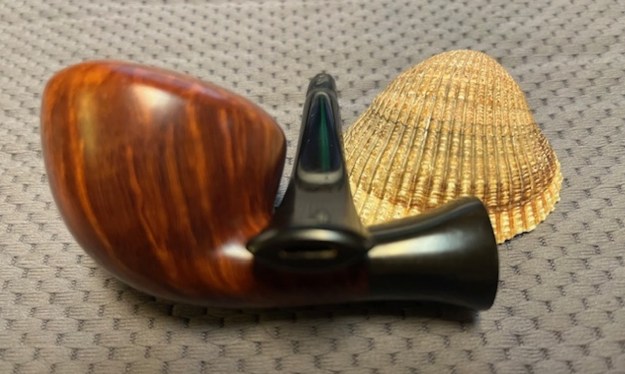
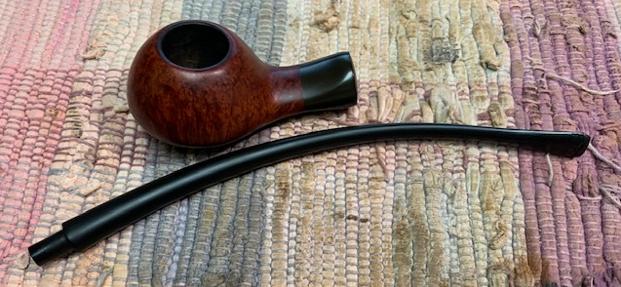
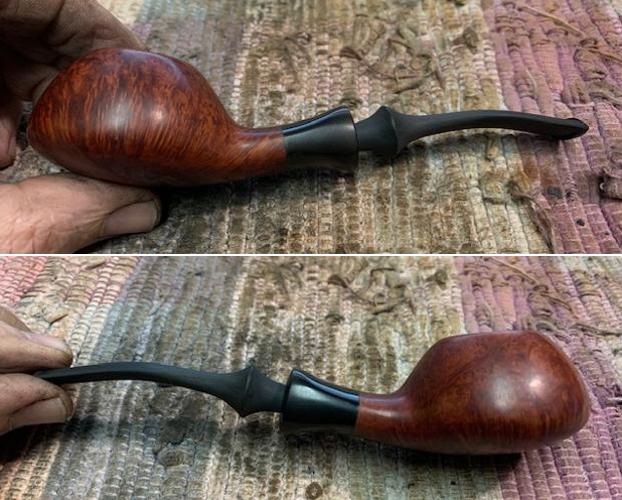
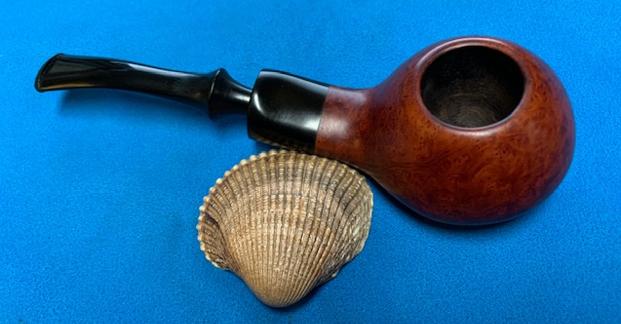
 I paused the process to put the stem in the shank and take a photo of the new look of the pipe with a stem in place. I still need to polish the stem but the look is very nice! I like it.
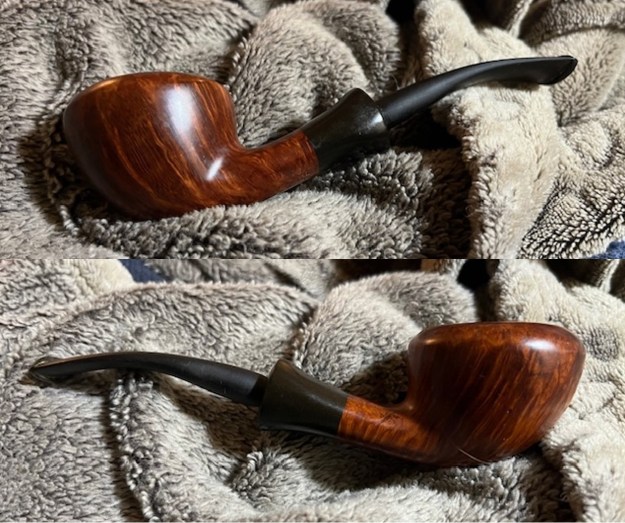
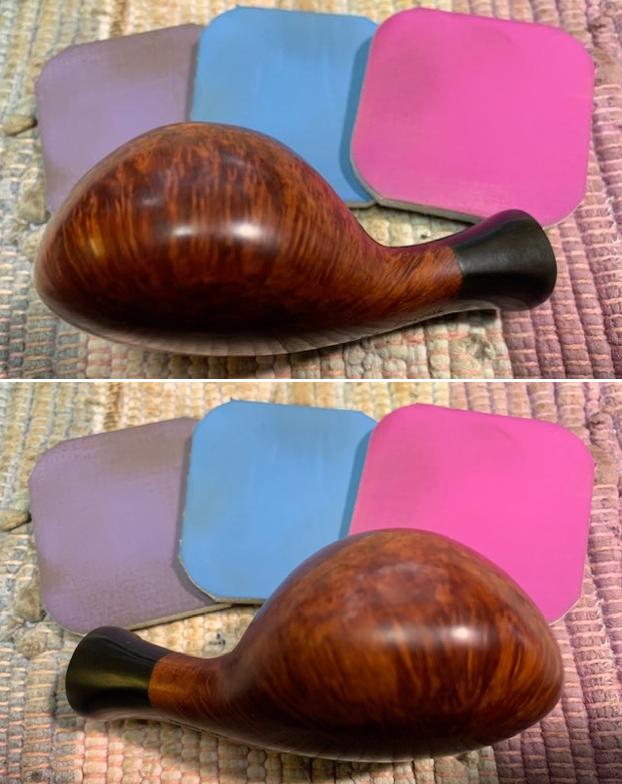
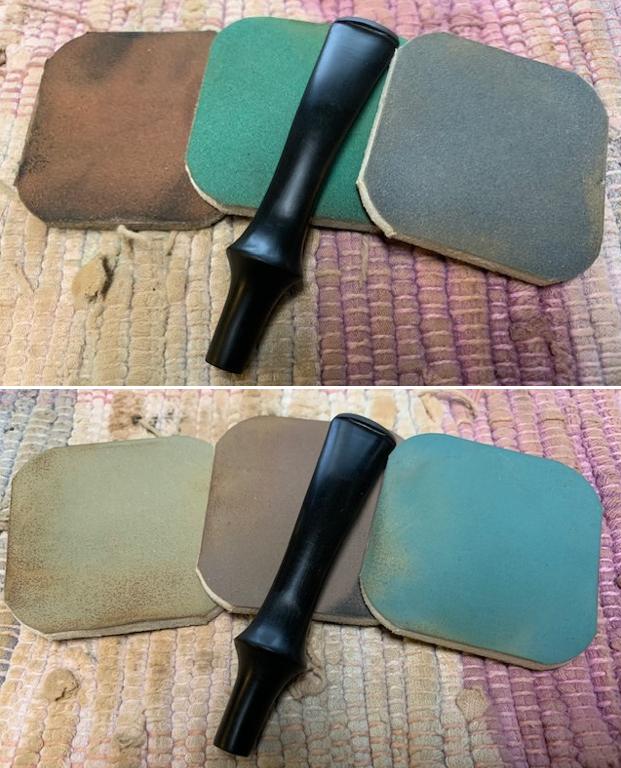
 I removed the stem and started my polishing process. I sanded out the scratches in the vulcanite with 320-3500 grit sanding pads. I wiped the stem down after each sanding pad with a cloth impregnated with Obsidian Oil. It started to take on a deep shine.
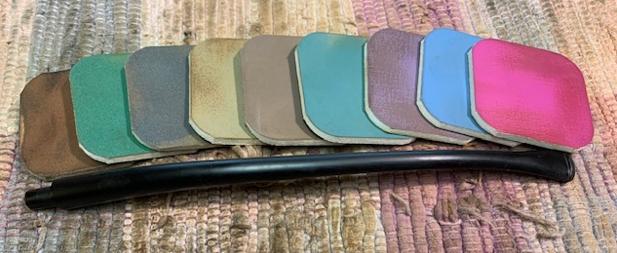
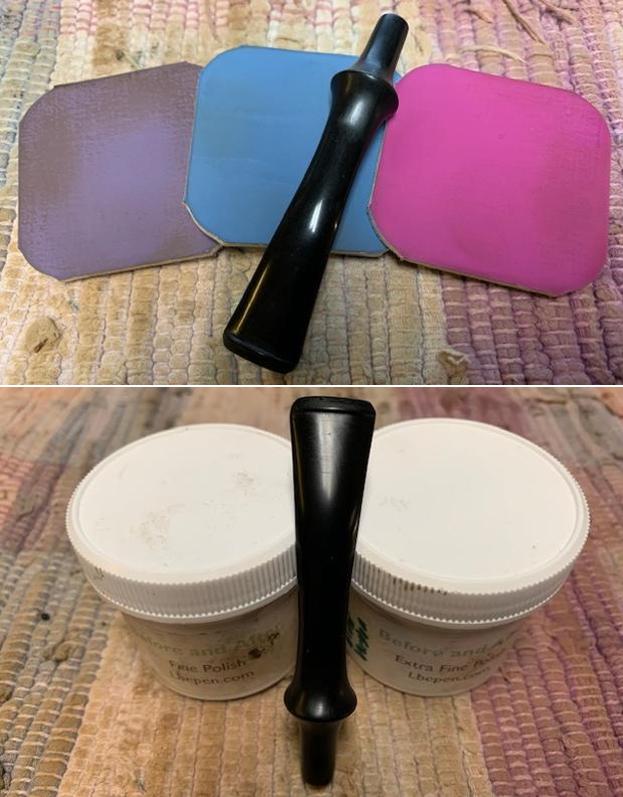
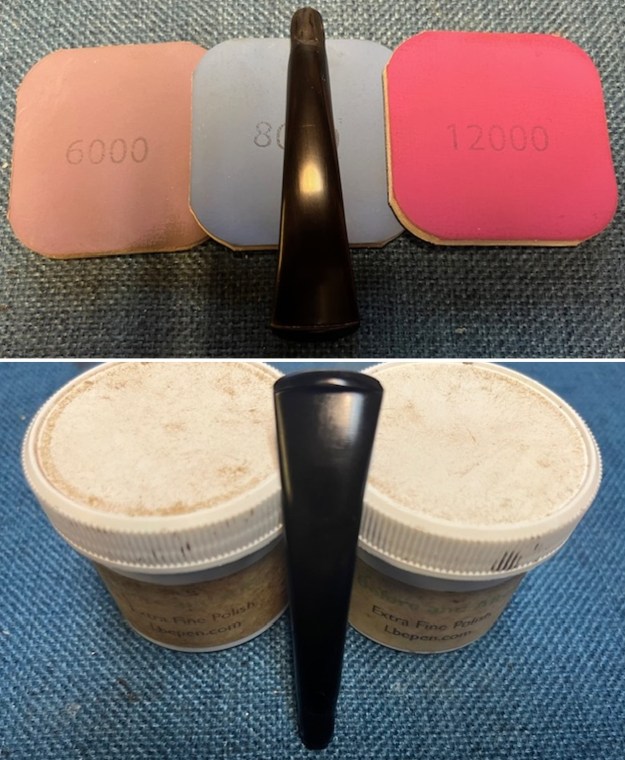
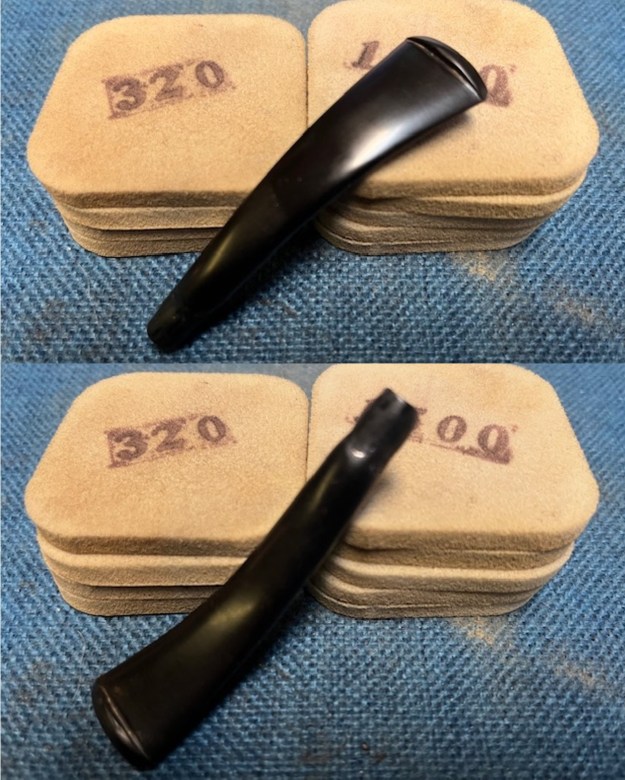 I polished the stem with micromesh sanding pads – 1500-12000 grit pads to remove them. I wiped the stem down with Obsidian Oil after each sanding pad. I used Before & After Pipe Polish – both Fine and Extra Fine to further polish the stem. I rubbed it down with a final coat of Obsidian Oil and let it dry.
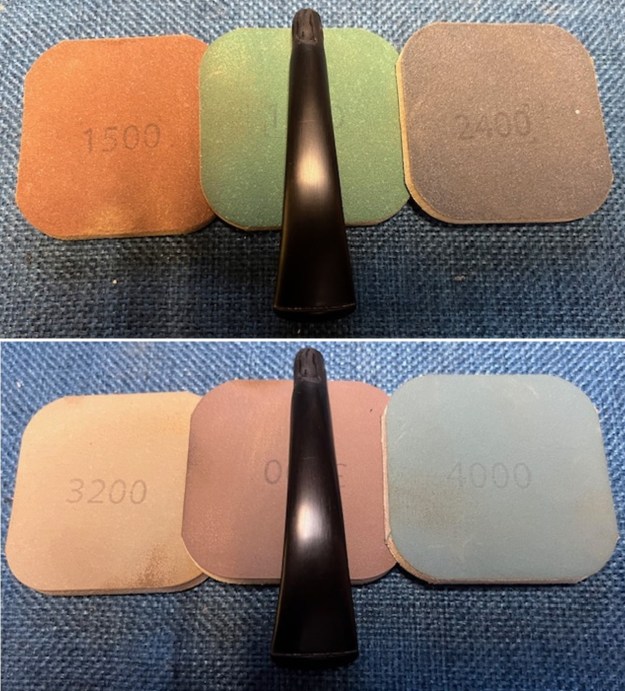
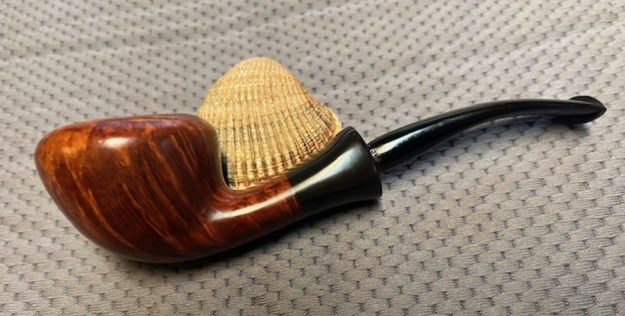
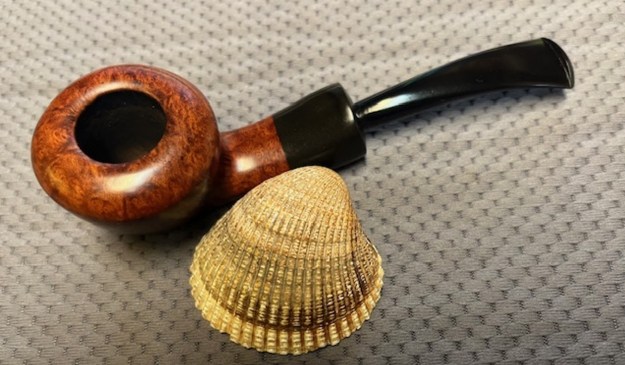
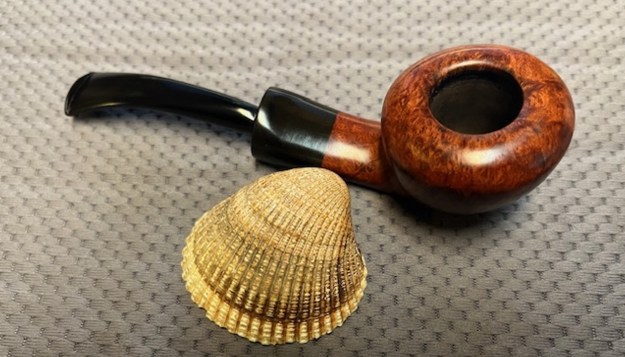
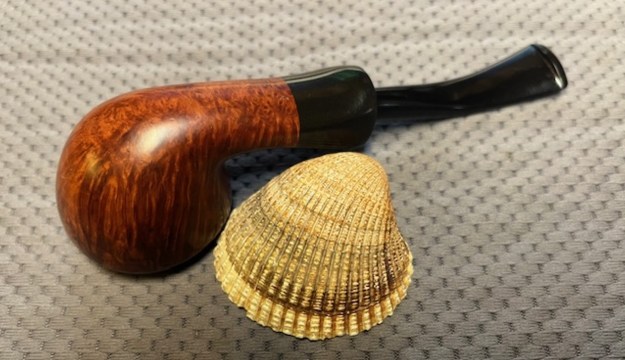
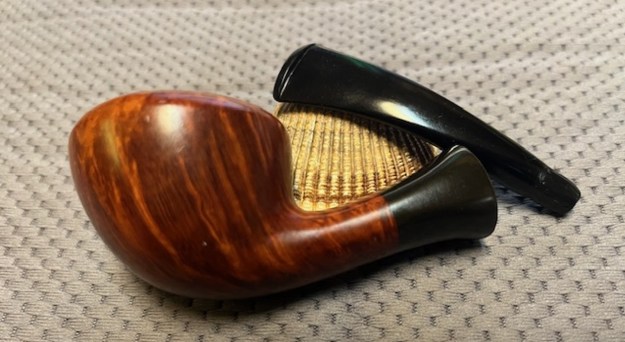
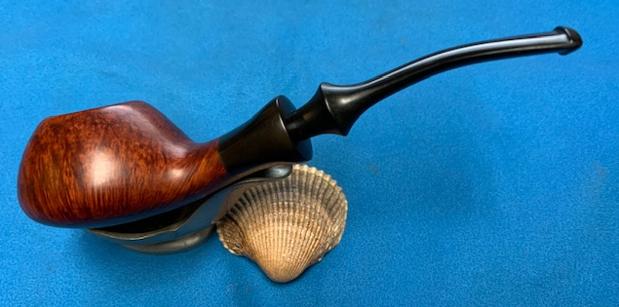
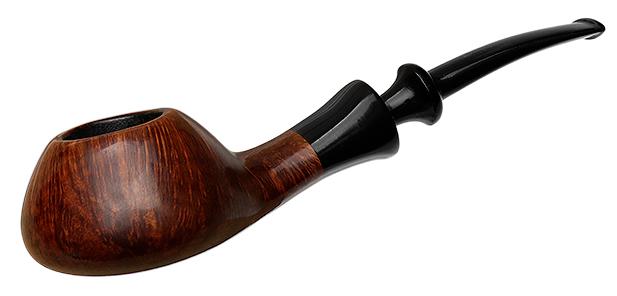
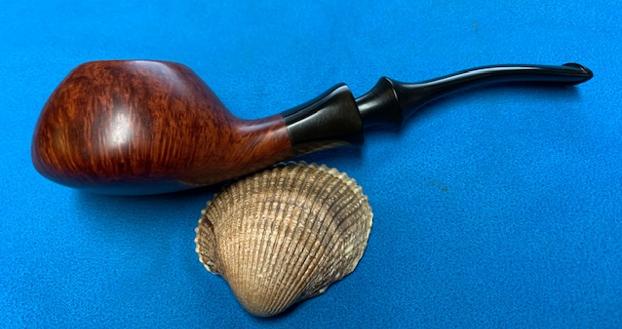
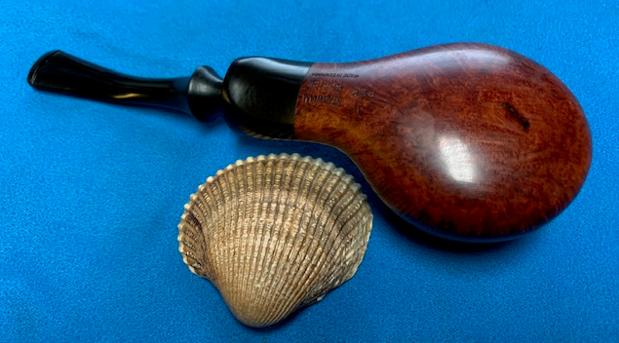
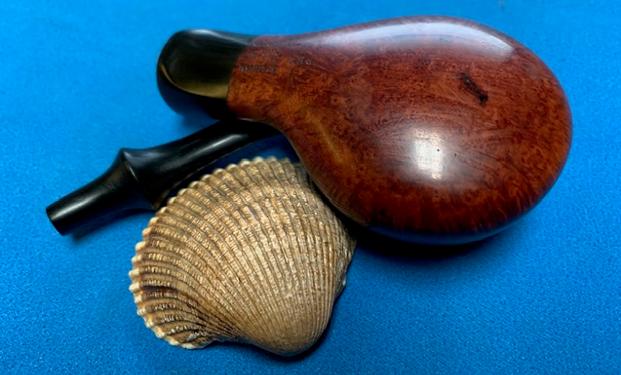
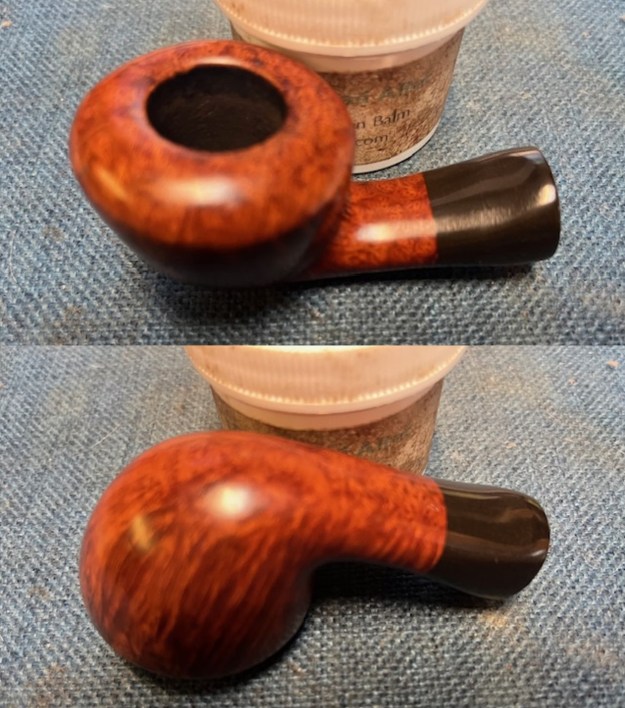
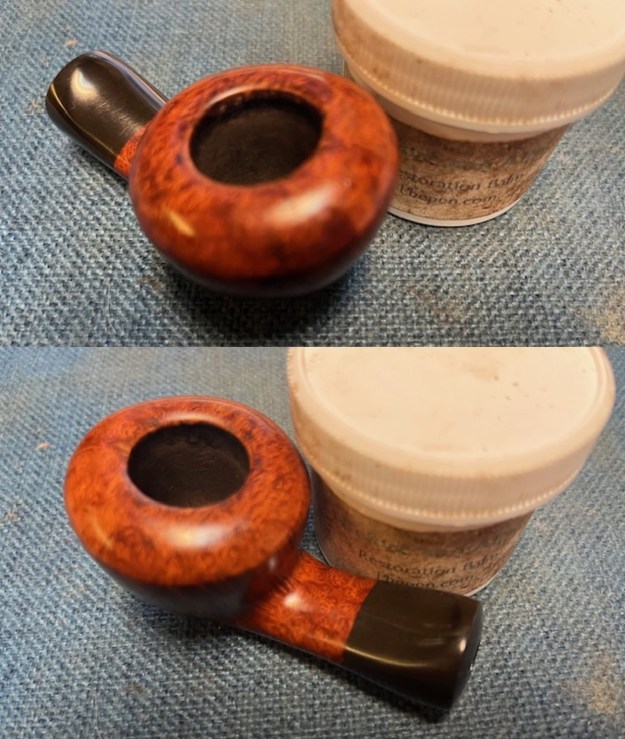
 This is another pipe that I am really happy about the finished restoration. This reborn Stanwell Design Choice 886 Danish Pot turned out really well. I used a vulcanite stem I had here to fit the pipe with a new stem. After restemming I think that it really is a great looking pipe with a great shape and grain. The bowl is Danish Style Pot shape and the vulcanite shank extension goes well with it. The new vulcanite stem is close to the original stem, though missing the saddle portion. The polished black of the stem works well with the briar. The briar really came alive with the buffing. The rich brown stains of the finish make the grain really pop with the polishing and waxing. I put the stem back on the bowl and buffed the pipe with Blue Diamond on the buffing wheel. I gave the bowl and the stem multiple coats of carnauba wax on the buffing wheel. I buffed the pipe with a clean buffing pad to raise the shine. I hand buffed the pipe with a microfiber cloth to deepen the shine. The finished Stanwell Design Choice 886 Pot really has a unique beauty and feels great in the hand. It looks very good. Give the finished pipe a look in the photos below. The dimensions of the pipe are Length: 5 ½ inches, Height: 1 ½ inches, Outside diameter of the bowl: 1 ¾ inches, Chamber diameter: ¾ of an inch. The weight of the pipe is 43 grams/1.45 ounces. The pipe will be going on the rebornpipes store soon. It will be in the section on Danish Pipe Makers if you would like to add it to your collection. Thanks for reading this blog and my reflections on the pipe while I worked on it. It was a fun one to work on!