Tag Archives: rusticating a repaired burnout

Plugging a Burnout on a Peterson’s Irish Whiskey 999


Blog by Steve Laug

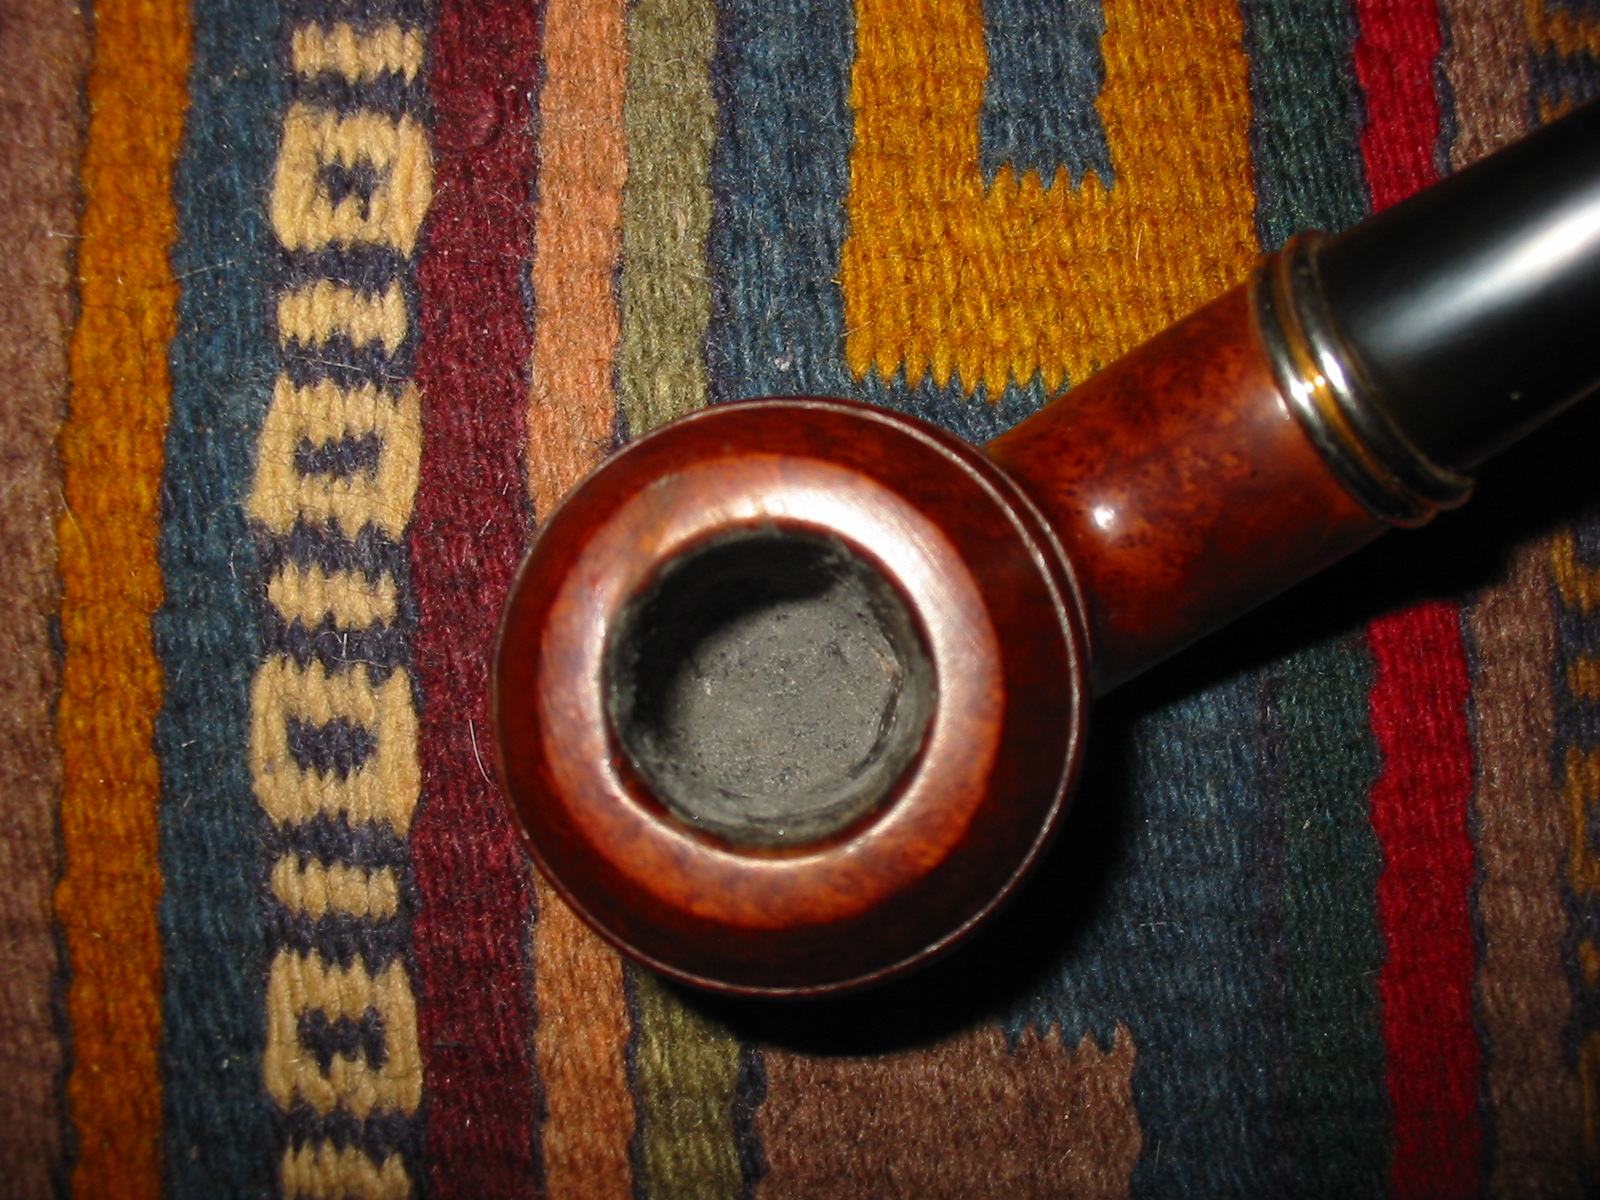
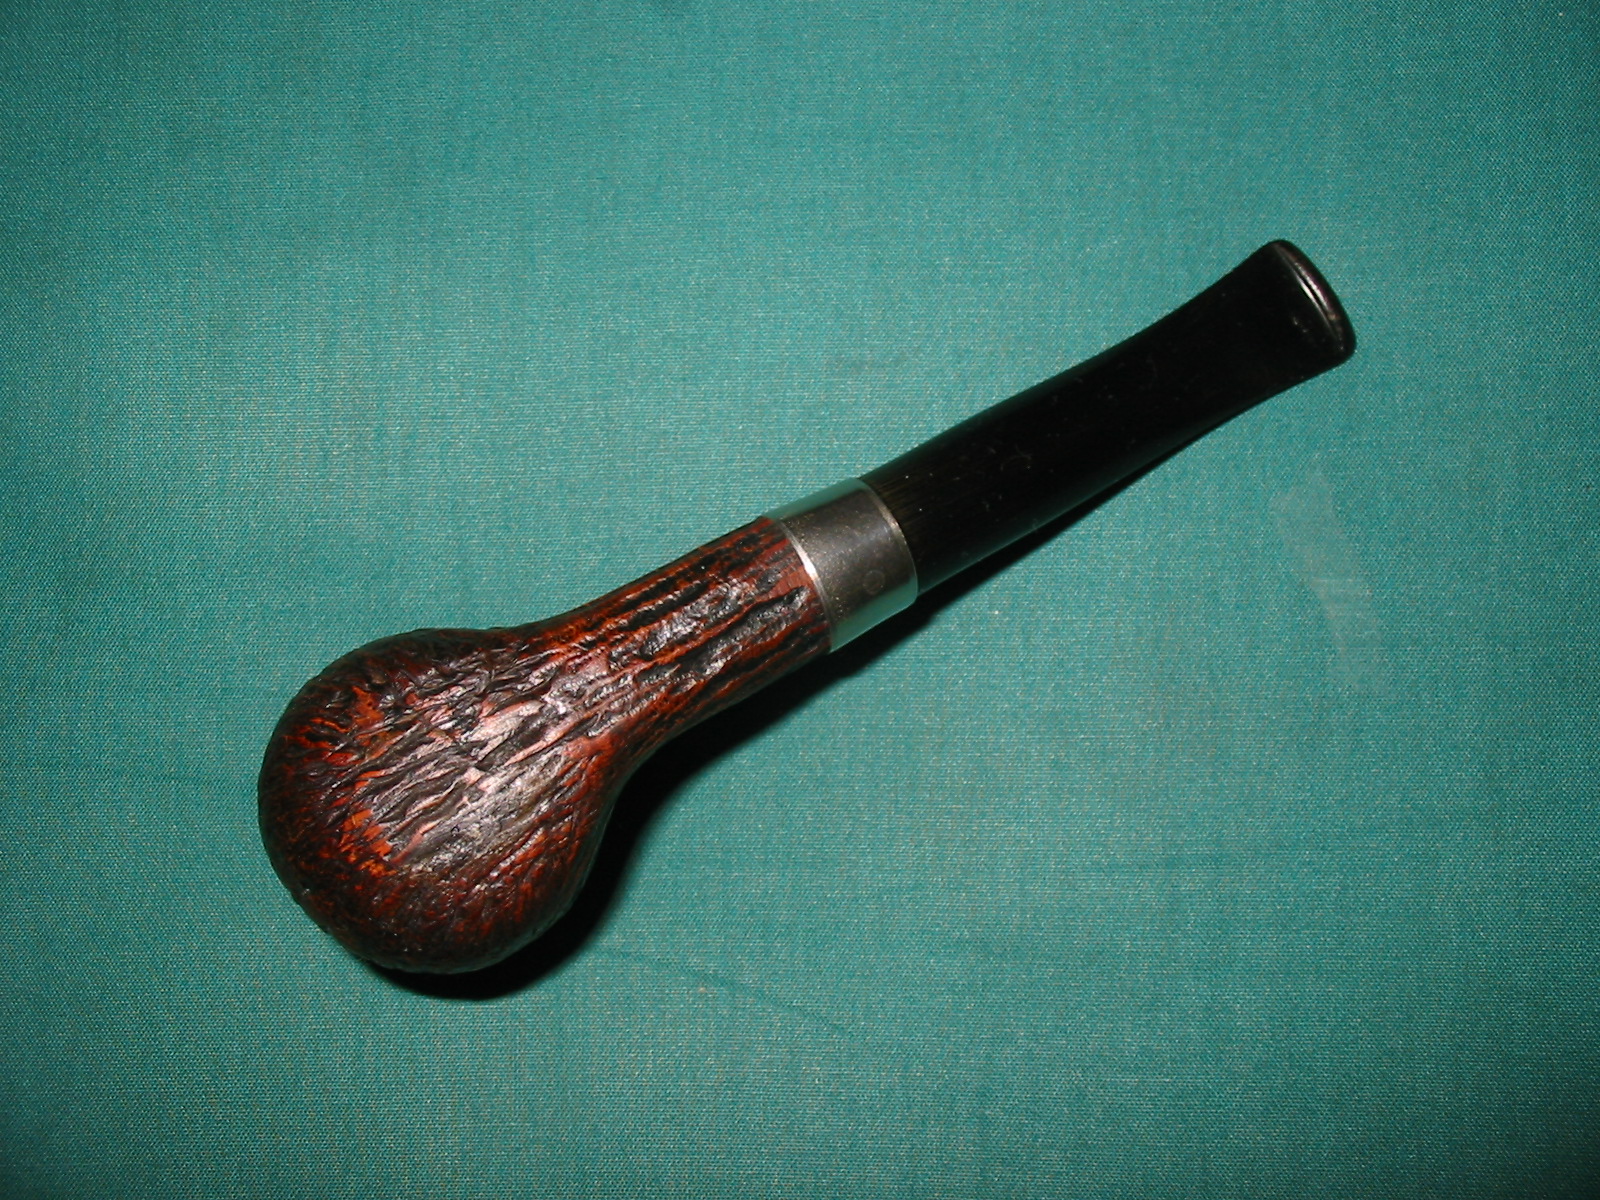
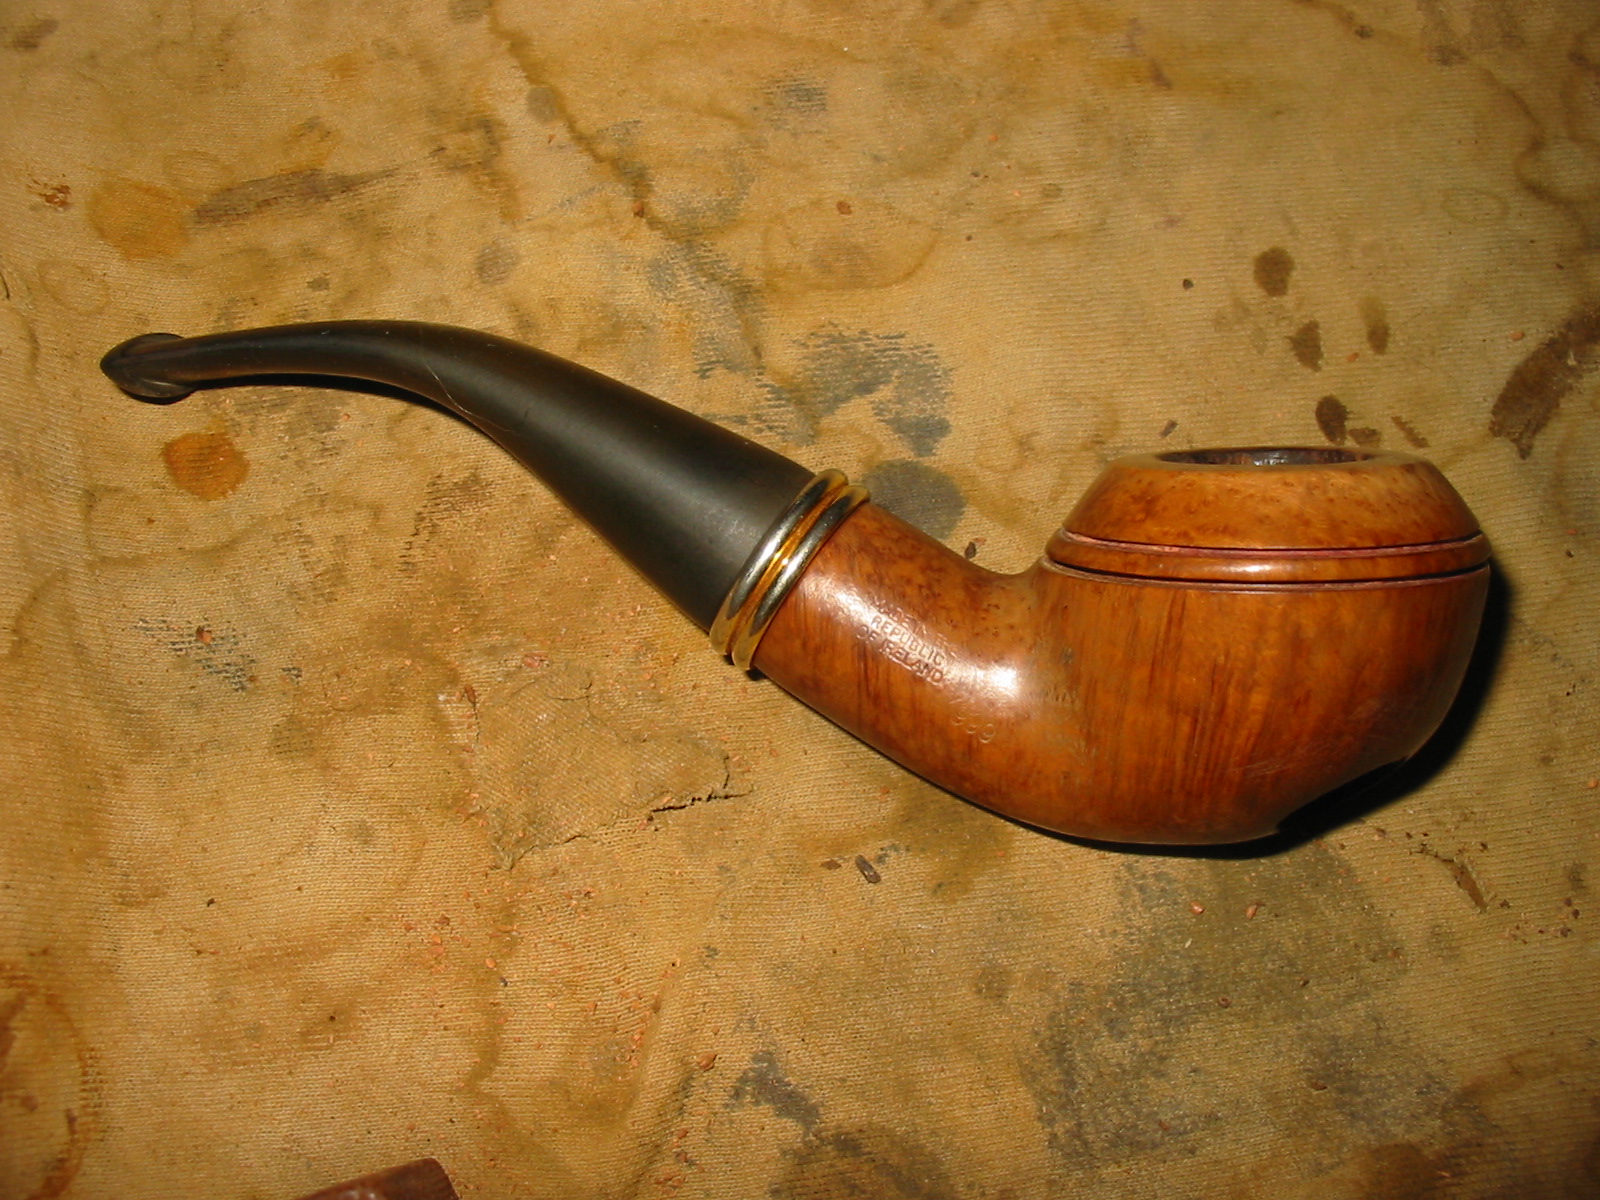
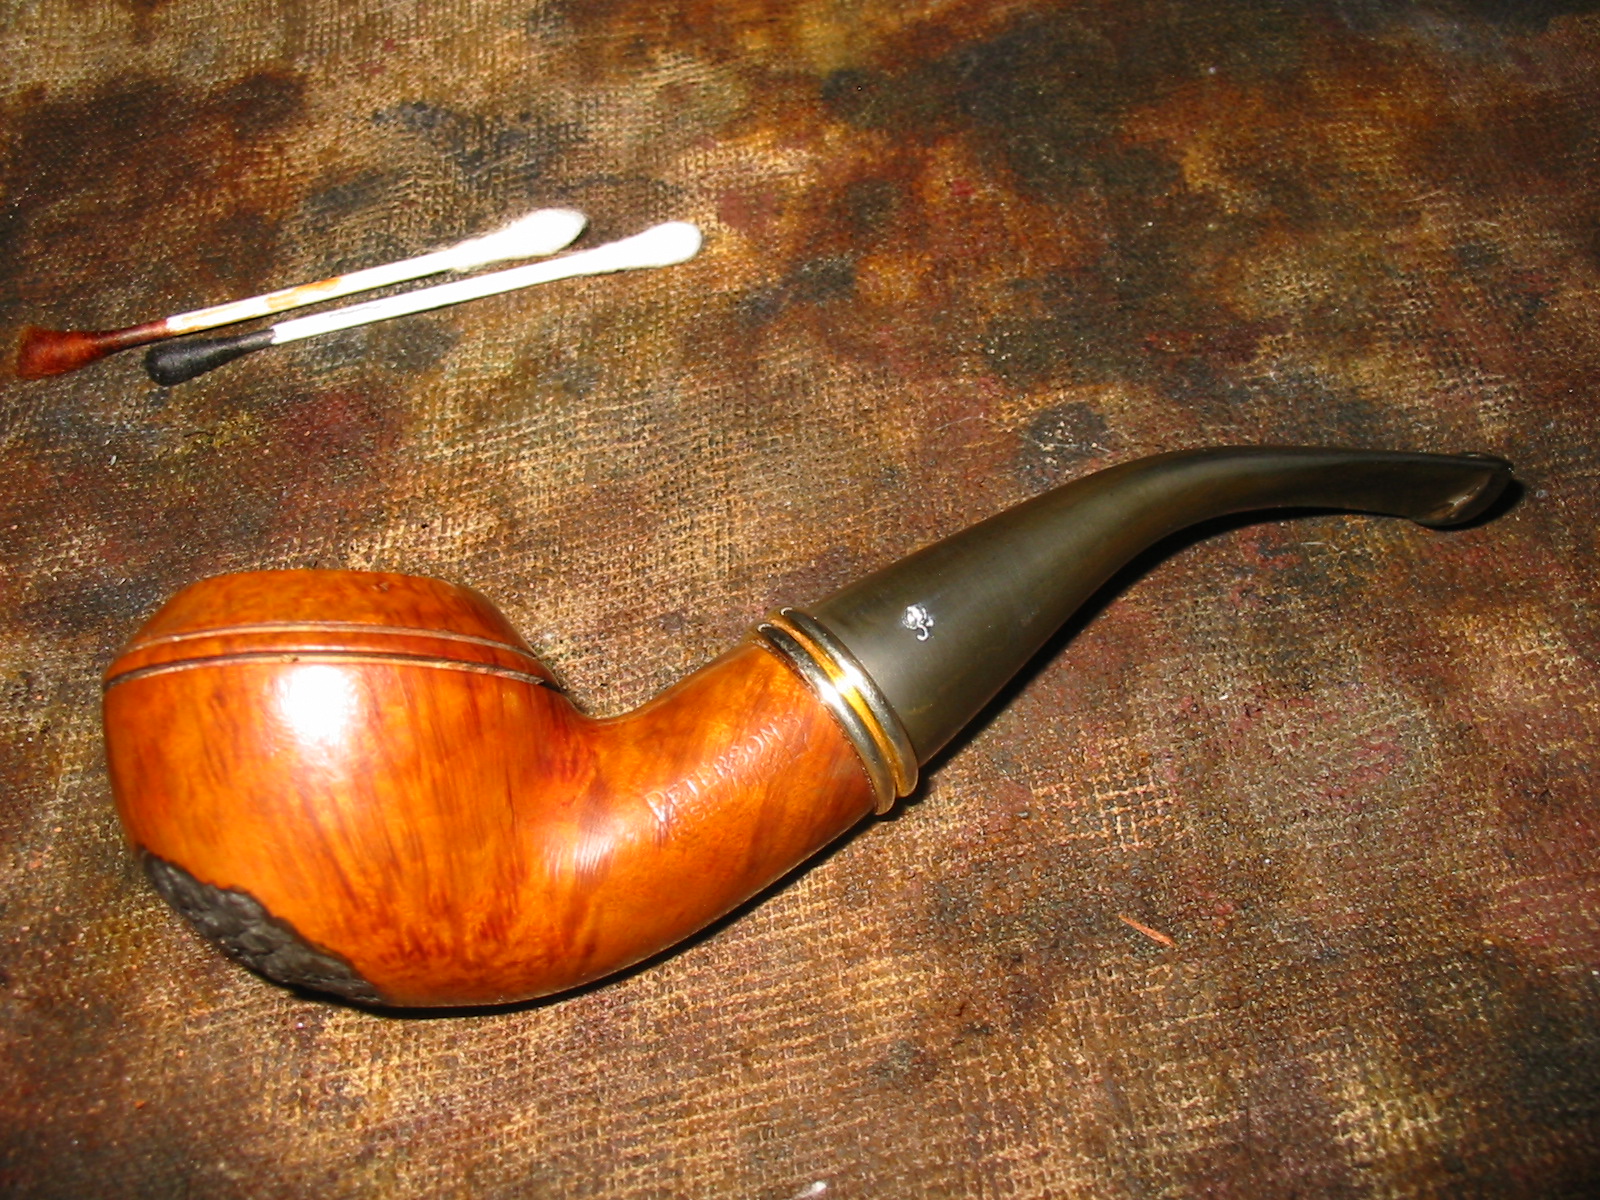
Lately several of the pipes that I have refurbished were part of a trade with Mark Domingues for work on this pipe. It is a beautifully grained Peterson’s Rhodesian 999 – one of my favourite shapes. The grain on this thing is beautiful. The photo below shows what drew Mark to bid on this pipe in the first place. What the photo does not show however, is the incredibly horrible shape that this pipe was in when it came to Mark.
IMG_20131124_082613_134_zps6ef902eb

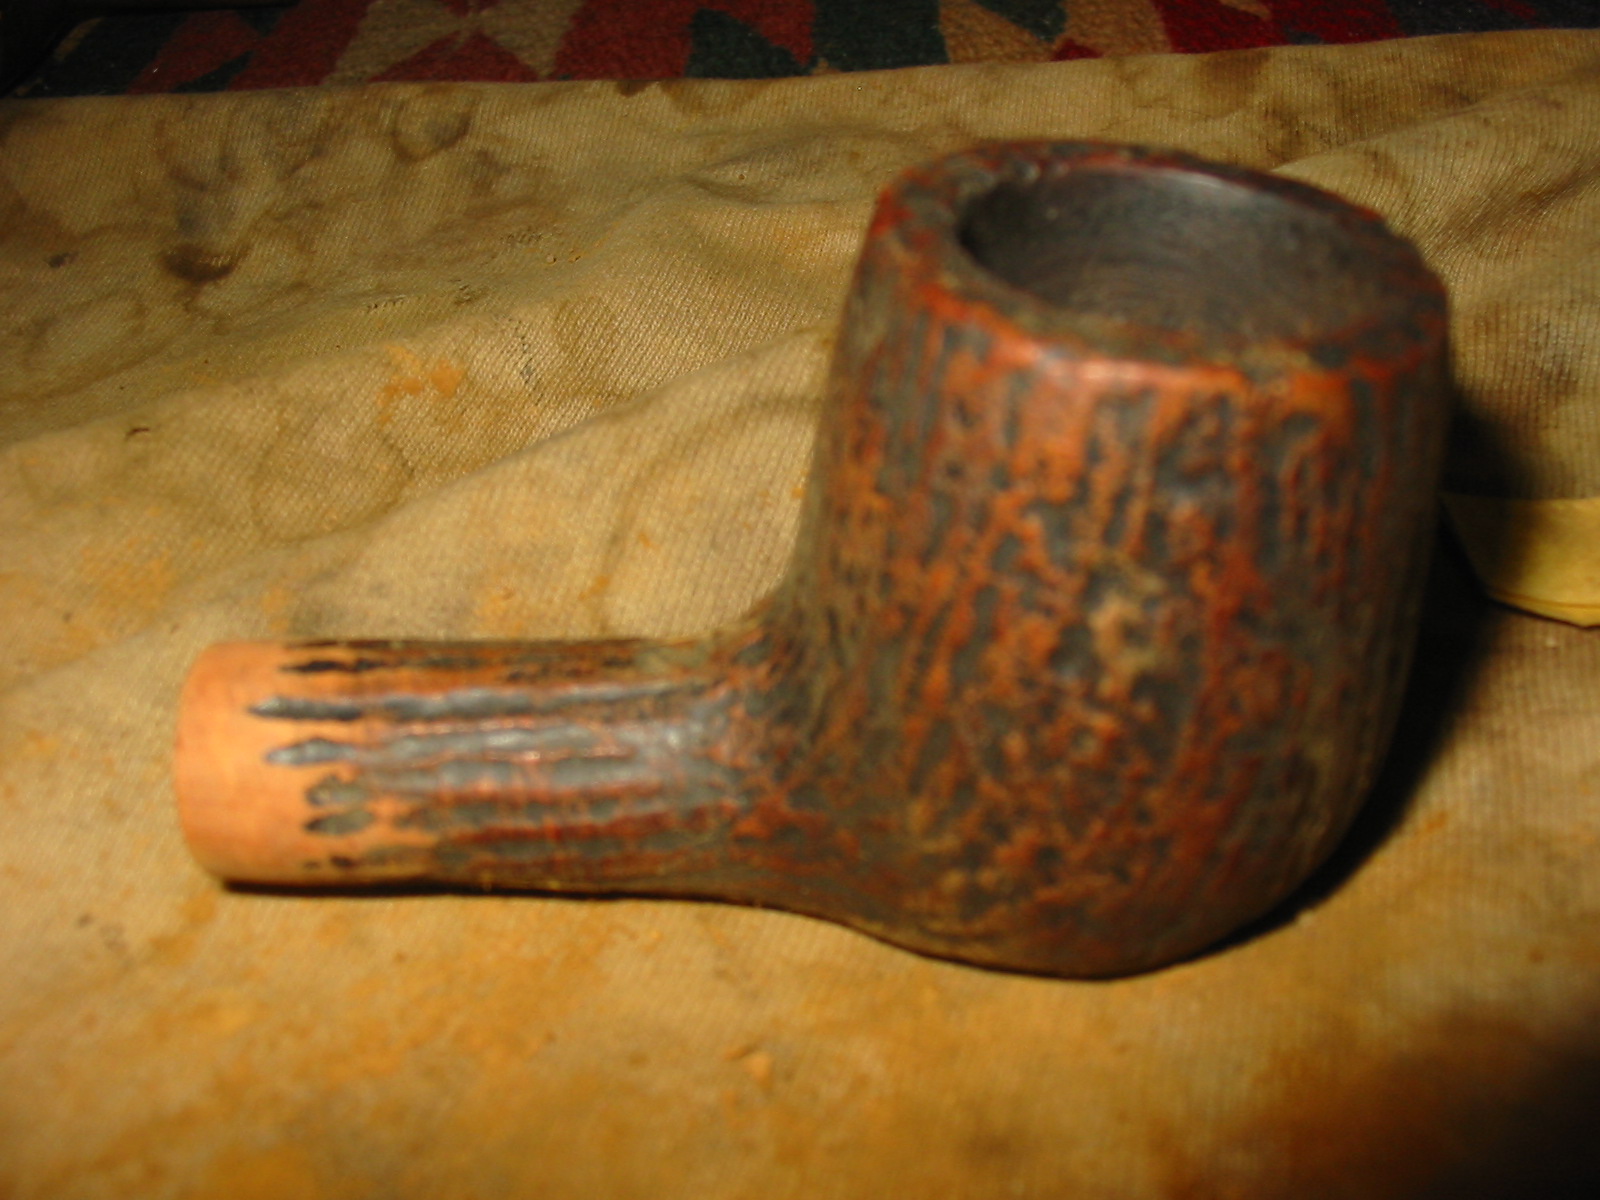
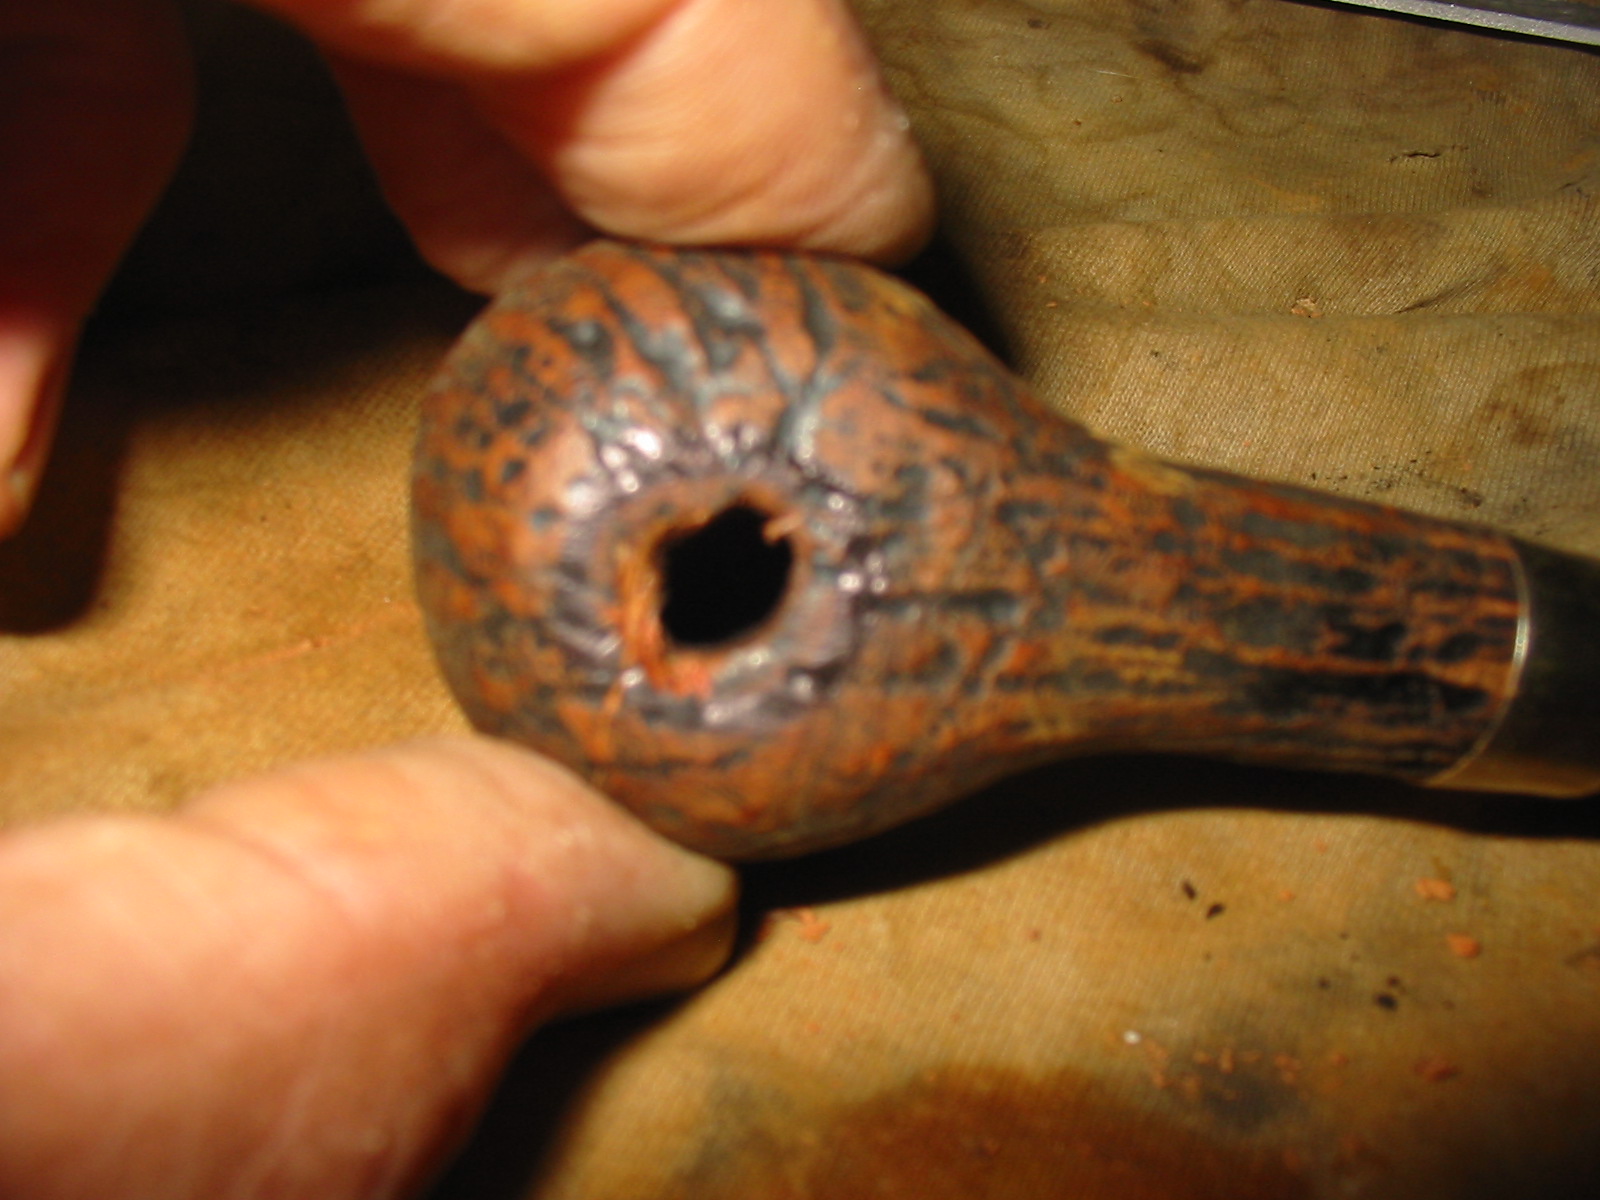
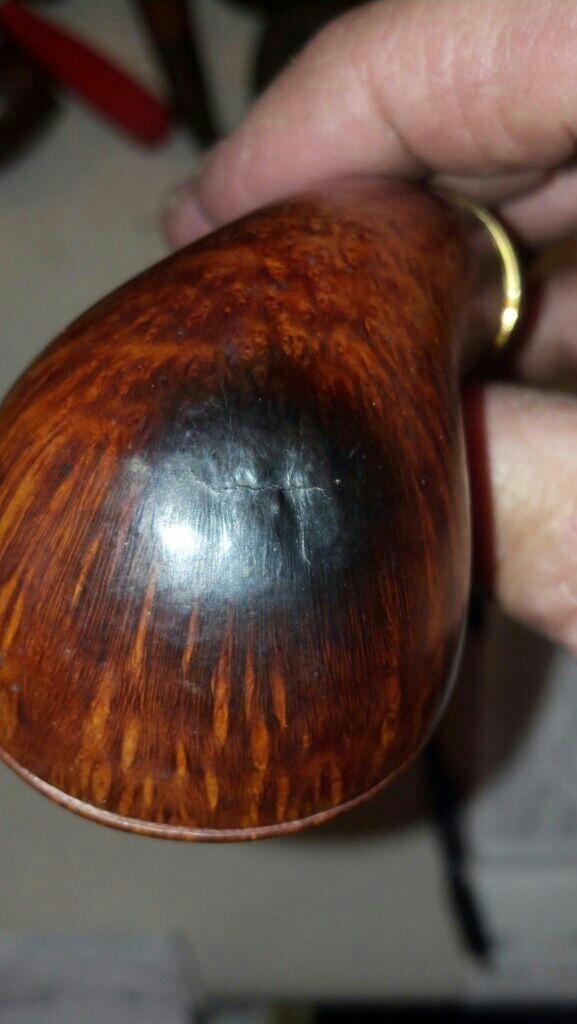
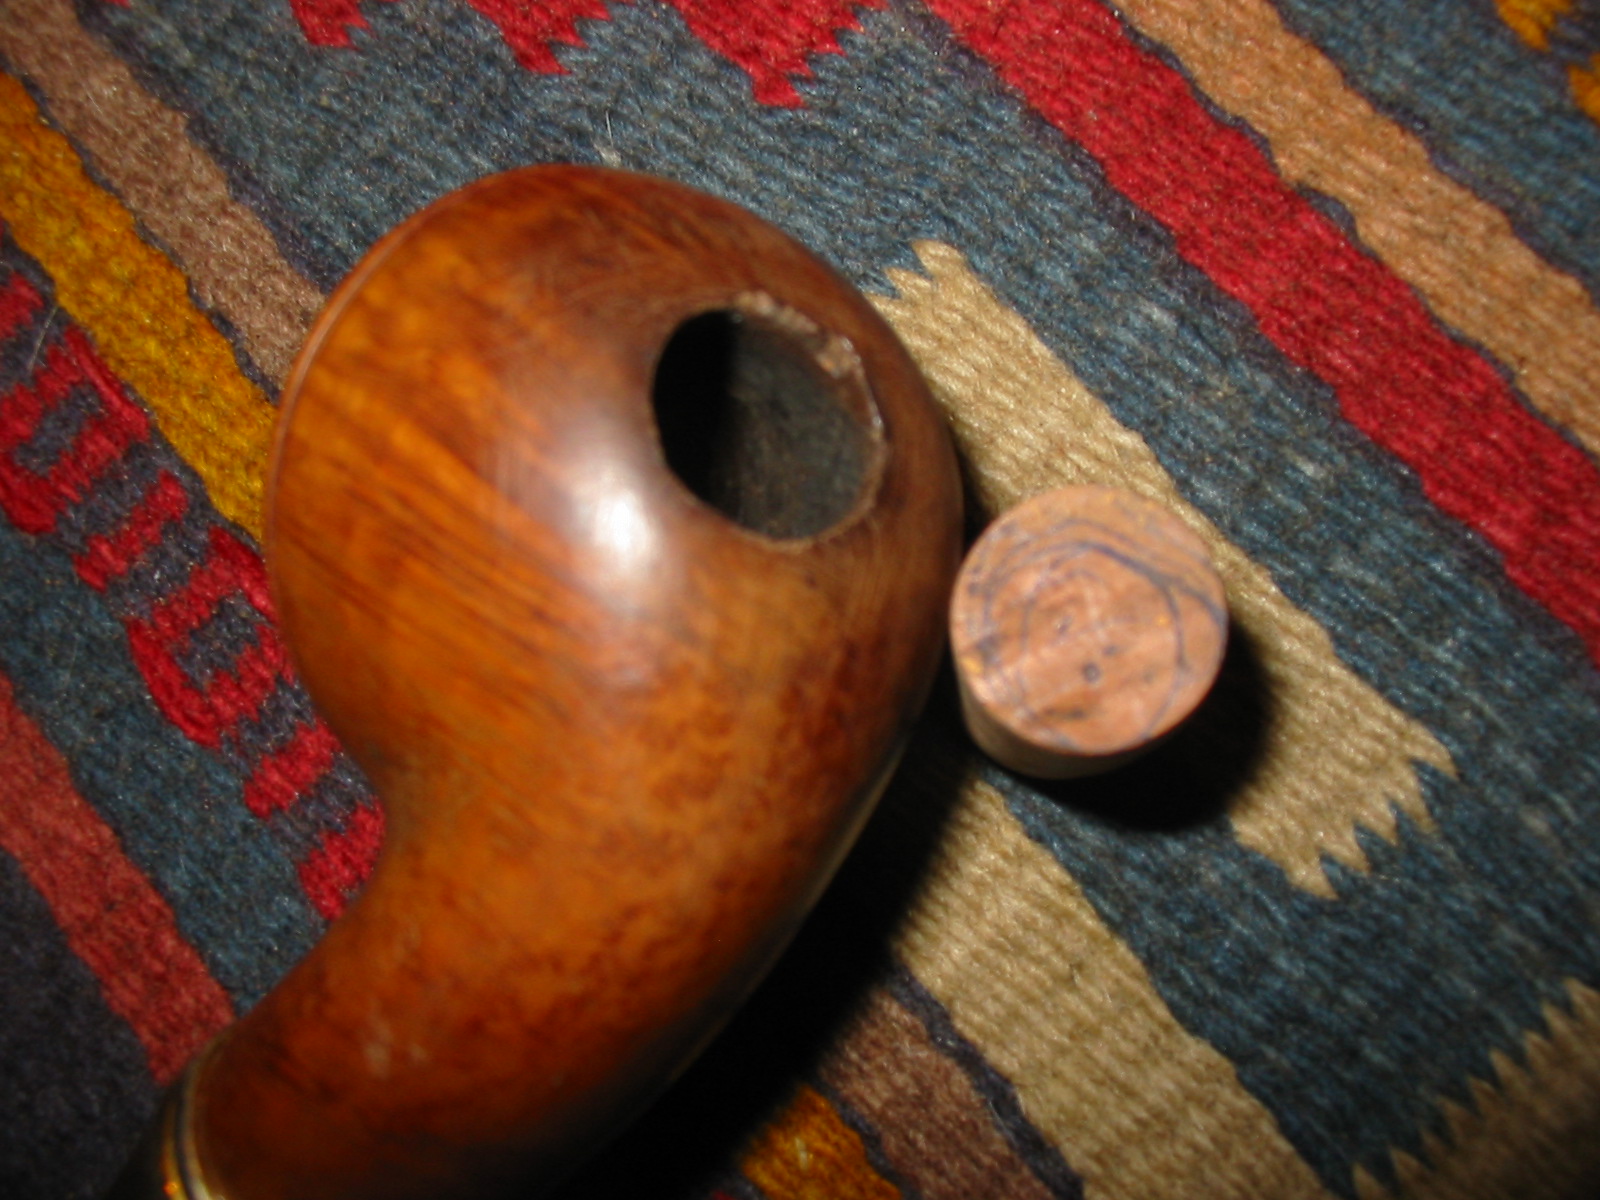
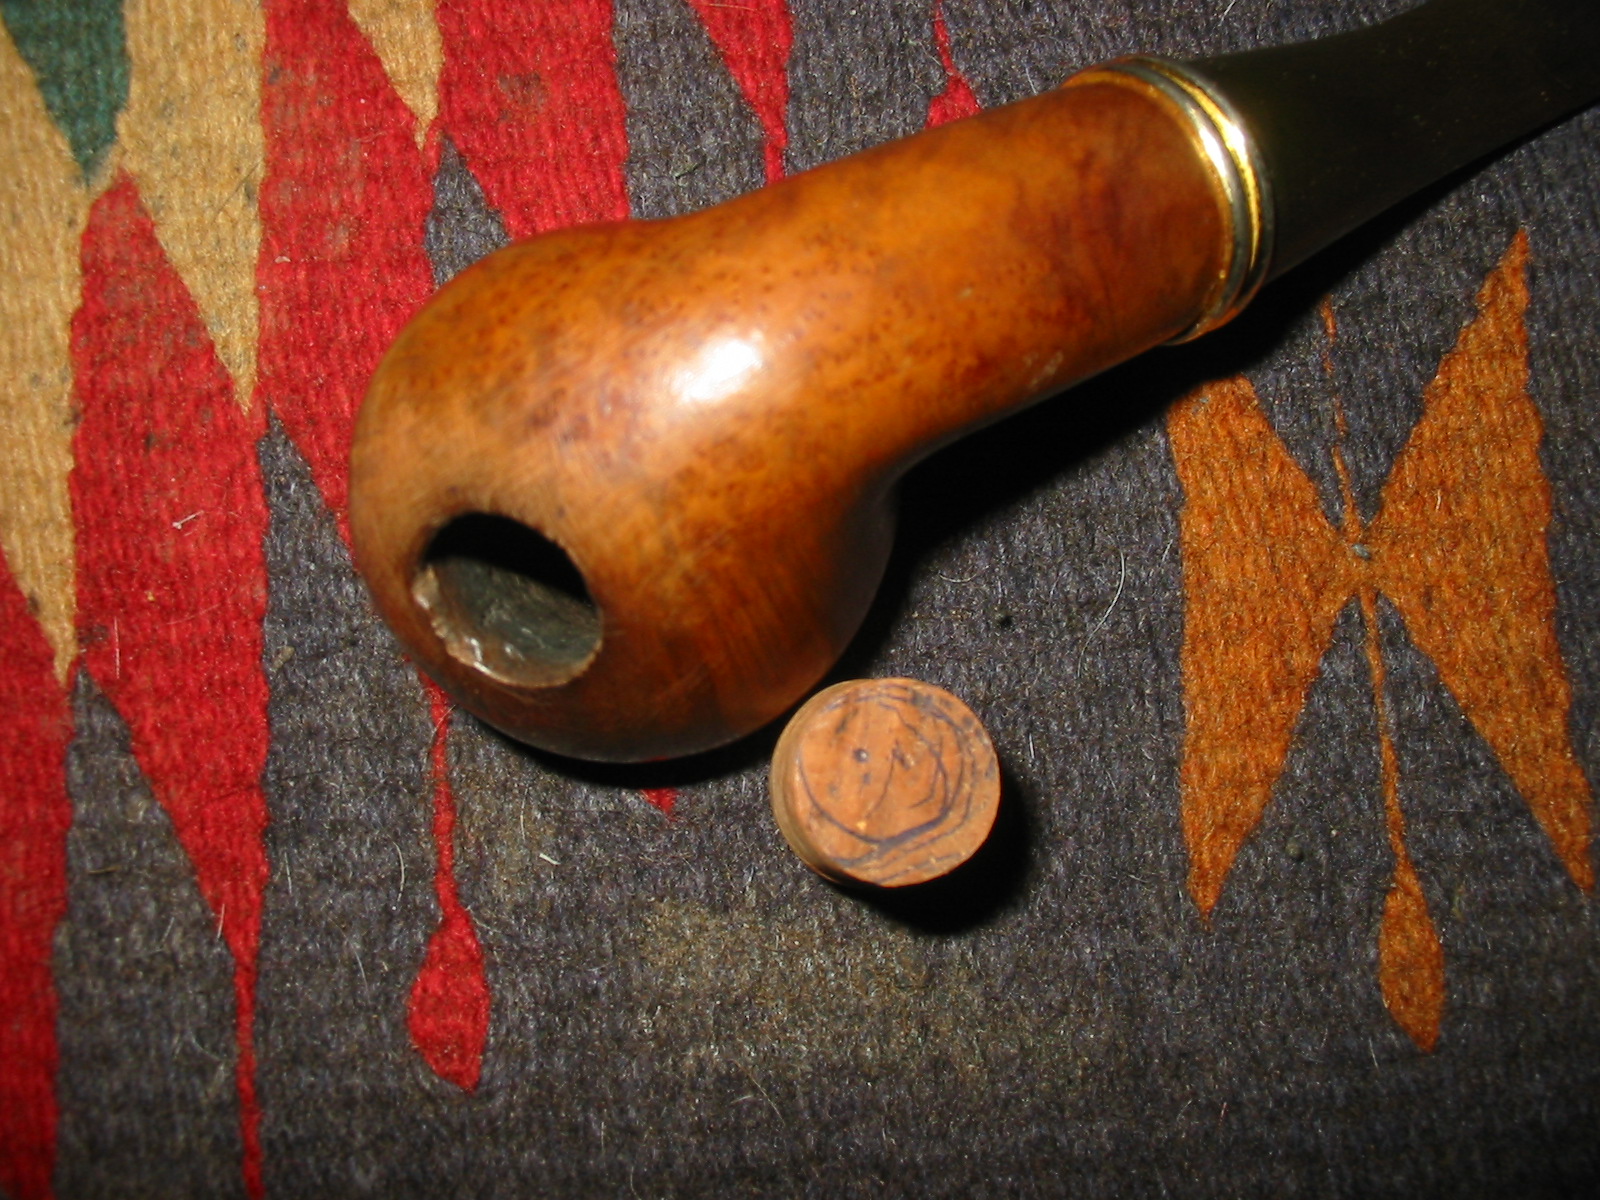
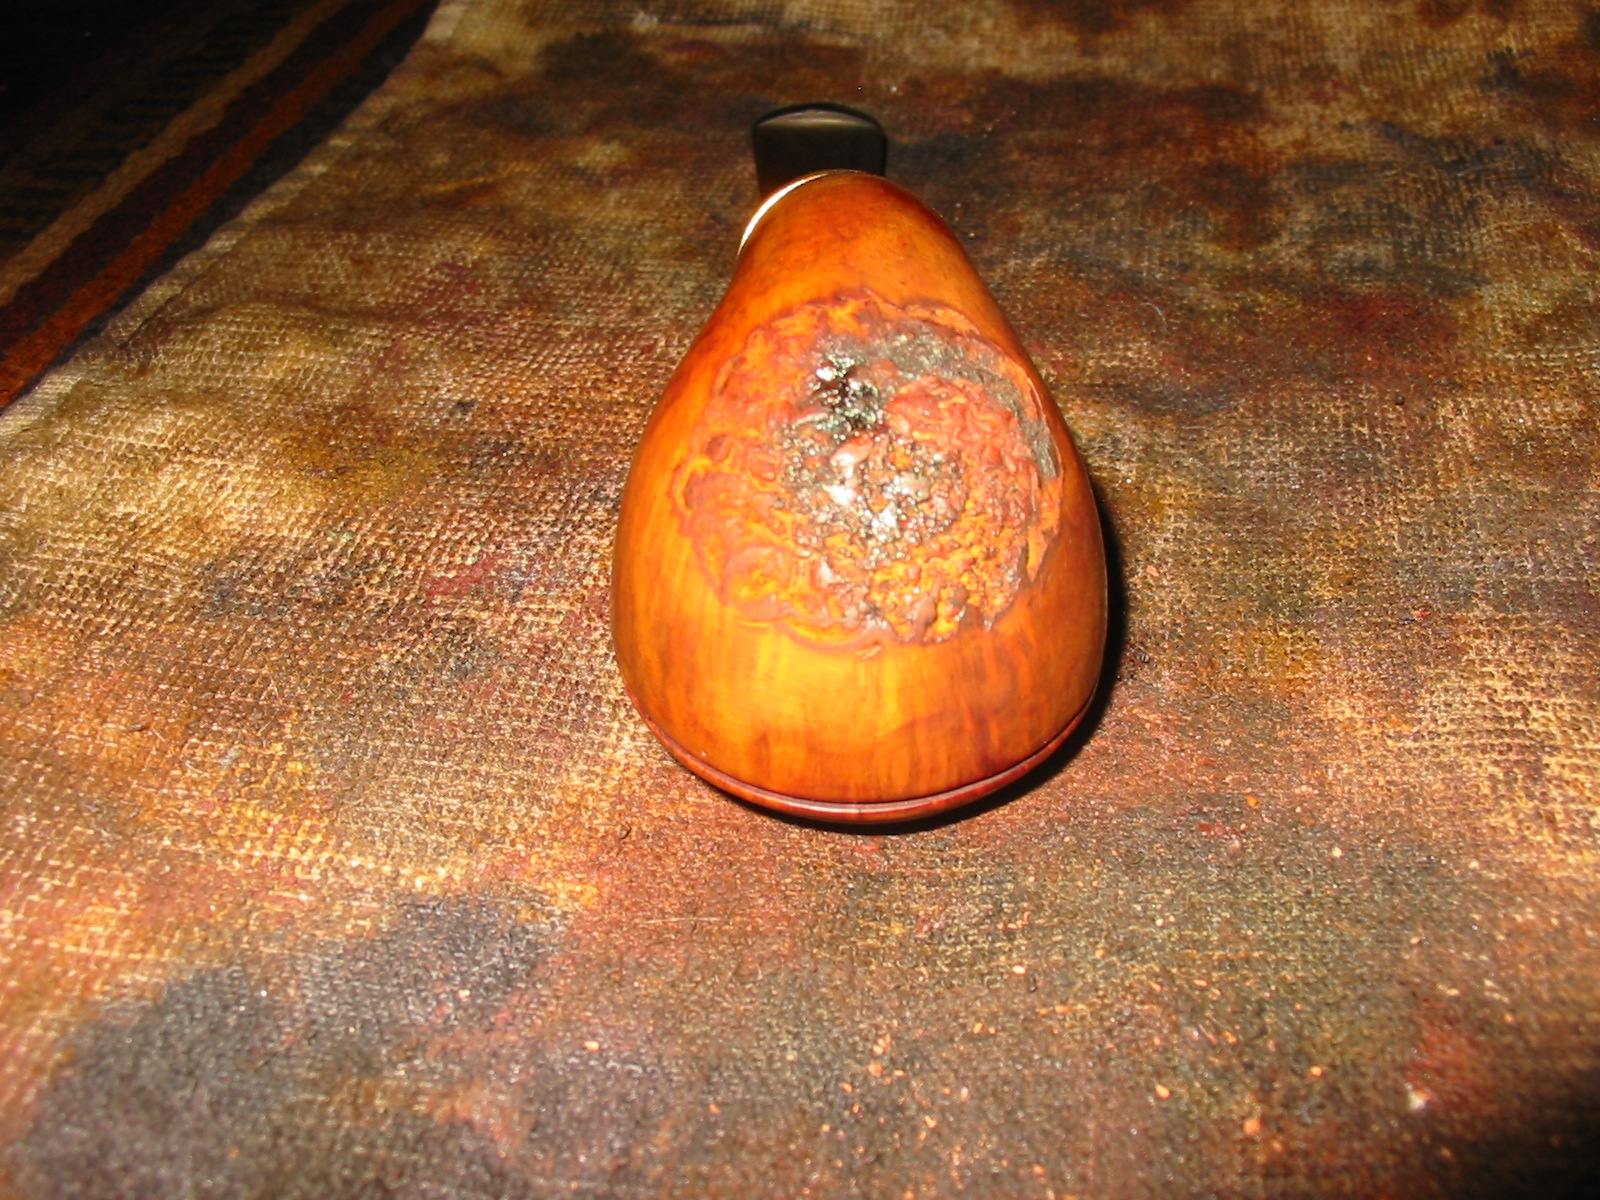
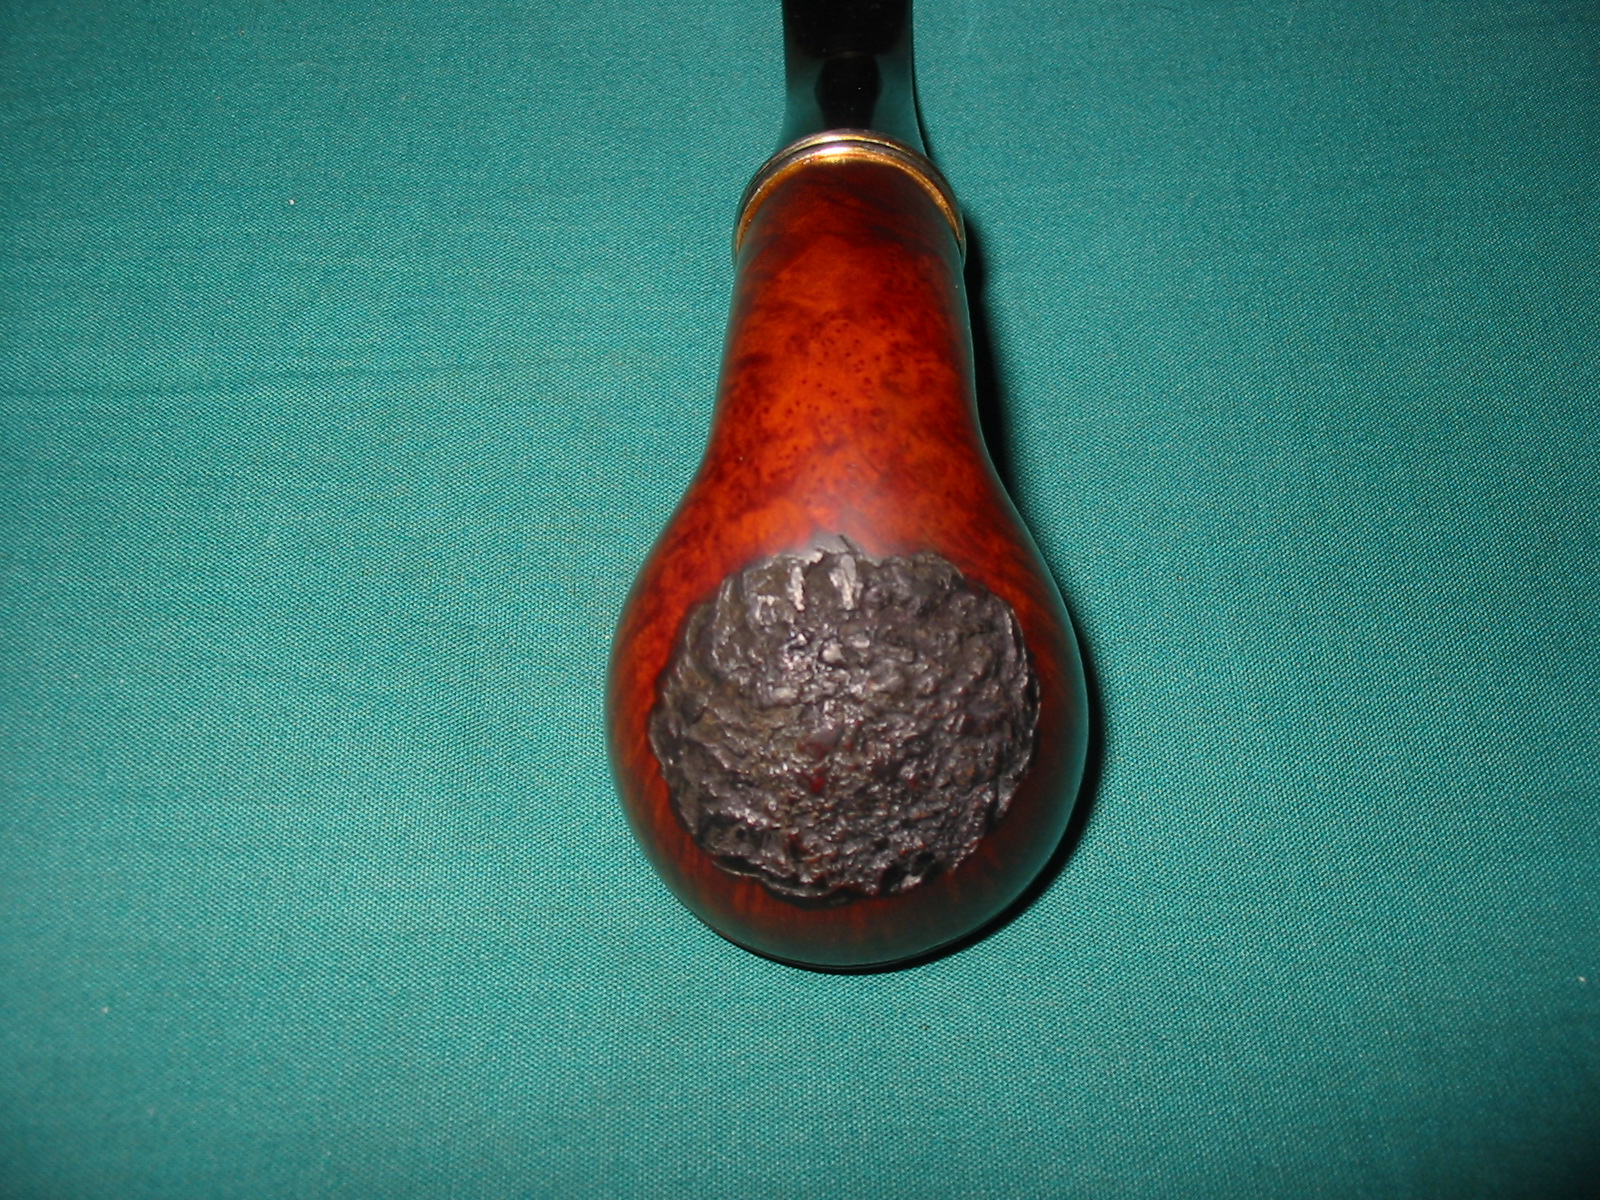
The problem with the pipe became obvious when Mark took it out of the shipping package to enjoy the “new” Peterson that he had purchased. The pipe had a serious burn through on the front right side of the bowl toward the bottom. That damage was quite extensive and either the pipe could be thrown away or the burn through drilled out and the damaged briar replaced with a briar plug.
IMG_20131125_123925_638_zps0ff2fe98

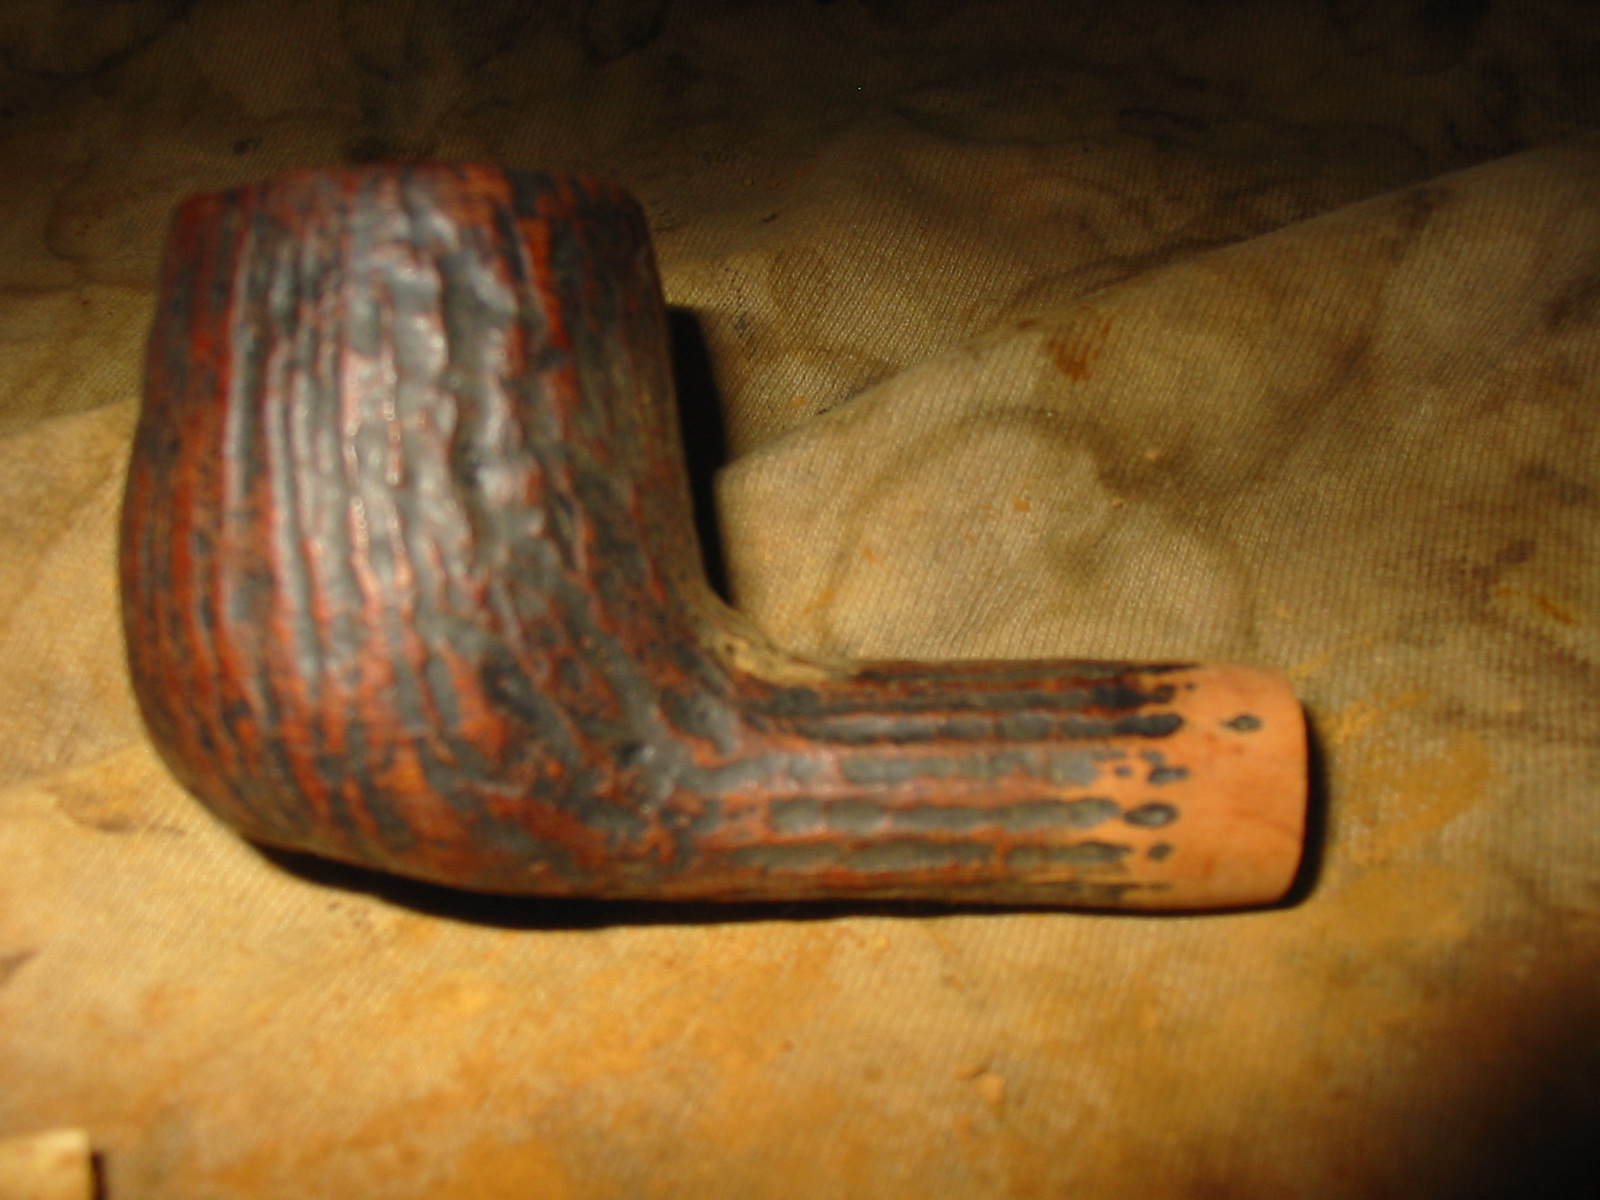
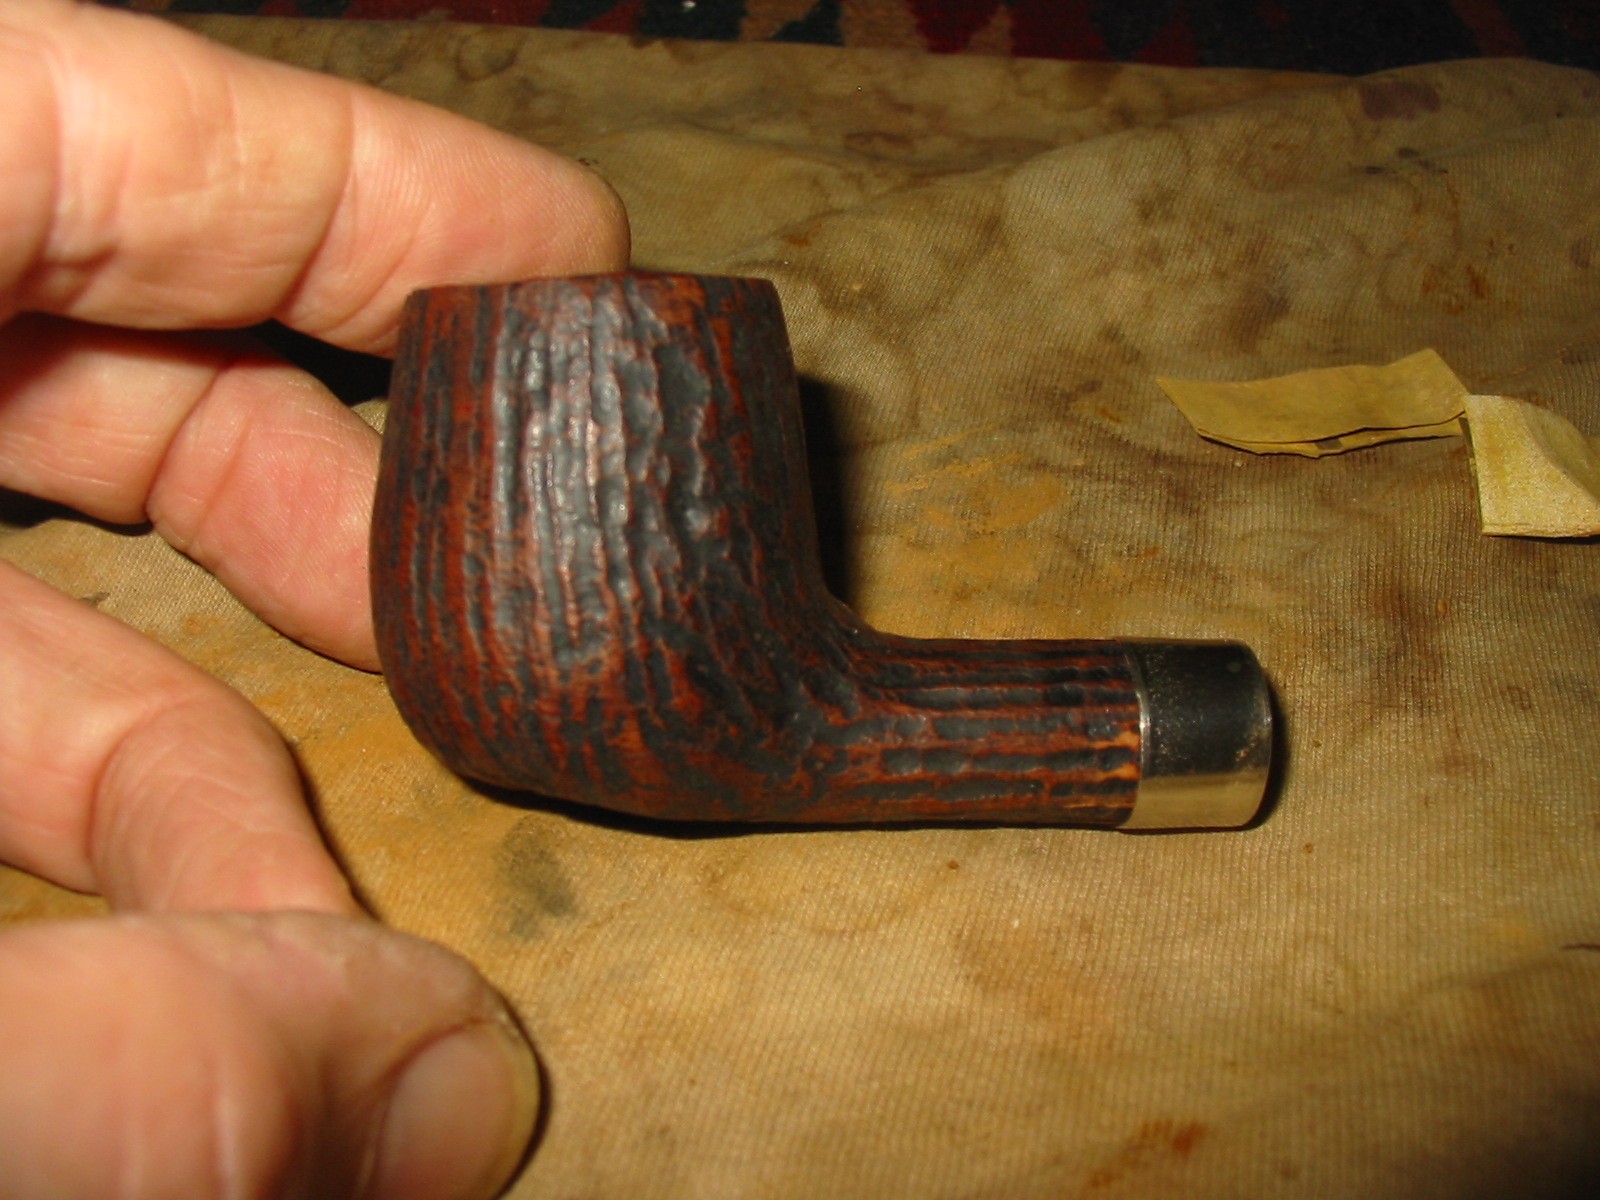
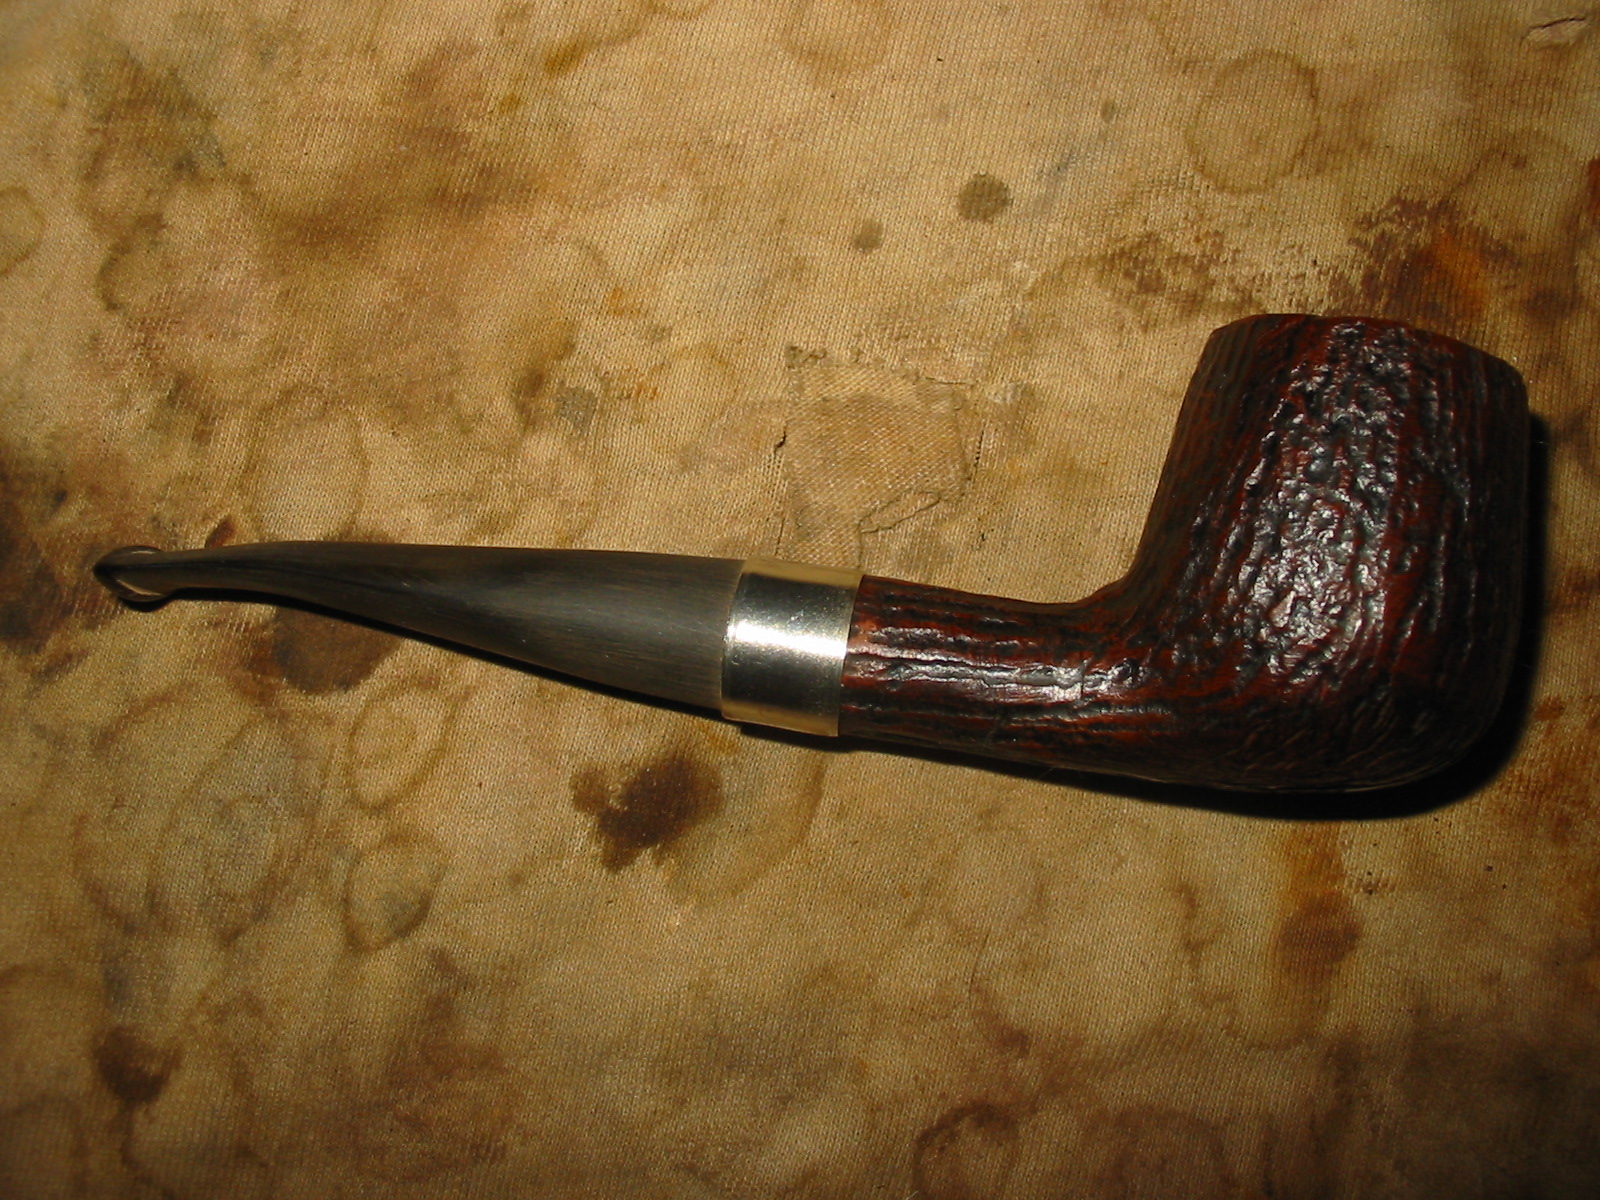
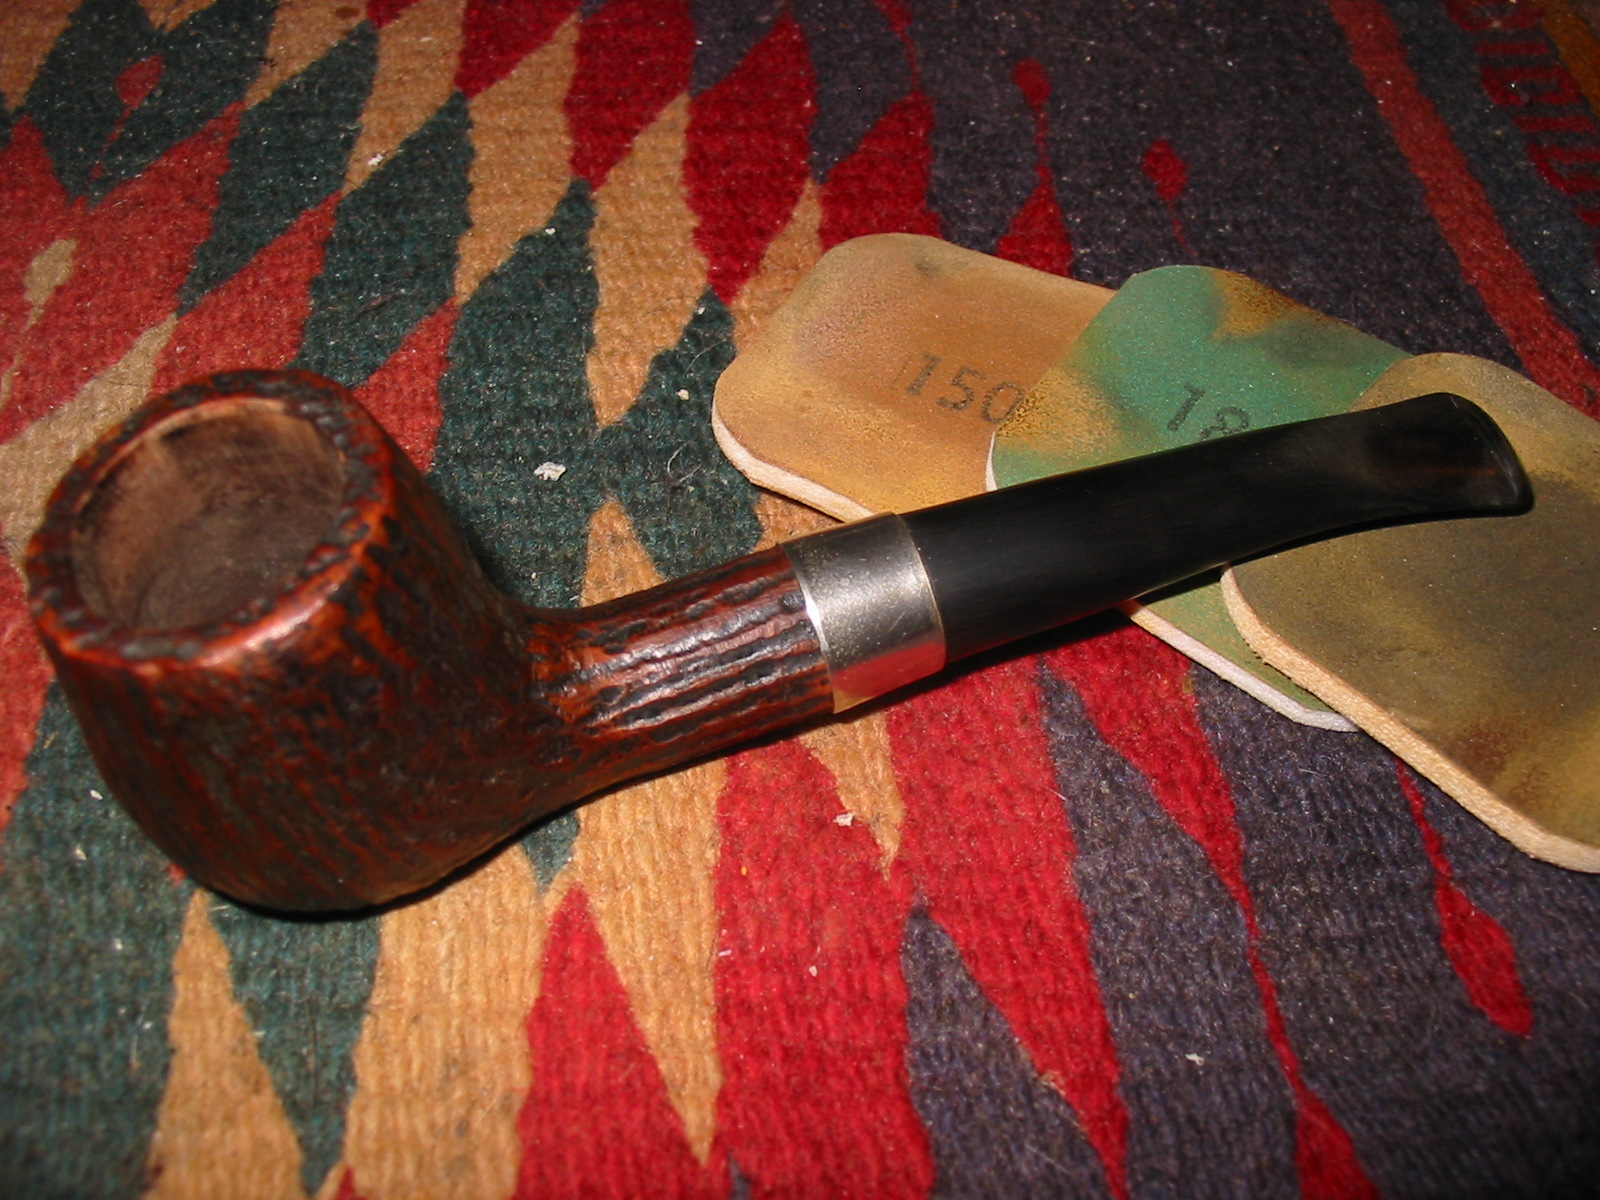
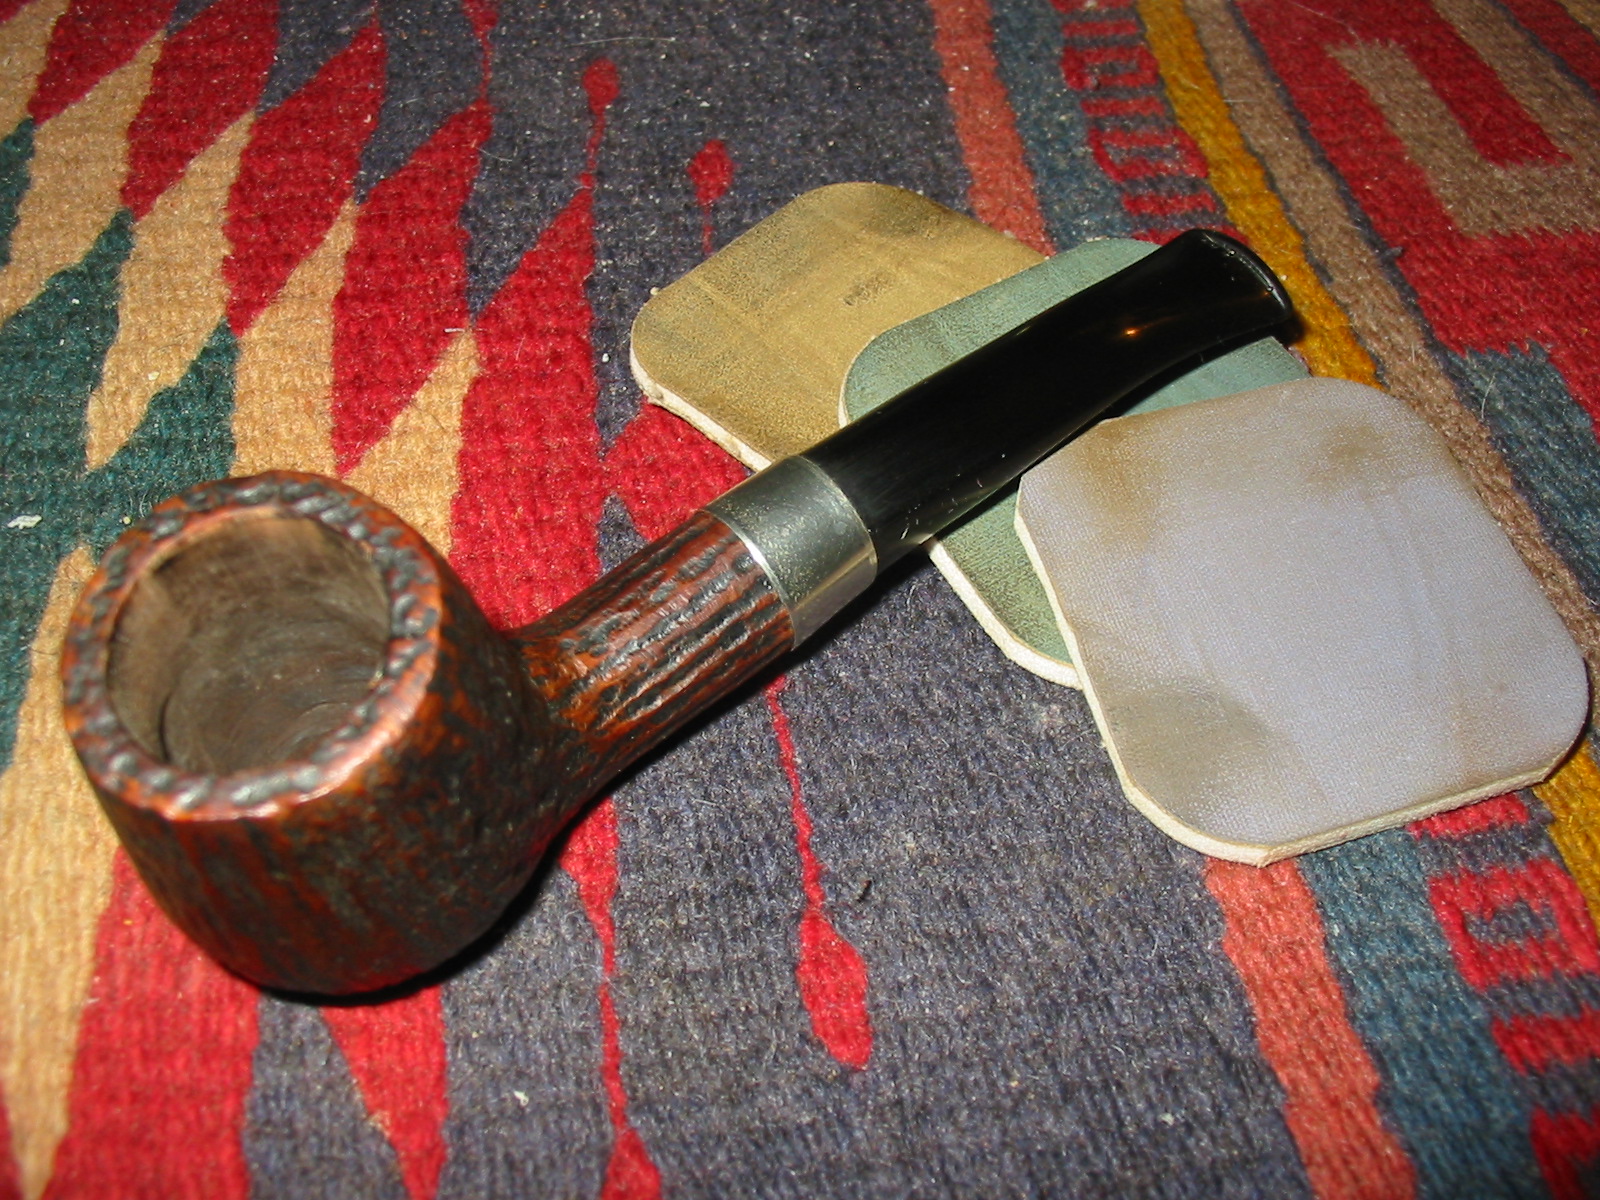
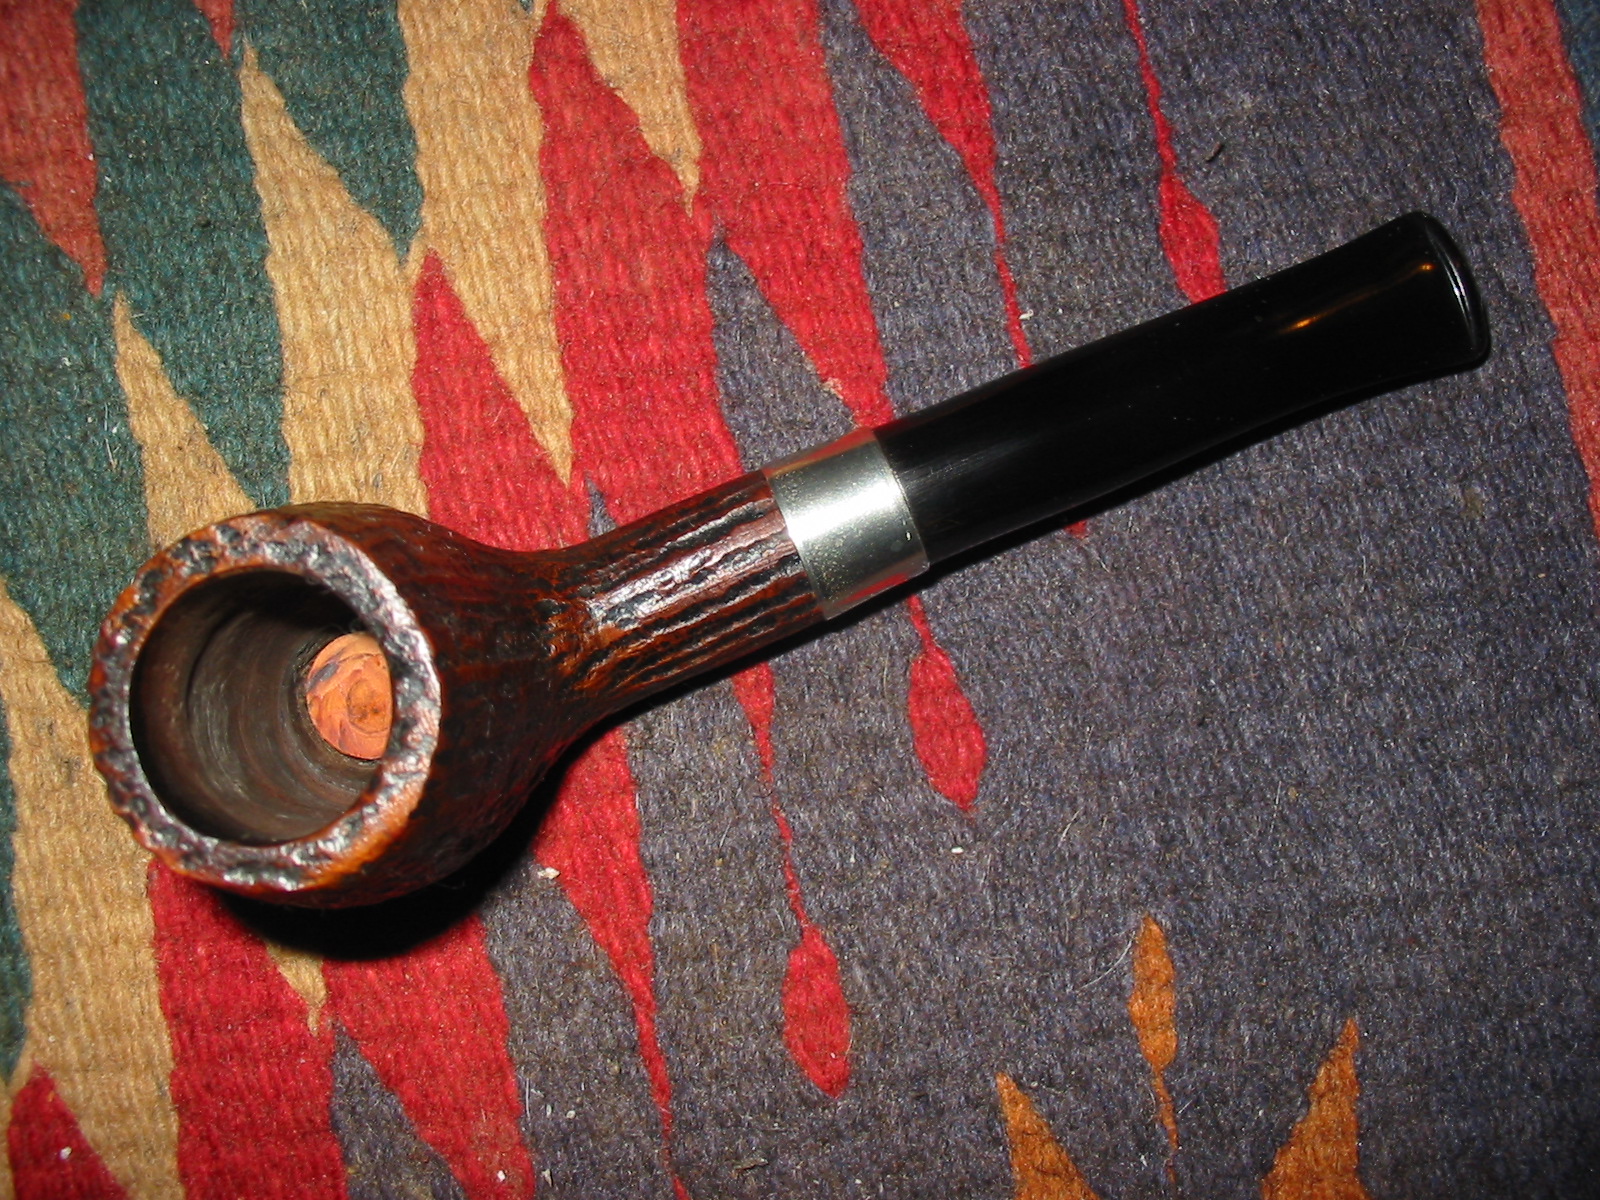
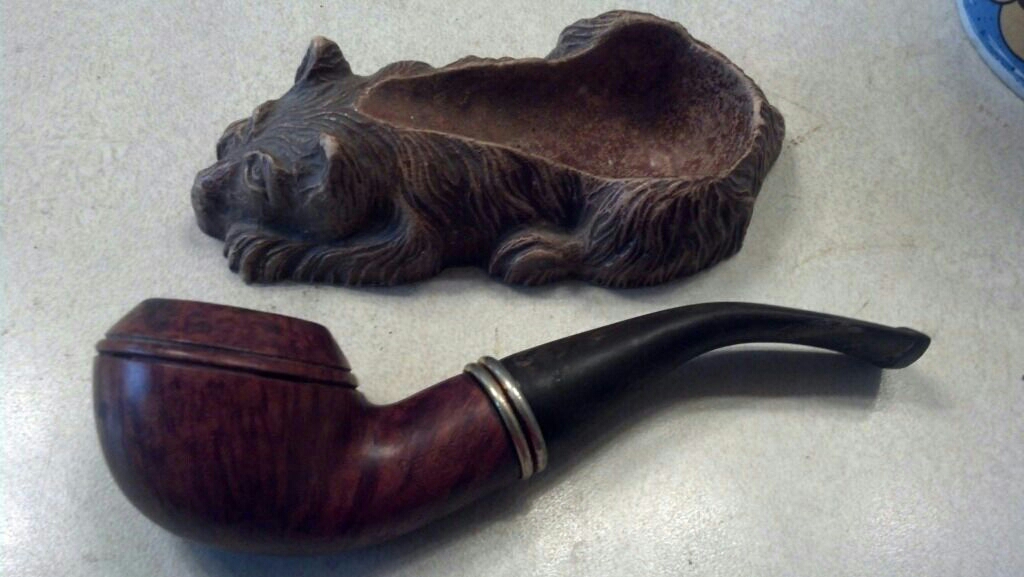
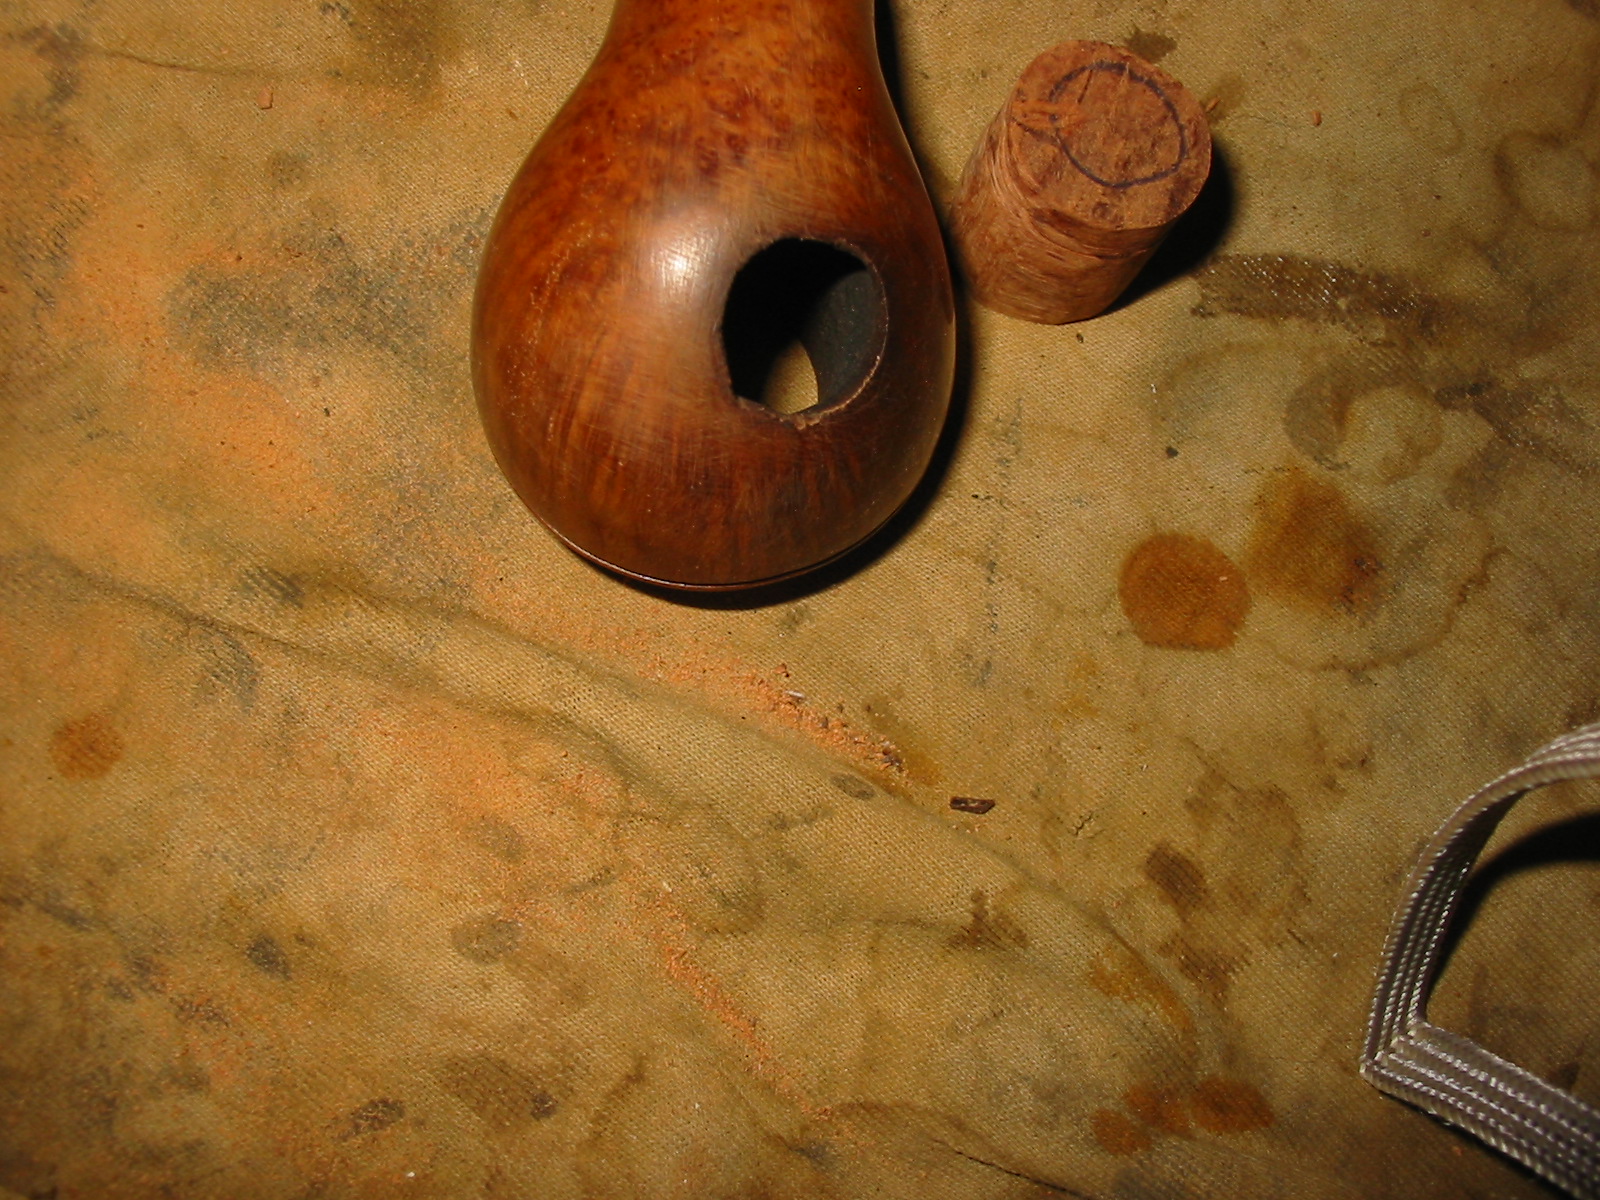
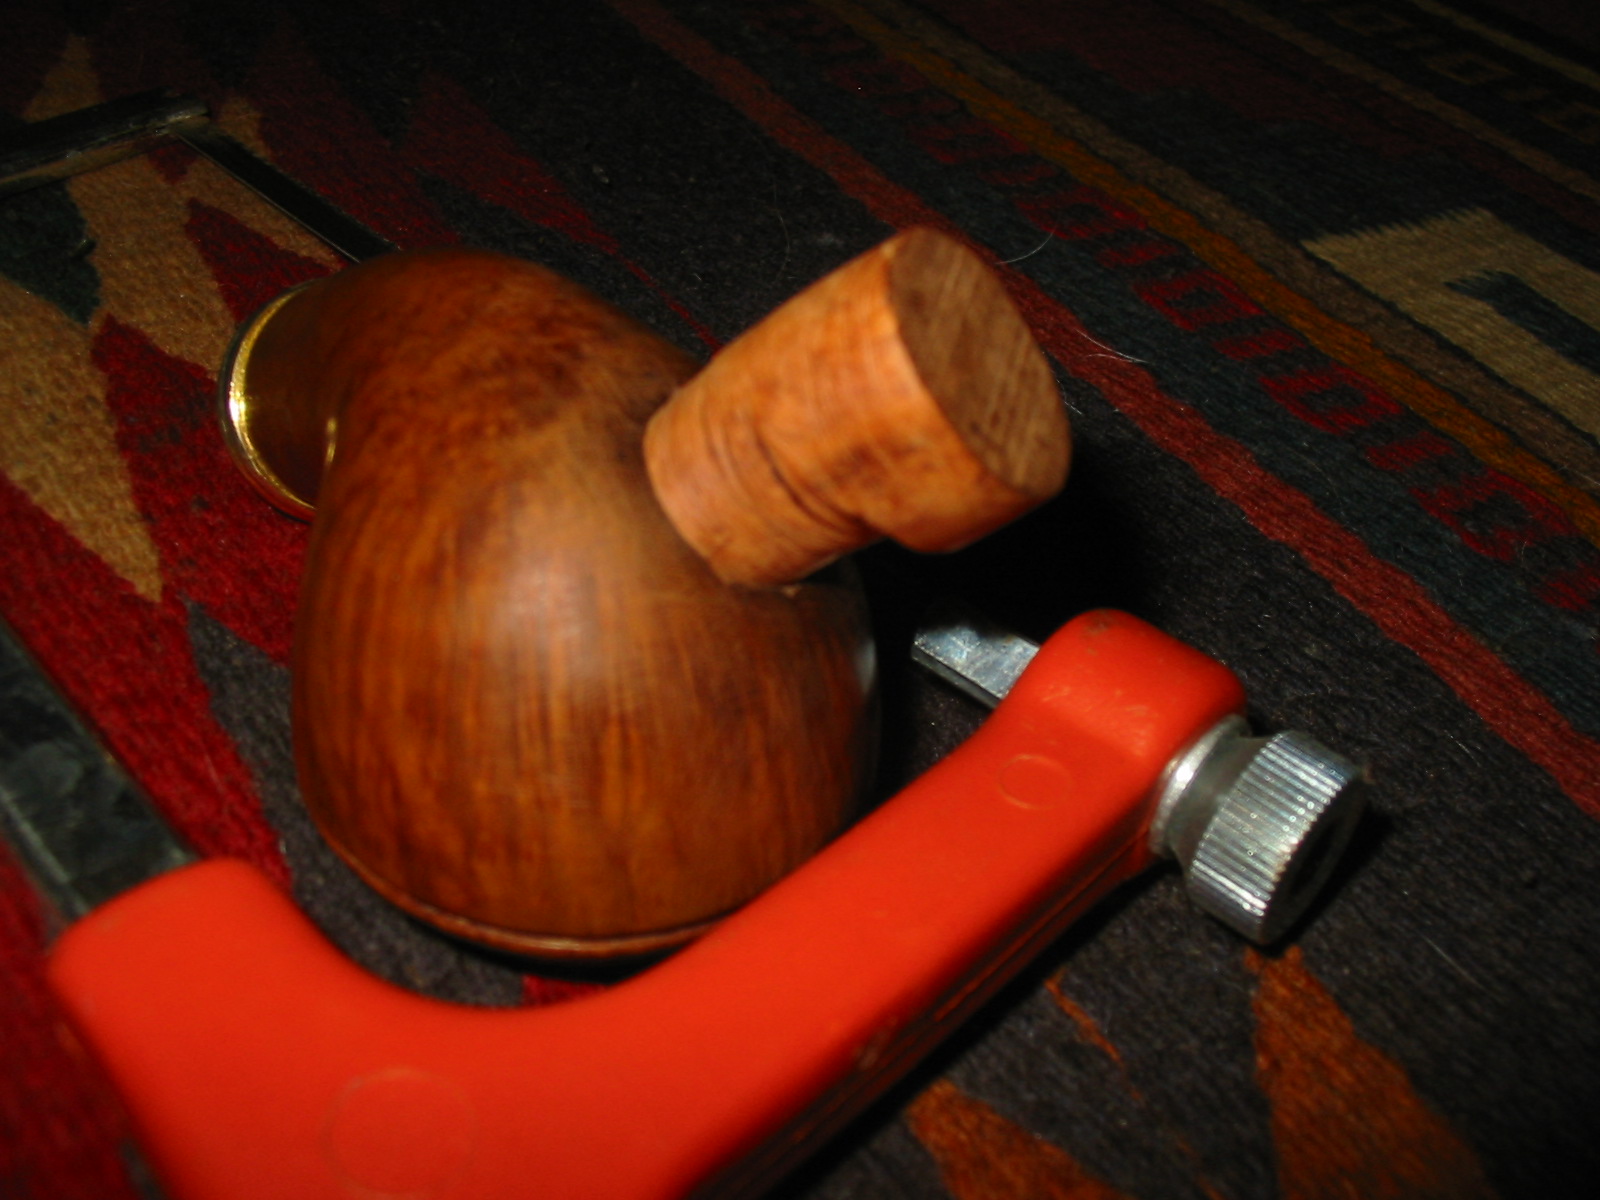
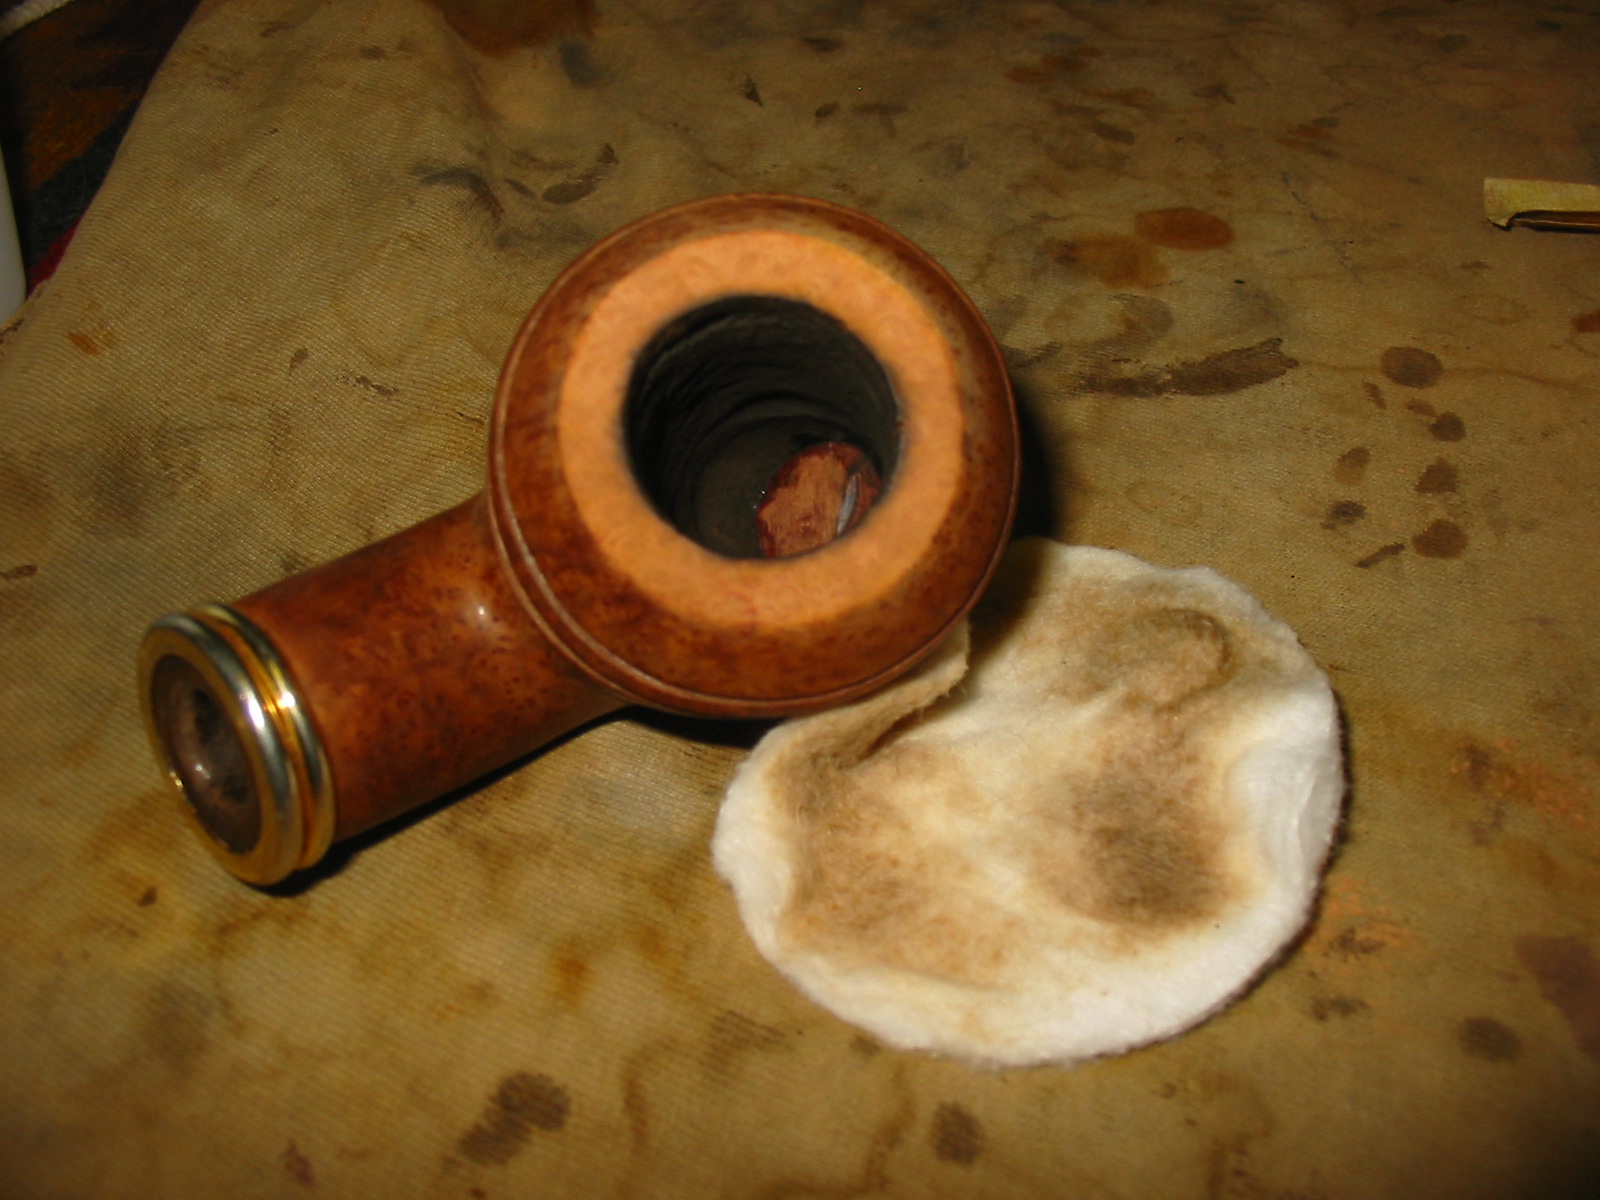
Mark decided to drill out the damaged portion of the bowl. We talked back and forth via email about the steps to take to fix it. He toyed with it and then one day asked if I wanted to do the work on it. He would send the pipe, a chunk of briar some pipes that he thought I might enjoy working on in exchange for the repair. After emailing back and forth we agreed to the terms and he sent the bowl on to me to do the repair in exchange for a few pipes for my refurbishing box. Here is what the pipe looked like when it arrived in Vancouver. Mark had cleaned up the exterior of the pipe and also the interior and drilled out the burnout. The brass/gold band on the shank was loose and the stem was in decent shape with two minor tooth marks.
IMG_4808

IMG_4809

IMG_4810

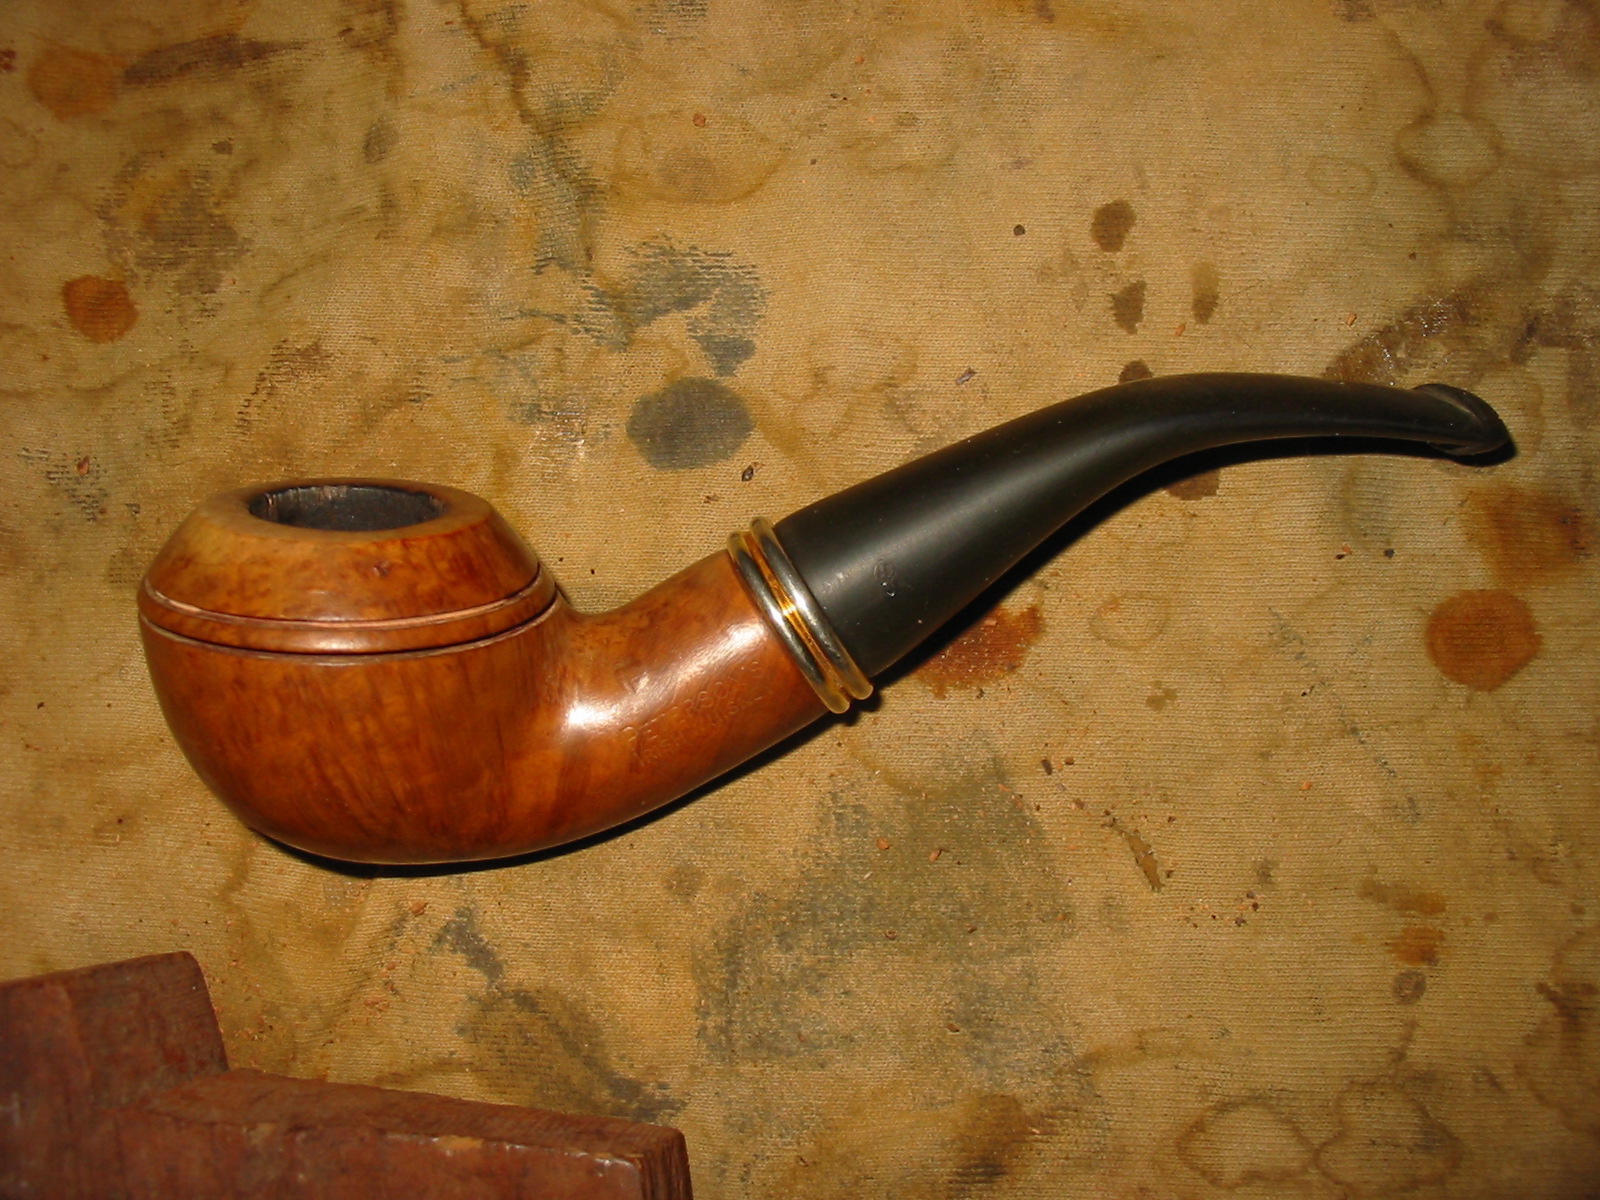
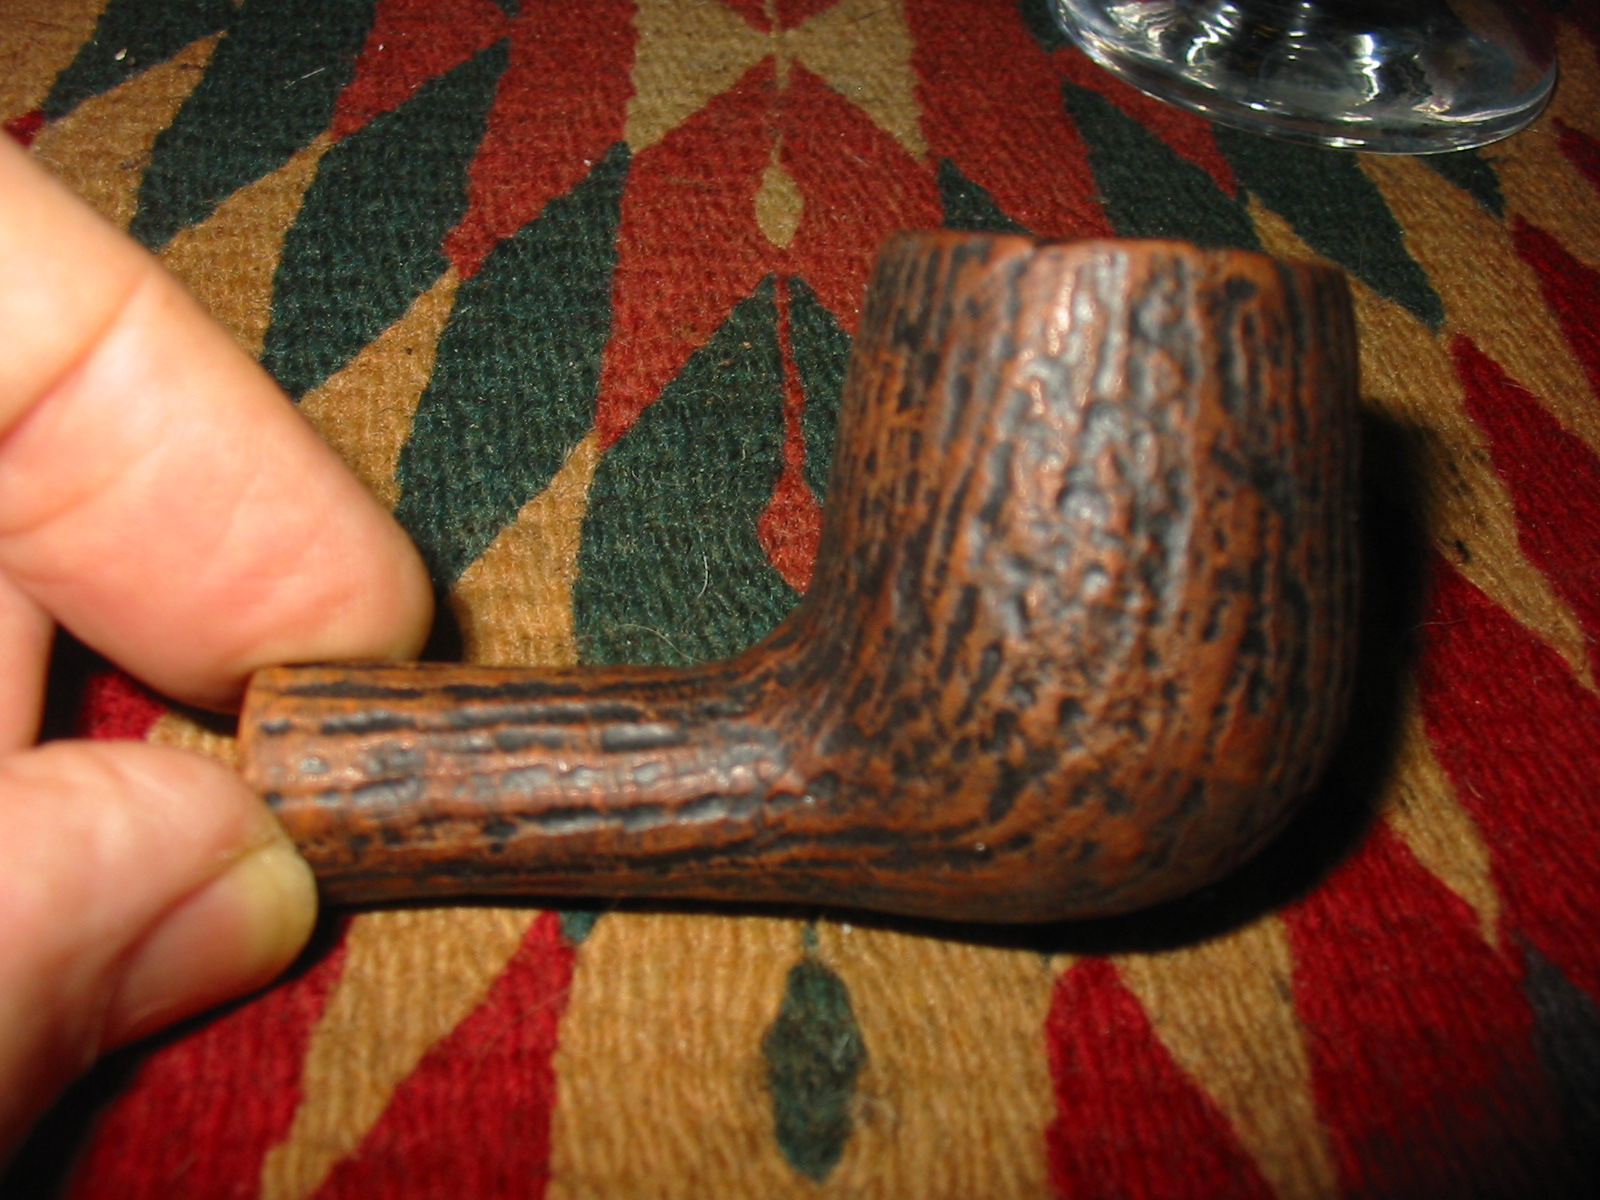
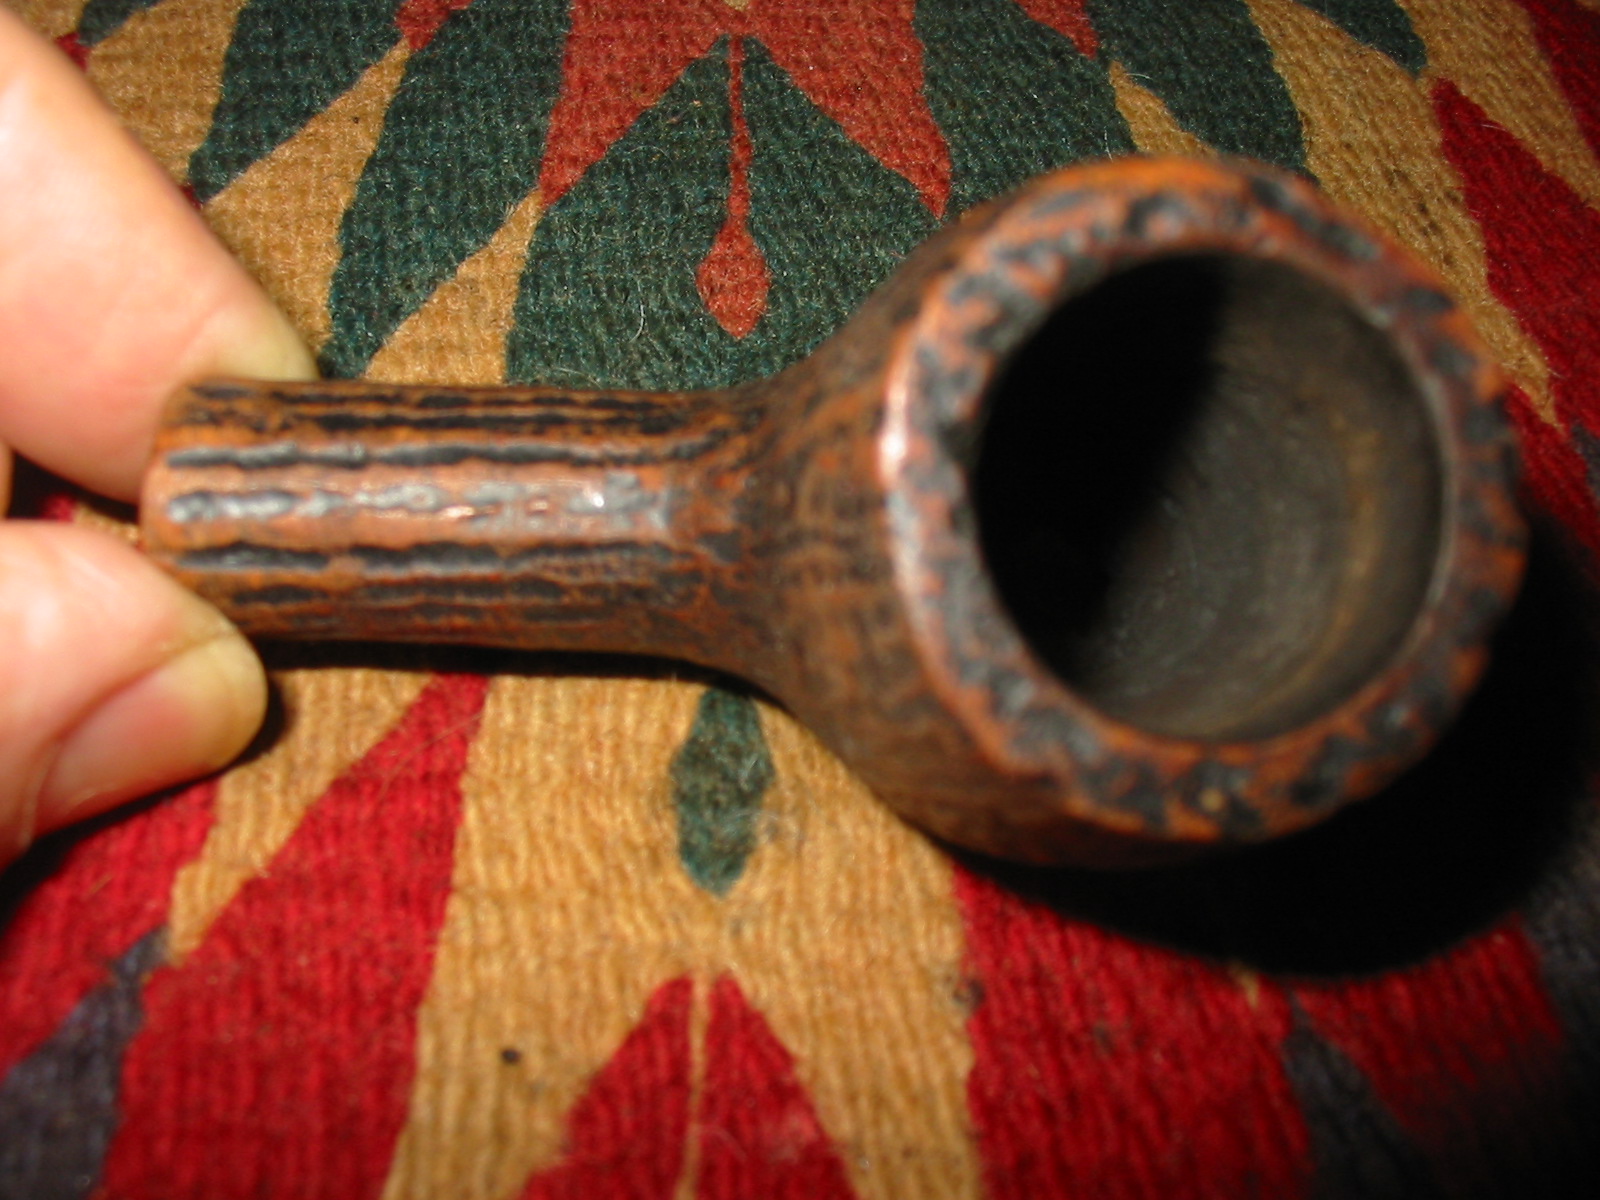
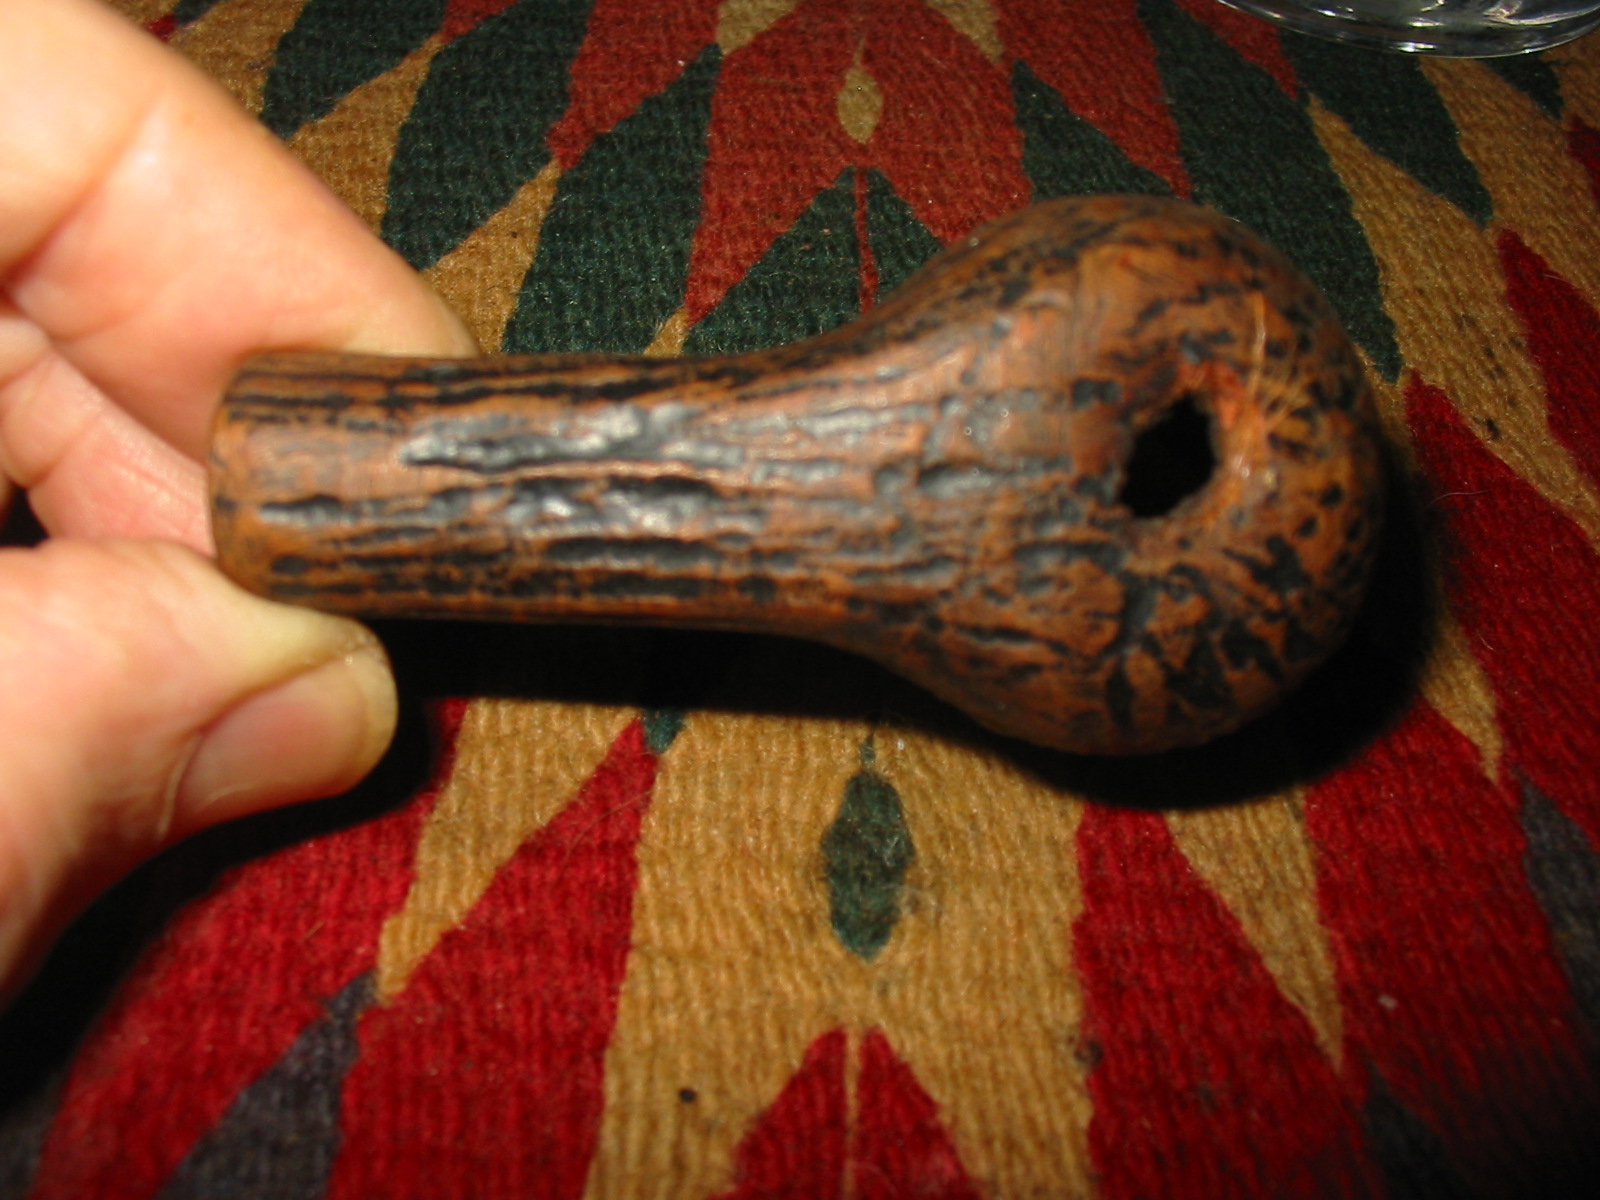
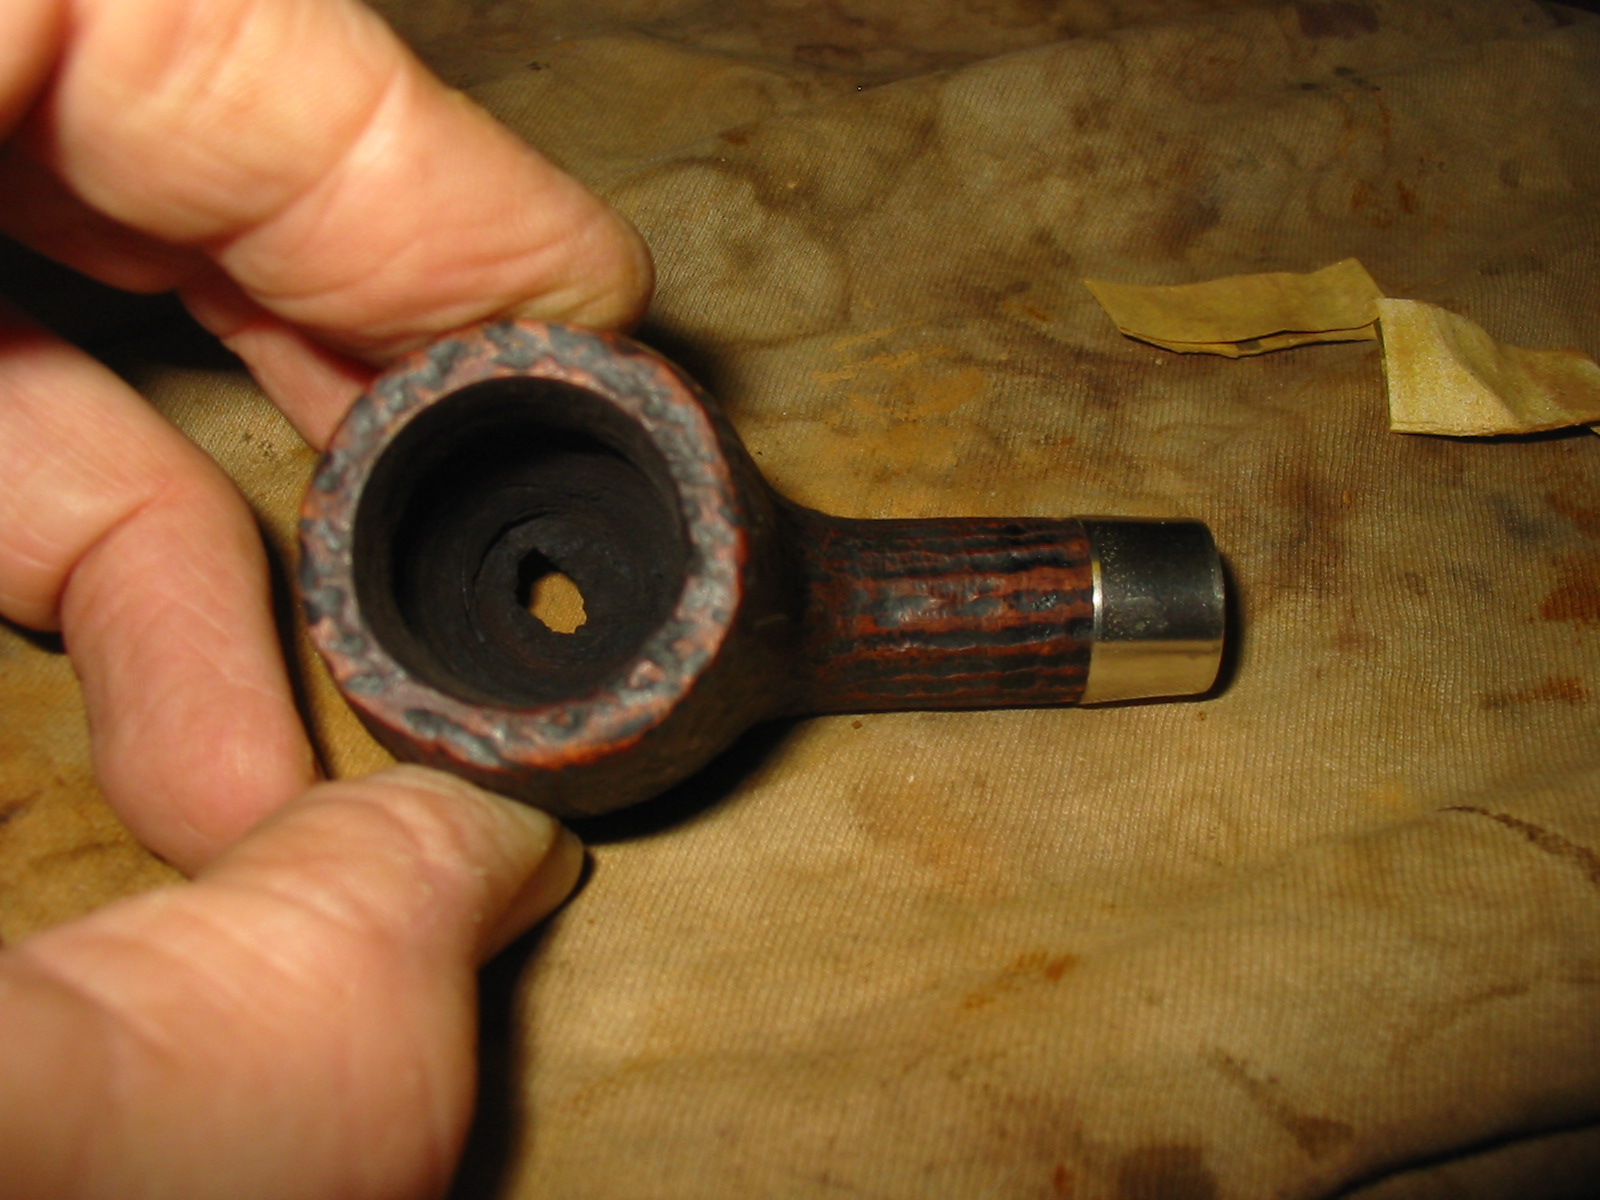
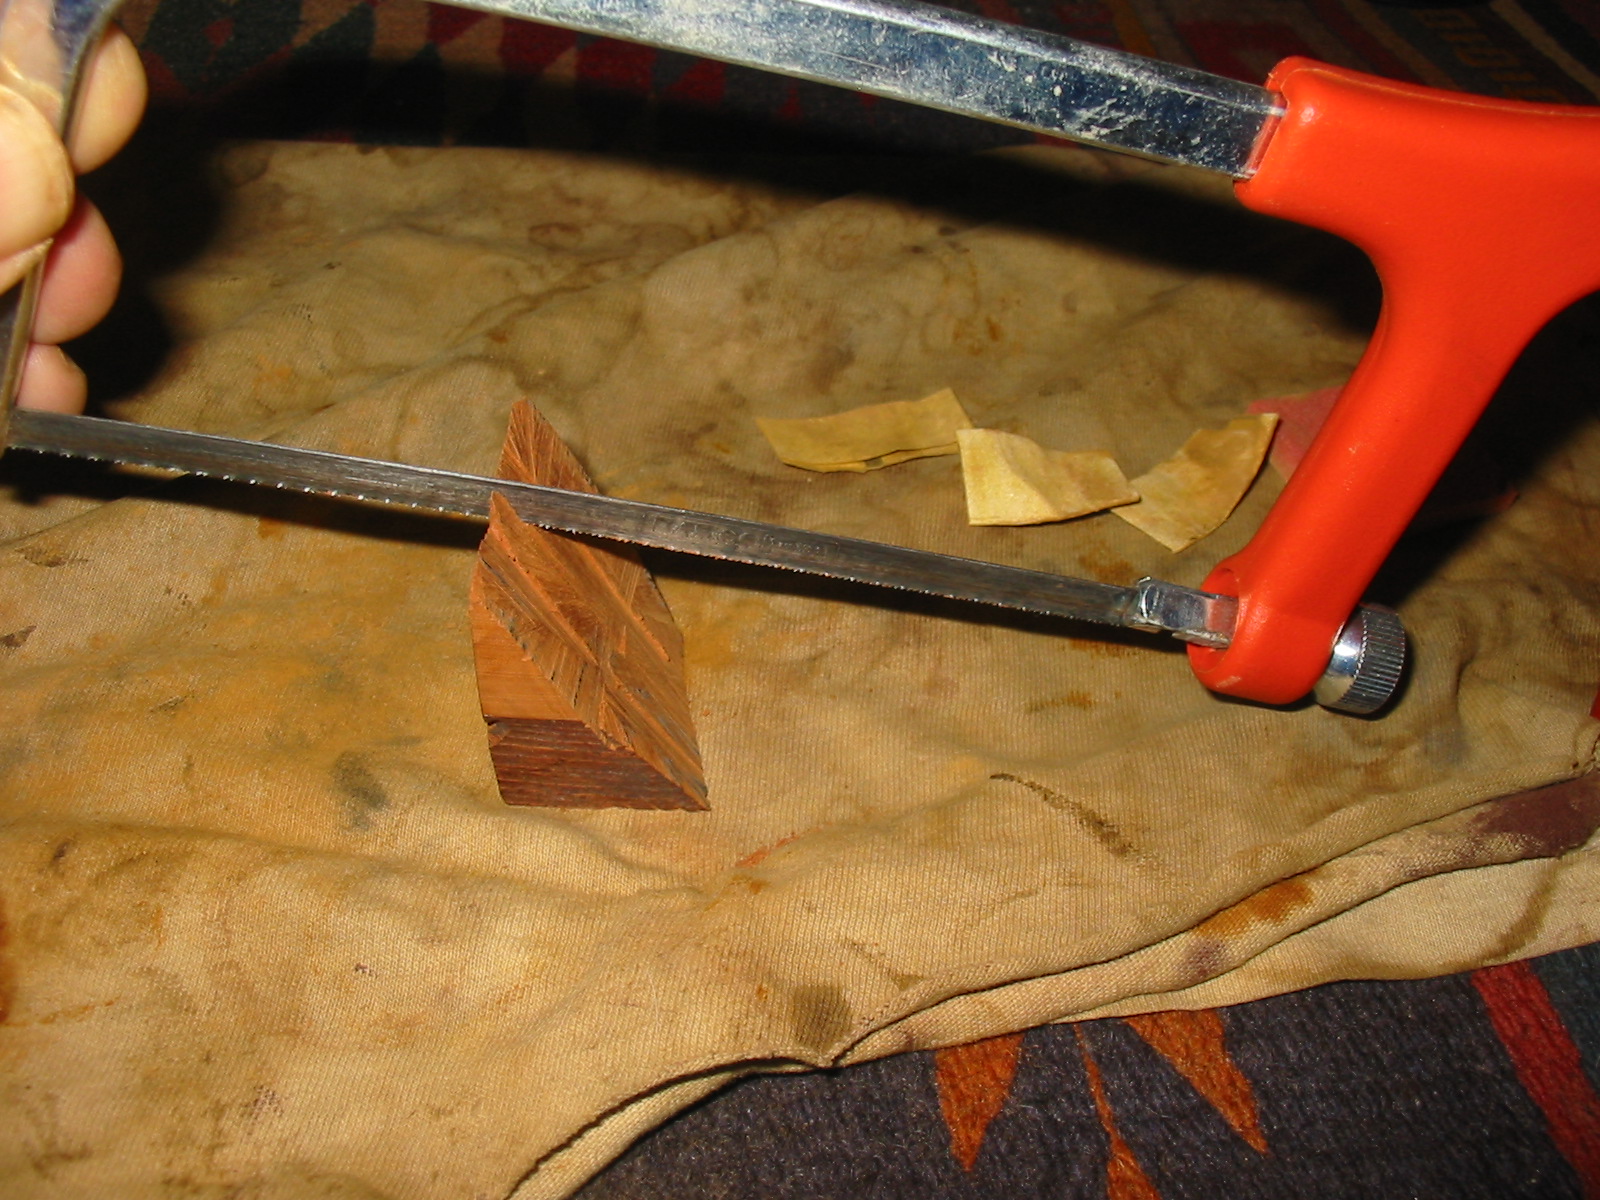
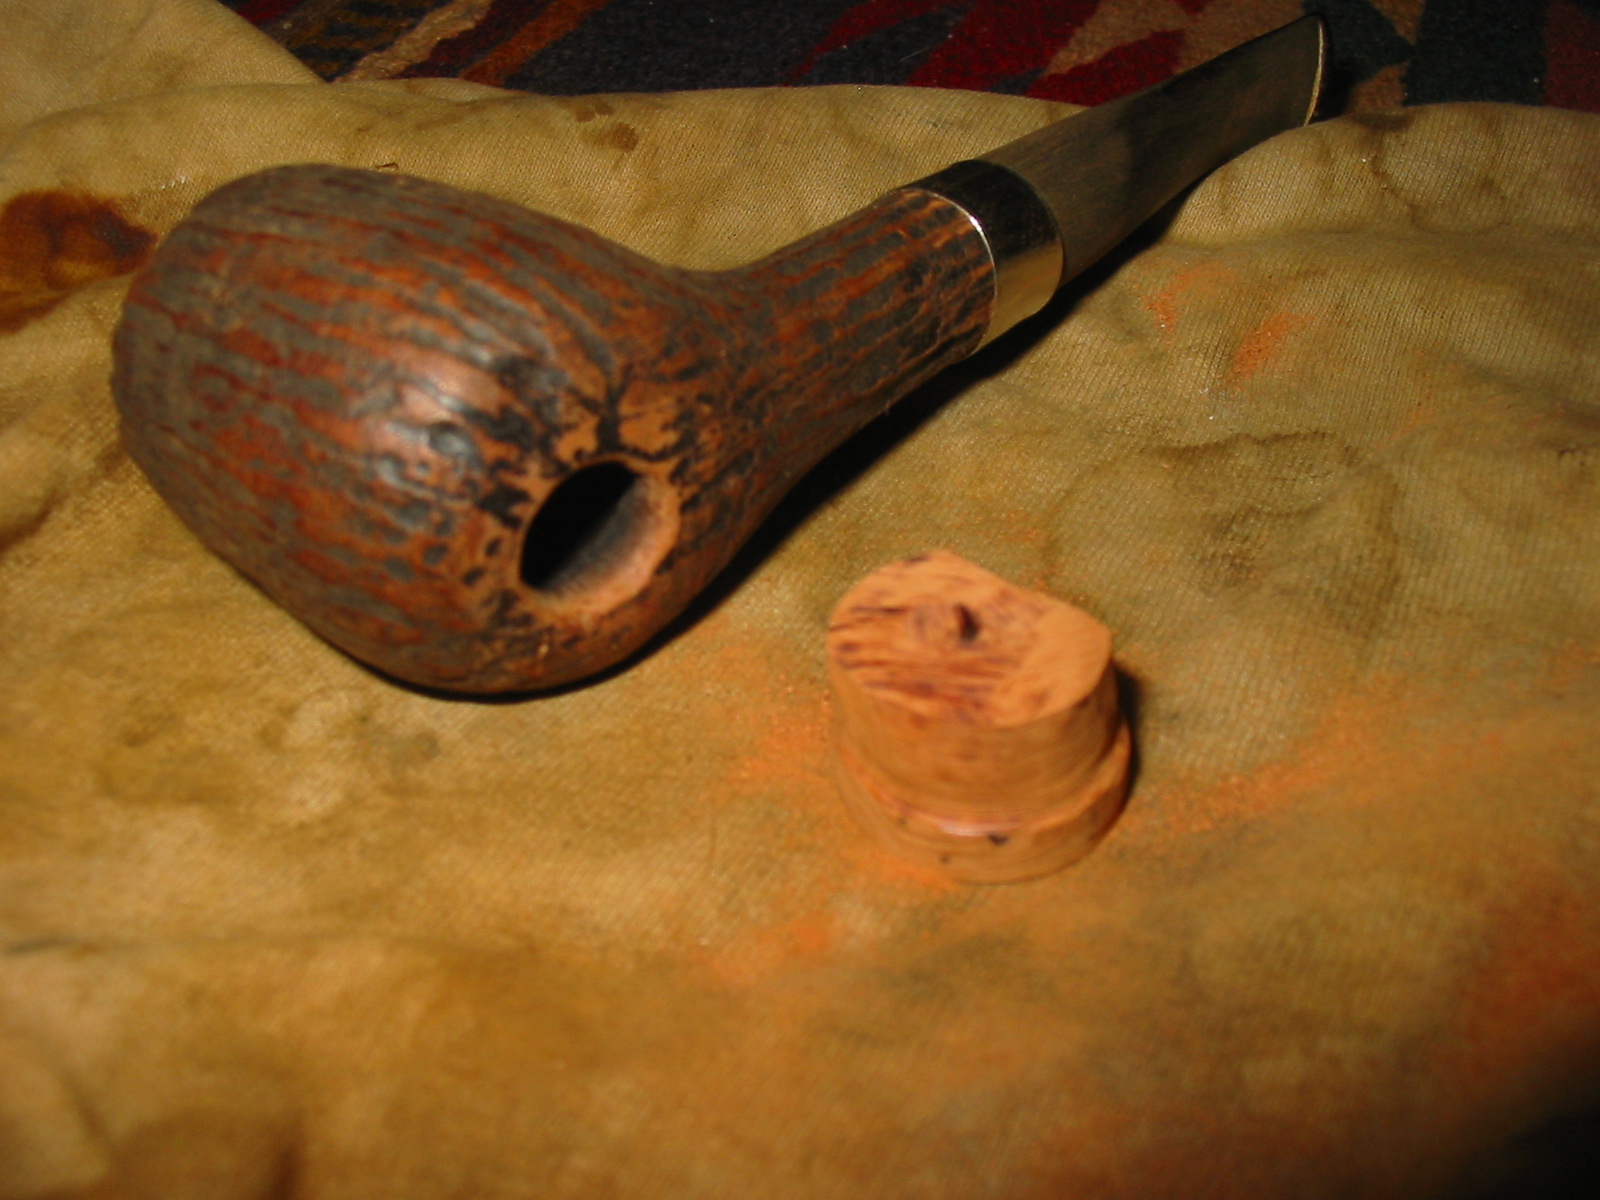
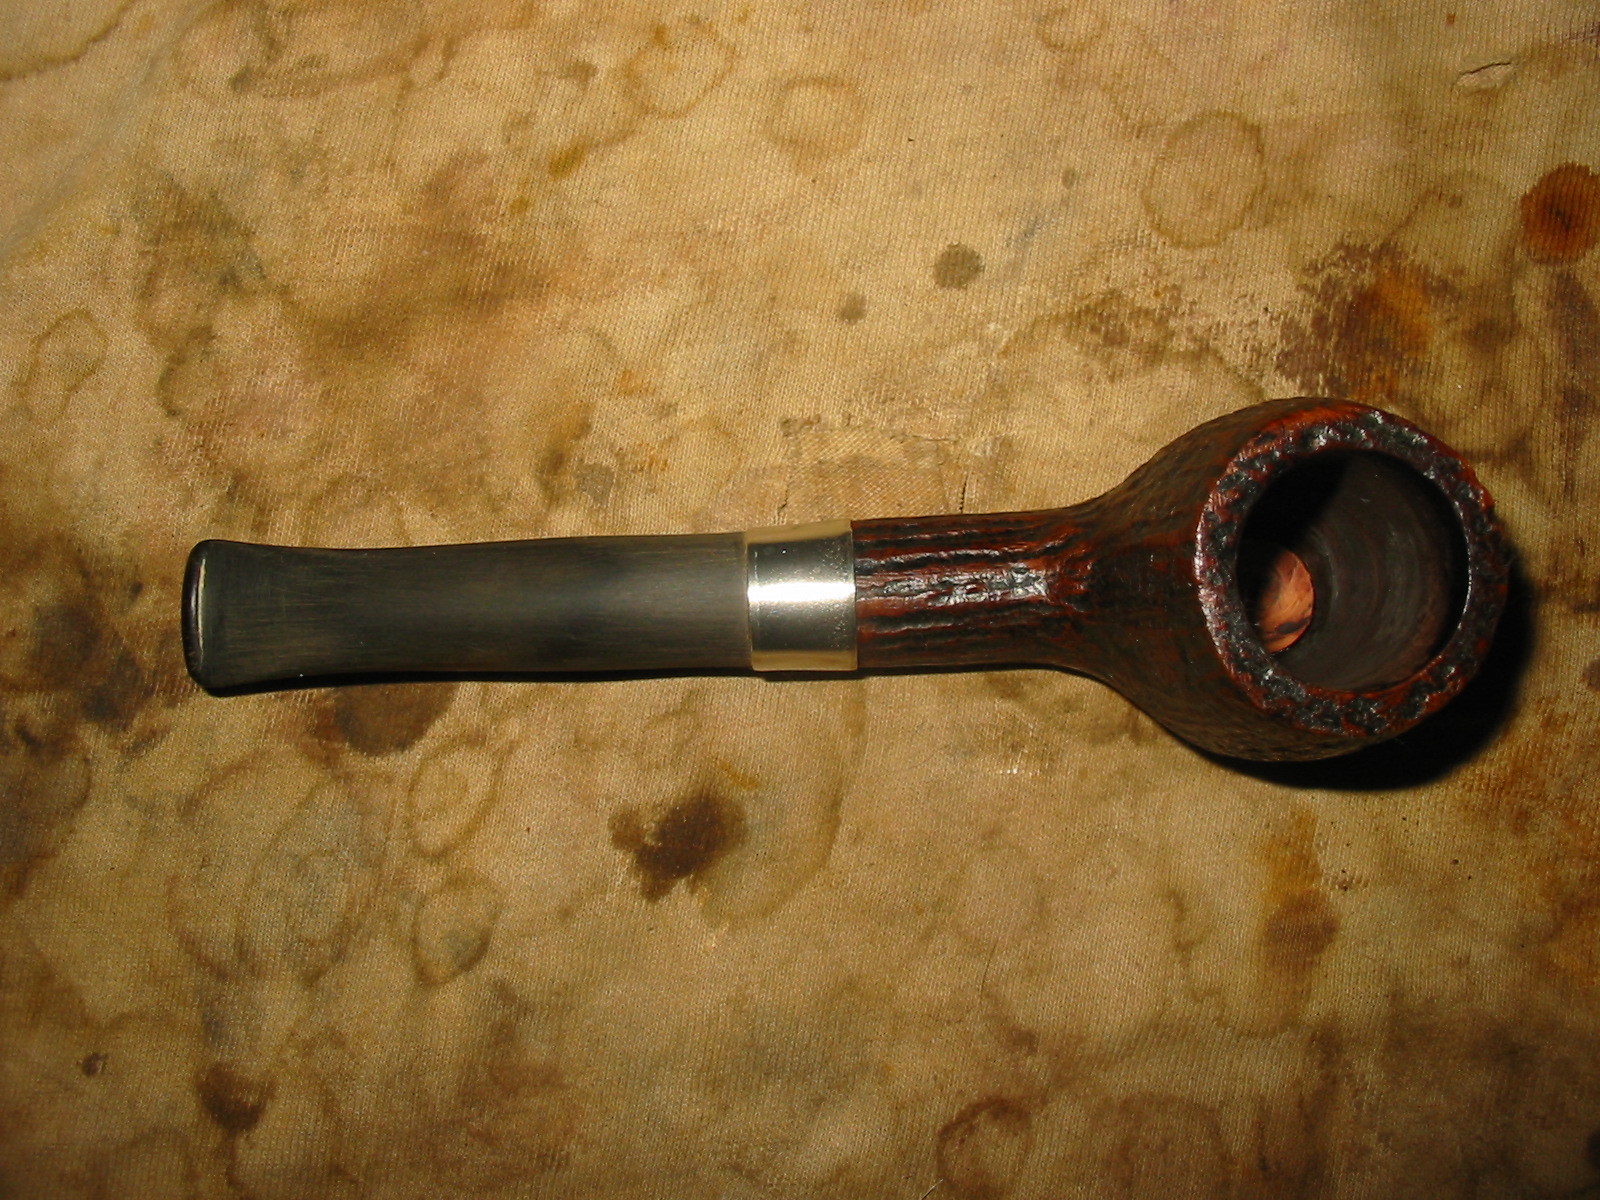
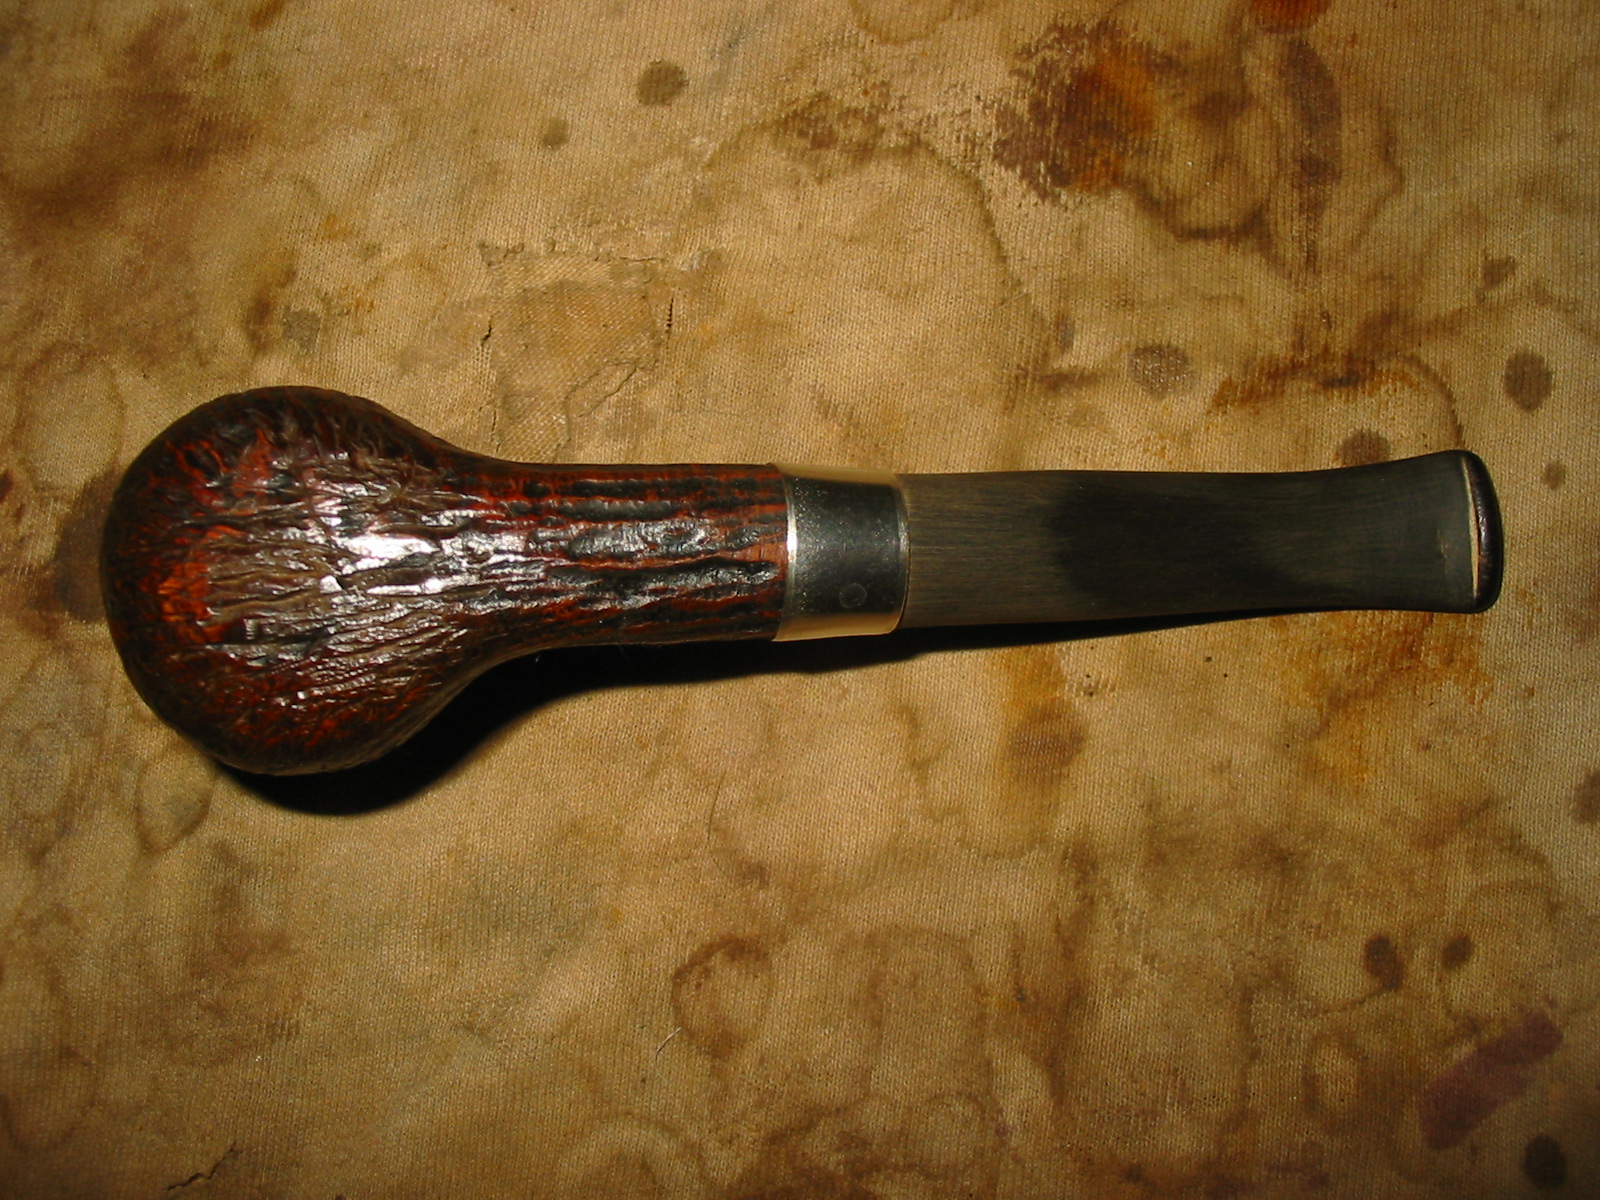
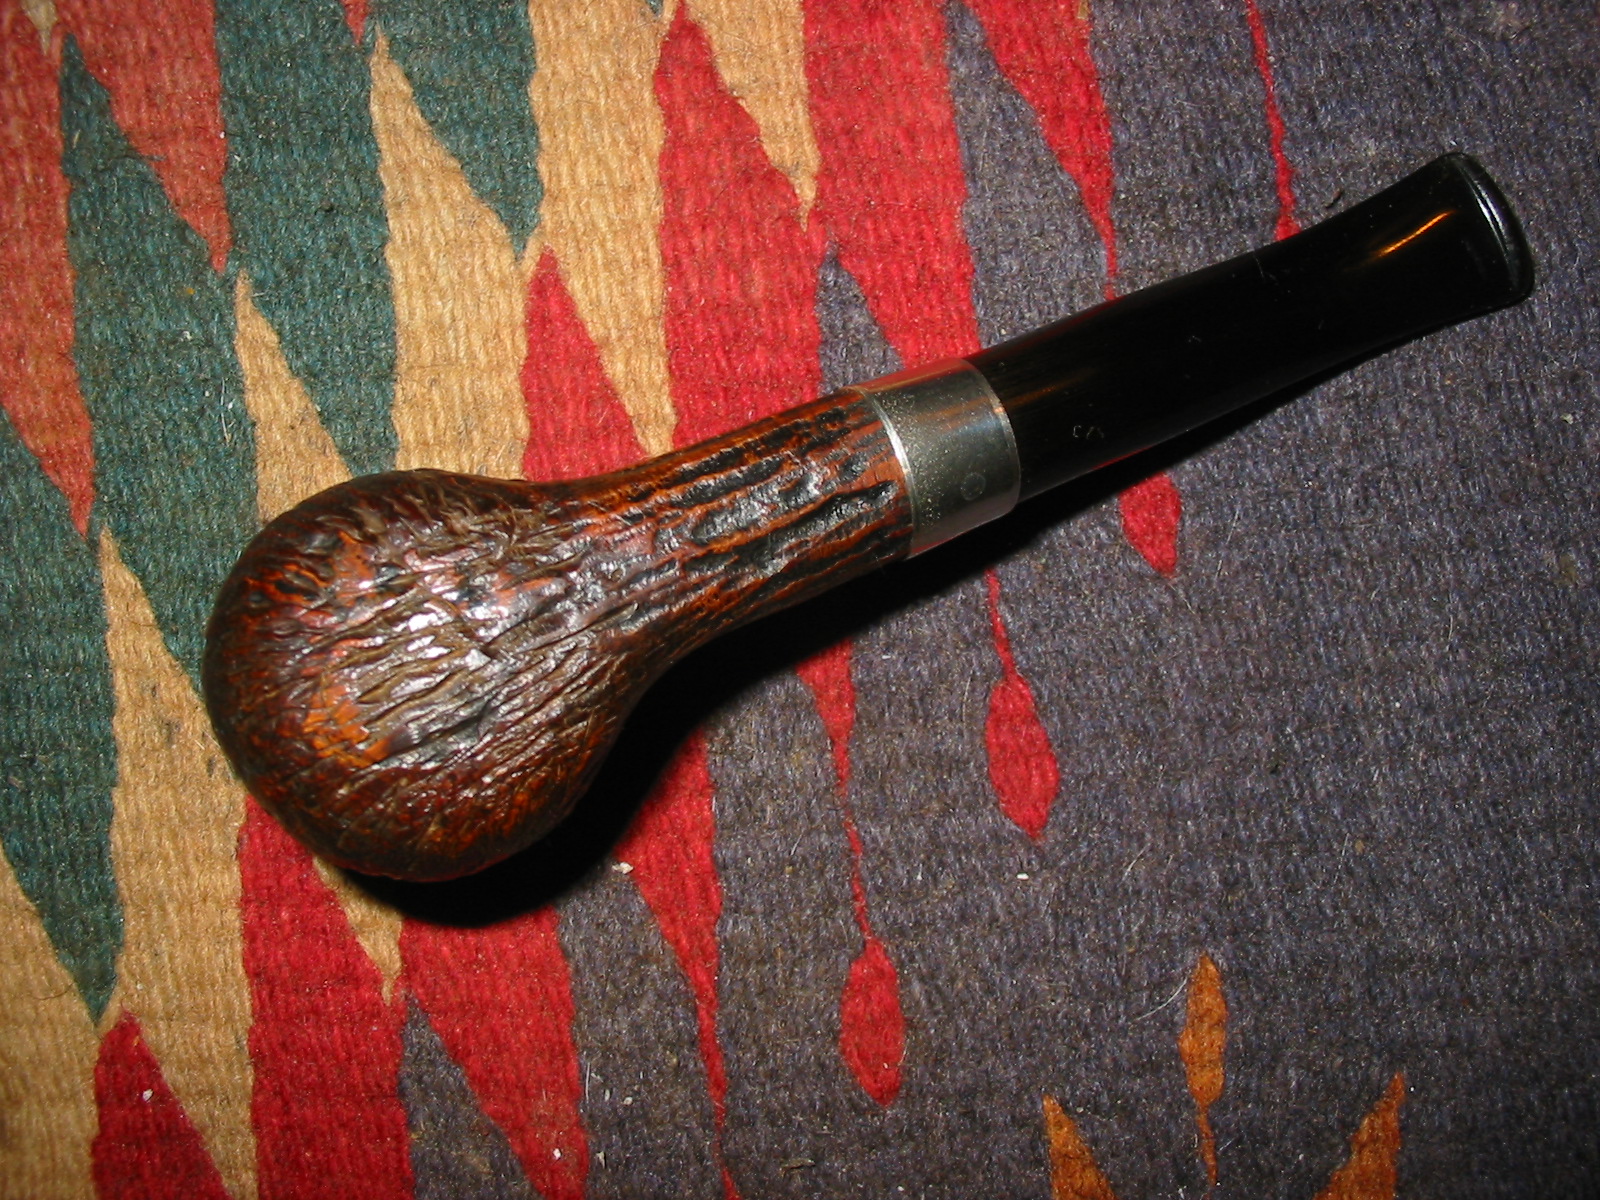
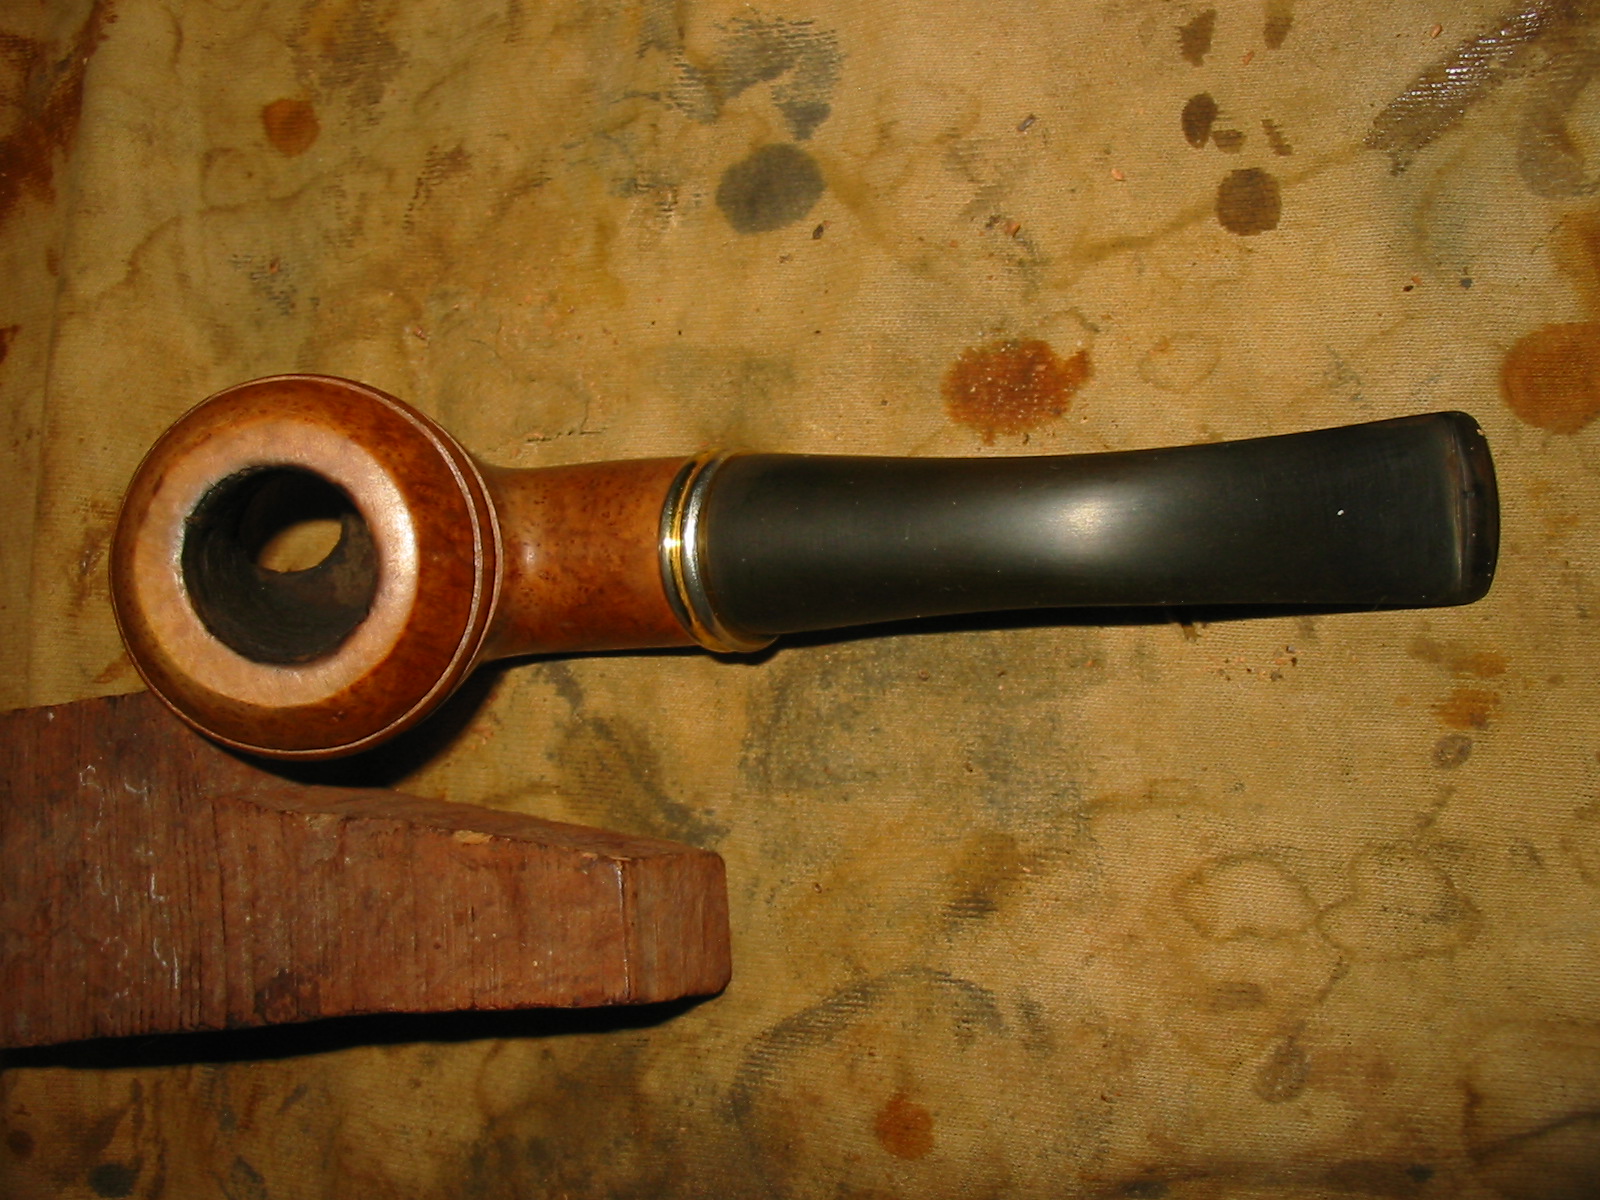
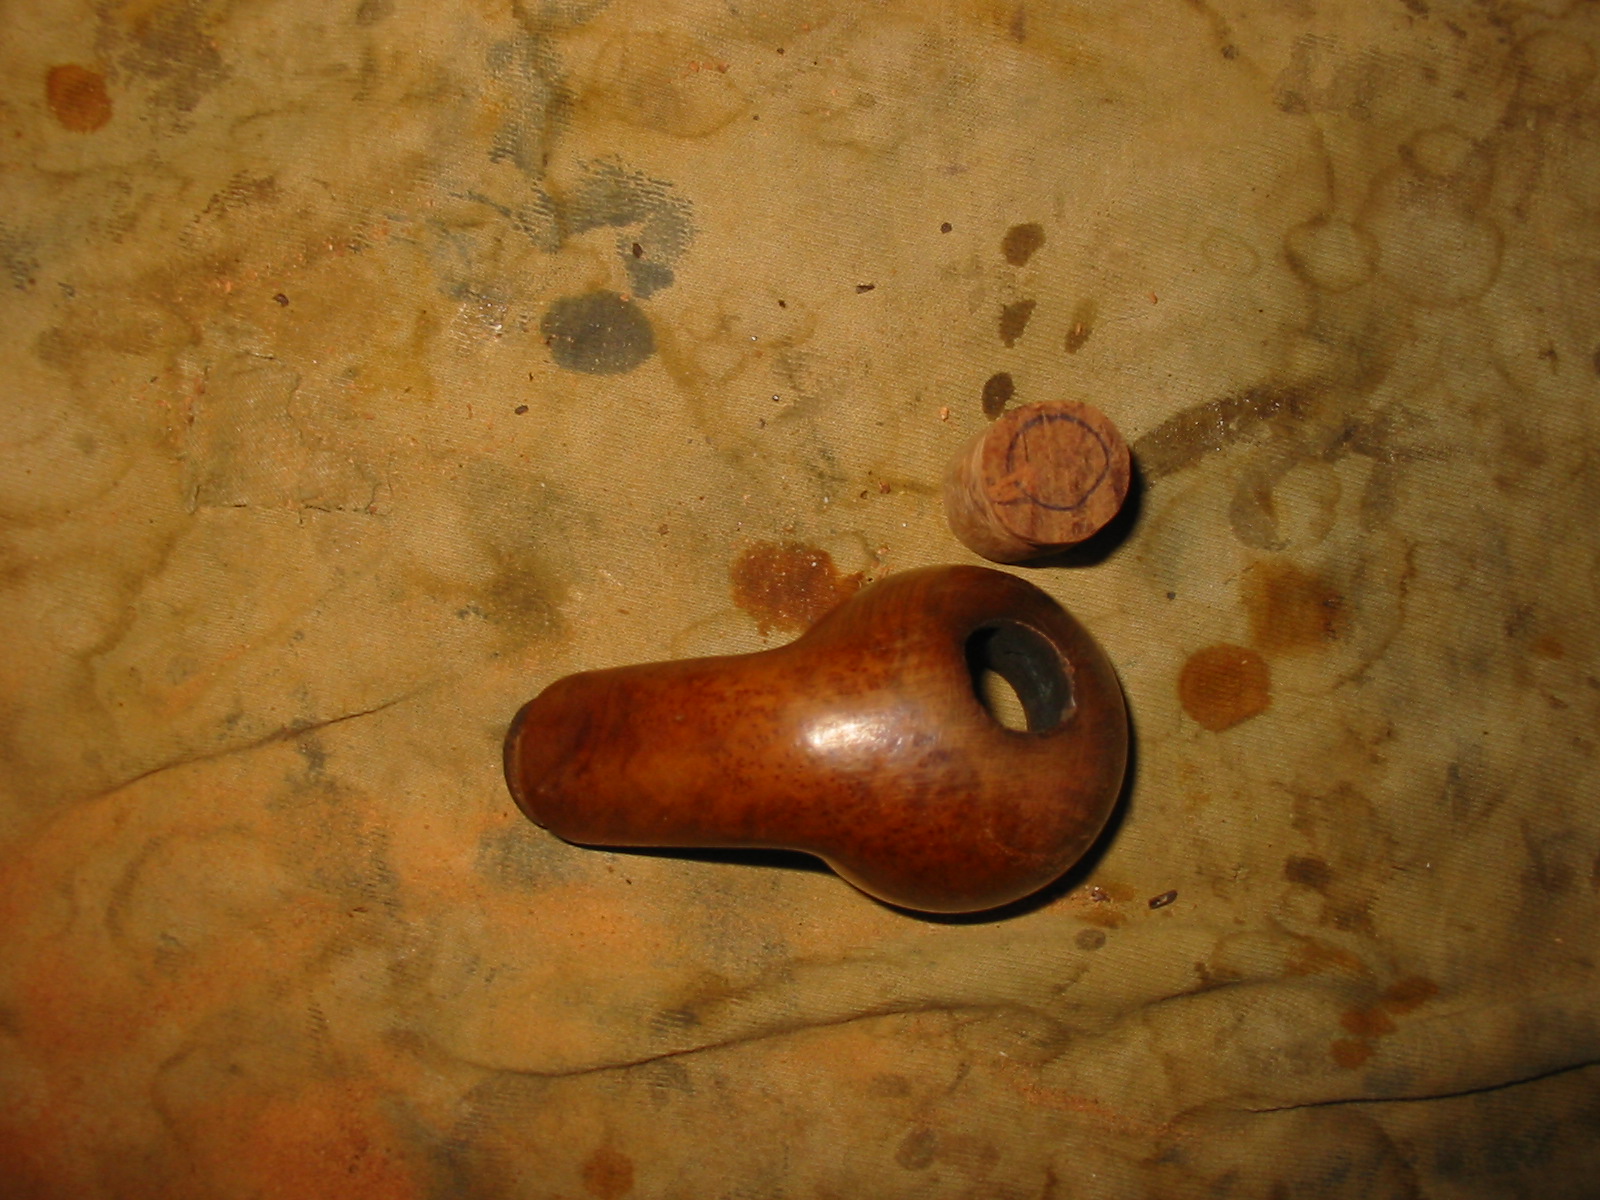
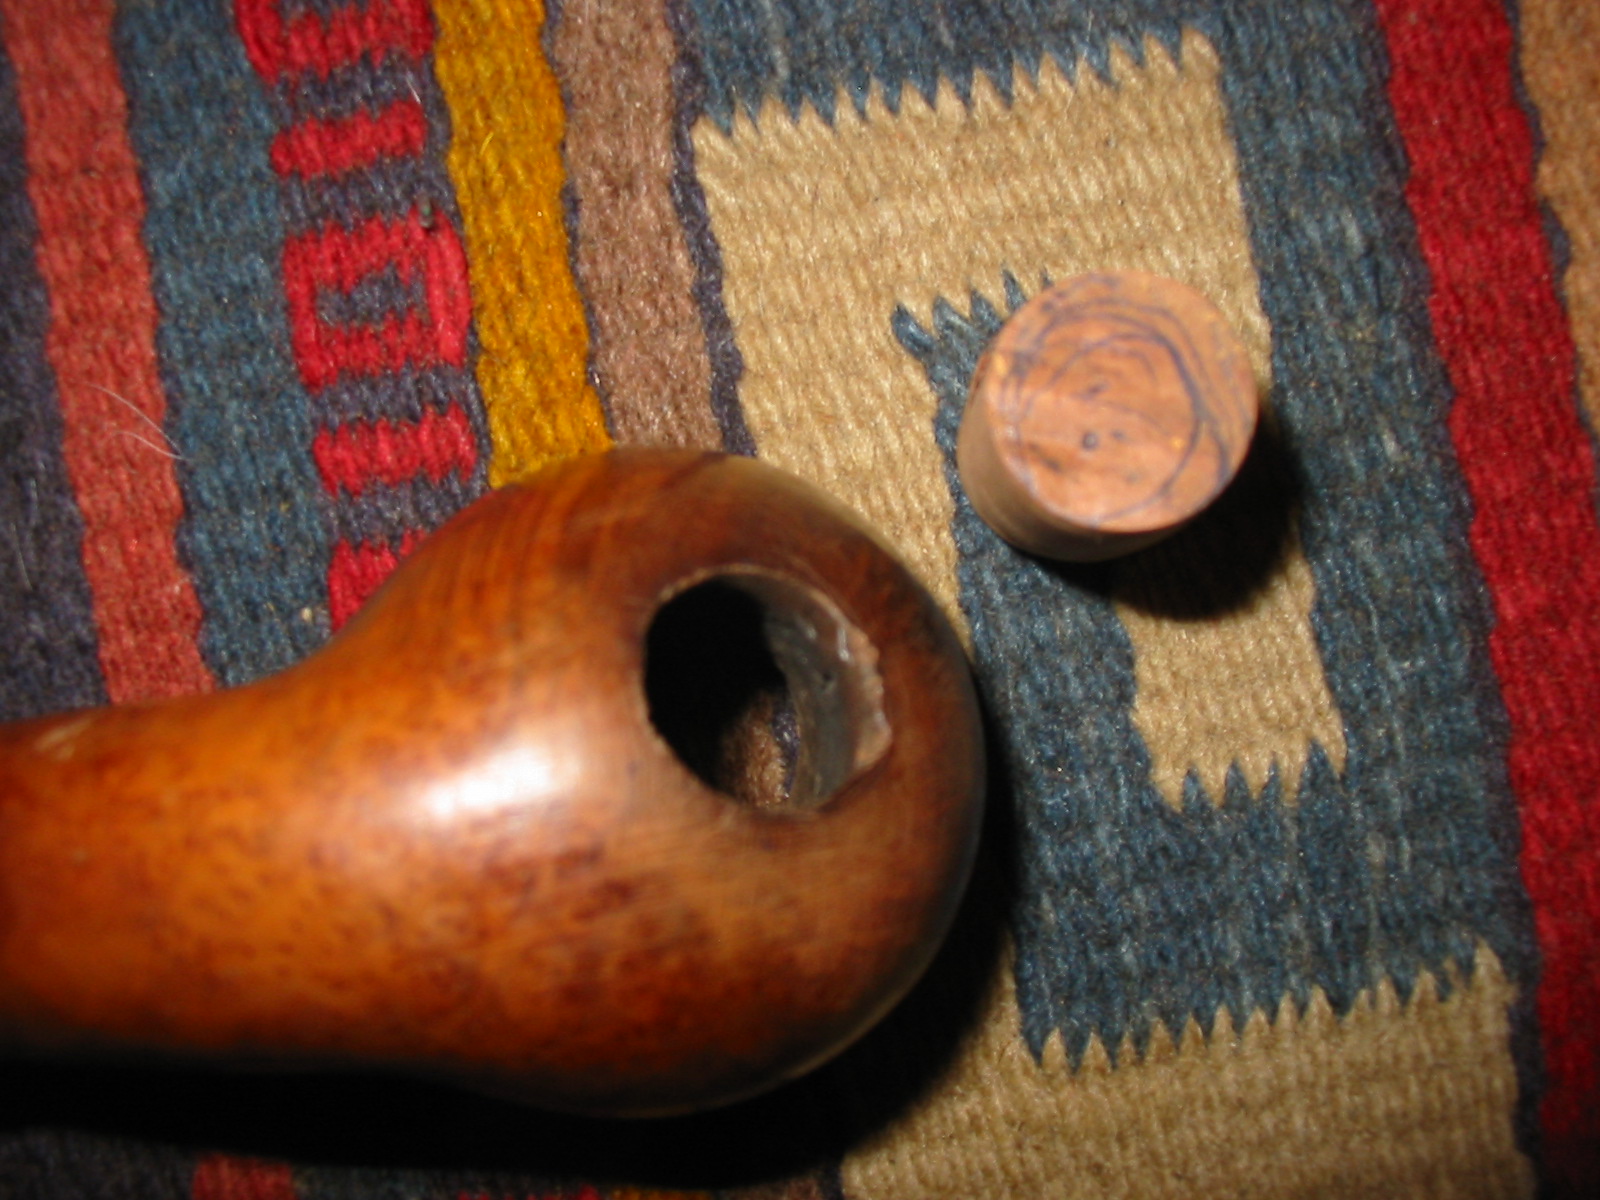
The top view of the pipe, shown in the photo below, also highlights several others issues with the pipe. First, the bowl itself was not drilled straight into the briar but at a slight angle from left to right. Second, the stem was totally out of round and the right side of the stem fit against the band far differently than the left side. Looking at the stem from the tenon end it was clear that the stem was not round but rather oblong. The small block of briar in the photo was sent along by mark for me to use in cutting a plug for the bowl.
IMG_4811

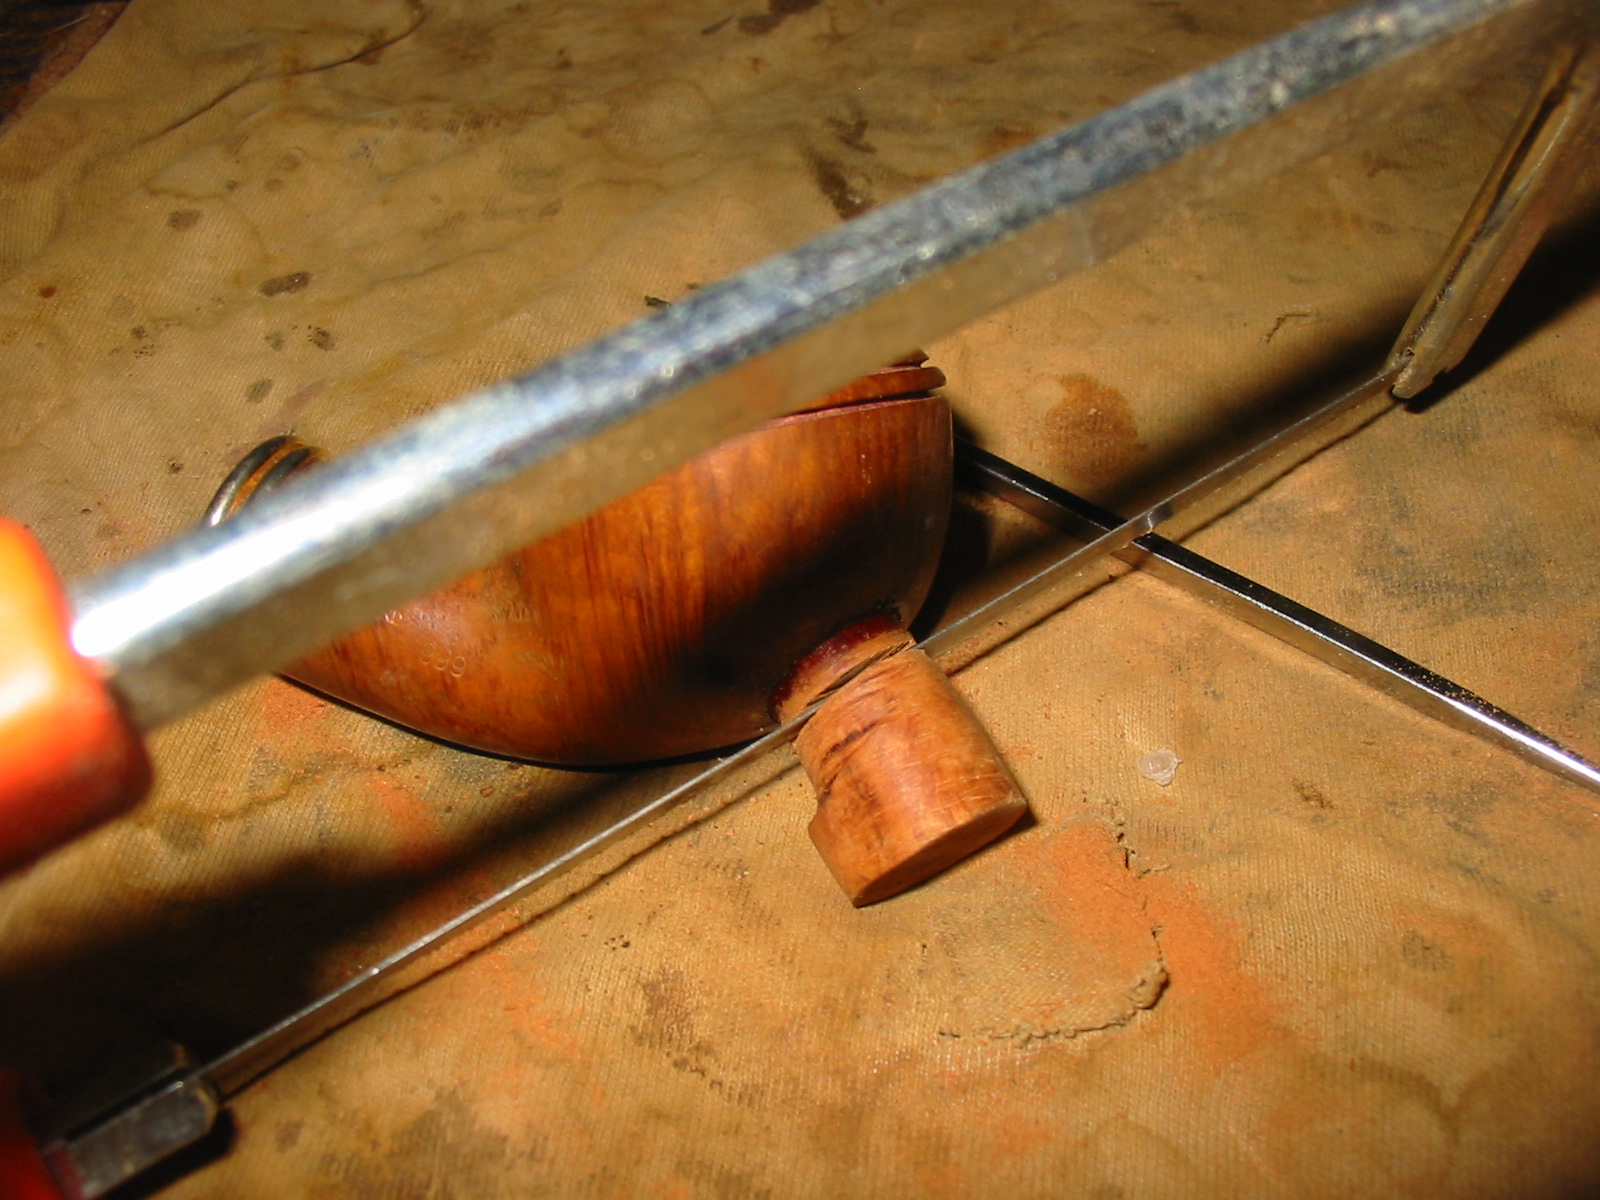
I used a small hacksaw to cut off a small chunk of briar. I then shaped the briar chunk into a cylinder. I always cut the plug long to give me something to hold onto when I am shaping it. I am sure others do it differently but I shape the plug with a Dremel by hand and I hold the piece of briar with my fingers while I shape it. The next series of eight photos show the progressive shaping of the cylinder to fit the drilled out hole in the bowl of the pipe.
IMG_4814

IMG_4815

IMG_4818

IMG_4819

IMG_4821

IMG_4822

IMG_4823

IMG_4824

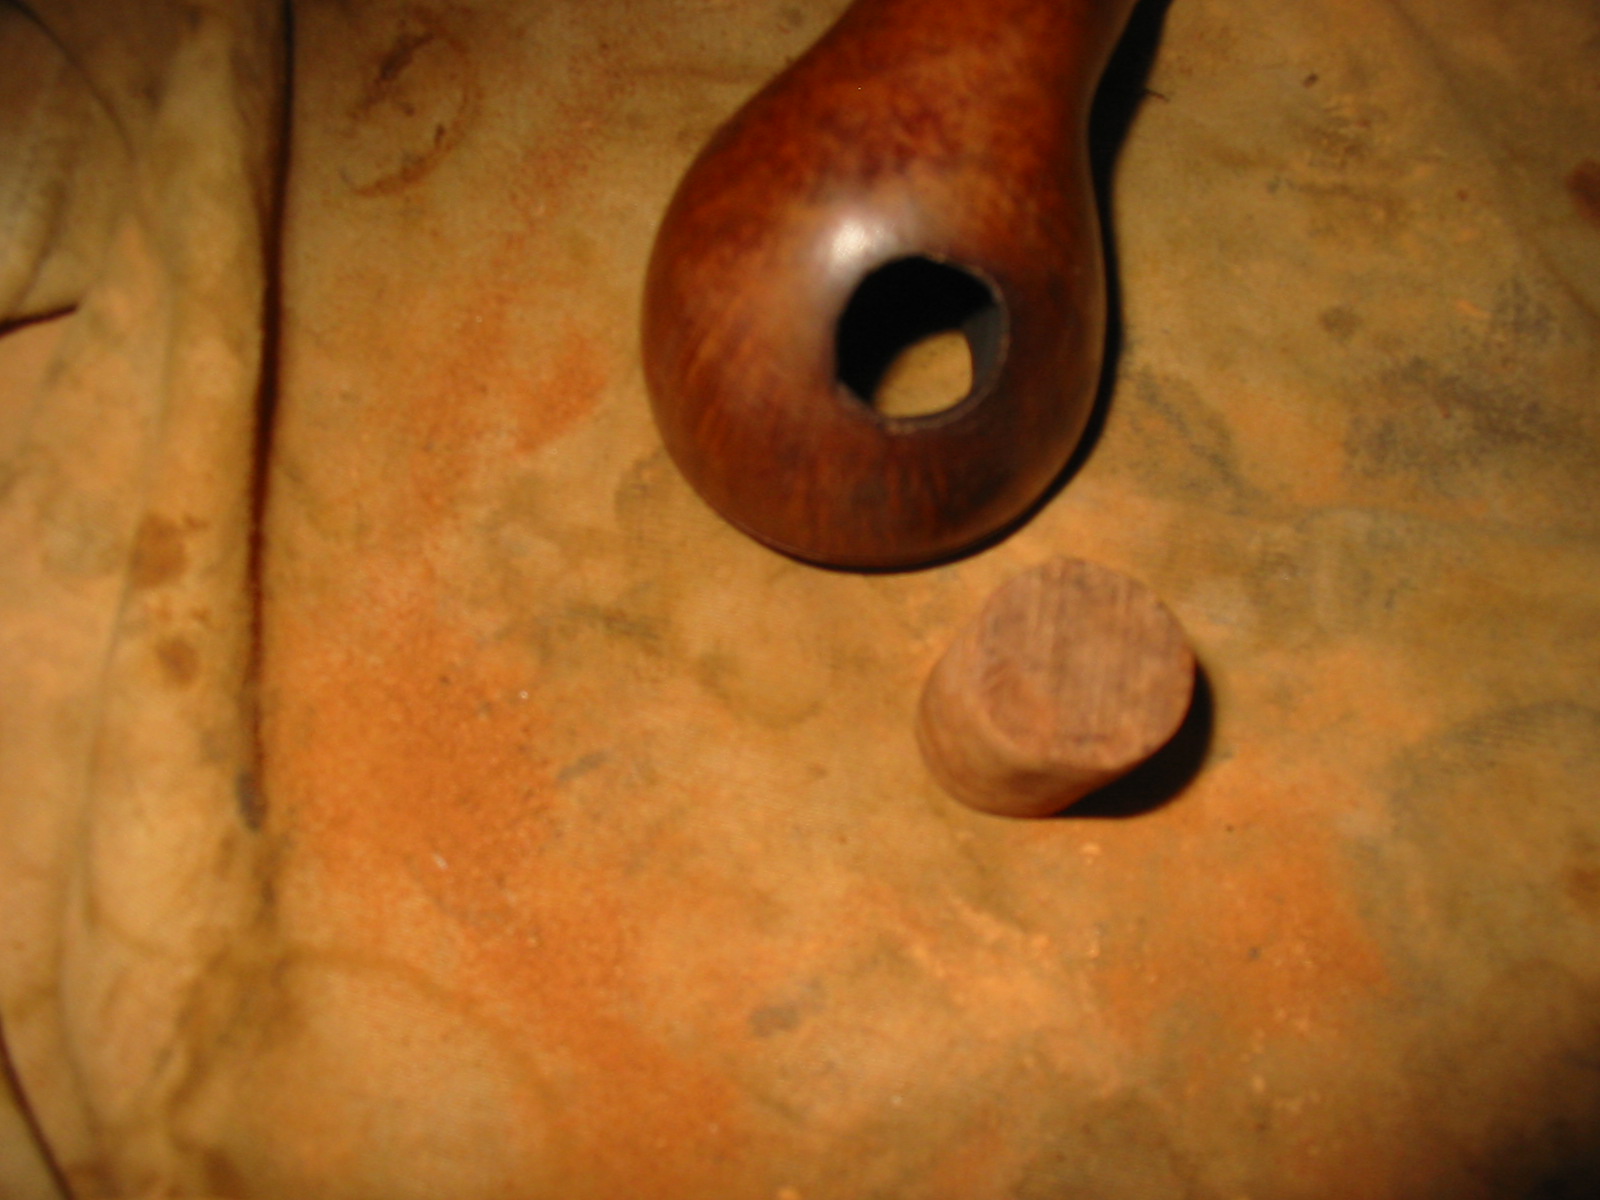
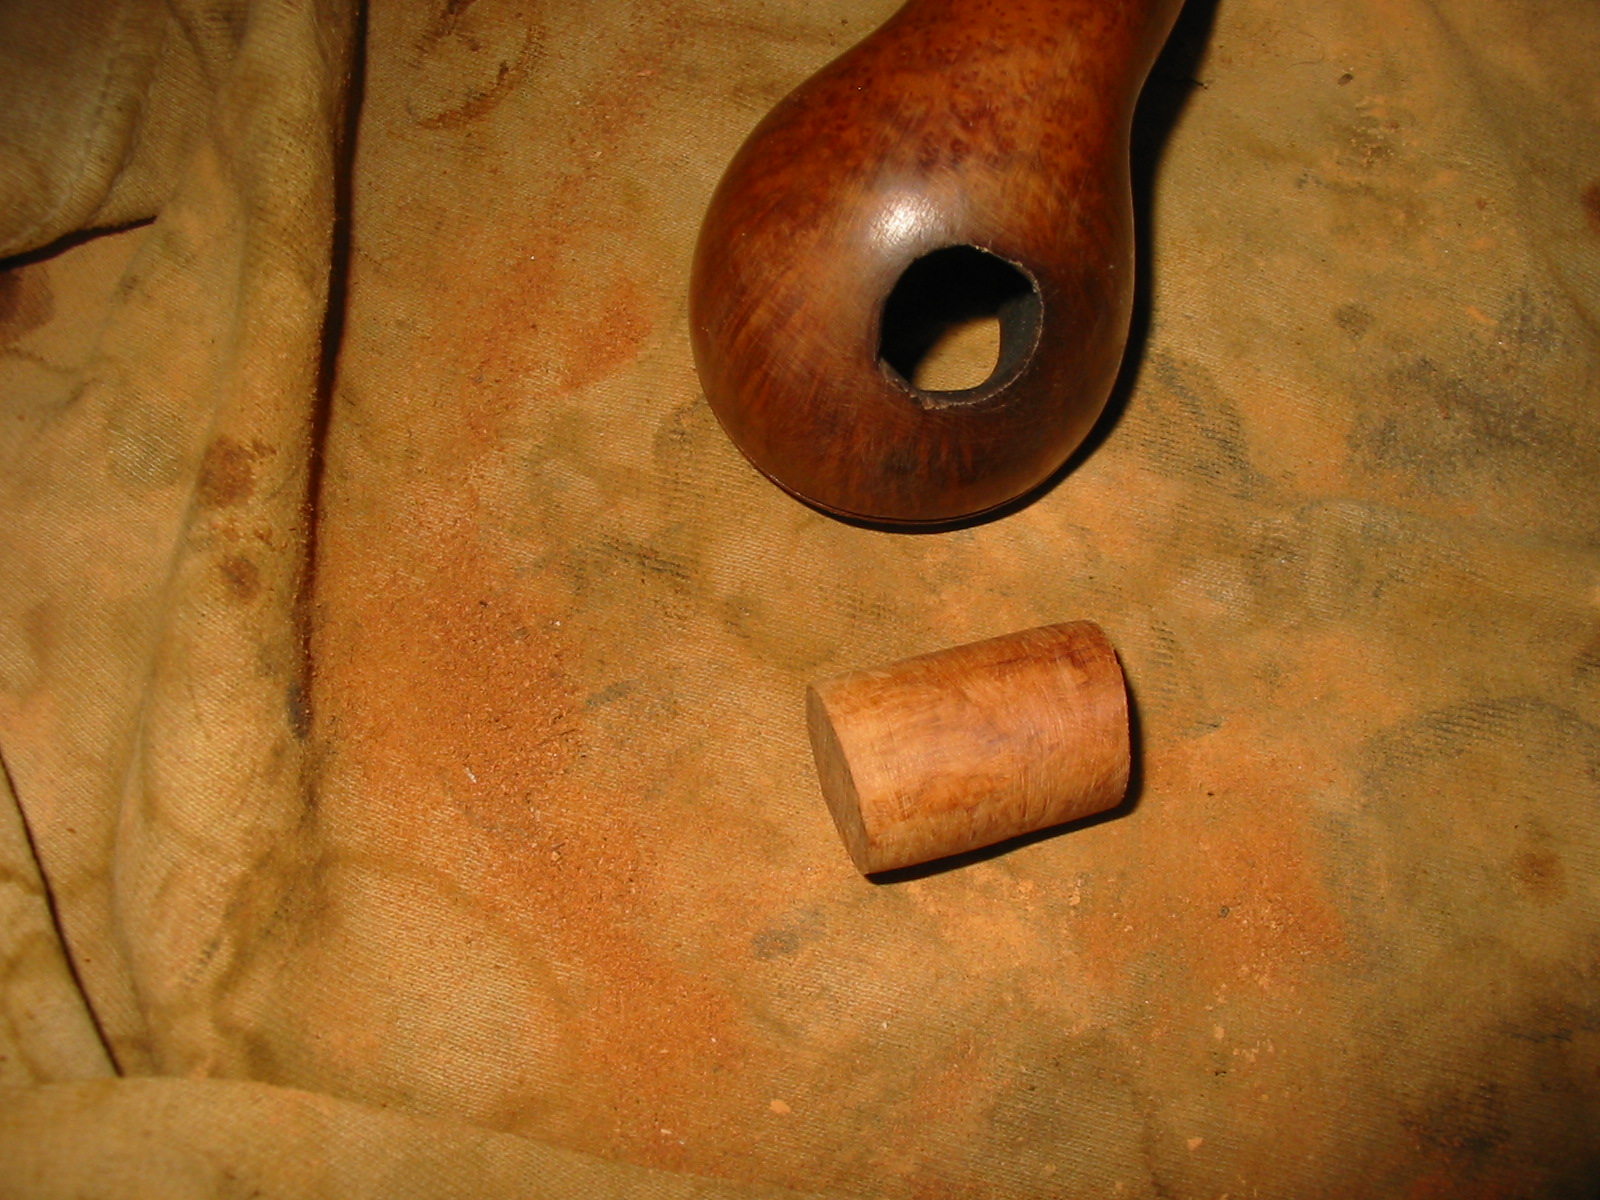
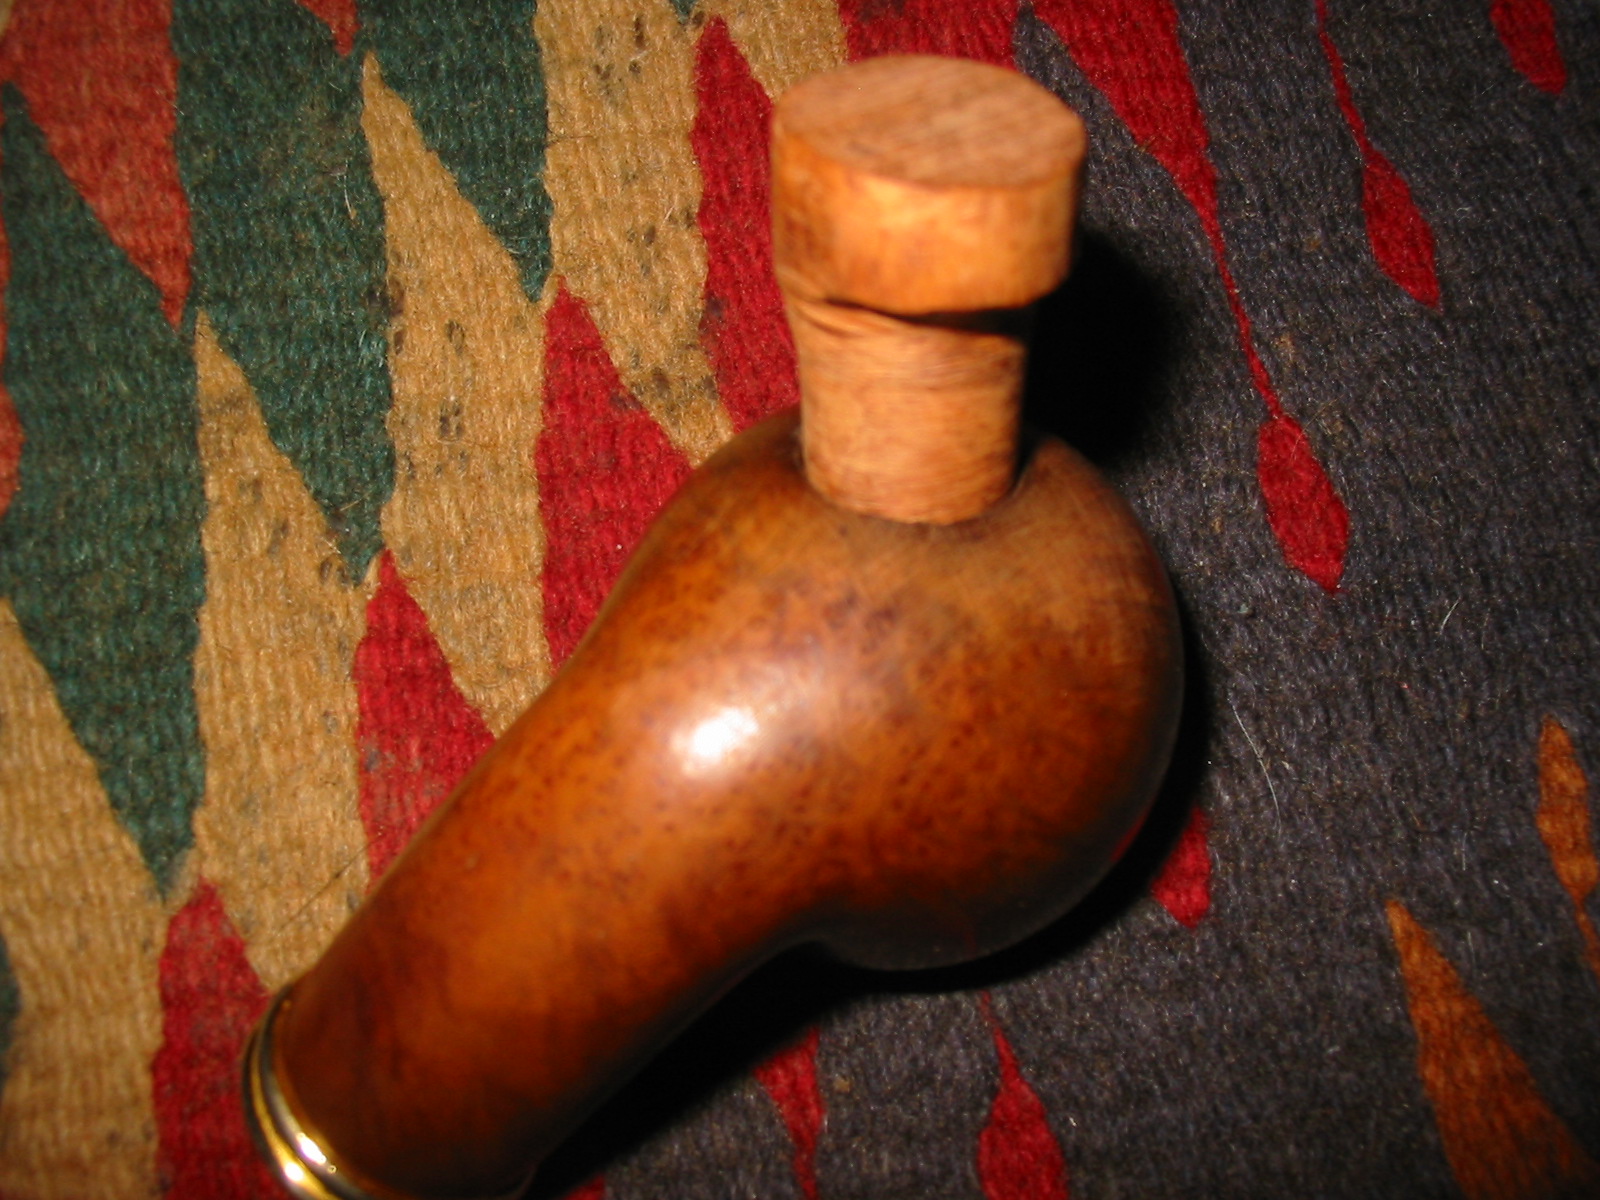
The next four photos show the final shape of the cylinder. I left a slight handle on the top of the plug to hold onto while I turned the cylinder with the Dremel. I tapered the plug slightly so that it would fit into the hole but not extend to far into the bowl itself. Once I had the shape correct and the piece extending into the bowl smoothed to fit the shape of the bowl I glued it in place with superglue.
IMG_4825

IMG_4826

IMG_4827

IMG_4828

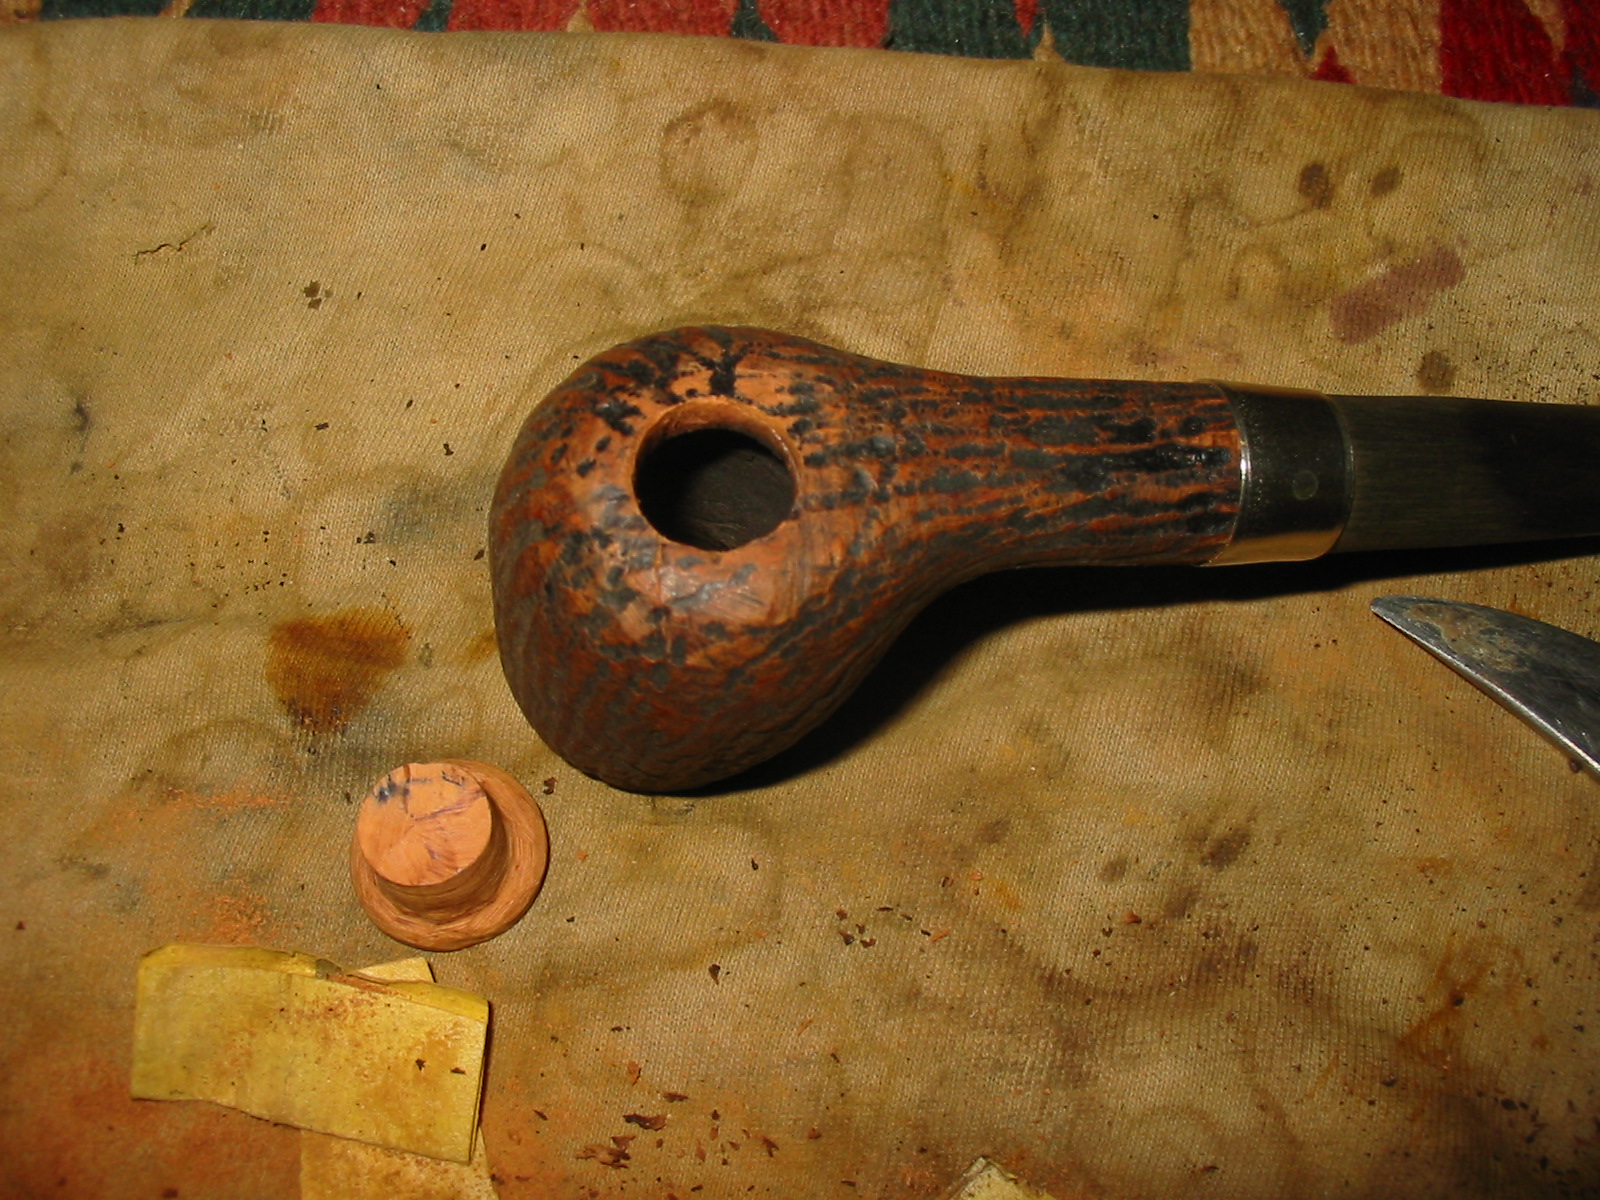
I used the hacksaw to trim off the excess briar in the plug as close as possible to the surface of the bowl.
IMG_4829

IMG_4830

Once I had it trimmed back to that place I used the Dremel and sanding drum to sand it down to the surface and then hand sanded with 220 grit sandpaper to make the surface of the plug and the bowl match. I used superglue around the circumference of the plug to hold it tightly in place.
IMG_4831

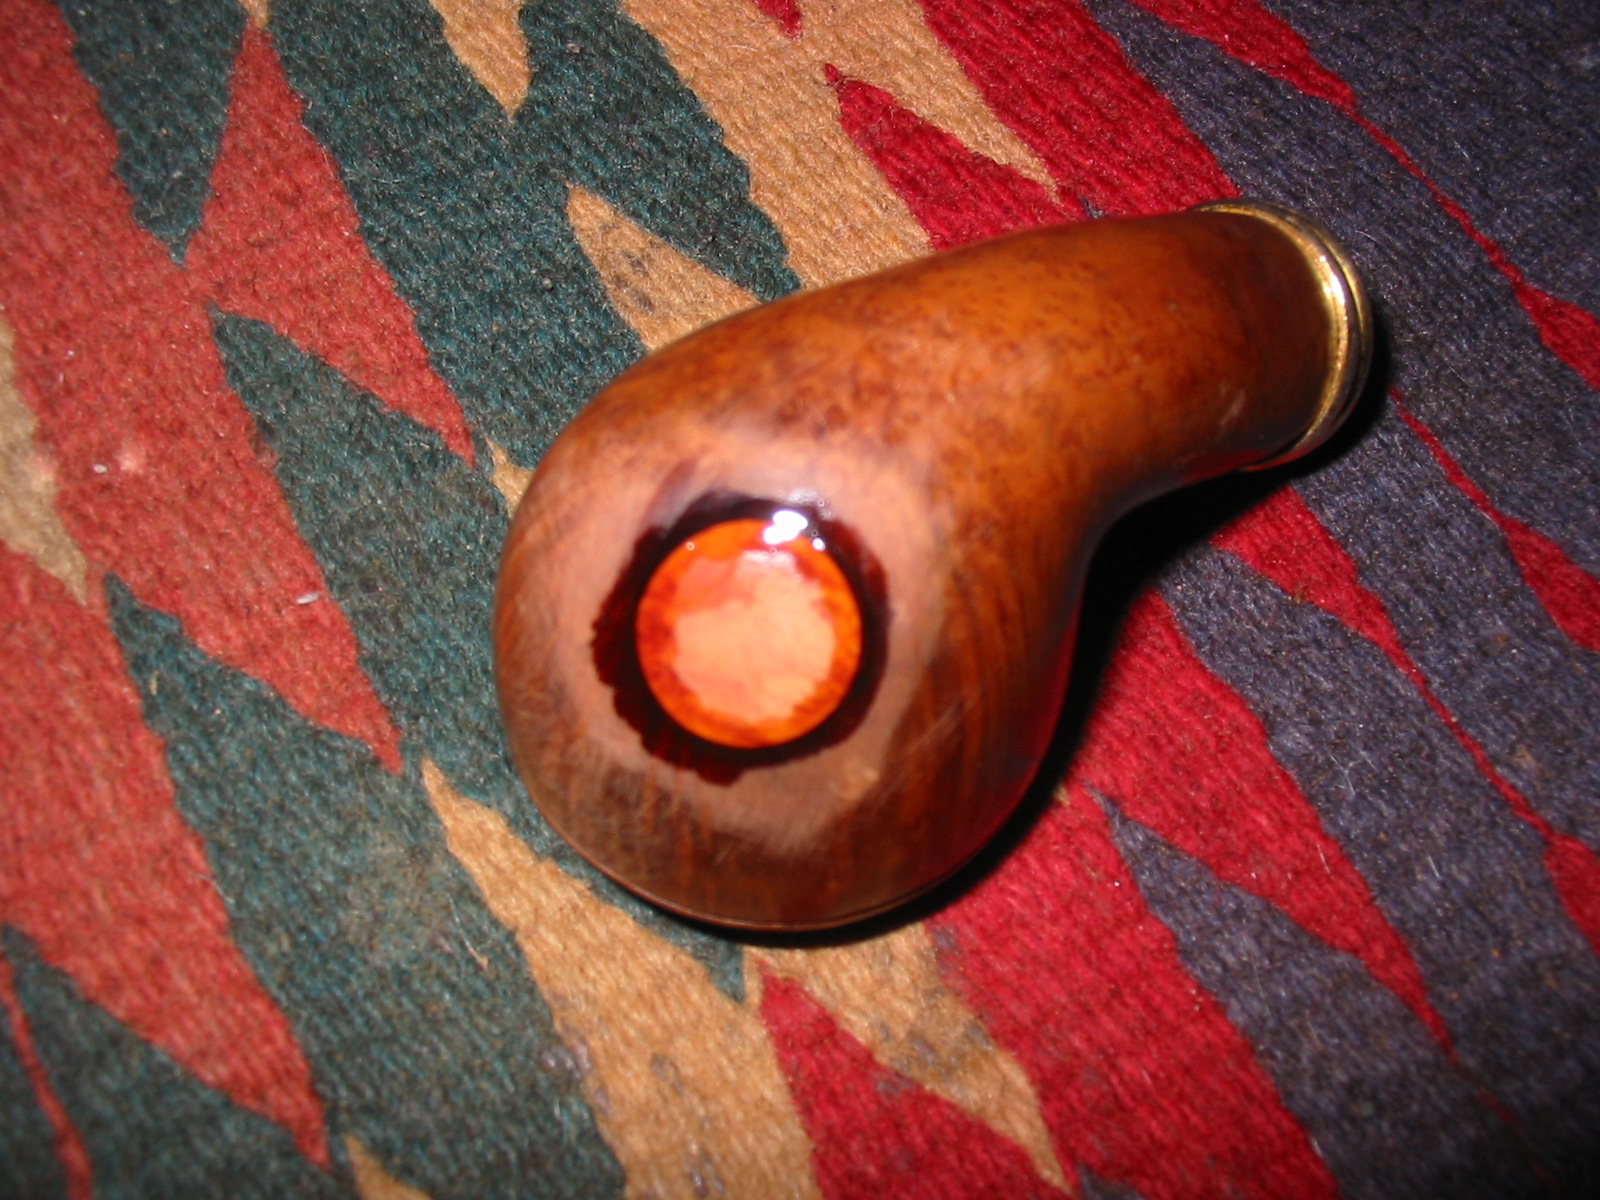
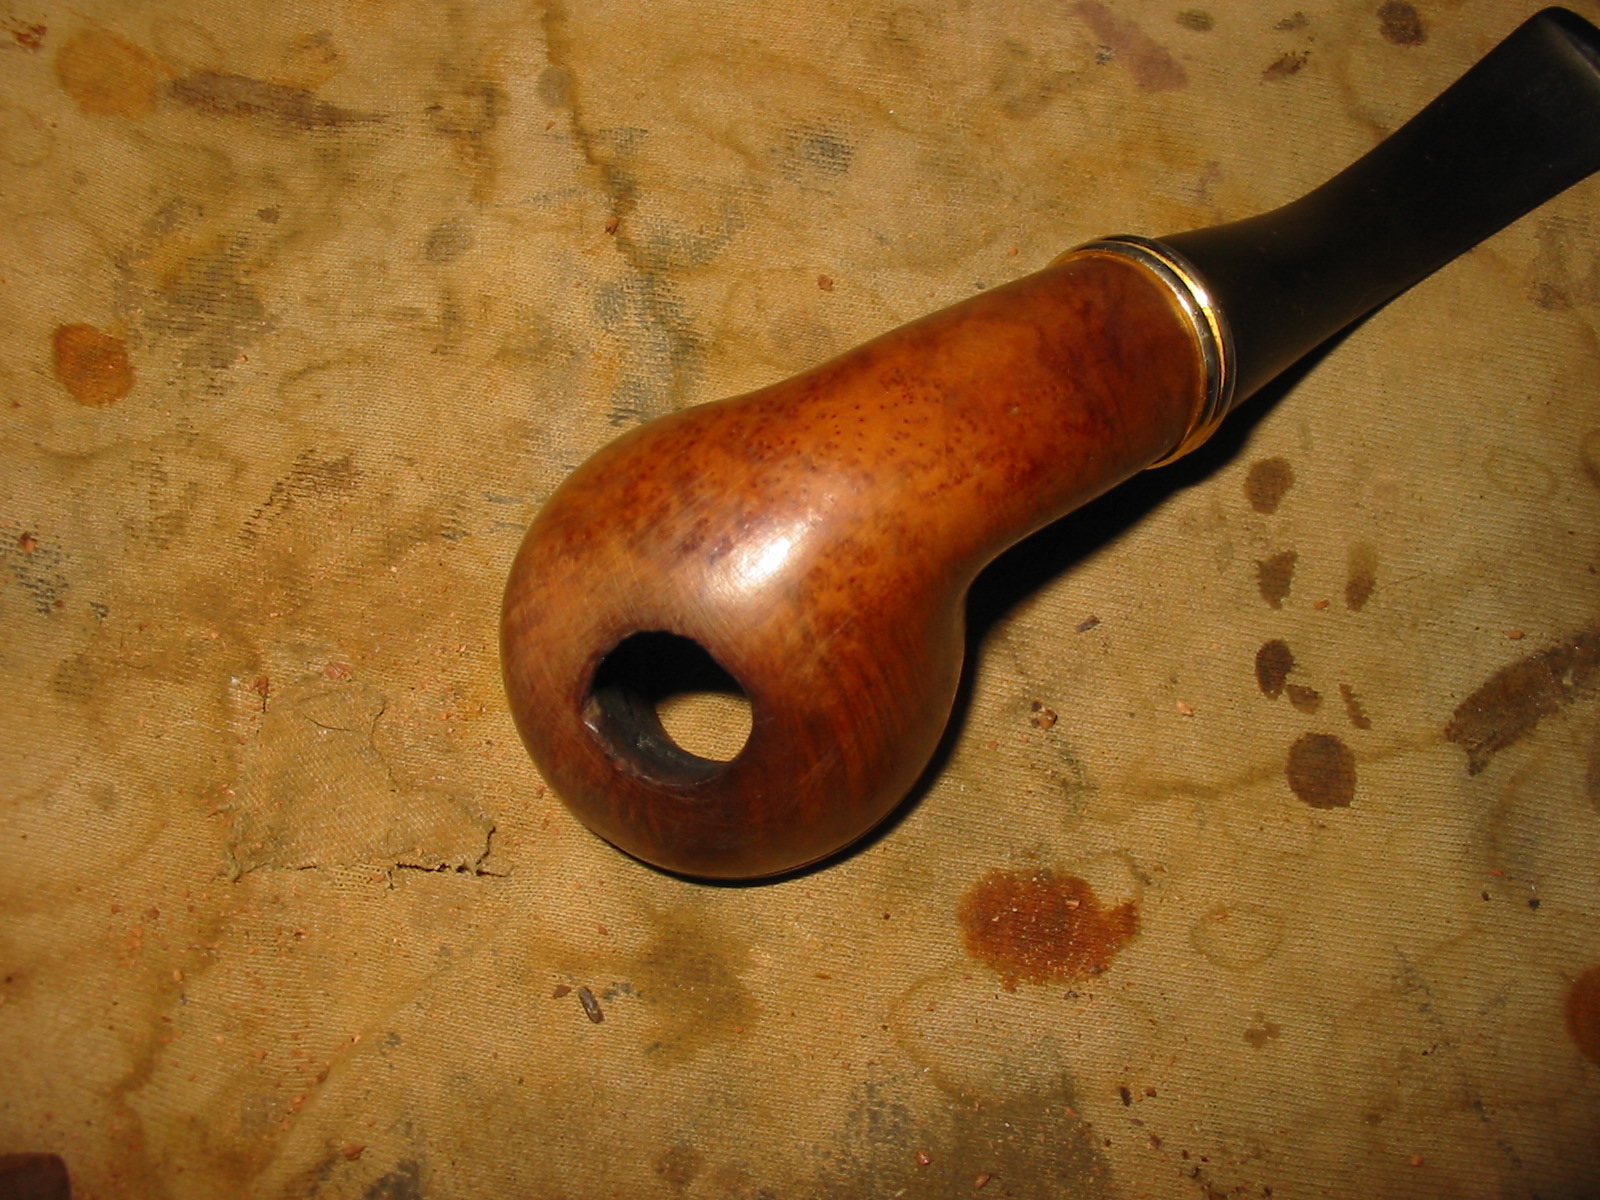
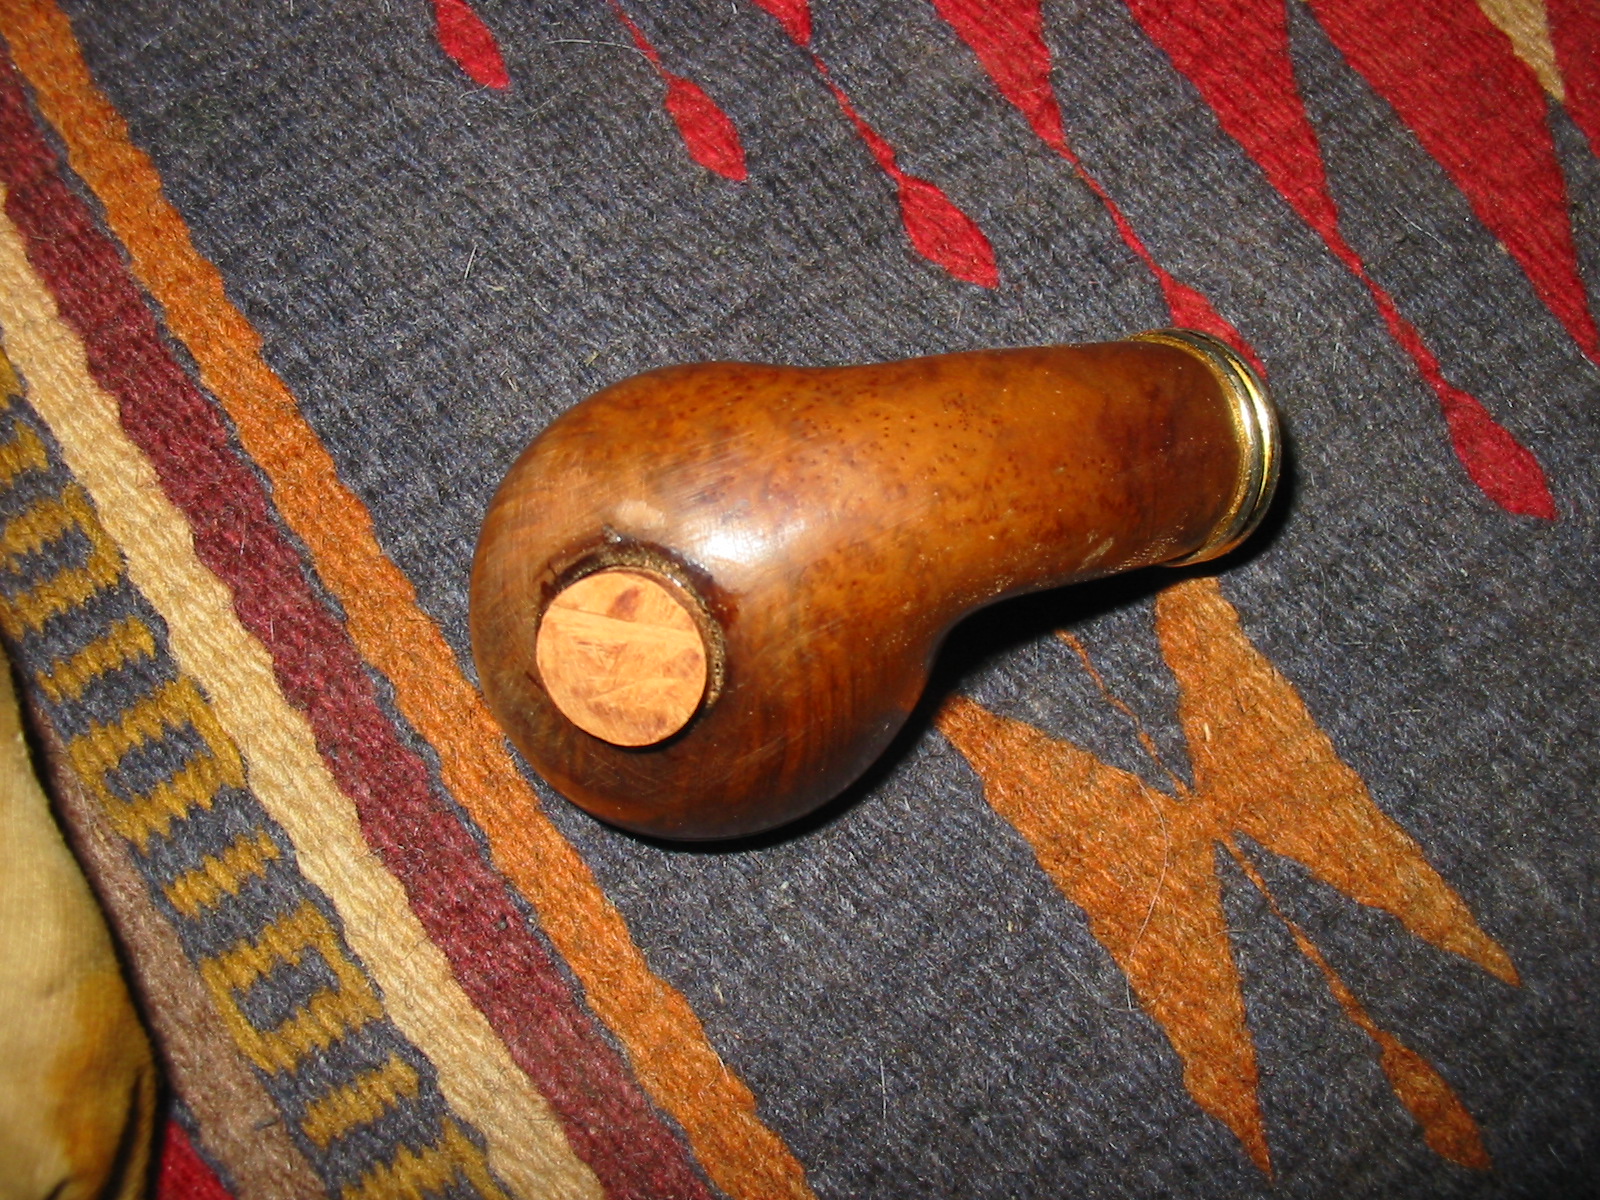
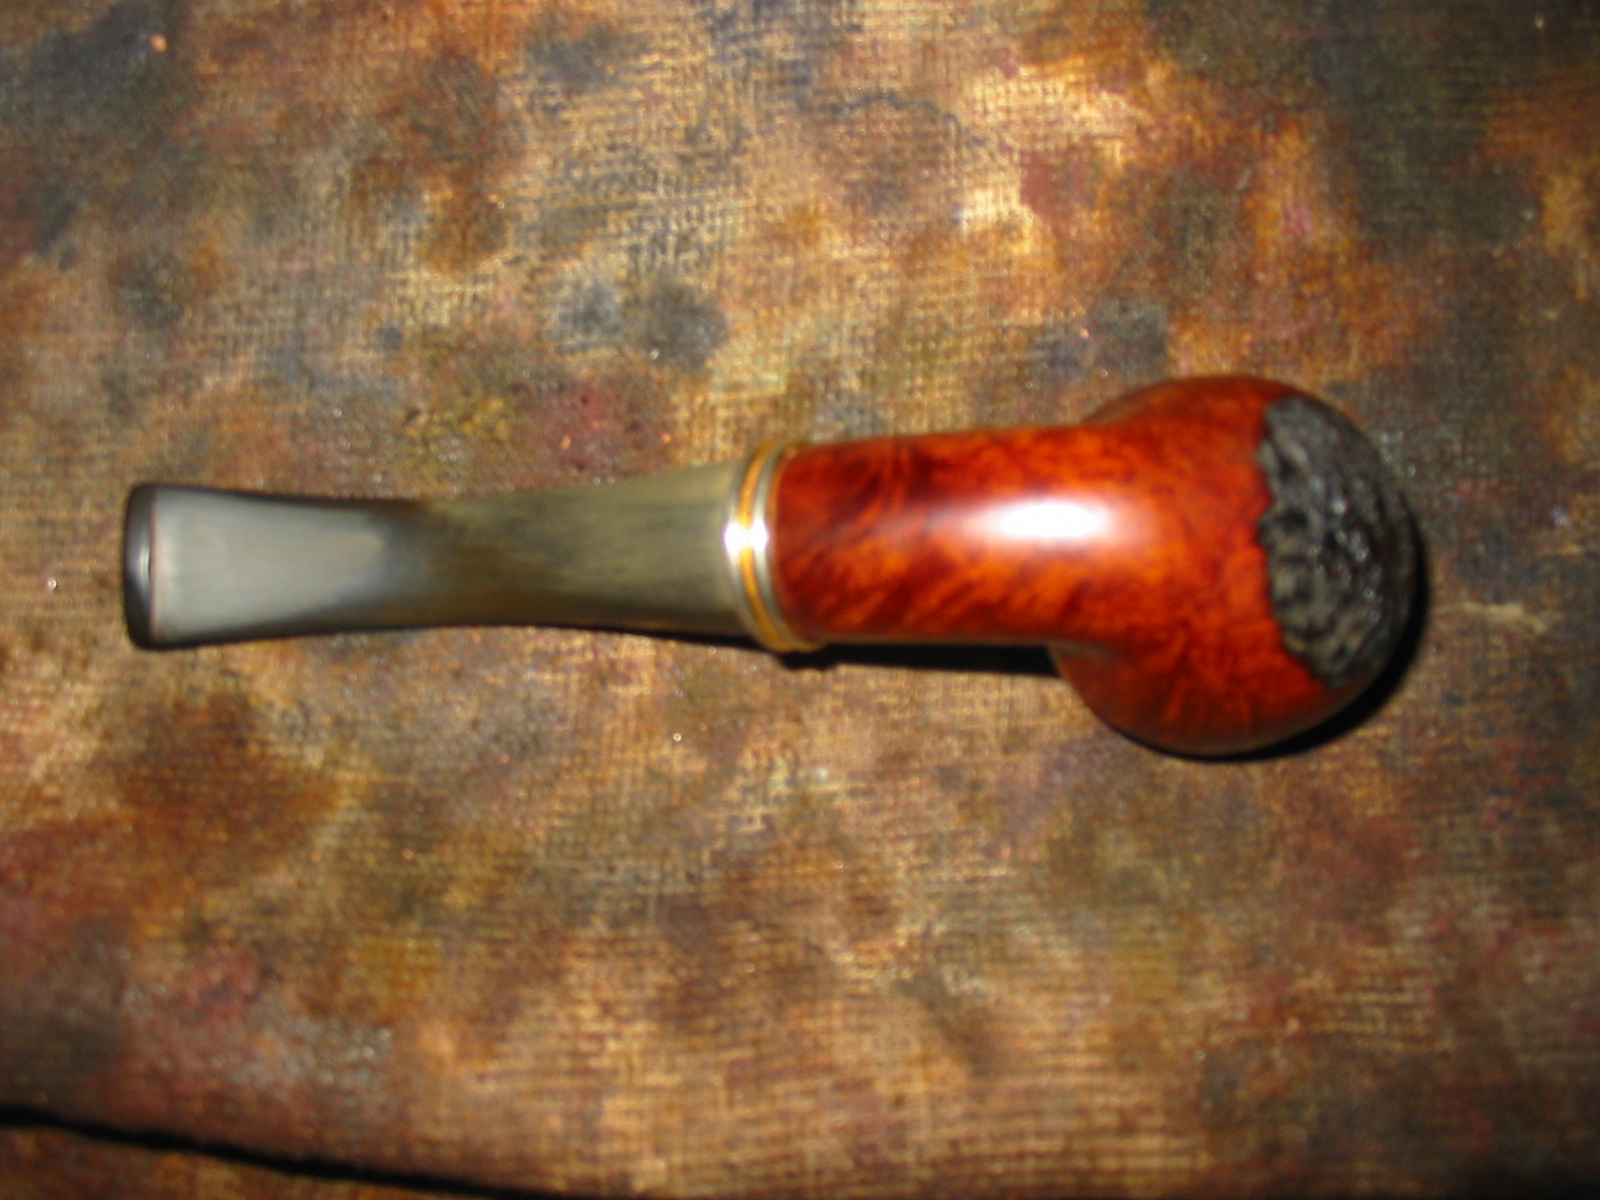
I washed down the surface of the bowl with acetone on cotton pads to remove the grit and the remaining finish on the bowl. I also sanded the plug and the rim with 220 grit sandpaper and then medium and fine grit sanding sponges to smooth out the scratches. I sanded the inner rim with a folded piece of sandpaper to remove the damage to that portion of the bowl. In the photos below the fit and finish of the plug is clearly visible. The grain on the plug and that on the bowl did not match but the fit was nearly perfect.
IMG_4832

IMG_4833

IMG_4834

IMG_4835

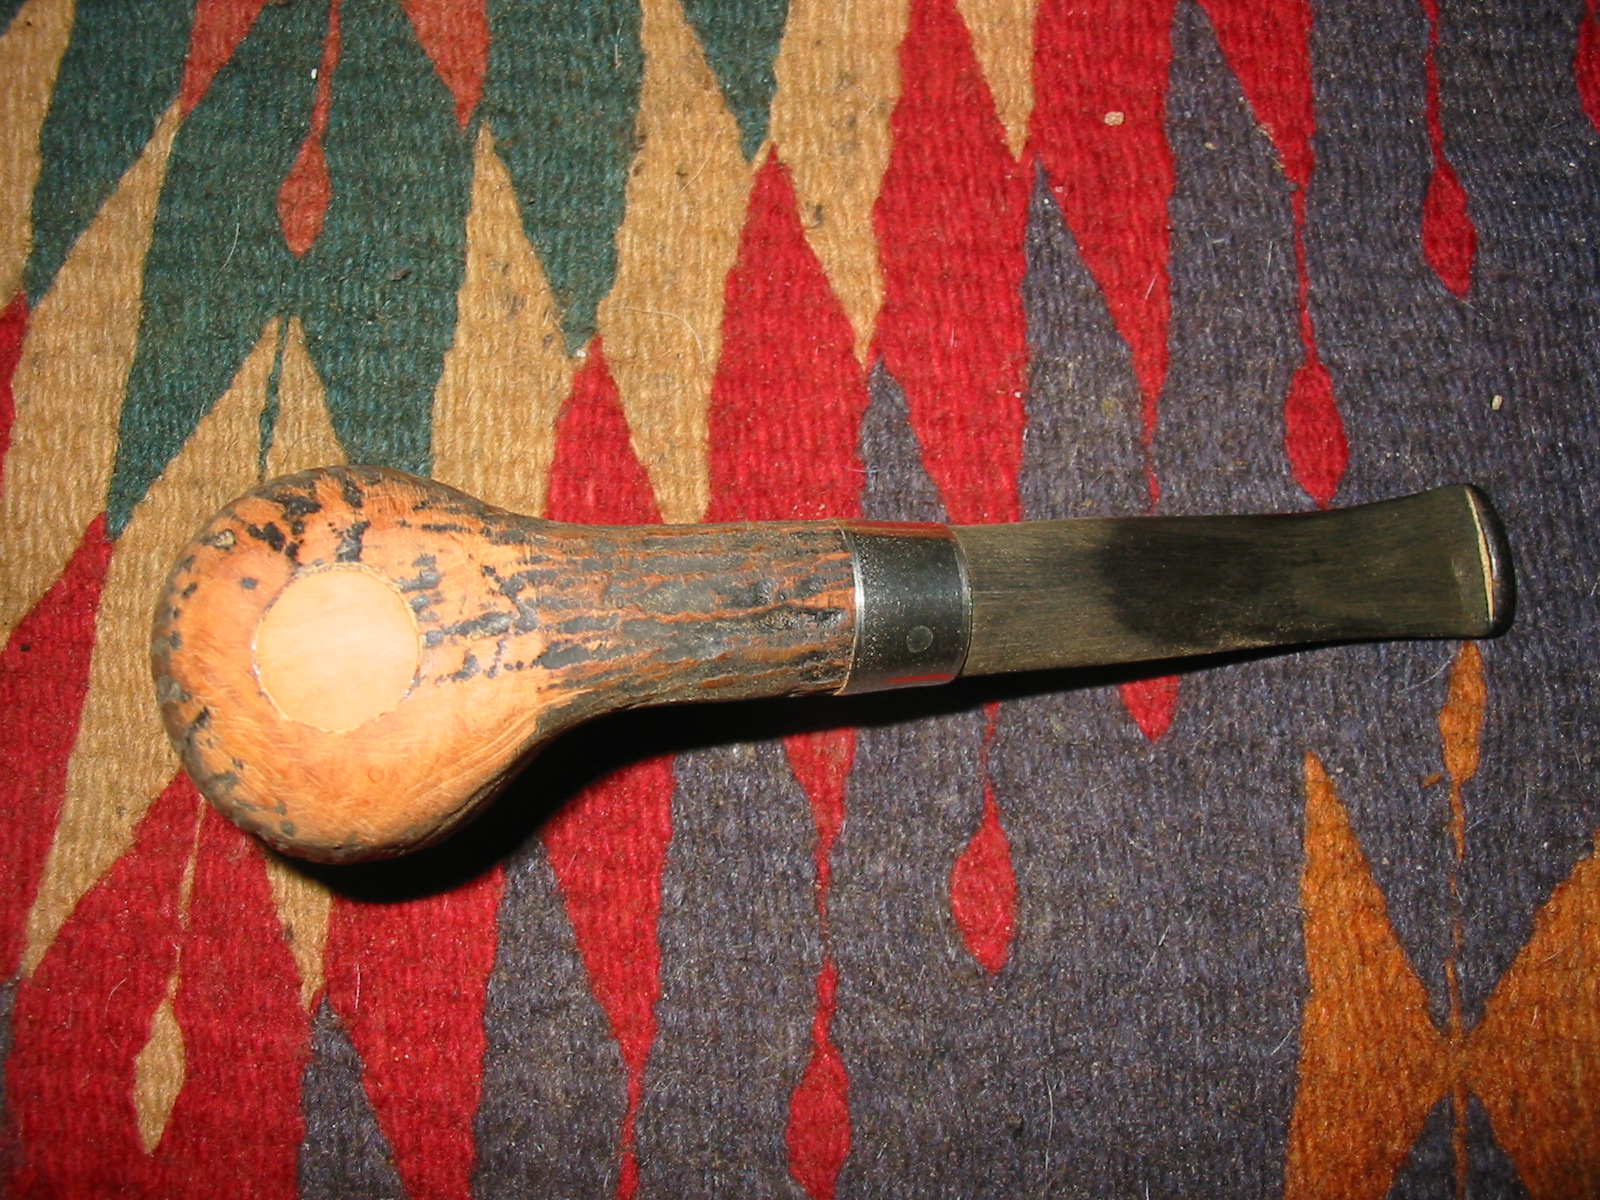
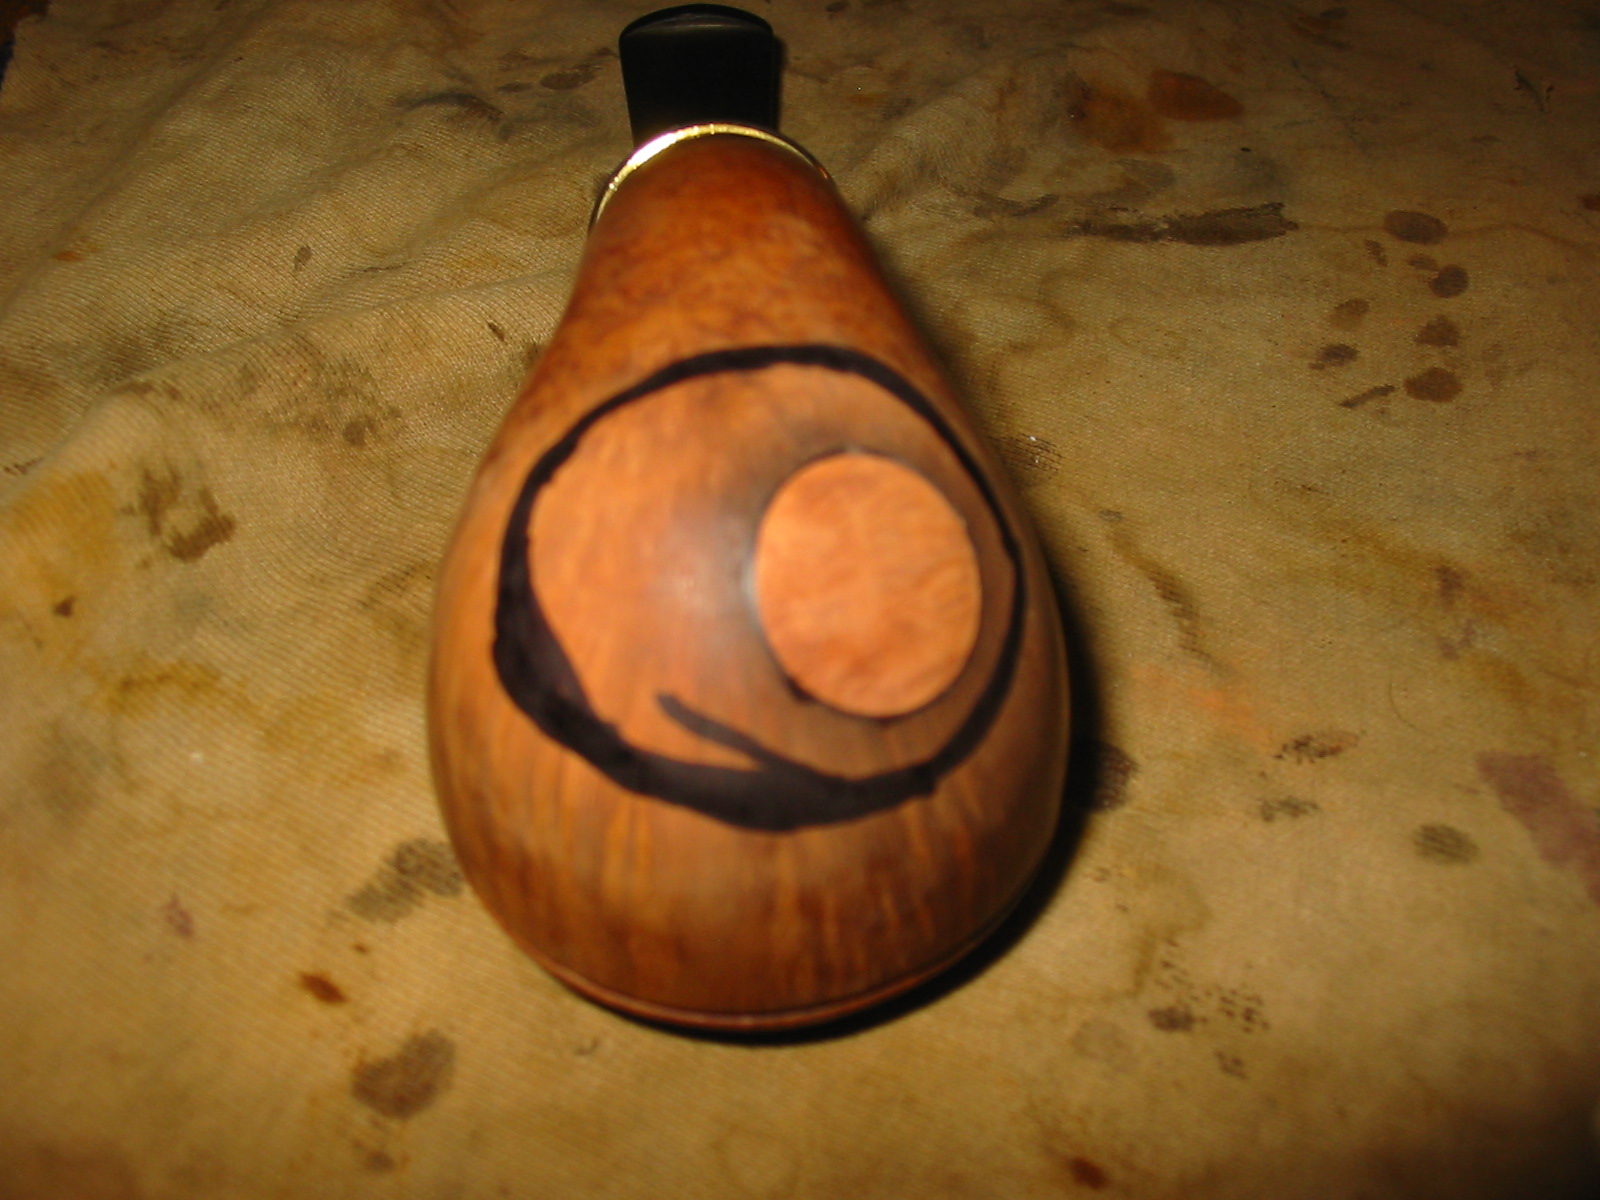
Mark and I had talked about rusticating the whole bowl but I could not bring myself to do that to such a beautiful piece of briar. I marked the area that I planned on rusticating with a black permanent marker to give myself an outlined area that I would rusticate. I find that setting up parameters and boundaries for the rustication helps me to keep it in a defined space more easily.
IMG_4836

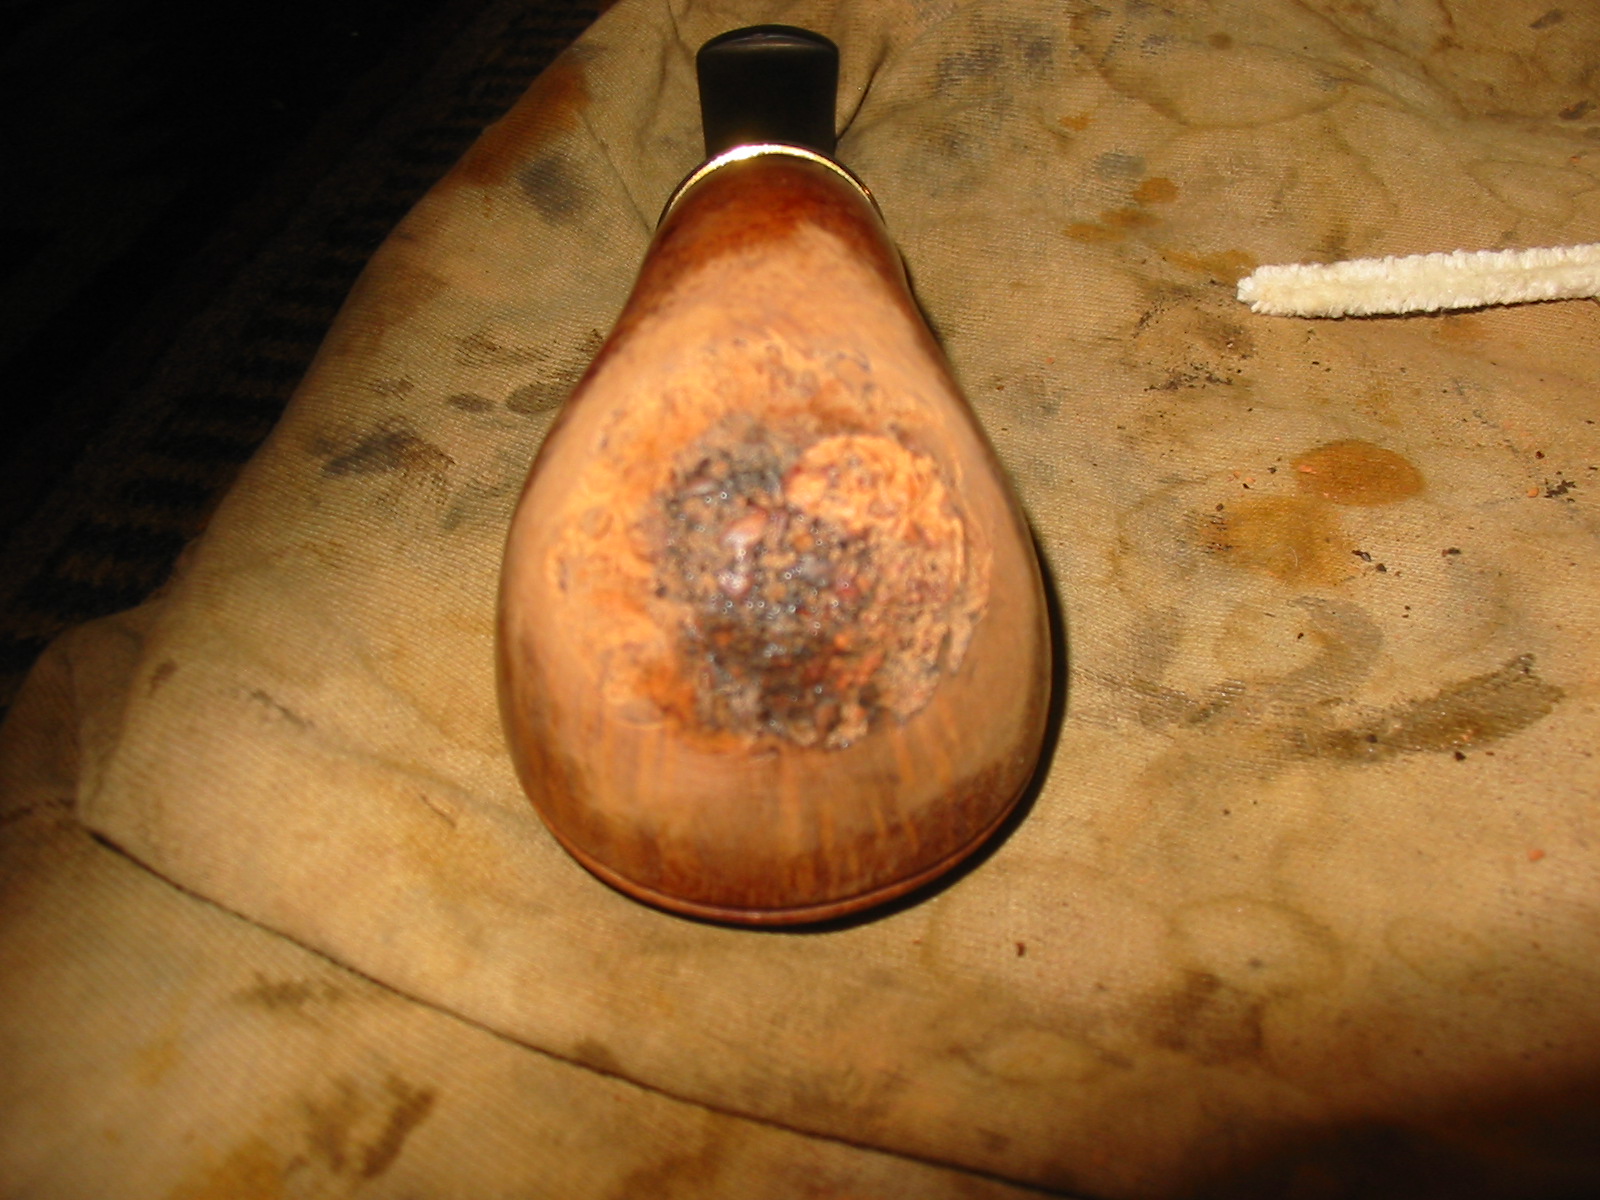
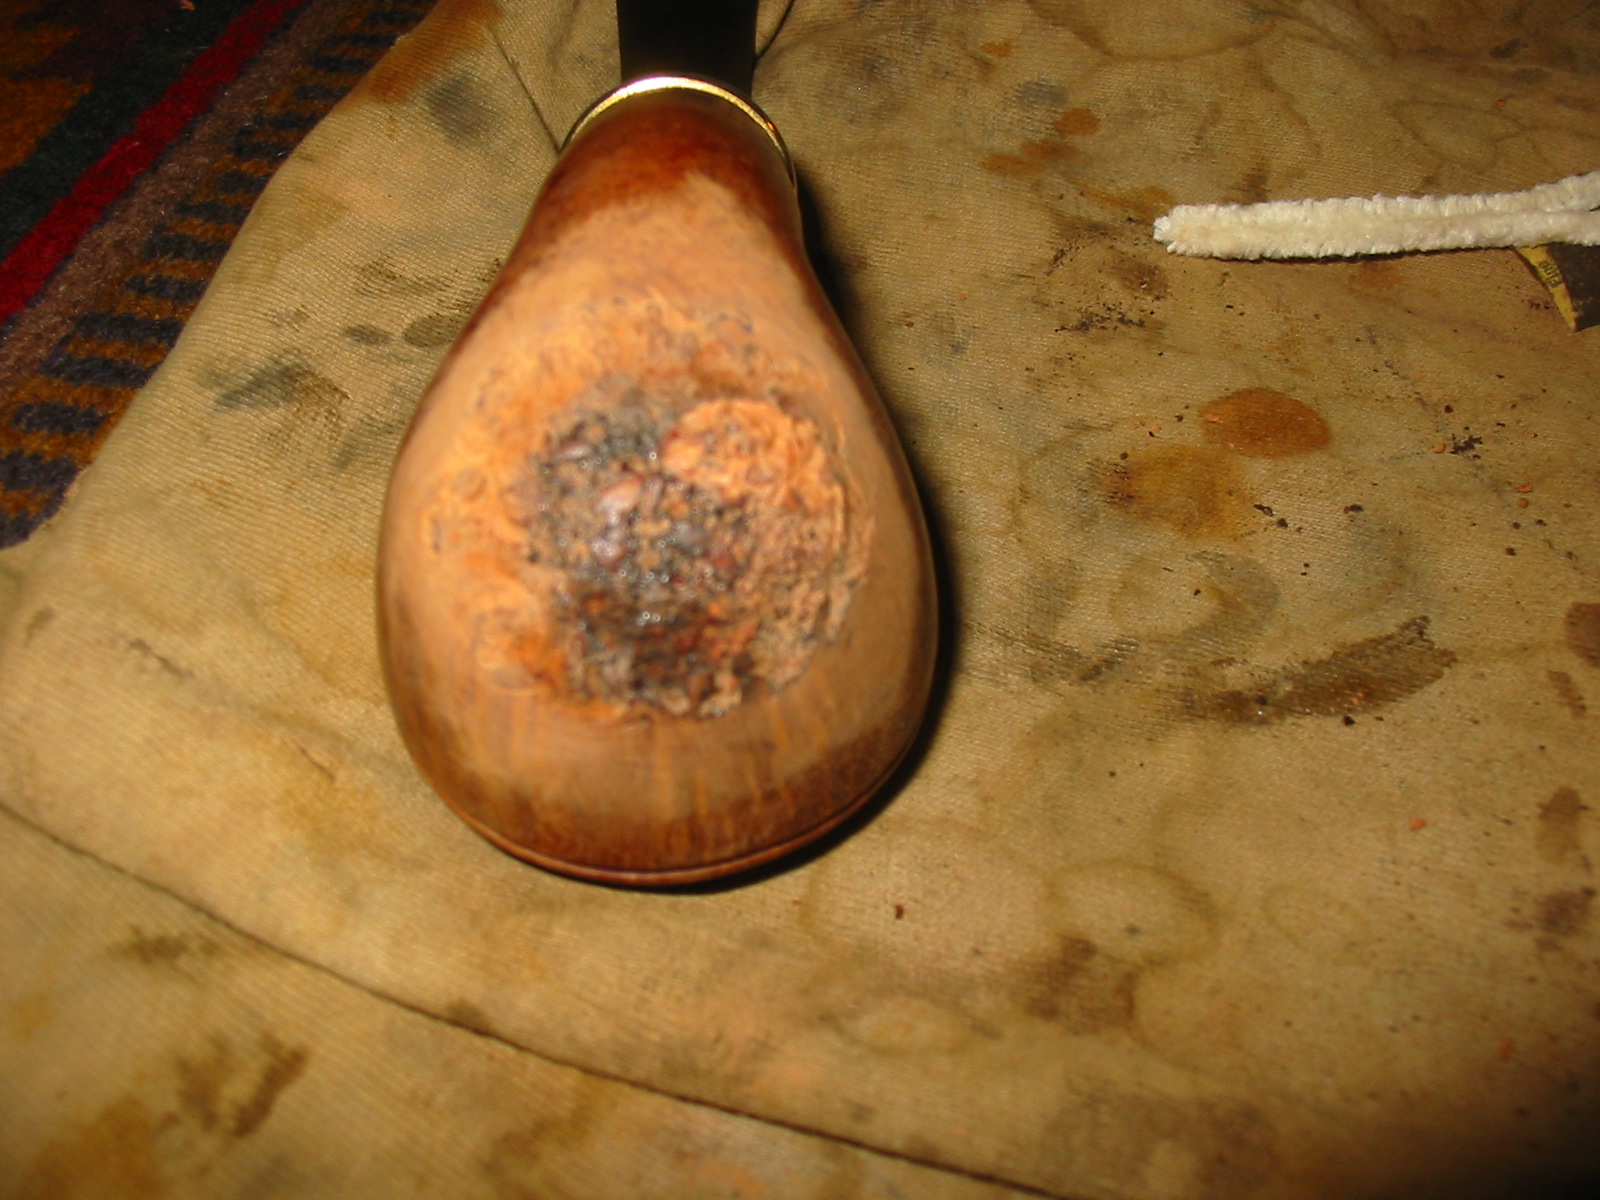
I used the modified Philips screwdriver with the four points to rusticate this part of the bowl. The next two photos show the rusticated portion of the bowl. The area of the older briar showed dark spots in the rustication and the new fresh plug showed almost white after rustication.
IMG_4837

IMG_4838

I decided to try and use a dark brown aniline stain thinned 2:1 with isopropyl alcohol on the whole pipe to see what would happen with the rustication. I wanted to see if the dark areas on the rustication would blend into the briar of the lighter parts. I did not really expect it to work but thought I would give it a try.
IMG_4840

IMG_4841

IMG_4842

IMG_4843

The dark portions of the old briar still showed dark after staining. I decided to use a black aniline stain on the rusticated portion of the bowl and leave the smooth part of the bowl the brown colour. I applied the stain with a cotton swab and flamed it, reapplied it and reflamed it until the coverage was even.
IMG_4844

IMG_4845

IMG_4846

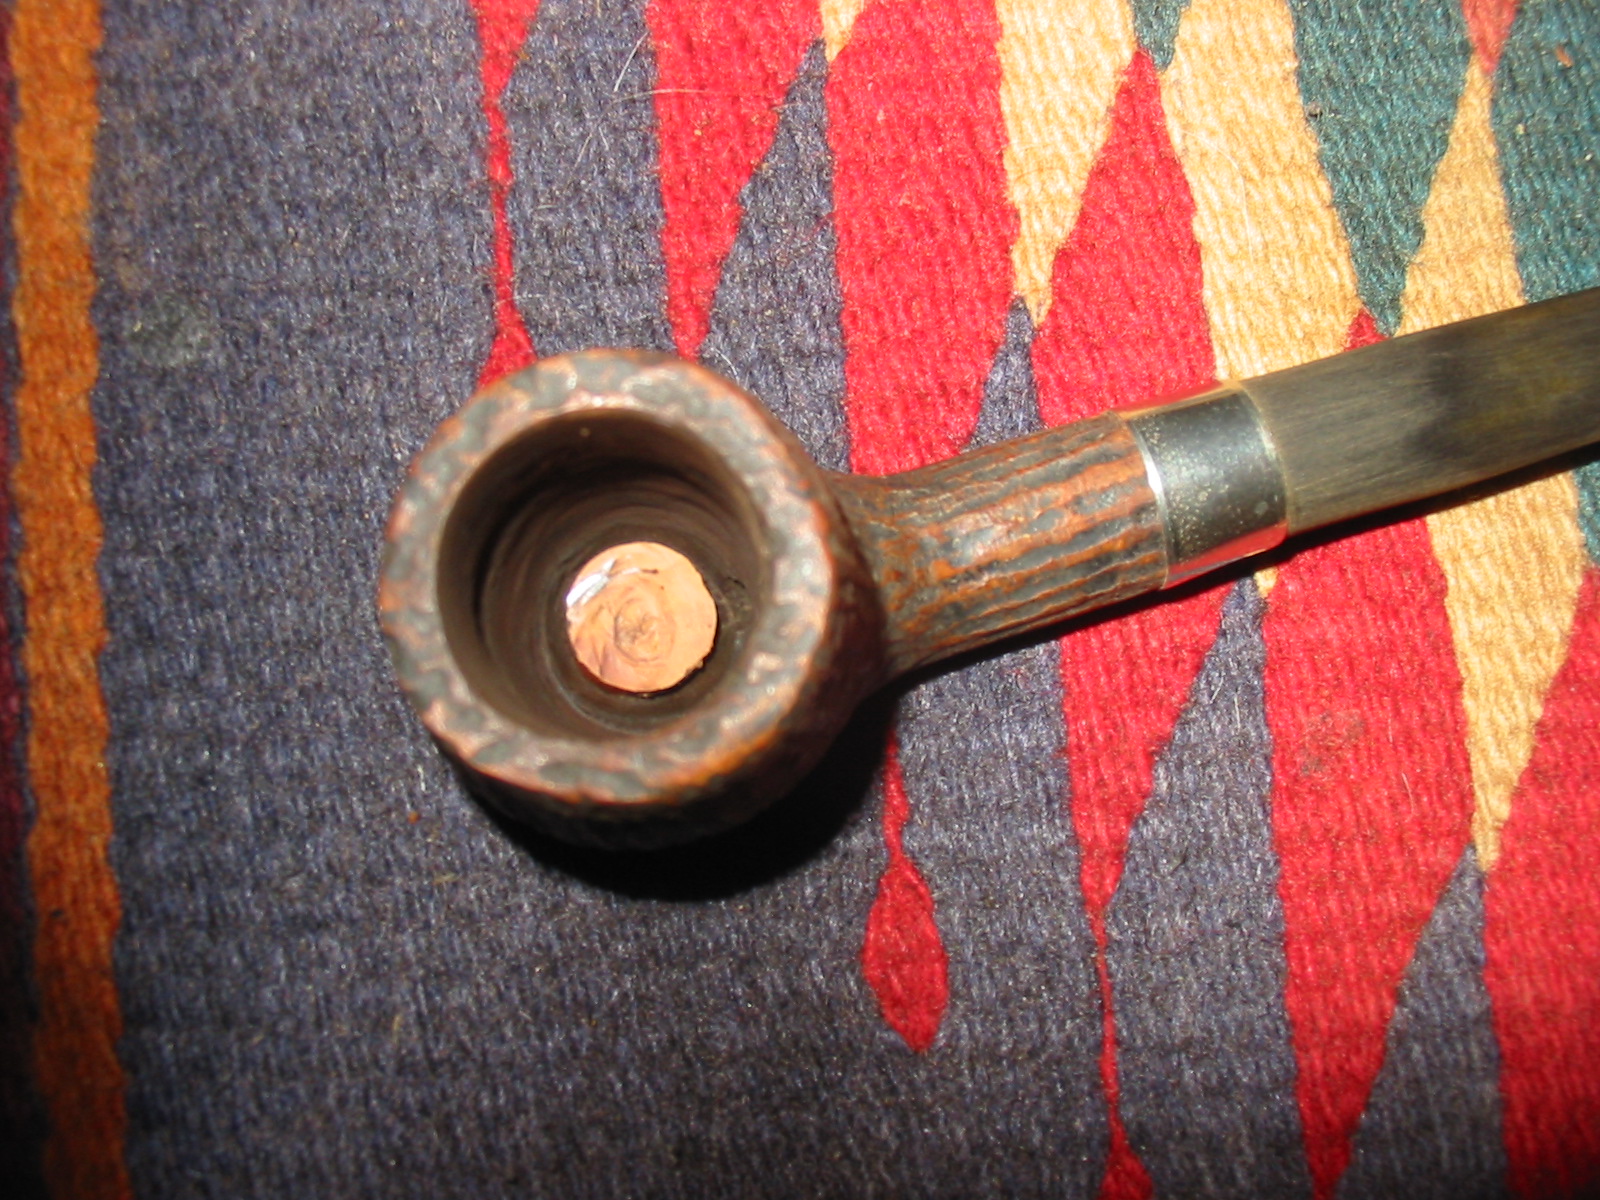
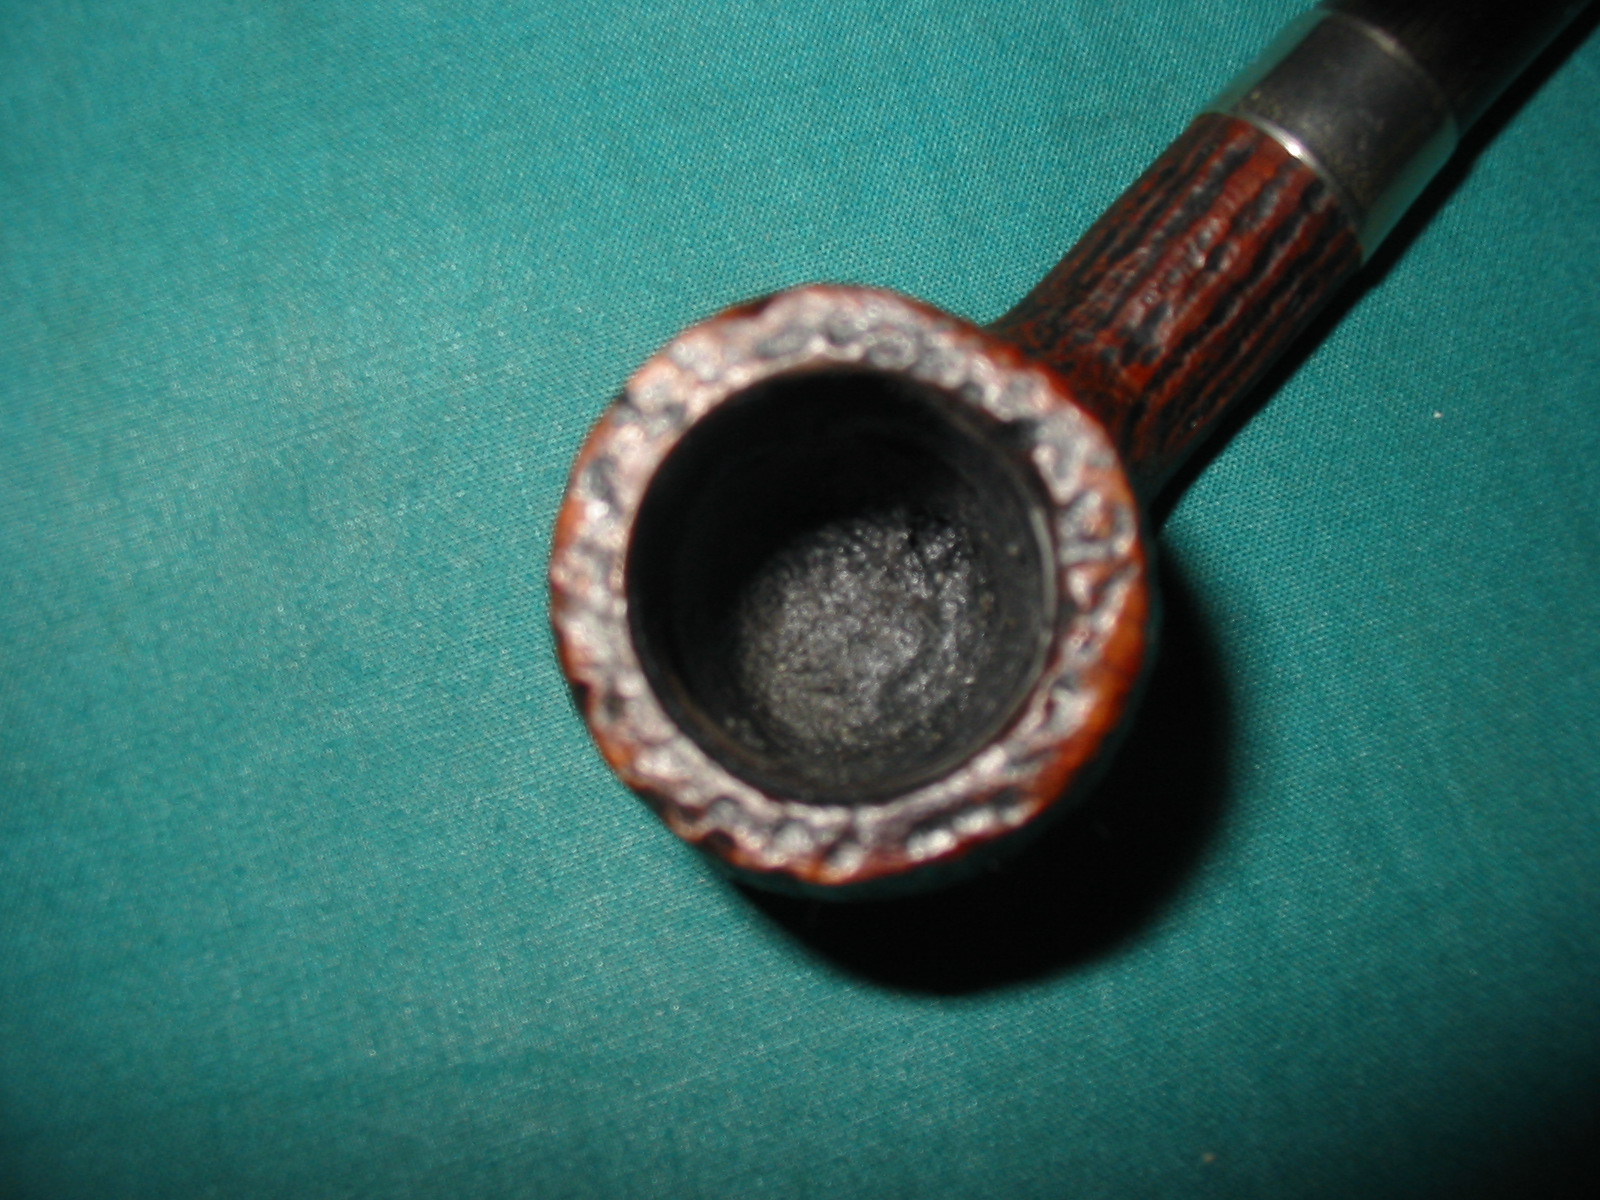
The inside of the bowl then needed to be addressed. The drilling of the bowl was not only angled from left to right but the airway entered the bowl over 3/8 inches above the bottom of the bowl. Whether this was caused by drilling or over reaming is not clear to me. My problem was that the angle of the patch on the side did allow me to shape the patch to provide a new bottom for the bowl. I could have cut another piece of briar and inserted it into the bottom of the bowl but the strange angles of the bowl made that a task that I did not want to tackle. I opted to build up the bottom of the bowl with Plaster of Paris instead of pipe mud because of the depth of the buildup. My fear was that the pipe mud would have to be almost ½ inch thick and I was not sure if it would hold. I have used Plaster of Paris to repair meerlined pipes and it is durable and gives a solid base. I intend to use pipe mud on top of the repair and also reshape the bowl sides.

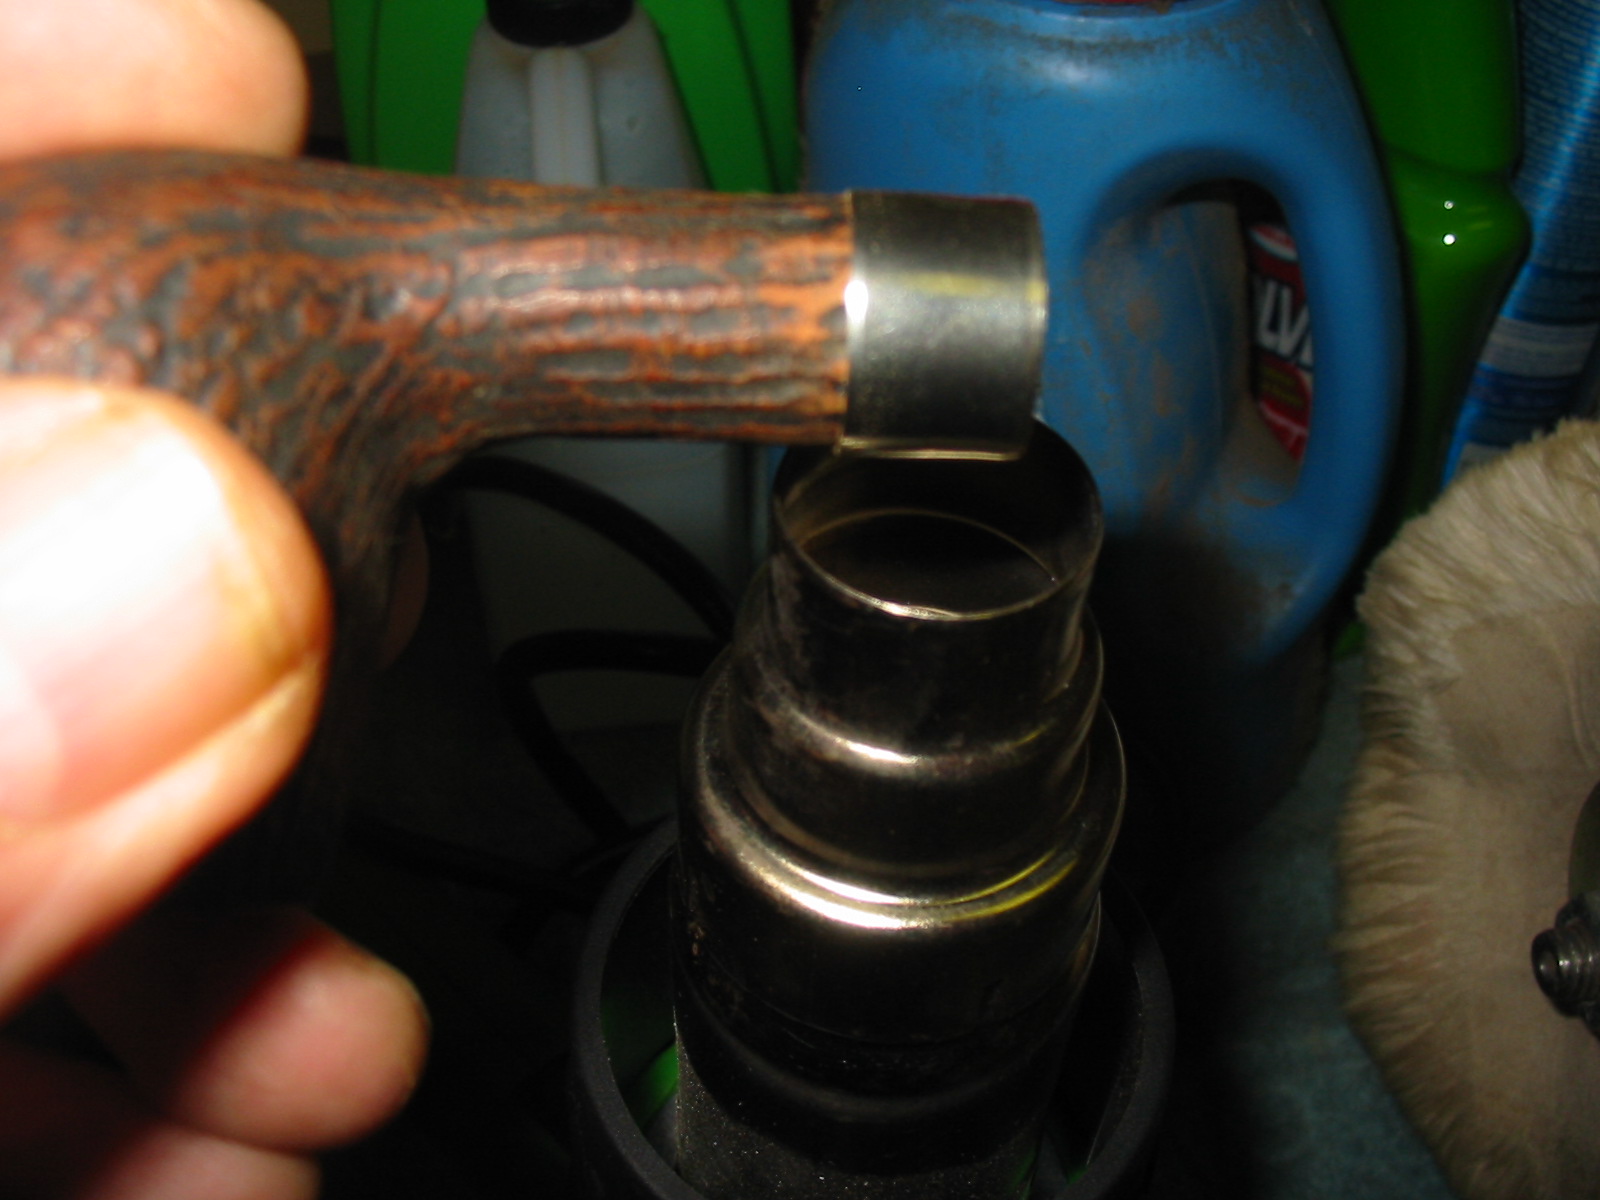
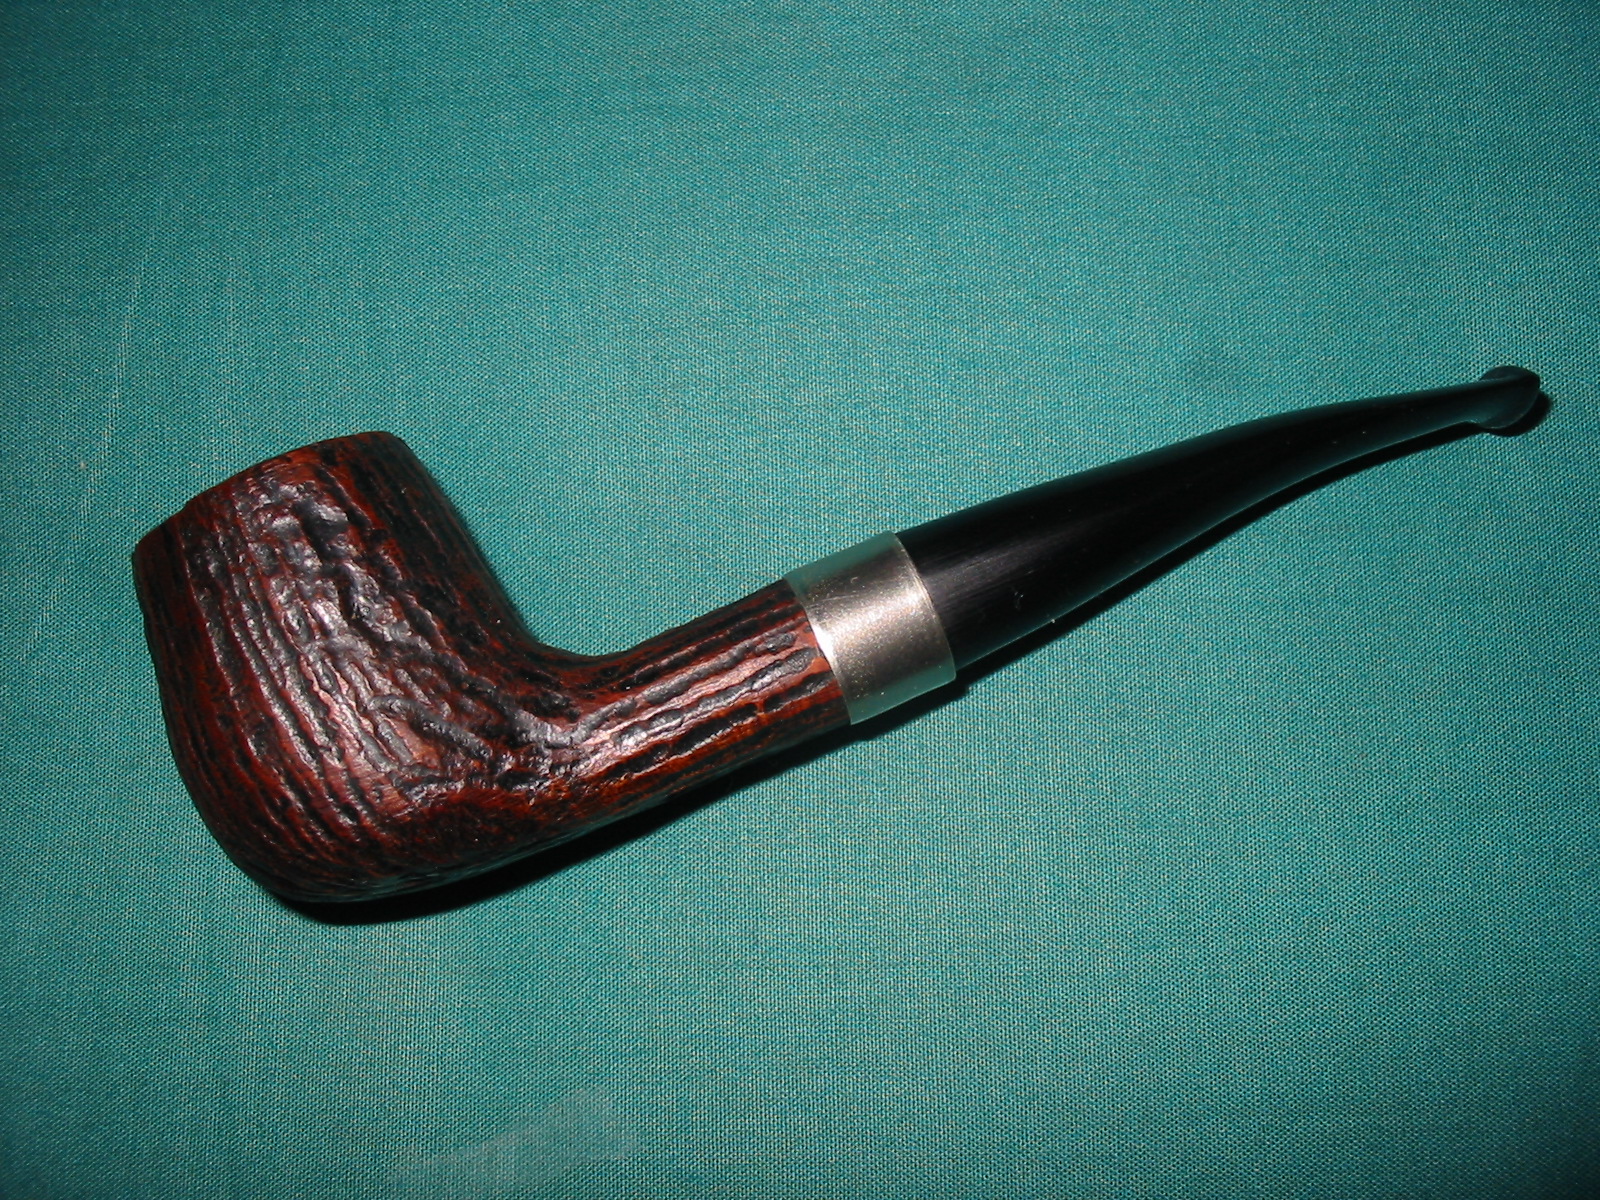
I glued the band on the shank with wood glue before I restained it with another coat of the medium brown aniline stain. I flamed it and then buffed it with White Diamond. I gave the smooth portions of the bowl several coats of carnauba wax and hand buffed the rusticated portion with Halcyon II wax.
IMG_4850

IMG_4851

IMG_4852

IMG_4853

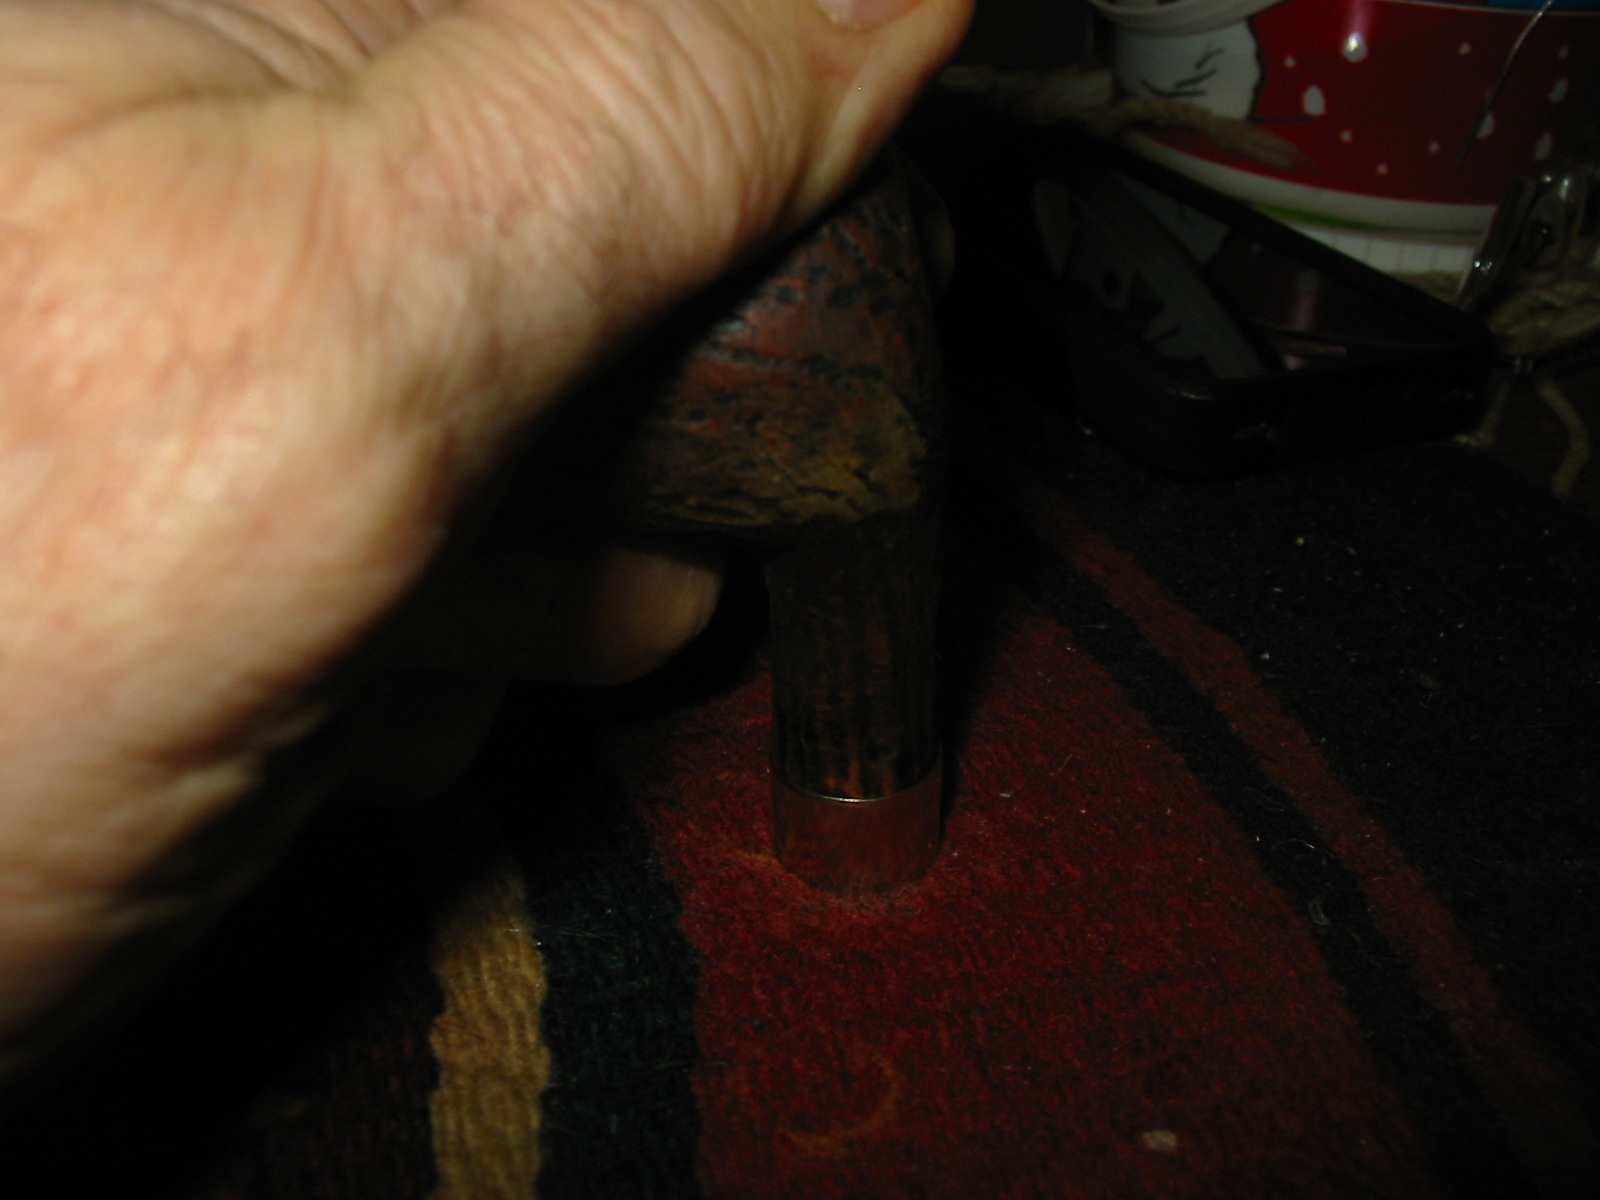
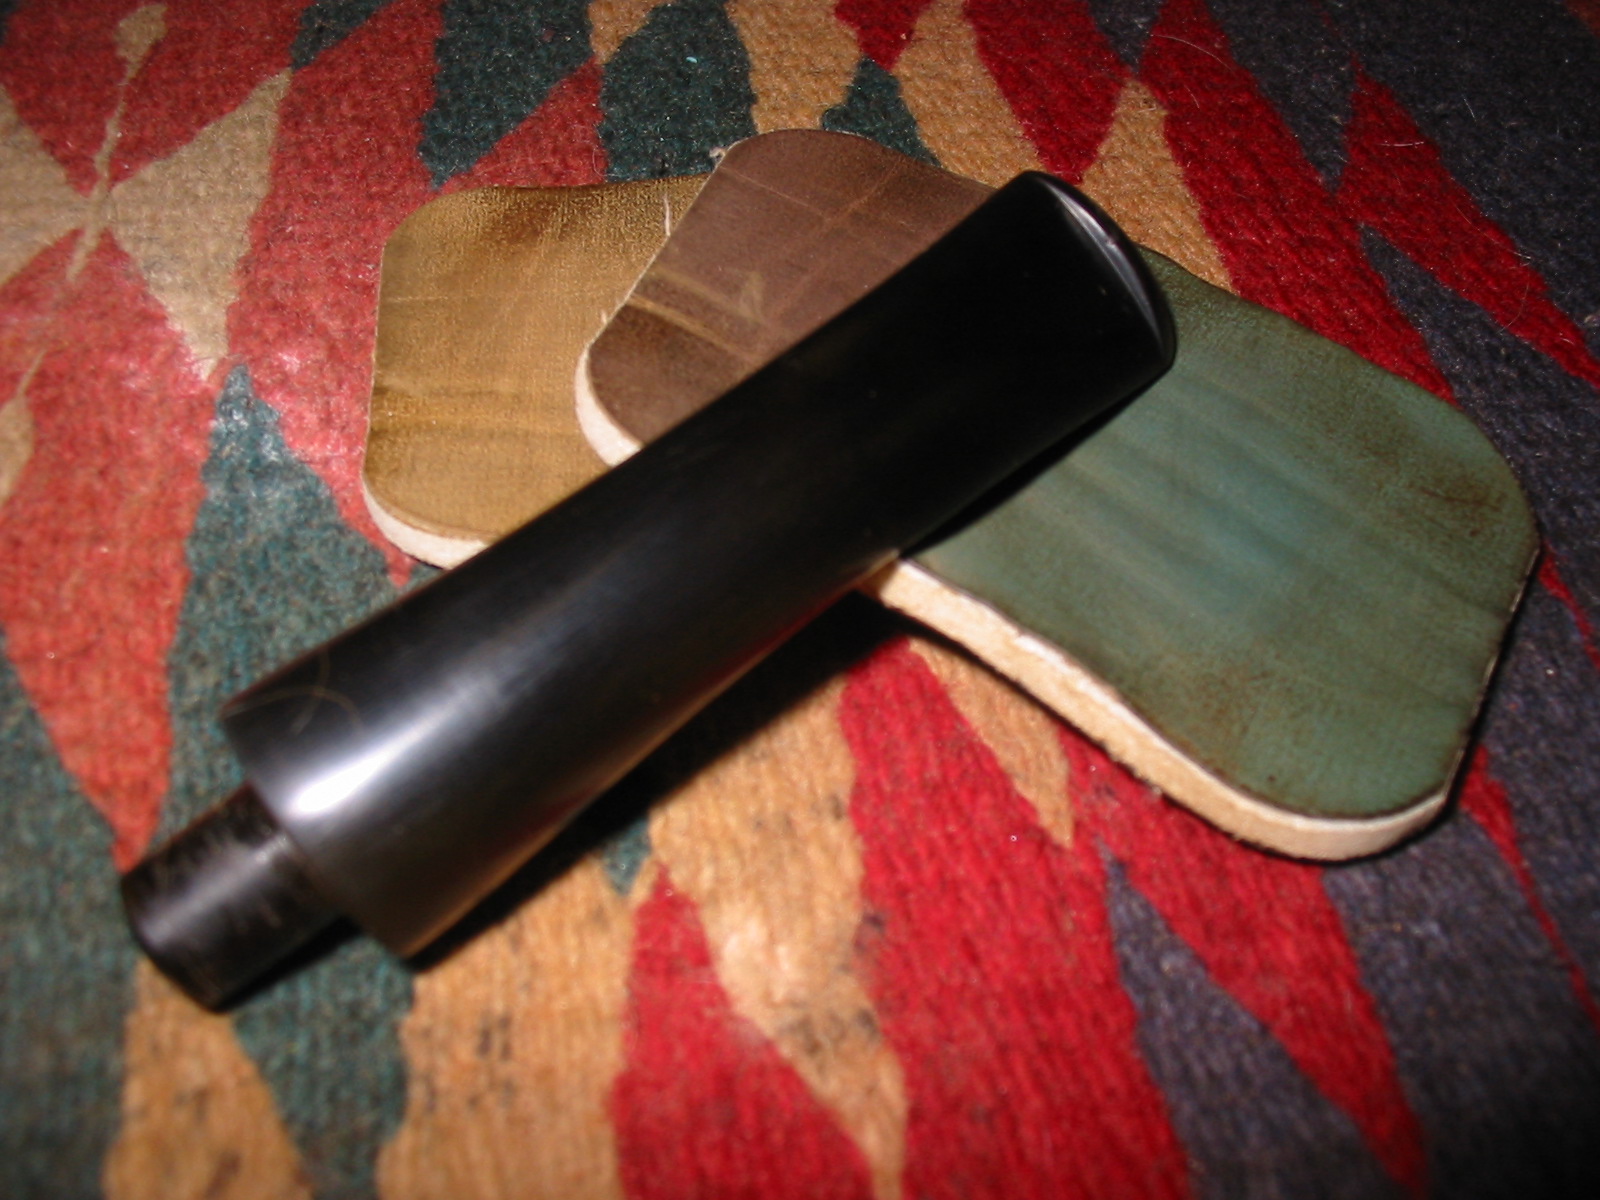
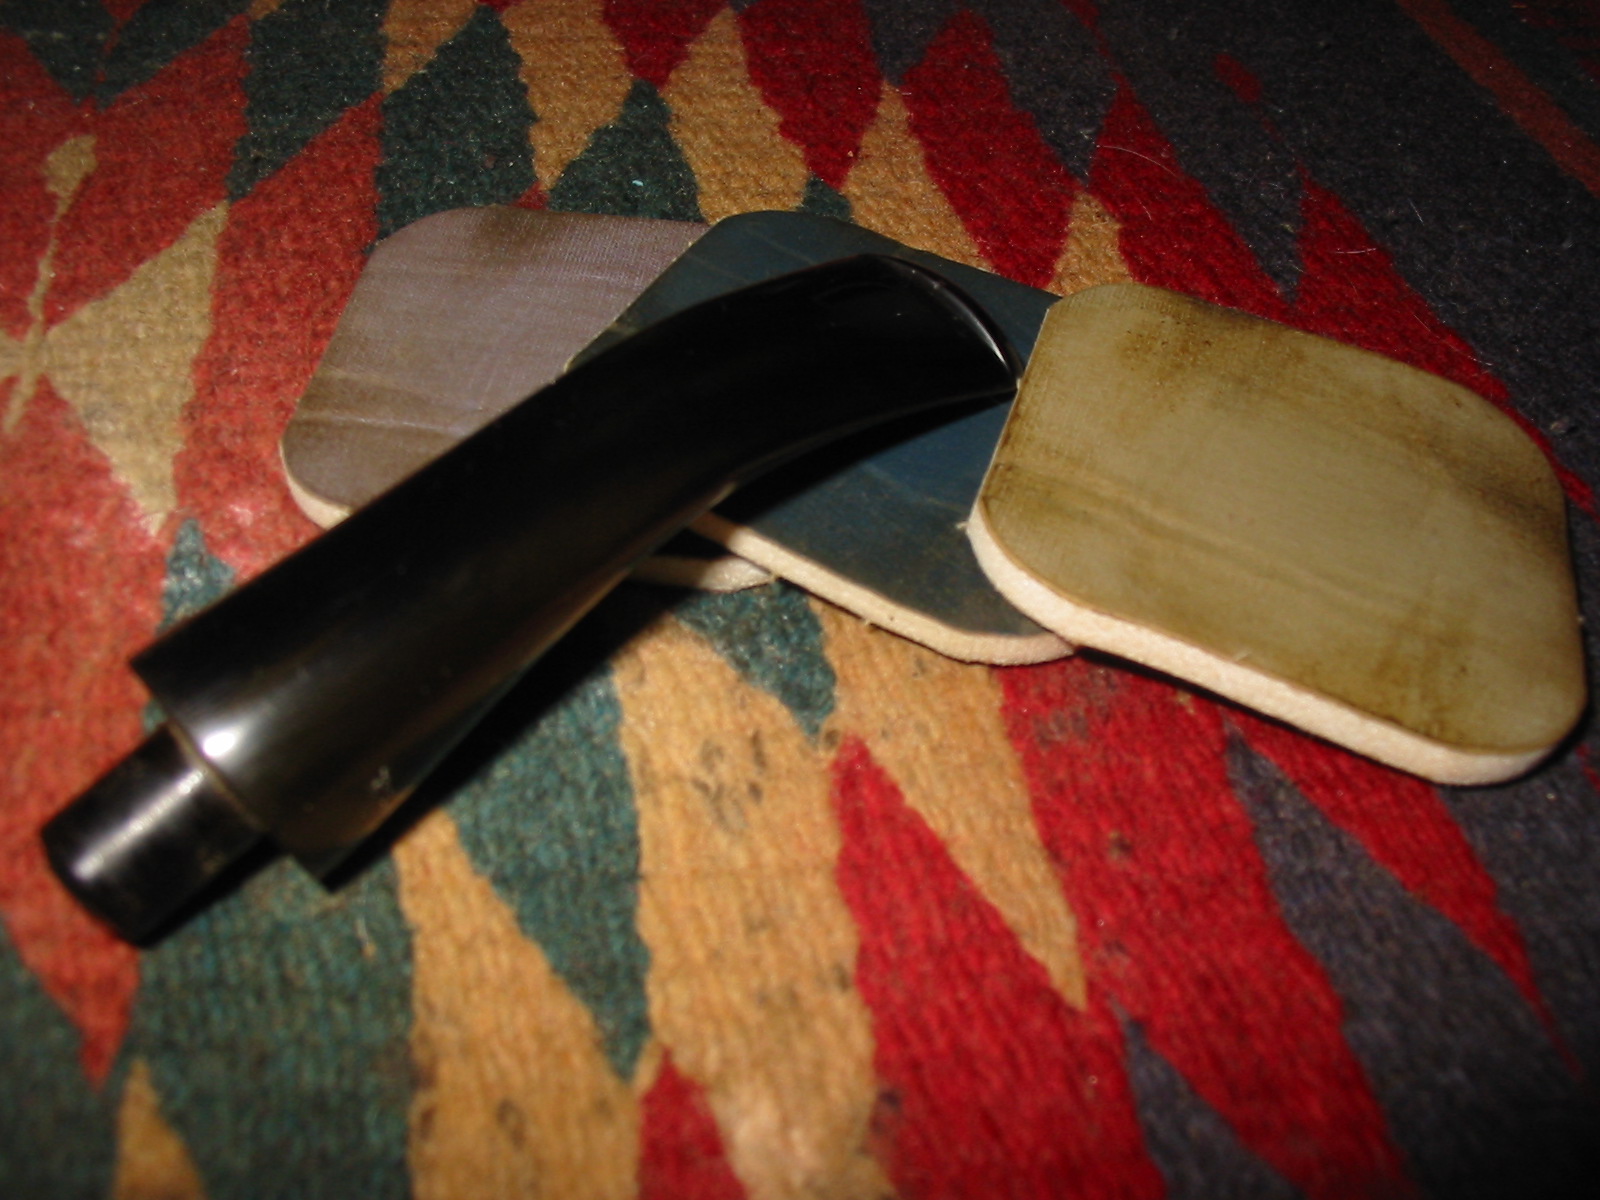
I sanded the tooth marks and chatter out of the stem with 220 grit sandpaper and a medium grit sanding sponge. I reshaped the stem to fit more proportionally against the band. I made it round instead of oblong so that the fit against the band was even all the way around giving it a more finished look. I then sanded it with my usual array of micromesh sanding pads – wet sanding with 1500-2400 grit pads and dry sanding with 3200-12,000 grit pads. I rubbed the stem down with Obsidian Oil and when it was dry buffed it with White Diamond. I gave the stem multiple coats of carnauba wax to finish and protect it.
IMG_4854

IMG_4855

IMG_4856

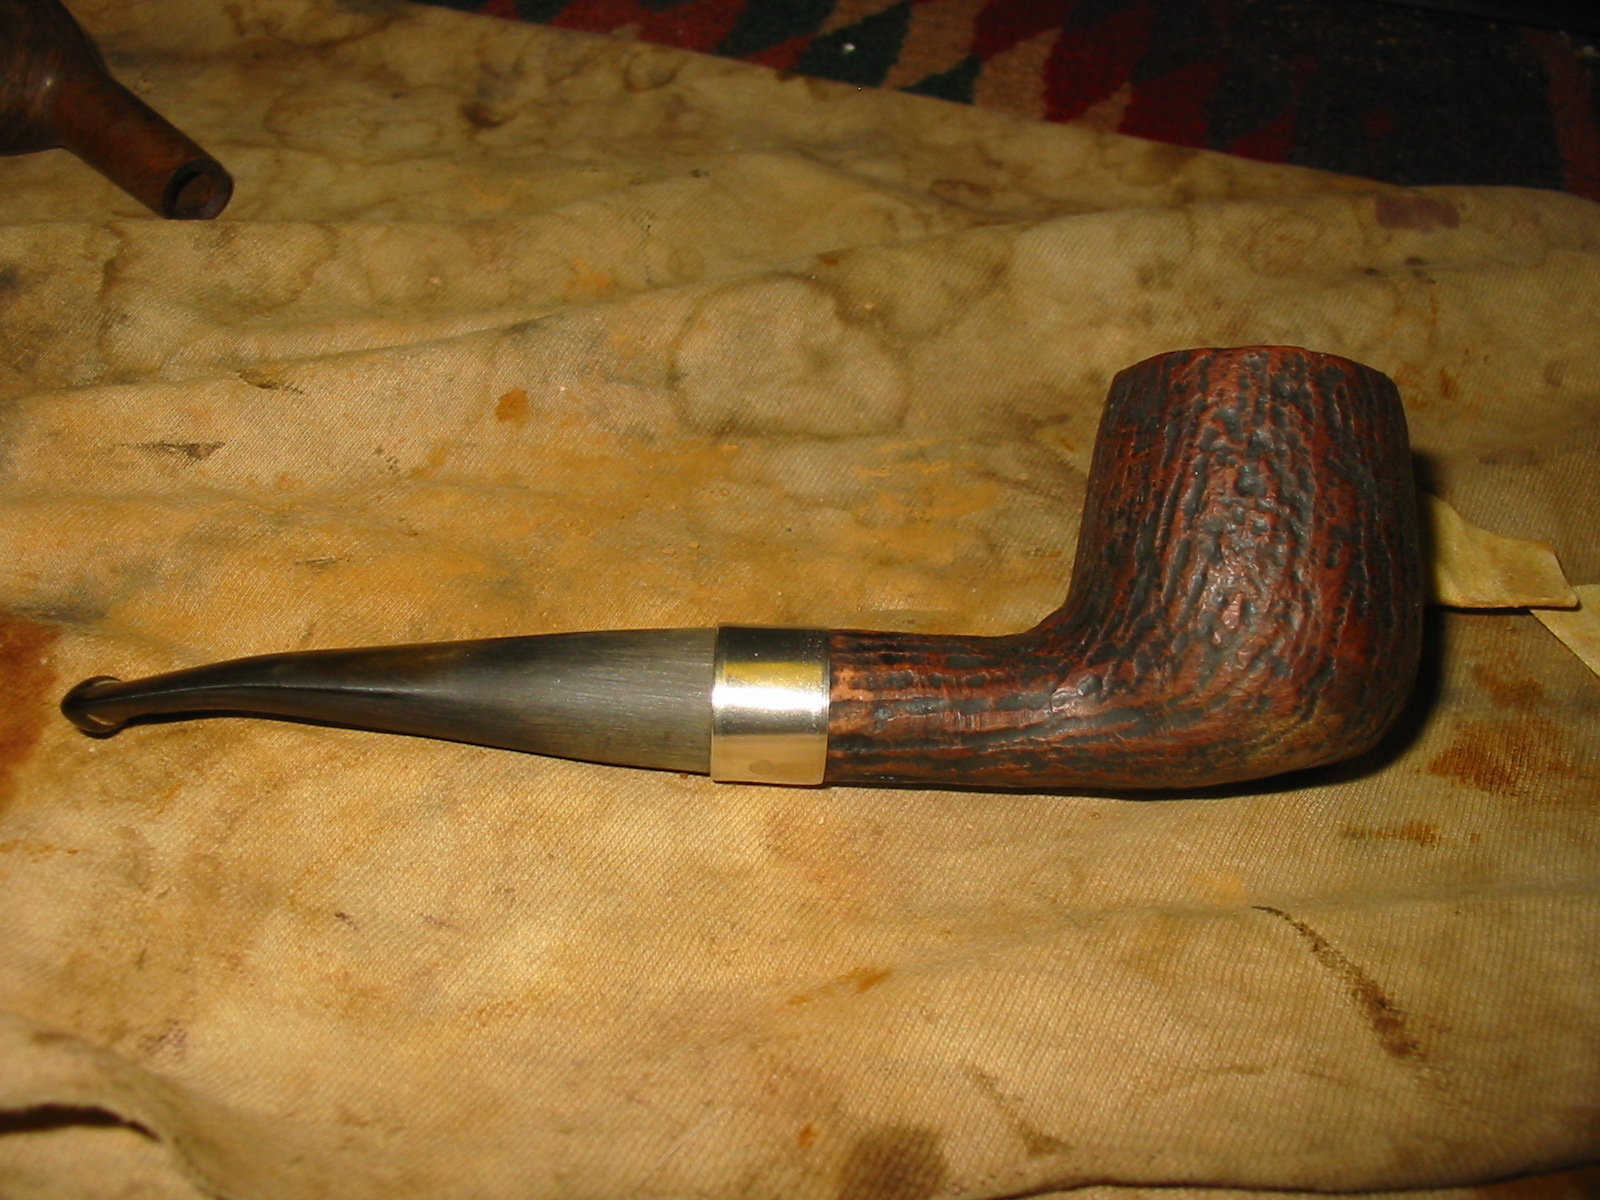
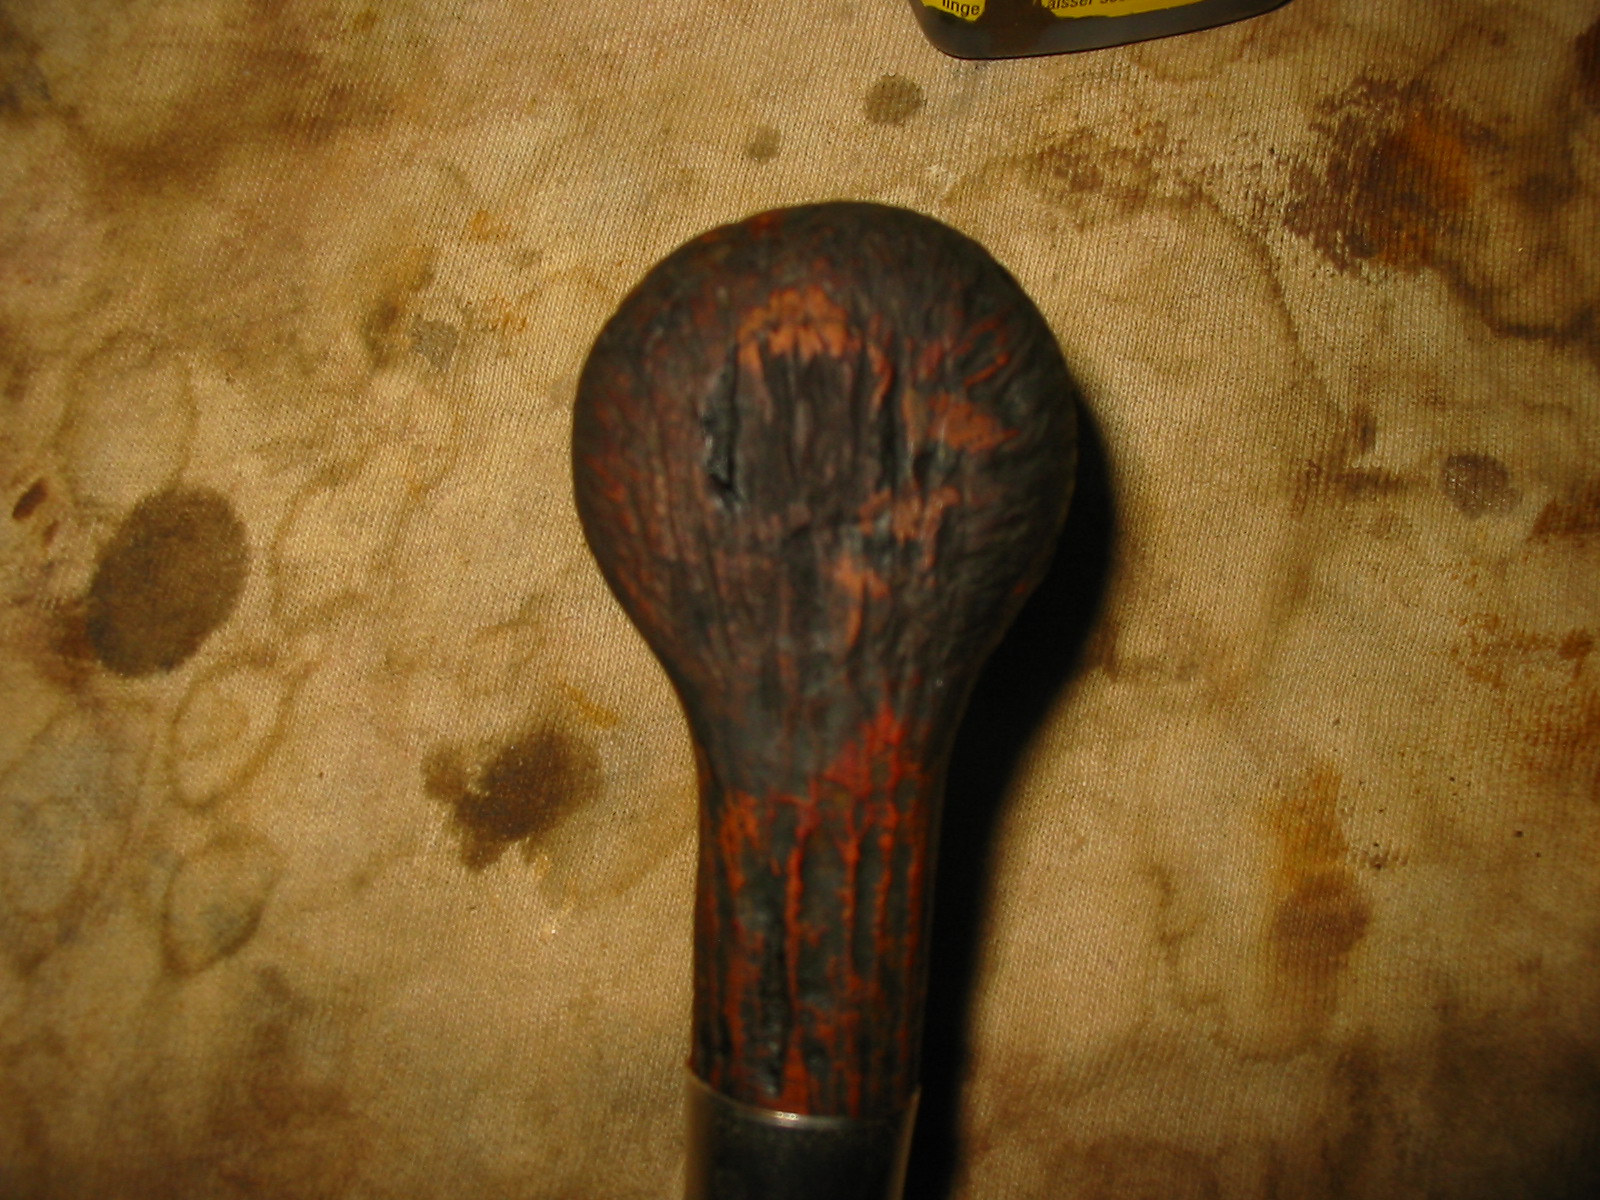
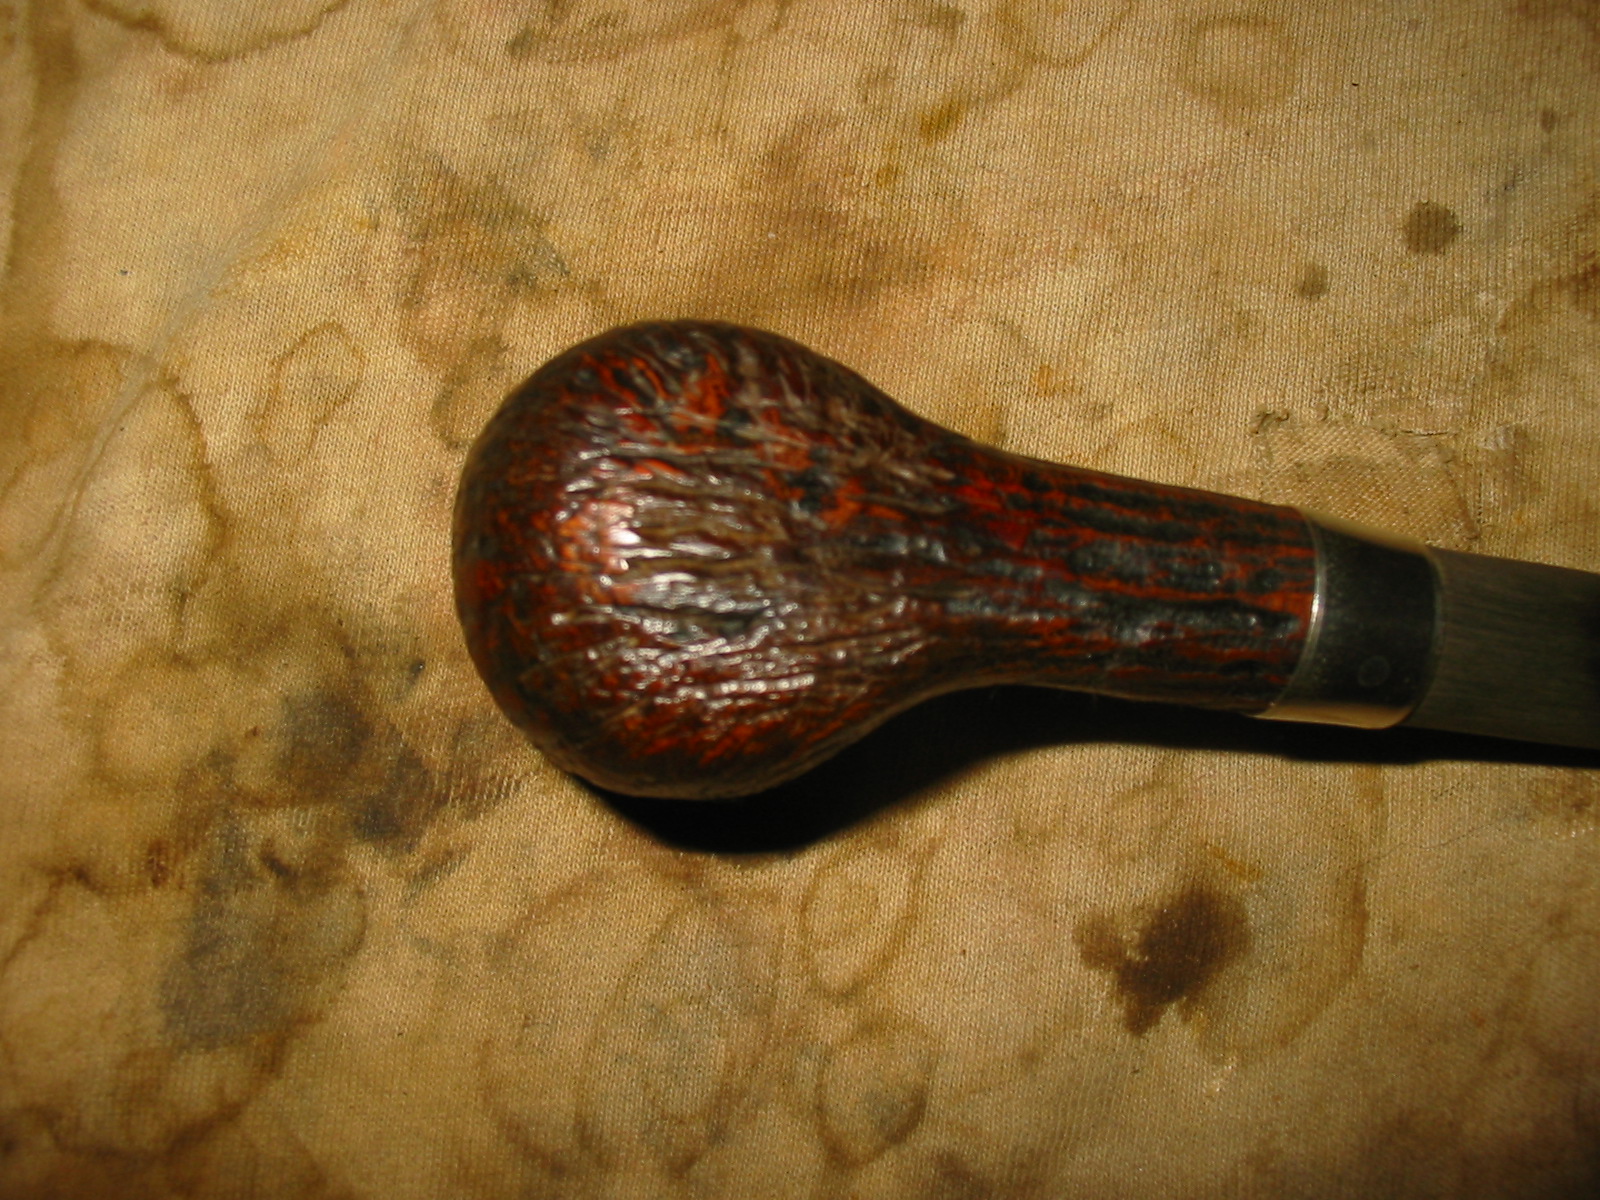
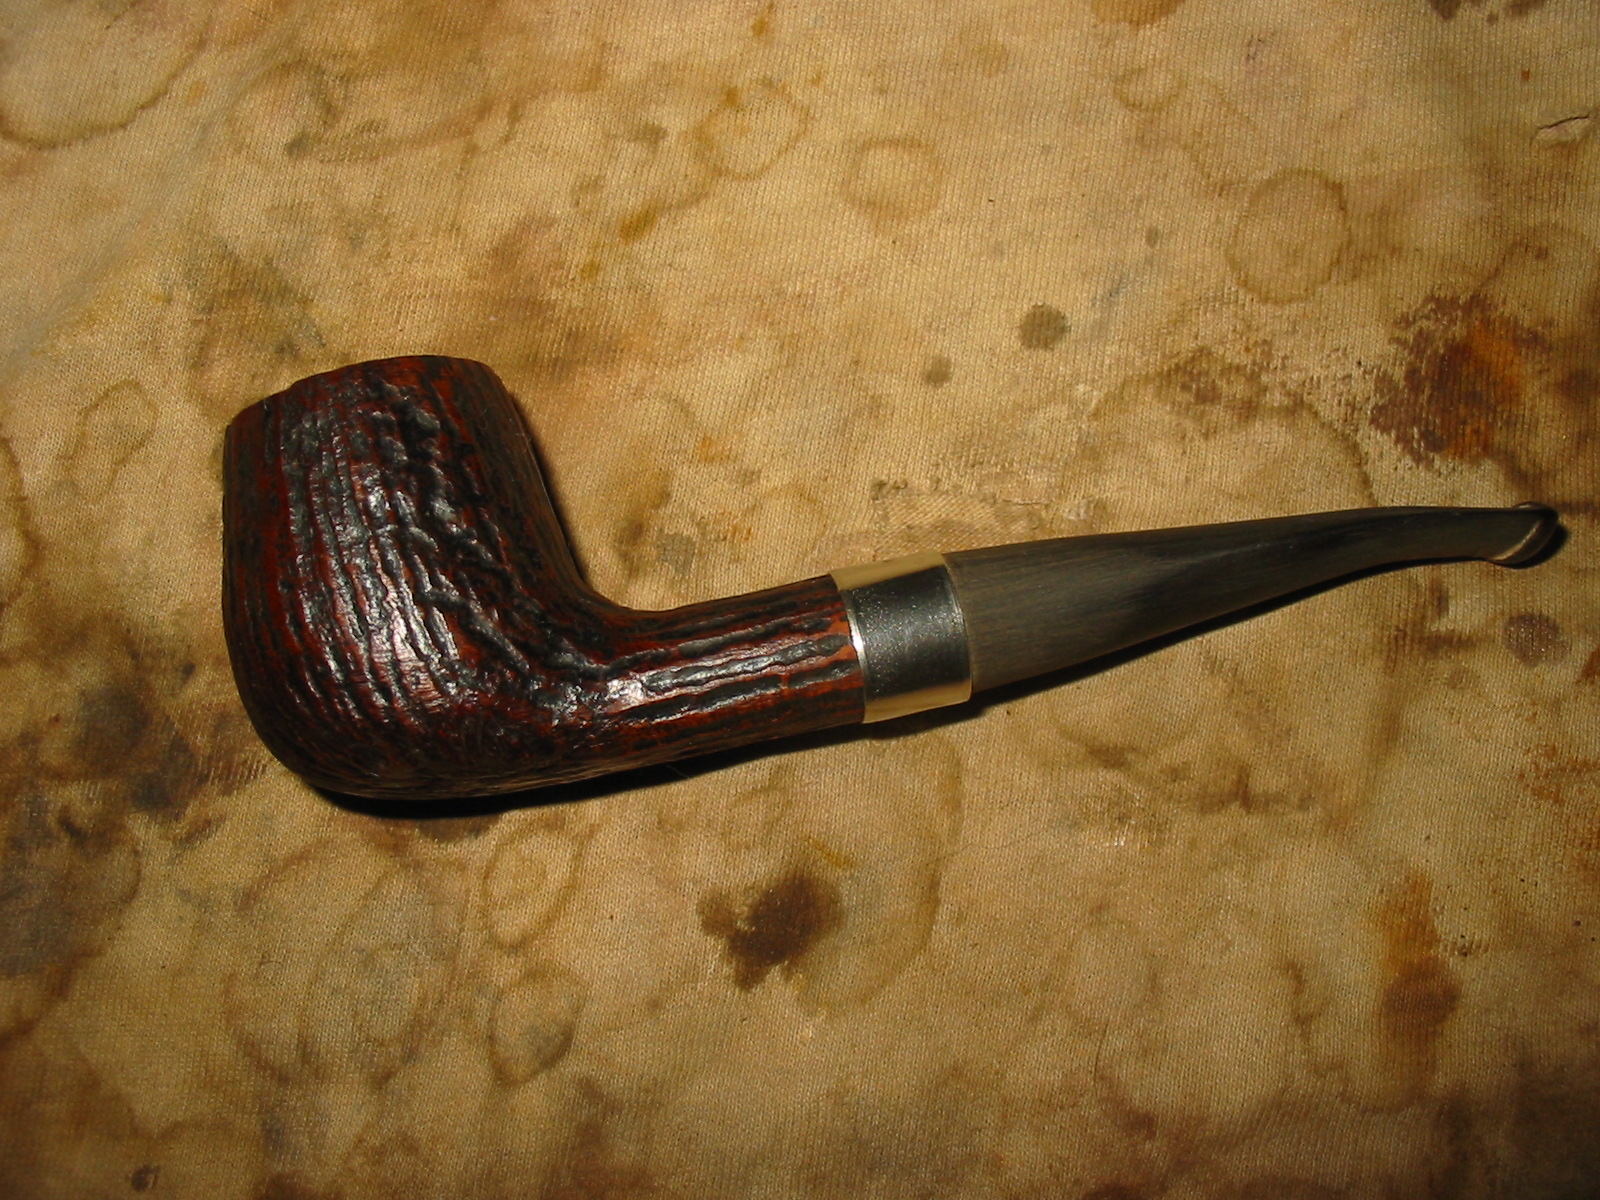
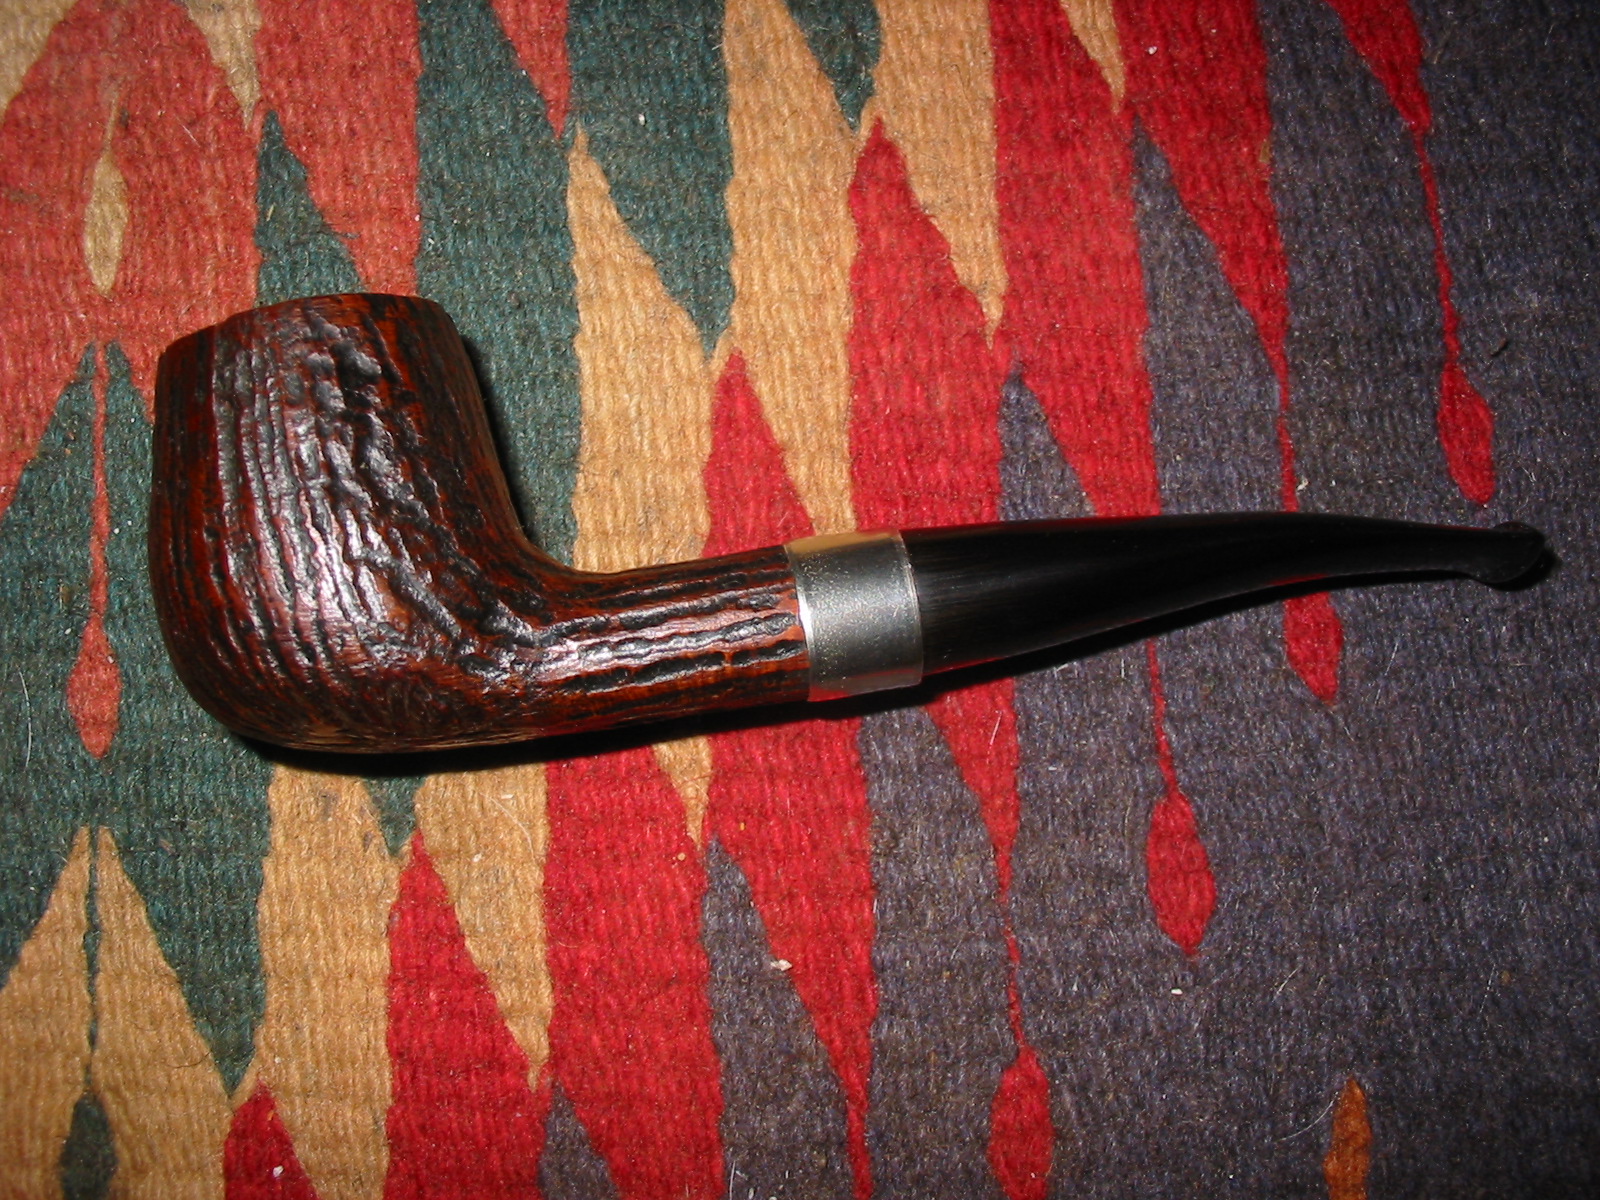
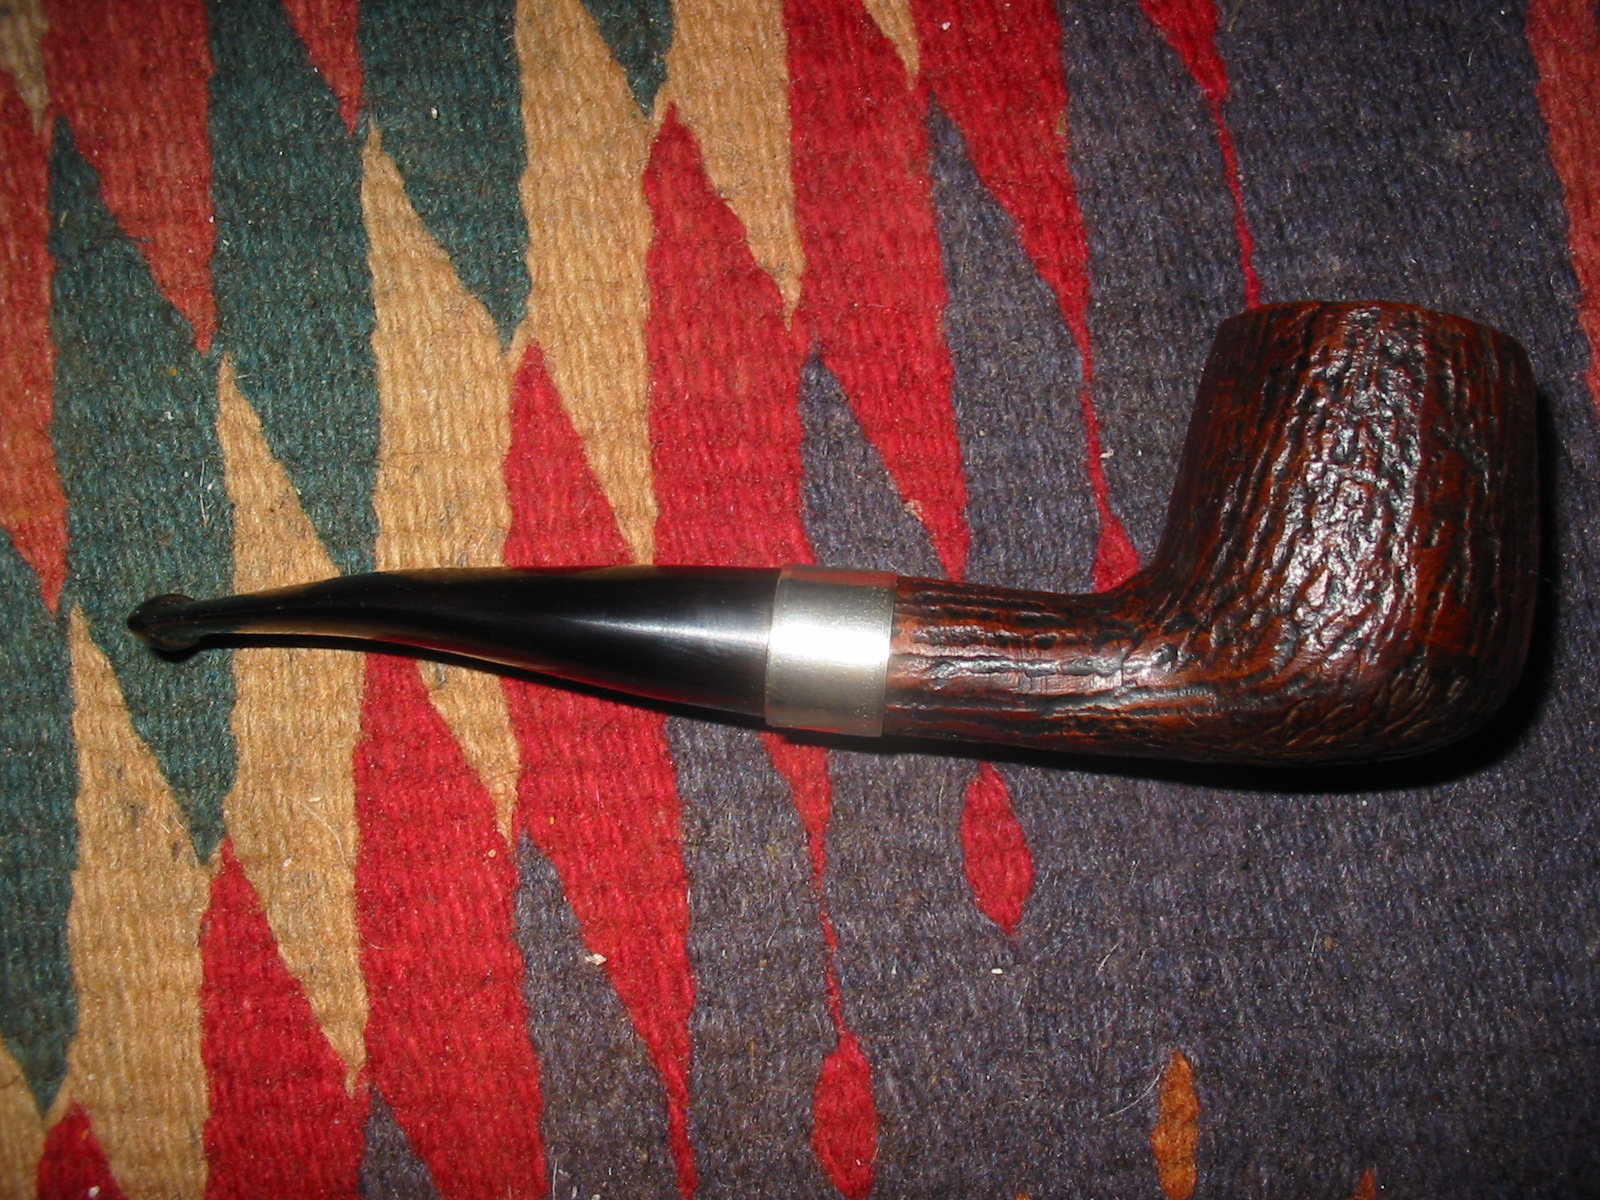
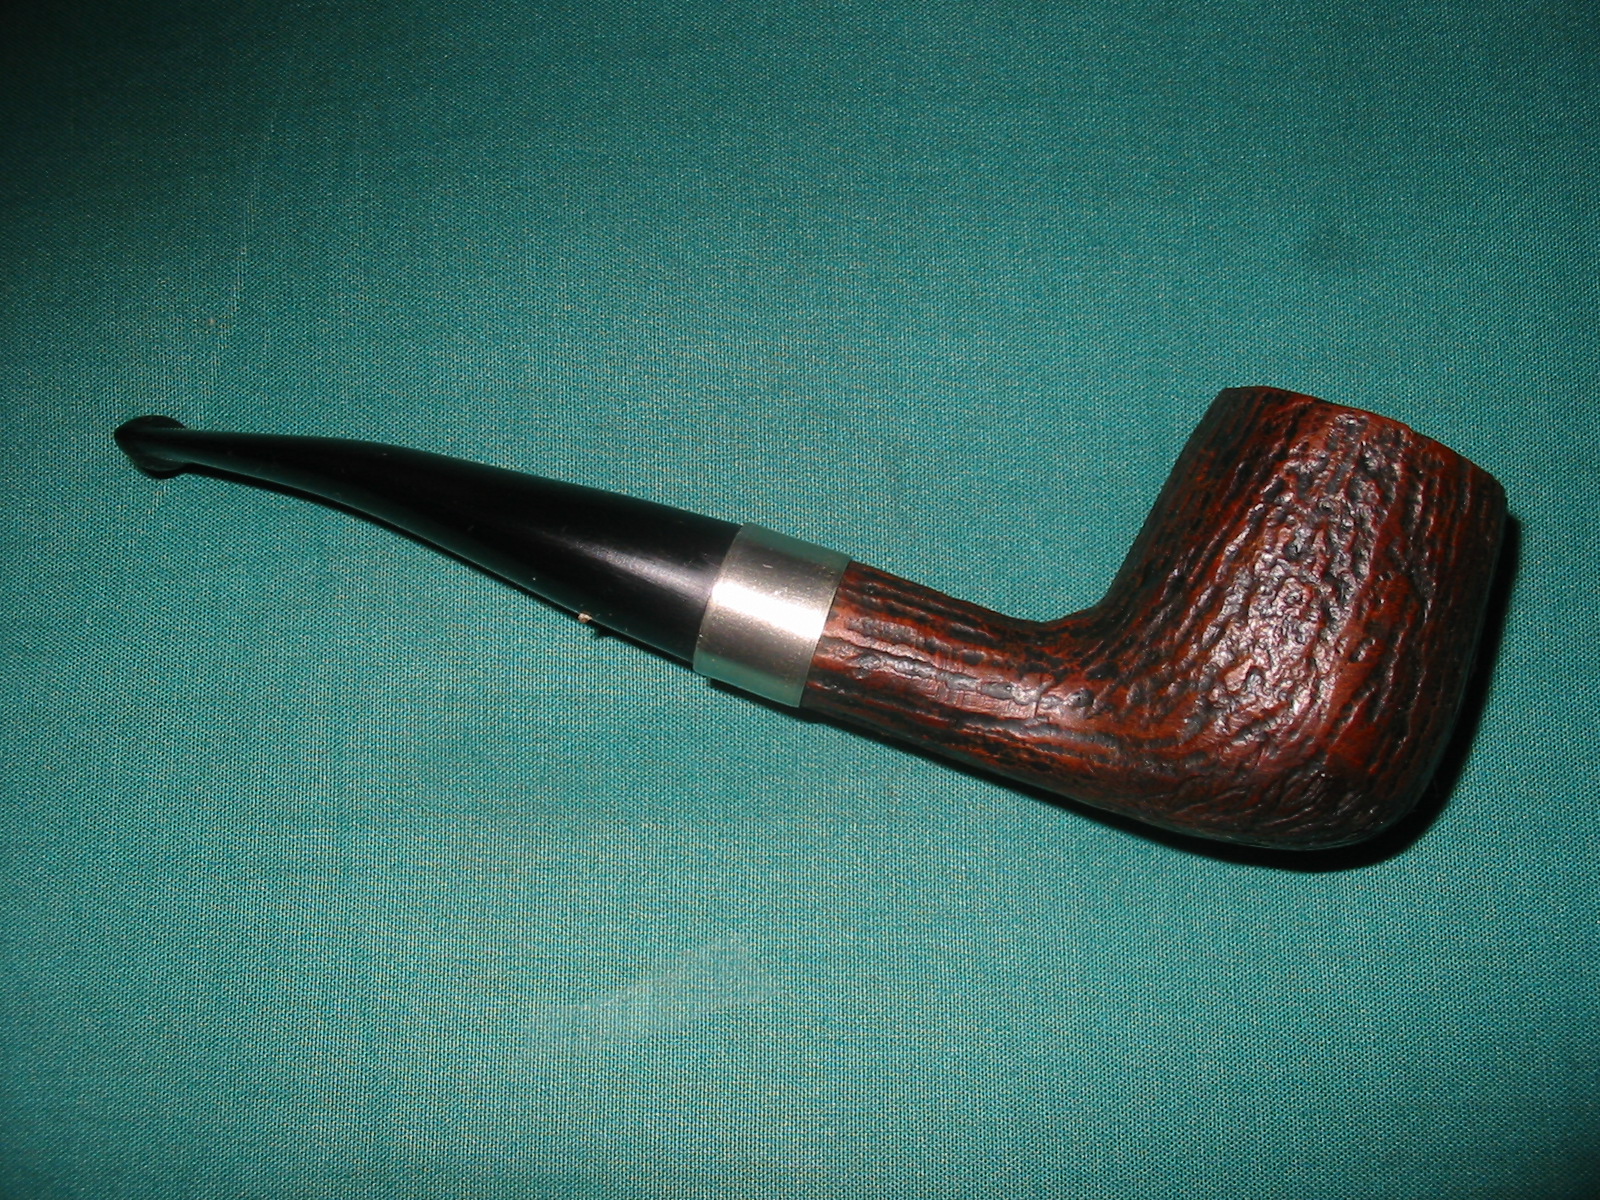
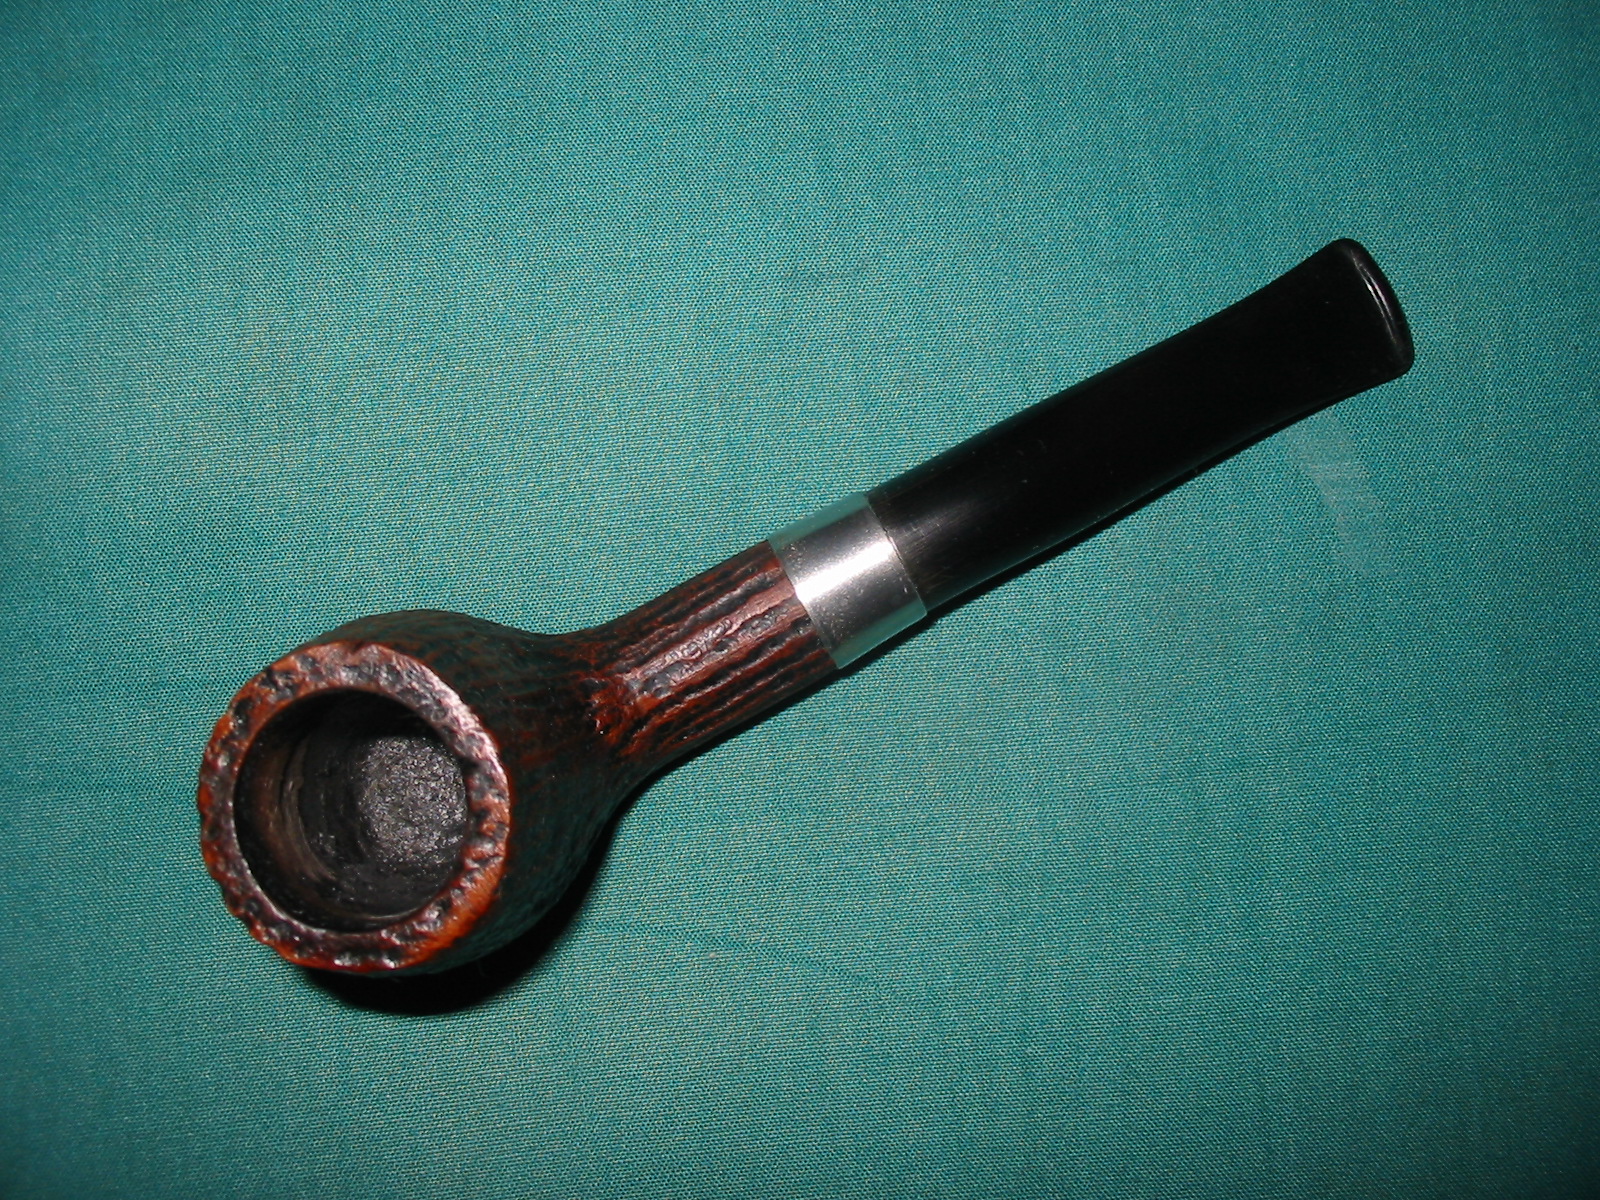
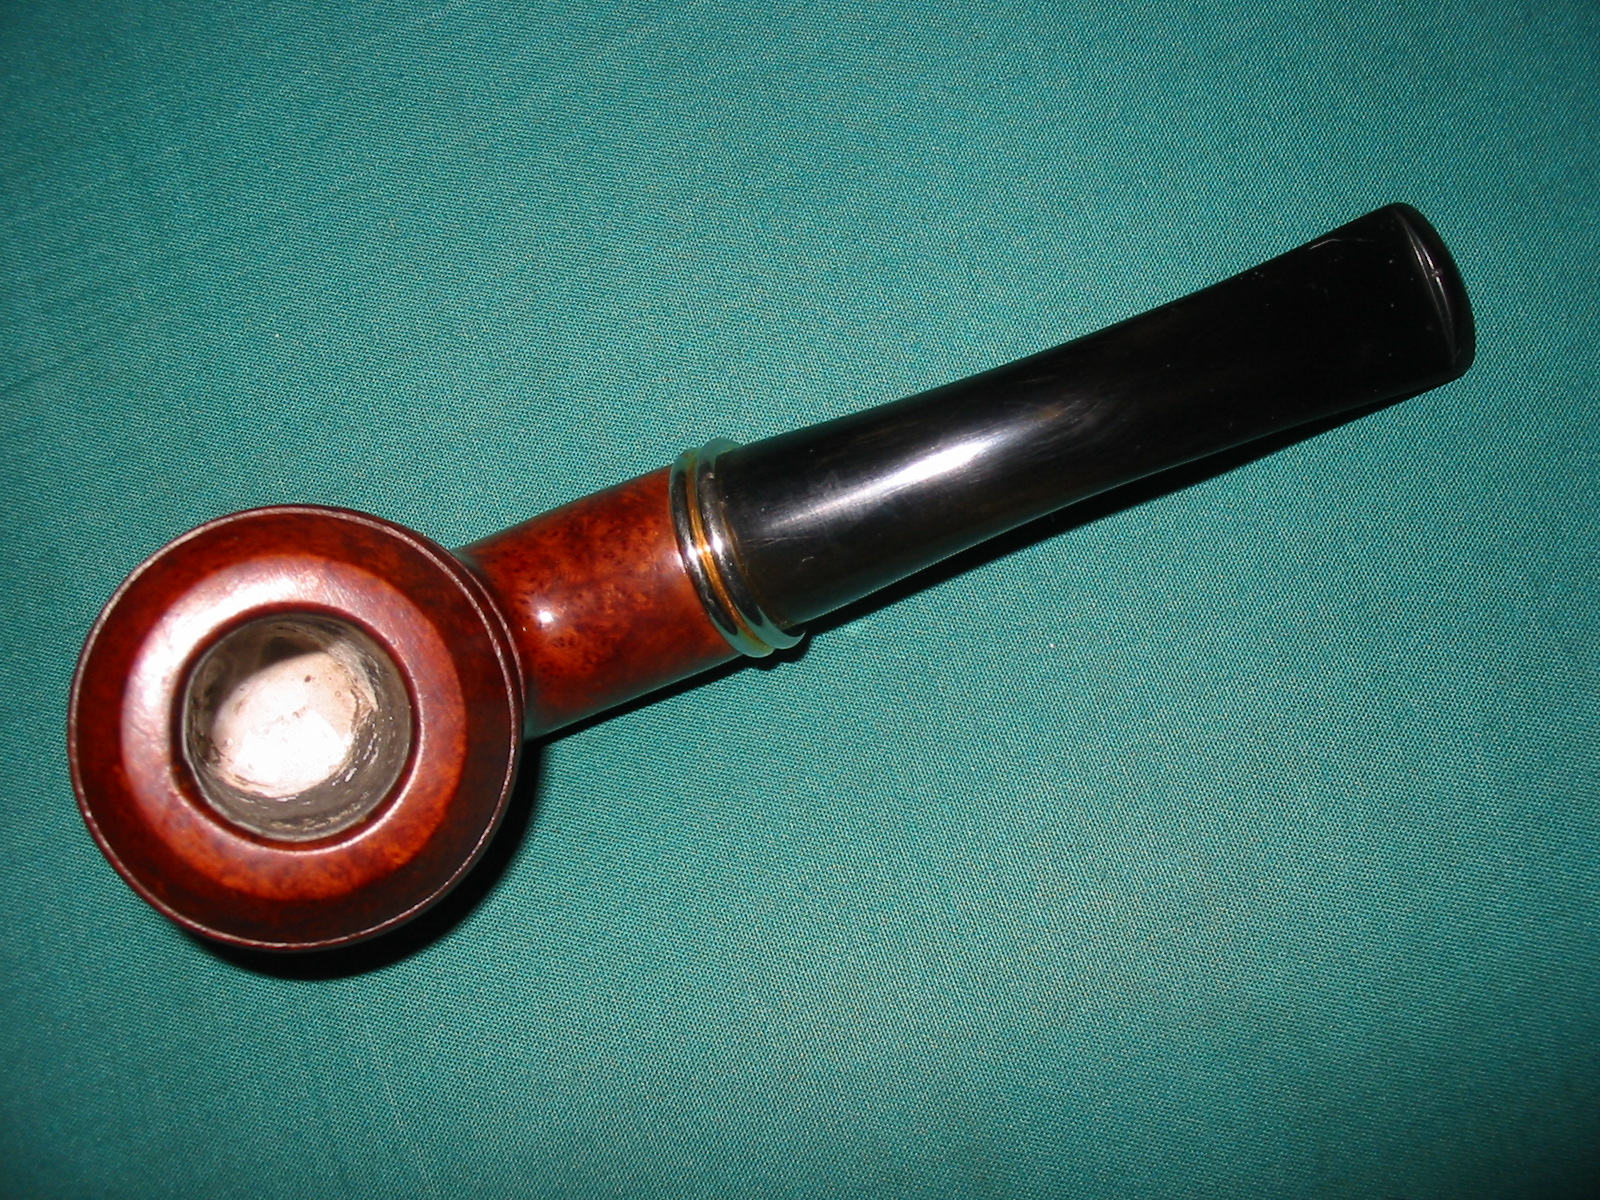
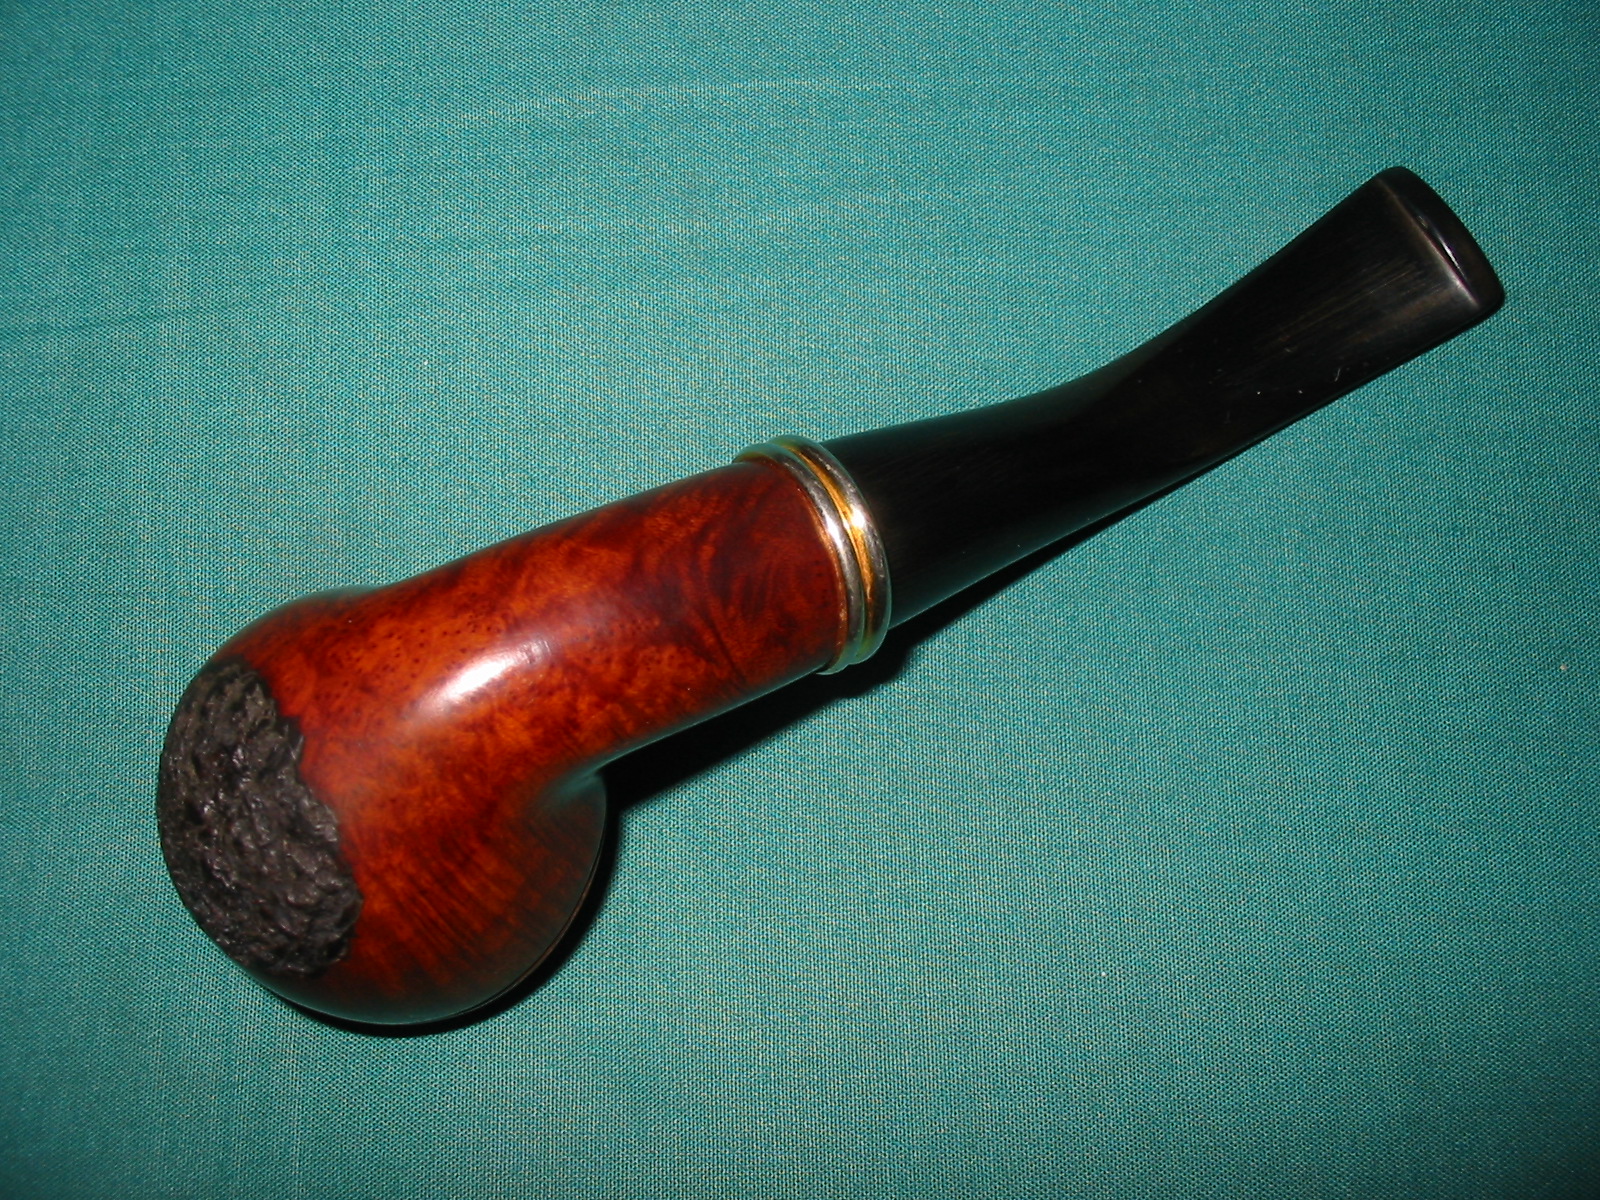
The next series of five photos show the finished exterior and stem of the pipe. The stain and the patch rustication are completed. The interior of the bowl still only bears the plaster repair. Once it cures for several days I will give it a coating of pipe mud to finish the job.
IMG_4857

IMG_4858

IMG_4859

IMG_4860

IMG_4861

The pipe is finished other than the pipe mud and soon it will go back to Mark for its inaugural smoke. I am looking forward to hearing his response once the pipe is in his hands and he has smoked it.

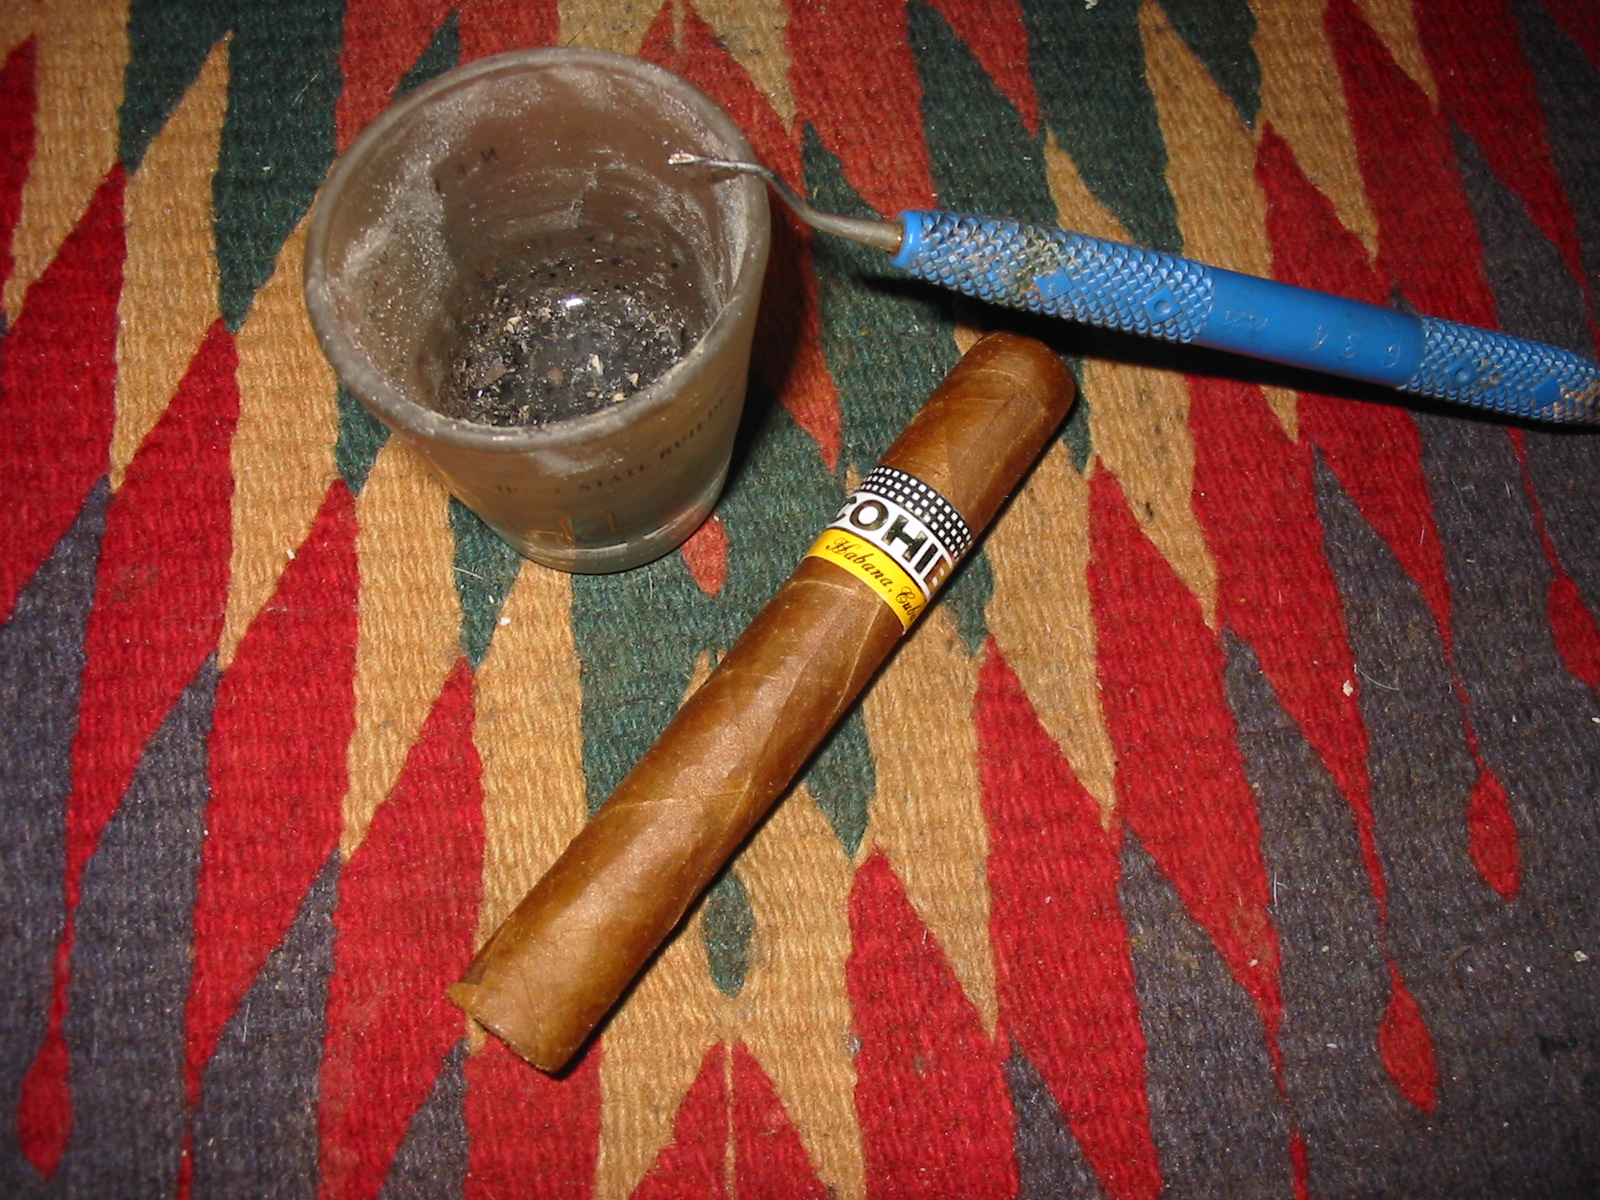
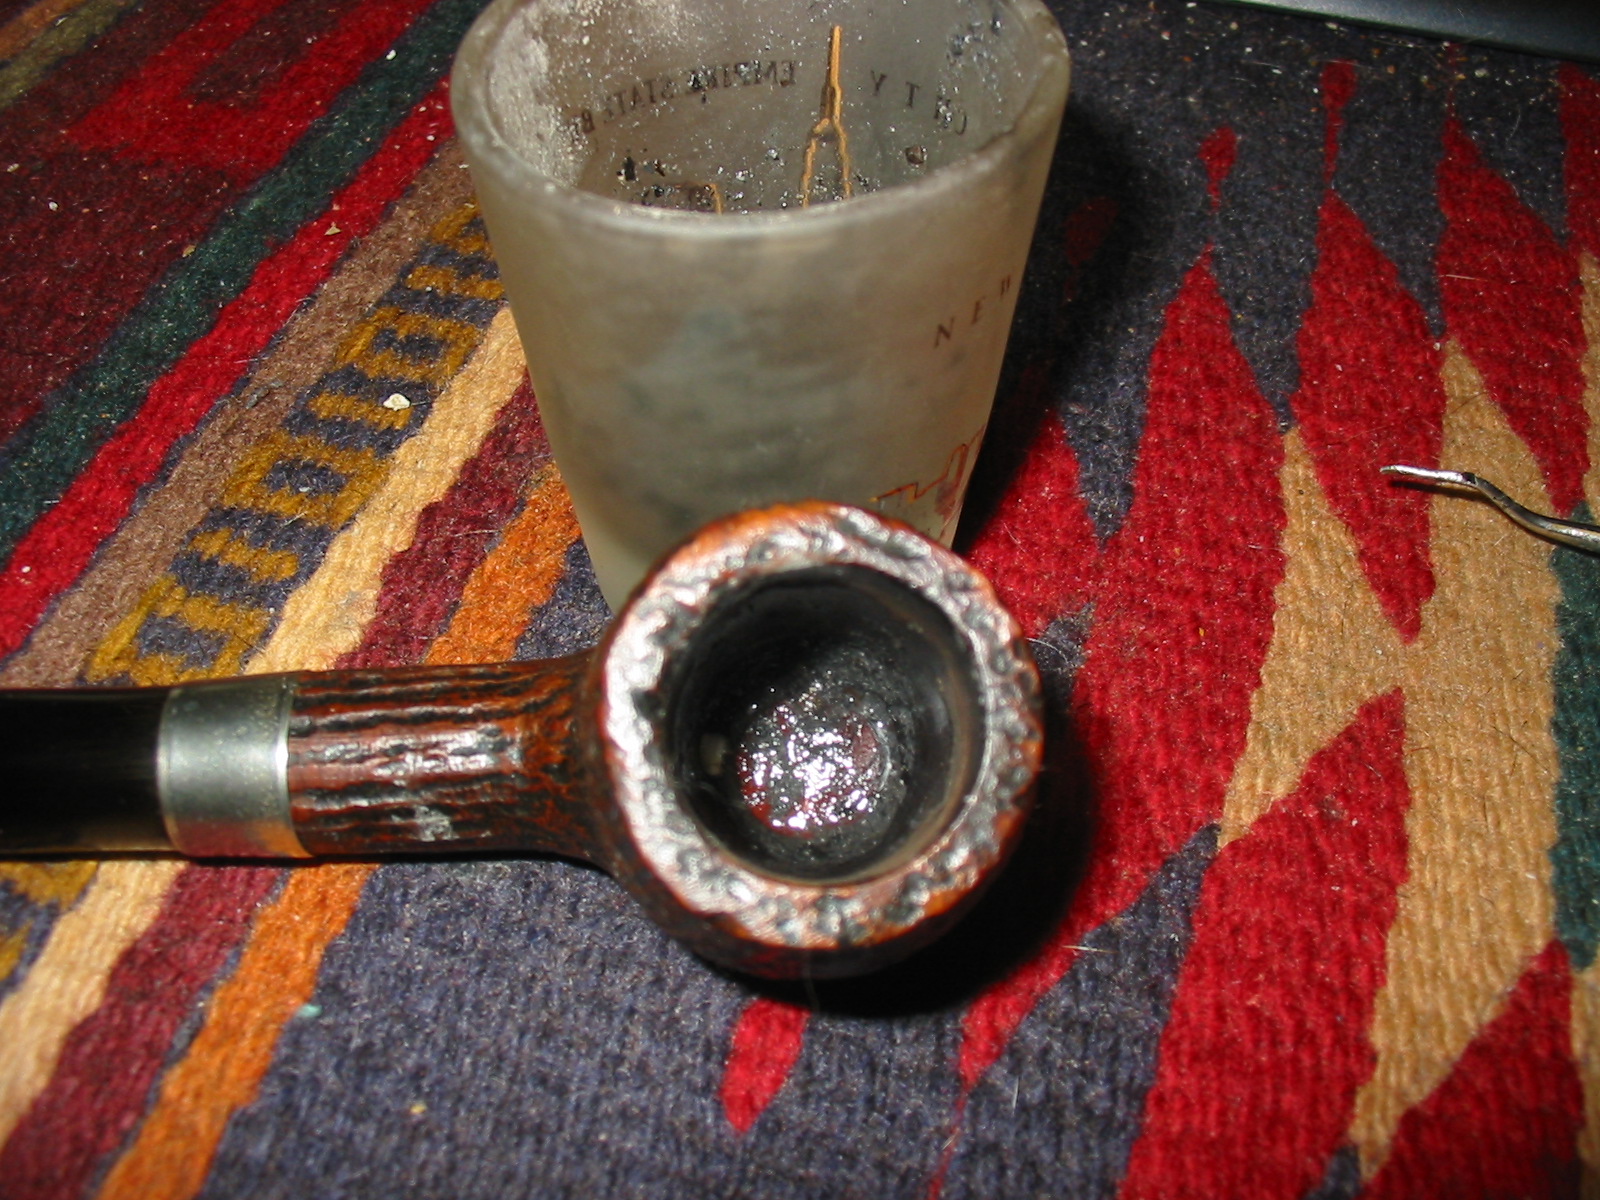
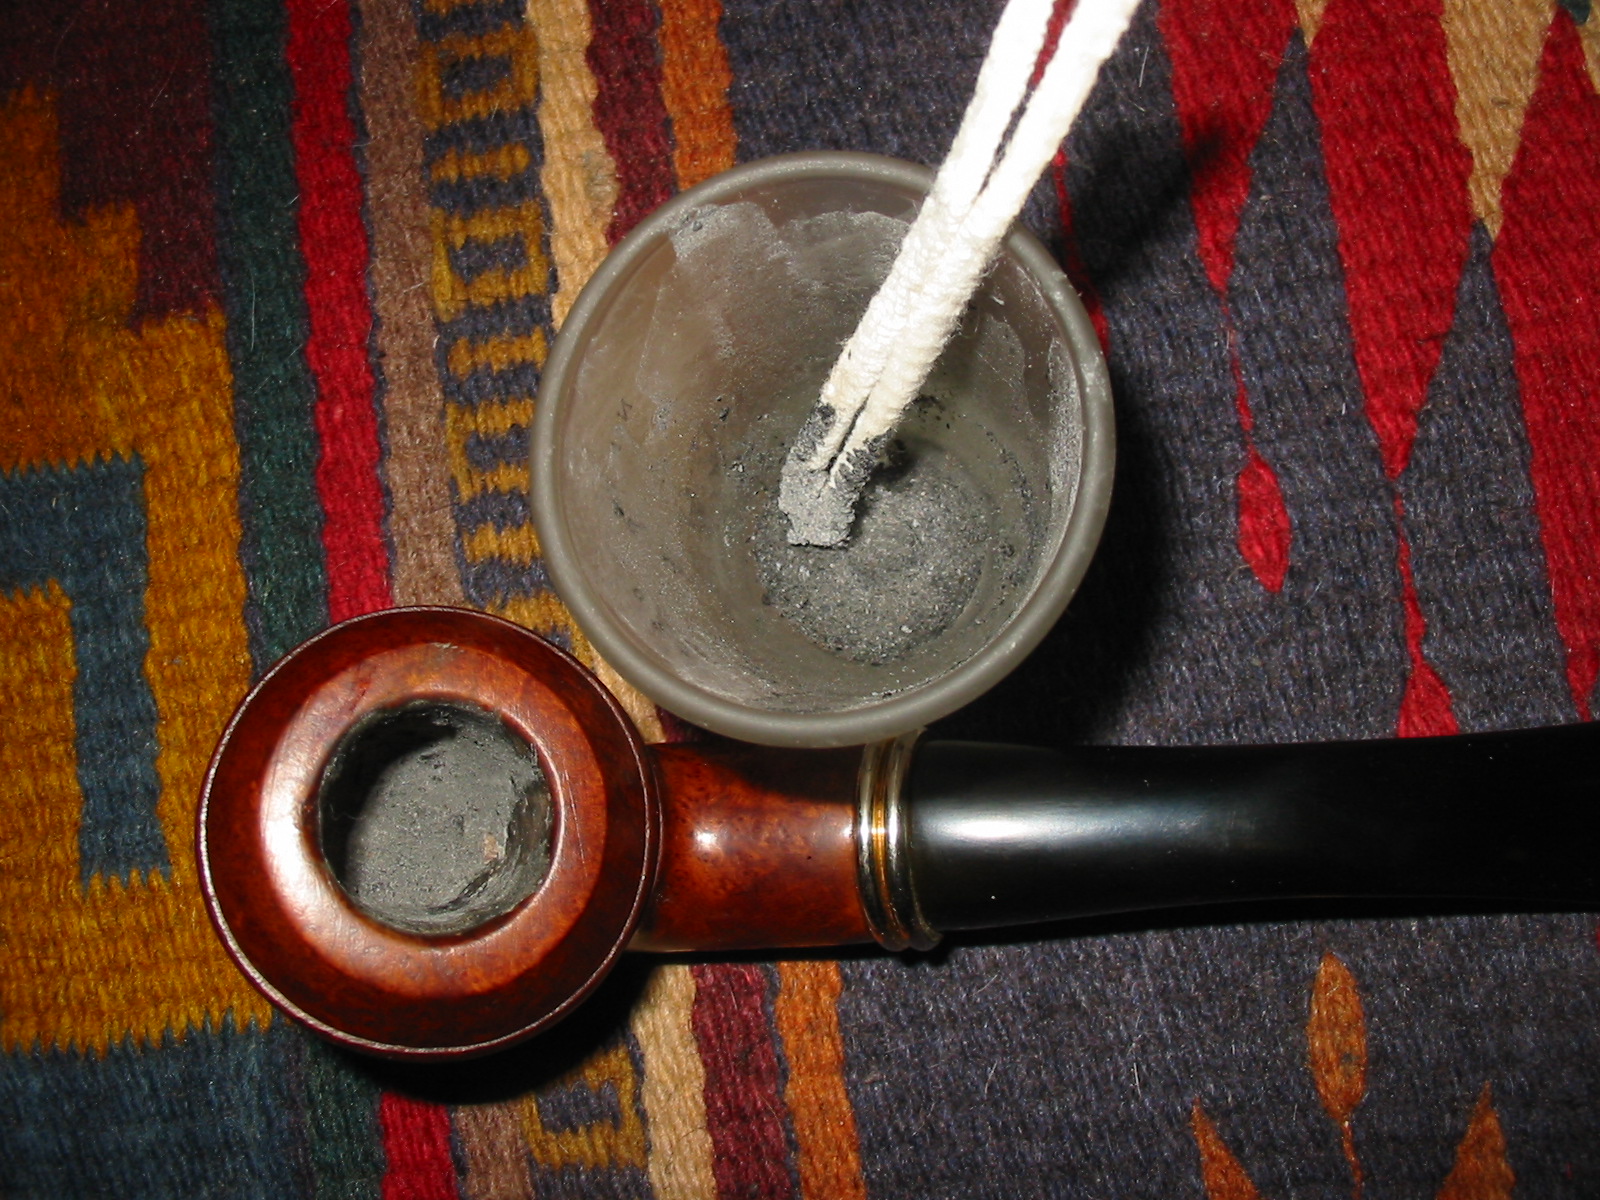
UPDATE: I applied the pipe mud to the bowl last evening. It was a great day to fire up a Cohiba Habana and save the ash to mix. I use a shot glass to collect the ash and add the water with an ear syringe. Once the mix is the right consistency I apply it with a folded pipe cleaner. I apply it and let it set and then follow up with a second or third coat as necessary.
IMG_5172

For this particular pipe mud application I built up the right side of the bowl toward the bottom to compensate for the angular drilling of the bowl. I was able to smooth out the wall and that side is as straight as possible.
IMG_5173

Repairing a Burned Through Bowl


Blog by Steve Laug

There are many times I take on the challenge of repairing a pipe totally for the learning experience. When I begin working on it there is nothing of redeeming value in the pipe itself. It is not beautiful or worthy of keeping. Rather it provides a unique learning opportunity for me to work on a skill in my refurbishing hobby. The pipe below is exactly that kind of pipe. Mark Domigues sent it to me along with other bowls when I was working on the shank repair on his old Peterson pipe. It is a no name pipe with a rustication pattern that I did find particularly attractive. In fact I put off working on it as it just did not appeal to me. I can’t tell you how many times I picked the bowl up and carried it to the recycle bin (a bin I used for briar parts) and then carried it back to the “to be refurbished” box.
pipemud1

pipemud2

pipemud3

Finally, Monday the challenge called me. I took the bowl out of my box and looked it over. As I looked at it, the shape kind of grew on me. It is a brandy glass shape and the shank actually has a flare to it as well. The rustication is a bit striated but as I cleaned up the exterior it is a lot like tree bark. The stain is a contrast stain – a black undercoat in the grooves and a brown top coat. It was worn but could be salvaged. The shank stem junction was also worn but a band would clean up that part of the pipe. The interior bowl sides were clean and solid. The rim was in good shape. But the glaring problem is visible in the photo below – a large, ½ inch diameter burnout on the flat bottom of the pipe. The surrounding briar was solid. The burnout was very focused. The burn did not extend into the rest of the bottom of the pipe. In fact the wood around the edges of the hole was clean and solid. There was none of the darkening around edges of the burnout or on the bottom of the bowl. It looked like it might be a great candidate for practicing a repair. I have done one other repair on a burn out which involved inserting a briar plug and this looked like it was another candidate for that repair. The difference in this one was the solidness of the briar around the hole.
pipemud4

As I worked up the chutzpah to tackle this repair I decided to work on the shank. I sanded the shank smooth in preparation for the band. I like to have a smooth surface under the band rather than a rusticated pattern. I find it gives a good smooth fit to the band. I sanded out the rustication to the width of a nickel band. Once it was sanded smooth, I heated a band over a heat gun and then pressed it into place. I liked the finished look of the band.
pipemud5

pipemud6

pipemud7

pipemud8

pipemud9

pipemud10

I am sure that you can tell at this point that I am procrastinating in addressing the main issue of the bowl with all of the other random work on the pipe but that went on a little longer. I found a stem in my stem box that fit the shank quite well. The mortise had originally had a screw in fitment so it was threaded. The threads were well worn so I decided to use a regular style push stem. I sanded the tenon to get a good tight fit on the stem and then sanded the stem to get a good fit against the shank and band. The slight bend in the stem looked good but it was a bit crooked so I would address that issue later. The finished look of the stem and band with the bowl was quite nice…maybe there was something redeemable about the bowl after all.
pipemud11

pipemud12

I have a few pieces of scrap briar that I have scavenged from pipe maker friends that I had put away for this kind of repair. So I found one that had enough briar left that I could carve it into a plug for the bottom of the bowl. I trimmed it with a hack saw to reduce the size of the plug.
pipemud13

In the first photo below you can see what the hole looked like after I had cleaned it up with a pick and Everclear. I had also reamed the inside of the bowl to remove all of the cake from the sides and the bottom of the bowl. The second photo shows the hole after I had drilled it out. I used a cordless drill with a ½ inch drill bit to round out the damage area and remove any further damage around the burnout. I chose the ½ inch bit as that was the diameter of the hole at the widest part of the hole.
pipemud14

pipemud15

I shaped the briar plug with a Dremel and sanding drum. The next series of photos show the progress of the shaping. I took the rough briar from a wedge to a circular plug and then shortened it to a round plug. I shaped a cap on the plug to the inner diameter of the bowl. Also originally I envisioned pushing the plug through from the inside of the bowl and then cutting off the portion that extended beyond the bottom of the bowl. I would then redrill the airway to finish the repair.
pipemud16

pipemud17

pipemud18

pipemud19

I continued to reduce the diameter of the plug until it was the same size as the hole in the bowl. The inside bowl bottom was hard to match with the cap of the plug. I continued to shape it until it was cup shaped. It seemed no matter how I shaped it however, it would not fit in the bowl bottom as the burnout was not centered in the bowl bottom. It was toward the front of the bowl bottom. I finally decided to use a different tact. I would forgo inserting it from the inside and go the other direction. I would insert it from the outside in. I measured the thickness of the bowl bottom (which was actually in good shape other than the burned portion). I then shortened the plug until it was relatively flush with the bottom of the airway. I coated the plug with superglue gel which gives me a bit more time before it sets and pushed it into the drilled hole. I pressed it against the table top to get the plug in place solidly.
pipemud20

pipemud21

Once the glue set I sanded away the excess briar with a Dremel to match the surface of the bowl. I was not worried about the rustication as I would duplicate that after I finished working the plug into place. The next two photos show the plug and the bowl surface are smooth and the plug is tightly in place.
pipemud22

pipemud23

The next photo shows the interior of the bowl. The plug is even with the entrance of the airway. There is difference in bowl depth around the left edge. I plan to give the bottom of the bowl a thick coating of pipe mud to both protect the new plug and to even out the slight trough on the left front edge of the plug.
pipemud24

I rusticated the bottom of the bowl with the Dremel to match the tree bark look of the rustication on the bowl (Photo 1 below). I stained it with a dark brown aniline stain and then also gave the bottom of the bowl a second coat with black stain to emulate the effect of the stain coat on the rest of the bowl (Photos 2 and 3 below).
pipemud25

pipemud26

pipemud27

I stained the rest of the bowl with the dark brown stain to freshen it up and blend in the stain on the bottom of the bowl. I buffed it with red Tripoli and White Diamond to raise a shine and then gave it several coats of carnauba wax on the buffer. The finished exterior is visible in the first close up below and the following four photos of the pipe.
pipemud28

pipemud29

pipemud30

pipemud31

pipemud32

With the repair finished on the exterior of the pipe I worked on the stem. I sanded it with 220 grit sandpaper and then with a medium grit sanding sponge to clean up the oxidation and scratches on the vulcanite. I heated the stem with a heat gun to straighten it and then rebent it over a rolling-pin to give it a slight bend. I set the bend under cool water and then gave the stem a quick buff with Tripoli before taking it back to the work table to further sand the stem.
pipemud33

pipemud34

I continued to sand the stem with micromesh sanding pads from 1500-12,000 grit to bring a shine to the vulcanite. I wet sanded with 1500-2400 grit pads and dry sanded with 3200-12,000 grit sanding pads. When I finished sanding with the pads I rubbed the stem down with Obsidian Oil and let it dry then buffed it with White Diamond and gave it multiple coats of carnauba wax.
pipemud35

pipemud36

pipemud37

pipemud38

pipemud39

pipemud40

pipemud41

With the externals repaired and finished it was time to make up some pipe mud to coat the bottom of the bowl and give a protective coat over the bowl plug. I sacrificed a nice little Cohiba Cuban cigar for the purpose of making the mud of the ash. When the cigar was finished I had a nice bowl of clean ash.
pipemud42

I mixed the ash with a small amount of water to make a paste. I inserted a pipe cleaner into the airway and then applied it to the bottom of the bowl, tamping it into the crevices around the plug and building up the bowl bottom. As the pipe mud dried I added additional layers of mud to the bottom of the bowl and around the lower sides of the bowl. The next series of three photos show the progressive build up of the mud in the bottom of the bowl.
pipemud43

pipemud44

pipemud45

When the mud had dried to touch I buffed the pipe a final time with White Diamond and then gave the entire pipe several coats of carnauba wax to protect and give it a shine. I then used a clean flannel buff for the final buffing. The restored pipe is pictured below. I will let the pipe mud cure and harden for a few days before loading up the pipe and smoking the inaugural bowl.
pipemud46

pipemud47

pipemud48

pipemud49