Tag Archives: rusticating a bowl and shank

Reworking a Medico Apple – A Save this Pipe Project of My Own!


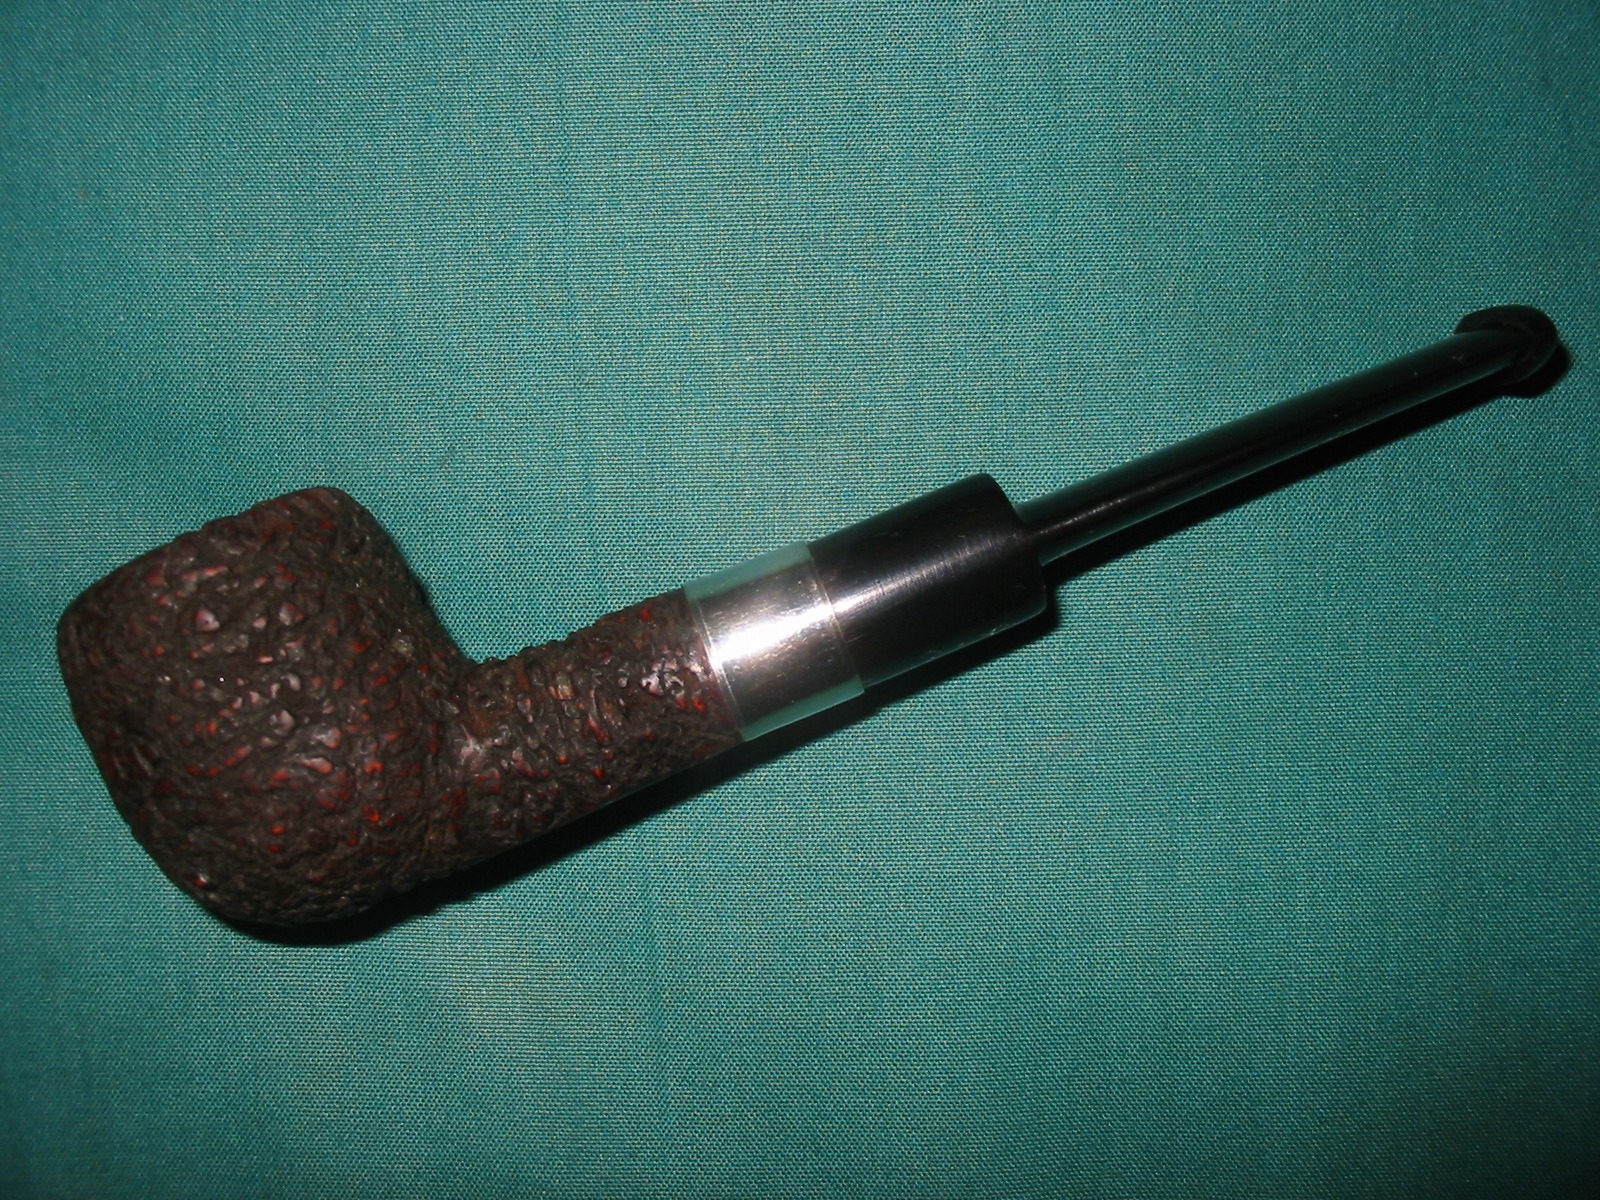
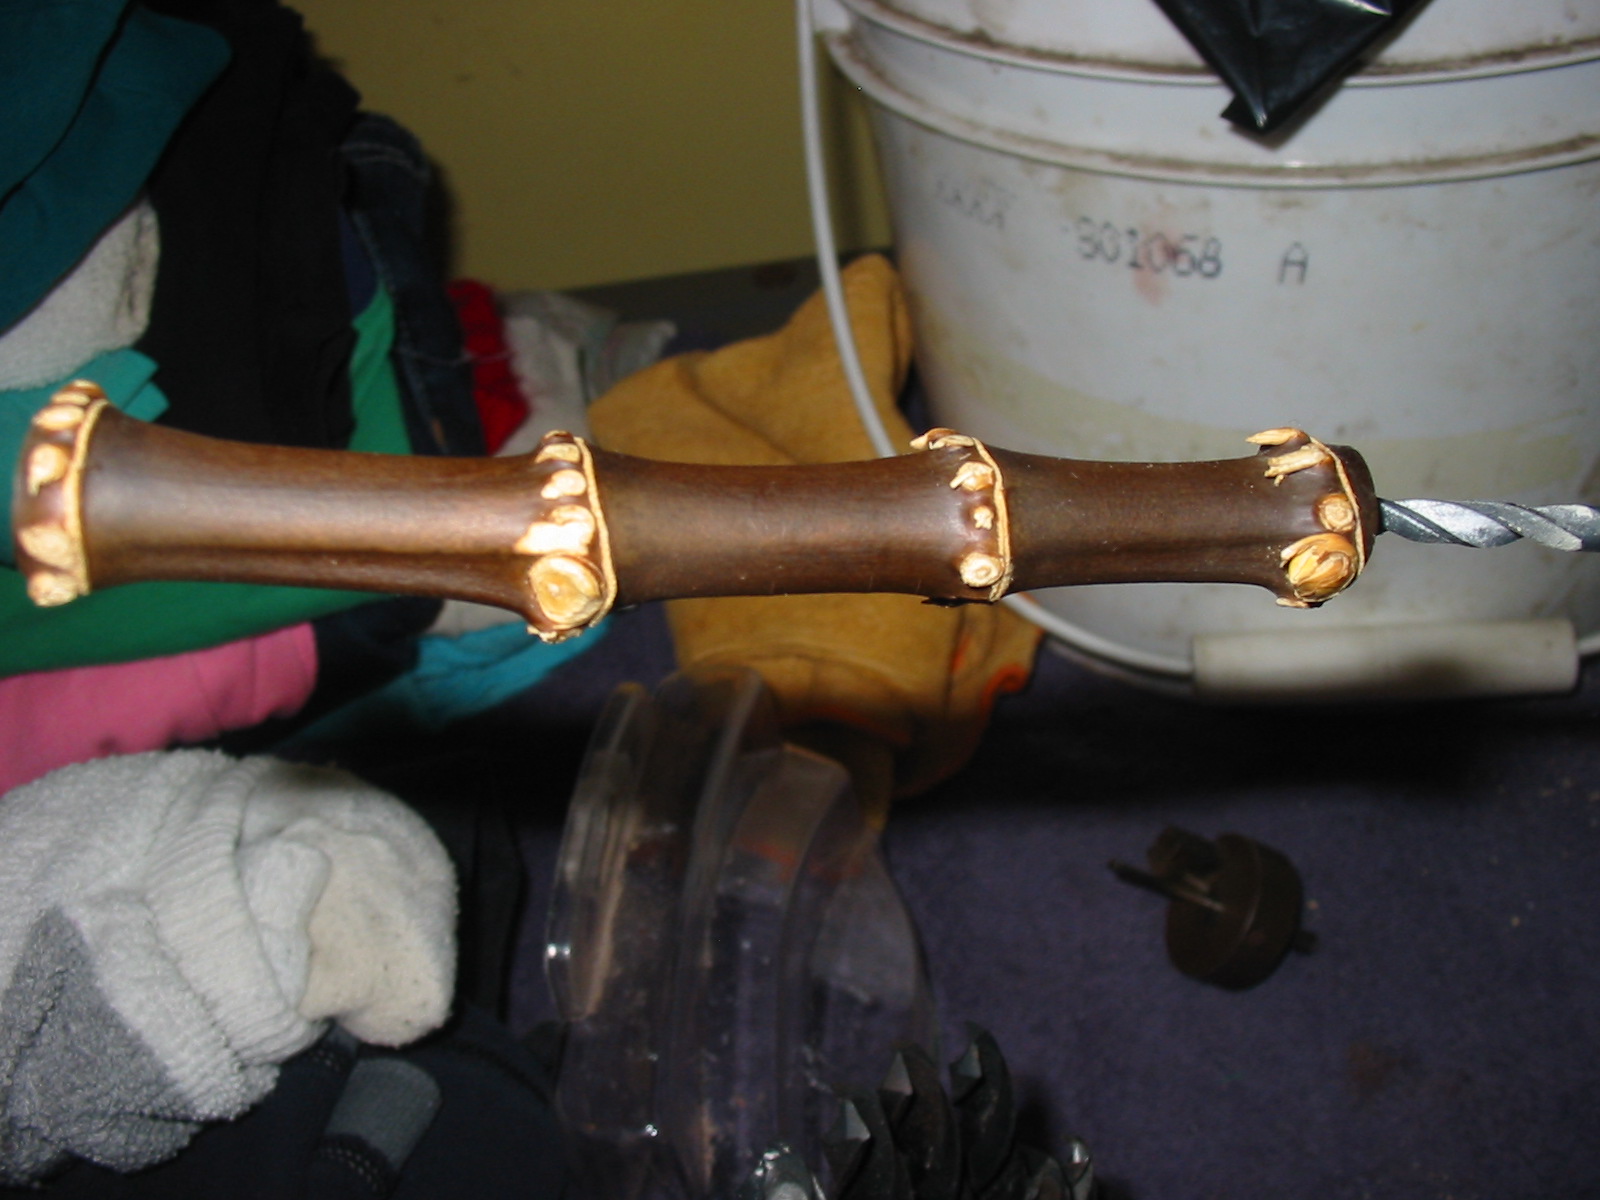
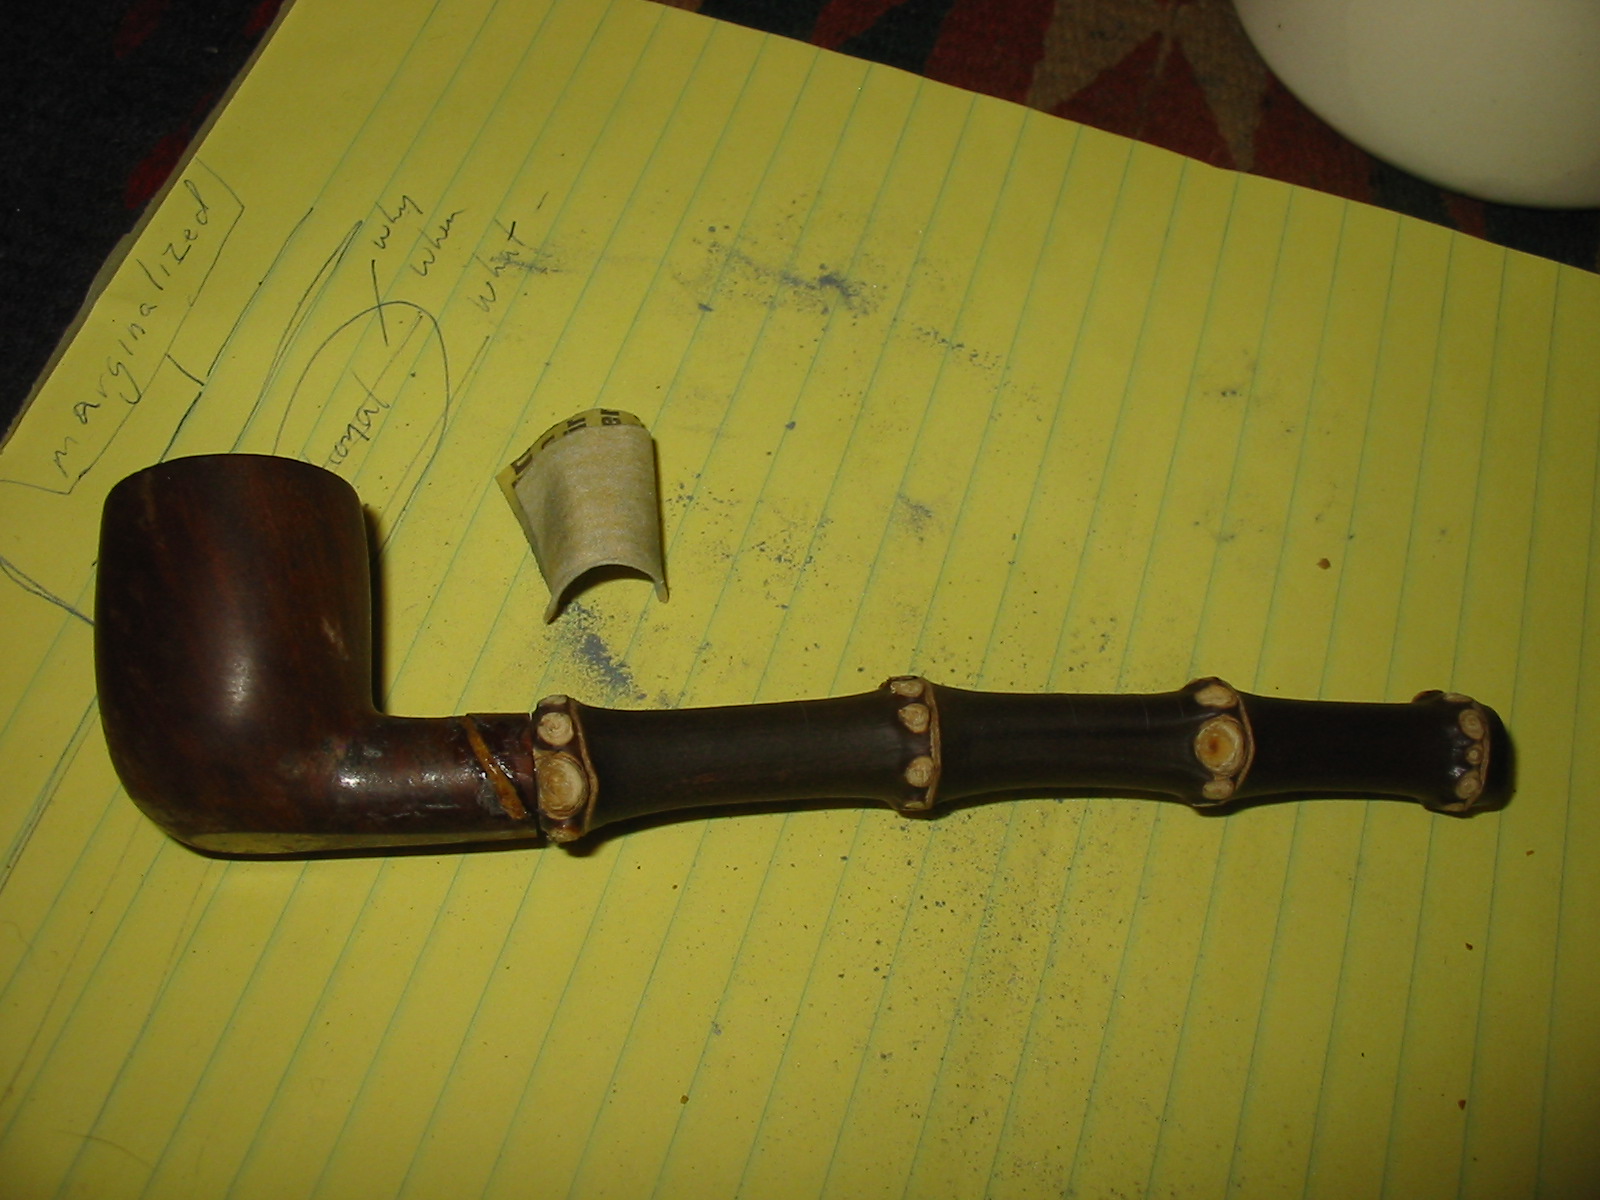
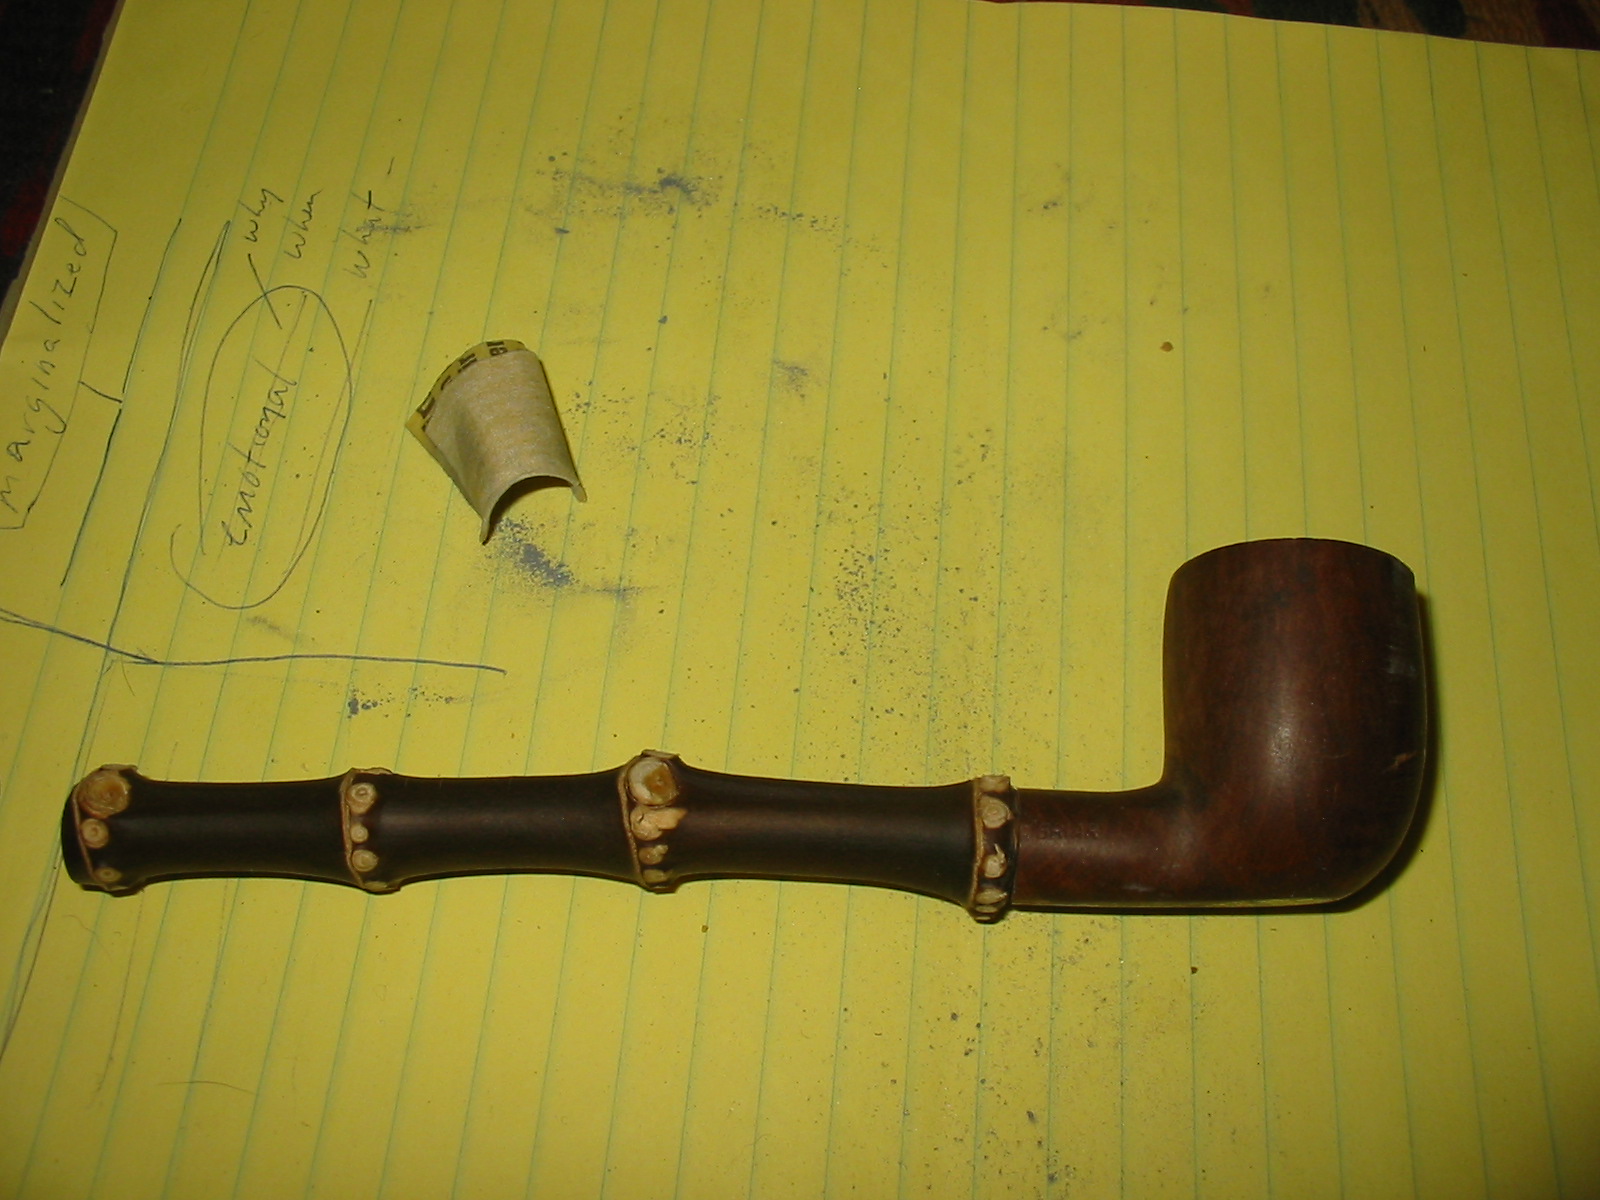
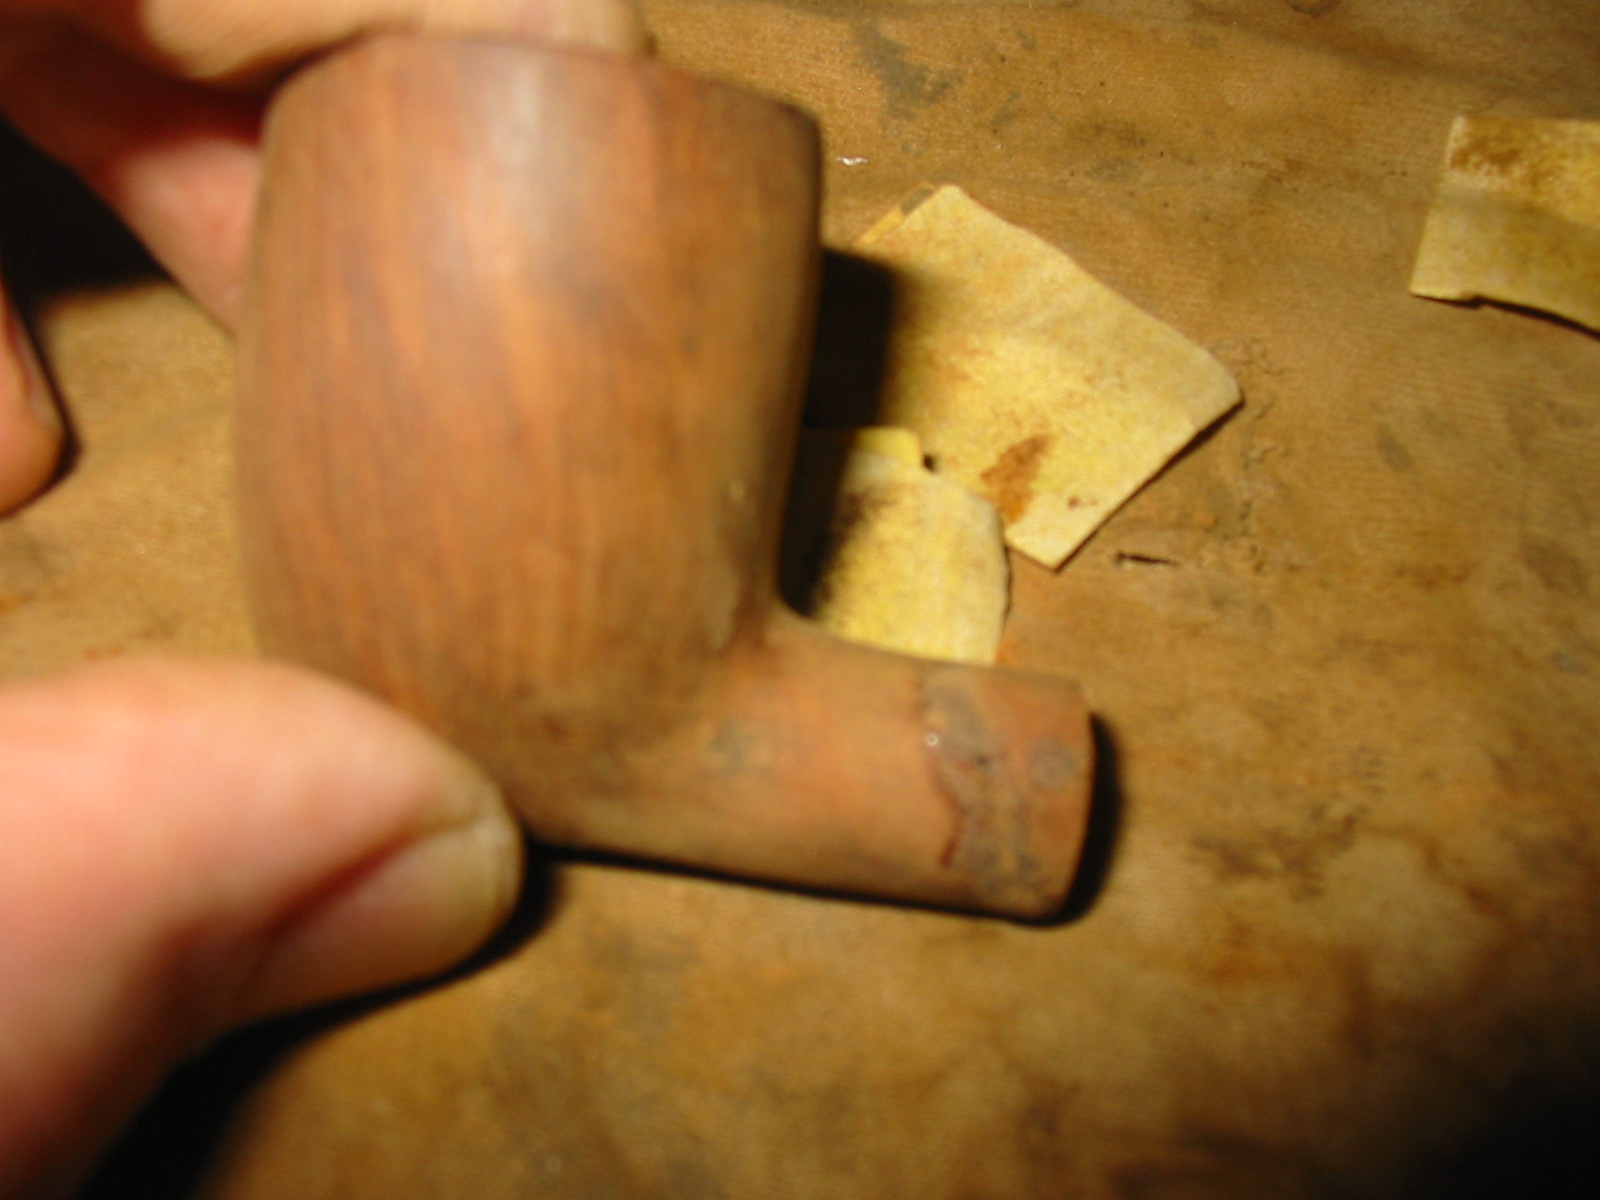
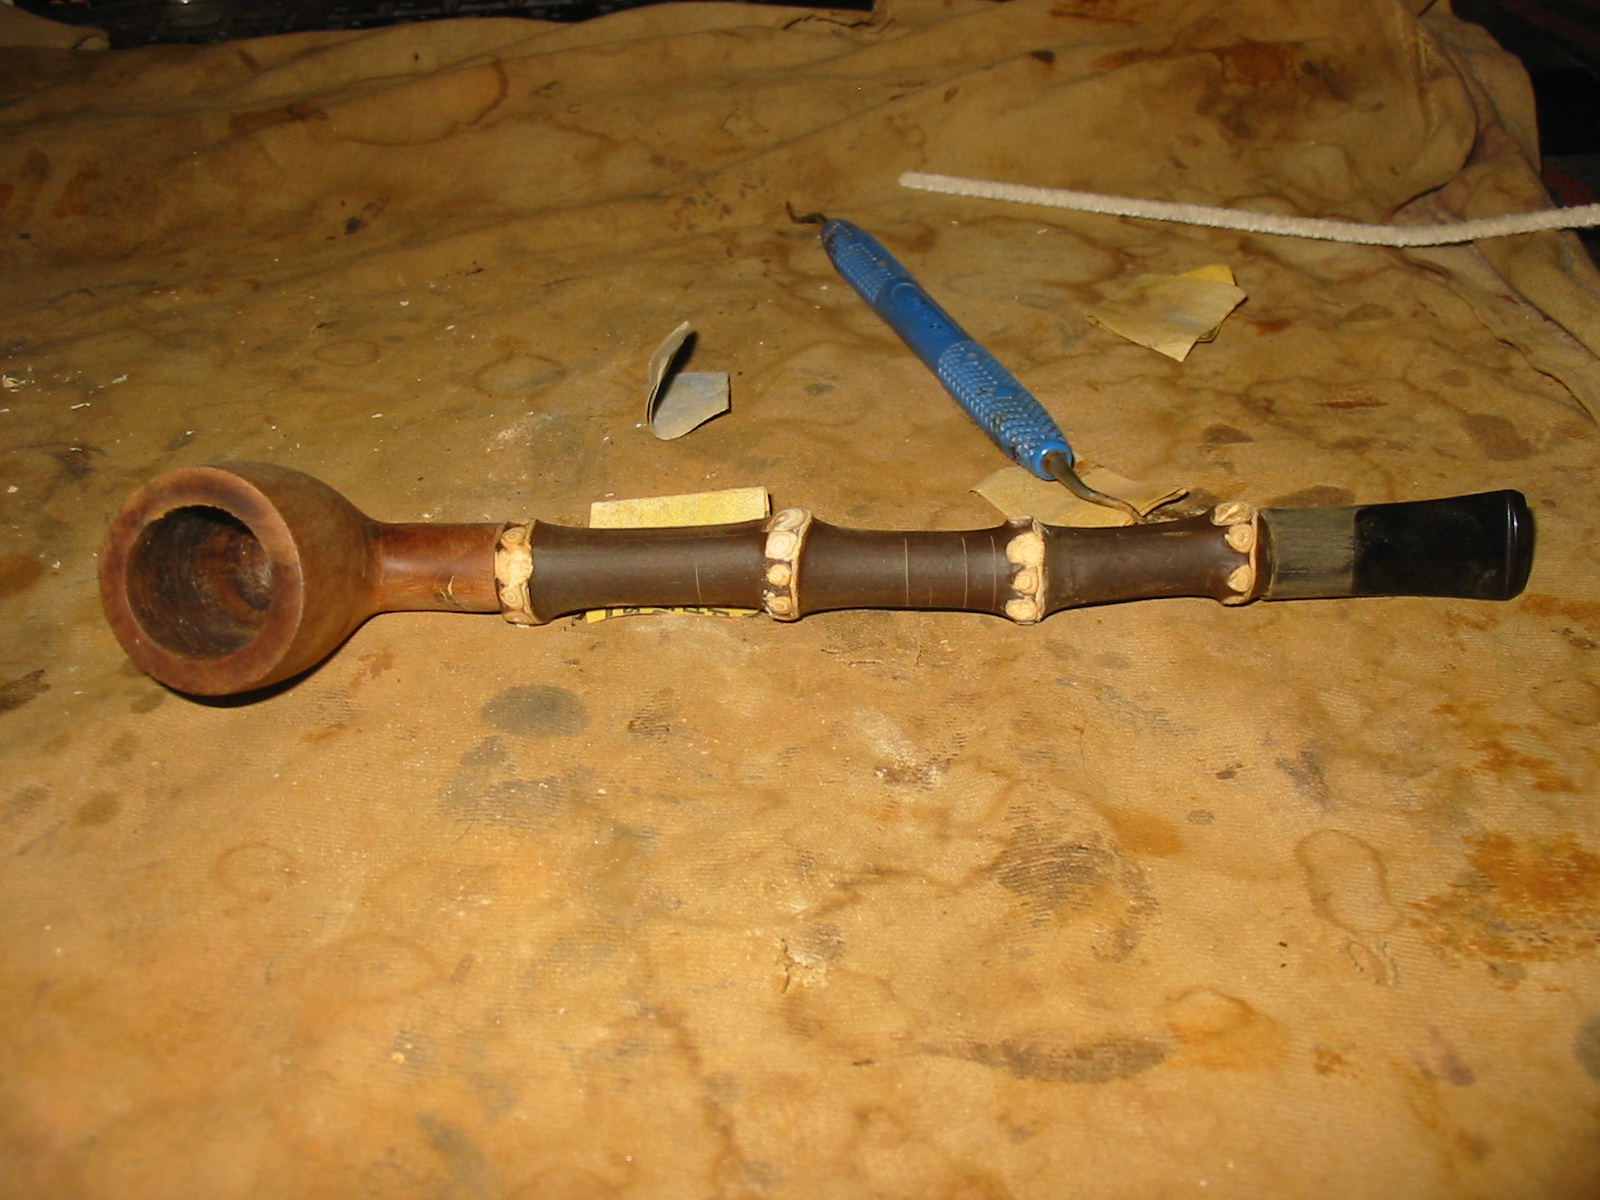
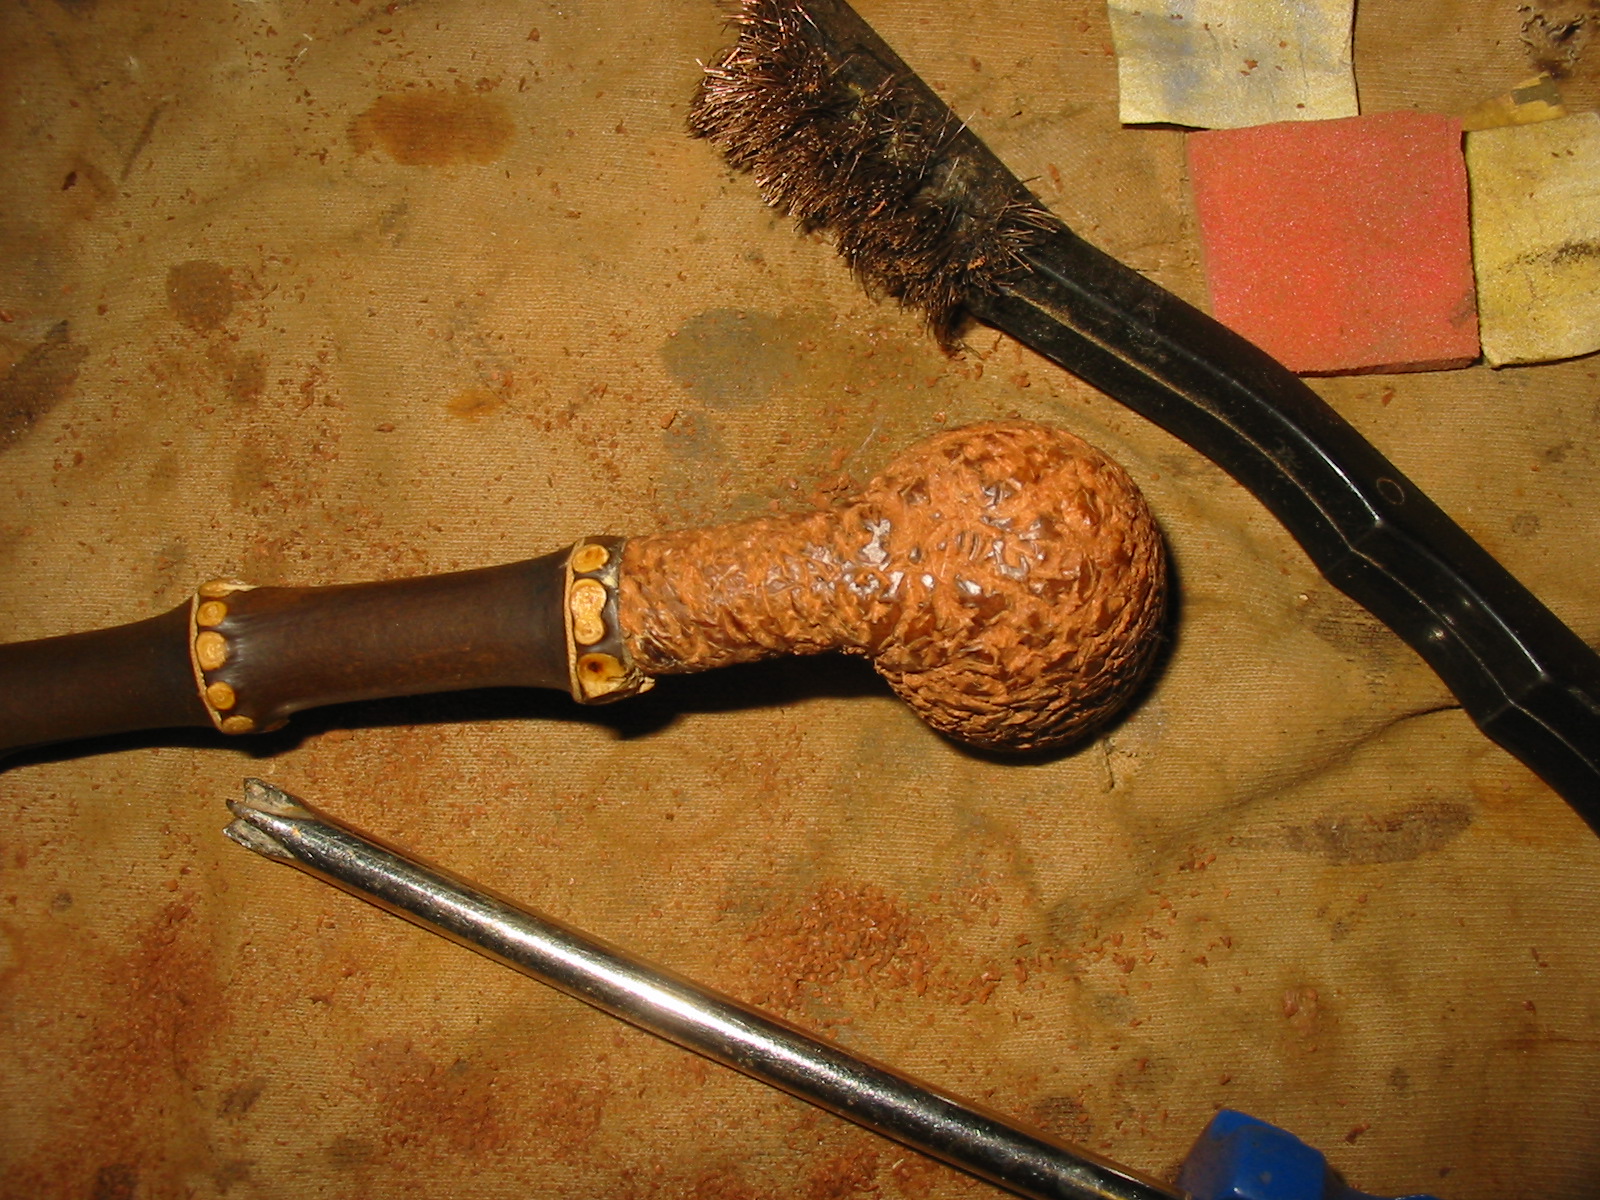
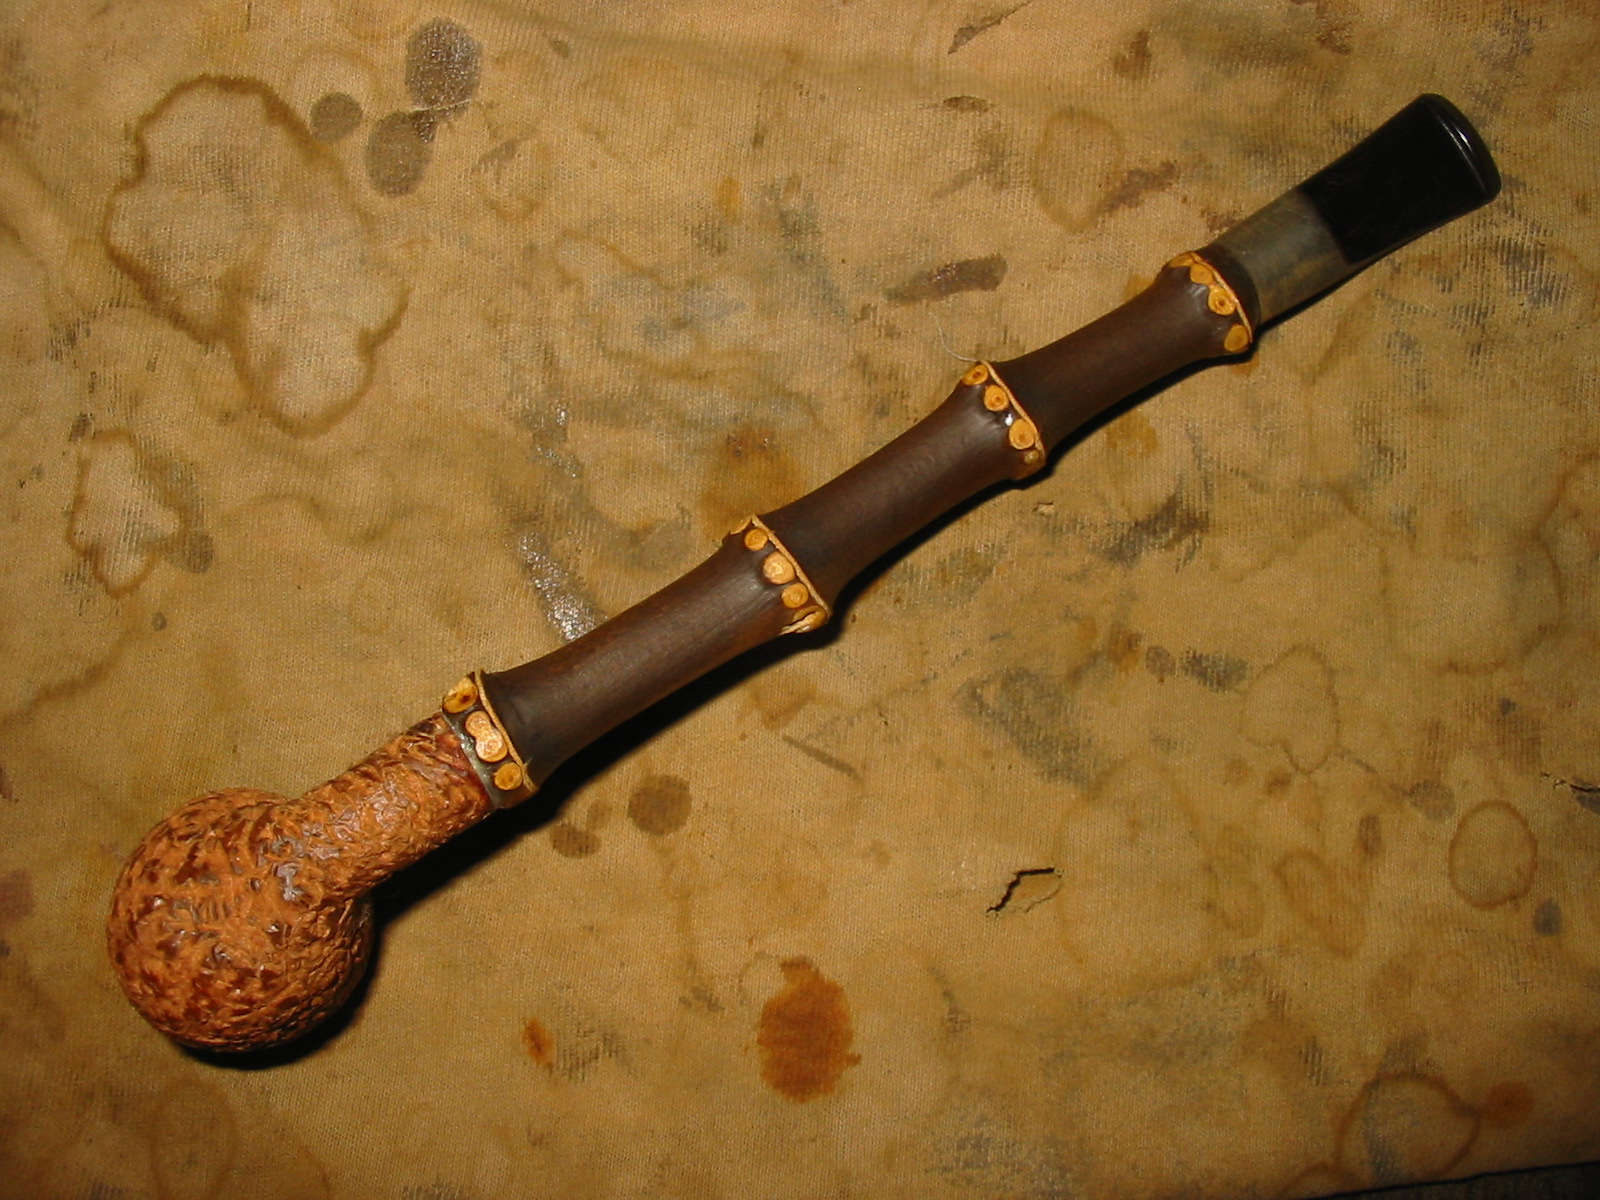
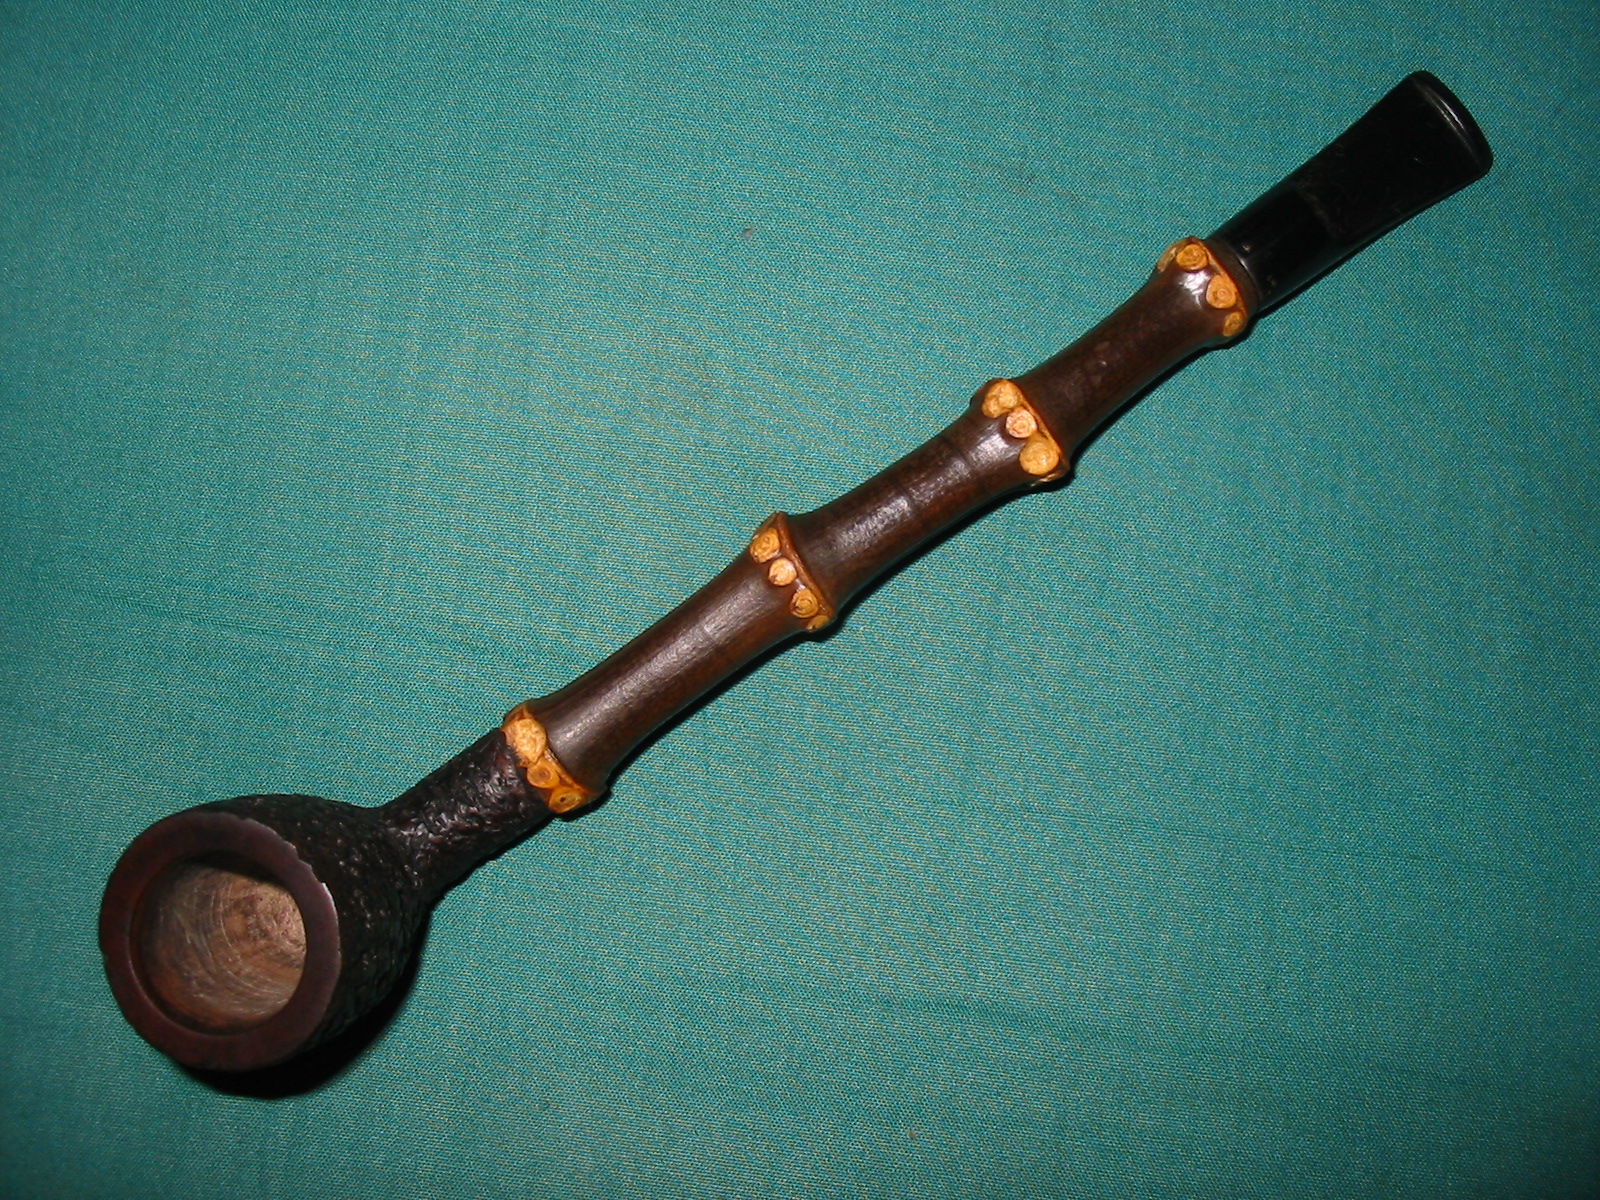
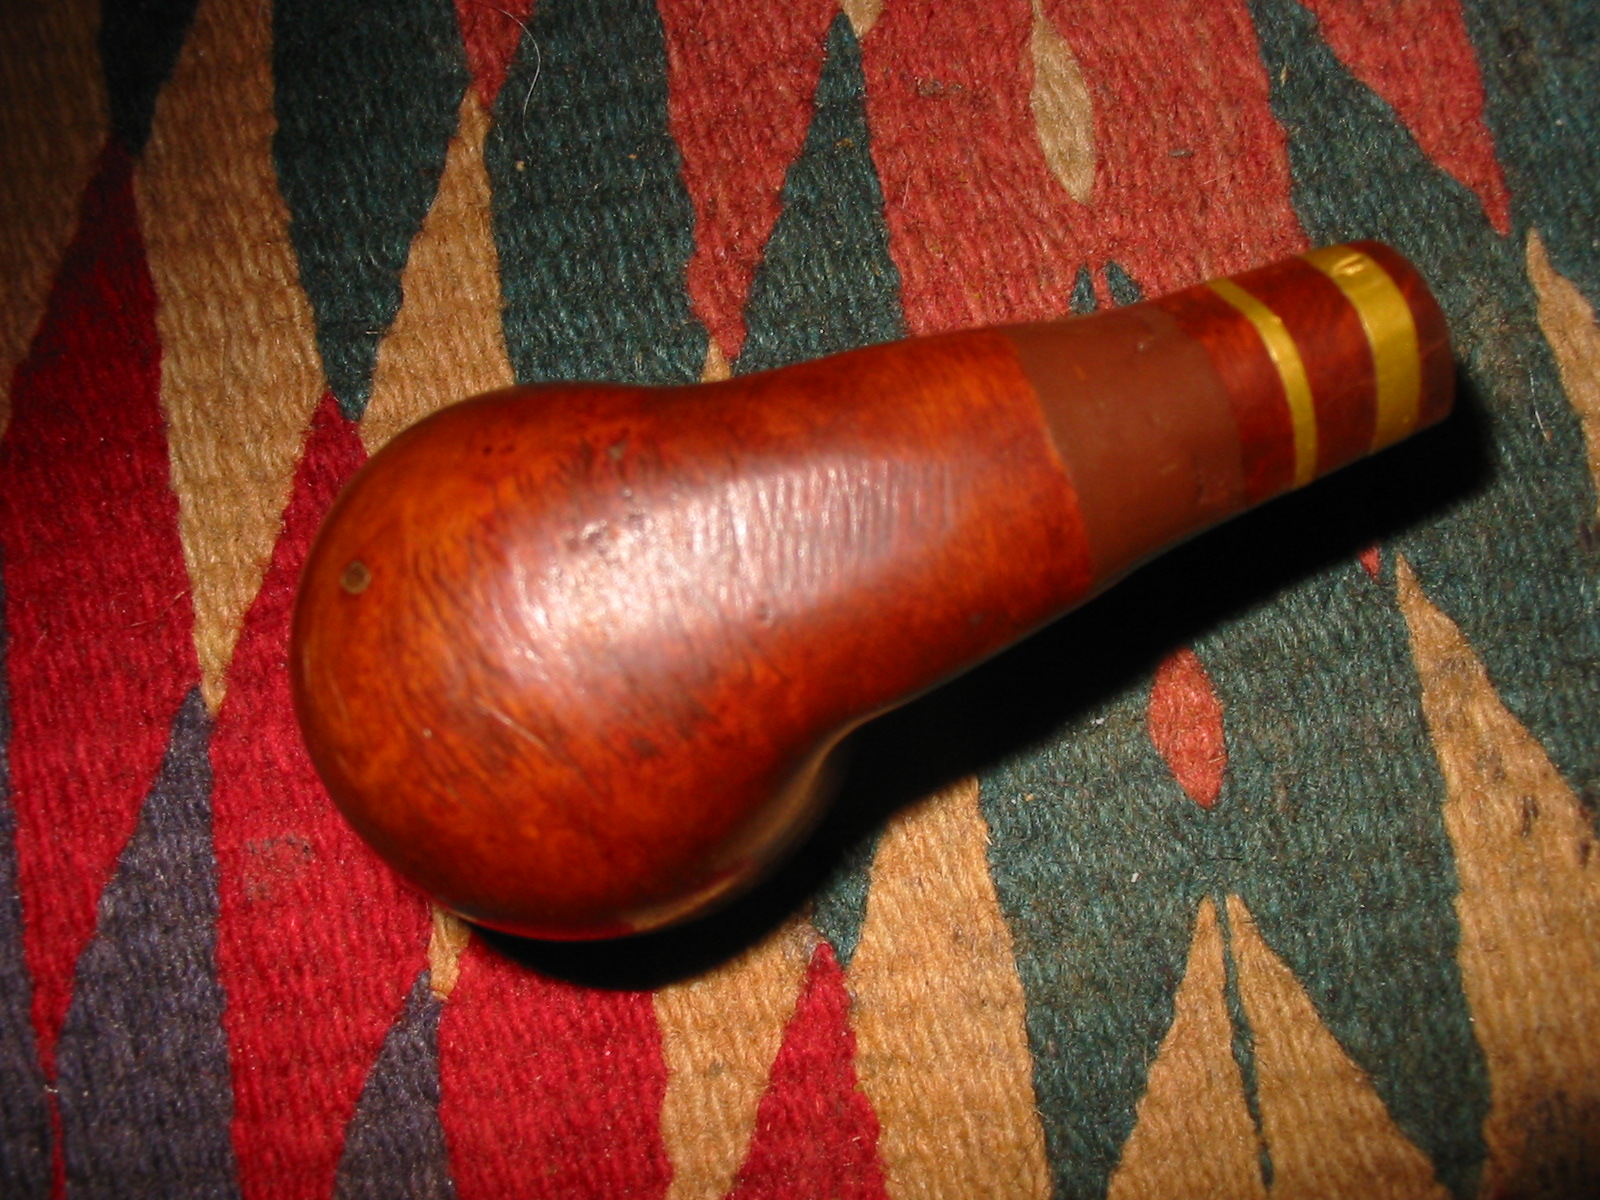
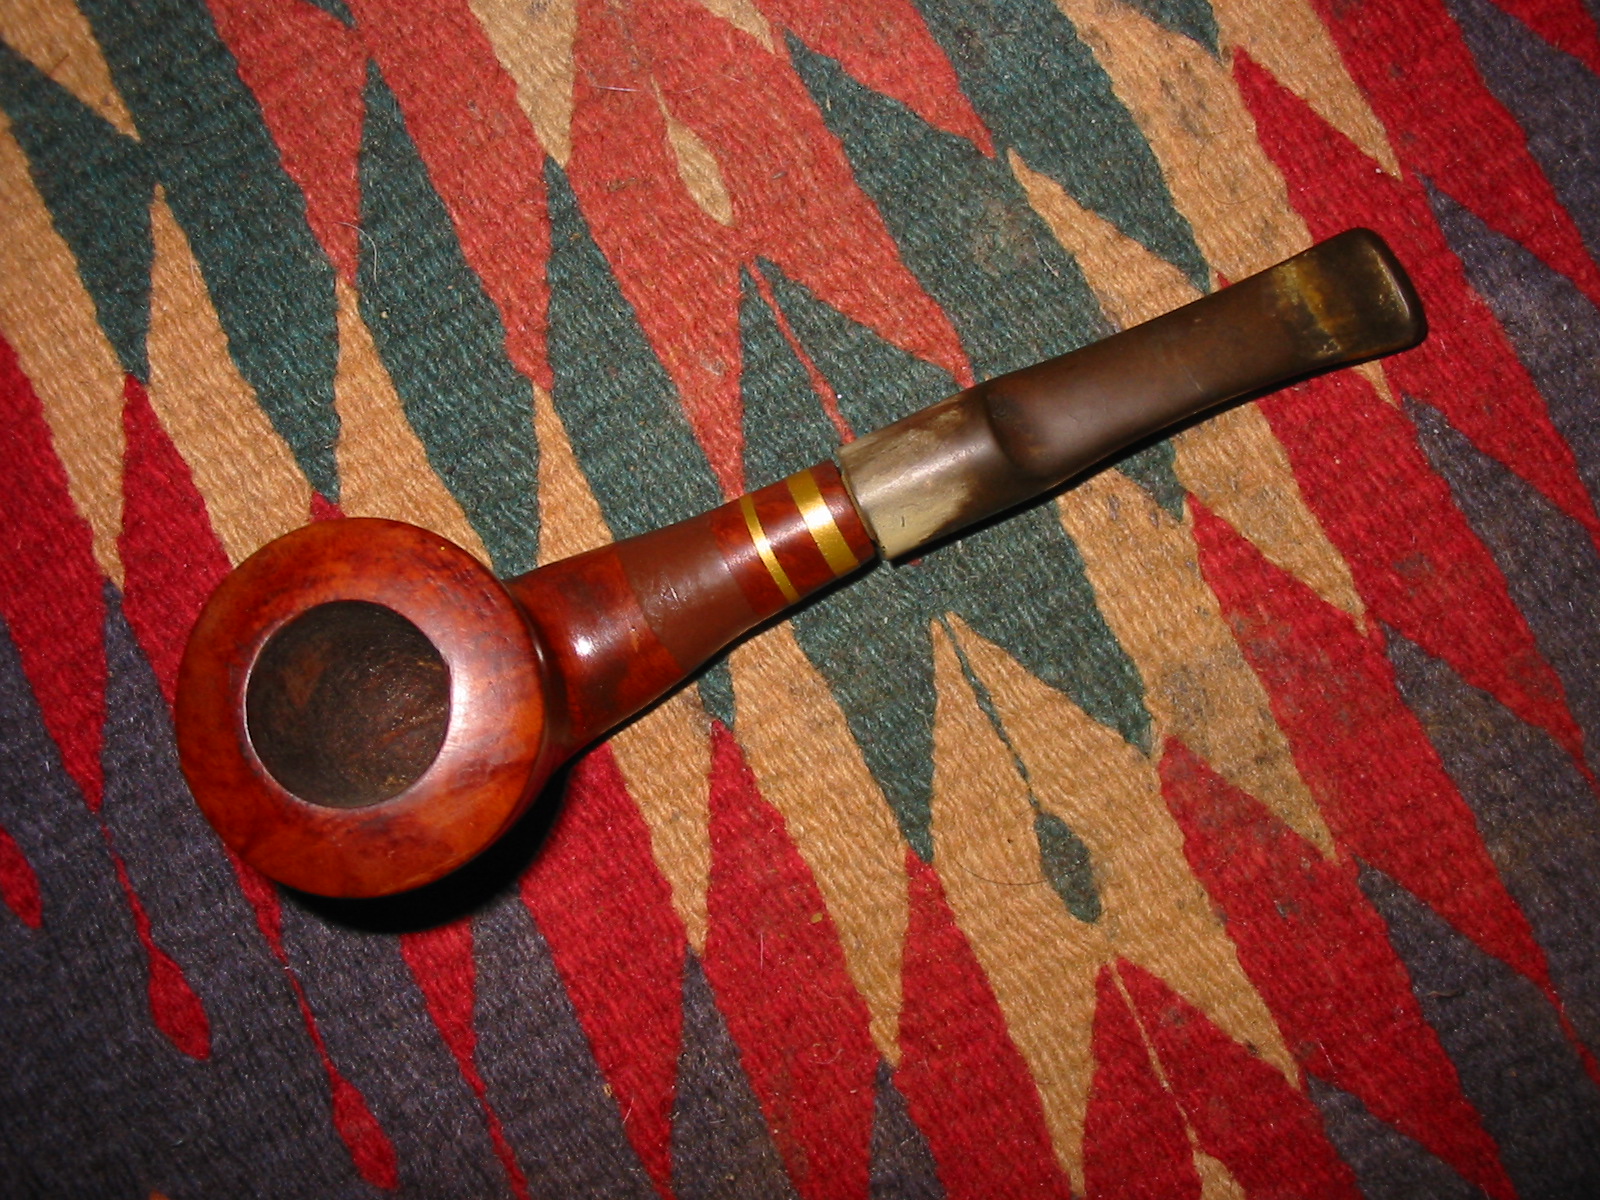
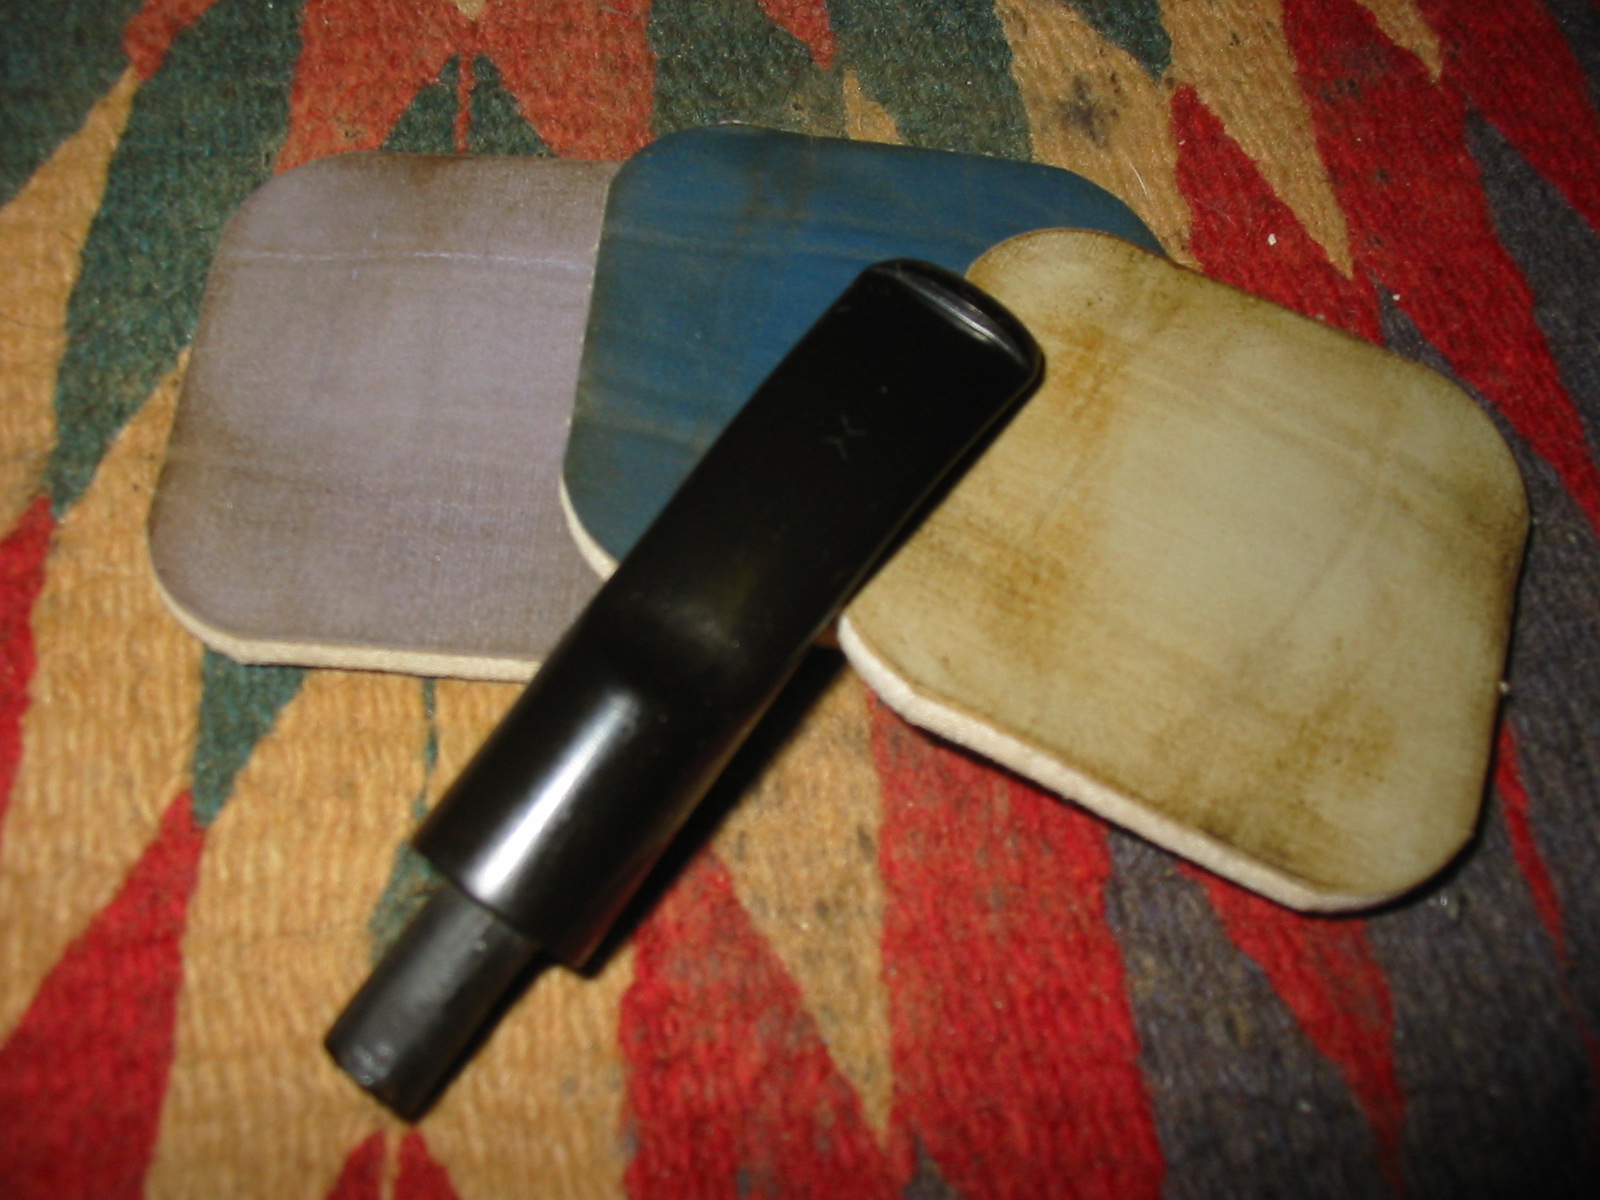
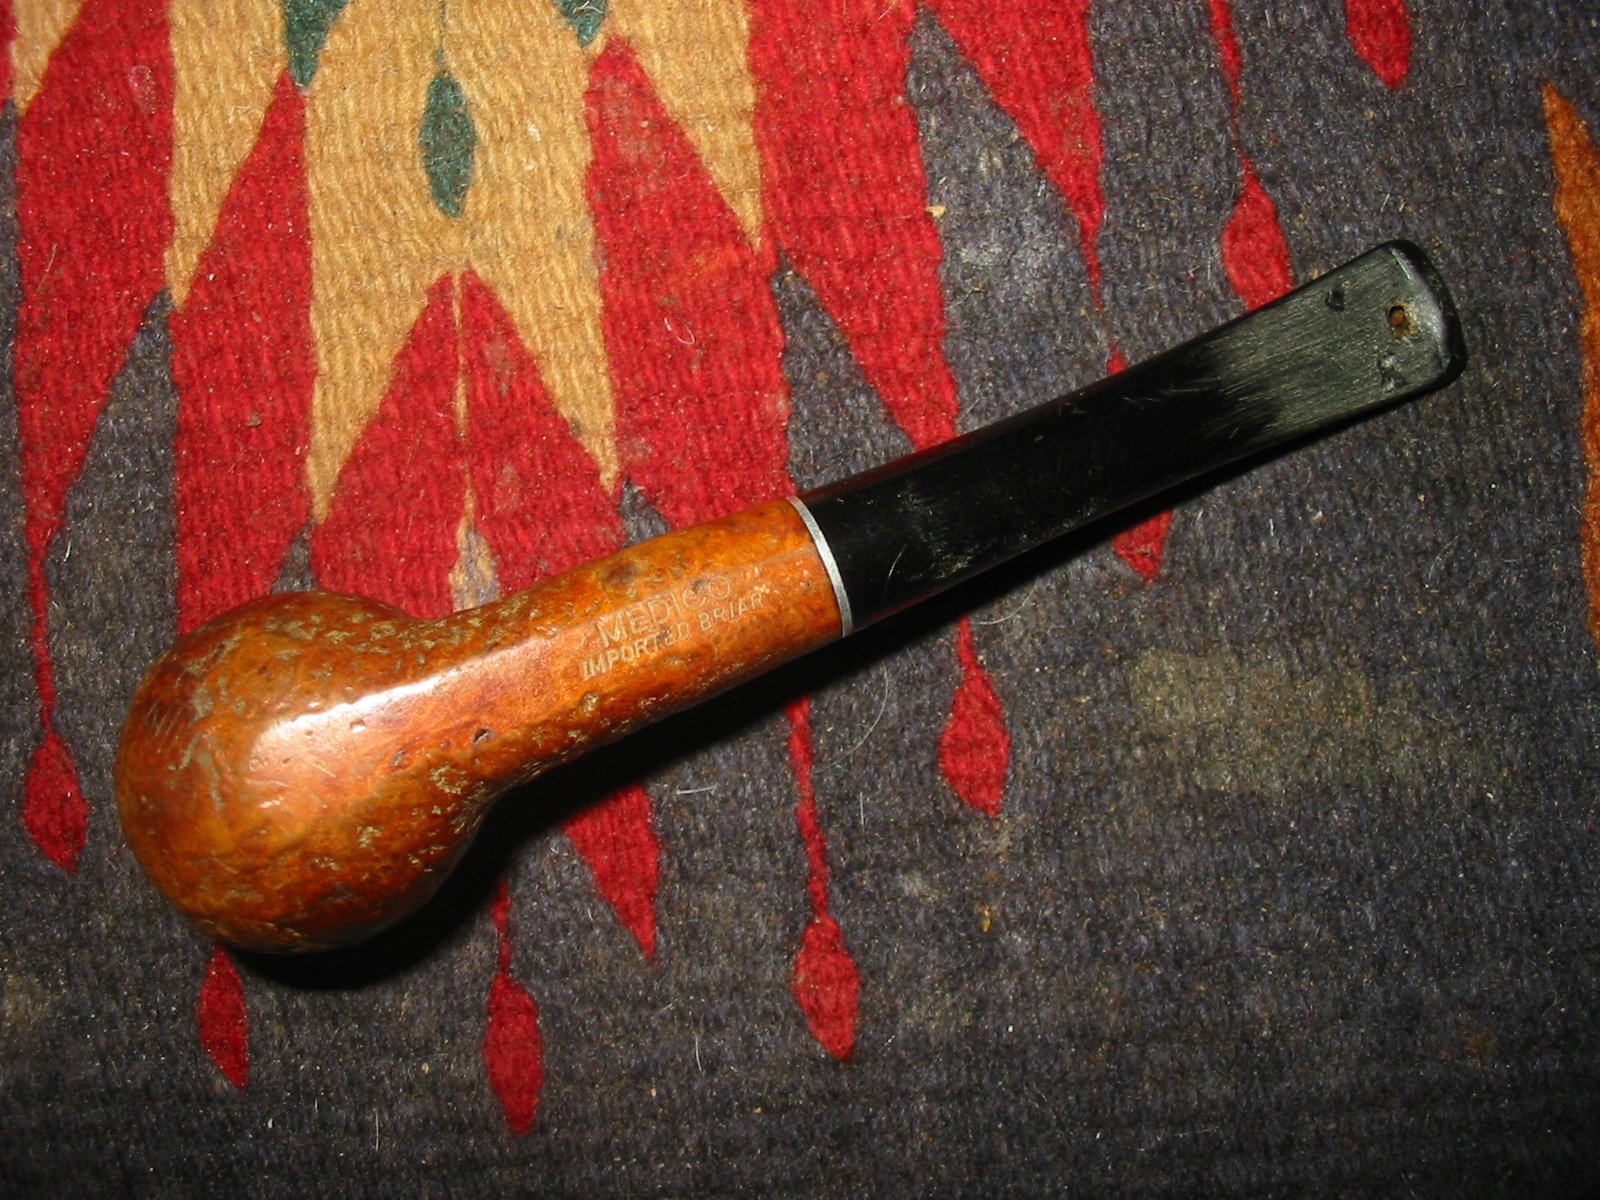
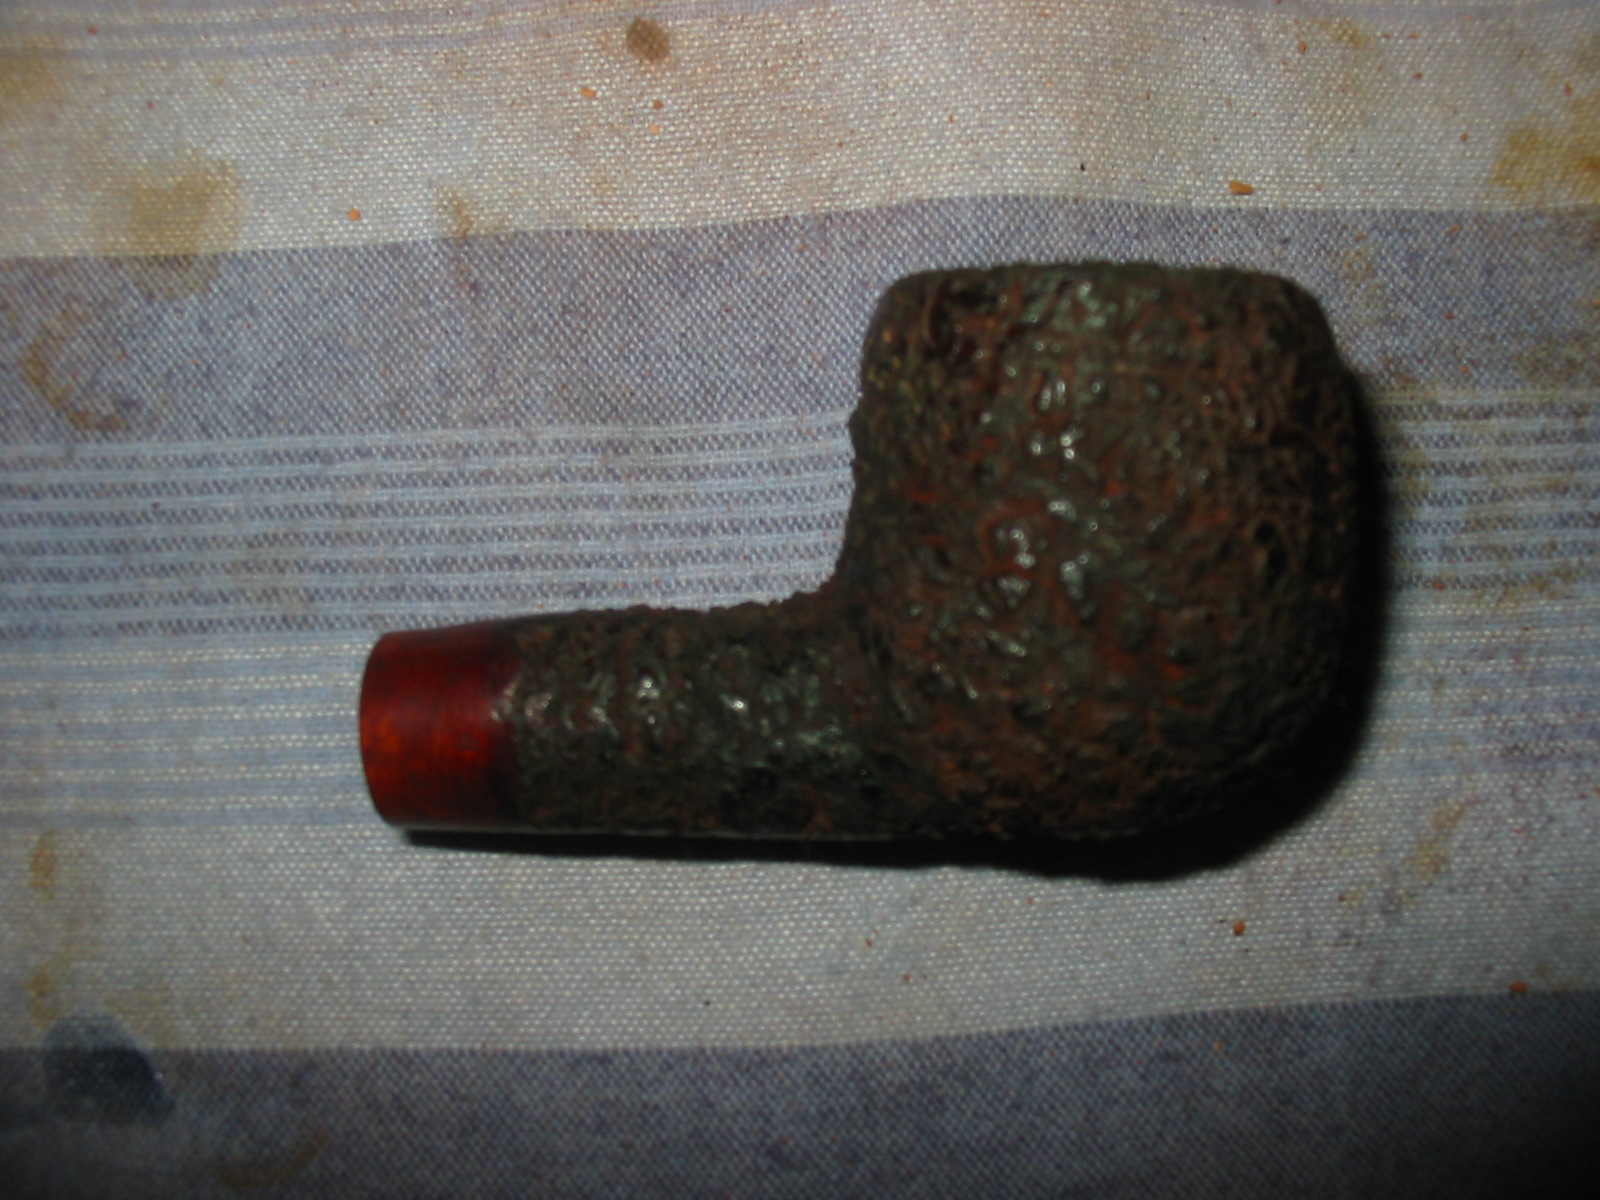
The last pipe in my box of pipes to refurbish was a Medico Apple that was stamped Medico over Imported Briar on the underside of the shank. It was a well-worn sandblast bowl that had dark stain marks on the front and back of the bowl. It appeared to be a dark blue India ink type of staining. The grooves in the blast were worn down almost smooth and what was left was dirty with light brown grime that raised the surface of the grooves smooth. The top of the bowl was damaged and worn from being struck against a surface to empty the bowl. The inside of the bowl was badly caked and crumbling when I received and I cleaned and dumped out the carbon and shreds of tobacco before throwing it in the box. The stem had been bitten through on both the top and the bottom sides next to the button. The nylon stem was in rough shape with many deep tooth dents around the holes. At one point I had taken the stem out thinking I would work on it and sanded down the tooth chatter and some of the lighter marks. I had heated the stem to raise them and gotten quite a few of them out-of-the-way. The holes in the stem left me questioning whether I even wanted to work on this poor worn pipe.
IMG_6980

IMG_6981

IMG_6982

IMG_6983
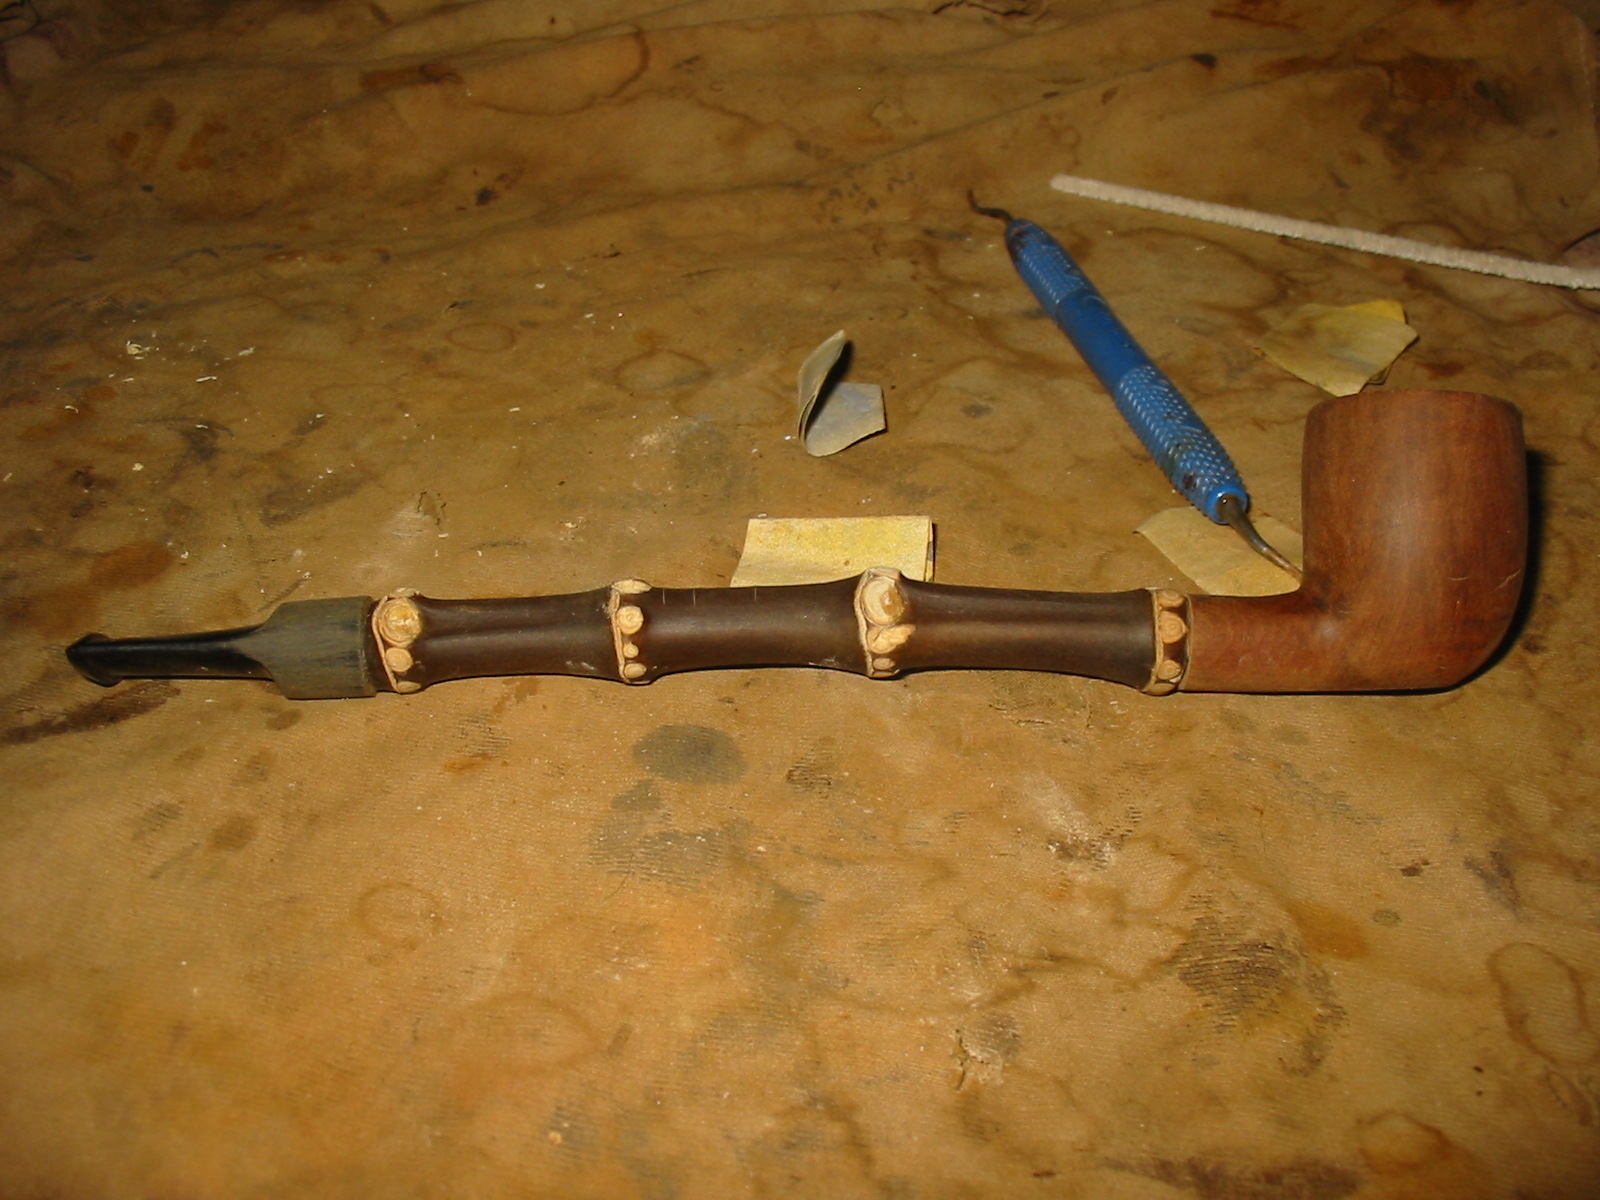
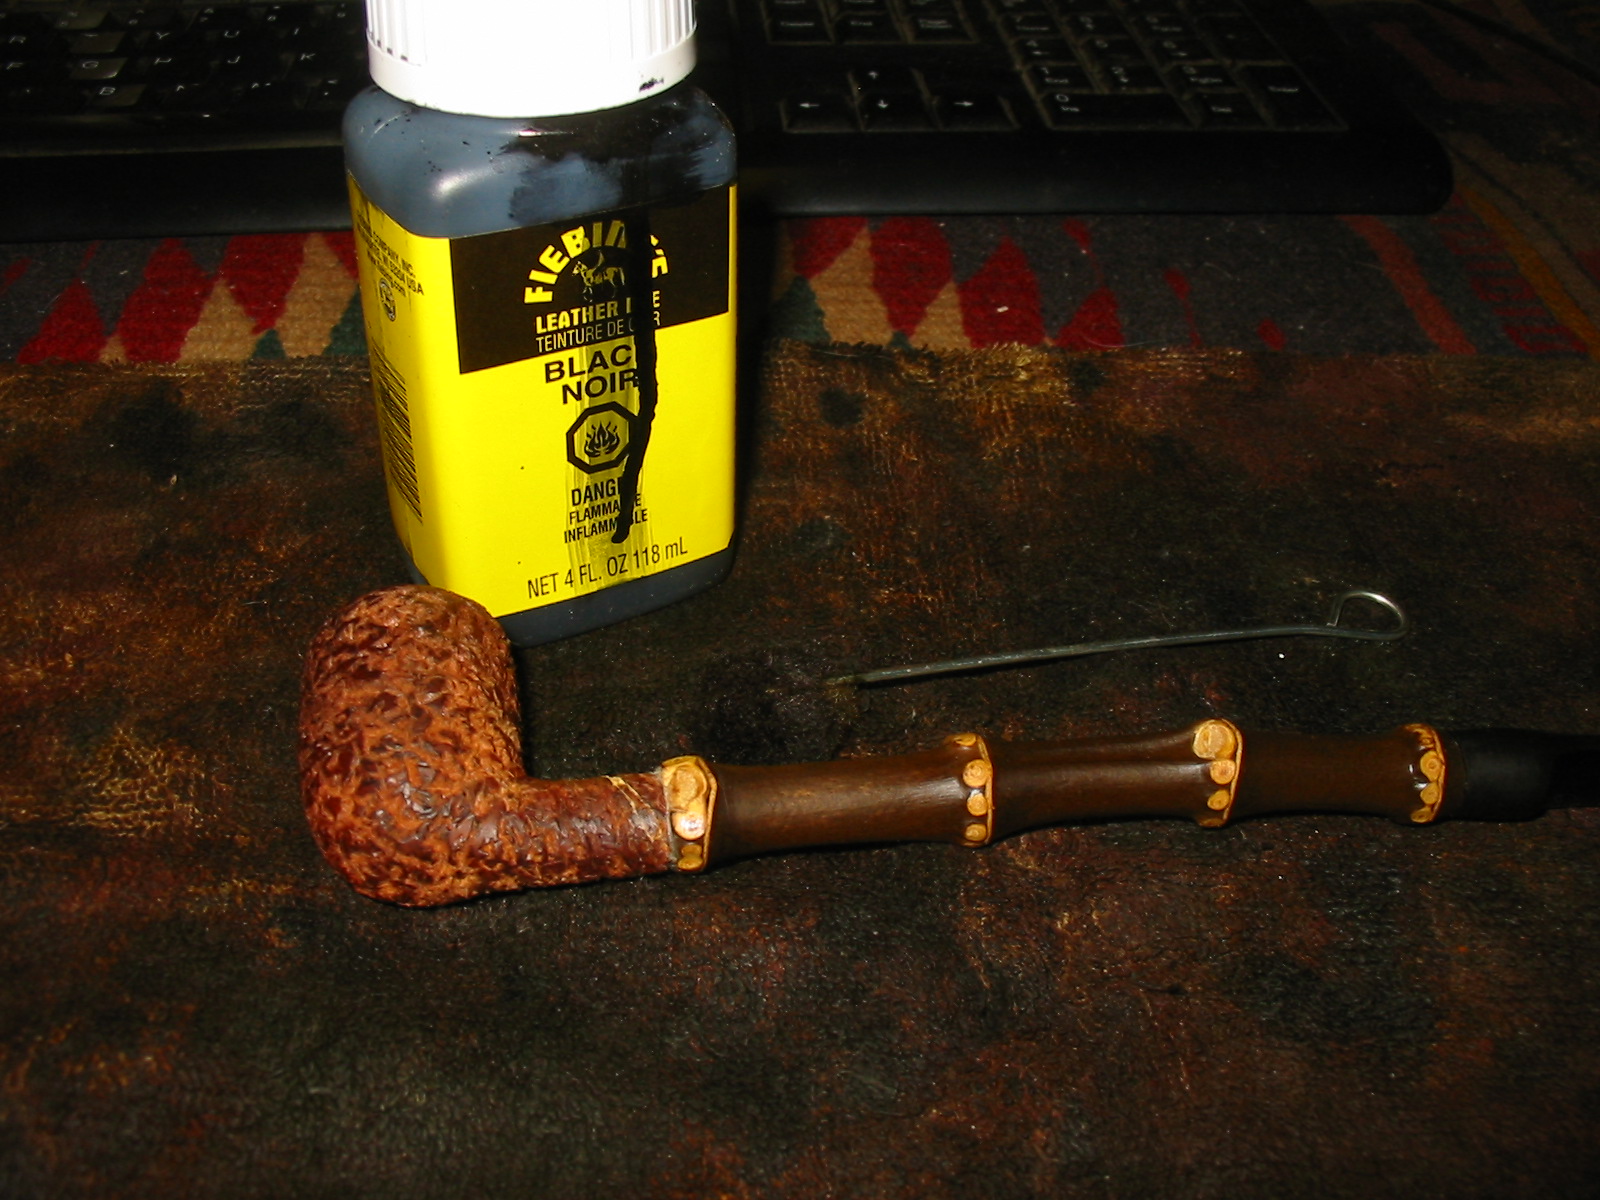
After reading Greg’s post about saving a pipe – the Medico VFQ I was moved to go and have a look at the last pipe in the box. I have four days off starting today and it is a rainy cool day in Vancouver. It is a perfect day for working on pipes so I took the pipe to the worktable. I knew all of the flaws that awaited me but the bones of the pipe, the briar was still sound. The damage truly was cosmetic. The stem was another question. But I figured it was worth the effort. I cleaned the surface of the nylon stem and wiped it down with alcohol. I folded a piece of cardboard and coated it with Vaseline before sticking it in the airway to provide a backing for the black super glue patches that I was going to use for the holes.
IMG_6984

IMG_6985
The super glue had become quite viscous which actually worked for me. It was not the thin liquid it had been when I purchase it several years ago. I shook it well and then applied it to the holes on the stem. I always do the patching in layers. I start quite wide around the edges of the hole and work toward the centre to close off the hole. I decided to work on both sides of the repair at the same time so I put the glue in both holes. I set the stem aside for the repair to cure before adding more layers of glue.
IMG_6986

IMG_6987
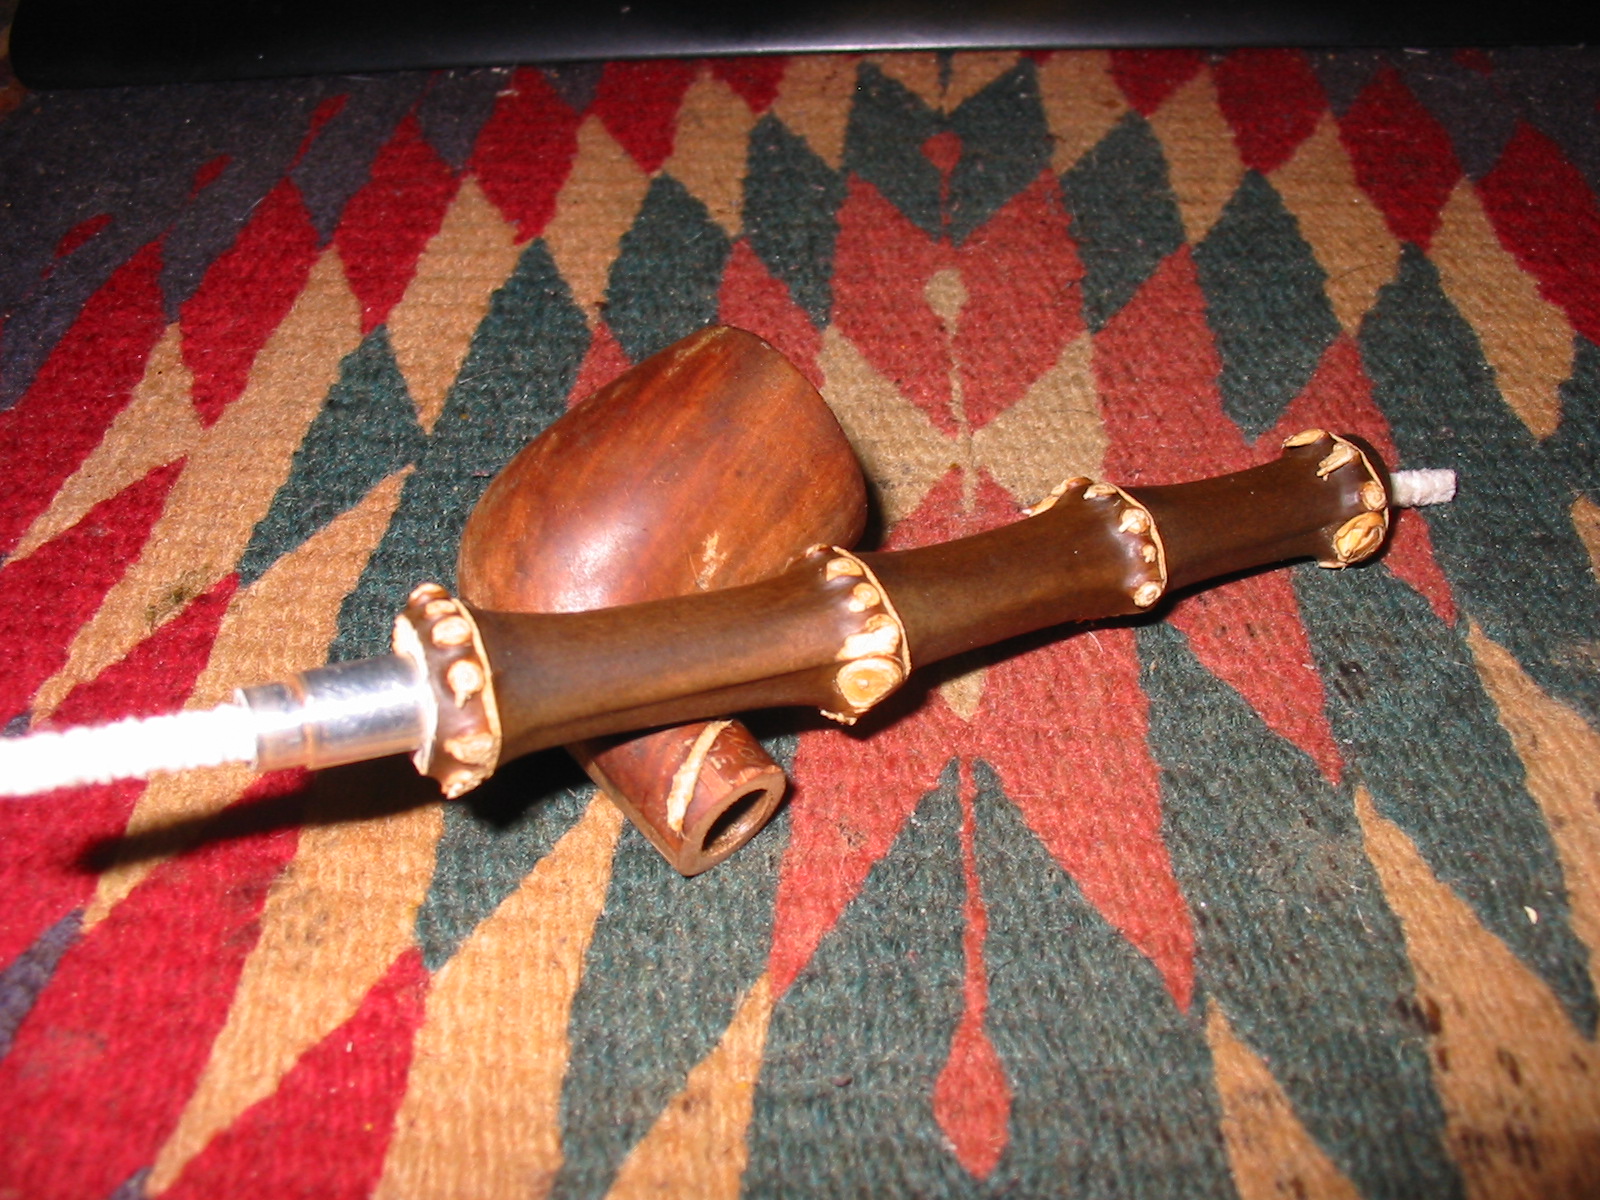
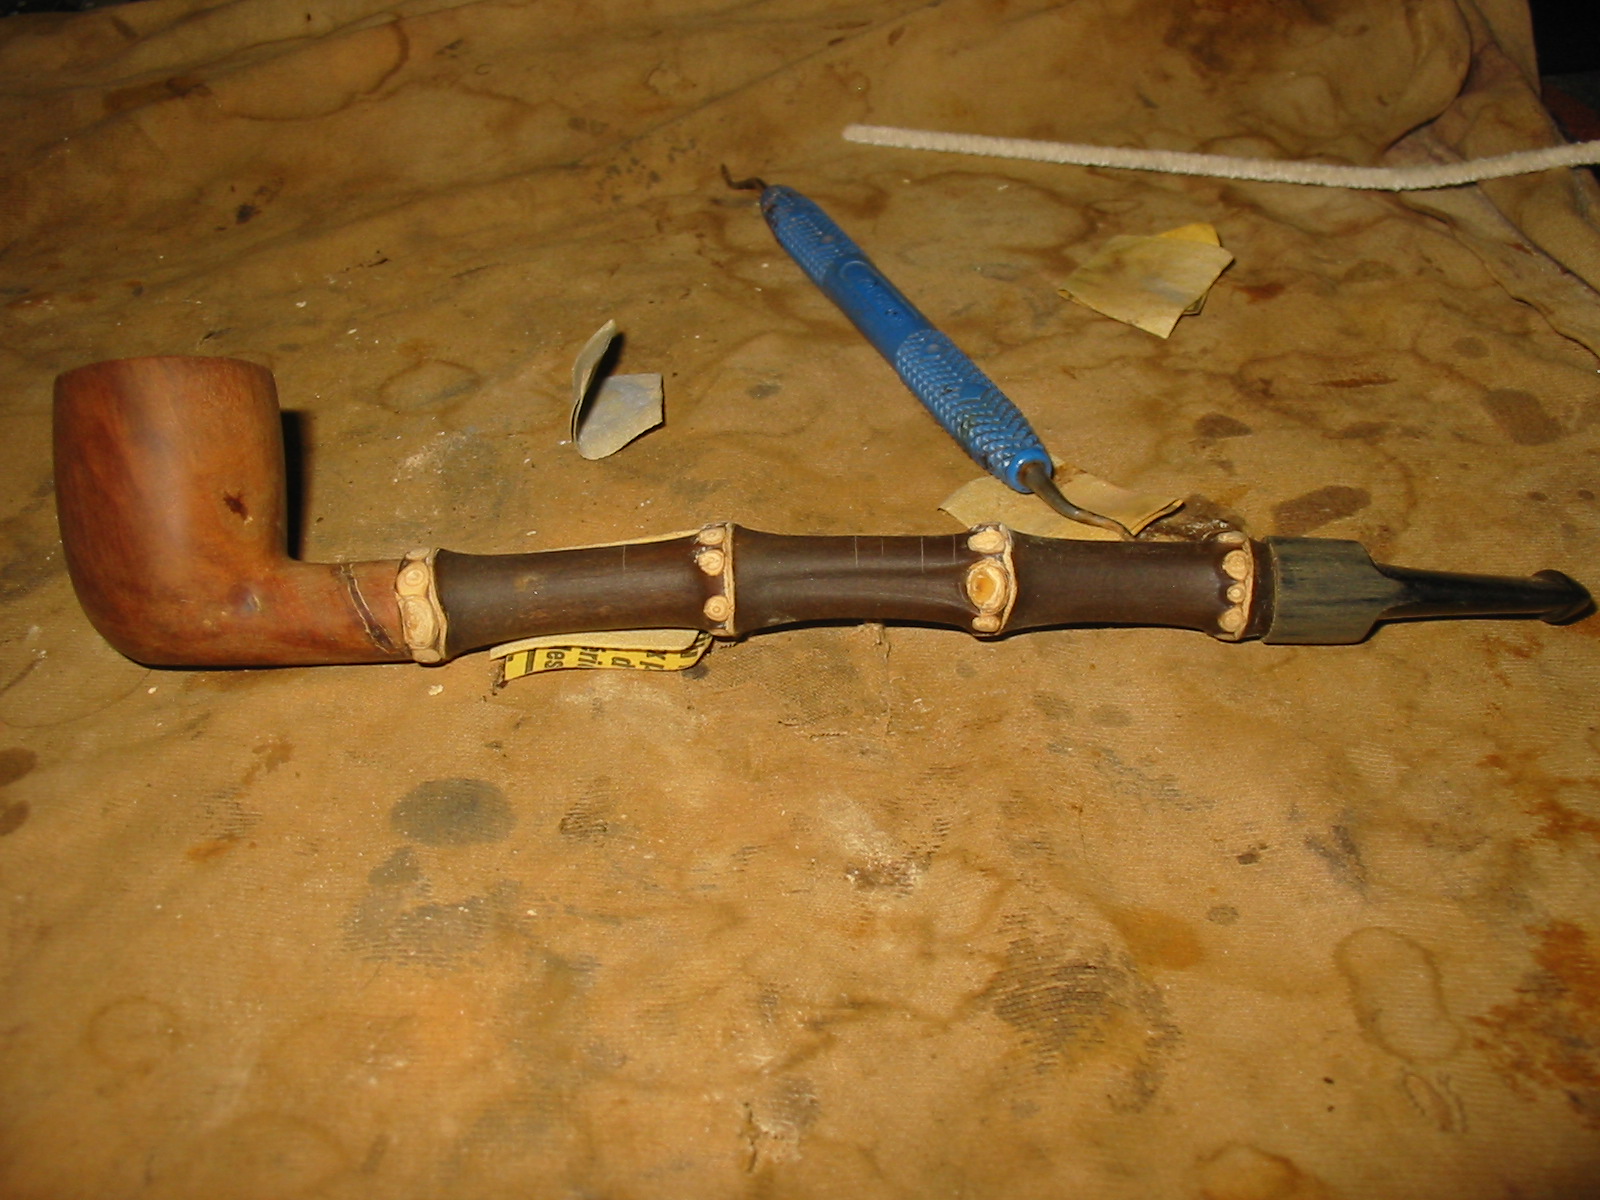
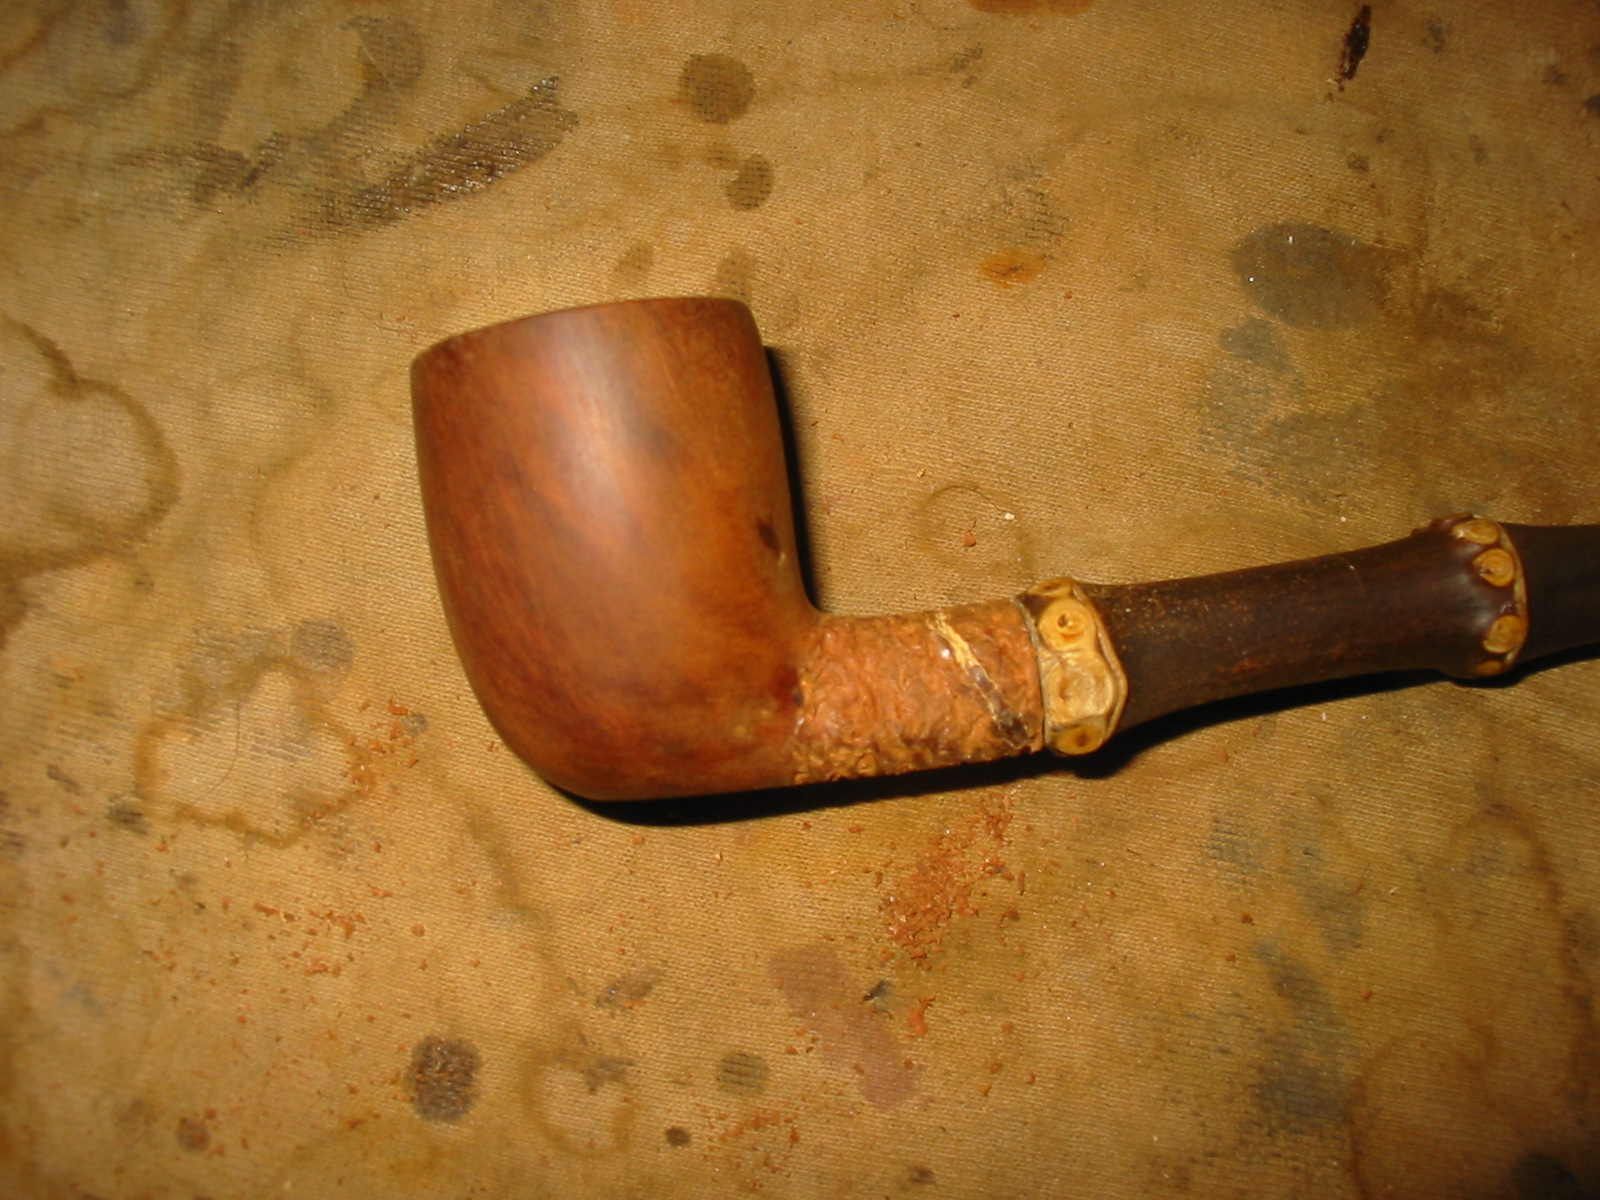
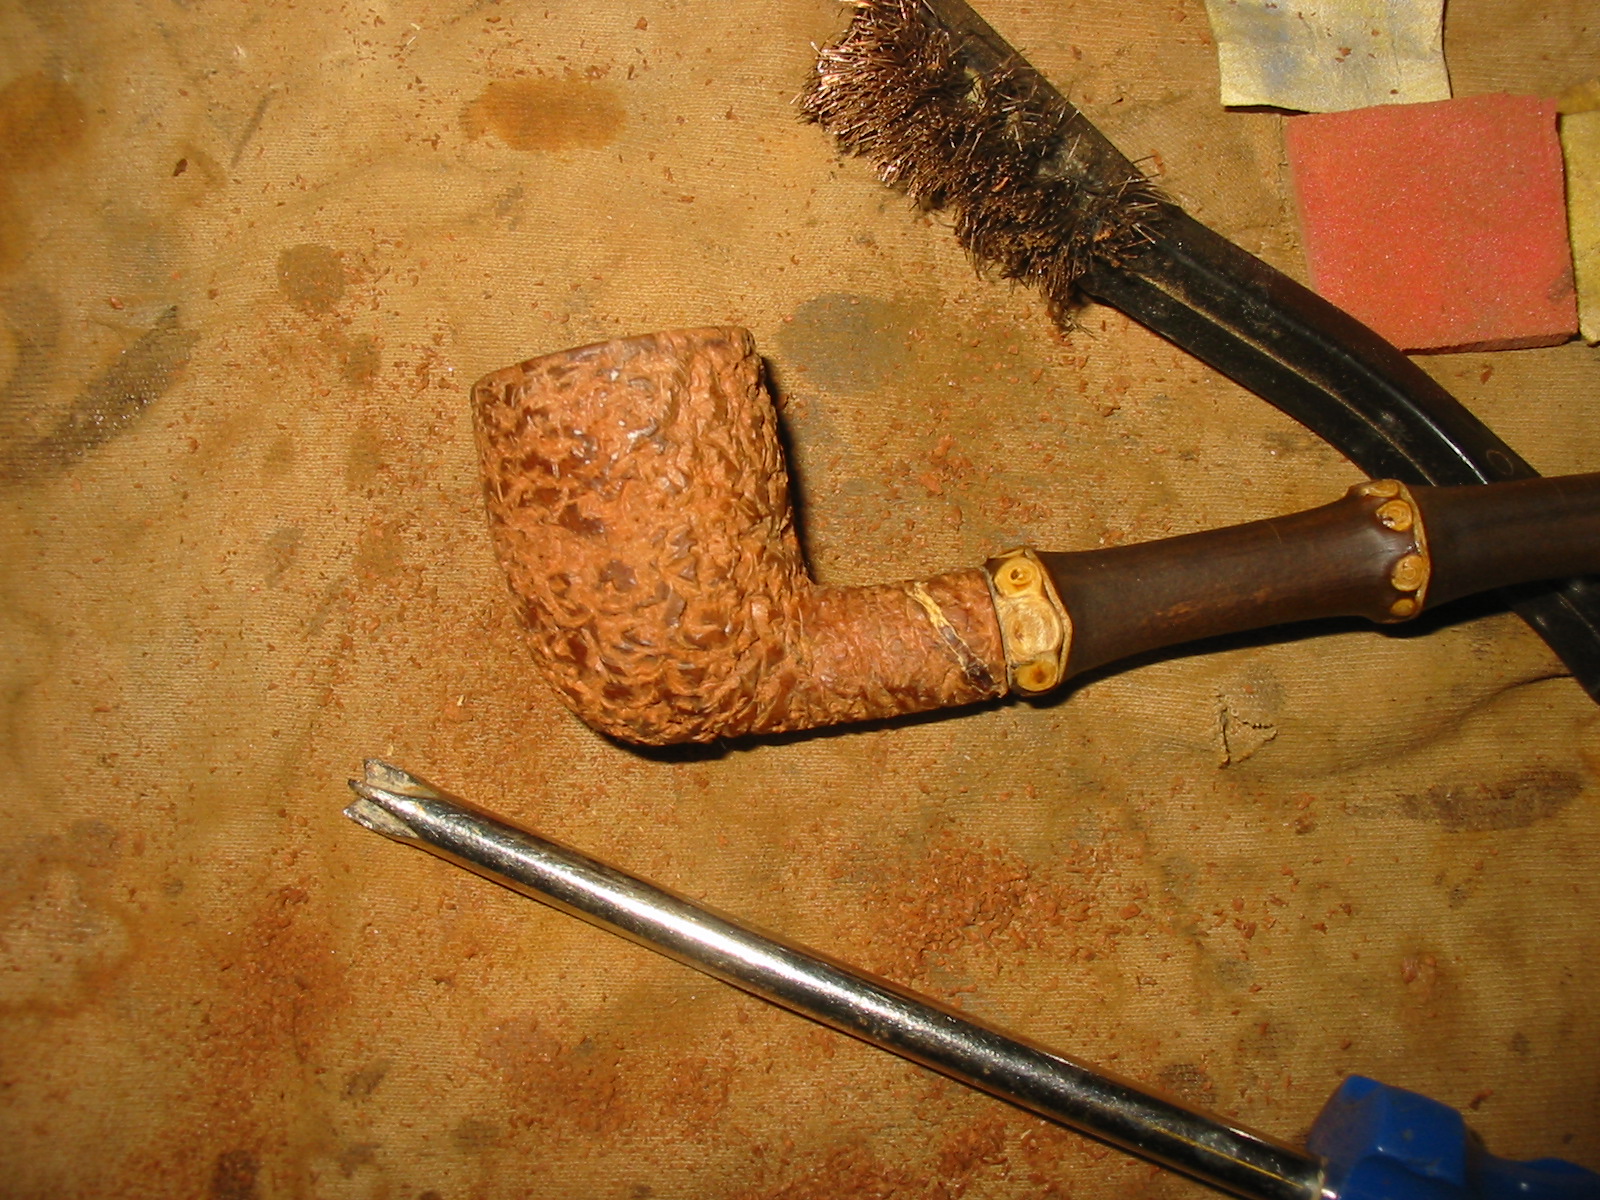
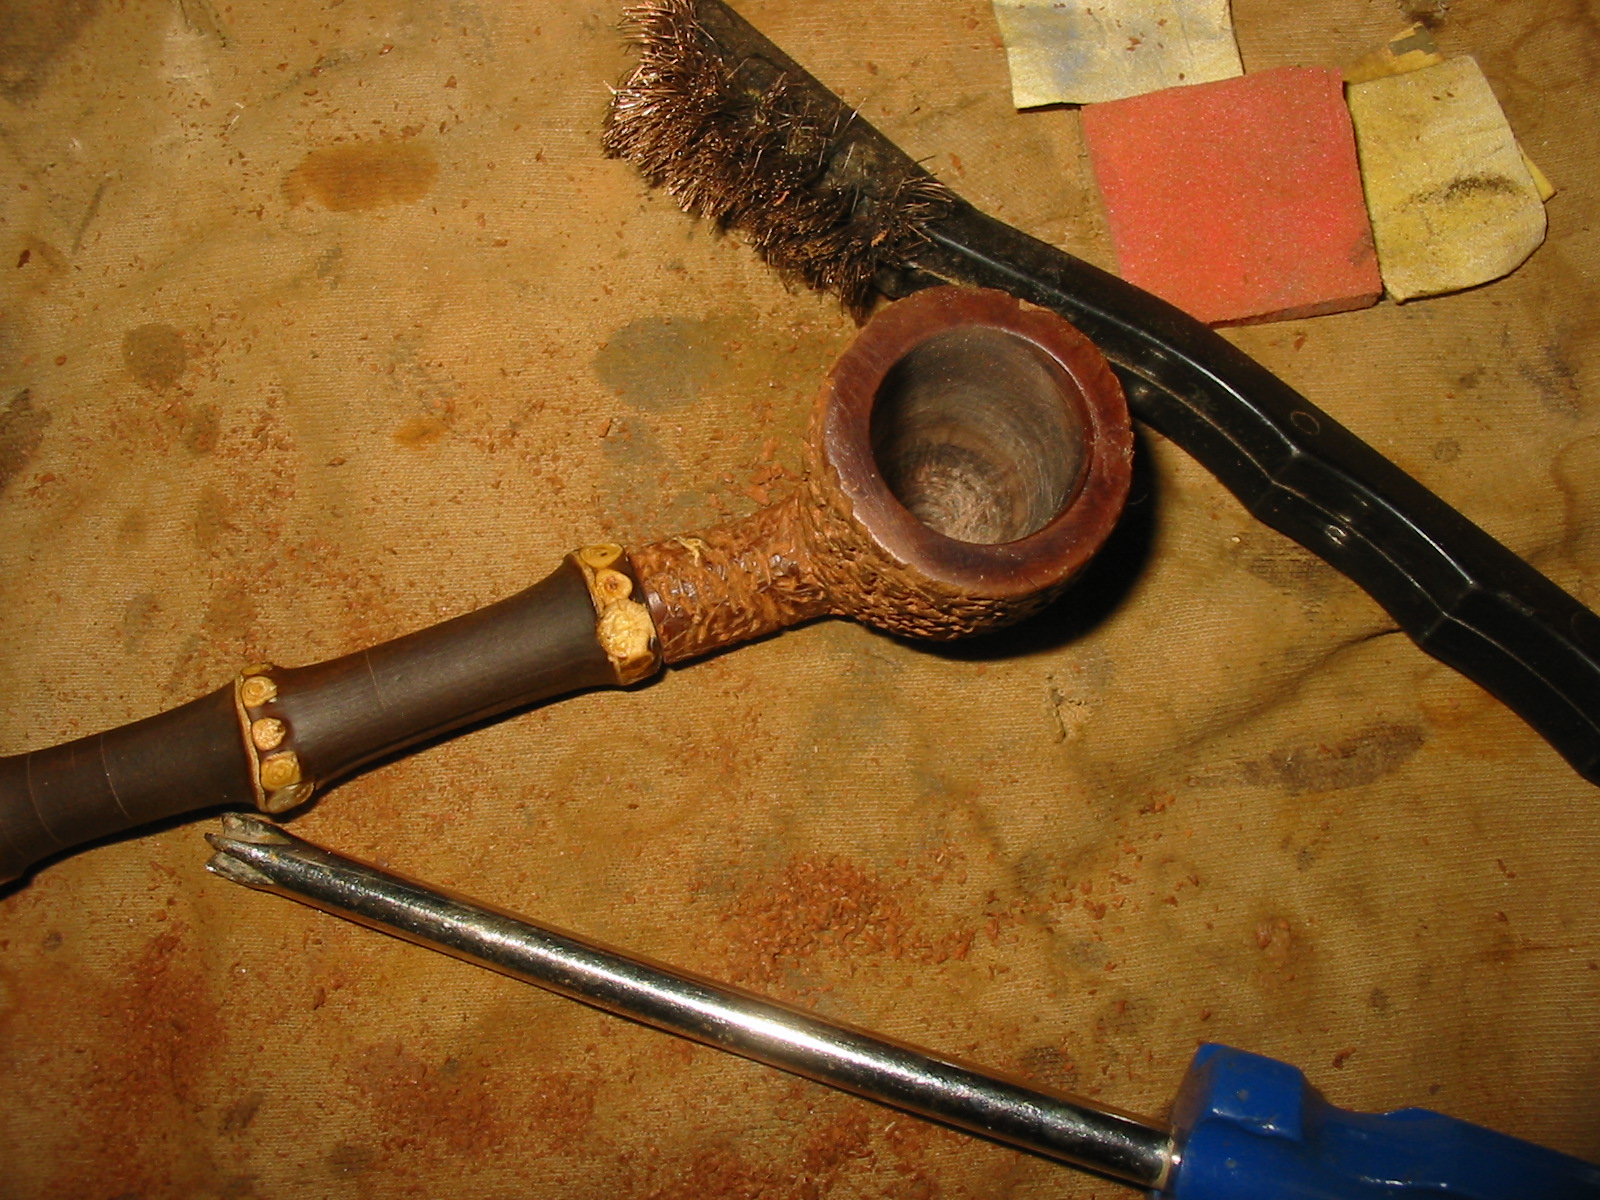
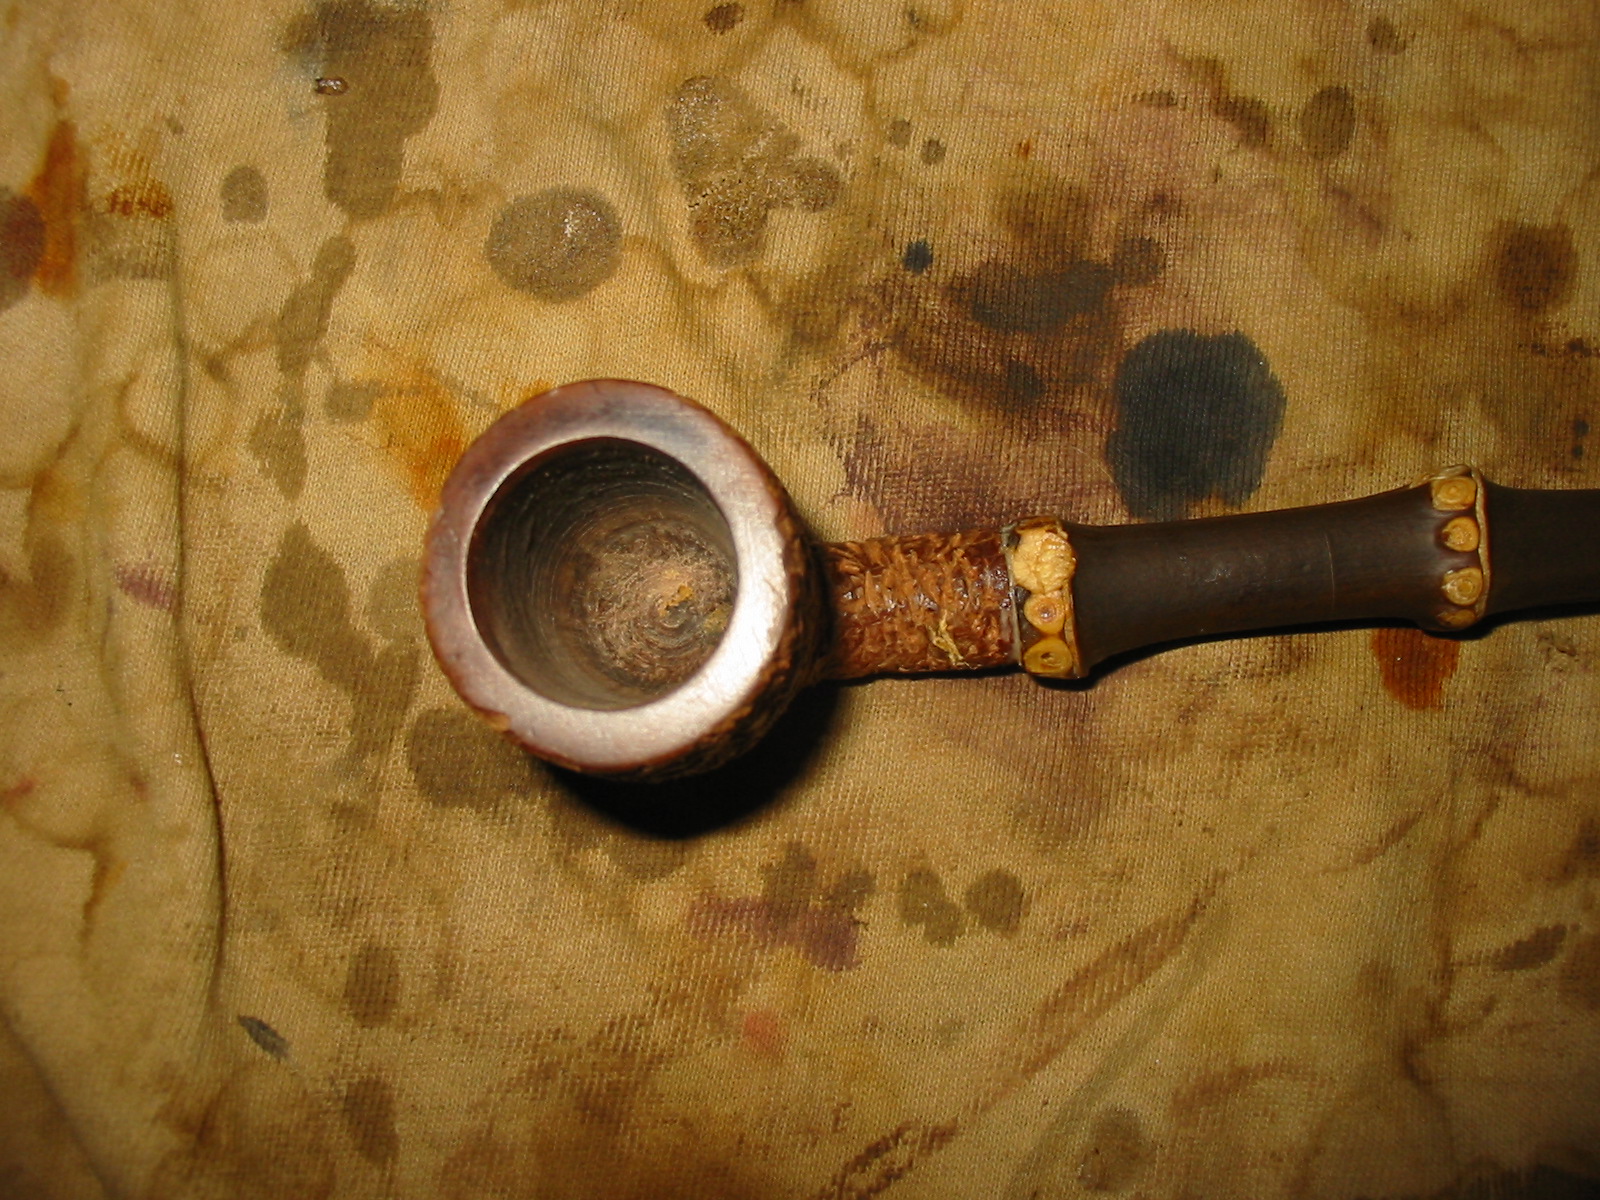
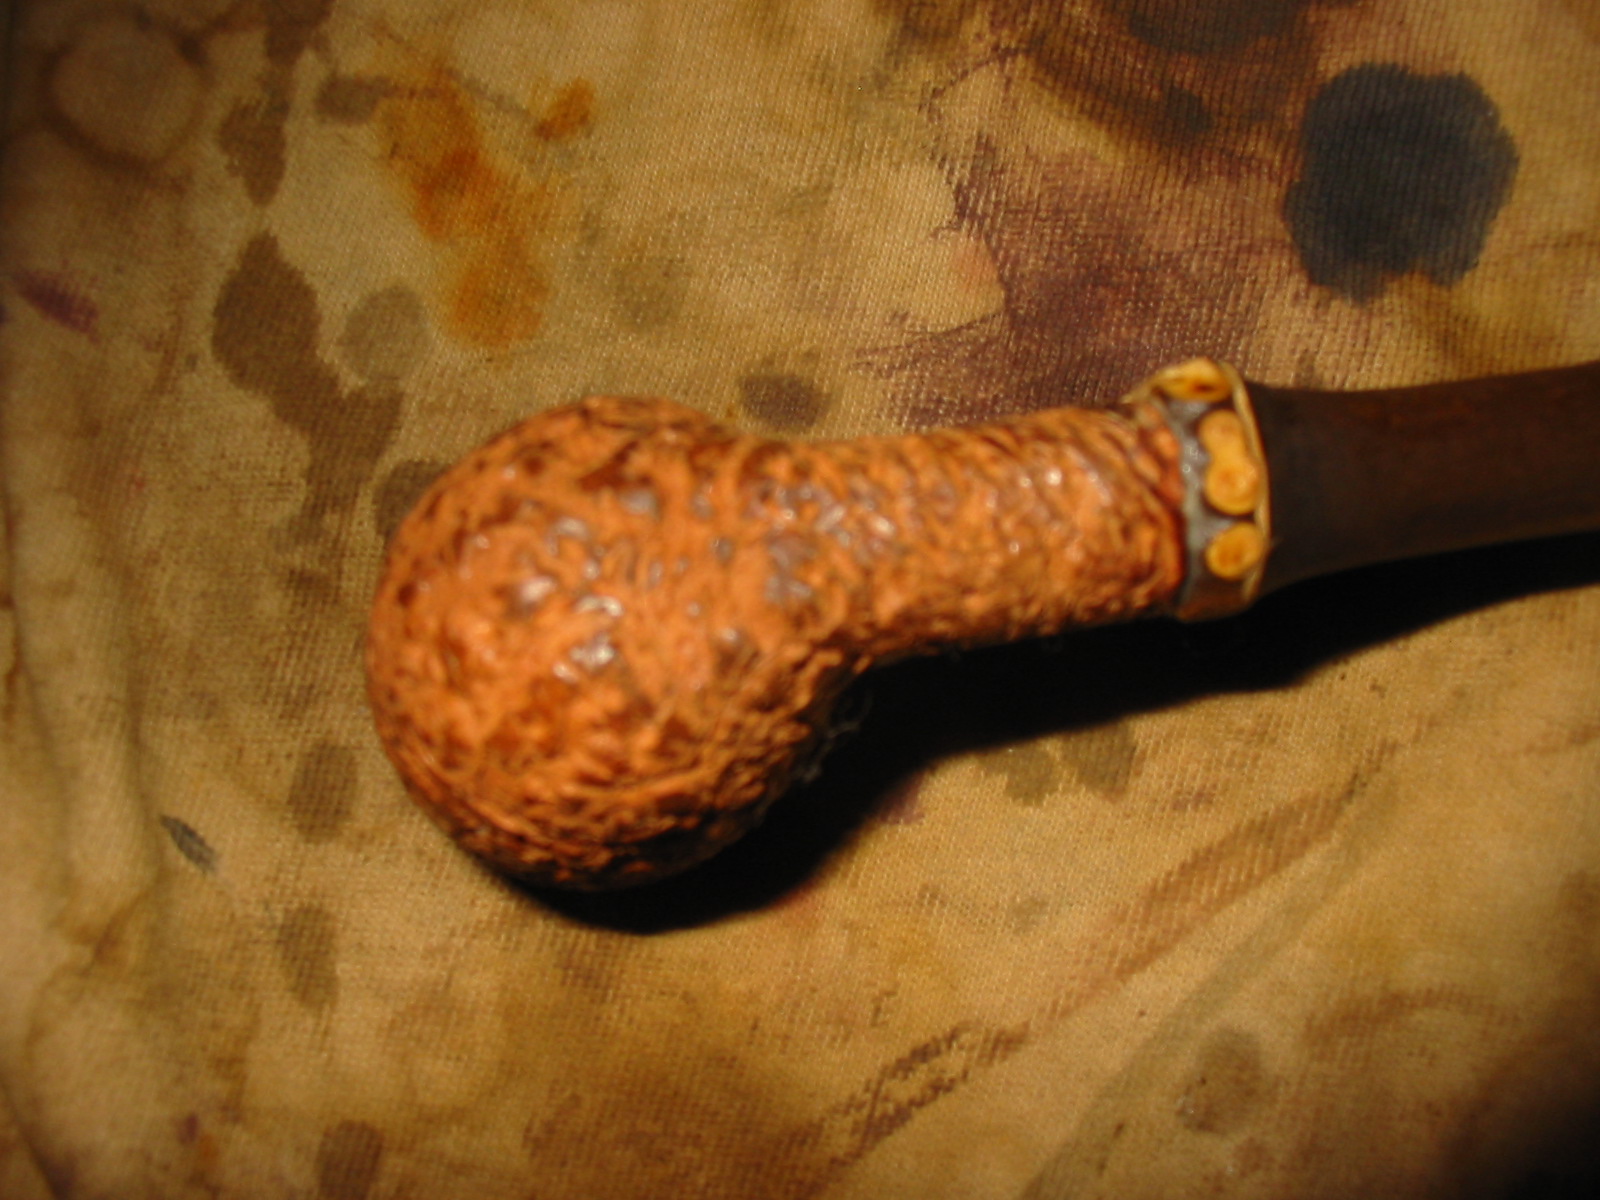
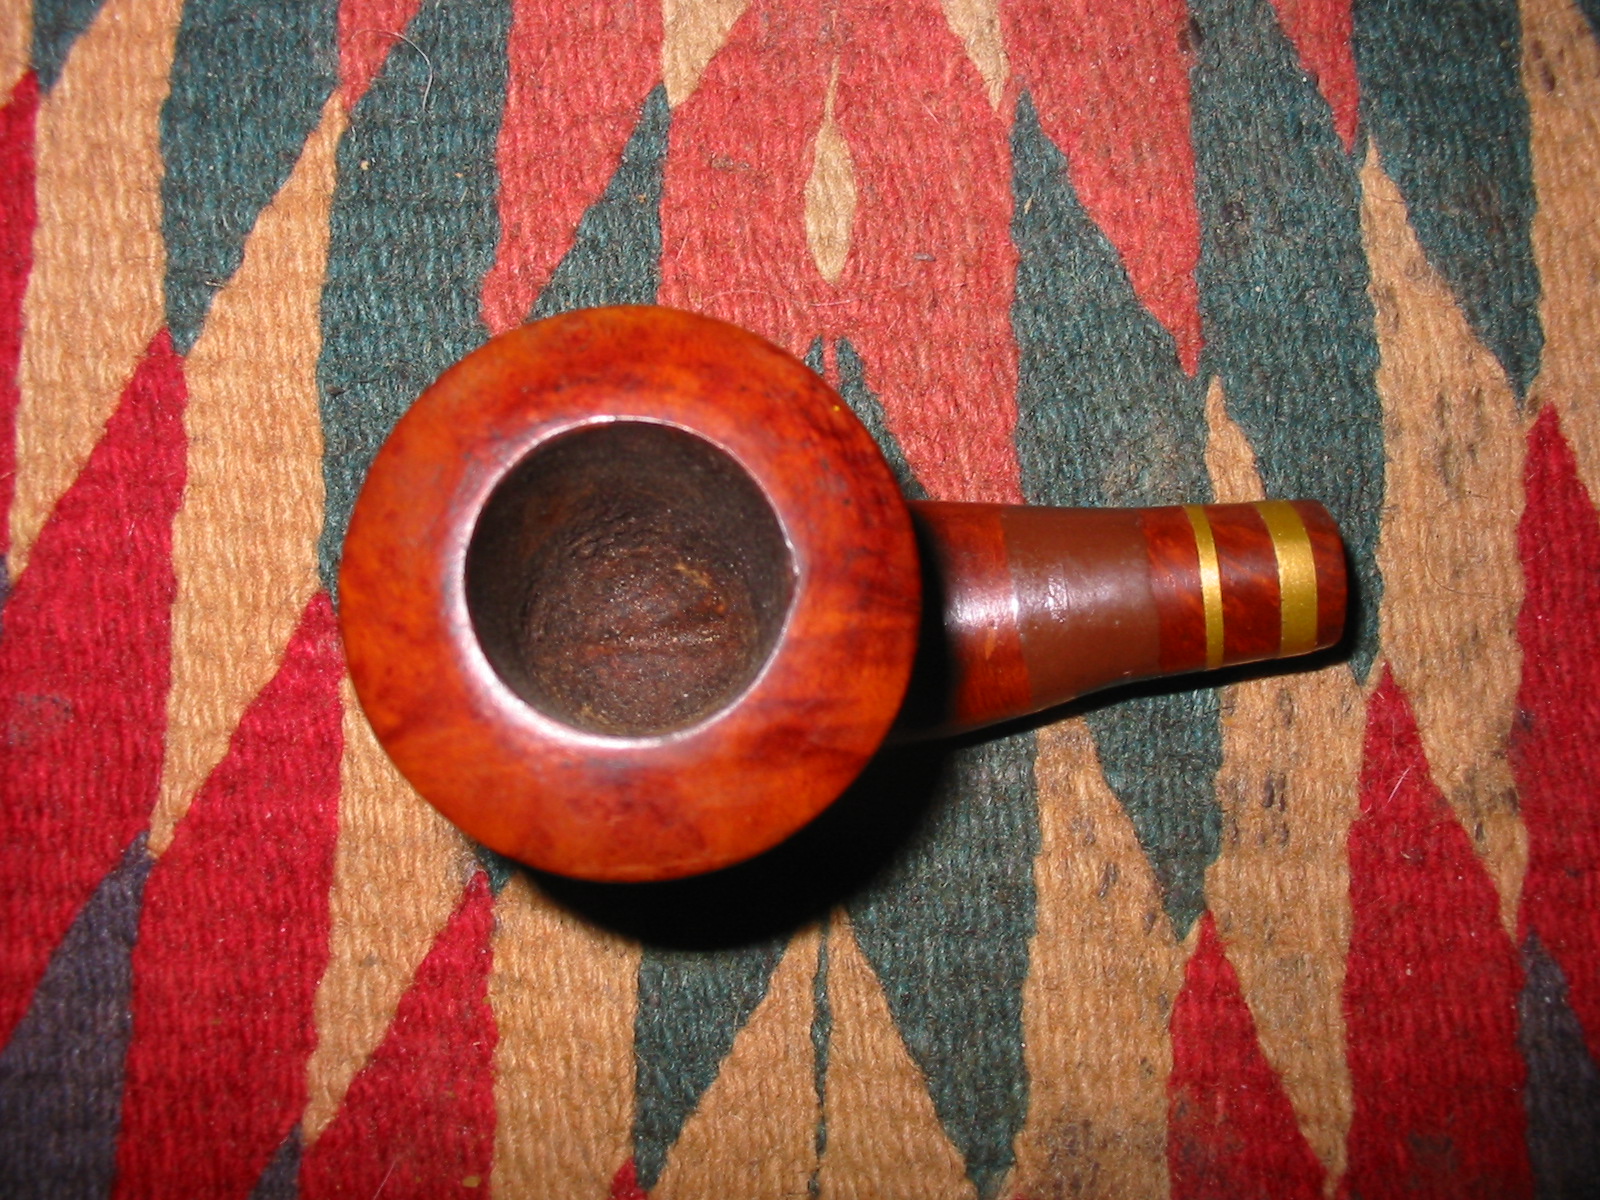
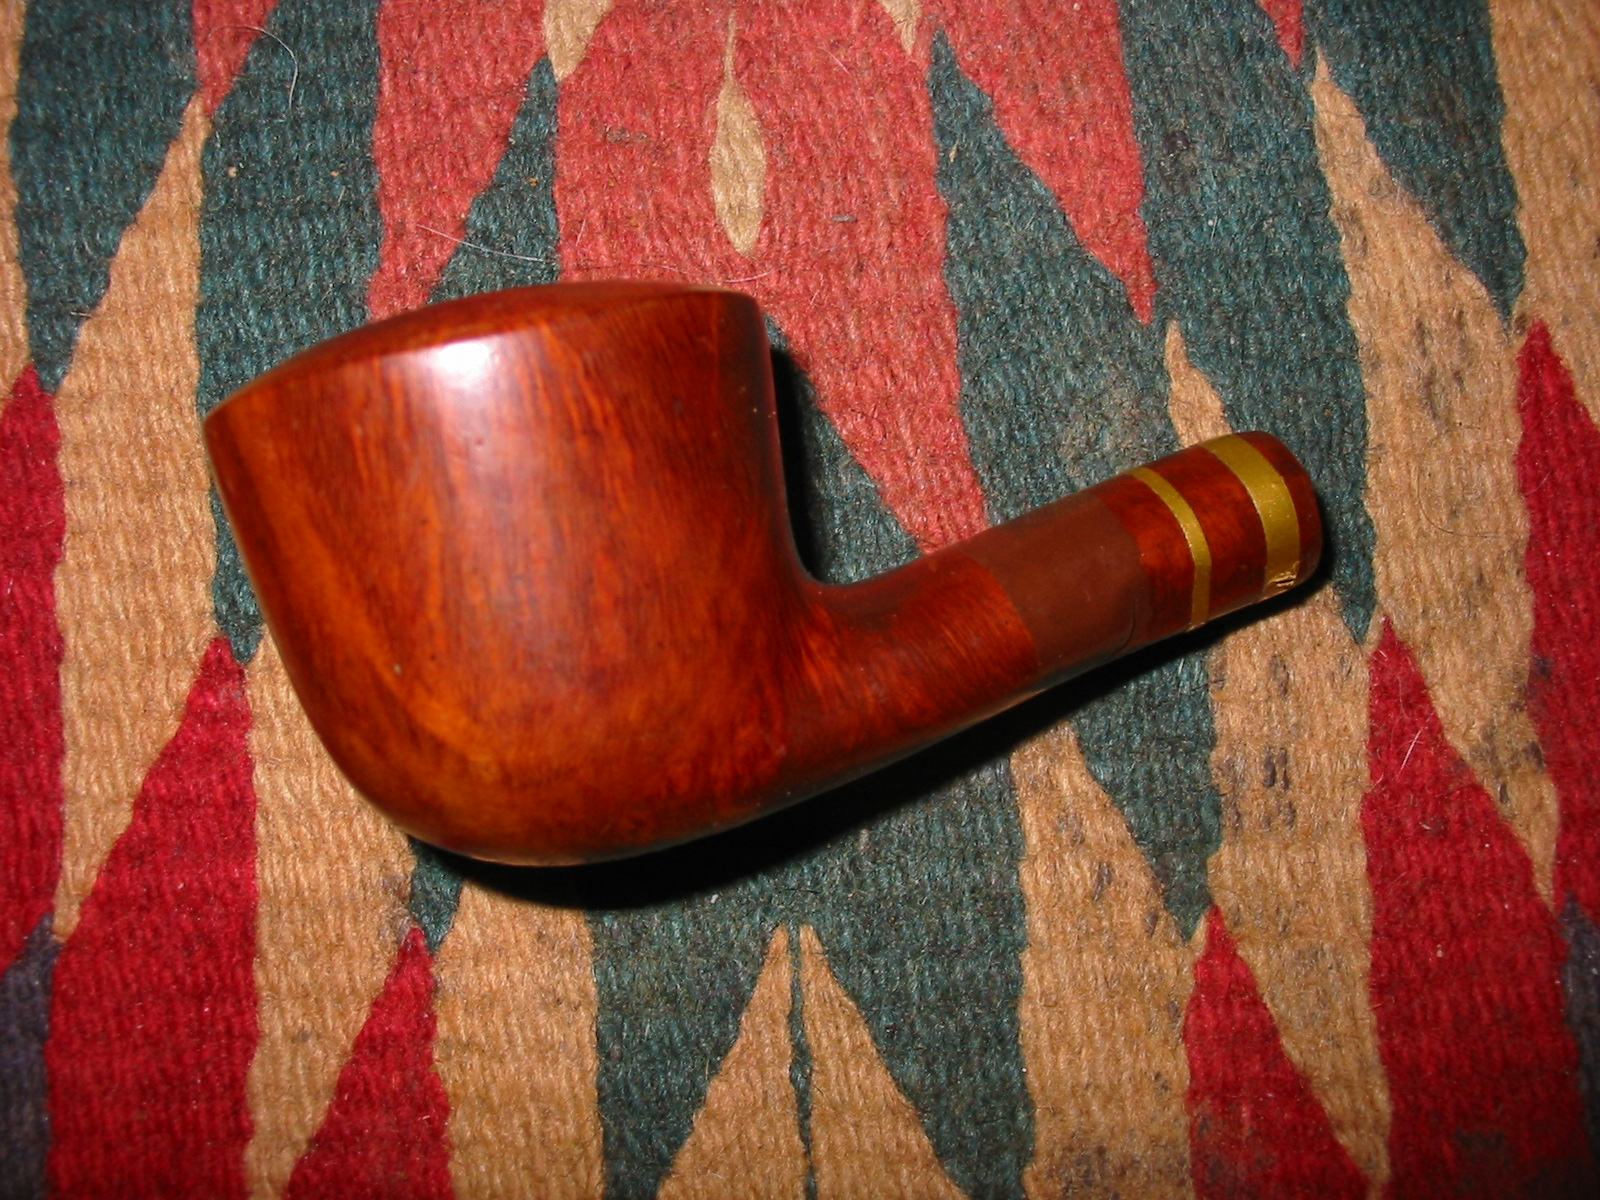
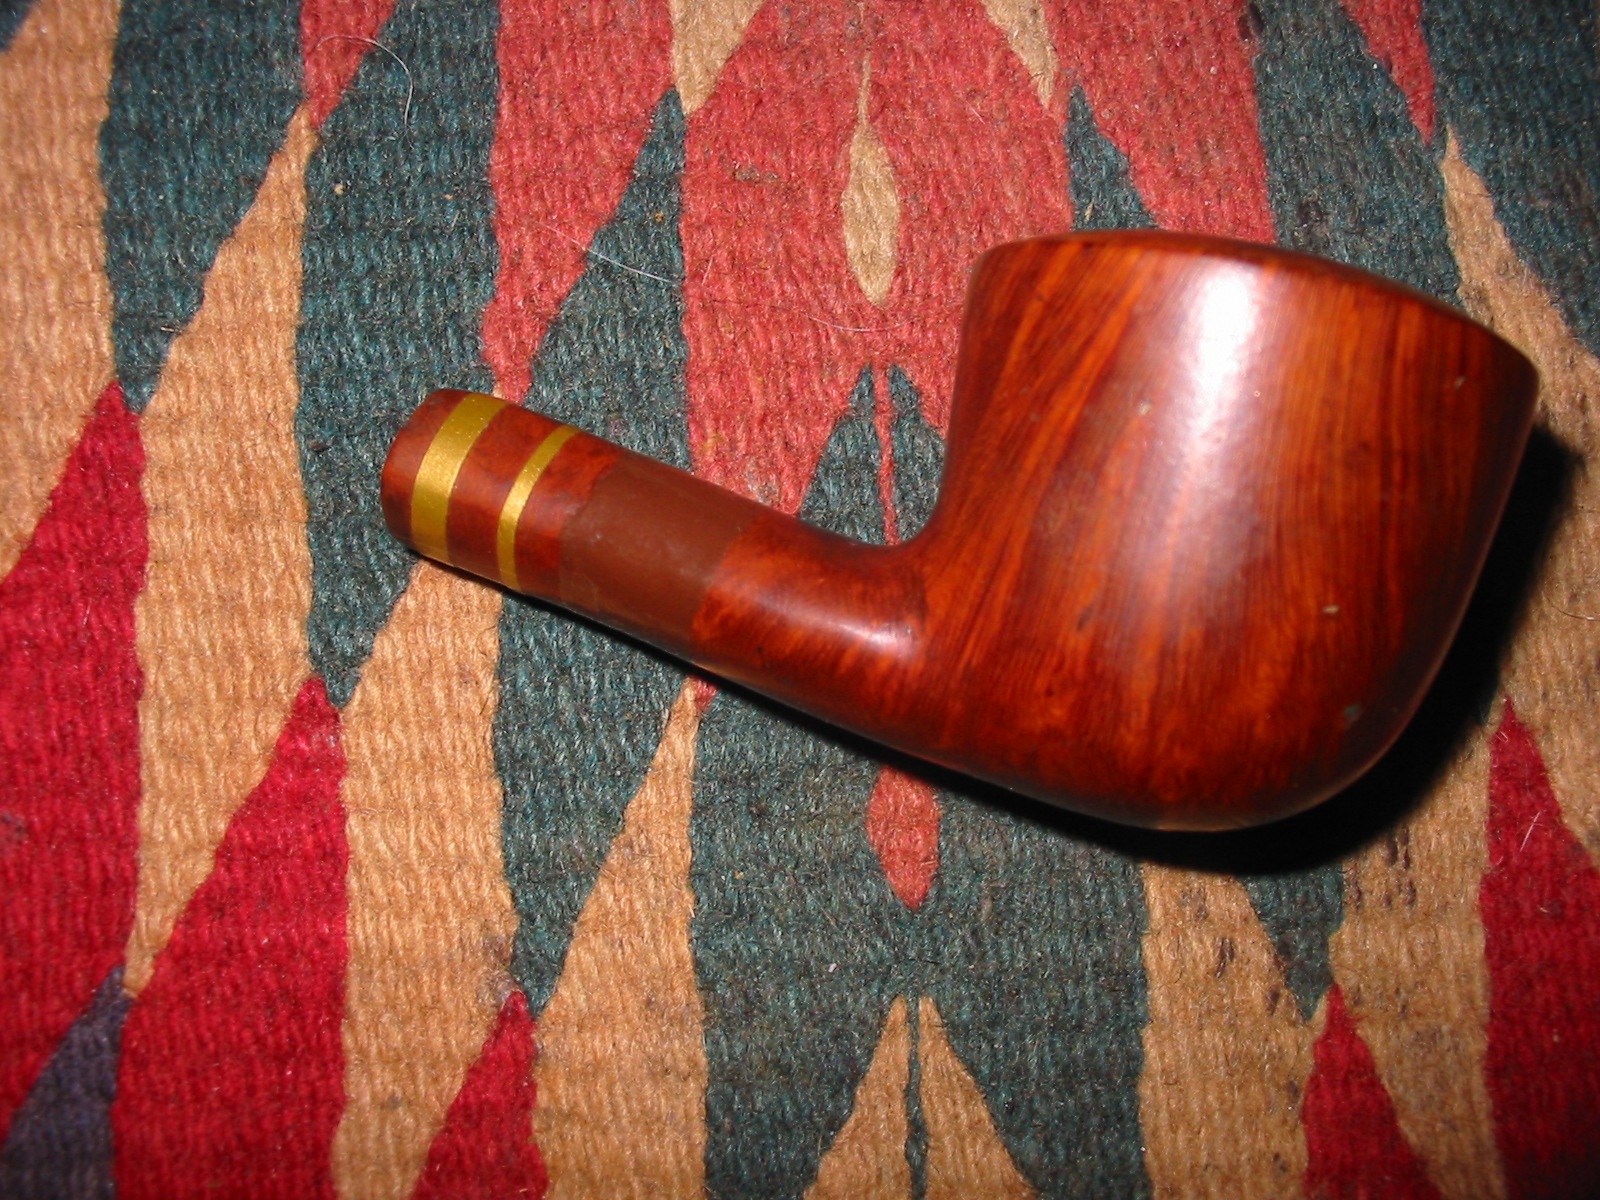
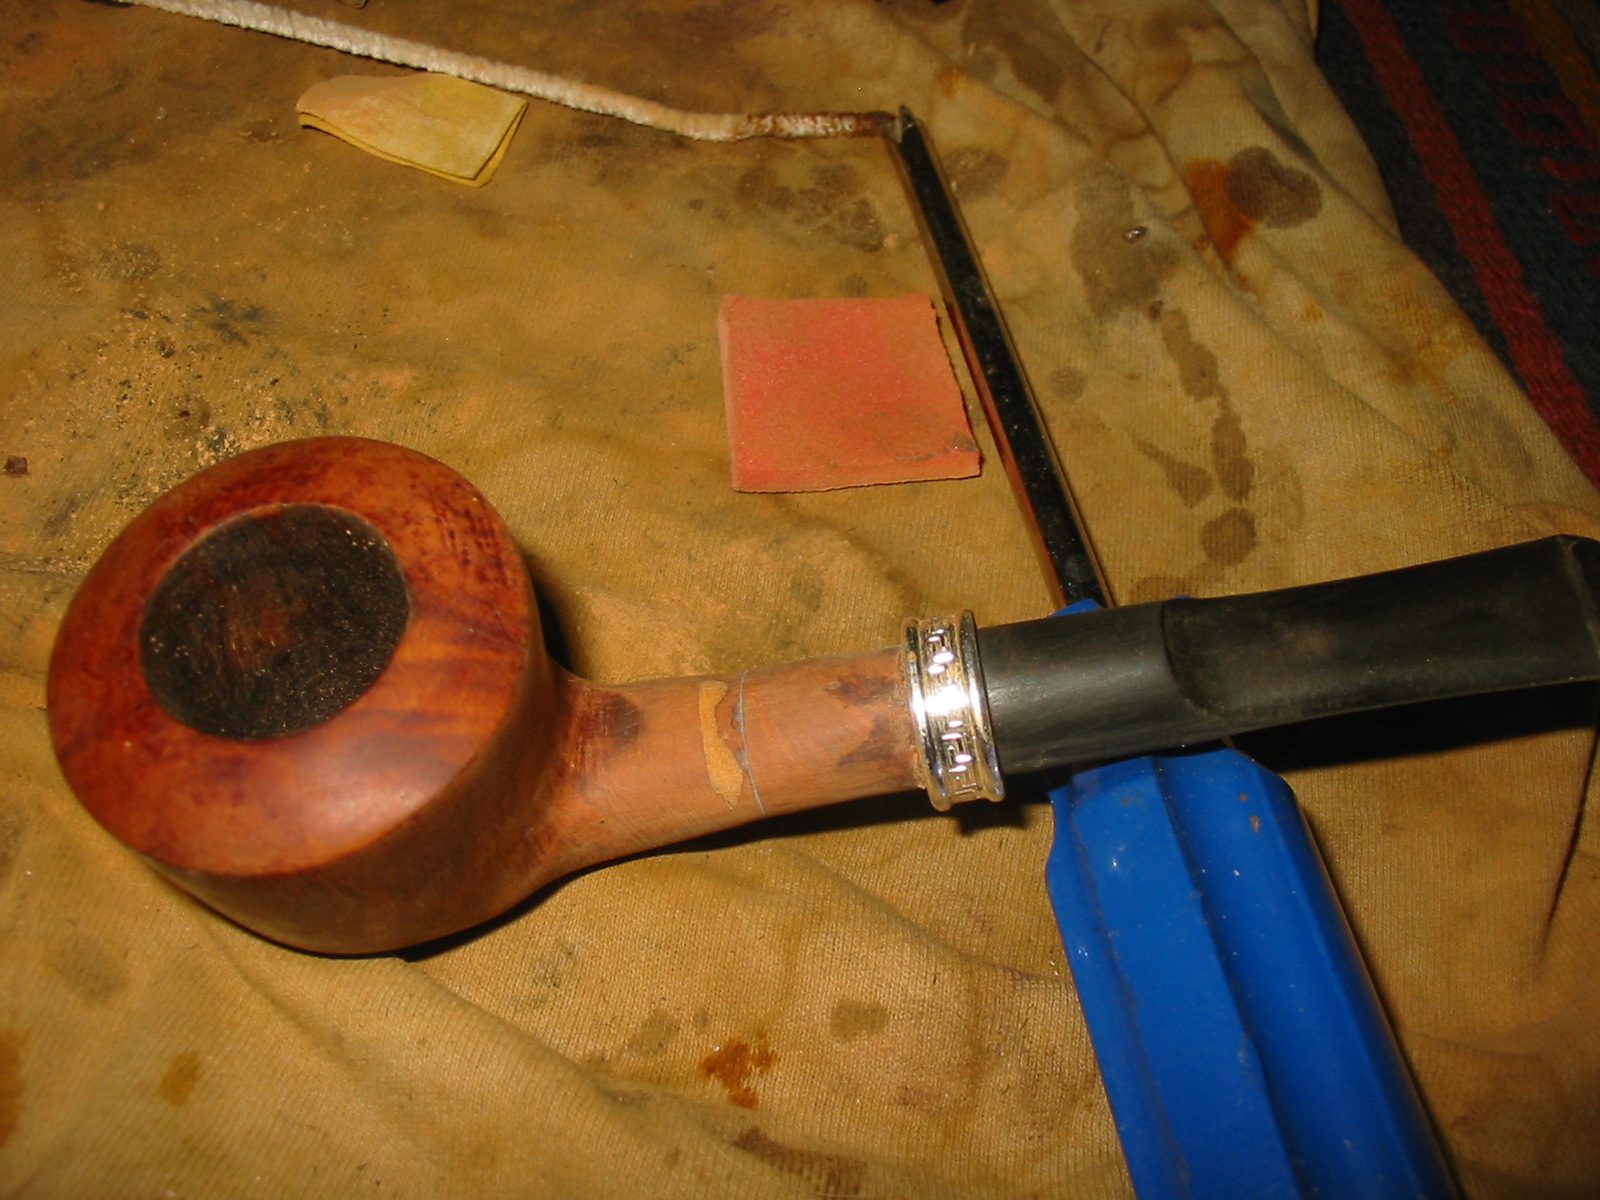
I scrubbed the bowl with Murphy’s Oil Soap to remove the grime. I used a tooth brush to get into the remaining grooves in the briar. I used the soap undiluted as I find it is less liquid and works better on rounded surfaces as a gel. I wiped off the soap with cotton pads, rinsed the bowl with warm water and dried it off. The next four photos show the bowl after this cleaning. The sandblast was basically worn away and I needed to make a decision on what to do with the finish on this bowl.
IMG_6988

IMG_6989

IMG_6990

IMG_6991
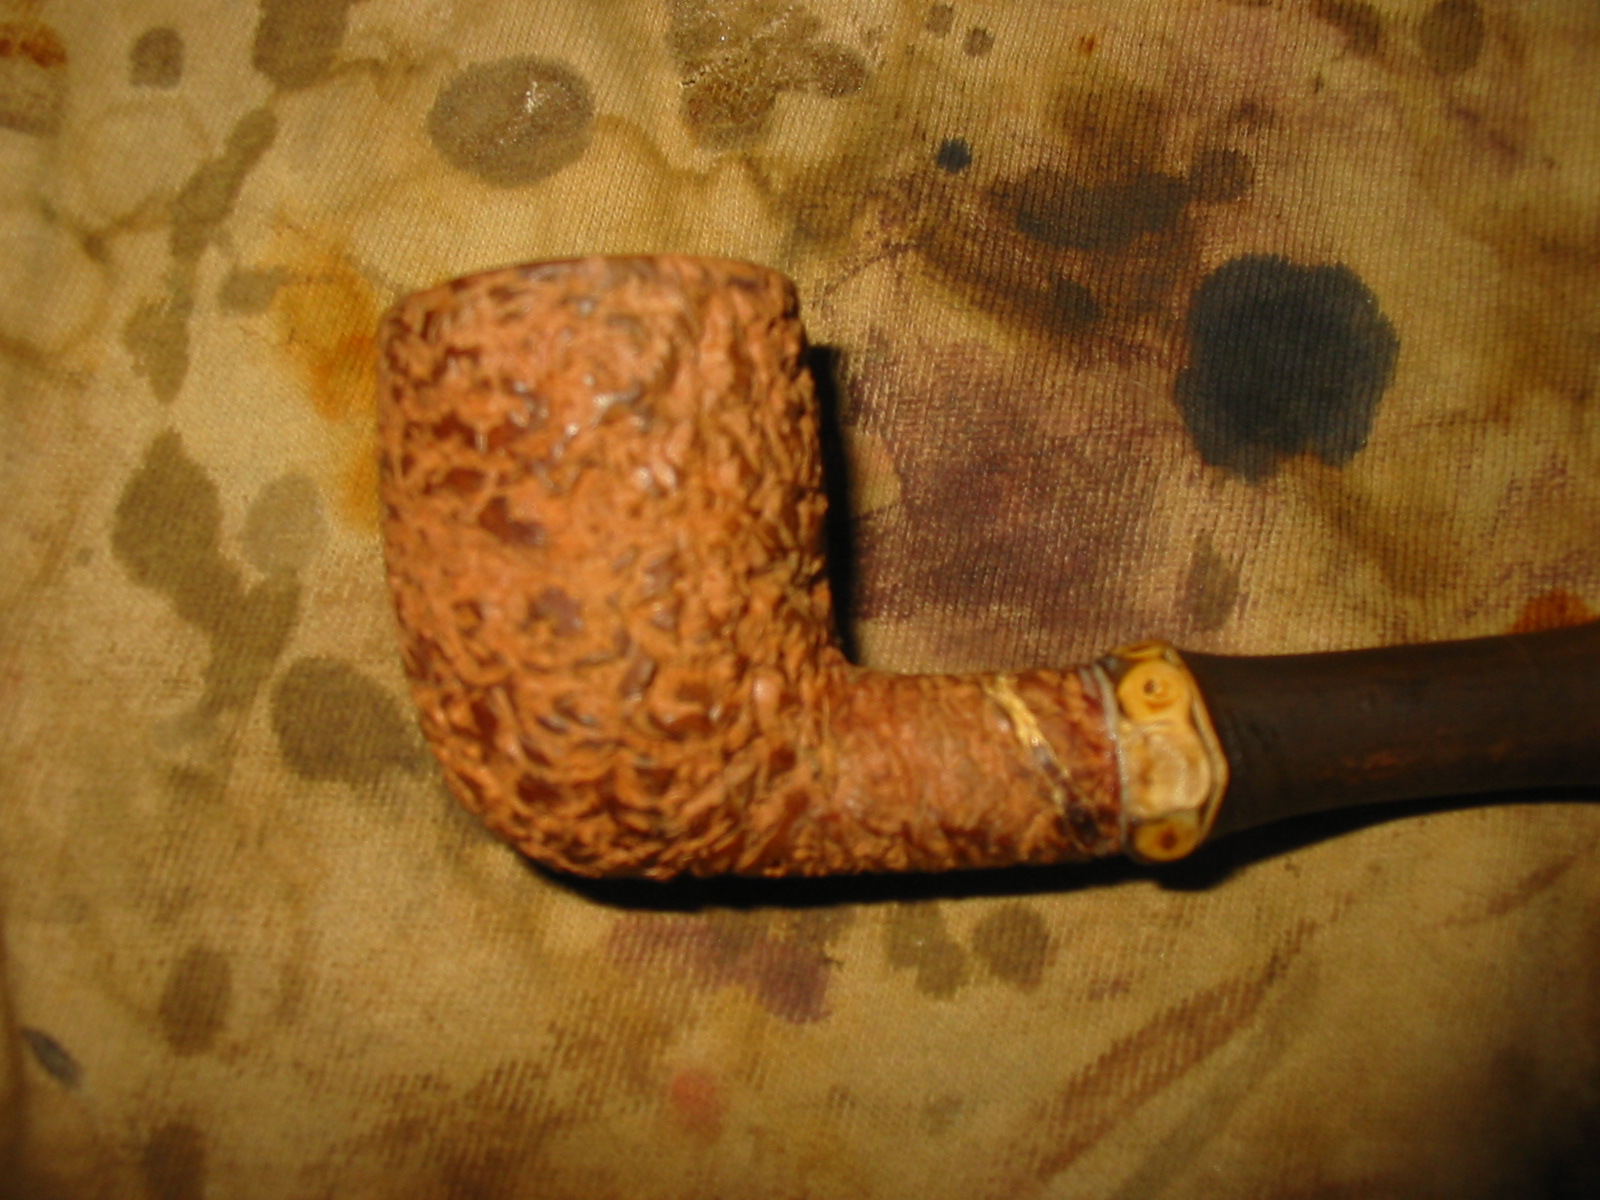
The worn finish and the ink stains on the front and back of the bowl made the decision pretty easy for me. To clean and restain the pipe would still leave it worn and the ink stains visible. I decided I would rusticate the bowl with the rusticator I had received from Chris. I wanted the finish to look slightly different from the previous pipe that I rusticated so I had some ideas on what to do once I had rusticated the finish.
IMG_6992

IMG_6993

IMG_6994

IMG_6995

IMG_6996

IMG_6997
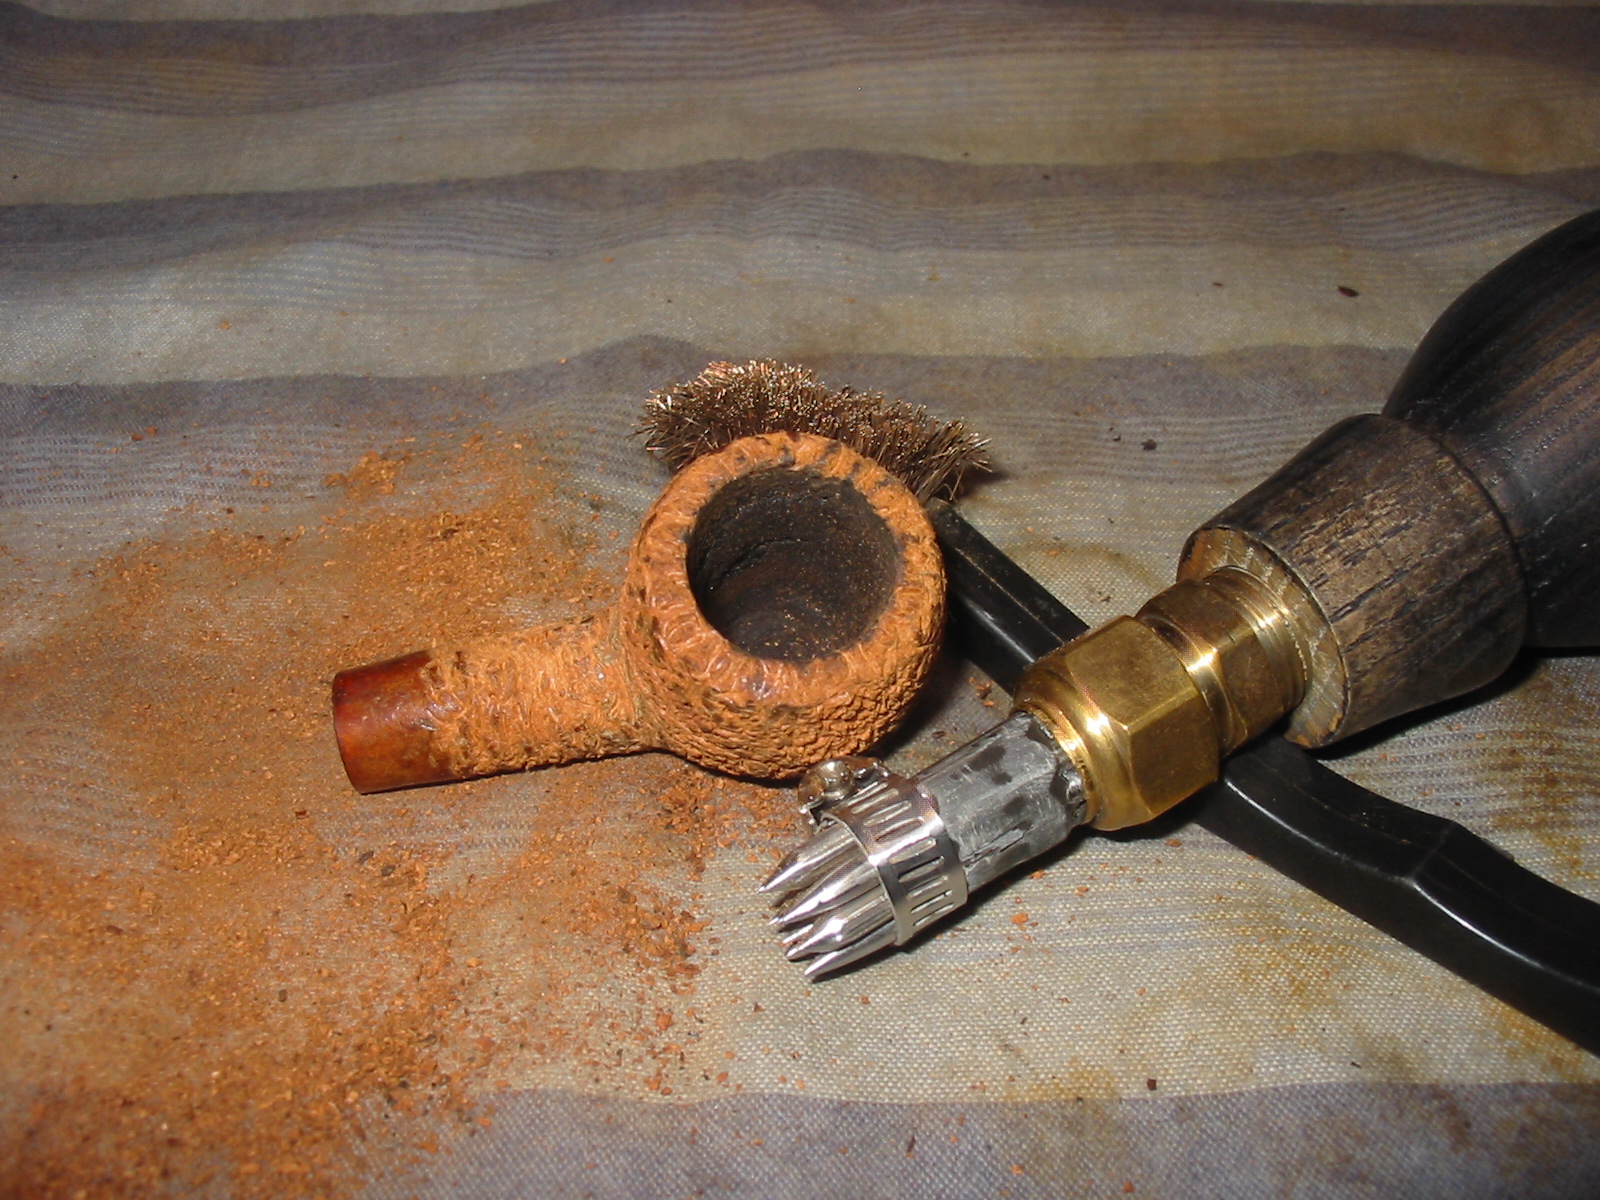
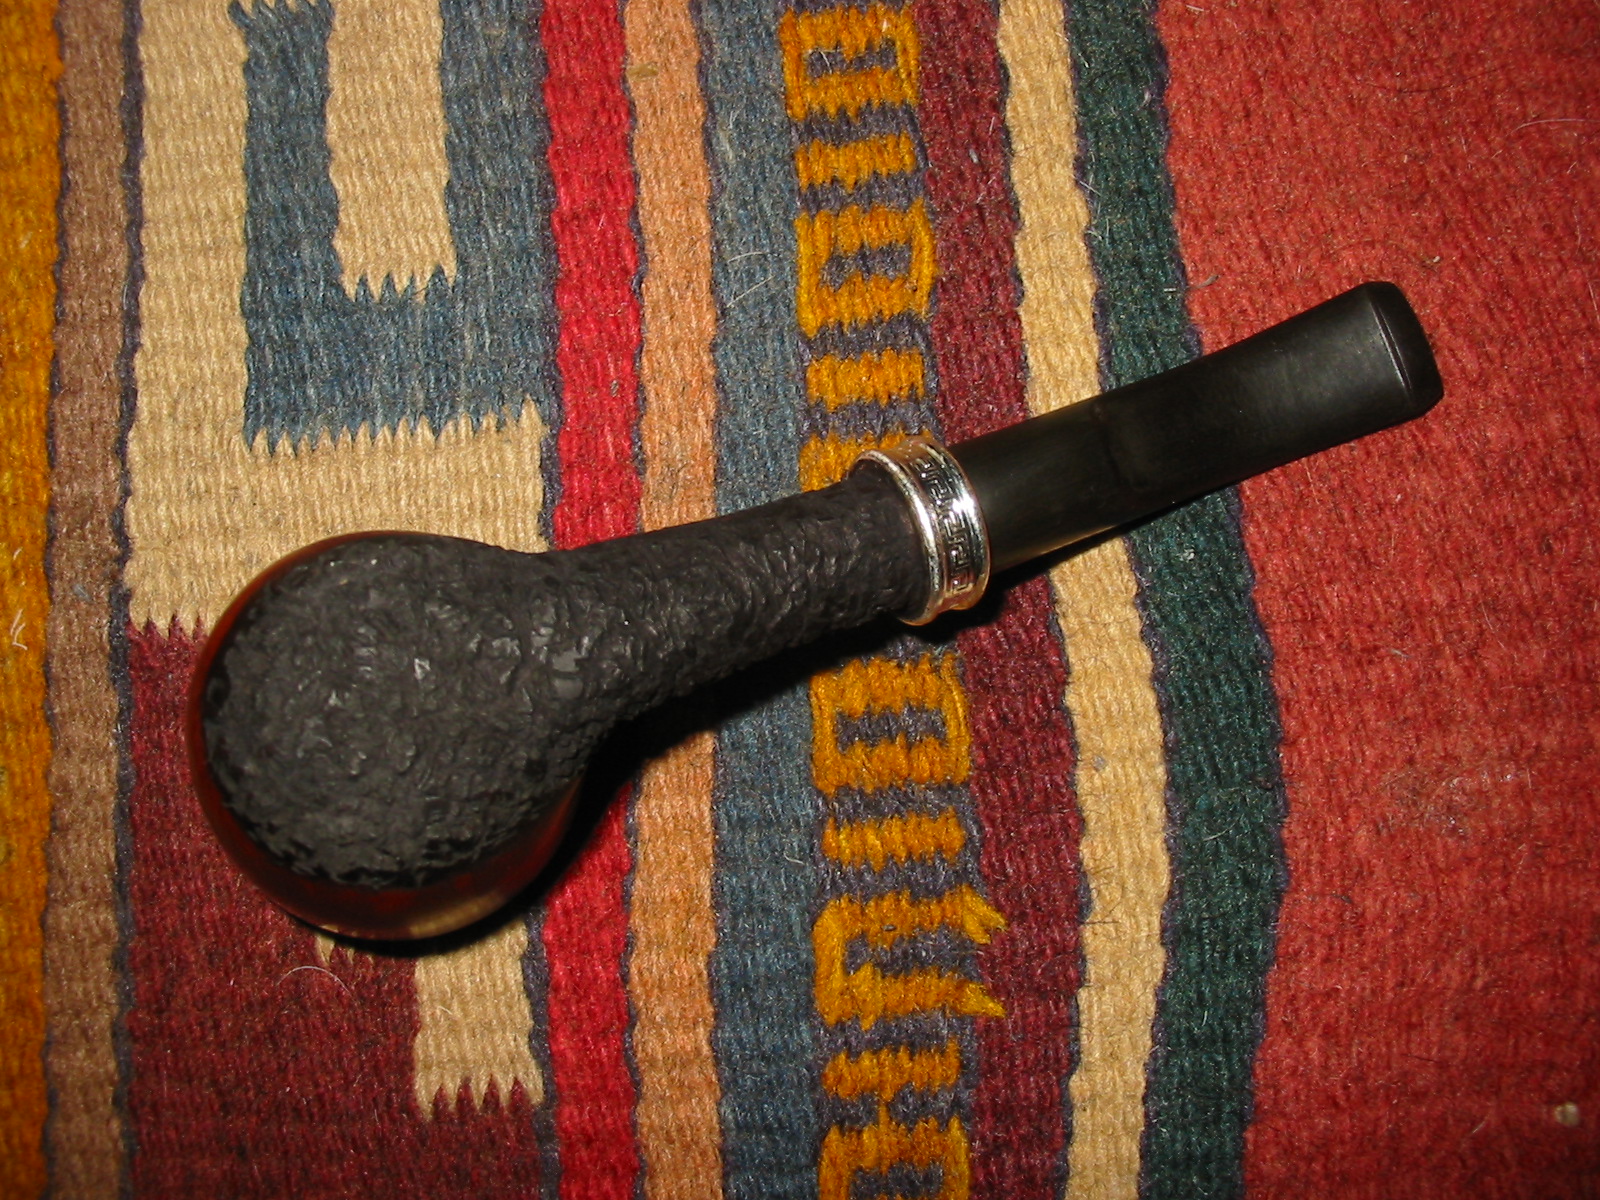
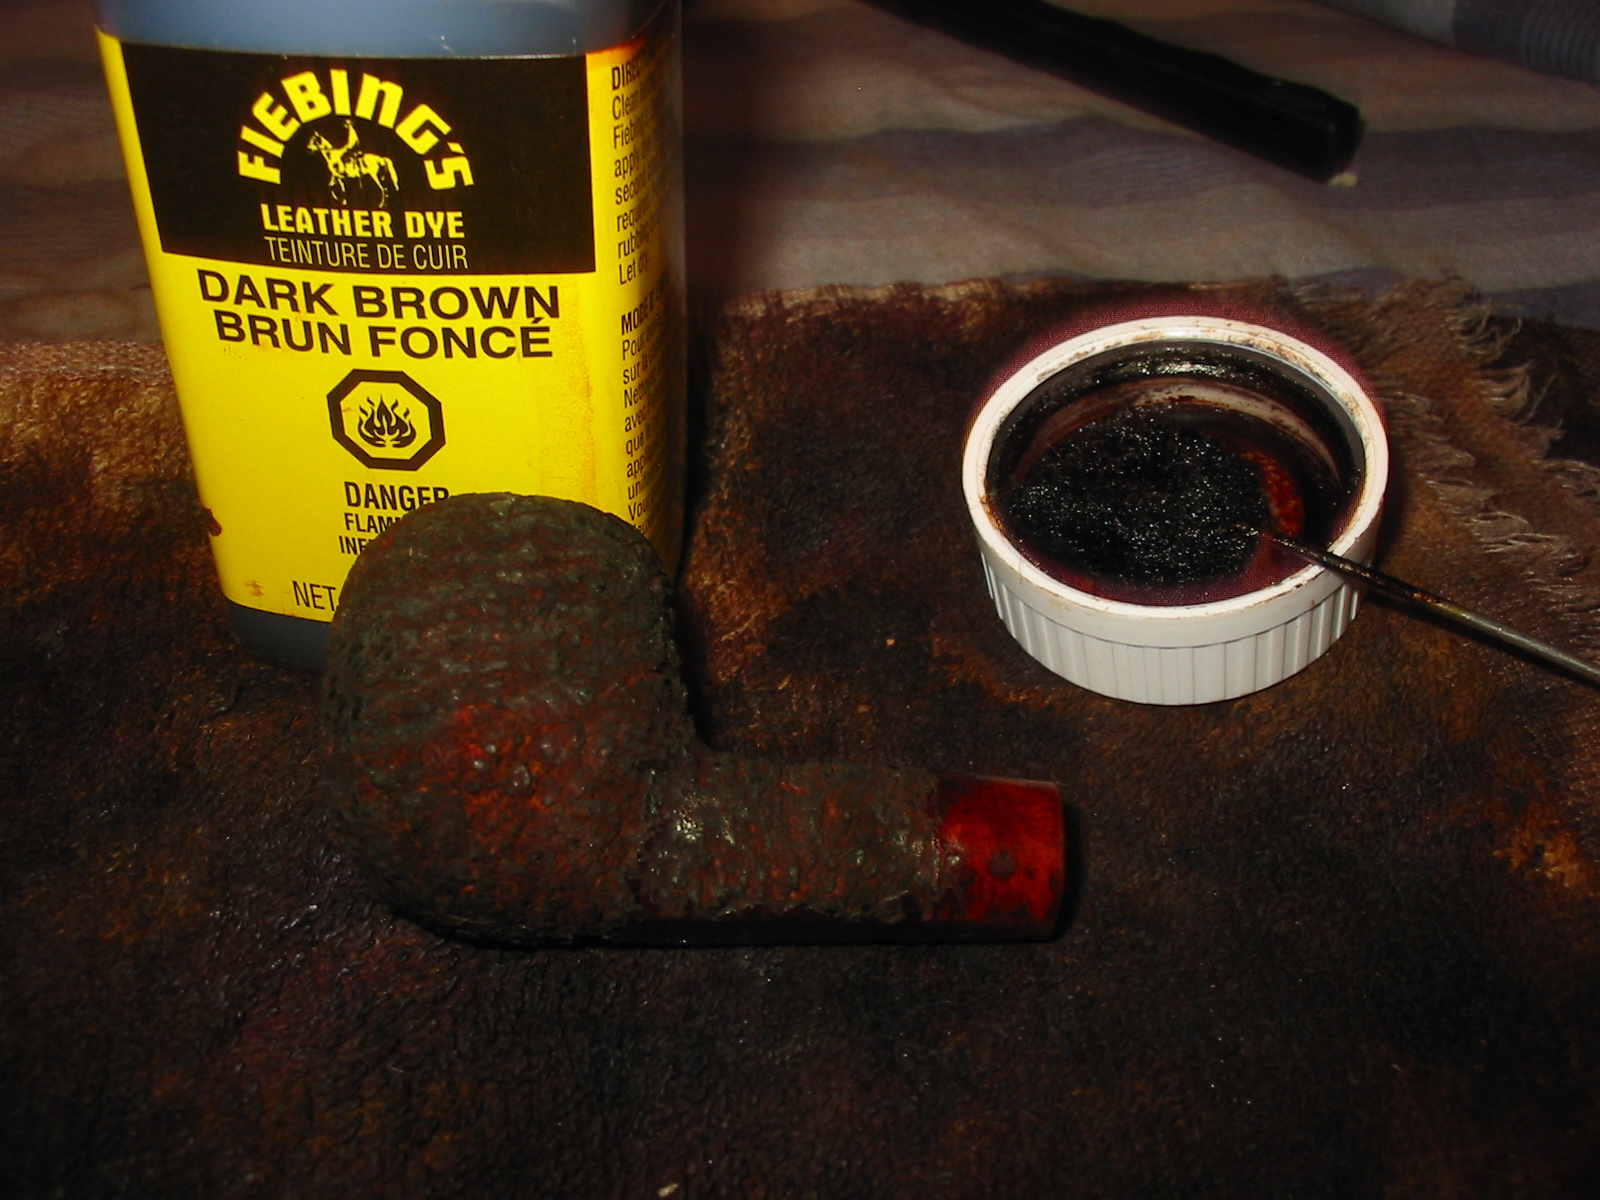
Once the bowl was rusticated I scrubbed the rough surface with a brass tire brush to knock of the edges. I carefully rusticated the rim and used the tool to round the edges on the outer rim to hide some of the obvious damage that had been present before. Once finished I stained it with a dark brown aniline stain. I had left the underside of the shank smooth and a portion of the shank next to the stem shank junction. I stained the bowl, flamed it, stained it and flamed it again until the coverage of the stain was even all over the briar.
IMG_6998

IMG_6999

IMG_7000

IMG_7001
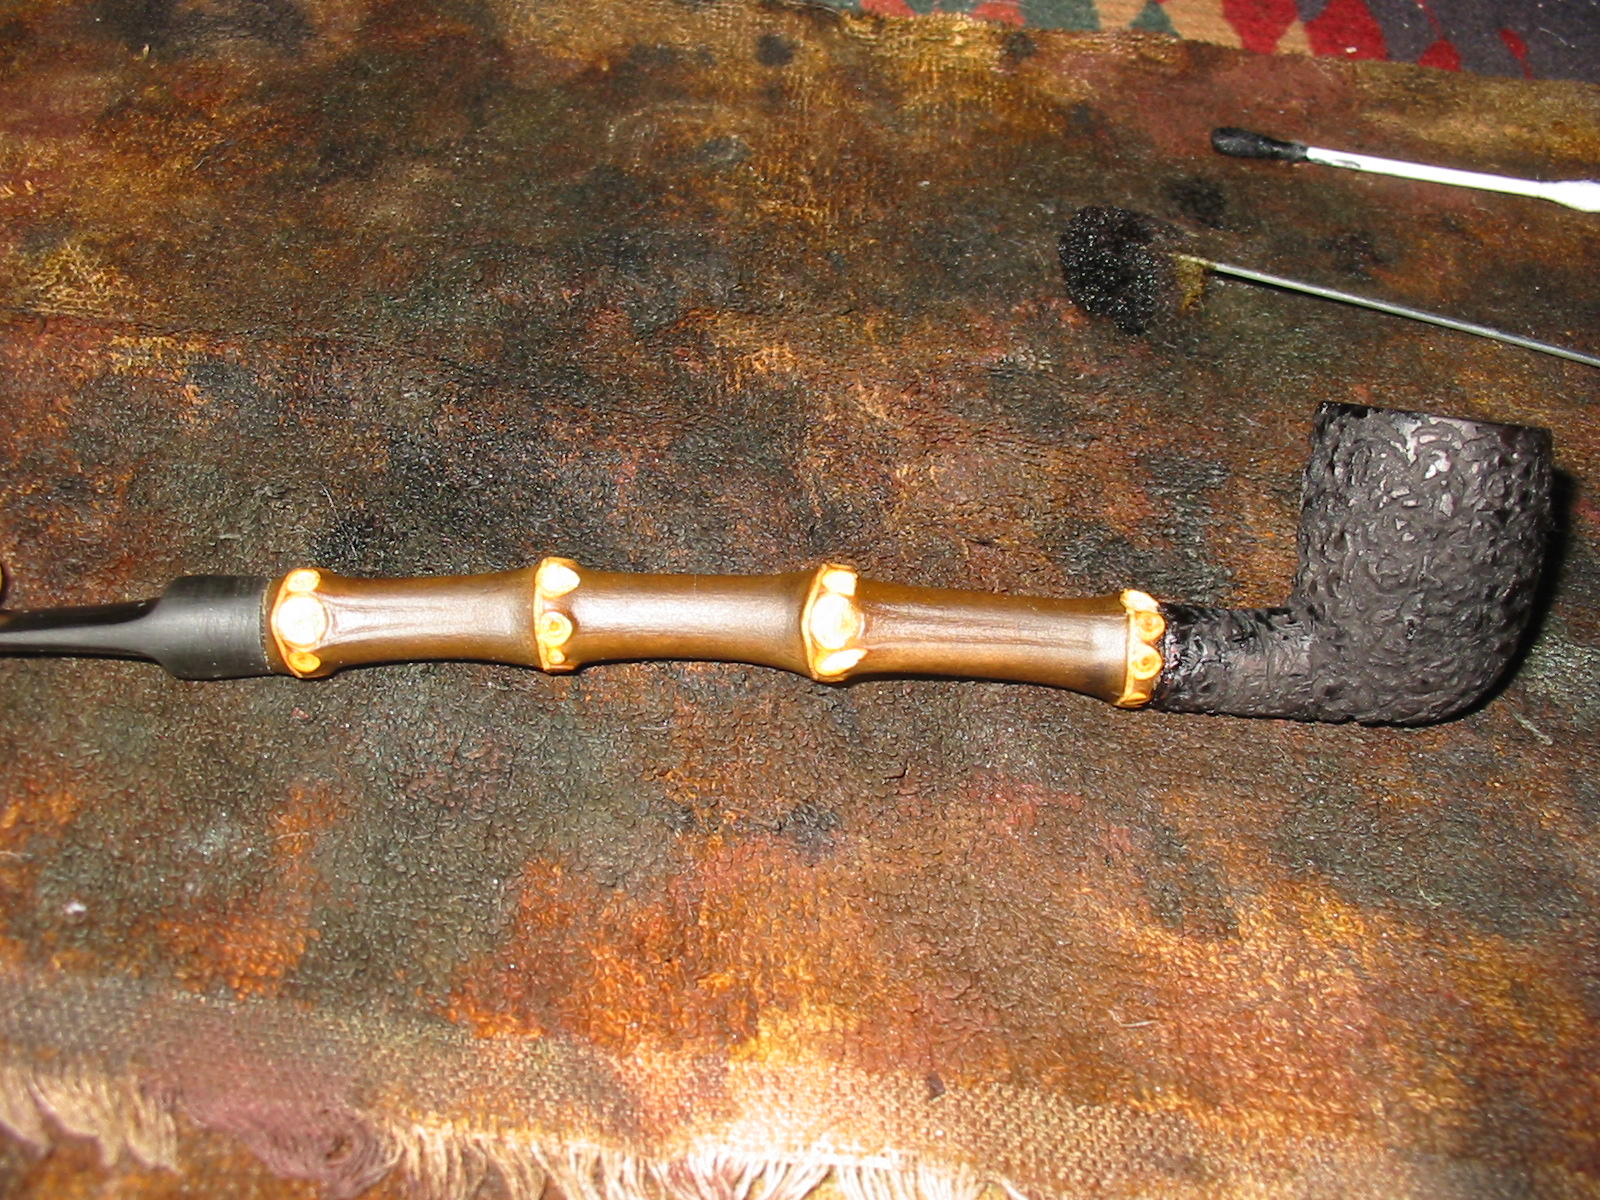
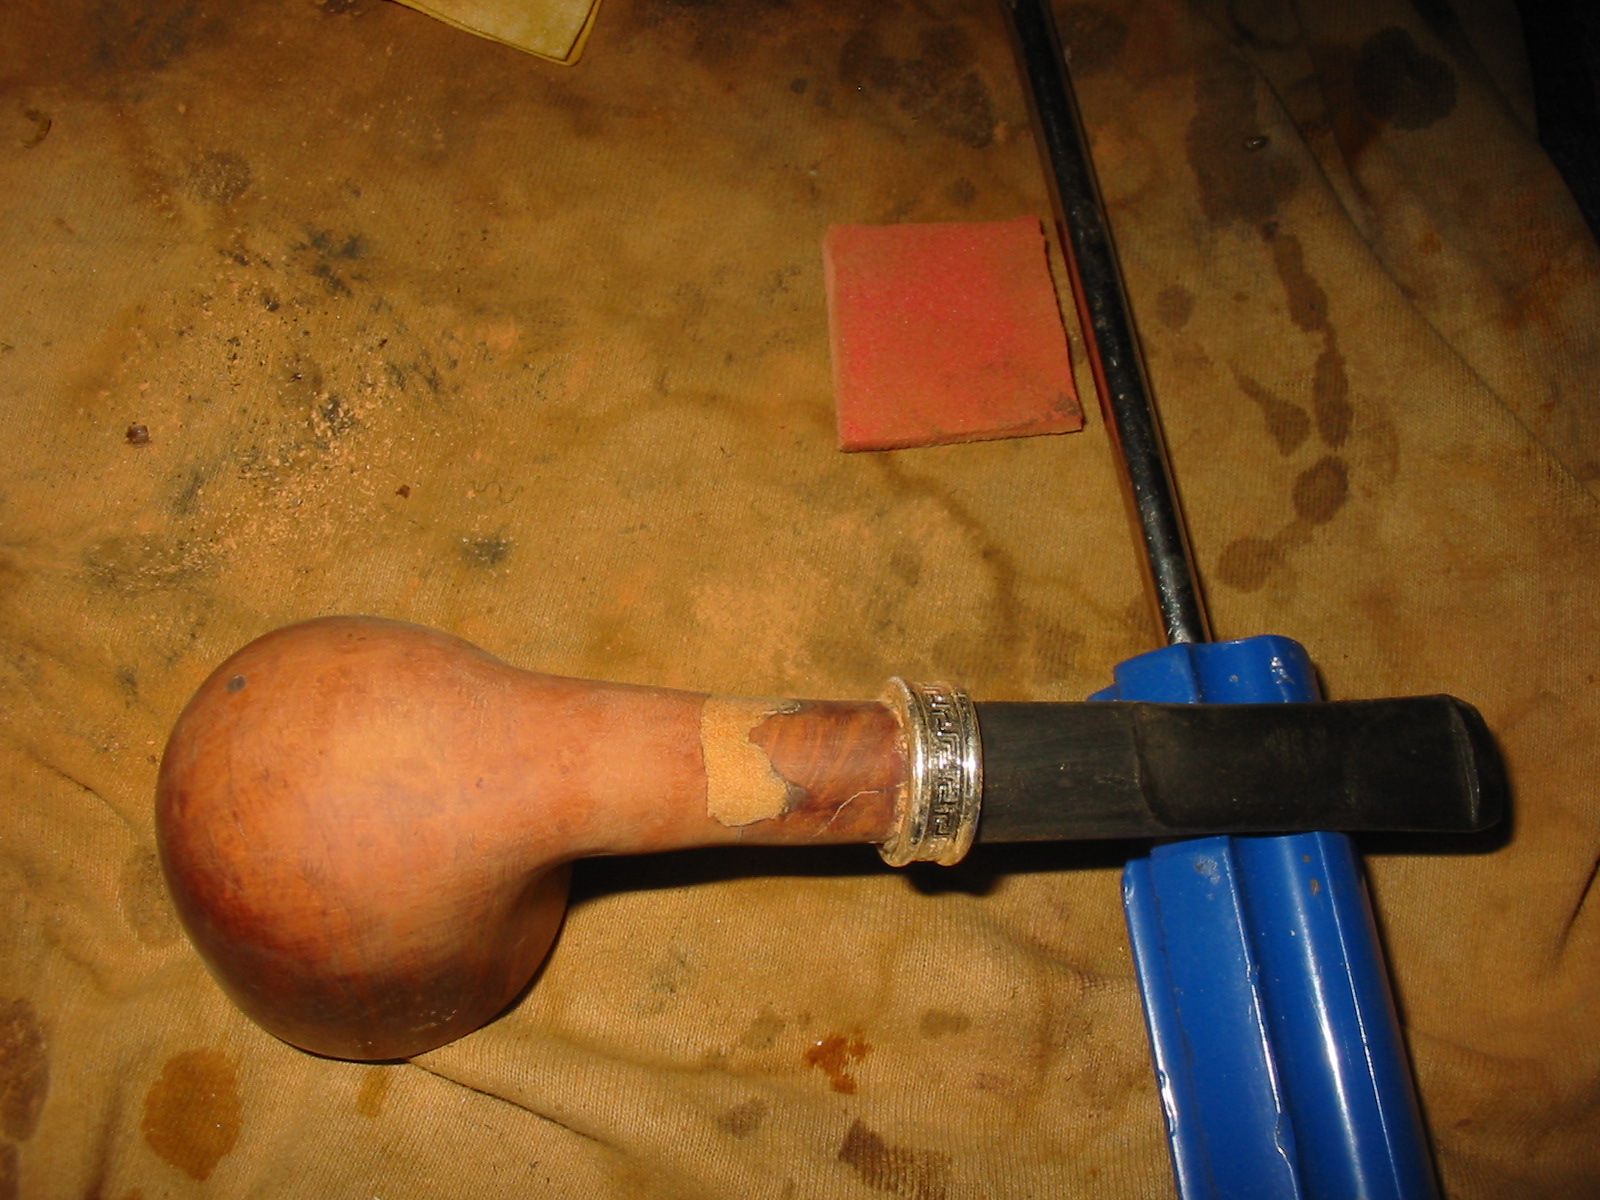
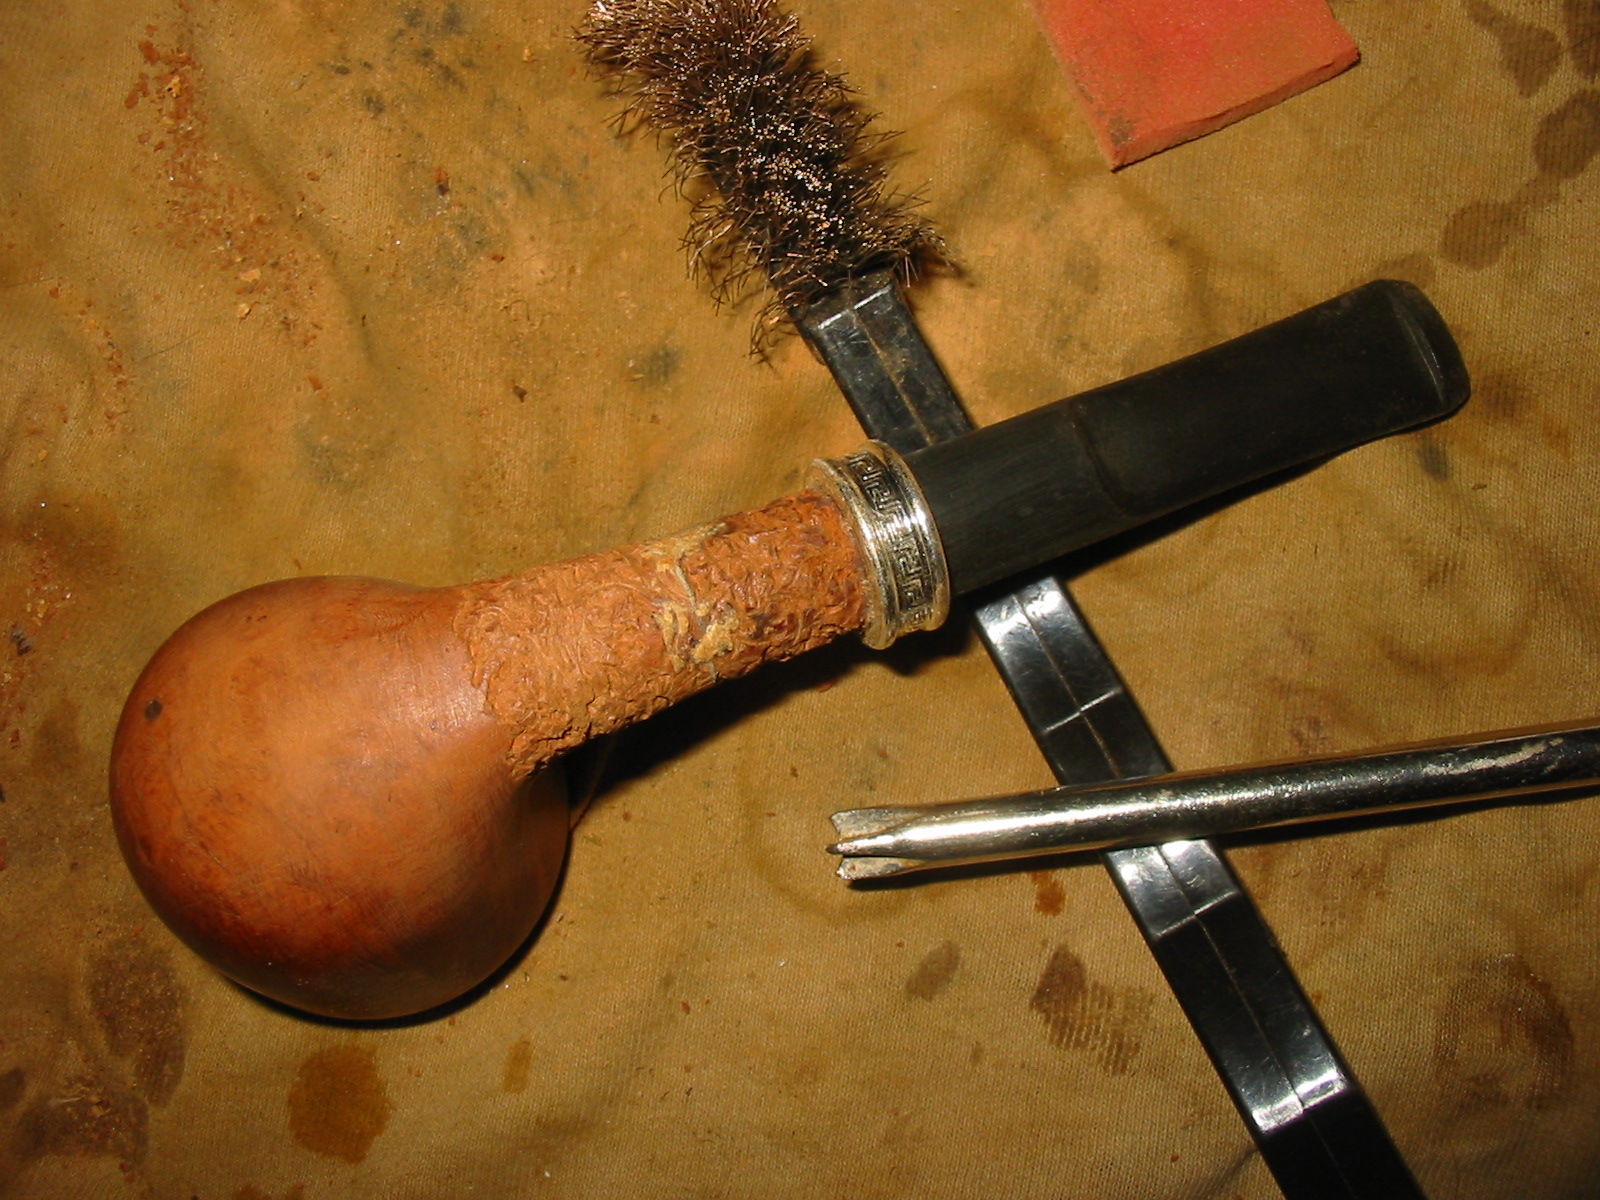
I buffed the bowl with red Tripoli to further smooth out the high spots on the rustication and give a little contrast to the stain. I used the brass brush a second time on the surface. It still was not quite what I was aiming for but I laid it aside for a while to look at it and think about the options. It was while I was doing that I thought I would see if I had a new stem that would work. It gave me a second option to try should the repair or patches not work well.
IMG_7002

IMG_7003

IMG_7004
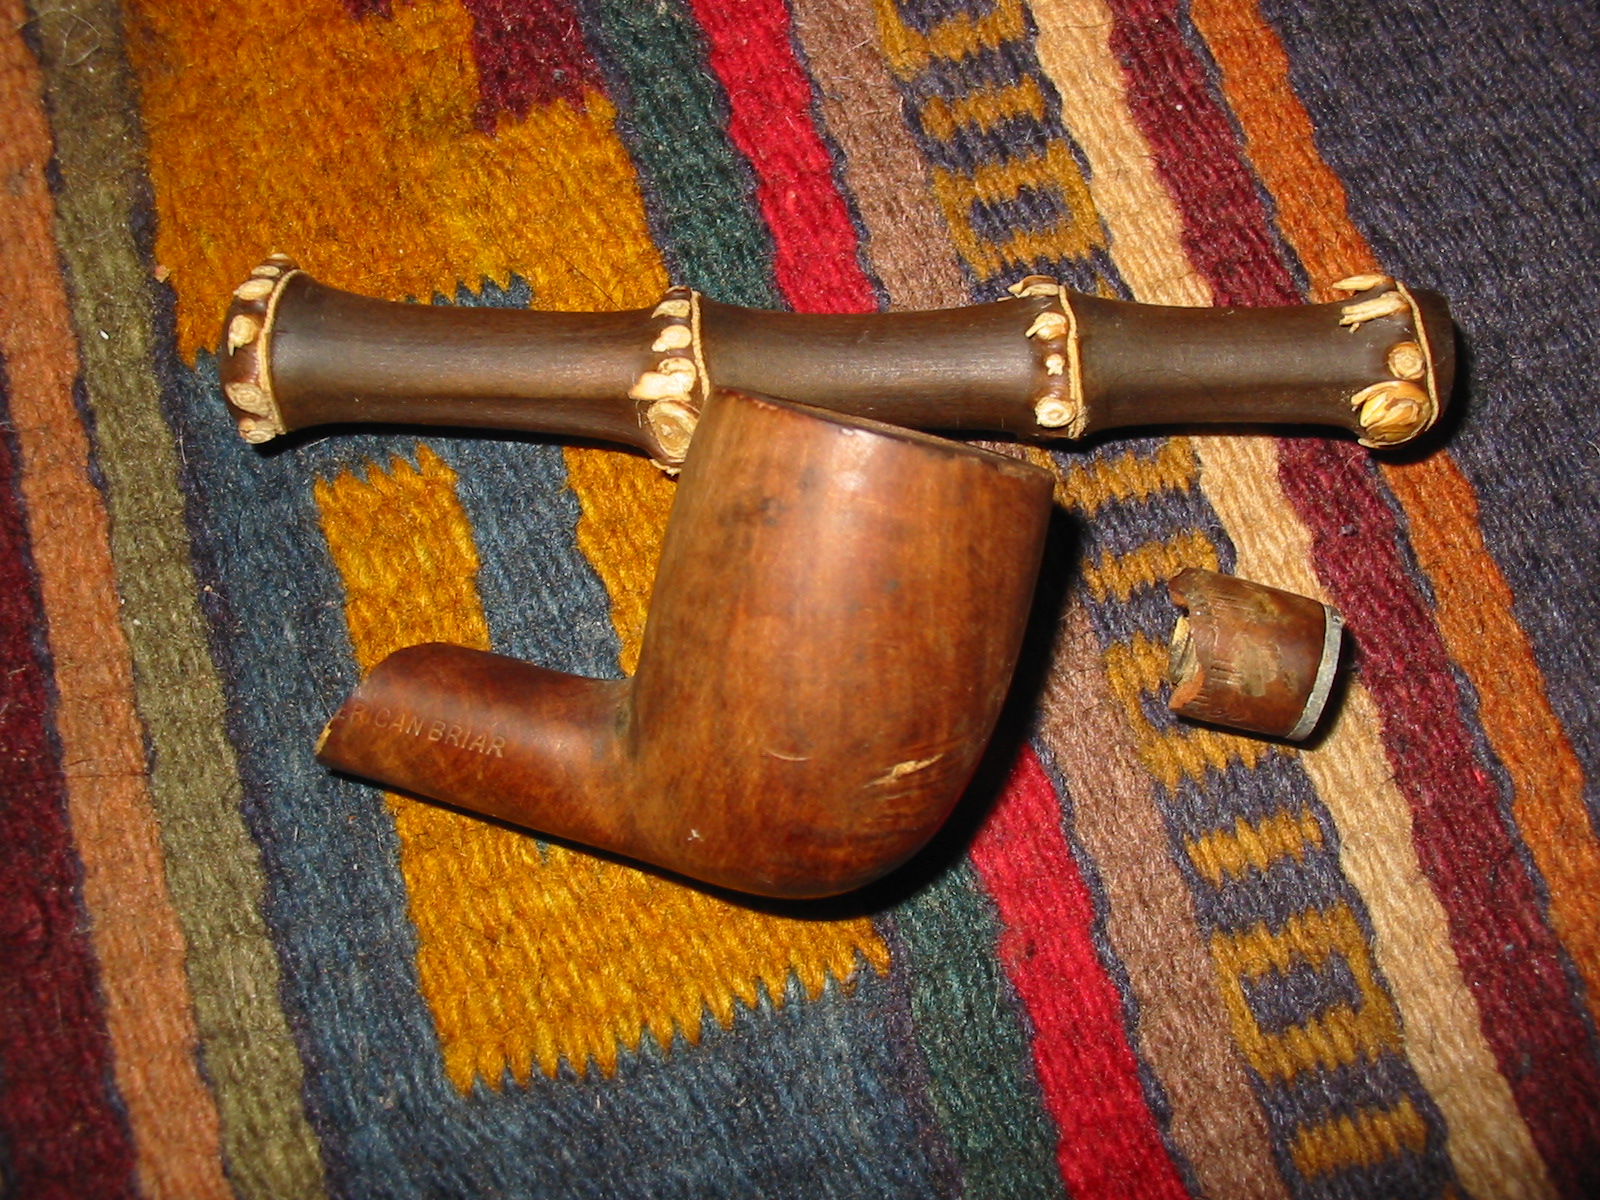
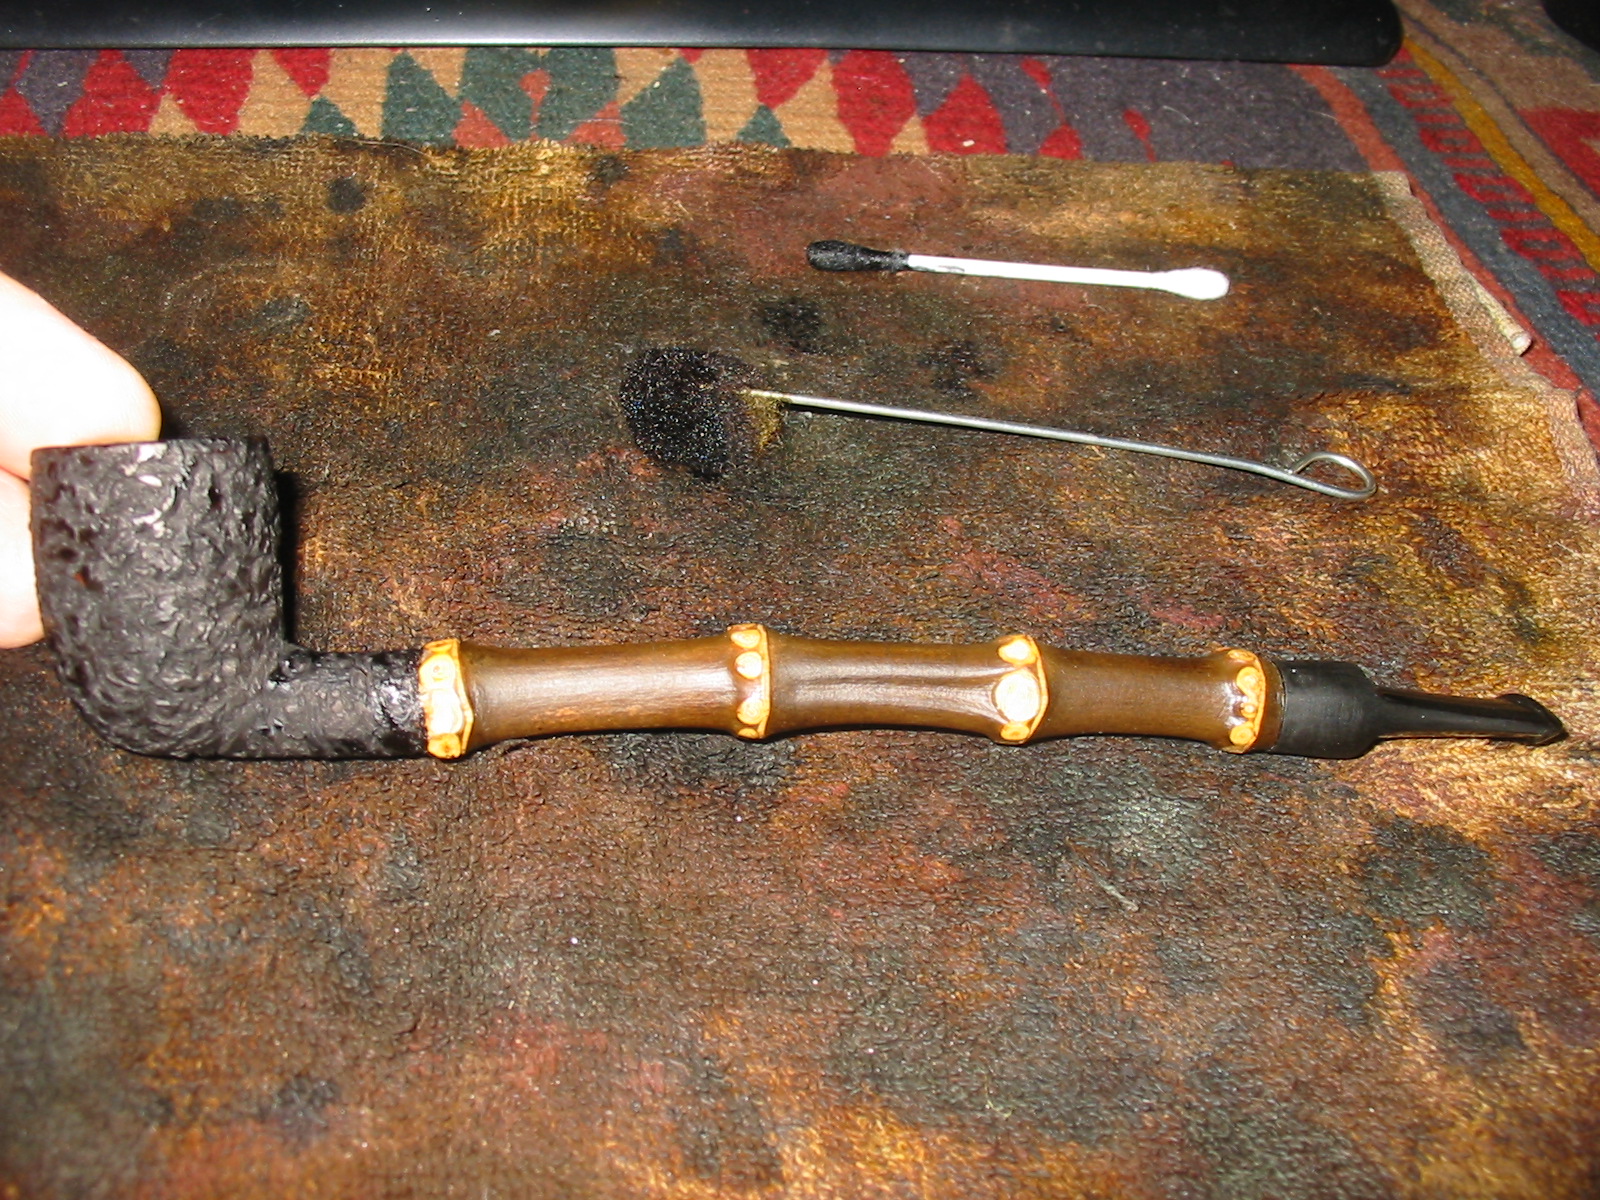
I did not have a round taper or saddle stem in my can of stems that was the right diameter for the shank but I did have quite a few square stems that could be modified to fit the shank diameter. I found one that had the tenon already turned for a previous pipe I was working on and put it on the pipe to have a look. I could see some potential in the stem and the look of the wide blade saddle stem. It would certainly be worth a try. If it turned out well and the patch on the other stem worked then I would have several options to work with. The tenon on the square stem was too long but that could easily be adjusted for a tight fit against the shank. I did the adjustment with a Dremel and sanding drum.
IMG_7006

IMG_7007
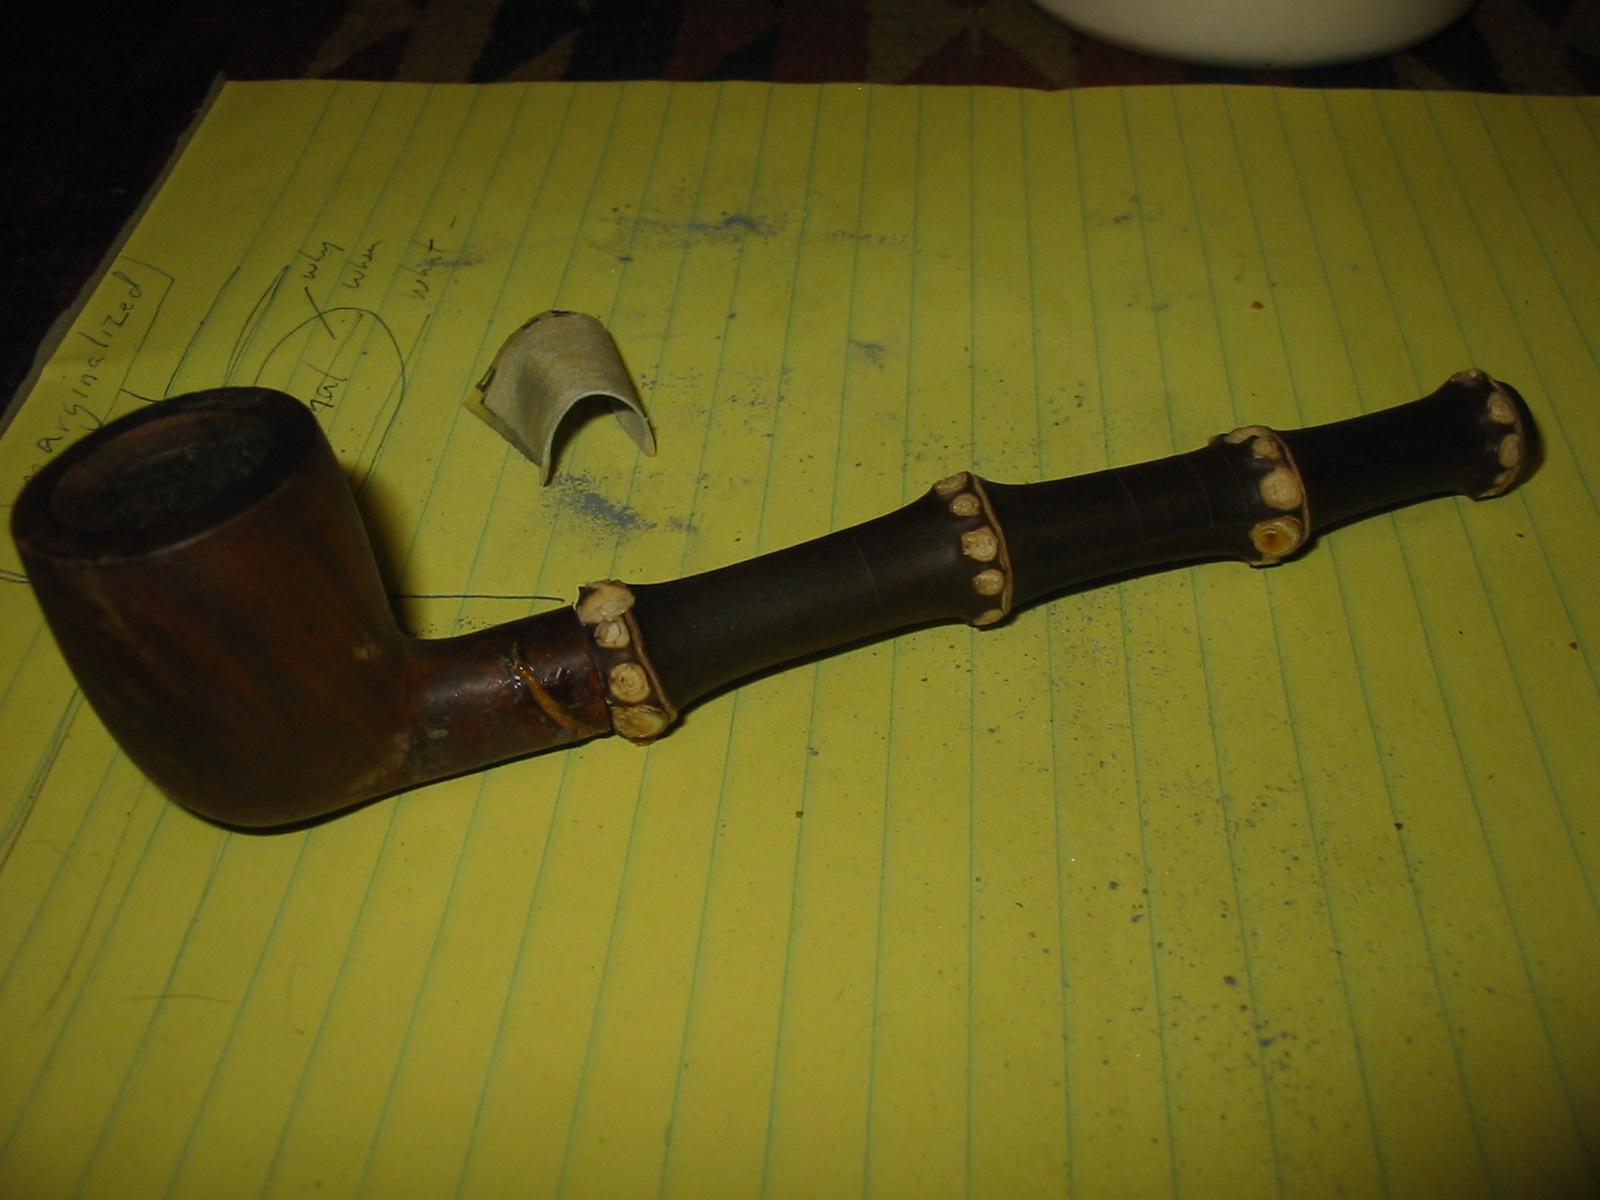
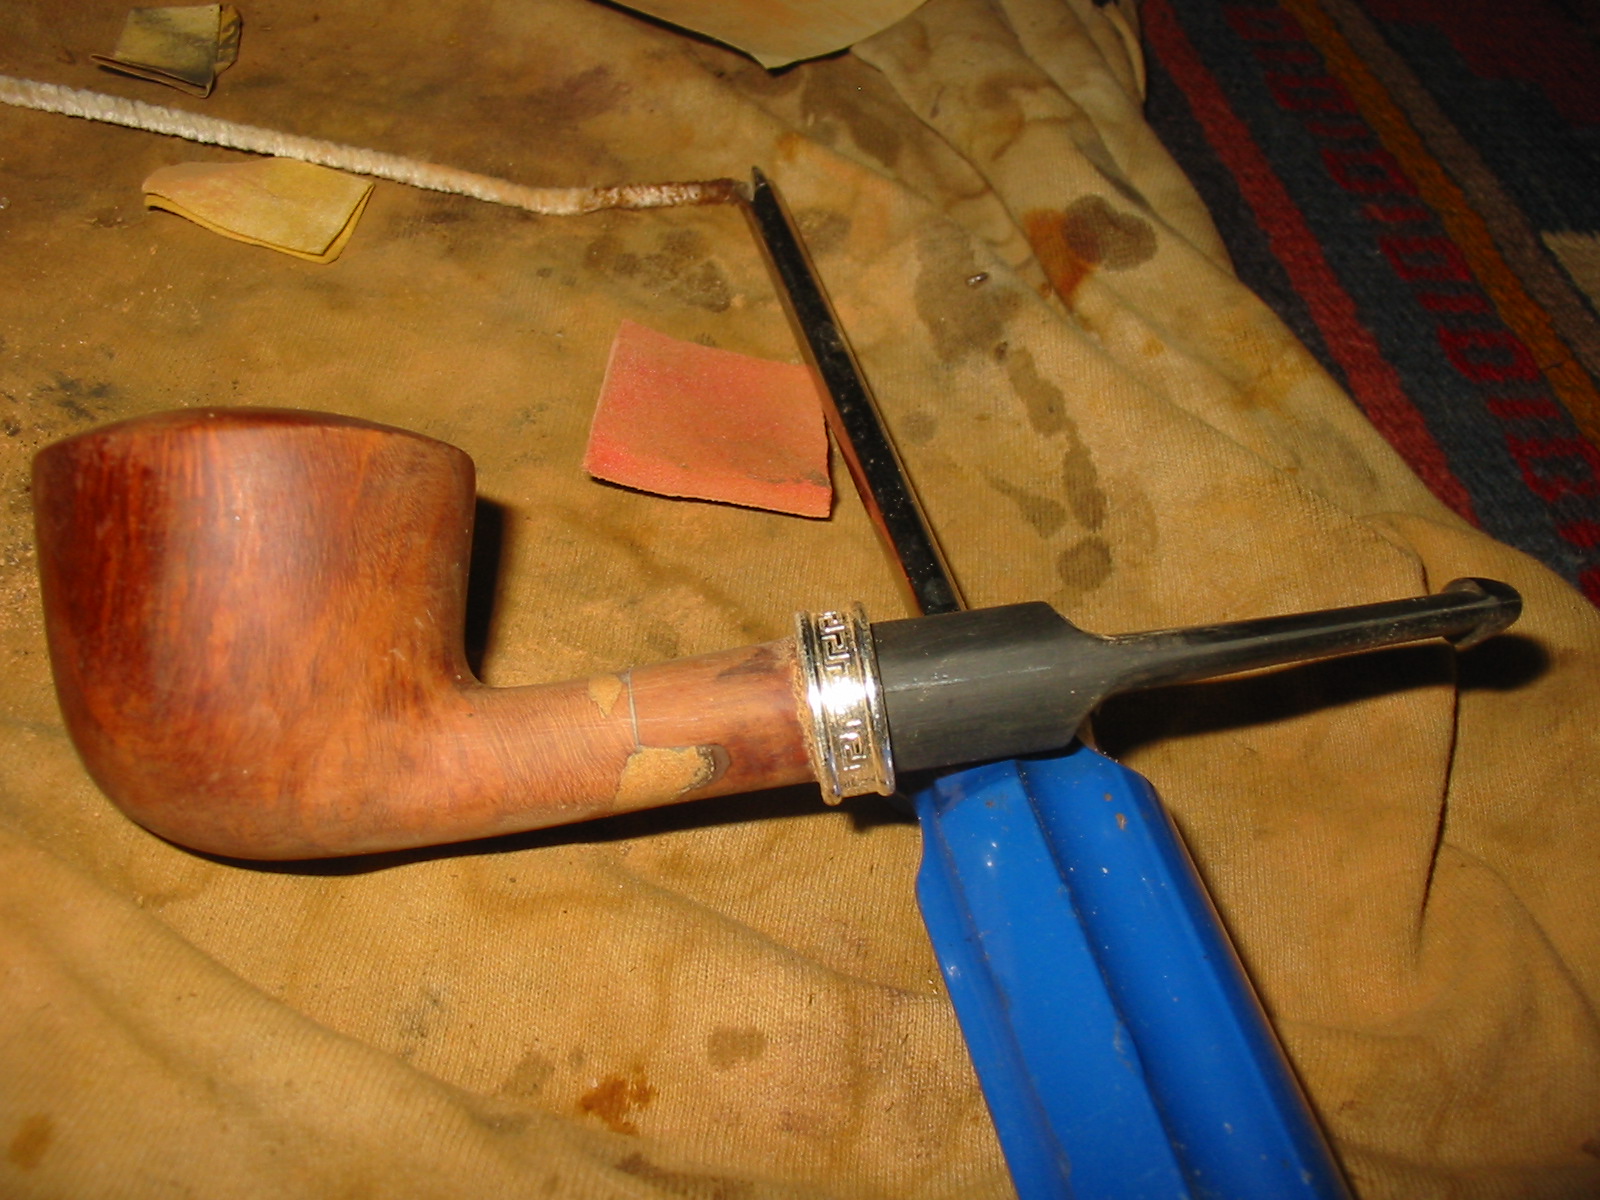
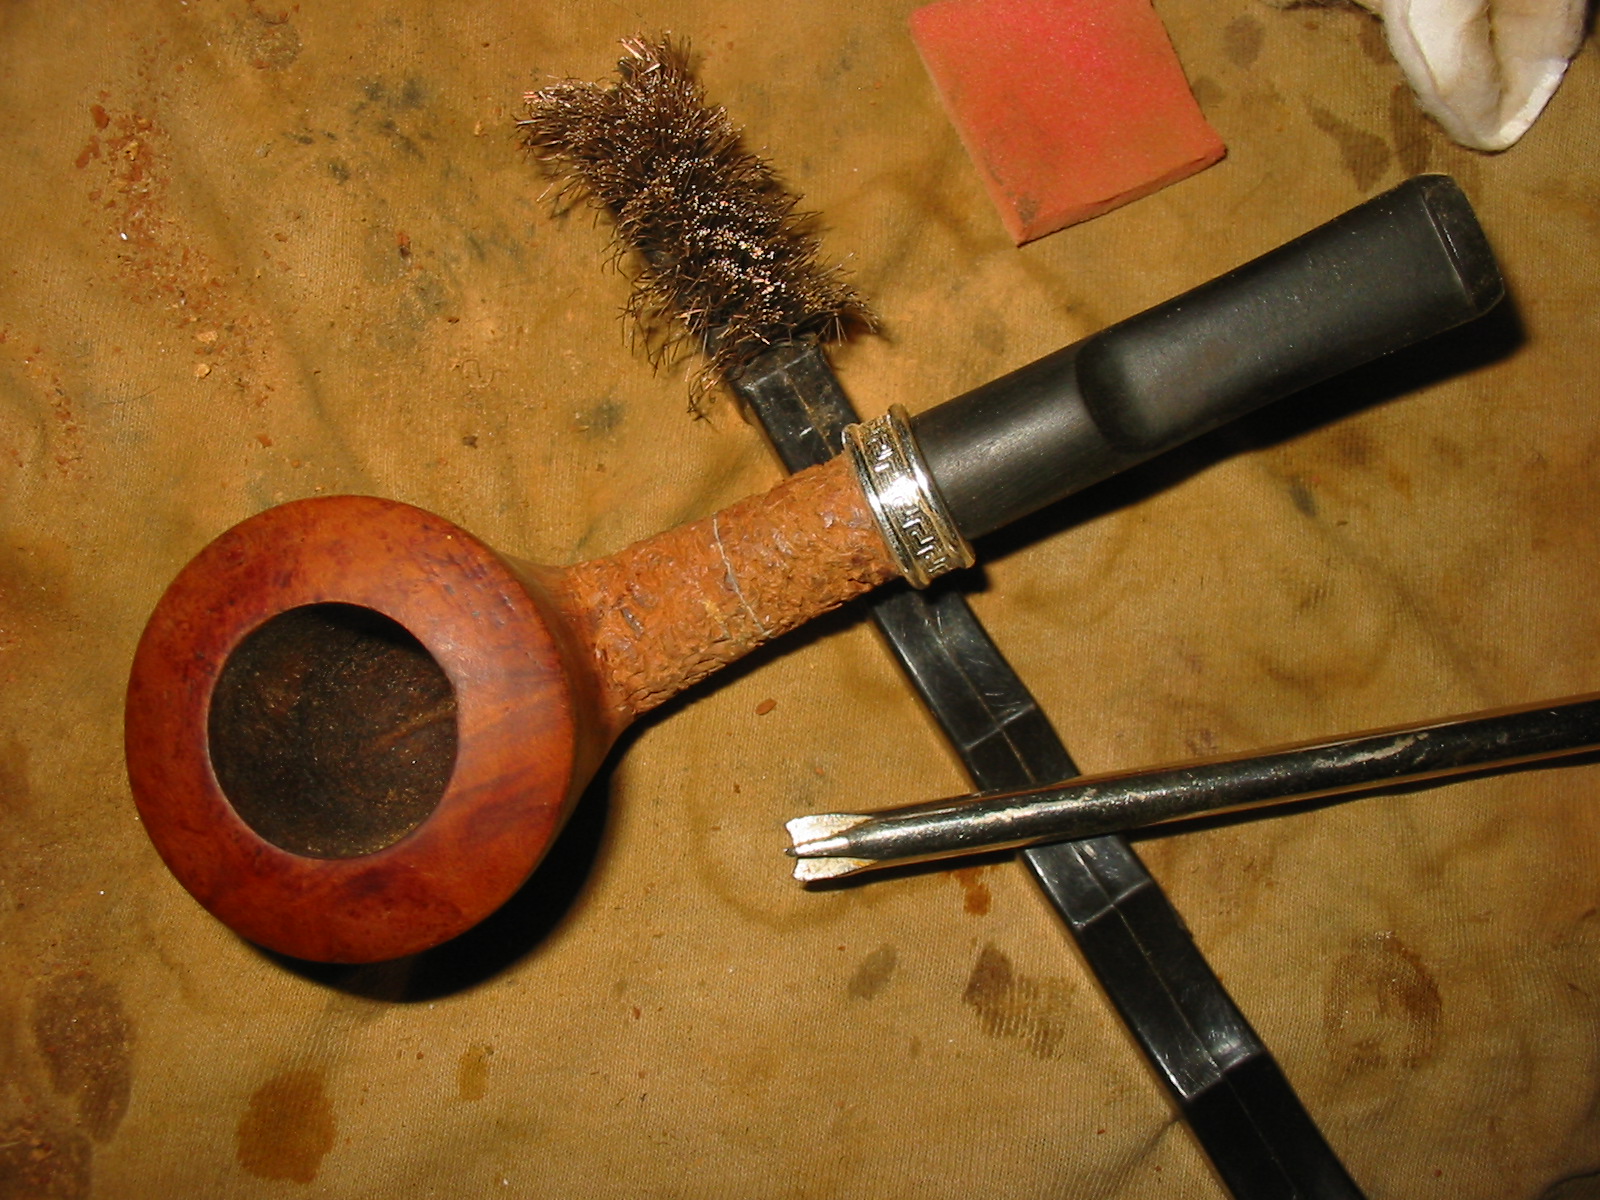
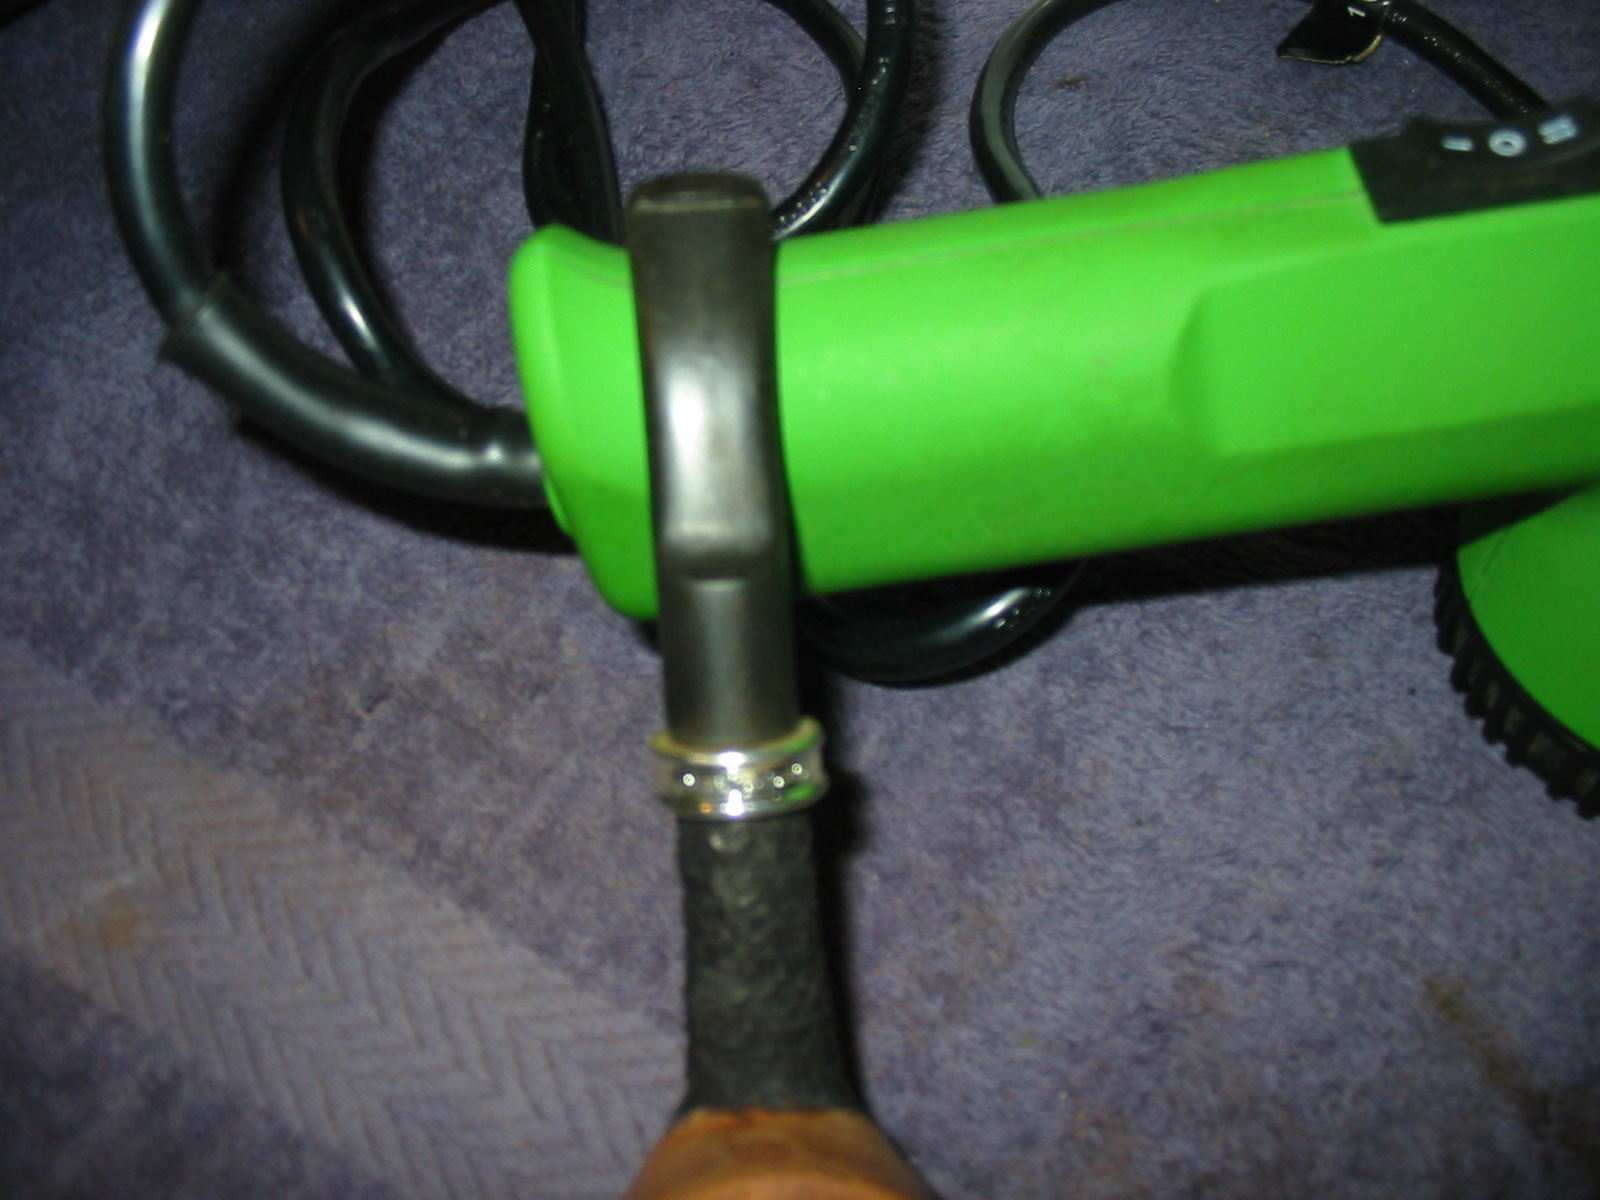
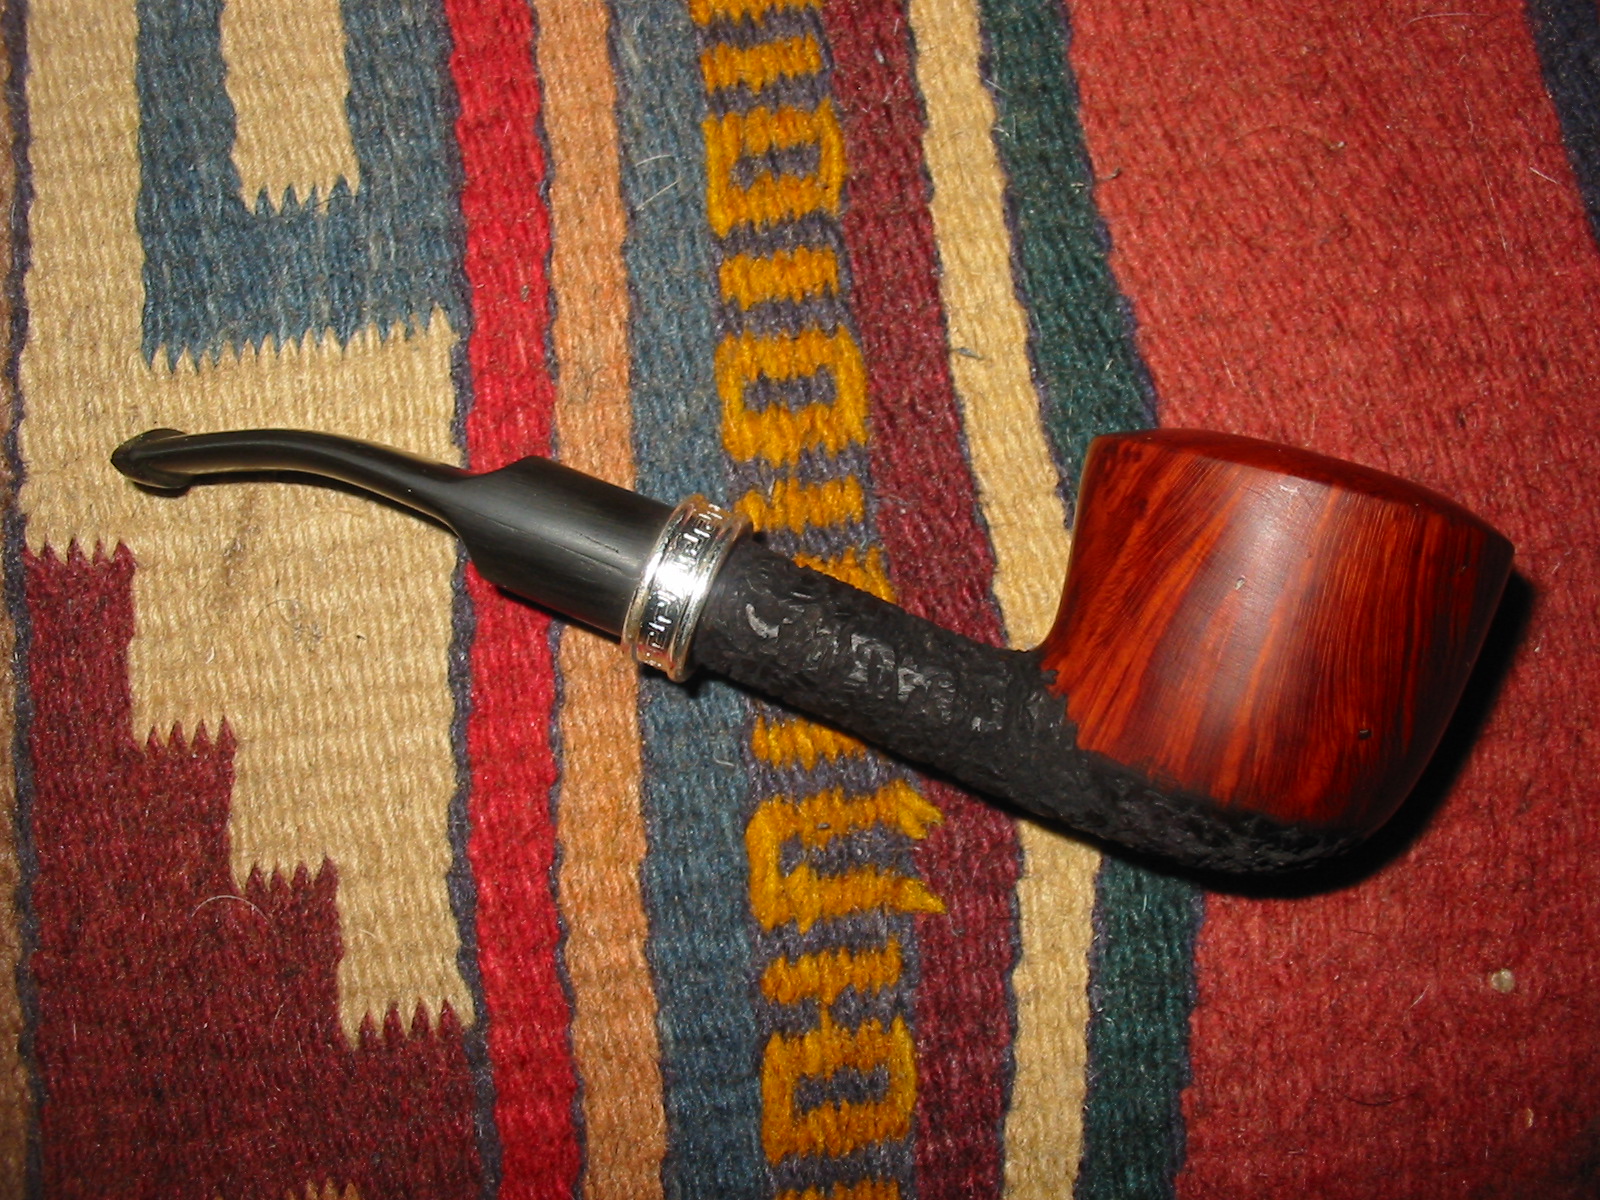
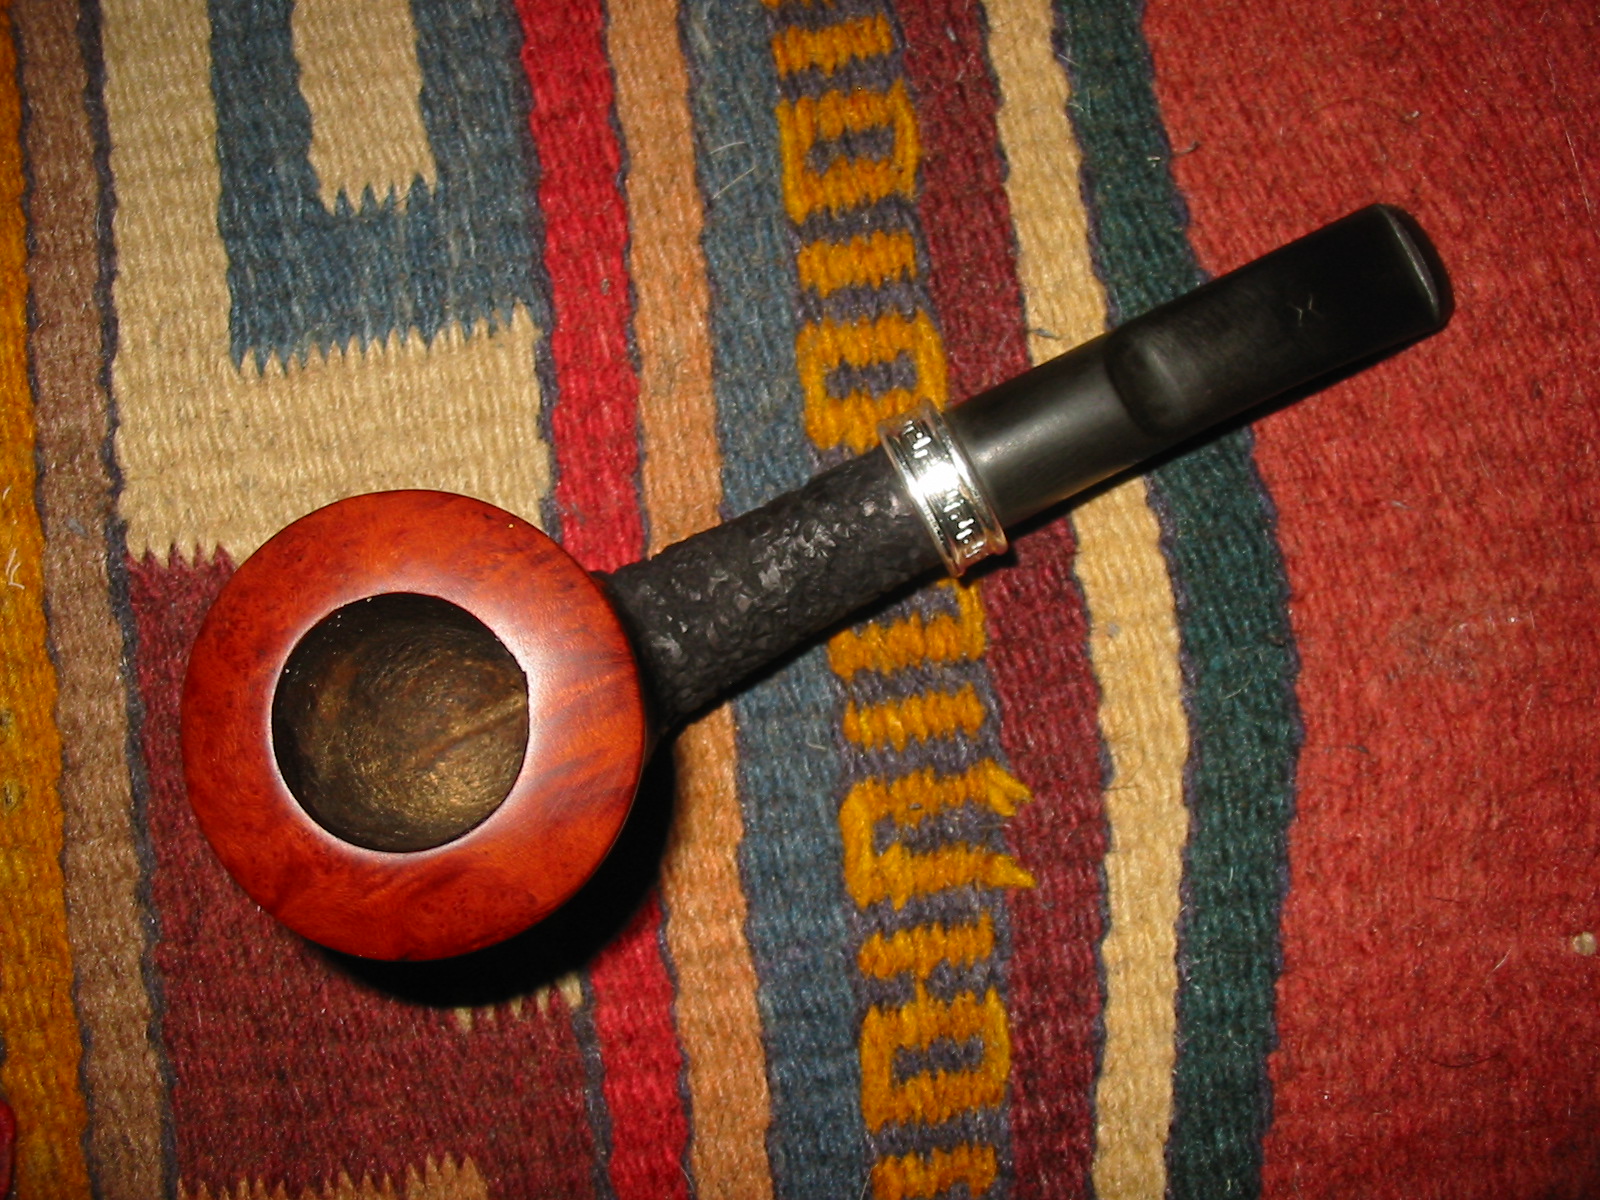
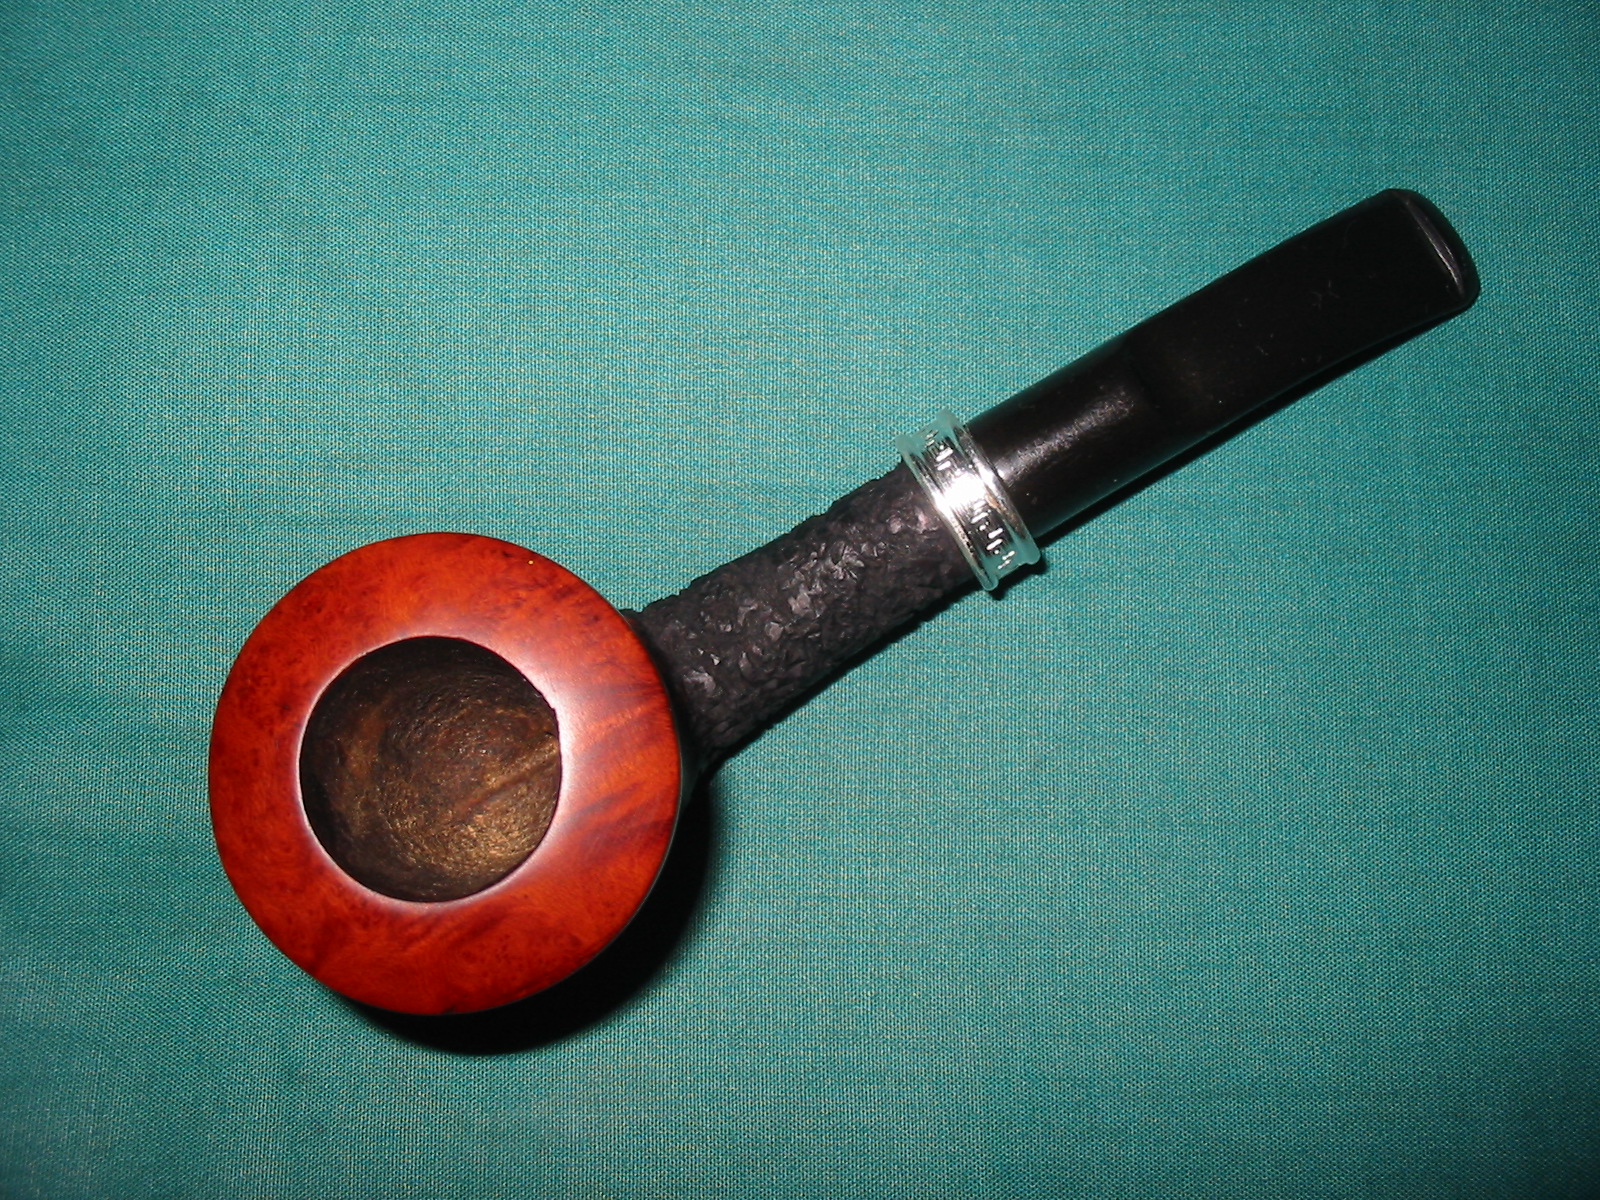
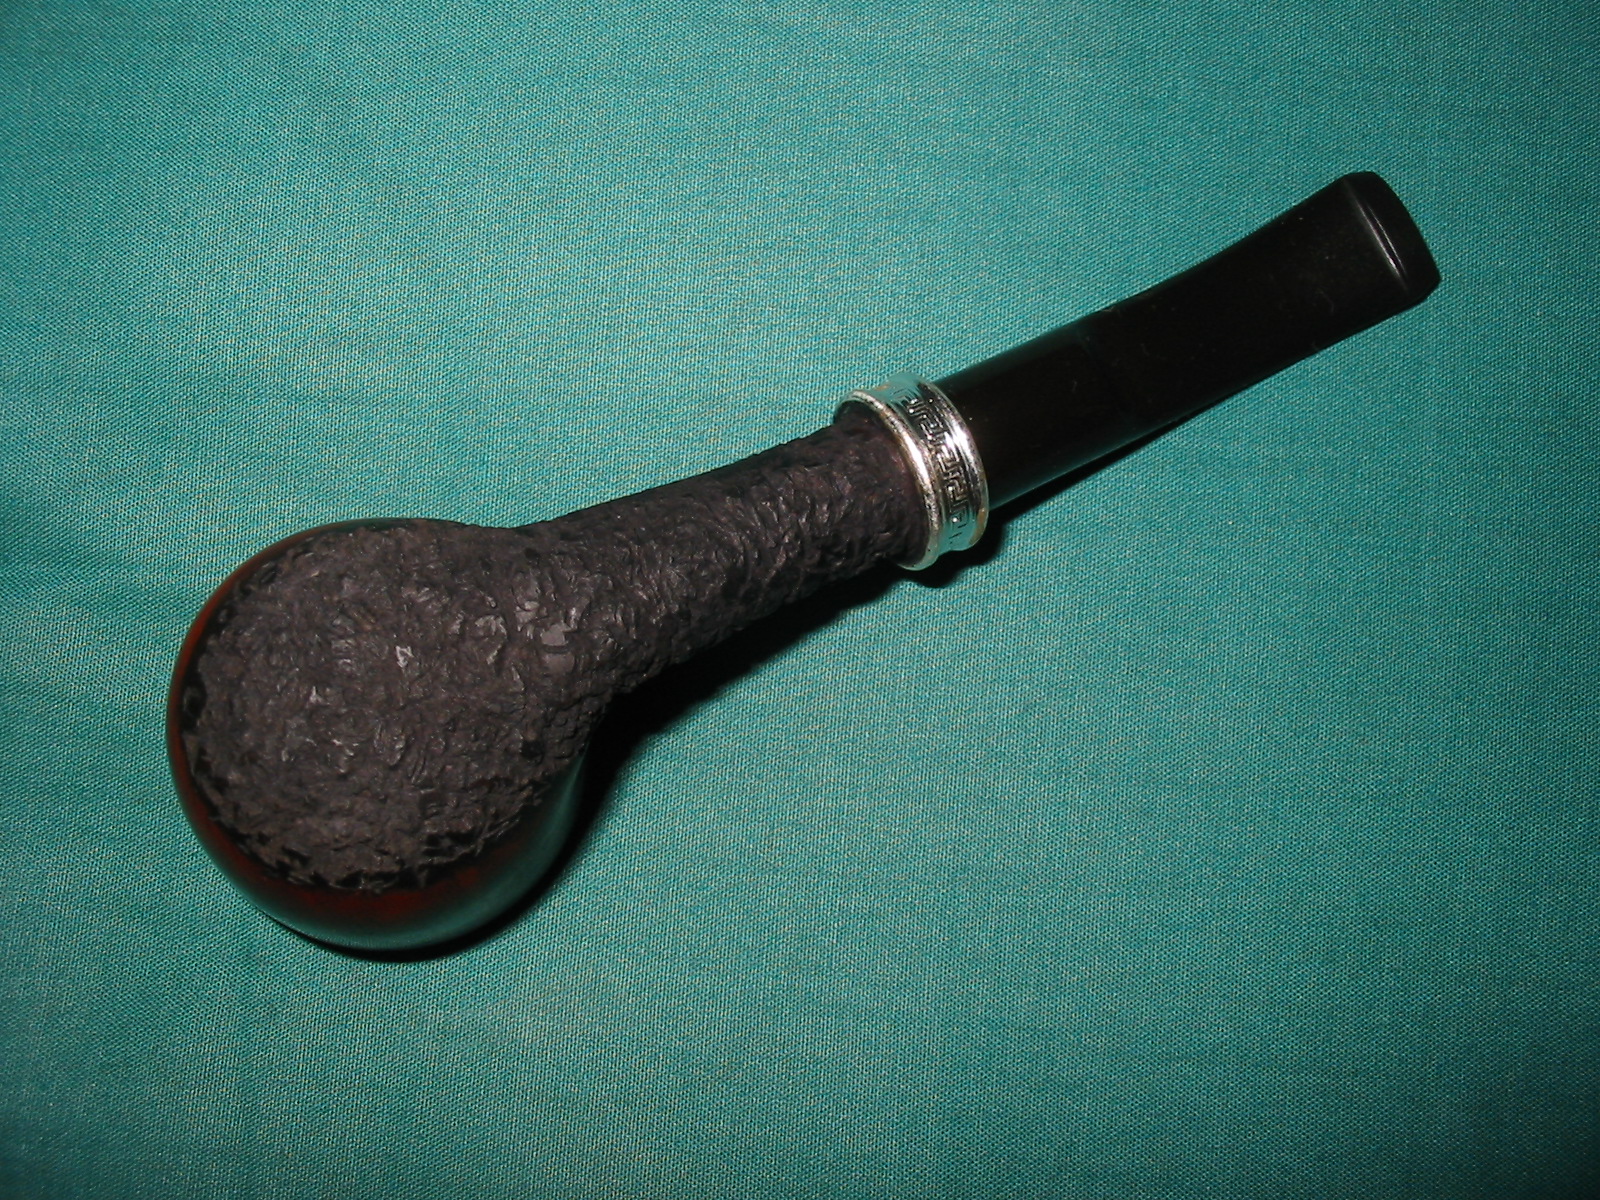
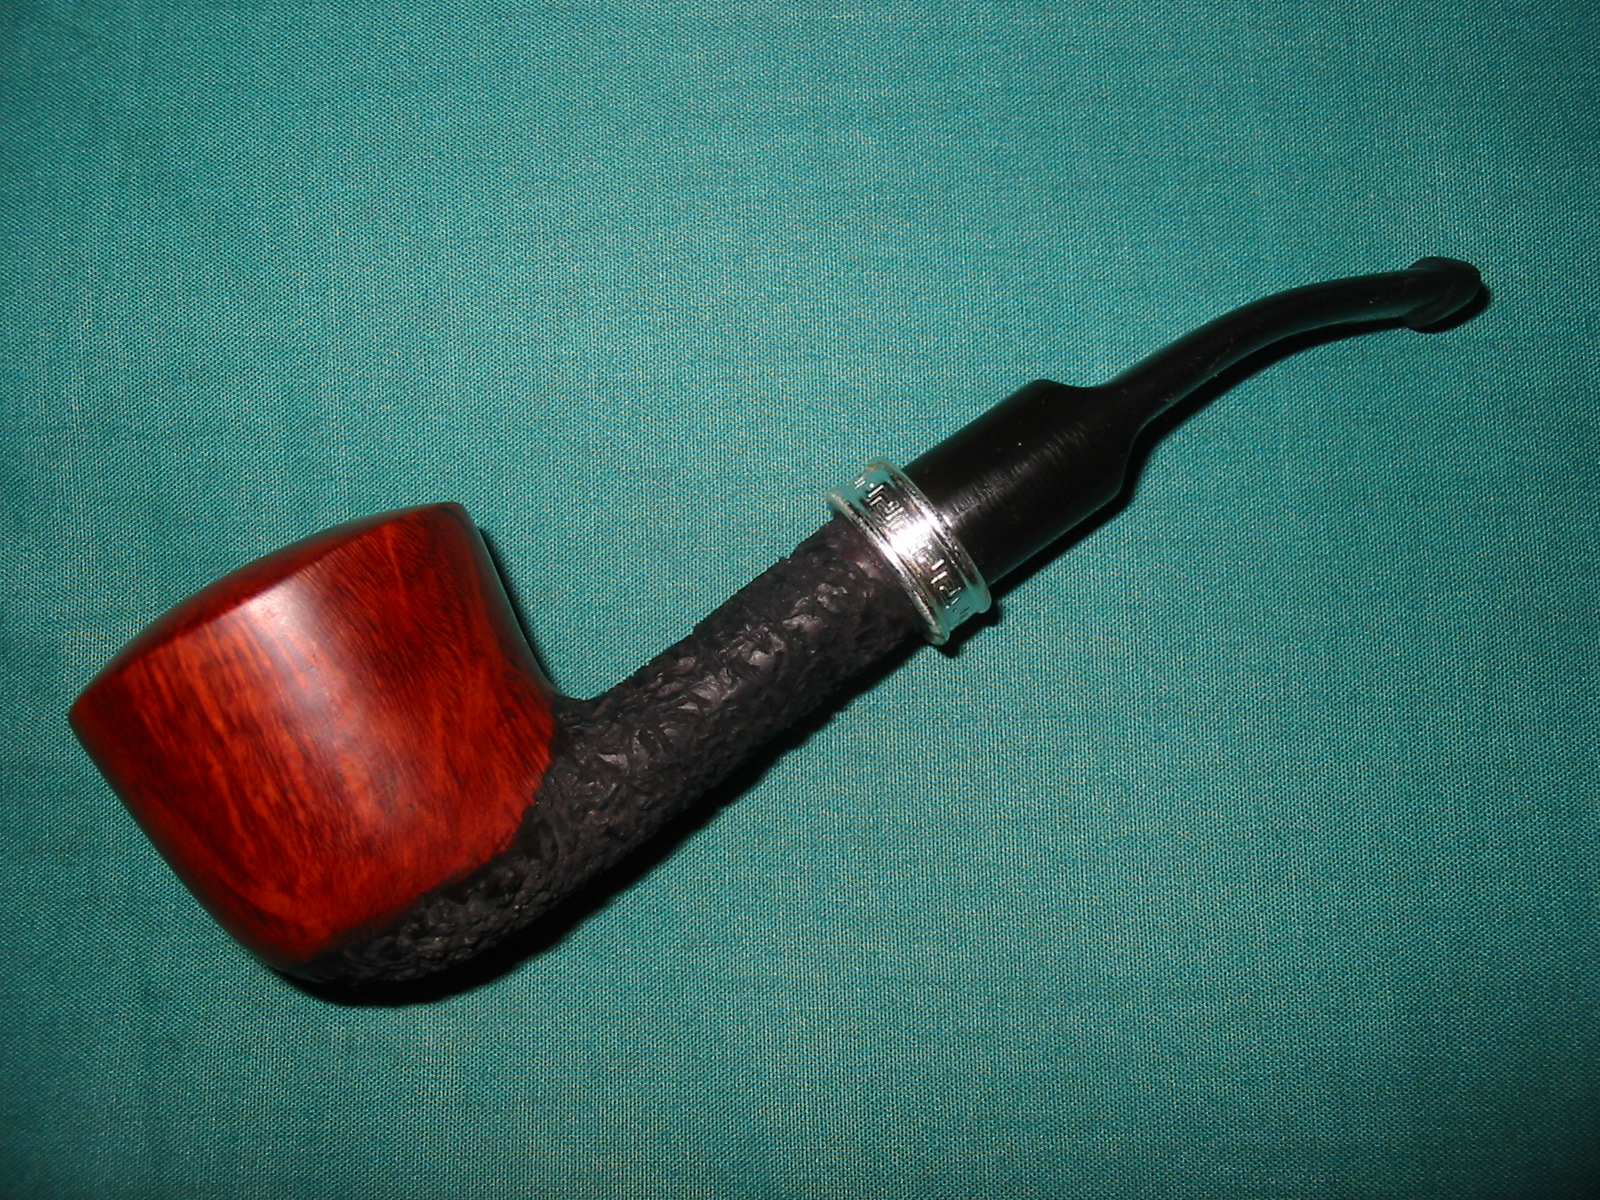
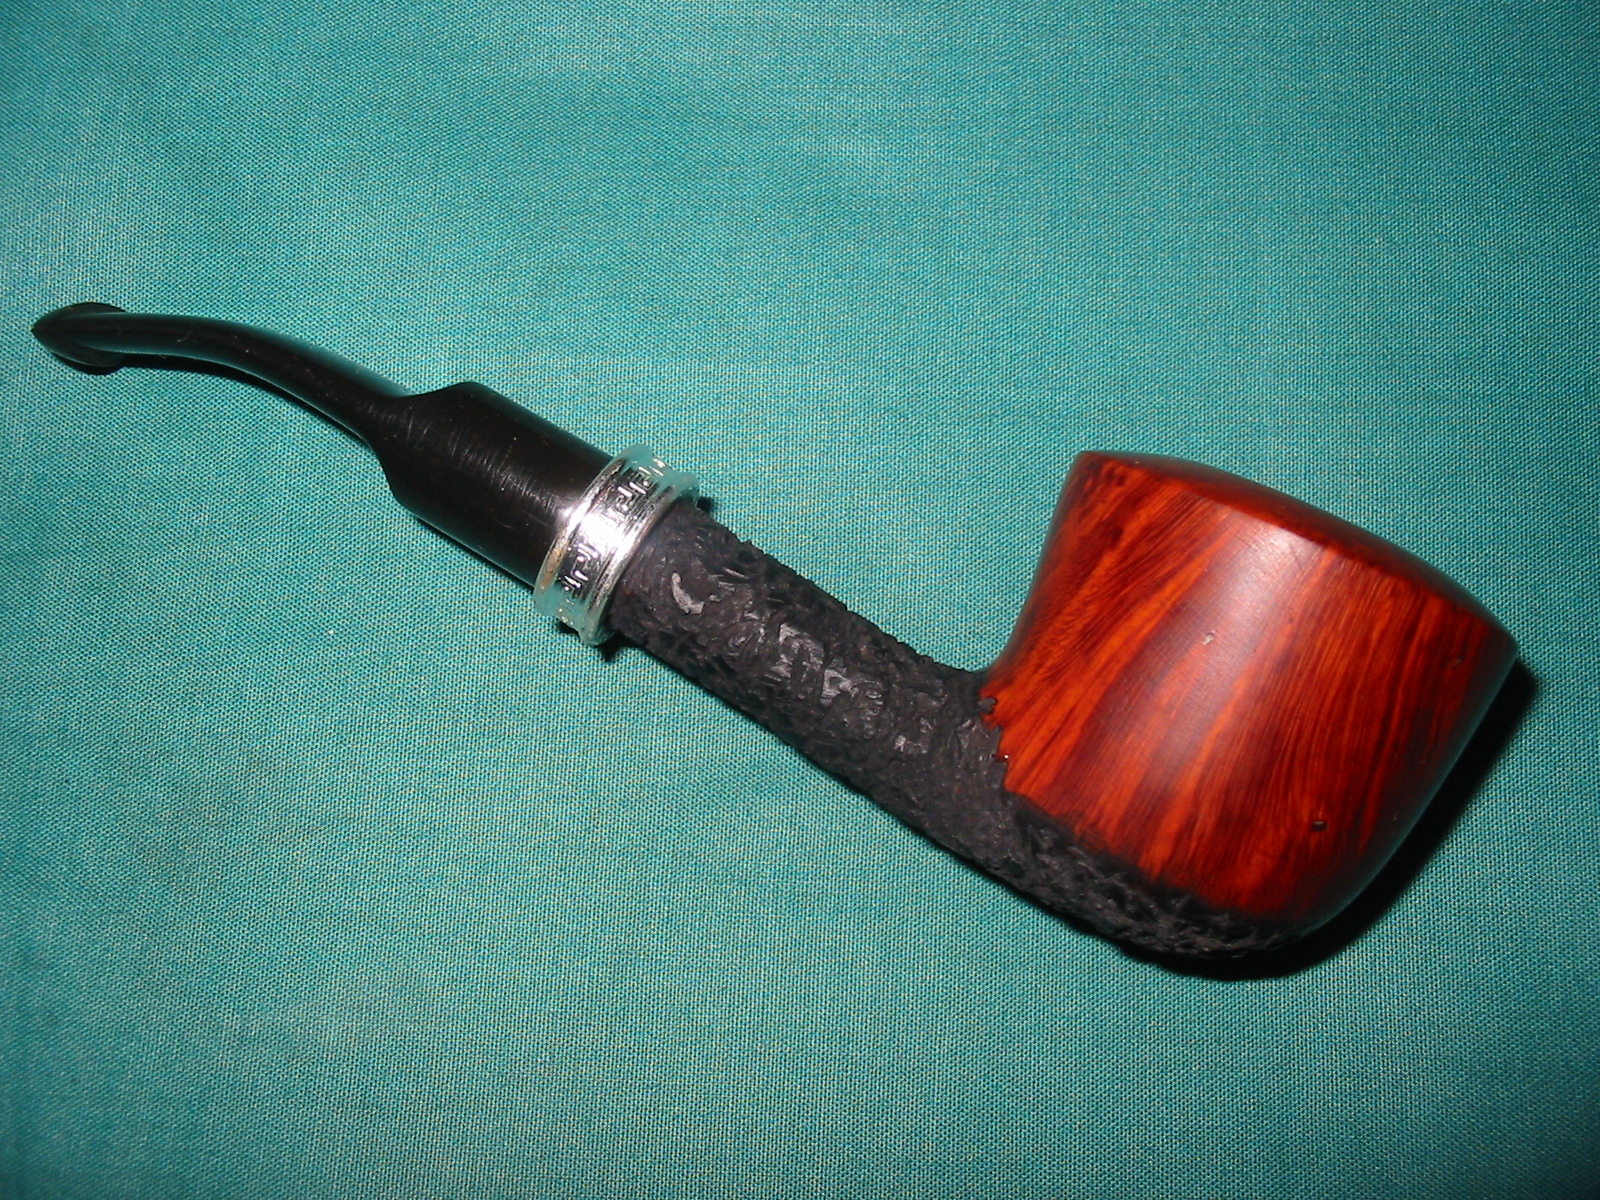
With the stem in place against the shank I could see the very evident taper of the shank on the topside and the underside. It was significantly narrower than the rest of the shank. I wondered if the smooth briar at the shank/stem junction was not from a previous refitting of a stem. I looked over the stem I was patching and saw that it actually bore the F stamping on the top rather than the M stamp that I had expected. I had not paid attention to that before but combined with the shape of the shank I was relatively certain that the stem was a replacement and the damage to the shank was caused by a sanding the shank to more readily match the smaller diameter of the replacement stem. That made the stem choice easy – I would refit a new stem to the shank. I would use a nickel band to level the shank out and make the taper of the shank more even. This would also make fitting the new stem quite easy. I set up a heat gun, heated the nickel band and pressed it into place on the shank. The silver actually looked good against the rustication of the bowl.
IMG_7008

IMG_7009

IMG_7010

IMG_7011

IMG_7012
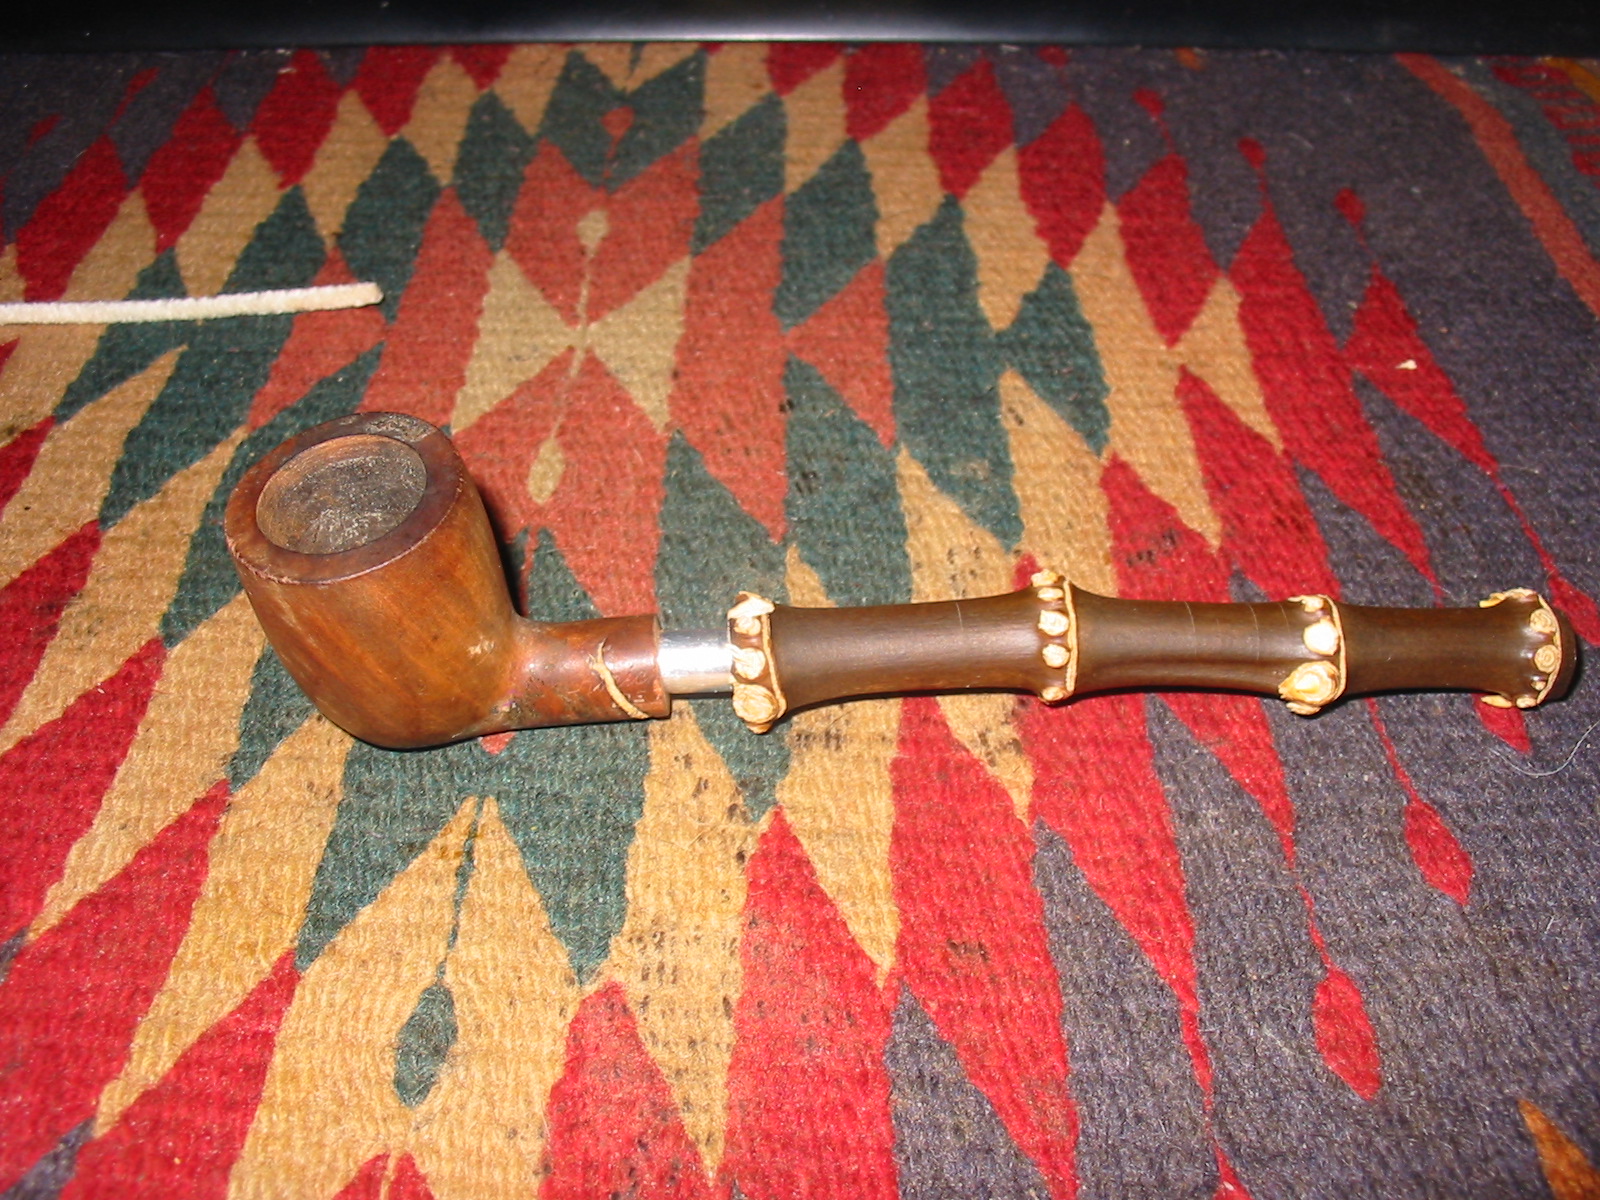
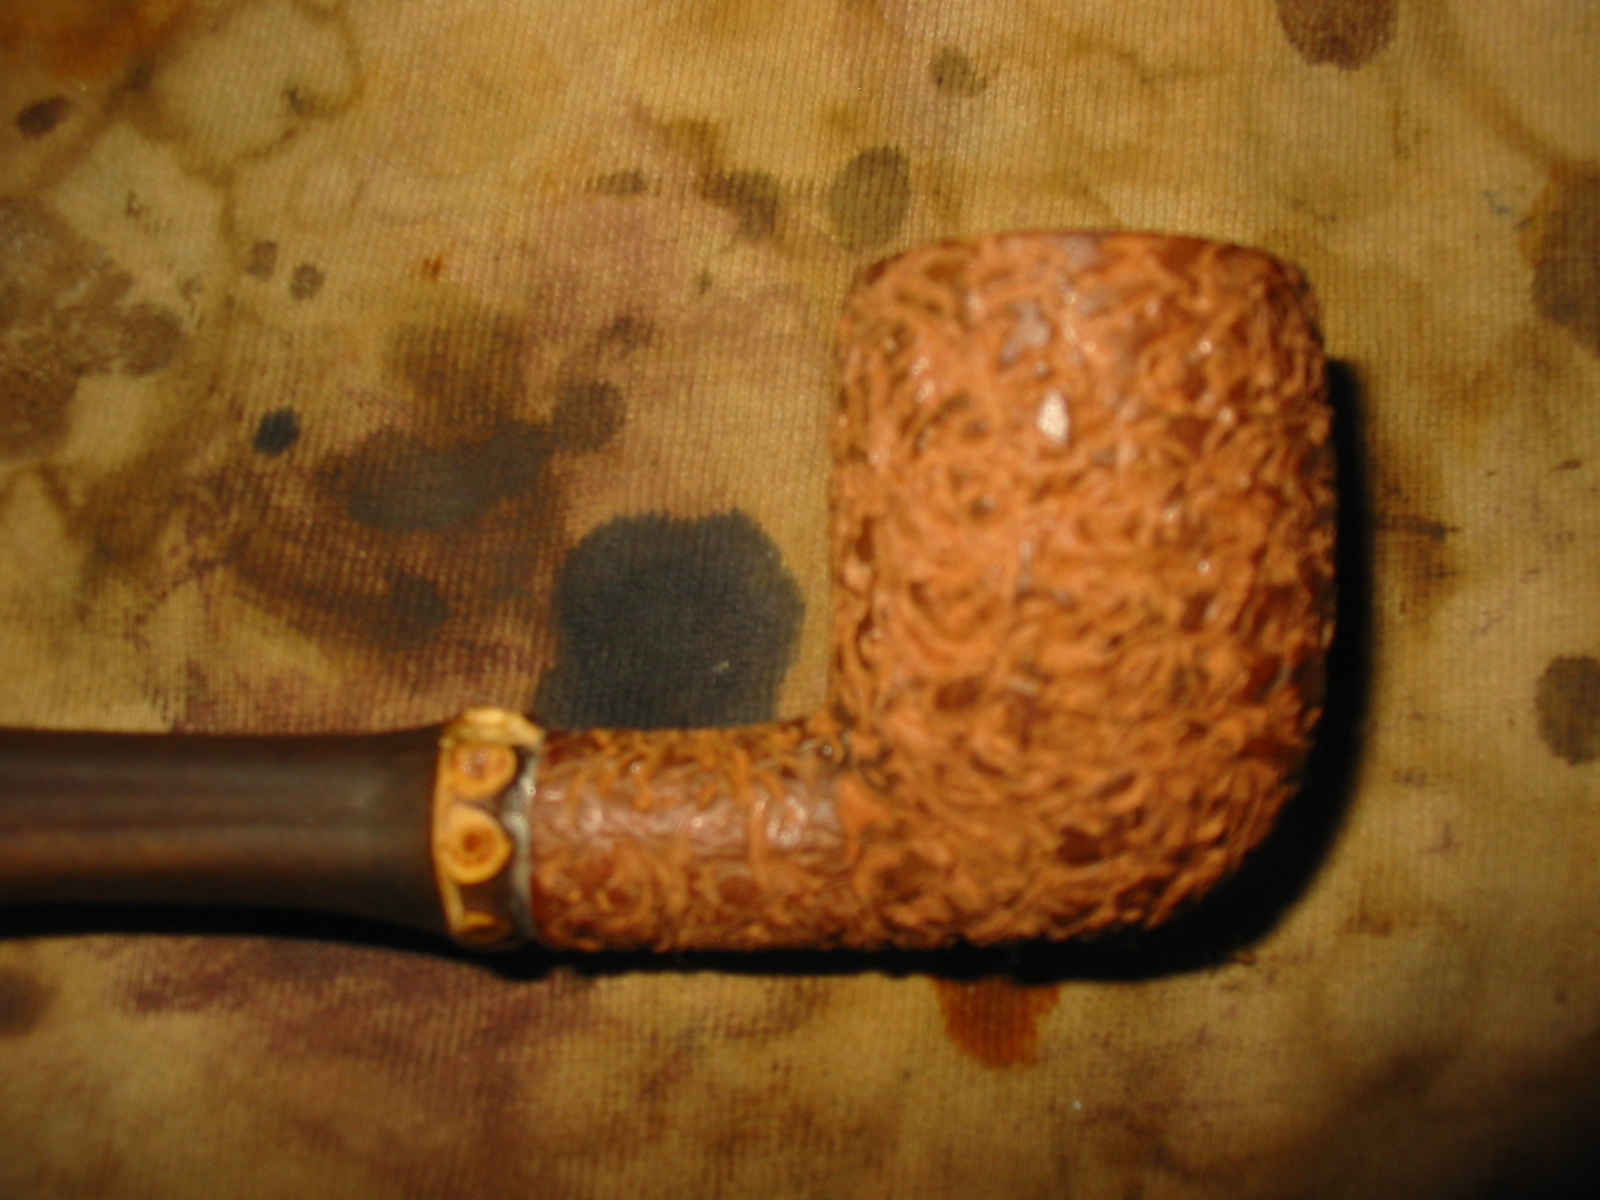
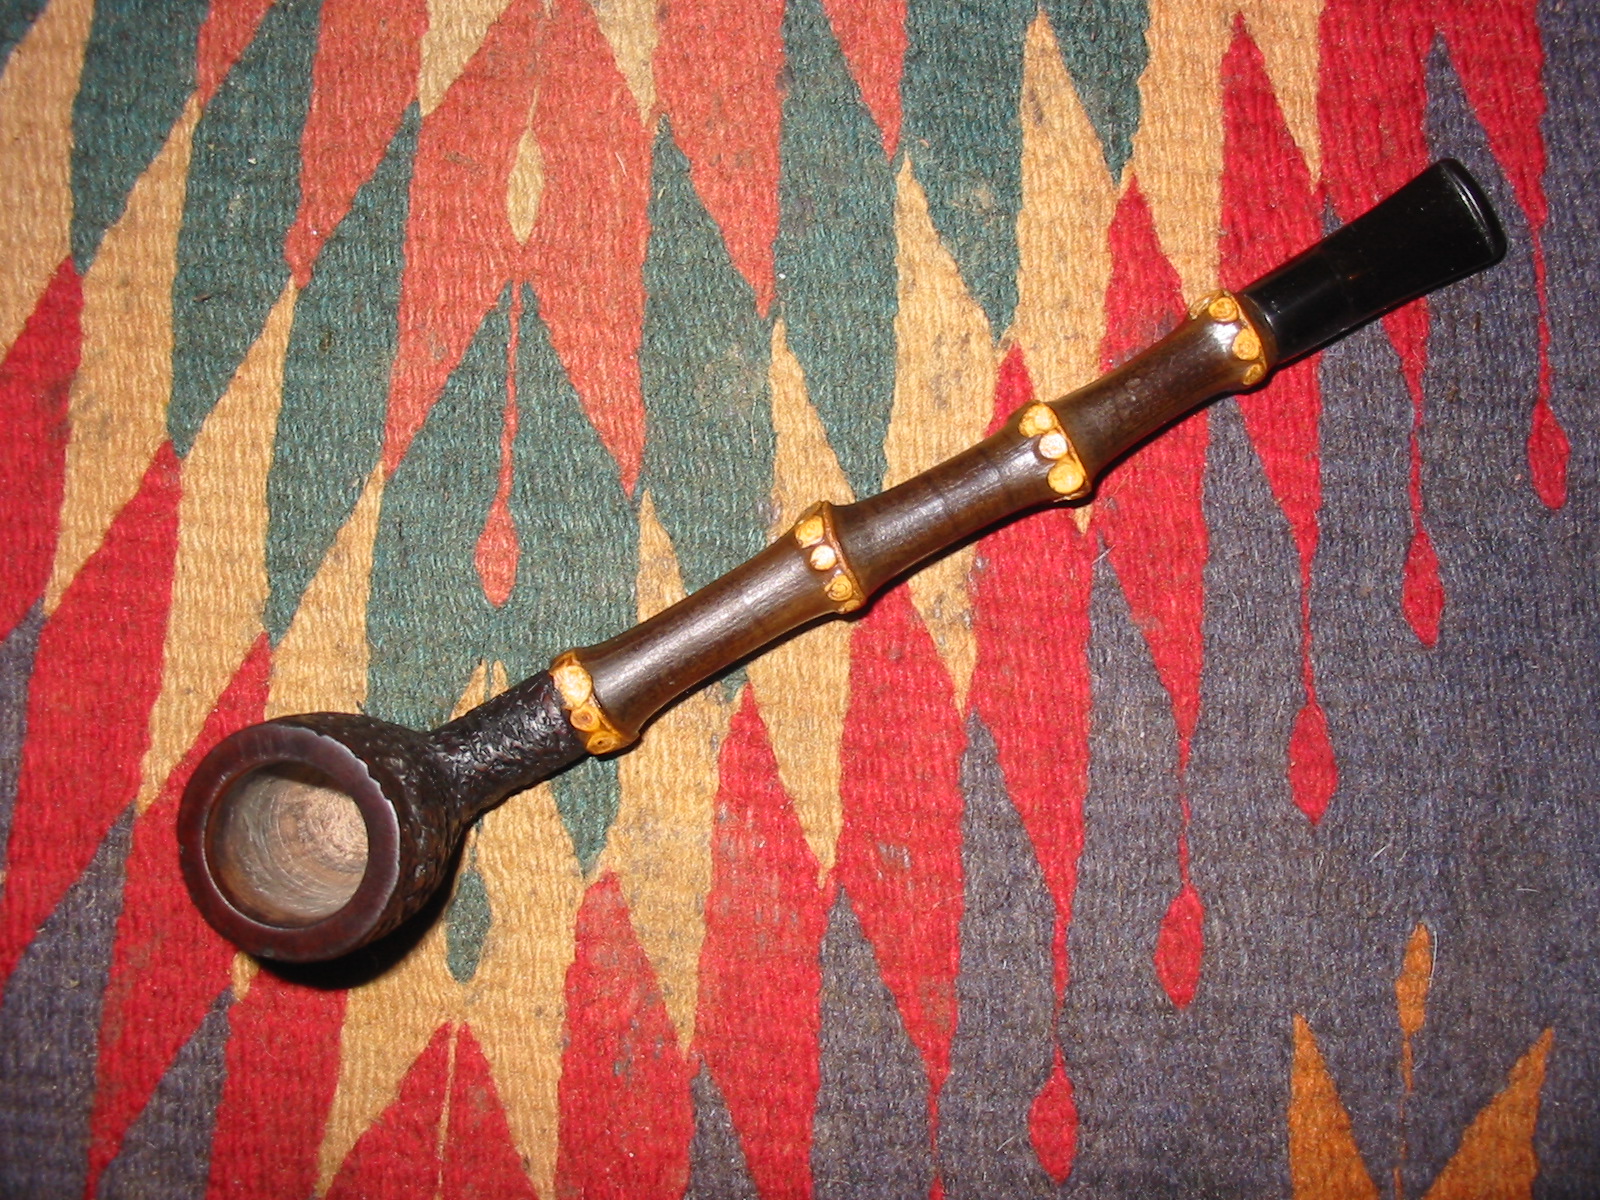
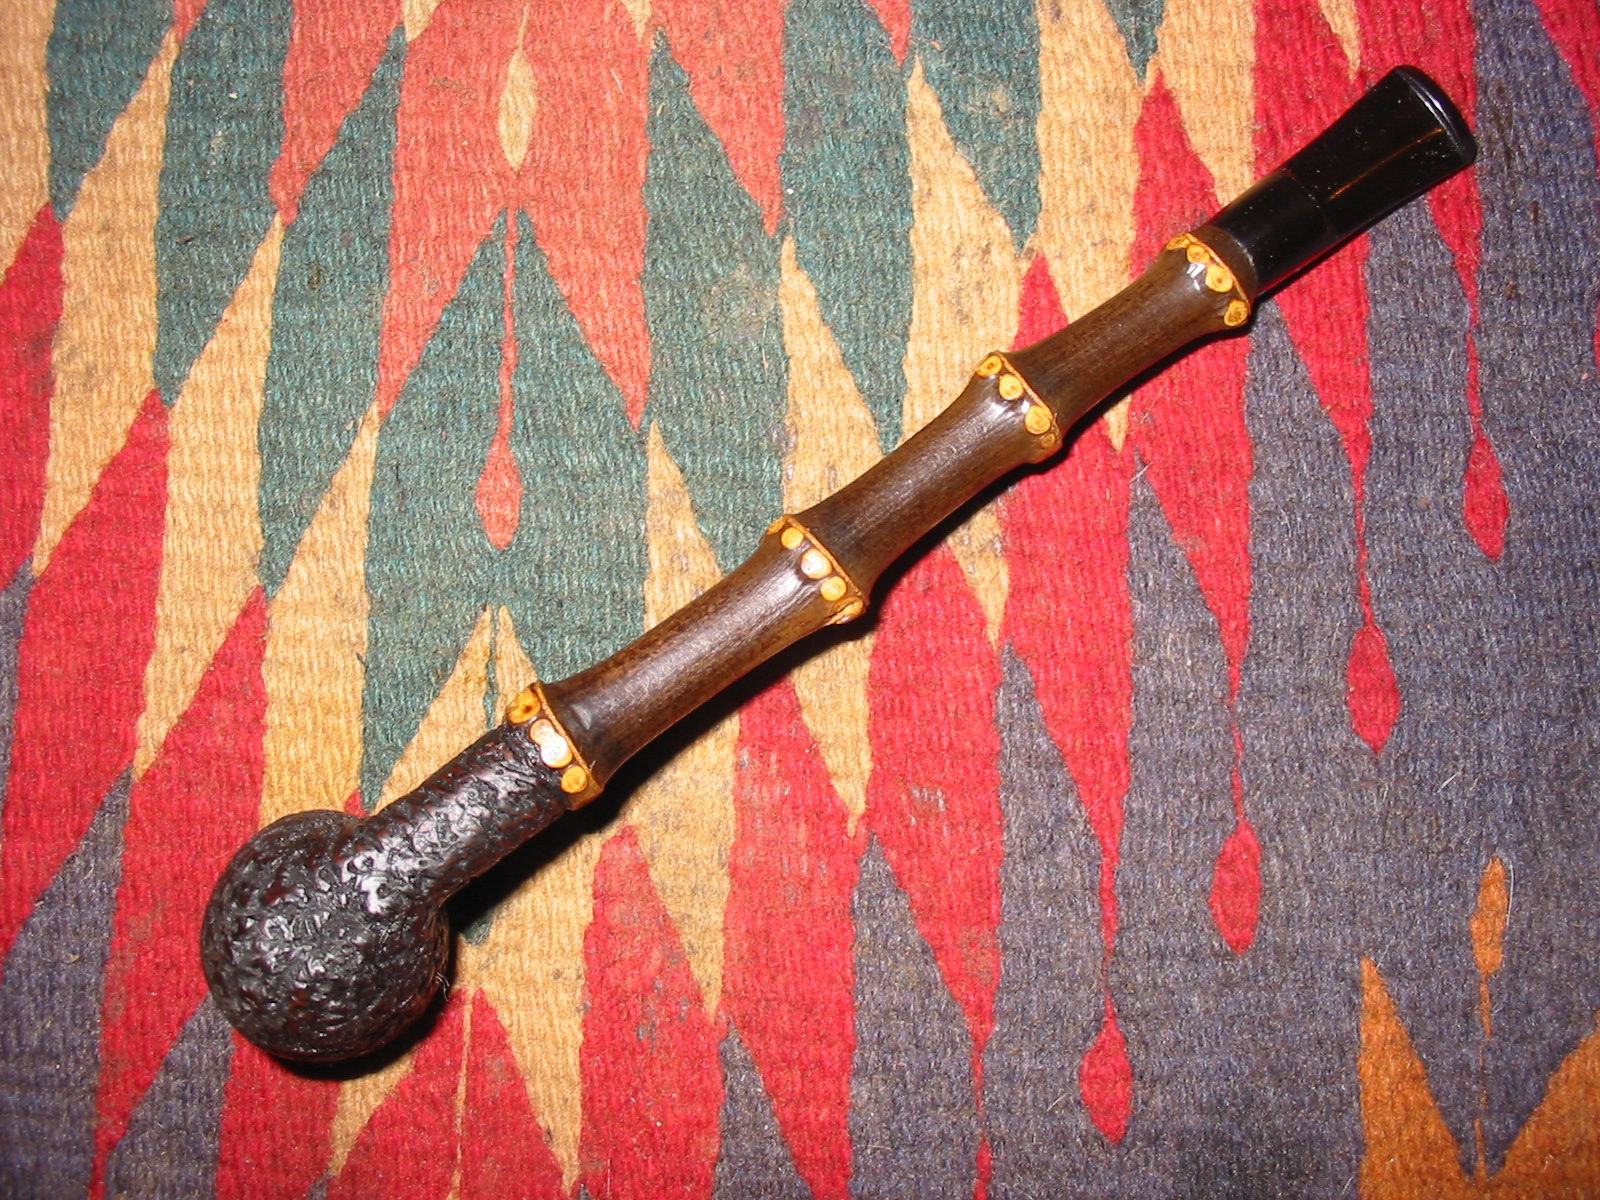
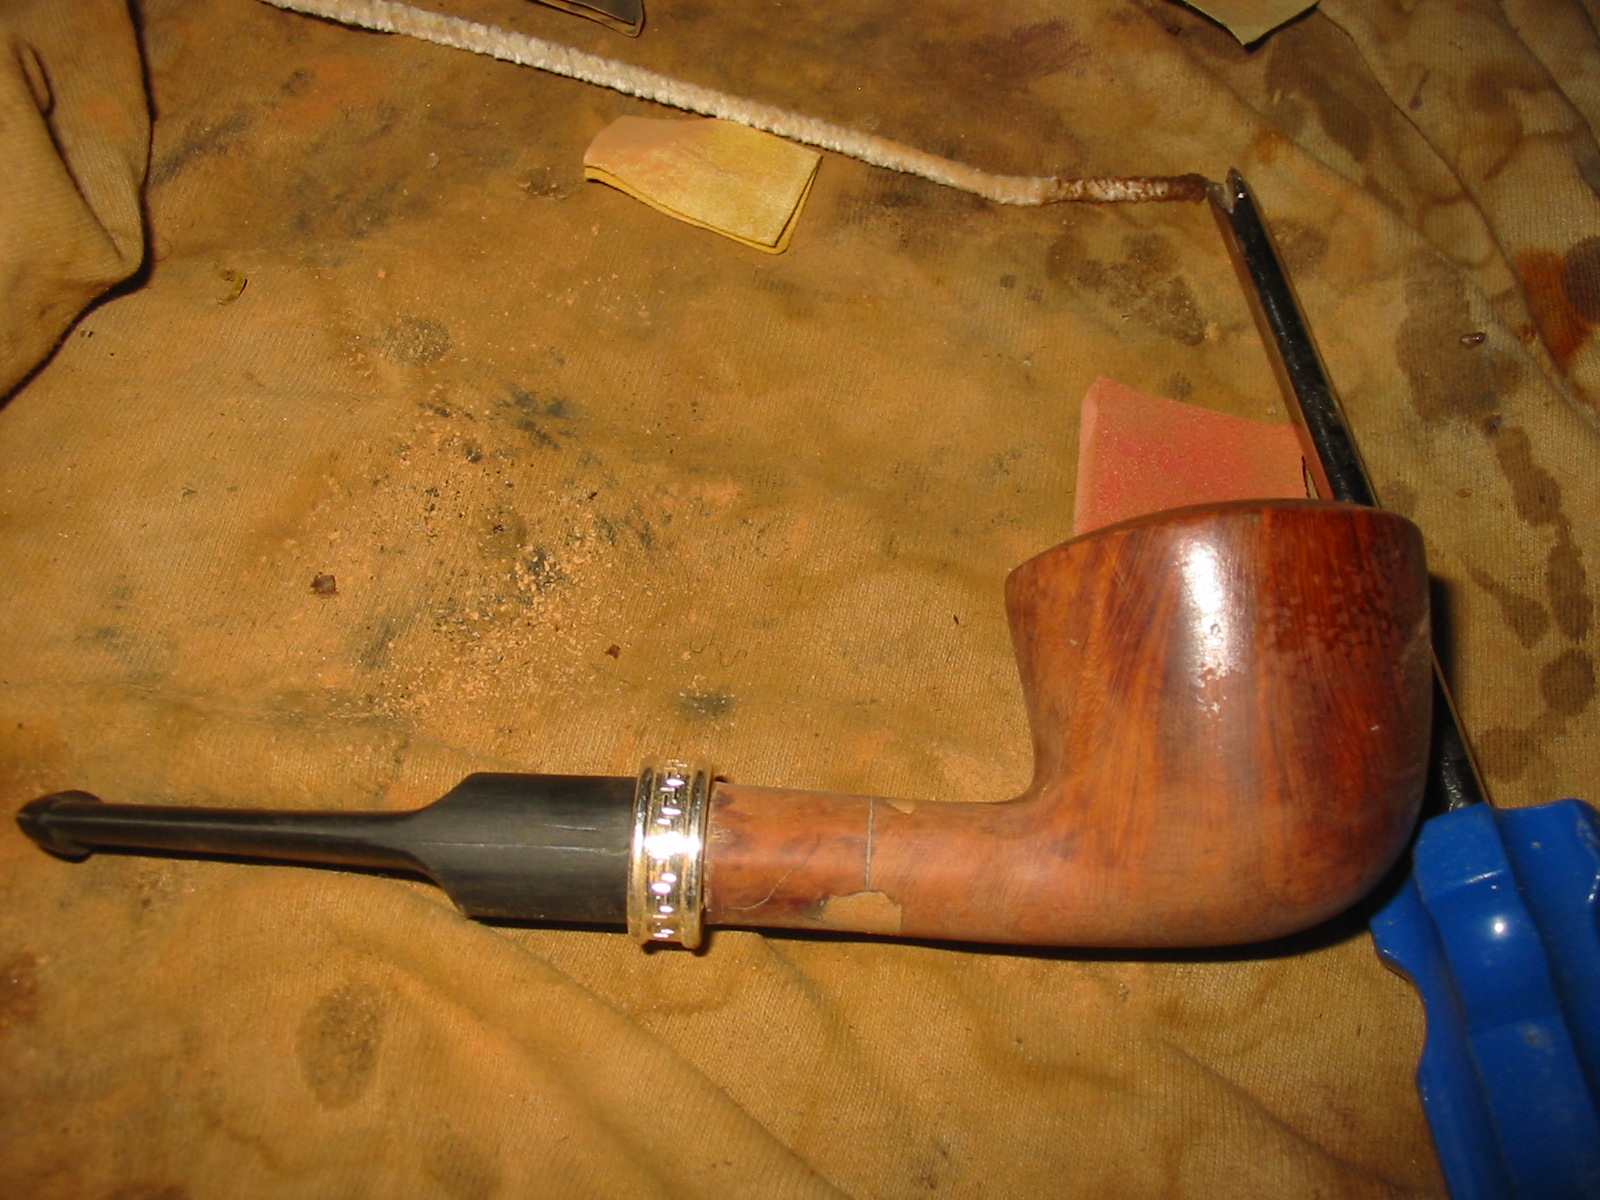
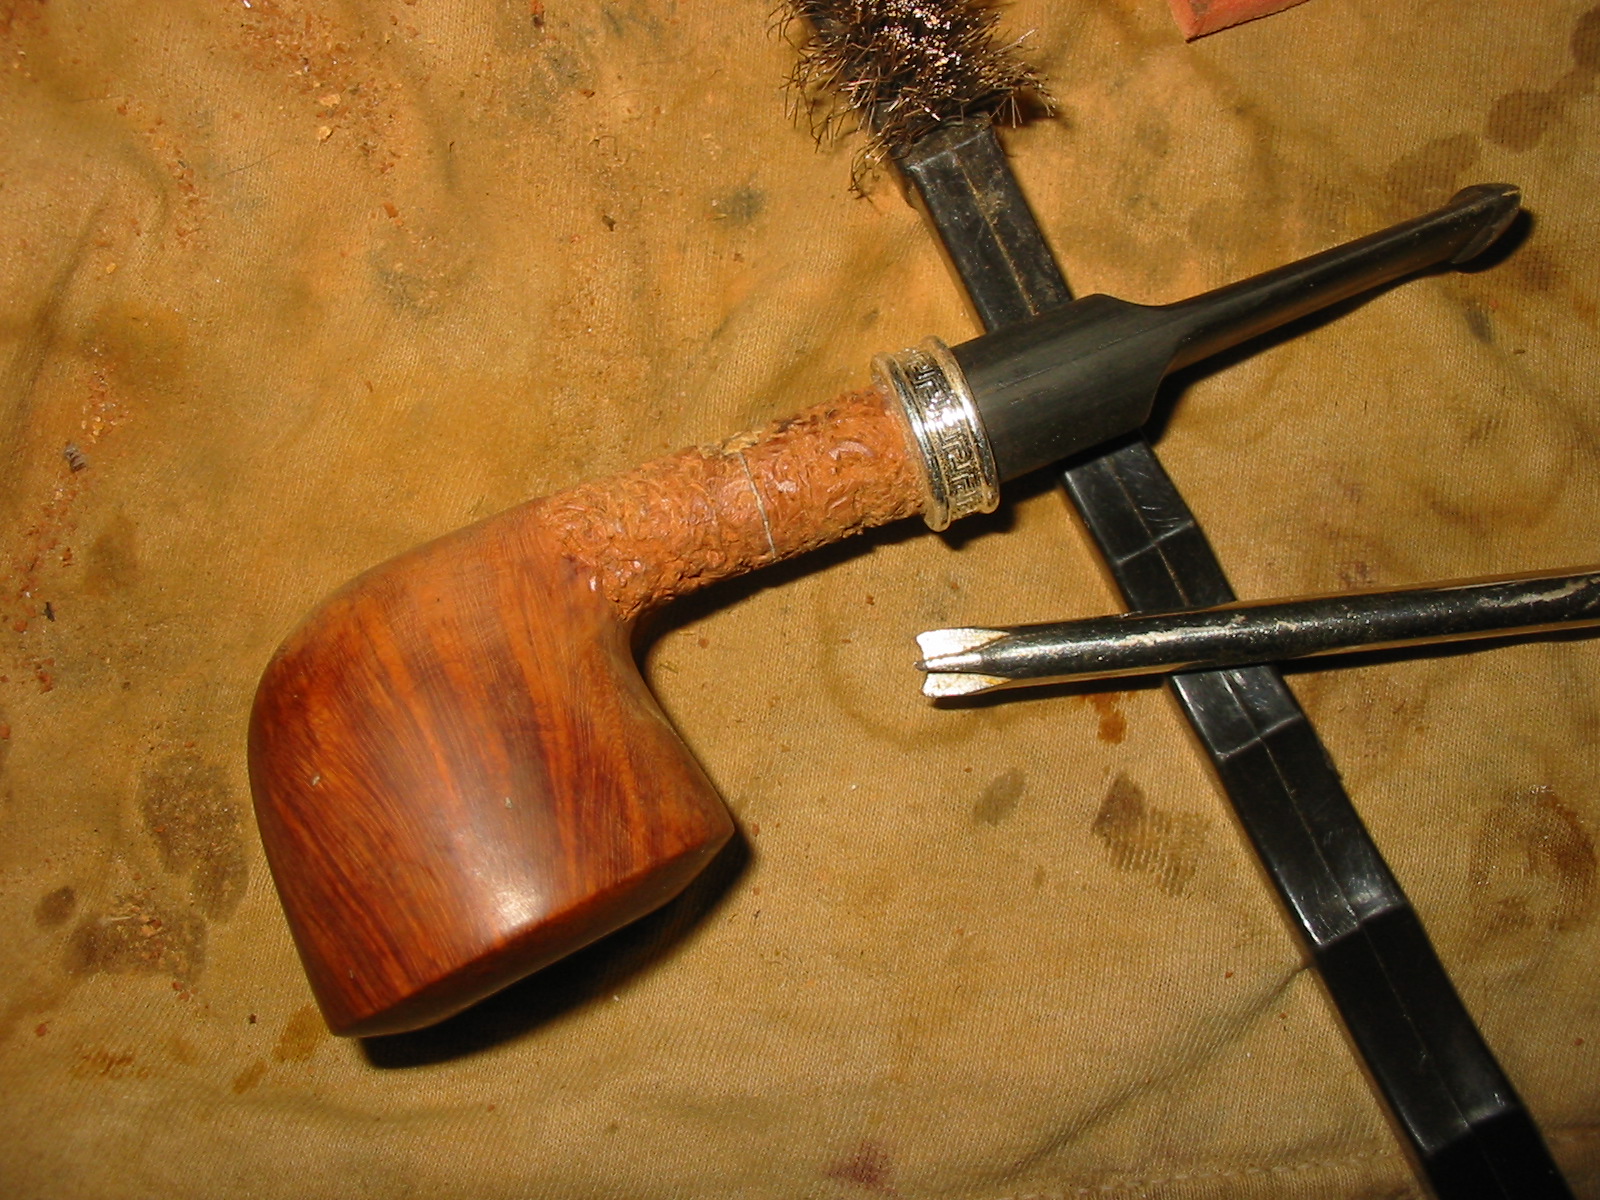
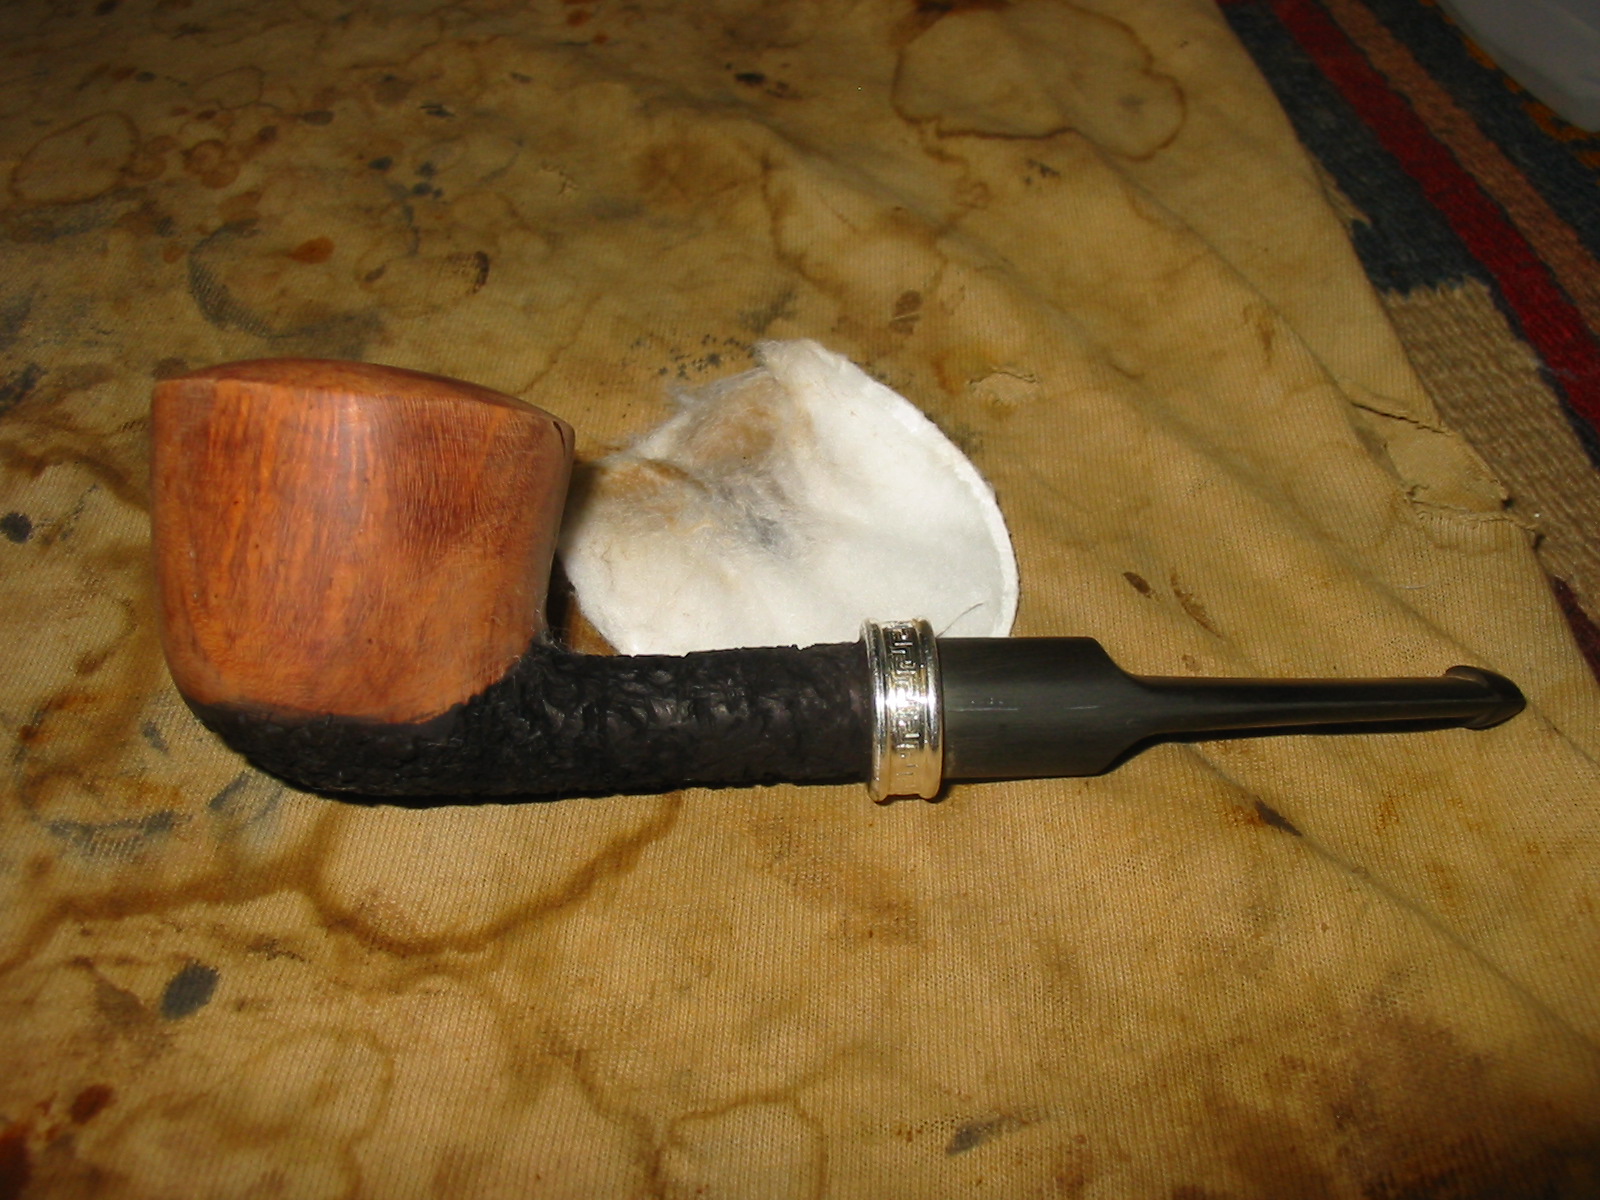
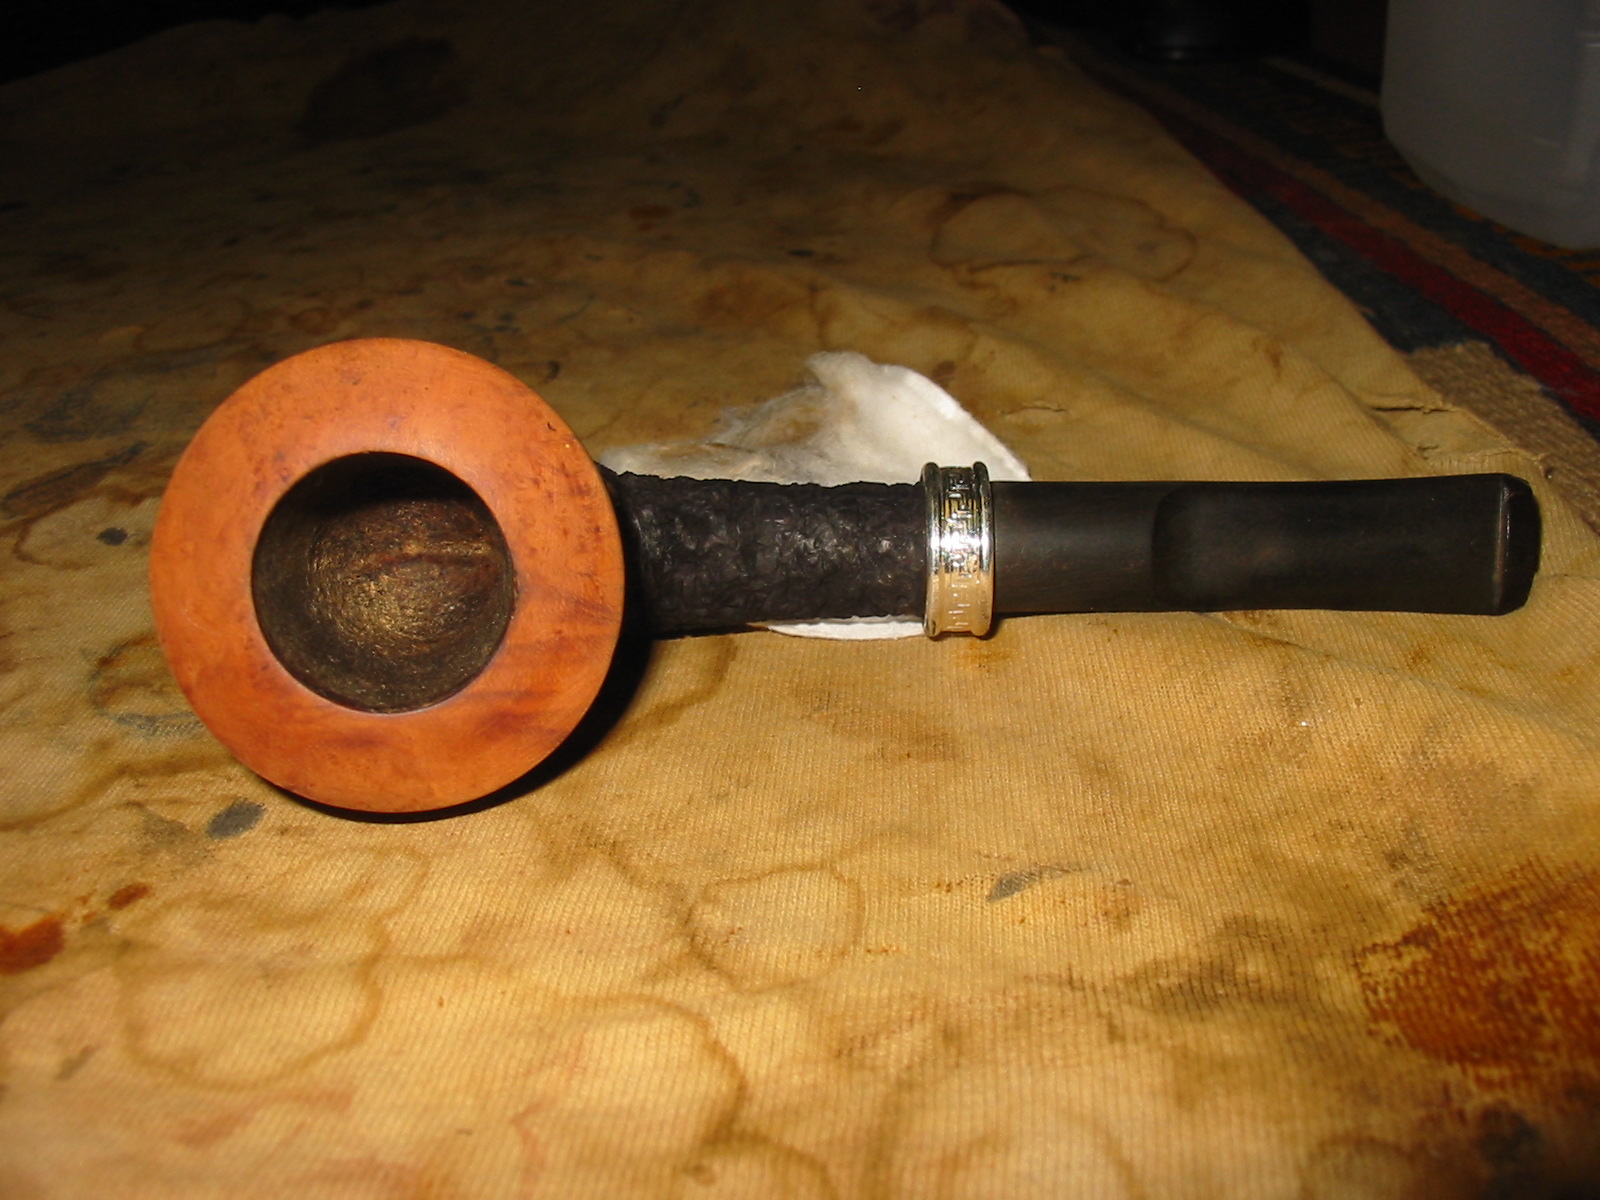
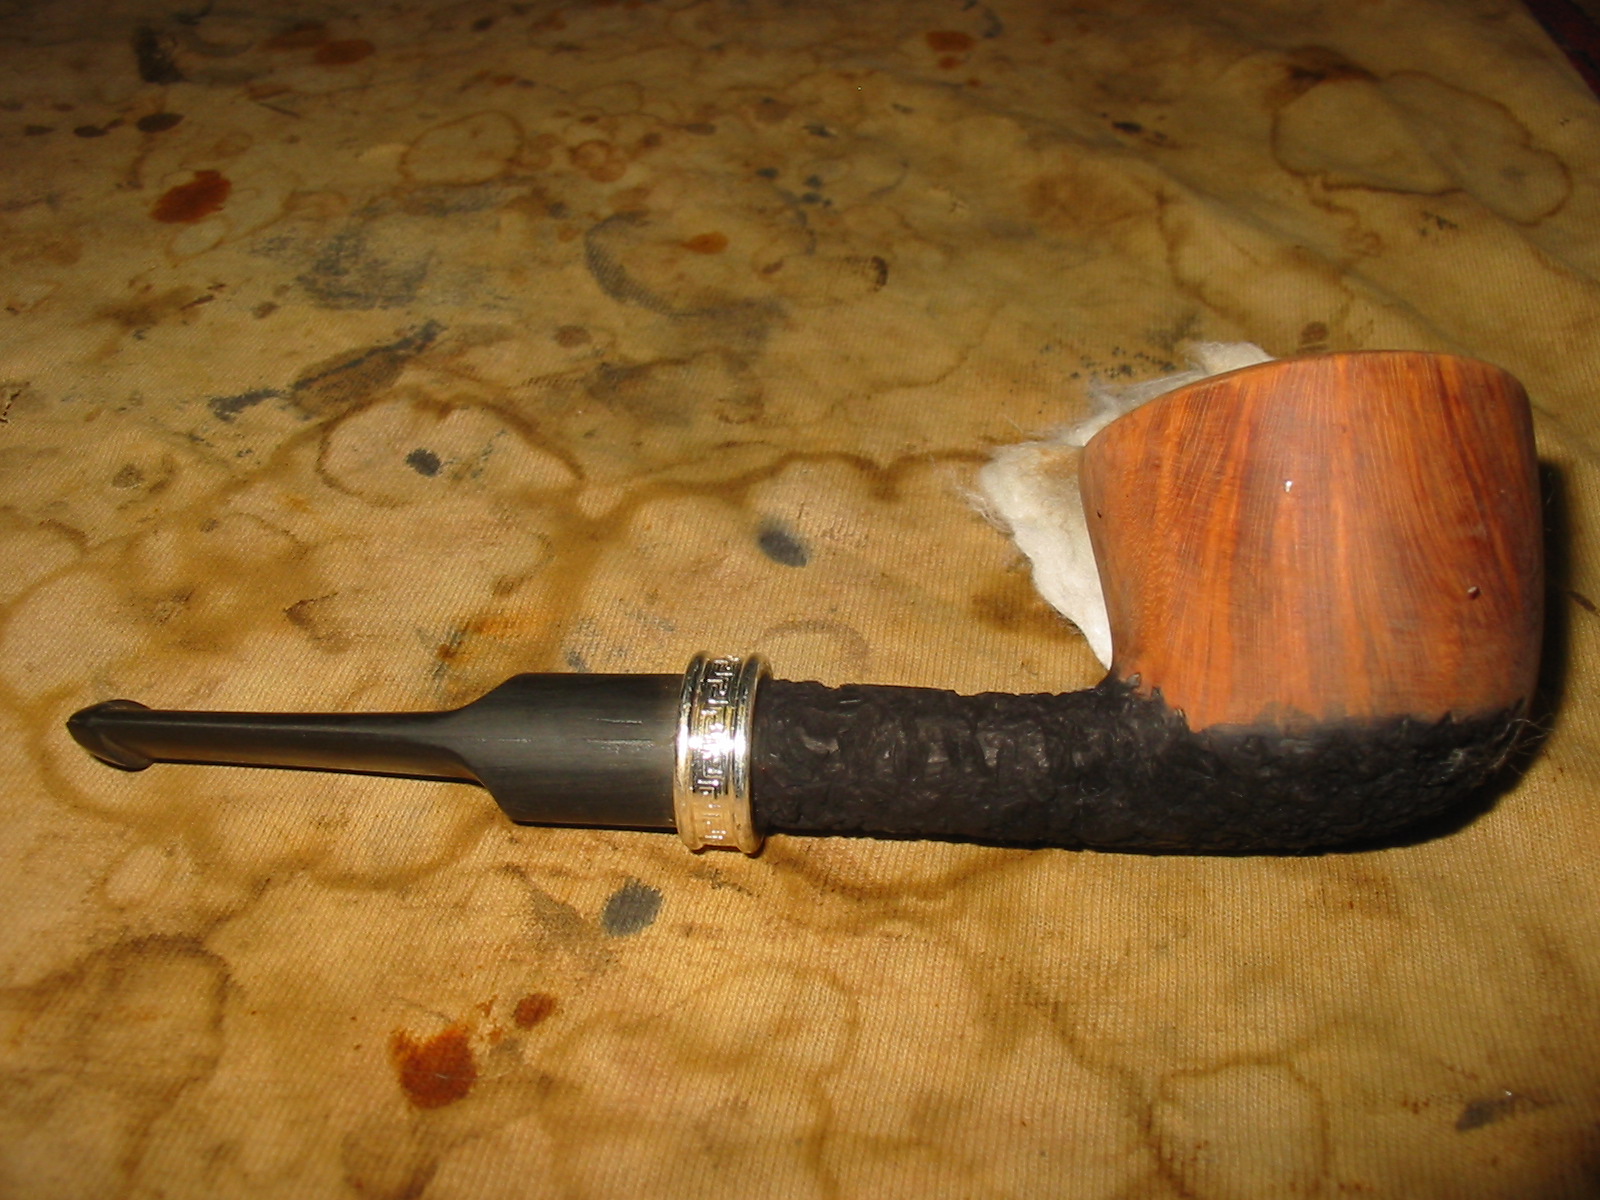
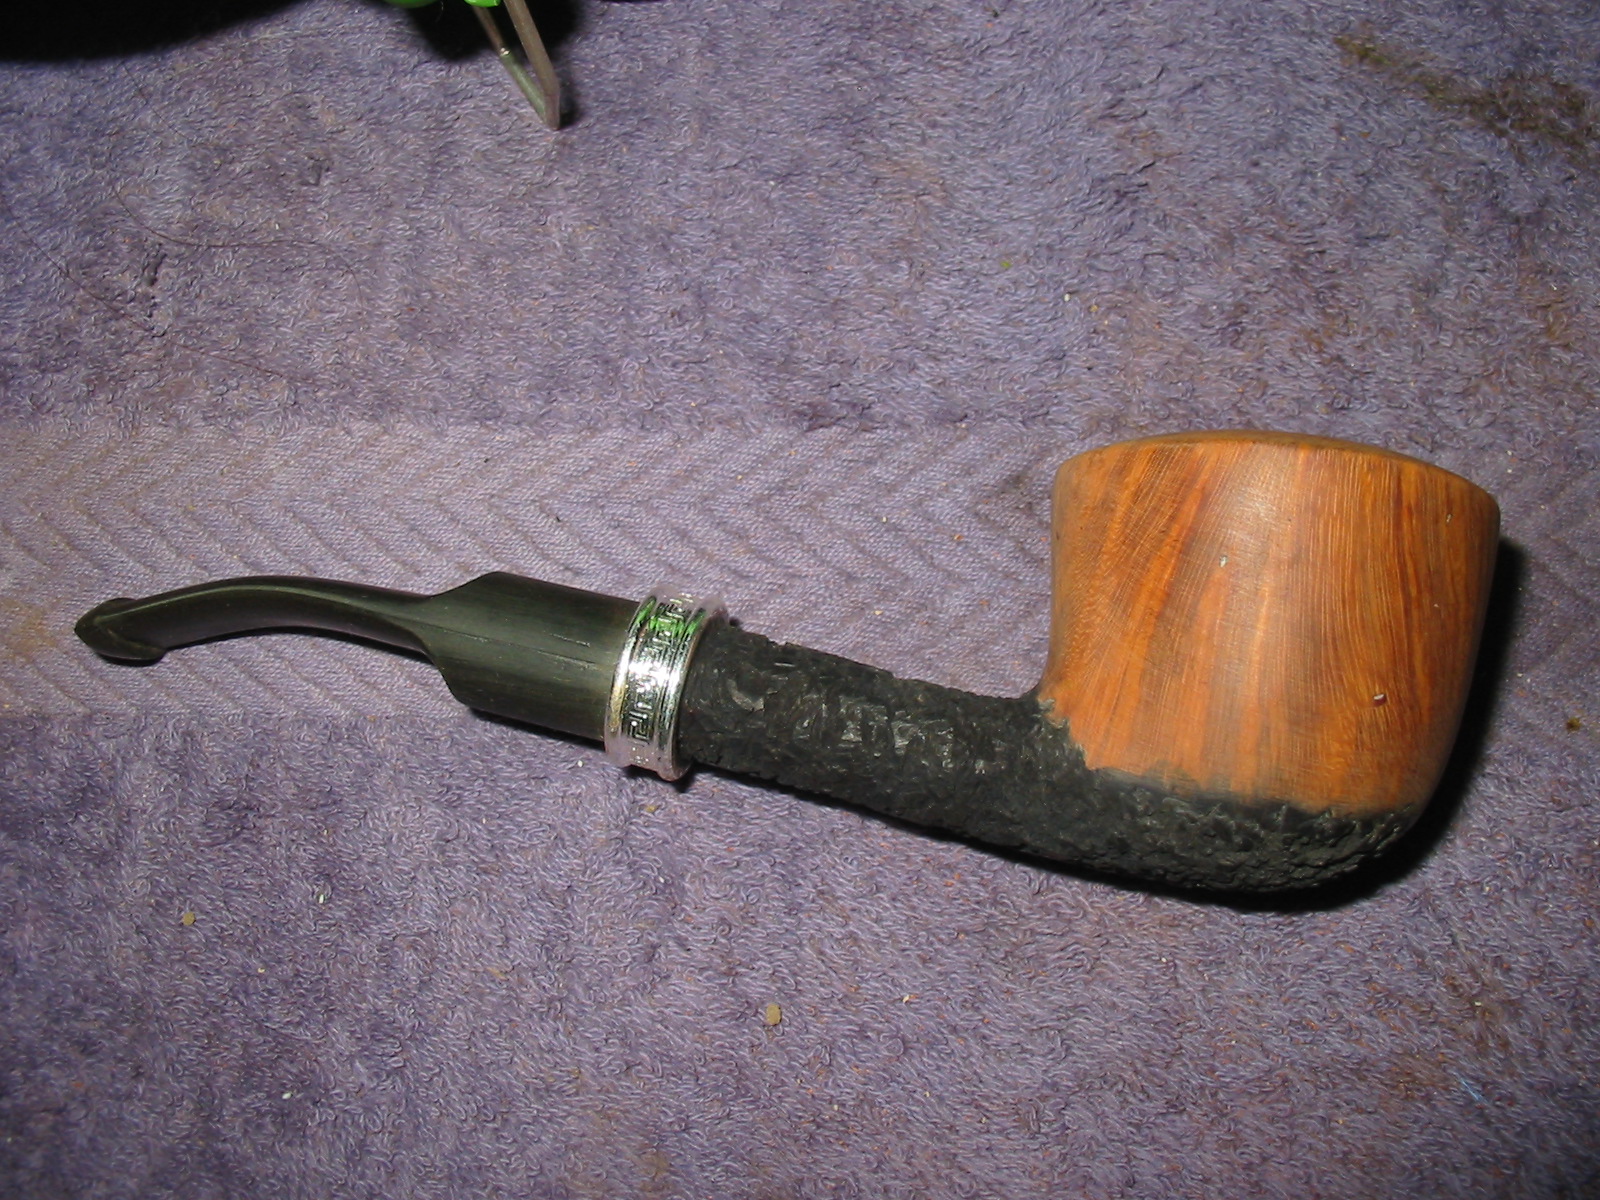
I used the Dremel and large sanding drum to take off the square edges of the new stem. I worked on it until it was round. I started by taking off all the corners and creating an octagon first and then continuing to round out the stem until it was the same shape as the shank. The bottom of the shank on the pipe was flattened so the pipe would sit upright on its own so I left the bottom side of the stem slightly flattened as well. I sanded the stem with 220 grit sandpaper and medium and fine grit sanding sponges to get the fit against the bowl and band perfect. I also sanded the rustication on the bowl to soften the high spots and flatten them out. I wiped the bowl down with alcohol after I had sanded. The next series of four photos show the sanded bowl and stem. The rustication is getting closer to the look that I was after when I started.
IMG_7013

IMG_7014

IMG_7015

IMG_7016
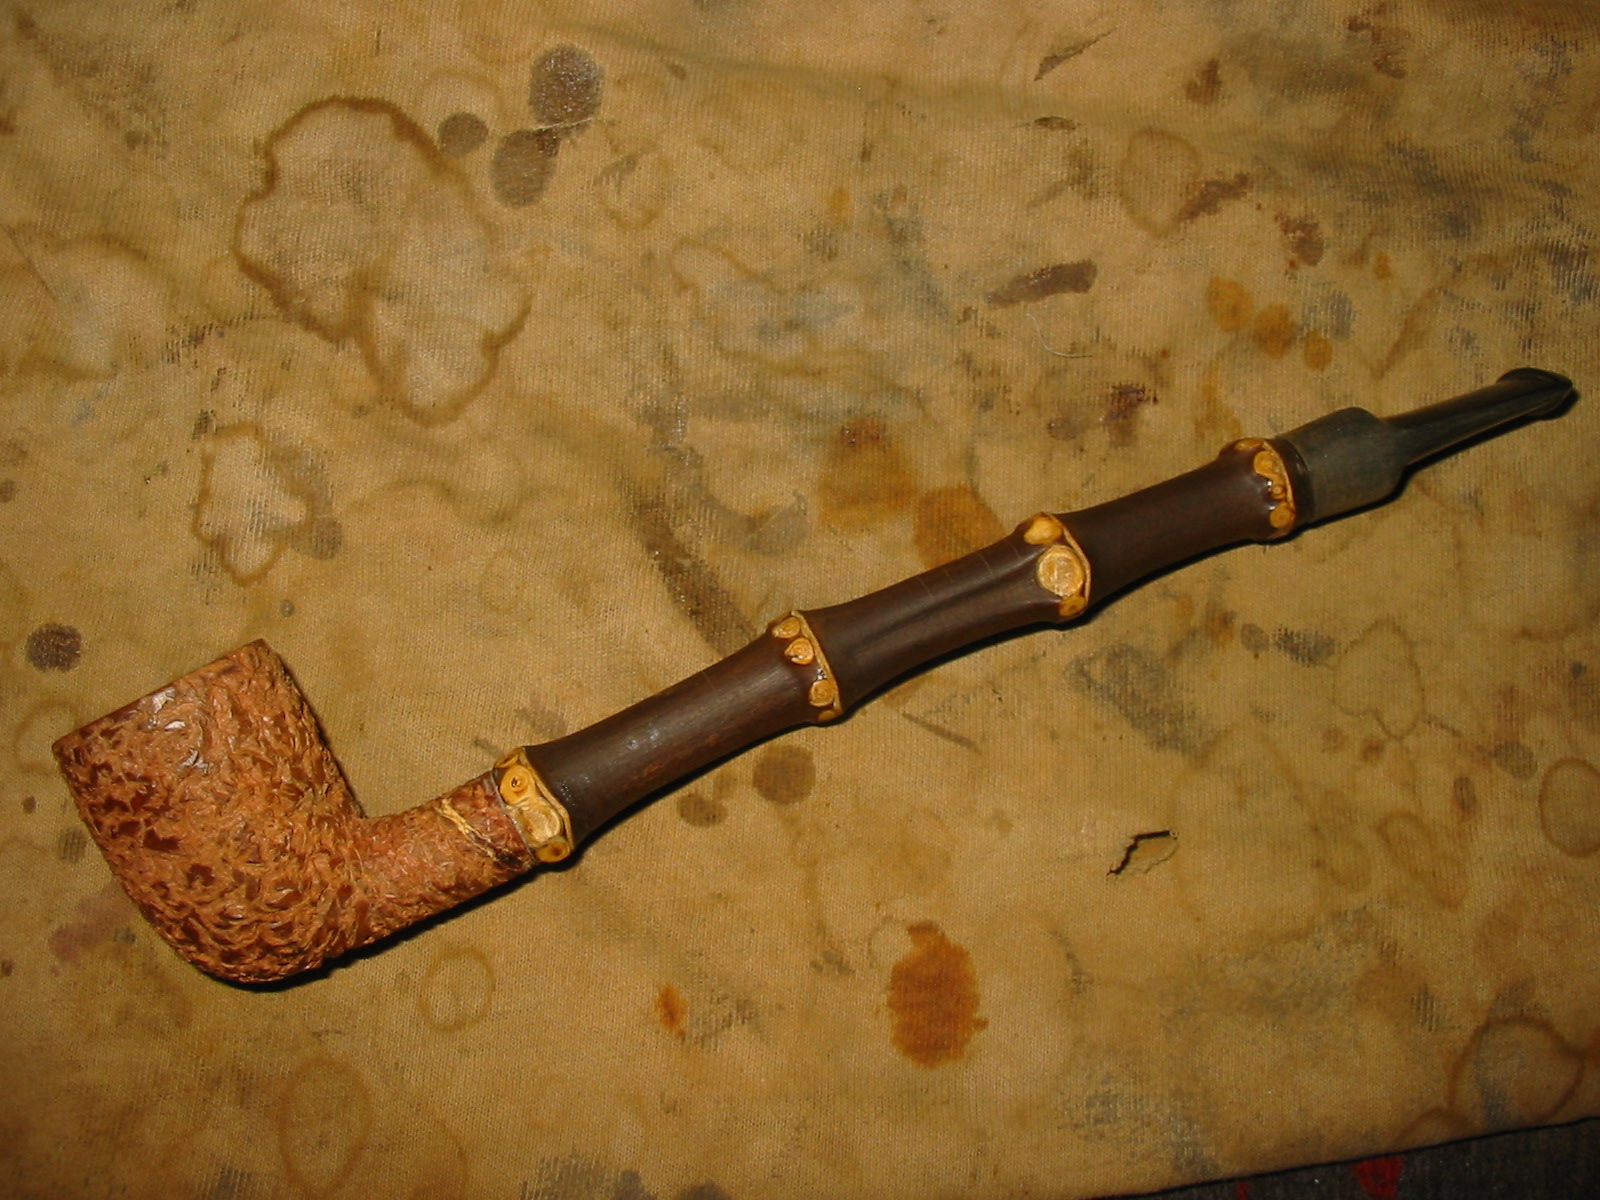
I continued to sand the stem with the fine grit sanding sponge and also the bowl. I once more wiped the bowl down with a soft cloth and alcohol to remove the dust. Each step in the process is flattening out the rustication slightly more and bringing a shine to the newly rounded stem.
IMG_7017

IMG_7018

IMG_7019

IMG_7020
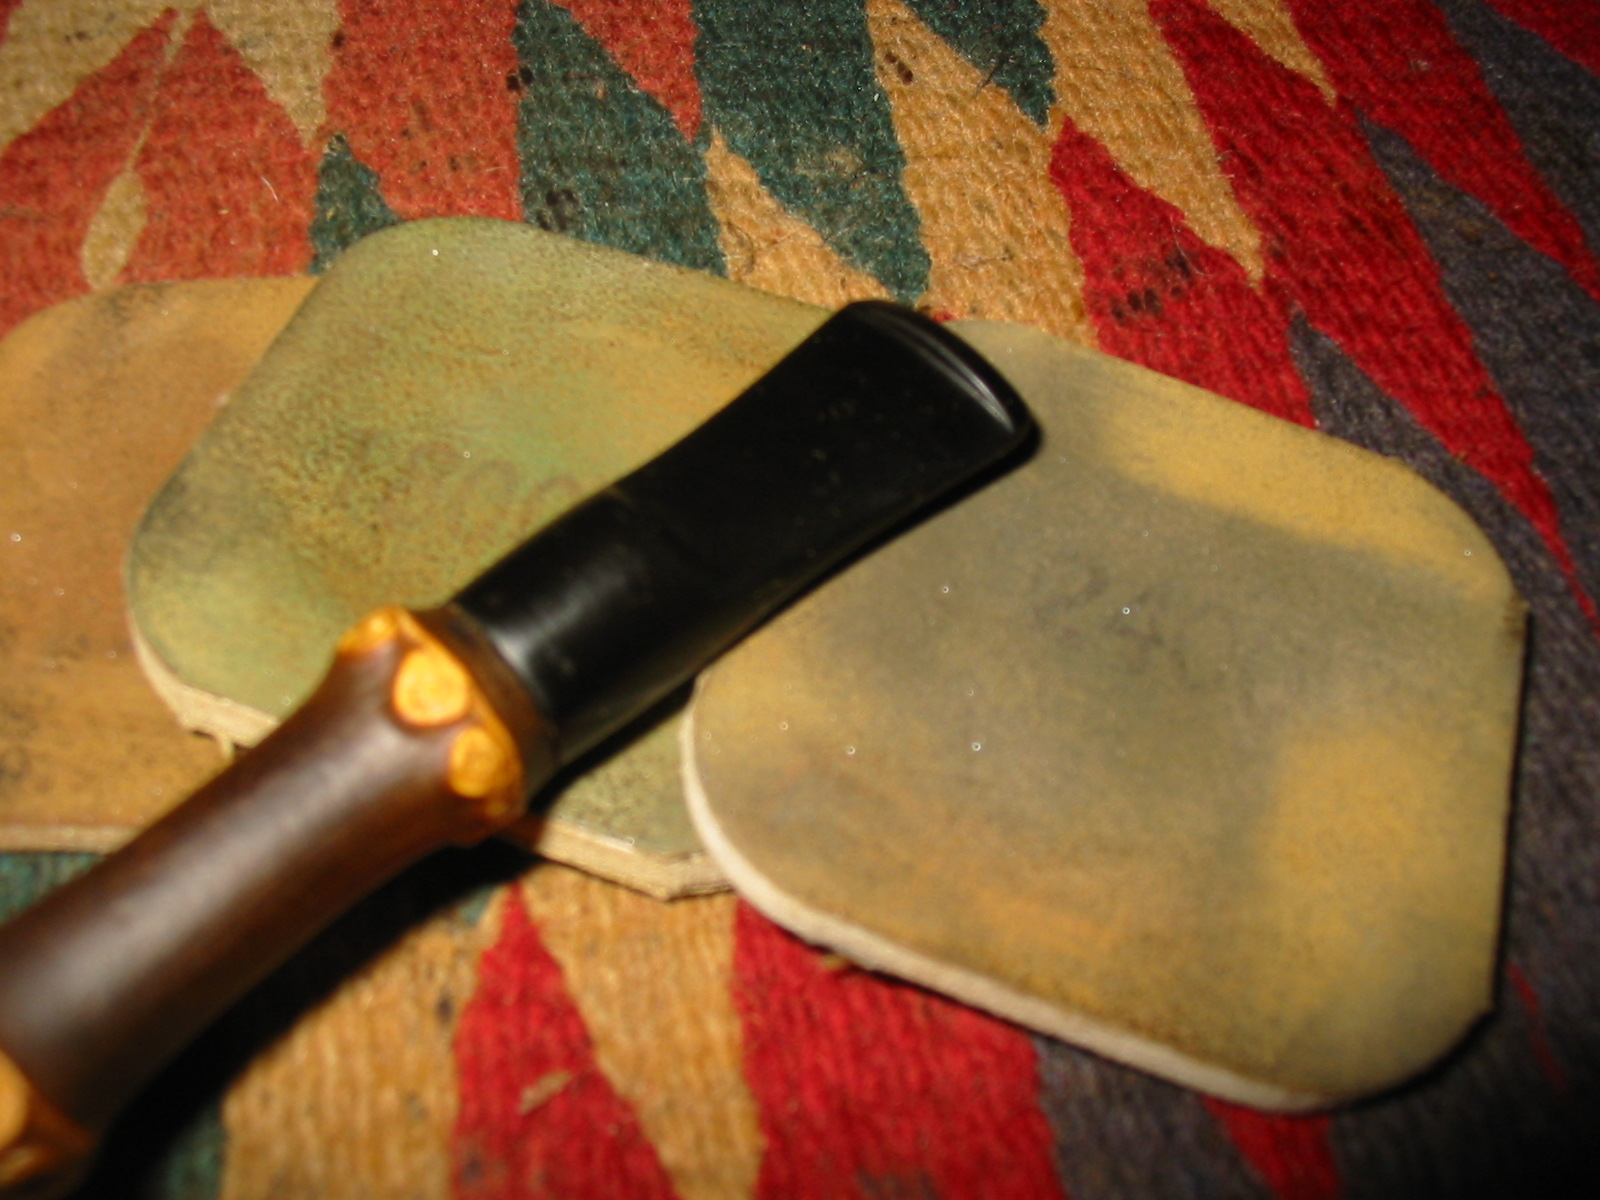
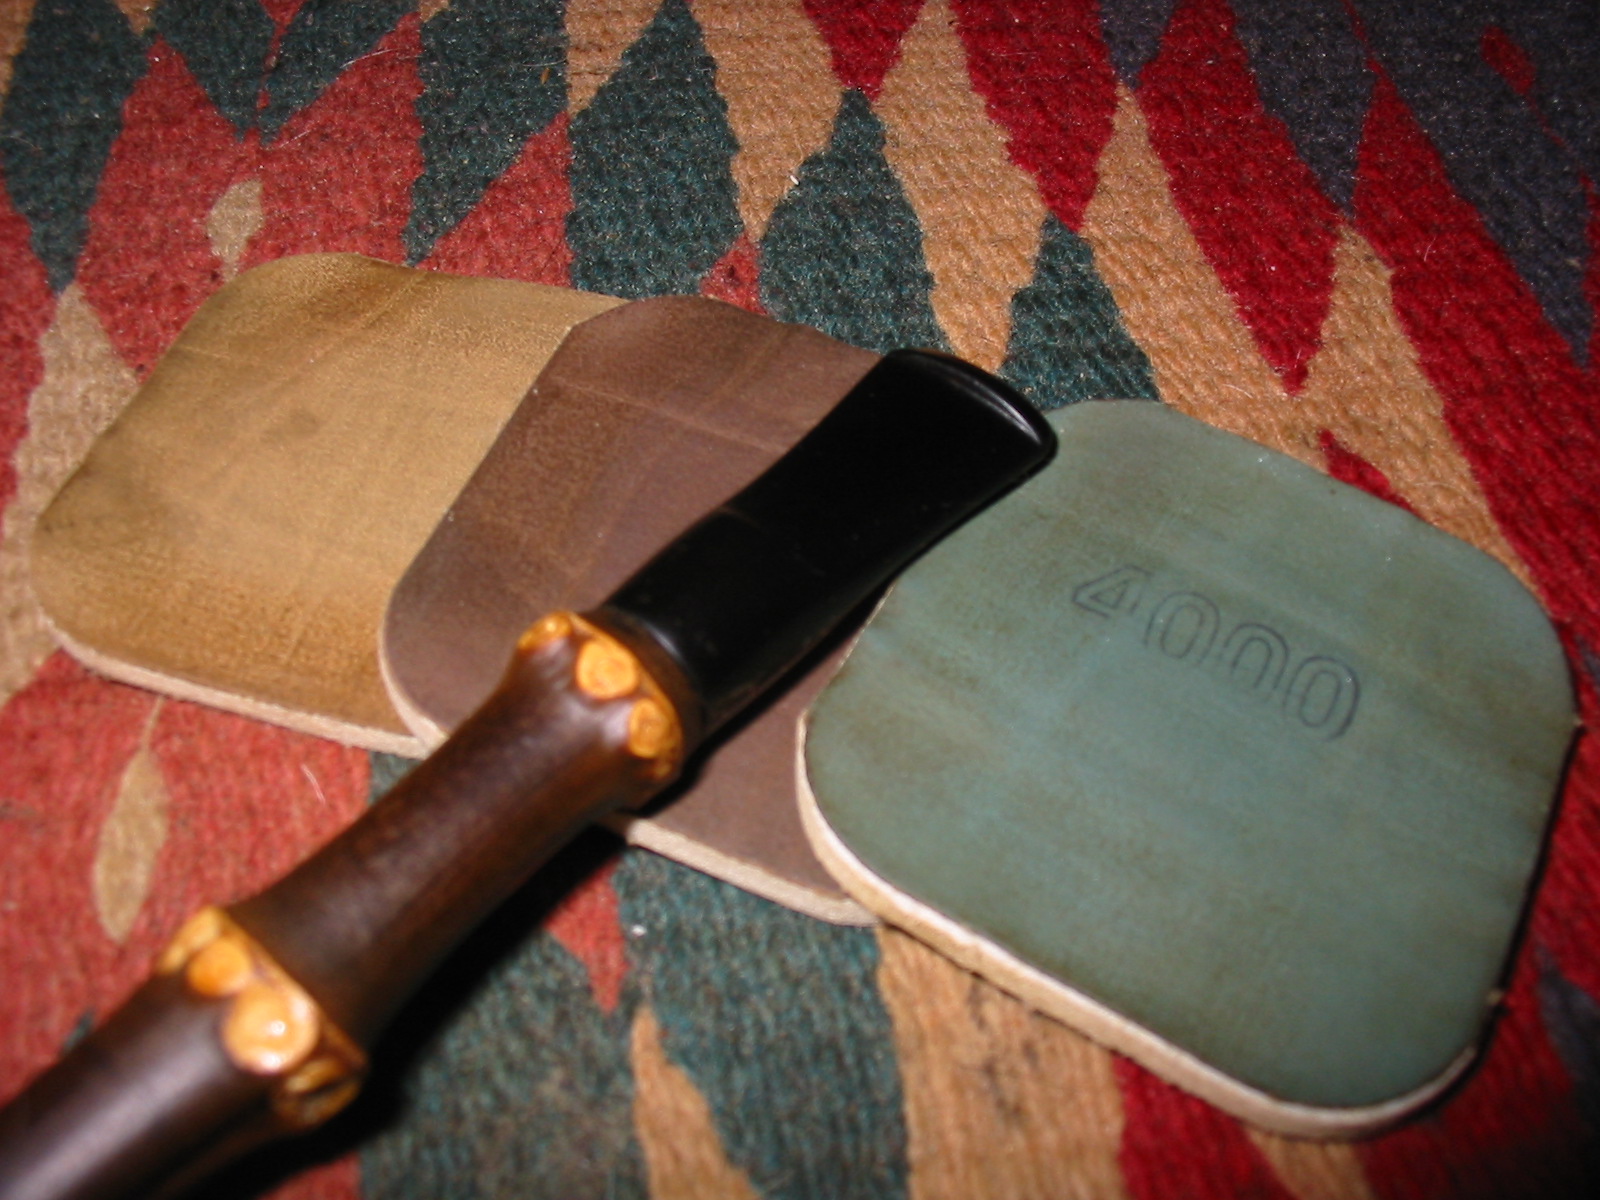
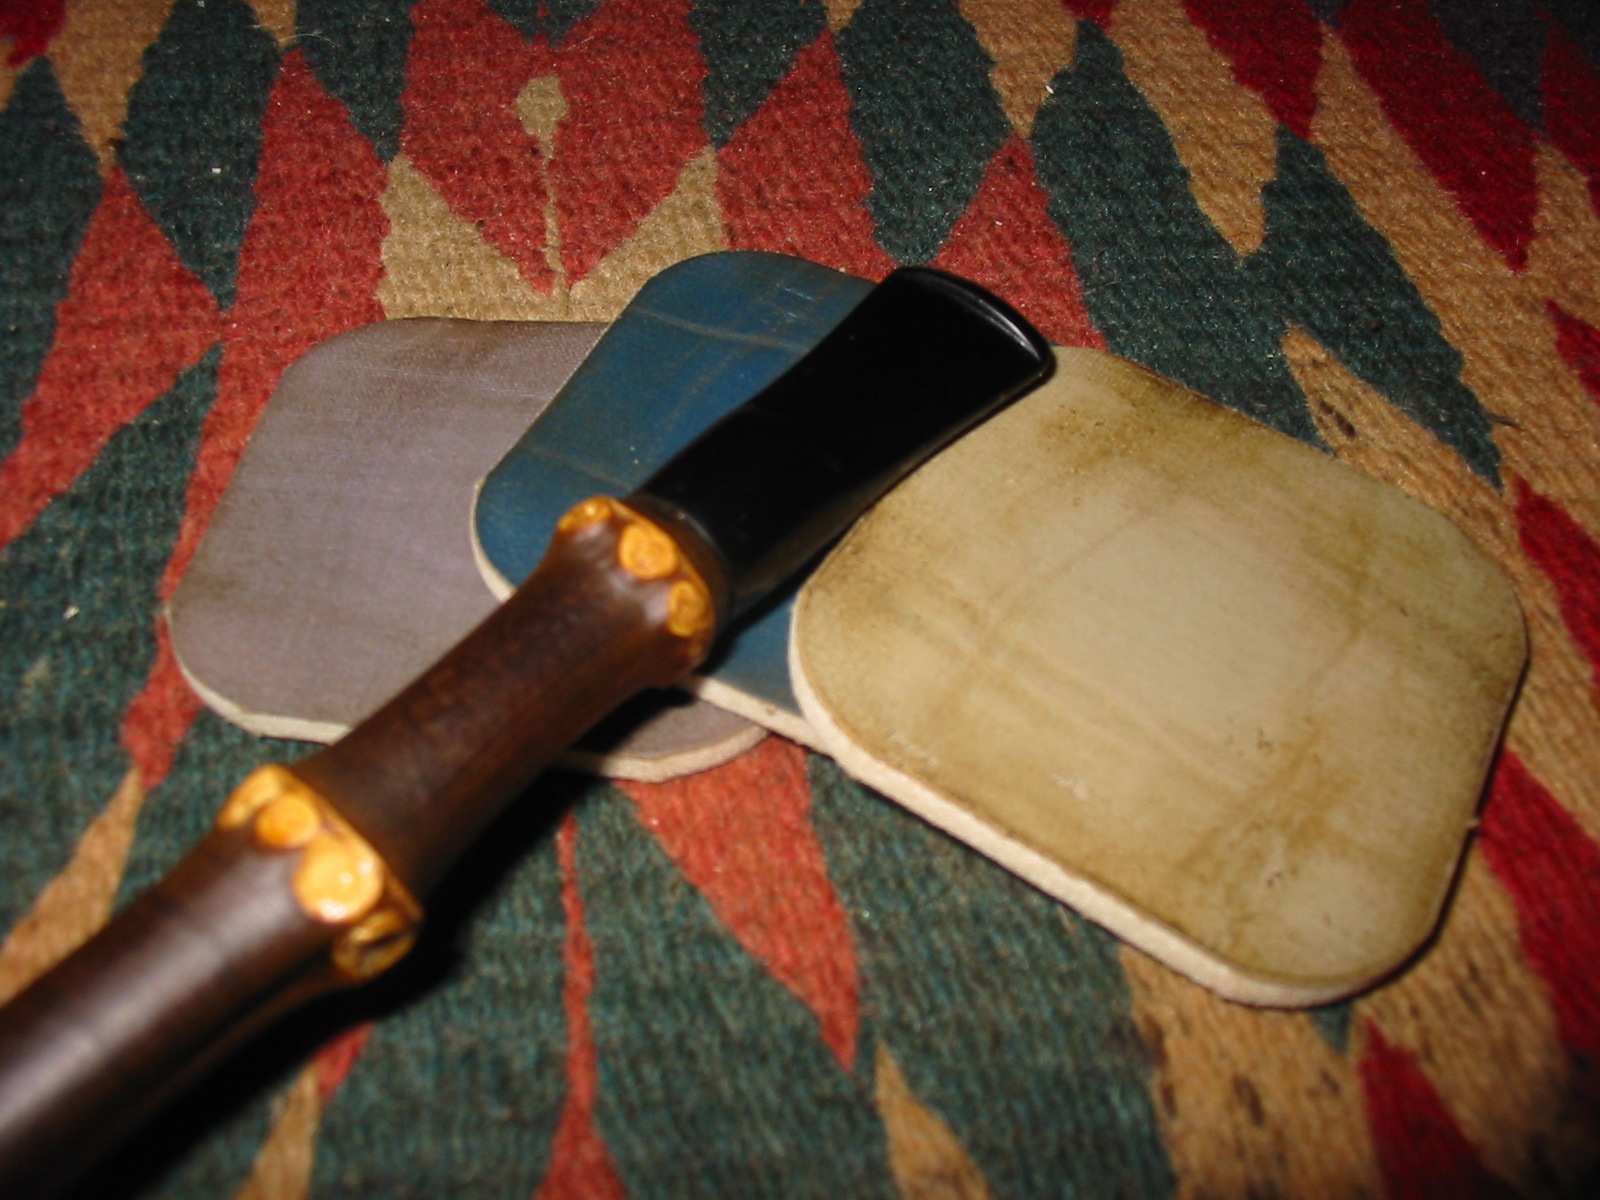
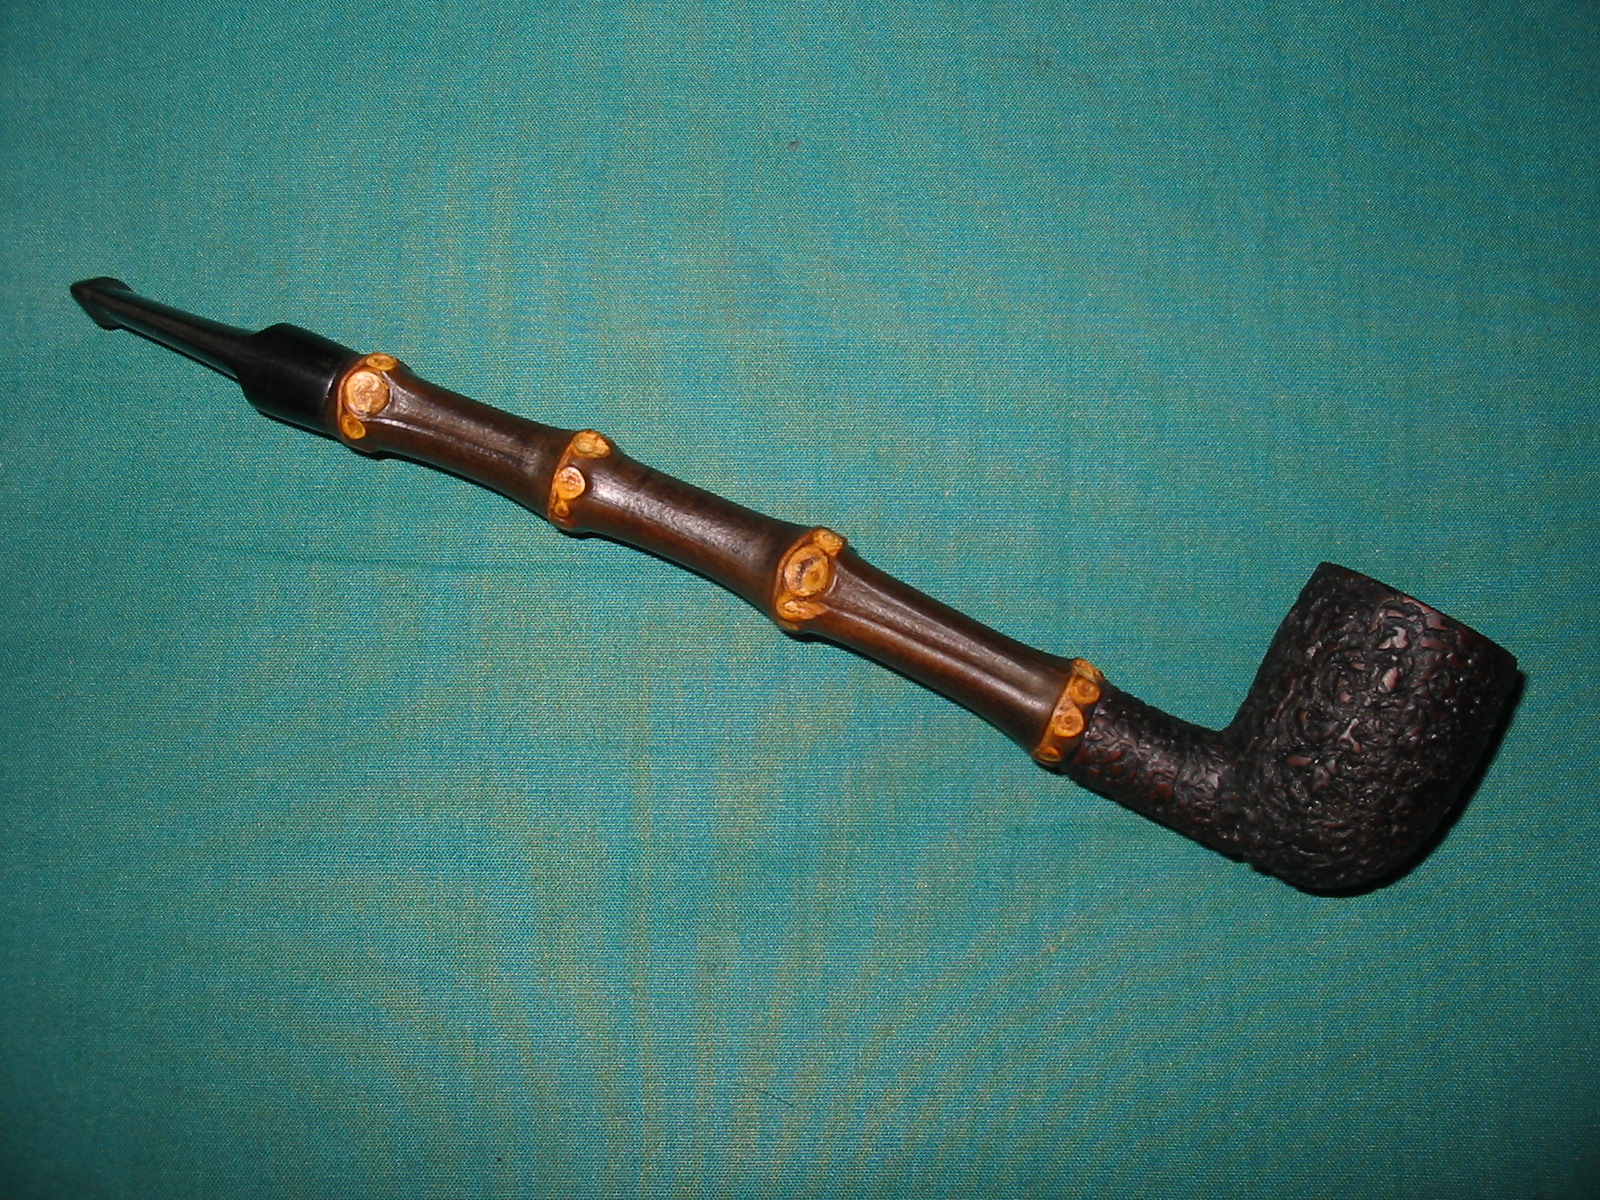
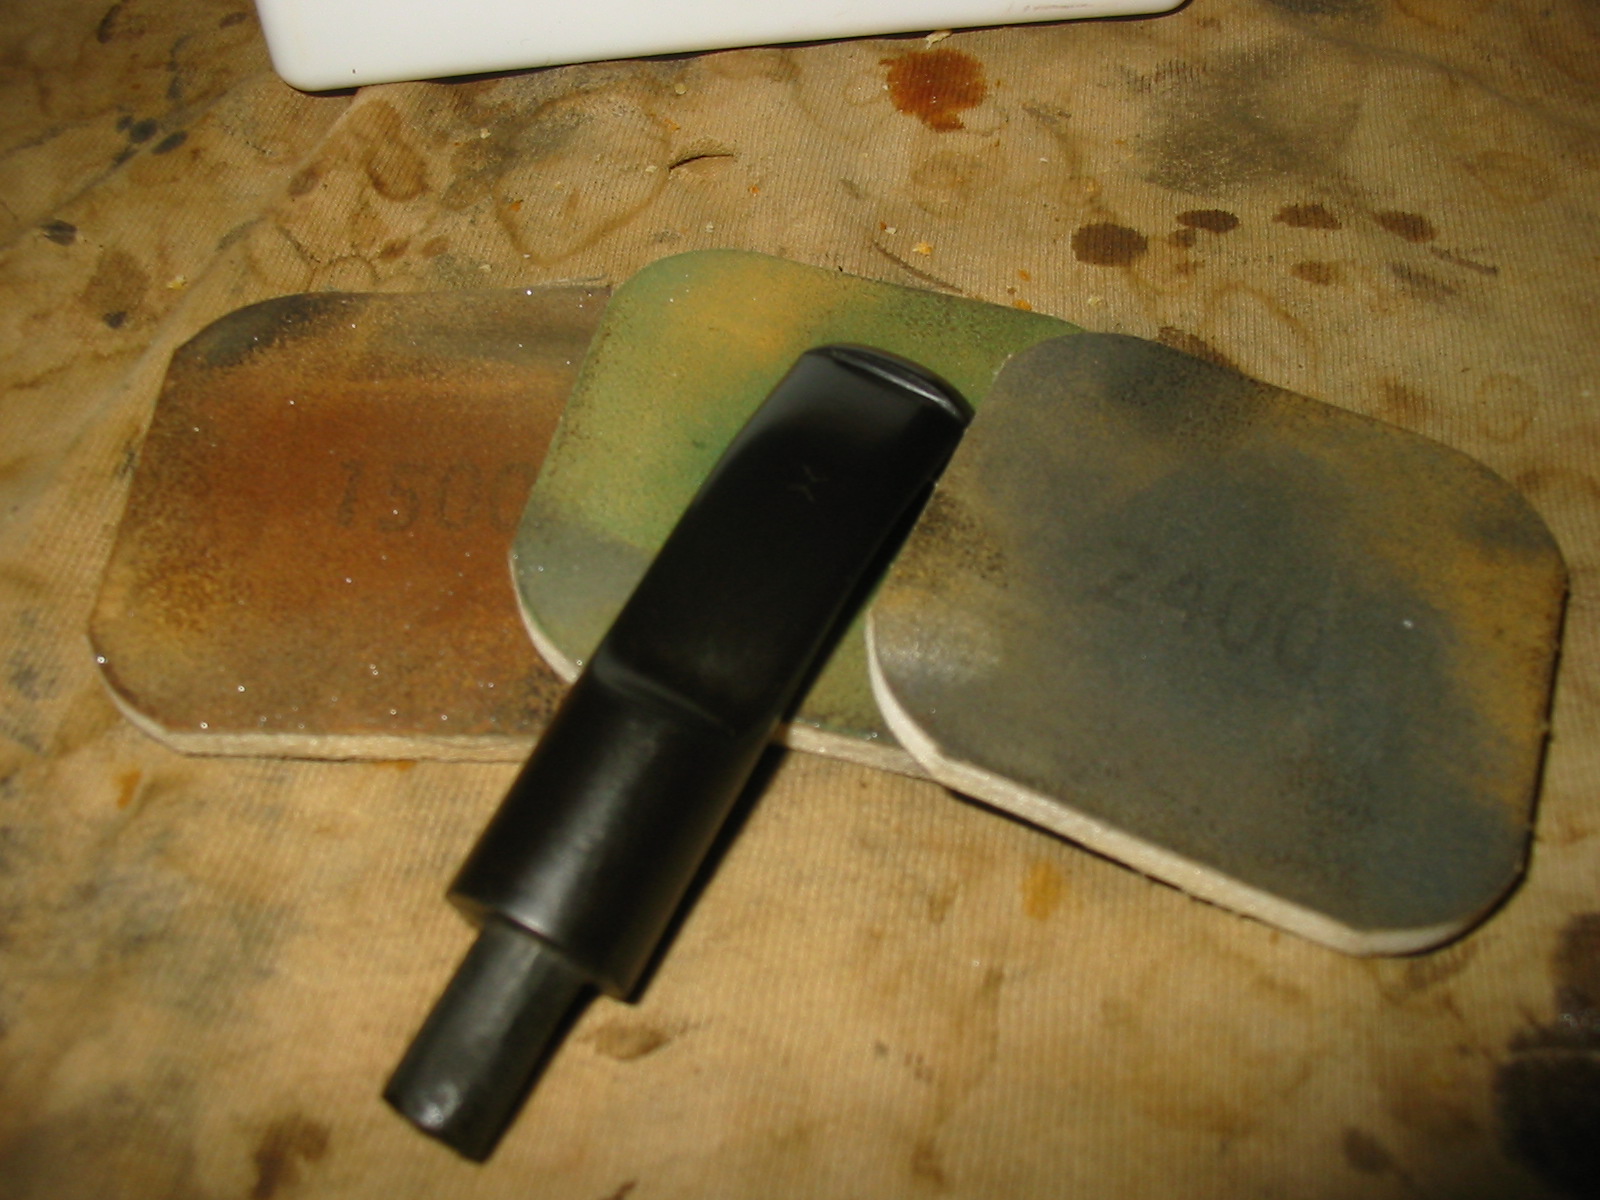
I sanded the stem with micromesh sanding pads – wet sanding with 1500-2400 grit pads and dry sanding with 3200-12,000 grit pads.
IMG_7021

IMG_7022

IMG_7023
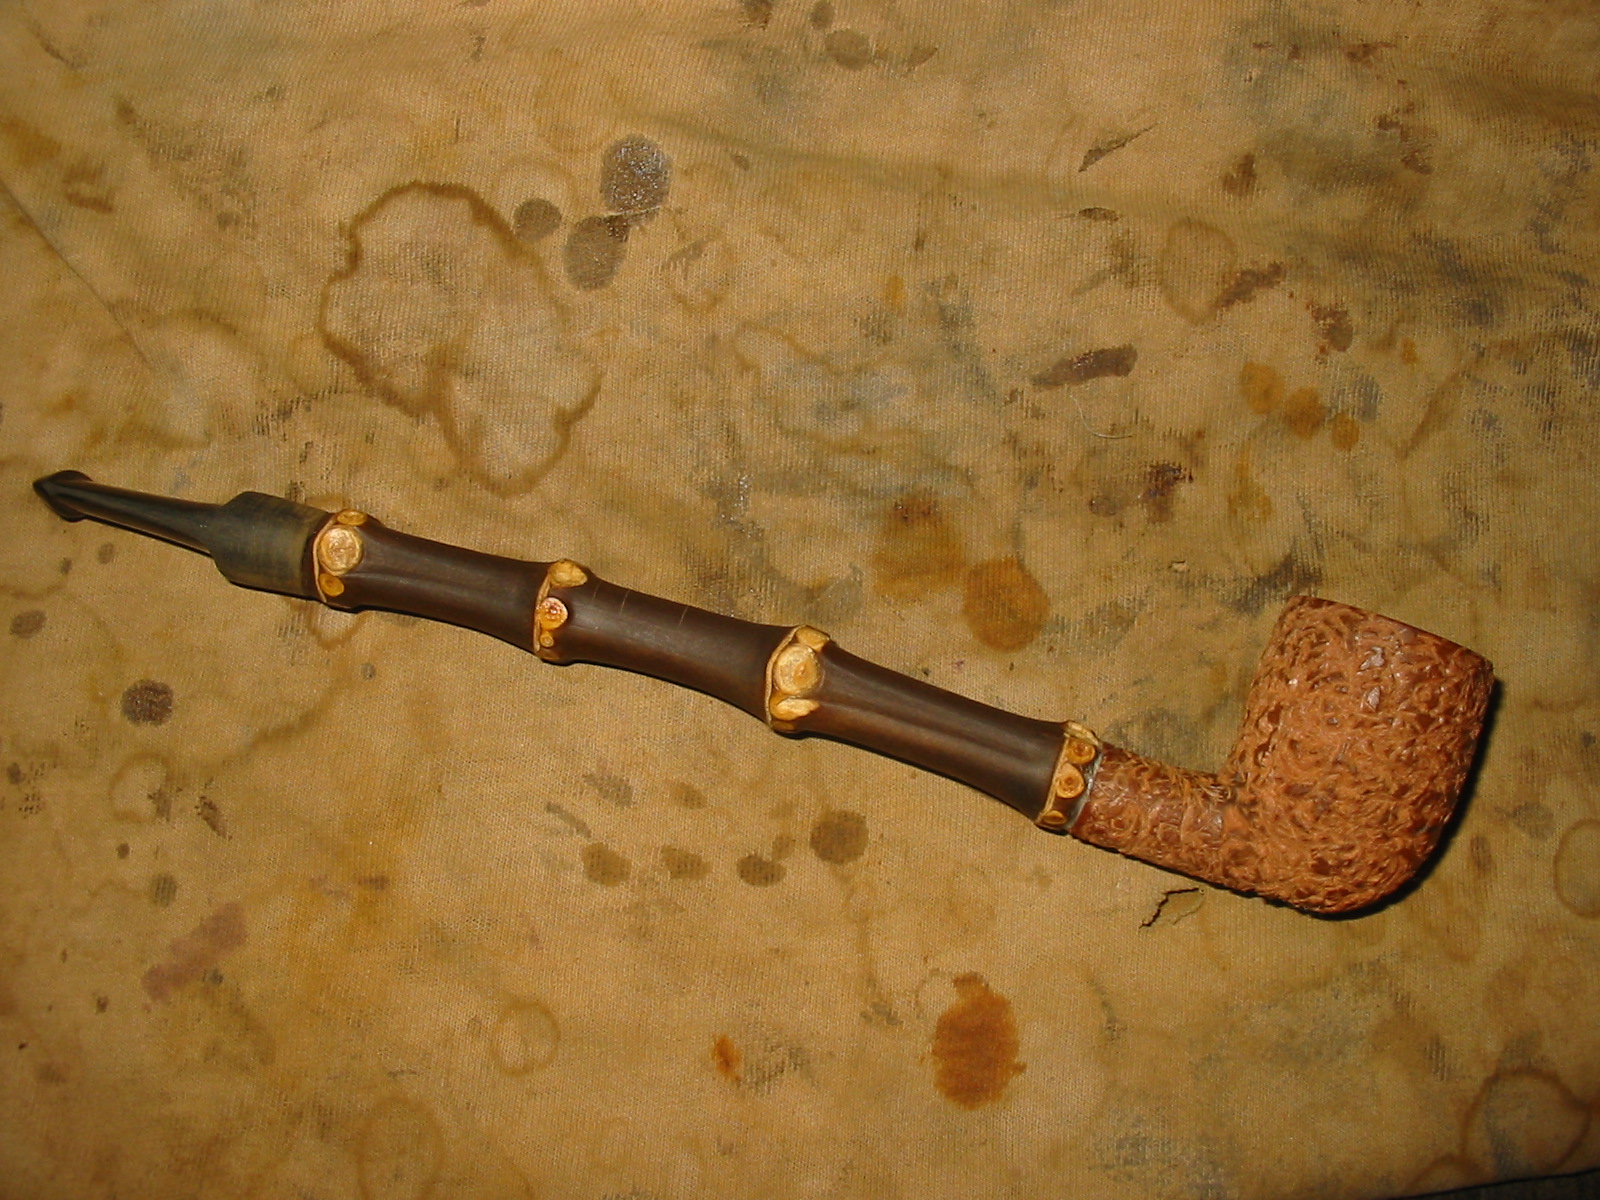
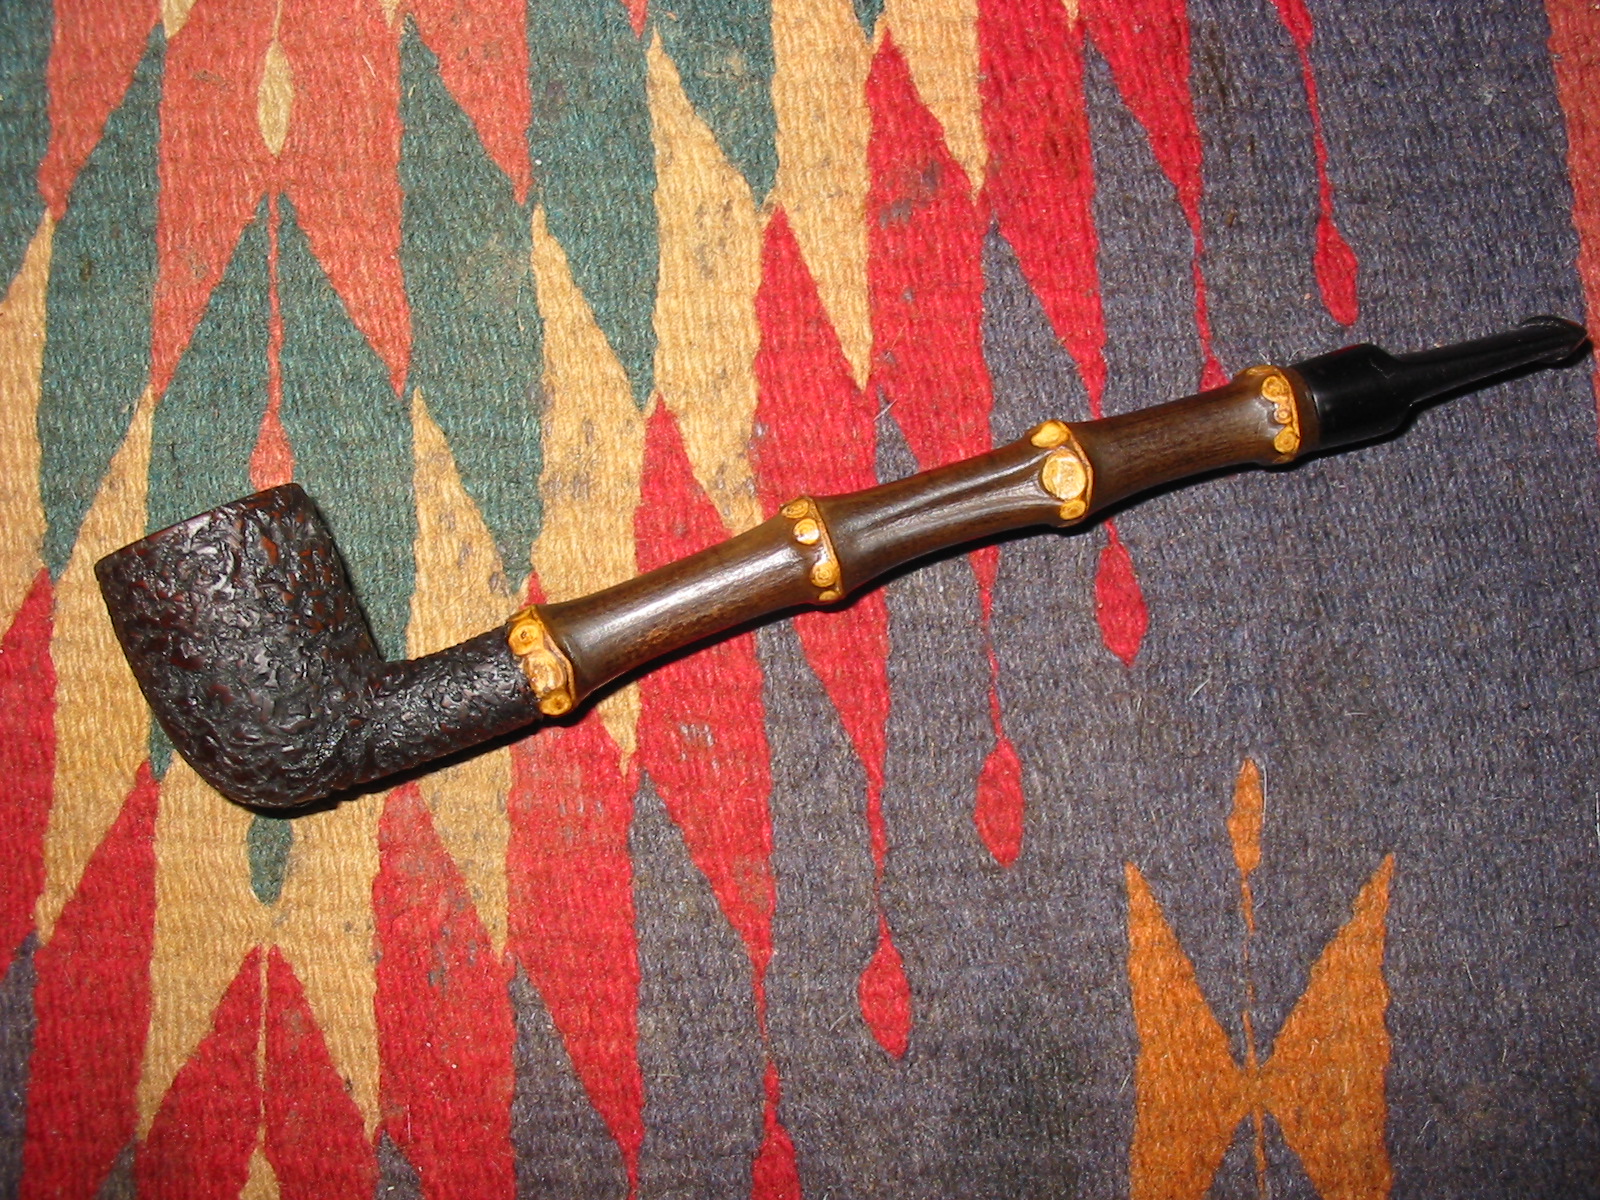
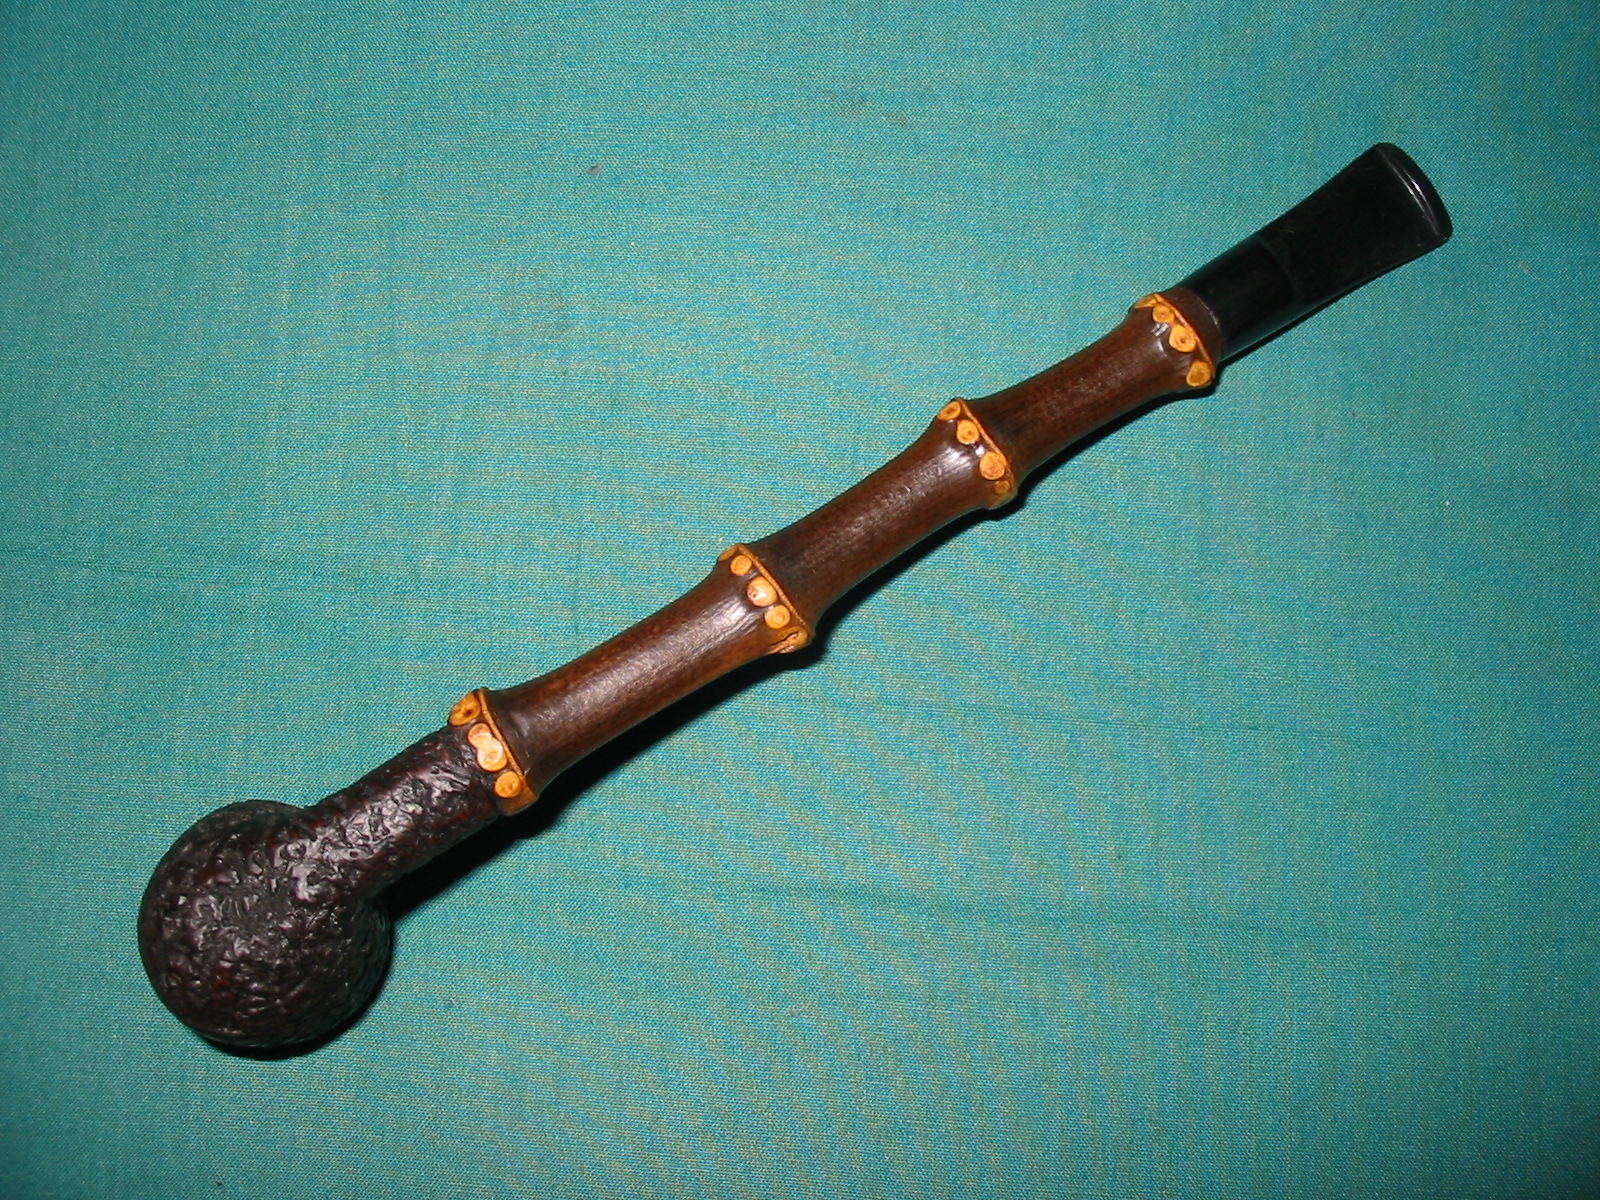
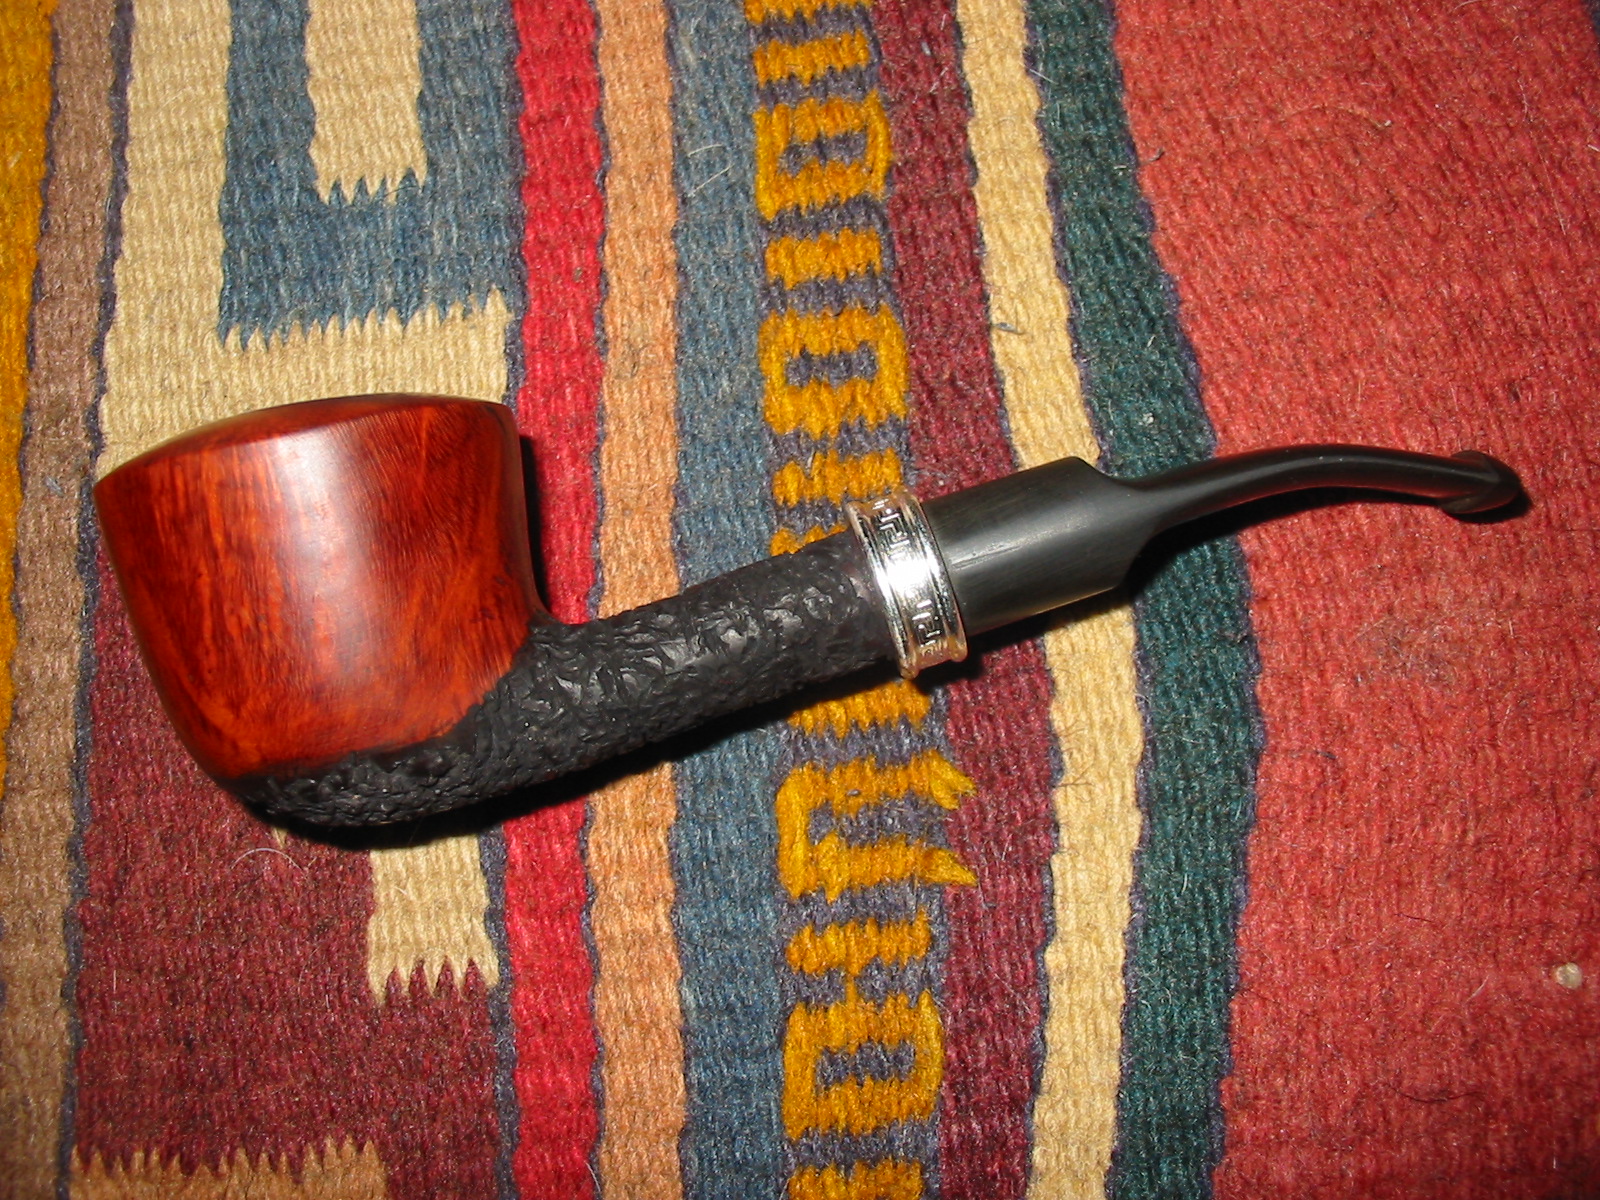
I rubbed the stem down with Obsidian Oil and when it had dried I buffed the bowl and the stem with White Diamond. I sanded the bowl with 1500-2400 grit micromesh sanding pads to further flatten he high points of the rustication and then buffed the bowl a final time with White Diamond. I gave the stem multiple coats of carnauba wax. I buffed with a soft flannel buff between the coats of wax. I wiped the bowl down lightly with a coat of olive oil. The finished pipe is shown below. It has come a long way from the worn and tired looking old Medico with the bite throughs in the stem. The rustication came out the way I wanted it to with the high spots showing a lighter brown and the valleys in the rustication holding the dark brown stain. It is finished and ready for an inaugural smoke – if not by me at least by someone who will take it home to their rack.

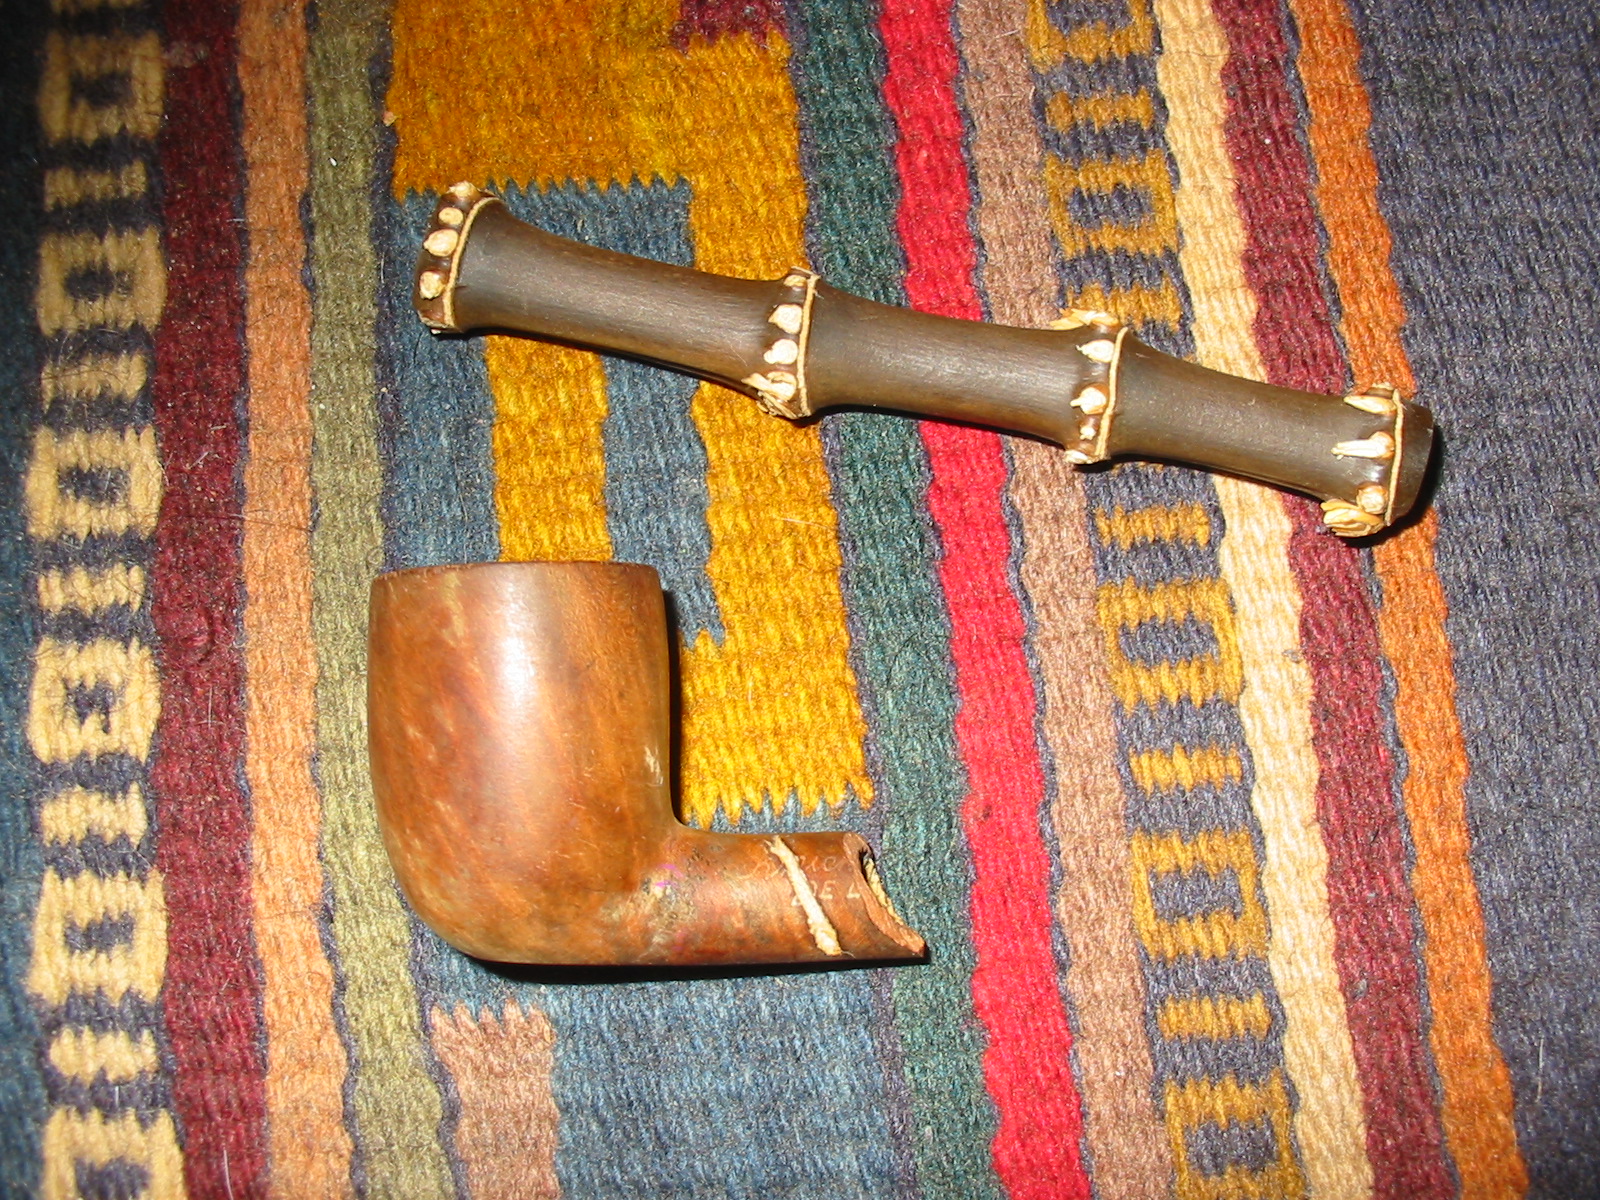
Oh, and for those who wondered about the “original” stem that I was patching earlier in this post, I am continuing to work on the repairs. Both sides have had two layers of super glue and the holes are sealed. There are still more layers to go as the glue shrinks as it cures. It will be used on some other pipe in the future I am sure but for now once the patch is finished it will go back to the stem can to be used on another pipe.
IMG_7024

IMG_7025

IMG_7026

IMG_7027

Crafting a Bamboo Shank Briar Mini Churchwarden


Blog by Steve Laug

I had all the parts to do a bit of an experiment. I had a broken shank briar pipe, a long piece of black bamboo and an assortment of stems to choose from to see if I could connect all the pieces and make a workable smoking pipe. Putting together the pieces is reminds me of playing with my old Erector Set when I was a kid. The only limit to what can be put together is your imagination. The bowl came to me with two large gashes in the shank. They were both quite deep and both had been repaired by fills. There was a metal threaded mortise in the shank for a threaded tenon. While I was cleaning up the bowl the shank fell off in my hands. I put it in the cupboard as I expected I could scavenge some briar for repairing burn outs in the future. It sat there for more than a week before I began to wonder if I couldn’t do something with it. I went through my parts drawer and found the piece of black bamboo that had been sitting for quite a few years waiting for the right moment. I brought the bowl out and put the two pieces side by side and kind of liked what I saw. The end product would be a four knuckle bamboo mini Churchwarden pipe. It would be extremely lightweight and might actually end up looking quite nice. Now it was time to start working.
IMG_5869

IMG_5870

IMG_5871
I drilled out the inside of the bamboo with an 11/64 inch drill bit. I then drilled out the end that would meet the bowl with a ¼ inch and then a 3/8 inch bit so that I could use a metal tenon I had saved from a previous pipe. Once the drilling was done the tenon fit the newly drilled bamboo mortise very well. I faced the end of the broken shank so that the bamboo would fit against it smoothly.
IMG_5872

IMG_5873
The metal tenon also fit in the shank of the bowl well. The length was perfect as it fit against the airway in the end of the shank next to the bowl bottom. There was no gap between the two so the smoked would flow smoothly down the shank of the pipe. I cleaned out the bamboo airway with pipe cleaners and isopropyl alcohol and then put the pipe together and checked the draw. It was open and was an effortless draw.
IMG_5874
I repaired the fill on the side of the shank as it was not even with the surface of the shank. I used a superglue and briar dust patch on it. Some might wonder why I did not cut back the shank and eliminate the damaged area. I chose not to do that as I wanted the shank to have some length to it in contrast to the long bamboo section. I also planned on rusticating the entire bowl so the damage would be covered. The insert of the metal tenon would stabilize the area as well and the shank repair would be solid.
IMG_5875

IMG_5876

IMG_5877
I took the bamboo shank off the bowl and sanded the bowl with 220 grit sandpaper to smooth out the finish. I repaired several of the gouges on the bowl surface with superglue and briar dust. I wanted a smooth canvas to work on when I rusticated the bowl. I then sanded the bowl with a medium grit sanding sponge. The top of the bowl had a slight buildup of tars so I cleaned that with the medium and fine grit sanding sponge. I wiped down the bowl with acetone on cotton pads. I sanded the knuckles on the bamboo to remove the fibers that were still attached and to smooth out the nodules. More work would need to be done on the shank but at least at this point it would be smooth in my hand while I worked on the bowl.
IMG_5878
I set the bowl aside and went through my can of stems to find a nice saddle bit that would look good proportionally with the pipe. I drilled out the stem end of the bamboo with a ¼ inch bit to serve as a mortise for the stem. I turned the tenon on a PIMO tenon turning tool and then hand sanded it. I pushed the stem in place and starting sanding the saddle portion of the stem to get the diameter of the stem and shank to match. I mixed some two part epoxy and glued the metal tenon in place in the bamboo. When it was dry I put the pipe together. I did not epoxy the bowl to the shank at this point as I wanted to be able to remove it work on the rustication. The next three photos show the pipe with all parts in place.
IMG_5879

IMG_5880

IMG_5881
I used a Dremel with a cone shape cutting head to pre-rusticate the shank and then followed that up with the modified Philips screwdriver. I rusticated the briar shank with it attached to the bamboo so that I could rusticate it up to the joint of the two shank materials. Once I had the shank finished I removed the bowl and worked on it with the Philips screwdriver. I find it easier to manipulate the bowl when it is not attached to the shank. When the bowl was completely rusticated I used a brass bristle wire brush to knock of the rough edges and give the bowl the texture that I wanted. I left the rim smooth to contrast with the finish on the bowl.
IMG_5882

IMG_5883
I put the pipe back together to have a look at the finished rustication and the contrast with the finish on the bamboo. I liked the overall look of the pipe at this stage. I did a bit more rustication on the bowl and shank and wire brushed them until I was happy with the end result.
IMG_5884

IMG_5885

IMG_5886

IMG_5887
At this point I was ready to attach the shank to the bowl permanently. I scored the metal shank to give the surface something to bond with in the briar shank. I mixed the two part epoxy and applied it to the metal shank with a dental pick. I pressed the two parts together and used the dental pick to trim off the excess glue and wiped it down with a soft cloth. I clamped the parts together while the epoxy set.
IMG_5888

IMG_5889

IMG_5890

IMG_5891

IMG_5892
While the glue was drying I worked on the stem to taper it to fit the diameter of the bamboo shank. I sanded it with a Dremel to take off the majority of the excess vulcanite and then hand sanded it with 220 grit sandpaper. Once the epoxy had set, late last evening I inserted the stem and took the photos below.
IMG_5893

IMG_5894

IMG_5895

IMG_5896
This morning I got up early and stained the bowl with a black aniline stain. My plan is to use the black stain as an undercoat on the bowl. Once the pipe is dry I will buff it with red Tripoli to remove the black from the high spots on the rustication and then stain the bowl with a brown topcoat to give it depth and contrast.
IMG_5897

IMG_5898

IMG_5899
I buffed the bowl with the Tripoli and then used isopropyl alcohol on cotton pads to dab off the stain on the high spots. The finish is rough so to scrub it with the pads leaves behind a lot of cotton bits. I sanded the surface of the bowl with a fine grit sanding sponge to remove more of the black stain from the high spots and to soften the rustication. I stained the bowl and shank with a coat of walnut stain to give some depth and highlights to the bowl. I had asked online how to finish bamboo and received a step by step response from James of JSEC pipes. He said to stabilize the cracks in the bamboo with superglue and then to sand the bamboo with 600 grit wet dry sandpaper and follow that with 1500 grit sandpaper. I followed that process to the letter. The change in the surface of the bamboo was noticeable. It was smooth and had a developing patina on the surface. I then took the next steps in the process and rubbed the shank down with Danish Oil. James said the he generally gave multiple coats of Danish Oil over several days. The photo below was taken after the bowl had been stained with the walnut and the shank sanded as described above. It also shows the first coat of Danish Oil on the stem. After about one hour the oil had dried to a matte finish on the bamboo.
IMG_5900

IMG_5901

IMG_5902

IMG_5903
While the Danish Oil was drying on the bamboo I worked on the stem. I sanded it with 220 grit sandpaper to reduce the diameter of the saddle to match the shank diameter. I then used a medium grit sanding sponge and 600 grit sandpaper. I then sanded the stem with my usual array of micromesh sanding pads. I wet sanded with 1500-2400 grit pads and dry sanded with 3200-12,000 grit pads. I rubbed the stem down with Obsidian Oil and let it soak into the vulcanite.
IMG_5905

IMG_5906

IMG_5907
When the bamboo had dried I buffed it with White Diamond on the buffing wheel. I buffed bowl and stem as well. I took the next series of four photos before I gave the bamboo a second coat of the Danish Oil. The pipe is beginning to look finished. I like the look of the black bamboo with this treatment – there is a rich patina beginning to show up on the shank now.
IMG_5908

IMG_5909

IMG_5910

IMG_5911
I gave it a second and third coat of Danish Oil and then buffed the bamboo with White Diamond. I gave the stem and the bowl a light buff as well. The bamboo is looking really nice. I like the developing patina that is coming from the finishing. I gave the shank and stem multiple coats of carnauba wax and then buffed to a shine with a clean flannel buff. The finished pipe is picture below. This weekend I hope to take it on its inaugural smoke!
IMG_5912

IMG_5913

IMG_5915

IMG_5916

Reworking a No Name Pipe Bowl – Adding Rustication and Bling


Blog by Steve Laug

Andrew is turning out to be a great source of older pipe bowls in need of stemming. I received this old bowl in the mail from him not to long ago. It had a look to it that was interesting to me. The shank had been reworked somewhere along the way. I think that originally it may have had a diamond shank. Someone had carved it by hand into an almost round end and flattening as it moved toward the bowl. They had added three bands of coloured tape to the shank to dress it up. The first two bands were thin gold tape and the third was a wide swath of dark brown tape. The bowl was clean and reamed and the inside of the shank was also clean. The underside of the shank and bowl were rough. I think that the person who had reworked this bowl had used a knife to work on it and had not sanded it smooth after his work. There were also some pretty deep dents and grooves on the bottom of the bowl.
IMG_5255

IMG_5256

IMG_5257

IMG_5258

This old pipe bowl provided a challenge to me. The tape had to go but I had no idea what was underneath and hidden by it. The funky shape of the shank also needed to be reworked to give it a more artistic and shapely appearance. The restemming would also be a challenge in that the shank was not round at this point but very oddly shaped with all sides being unequal. I found an old saddle stem in my box of stems and tried that first – to me it was too long and gave the pipe an unbalanced look so I dug through my can of stems and found a saddle stem that was shorter that would look nice on the pipe.
IMG_5259

I peeled off the tape and underneath the two gold tape bands was a small crack in the shank. Underneath the brown tape was a huge fill on the top and underside of the shank. I used a Dremel with a sanding drum to reshape the shank and bowl union and also to reshape the end of the shank. I had a nice sterling silver wedding ring band that would work well on this pipe bowl so I reshaped the end of the shank with 220 grit sandpaper after the Dremel work and then applied all purpose white glue on the shank and pressed the silver band into place. Once it was in place I could see that the end of the shank was not straight but had been cut off at an angle. With the band in place I used the Dremel and sanding drum to straighten up the end of the shank. I finished that work by using the same sanding board set up I use for topping bowls. With all that finished I put the stem in place and sanded the bowl and shank until it was a clean smooth shape. I wiped the surface down with acetone on cotton pads to remove the urethane finish that the previous person put over all the bowl and tape. In the next four photos below the size of the large fill is obvious.
IMG_5260

IMG_5261

IMG_5262

IMG_5263

With the shaping of the bowl and shank finished and looking more balanced I had to make a decision on how to deal with the large fills on the shank. There were also several sand pits on the bottom of the bowl that needed to be addressed. I weighed my options and decided to rusticate the shank. I used the modified Philips screwdriver to rusticate the shank first. At this point I left the bottom of the bowl smooth and just worked on the shank. Once I had rusticated it I used a small brass tire brush to smooth out the roughness of the rustication. I find that the brush knocks off the loose pieces of briar and gives the finish a contrast of highs and lows. The rustication looked good against the wedding band and the smoothness of the vulcanite. I also liked the look of the rustication against the smoothness of the bowl.
IMG_5264

IMG_5265

IMG_5266

IMG_5267

I stained the shank with a black aniline stain. I applied it heavily with a cotton swab and flamed and repeated the process until I had a good matte black finish on the shank. At that point I decided to carry the rustication to the bottom of the bowl and slightly up the sides and curve it into the top of the shank bowl union.
IMG_5268

I stained the bottom of the bowl to match the shank colour. I applied a black aniline stain to the bottom and restained the shank at the same time. I flamed the stain and repeated the process until I had the coverage that I wanted on the bottom of the bowl. I then sanded the rest of the bowl with 200 grit sandpaper and then a medium and a fine grit sanding sponge. I finished by sanding it with 1500-2400 grit micromesh sanding pads. I wanted to have the briar clean and smooth on the upper portion of the bowl. The grain on that part of the bowl was quite nice. I wiped down the bowl with isopropyl on a cotton pad to remove the sanding dust. The state of the bowl at this point is shown in the next four photos below.
IMG_5269

IMG_5270

IMG_5271

IMG_5272

It was time to bend the stem so I heated the stem until it was pliable with a heat gun set on the lowest setting. I bent is over a rolling pin to the angle that I wanted and set the angle with cold water. This particular stem evidently was good quality vulcanite as it did not have any oxidation and the water did not bring any to the surface. That was a real gift in this process as I would have had to work out the oxidation on the stem as well. The next series of photos shows the process and the finished look of the bend.
IMG_5273

IMG_5274

IMG_5276

At this point I reflected on what I wanted to do with the upper part of the bowl. I could stain it with a variety of colours to contrast with the rusticated black portion of the shank and bowl bottom but I was not certain I wanted to do that. I finally decided to rub down the bowl with olive oil to bring out the grain. I rubbed it in by hand and repeated that until it was finished. I gave the bowl a light buff with White Diamond to give it a shine. I will still need to give it several coats of carnauba wax but the look works for me. The grain pops with the oil finish. The next series of four photos show the bowl finish at this point in the process.
IMG_5277

IMG_5278

IMG_5279

IMG_5280

I liked the overall appearance of the pipe. It was certainly significantly different from the bowl that it was before I started. The old bowl had a more elegant look to it now and felt great in the hand. The chunky wedding band contrasts well with the shape and the finish of the bowl. Now it was time to work on the stem. I sanded the stem with 220 grit sandpaper to remove the casting marks on the sides of the saddled and blade of the stem. I followed that by sanding with medium and fine grit sanding sponges to further remove the scratches to the vulcanite. I finished the sanding with my usual list of micromesh sanding pads – wet sanding with 1500-2400 grit pads and dry sanding with 3200-12,000 grit pads. I rubbed the stem down with Obsidian Oil and let it soak in to the stem material.
IMG_5293

IMG_5294

IMG_5295

I buffed the finished pipe and stem with White Diamond and then gave it multiple coats of carnauba wax. I was careful to not get wax on the rusticated portion of the bowl and shank. The finished pipe is pictured below. It seems to me to have a much more dignified appearance than what it started with. I like the tactile feel of the bowl in my hand while at the same time maintaining the beautiful straight and flame grain on the bowl. I think this one will stay in my collection for quite awhile.
IMG_5296

IMG_5297

IMG_5298

IMG_5299