Tag Archives: reshaping a stem

Repairing a Cracked Shank on a Salstrom & Skinner Handmade Acorn


Blog by Steve Laug

Early in December I received and email from a reader of the blog about one of his first pipes. Here is what he wrote to me:

I have got a custom made briar tobacco pipe that split at the shank when I removed the pipe stem. It’s a hair line crack. Was looking to get an estimate of a repair. Was reading one of your repair articles of putting a brass ring to reinforce shank and stem connection. This is something I would like possibly have done. And what is the lead time for such a repair?… Thanks,  Jake

The story behind this being his first pipe caught my attention. I forgot to ask him what the brand was. He sent me some photos of the crack in the shank but I changed out my computer and do not have access to those photos any longer. I figured that it would be a straightforward repair so I answered him and he shipped the pipe to me. This afternoon while I was working the package arrived from Jake. I opened it after work and took some photos of the pipe. 
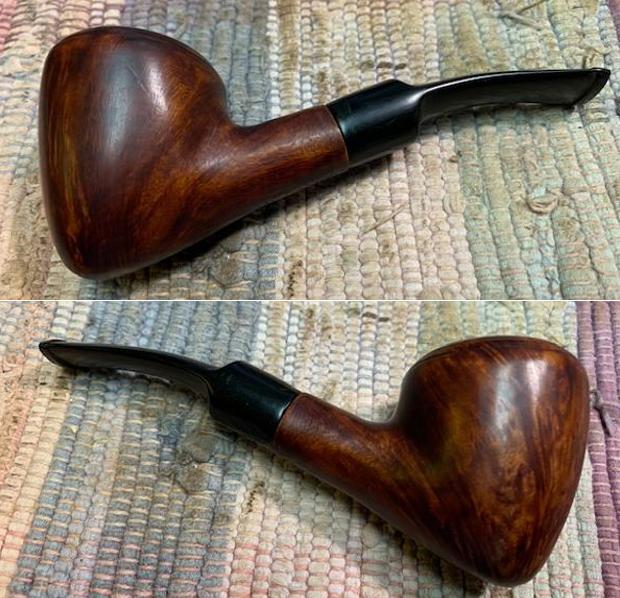
I wrote Jake an email to let him know that the pipe had arrived and asked him about the maker and the brand. He wrote me back and I am including that below.

Hi Steve! I was actually going to contact you today to see if it did, but that’s good. Glad it finally made it to you. I bought that pipe back in 2015 from an Etsy retailer that went by the name of Salstrom & Skinner. I believe they are out of Oregon. They aren’t in business anymore from what I can tell, their online Etsy shop is no longer up. And yes, that is the stem that came with the pipe. –Jake

I thanked Jake and sent him my assessment of the pipe and what needed to be done to make a repair work on the pipe. I broke my assessment down to cover the bowl and shank issues and then the stem issues. Both contributed to the crack on the underside of the shank. I include a summary of the email that I sent to him below.

The damaged shank…

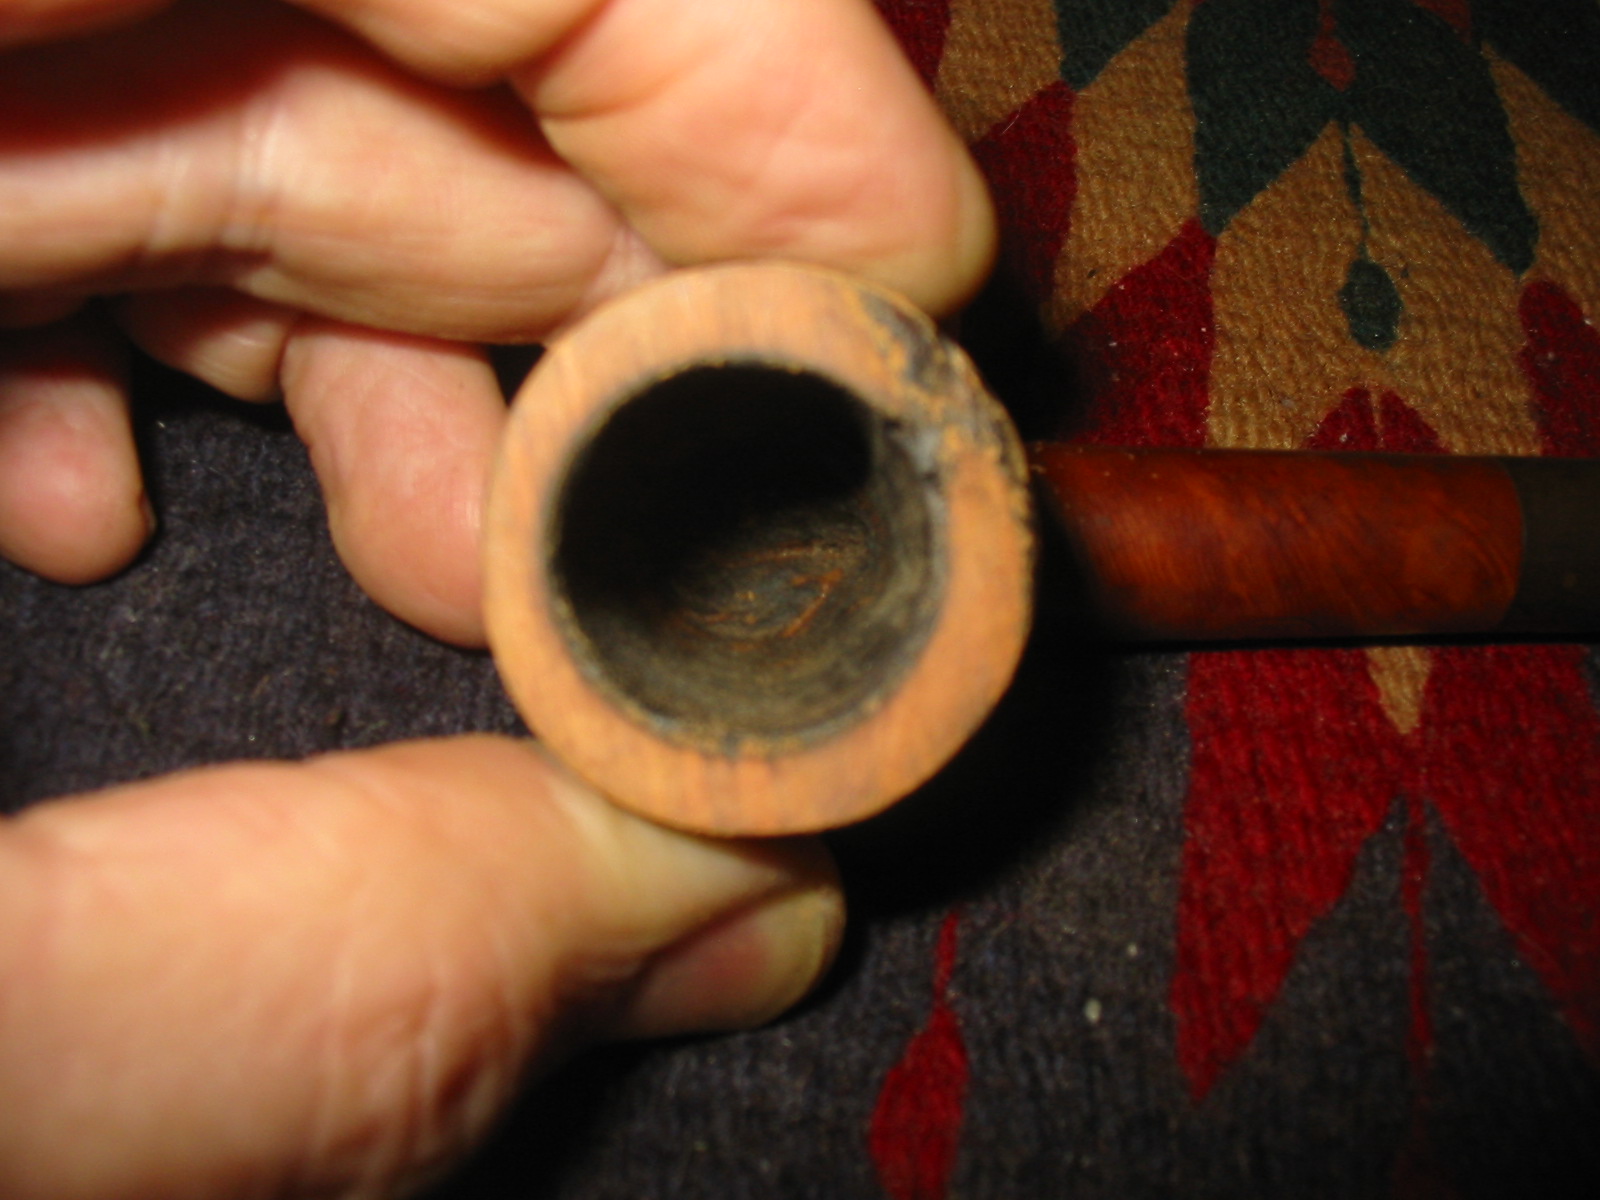
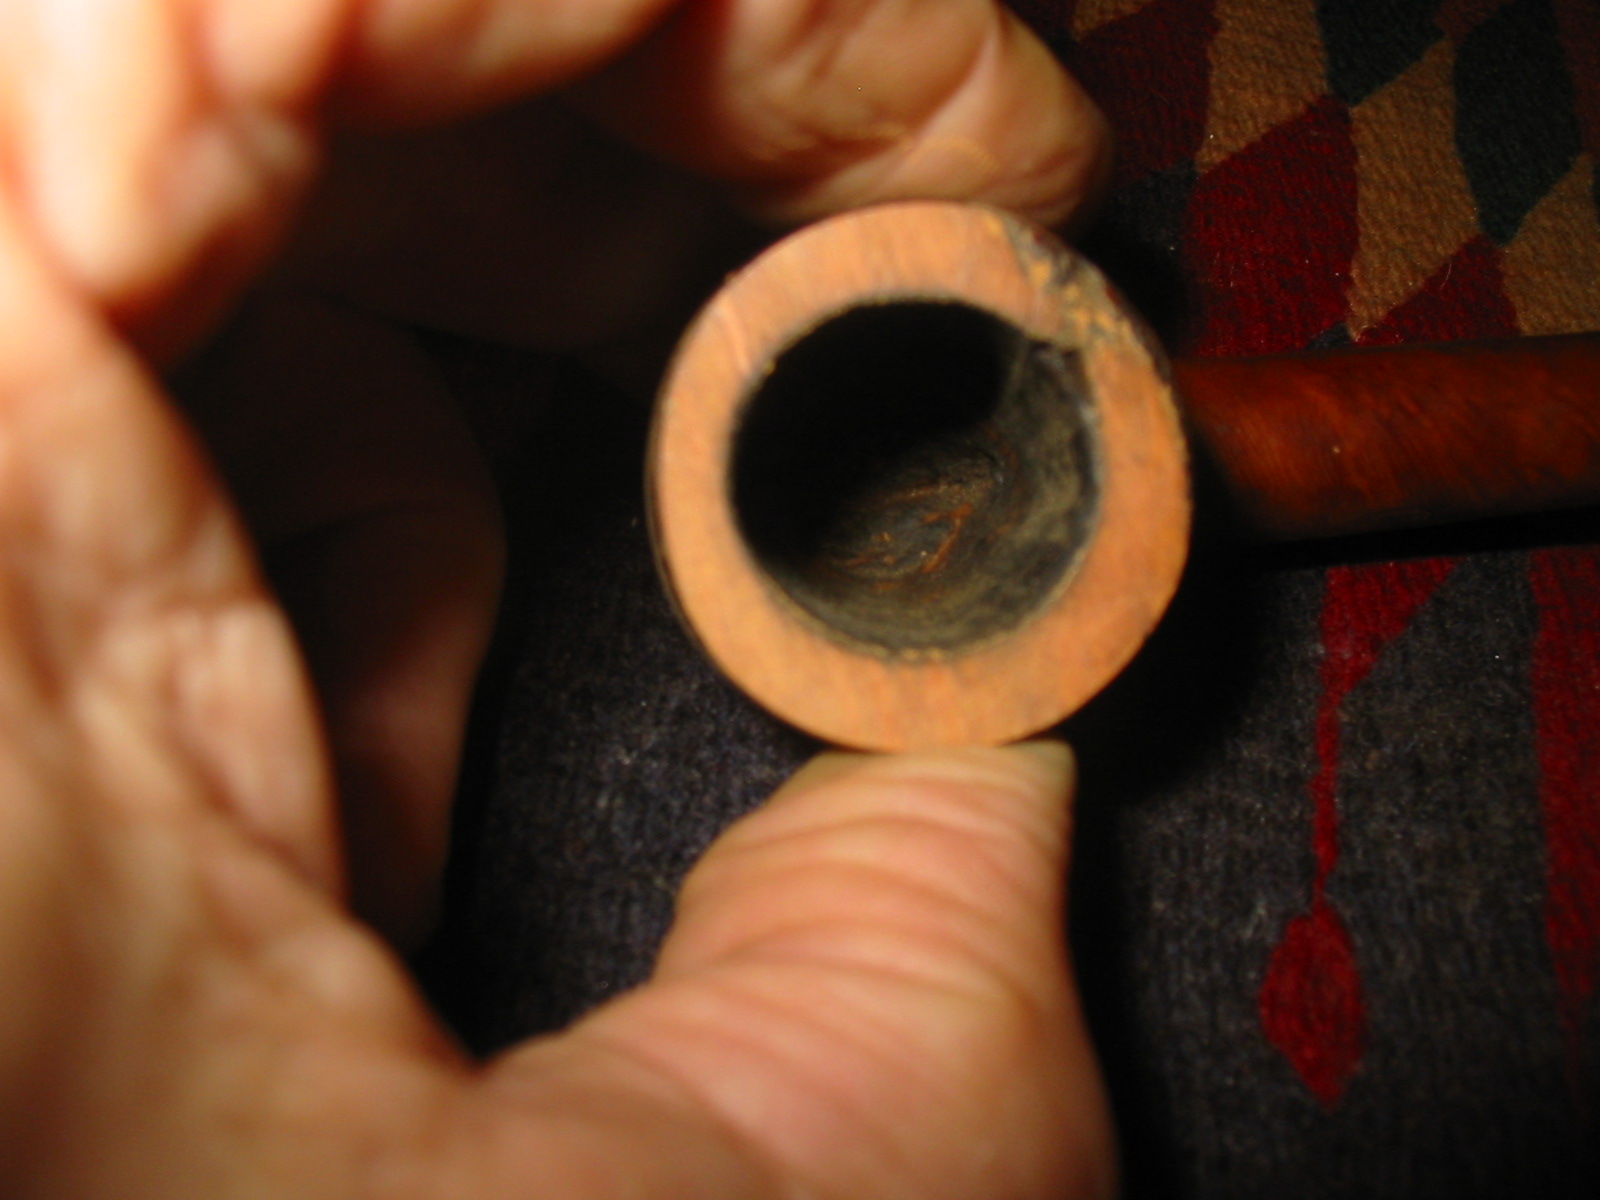
  1. I cleaned out the shank to check the crack and it goes all the way through.. Fortunately it is not too long maybe 1/4-1/2 inch into the shank.
  2. The shank was quite thin walled so I decided to glue it and then band it. I would open the crack and fill it with clear CA glue and clamp it shut until the glue dried.
  3. I would fit a thin brass band on the shank end and customize the fit. Once the fit was correct I would need to press it on the shank glue it in place. That would take care of the shank damage.

The stem issues…

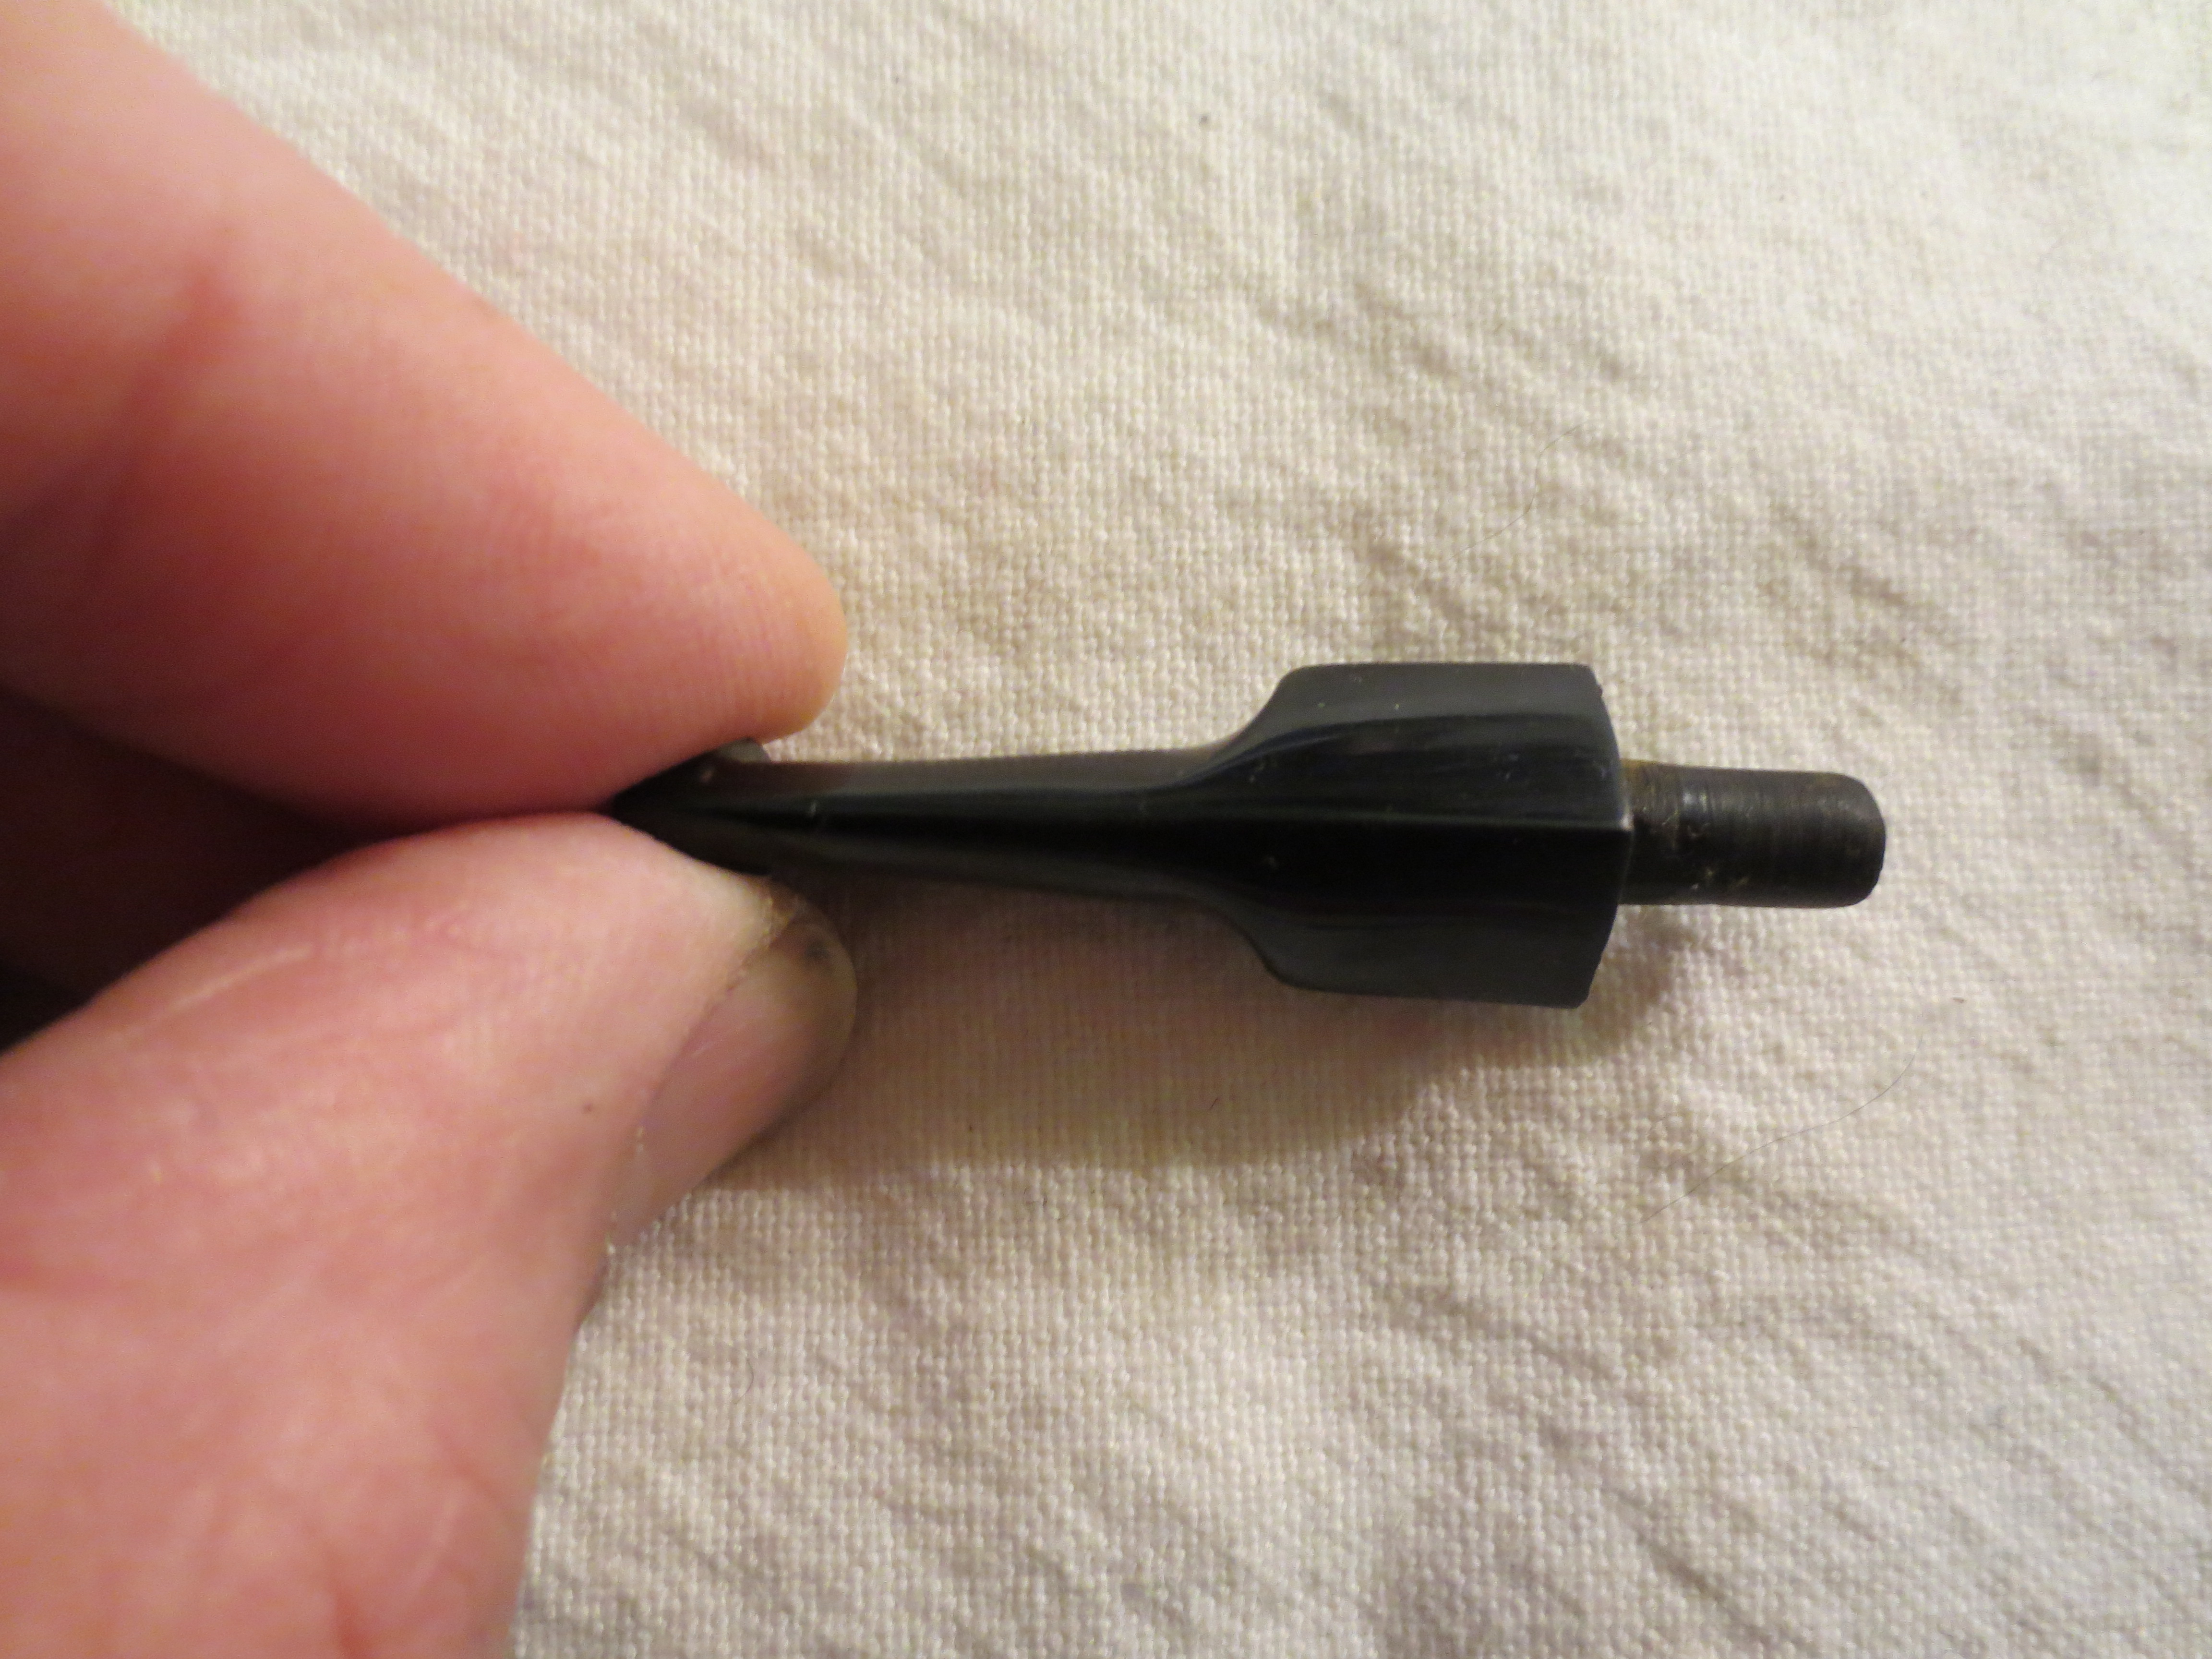
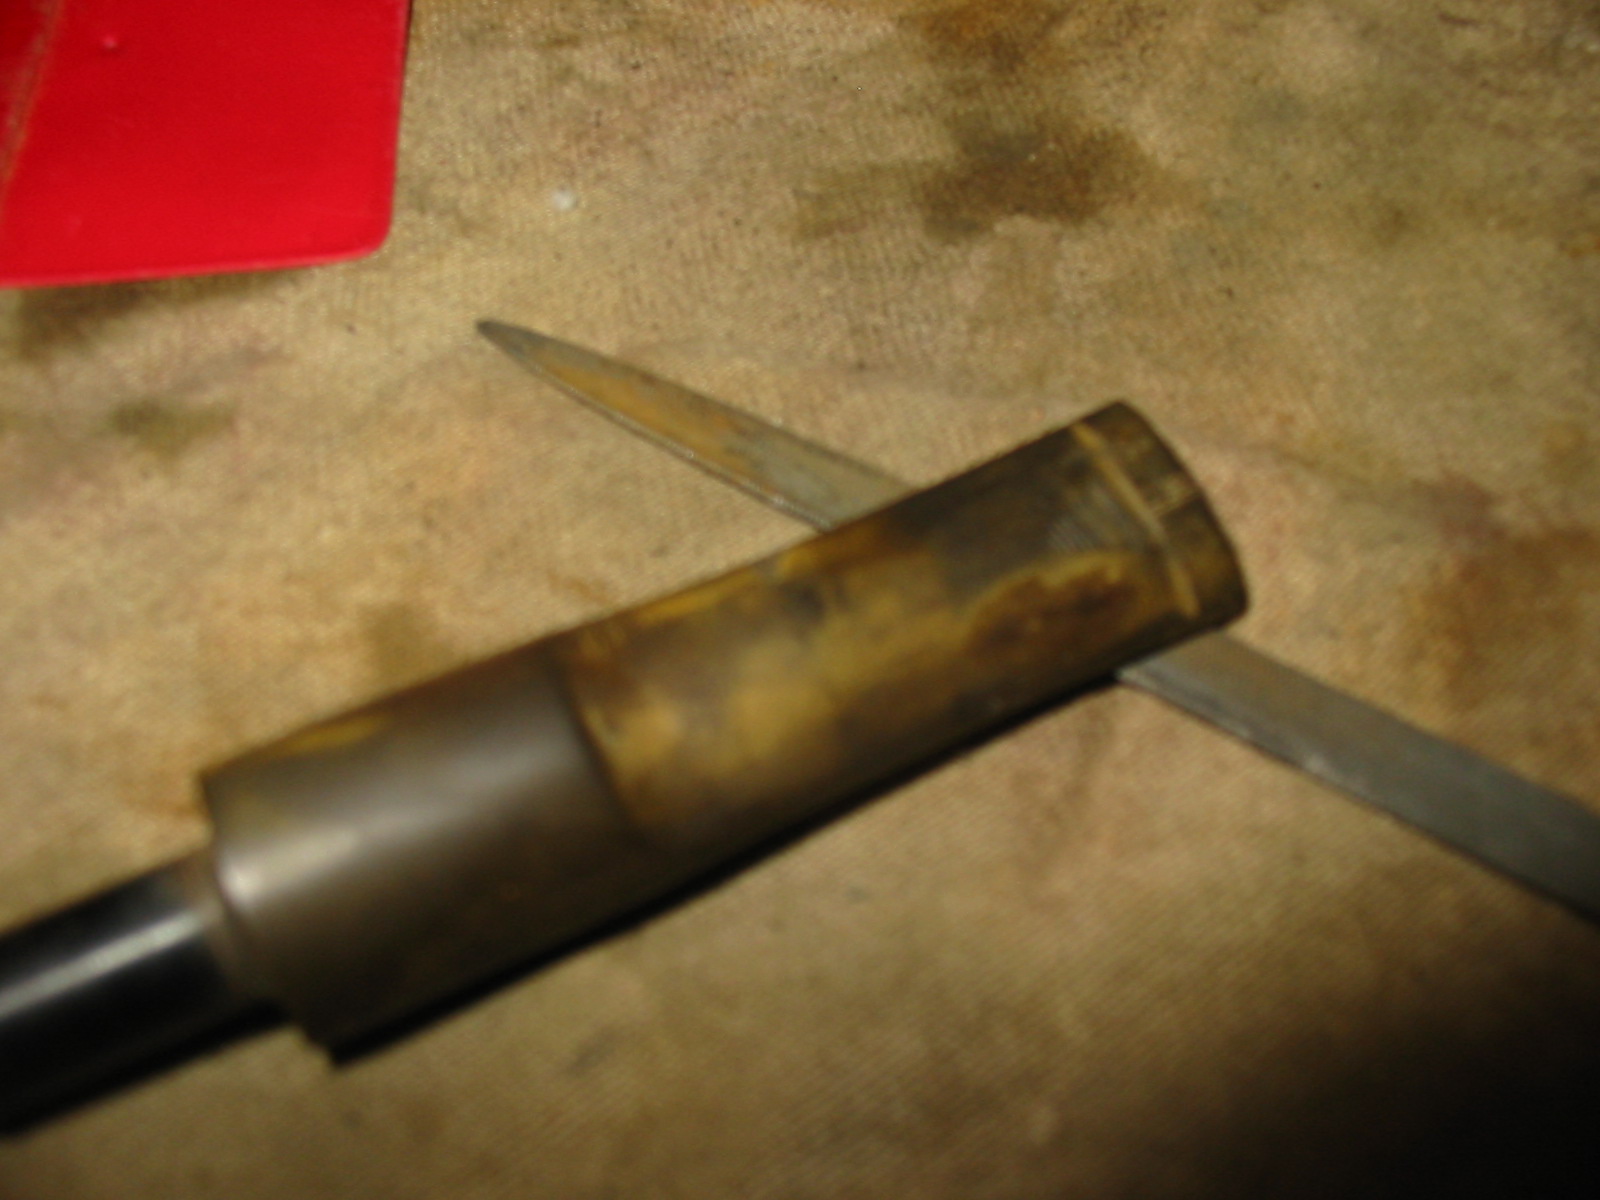
  1. The stem is really a mess. The tenon was quite large and poorly cut. It still had the castings on it and the Made in Italy castings. These made the fit in the shank very tight and also I believe caused the crack originally as the shank is quite thin.
  2. I would need to smooth out damage on the tenon and remove the castings.
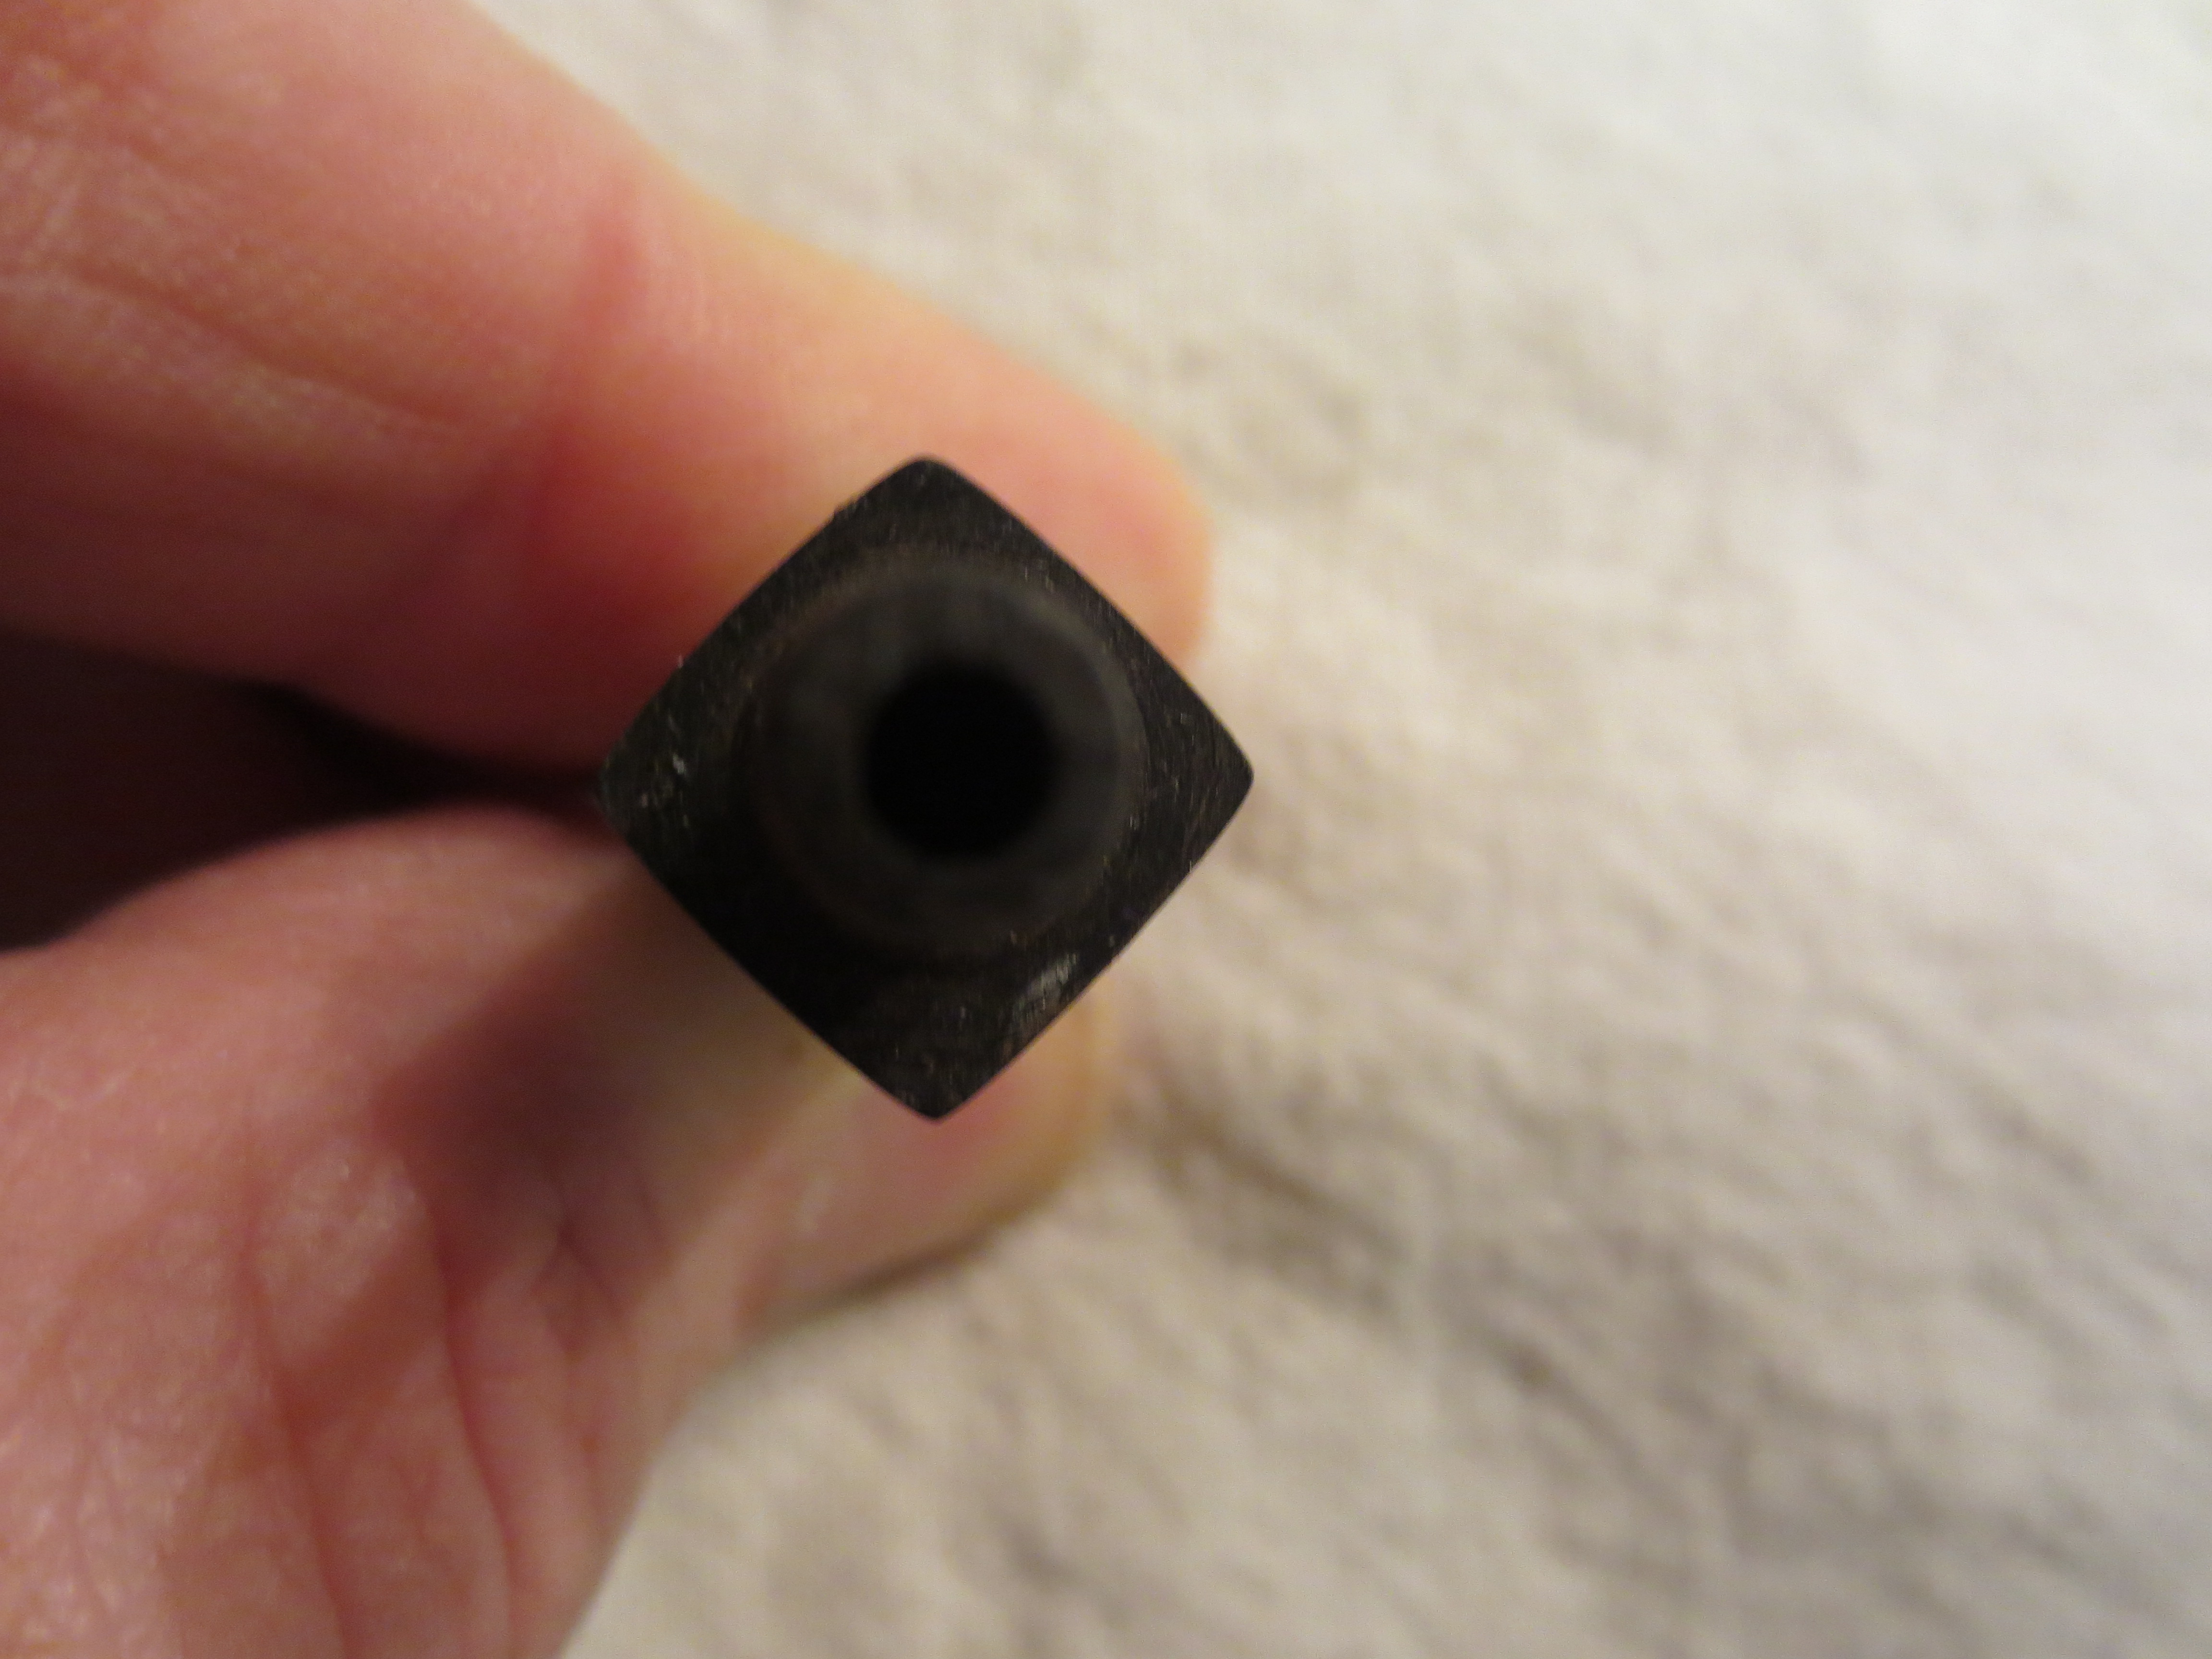
  3. I also would funnel the entry of the airway in the end of the tenon to make the draw better.
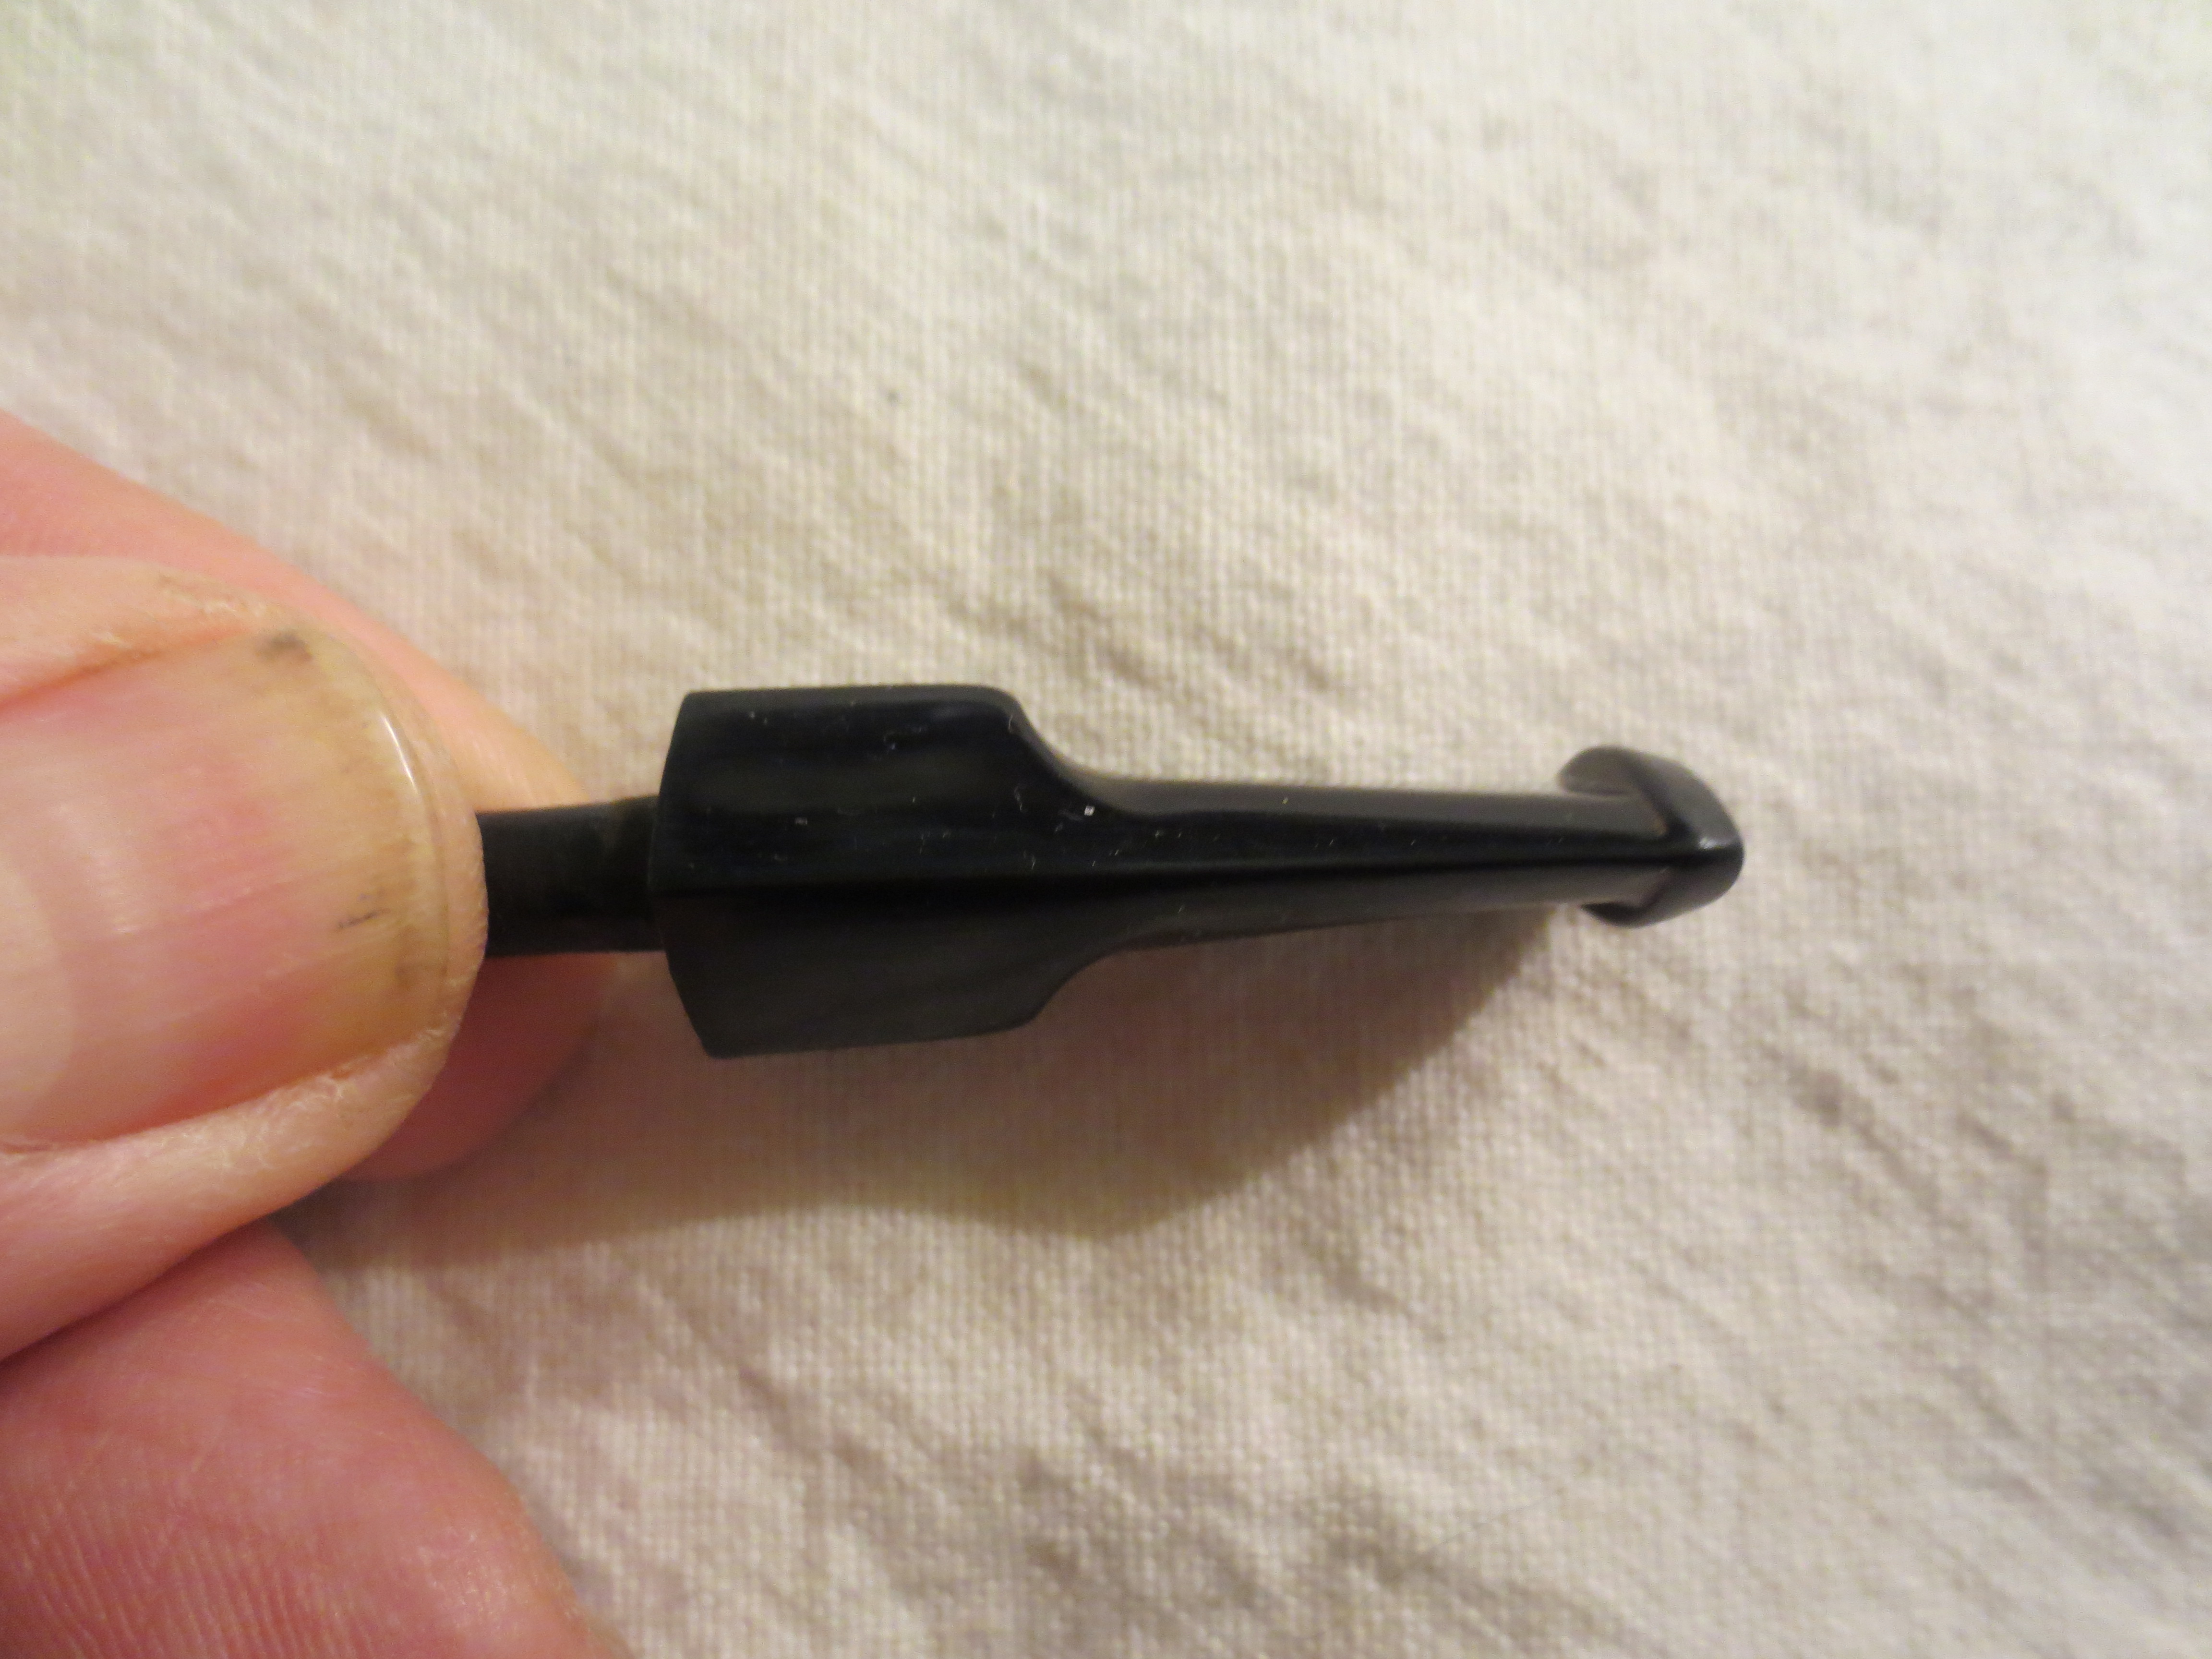
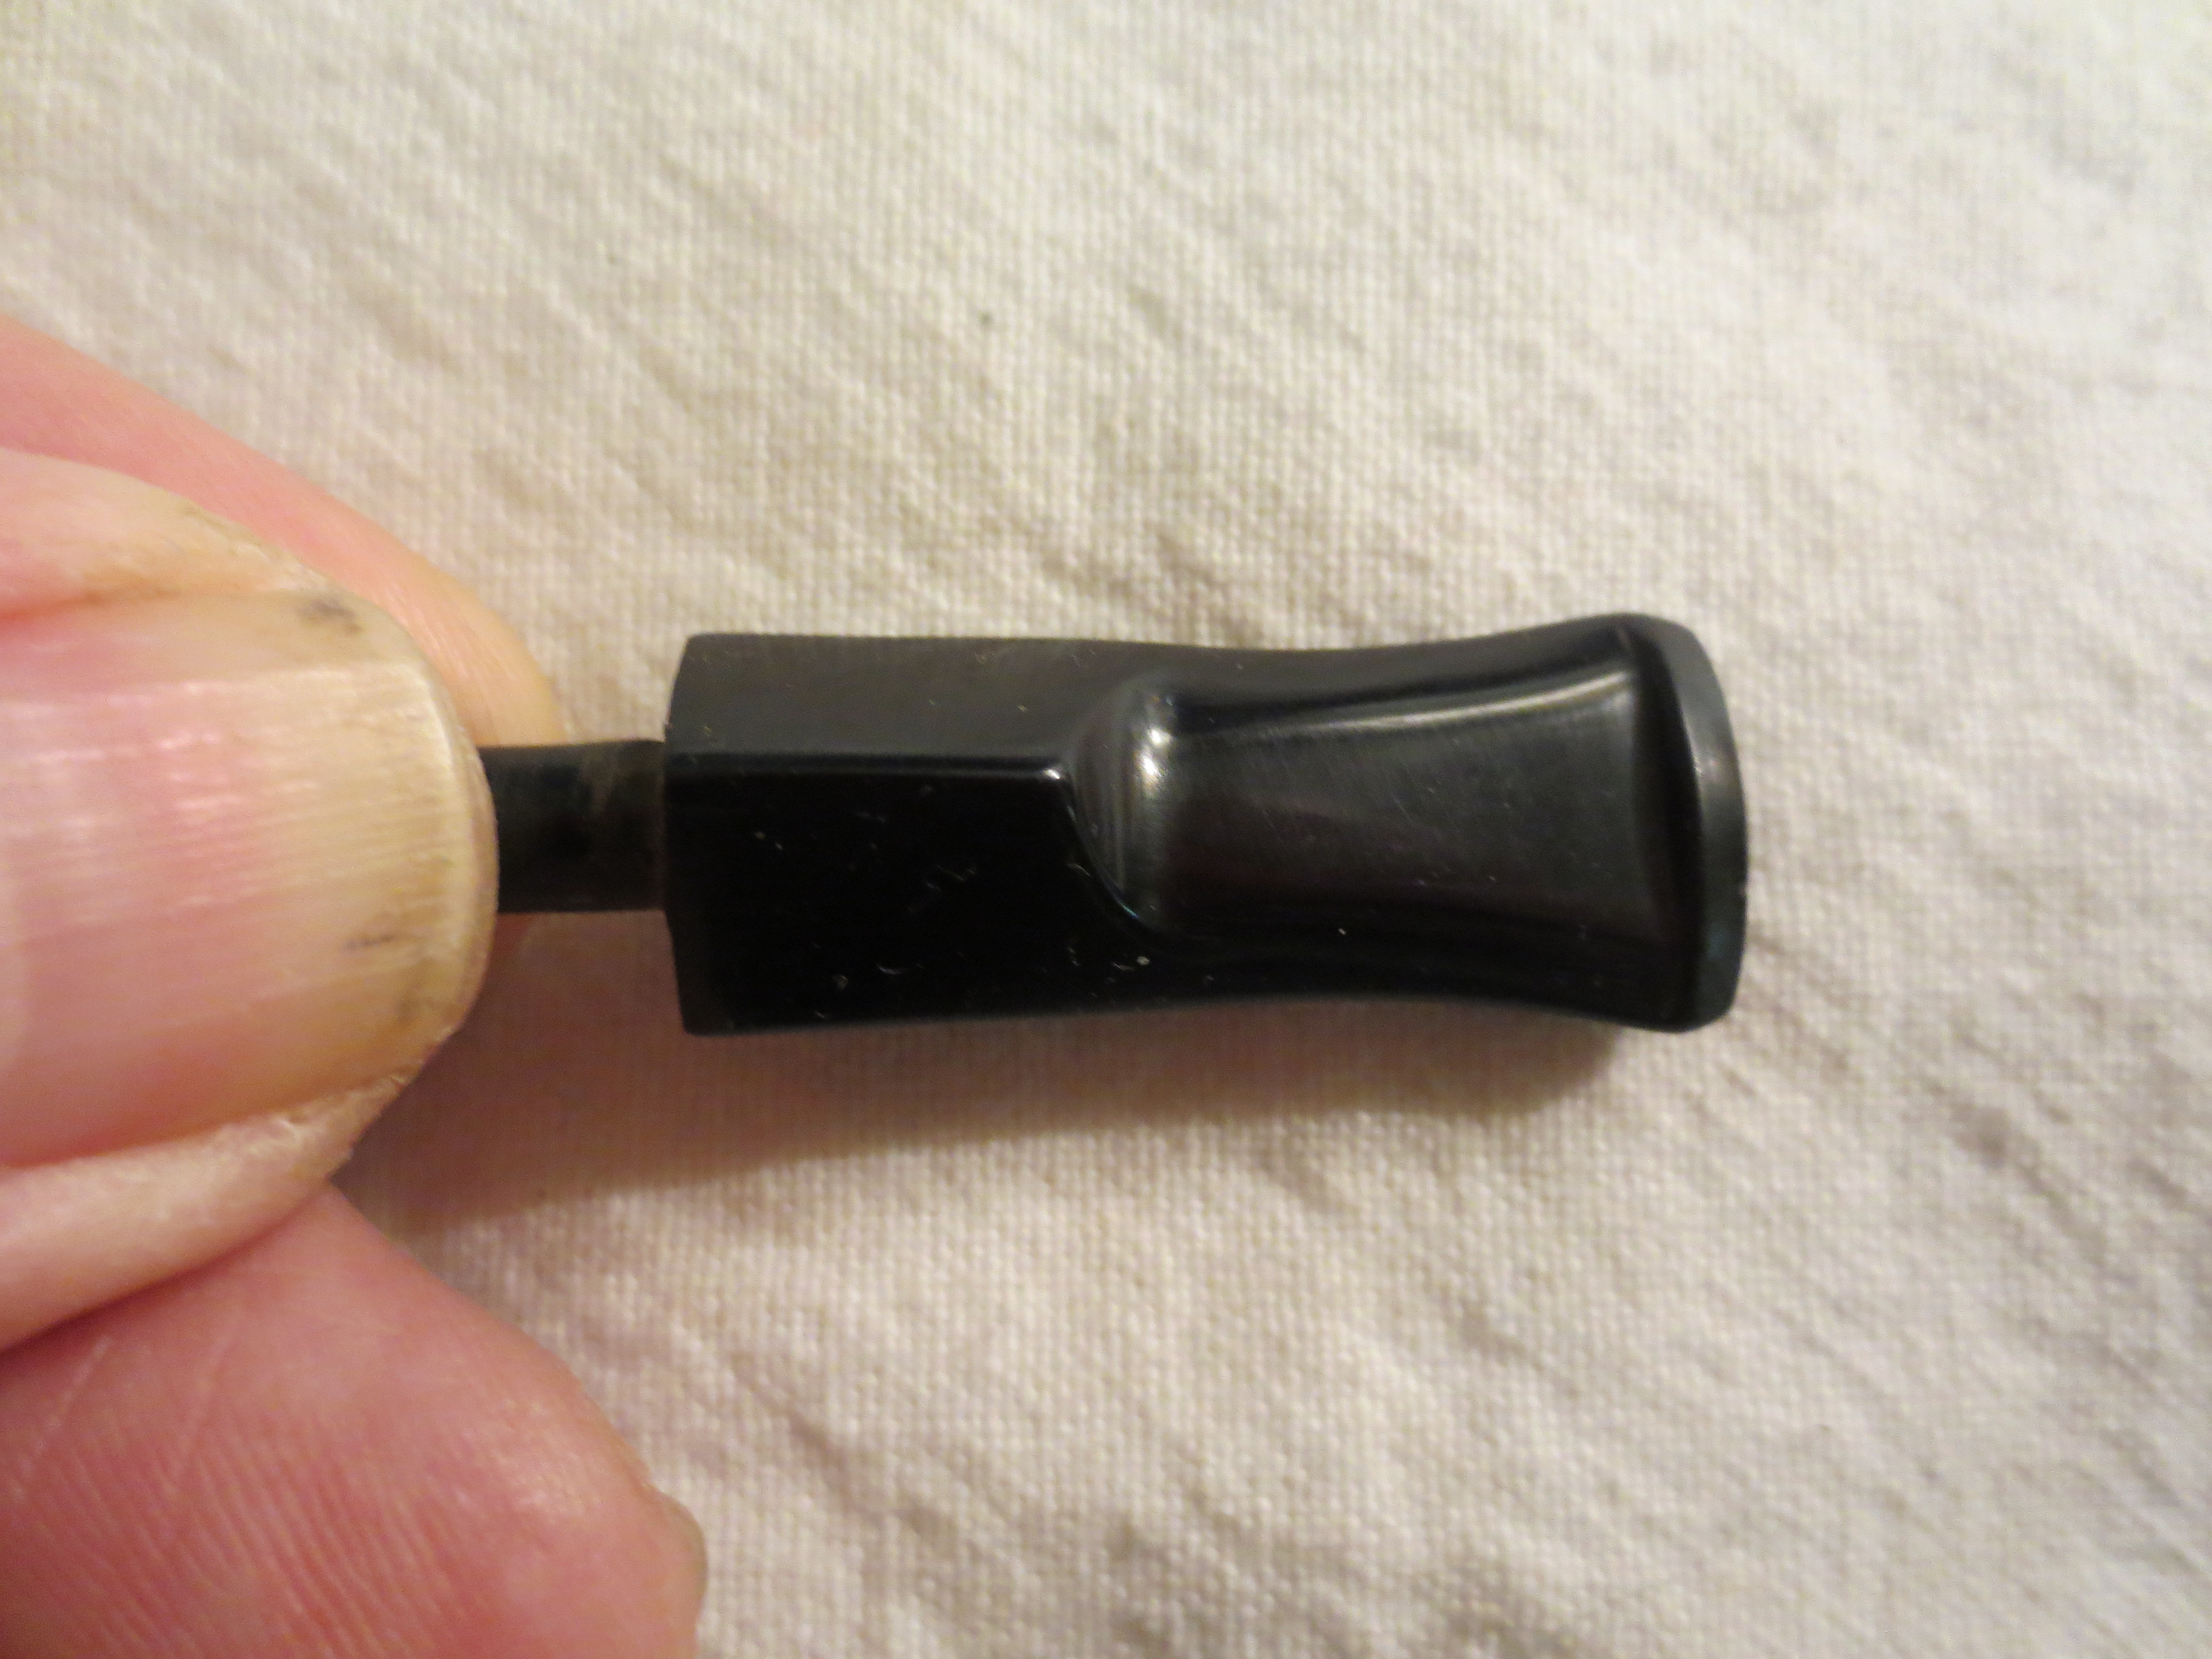
  4. The saddle portion of the stem was very rough and not round. There were file marks and cuts all around it and it did not fit against the shank well. The diameter of the stem and the shank did not match. I would need to round the saddle and removed the cuts and the file marks.

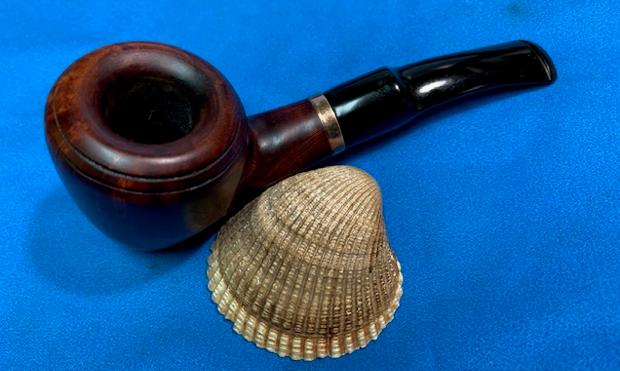
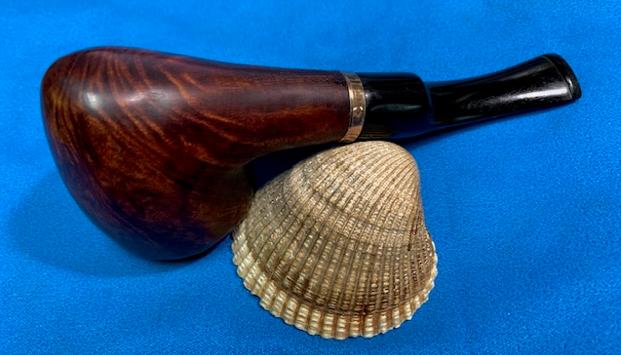
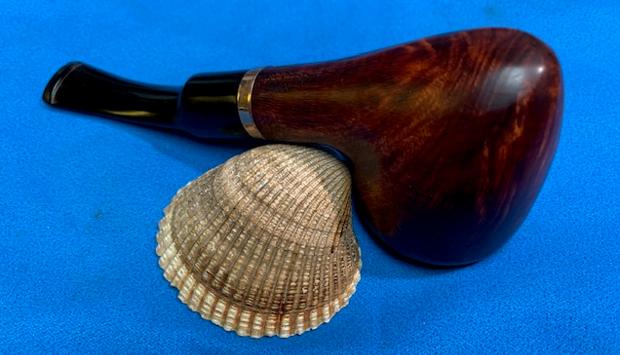
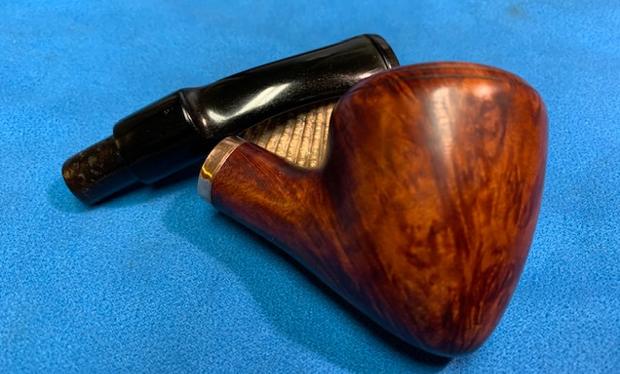
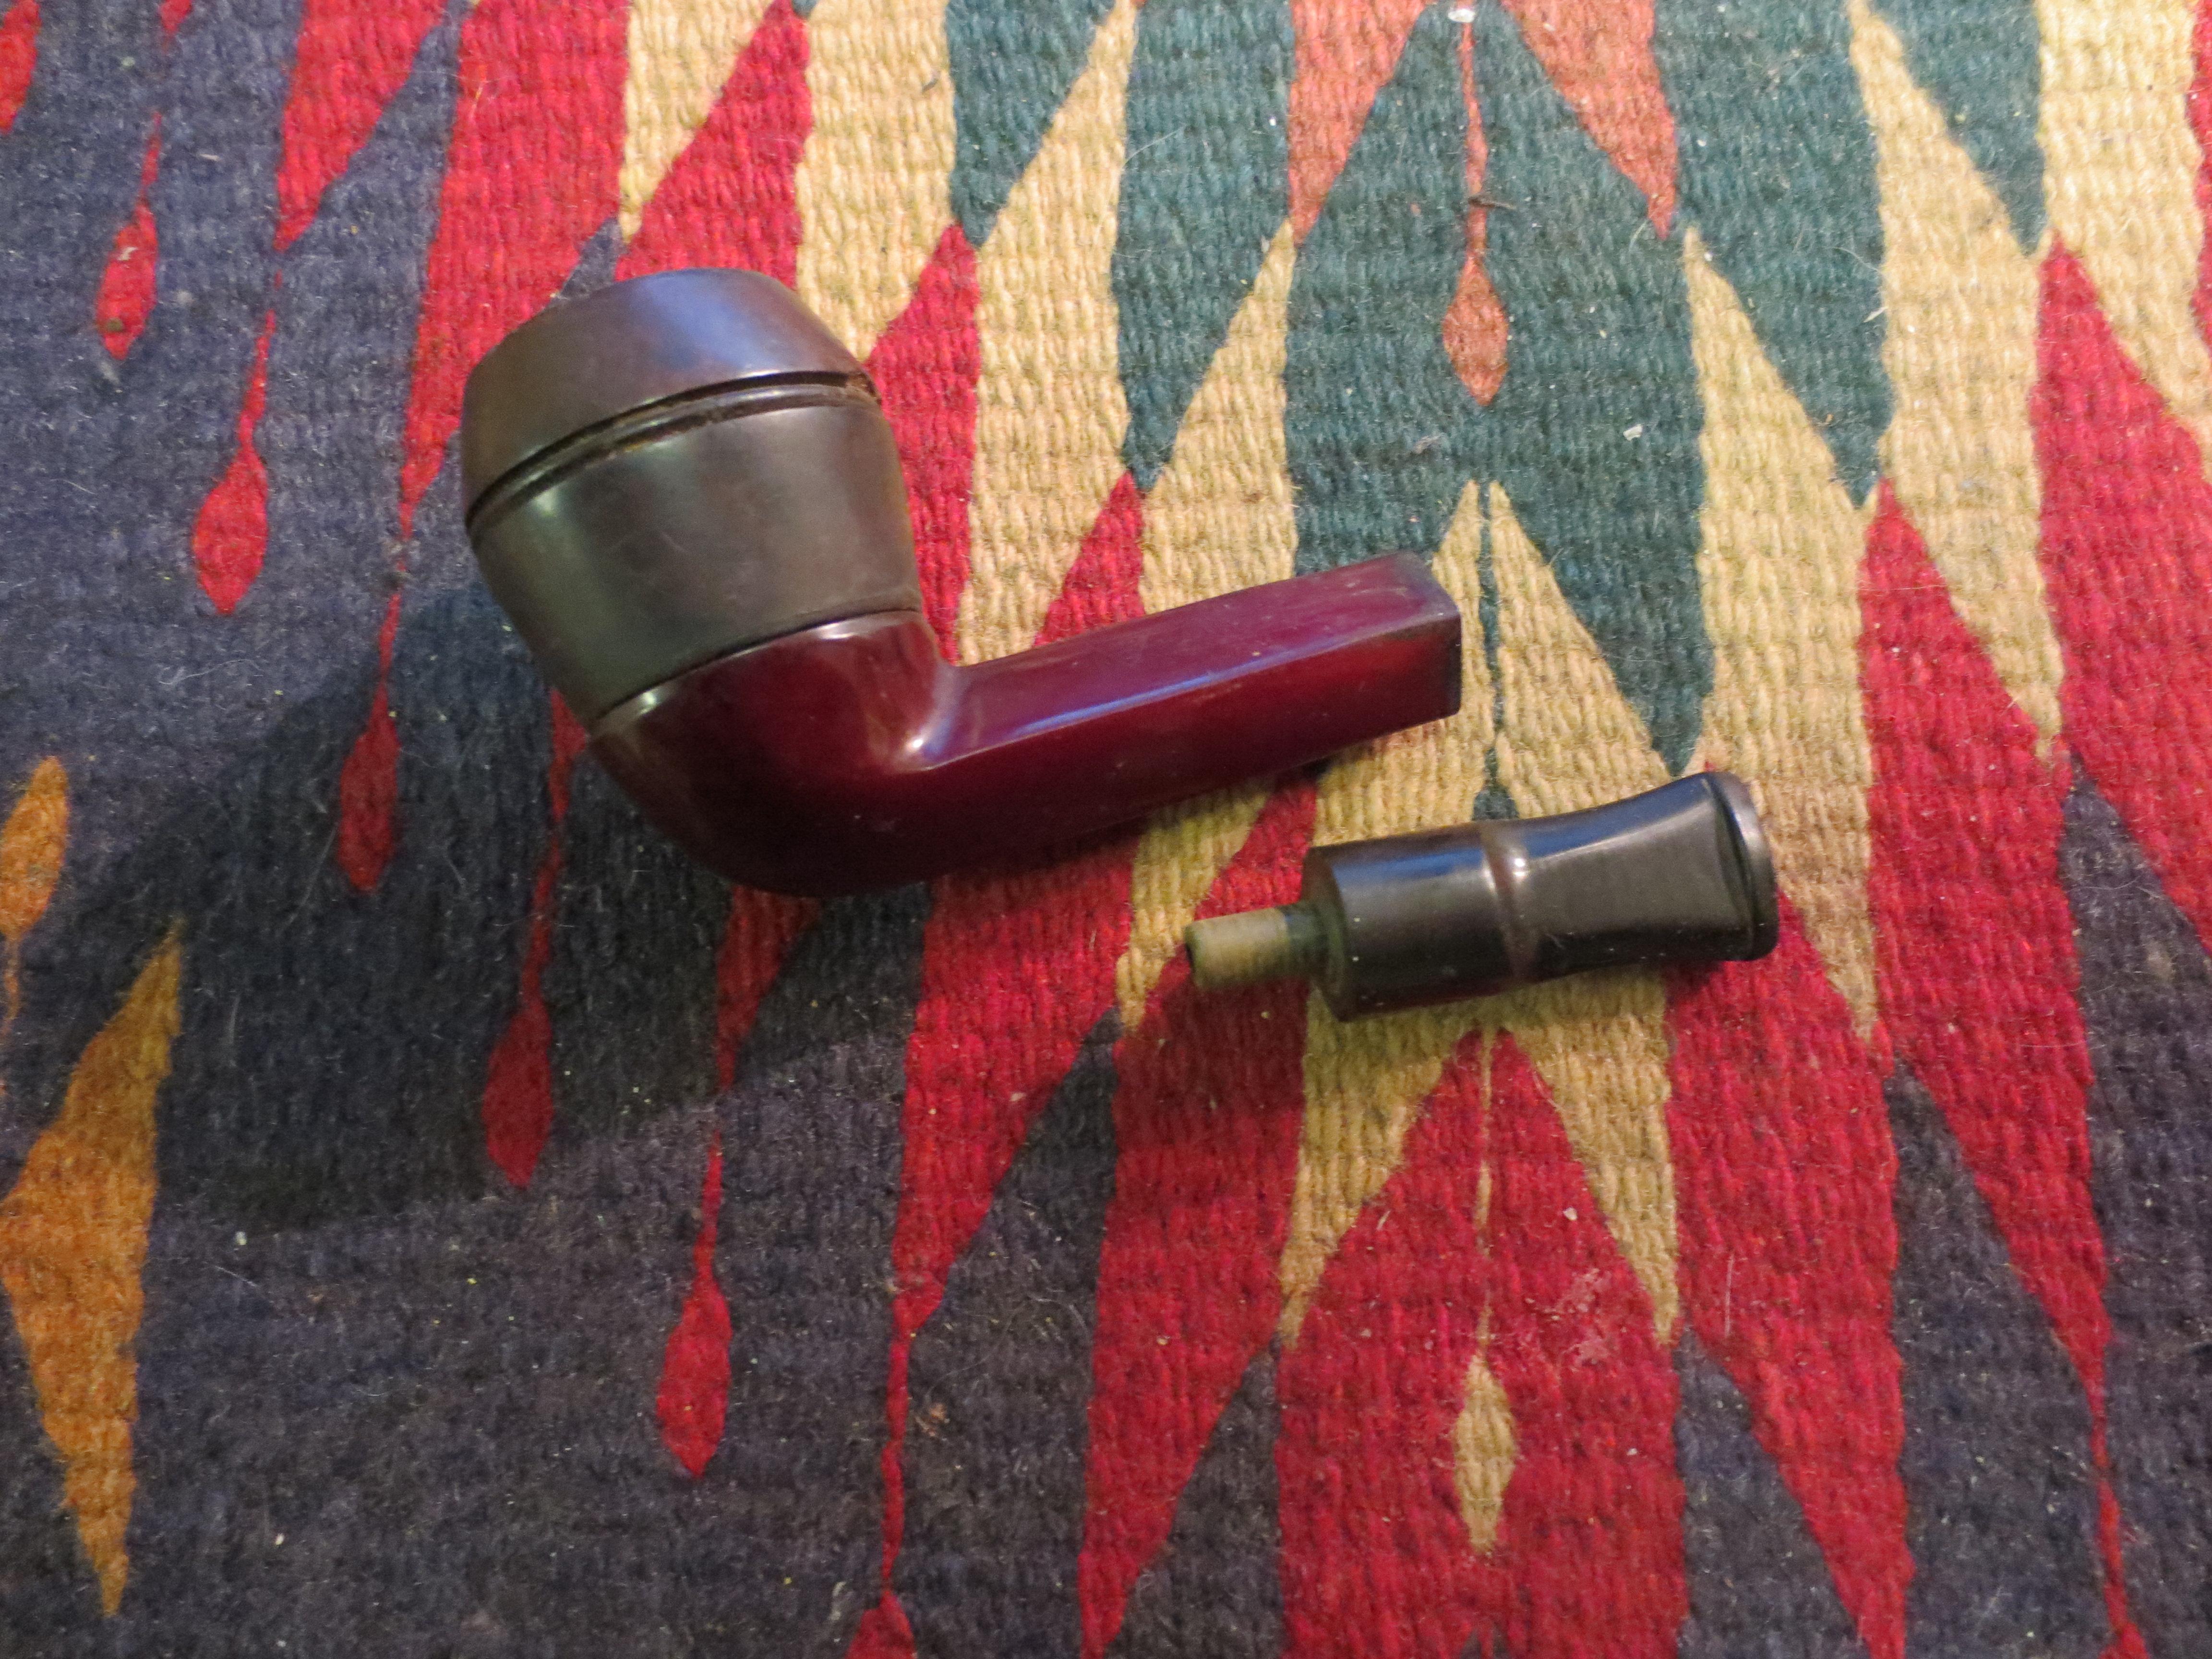
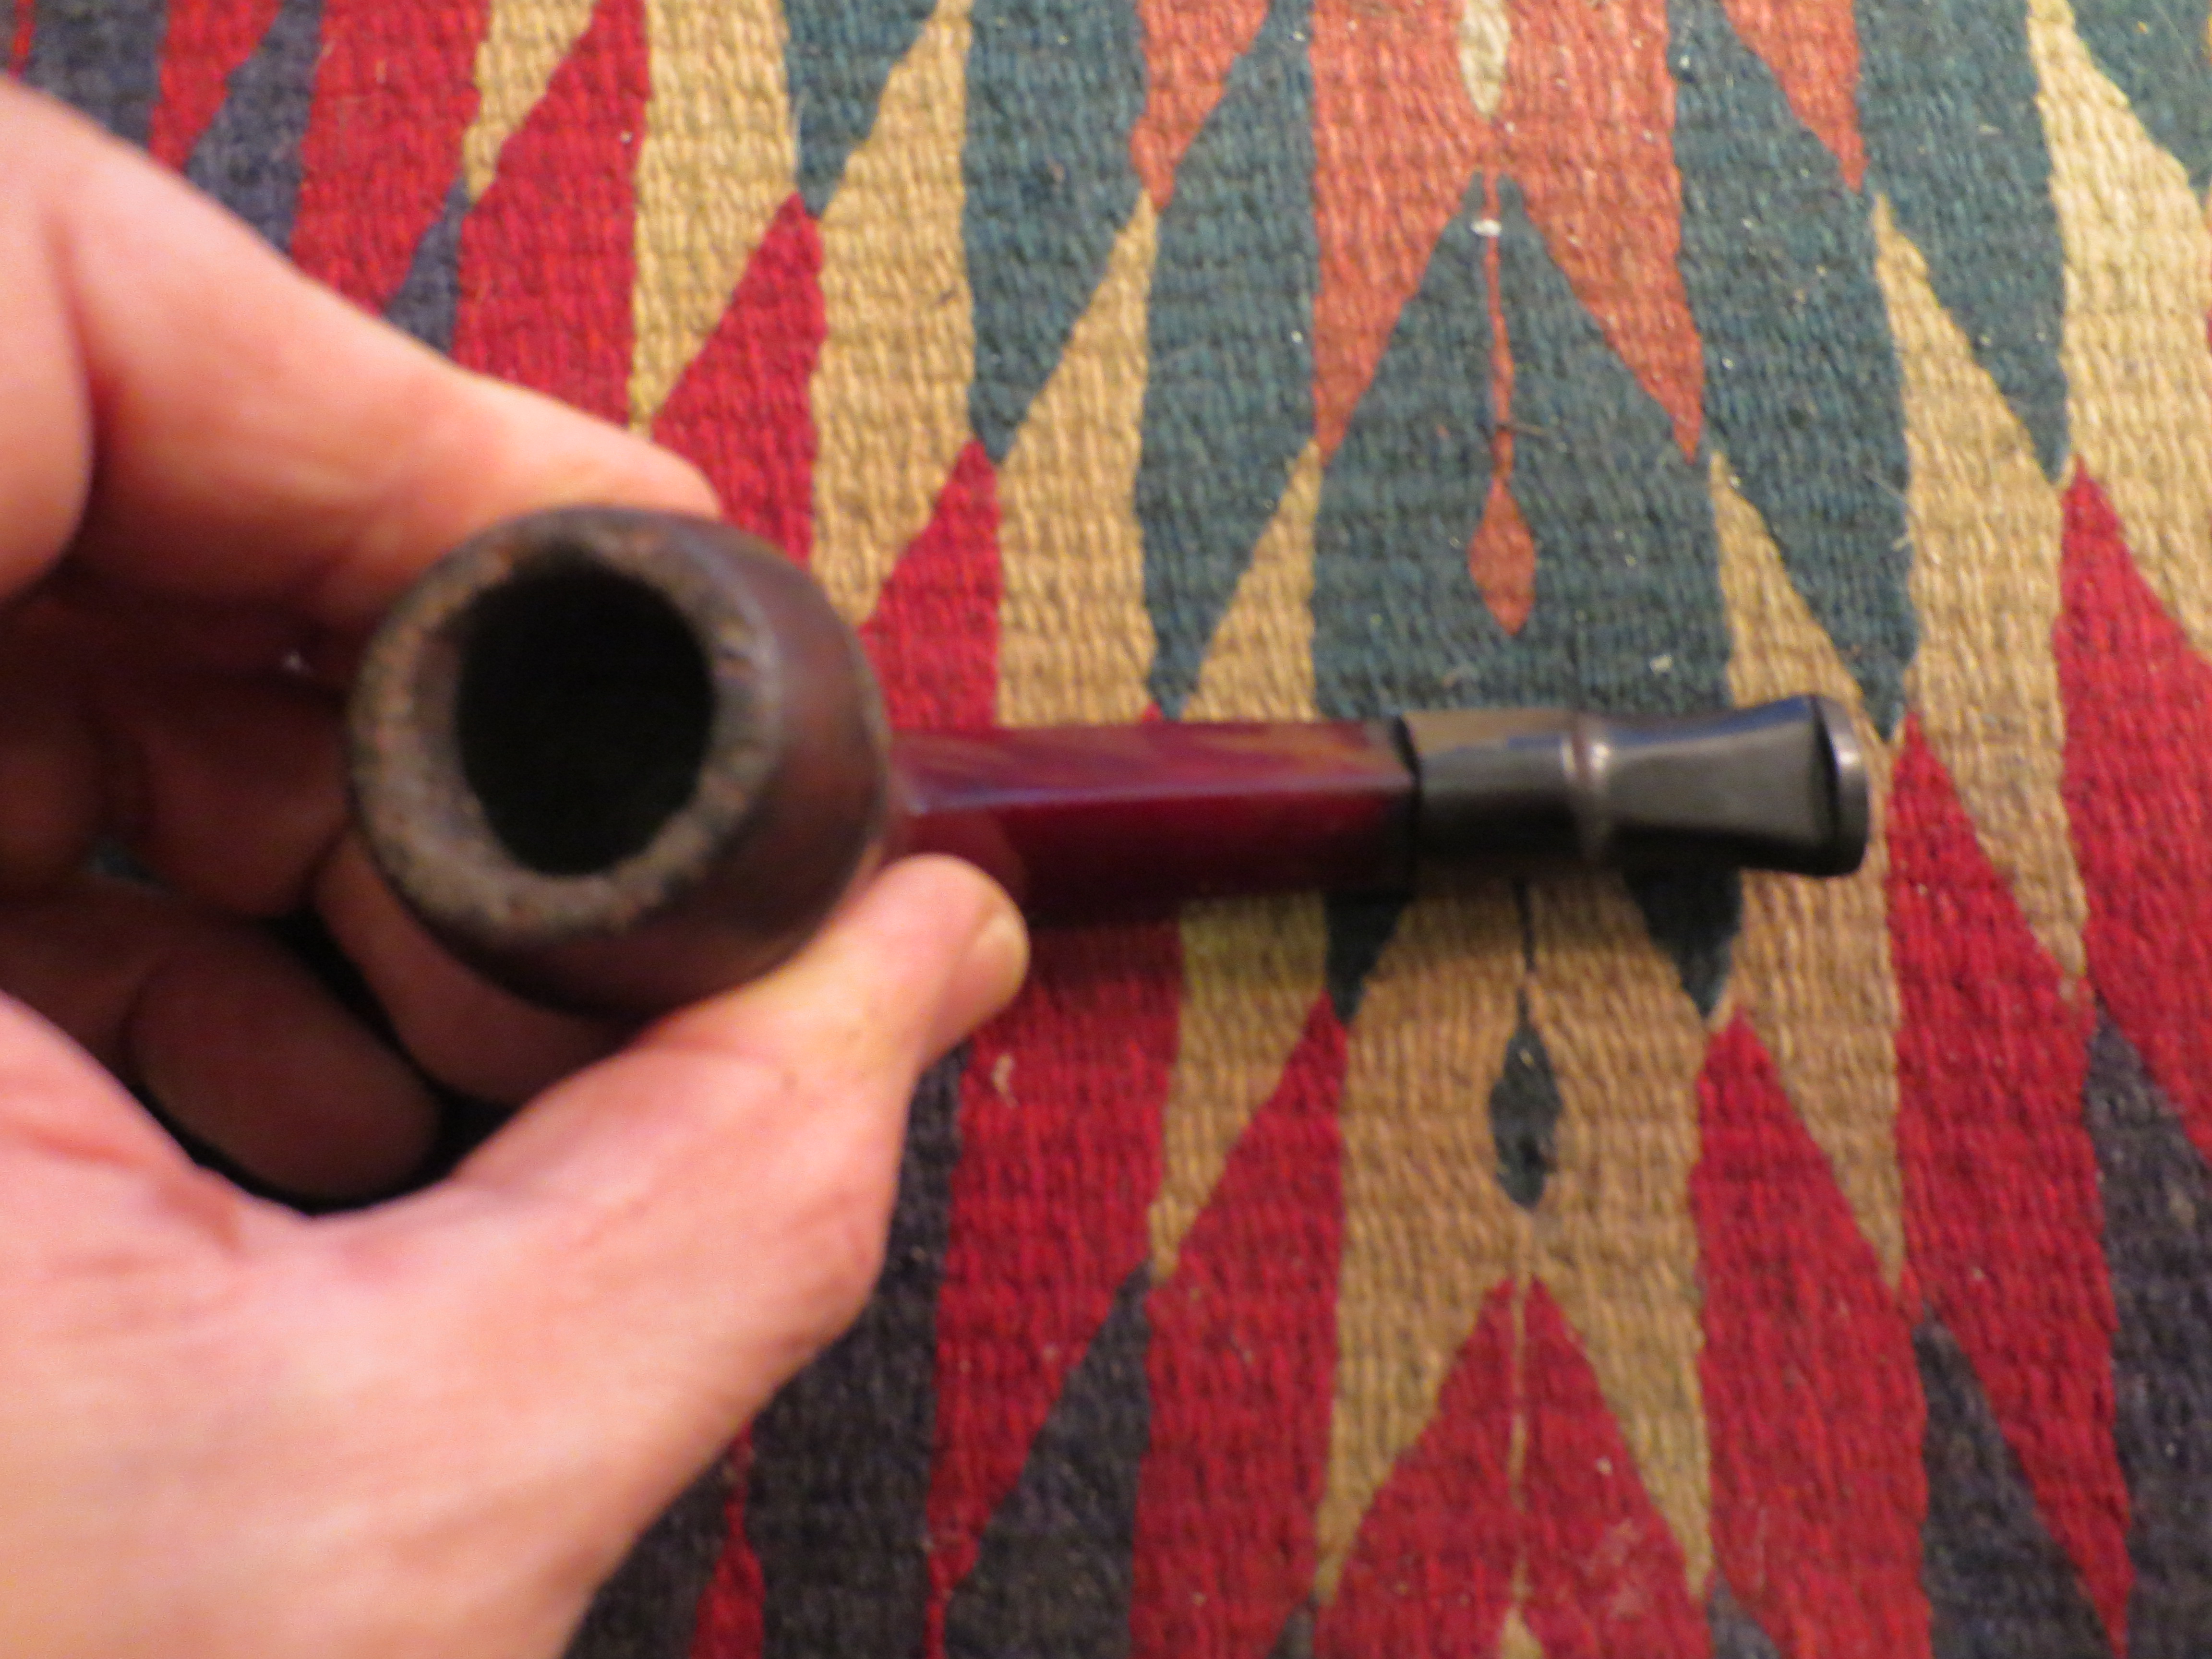
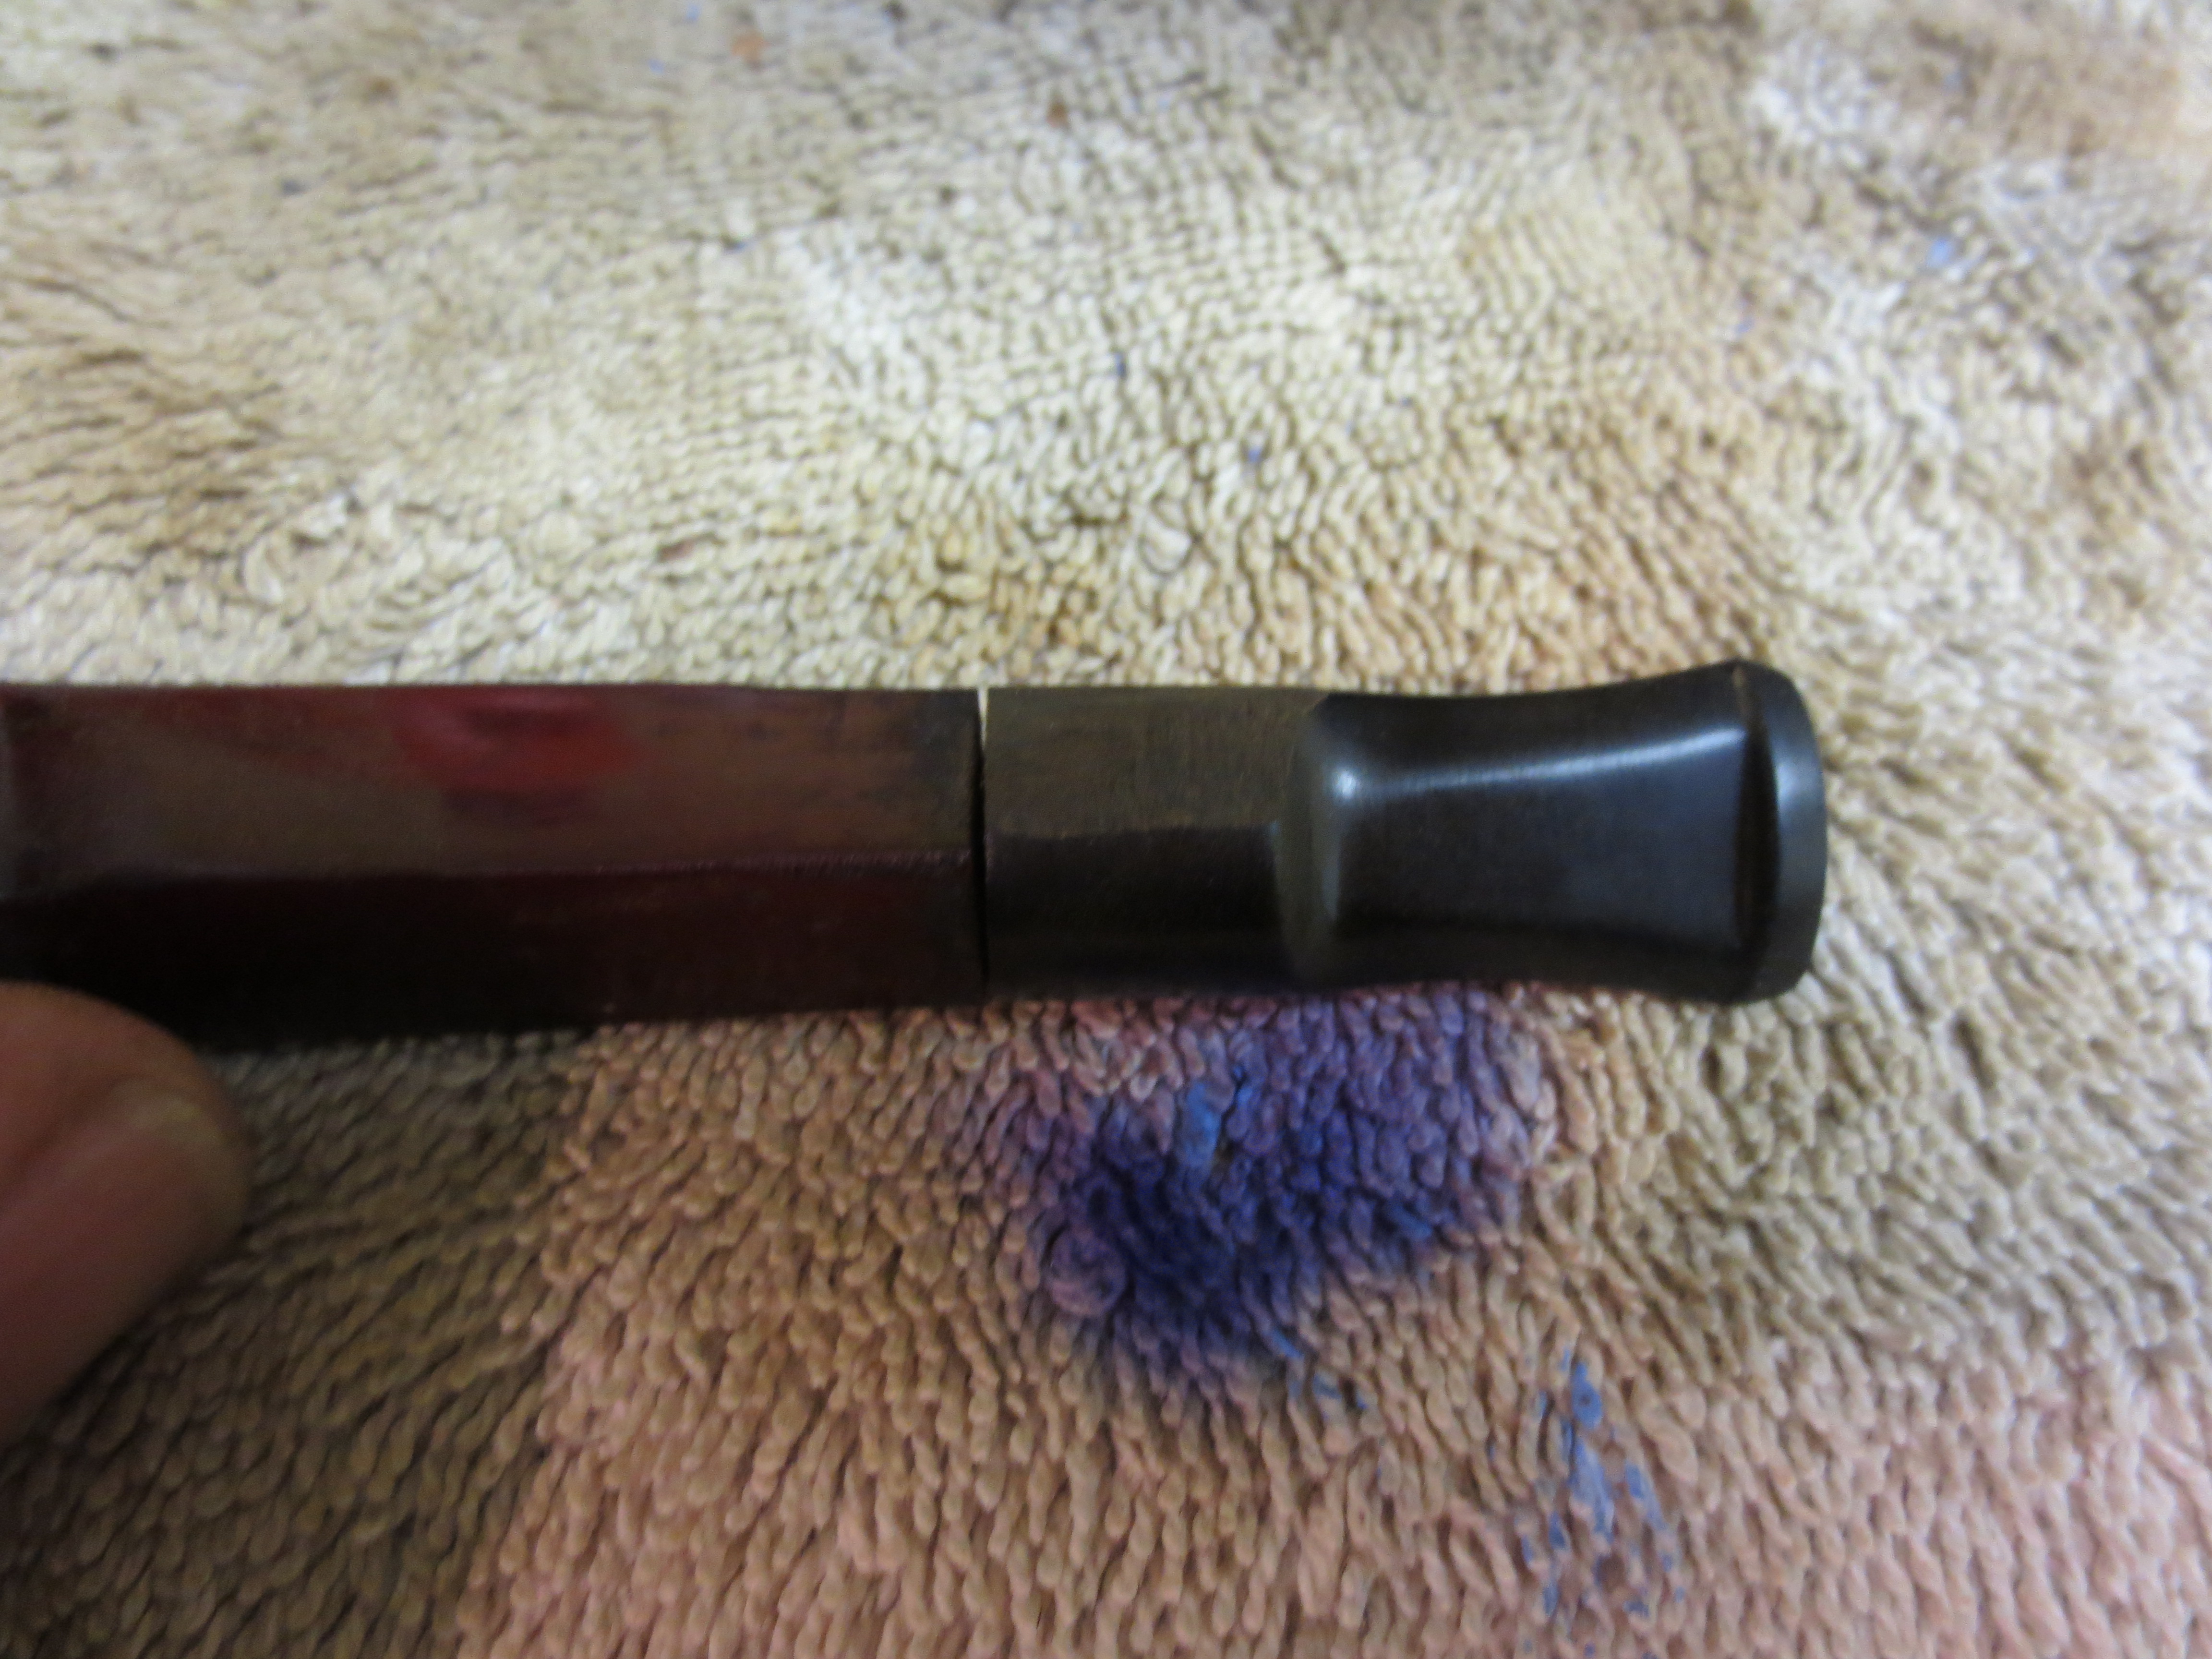
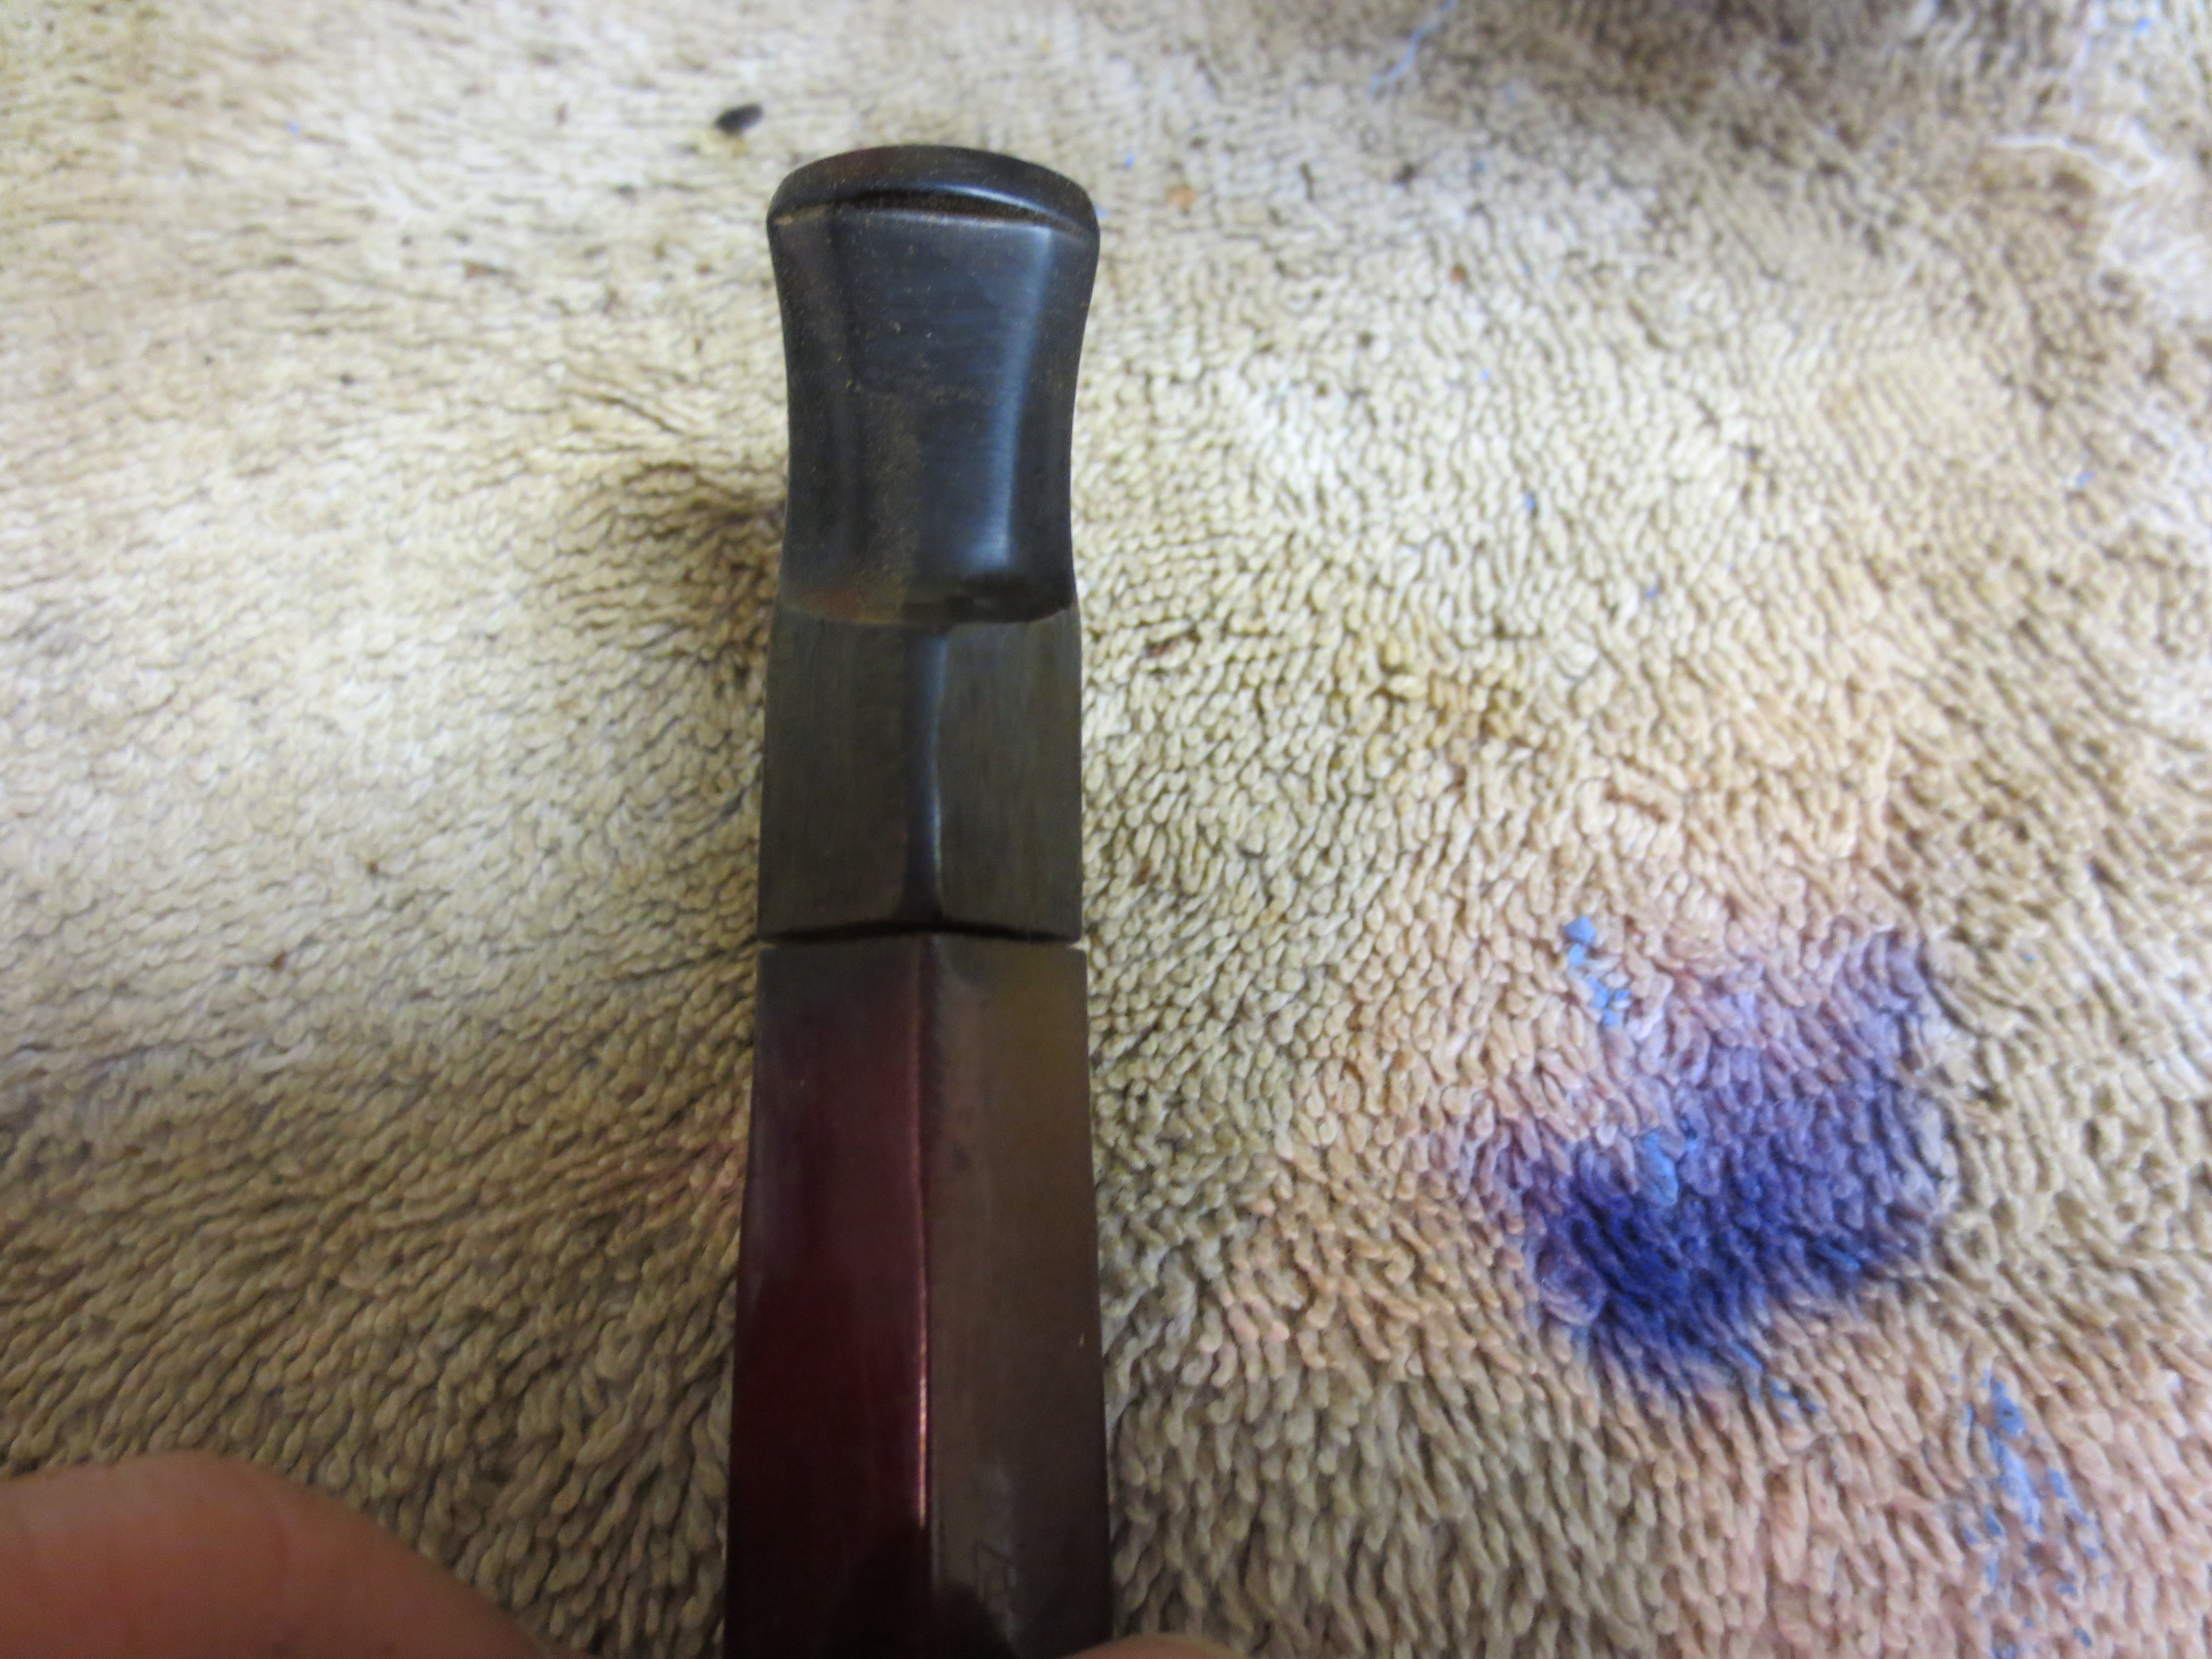
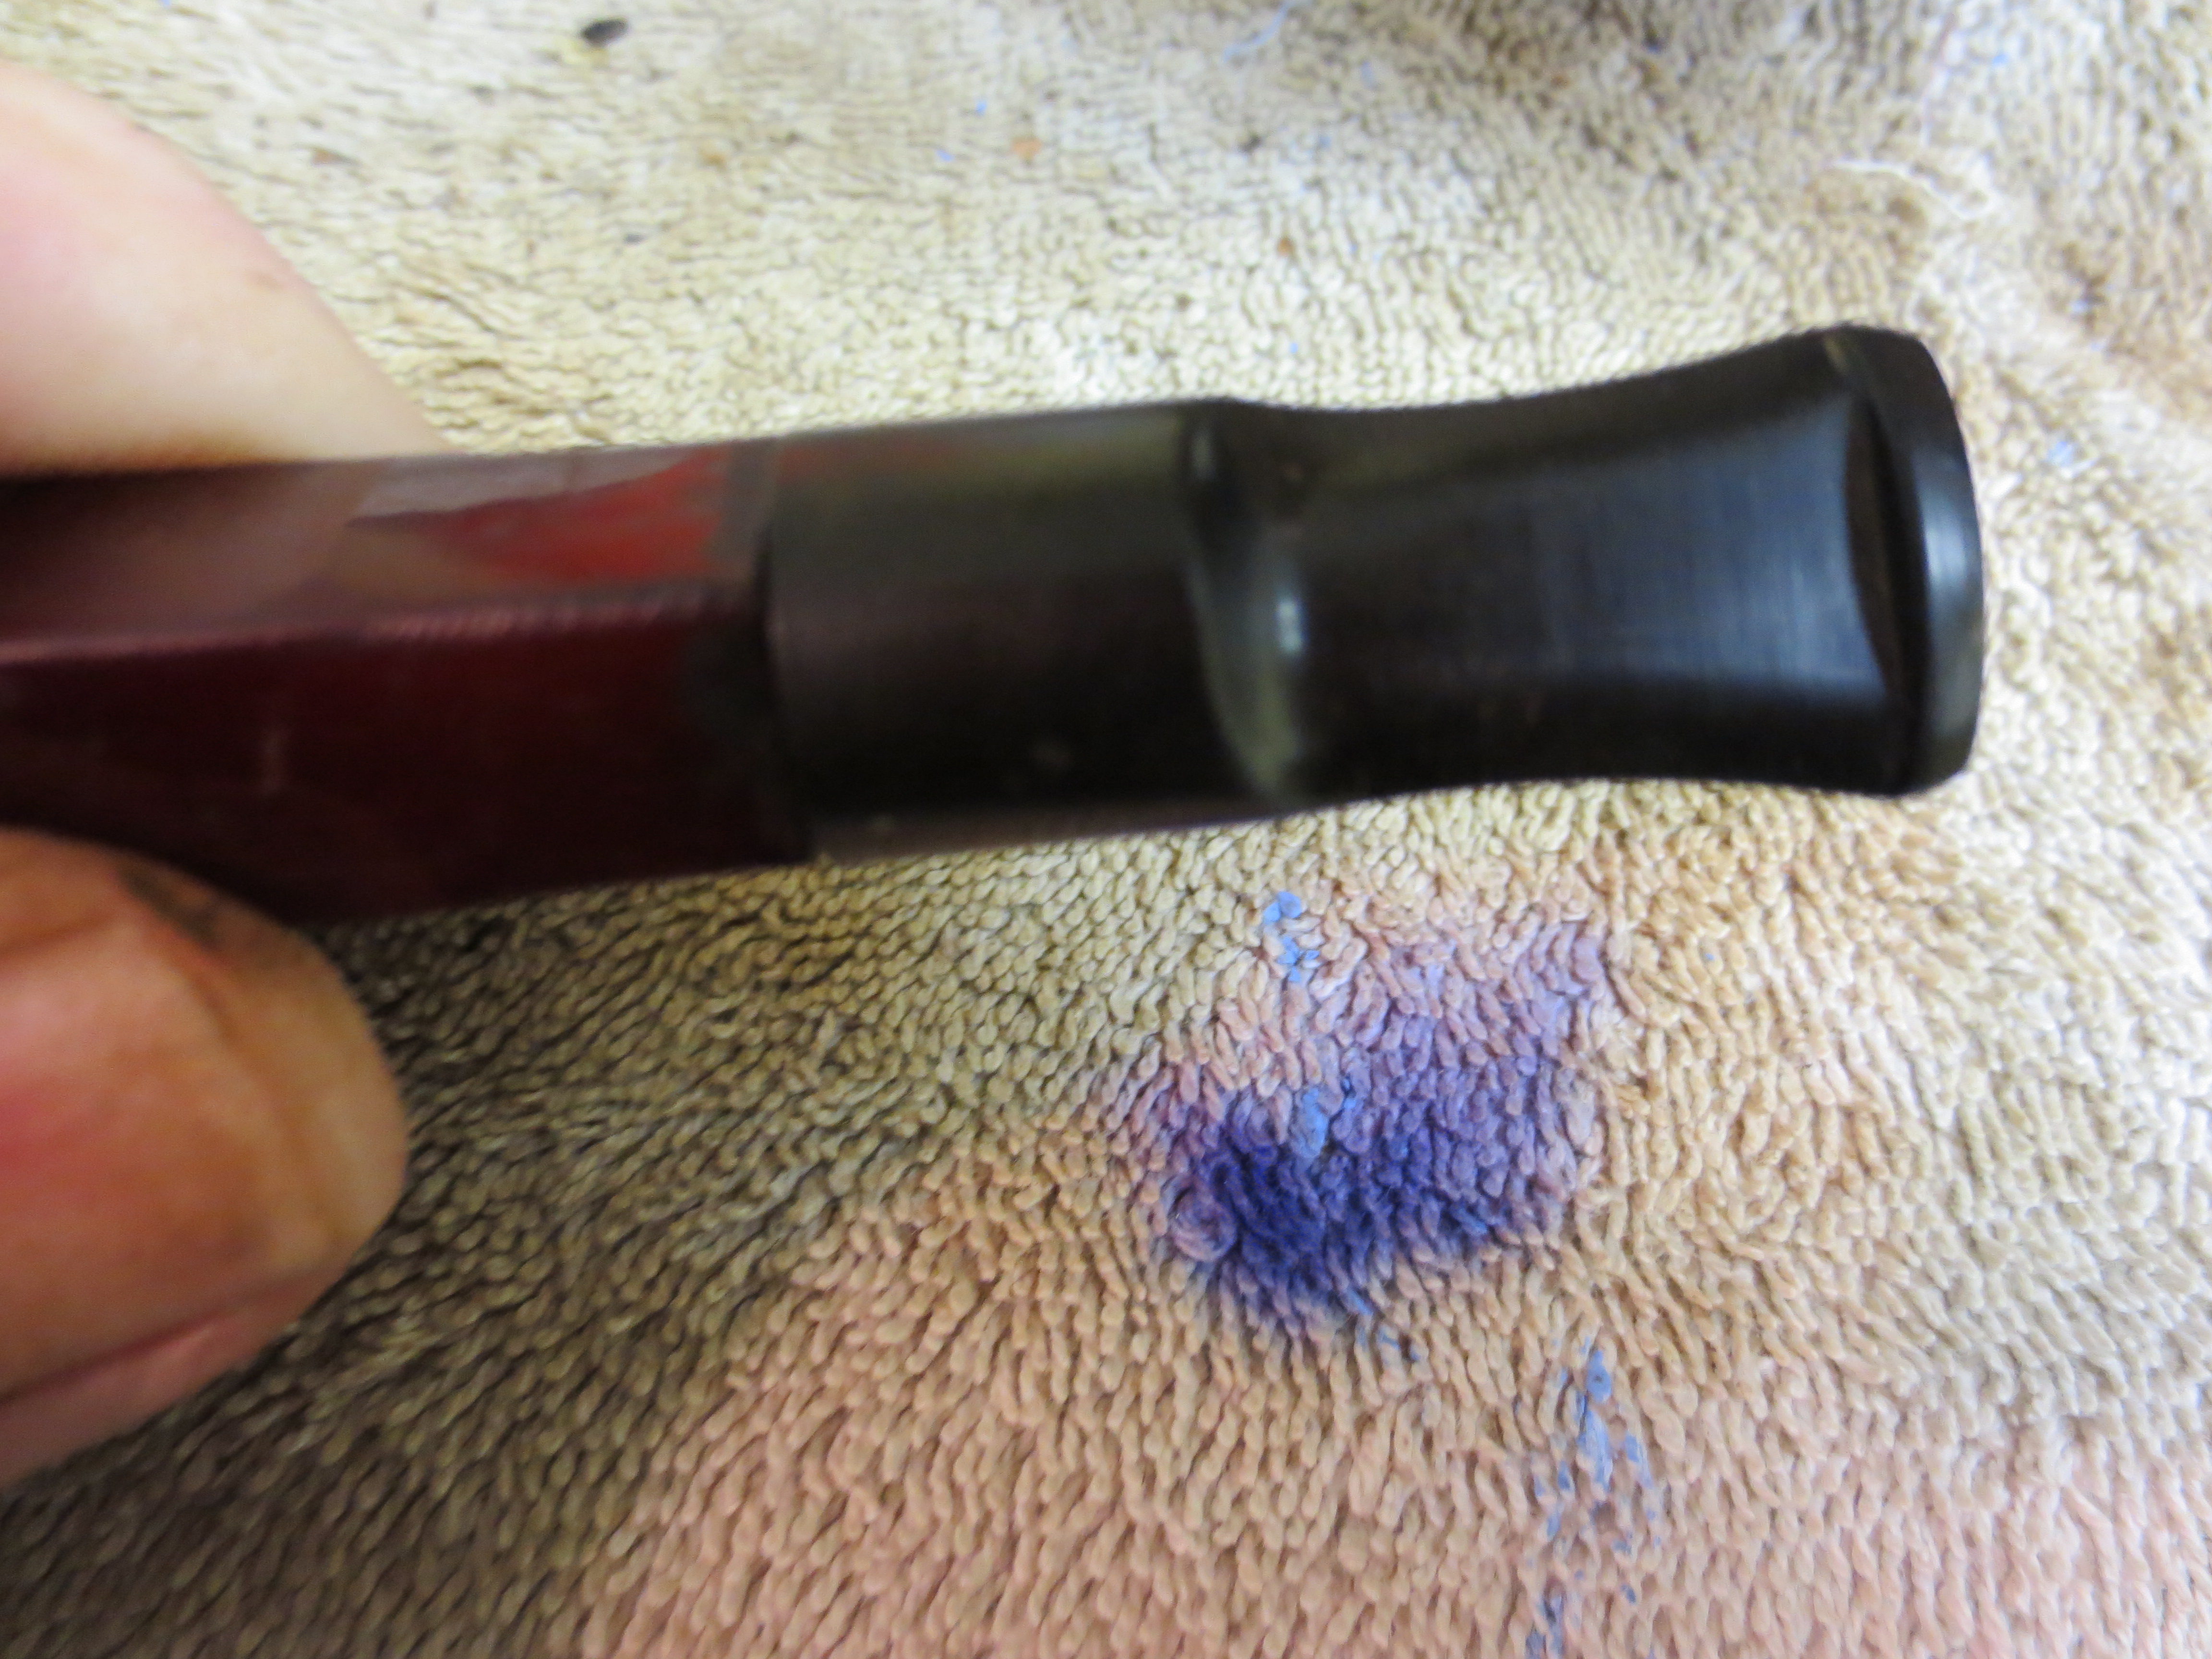
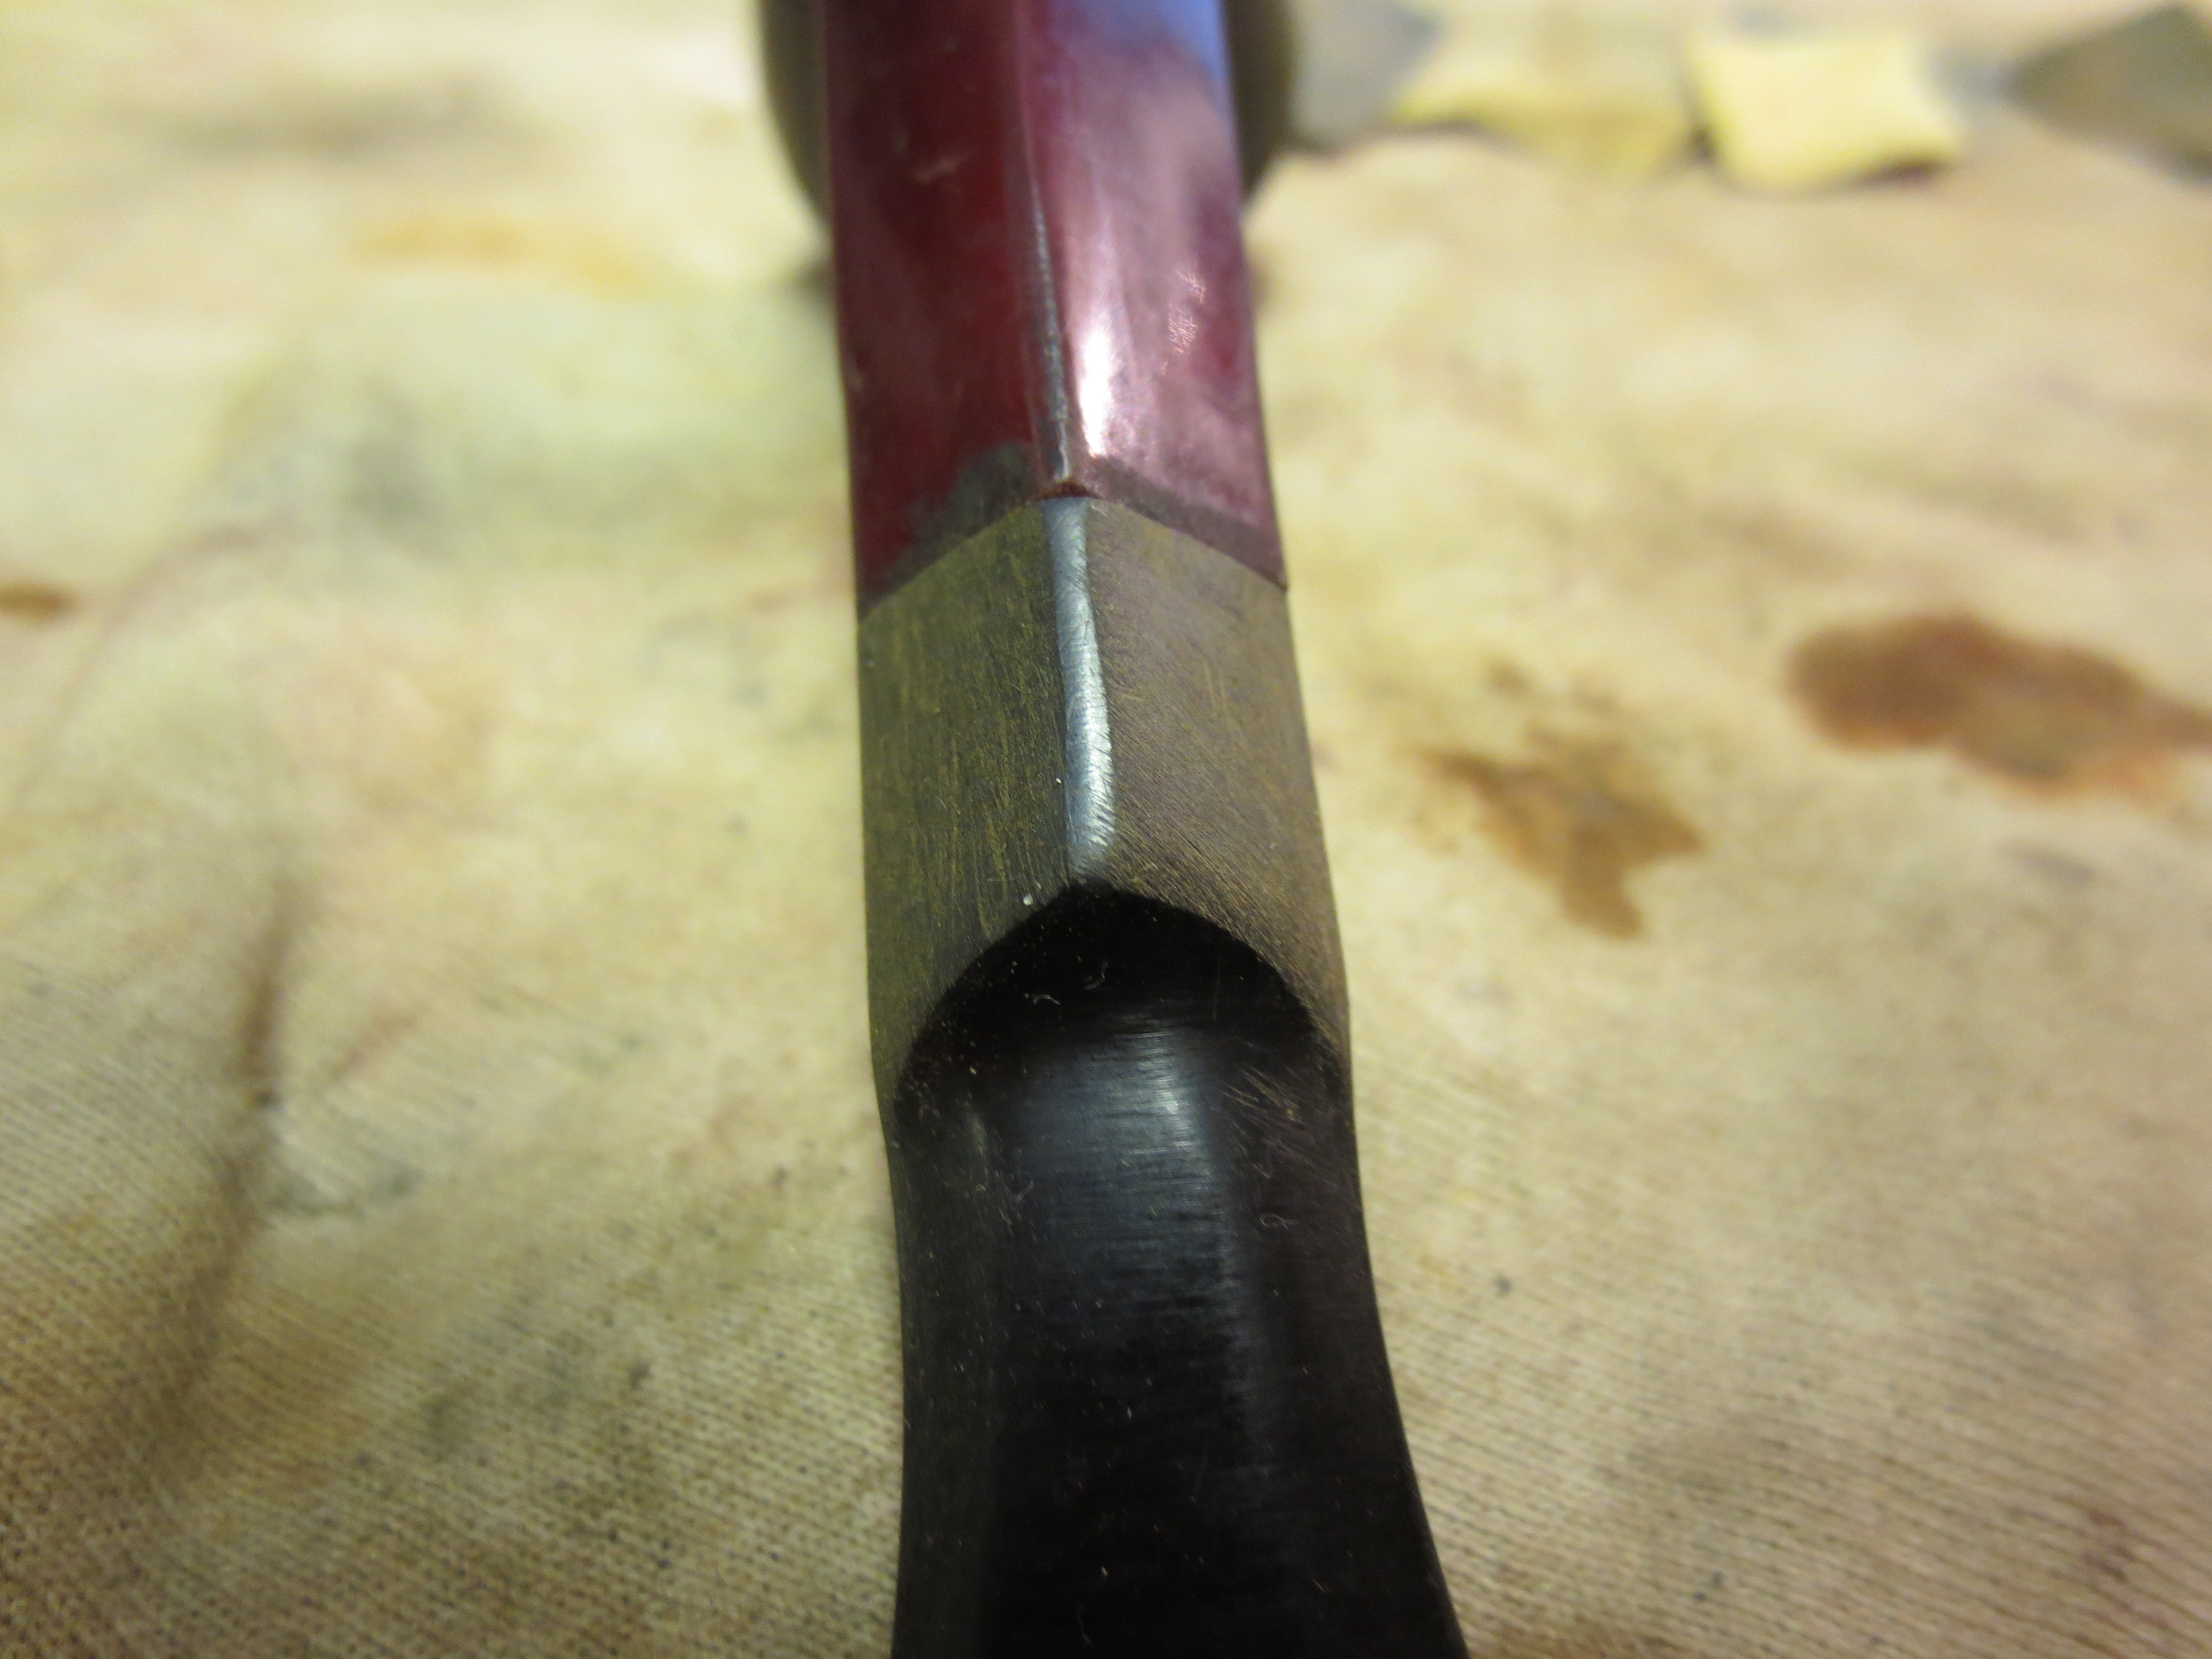
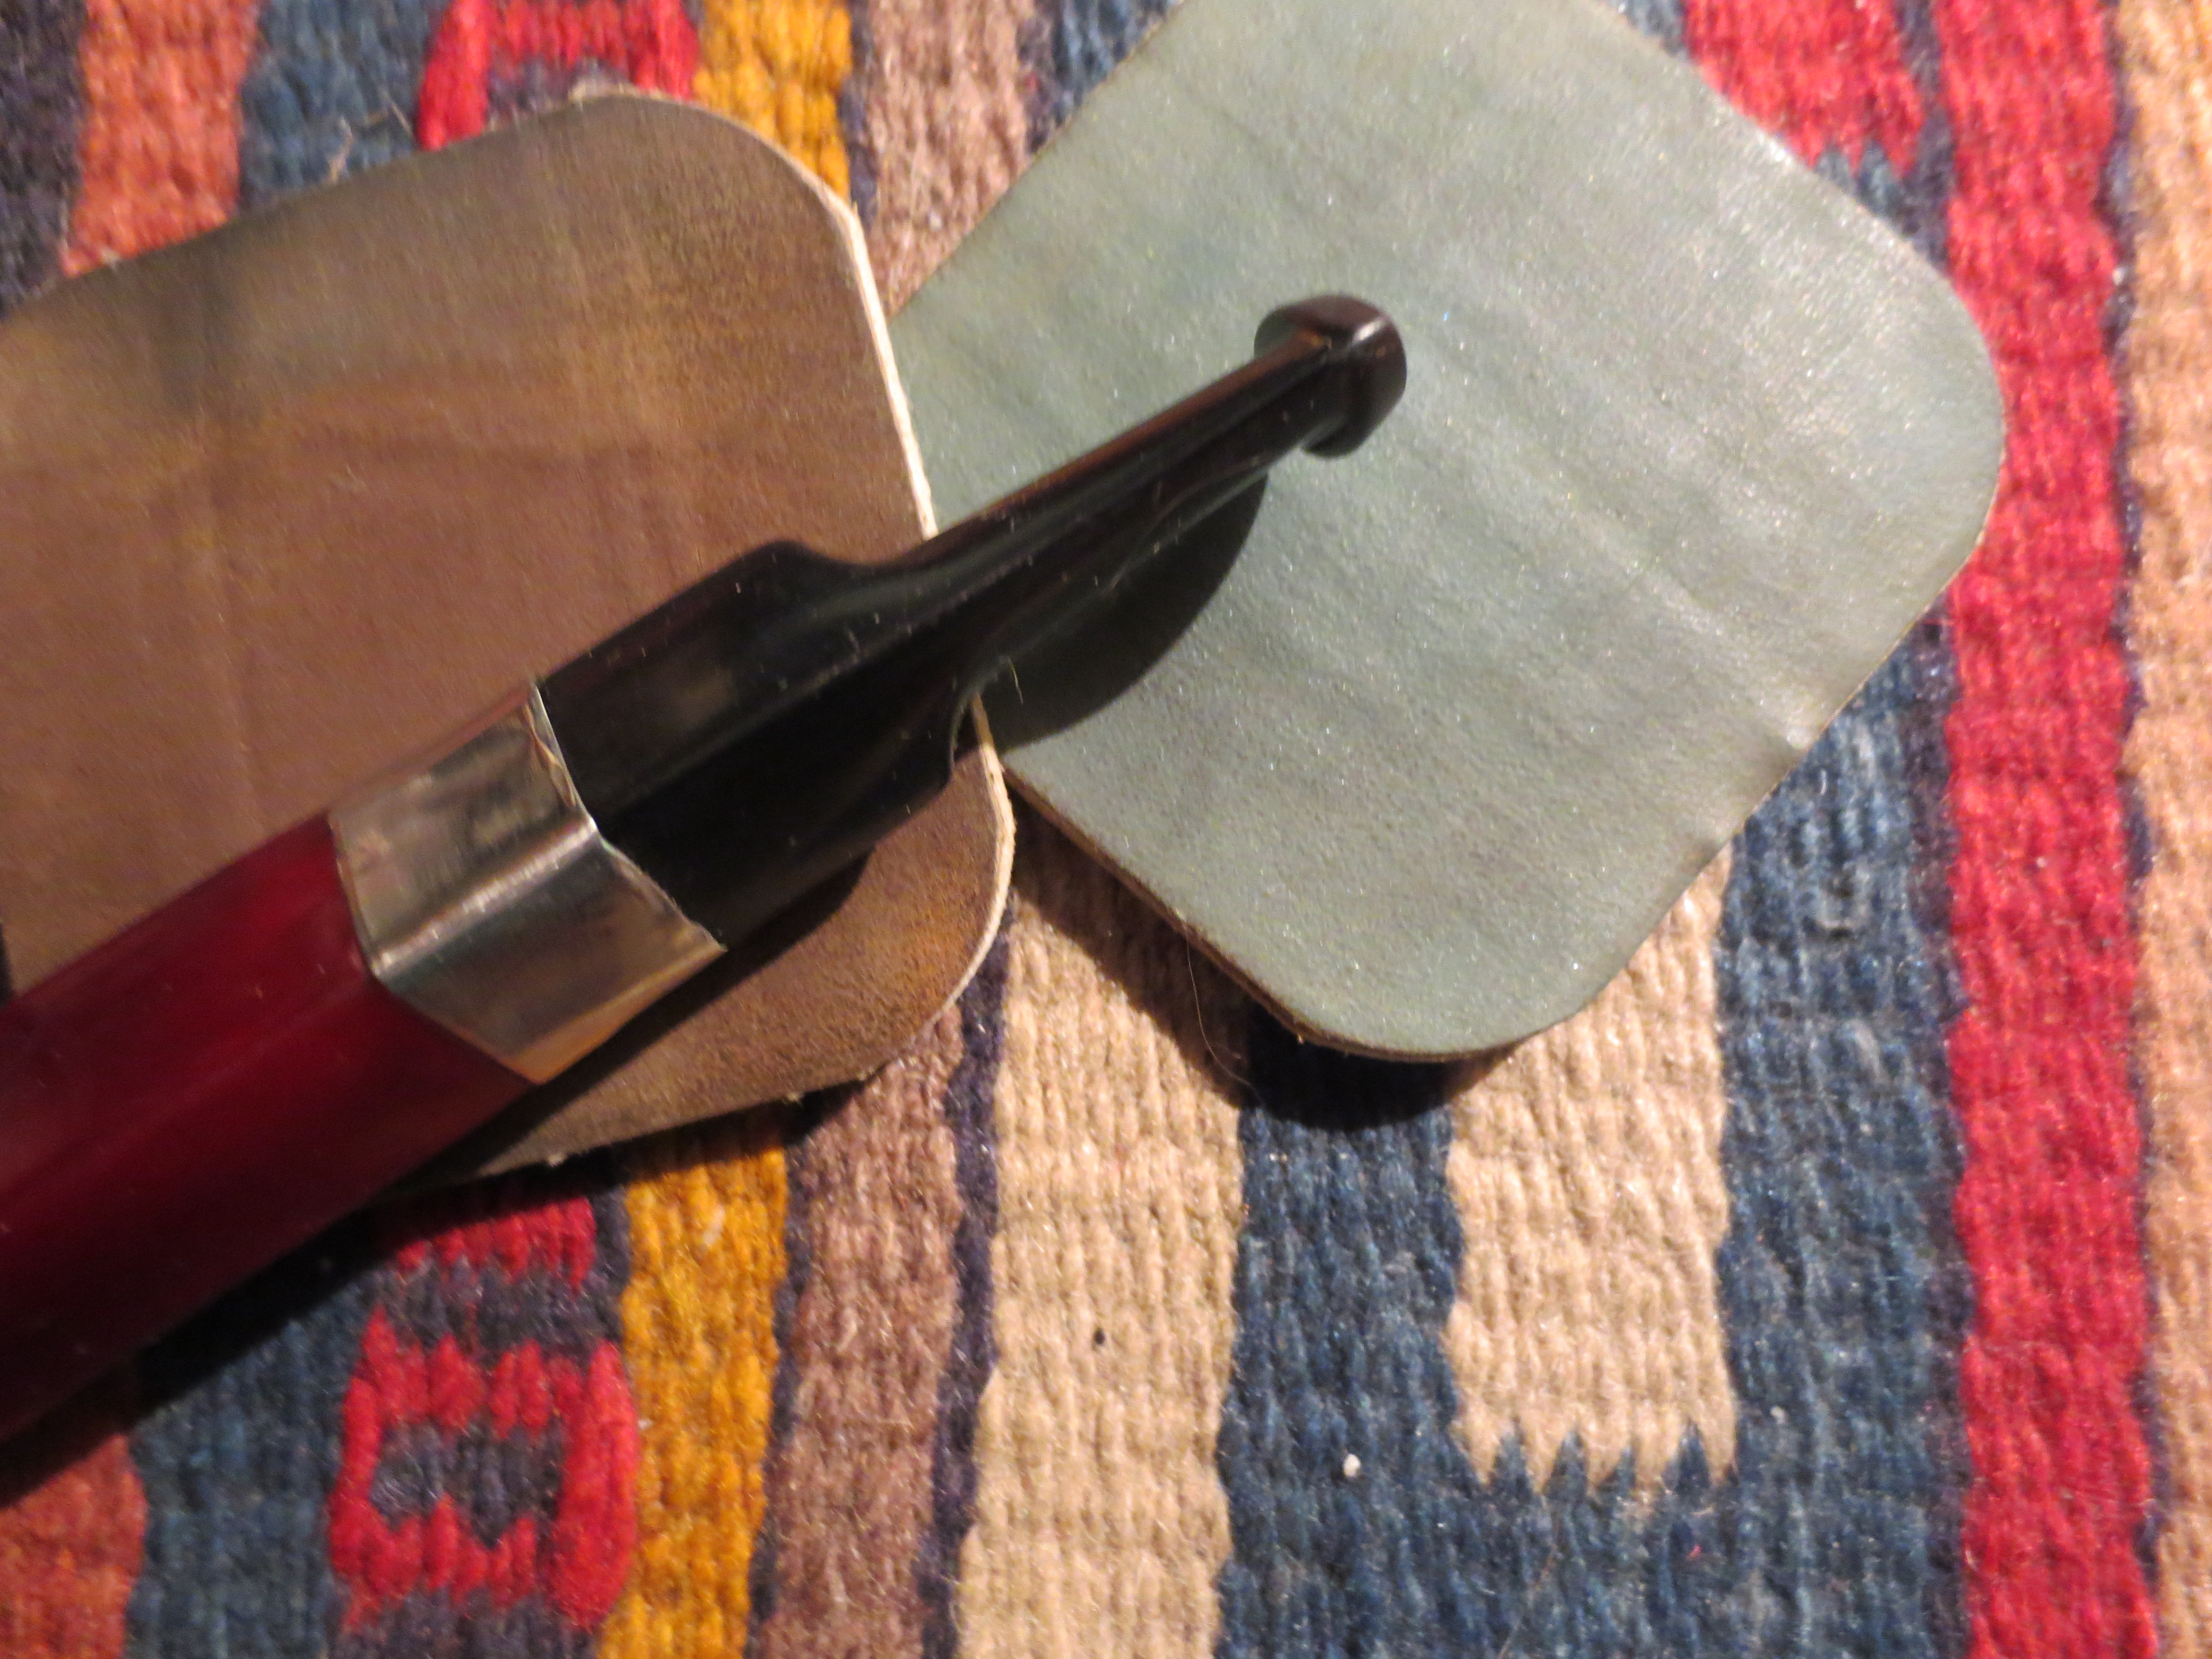
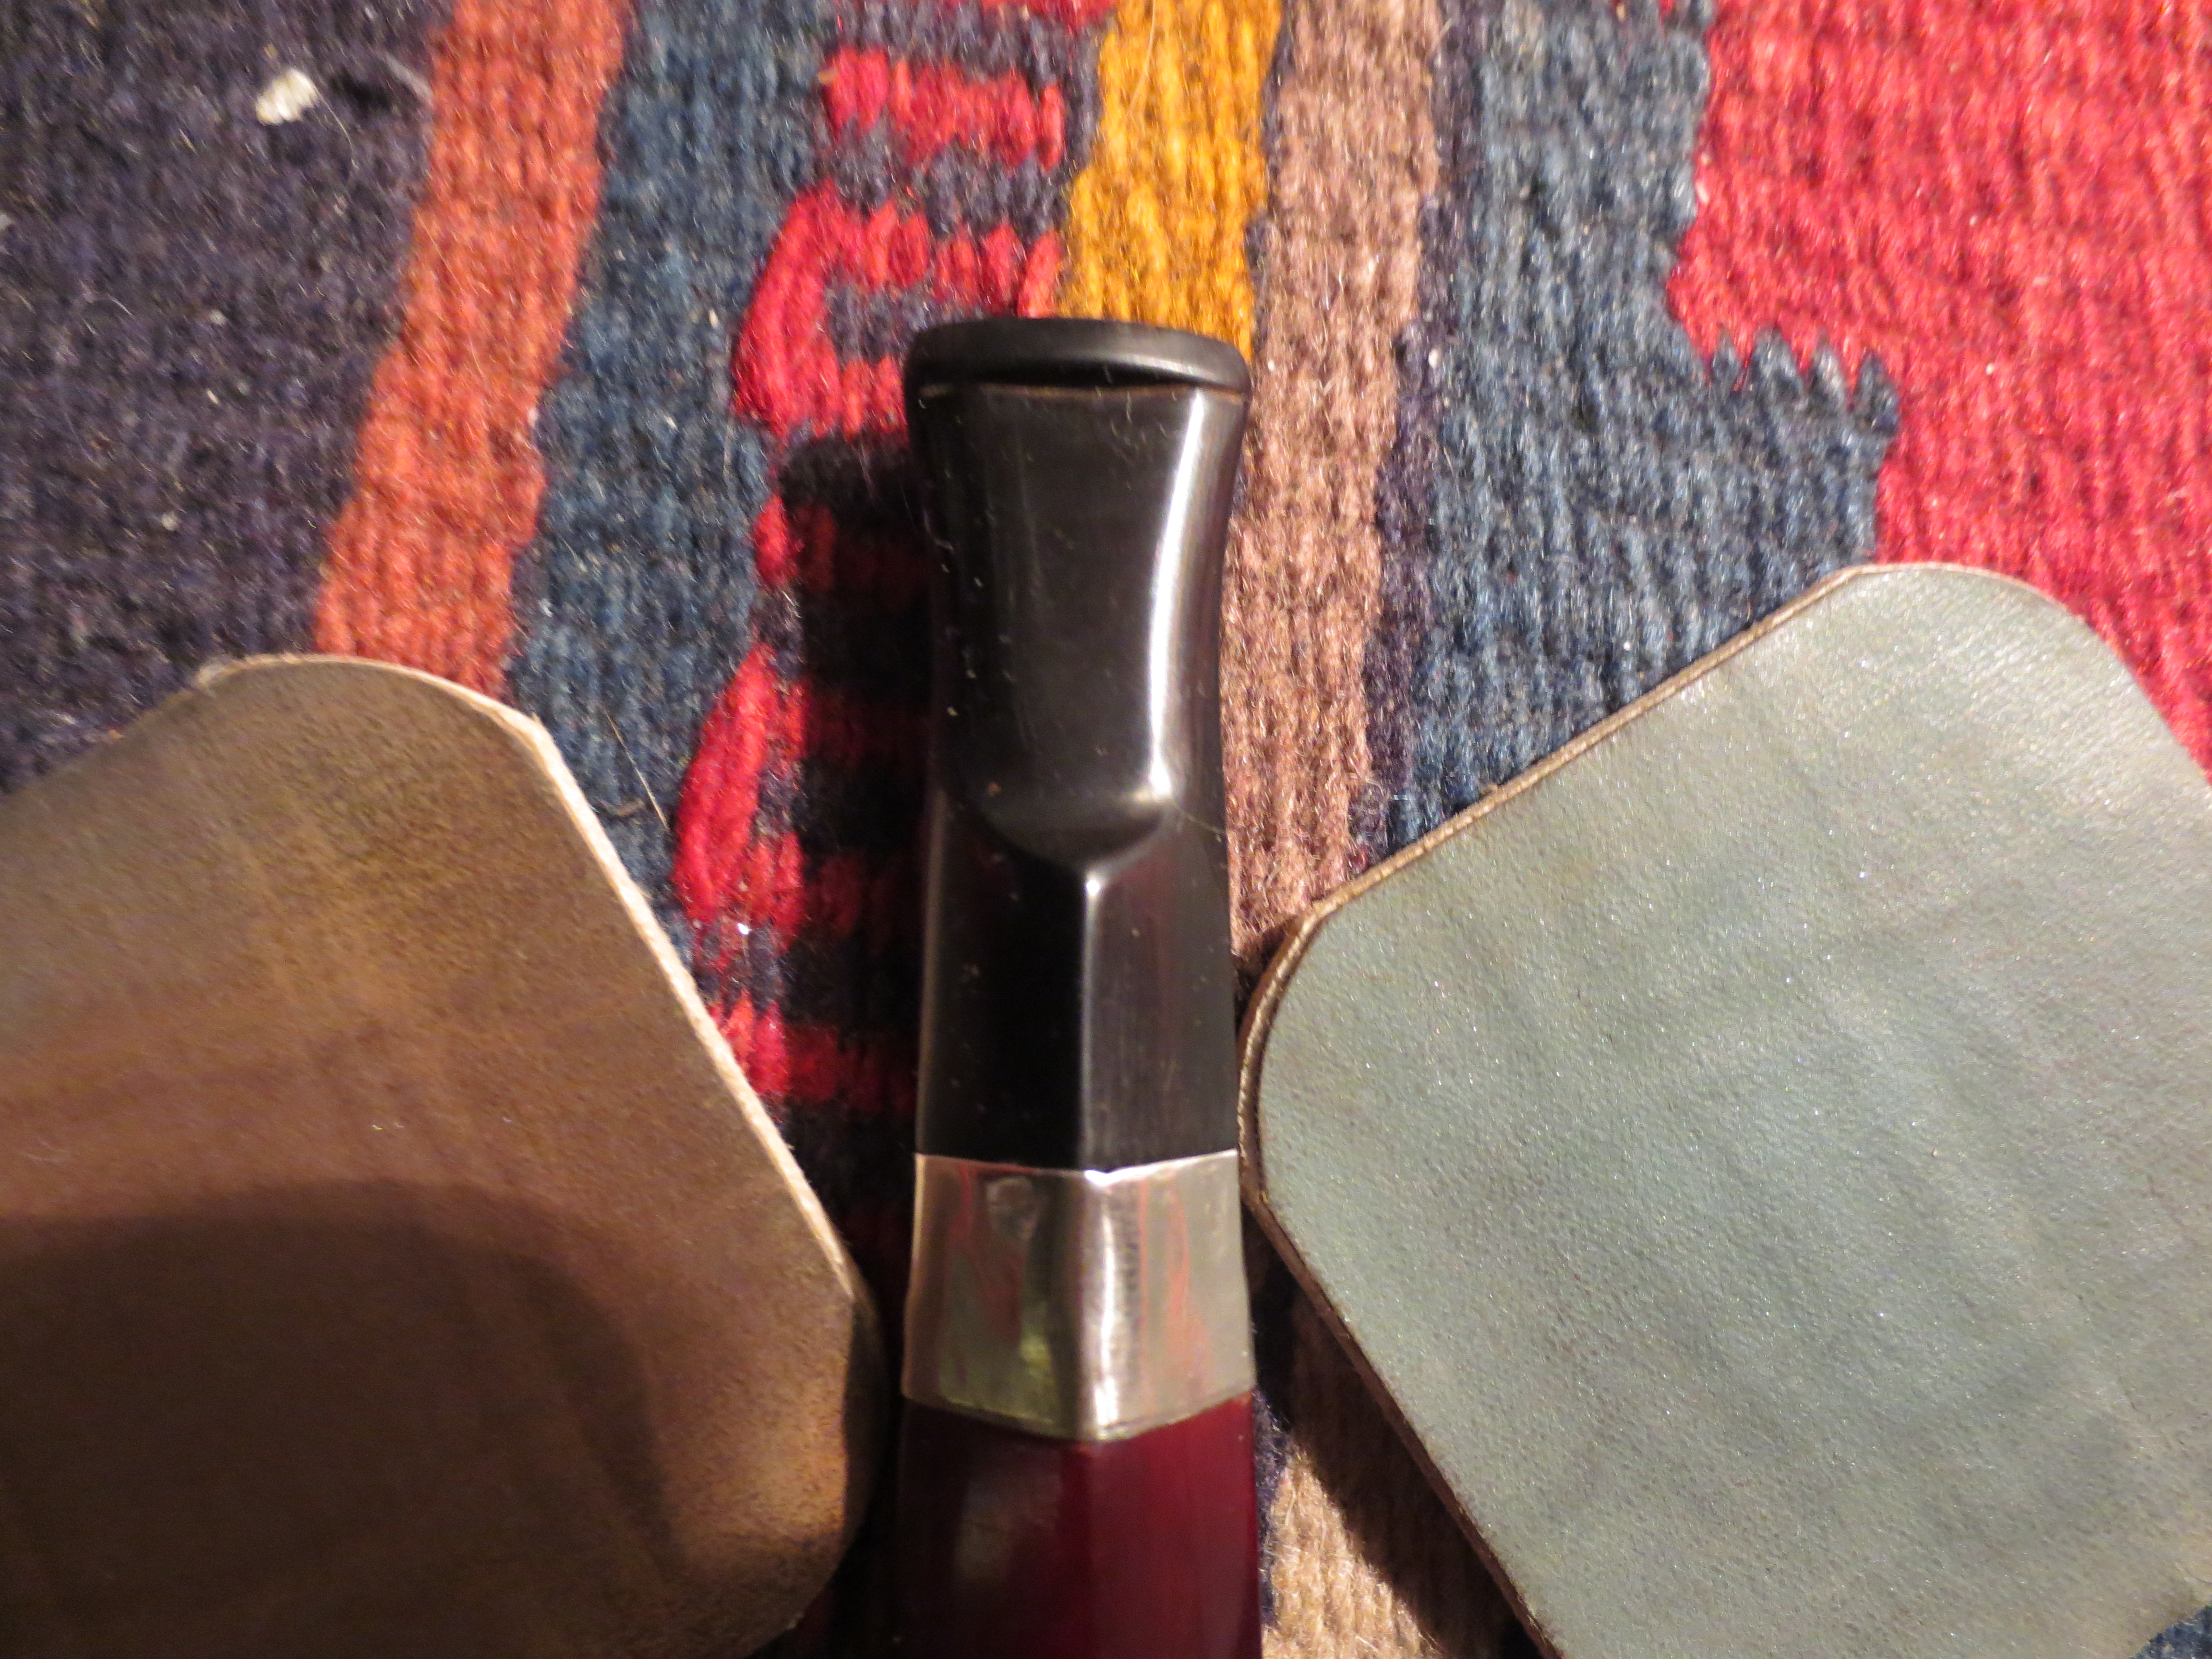
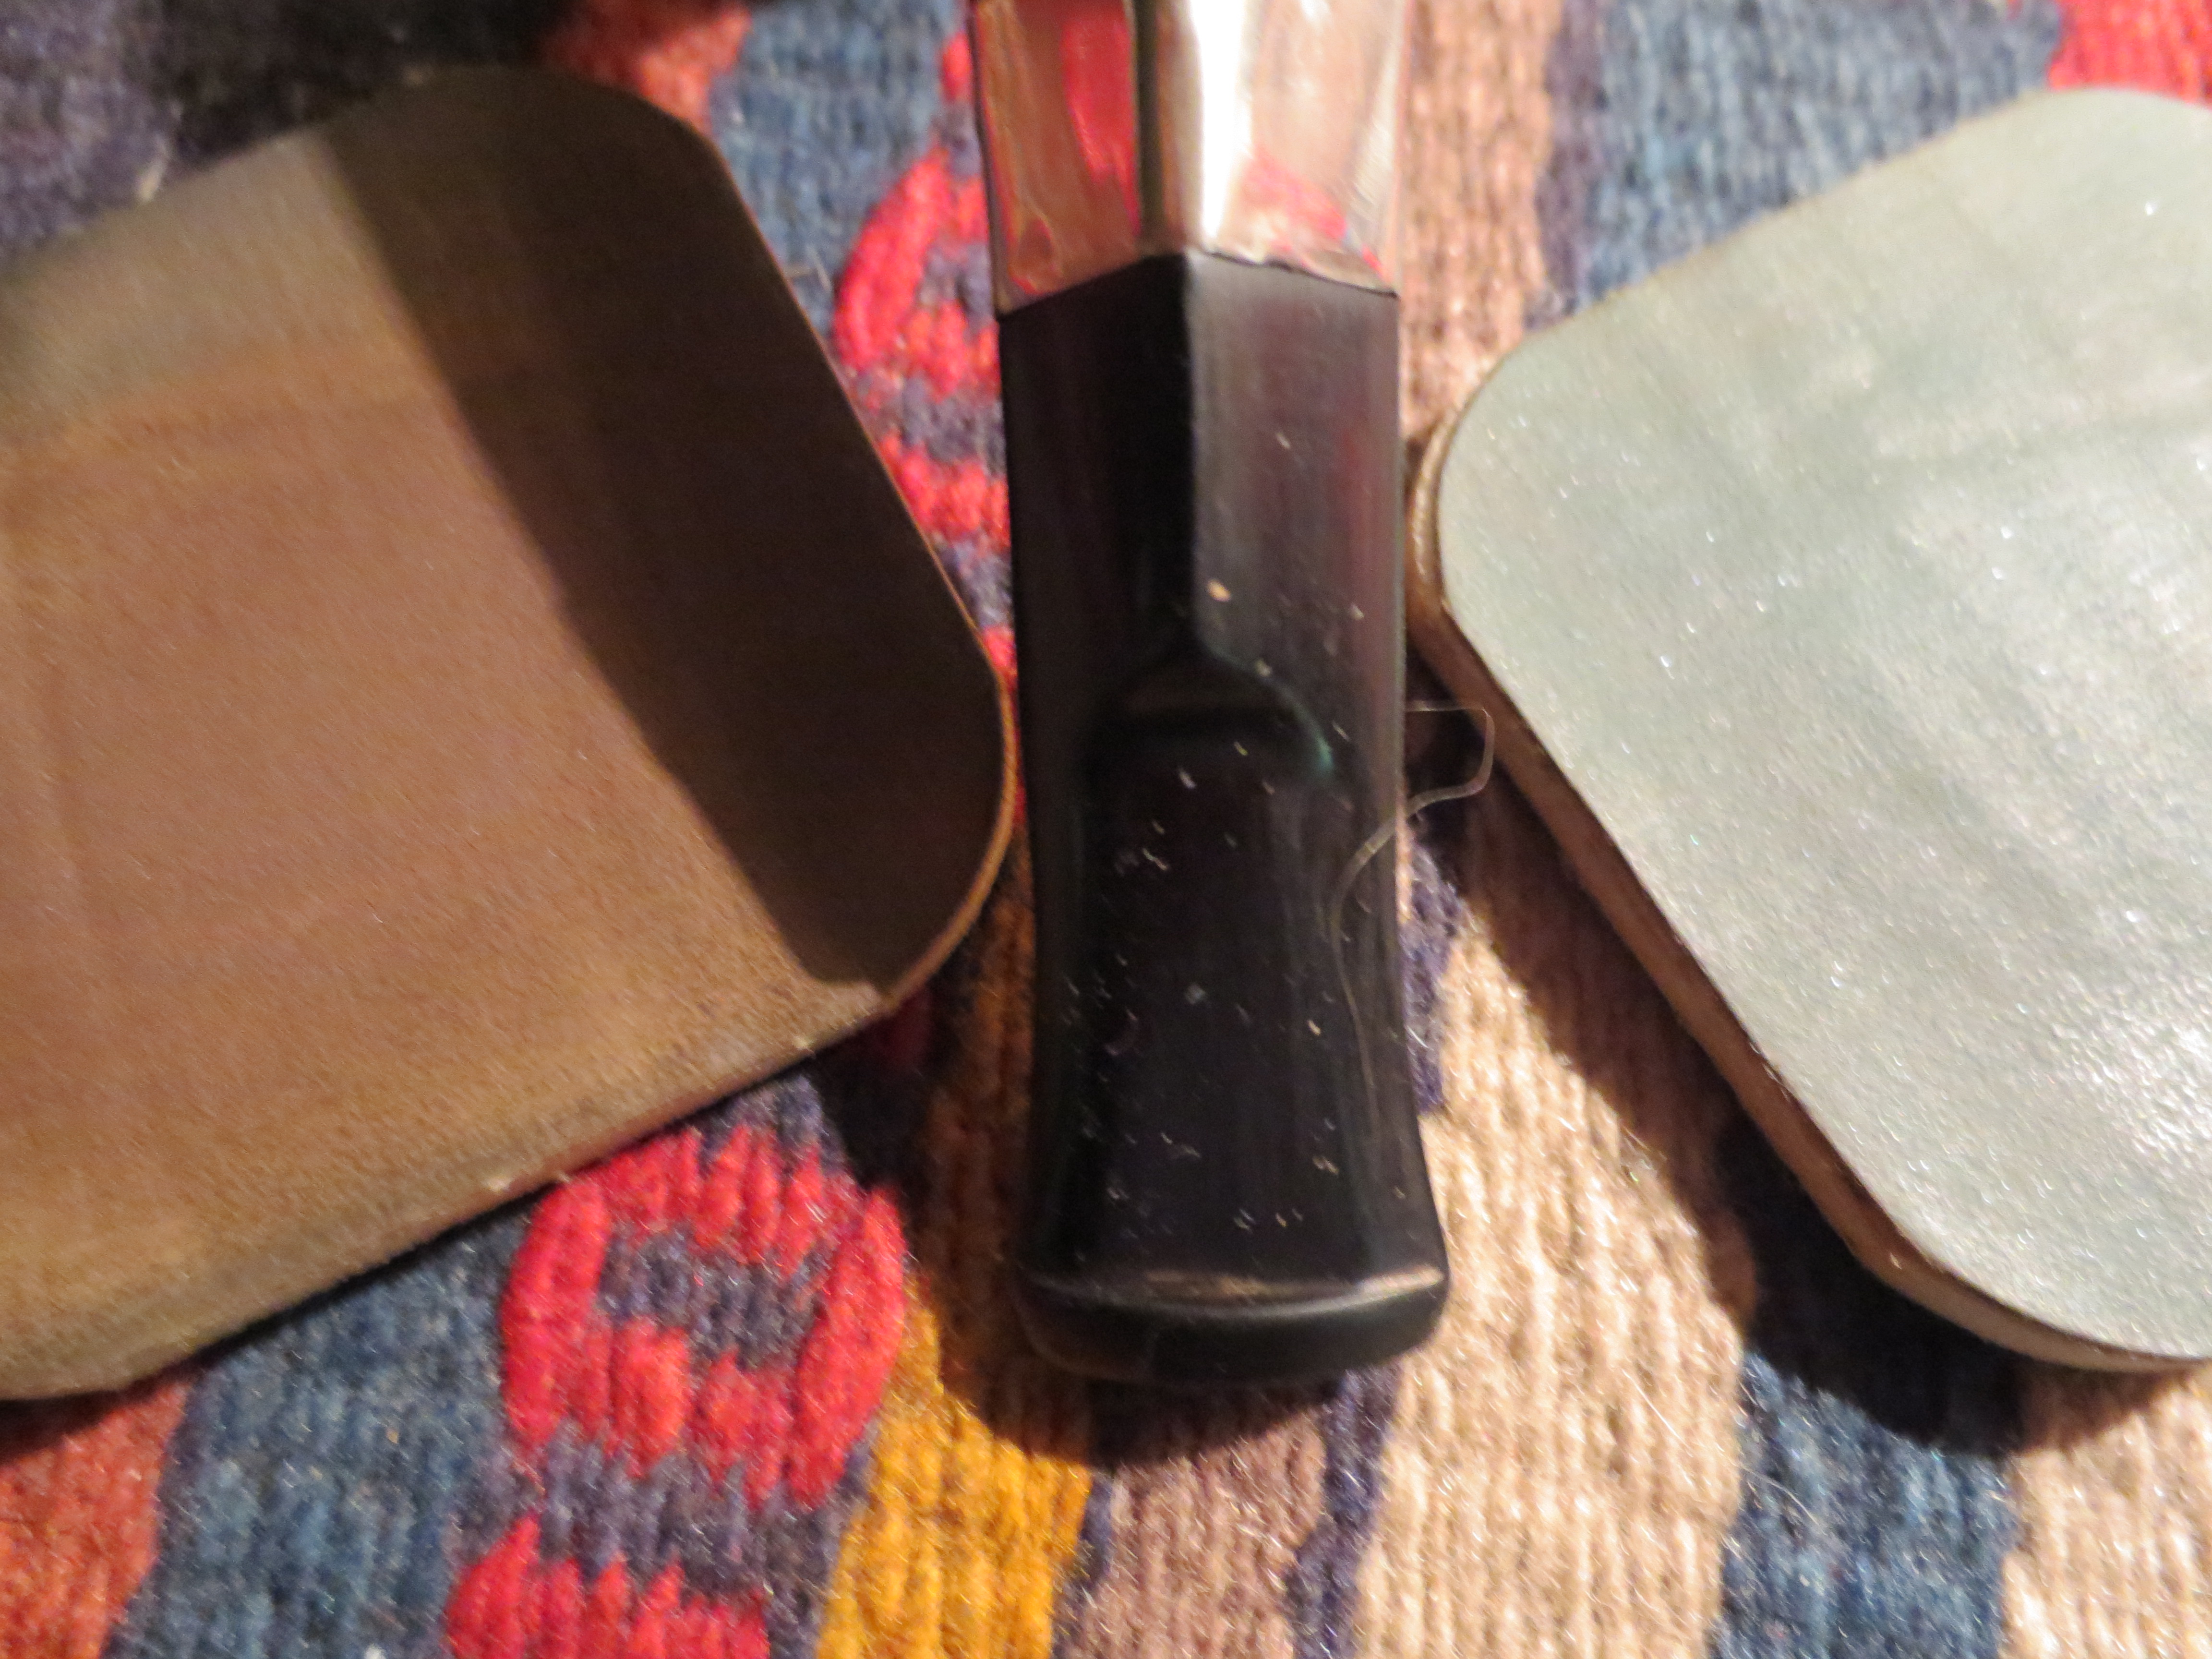
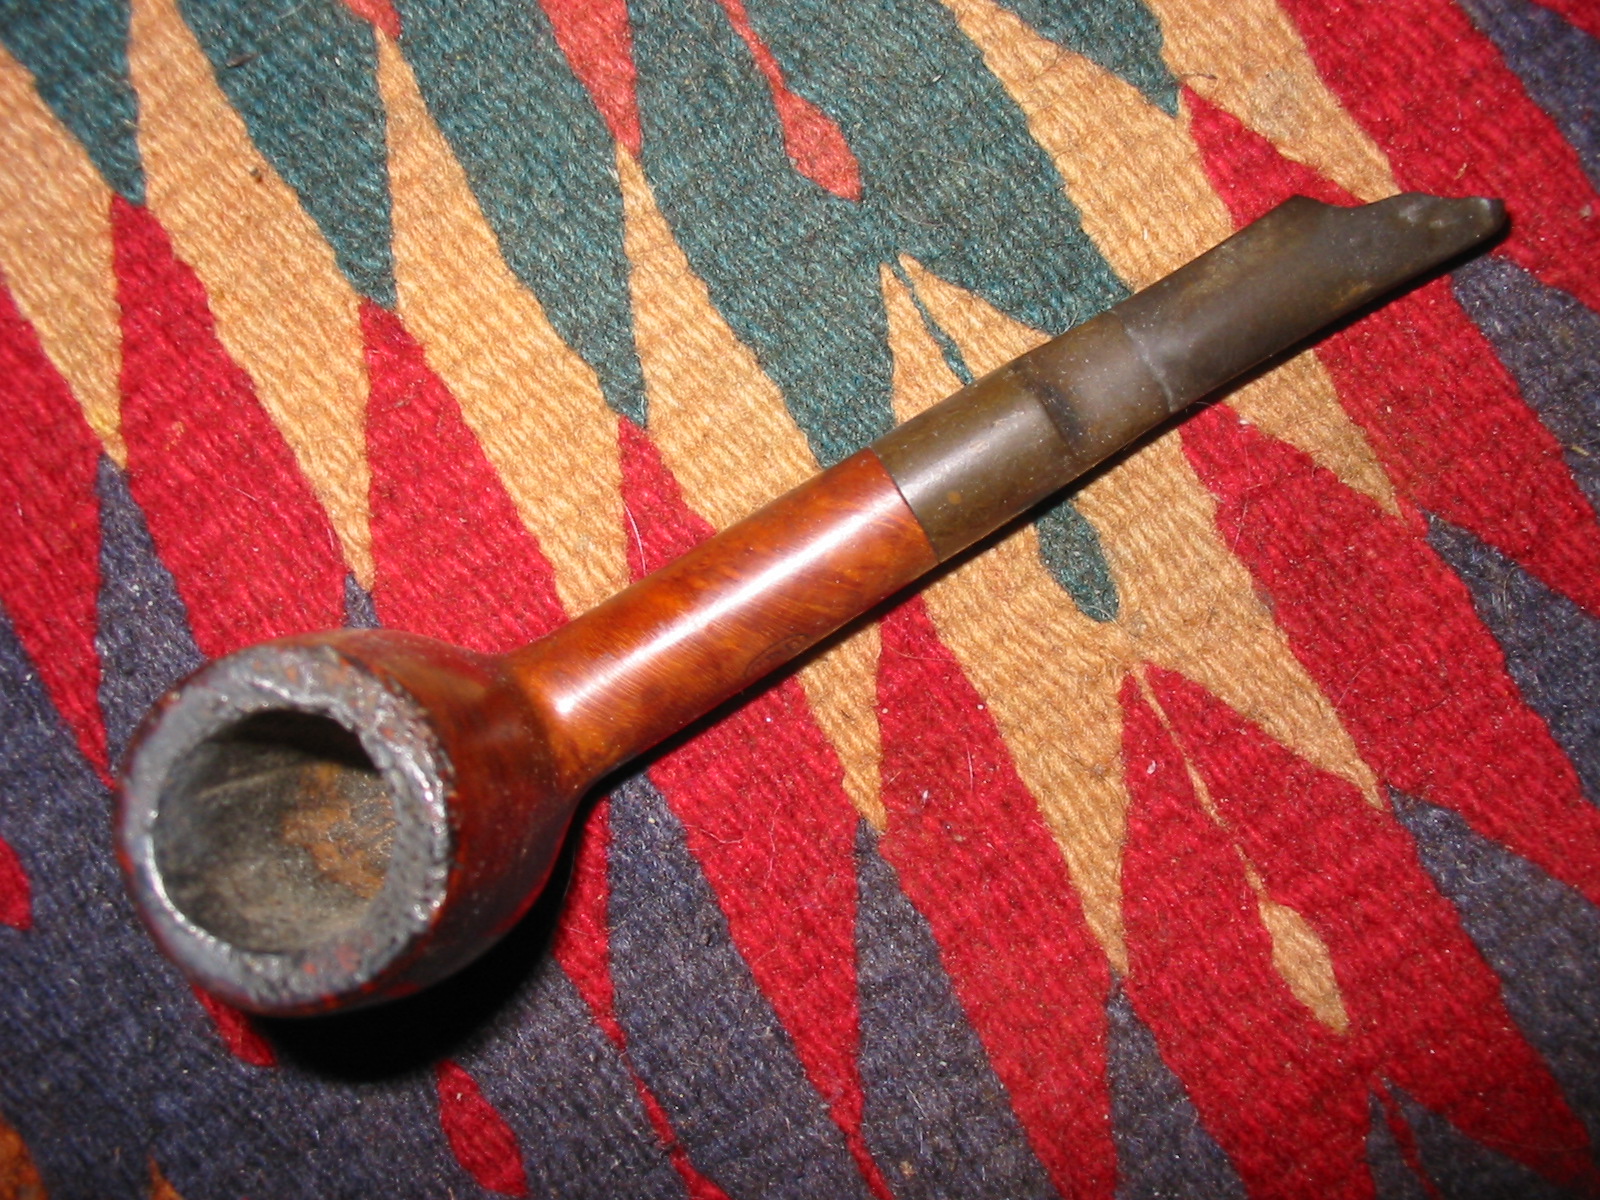
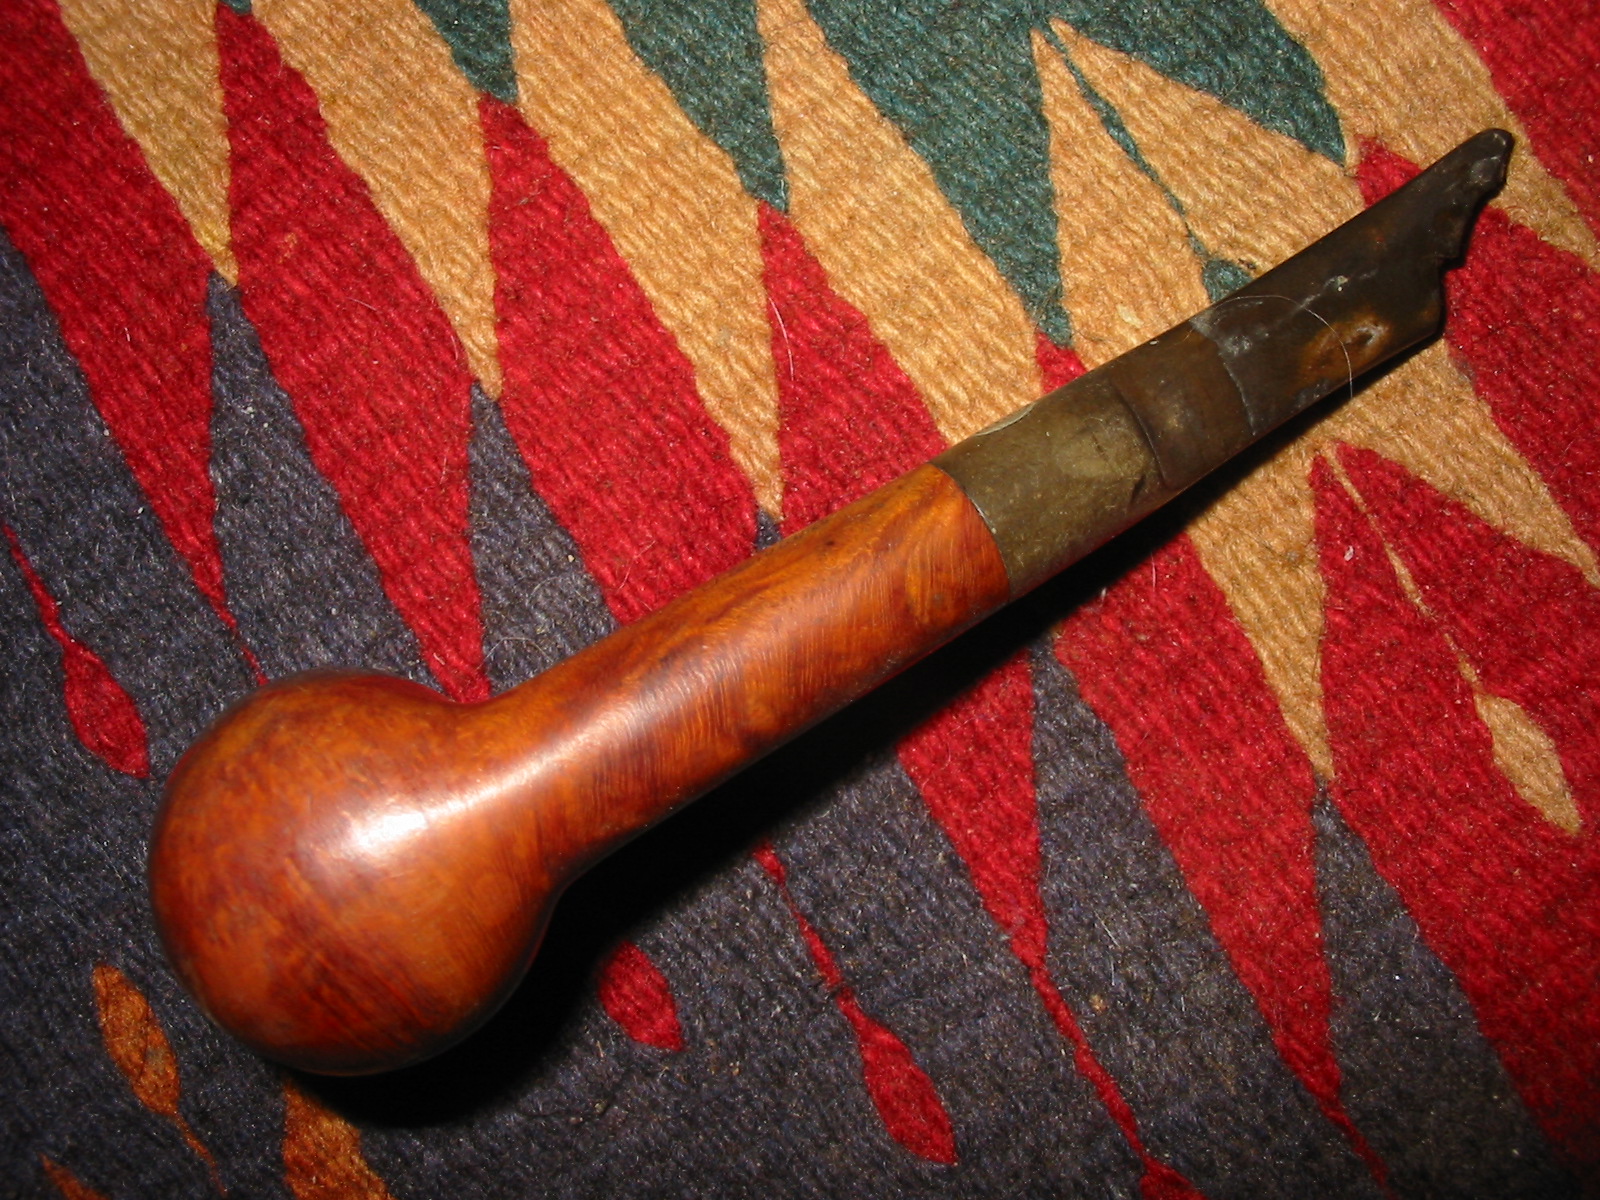
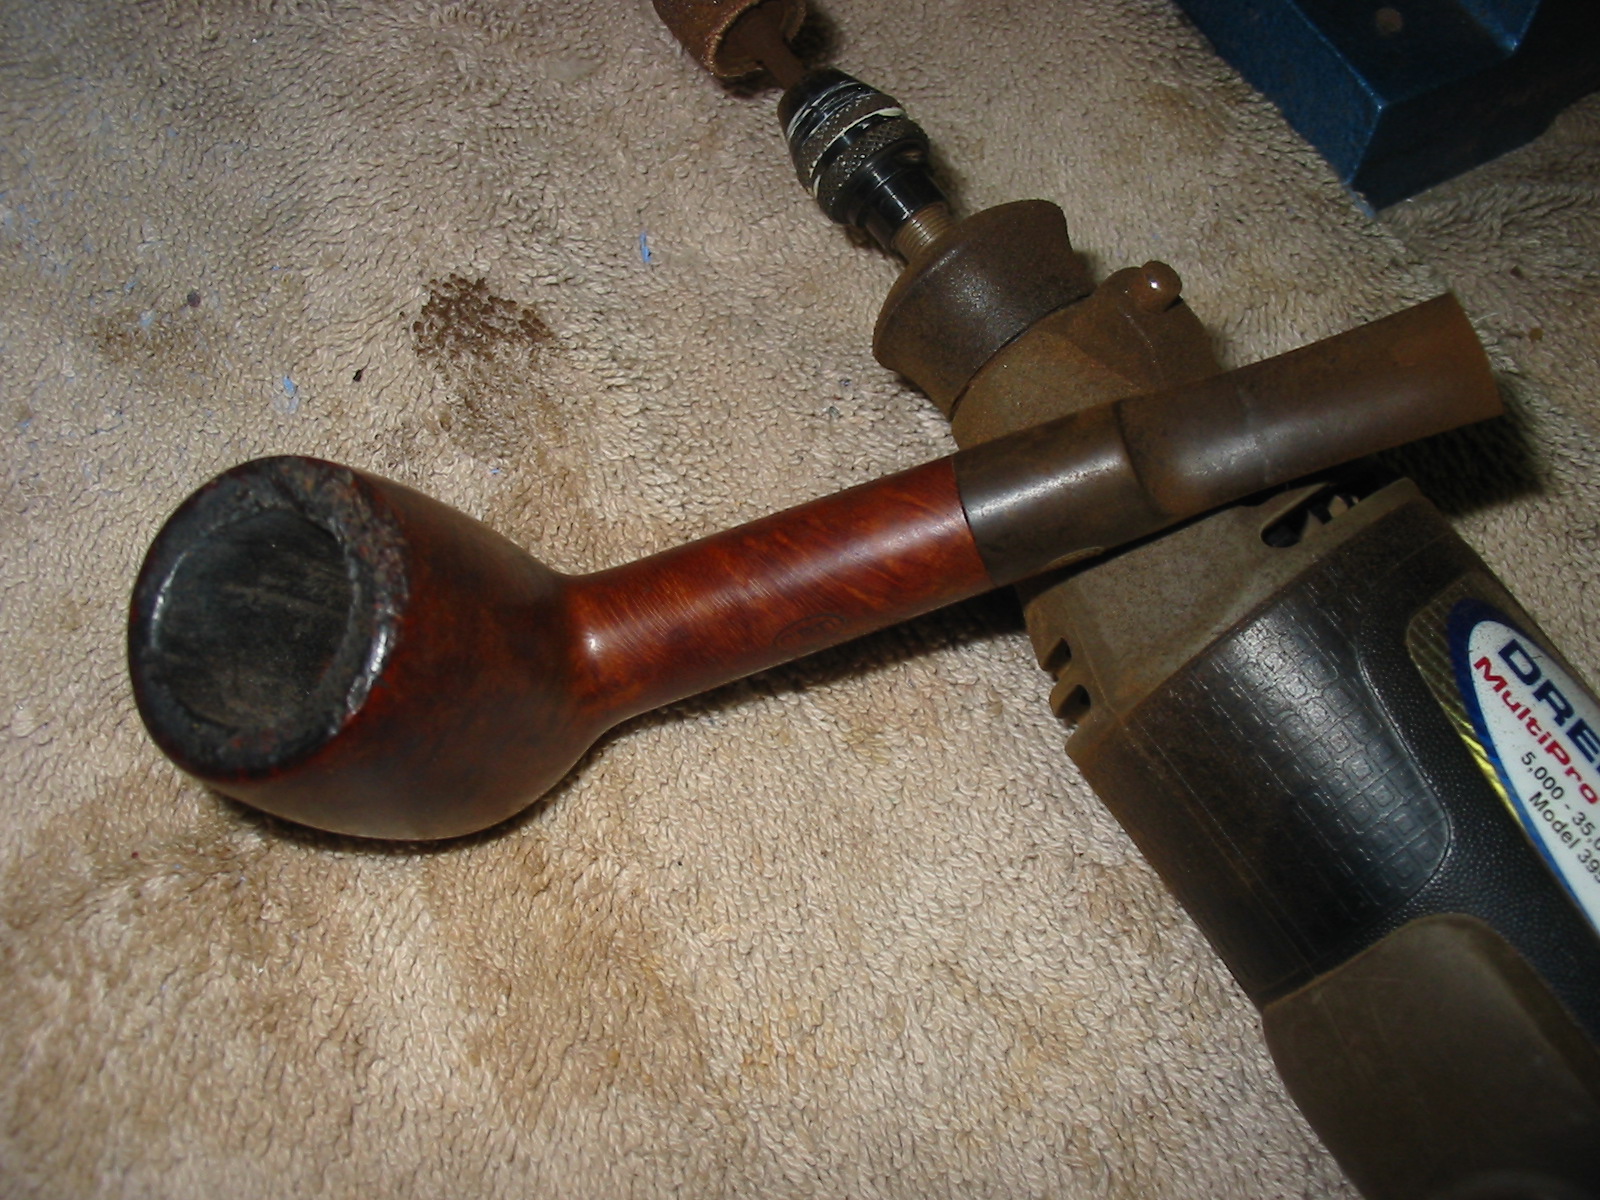
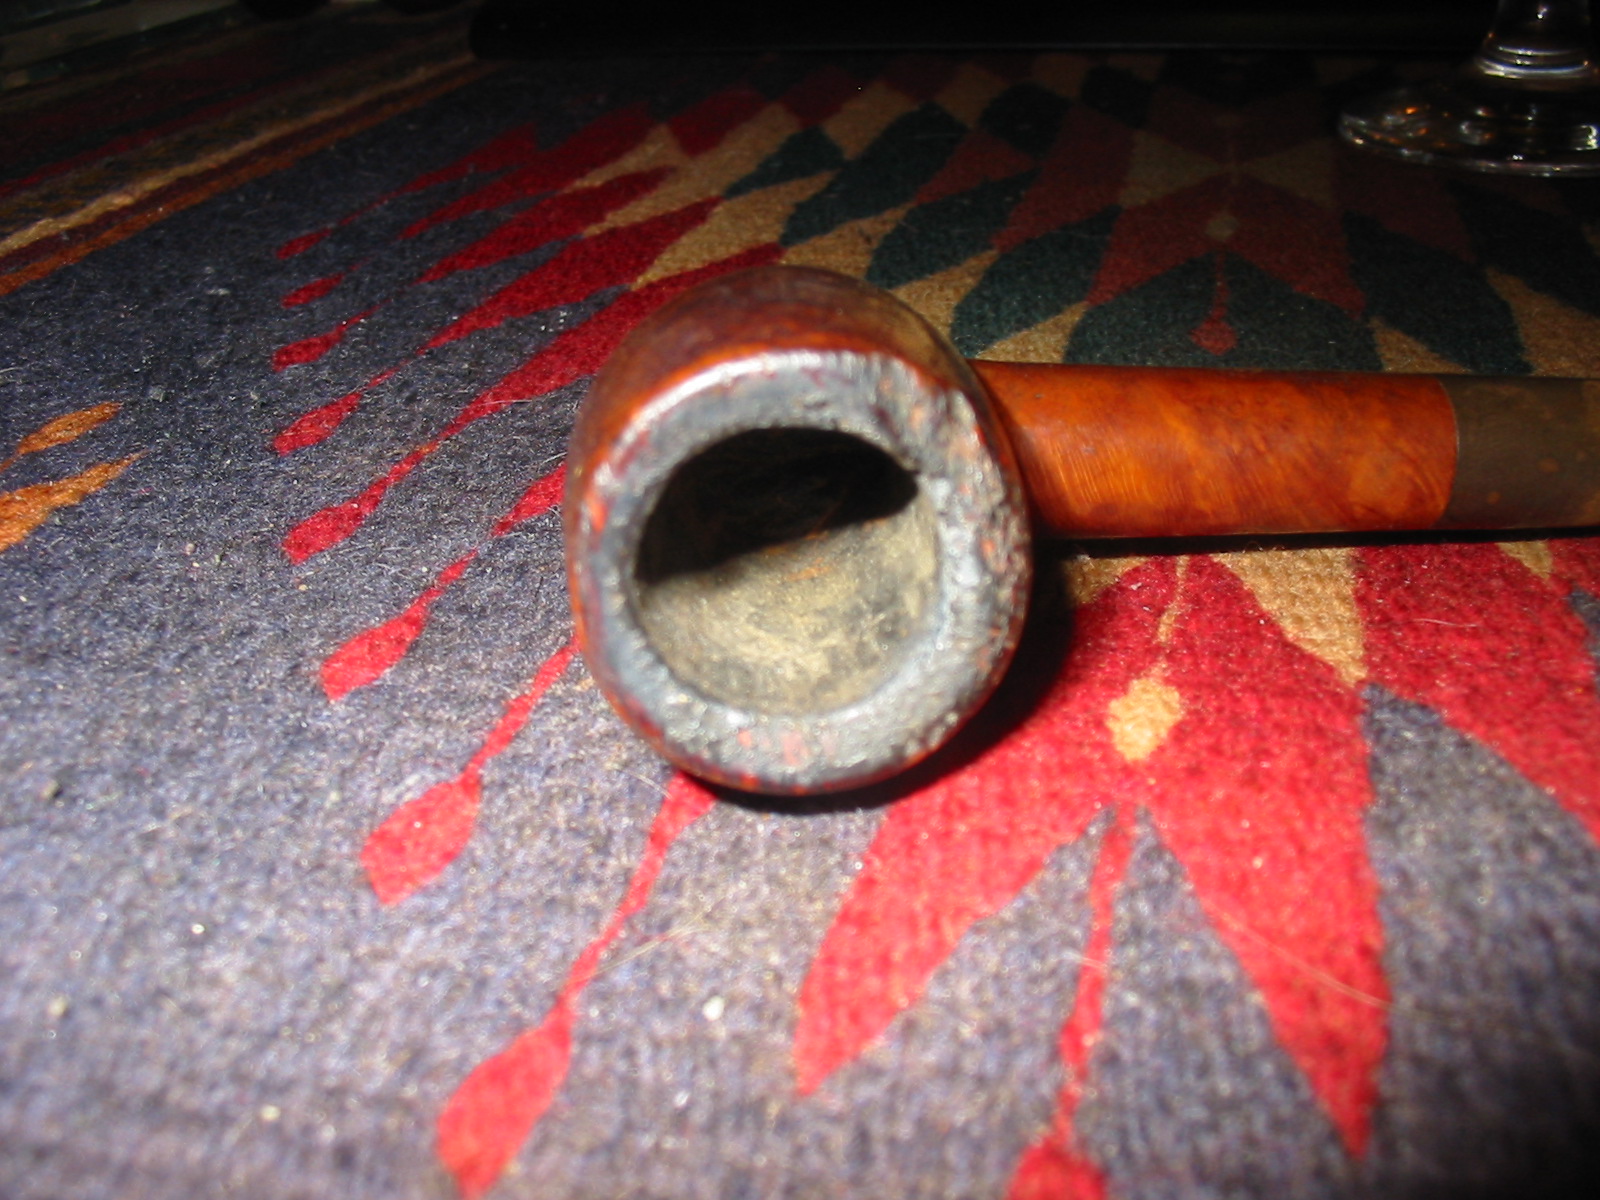
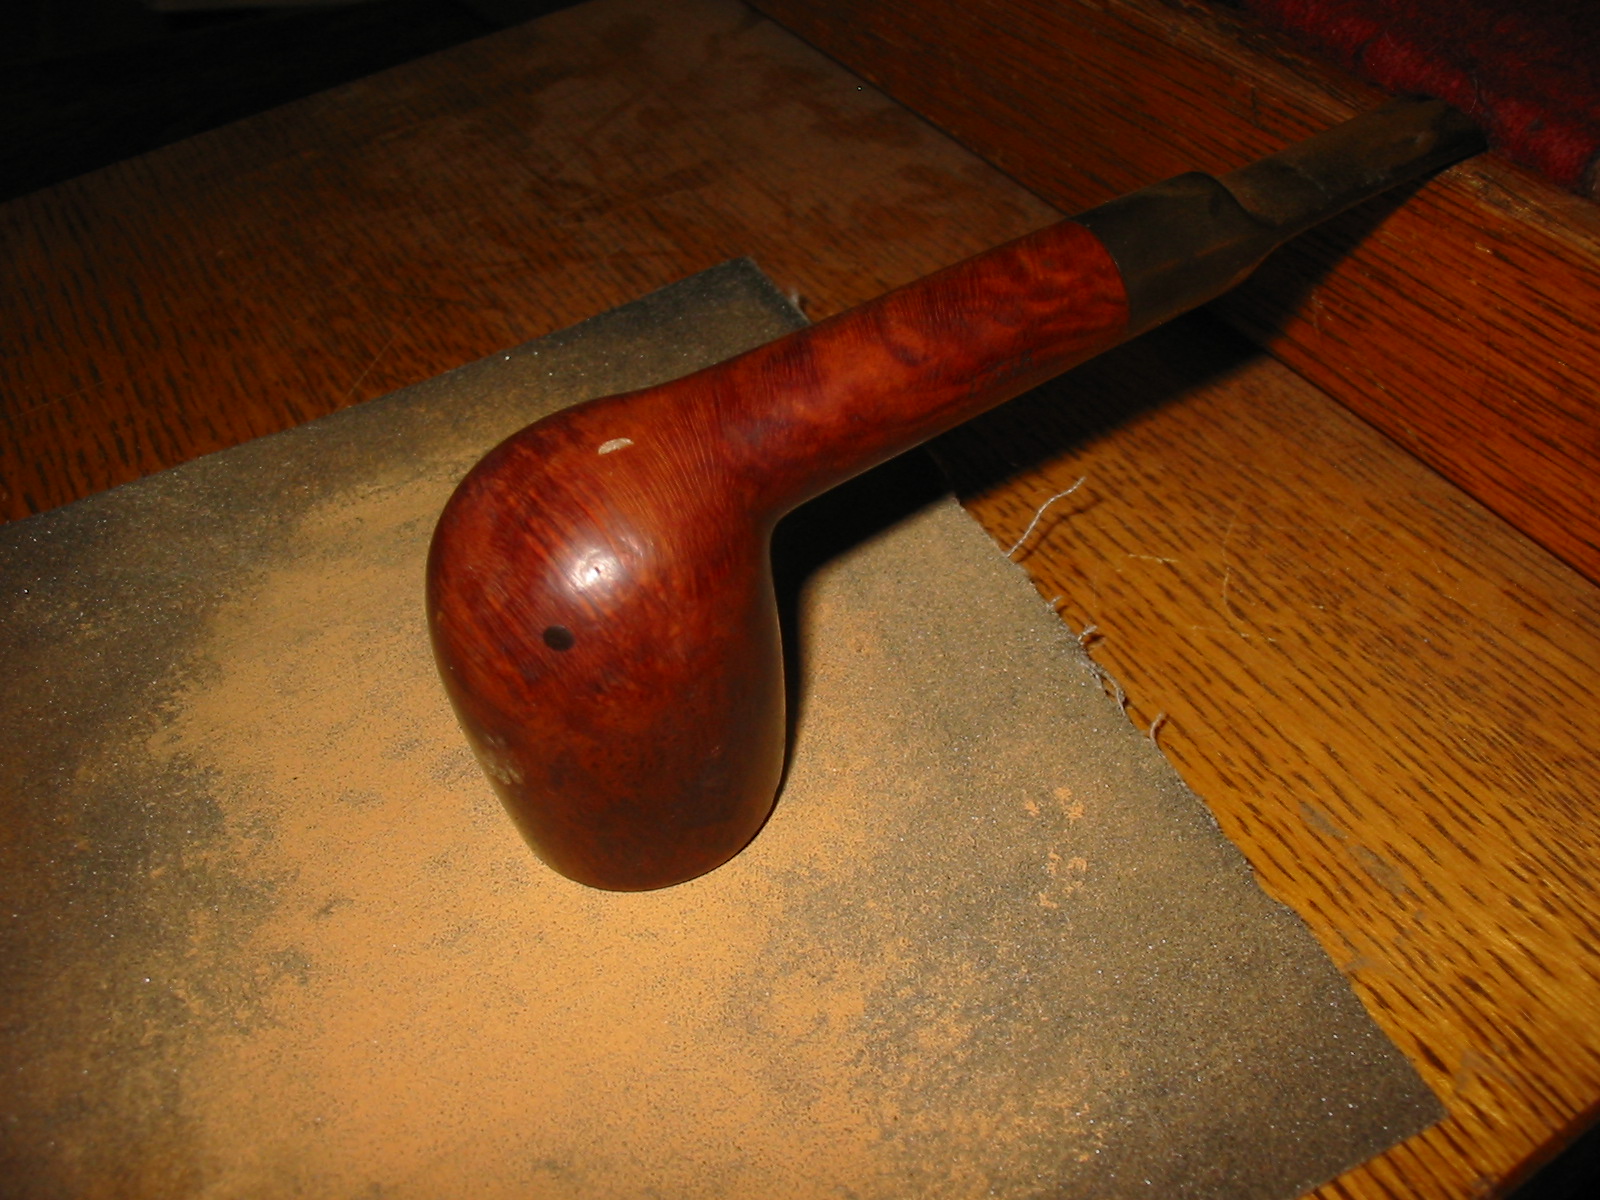
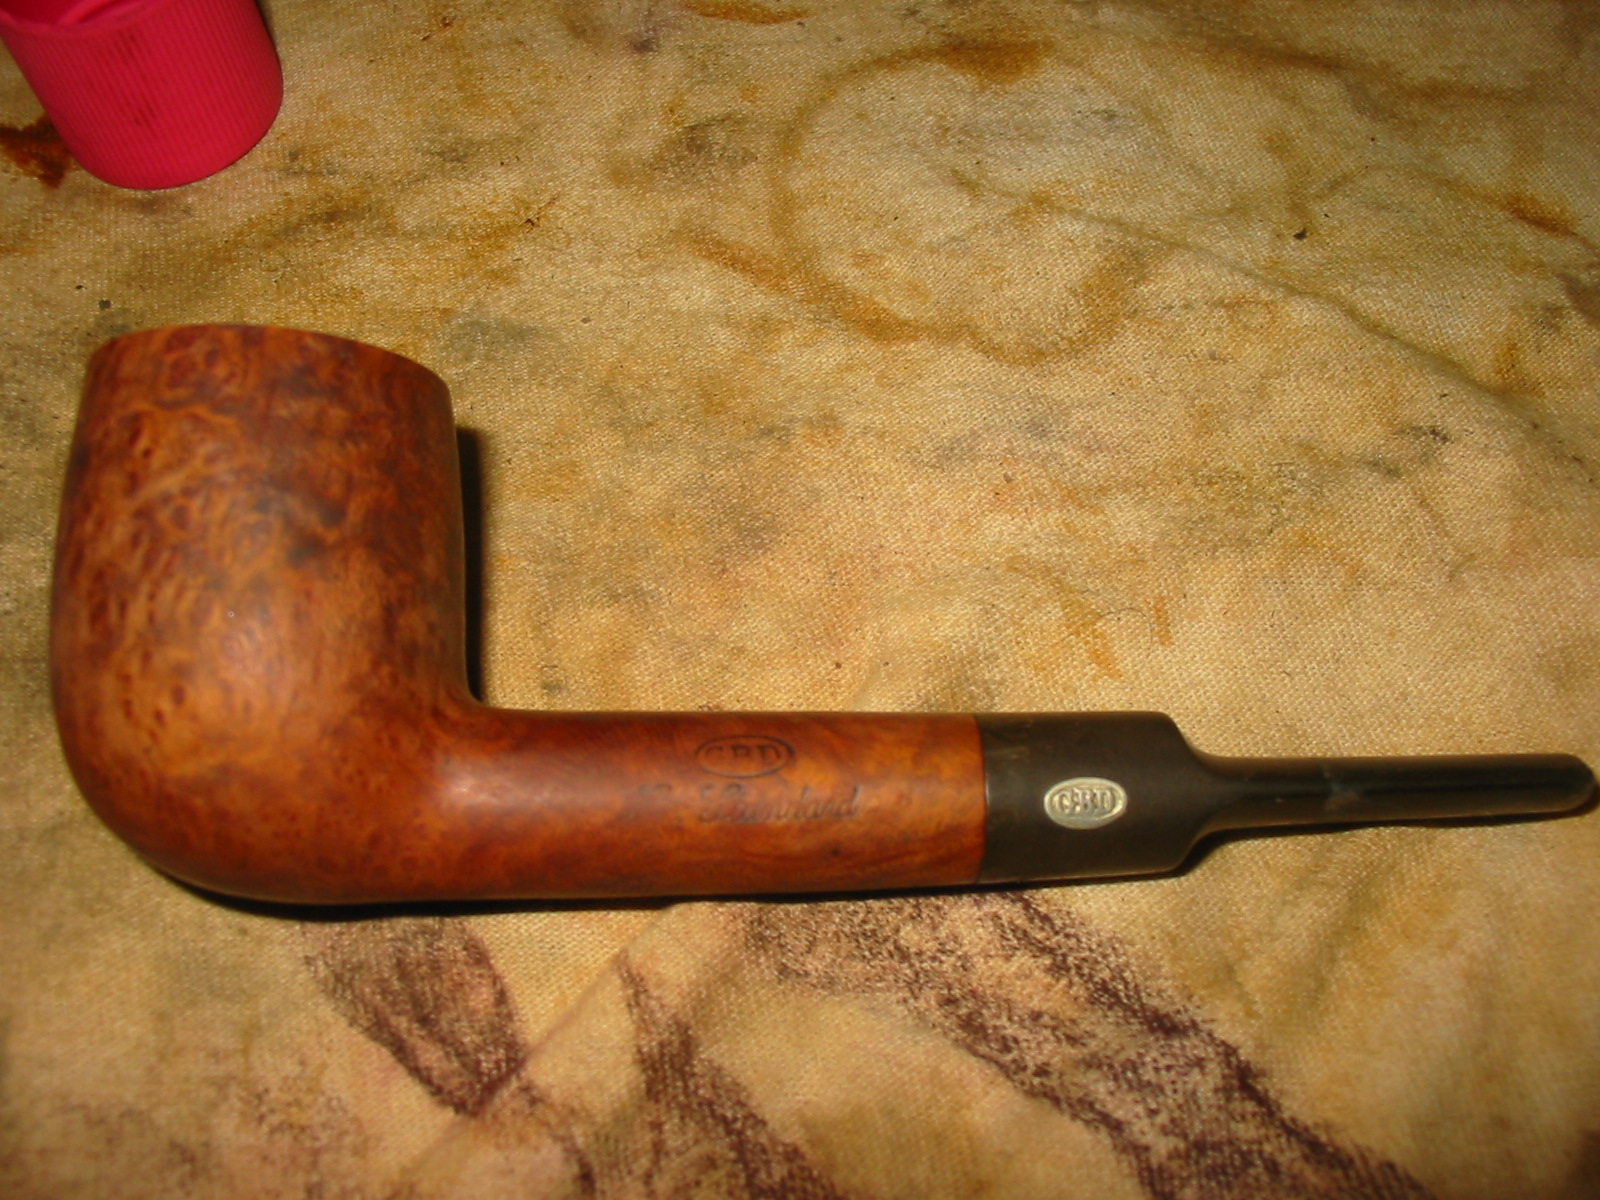
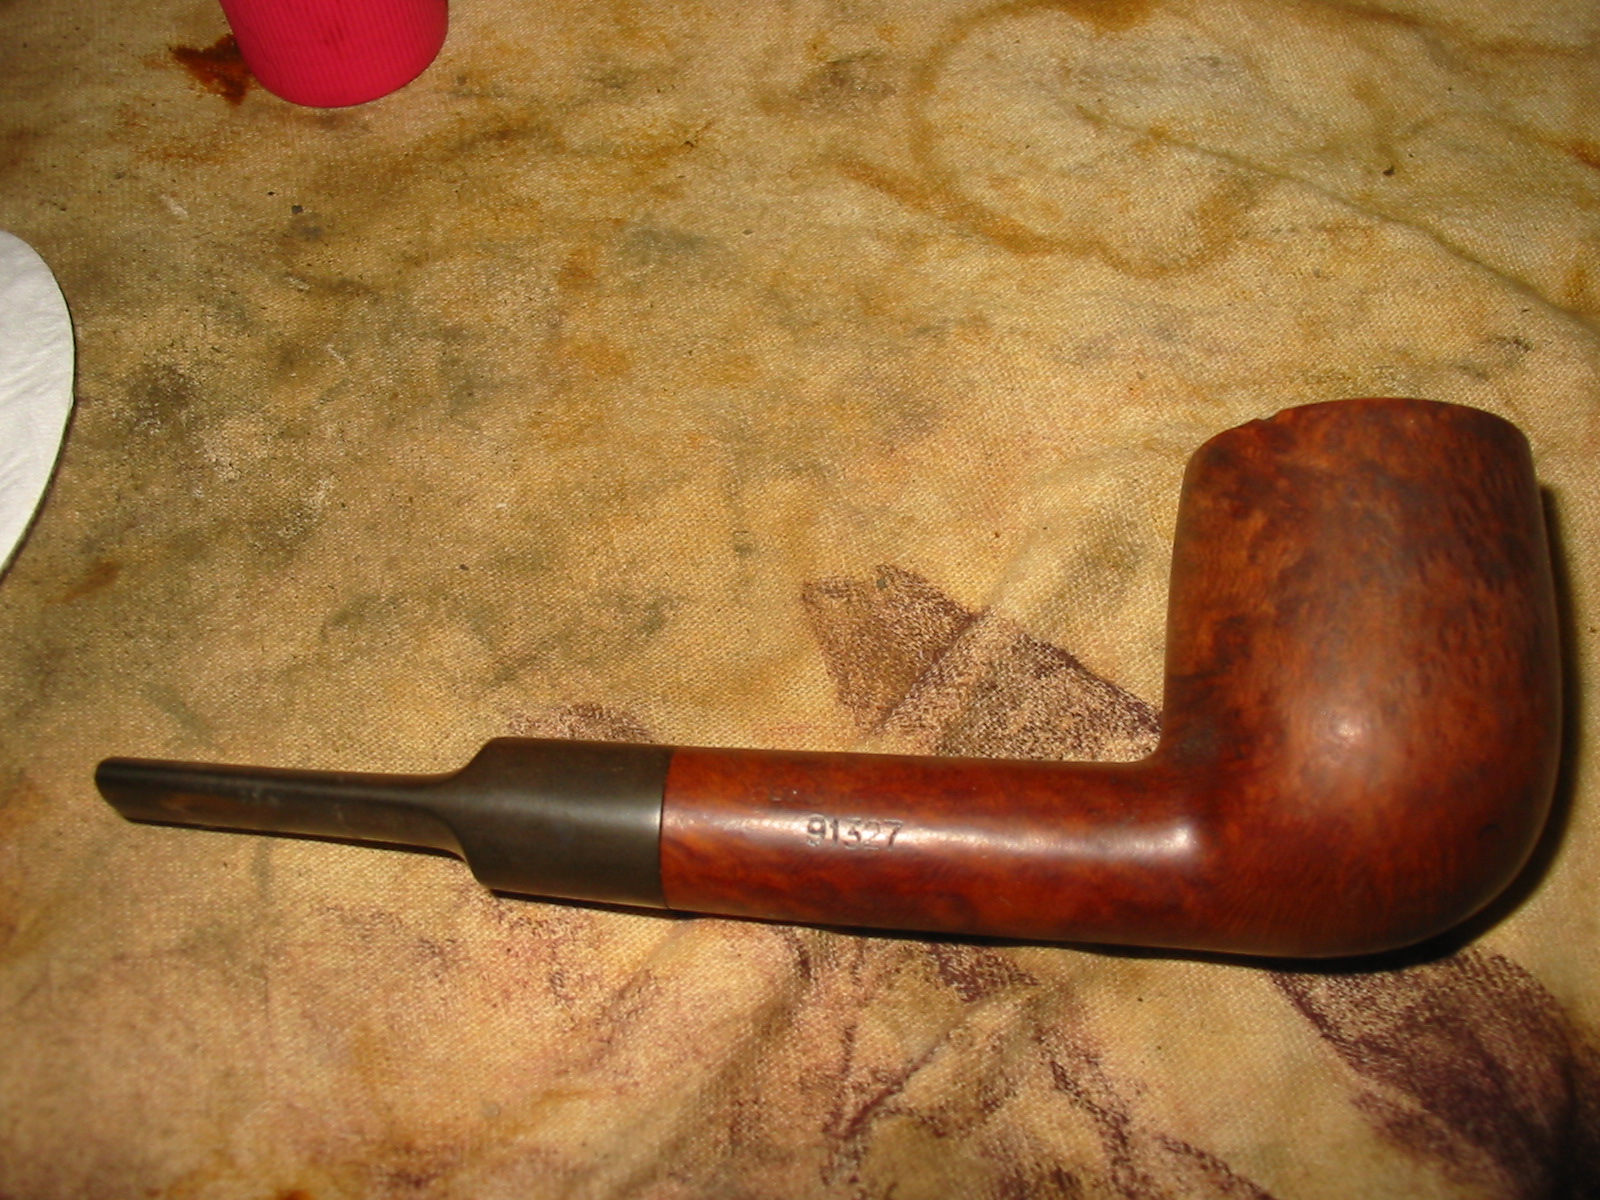
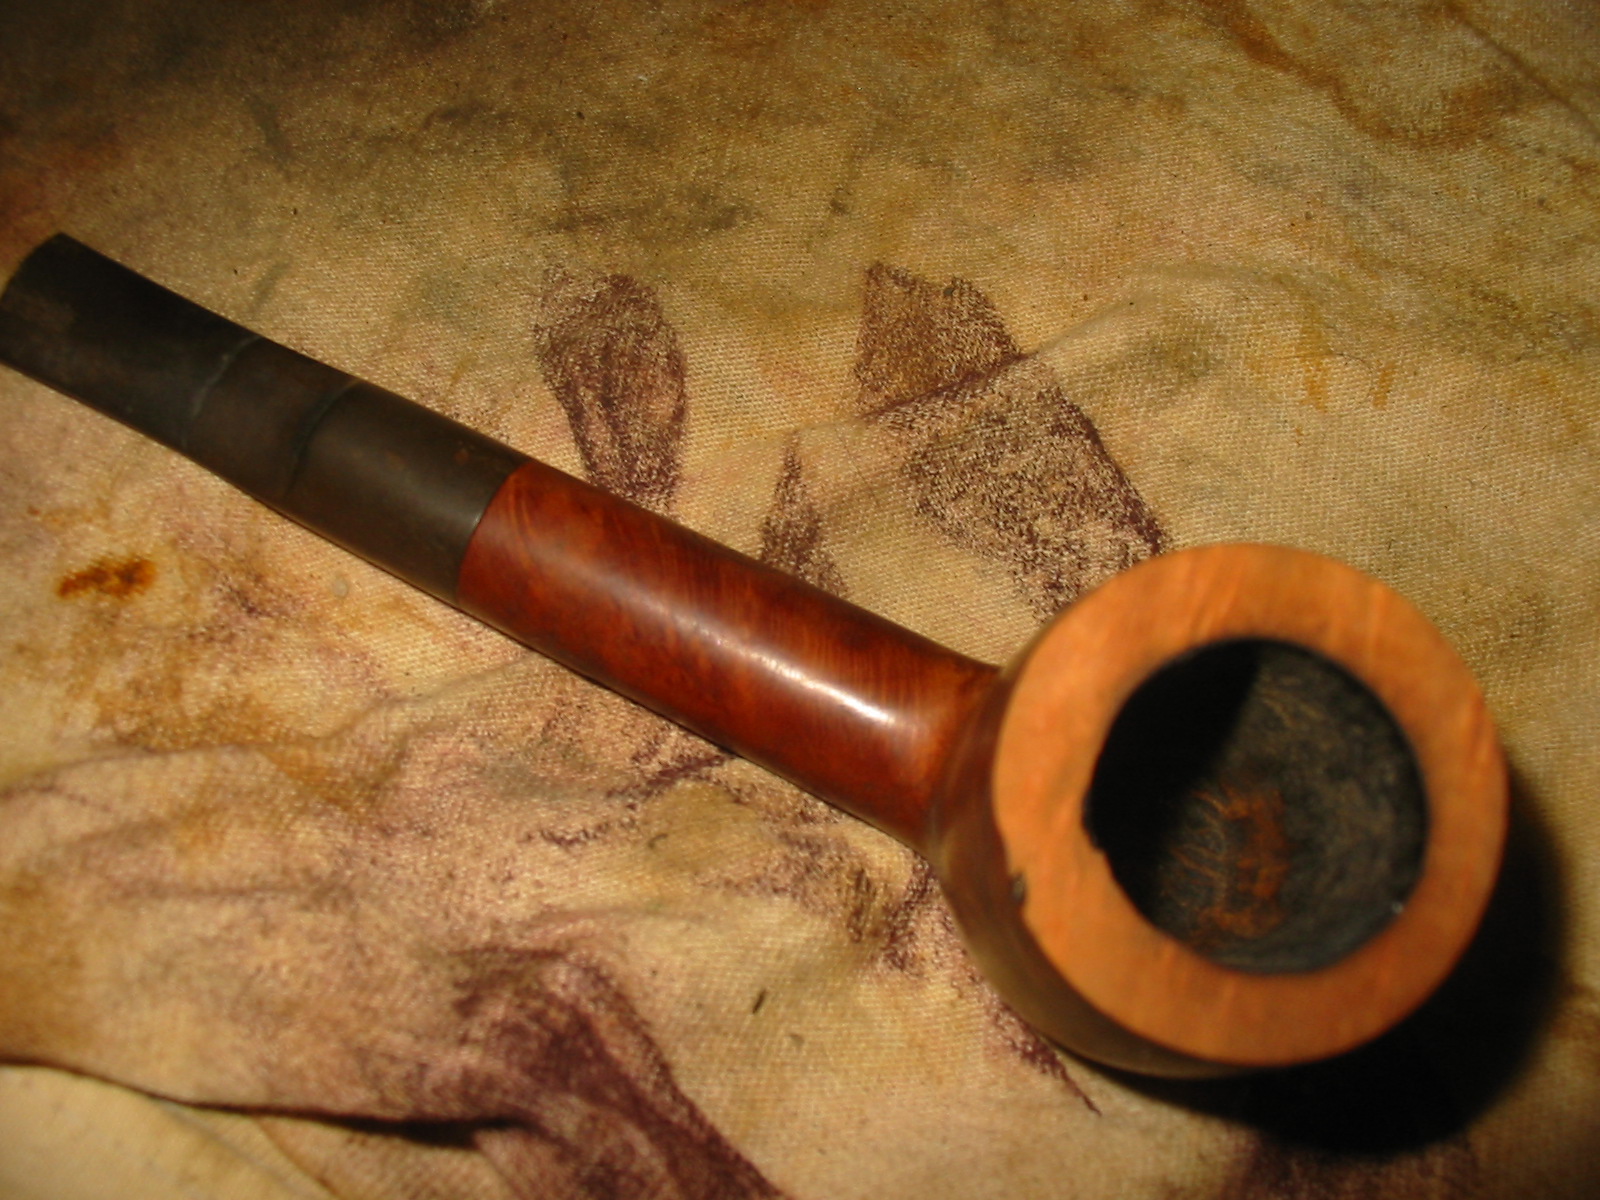
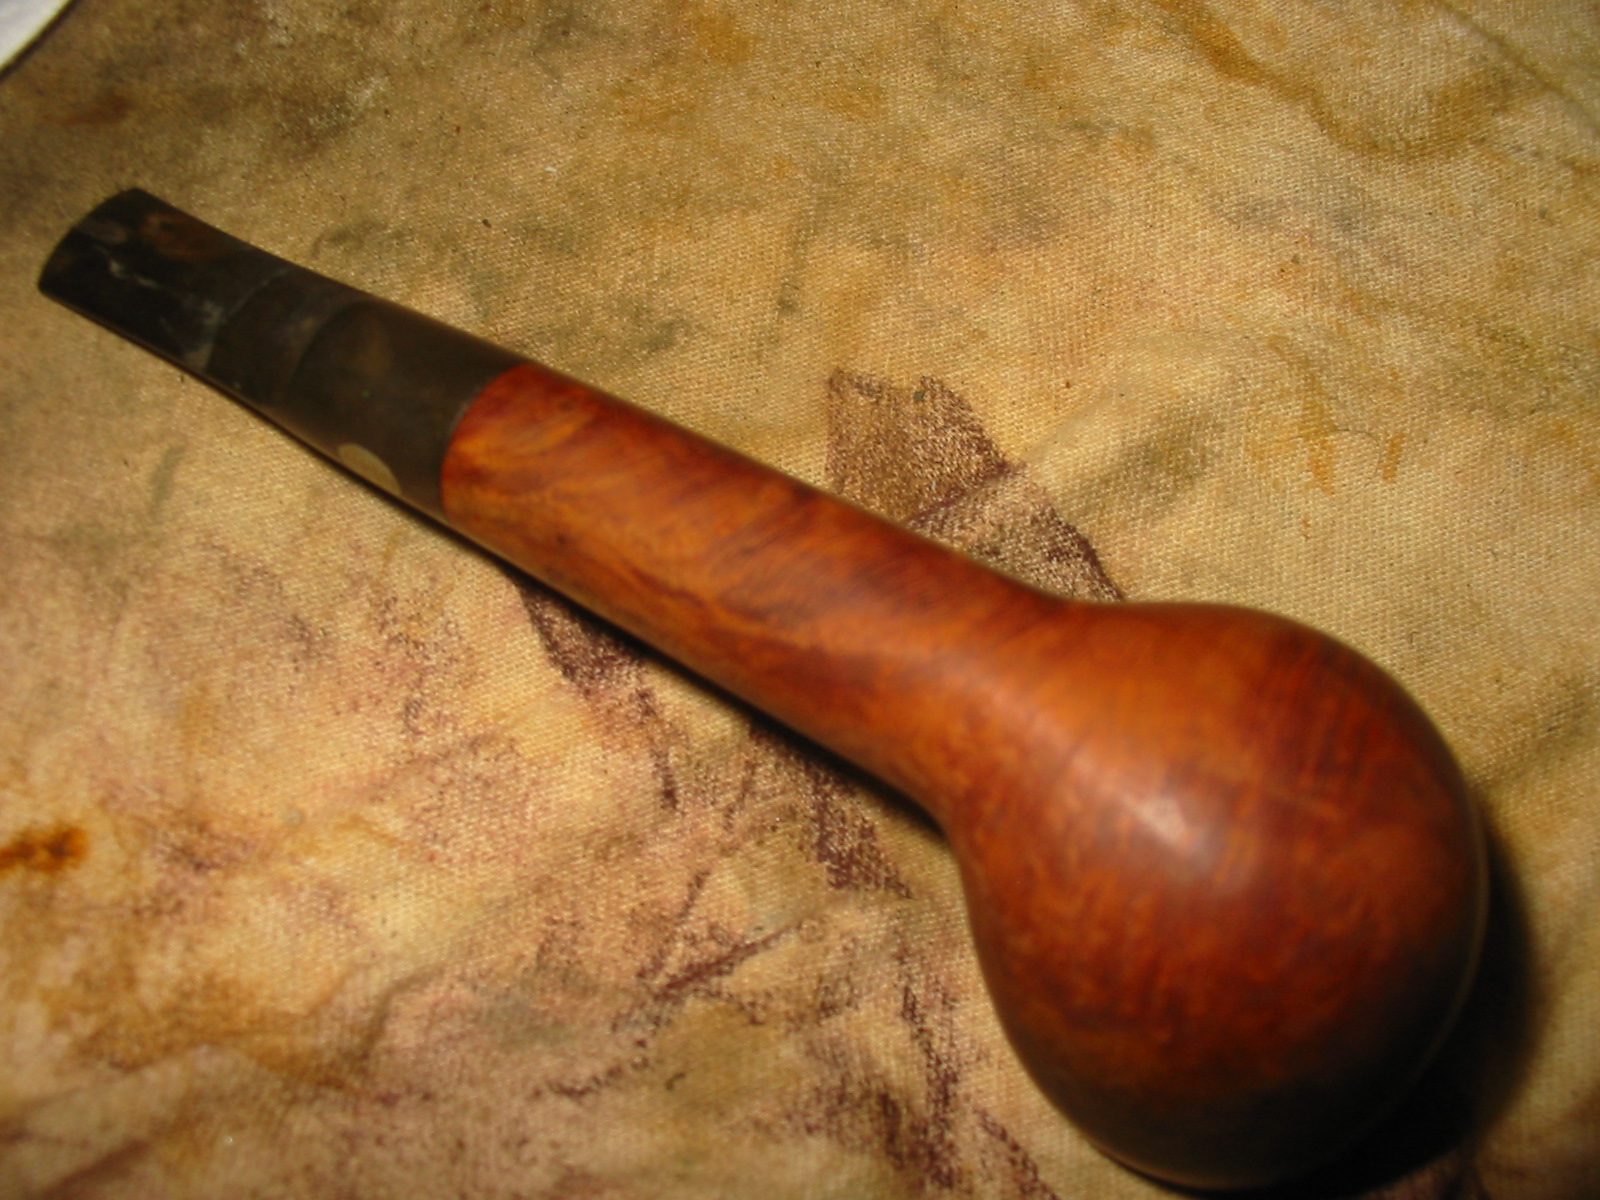
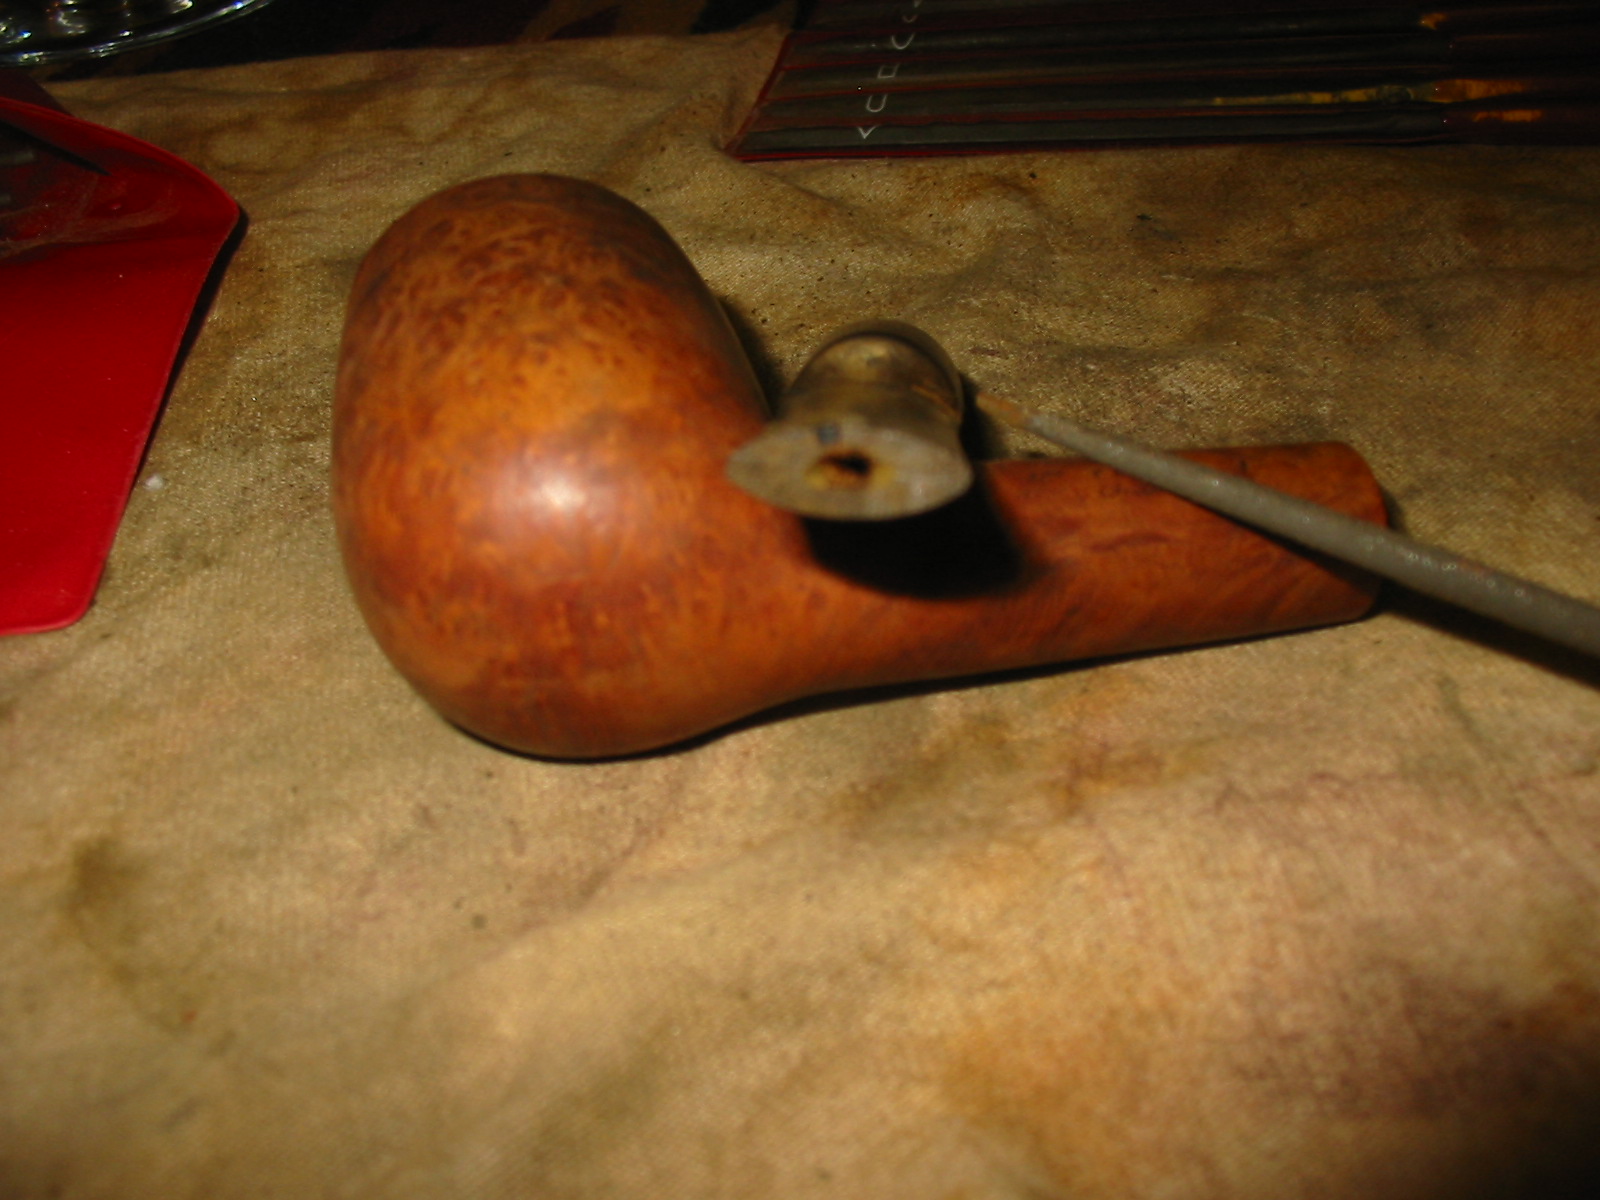
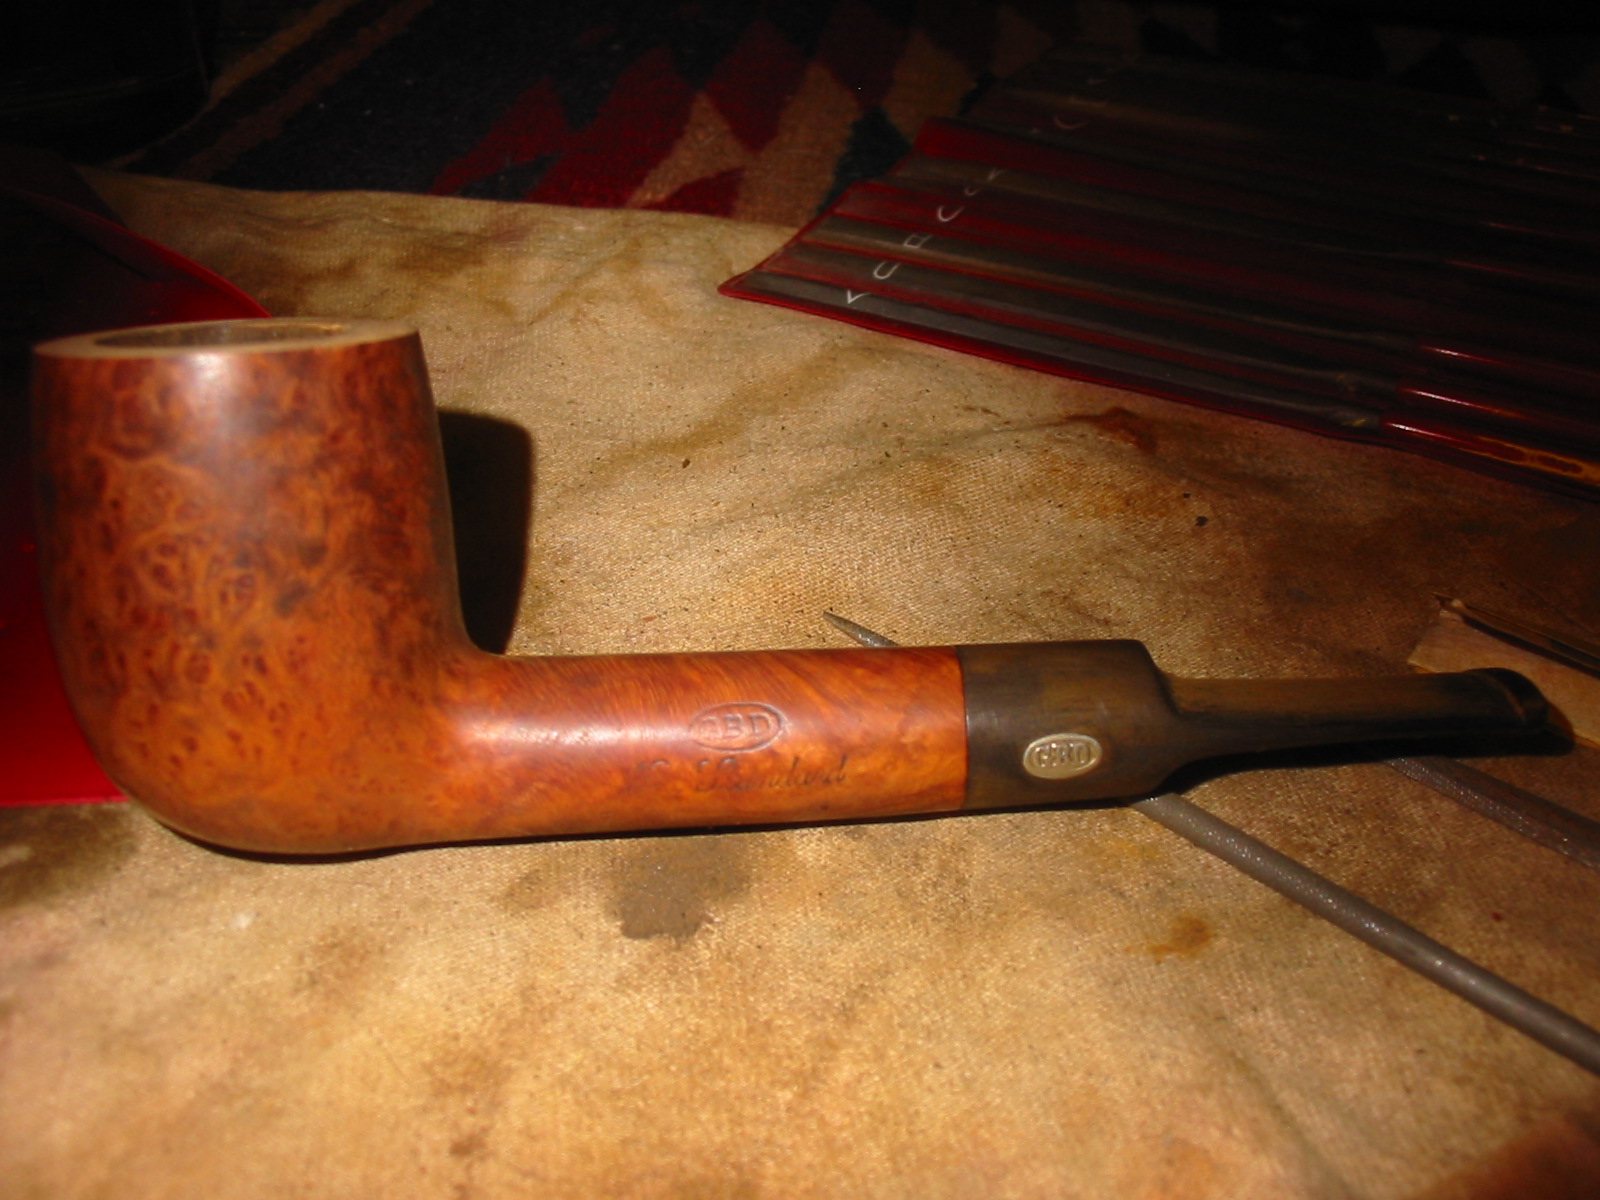
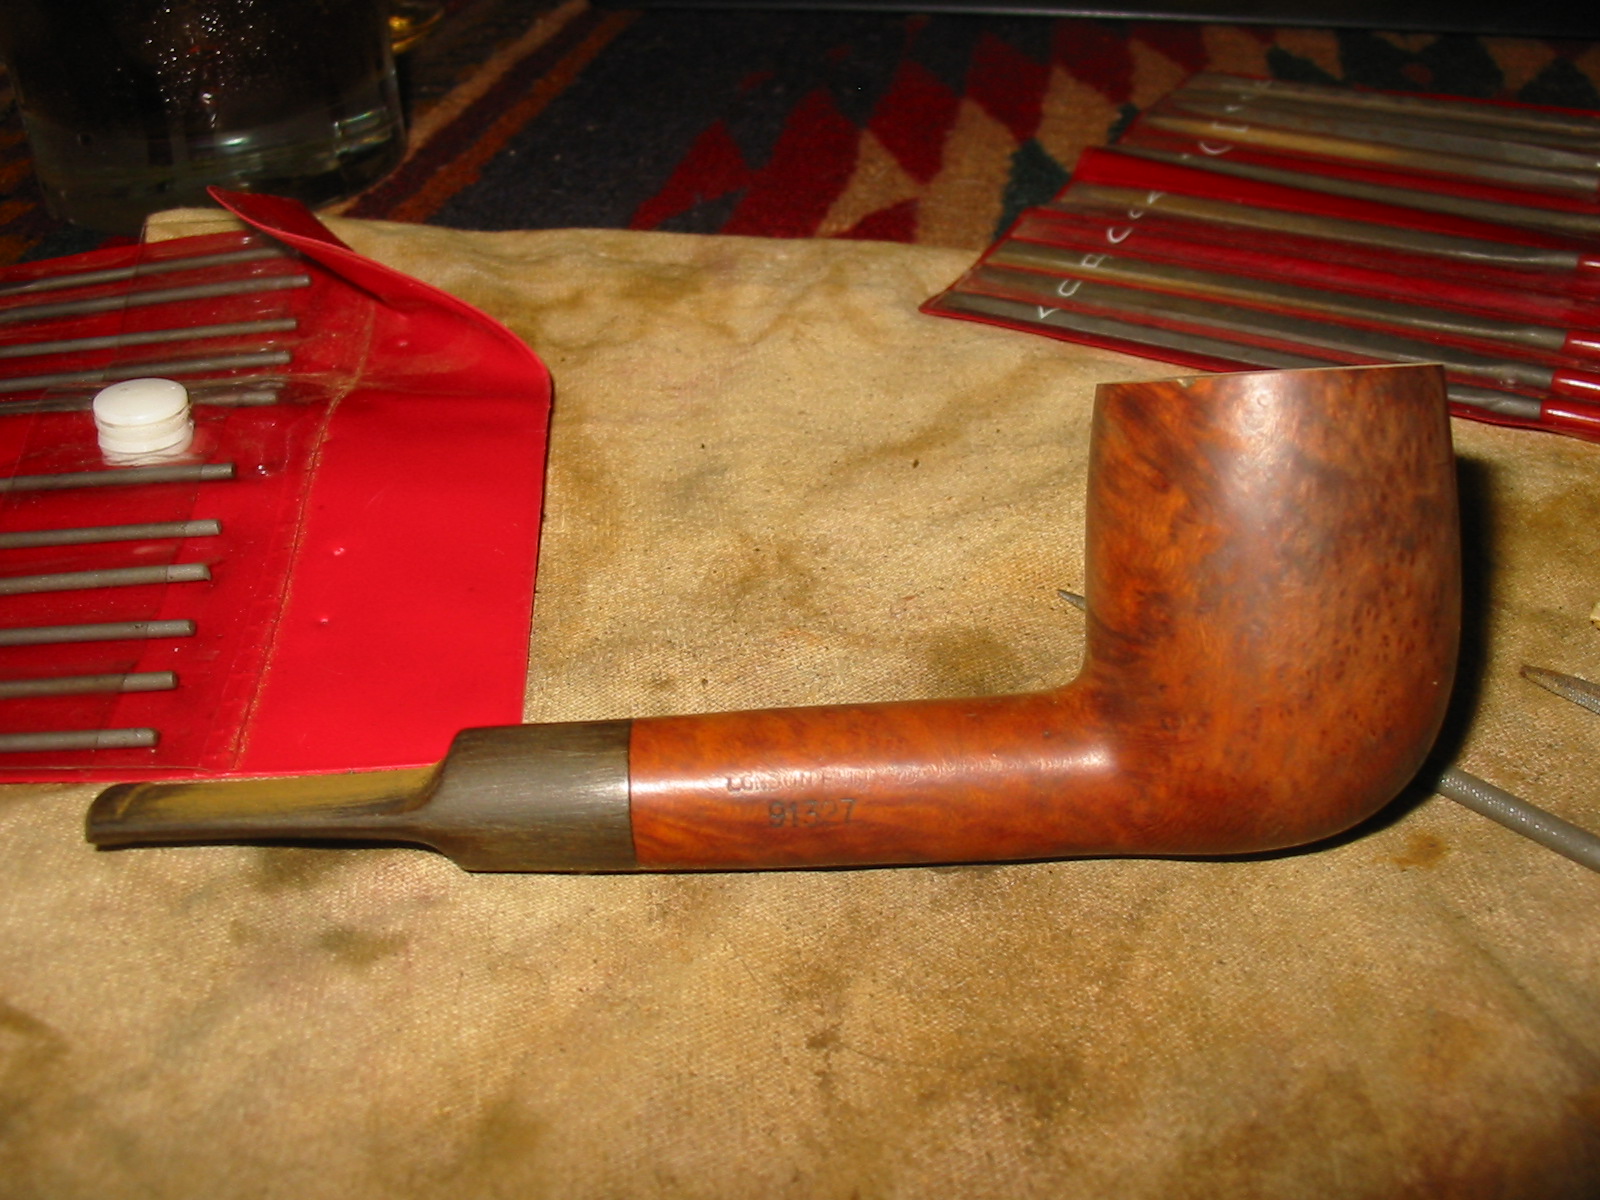
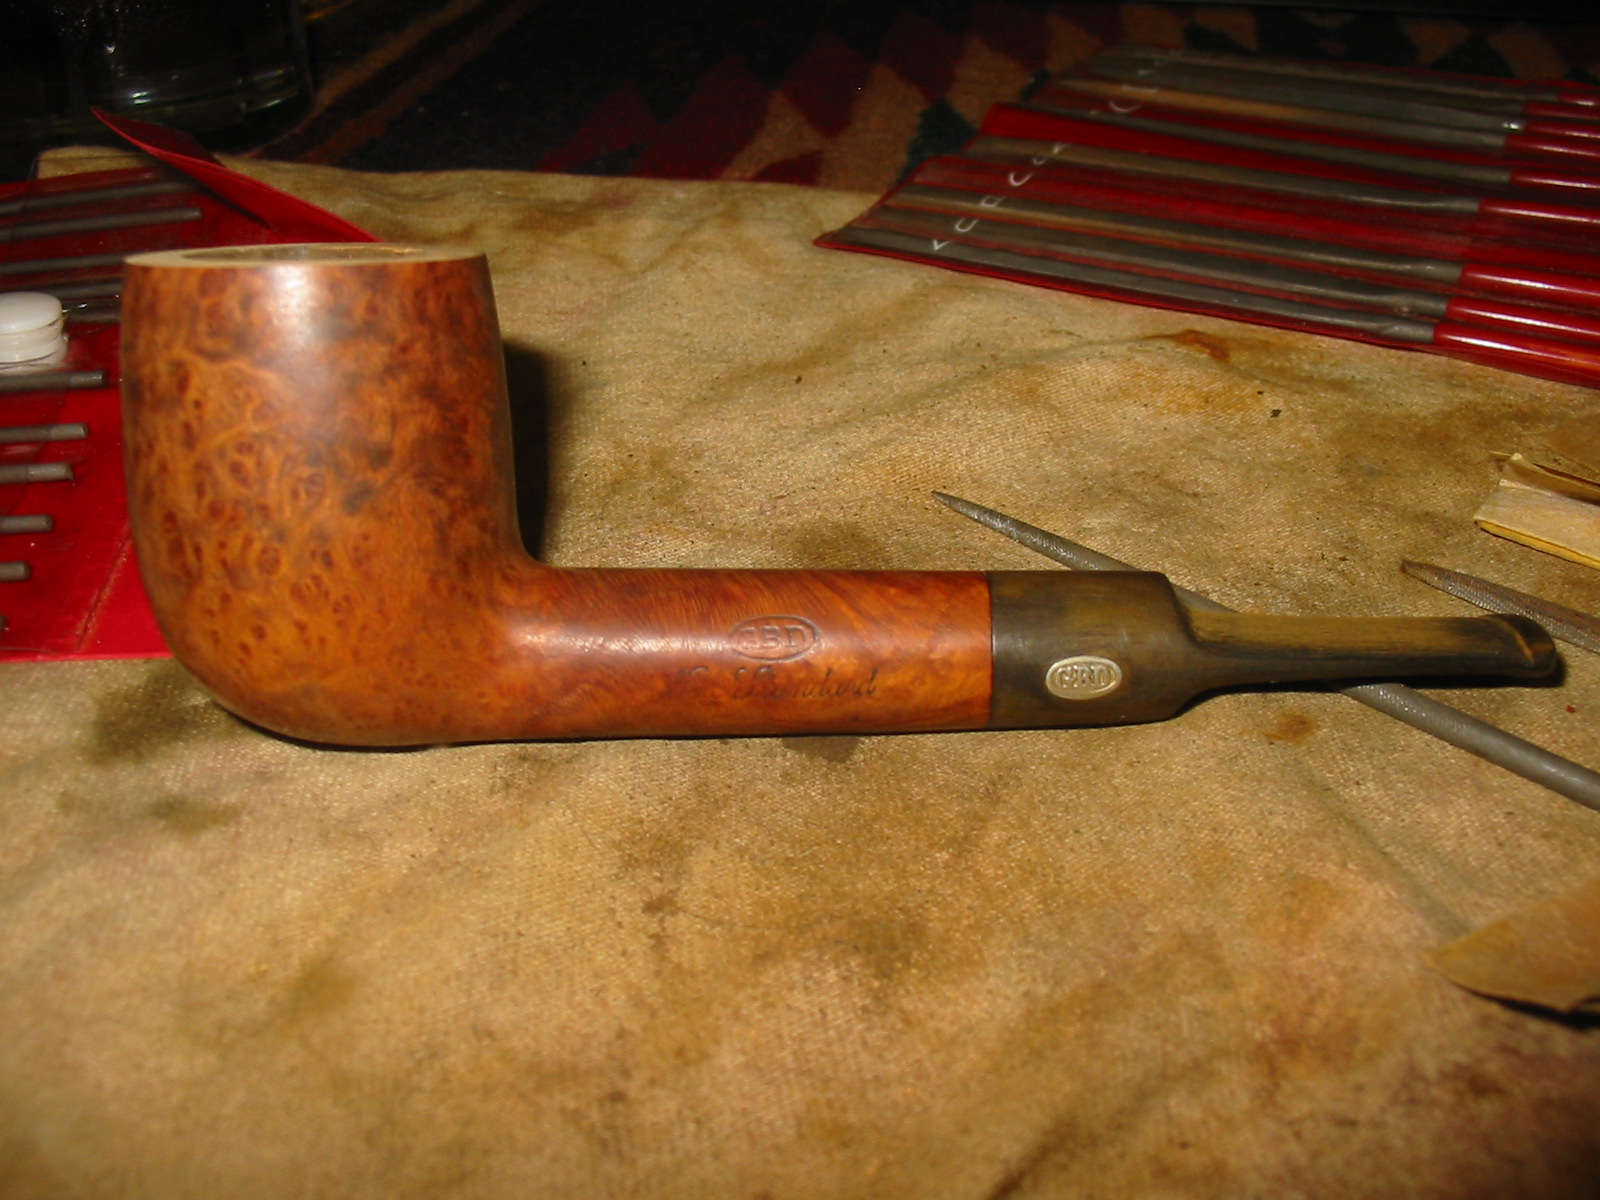
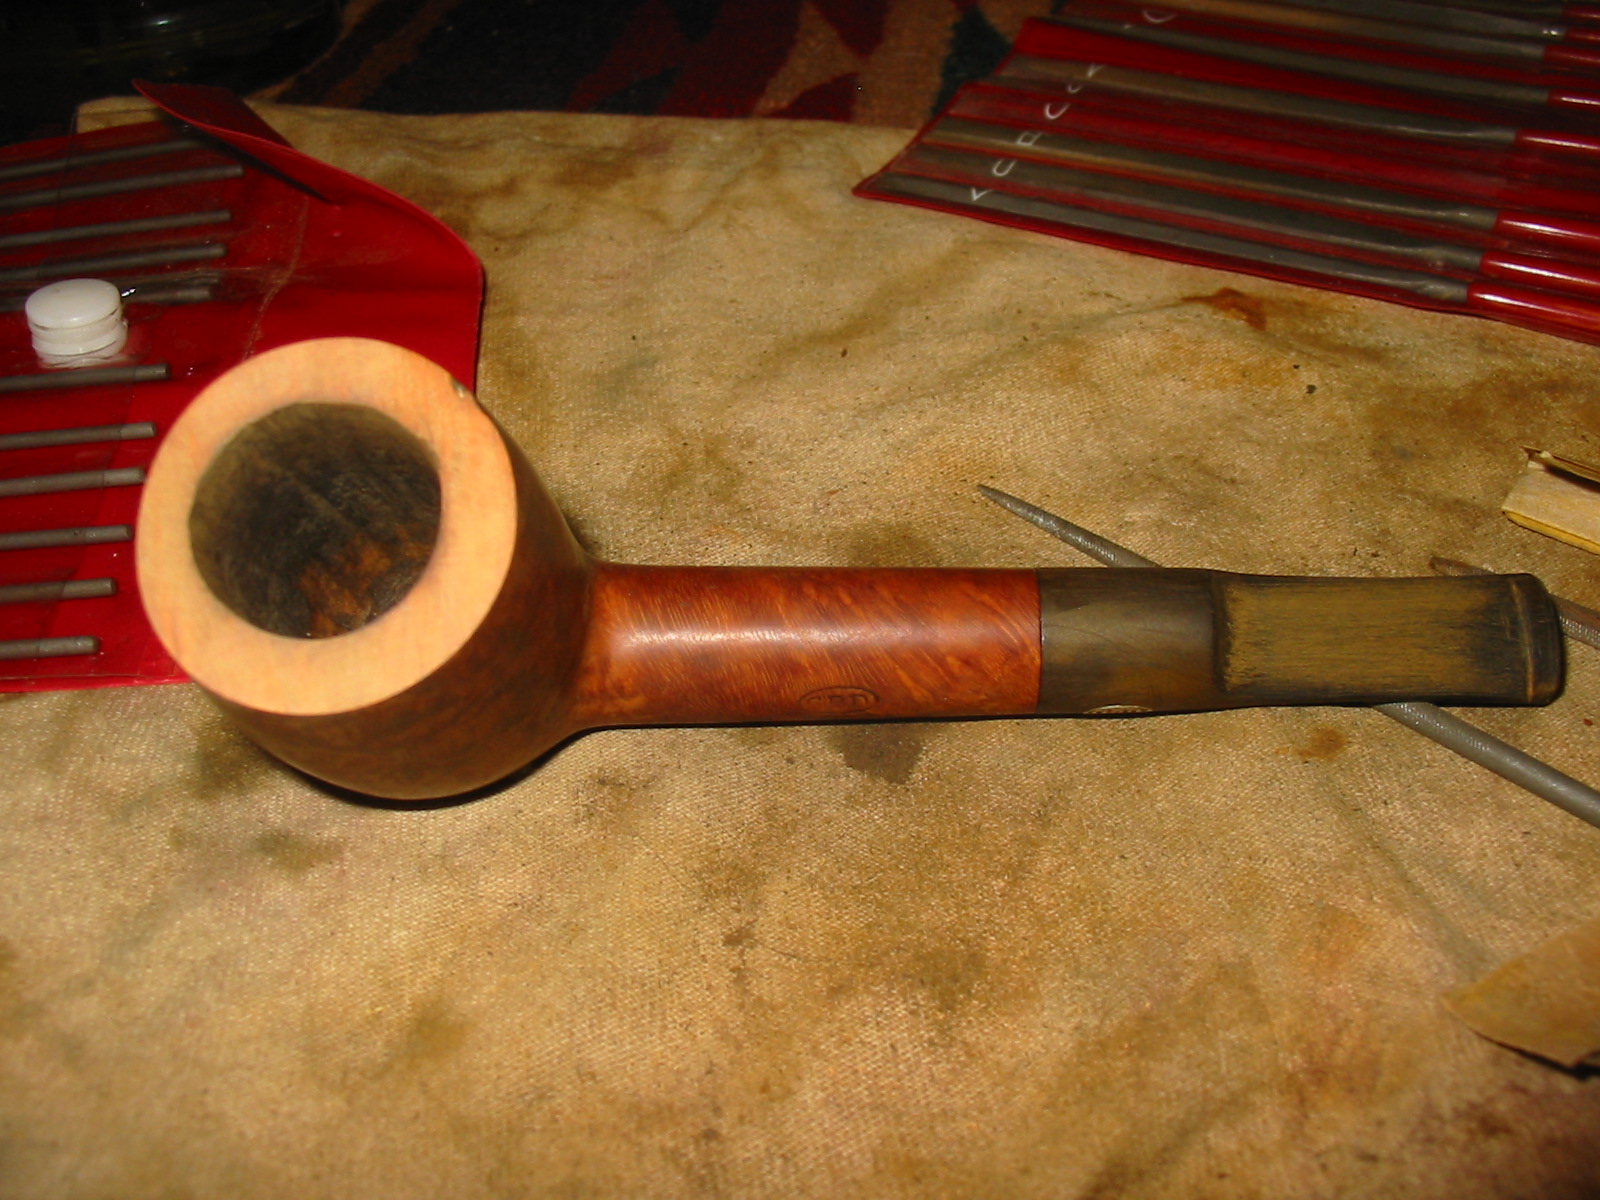
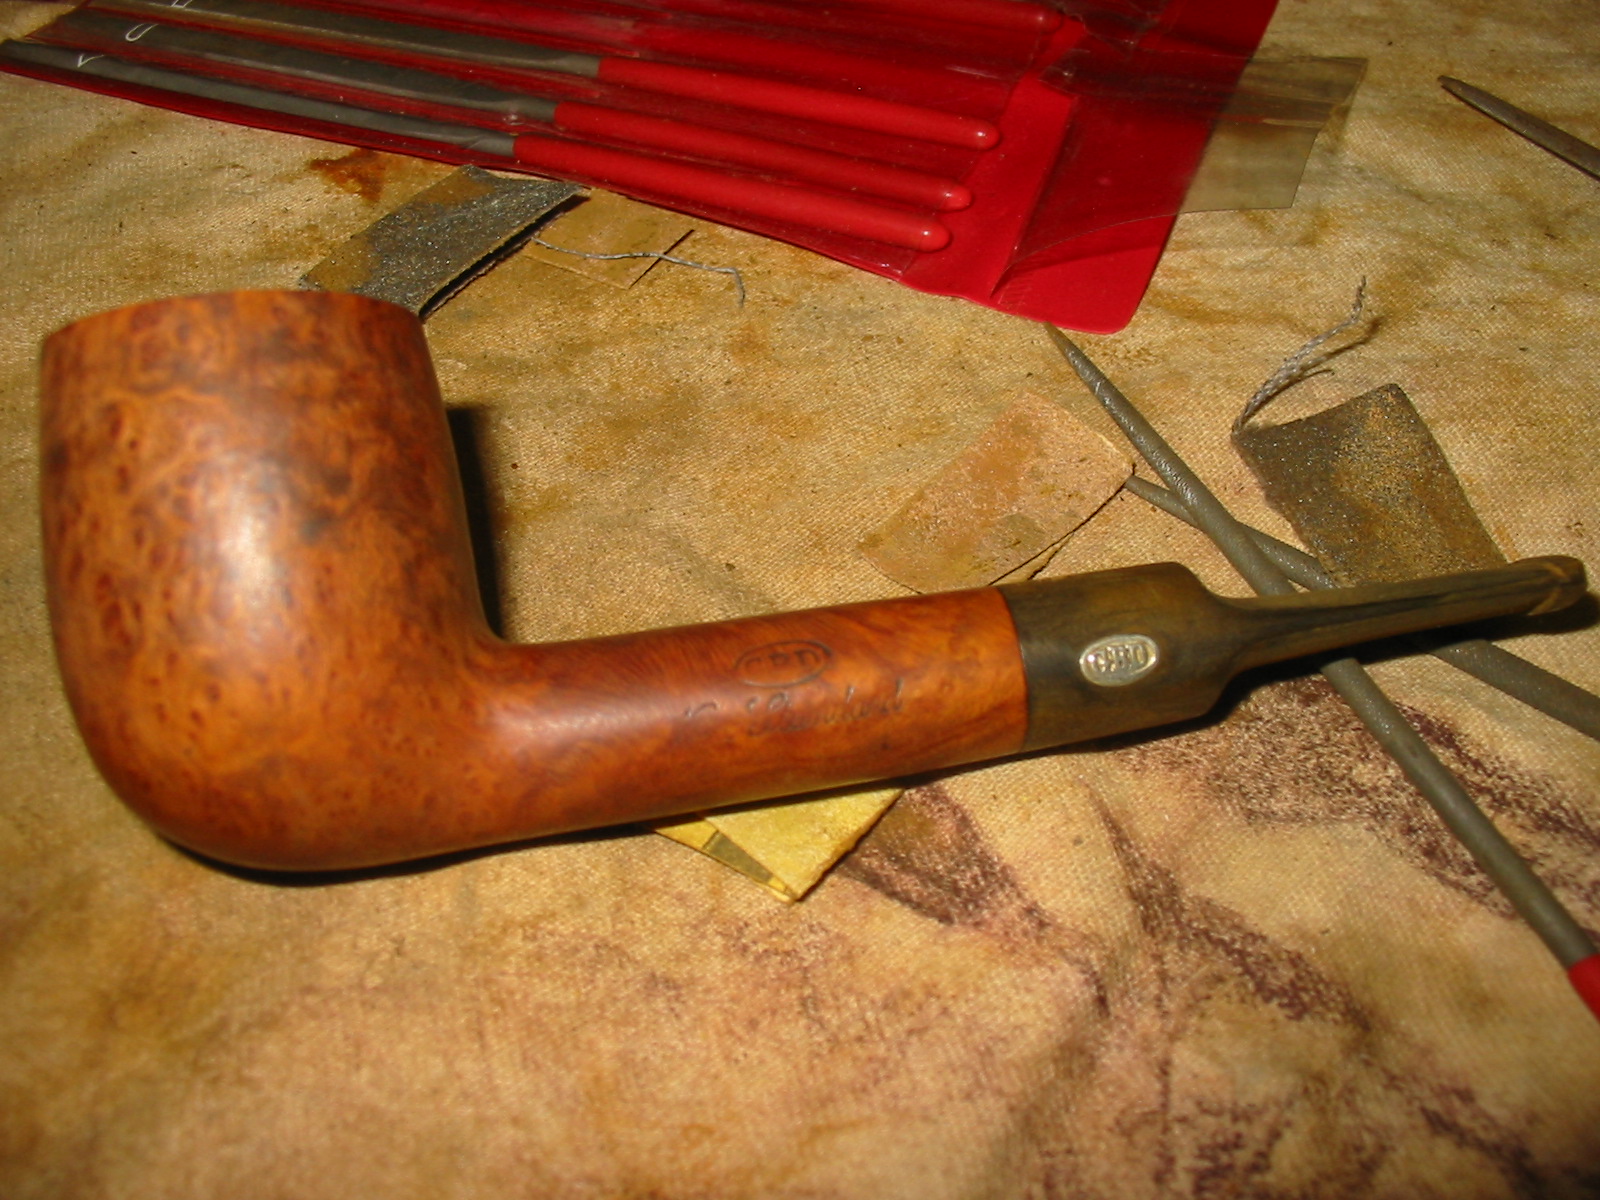
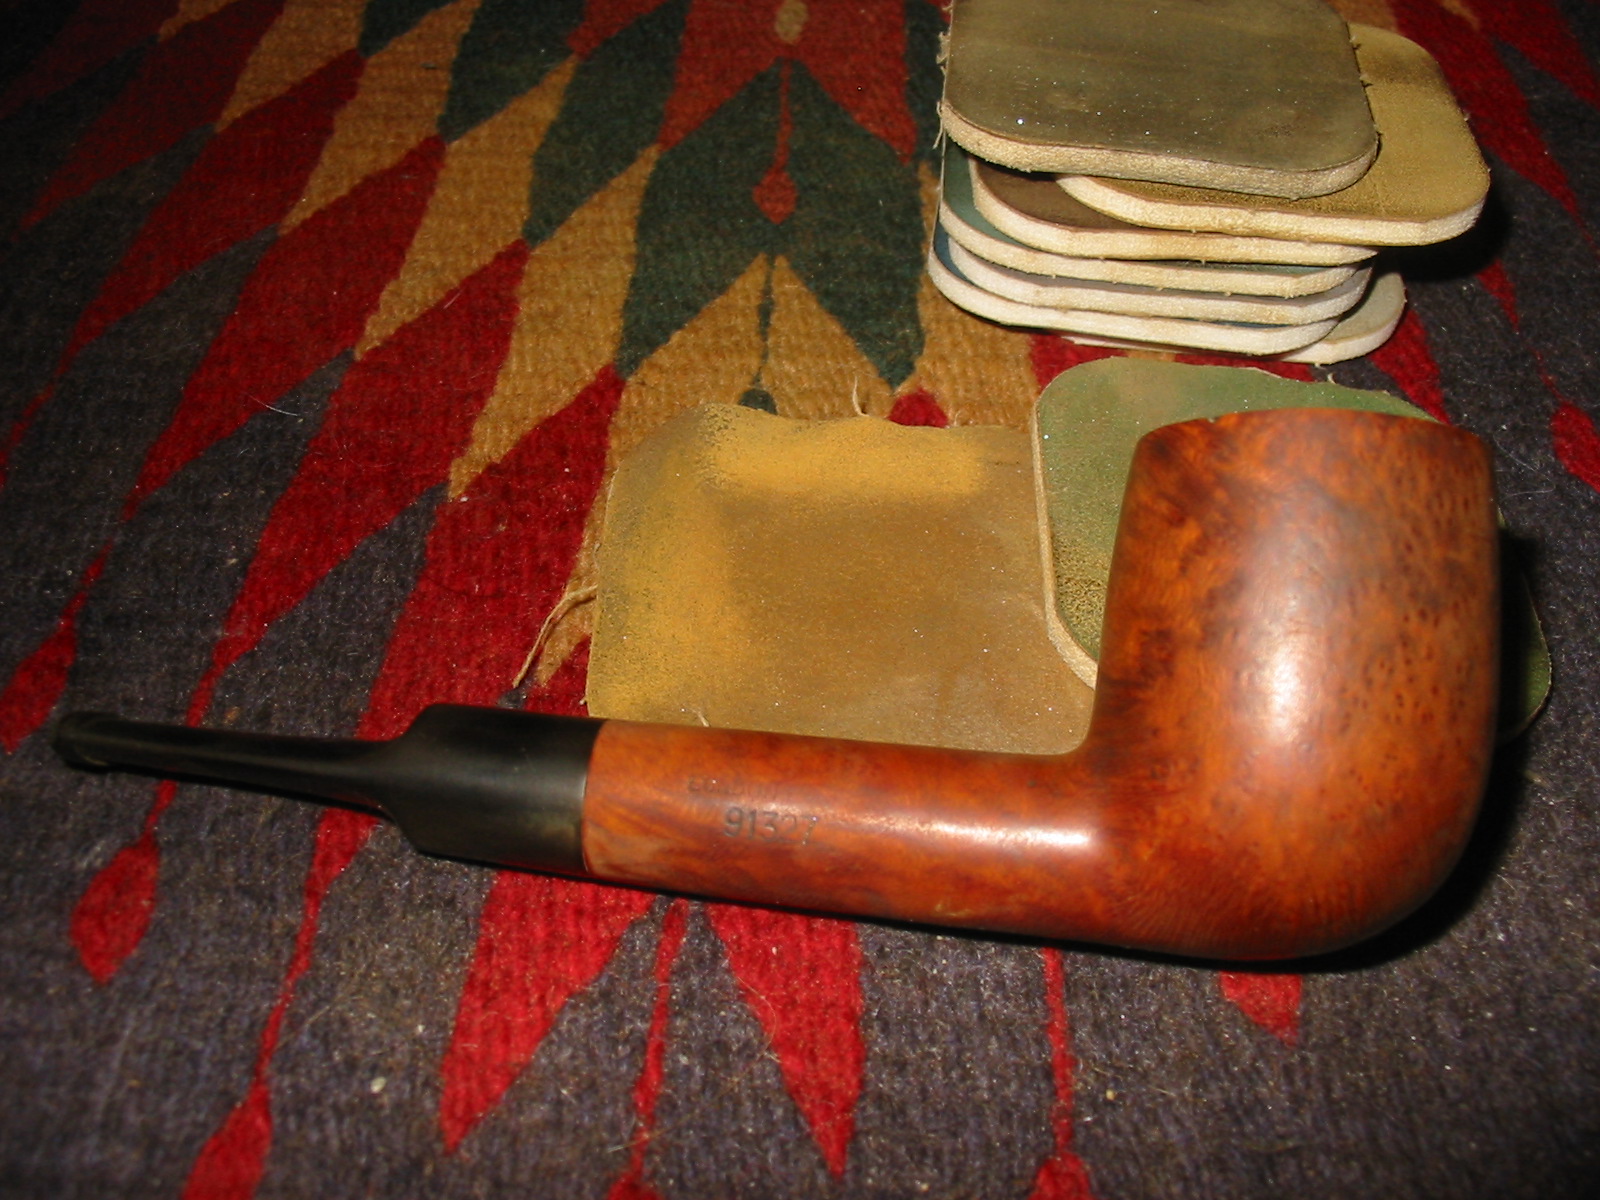
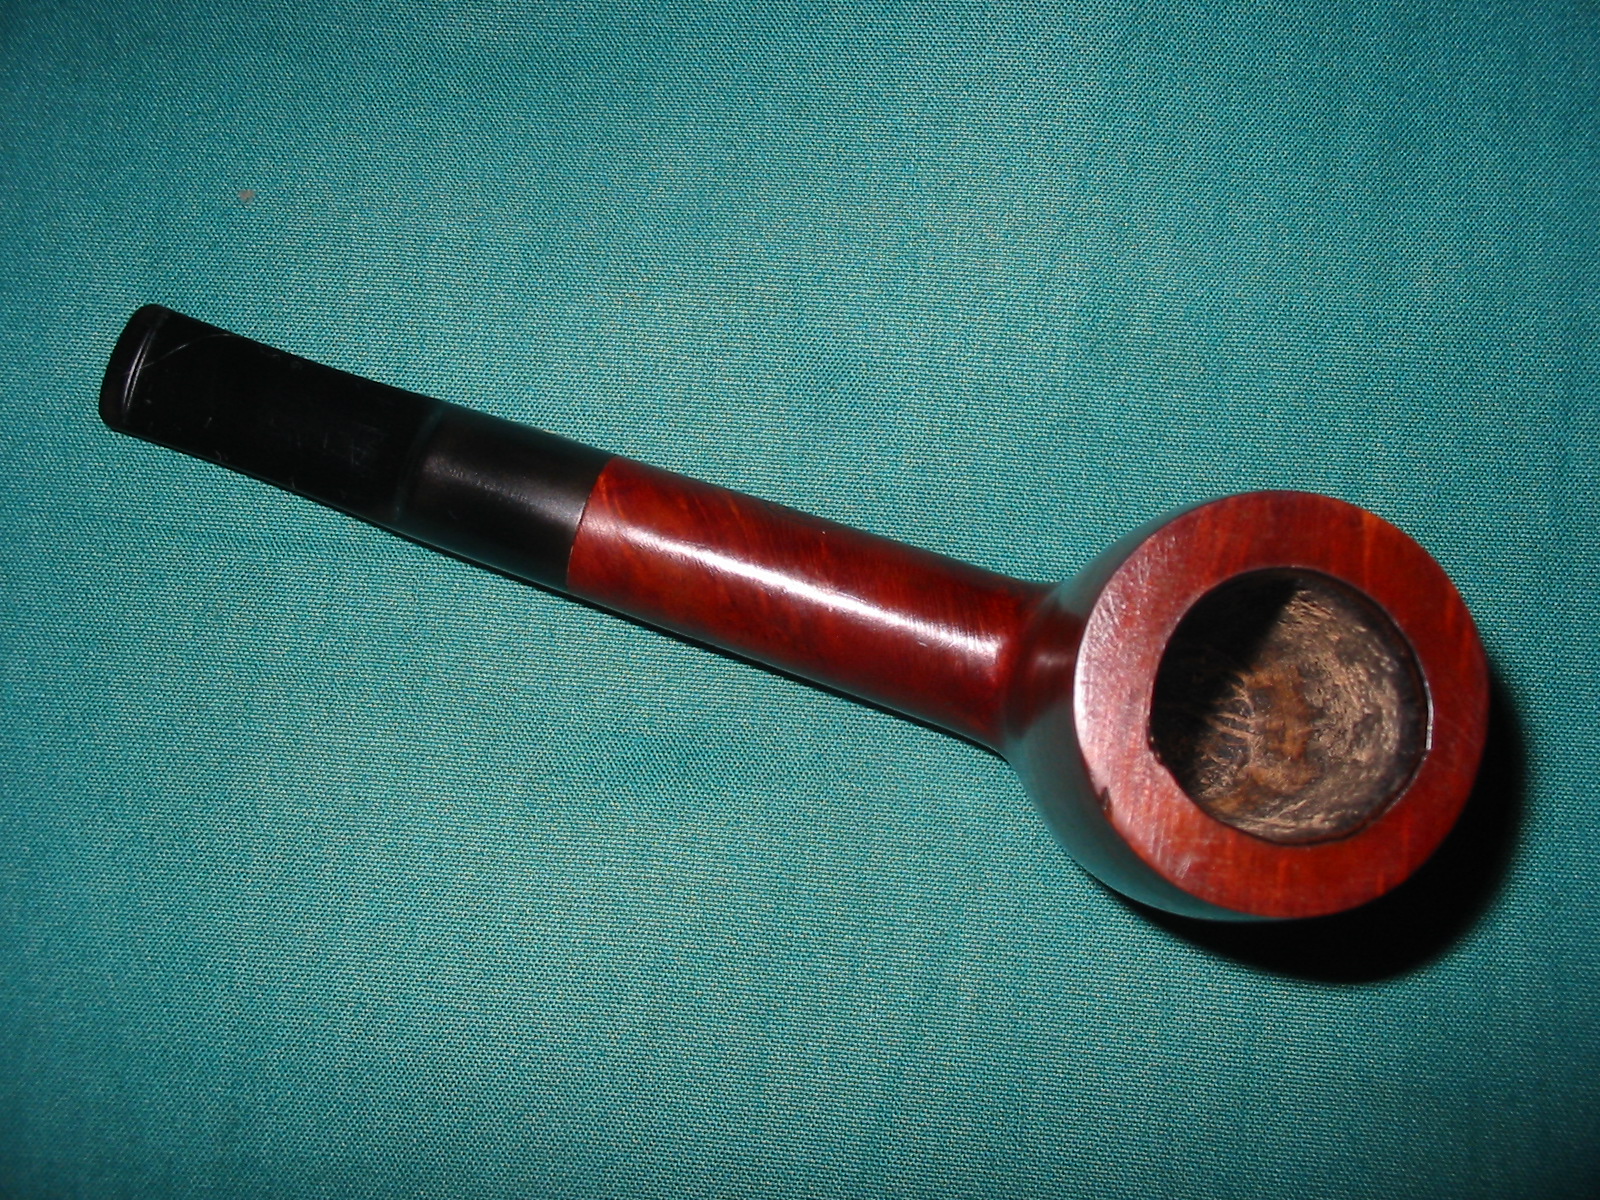
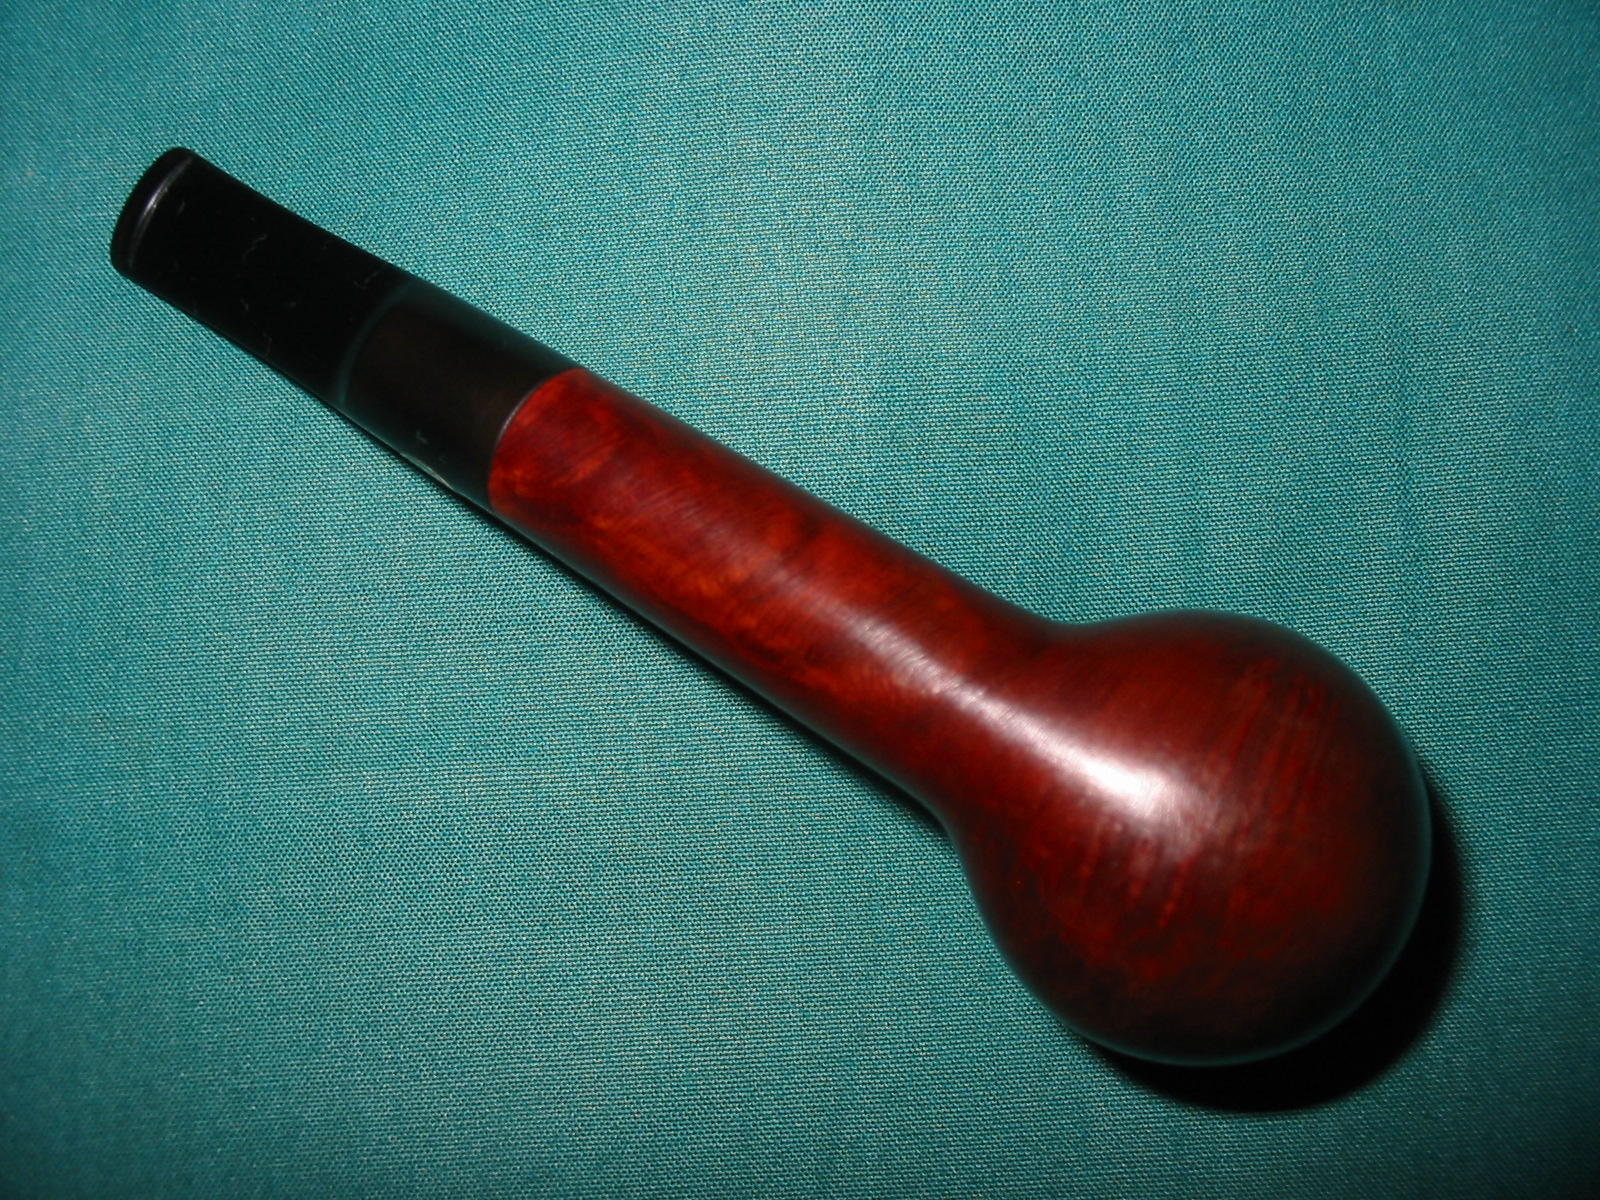
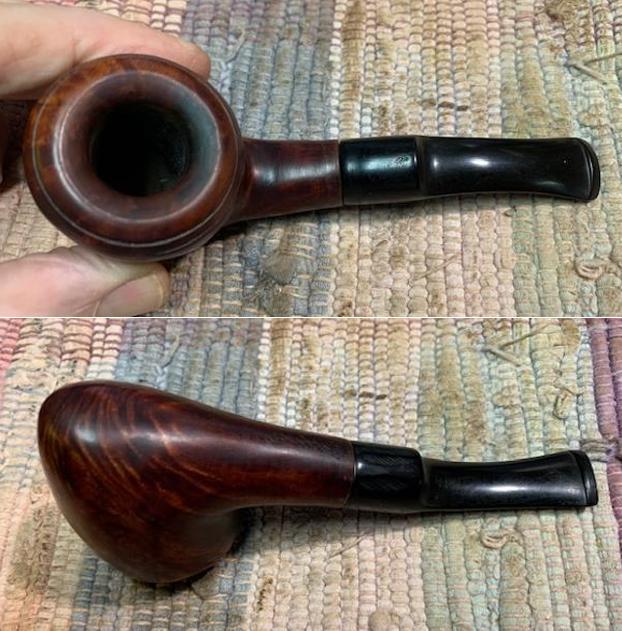
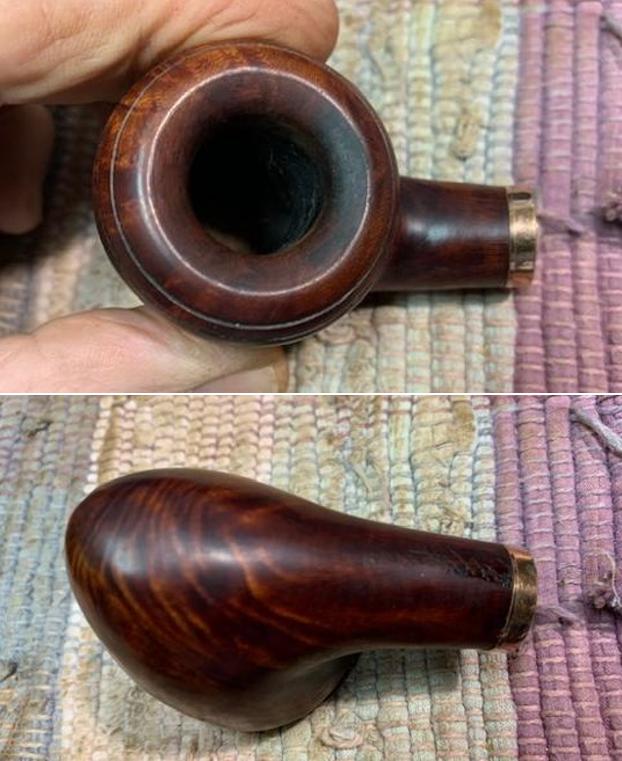
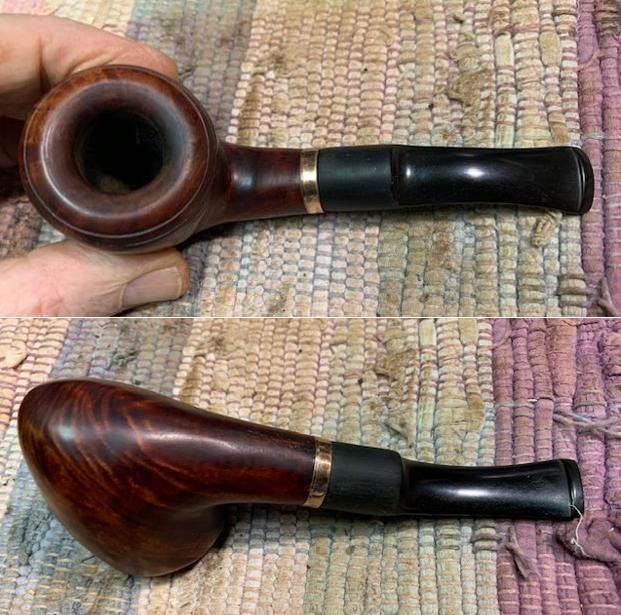
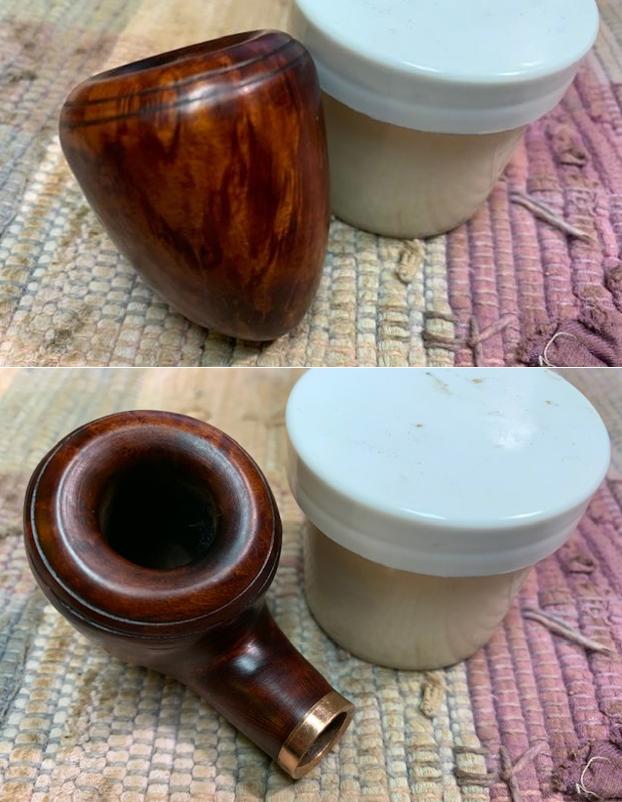
I took photos of the rim top and stem to show the general condition of the pipe. The bowl looked to be in good condition. There was some darkening and lava build up on the top back of the rim. I also took photos of the stem to show the cut marks and fill marks on the surface of the saddle.    I took some photos of the rough looking finish on the stem, its fit to the shank and the crack in underside of the shank.
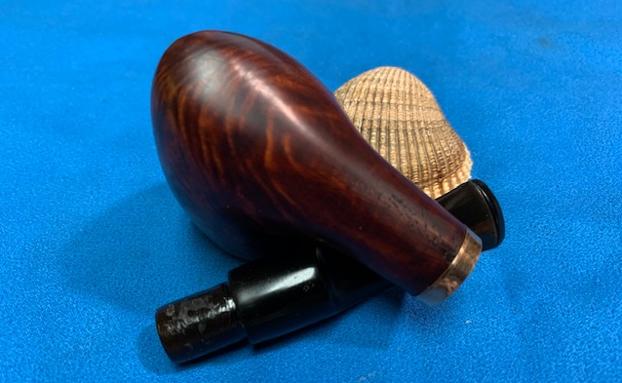
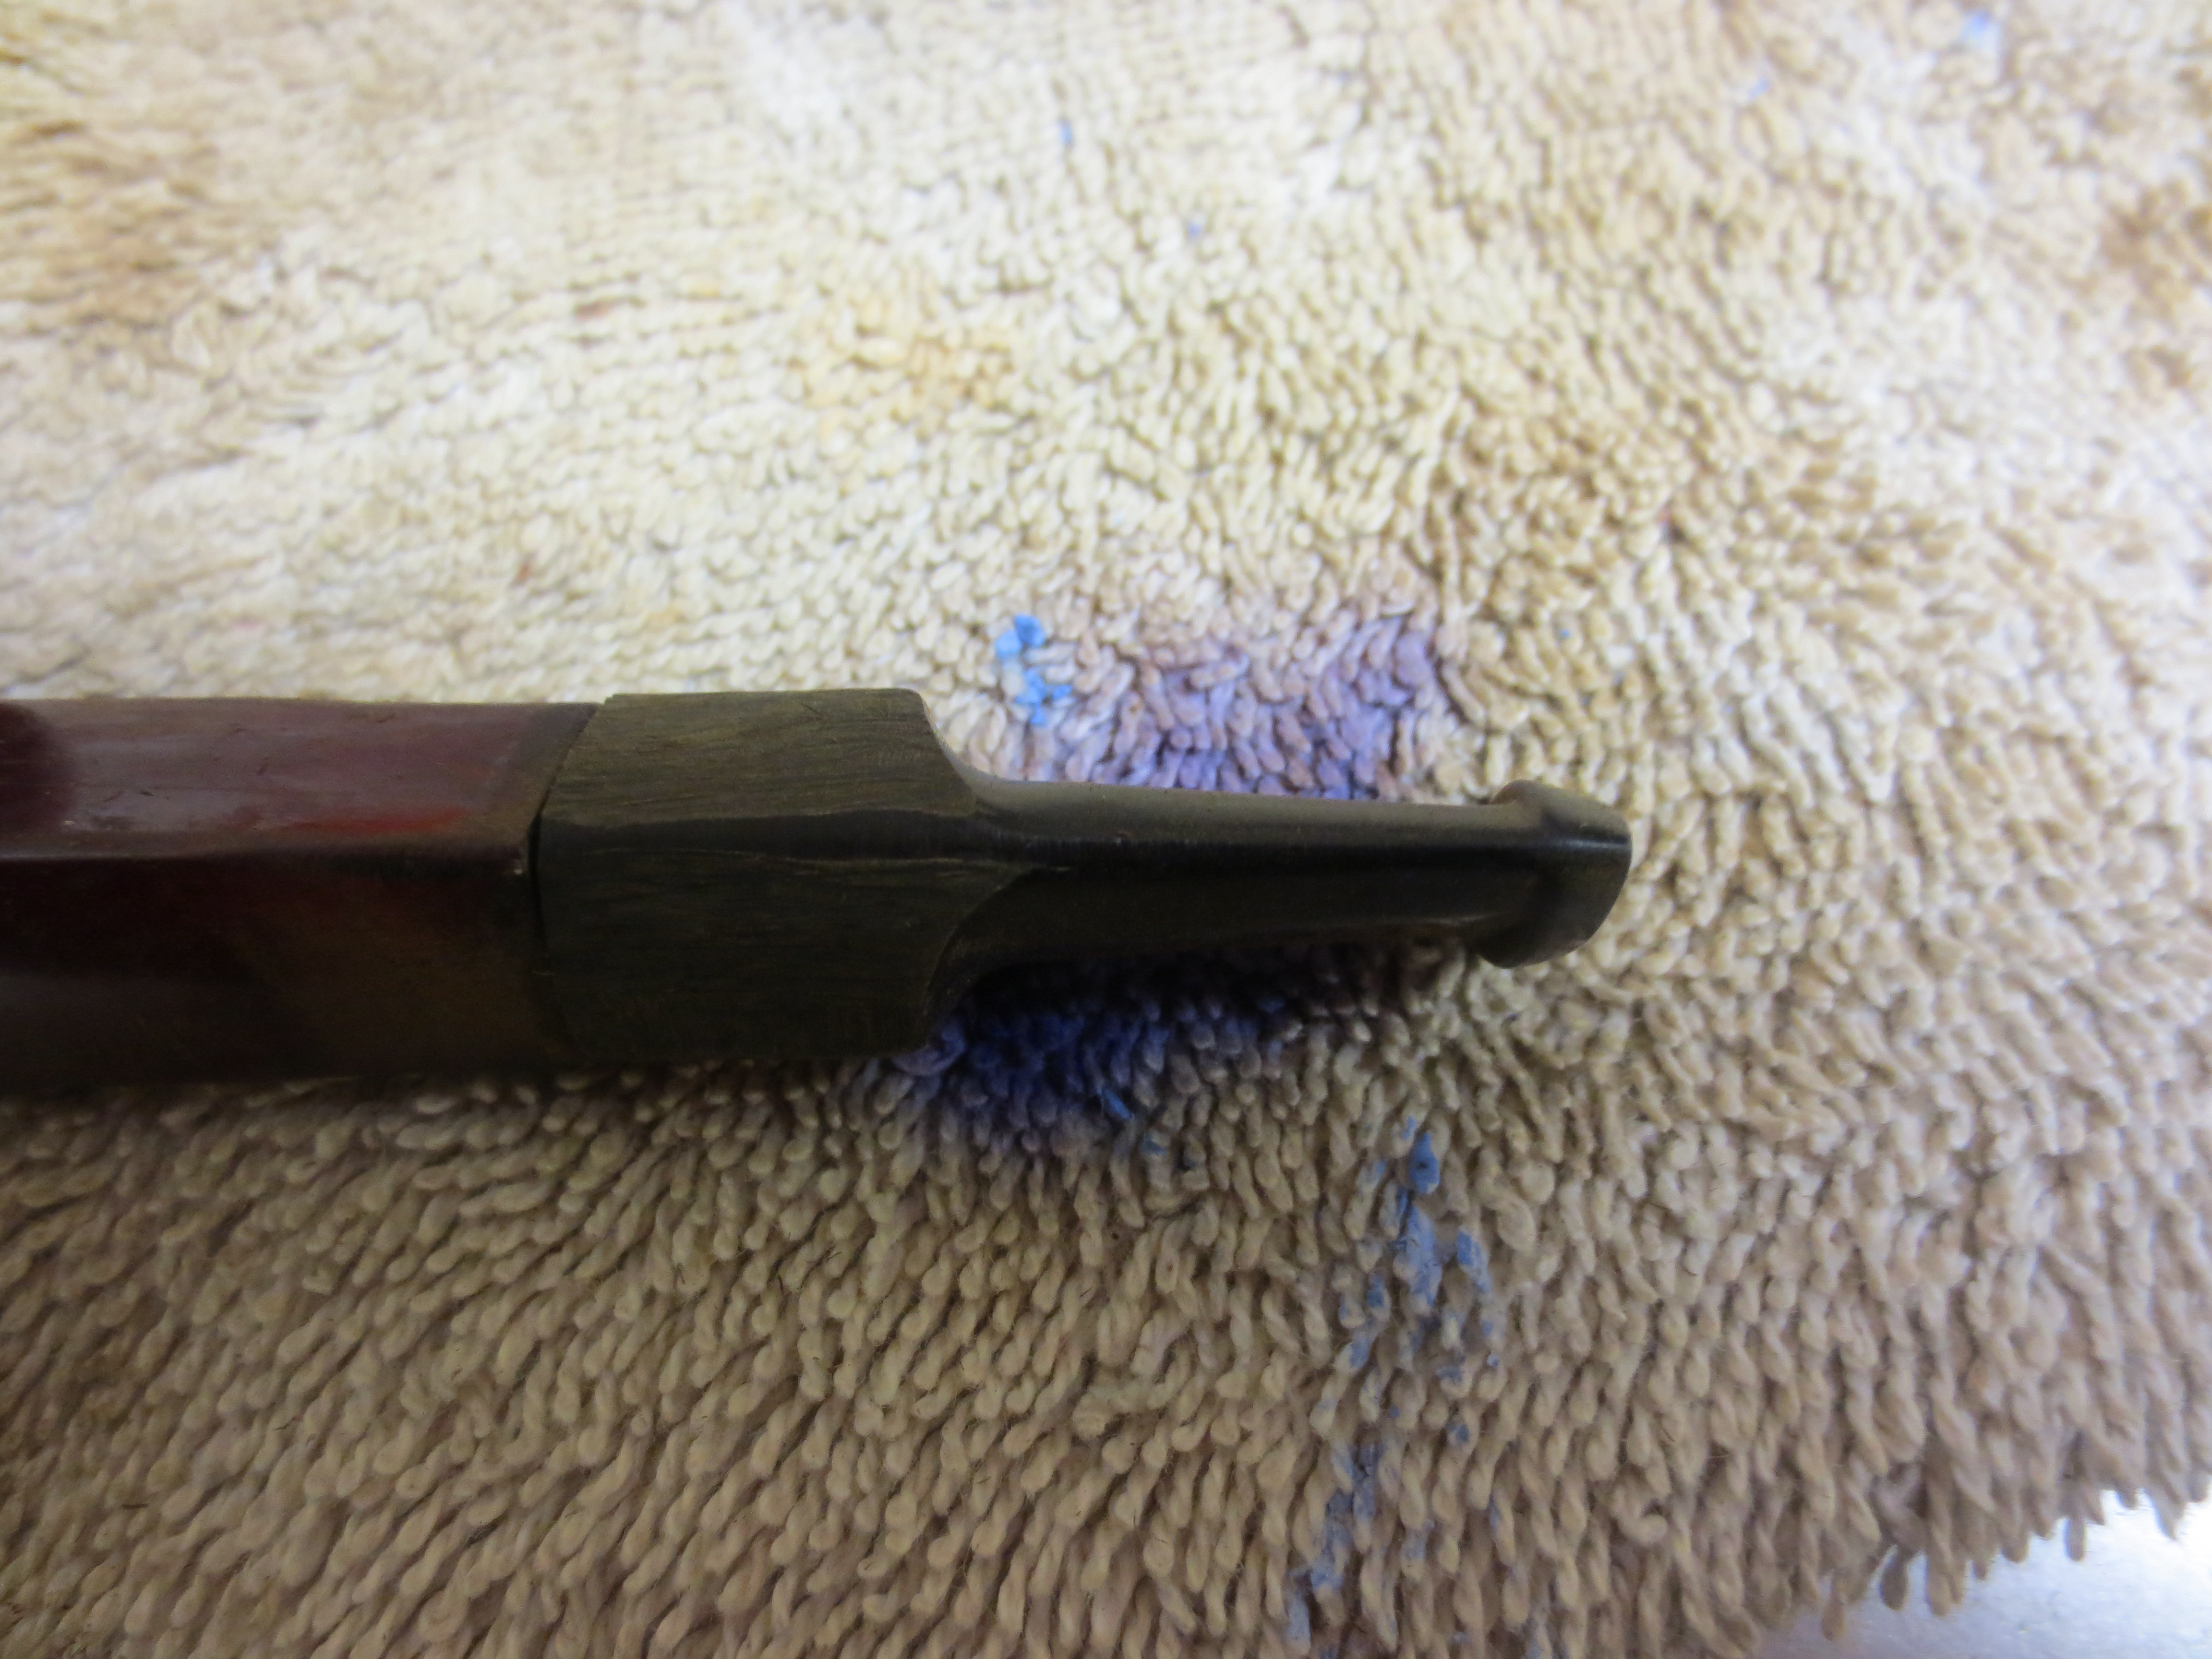
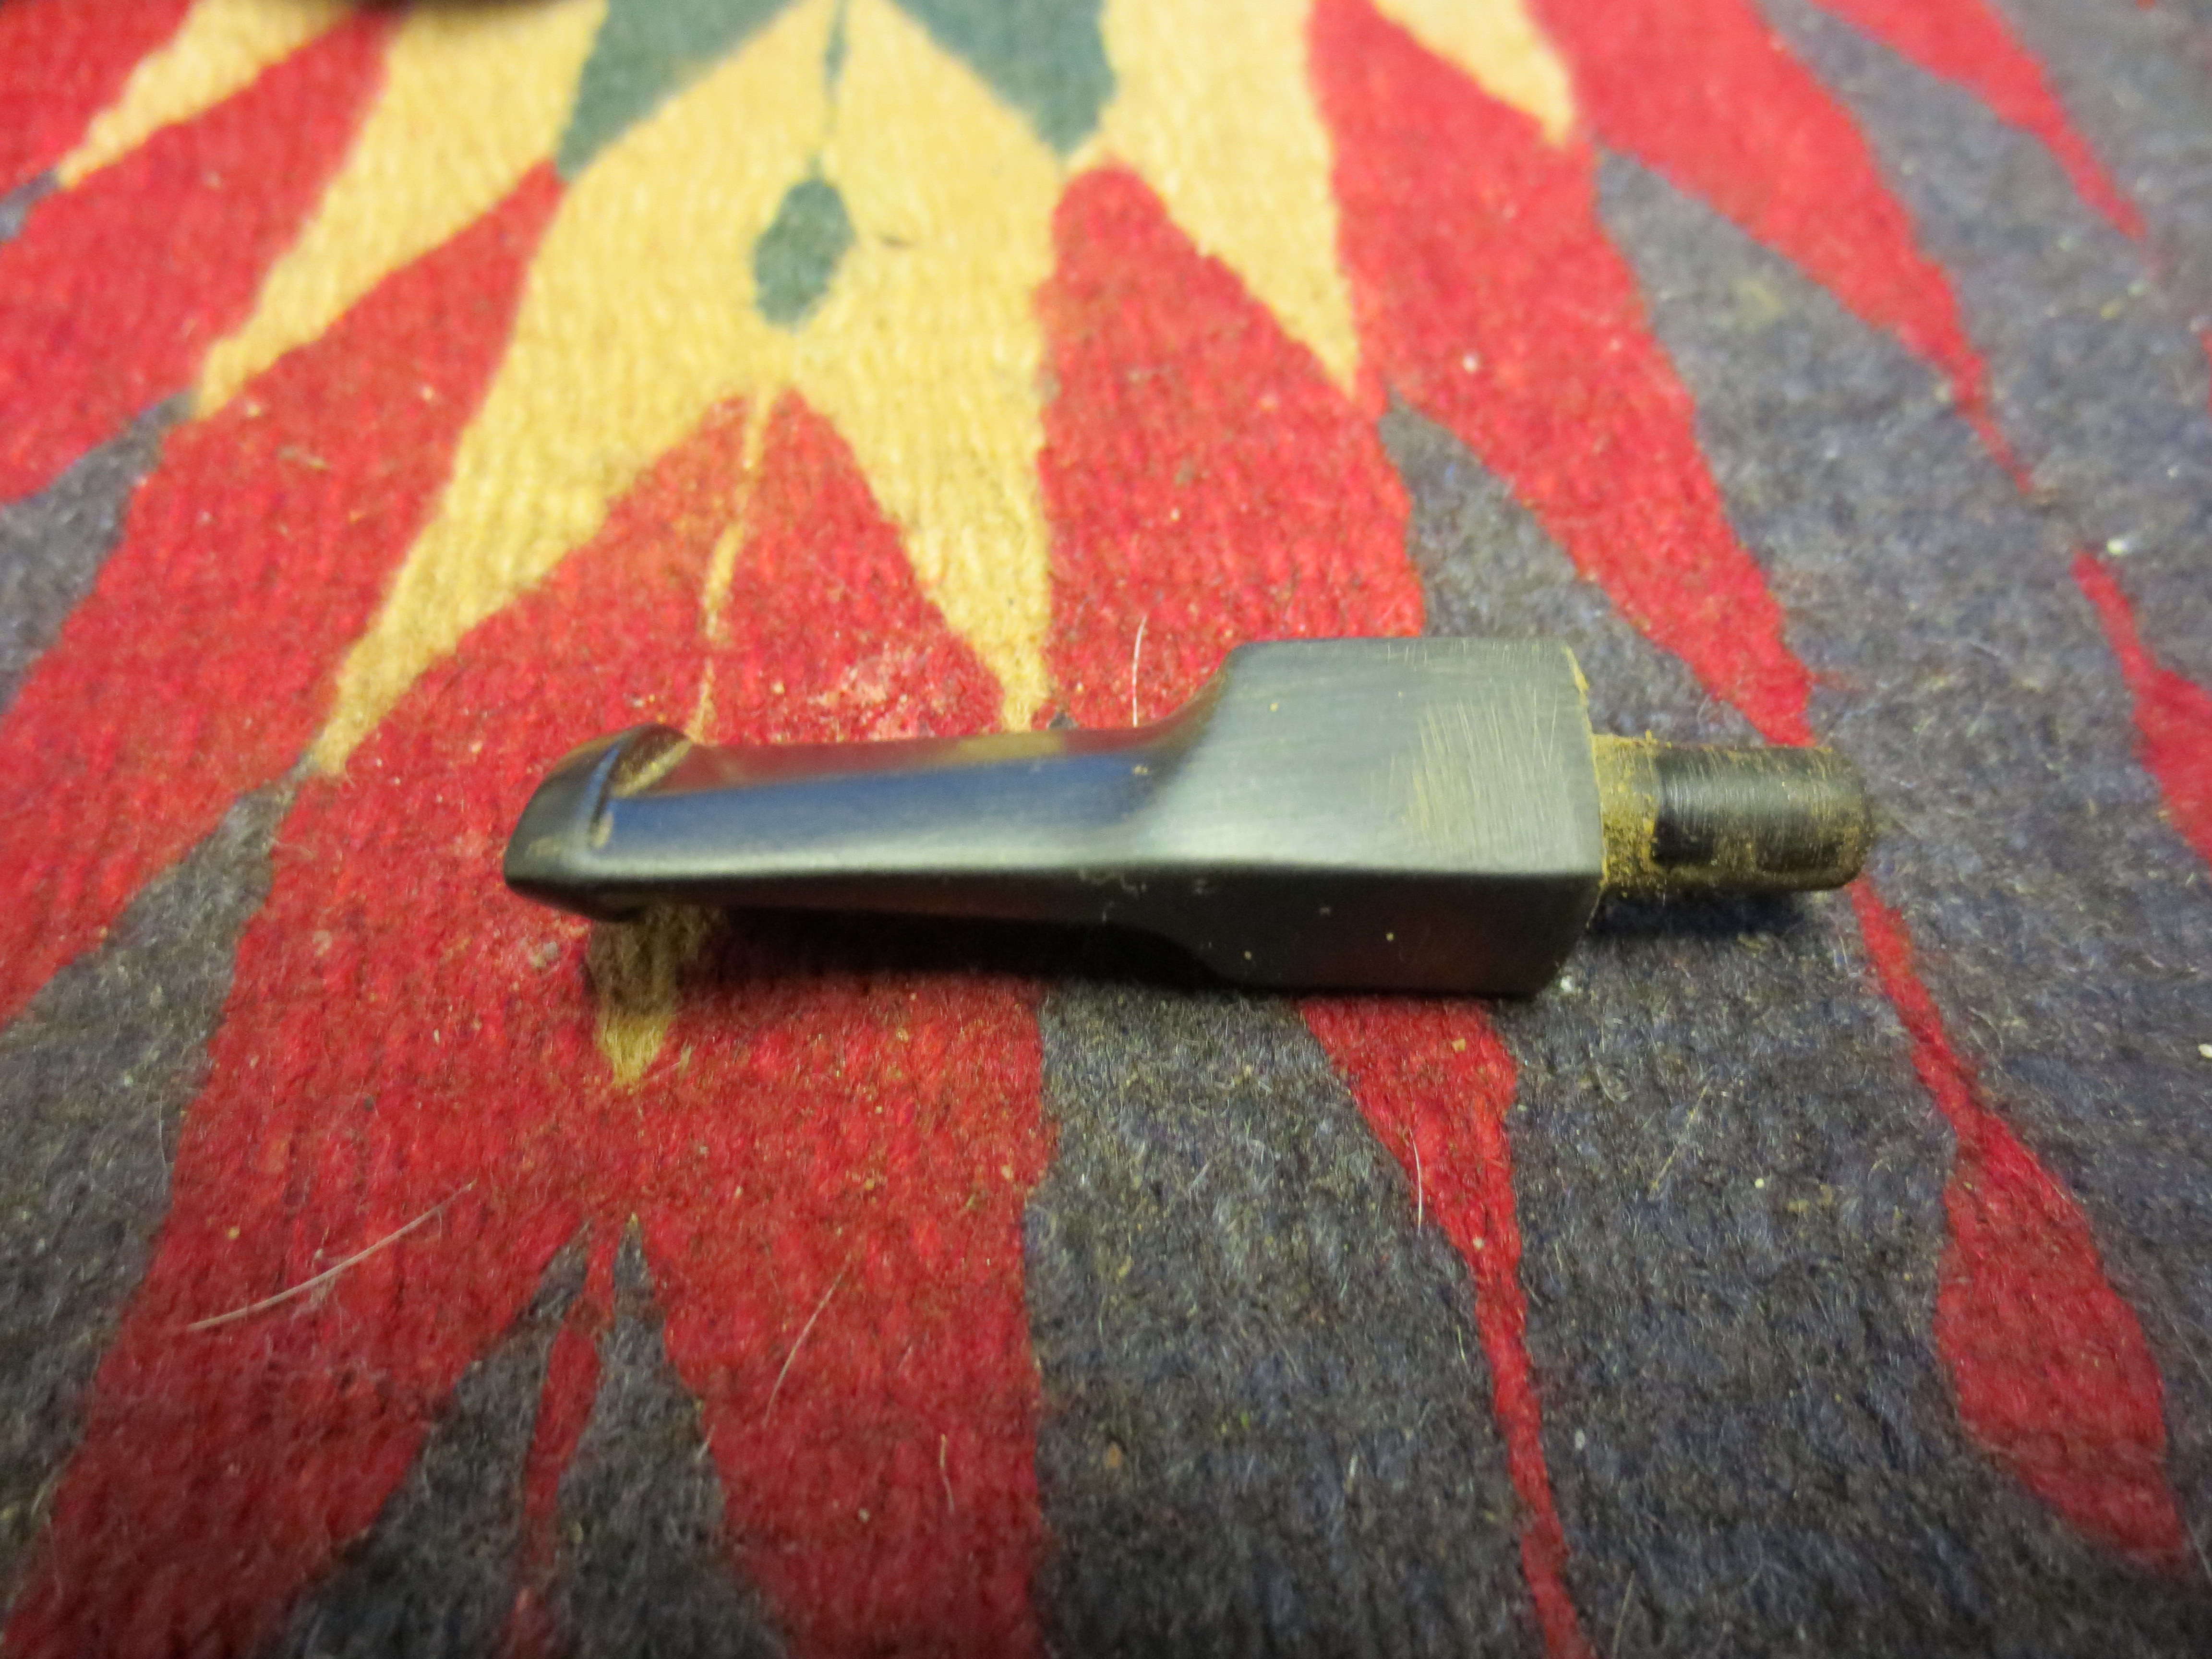
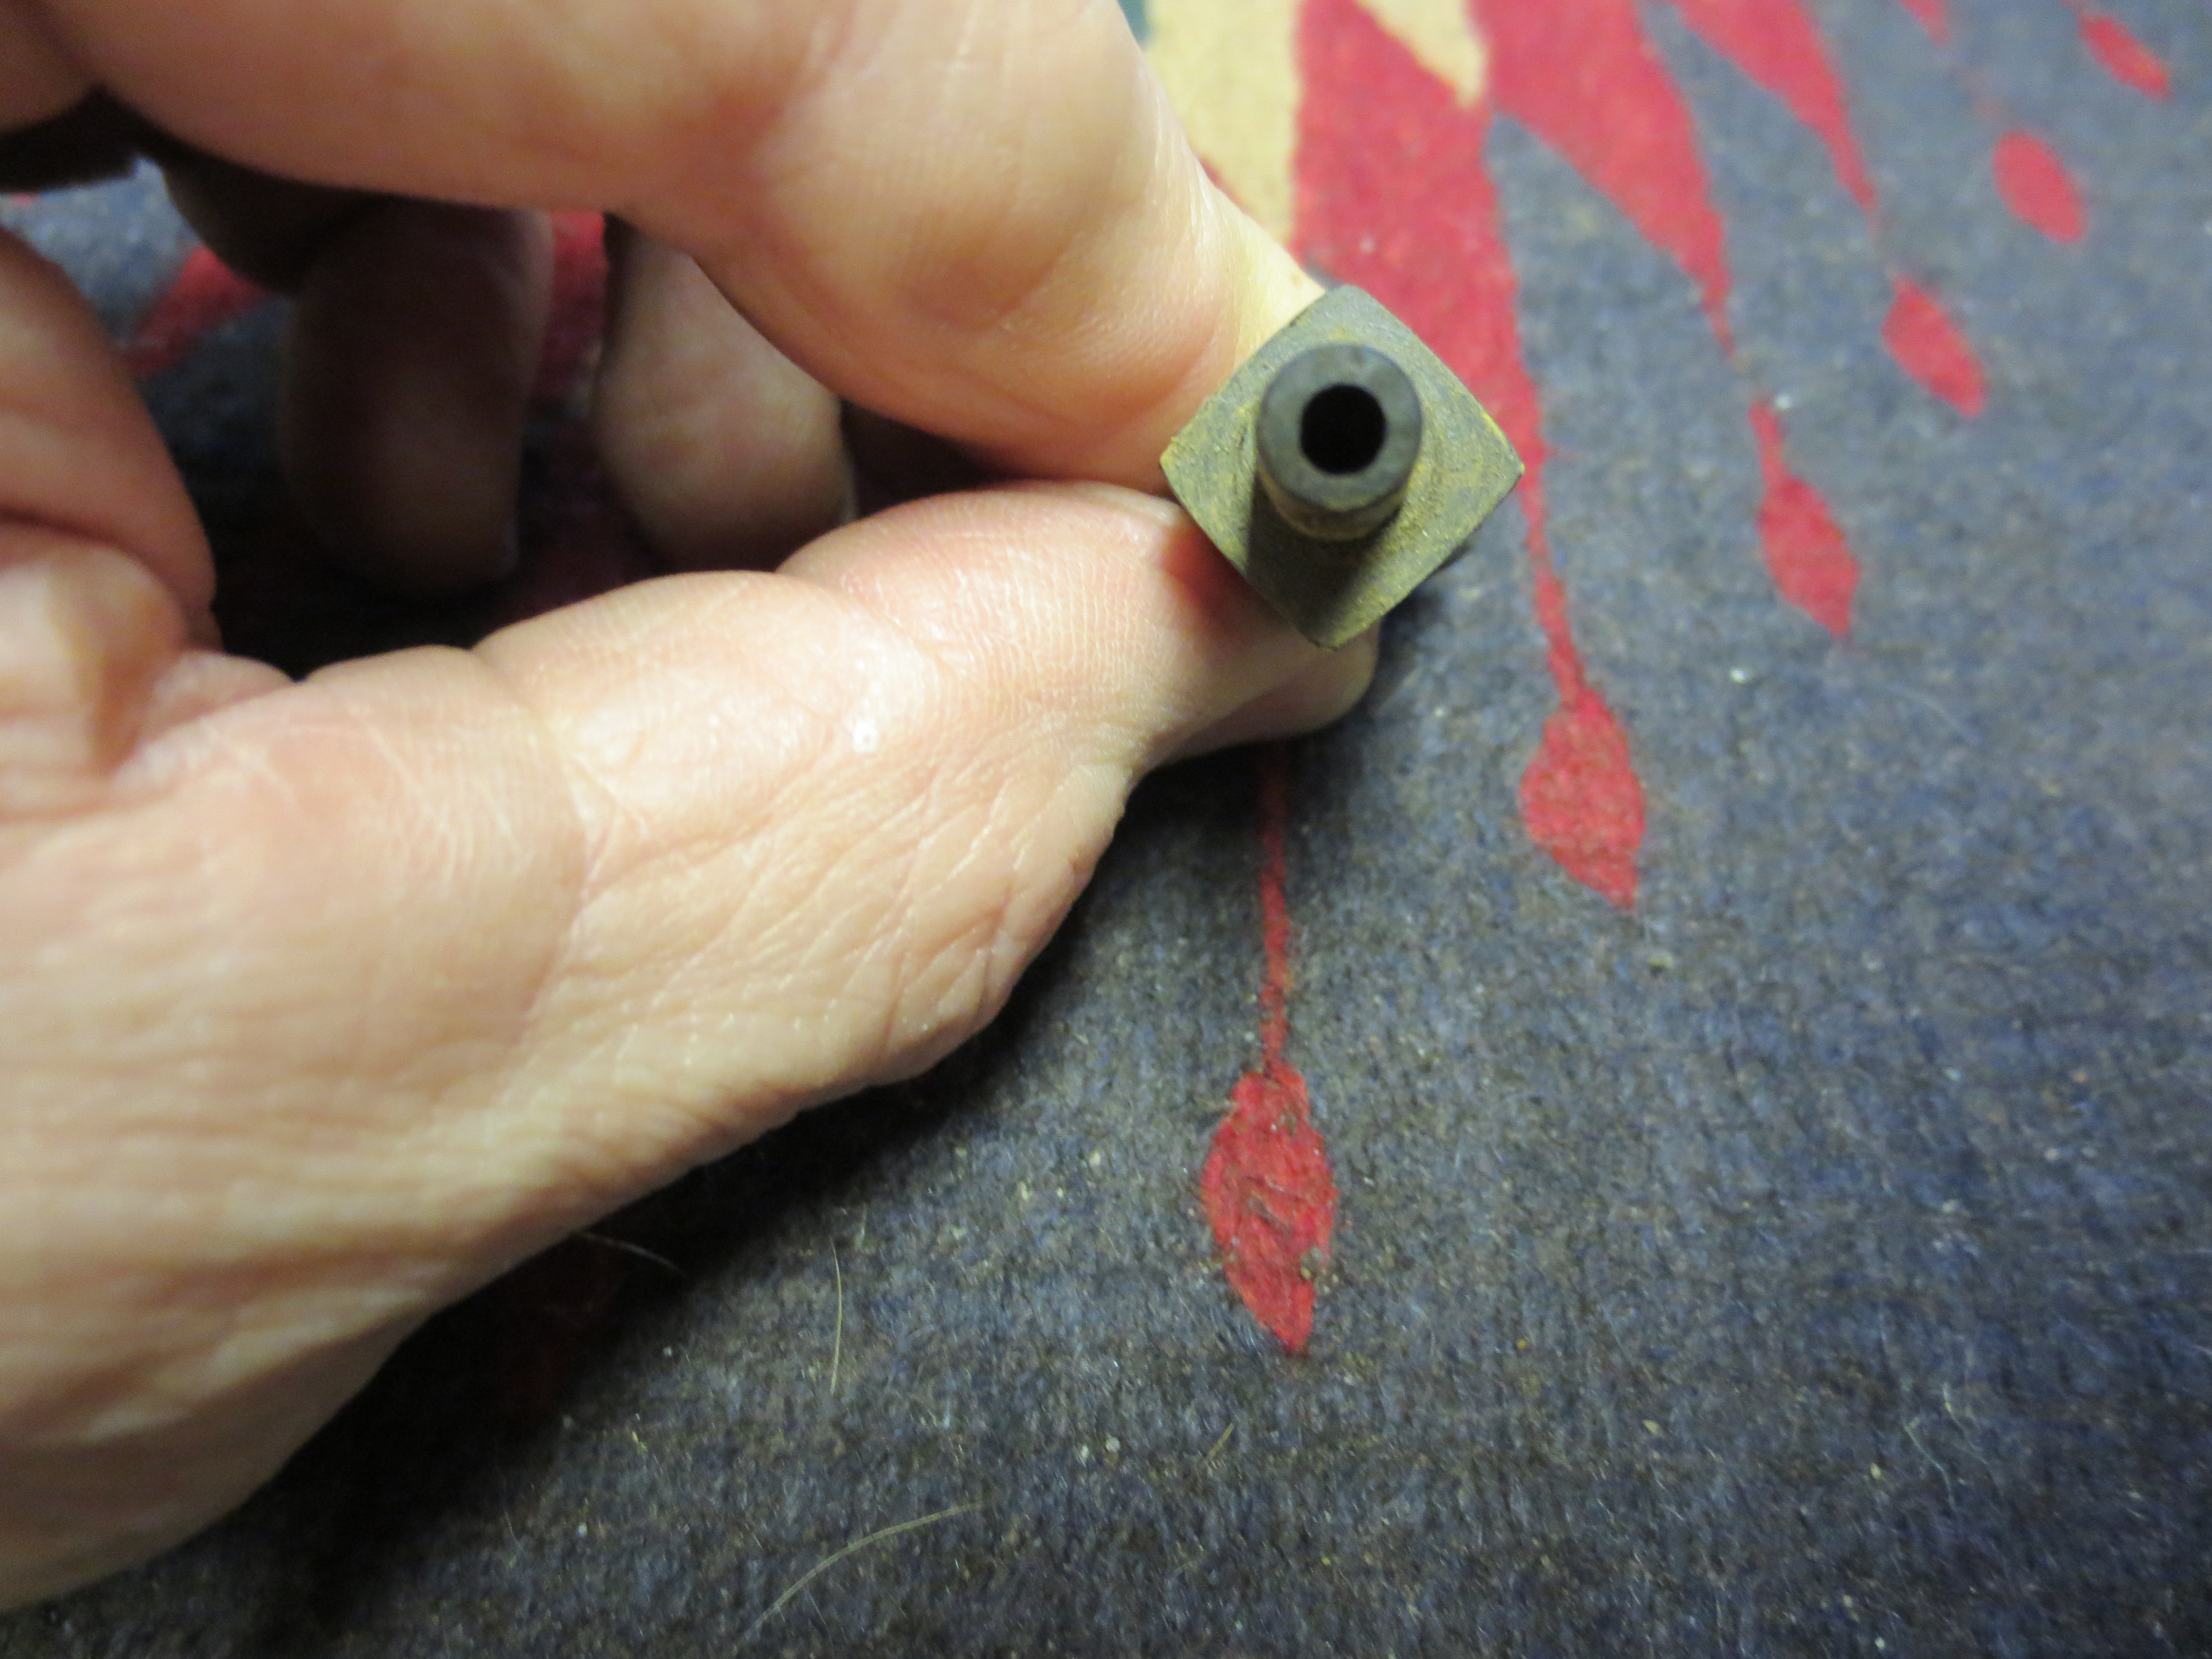
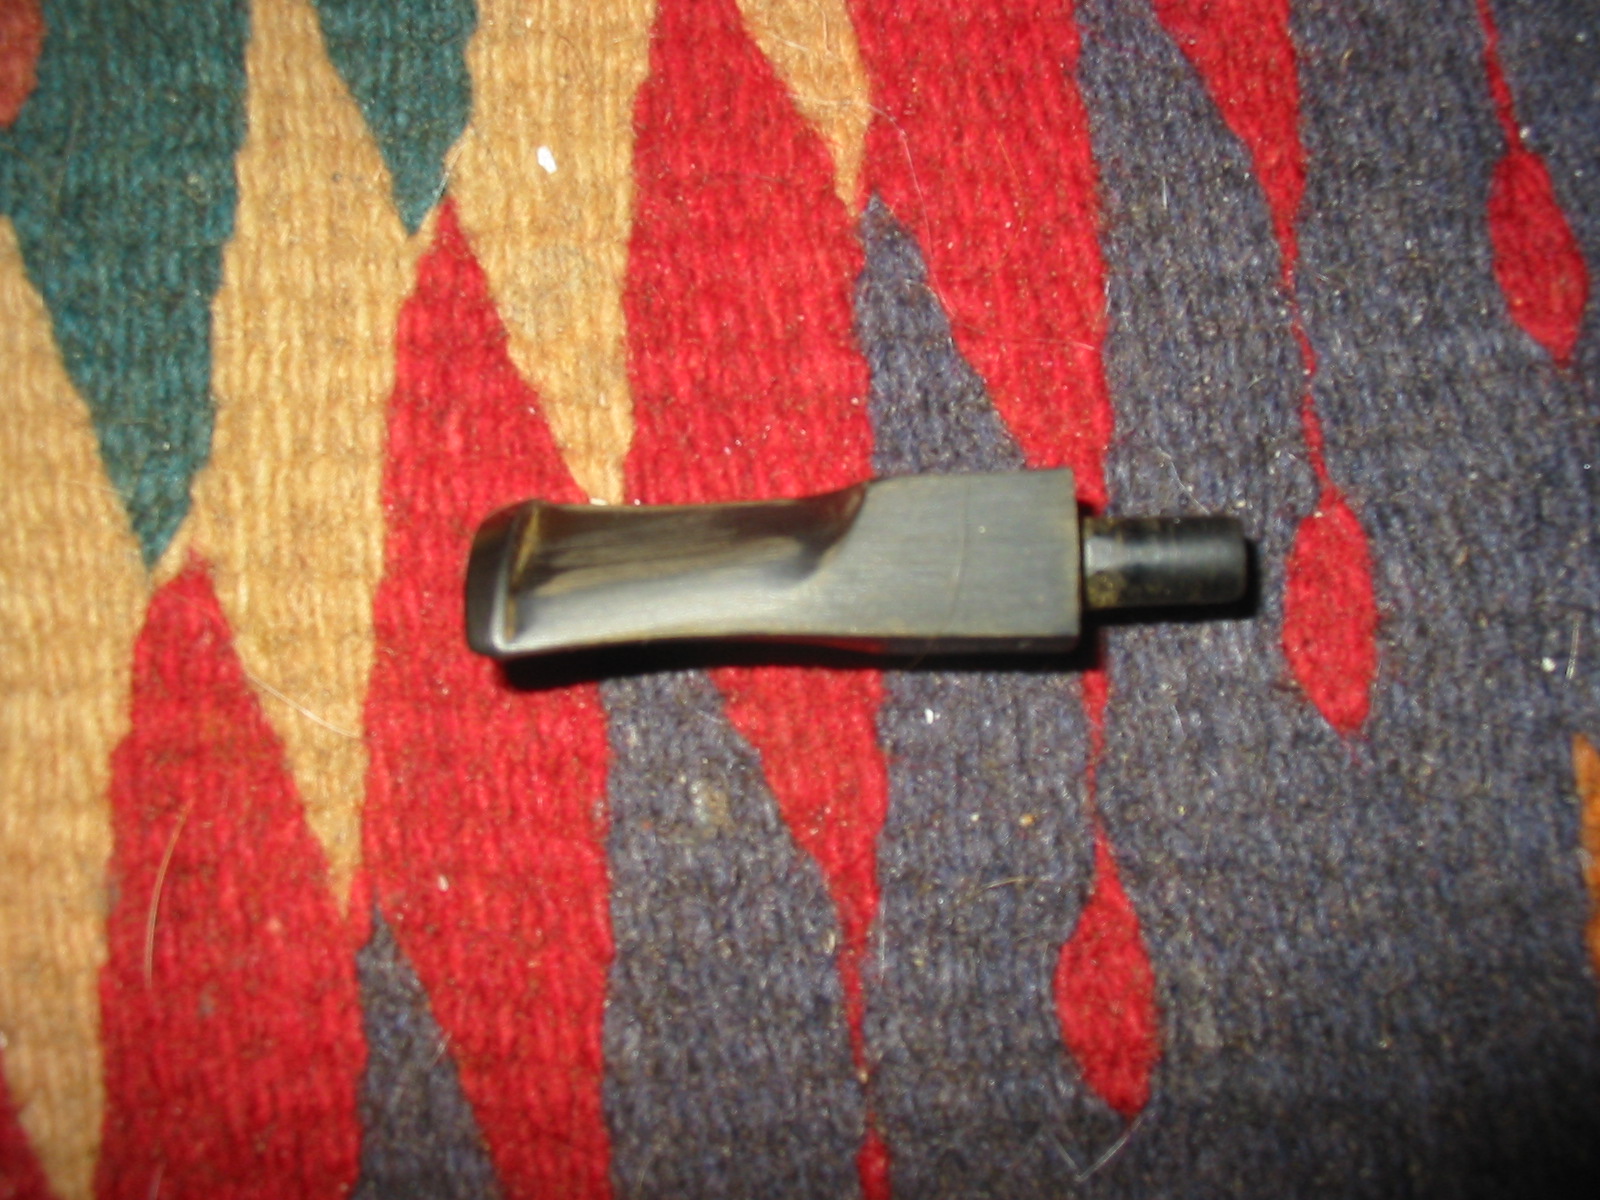
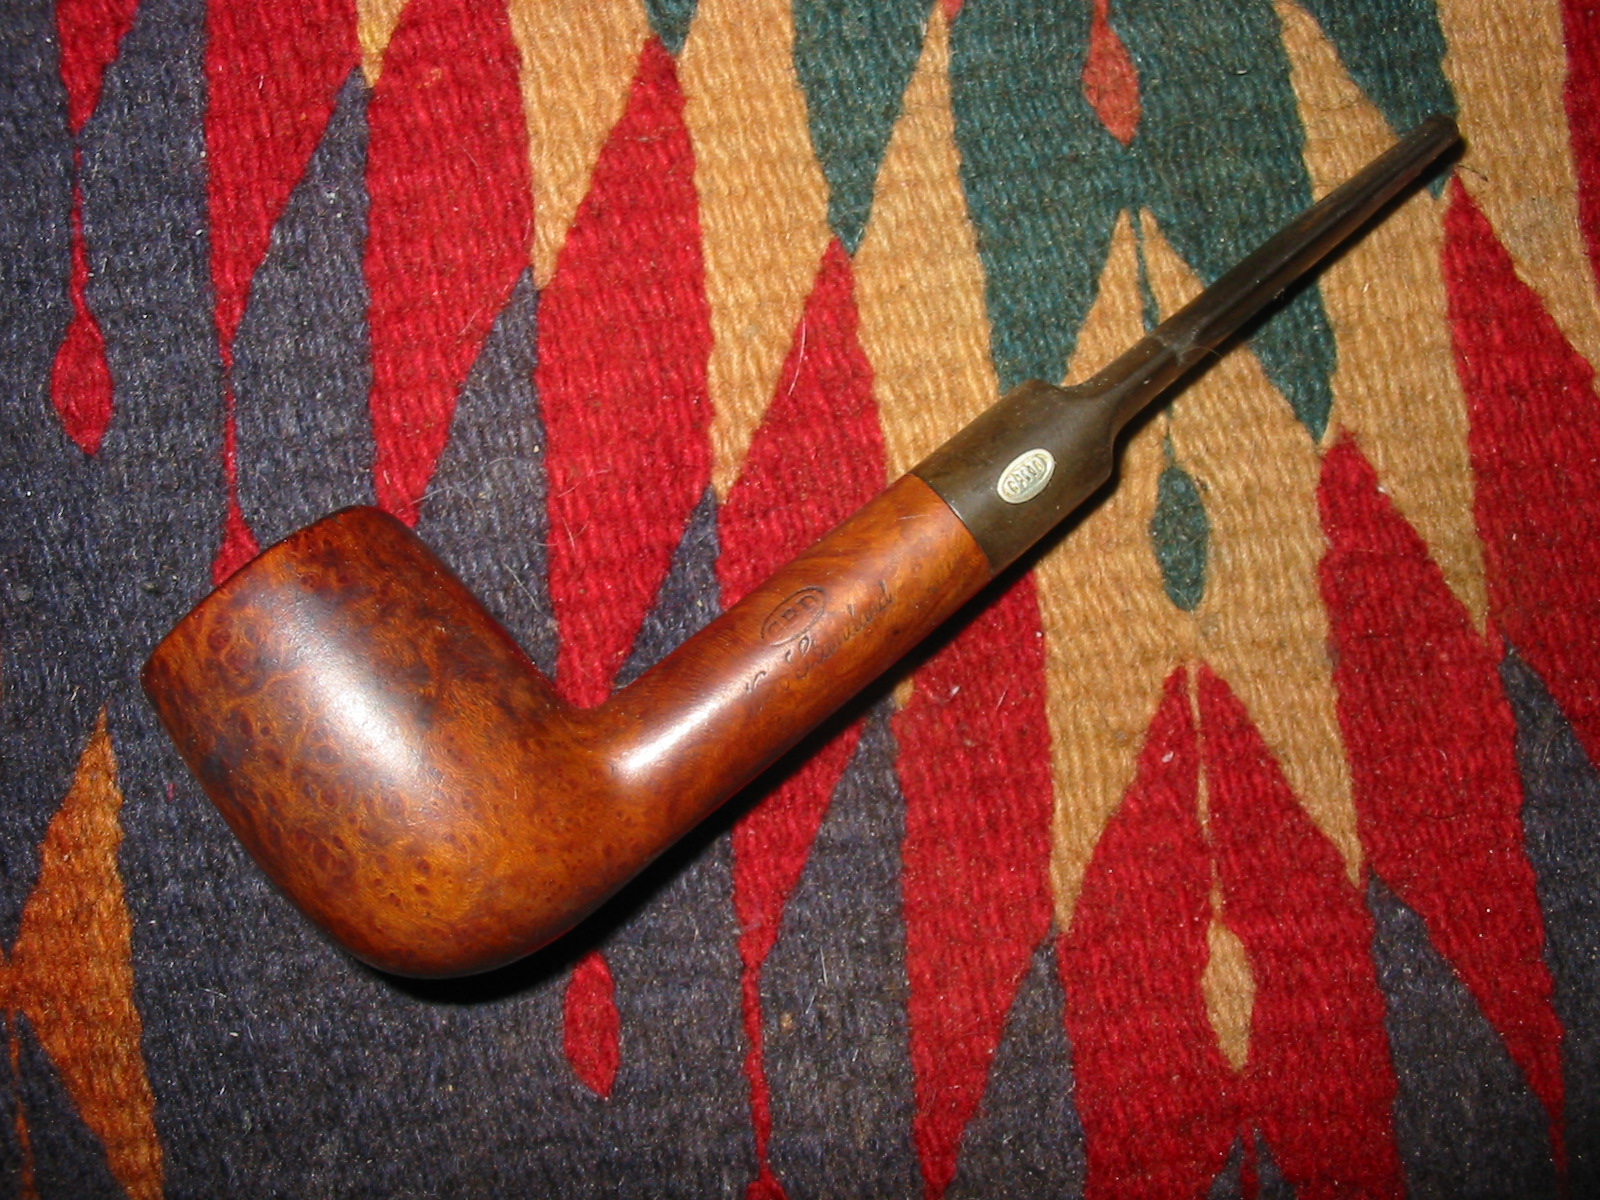
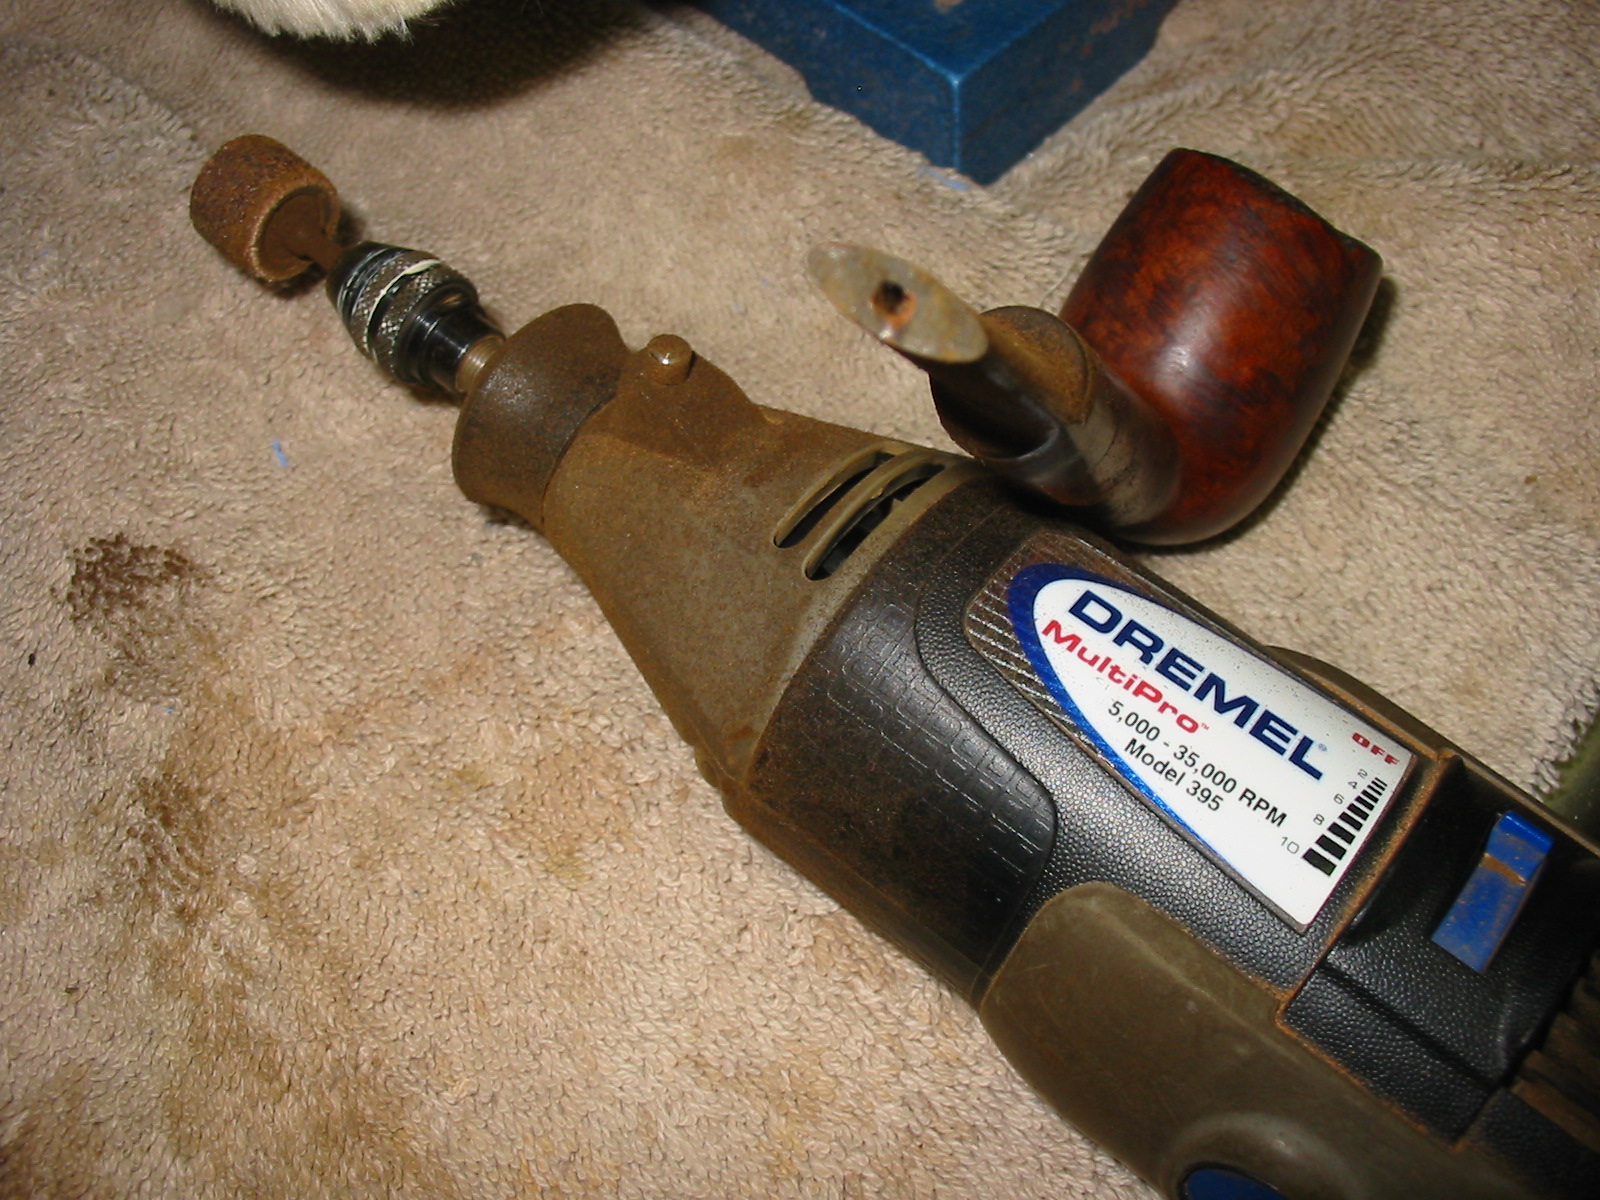
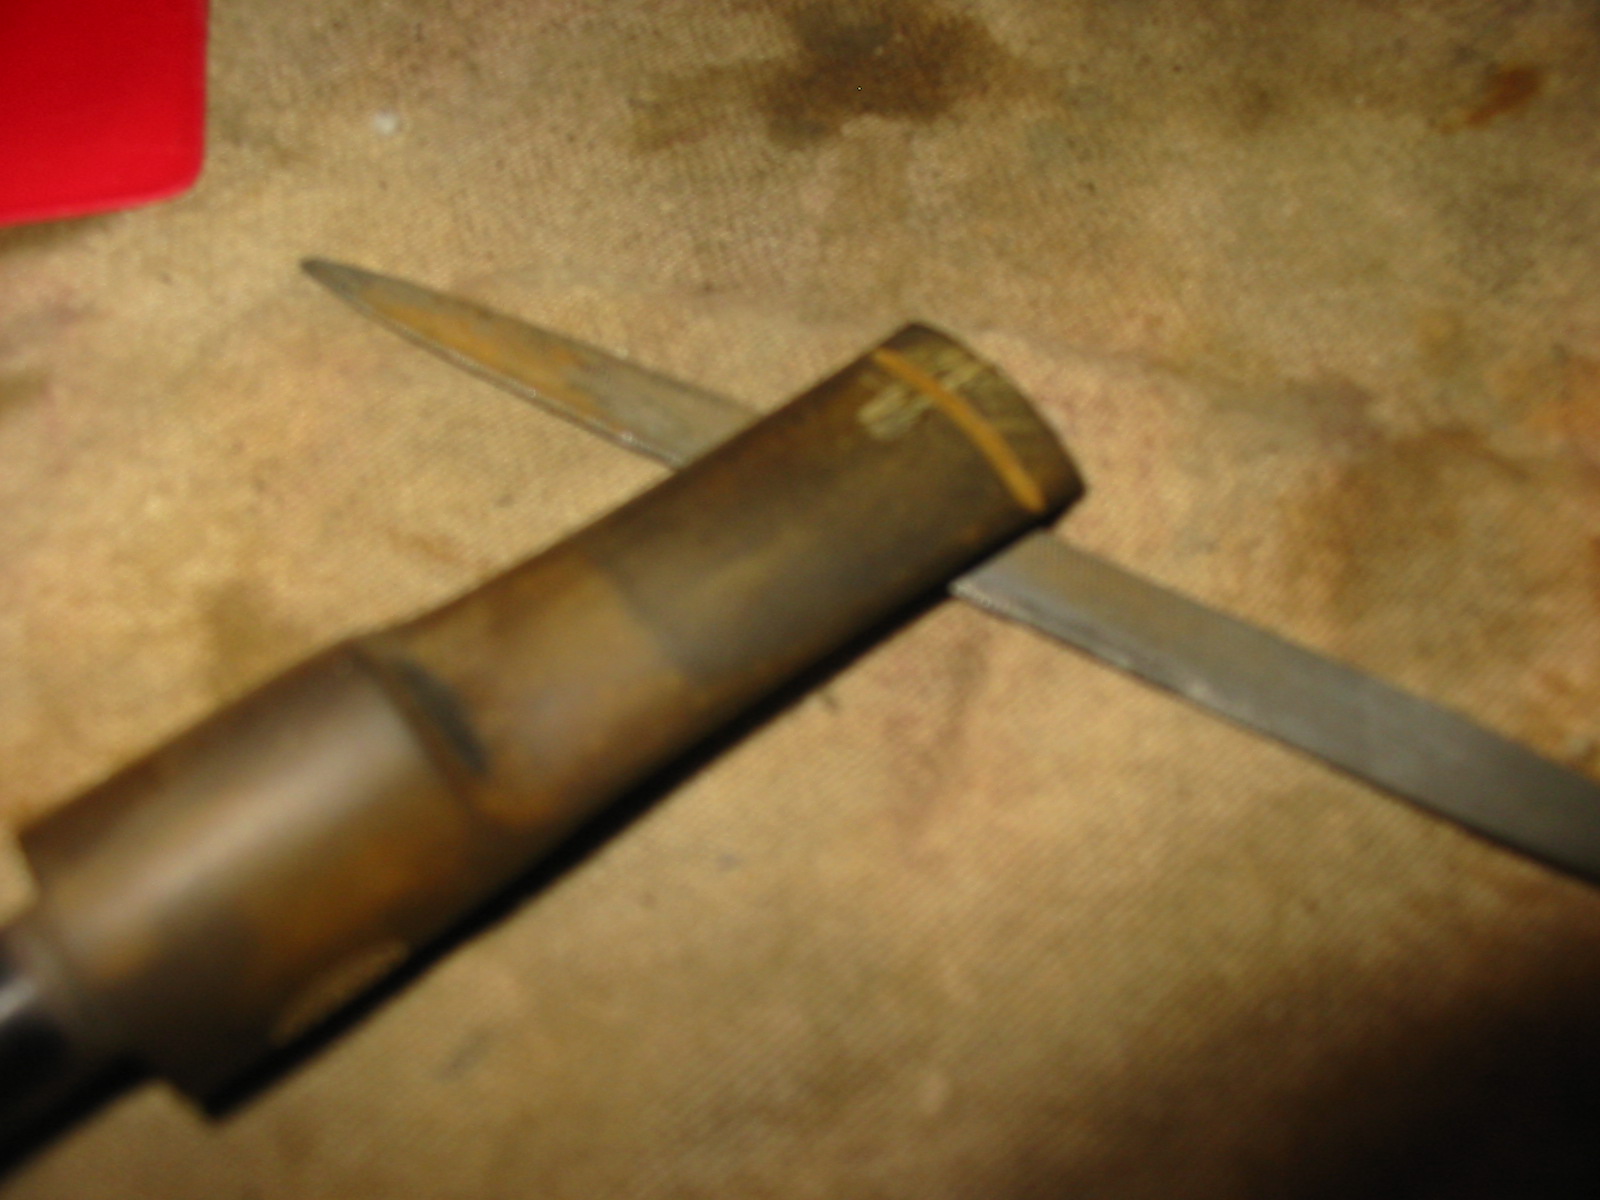
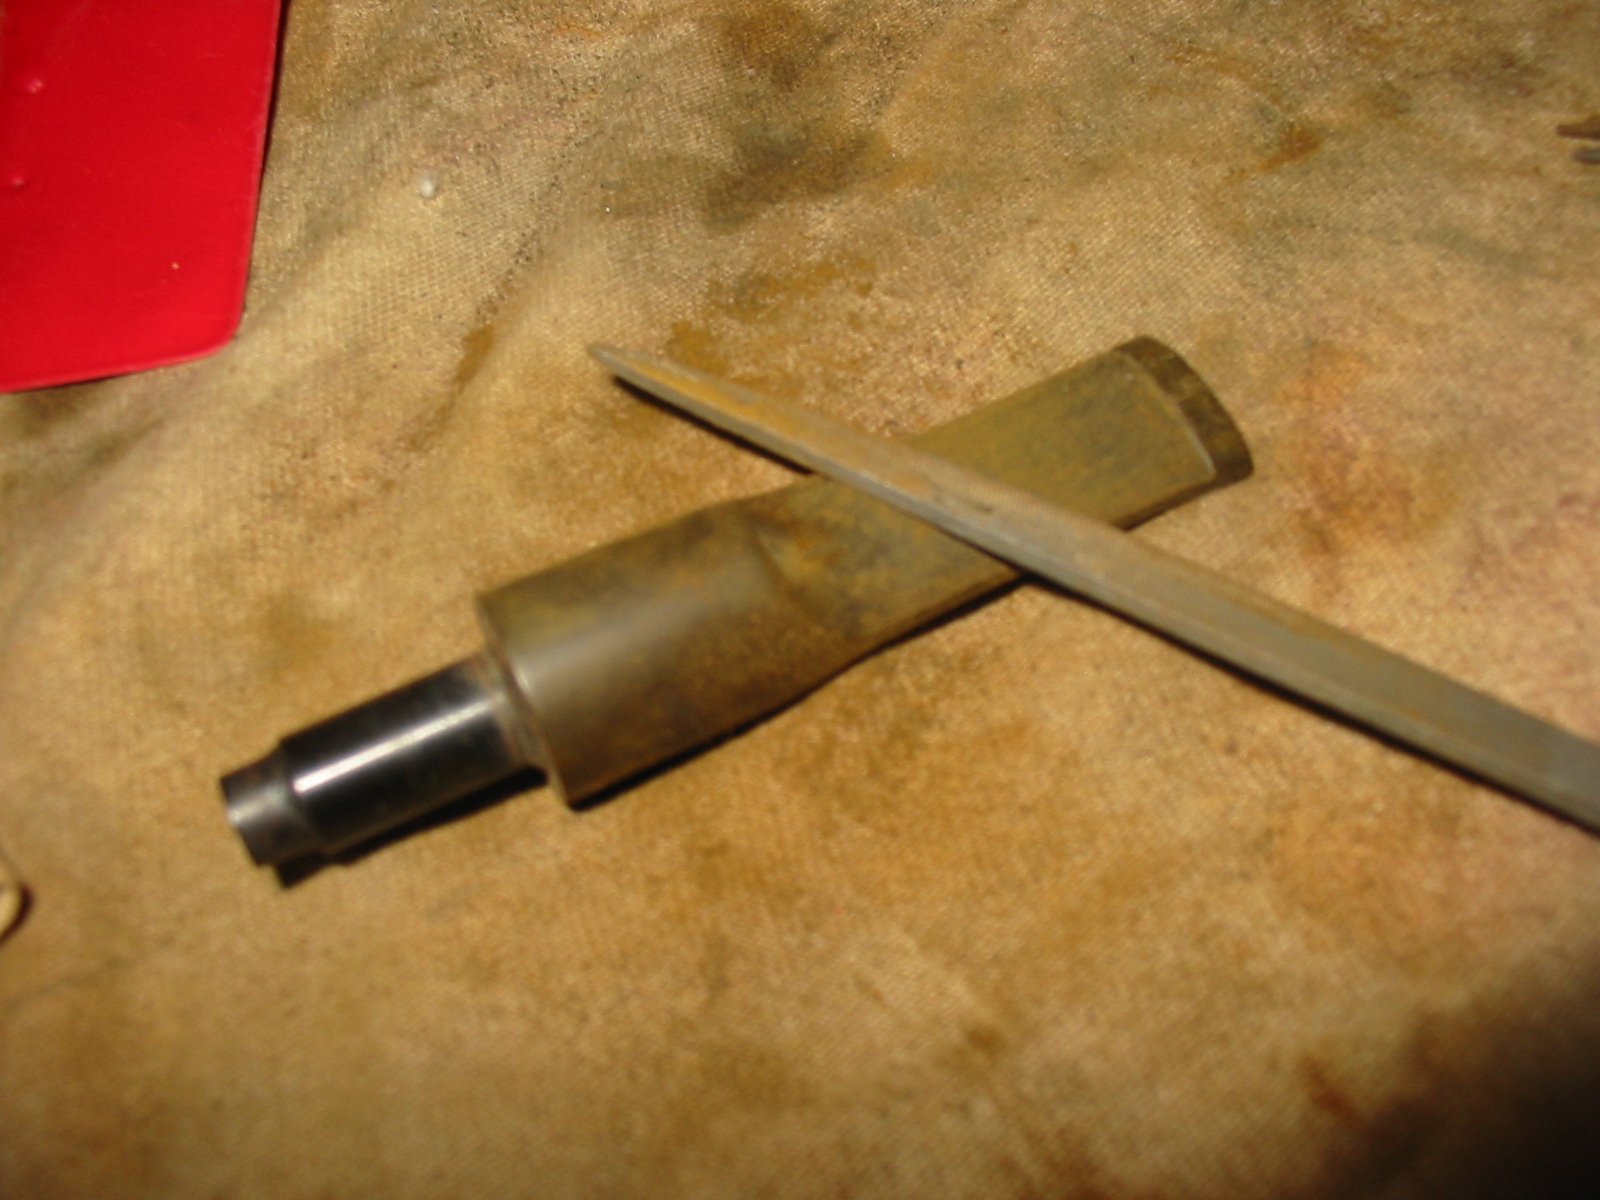
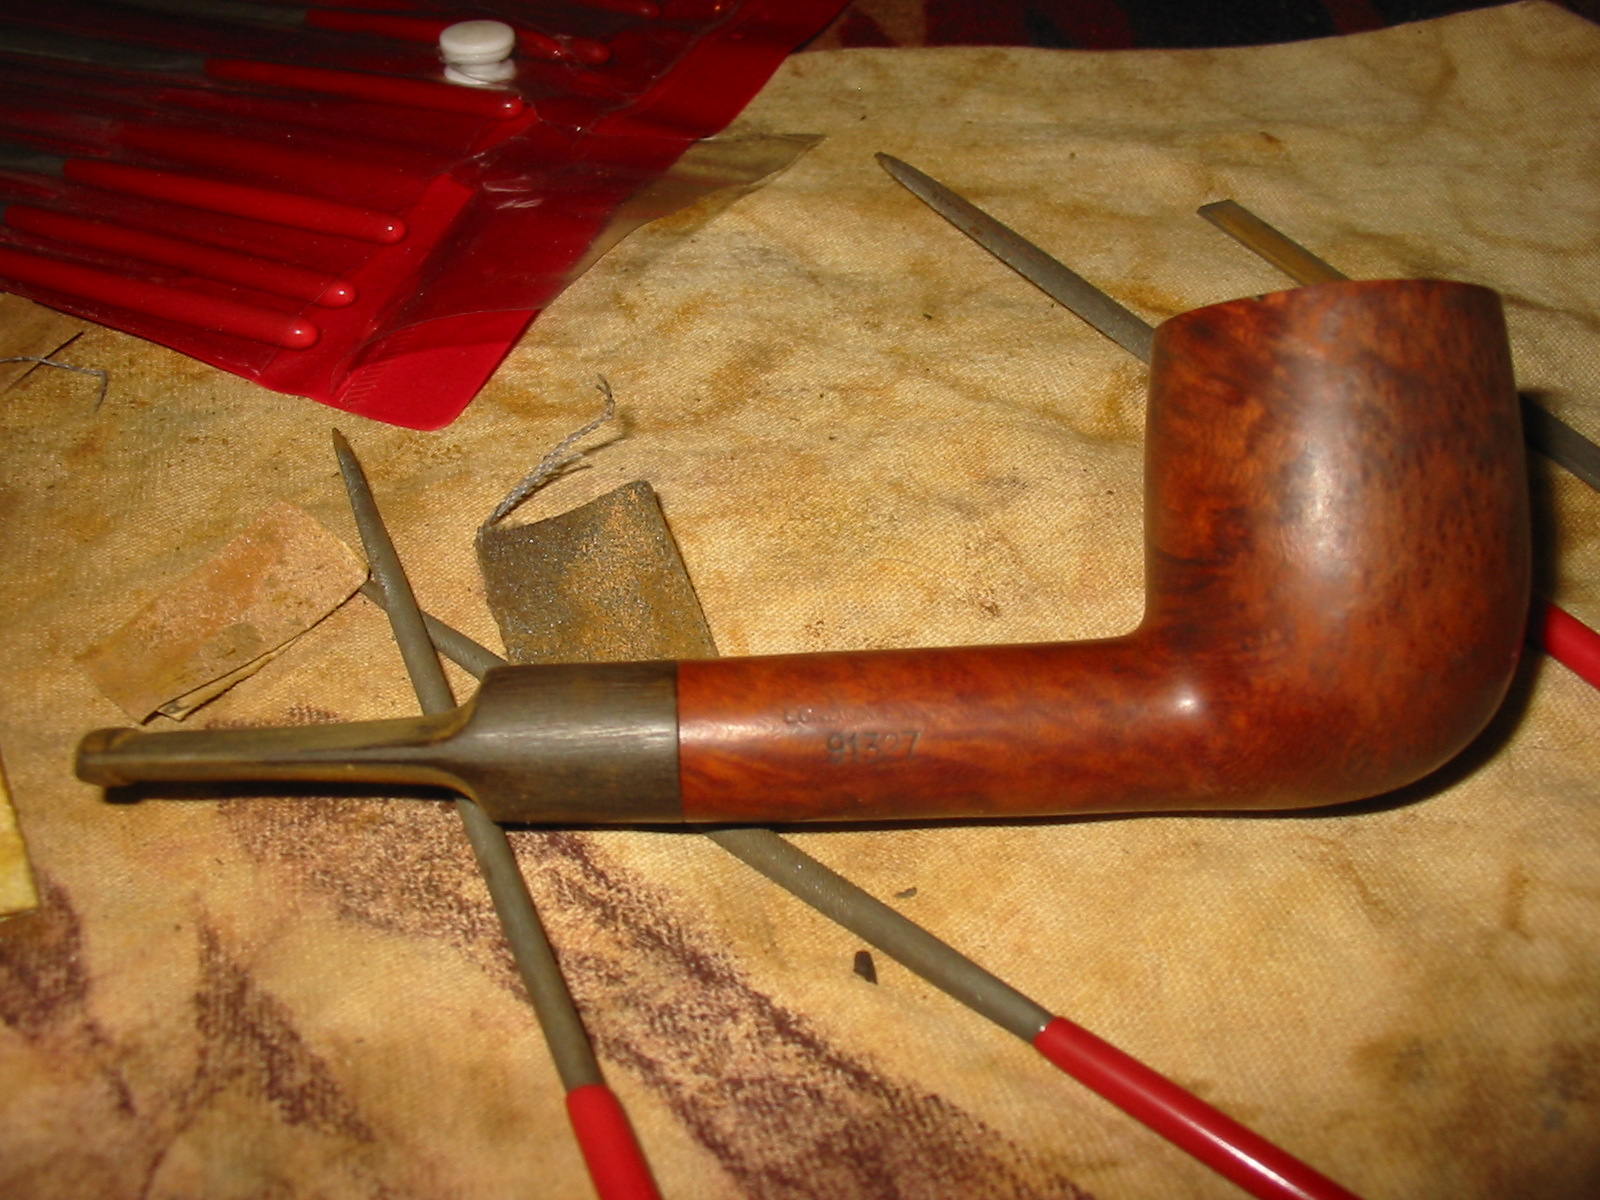
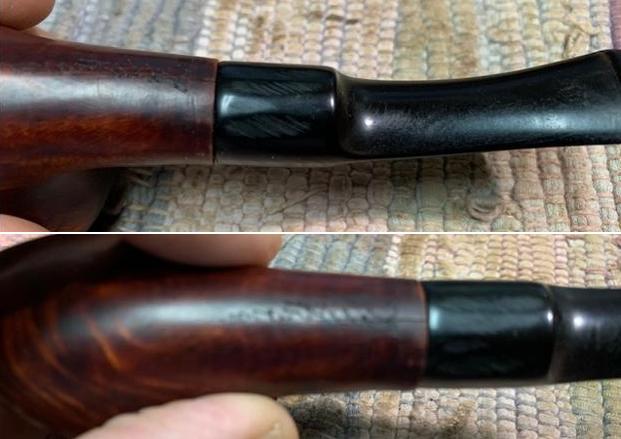
I removed the stem and took a photo of the pipe to have a look at the parts and overall look. I am still amazed by the thickness of the tenon. 
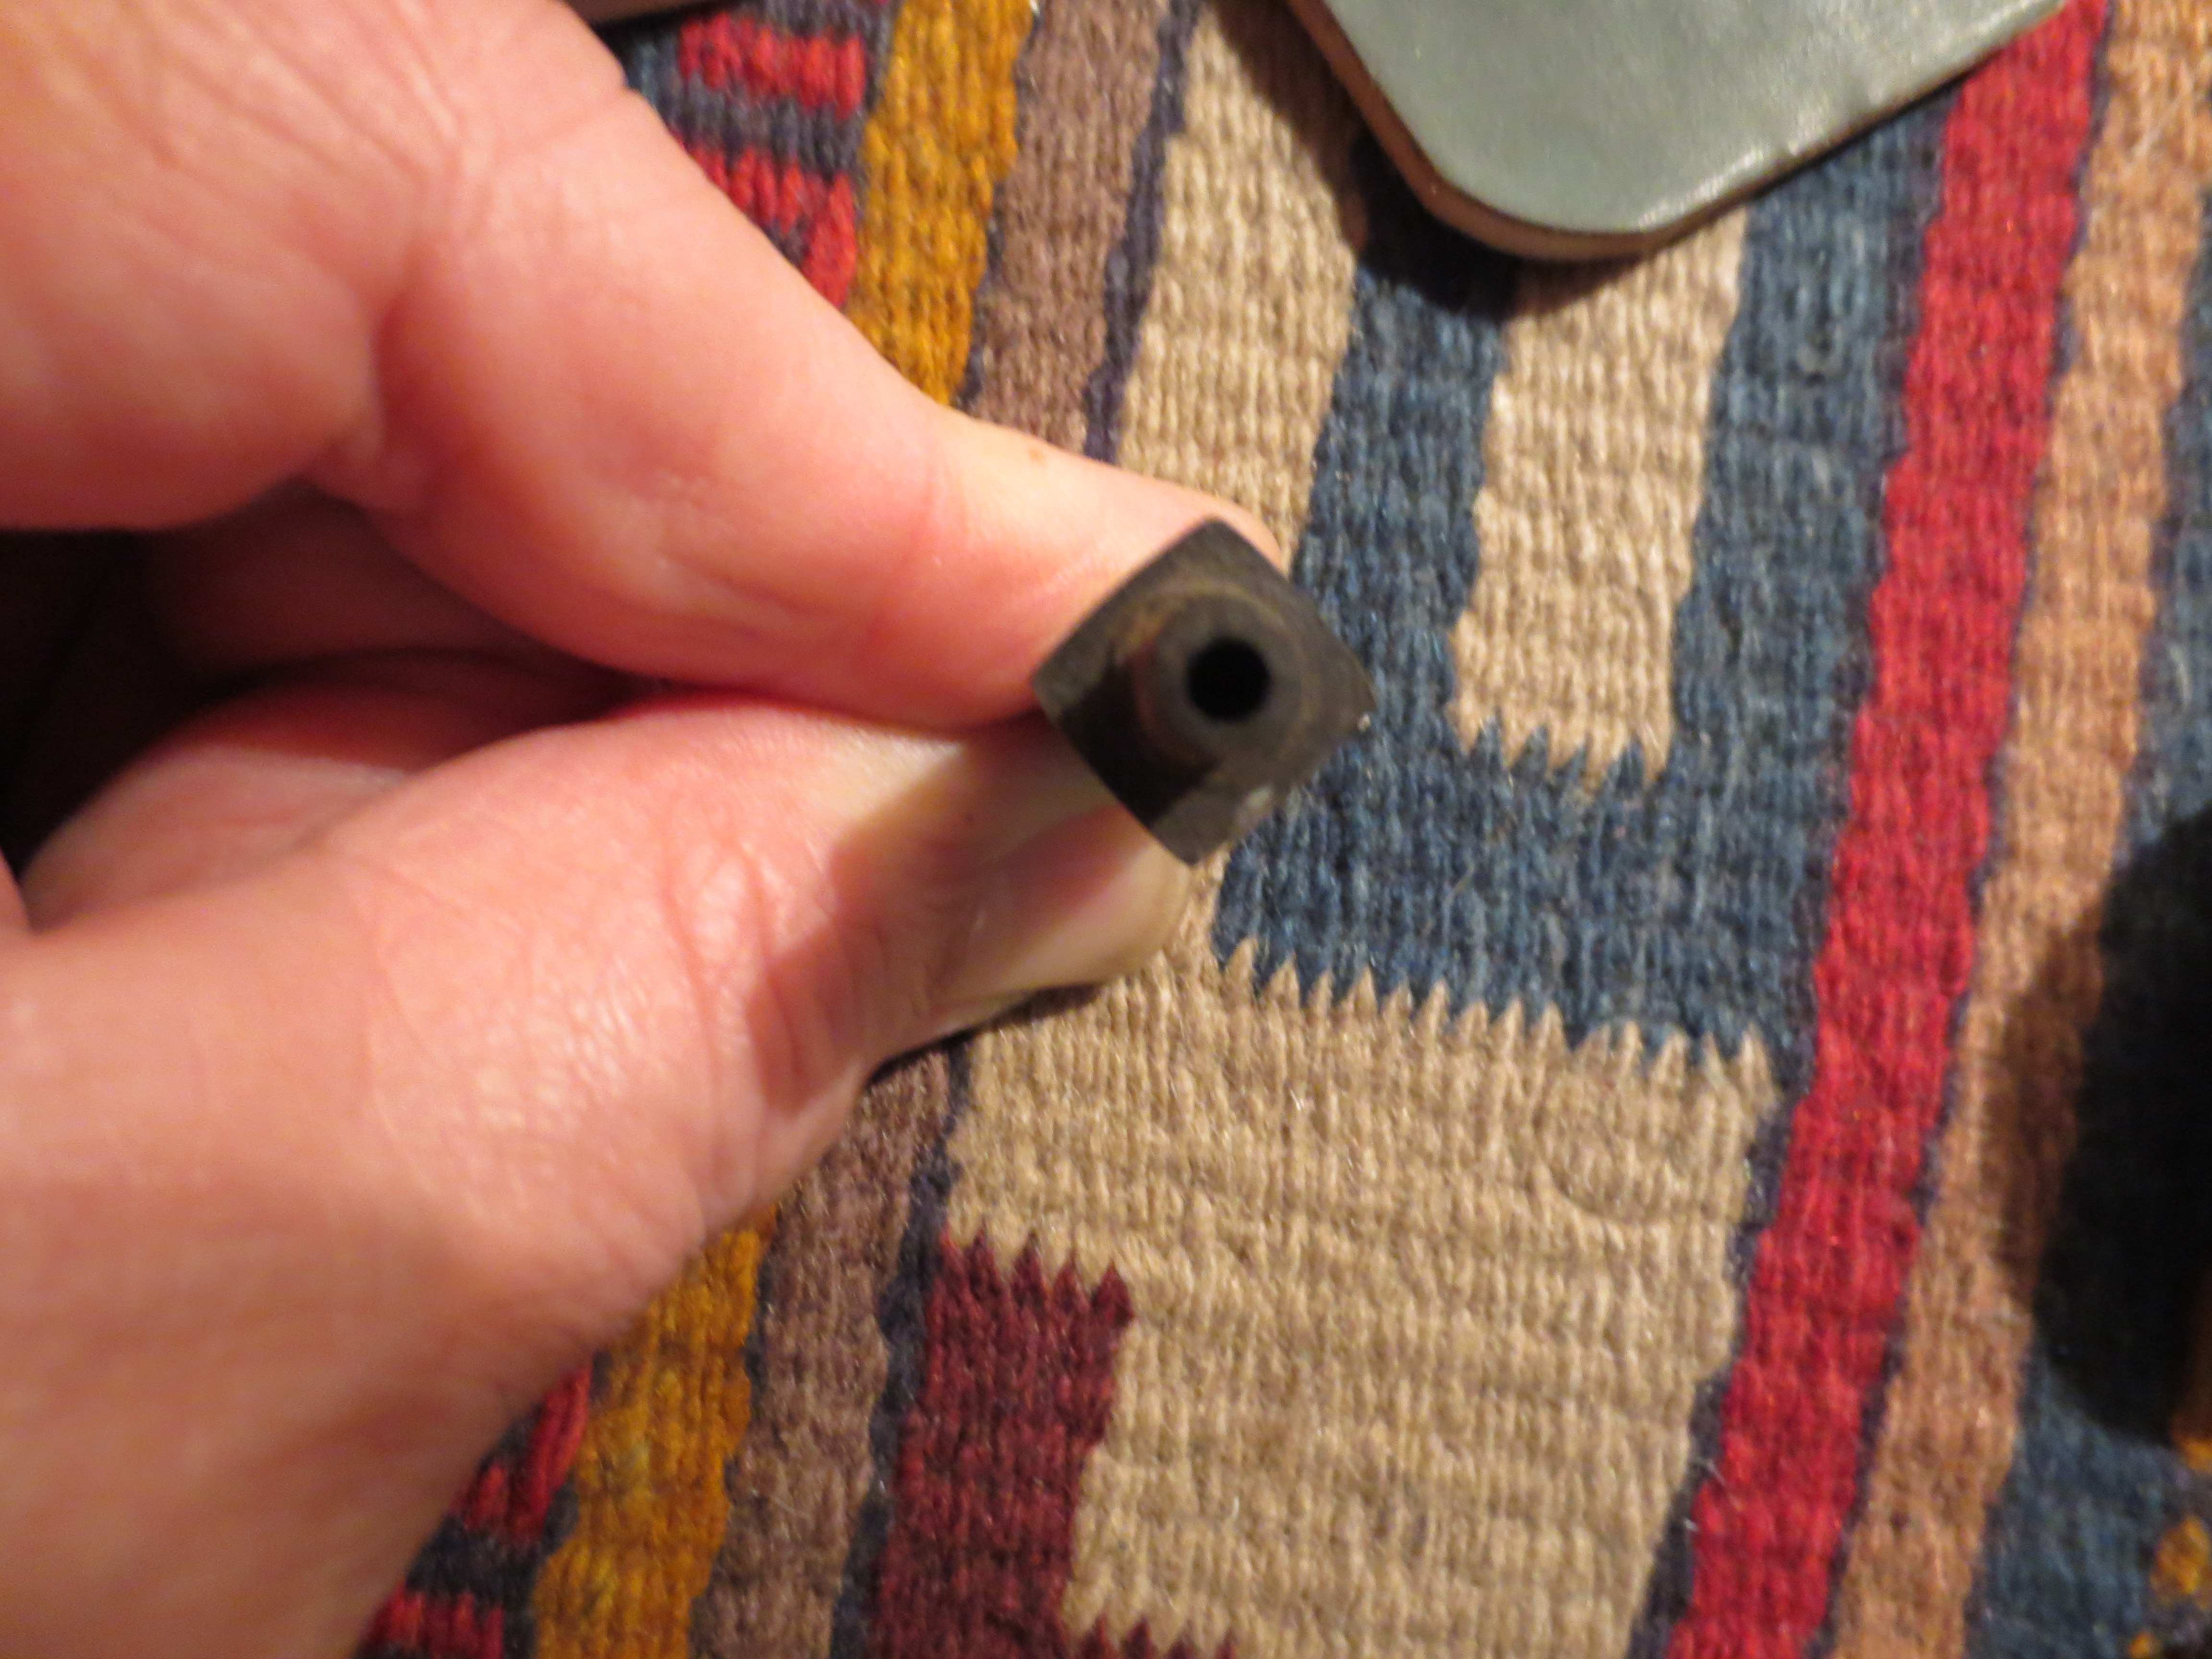
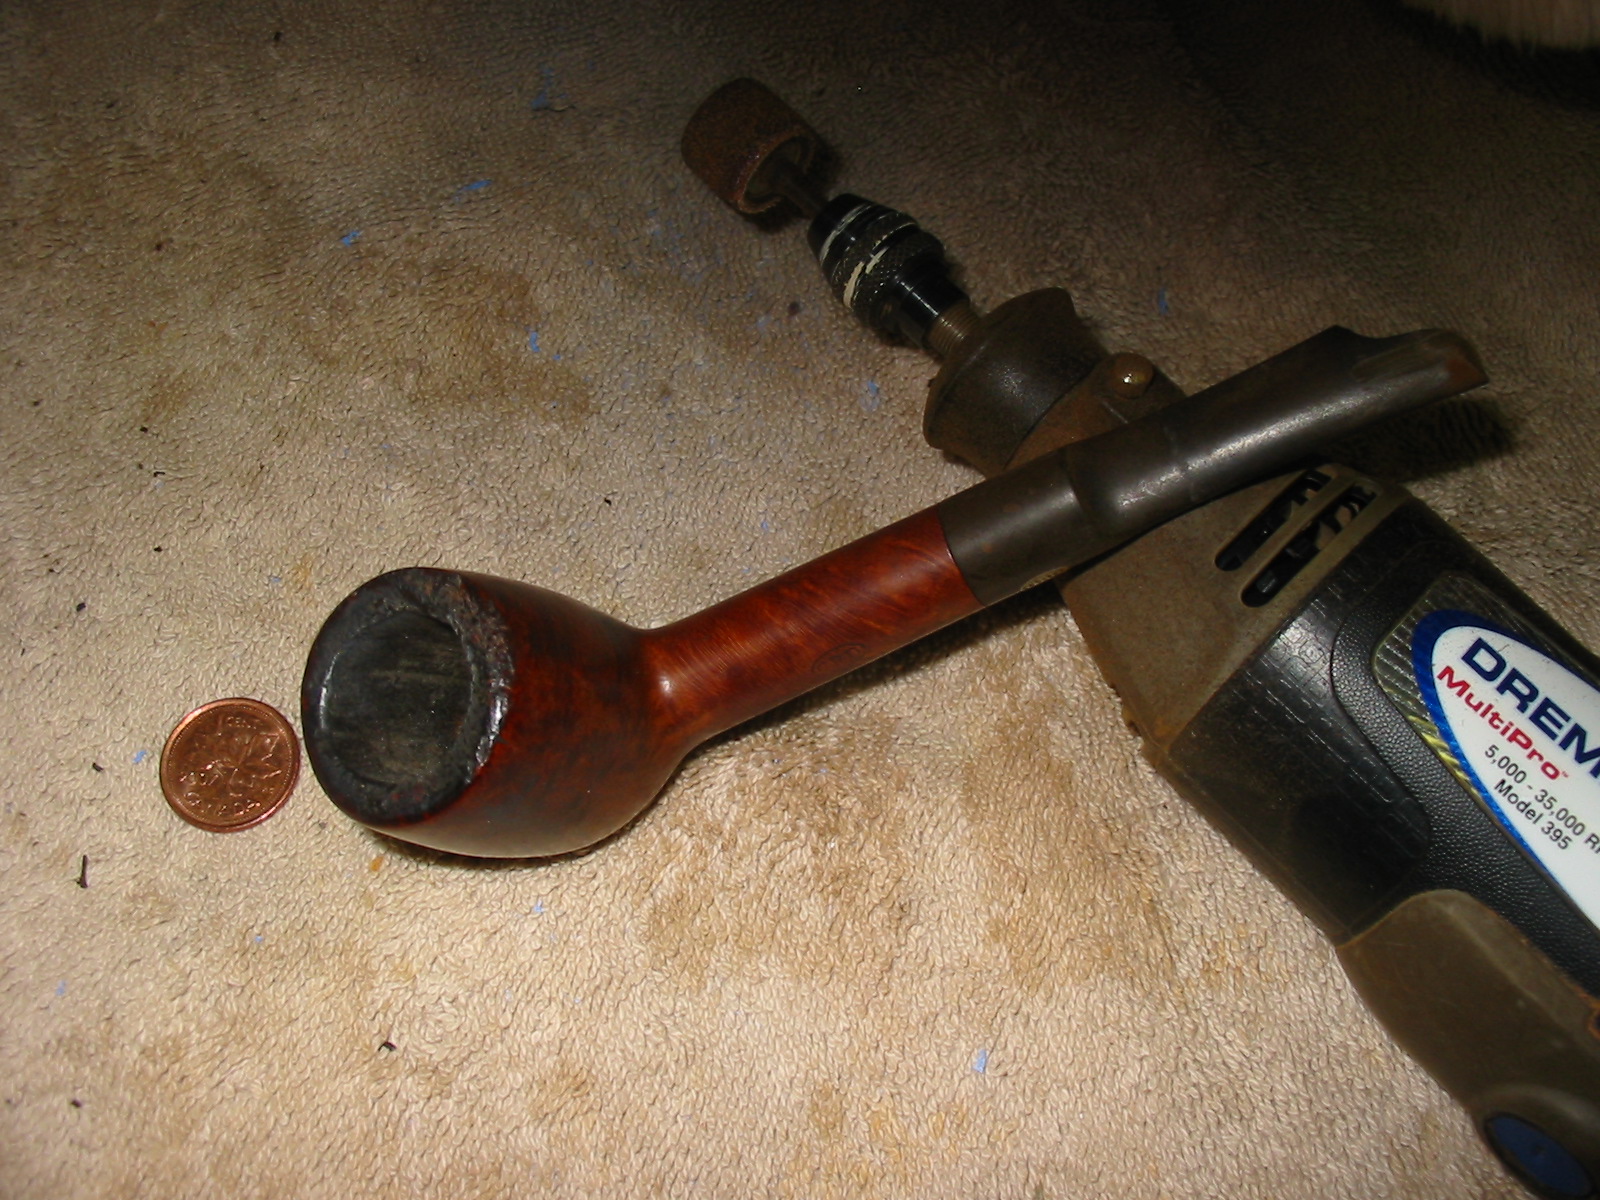
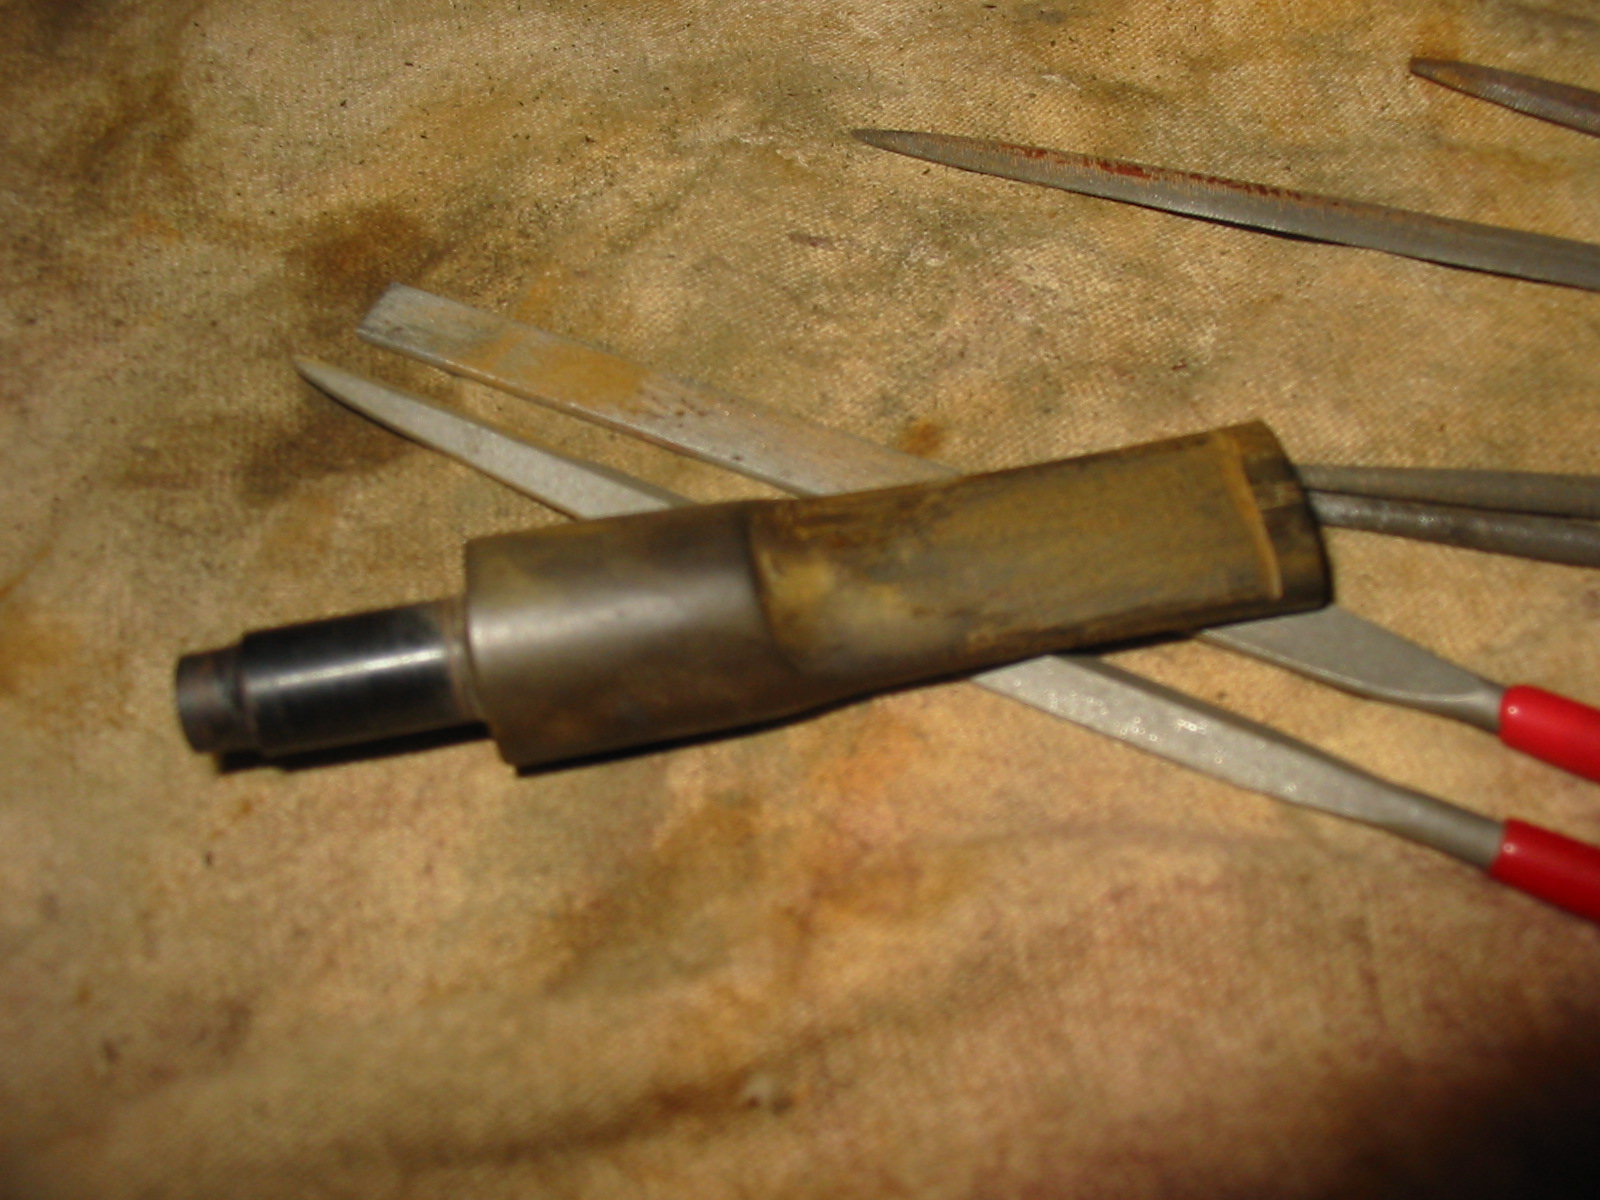
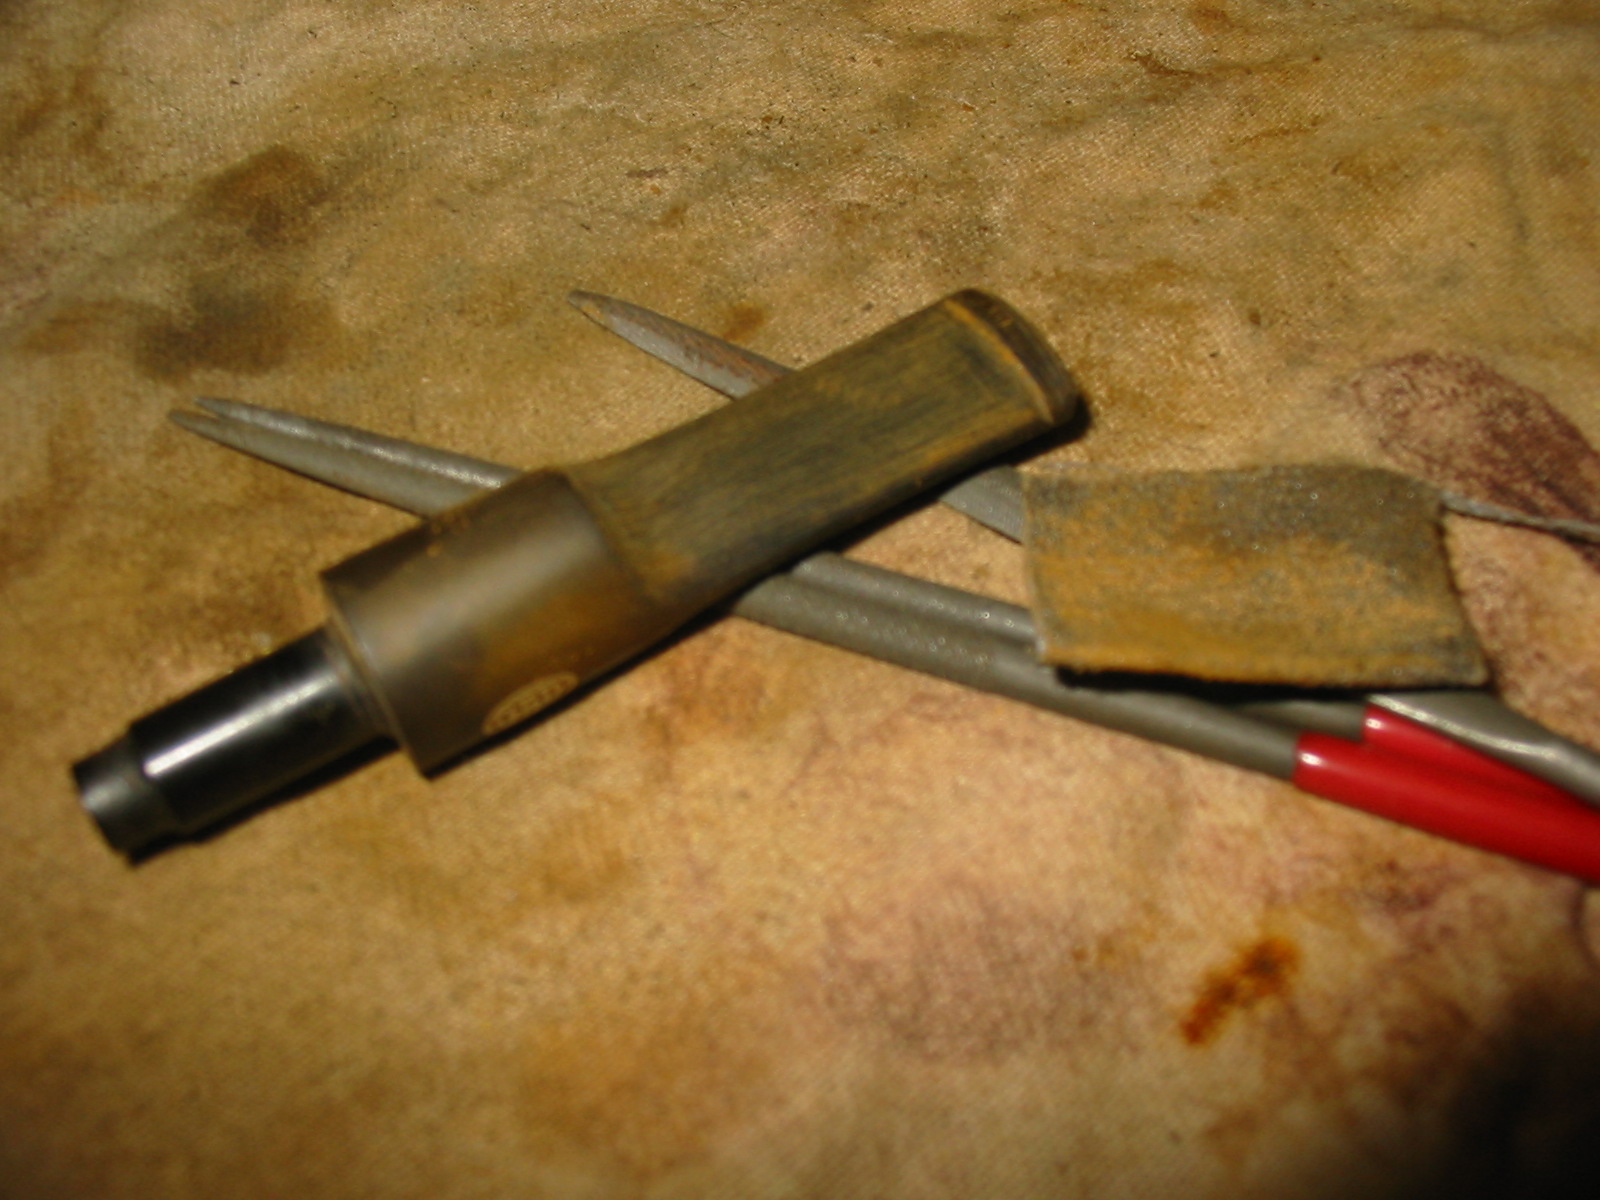
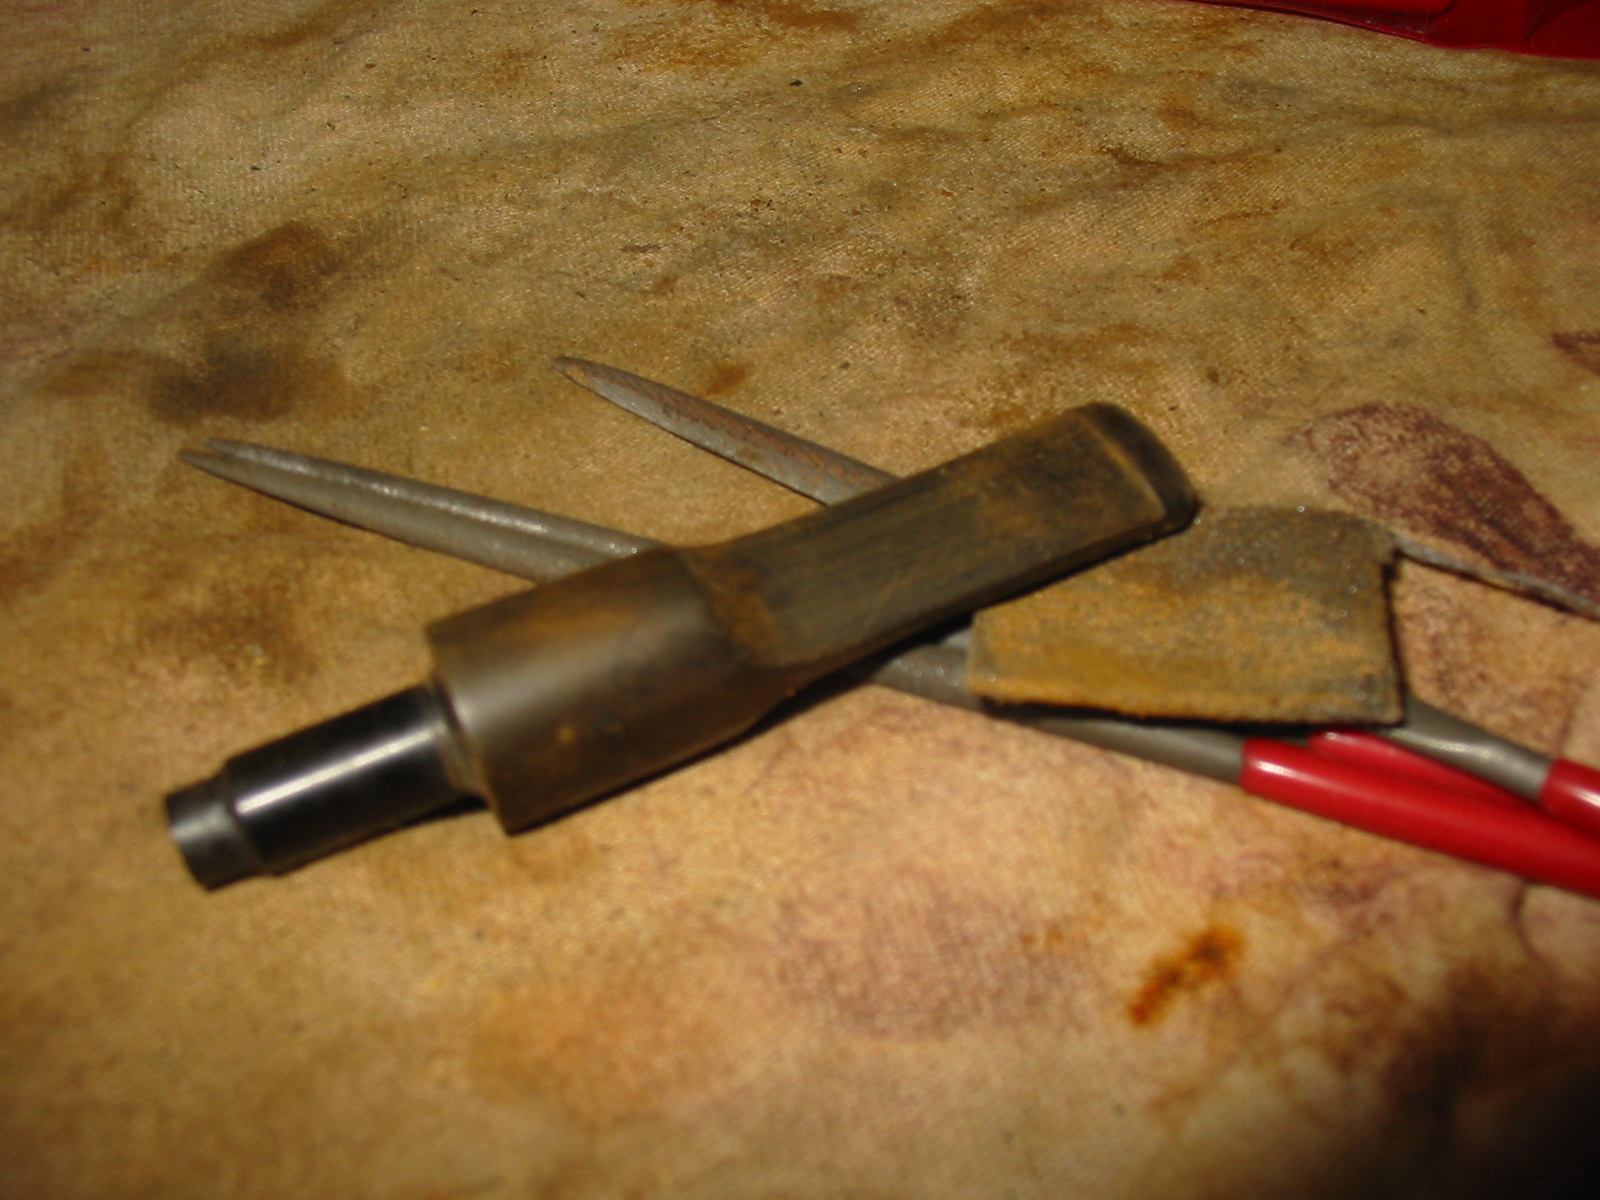
I took a photo of the castings on the tenon and on the airway entering the tenon end. It made the castings very clear.    
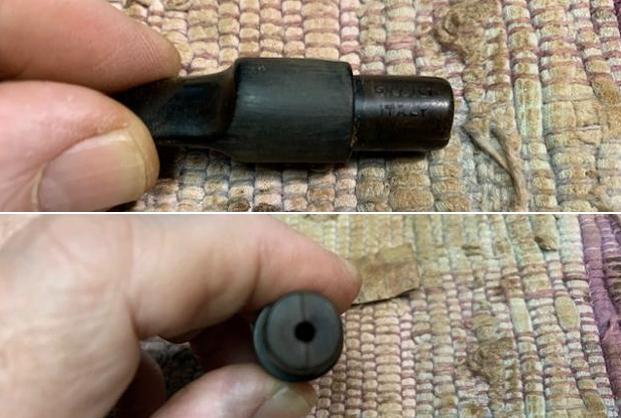
I started my work on the pipe by addressing the crack in the shank. I put the stem on the shank and opened it up. I filled in the crack with clear super glue (CA). I removed the stem and clamped the repaired shank together until the glue cured.  
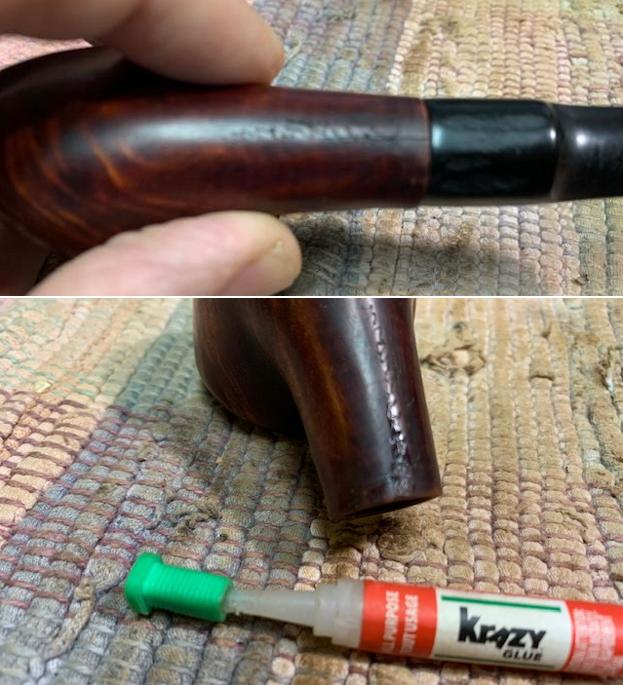
Once the glue had cured and the crack was bound together I fit a brass band on the shank end. After I had fit the band to the shank I removed it and coated the shank end and inside of the band with all-purpose glue. I pressed it onto the end of the shank. I set it aside and let the glue cure.   
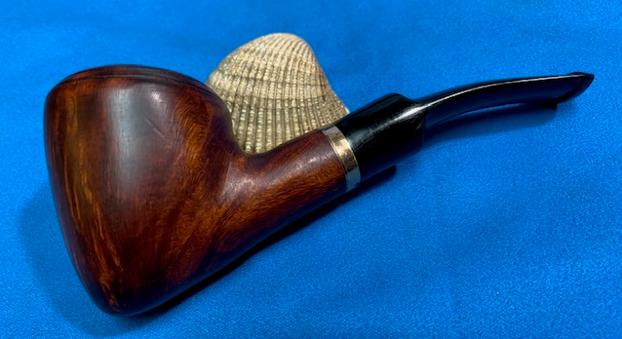
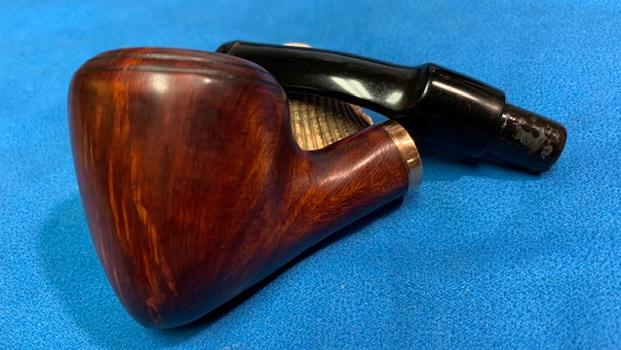
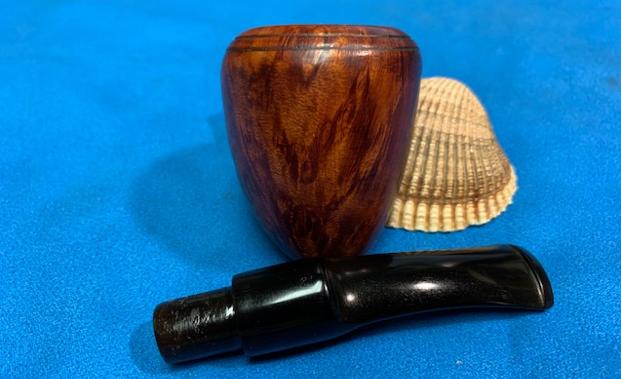
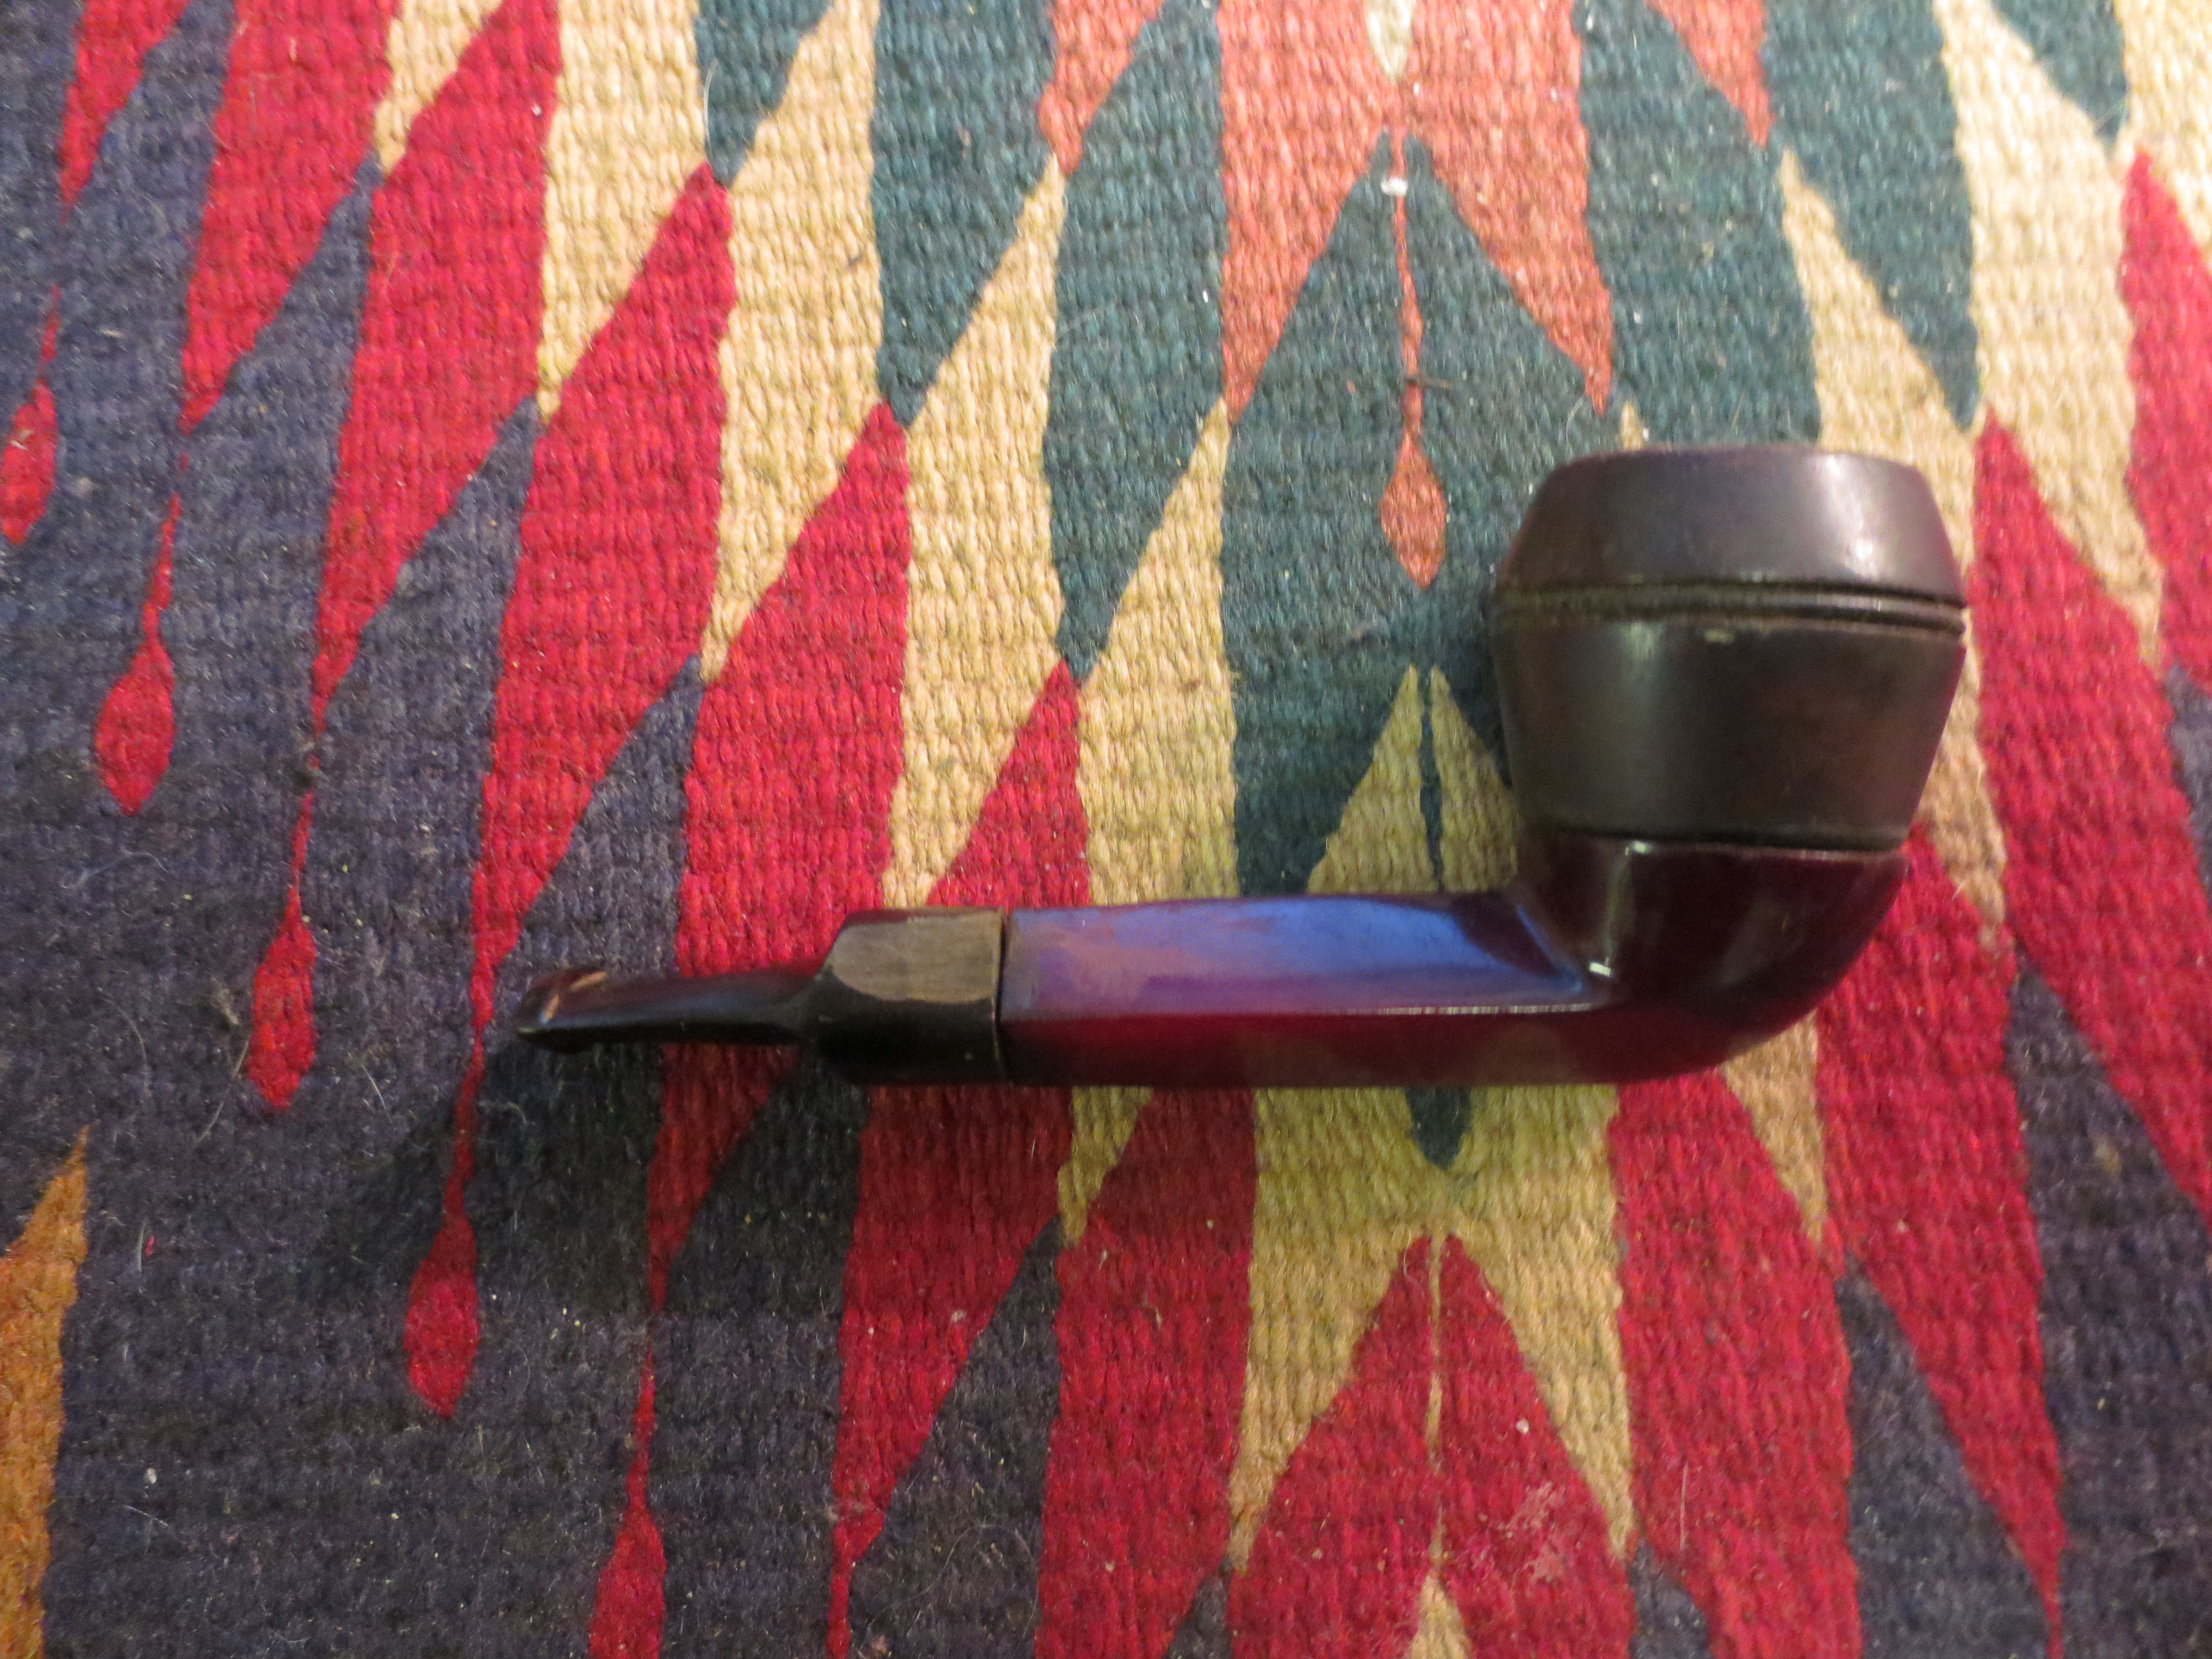
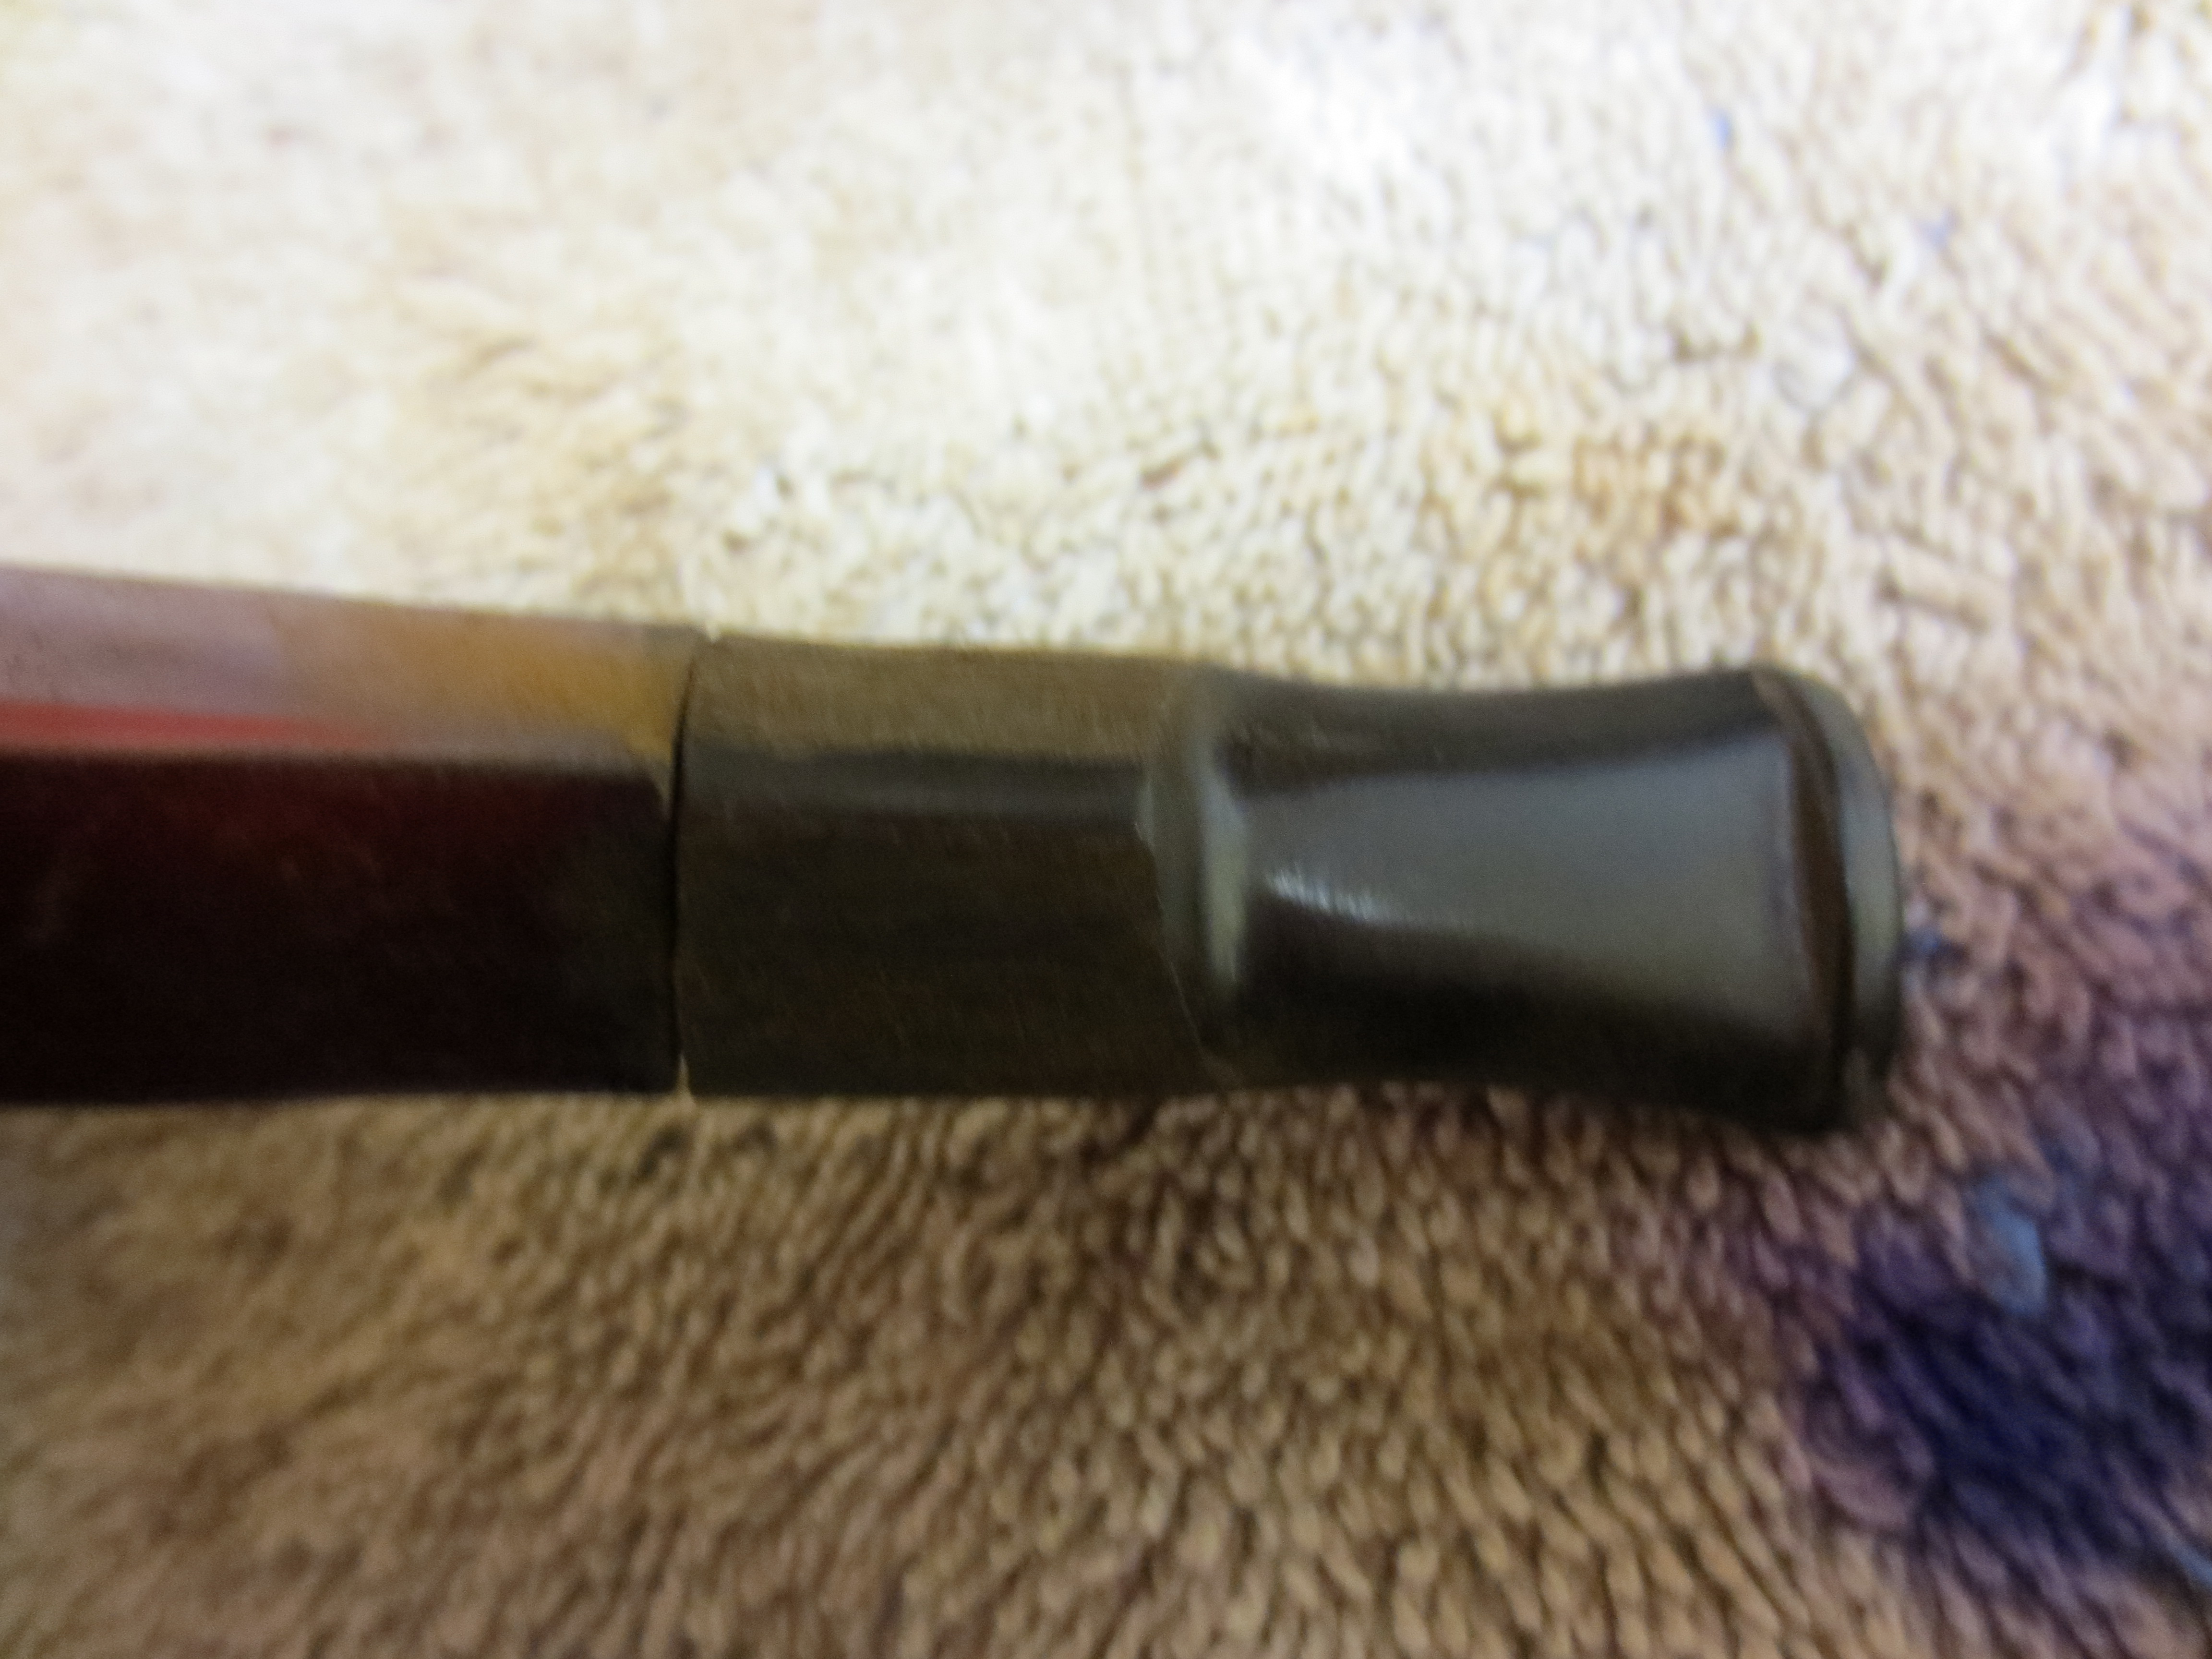
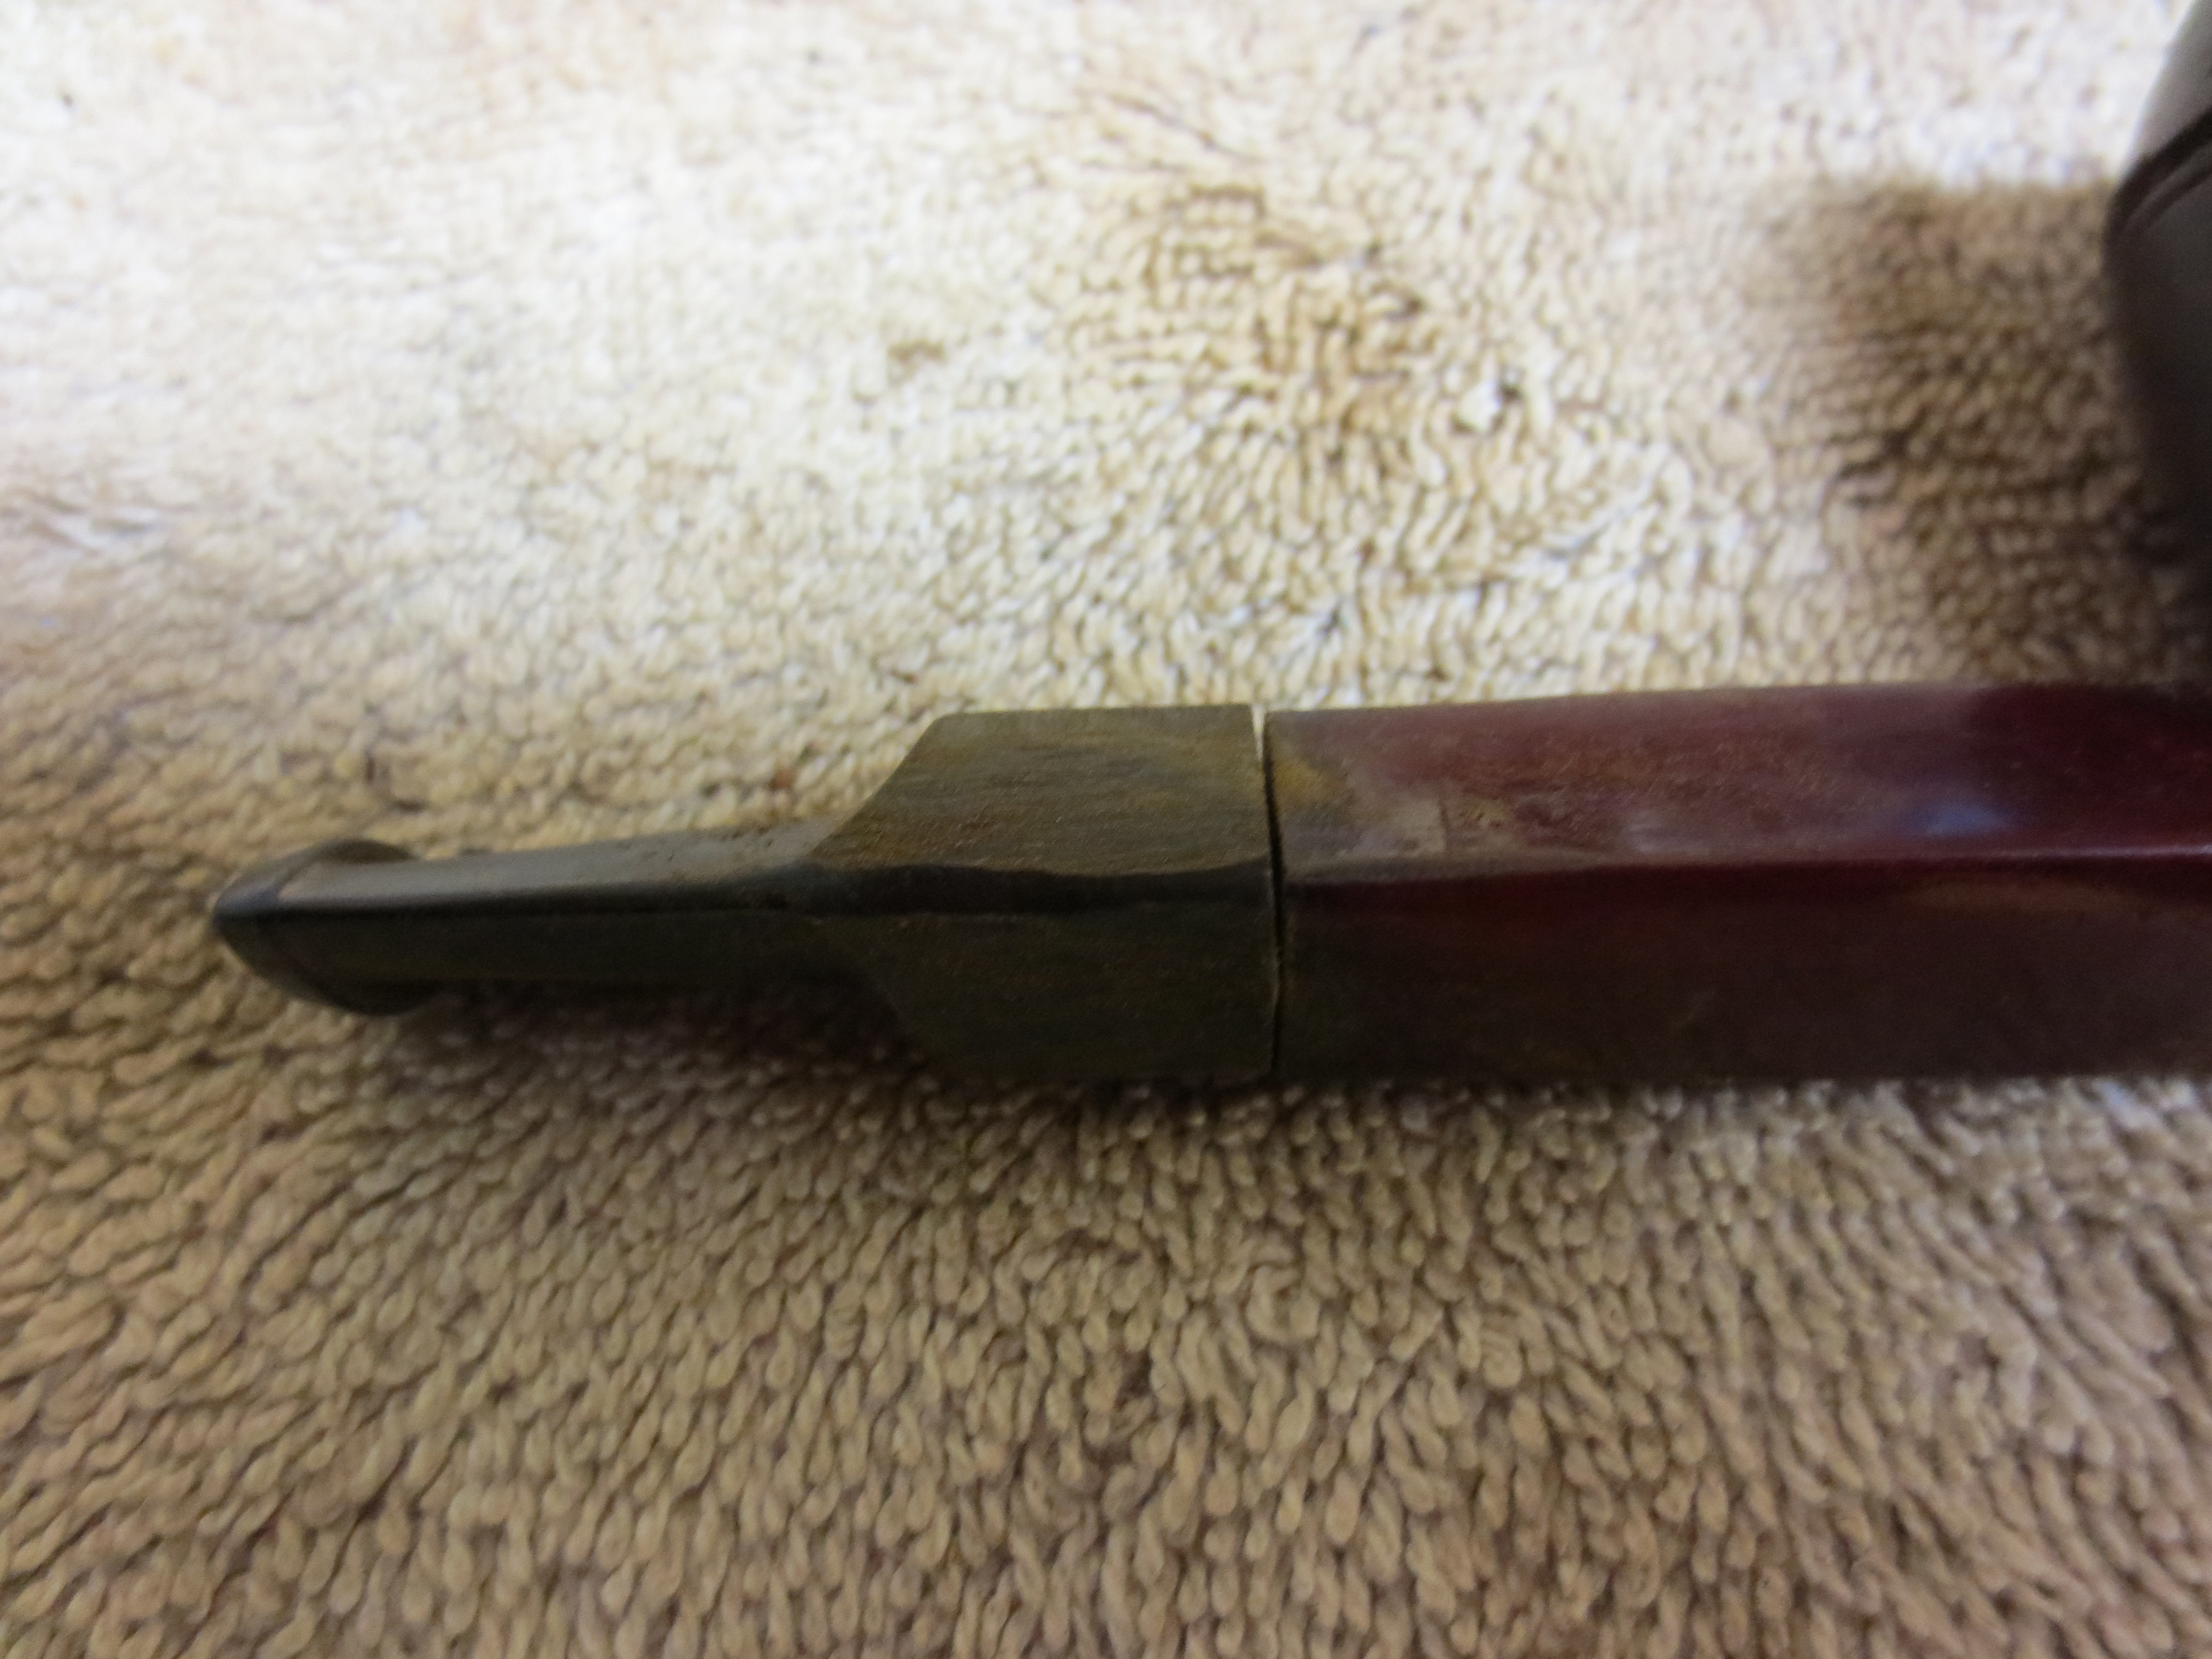
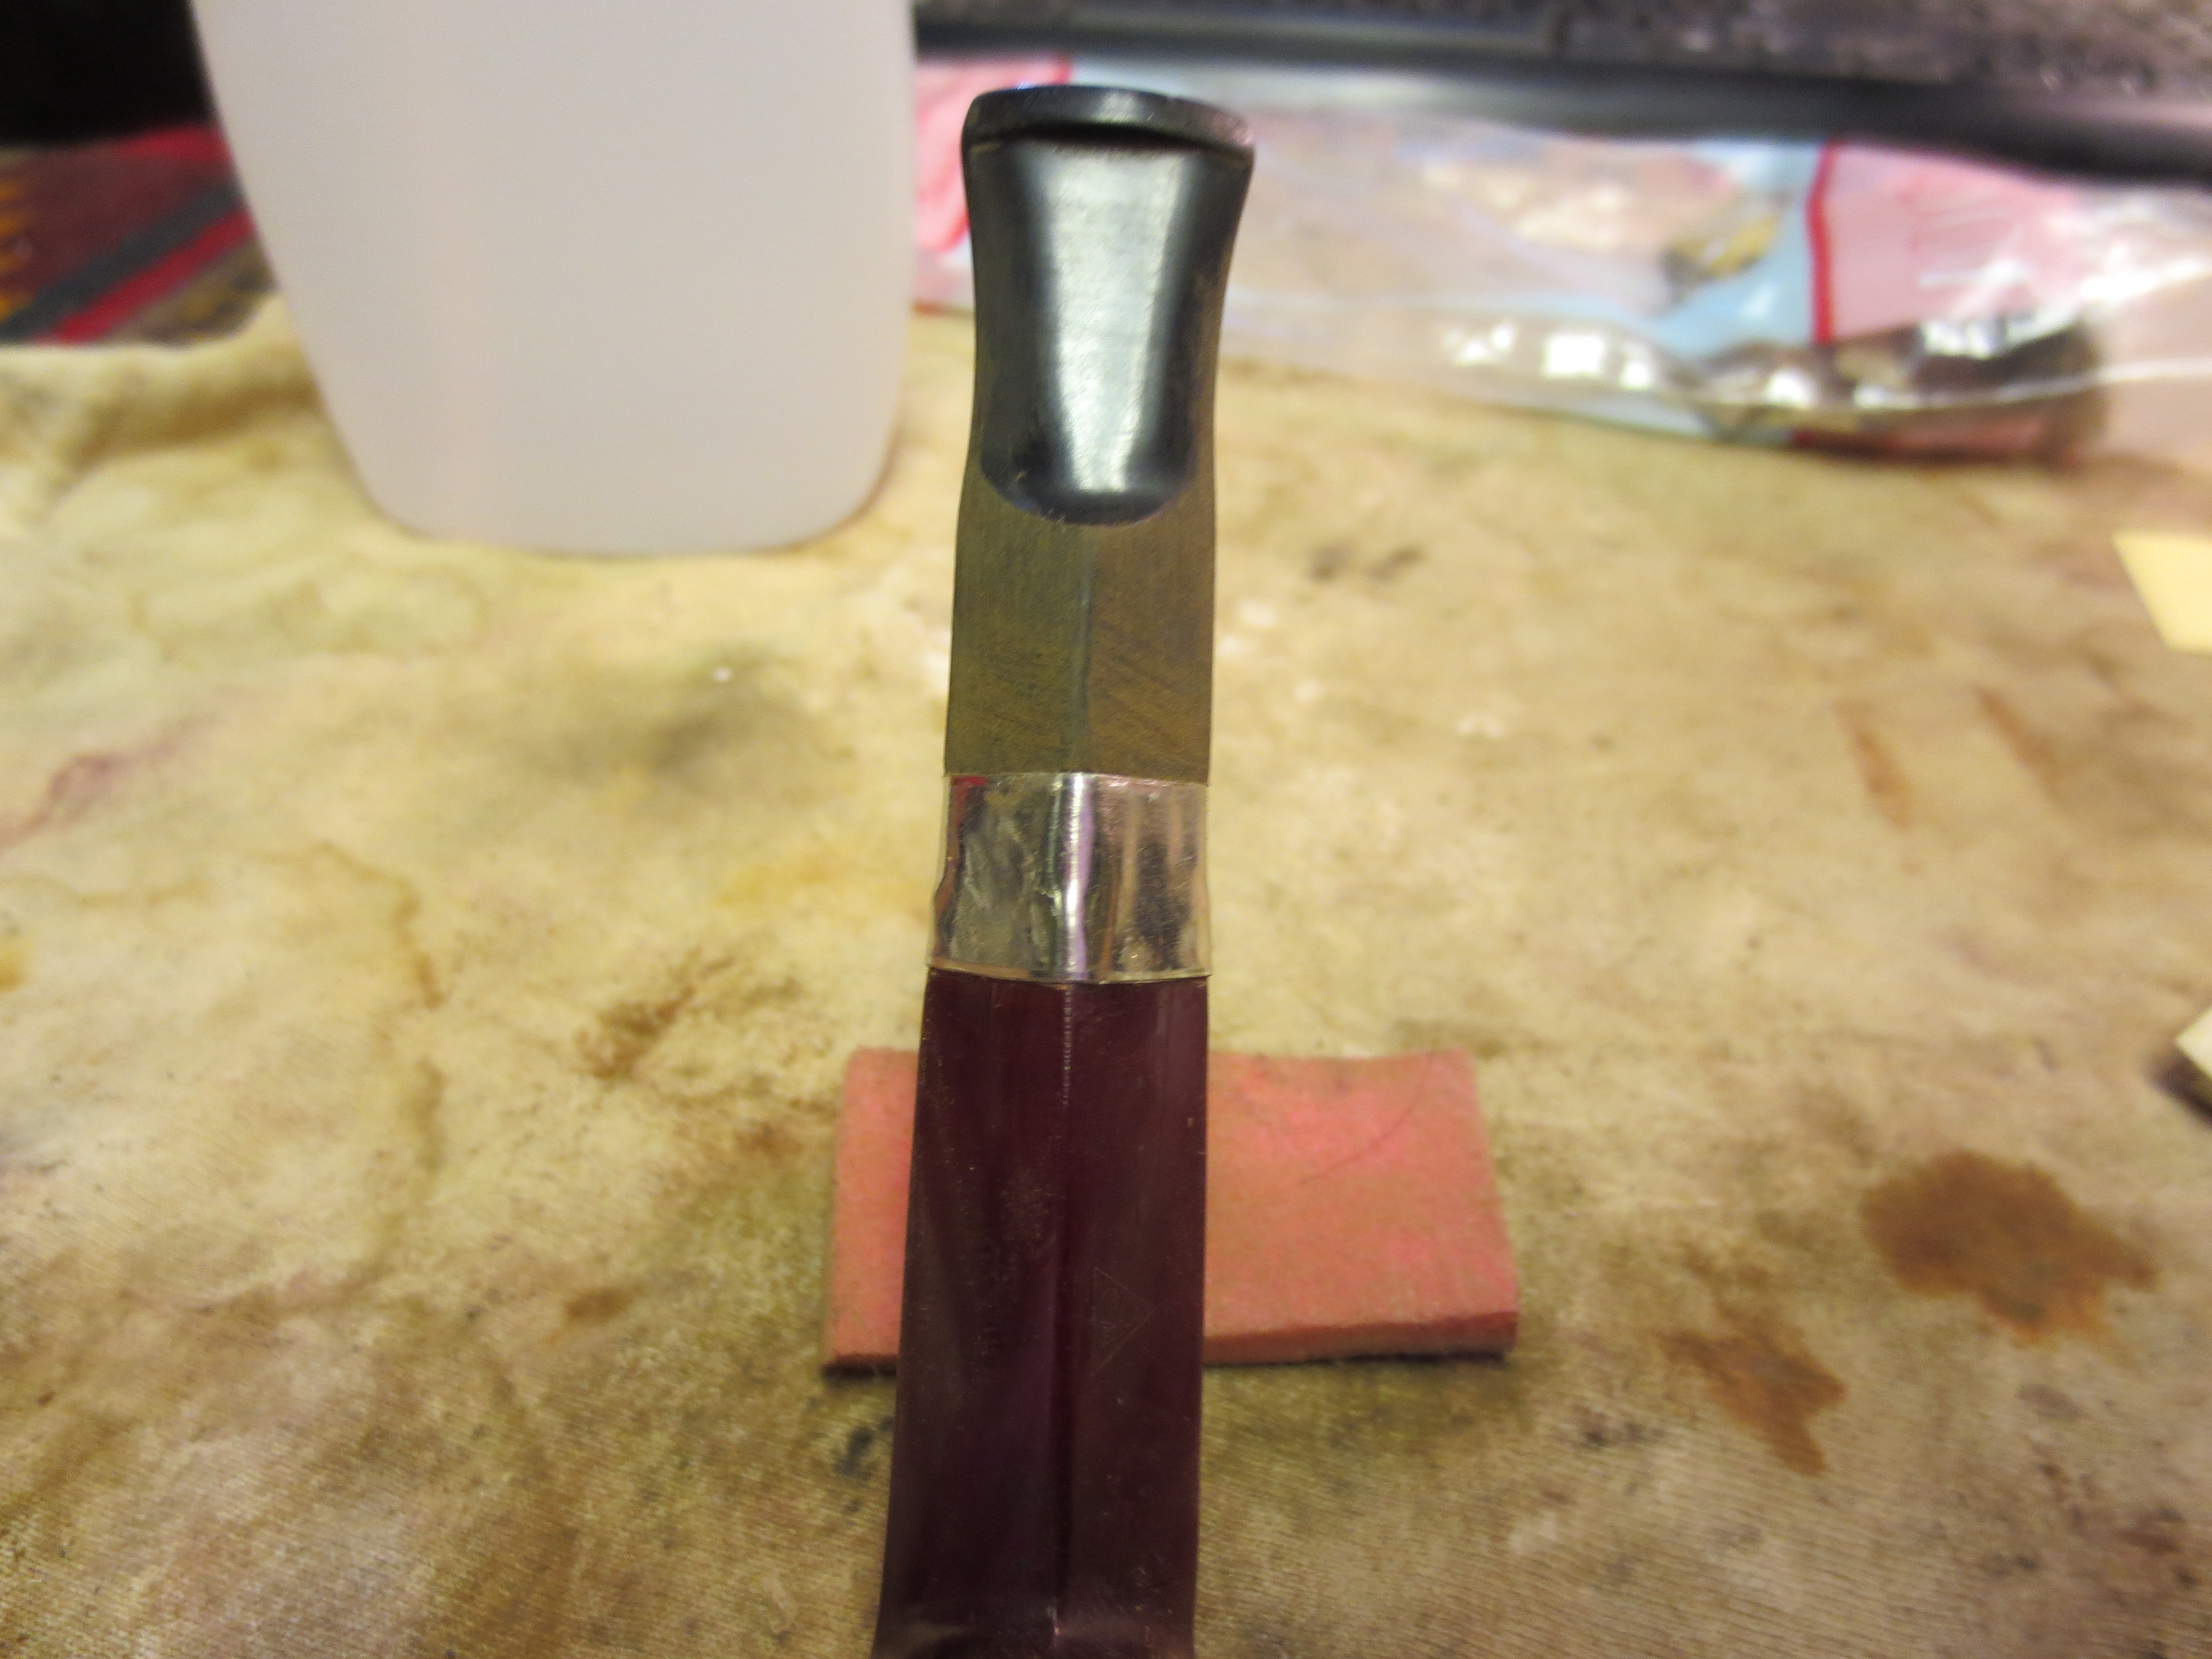
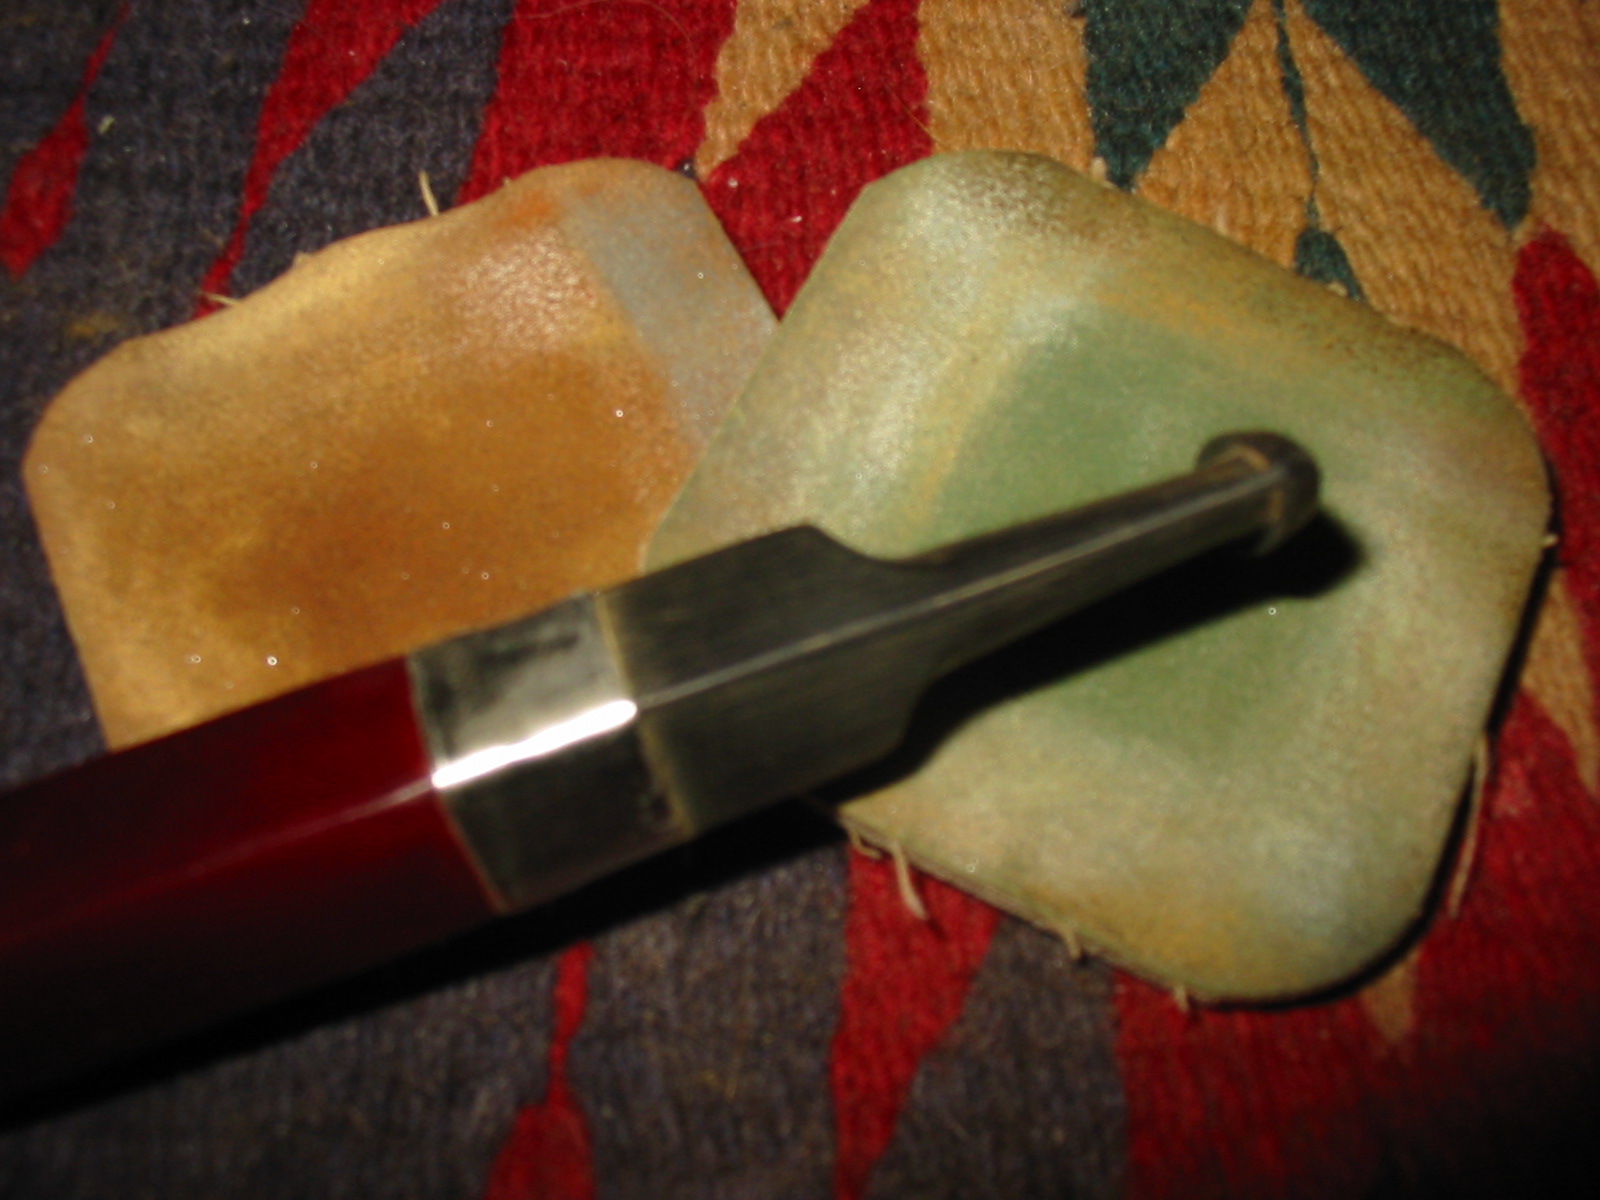
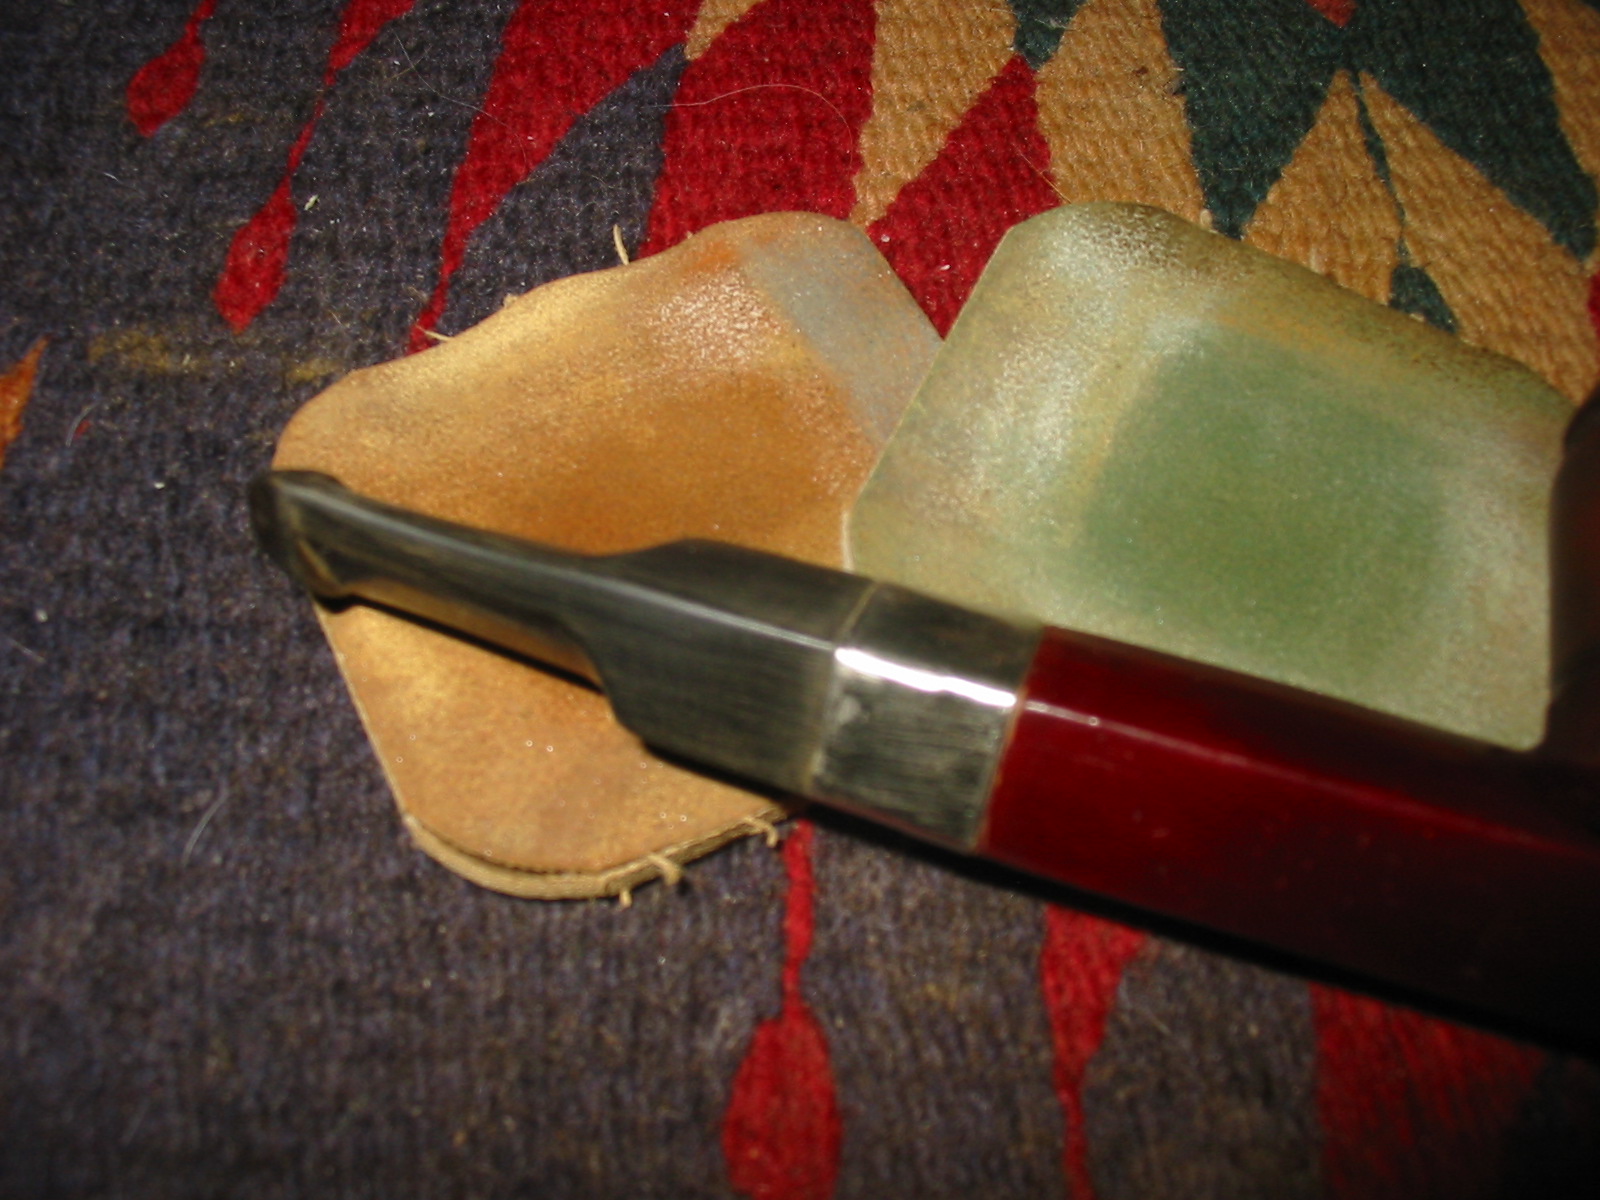
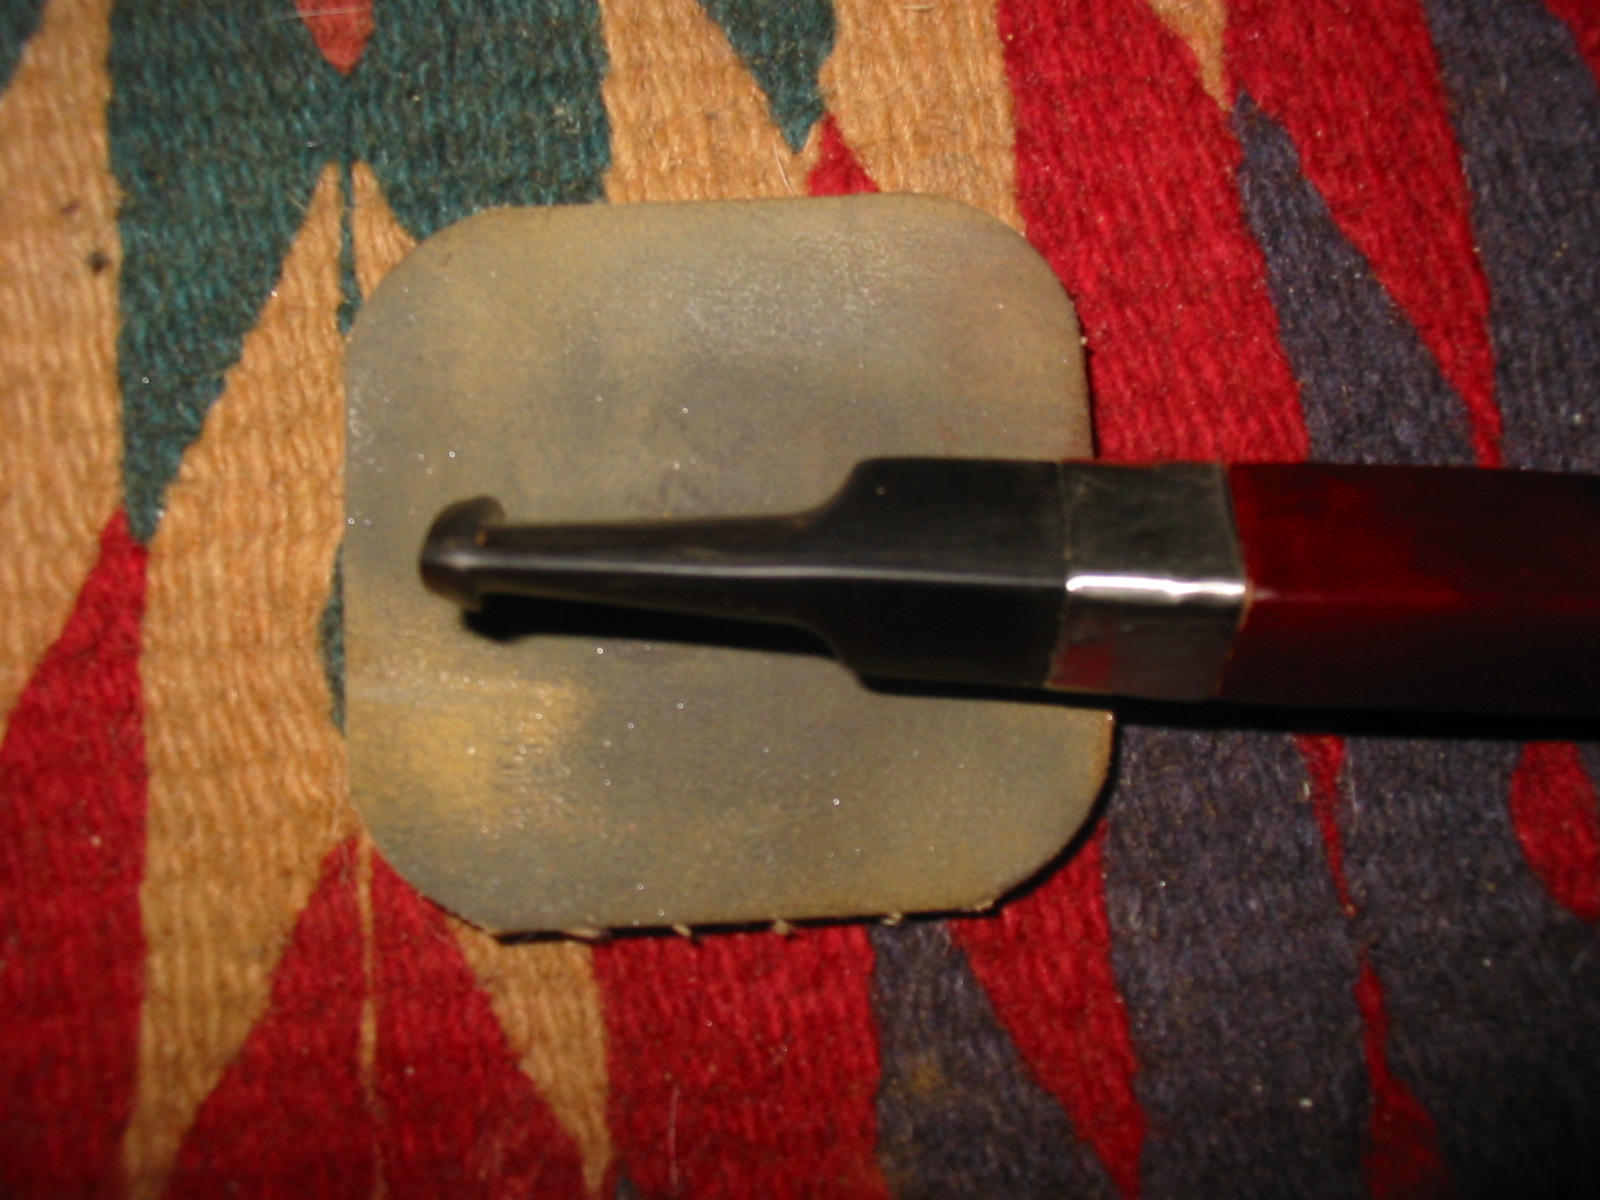
I took photos of the band on the shank from the various angles to show what it looked like. It is a pretty addition. 
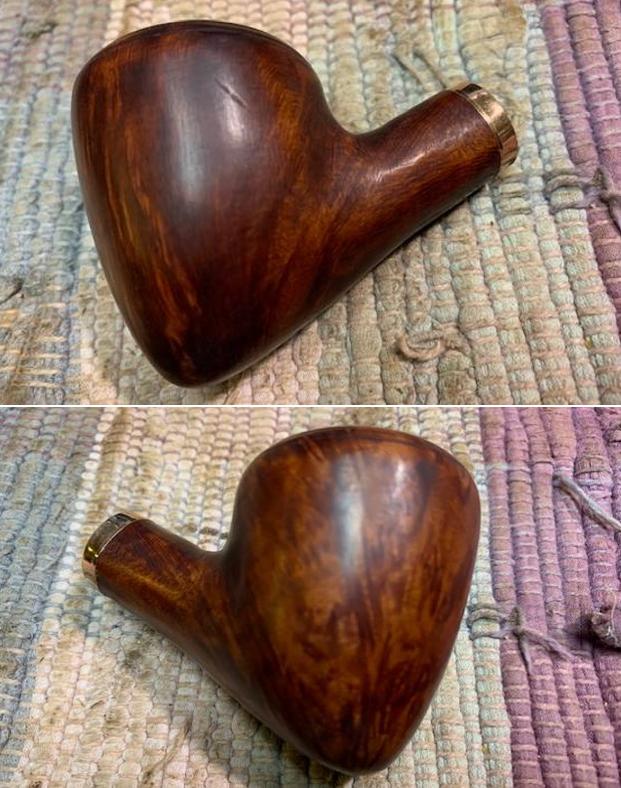
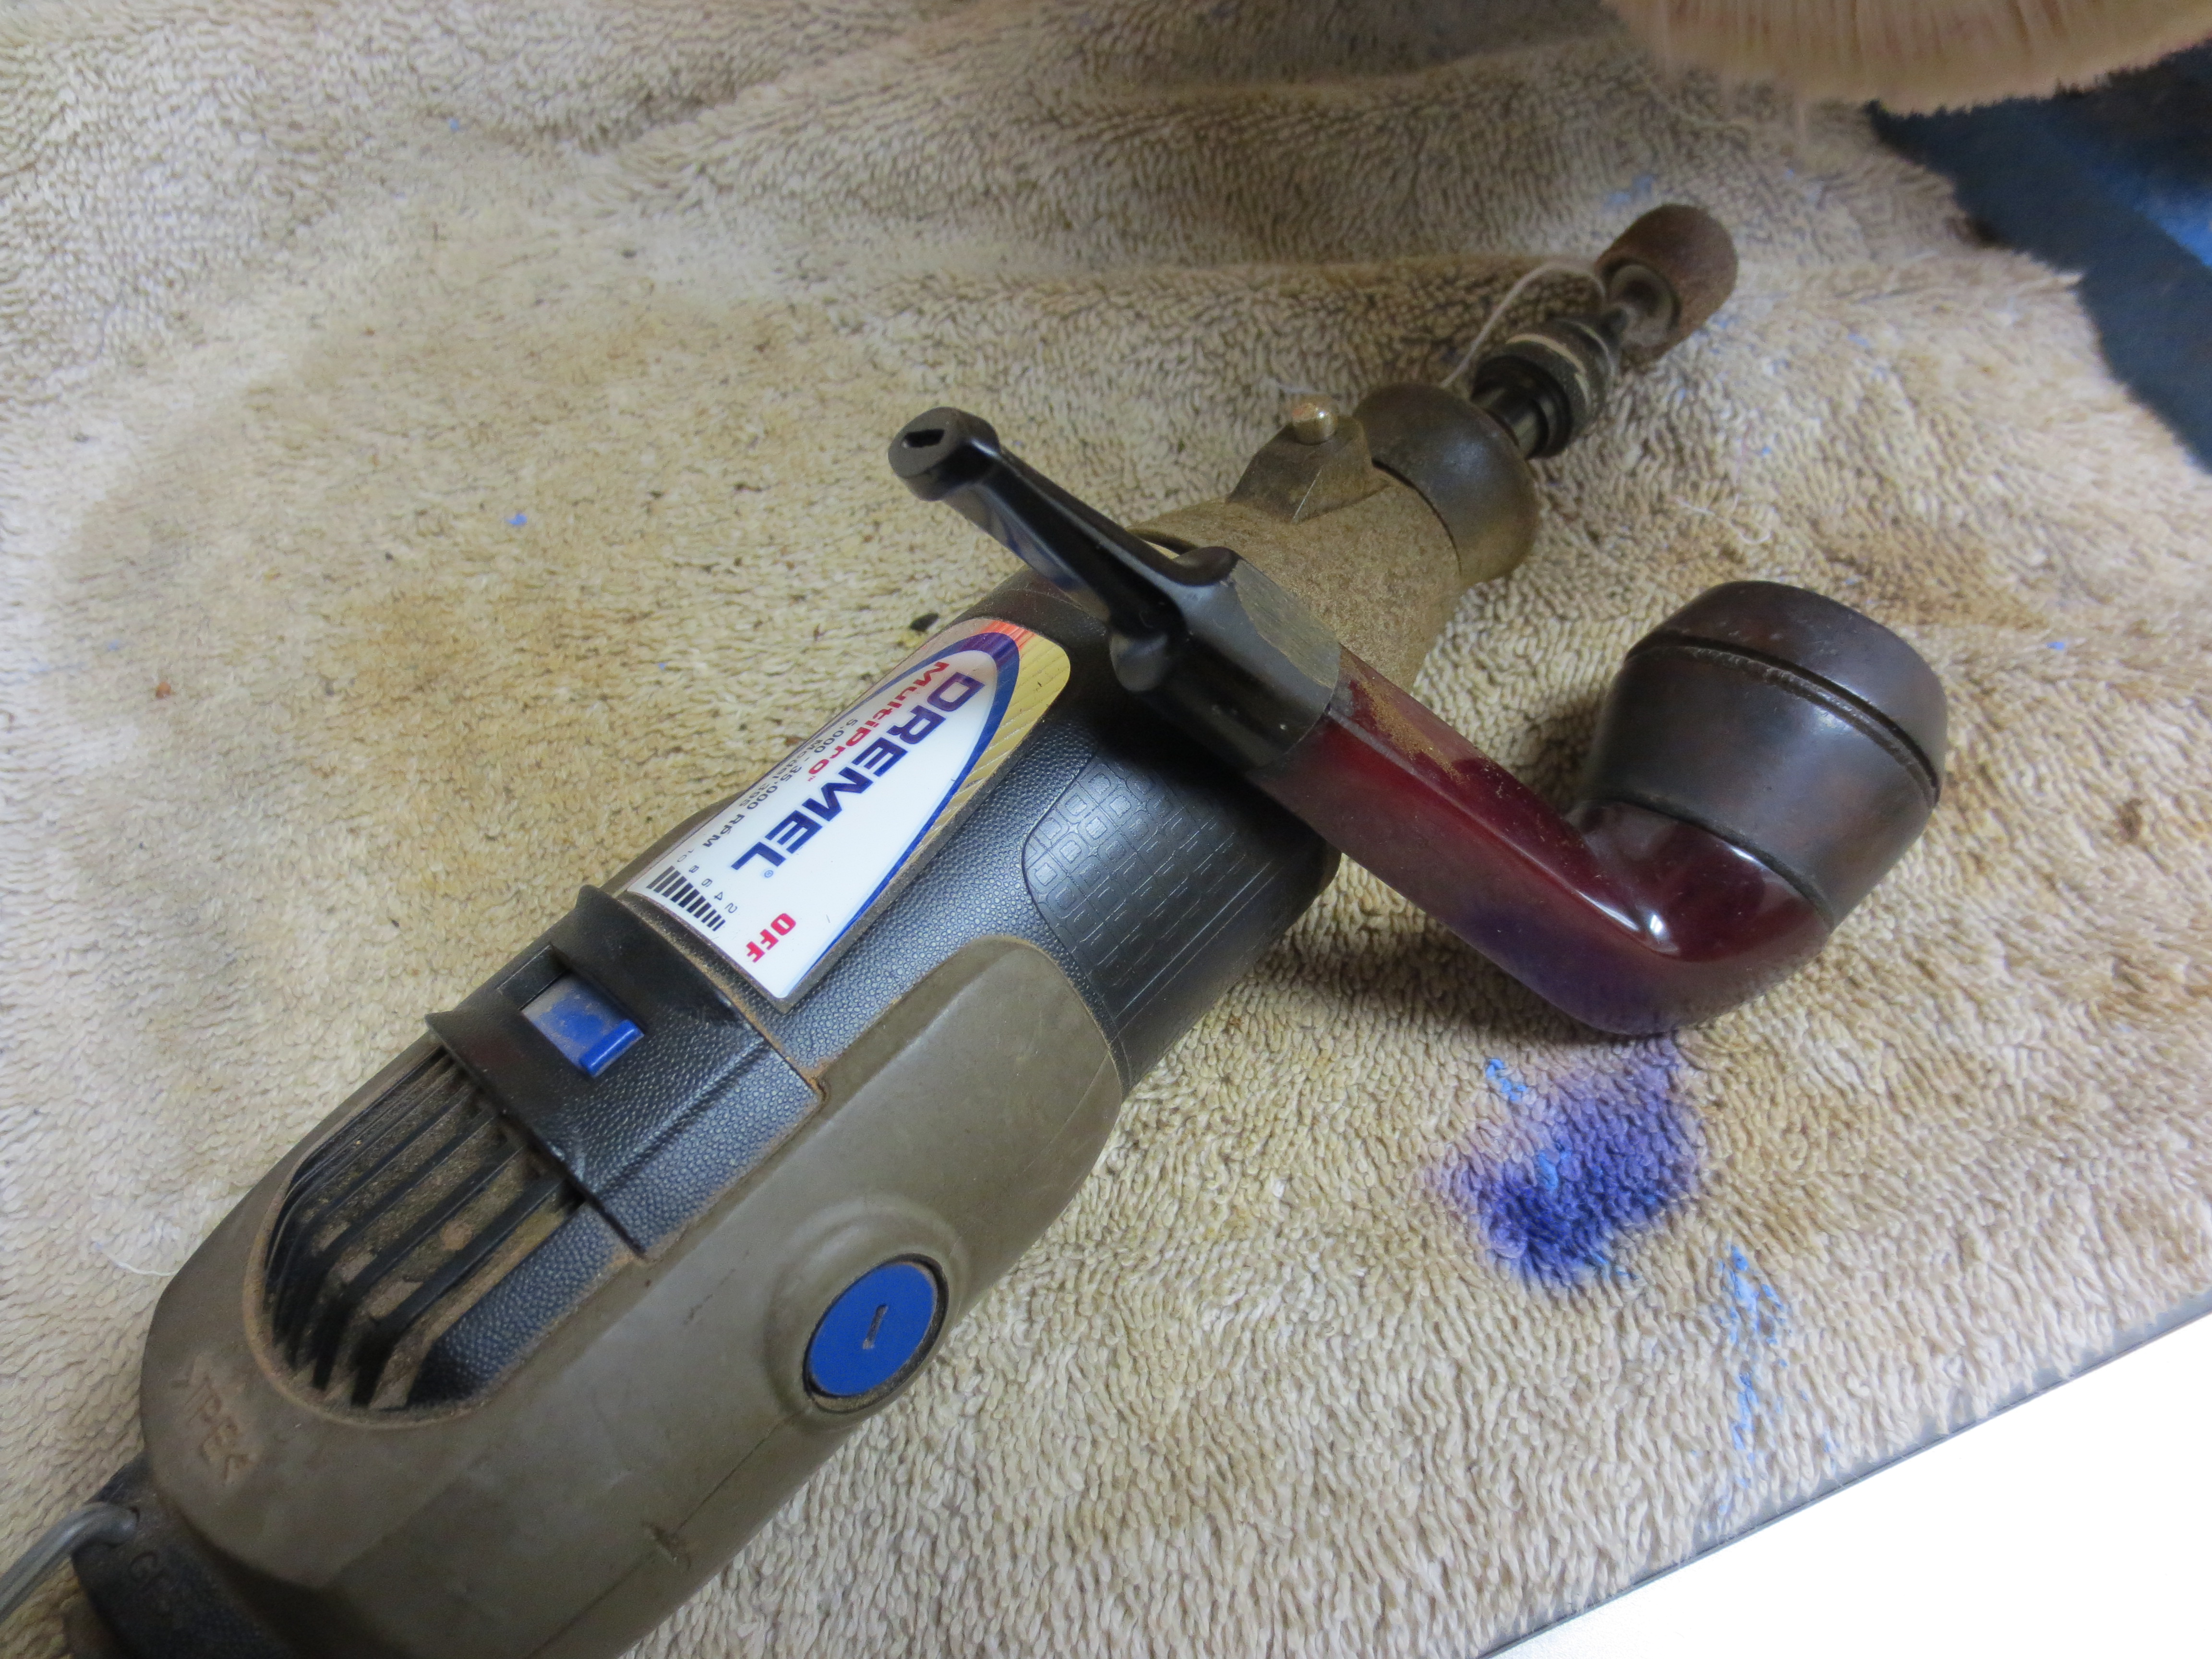
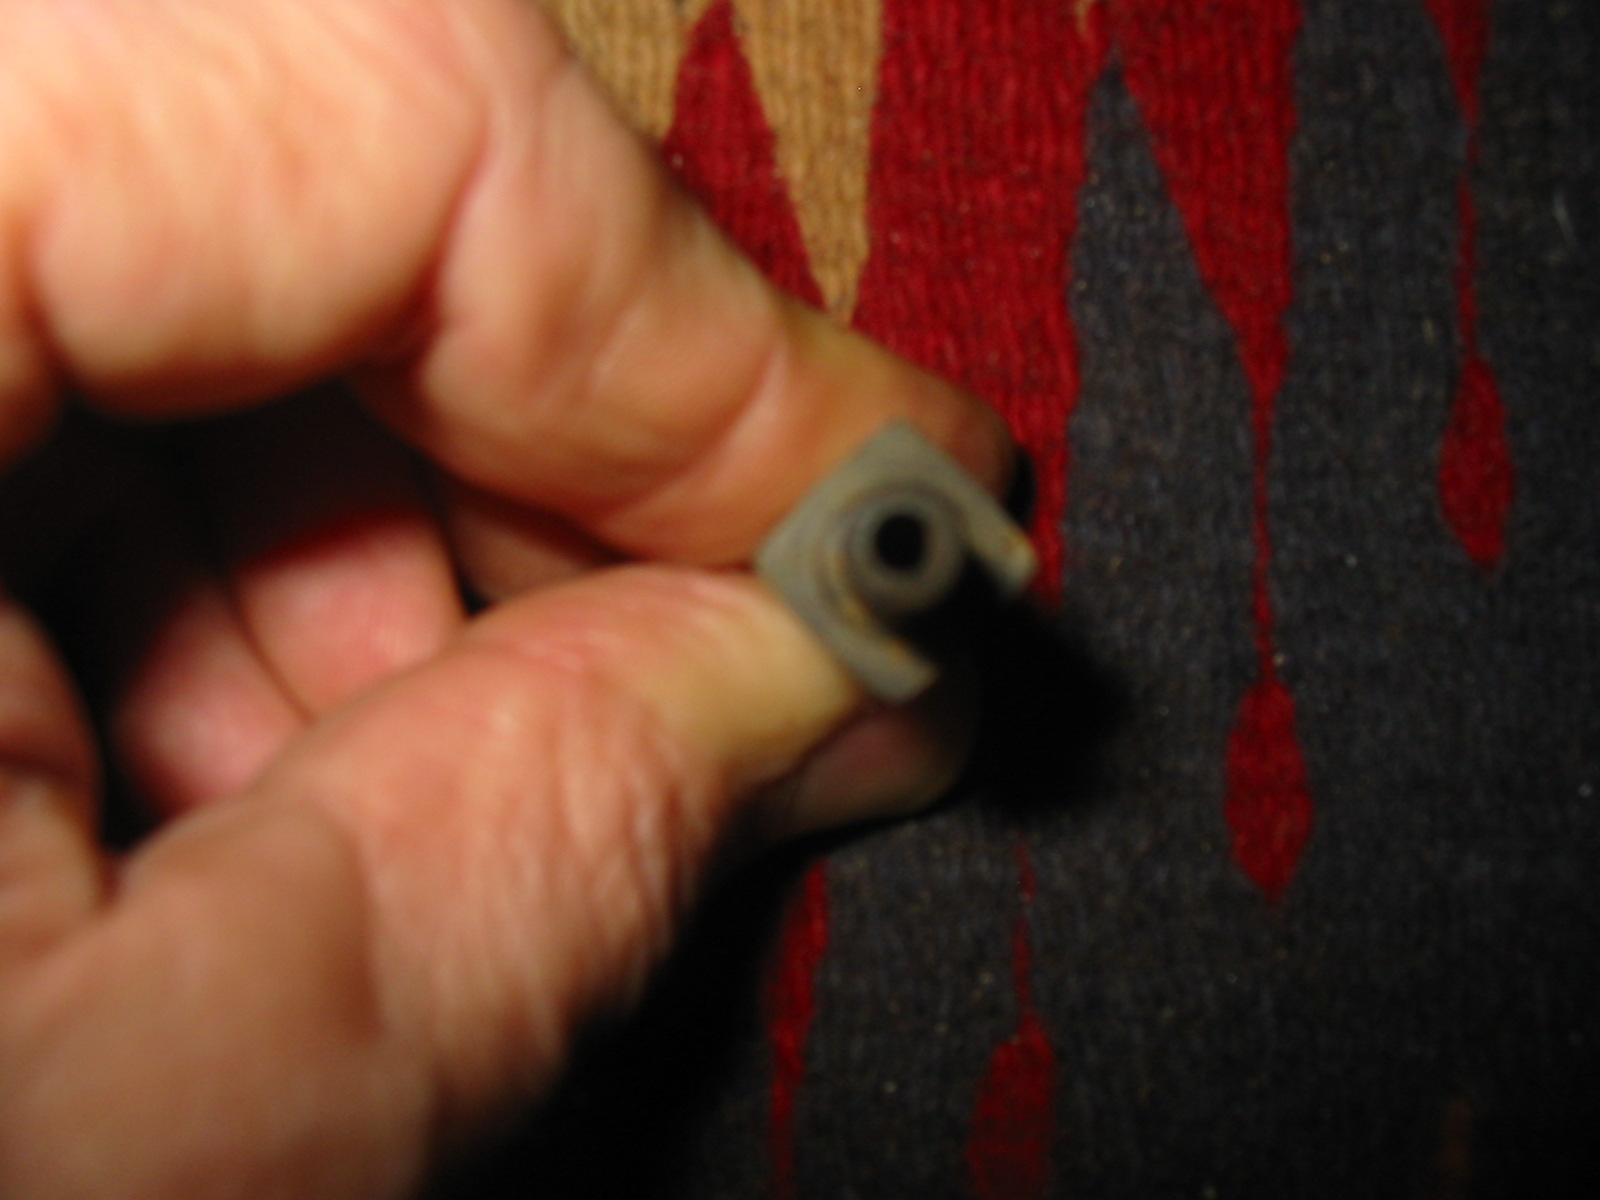
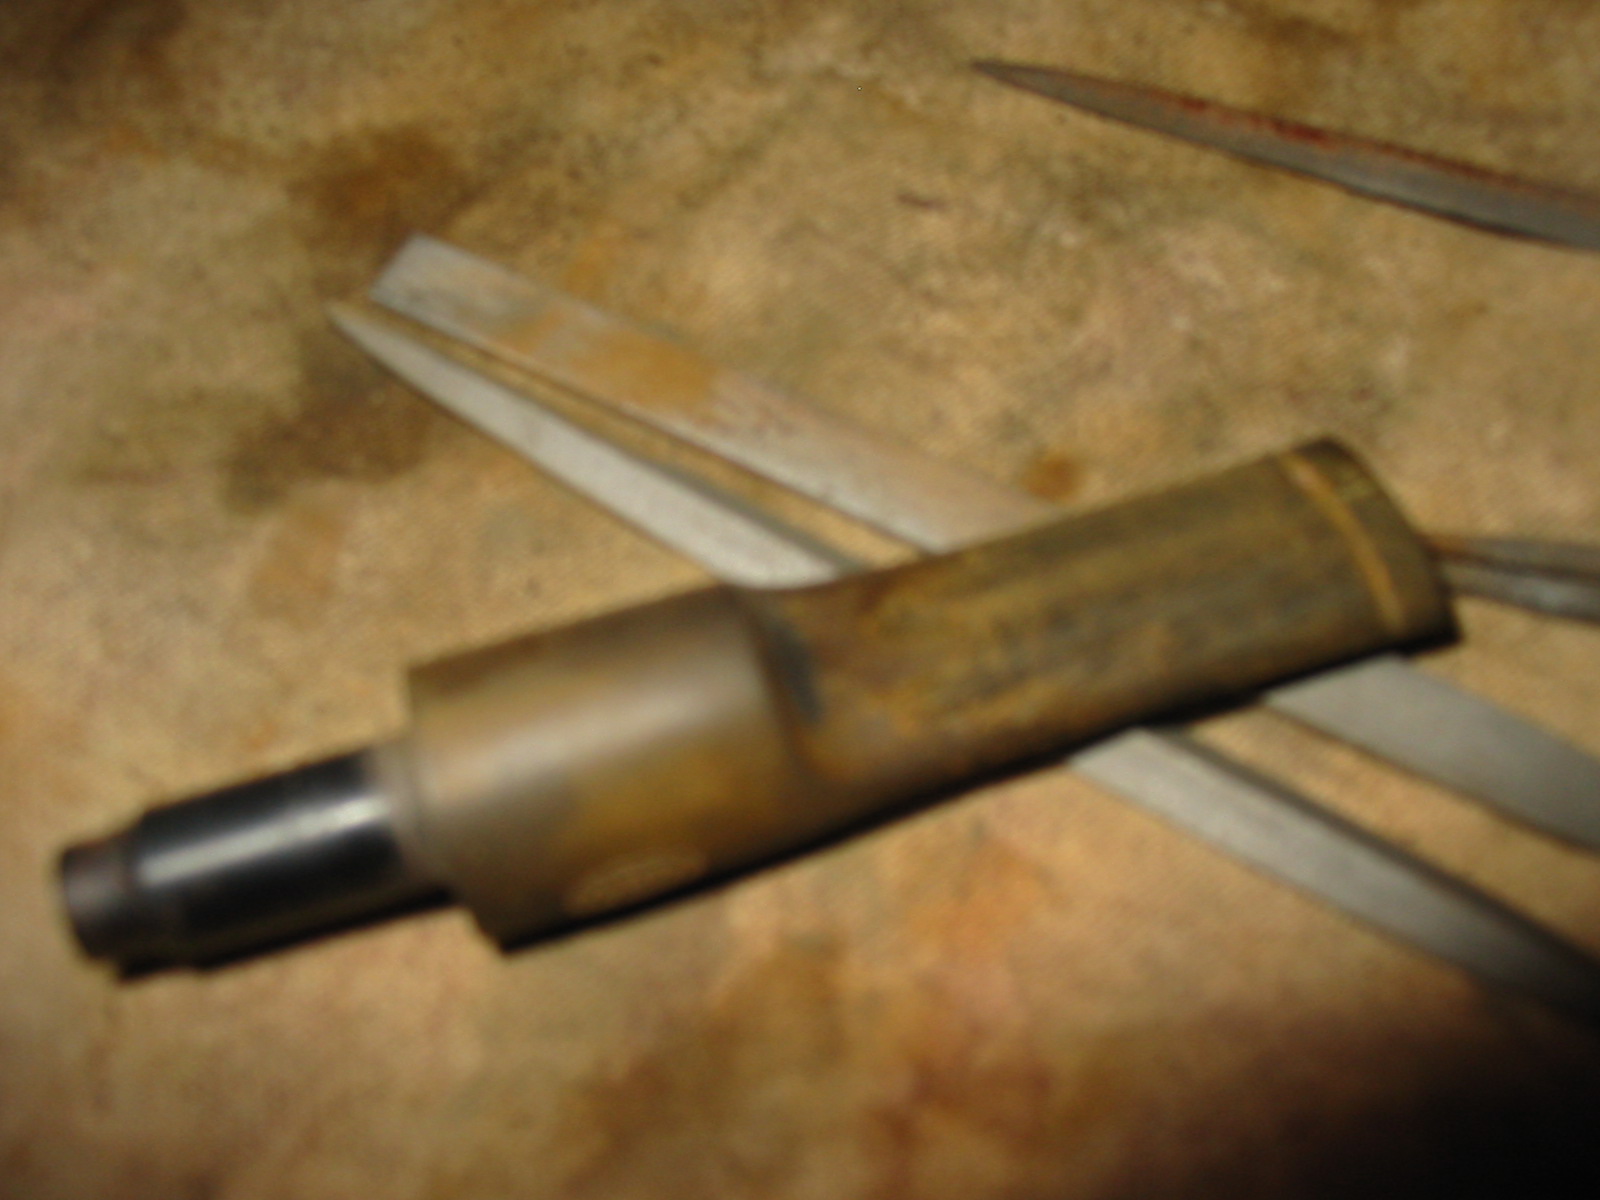
I set aside the repaired bowl and turned my attention to the stem. I used the blade of pen knife to funnel the airway in the tenon.I smoothed out the castings on the tenon with 220 grit sandpaper. I also smoothed out the file marks on the saddle portion of the stem and worked to make it round again.
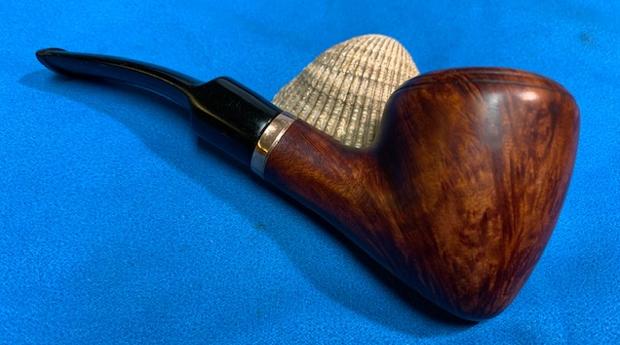
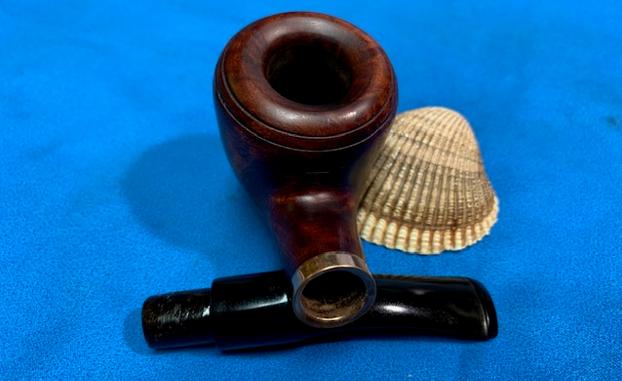
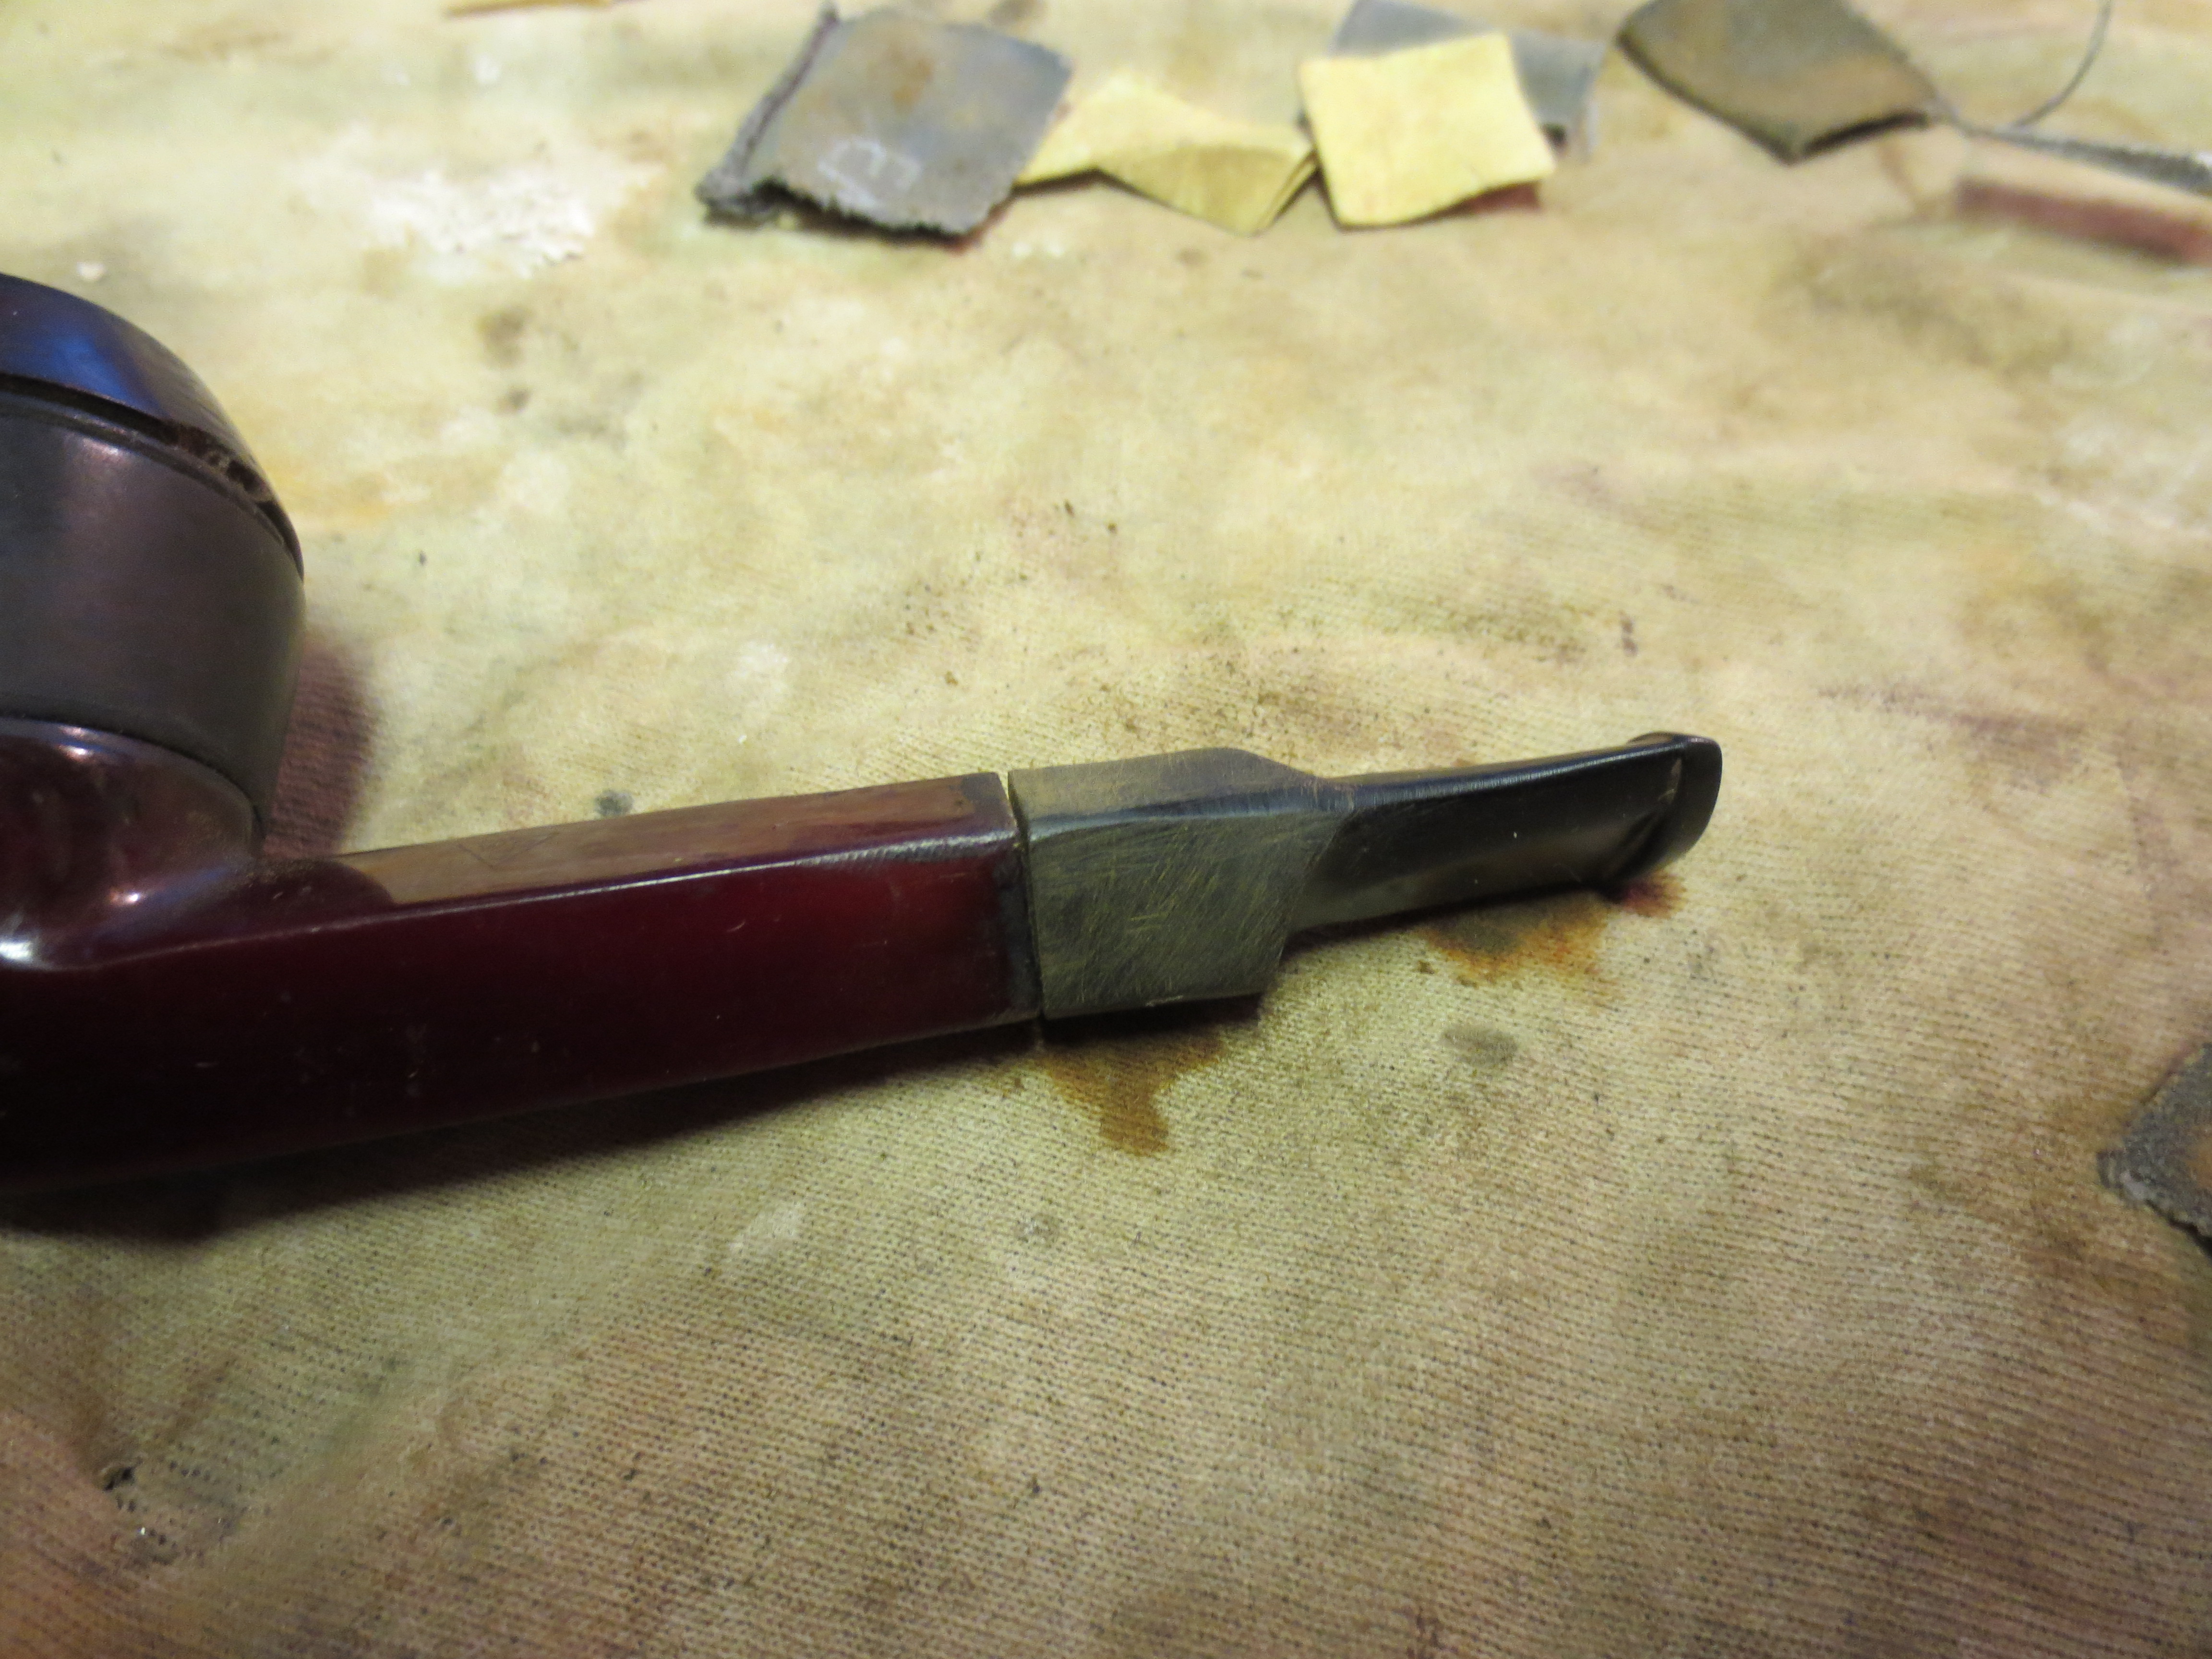
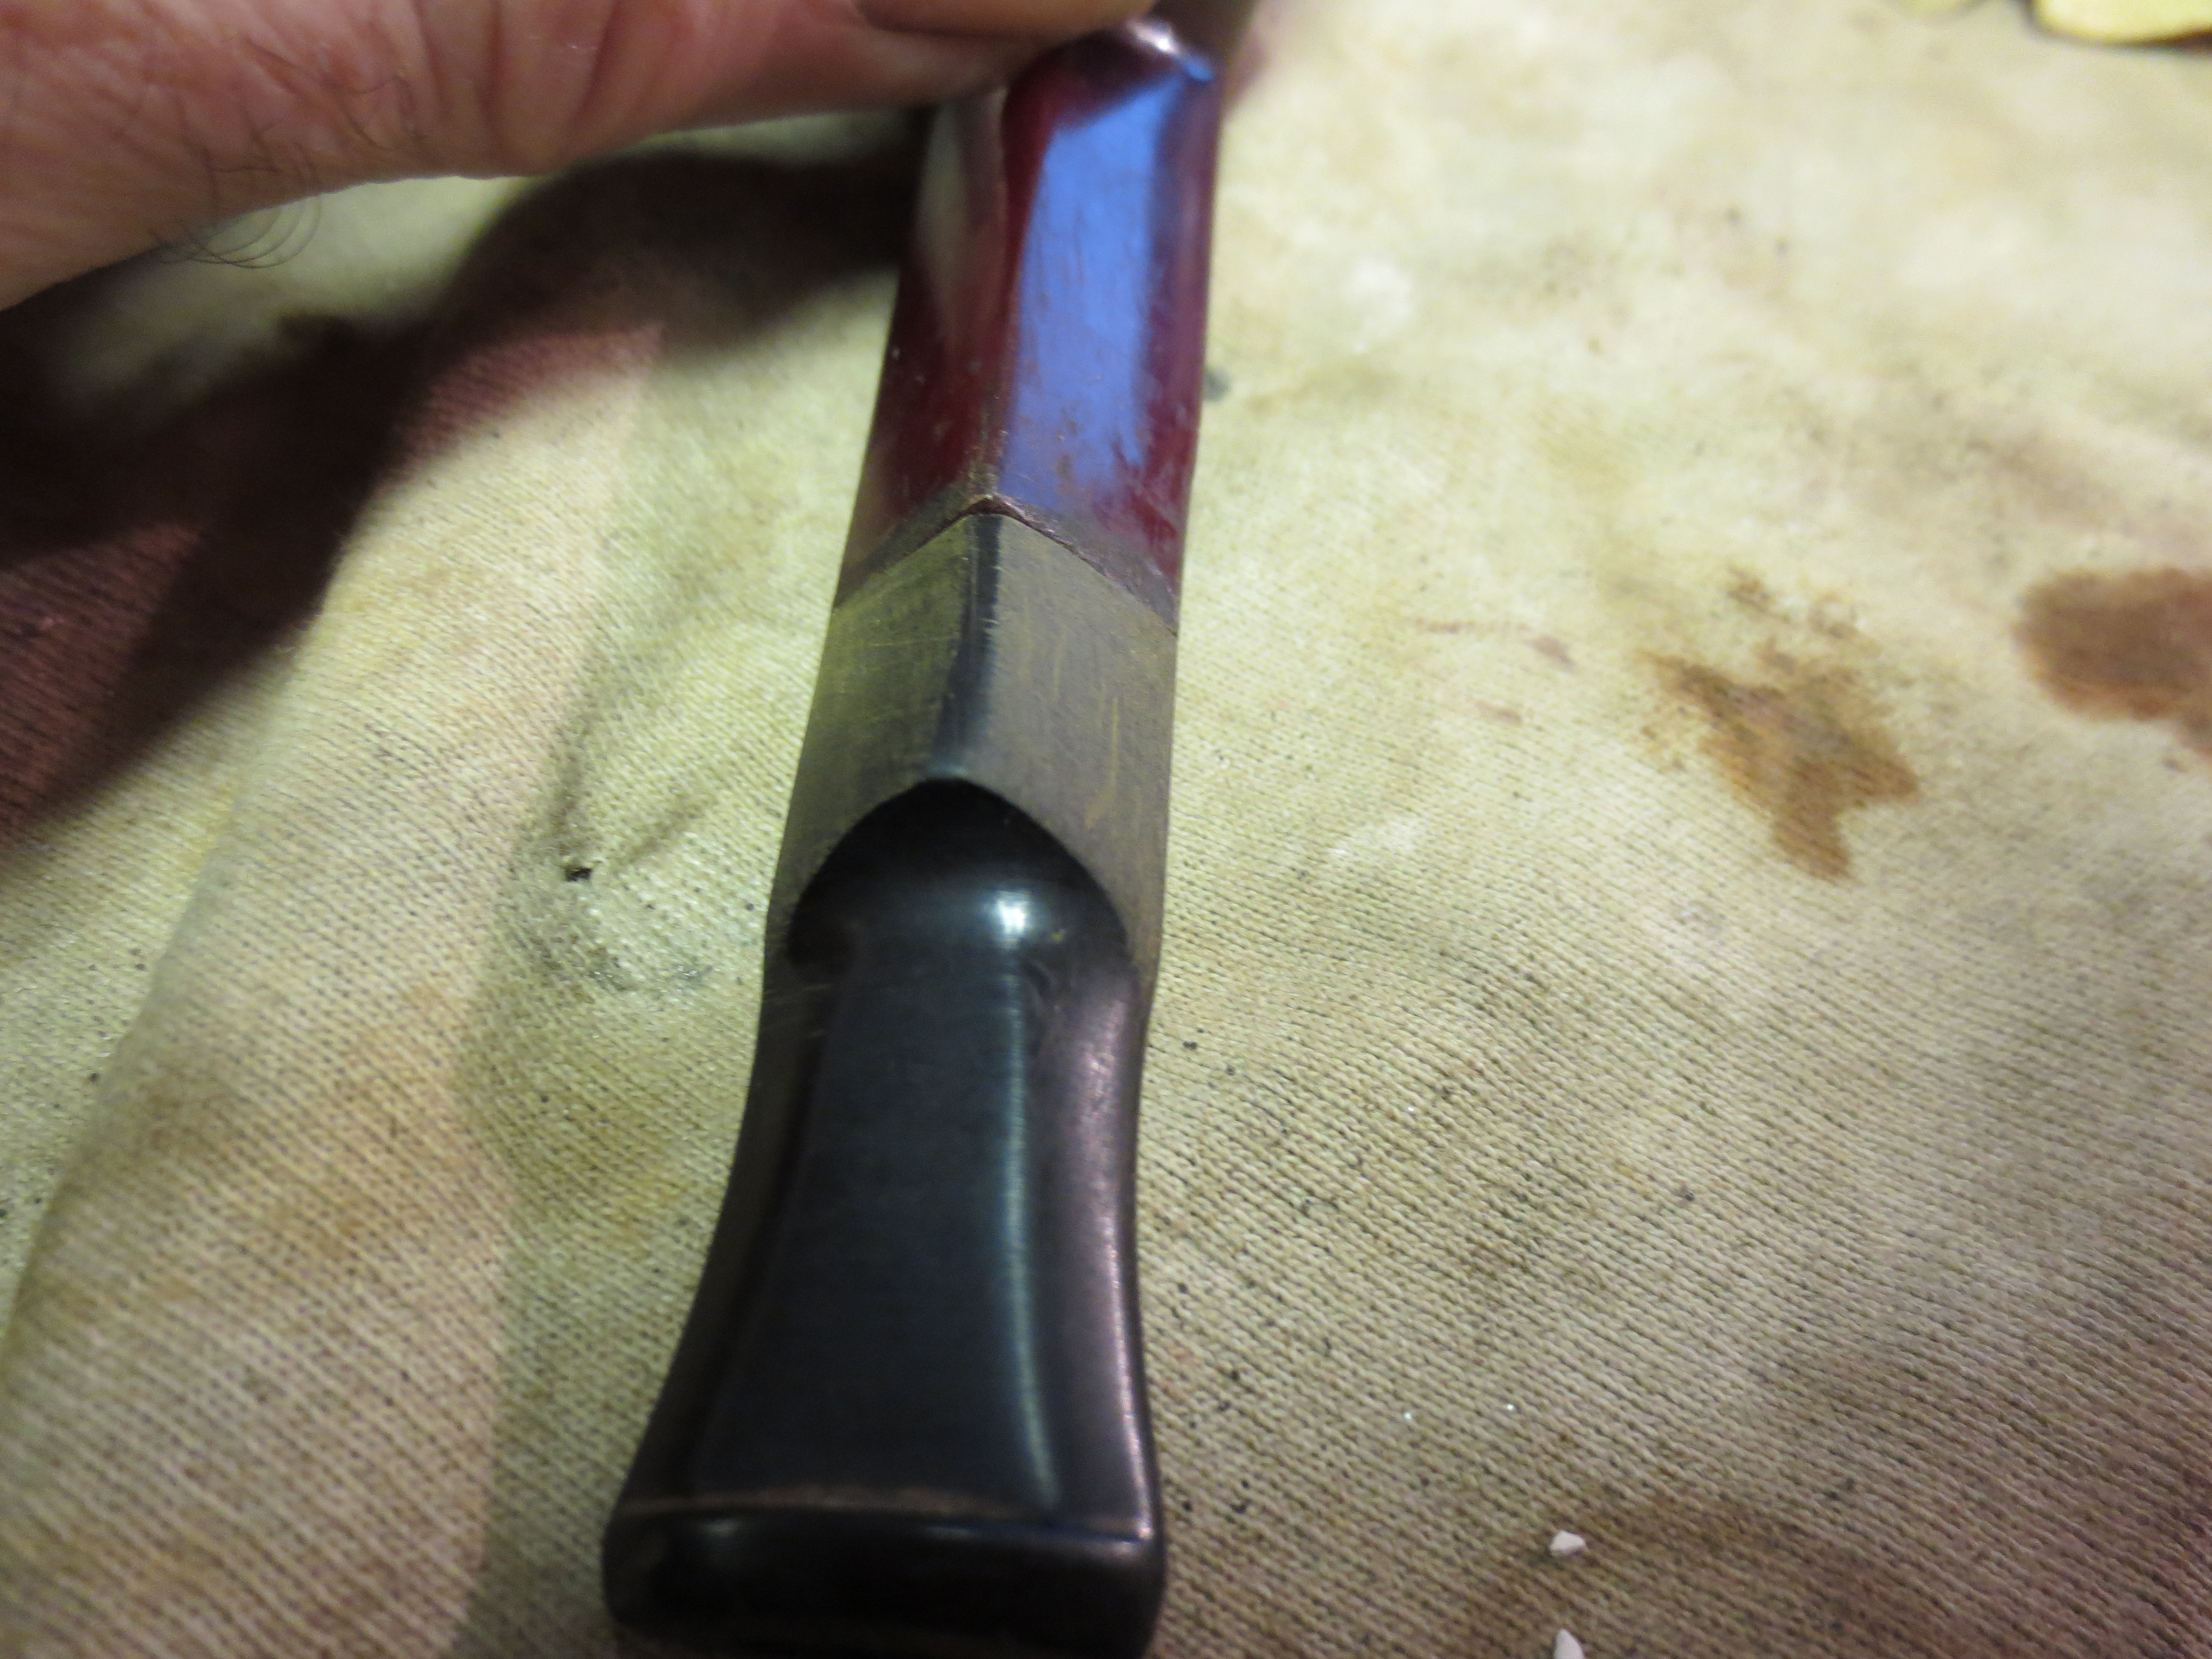
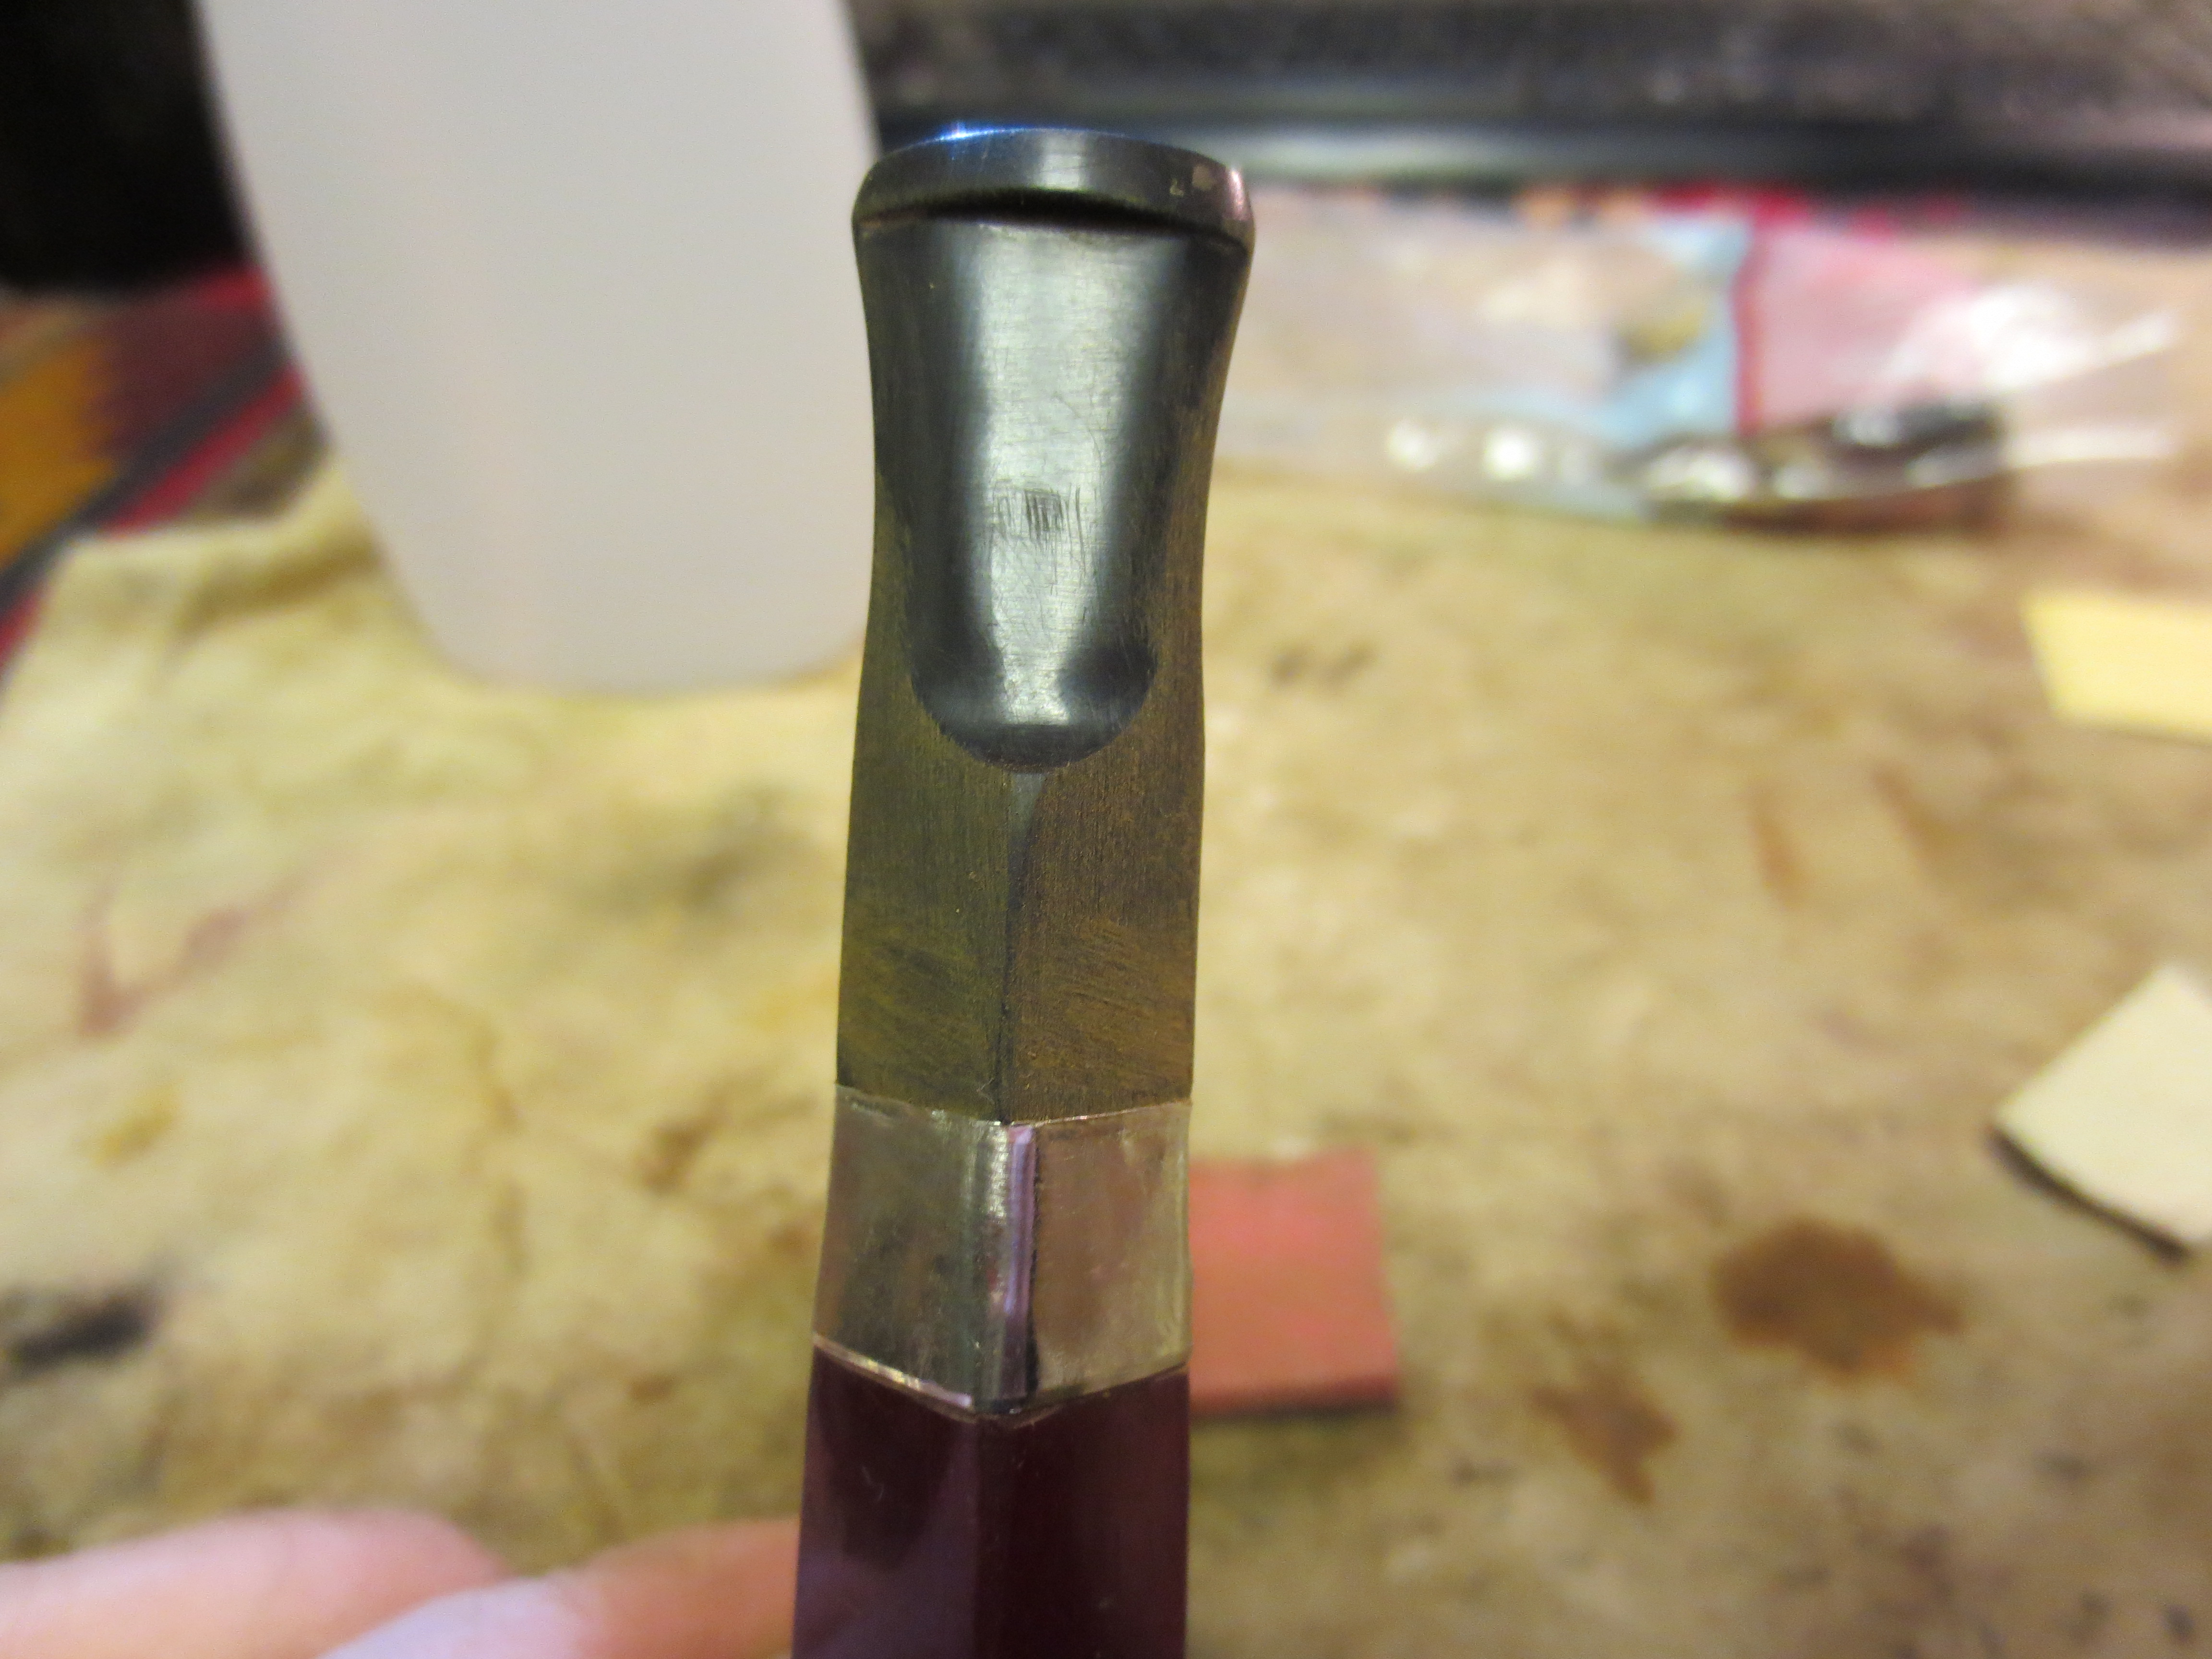
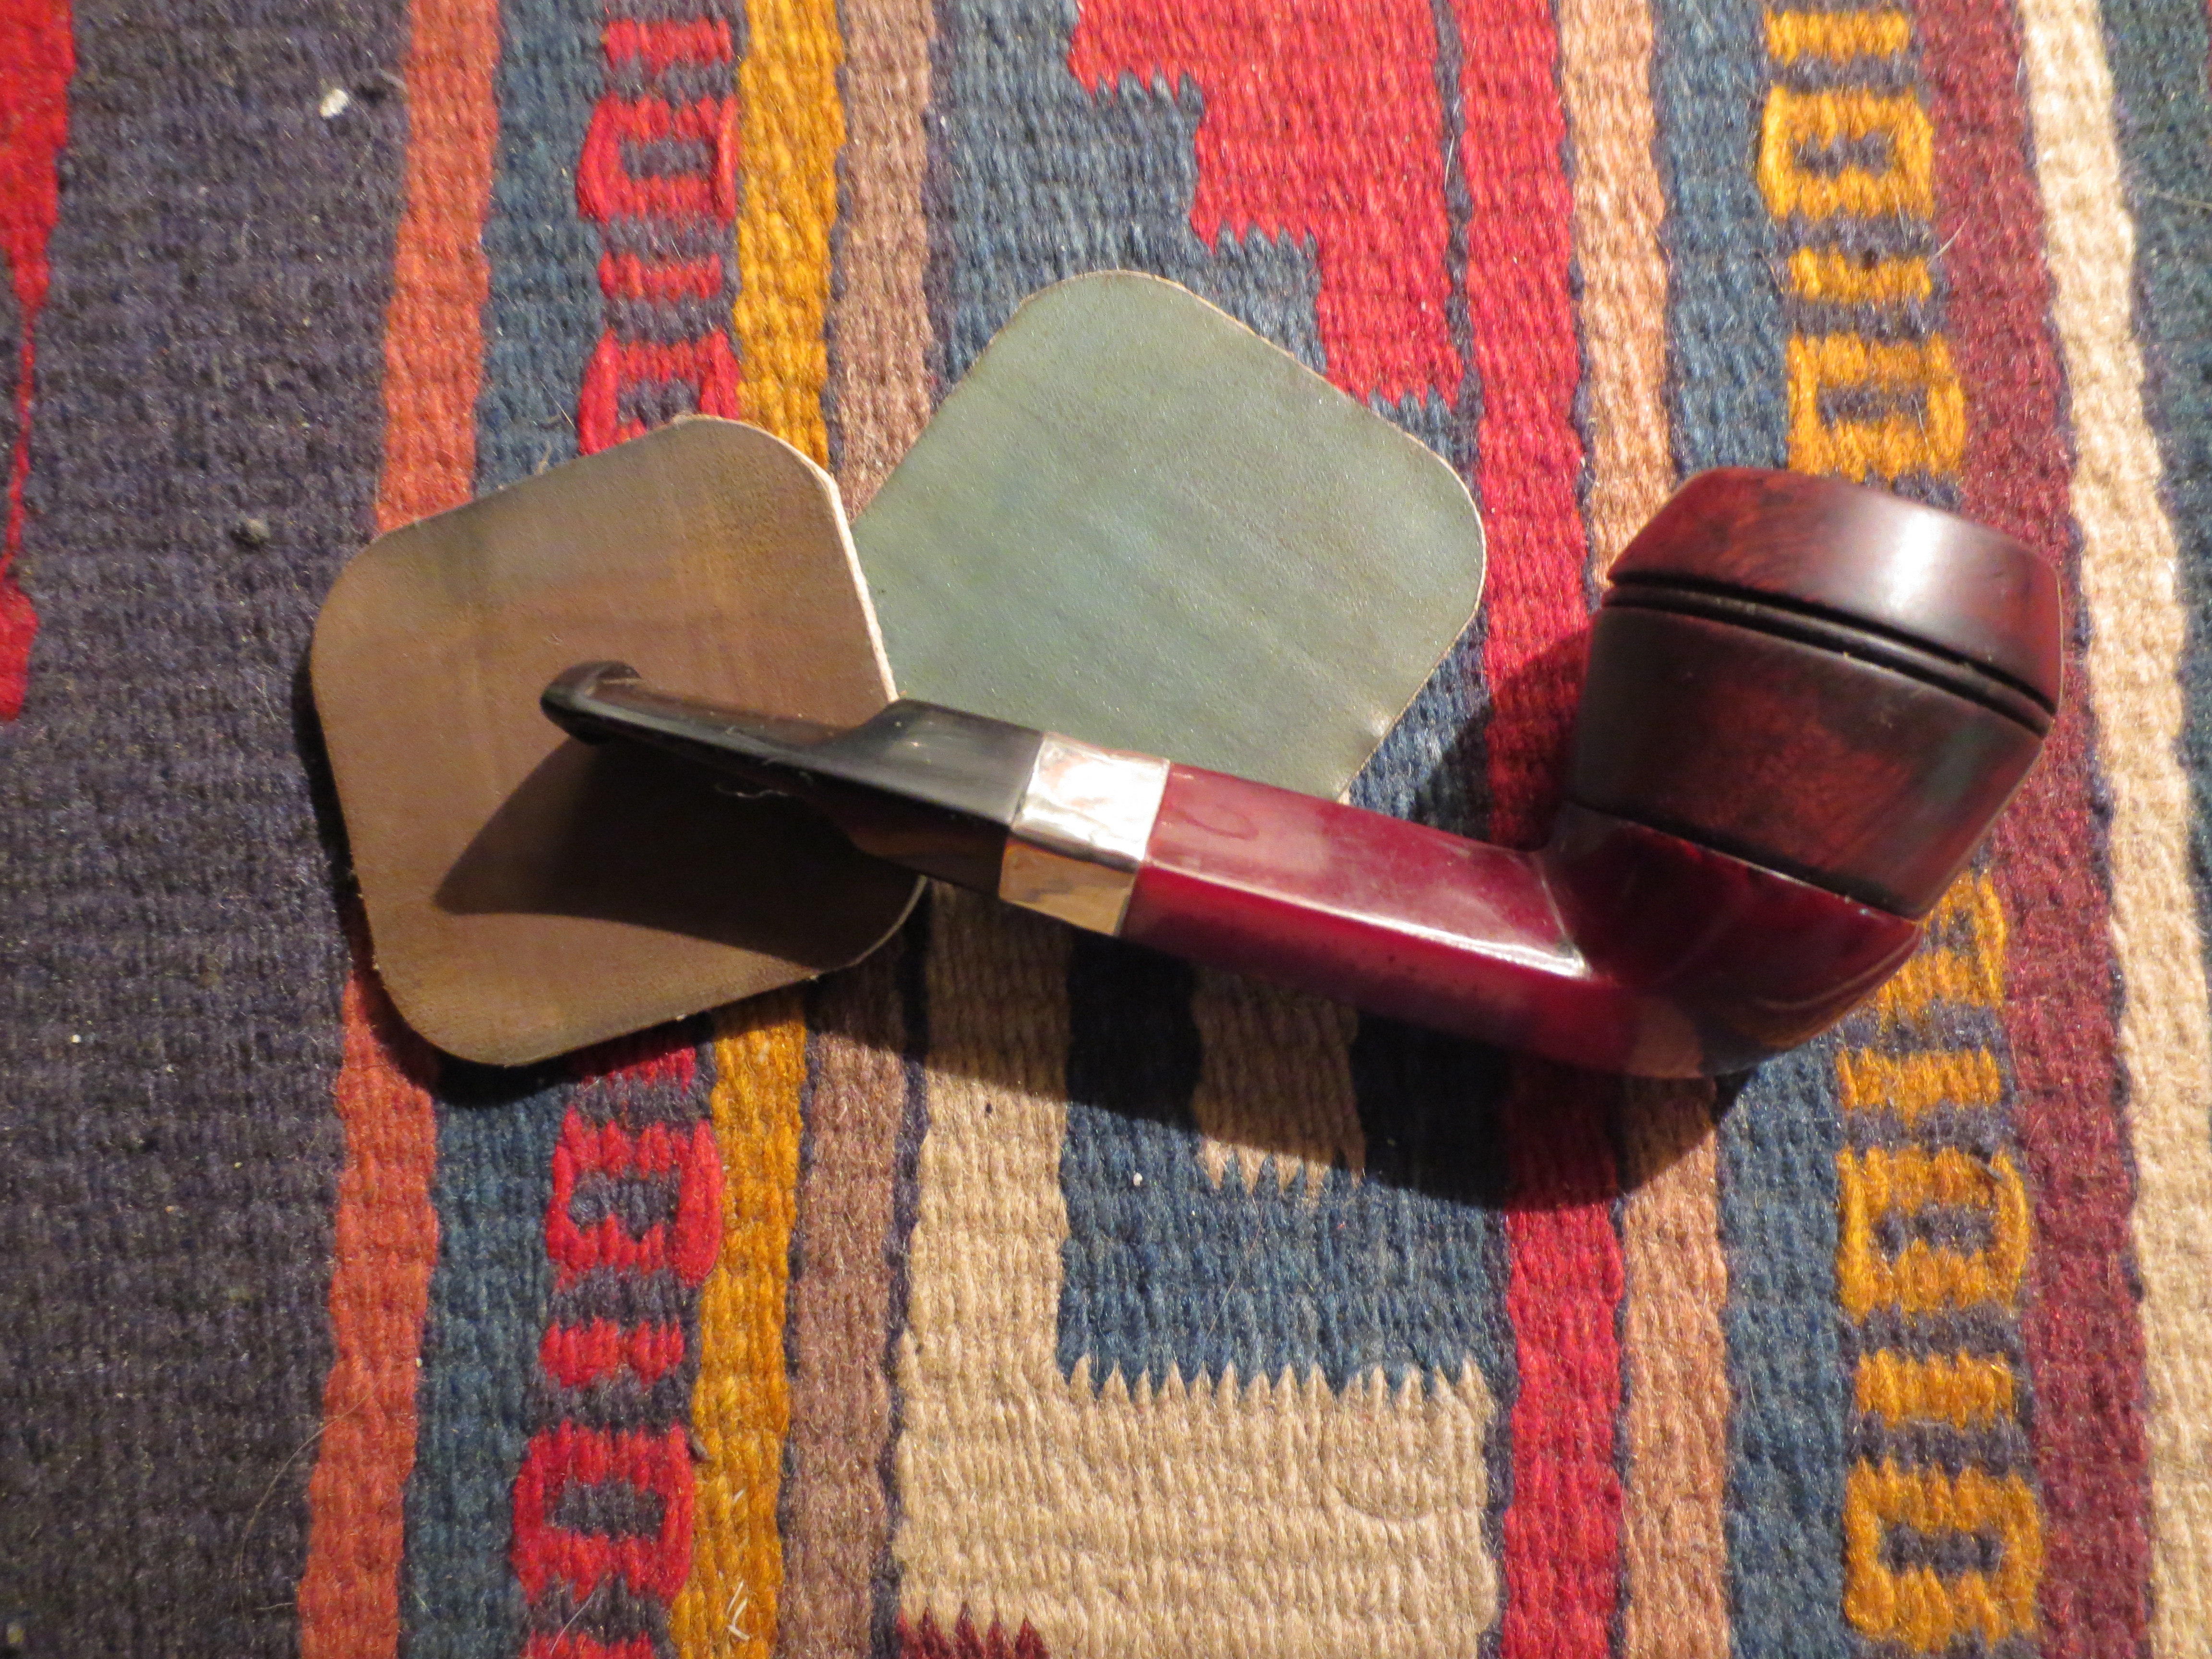
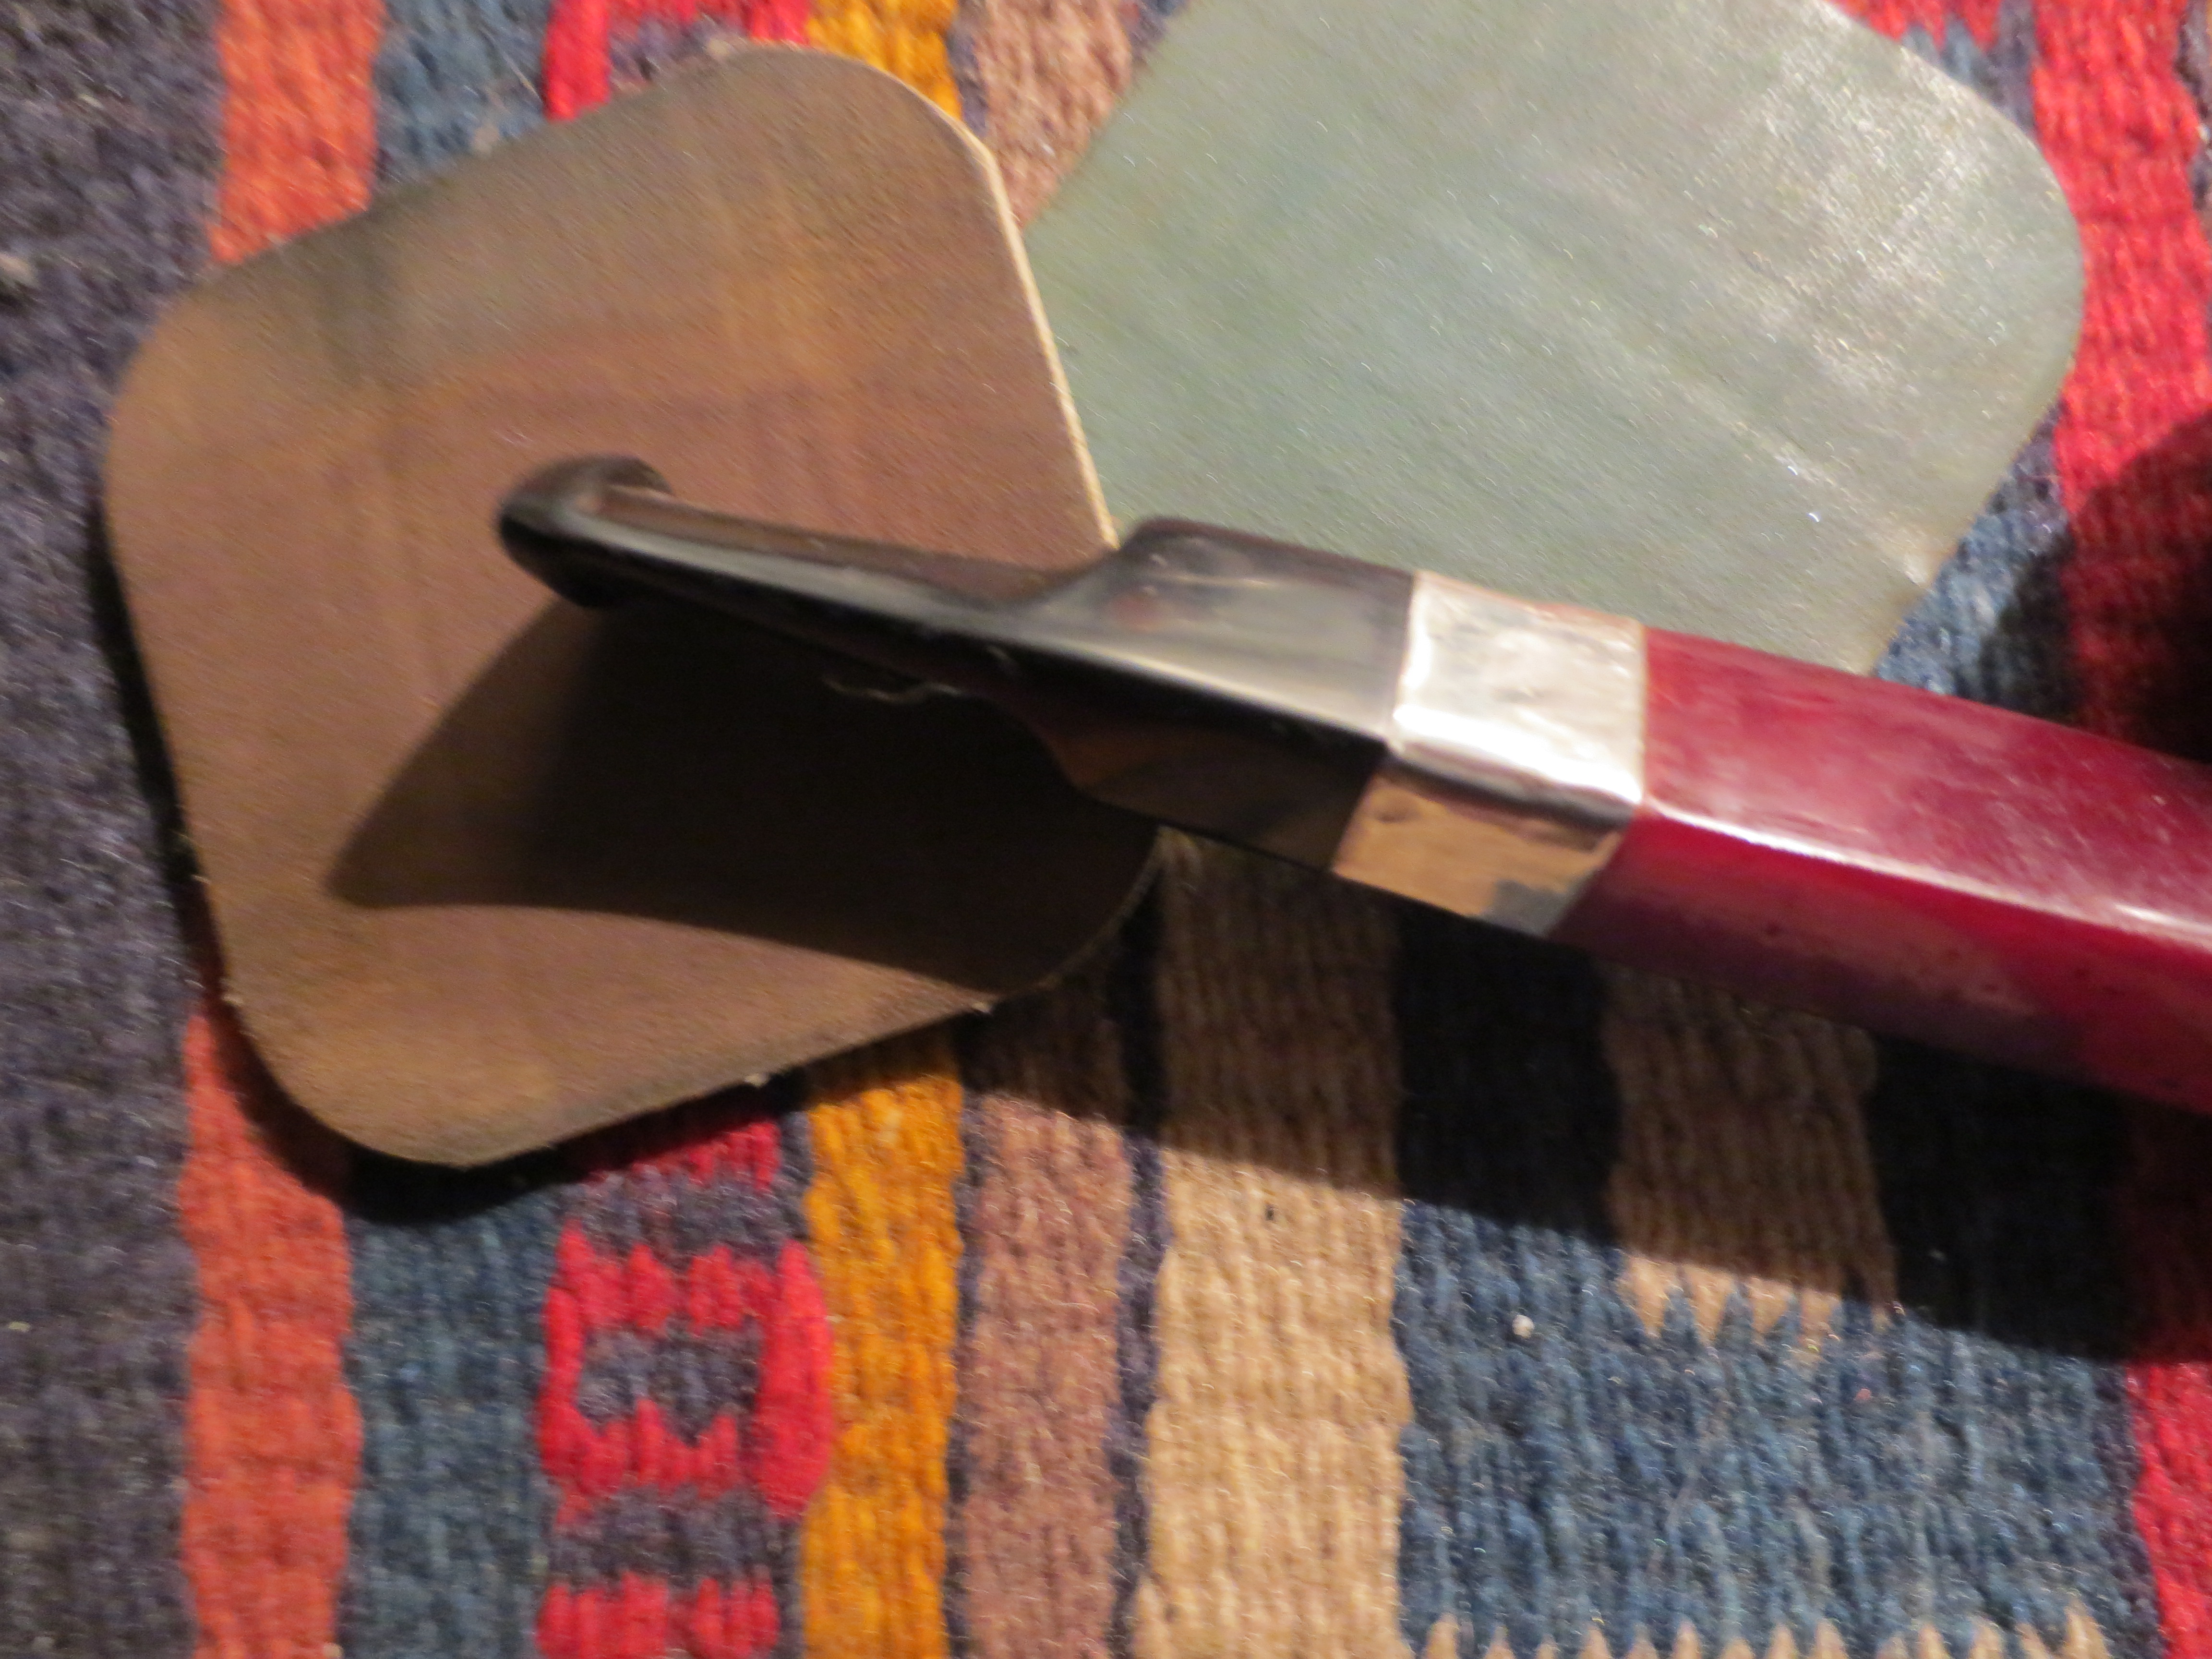
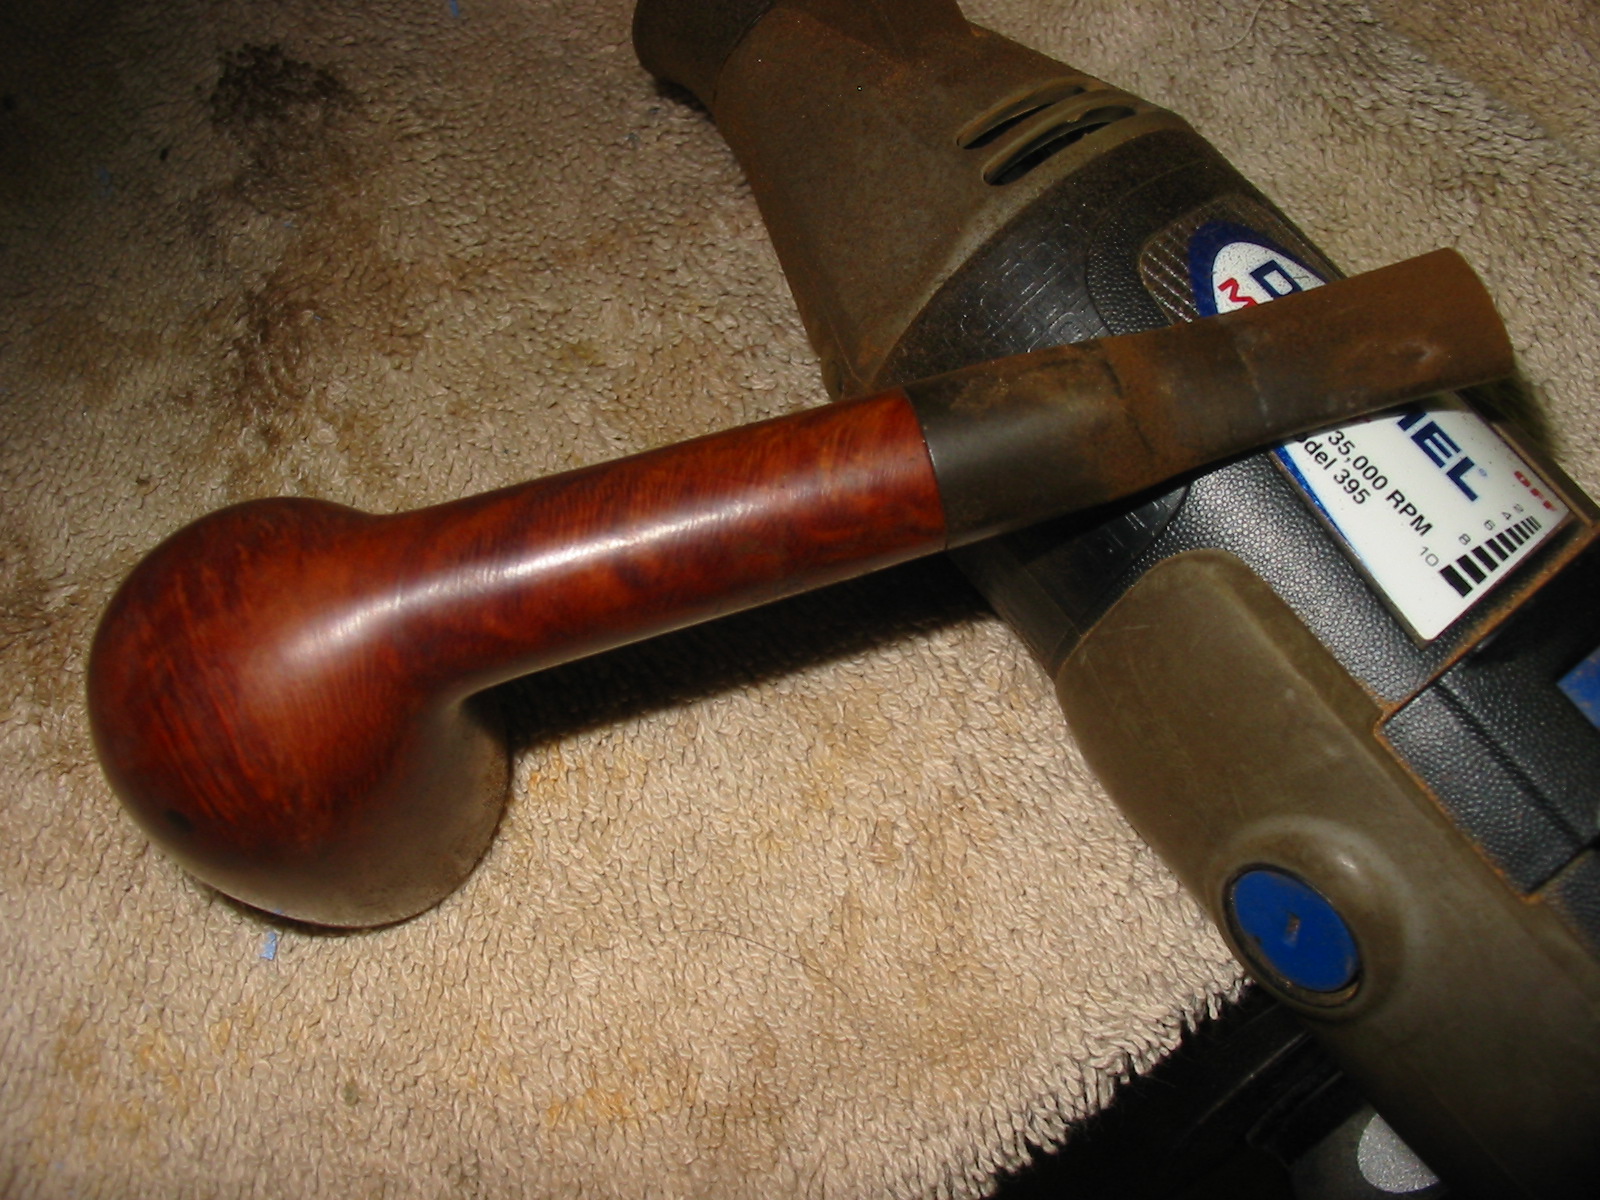
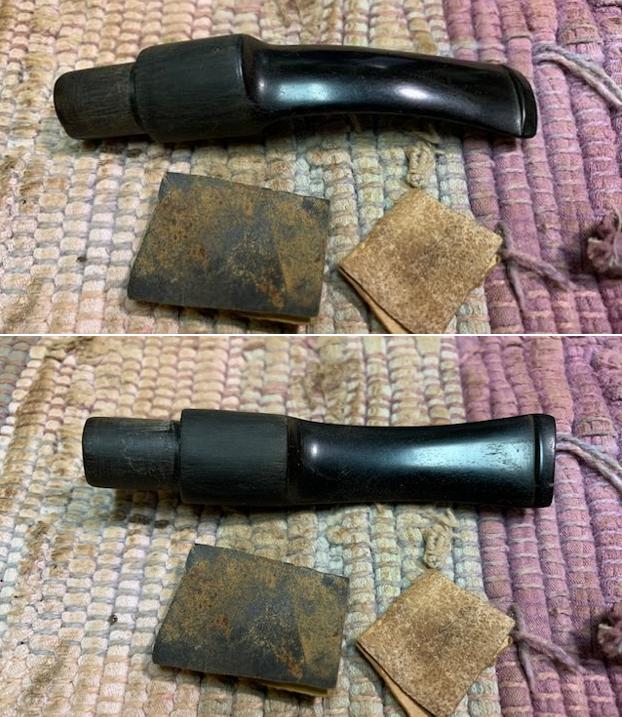
I put the repaired and newly shaped stem on the shank of the bowl and took photos of the look of the pipe. I still needed to polish it but the stem looked much better. 
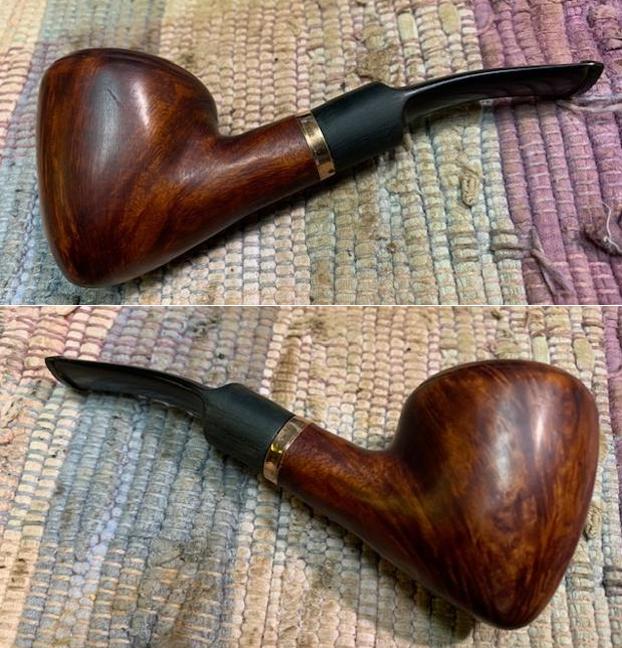
It was time to polish the stem now. I polished it with 1500-12000 grit micromesh sanding pads. I wiped the stem down with Obsidian Oil after each pad. I finished polishing it with Before & After Stem Polish – both Fine and Extra Fine. I gave it a final coat of Obsidian Oil to protect the stem surface from oxidizing. 
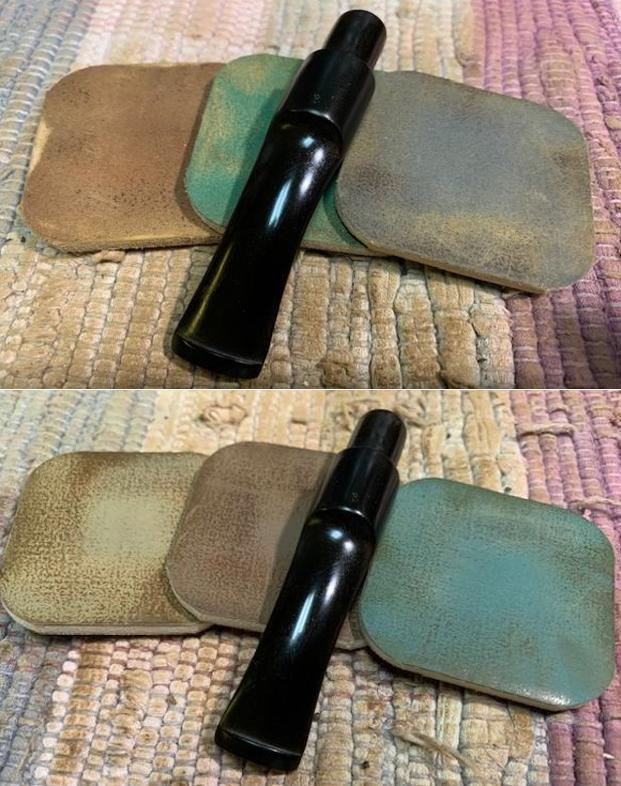
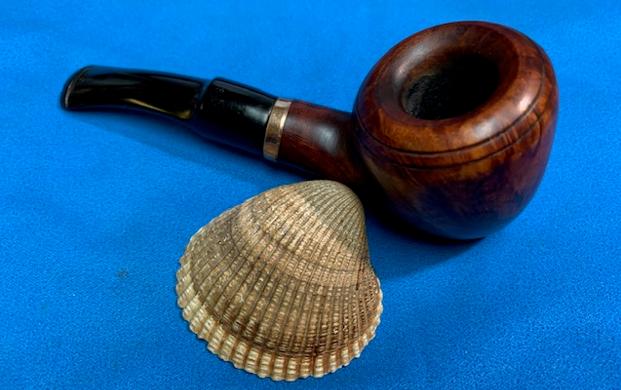
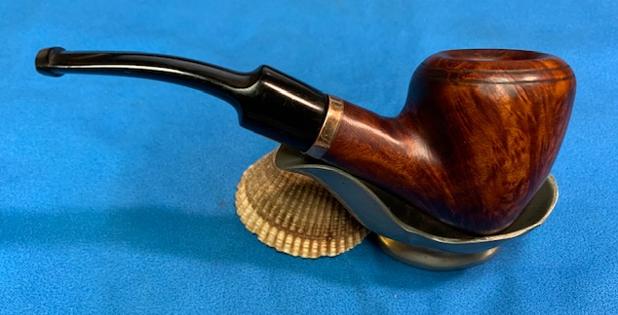
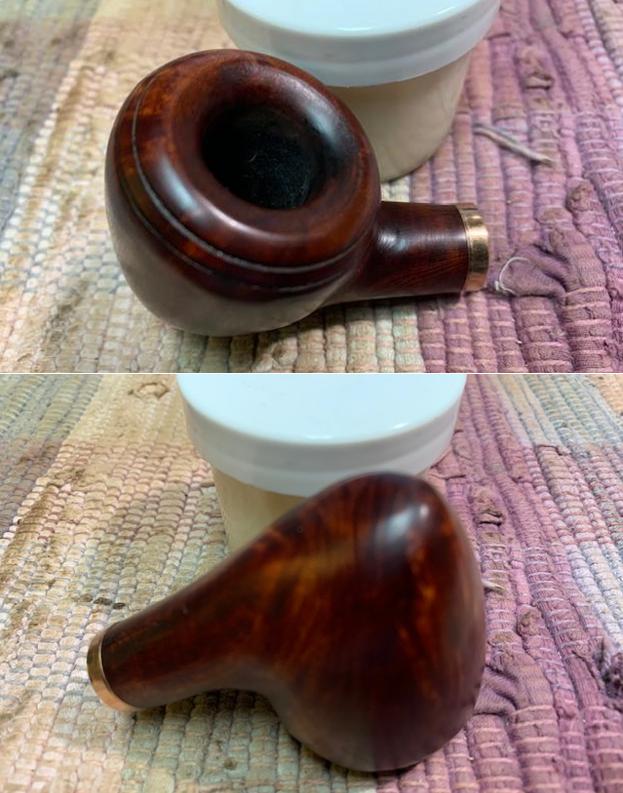
I worked some Before & After Restoration Balm into the surface of the briar with my fingertips to clean, enliven and protect the briar. I let the balm sit for 15 minutes and then buffed with a cotton cloth to raise the shine. The photos show the bowl at this point in the restoration process.    
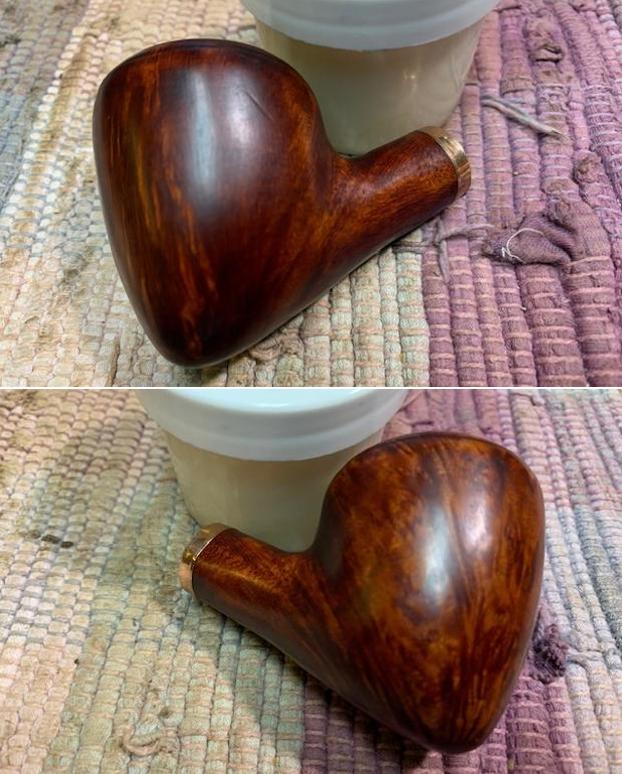
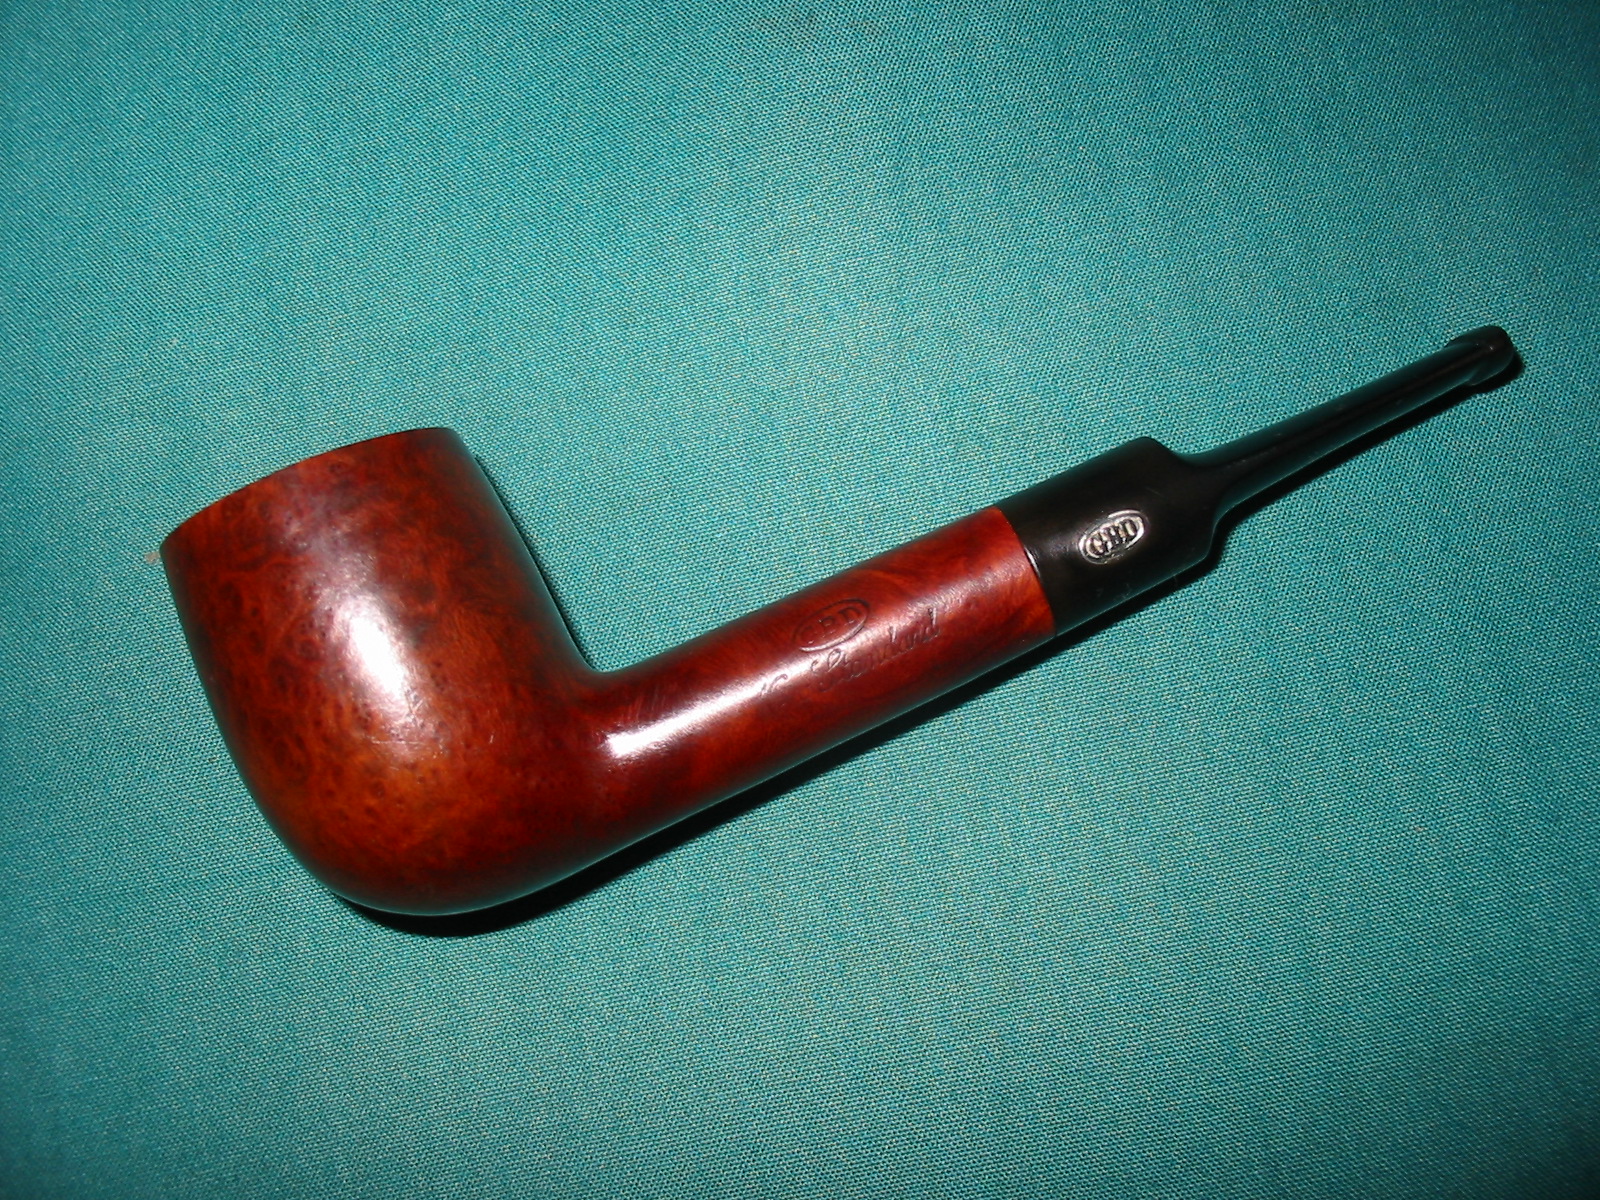
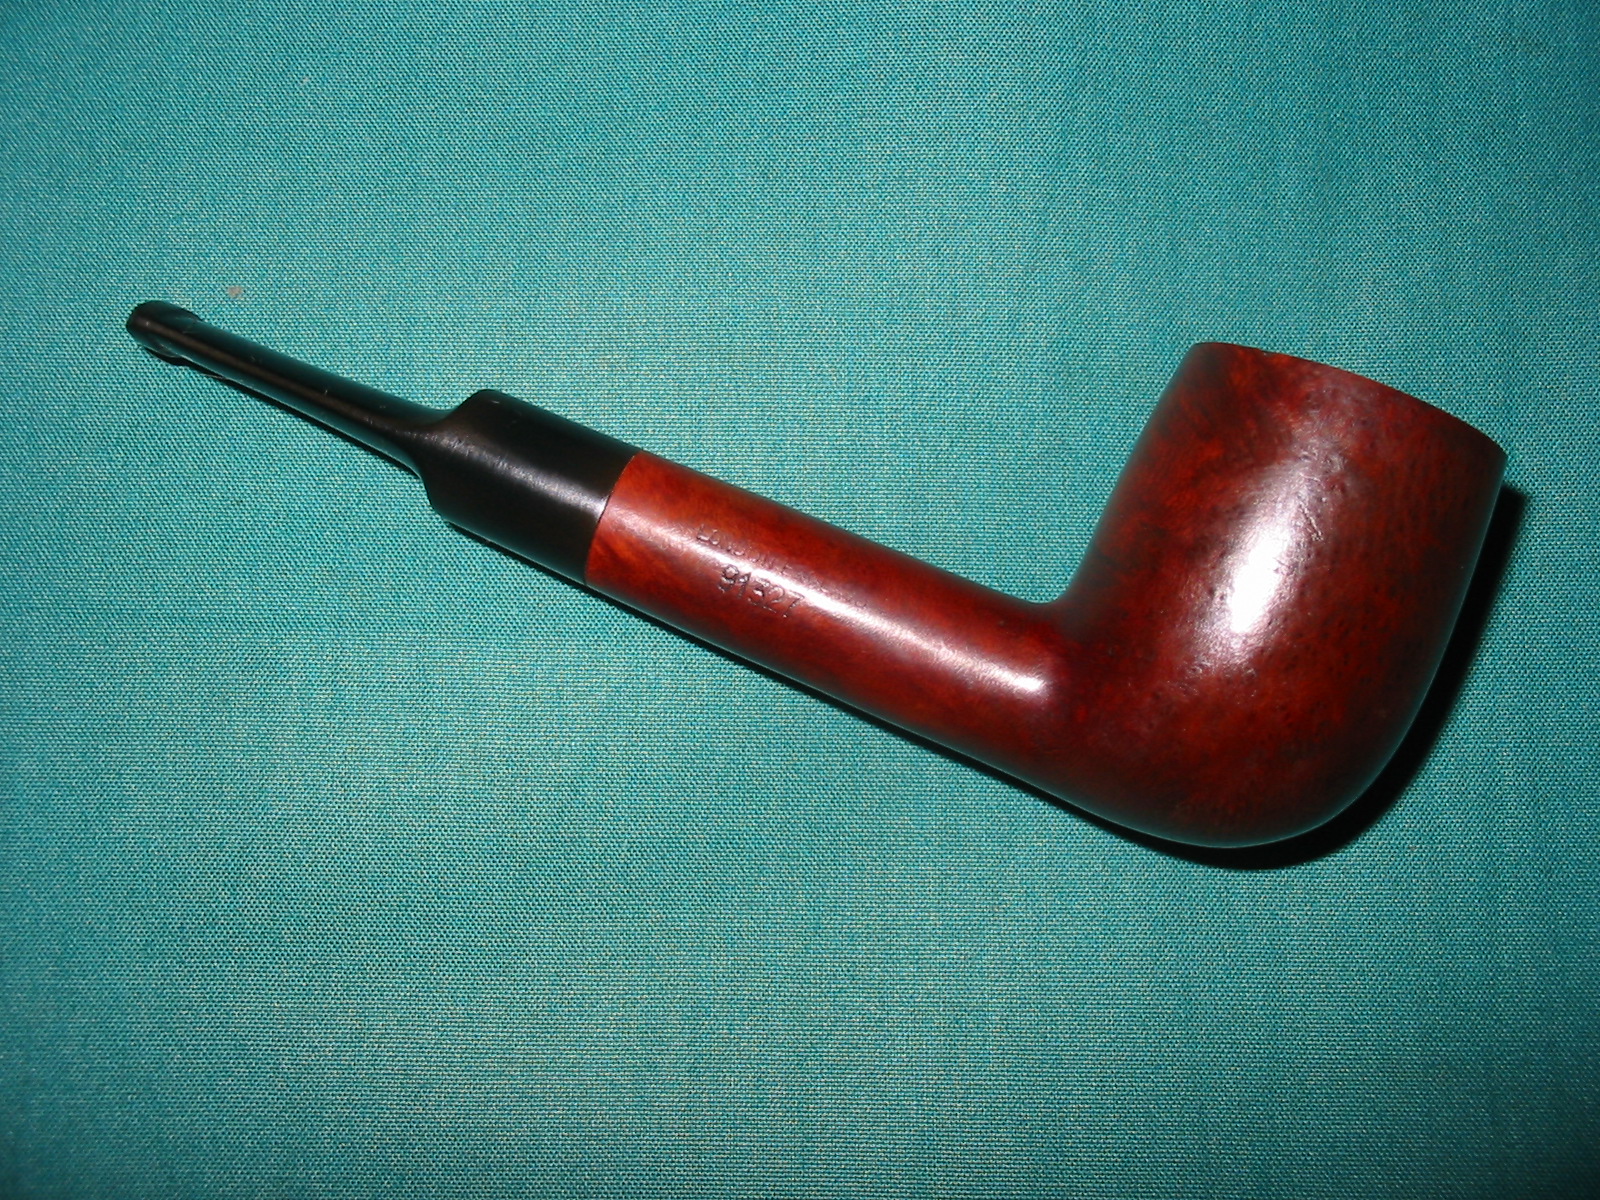
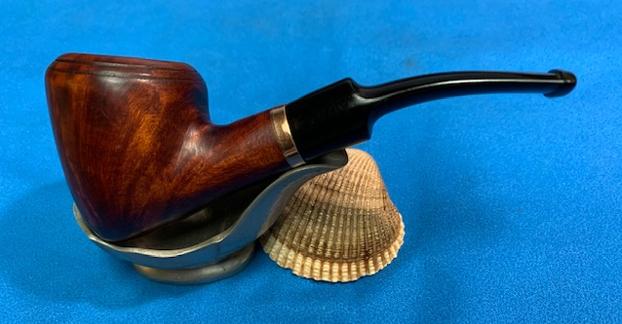
I am excited to finish this Salstrom & Skinner Handmade Acorn. It was a rustic pipe with a lot of flaws in craftsmanship of the briar and the stem but it is looking much better. The band on the shank and the reworked stem give the pipe a sense of newly formed class and character. I put the pipe back together and buffed it with Blue Diamond on the buffing wheel. I gave the bowl and the stem multiple coats of carnauba wax. I hand buffed the pipe with a clean buffing pad to raise the shine. It is fun to see what the polished bowl looks like with the polished brass band and the black vulcanite stem was beautiful. This smooth Handmade Acorn is good looking and the pipe feels great in my hand. It is light and well balanced. Have a look at it with the photos below. The dimensions are Length: 5 inches, Height: 2 inches, Outside diameter of the bowl: 1 ¾ inches, Chamber diameter: ¾ of an inch. The weight of the pipe is 48grams/1.69oz. It is a nice looking pipe and one that I will be sending back to Jake in the next few days. I look forward to hearing what he thinks of his “resurrected first pipe”. Thanks for walking through the restoration with me as I worked over this pipe. Thanks to each of you who are reading this blog.

Shaping a Diamond Shaped Stem from a Round One


Blog by Steve Laug

This morning I found myself in need of a diamond shaped stem – a short Lovat style stem for a long shanked pipe I was restemming. I did not have any diamond shaped stems in my can of stems so I decided to craft one. I took a round stem that had the same diameter as the high points on the diamond shank and turned the tenon to fit. It was a tiny diameter mortise so I did a lot of work on it with my dremel and with files and sandpaper. Once I had the fit on the mortise I inserted it in place and used the Dremel to reduce the round sides of the stem to match the diamond shank.

Figure 1 WDC base in need of a diamond shaped stem. Necessity is the mother of invention. I used a round Lovat stem.

Figure 1 WDC base in need of a diamond shaped stem. Necessity is the mother of invention. I used a round Lovat stem.

Figure 2 I turned the tenon to fit the mortise and then inserted the stem against the shank.

Figure 2 I turned the tenon to fit the mortise and then inserted the stem against the shank.

I worked on one side at a time with the sanding drum on the Dremel running at medium speed. I worked holding the pipe bowl and shank in hand and holding the Dremel with the sanding drum perpendicular to the stem. I worked it the length of the saddle until each side was set at the same angle as the shank of the pipe. This took care so as not to damage the Bakelite of the shank and base.

Figure 3 I used a Dremel to shape the stem to match the diamond angles of the shank. I worked on one side at a time.

Figure 3 I used a Dremel to shape the stem to match the diamond angles of the shank. I worked on one side at a time.

Figure 4 Pipe resting against the Dremel with a sanding drum. Shaping progressed quite quickly. This picture shows one side beginning to take shape.

Figure 4 Pipe resting against the Dremel with a sanding drum. Shaping progressed quite quickly. This picture shows one side beginning to take shape.

5 Top view of the shank. Both sides of the round stem are beginning to take on the shape of the shank.

5 Top view of the shank. Both sides of the round stem are beginning to take on the shape of the shank.

I finished the top side of the stem with the Dremel before going on to the underside. I worked the Dremel so as to leave a relatively straight line down the centre of the stem. The goal was to align the line with the line of the shank on each side. I eye balled it at this point and would fine tune it when I worked it with sandpaper.

Figure 6 Top view after more shaping with the Dremel.

Figure 6 Top view after more shaping with the Dremel.

Figure 7 Bottom view before the Dremel did its work.

Figure 7 Bottom view before the Dremel did its work.

Figure 8 Left side view after the first side has begun to take shape.

Figure 8 Left side view after the first side has begun to take shape.

Figure 9 Bottom view after both sides have begun to take shape.

Figure 9 Bottom view after both sides have begun to take shape.

Figure 10 Right side view of the stem after it began to take shape.

Figure 10 Right side view of the stem after it began to take shape.

From this point in the process all the work was done by hand with a variety of sandpapers from medium grit emery paper through 220 grit sandpaper. I wanted to smooth out the angles and align the edges with the straight line of the shank.

Figure 11 Back to the worktable and the hand sanding.

Figure 11 Back to the worktable and the hand sanding.

Figure 12 Hand sanding continues.

Figure 12 Hand sanding continues.

Figure 13 Hand sanding continues.

Figure 13 Hand sanding continues.

Figure 14 View from the tenon end of the diamond stem at this point in the process.

Figure 14 View from the tenon end of the diamond stem at this point in the process.

Originally the Bakelite base had a band on it. I used an older complete one I have here for an example so that I could get the feel for it. The original was more of a brass/gold coloured ornamental band. I have none of those bands so I used a nickel band. After fitting the band I needed to reduce the tenon slightly for a snug fit and also work on the angles of the sides and corners of the diamond to match the banded shank.

Figure 15 Top view after more hand sanding with a medium grit sanding sponge.

Figure 15 Top view after more hand sanding with a medium grit sanding sponge.

Figure 16 Bottom view after more hand sanding with a medium grit sanding sponge.

Figure 16 Bottom view after more hand sanding with a medium grit sanding sponge.

At this point in the process I removed the stem from the shank and worked on the sides with a fine grit sanding sponge to remove the scratches and marks from the previous grits of sandpaper. Once I was finished with this portion I cleaned off the stem with a soft cotton pad and Everclear so I could see the scratches that were left before I moved on to sanding with the micromesh sanding pads.

Figure 17 Top view. Shape is finished. Now to sand out the scratches and polish the stem.

Figure 17 Top view. Shape is finished. Now to sand out the scratches and polish the stem.

Figure 18 Side view. Shape matches the shank perfectly. Need to remove scratches and polish.

Figure 18 Side view. Shape matches the shank perfectly. Need to remove scratches and polish.

Figure 19 Bottom view. Need to remove scratches and polish.

Figure 19 Bottom view. Need to remove scratches and polish.

Figure 20 Tenon end view of the diamond shape of the shank. The hardest part of shaping a diamond stem on an old pipe shank like this one is that all sides of the shank were slightly different measurements so that all sides of the stem would have to be as well to match the angles.

Figure 20 Tenon end view of the diamond shape of the shank. The hardest part of shaping a diamond stem on an old pipe shank like this one is that all sides of the shank were slightly different measurements so that all sides of the stem would have to be as well to match the angles.

Once I saw the scratches that remained I worked over the stem with 320 grit sandpaper to remove the scratches and clean up the surface so that when I sanded with the micromesh the deeper scratches would be gone.

Figure 21 Left side after sanding with 320 grit sandpaper.

Figure 21 Left side after sanding with 320 grit sandpaper.

Figure 22 Right side after sanding with 320 grit sandpaper.

Figure 22 Right side after sanding with 320 grit sandpaper.

Figure 23 End view showing the diamond shape after sanding with 320 grit sandpaper.

Figure 23 End view showing the diamond shape after sanding with 320 grit sandpaper.

Finally with the scratches removed it was time to move on to the micromesh sanding pads. Photos 1 & 2 show the stem after sanding with 1500 and 1800 grit micromesh. It should clean up nicely with each successive grit of micromesh. Photo 3 shows the stem after sanding with the 2400 grit micromesh. With all three of these grits I wet sanded the stem.

Figure 24 Left side after sanding with 1500 and 1800 grit micromesh sanding pads

Figure 24 Left side after sanding with 1500 and 1800 grit micromesh sanding pads

Figure 25 Right side after sanding with 1500 and 1800 grit micromesh sanding pads.

Figure 25 Right side after sanding with 1500 and 1800 grit micromesh sanding pads.

Figure 26 Right side after sanding with 2400 grit sanding pads

Figure 26 Right side after sanding with 2400 grit sanding pads

I moved on to the higher grits of micromesh. The next five photos below show the 3600 and 4000 grit micromesh. I dry sanded with these pads. The scratches have pretty much disappeared and the higher grits will give the stem a deep shine.

Figure 27 Sanding with 3600 and 4000 grit micromesh.

Figure 27 Sanding with 3600 and 4000 grit micromesh.

Figure 28 Right side sanded with 3600 and 4000 grit micromesh pads.

Figure 28 Right side sanded with 3600 and 4000 grit micromesh pads.

Figure 29 left side of the stem - sanding with 600 and 4000 grit micromesh.

Figure 29 left side of the stem – sanding with 600 and 4000 grit micromesh.

Figure 30 Top view of the stem after sanding with 3600 and 4000 grit micromesh.

Figure 30 Top view of the stem after sanding with 3600 and 4000 grit micromesh.

Figure 31 Bottom view of the stem after sanding with 3600 and 4000 grit micromesh

Figure 31 Bottom view of the stem after sanding with 3600 and 4000 grit micromesh

The next photo shows the view of the stem from the tenon end. The diamond shape is complete and the remnants of it being a round stem are gone. More polishing will bring this to life.
IMG_1027
From this point on in the process I dry sanded with 6000, 8000 and 12,000 grit micromesh to finish the polishing. Once finished I buffed it with White Diamond and then gave it multiple coats of carnauba wax to preserve the stem. The next four photos show the finished stem.

Figure 33 Right side view of the finished stem.

Figure 33 Right side view of the finished stem.

Figure 34 Left side view of the finished stem.

Figure 34 Left side view of the finished stem.

Figure 35 Top view of the finished stem.

Figure 35 Top view of the finished stem.

Figure 36 View of the stem from the tenon end.

Figure 36 View of the stem from the tenon end.

At this point the stem is finished and ready to be added to the WDC pipe that I was restemming. This process proved a point I have held forever – within in every stem resides another smaller stem or at least one of a different shape. That is why I rarely get rid of a stem. They can be reshaped, the button added on a second time a new tenon added… you get the picture.

A Transformation from a GBD Billiard to a GBD Lovat


Blog by Steve Laug

I picked up this little GBD New Era Billiard while traveling awhile back. It had a cracked and broken stem. The GBD roundel was still intact and in good shape. The bowl was a mess in that the rim was hammered. The top of the rim was chipped and rough. It was also out of round from over reaming. Since I had found it I had been looking for a new stem for a replacement. I had searched EBay and some of my other usual spots to see if I could pick up a GBD stem or even broken pipe that would work for me. This evening I gave up on the hunt and decided to see what I could do with the existing stem. I set out to transform the pipe from a billiard to a lovat by shortening the stem.

ImageImageImageImage

The first step in that process was the shortening of the stem – the removal of the damaged portion of the stem would have to go. I used my Dremel with the sanding drum to remove the broken part of the stem and cut a straight line across it. The next three photos show the stem before the cutting and after. The fourth photo in the series shows the airway in the stem. There was plenty of vulcanite for me to cut a new button on the stem and to open a slot in the button.

ImageImageImageImage

The next series of six photos show the process and results of topping the bowl. I used emery cloth on a solid board to sand away the damage to the rim. I chose the emery cloth because the damage was quite deep and extensive and I wanted to be able to remove the rough briar before sanding the rim with higher grit sandpaper. I hold the pipe with the rim flat against the sandpaper and work the pipe over the surface of the sandpaper in a clockwise motion. I find that this works better than using a horizontal or vertical motion and minimizes the scratches on the surface of the briar. I sanded the top until all of the damage was removed on the rim. There was one spot at about 5 o’clock on the rim where there was a large chunk taken out of the briar. I minimized that as best as I could but could not remove it all without damaging the profile of the pipe.

ImageImageImageImageImageImage

Once the rim was finished I decided to clean the pipe inside and out. I used Everclear and pipe cleaners and cotton swabs to clean out the interior of the pipe and stem and then some acetone on a cotton pad to wipe down the bowl surface. I also sanded the rim with 320 grit sandpaper and went on to use 400 and 600 grit wet dry sandpaper to wet sand the rim. In the four photos below you can see the little lovat being born.

ImageImageImageImage

Once the pipe was clean I decided to work on the slot in the end of the stem before cutting the button. There is no logical order to what I worked on next; it was more a matter of whatever I wanted to look at first. I opened the slot with needle files and started to shape the slot into the oval opening I was aiming for. Once it was roughed in I cut the button on the surface of the stem with needle files. The first two photos show the slot taking shape. The next seven photos show the progress of the button and the adjustments to the slope of the stem. I carved the stem with my files removing vulcanite on the top to flatten the profile of the rounded stem. It took quite a bit of sanding to the top and bottom of the stem to achieve the right angles. I also used folded emery cloth to smooth out the flow and remove the file marks from the surface of the stem. By the seventh photo you can see the progress of the button and the slope quite clearly.

ImageImageImageImageImageImageImageImageImage

The next series of six photos show my next steps in shaping the stem. I put it back on the pipe and continued to work on the slope of the stem surface and the definition of the button. By the sixth photo the stem is virtually done in terms of shaping. I finished cutting the slot and smoothing it out by a folded piece of sandpaper. I also sanded the remaining parts of the stem on the saddle to remove the oxidation that was prevalent on that stem as a whole.

ImageImageImageImageImageImage

Once the shaping was finished and the rough sanding done to the surface of the stem I progressed through 320 grit sandpaper and 400 and 600 wet dry sandpaper used wet to remove the scratches left behind by the emery paper. It took quite a bit of fine sanding to work around the roundel and not damage the stamping of the brass. When I finished with the sandpapers I worked with micromesh sanding pads. I used the first three grits – 1500, 1800 and 2400 and wet sanded the stem. I find that the rounded corners of the sanding pads allow me to work closely around the roundel and clean up the oxidation and scratches.

ImageImage

I then polished the stem with Maguiar’s Scratch X 2.0 to remove the surface scratches and to see what remained to work on in terms scratches and marks. I rub the polishing compound on with my finger and work it over the surface of the stem and into the angles of the button. Once it is applied that way I scrub it with a cotton pad to polish and remove the compound. I then sanded it with the next three grits of micromesh – 3200, 3600 and 4000. I dry sanded with these grits and began to see a deep shine emerging. Once finished with the 4000 grit I rubbed the stem down with Obsidian Oil and set it aside. I then stained the pipe with medium brown aniline stain that I thinned down 2:1 with isopropyl. I flamed the stain to set it and then reapplied the stain, flamed it again and then reapplied it to the rim a third time and flamed it. I took it to the buffer and used Tripoli and White Diamond to buff it. I wiped the bowl down with isopropyl on a soft cotton pad to lighten the stain and make the grain variations more visible. I put the stem back on the pipe and finished sanding it with the final three grits of micromesh – 6000, 8000, 12,000. After dry sanding with these pads I took the pipe to the buffer and buffed it with White Diamond. I finished by giving pipe and stem several coatings of carnauba wax and buffing with a soft flannel buff. The new little lovat is pictured in the four photos below.

ImageImageImageImage