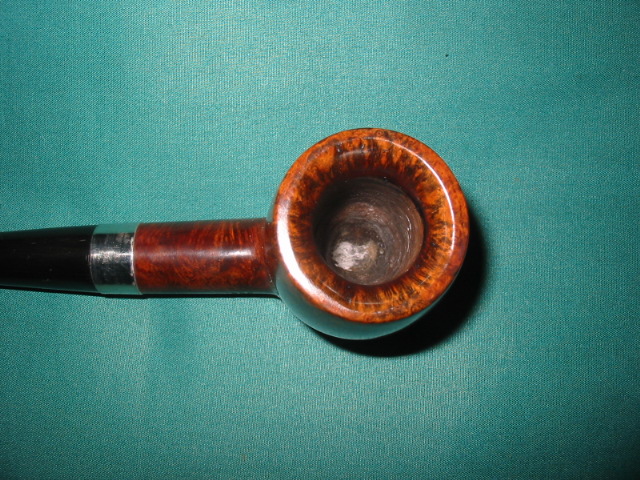
I picked up this old Butz Choquin in a lot I was given by a friend and it was in very rough shape. I somehow neglected to take any pictures of what the pipe looked like when it arrived. But it came stem less and the rim was ruined. It had been hammered on concrete or something like that as it was stippled and rough. The inner rim was ruined as it seemed to have been reamed with a pocket knife and it was cut and grooved at all different angles. To have topped it I would have had to lose almost a half an inch on the pipe. In my opinion that would have ruined the billiard profile and created a pot shape. I decided to try something different on this one. The finish was shot as well and the stain was gone. It was a dull brown with much dirt and grime ground into the surface of the briar.
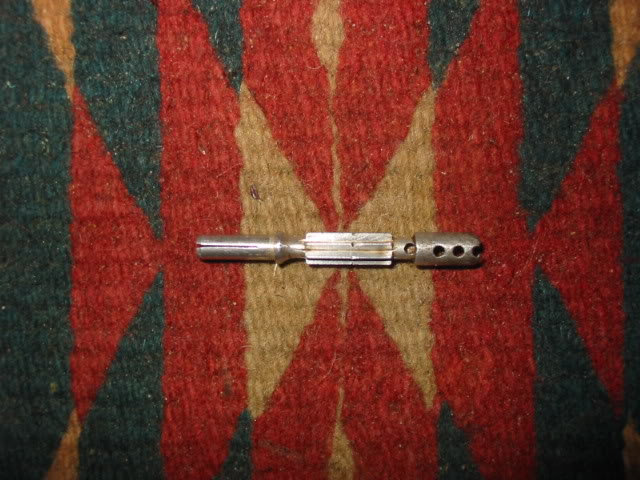
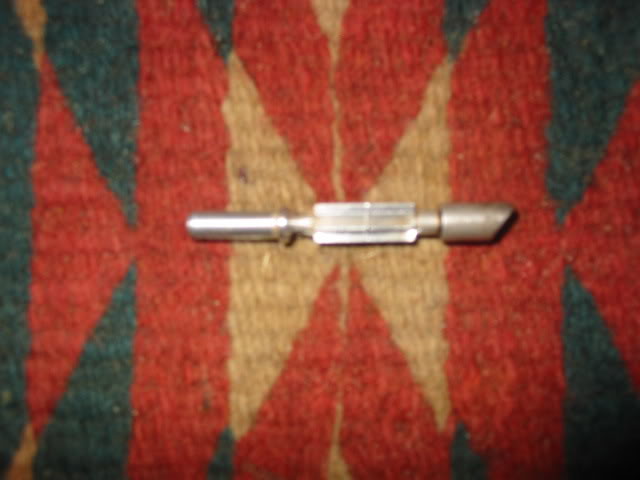
I reamed the pipe with a PipNet reamer (like a Castleford T handle reamer) to even the sides of the bowl and smooth out the inner surface. I wiped the bowl down with acetone to clean off the grime and grit. Once it was clean I hunted down a stem blank that would work on a pipe with this sized shank. I cut the tenon with my Pimo tenon turner and shaped the stem to a clean fit with my Dremel. Then I took the bowl and dropped it in the alcohol bath while I worked on the stem. I sanded the stem to remove the scratches left by the Dremel. I also shaped the button a bit to change the shape and open up the slot to an oval.
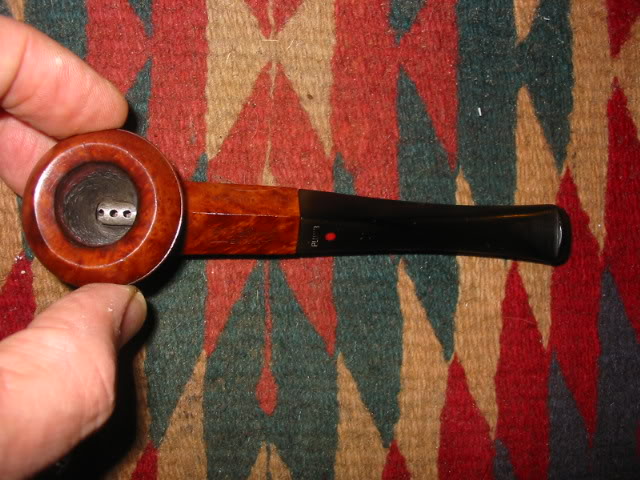
I took the bowl out of the bath and dried it off. I gave it another wipe down with the acetone to give me a clean surface to work on. I then went to work on the rim. I wanted to chamfer the rim inward toward the bowl to remove the damaged material and give it a different look. I topped the bowl first to get a smooth and even surface. From there I sanded the inner edge of the rim with a folded piece of sandpaper (280 grit). I use a one inch square piece of sandpaper folded into quarters. Then I set the angle I want to have on the chamfer by the way I hold the paper. I sanded it until I got it at the angle I wanted and removed the damaged material. Once I had the angle right I then changed the grade of sandpaper sanding it with 400 and 600 grit wet dry and then with the micromesh sanding pads from 1500 to 6000 grit.
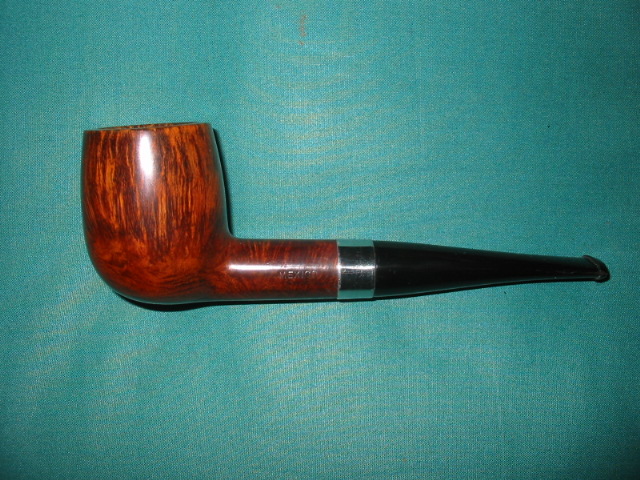
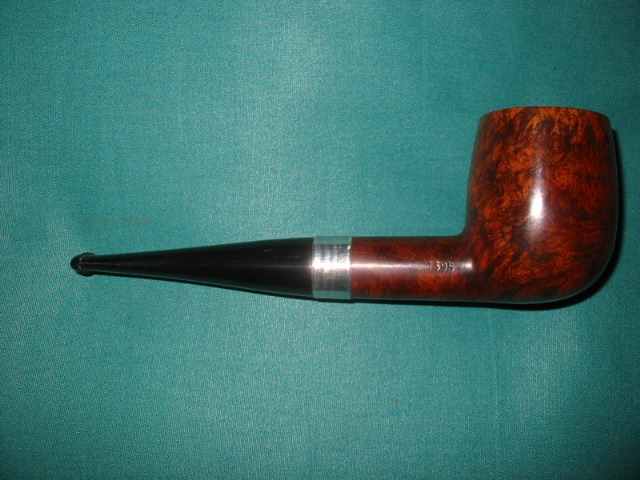
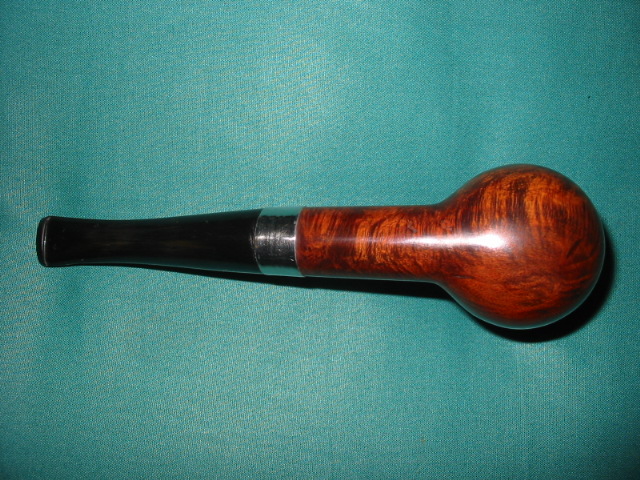
At that point I put the stem back on the pipe and sanded it until the transition between the shank and the stem was smooth. I wanted it to be a fit that appeared to be seamless. Once I had that done and had sanded the stem smooth with the various grades of micromesh sanding pads I took it to the buffer to give the stem a shine. I brought it back to my work table and sanded the bowl and shank until they were also smooth. I did not sand around the nomenclature as I wanted that to be intact.
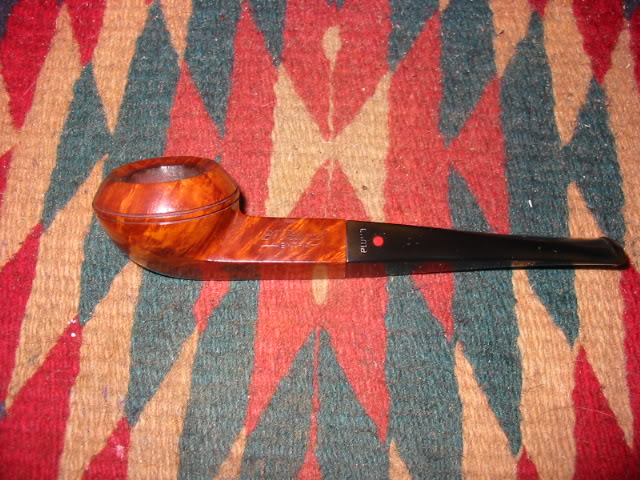
I decided that I would give the bowl a contrasting stain finish. I heated the briar with a blow dryer to warm it up and open the grain on the bowl. Once it was warm I stained it with a black aniline stain. I flamed the stain and let it dry. I took it to the buffer and buffed it with Red Tripoli to remove the black stain from the surface of the briar. This takes off the extra black and leaves it in the softer grain of the briar. I sanded it again with 600 and 800 grit wet dry sandpaper and then buffed it again with White Diamond. I wanted contrast between the black that was deeply set in the grain and the harder smooth surfaces. Once that was done I wiped the bowl down with acetone to tone down the blacks and to clean off the surfaces that did not have the stain set in them. I restained the pipe with a Medium Brown aniline stain and flamed it as well. Once it was dry I buffed it with White Diamond to polish it. The whole pipe was then given multiple coats of carnauba wax and a finish buff with a soft, clean, flannel buffing pad.
While I liked the look of the pipe at this point I decided that it needed a bit of bling to finish it off. I have a box of bands here and found one the correct size – a nickel band that would add just the touch I was looking for. I heated the band with my heat gun and pressure fit it on the shank of the pipe. The finished product is in the photos below. This pipe found a new home with a friend on one of the online forums. I am sure he has enjoyed it as it was a great smoking machine.
The verdict is yours is the new look stunning or not?