Blog by Steve Laug
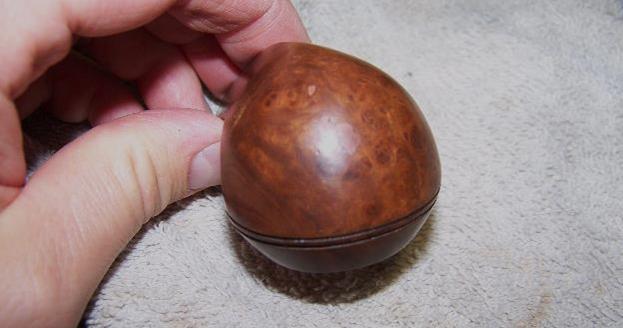
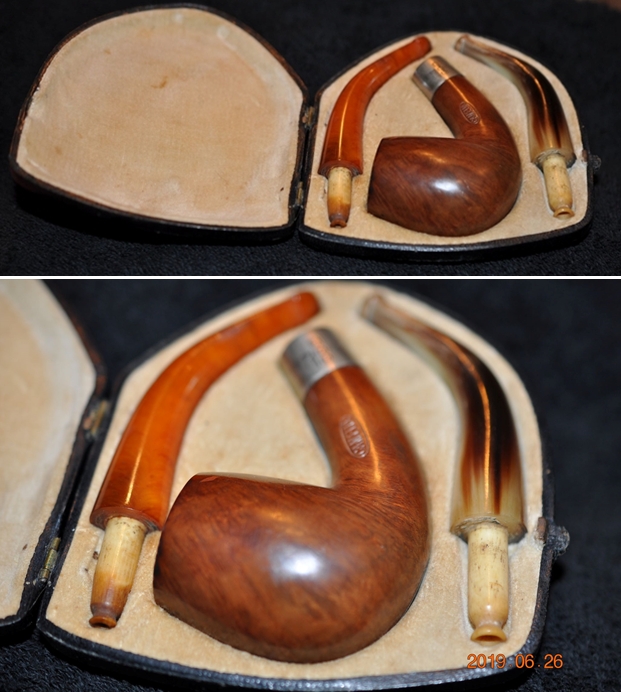
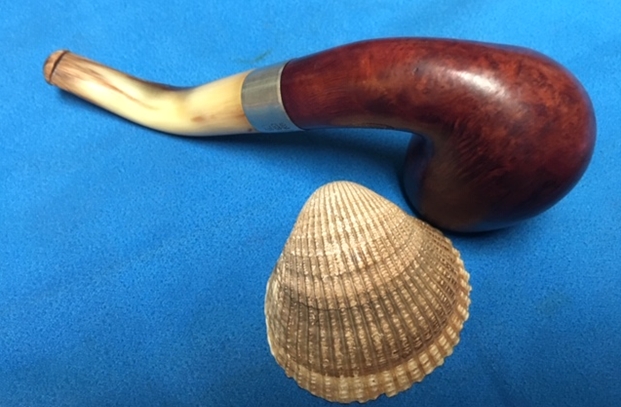
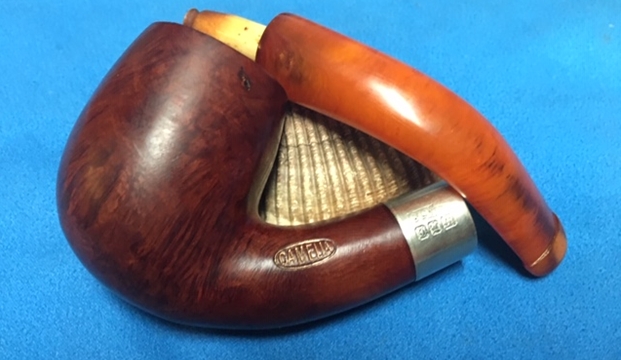
Jeff picked up this clam shell cased pipe from an online auction out of Virginia and I brought it back to Vancouver to work on. It is an interesting pipe that came in a nice case with a pair of stems included. One of the stems is golden amber with some interesting swirls and patterns and the other one is a horn stem. Both stems appear to be in excellent condition with minimal tooth chatter. The bowl itself had a cake and some darkening and lava overflow on the rim top. The finish was in decent condition though there was one medium sized fill on the left side mid bowl. Otherwise it is a nice piece of briar with a mixture of grains around the bowl and shank. The stamping on the pipe reads Camelia on the left side of the shank and 515 on the right side of the shank. The brand is not one that I had heard of before but shape number reminded me of some of the GBD numbers. Regardless who made it, it is hard to pass up older pipes with either horn or amber stems and impossible to pass up one that came with both. Jeff took the following photos of the pipe in its case from closed to opened showing the pipe and stems. 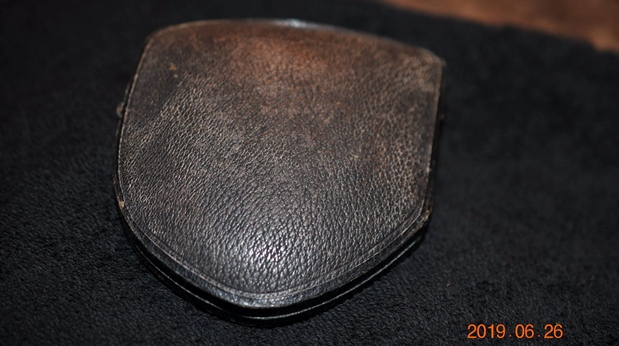
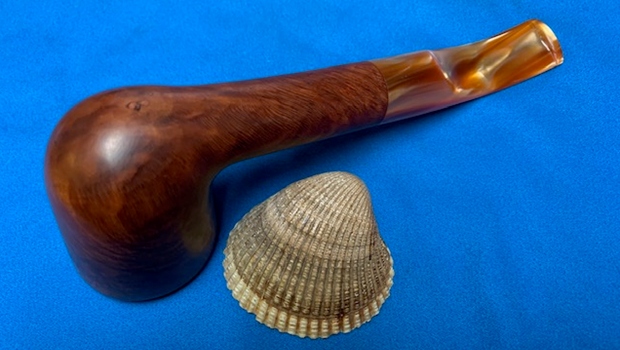
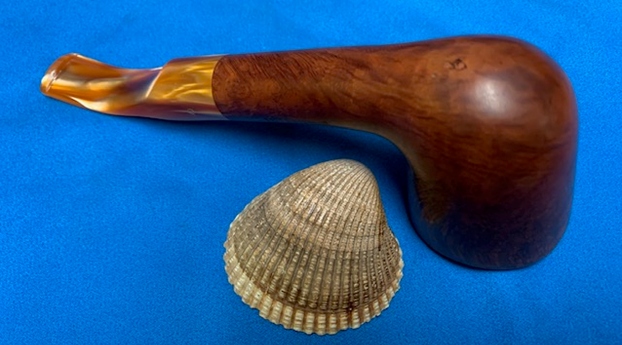
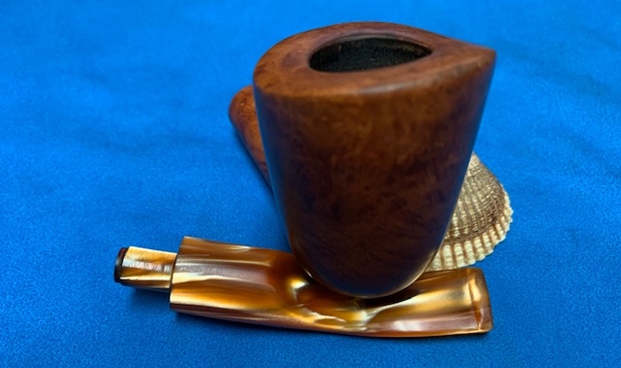
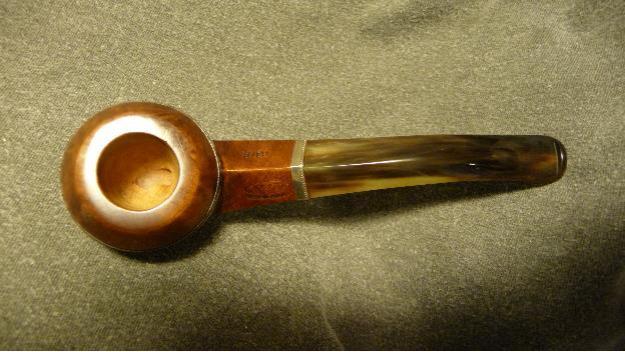
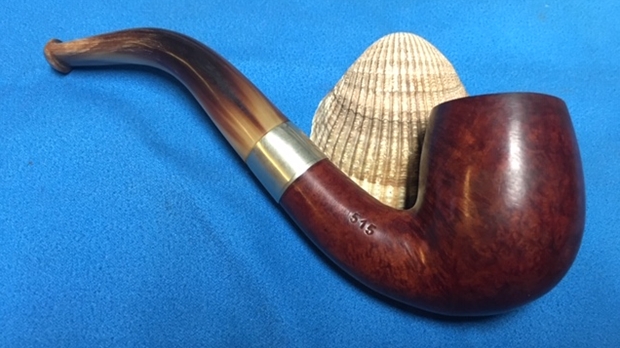
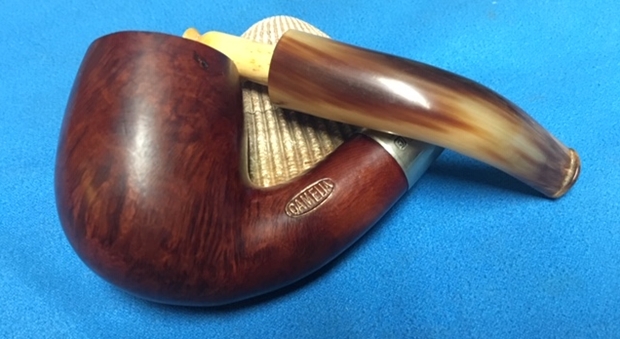
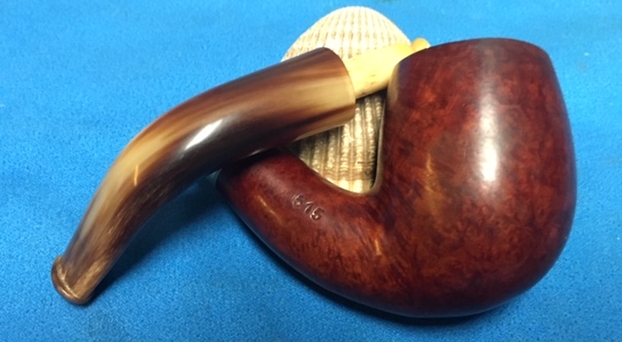
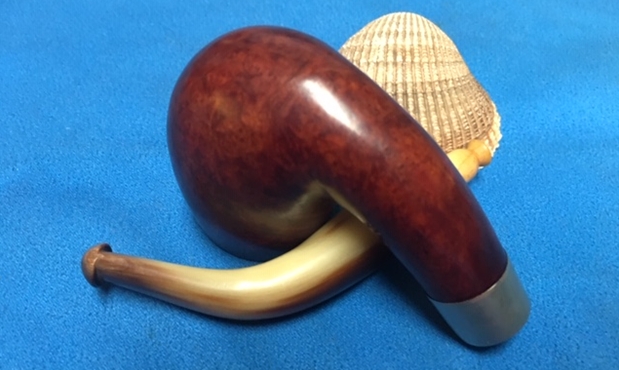
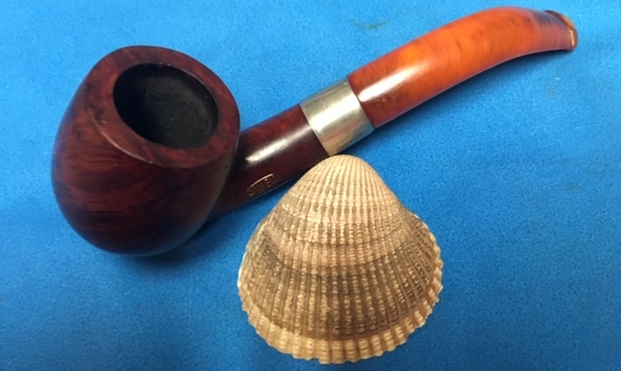
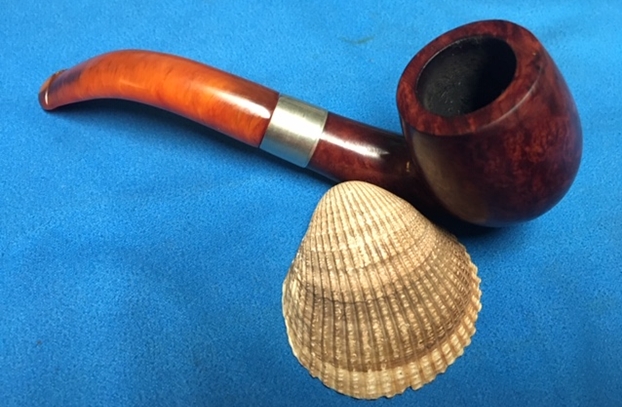
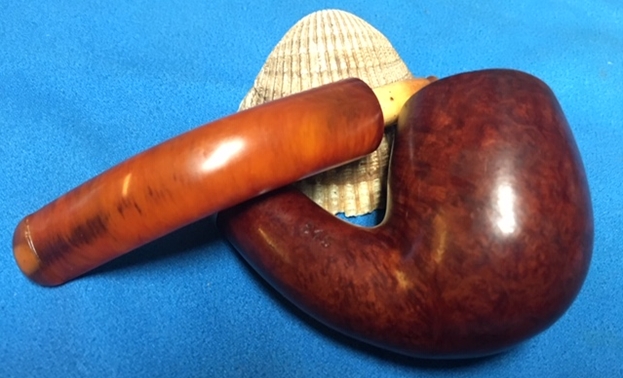
 Jeff took a photo of the pipe with each of the stems in place in the shank. The top one is a very nice amber stem and the lower one is the pipe with a nice horn stem.
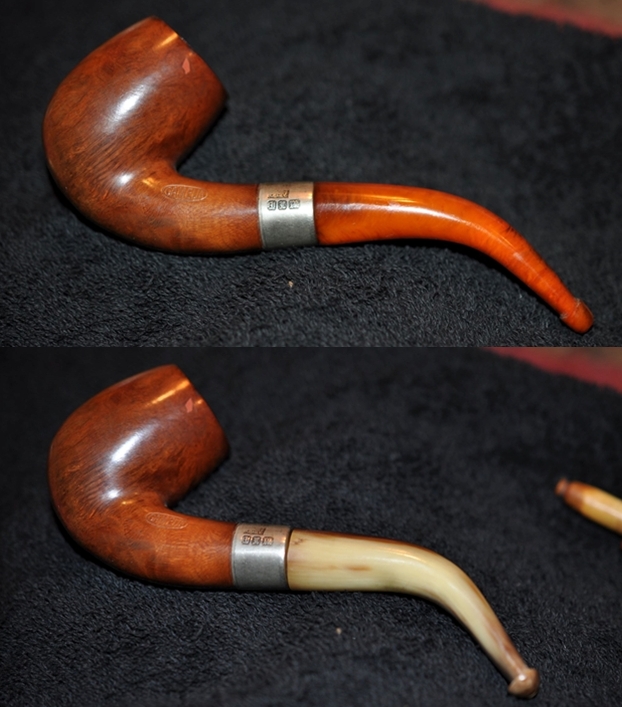 He took the pipe and stems out of the case to show the look of the parts of this old timer. The pipe has some good grain on the sides.
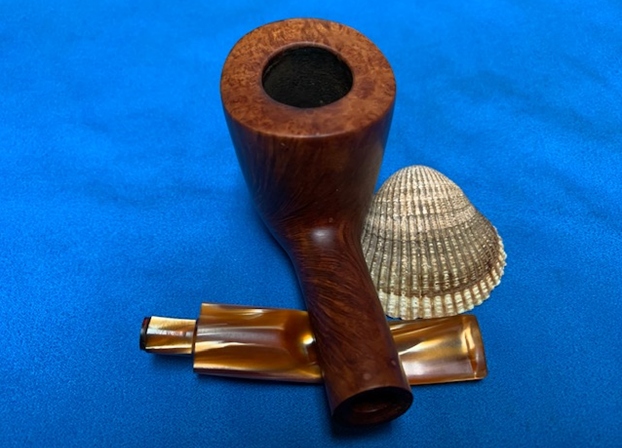
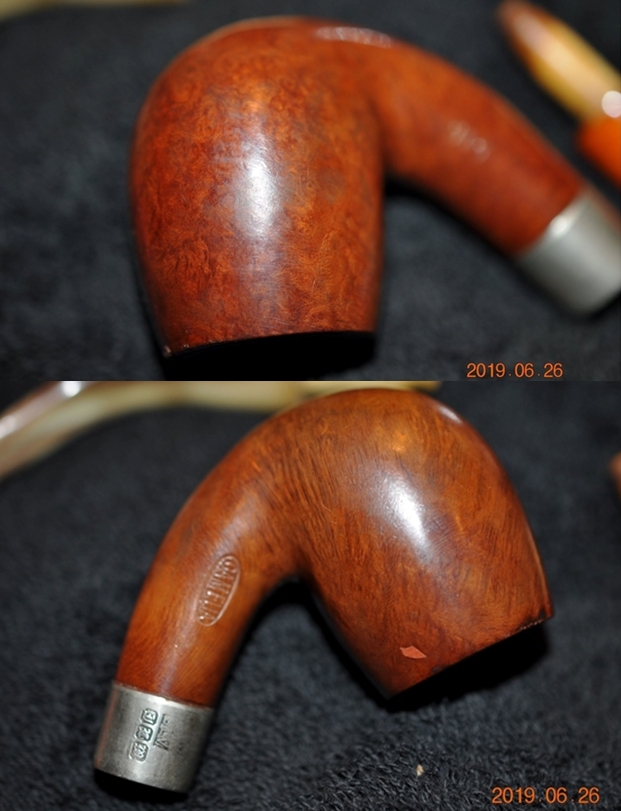
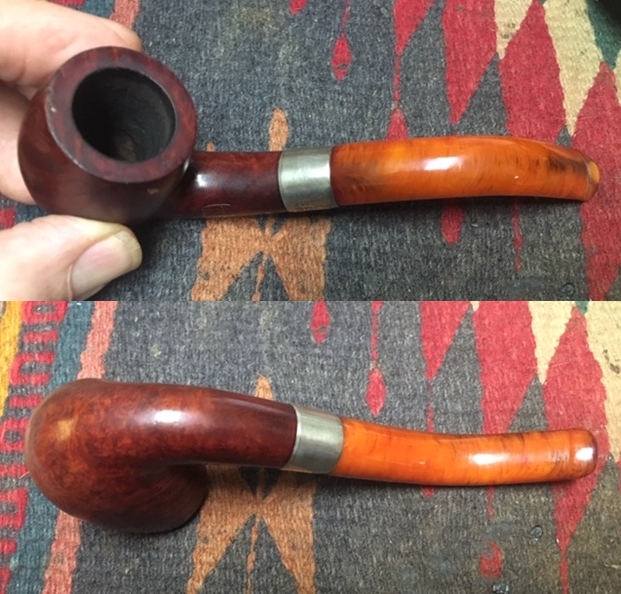
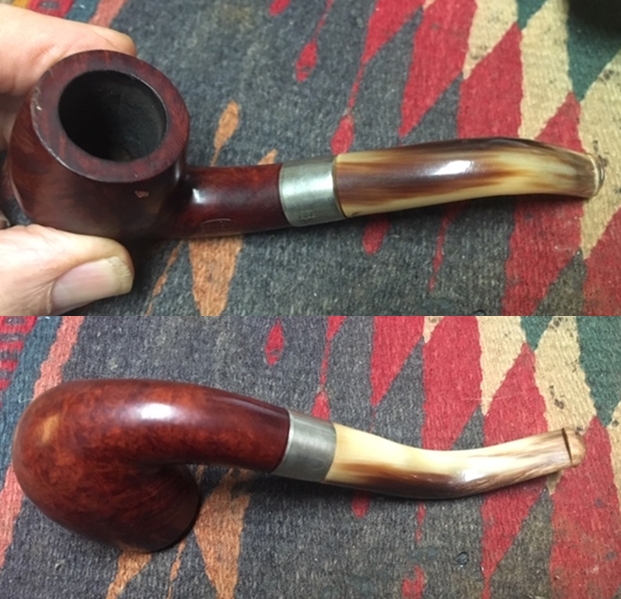
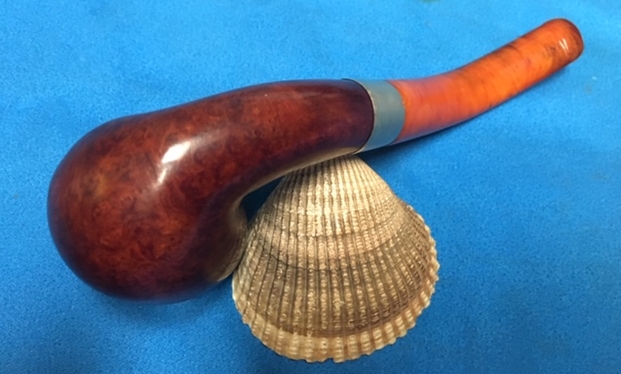
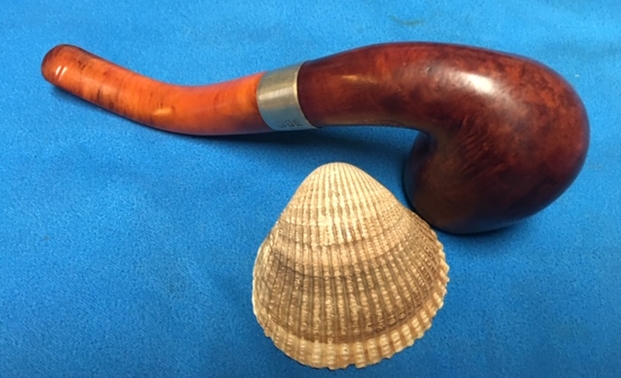
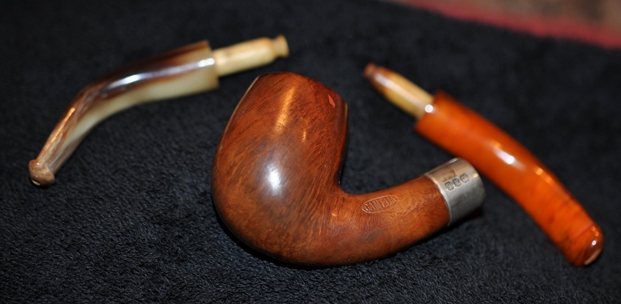 Jeff took a photo of the rim top to show the condition. The photo shows the tarry buildup on the top and the damage to the inner and outer edge of the rim. You can see the cut like marks on the front of the bowl. The thick cake is also visible on the inside of the bowl. The second and third photo shows the grain around the bowl sides. Even under the grime you can see the interesting grain on the bowl sides. There is also a fill very visible on the left side of the bowl toward the rear top.
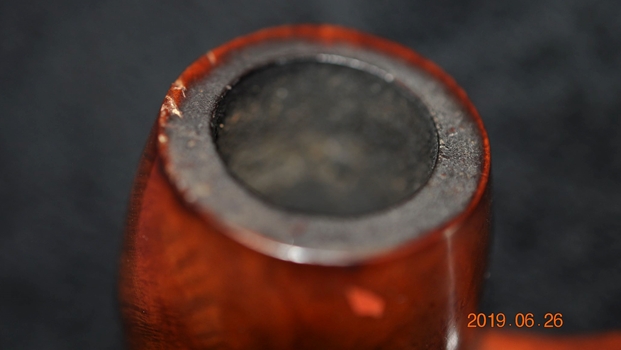
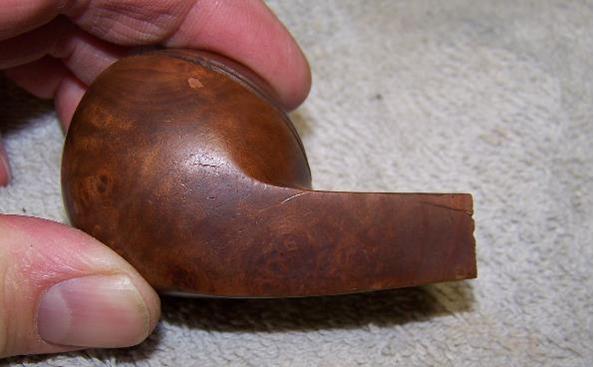
 The next photo is a close up of the fill on the left side. It is a bit shrunken but still and ugly pink putty.
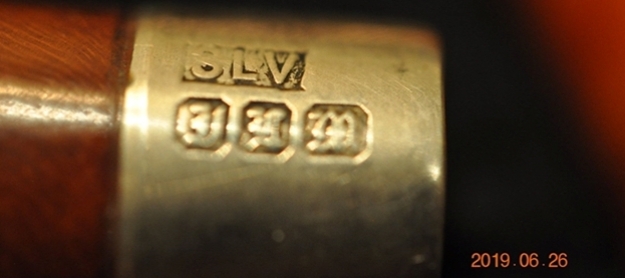
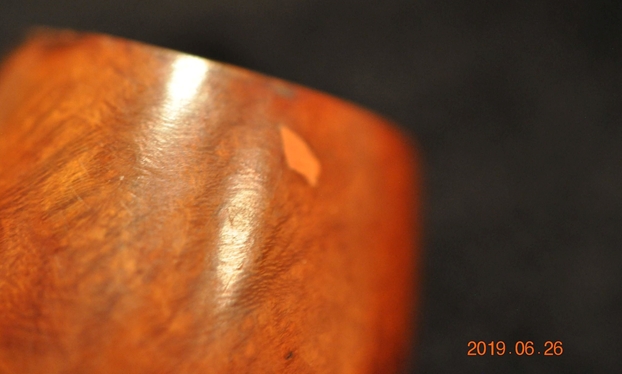 Jeff also took photos of the stamping on the pipe. On the left side it was stamped with Camelia in an oval and on the right side it was stamped with the number 515. I assume the number is the shape number for a bent billiard. The third photo shows the stamping on the silver band. It has the letters SLV in a rectangle. Under that are three hallmarks – each one has a letter in in a cartouche. The first letter appears to be a J, the second letter looks like a Y and the third looks like an M. All three letters are in a square shaped cartouche with the corners cut off.
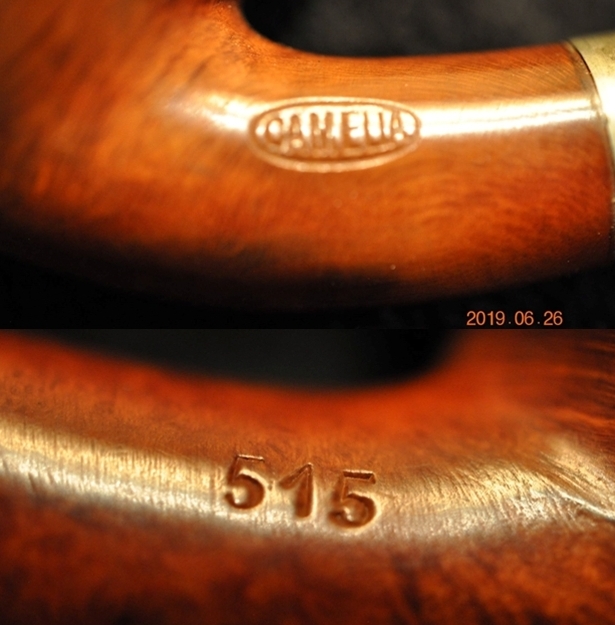
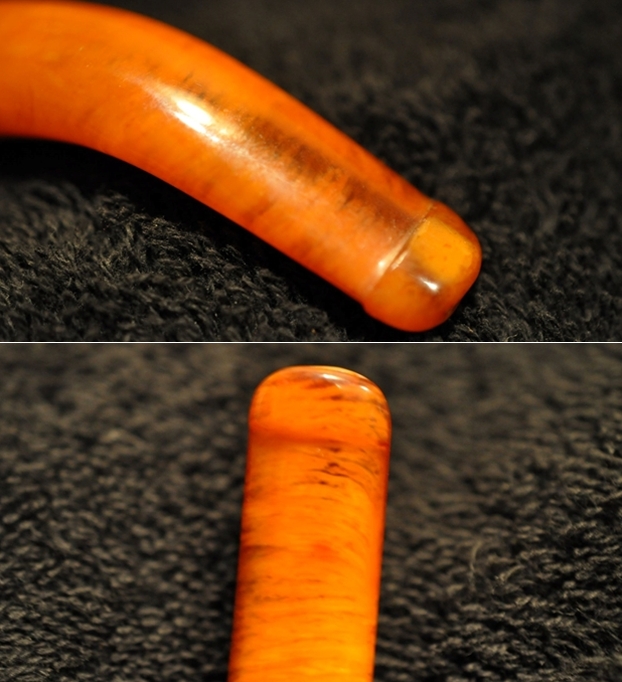
 Jeff also took photos of the tenon on each of the stems. Both are bone push tenons rather than the older style threaded bone tenons. The tenon on the amber stem has more of a taper to the end before the nipple. The tenon on the horn stem is more even from the end of the stem to the end of the nipple.
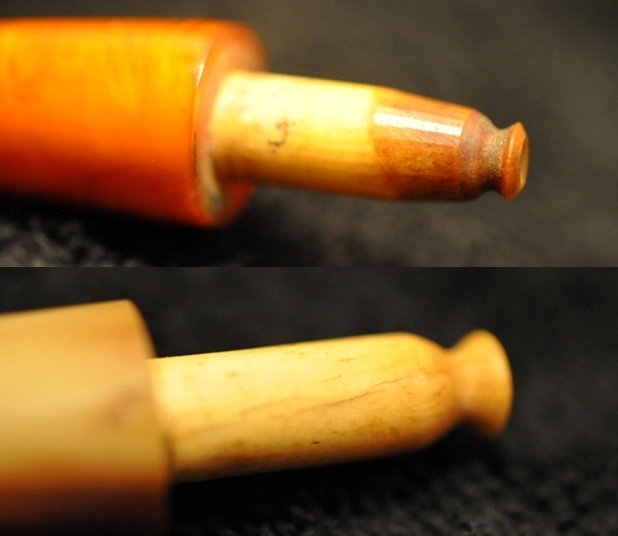 Jeff took photos of the two stems together. There seems to be a variation in length between the two stems. The horn stem has more of a bent and makes it appear to be slightly shorter than the amber one. In reality they are the same length. Jeff also took photos of both sides of each stem to show their condition.
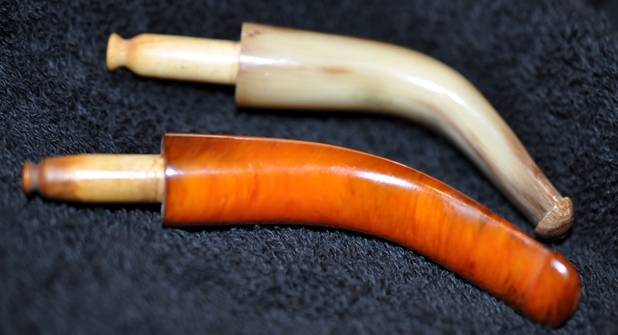
 I searched online using Google. Several of the links I found took me to Smokingpipes.com where they had a Camelia pipe listed in their estate area. They listed the brand in the French Made Pipe section. Here is the link to the billiard that they were selling (it has since sold but the connection is interesting to me here it is https://www.smokingpipes.com/pipes/estate/france/moreinfo.cfm?product_id=307863). I am not sure how they arrived at the brand being French as there are no clues on the pipe itself other than what they identify as a classic French billiard shape.
I also found a link to a blog on rebornpipes that Robert M. Boughton had done on a Camelia pipe that he restored also commenting that it was French made (https://rebornpipes.com/tag/camelia-pipes/). I had forgotten about this blog. In it Robert pointed the way to the GBD connection for me in this quote: “this lovely example of the elegant Camelia straight smooth bulldog #699, originating in France of excellent lineage, being, according to Pipedia, an obsolete line of pipes once made by GBD.”
I did some digging on the Pipephil website (http://pipephil.eu/logos/en/logo-c1.html) and found a listing there that also associated the brand with a French pipe manufacturer. I have included a screen capture from the site on the brand showing the French connection. However I am not able to link the brand to a larger pipe manufacturer in France. This always makes me want to dig a bit deeper so the search continues.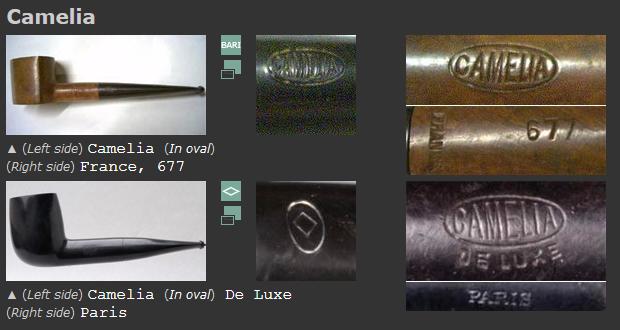 I turned to Pipedia (https://pipedia.org/wiki/French_Pipe_Brands_%26_Makers_A_-_D) under the Pipe Brands and Makers section and clicked on French Made pipemakers in the A-D section and sure enough I found a note there that read as follows – Obsolete brand by GBD in Paris. With that I clicked on the link and was taken to a page where there was a very brief write up on the brand itself (https://pipedia.org/wiki/Camelia). Here is what it said:
Camelia is thought to be a GBD second, and was one of many brands owned by the Oppenheimer Pipe Group, as evidenced in the following catalog page from a Circa 1950s Oppenheimer Pipes Catalog.
The page makes the GBD connection very clear and says the pipe is LONDON Made. It also states that the pipes would not be released for sale until 1952. I am getting closer to what I am looking for – a post 1954 London Made pipe with a GBD connection. Now that the connection to GBD was established I decided to go back and read the connection between GBD and Oppenheimer. The pipe catalogue page for the 1950s Oppenheimer catalogue was good but I am not clear about the age of the pipe that I have in hand. So I went to the Pipedia section on GBD (https://pipedia.org/wiki/GBD). I quote in part the section spelling out the details on Marechal and Ruchon’s sale of GBD to Oppenheimer.
There is a very simple explanation for GBD’s program to turn more “British”: GBD became a British company soon after the turn of the century! In 1902 Marechal and Ruchon sold GBD to A. Oppenheimer & Co. in London. Charles Oppenheimer had founded this successful trade business in 1860 as an import-/export house. His brothers David and Adolphe and brother-in-law Louis Adler soon joined him. Adolphe took over when Charles went to Germany as British ambassador. Briar pipes were among the first products traded. The business relation to GBD in Paris began as early as 1870. Being the most important customer in the English speaking world, Oppenheimer & Co. were designated as sole distributor for Great Britain, the USA and Canada in 1897. Especially Adolphe Oppenheimer had a burning interest in the pipe business, and Louis’ son James Adler shared that. He should play the most important role in the amicable merger of GBD. A. Marechal, Ruchon and Cie. in Paris was now Marechal, Ruchon & Co. Ltd. (see Marechal Ruchon & Cie. page) – a British firm with four directors: Adolphe Oppenheimer and James Adler had their seat in the head office in London while Auguste Marechal and Ferdinand Ruchon went on leading the GBD factory in the Rue des Balkan in Paris, which was considerably extended and modernised. Ruchon acted as CEO.
Simultaneously Oppenheimer started to build a pipe factory in London. It was opened in 1903, but the forecasts had been over-optimistic for it’s capacity could not be utilized to the full until World War I. Things changed as the French pipe factories lacked more and more workers who were called to the front. In 1916 the ledgers registered that 18,000 of 27,000 dozens bowls manufactured in Saint-Claude were determined via GBD Paris for GBD London. Wherewith London had become the more important location.
After the war, GBD continued production both in London and in Paris. London GBDs mainly went into the national trade and as well into the British Empire and the USA. Paris on the other hand served the French and the other European markets. The location of the factories influenced the GBD history furthermore in the future although later on the products of both countries occasionally were marketed side to side to match special market requests.
I decided to follow the trail on the Marechal Ruchon and Cie name and see if I could read a bit more about the sale to Oppenheimer (https://pipedia.org/wiki/Marechal_Ruchon_%26_Cie). I quote piece of that article to cross reference the information on GBD.
Marechal Ruchon & Cie. was a company owned by Auguste Marechal and Ferdinand Ruchon (“& Cie” is the French equivalent of “& Co”) which owned the GBD brand from the end of the 19th century until 1902 when they sold Marechal, Ruchon & Cie. to Oppenheimer Pipe, which in turn changed the name of the company to Marechal, Ruchon & Co., Ltd.. Upon the creation of Cadogan, however, the brand was no more, remembered only in the name of the GBD Marcee pipes made until just after the Second World War.
Now I knew the connection to Oppenheimer but I still wanted to understand the birth and life of the Camelia Brand. I went back to the Pipedia article on GBD (https://pipedia.org/wiki/GBD) and read further to see if there was any mention of the Camelia line of pipes. Low and behold there was a reference to the brand just below the 1950s Oppenheimer Catalogue pages and just above the photos of GBD pipes. I quote the pertinent part of the article below and have highlighted the section on the brand.
The claims after the 1st World War demanded further distinctions. First of all was the London Made, which became the Standard London Made, followed by the New Era– in 1931 the top model asking 12½ Shilling. The Pedigree, although sketched around 1926, was not produced until the later 1930s. The New Standard was introduced in order to give the popular Standard of the 20s a higher rank in value. The Prehistoric, a deeply sandblasted black pipe, that still carried the small GBD Xtra stamp, was entirely new and unusual.
The French GBDs more or less followed the same developments, although Xtra and Speciale very longly used there. In the late 1920s a GBD with a metal filter system was introduced under the name Extra Dry. Also from Paris came another important new feature: the introduction of the inserted metal plate with the GBD initials on the stems. That insert added a further “touch of class” to the pipes and in London it was attached immediately.
The solid demand for GBD pipes also encouraged the management to introduce a number of sub brands designed to win new buyers. We can list such sub brands as follows:
- The City de Luxe (1921) had an inserted star on the stem as trademark and were marketed in England and in France. These pipes were the bestseller of the 5½ Shilling class in the 1930s in Great Britain.
- Reserved for the French market remained the even more favorable GBD brand Marcee, a derivative of Marechal Ruchon & Co. Ltd. that was offered until the 2nd World War and for another one or two years afterwards.
- The Camelia – made in London as a 2½ Shilling line – was only around for a few years.
- Important to mention is also the Riseagle—completely produced in Paris before the wartime for England’s smokers who wanted “a cheap but dependable British made pipe”… one of the most successful 1 Shilling pipes until 1939! The introduction of the luxury impact on the excise tax for pipes after the war put an end to this cheap brand.
Other brands of this time were marketed with even larger independence. The Dr. Plumb’s had been developed by the Parisian sales manager J.B. Rubinovich in 1925 when GBD France needed “a cheap line of pipes” especially for the Canadian market. In fact, the new brand was nicknamed for Mr. Rubinovich’s secretary Leslie W. Plumb, whose most important business was “to doctor figure” the ledgers. Dr. Plumb’s made their way not only in Canada. – The Peter Piper, as well as the Dr. Plumb’s produced in Saint-Claude, is another great example that stampings like “London made” or “London England” are not always totally trustworthy also on older pipes! Not only today numberless brands are made in Saint Claude and stamped with whatever the buyer wants to be stamped.
Here is a link to the full GBD Oppenheimer catalogue from the 1950’s if you would like to check it out further (https://pipedia.org/images/2/2f/1950s%3FGBDcatalog.pdf).
Now I could honestly say that while many thought this was a French brand it is actually only French by association with GBD in its early days. However, the quote above unequivocally asserts that it is a London Made Pipe that was made as a 2 ½ Shilling Line of pipes for a short time. The catalogue from the 1950s Oppenheimer Group pushes the date to post WWII and potentially the early 1950s (there is a note on the catalogue page saying that the pipe was not available for Home Trade until 1952) for a very short time and then it was gone. The only thing that leaves me with a bit of a question is the twin stems – a horn one and an amber one. Were those made for pipes in the 1950s?
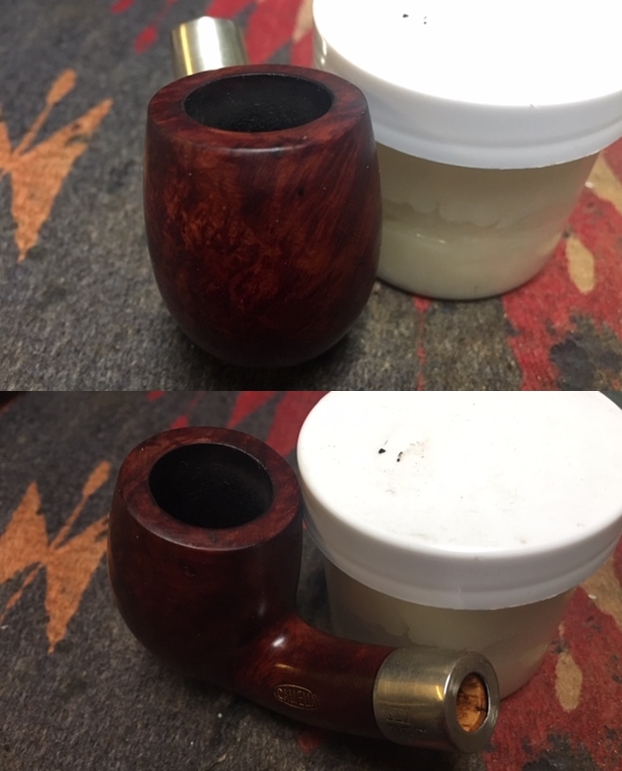
Last night I took the pipe out of the box of pipes for restoration. I took a photo of the case it was in to show the condition it was in. The leather was in very good shape for a pipe of this age. The outside of the case is stamped in gold PWS in an oval followed by Echt Bruyere & Bernstain. That translates as follows. Echt = Genuine, Bruyere = Briar and Bernstain = Amber. The description fits the pipe that is in the case. It states that the pipe in the case is Genuine Briar and Amber. I am not sure of what the PWS means on the case or how it connects to GBD.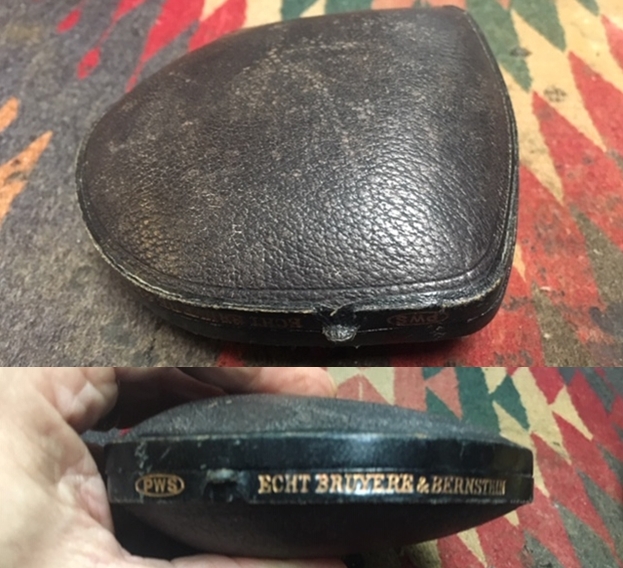 On opening the case I was once more stunned by the beauty of the pipe. It really was a beautiful billiard. The only visible flaw was the fill on the left side of the bowl. The fill had shrunken and was rough to touch. You can see it in the photo below. Other than the damage to the rim top it is a stunning pipe. Jeff did his usual thorough cleanup of the pipe and stems. He cleaned the exterior of the pipe with Murphy’s Oil Soap and a tooth brush. He scrubbed it and rinsed it off with warm water. He scrubbed out the internals with pipe cleaners, cotton swabs and alcohol.
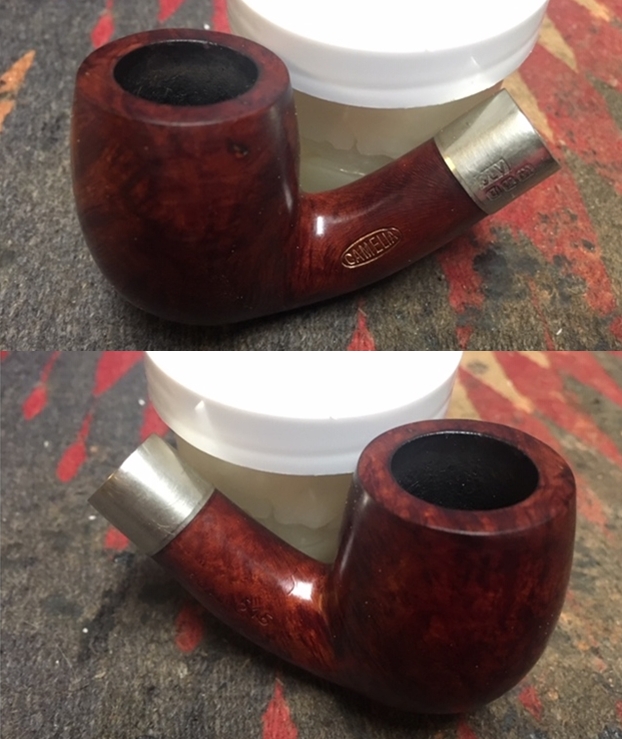
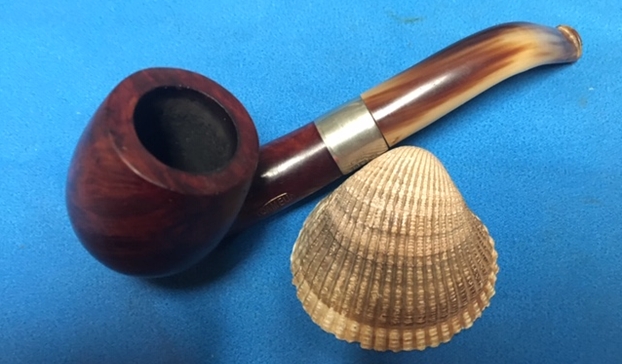
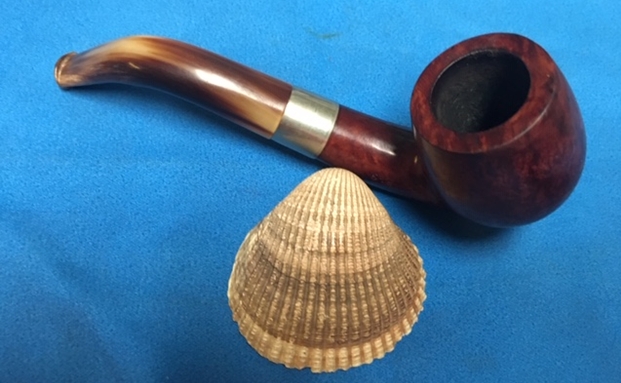
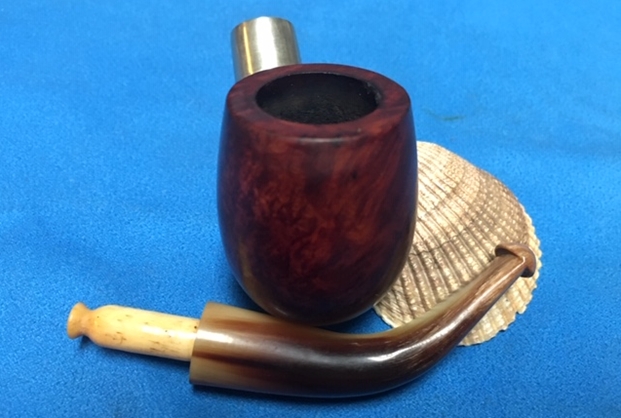
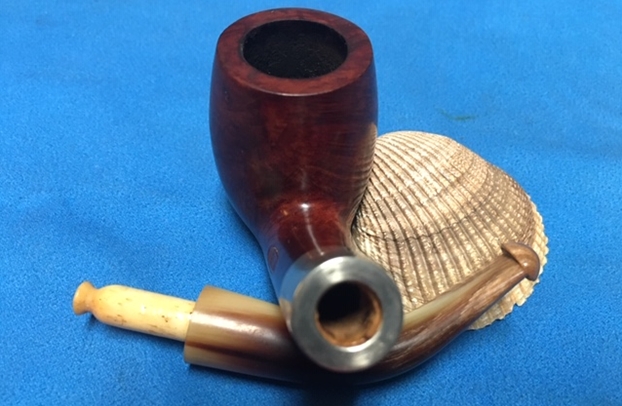
 I took photos of the pipe bowl with each of the stems in place. The first set of photos show the bowl with the amber stem. The fill is very visible in the left side of the bowl and the damage to the rim top is also visible in the photos. The second set of photos show the bowl with the horn stem in place. The tenon on the horn stem had some shrinkage, I believe due to age and not being used. It was loose in the shank and would need to be taken care of in the restoration.
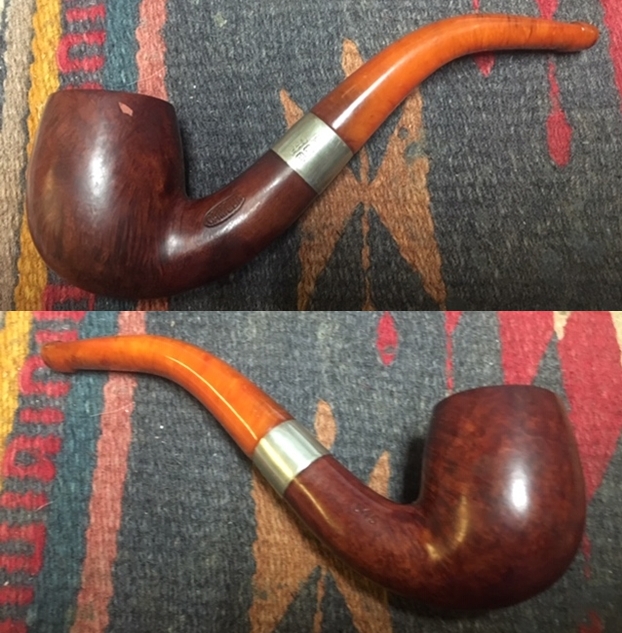

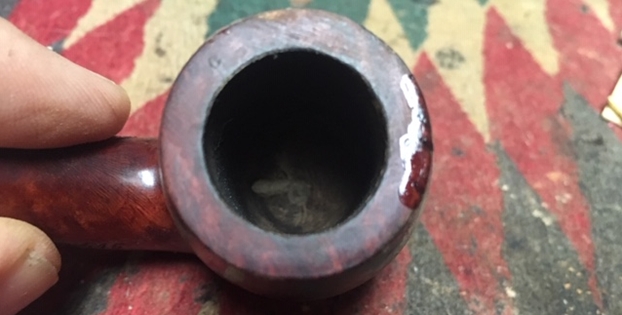
 I took a close up photo of the rim top to show the cuts in the rim top on the front outer edge of the bowl. The scratches and cuts were deep. I also took close up photos of the stem surfaces to show their condition.
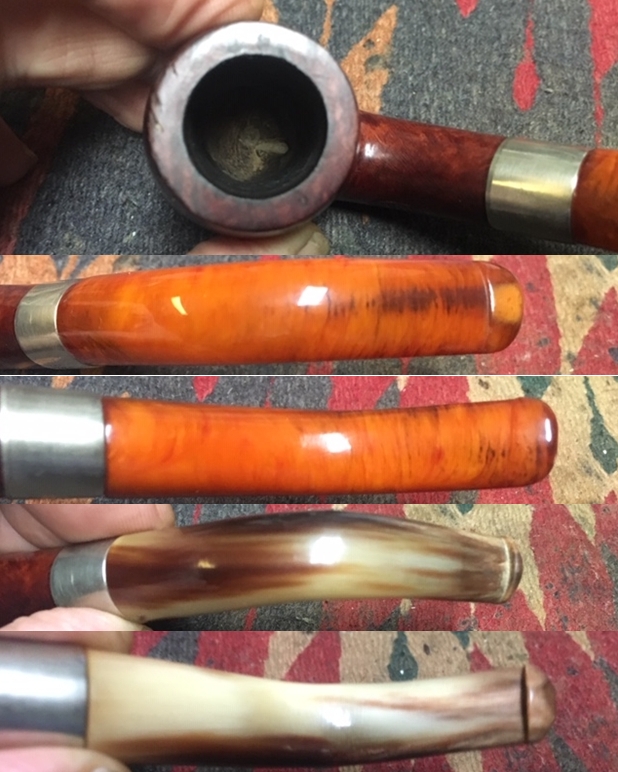 I set the stems aside and turned my attention to the bowl. I used a dental pick to remove the large fill on the left side of the bowl. I cleaned it up with alcohol on a cotton swab to remove the dust and debris from the crevice. I used clear super glue and briar dust to fill in the cleaned out hole in the bowl side and clear super glue to fill in the cuts and nicks on the rim top.
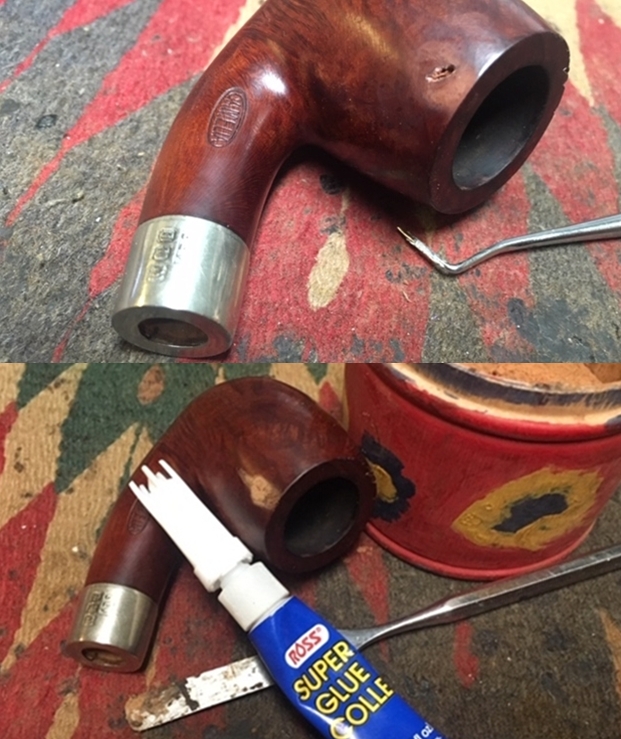
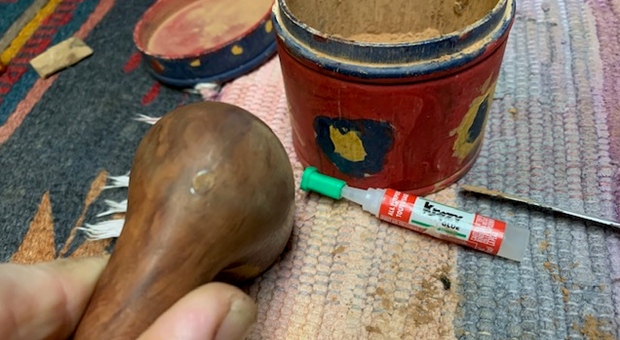
 When repairs had cured I sanded them with 220 grit sandpaper and polished it with 400 grit wet dry sandpaper. I sanded and resanded until the surface was smooth. I polished it with 1500-2400 grit micromesh sanding pads. I wiped it down with a damp cloth after each pad.
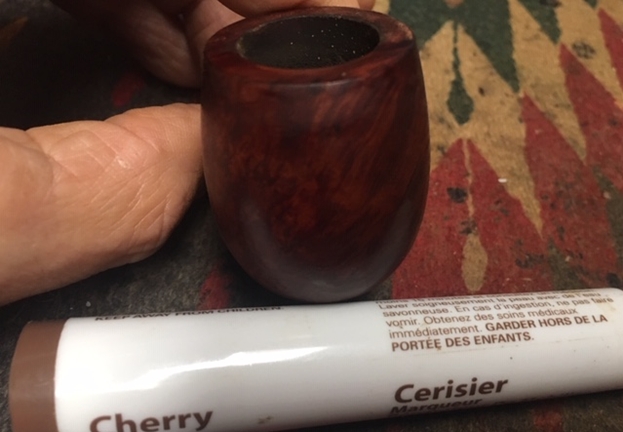
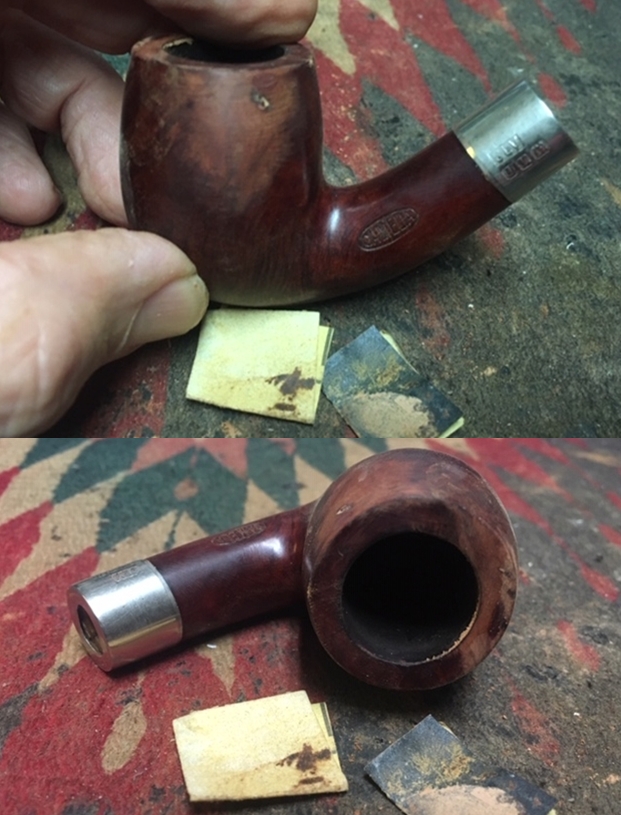 Once the surface was smooth I used a cherry stain pen to touch up the repaired areas on the rim top and the left side of the bowl. The colour of the pen was a good match to the rest of the bowl. The repaired areas on the front of the bowl and the repaired fill look very good with the stain coat.
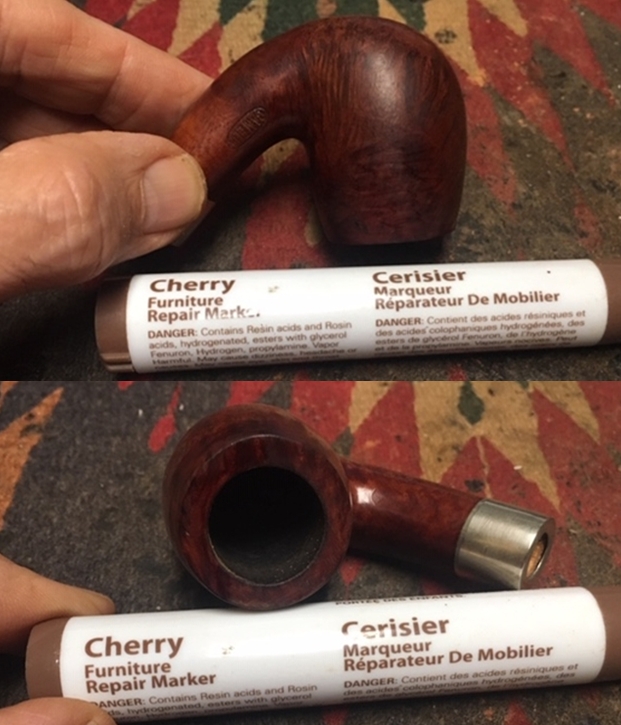
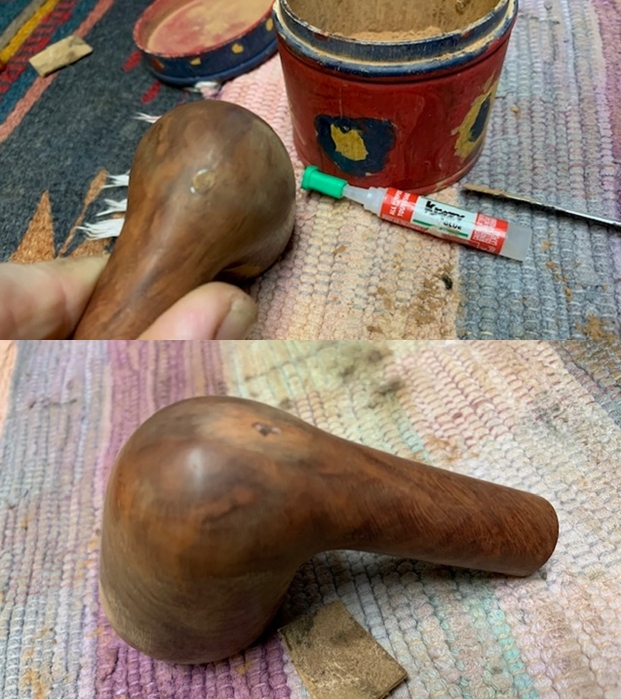
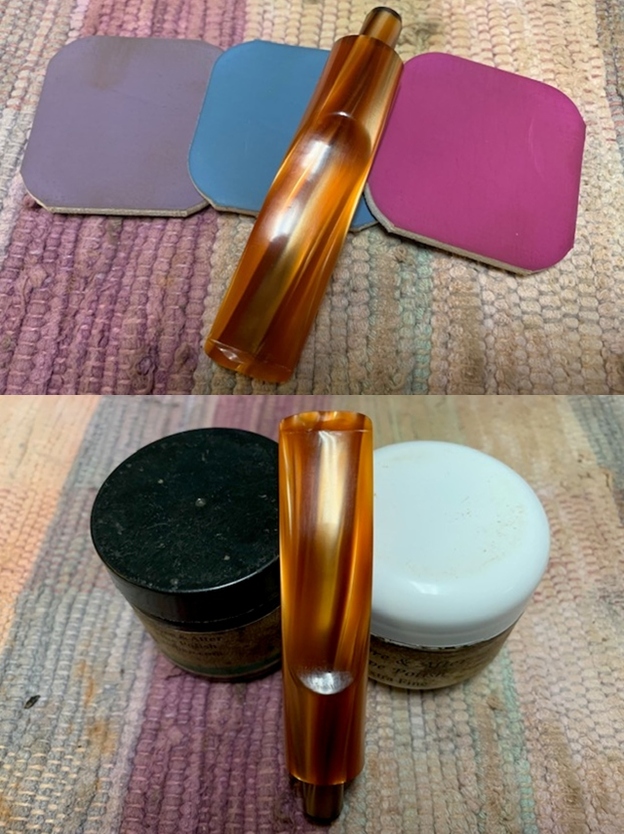
 To further blend the stain into the rest of the bowl colour I decided to continue experimenting with a new product from Mark Hoover of Before & After Products. This one is a product he labels briar cleaner and it has the capacity of absorbing grime and dirt from the surface of briar. I rubbed the bowl down with some of his Briar Cleaner to see how it would work in this setting. In speaking to Mark he noted that the product is completely safe to use. The main product is even FDA approved edible. I rubbed it onto the bowl and rim top with my finger tips and worked it into the grime and grit on the bowl. I let it sit on the pipe for about 5 minutes before I rubbed it off with a microfibre cloth. I rinsed it under warm running water to remove the residue. I was pleasantly surprised by how clean the surface on the bowl looked when I was finished.
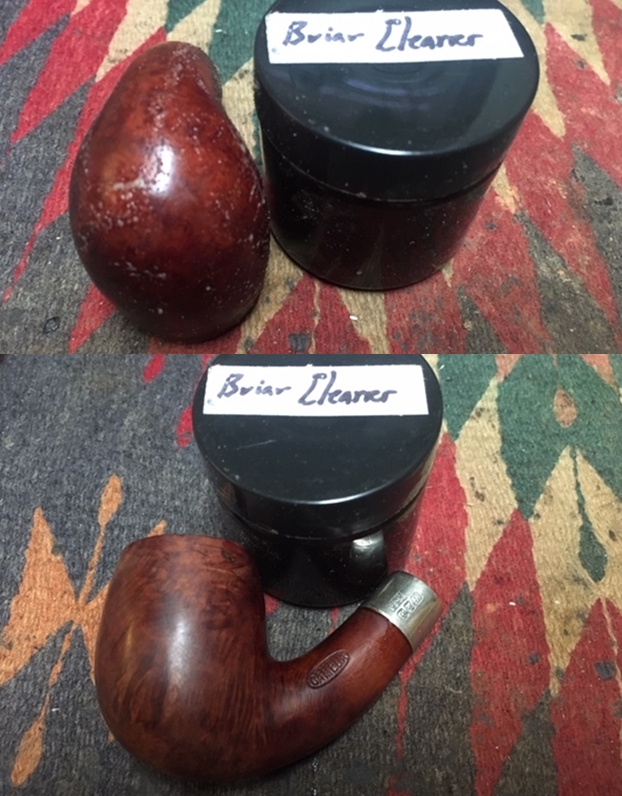
 I could see remnants of gold leaf in the Camelia logo as well in the catalogue illustration above. I used some Antique Gold Rub’n Buff to give the stamping a new coat of gold leaf. The finished bowl looked really good at this point in the process.
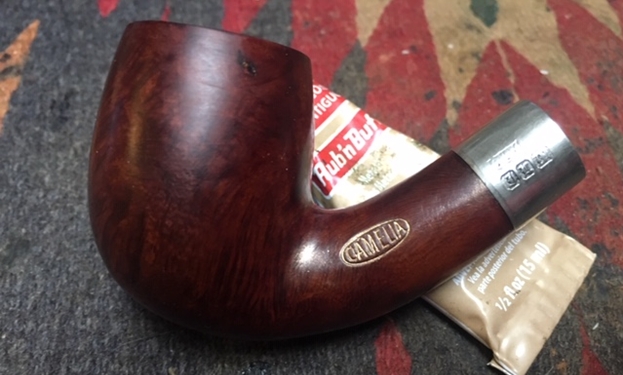 I touched up the repaired fill on the left side of the bowl with a black Sharpie Pen to assure that it blended into the finish. I worked some Before & After Restoration Balm into the surface of the briar with my fingertips to clean, enliven and protect it. I let the balm sit for a little while and then buffed with a cotton cloth to raise the shine. Mark Hoover’s Balm is a product that I have come to appreciate and one I use on every pipe I have been working on.
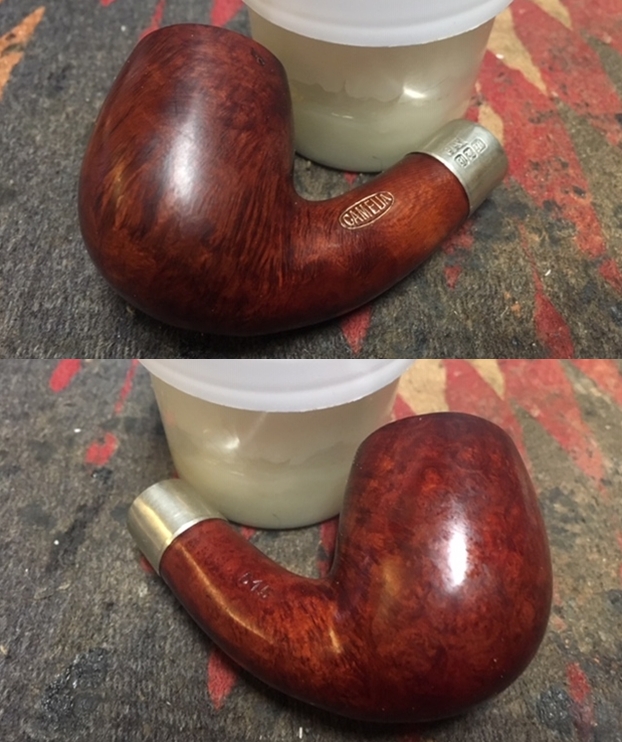
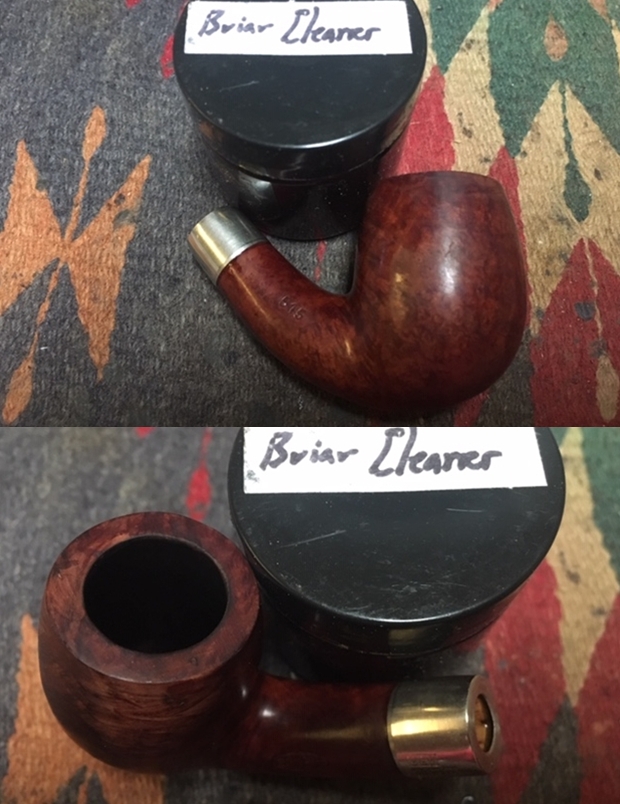
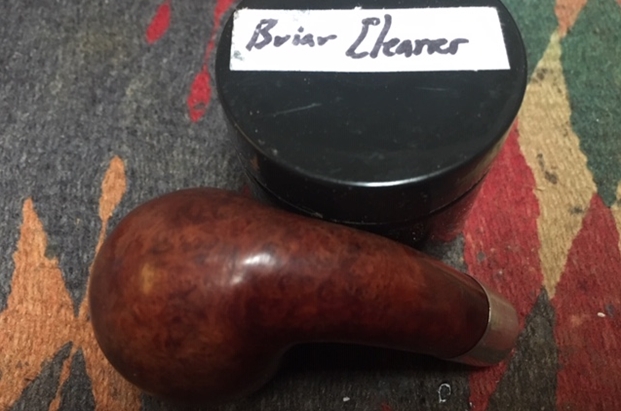
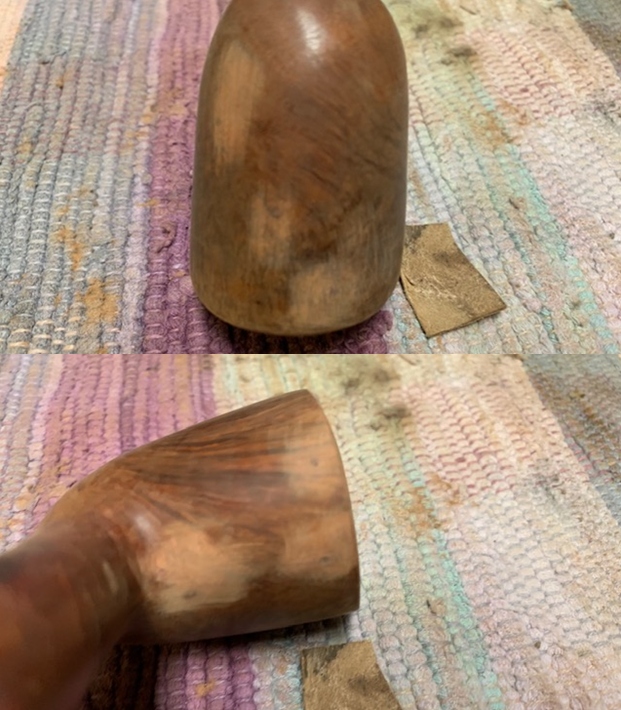
 I hand buffed the bowl with a microfiber cloth to raise a shine in the briar and the silver. I took photos to show what the pipe looked like at this point in the restoration process. I really like the look of the bowl and after this I set it aside to work on the pair of stems.
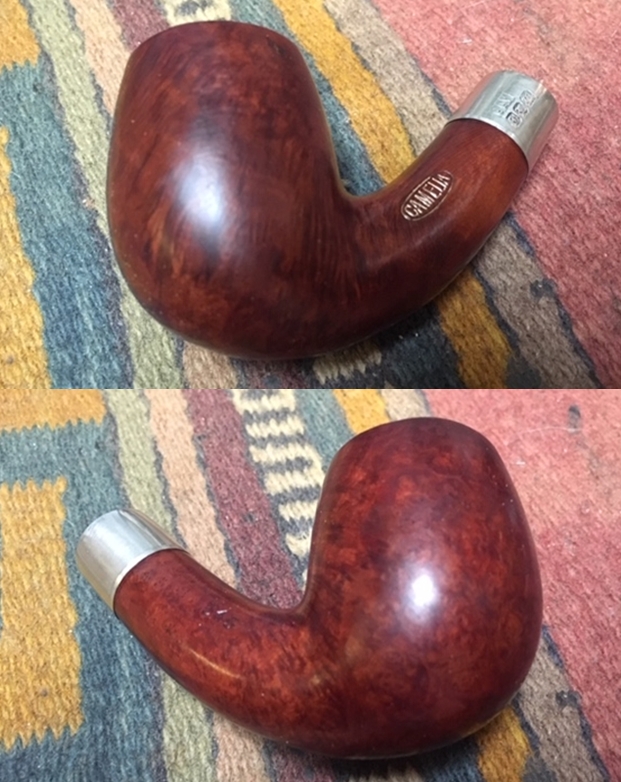

 The bowl had the lion’s share of the restoration work needed on this pipe. So with that virtually completed other than the final polishing I set it aside and turned my attention to the stems. I painted the bone push tenon with clear fingernail polish to build it up and tighten the fit in the shank.
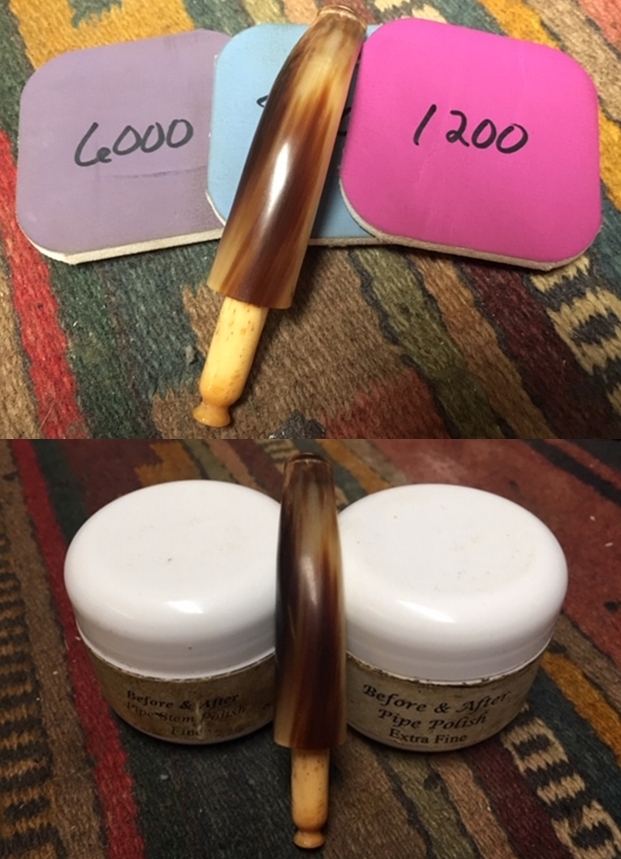
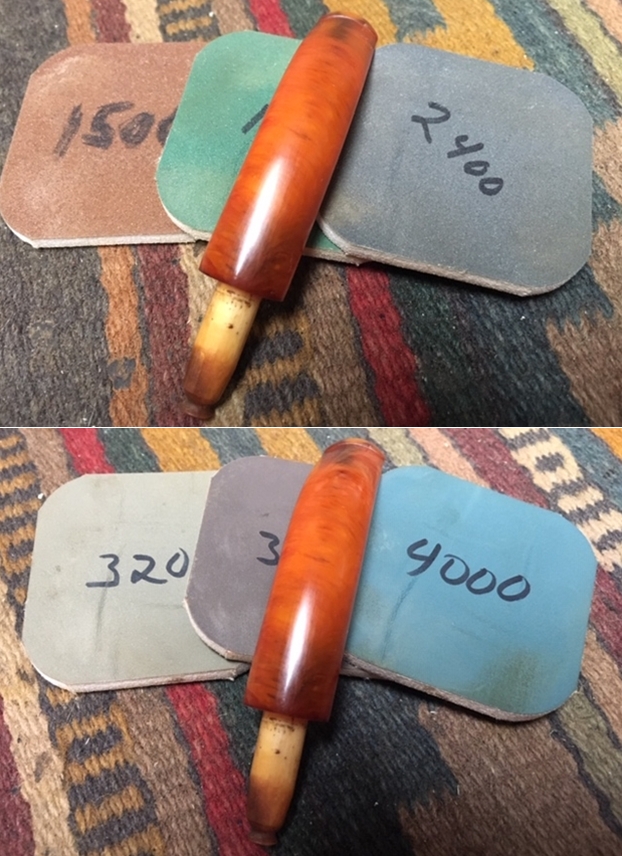
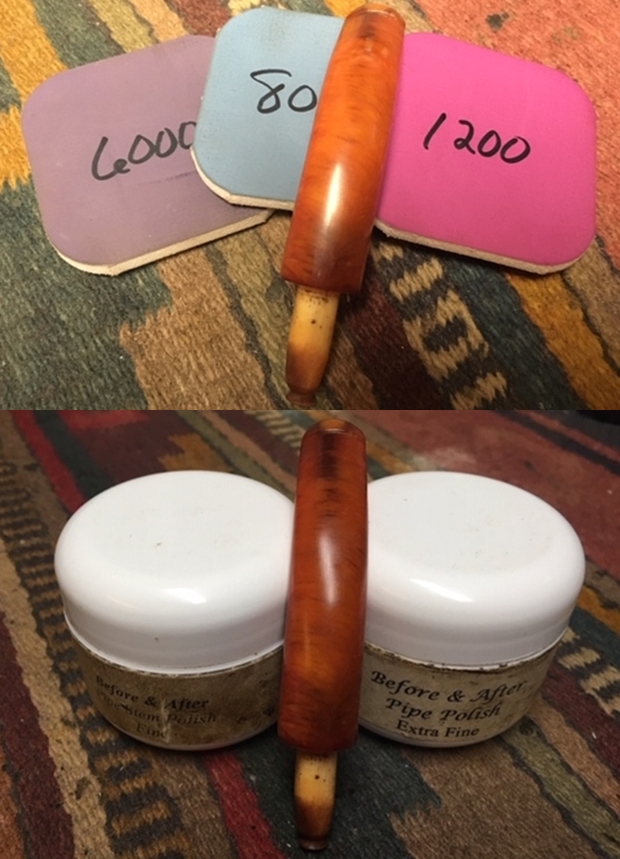
 I polished the horn stem with micromesh sanding pads – wet sanding it with 1500-12000 grit pads and wiping it down with some Obsidian Oil after each pad. I repeated that with the amber stem as well. I polished it with 1500-12000 grit pads. I wiped it down with Obsidian Oil after each pad. I finished polishing it with Before & After Pipe Polish – Fine and Extra Fine and rubbing it down with a final coat of Obsidian Oil. I hand buffed it with a microfiber cloth.
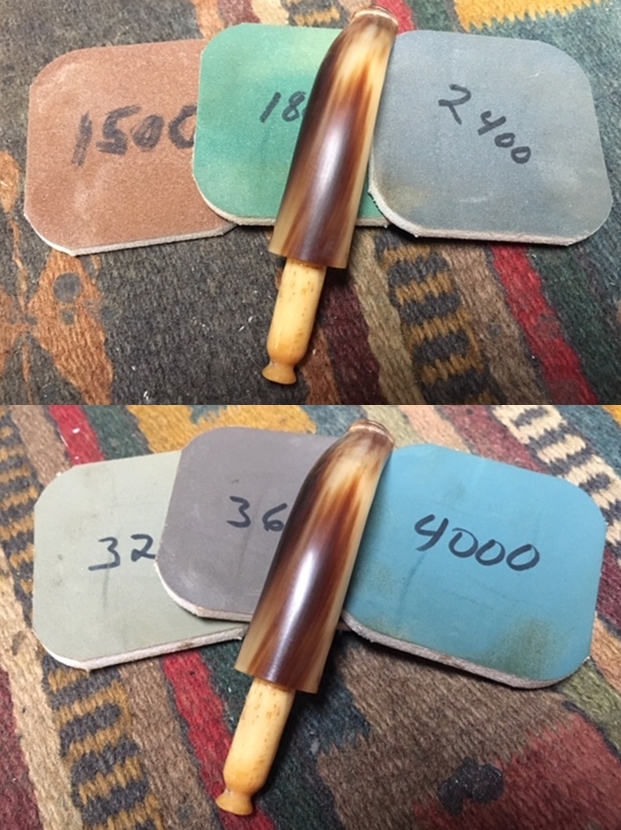
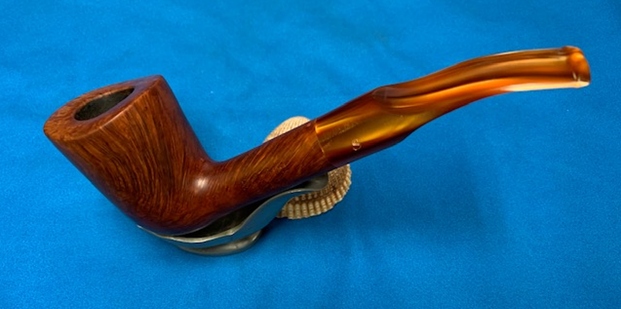
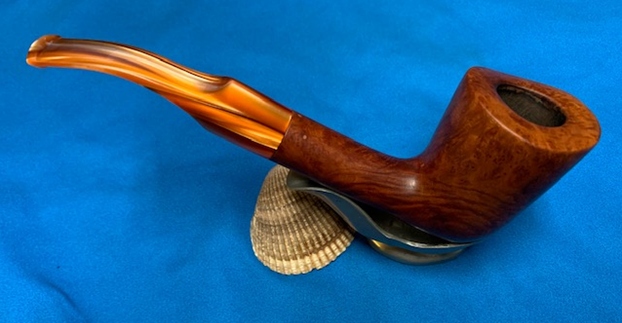
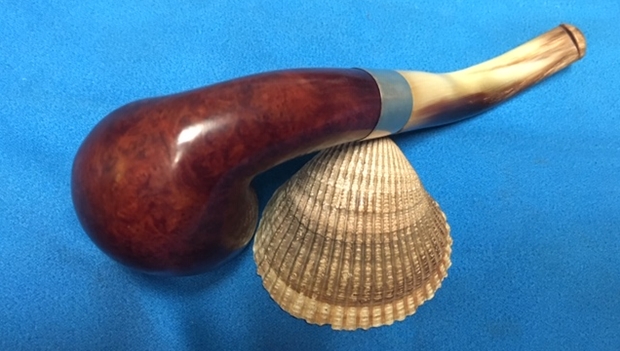
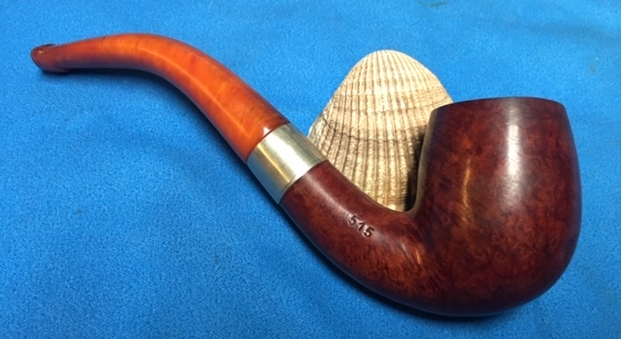
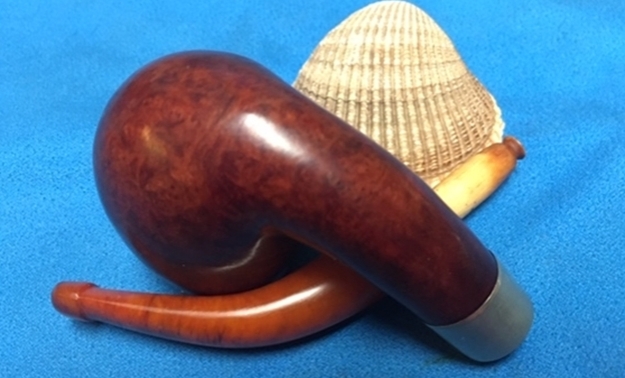
 With the parts finished it was time to polish up this interesting piece of GBD post WWII pipe history. It is a great clam shell cased pipe with both a beautiful striated horn stem and a swirled genuine amber stem. It was time to finish this pipe. I put the horn stem and bowl back together first and buffed the pipe with Blue Diamond on the buffing wheel. I polished the briar and the minute scratches still in the horn stem until there was a rich shine. The horn stem looks really good with the rich red/browns of the bowl. The Gold Leaf in the logo stamp goes well with the older look of the horn stemmed pipe. The finish really highlights some amazing grain and hides the fill on a proportionally well carved pipe. Once I buffed the pipe the briar came alive and the mixture of grain popped with polishing. The horn stem had a rich glow. The finished pipe is a beautiful grained Bent Billiard. It fits well in the hand and sits right in the mouth. Have a look at it with the photos below. The dimensions of the pipe with the horn stem are Length: 5 ½ inches, Height: 1 7/8 inches, Outside diameter of the bowl: 1 1/4 inches, Chamber diameter: ¾ of an inch.
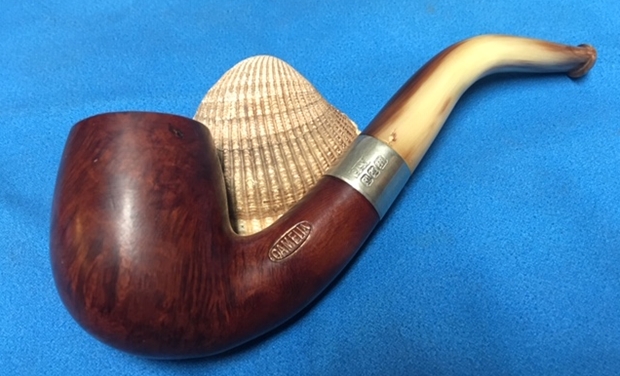
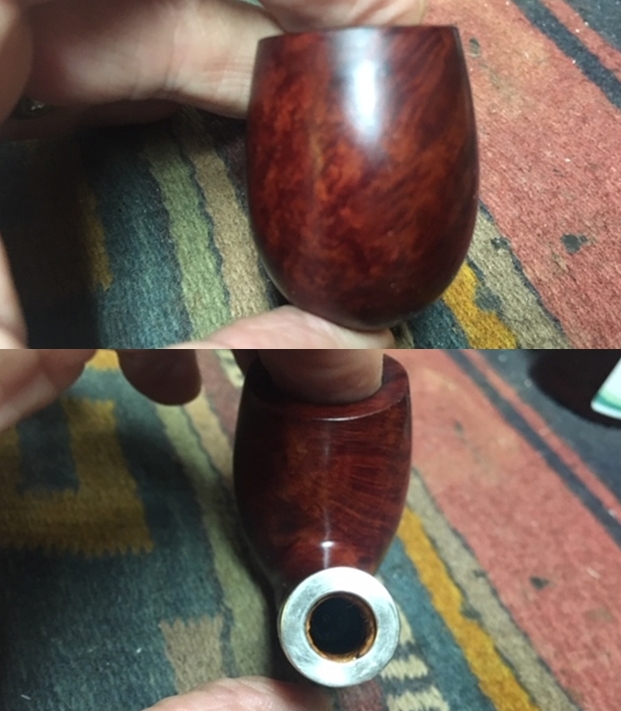
 The dimensions of the same pipe with the amber stem are Length: 5 ½ inches, Height: 1 7/8 inches, Outside diameter of the bowl: 1 1/4 inches, Chamber diameter: ¾ of an inch. This is an interesting piece of GBD history having been made only for a short time from 1952 onward. It is mentioned in the Oppenheimer 1950 Catalogue and it clearly states that it did not come out for sale until 1952. The horn and amber stems could well be a re-introduction of older stem materials when vulcanite was scarce in post war Europe. The push style bone tenon rather than a threaded older style bone tenon also makes this very feasible. However you view it I have to say that is a beautiful pipe with options for each smoke that will give a very unique experience each in their own right. Thanks for taking time to work through the whole blog. It was a pleasure to work on. Sorry for the length!
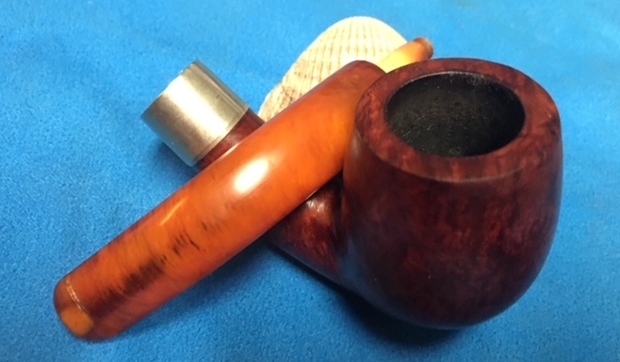
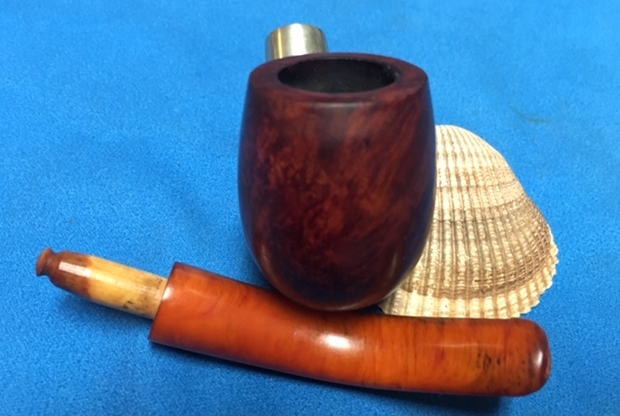

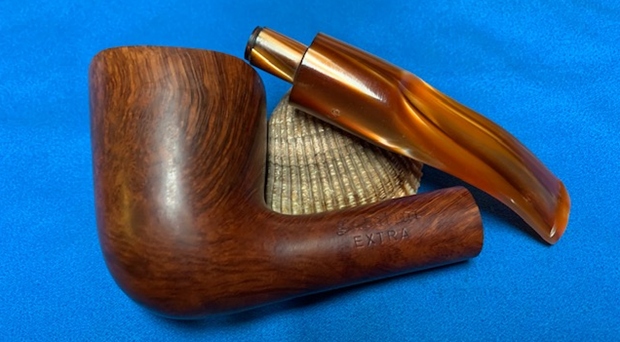
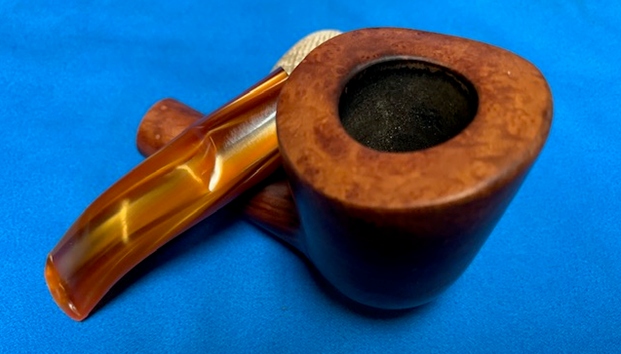
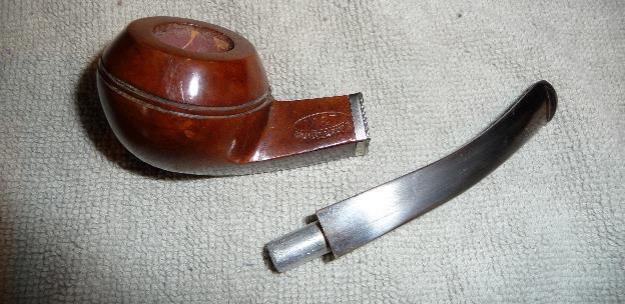
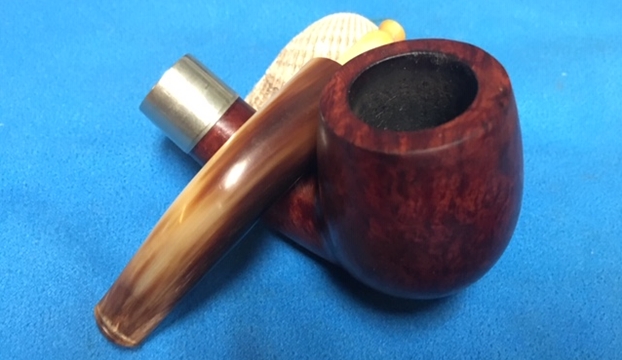
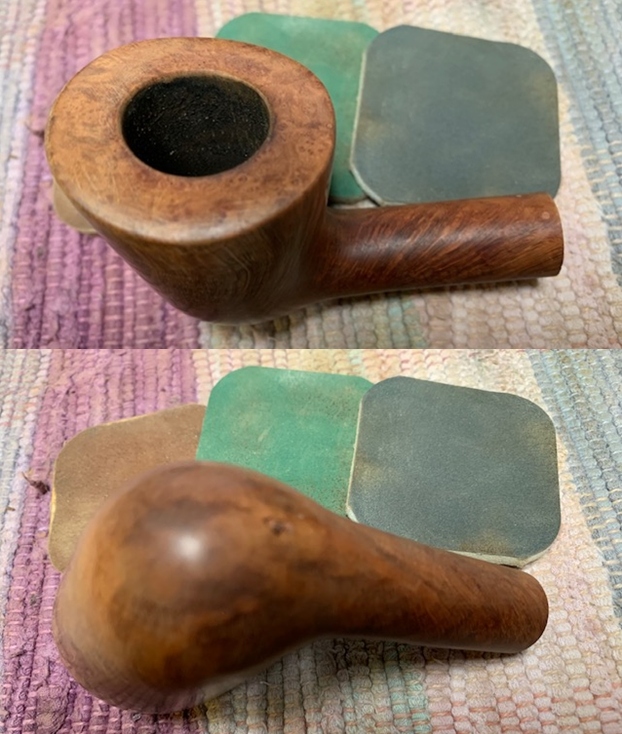
 I took a photo of the rim top to show the interior the bowl and the rim top and inner edge. It is moderately caked with some damage to the rim top and edges and some darkening on the back top of the rim. The Lucite stem is in decent condition with tooth marks on the top and underside near the button.
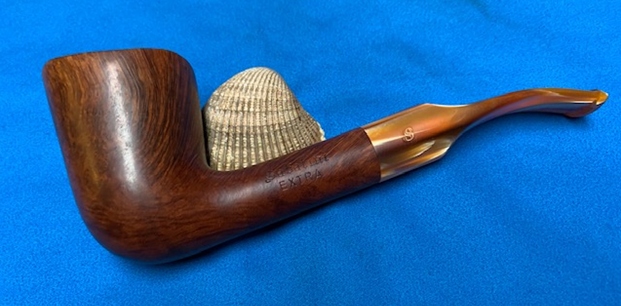
 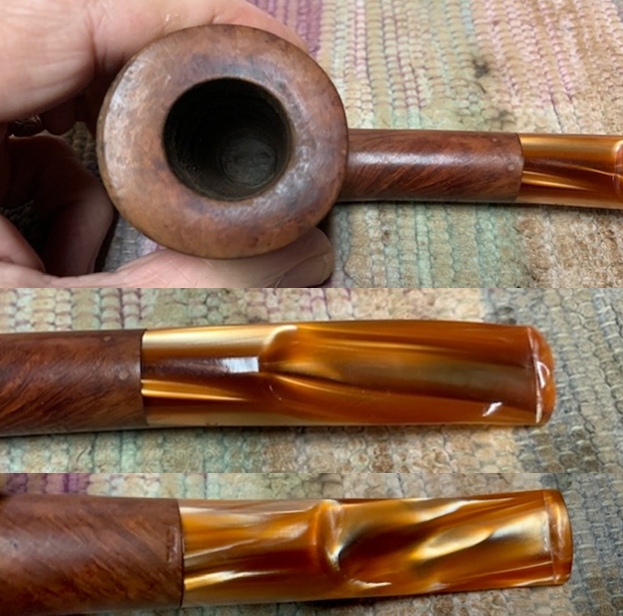 I took a photo of the left side of the shank to show the stamping. The stamping is readable in the photos below and is as noted above. The stem has a stylize upper case S on the left side.
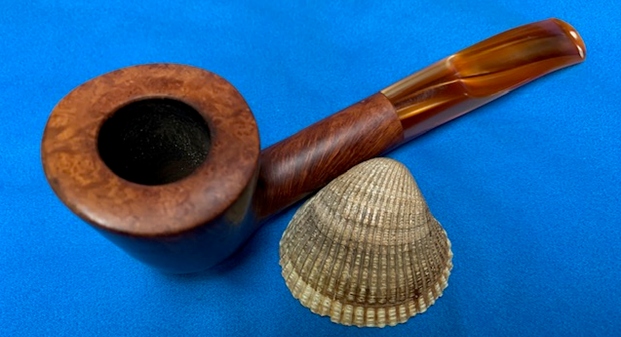
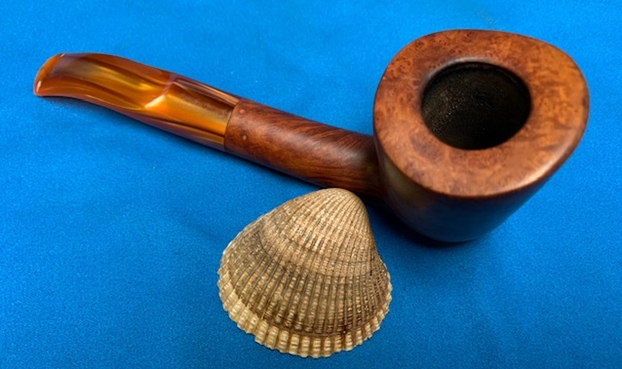
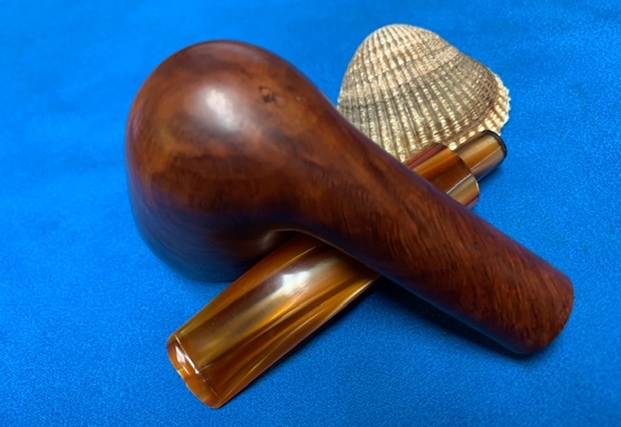
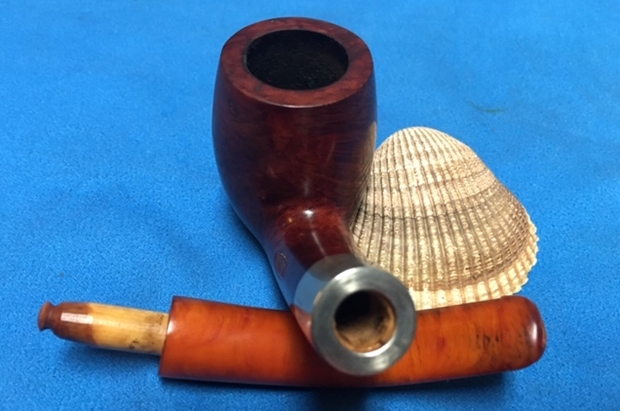
 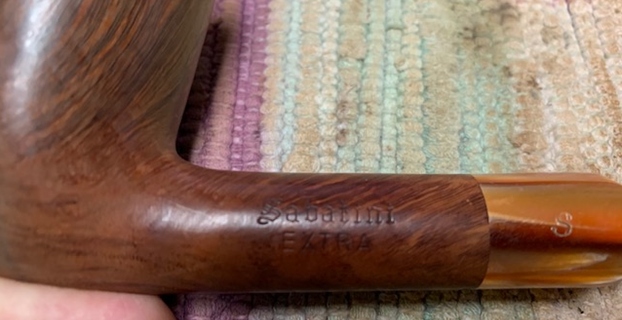 I took the stem off the bowl and took a picture of the parts of the pipe to give a sense of size.
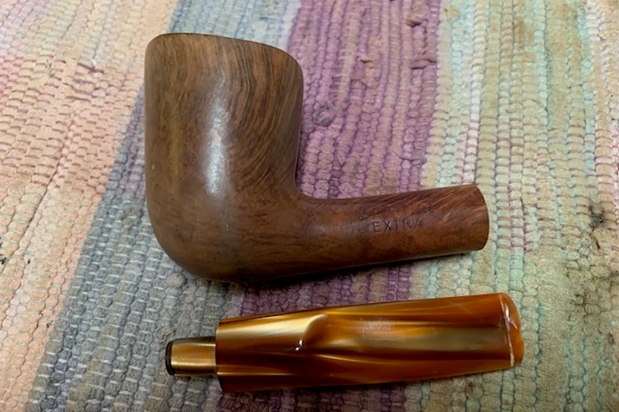 I turned to Pipephil’s site to see if I could find out any information on the brand (http://www.pipephil.eu/logos/en/logo-s2.html). There was little there to go on however it appears that the Italian crafted pipes were distributed by the US distributor Wenhall Pipes LTD. I did a screen capture of the information that was there.
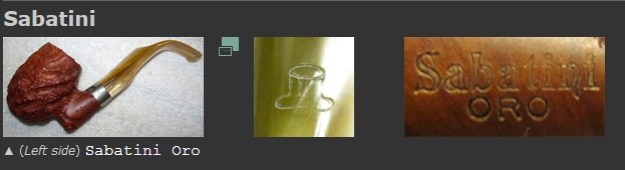 I checked on Pipedia and came up empty handed on the Sabatini brand but then turned to the article on Wenhall Pipes Ltd (https://pipedia.org/wiki/Wenhall). I found that Wenhall Pipes Ltd. was a distribution company out of New York City and distributed some well-known pipes. I quote the article below
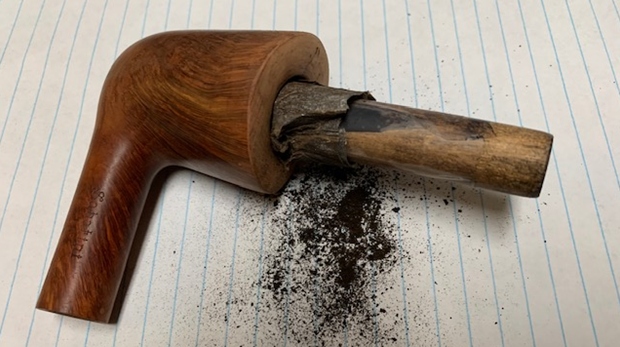
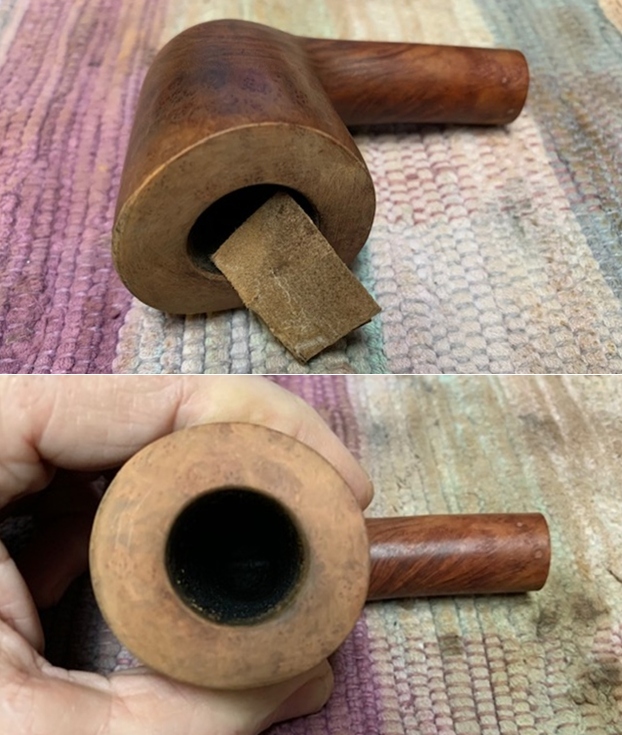 I reamed the pipe with a PipNet reamer and cut back the cake back to the bare briar. I cleaned up the walls with a Savinelli Fitsall Pipe Knife. I sanded the walls as a final touch with 220 grit sandpaper wrapped around a dowel. The interior walls of the pipe looked free of burn or heat damage. To me that is always a relief.
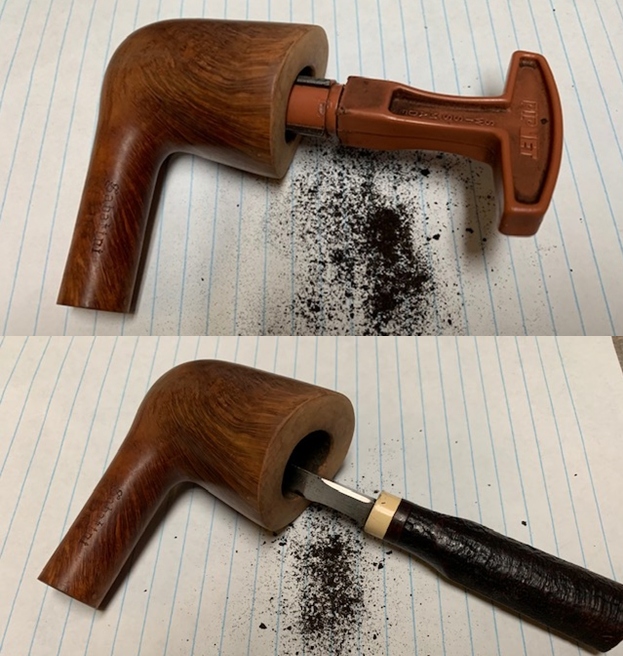
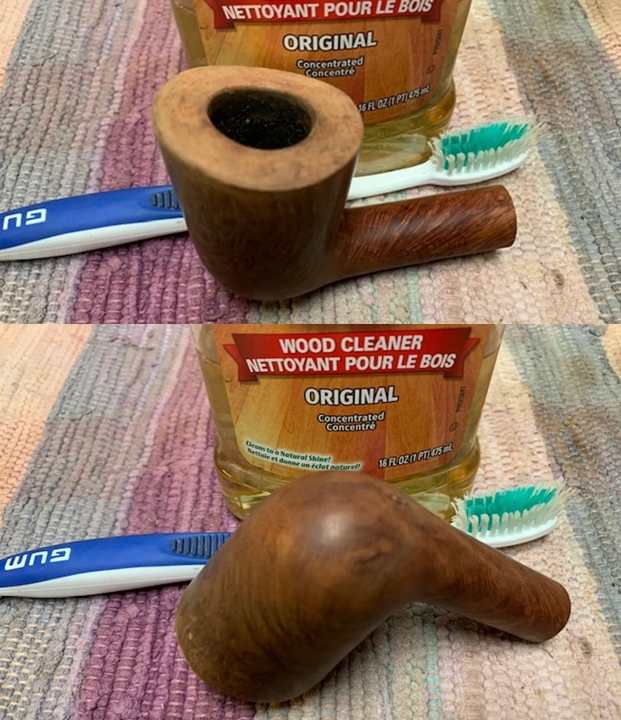
 I scrubbed the exterior of the bowl with a tooth brush and undiluted Murphy’s Oil Soap. I find that the soap cuts the grime and grease on the briar and leaves the surface clean and easier to work with. I rinsed it off with warm water and dried it with a cotton towel.
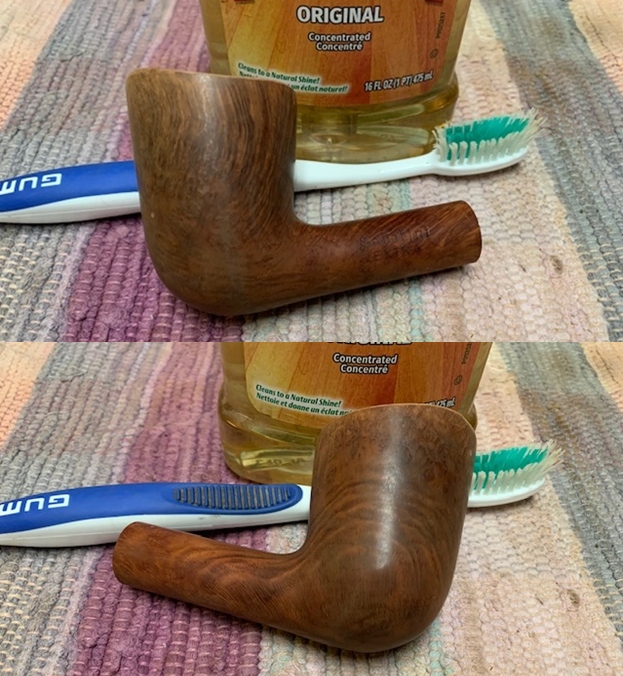
 I filled in all of the putty filled flaws around the bowl with briar dust and clear super glue. Once it cured I sanded them smooth with 220 grit sandpaper.
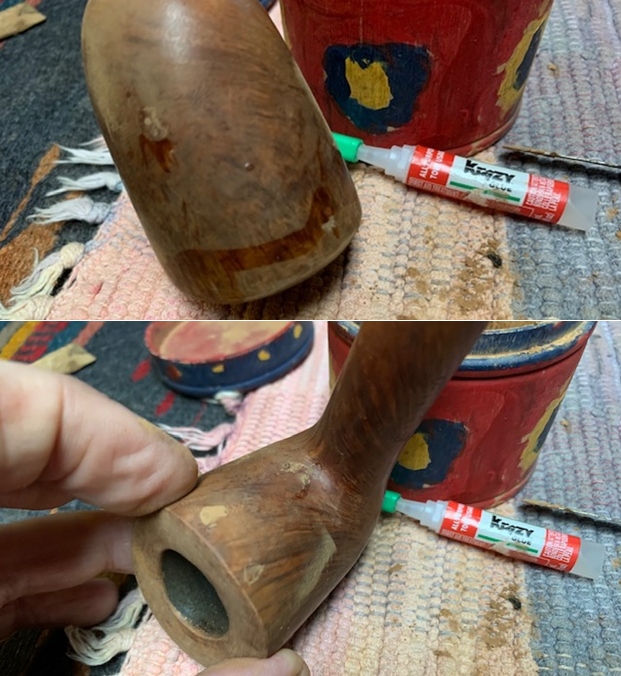
 I cleaned out the shank and airway in the shank and stem with pipe cleaners, cotton swabs and alcohol. I was surprised that I also was removing some brown stain from the end of the shank.
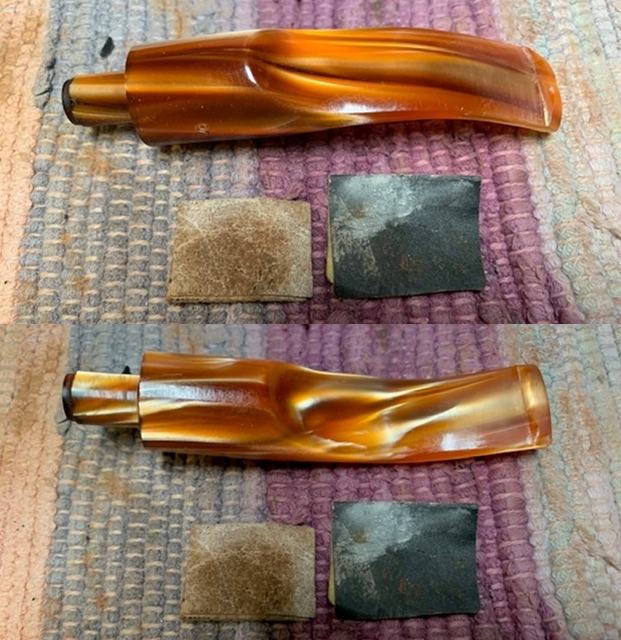
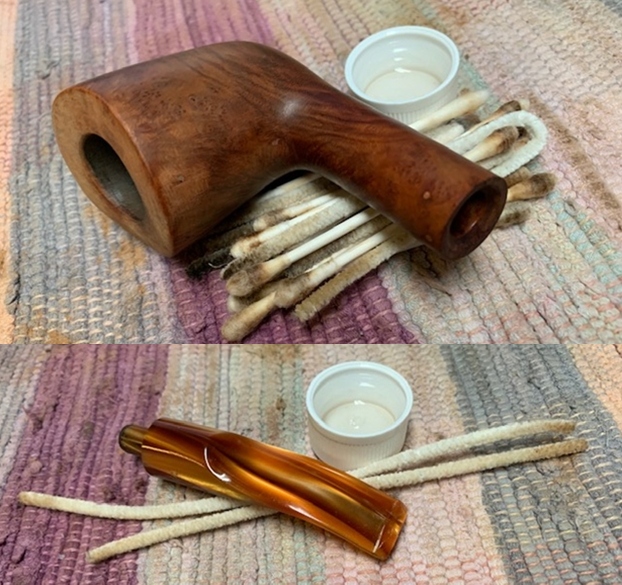 I polished the bowl and rim top with micromesh sanding pads – dry sanding it with 1500-12000 grit pads. After each pad I wiped the briar down with a damp cloth. This served a dual purpose of both removing the sanding debris and the dust that had accumulated in the rustication patterns around the bowl and shank.
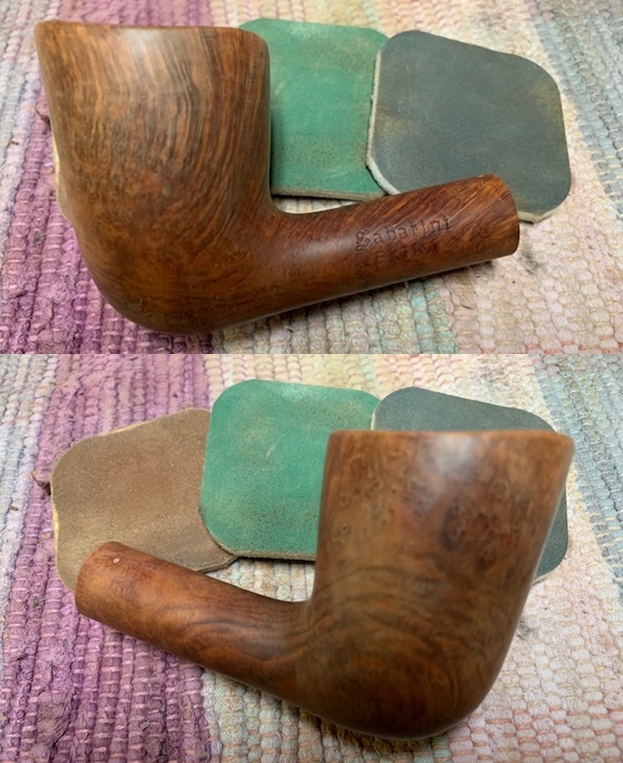
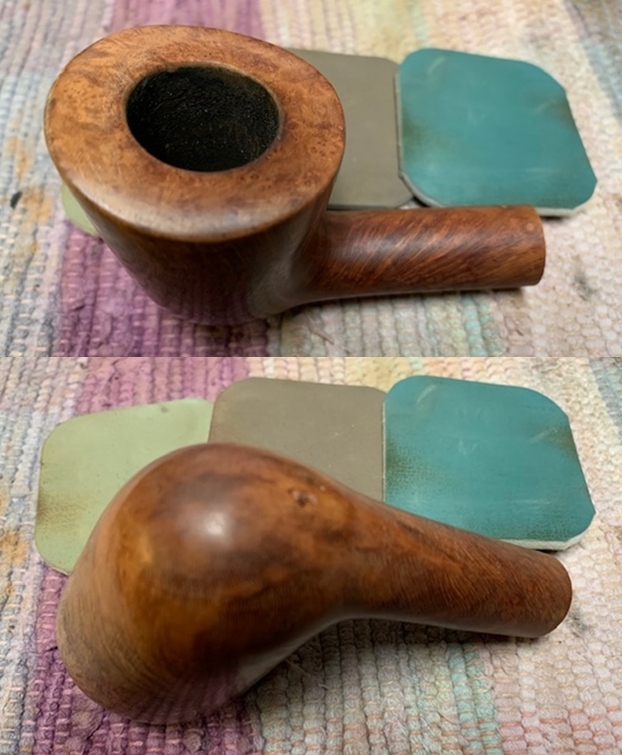

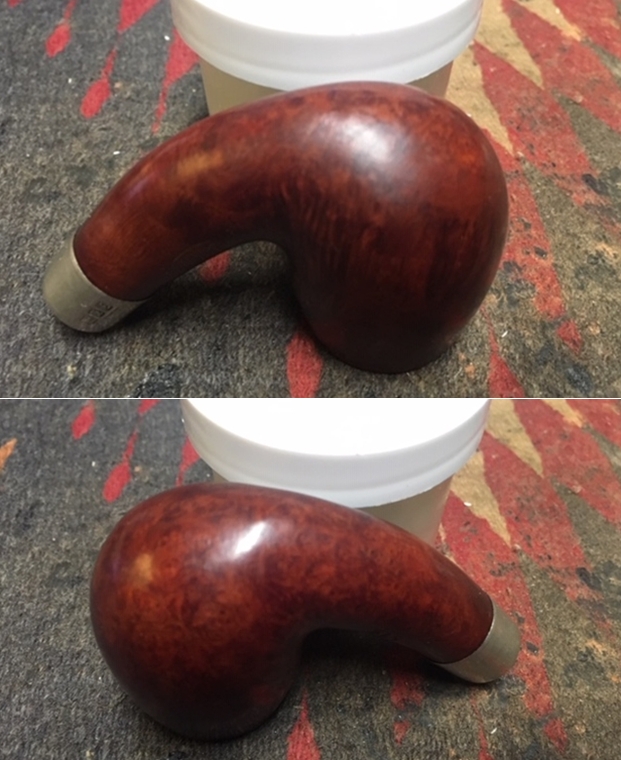
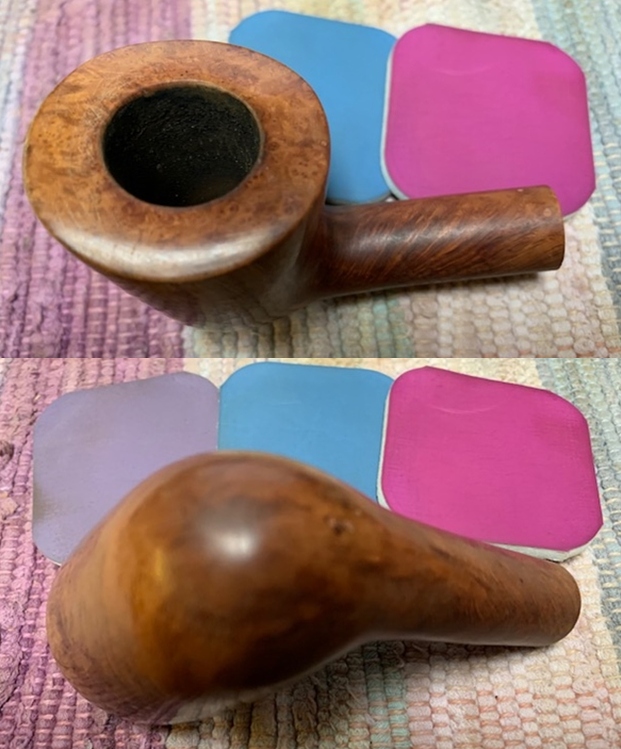 I worked some Before & After Restoration Balm into the surface of the briar with my fingertips and a horsehair shoe brush to clean, enliven and protect the briar. I let the balm sit for 15 minutes and then buffed with a cotton cloth to raise the shine. The photos show the bowl at this point in the restoration process. It looks quite nice at this point.
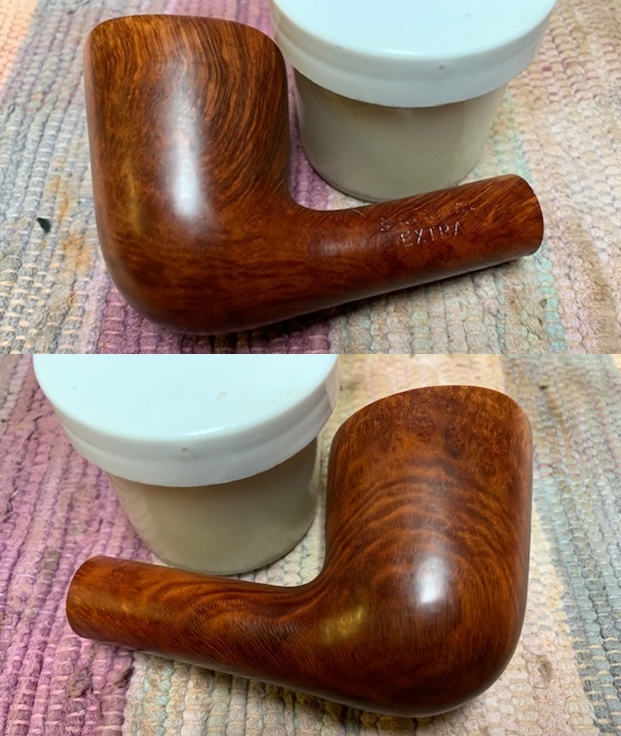

 With that done the bowl was finished other than the final buffing. I set it aside and turned my attention to the stem. I filled in the tooth marks and rebuilt the button with clear super glue and set it aside to cure. Once the repairs cured I used a piece of 220 grit sandpaper to clean them up and blend them into the surface of the acrylic. I started the polishing with 400 grit wet dry sandpaper.
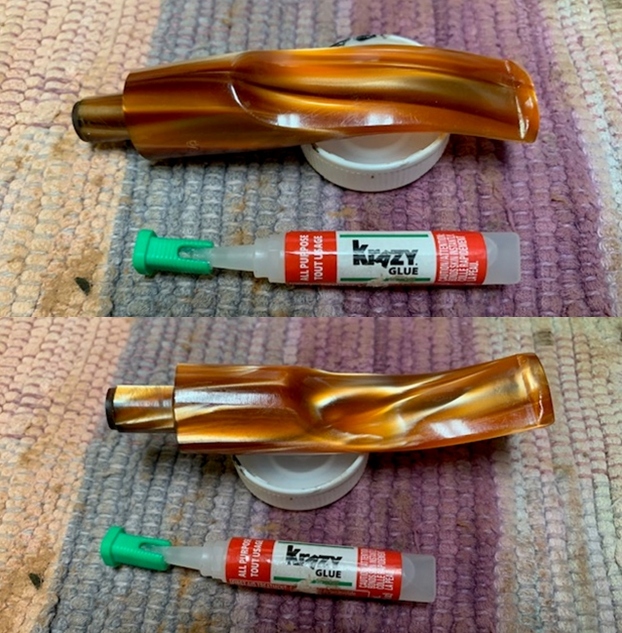
 I used some Rub’n Buff Antique Gold to touch up the S logo on the stem. I rubbed it on and pressed the product into the stamp. I rubbed it off with a cotton pad.
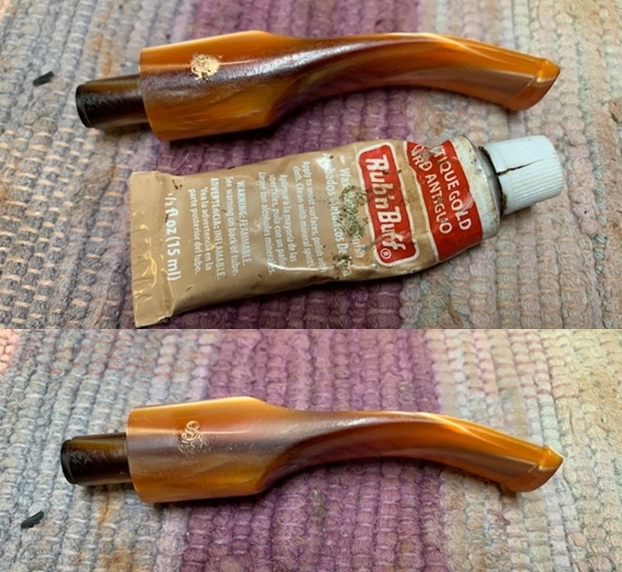 I polished the stem with micromesh sanding pads – wet sanding with 1500-12000 grit sanding pads. I wiped it down after each sanding pad with Obsidian Oil. I polished it with Before & After Pipe Stem Polish – both Fine and Extra Fine.
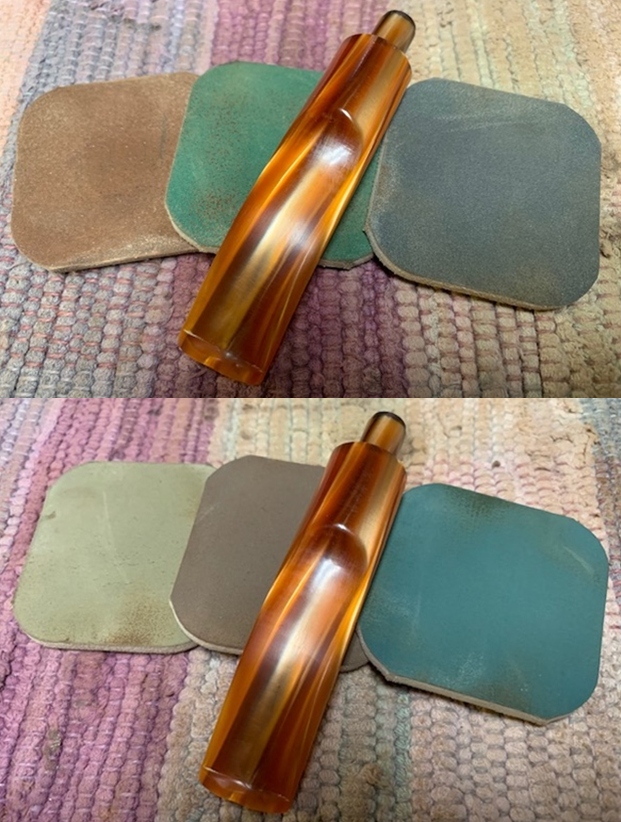
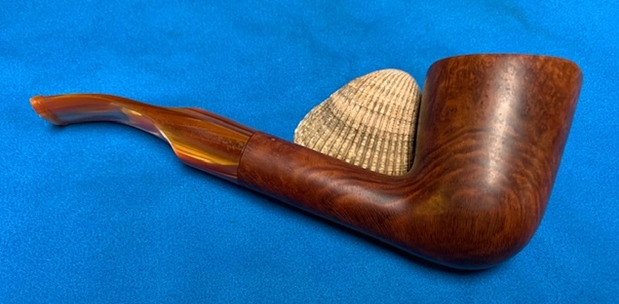
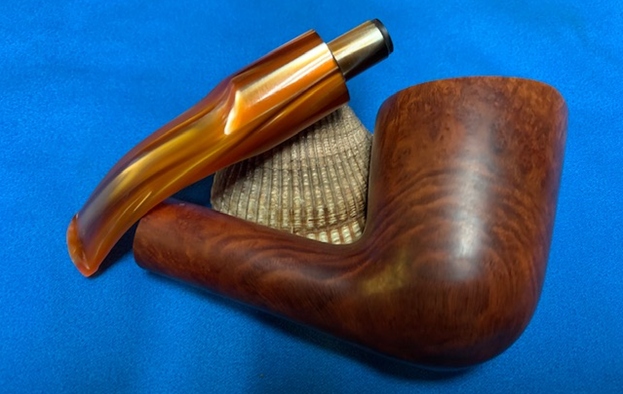
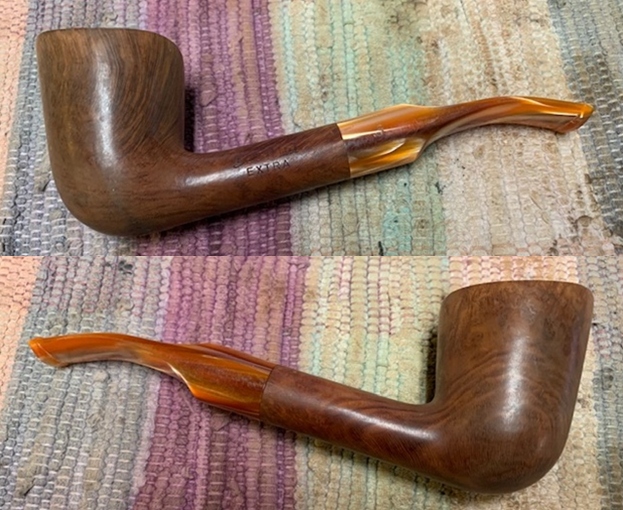
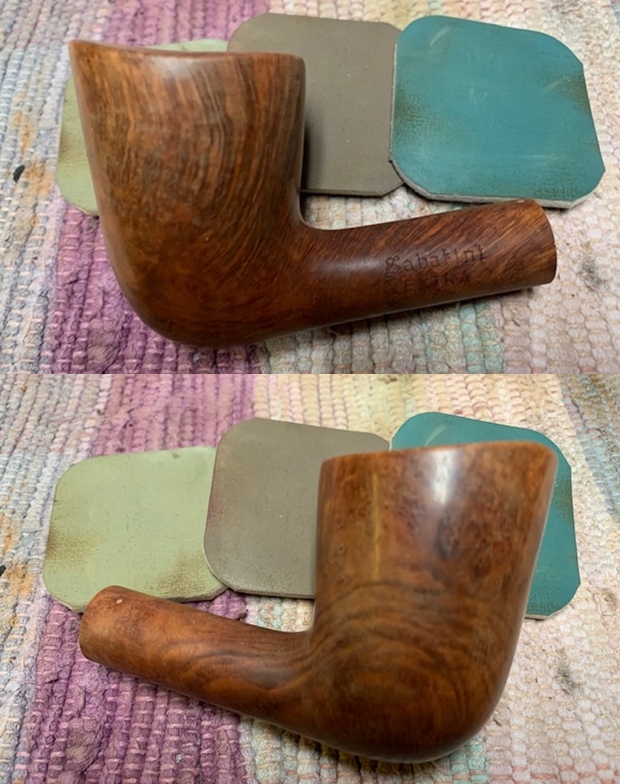
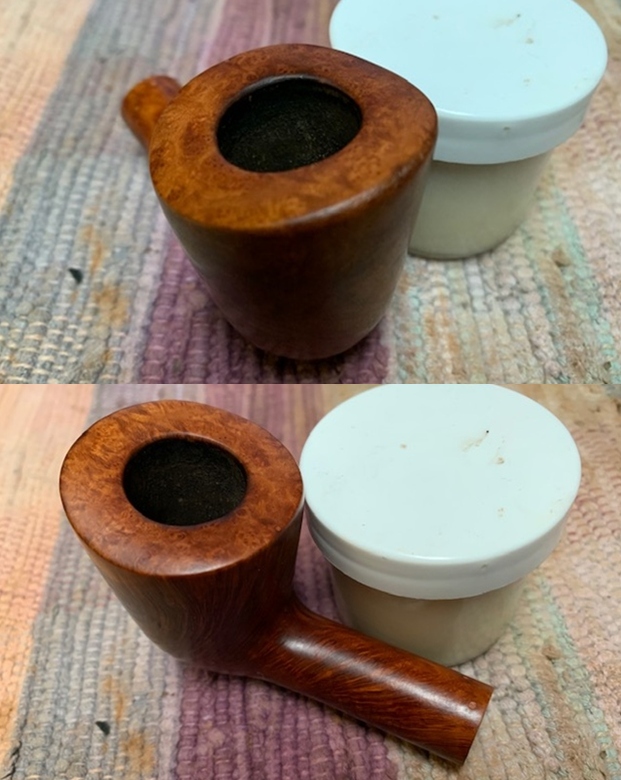
 I am excited to finish this Sabatini Extra Bent Dublin. I put the pipe back together and buffed it with Blue Diamond on the buffing wheel. I gave the bowl and the stem multiple coats of carnauba wax. I hand buffed the pipe with a clean buffing pad to raise the shine. It is fun to see what the polished bowl looks like with the grain popping through on the bowls sides and rim top. Added to that the polished variegated orange Lucite stem was beautiful. This smooth finished Dublin turned out to be a nice looking pipe that feels great in my hand. It is light and well balanced. Have a look at it with the photos below. The dimensions are Length: 6 ½ inches, Height: 2 ¼ inches, Outside diameter of the bowl: 1 ¾ inches, Chamber diameter: ¾ of an inch. The weight of the pipe is 67grams/2.36oz. It is a beautiful pipe and one that will be on the rebornpipes store in the Italian Pipe Makers section soon. If you are interested in adding it to your collection let me know. Thanks for walking through the restoration with me as I worked over this pipe. Thanks to each of you who are reading this blog. Remember we are not pipe owners; we are pipemen and women who hold our pipes in trust until they pass on into the trust of the next pipeman or woman.