Blog by Paresh Deshpande
I have embarked on a journey into the wonderful, invigorating and leisurely world of pipe restoration and want to try out and address as many issues that one may encounter when dealing with an old, used and also abused pipes. Though there are a large number of old and vintage pipes that I have inherited, I went ahead and purchased two pipes, one is a CHACOM PANACHE # 44 and the other is a SAVINELLI SILVER, for gaining hands-on experience in stem repair. The stems on both these pipes have large gaping hole near the button end, exposing the stem’s airway. I shall be working on the stems of both these pipes simultaneously while the stummel will be worked on separately. The write up on both, though separate, is being uploaded at the same time so as to maintain continuity.
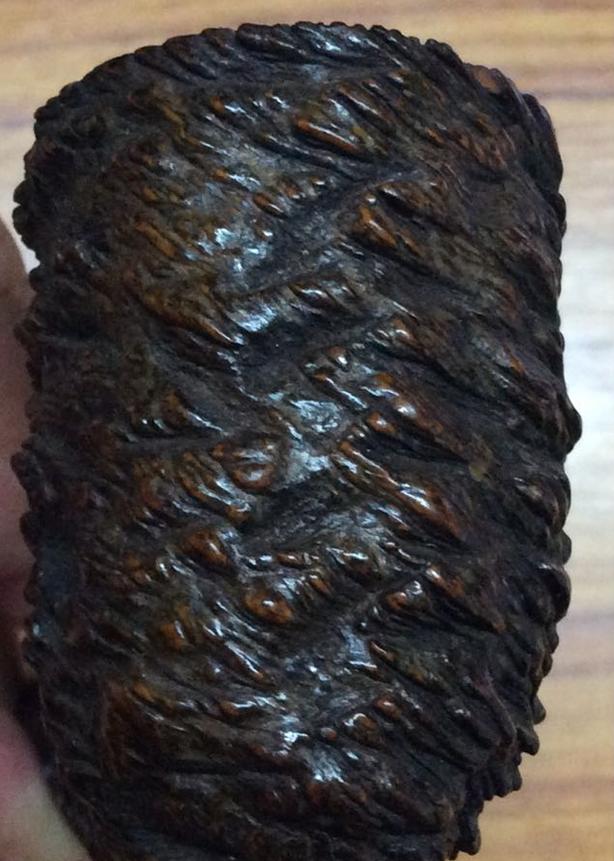
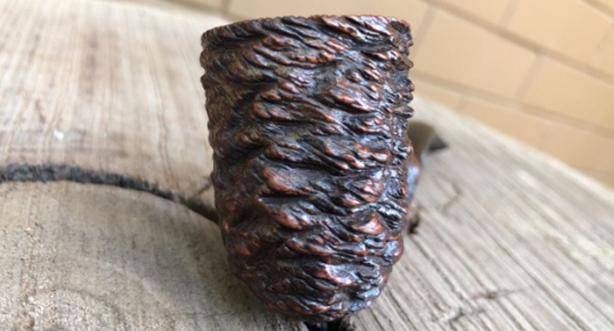
Even though I had purchased this pipe to practice repairing a stem bite-through, what really caught my attention was the beautiful coral like rustication on the bowl and shank which could be seen on some high end pipes from equally higher end brands. Through all the dust and grime, the beautiful contrasting stains between the lighter brown raised rustication and darker hued depressions makes for an eye catching finish.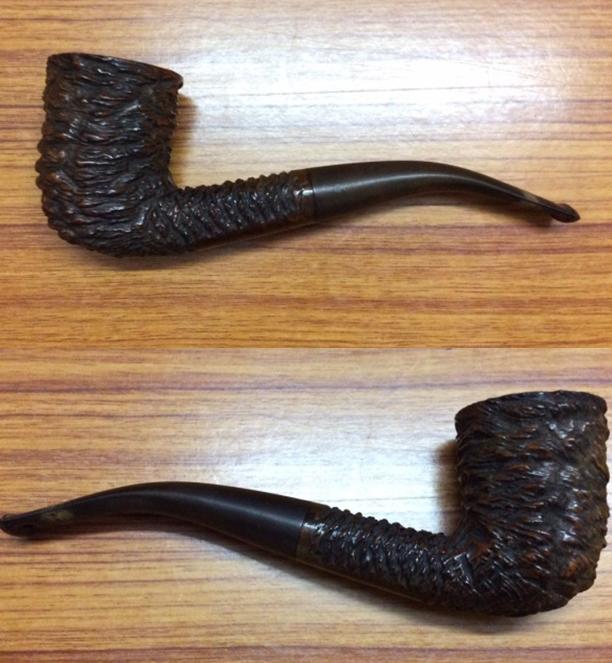
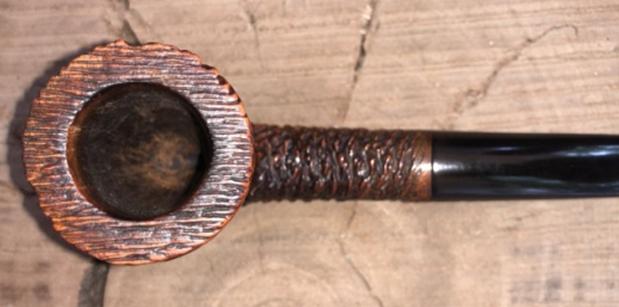
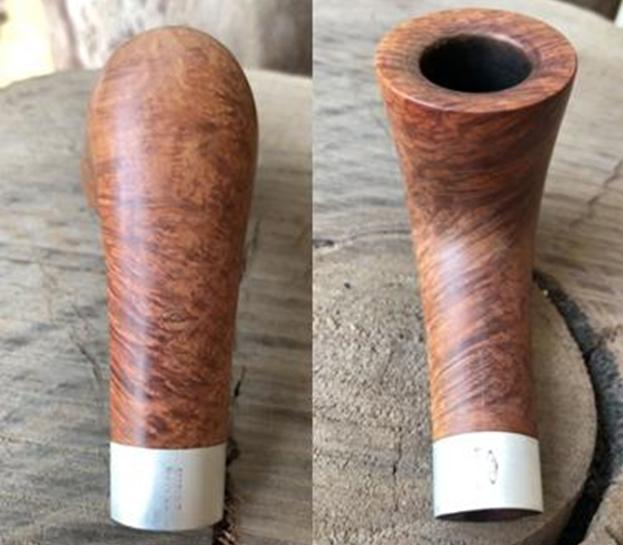
 On the smooth surface at the bottom of the shank, it is stamped “CHACOM” in an artistic hand over “PANACHE” in block capital letters. This is followed by the shape number # “44” at the edge of the shank where it meets the stem. The stem bears the double “C” logo stamped on the left side of the stem towards the tenon end.
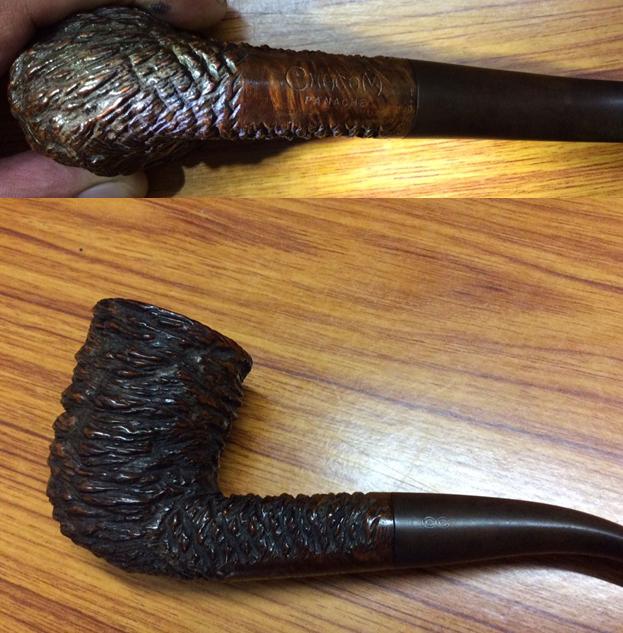 I gleaned following info from Pipedia to know more about the brand of this pipe. It is reproduced below (https://pipedia.org/wiki/Chacom):
1825 : Well before the discovery of briarwood the COMOY family manufactured pipes in the small village of Avignon, near to Saint-Claude, mostly in boxwood for the “Grumblers” of the Army of Napoleon. 1850 : Birth of Henry COMOY, founder of the brand.
1856 : Discovery of briarwood and particularly the special treatment it required for the making of pipes. Saint-Claude becomes the birthplace of briar pipe manufactures and the world capital of pipe-making.
1870 : Henri COMOY, prisoner of war in Switzerland meets his cousins the Chapuis and ruminates the idea of an association.
1879 : Henry COMOY emigrates to London with some of his technicians from Saint-Claude and establishes the first English pipe factory in England H. COMOY & C° LTD. The Saint-Claude factory supplies them with briarwood and pipe bowls.
1922 : After the First World War the association COMOY and CHAPUIS is realised and the Saint-Claude factory becomes CHAPUIS COMOY & Cie.
1924 : Death of Henri COMOY. His sons Paul and Adrien assume the direction of the factories in Saint-Claude and London assisted by their cousins Emile and Louis Chapuis.
1928 : London now able to produce their own pipes, and in order to develop the Saint-Claude factory, the brand CHACOM is created, using the first three letters of the COMOY and CHAPUIS families. Up till 1939 CHACOM was offered only in France, Belgium and Switzerland in order not to embarrass the COMOY pipes which had the same shapes and qualities.
1932 : The world economic crisis reaches Saint-Claude. To weather this problem Chapuis Comoy & Cie joins with another company under the name of LA BRUYERE, forming the biggest pipe concern in the world with 450 workpeople. Big trucks were needed to transfer the briar blocks from the drying shed to the factory.
1945 : After the Second World War CHACOM assumes its entire commercial liberty and launches a complete and modern range of pipes.
1946 : Chacom becomes the principal brand in France and Belgium.
1947 – 1948 : CHACOM, number one in Scandinavia, Germany, then United States…
1957 : In face of the commercial preponderance of the brand CHACOM the company La Bruyère returns to the name of CHAPUIS COMOY & Cie.
1964 : Death of Adrien COMOY. His son Pierre succeeds to him in London. Mr REED is the Chairman and Managing Director in Saint-Claude.
1965 : First French brand named pipe in JAPAN
1971 : Having recovered its independence from COMOYS of London, Yves GRENARD, second cousin of Pierre COMOY, takes over the Direction of Chapuis Comoy & Cie and at the same time the exclusive sale of H. COMOY & Ltd, in France.
I further searched pipephil.eu for additional information and the same is reproduced below:
The brand Chacom turned up (1934) after fusion of Chapuis-Comoy with La Bruyère. Yves Grenard (†2012), second cousin of Pierre Comoy headed the company from 1971. He was responsible for Chapuis Comoy’s recovering its independance from Comoy. His son Antoine Grenard took over the direction of the company in 2007. Chacom is a brand of Cuty-Fort Entreprises (Jeantet, Vuillard, Jean Lacroix, Ropp …).
INITIAL VISUAL INSPECTION
The bowl is caked but not heavily. The rustication on the rim top is filled with tars oils and grime. The finish is dull with dirt and dust filling the rustication. This will be cleaned with Murphy’s oil soap and hard bristled tooth brush.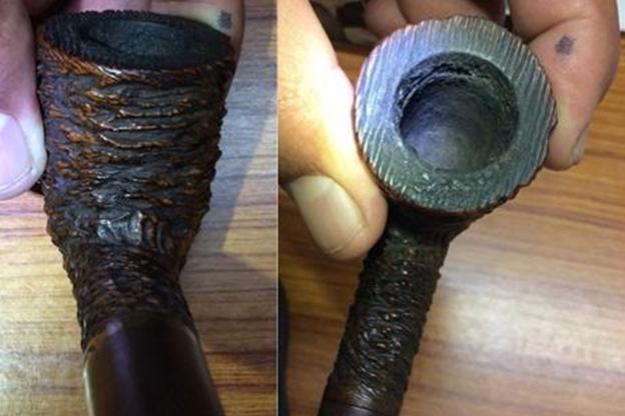 The mortise is filled with gunk and debris. This will need to need to be cleaned.
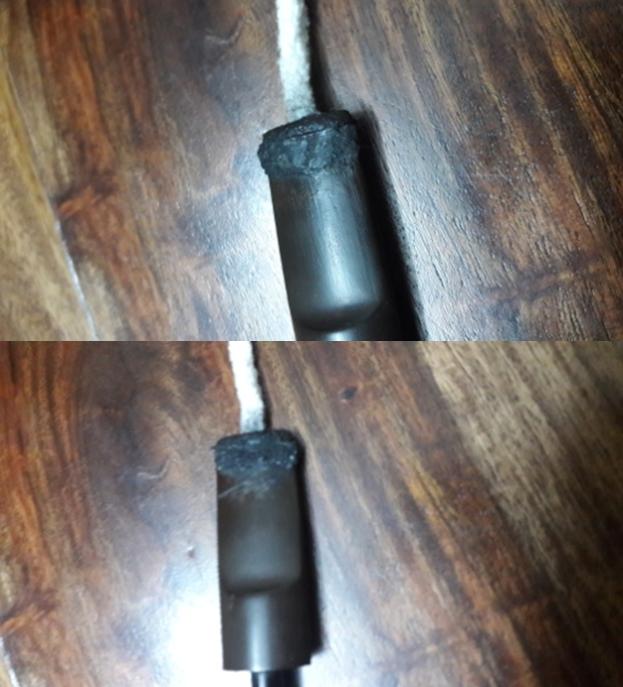
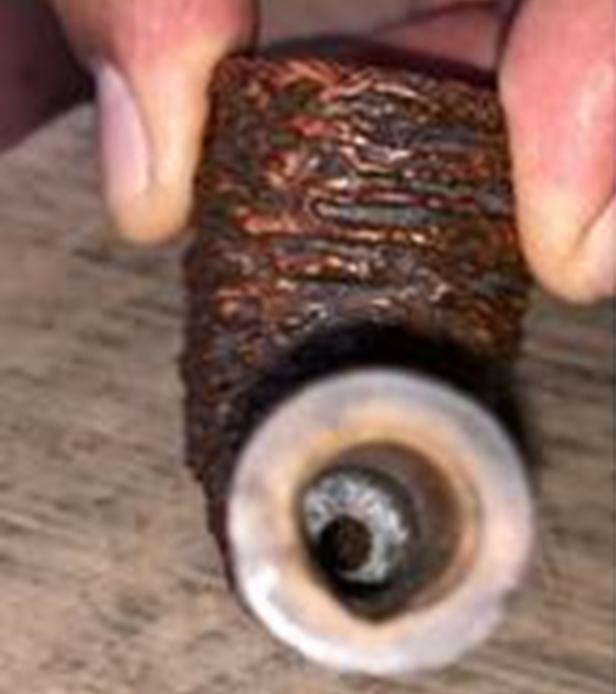 The stem is heavily oxidized with heavy calcification towards the button end in the bit area. There is tooth chatter and bite marks on the top surface of the stem near the button end. However, the biggest damage can be seen on the lower surface of the stem. There is a large through and through hole in the stem exposing the airway. Thankfully, the top surface is complete with only tooth marks and tooth chatter. This reconstruction will be the biggest challenge since I have never attempted this restoration before. The button is badly damaged and will need to be reconstructed.
 THE PROCESS
In this restoration project the stem repair posed the biggest challenge. I searched the net, viewed YouTube videos and my most reliable website “rebornpipes.com” and read over each and every blog available on the website on stem repairs and took down notes and the steps involved. I even discussed with Mr. Steve. Now armed with this acquired knowledge, I embarked on my quest to gain knowledge through personal experience.
The first thing I did was to paint the upper and lower surfaces of the stem with the flame of a Bic lighter to raise the tooth chatter to the surface and also raise the edges of the hole to create an even surface. Next, I cleaned the surface of the stem with isopropyl alcohol to get rid of all the dirt, oils and tars from the surface. I also had the internals of the stem thoroughly cleaned using pipe cleaners, cue tips and alcohol.
Once I was satisfied with the cleaning, I smeared a generous amount of Vaseline onto regular pipe cleaners and inserted it into the airway, ensuring the pipe cleaners are fully underneath the hole. This helps in ensuring that the airway remains open. Vaseline coated pipe cleaners prevents the mixture of CA superglue and activated charcoal from percolating down into the airway and clogging the airway. The next step in the process of this repair is mixing of CA superglue and activated charcoal to the consistency of putty filler. Suffice to say that the consistency should be such that it should not be too runny but just sufficient to spread smoothly and evenly over the intended surface. First timers like me, do not worry too much, even I did not understand what should be the ideal consistency (LoL). From the pictures below, it is amply evident that I did not achieve the exact consistency I desired, but no issues, it still worked!!! Since the beginning of my journey into the beautiful and challenging world of pipe refurnishing, I am being faced with problem relating to glue. Maybe the hot temperate climate prevalent here is causing issues or the quality of glue itself is an issue. However notwithstanding the issues of glue, I was able to prepare a mixture of CA superglue and activated charcoal and applied it to the surface. I set it aside to cure overnight.
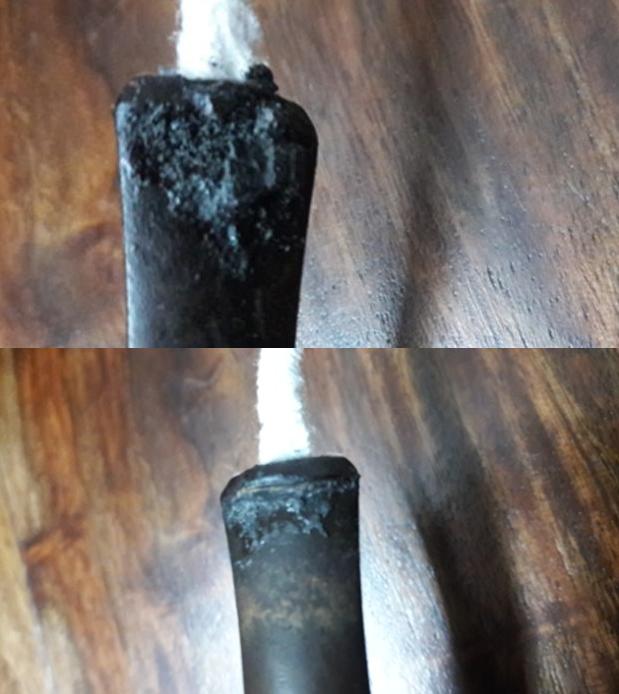 I began by sanding the repaired/ filled areas using a flat needle head. It was not as easy as it seemed because when I began the process, as I sanded down the stem, I observed that the filling crumbled and dislodged from hole. Apparently, the filling was too dry.
I prepared a fresh mixture of CA glue and activated charcoal and applied it to area to be filled. After curing, when I tried to file it down, I realized that shiny dots were visible. On close observation, these tiny dots were air pockets which were trapped during application and subsequent curing. I discussed with Mr. Steve who advised me to fill the spots with glue only. I did so and let it cure for 2 days. I sanded down the fill and realized bigger air pockets were now exposed. It is unfortunate that I did not take pictures of these issues and processes as I was too engrossed and concentrating on getting the filling right.
I again prepared a fresh mixture of activated charcoal and superglue and reapplied it to the stem surface and let it cure for 3 days since I was traveling.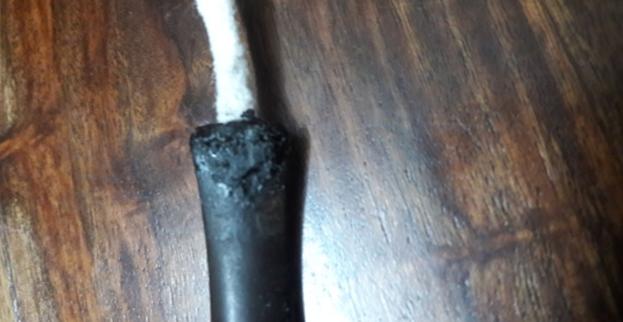 For this sanding, I took unusually long time taking frequent breaks to check the progress. I was very deliberate and used light hands. I used less of flat head needle file and more of 180 grit sandpaper. Finally, I was able to achieve a satisfactory fill. I further evened out the fill using 220 grit sandpaper, followed by 440, 600 and 800 grit papers. Now I am satisfied with the results of the fill.
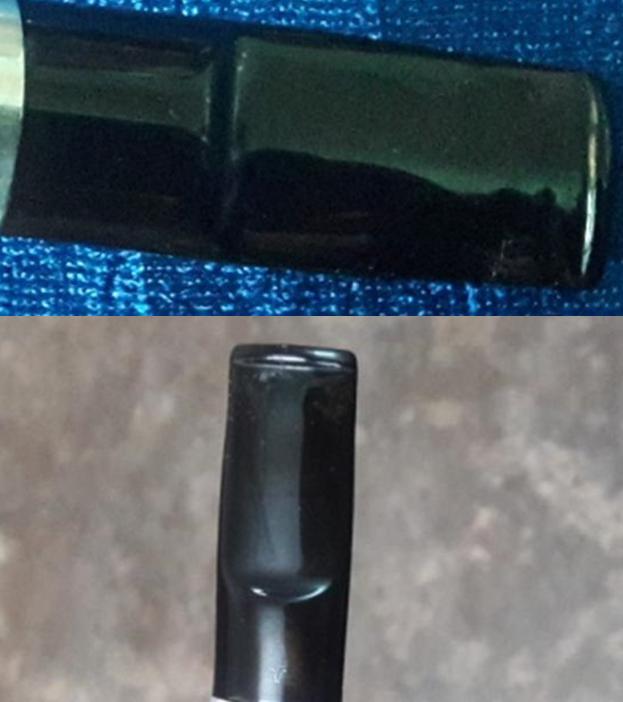
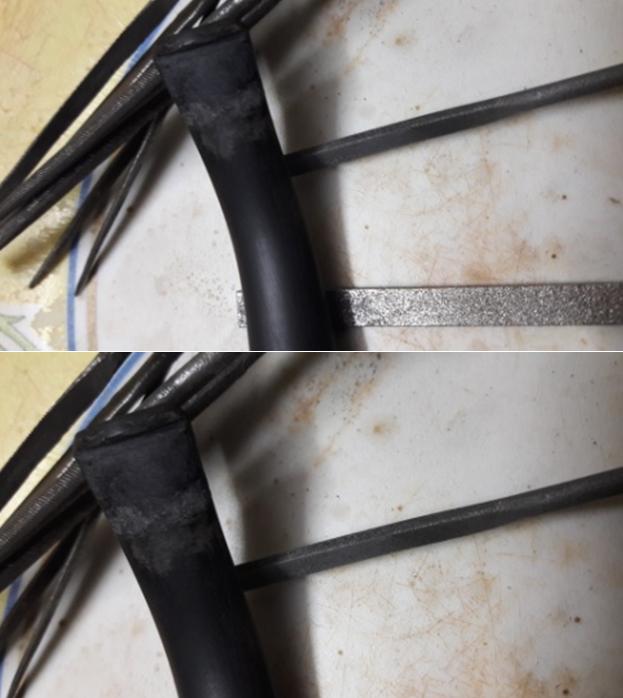 With the fill now evened out, I proceeded to sand the stem with micromesh pads, going through wet sanding with 1500-2400 pads and dry sanding with 3200- 12000 grit pads. I rubbed in Extra Virgin Olive oil after every three pads. The stem now has a nice shine to it and No Hole!! However, the finish is not as refined and minor imperfection can be seen in the finish, though not as glaring in person.
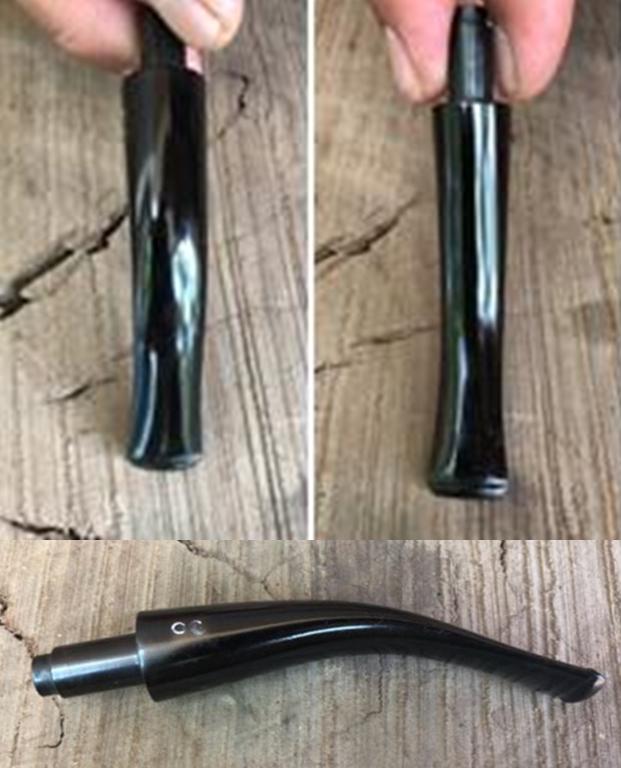 With the issue of the stem now addressed, I turned my attention to the stummel. Using a Kleen Reem pipe reamer and fabricated knife, I removed the complete cake from the chamber. I further sanded down the walls of the chamber with a 220 grit sand paper to smooth the walls and took the cake back down to the bare briar.
 I cleaned the internals of the shank and mortise using regular and bristled pipe cleaners dipped in isopropyl alcohol and cue tips. I also wiped the internal walls of the chamber with cotton pads dipped in 99.9 % isopropyl alcohol. I use high proof isopropyl alcohol as it evaporates very rapidly and leaves no traces of odor or liquid behind to ghost your pipe.
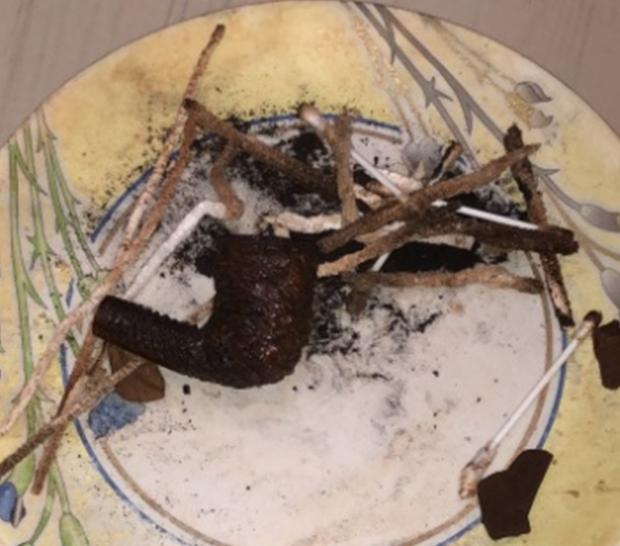 I cleaned the externals of the bowl with undiluted Murphy’s Oil Soap and tooth brush. Thereafter, the stummel was washed under running water and dried using a paper towel. I observed that the thin, delicate wire rustication on the rim top was still filled with oils and tars. To clean the rim top, I used a 000 grade steel wool with Murphy’s Oil soap to gently scrub out the dirt. I dried it with paper towels and a soft cotton cloth.
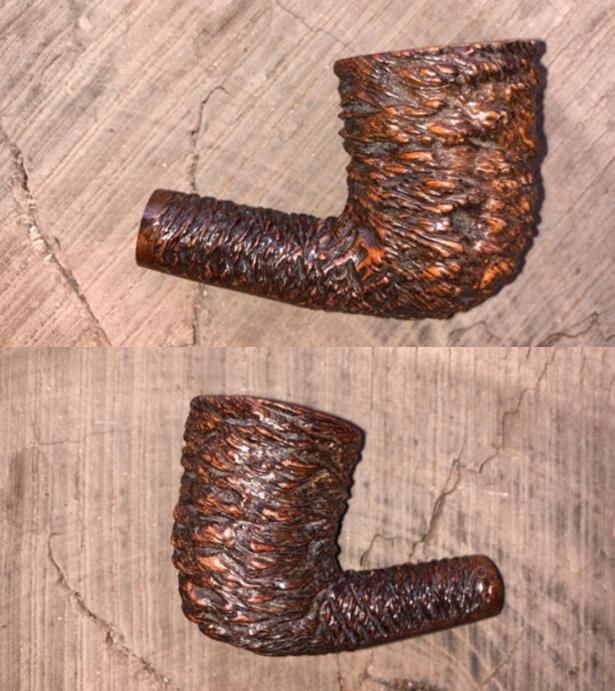
 Once the stummel had dried out, I rubbed a little “Before and After Restoration Balm “deeply into the coral rustication and also into the wire rustication of the rim top. I worked it deep into the rustication with a horse hair shoe brush. I polished the stummel to a deep shine by rubbing it down with a microfiber cloth. The raised portion of the rustication has a light reddish hue which contrasts beautifully with the dark brown coloration of the rest of the stummel. The completed pipe is shown below.
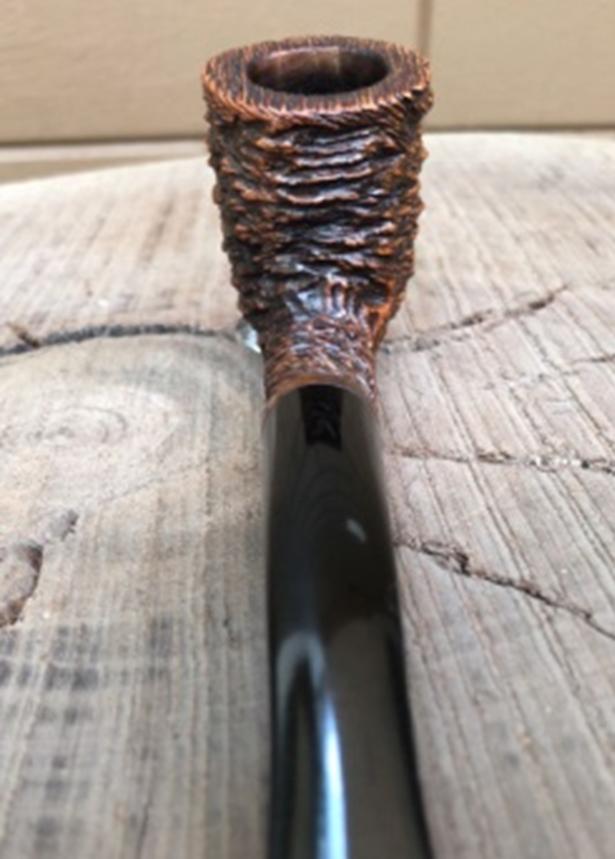

 Thanks for your valuable time spent in reading my amateurish attempt at pipe restoration.
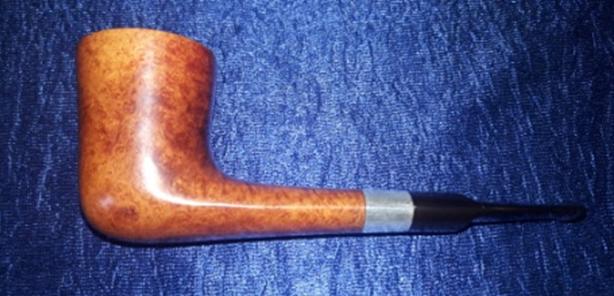

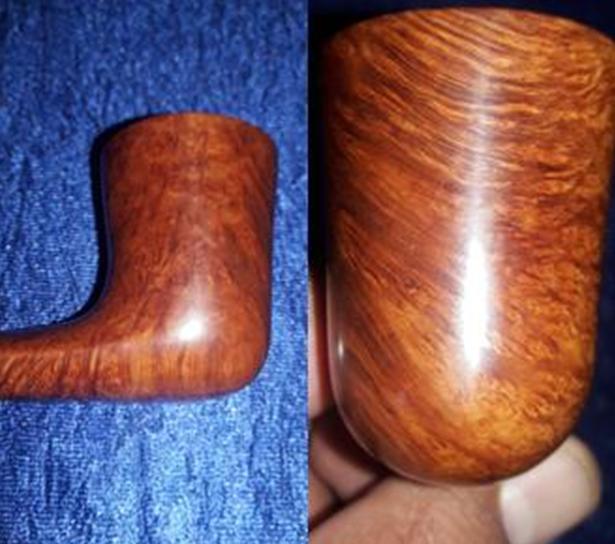
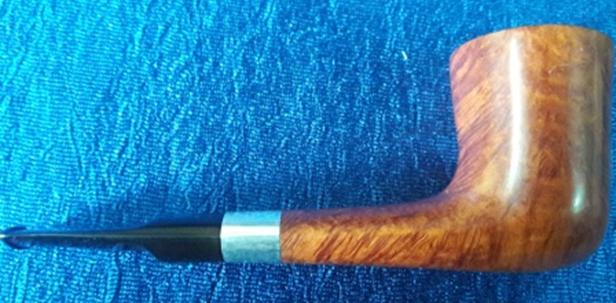
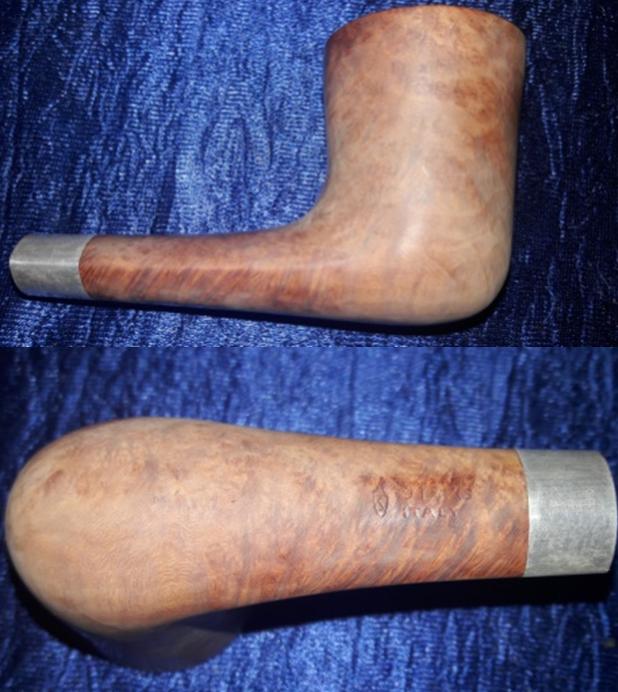
 A sterling silver band adorns this Sav and is stamped on the upper surface with “925” in an elongated hexagon over “SAVINELLI”. On the lower surface, this band is stamped as “STERLING” over “MOUNTED”. All stampings are in block capital letters. On top of the oval shank, towards the shank end, it bears the stamp “SAVINELLI” over “SILVER” while at the bottom, it is stamped with Savinelli shield, followed by “915”, followed by size “KS” over “ITALY” in block capital letters. The saddle stem bears the Sav Shield logo on top of the saddle.
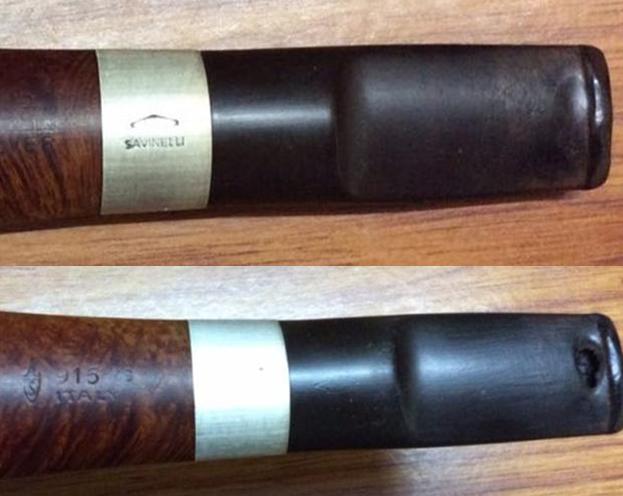
 History of Savinelli pipes is very well documented on pipedia.com, however, due to a very large line up, frequent changes to models, shapes and finishes, I came to a halt when I tried to date this Savinelli. I earnestly request all the knowledgeable veterans of pipe world to share any bits and pieces of information on this pipe.
 It is the stem which has the maximum damage. A large hole can be seen on the upper surface of the stem near the button end, exposing that portion of the airway. There are two deep bite marks on the upper surface of the stem. The button on both surfaces of the stem has been chewed and will need to be reconstructed.
 The mortise shows some accumulation of previously smoked tobacco oils and tars, but it is nothing as compared to some pipes which I have seen.
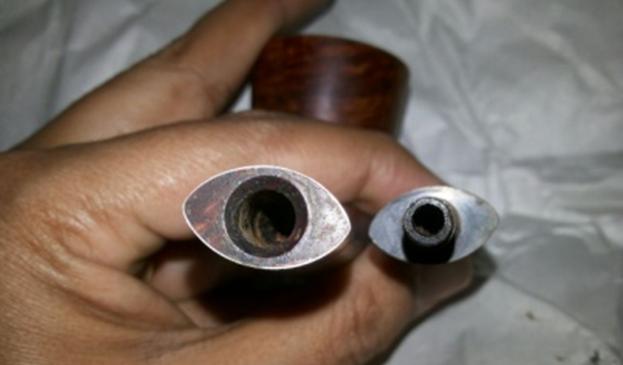 The airway is not clogged and will only require minor cleaning.


 Having finished the stem repair (some imperfections are seen, but cannot be discerned in person), I turn my attention to the stummel. I reamed out the chamber using a Kleen Reem pipe reamer and fabricated knife. I removed the complete cake from the chamber. I further sanded down the walls of the chamber with a 220 grit sand paper to smooth the walls and took the cake back down to the bare briar. I gently scraped out the little overflow of lava from the rim top.
 I cleaned out the internals of the shank with pipe cleaners and cue tips dipped in isopropyl alcohol. I wiped the inside of the chamber with cotton swabs dipped in alcohol. There was very little amount of cake and the shank was pretty clean too. It appears that though the pipe was well smoked as is apparent from the stem condition, it was well cared for.
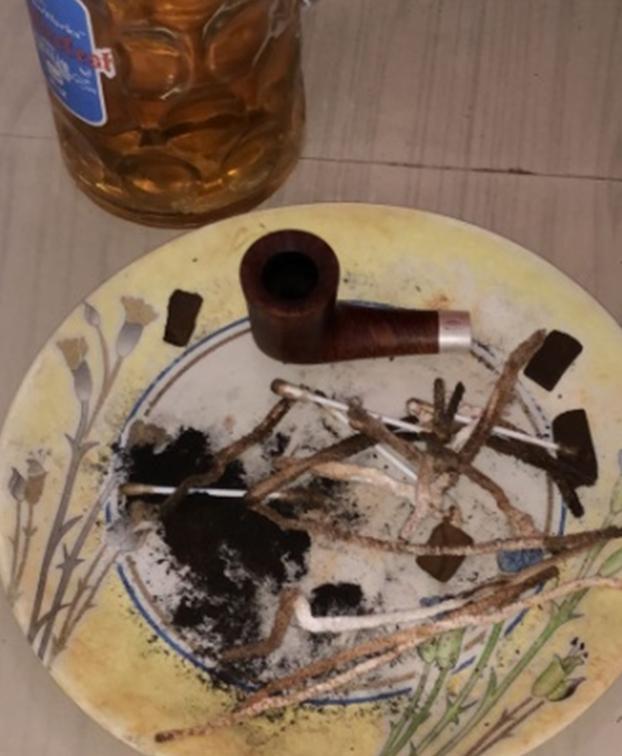 I cleaned the stummel with undiluted Murphy’s oil soap and a tooth brush. I washed the stummel under running water and dried it using paper towels and soft absorbent cotton cloth. Once the stummel had dried, I felt that the bowl was still appearing dull and lackluster. The grains, though visible, needed to be highlighted.
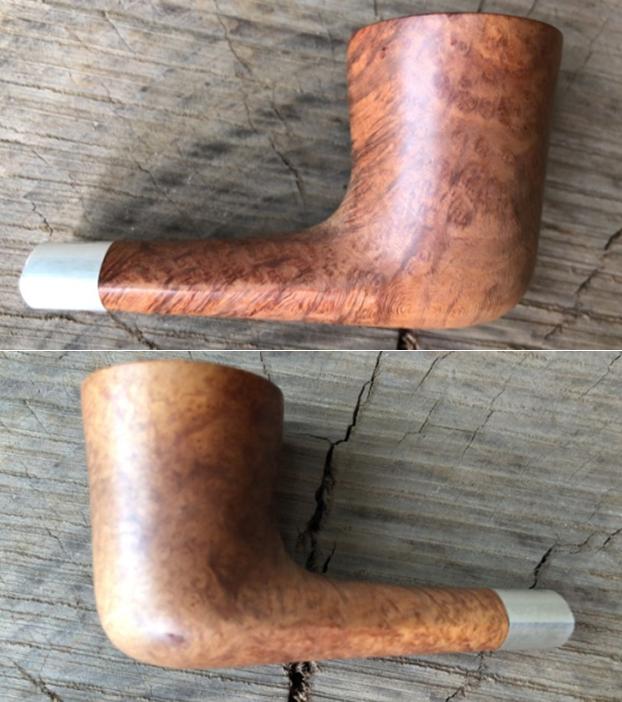
 To achieve the desired results, I sanded the stummel with micromesh pads, wet sanding with 1500 to 2400 grit pads and dry sanding with 3200 to 12000 grit pads. The rim top was also sanded down with micromesh pads to remove/ reduce the darkened areas. I wiped the bowl with a moist soft cotton cloth to remove the sanding dust after each pad. The stummel now looks beautiful with the grains on full display.
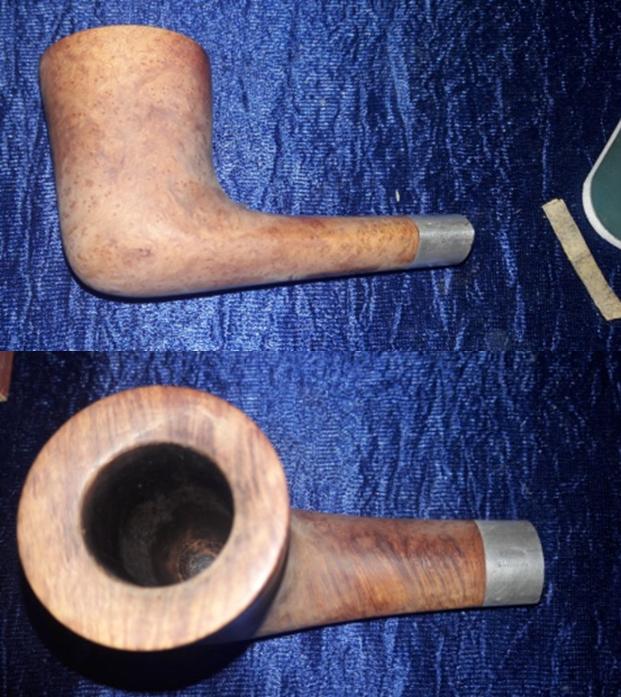

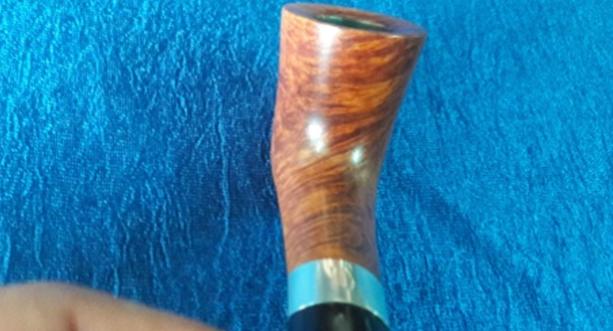
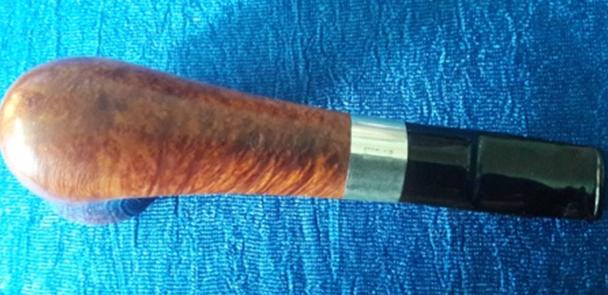
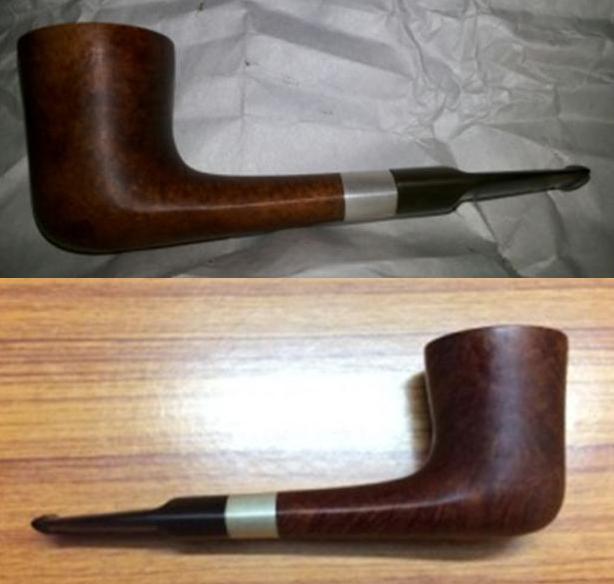
 I finished the bowl by rubbing “Before and After Restoration Balm” with my hands and polished it with a soft cotton cloth. The bowl now appears to be alive and the grains pop out and are on display to be enjoyed. This pipe, along with the CHACOM, will always find a place of pride in my collection for being first major stem repair project. The finished pipe is shown below.