Blog by Steve Laug
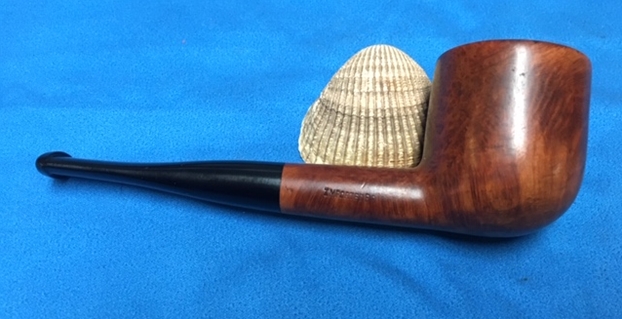
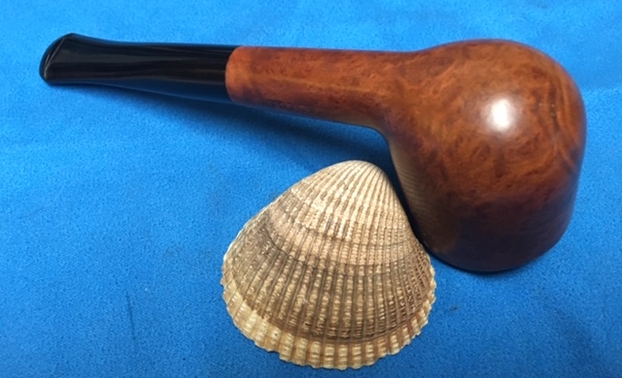
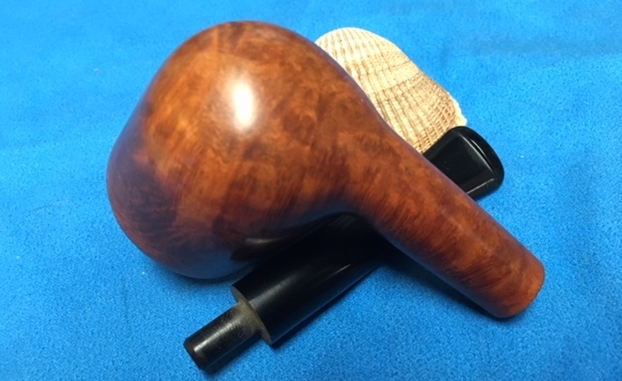
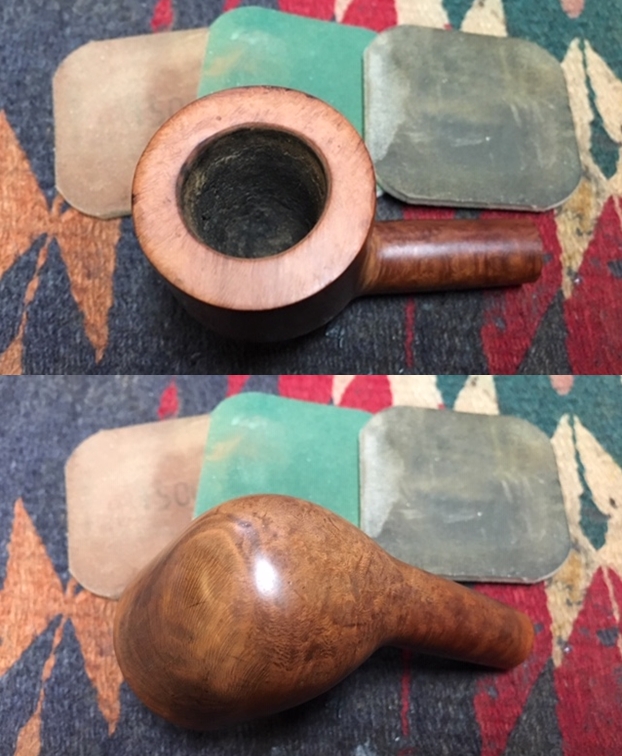
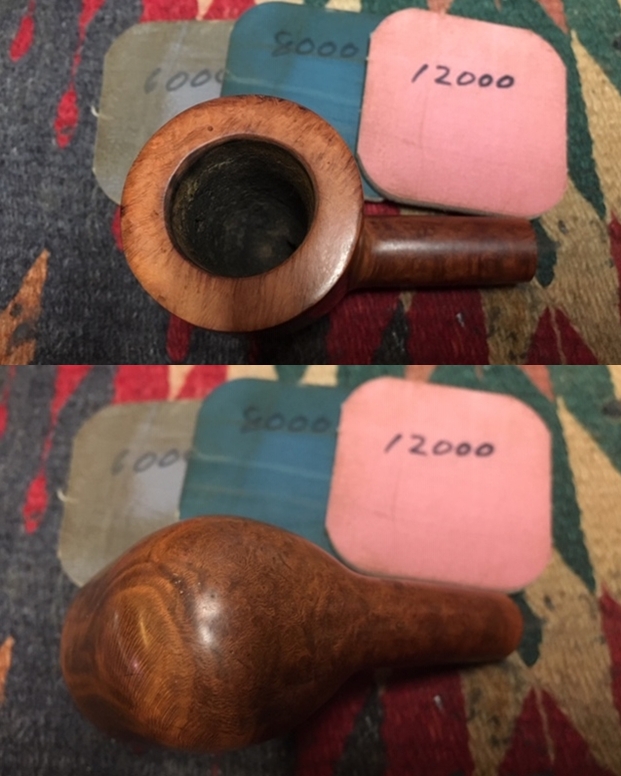
I have a box of some 25 pipes that I am working through for a friend here in Vancouver. The next group of four pipes that I am working on came to me in a sour, stinky condition. Alex had smoked them and found that as he smoked them each one became fouler. From my experience this happens when a pipe has not been thoroughly cleaned in the process of restoration. Sometimes even if it has been cleaned, the first few smokes draw out a foul taste and in this case an odor that made me put the four pipes in a zip lock bad to keep the odor contained. They really stunk! On Sunday evening I decided to give the foursome a cotton ball and alcohol treatment to draw out the oils and tars in the briar. I pushed cotton balls into the bowl and a folded pipe cleaner in the shank and used an ear syringe to fill the bowl with isopropyl alcohol. I set the pipes aside to let the alcohol do its work overnight. I know many of you use kosher salt and alcohol and that certainly is your choice. For me however the cotton balls work just as effectively in providing a medium for the foul juices drawn out of a pipe to be deposited. They are also easier to clean up and they do not leave residual salts in the briar. In the morning I took a photo of the finished work. You can see the effectiveness of the treatment.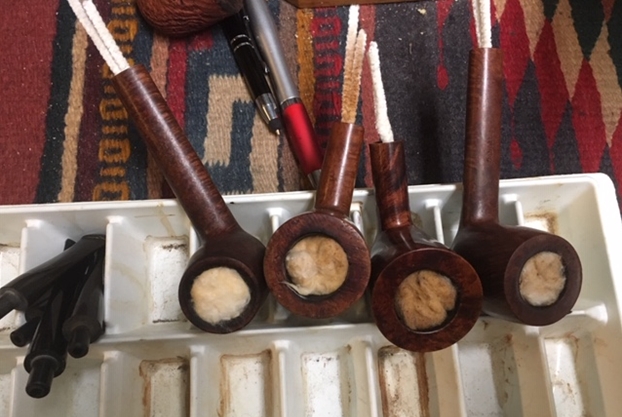 I took the cotton out of the bowls of the pipes and wiped the bowl down with pipe cleaners and cotton swabs to dry them out. The pipe I decided to work on is the beautifully grained straight pot, the third pipe from the right in the photo above. It is stamped on the left side of the shank “MALAGA” and on the right side of the shank is stamped Imported Briar. Alex has grown to love Malaga pipes and continues to pick them up on eBay and other places on his journey. It was another pipe that the seller said was clean but after several smokes Alex deemed it unsmokable. It was now up to me to figure out what was going on. I examined the pipe when I took out the cotton balls and alcohol and I learned a few things about it that would need to be addressed. The rim top and inner and outer edges of the rim were in rough condition. It looked like the pipe had been used for a hammer. The finish was spotty with nicks and marks. The bowl had some cake inside and it too would need to be reamed out. The stem was the best of the lot. It was clean and was free of tooth marks or chatter. I wondered what the airway was like but that is an easy clean up. I took some photos of the pipe at this point.
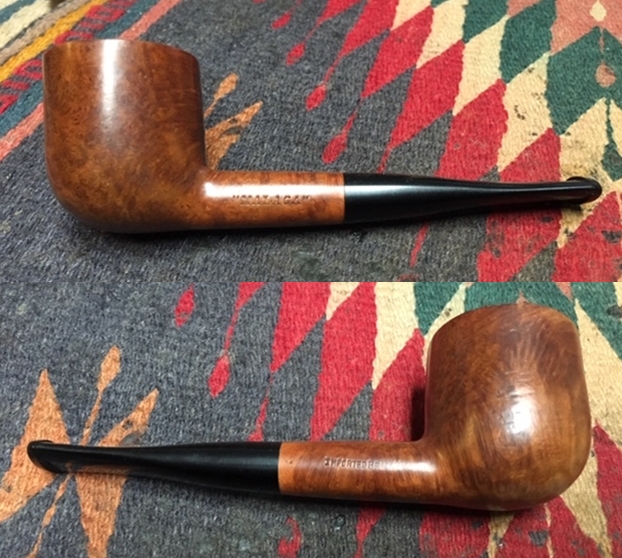
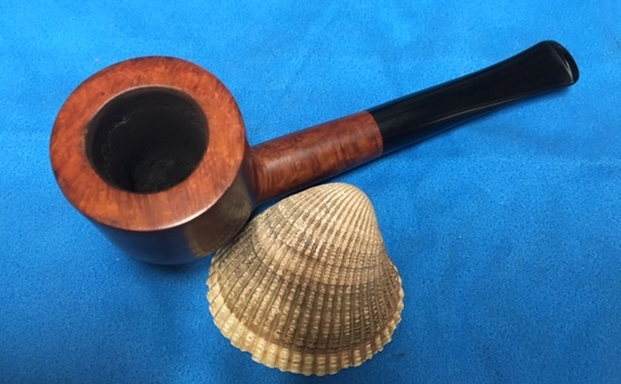
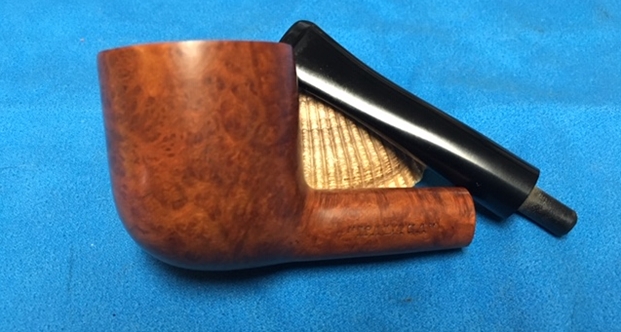
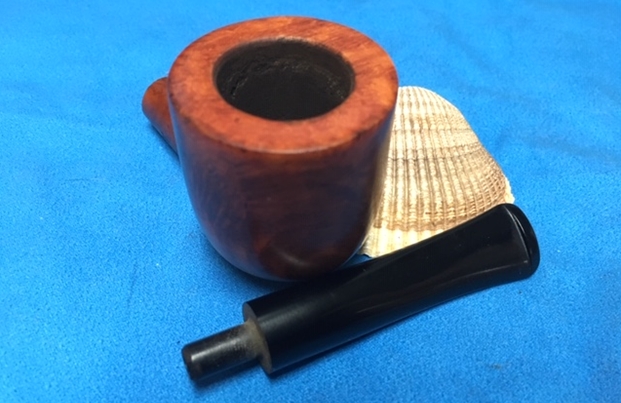
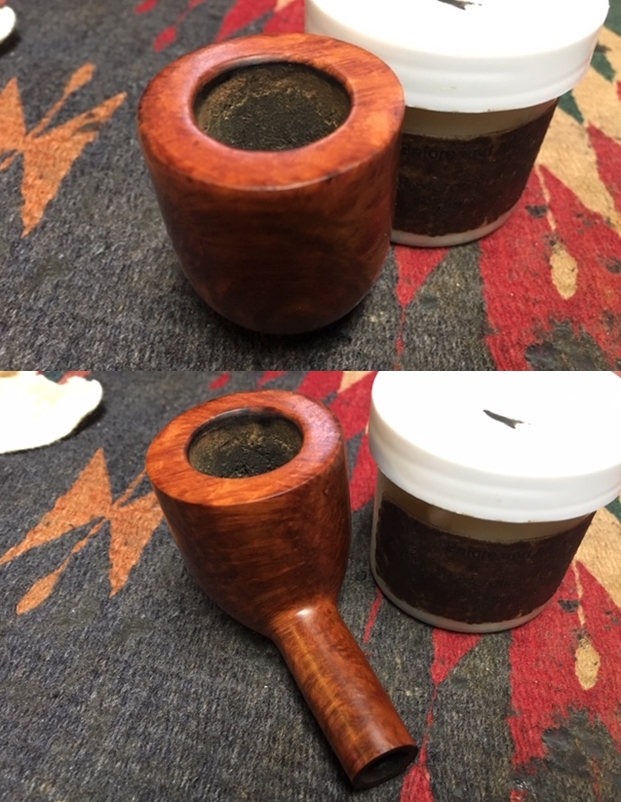
 I took a close up photo of the bowl and rim to capture the damage to the rim top and light cake in the bowl. The rim top was in bad condition with nicks and cuts. The inner and outer edges were rough. The bowl was out of round. It needed some more work to clean it up but at least the cotton ball alcohol treatment had rid the pipe of the rank smell. The stem was in the best condition of the four pipes. It did not have tooth chatter or marks and was not oxidized.
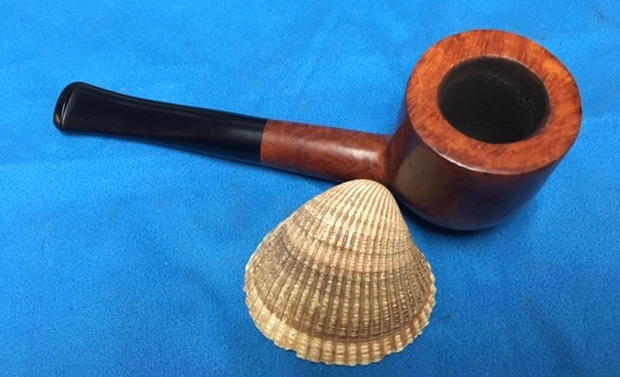
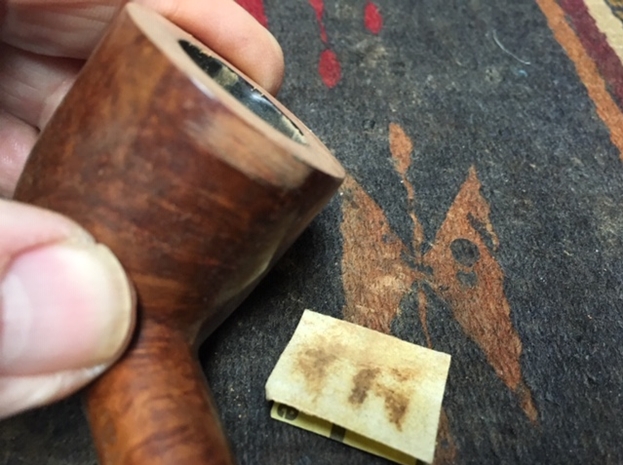
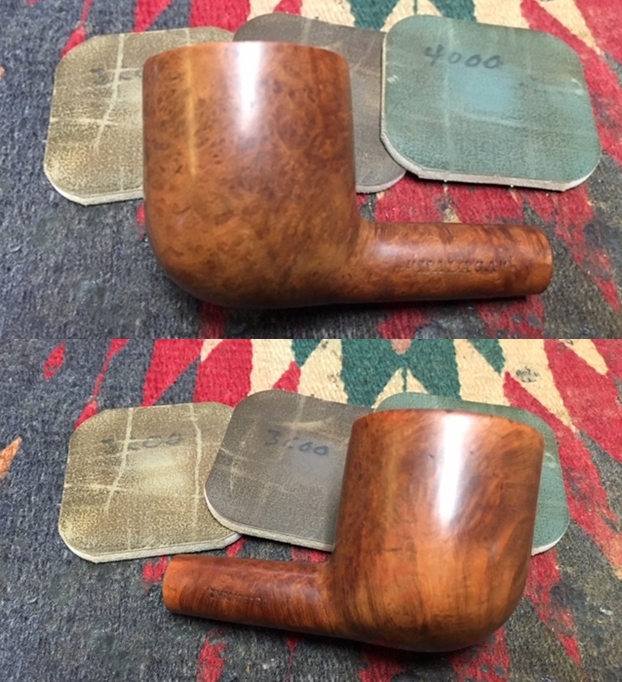
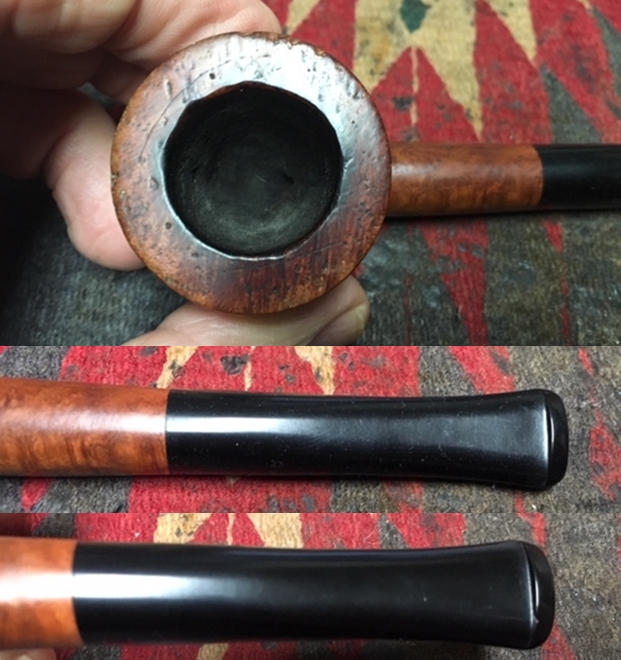 I took a photo to capture the stamping on the right and left side of the shank. The first photo shows “MALAGA” on the left side of the shank. The second photo shows the stamping on the right side it reads Imported Briar. The stamping on this pipe is readable.
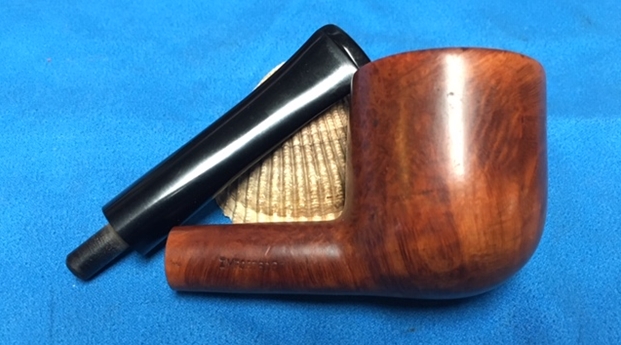
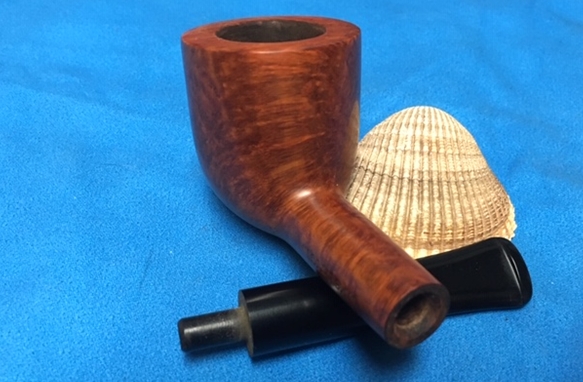
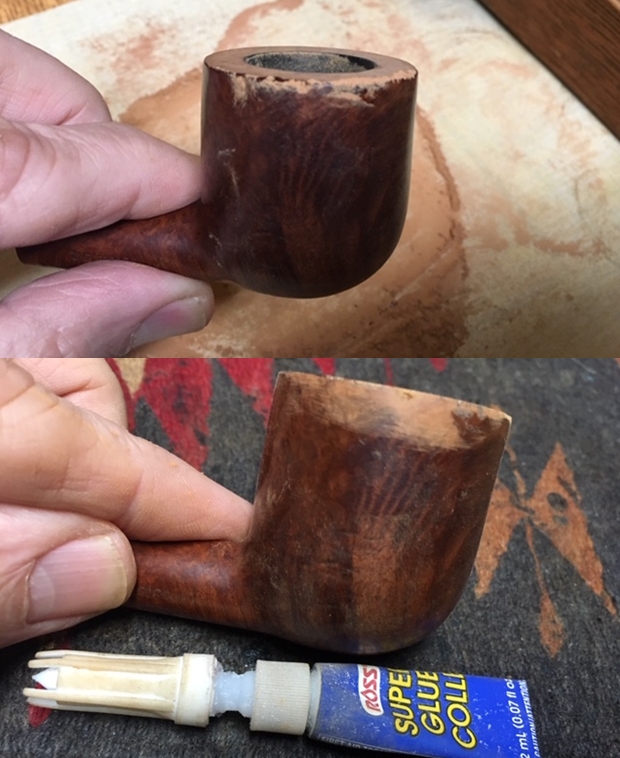
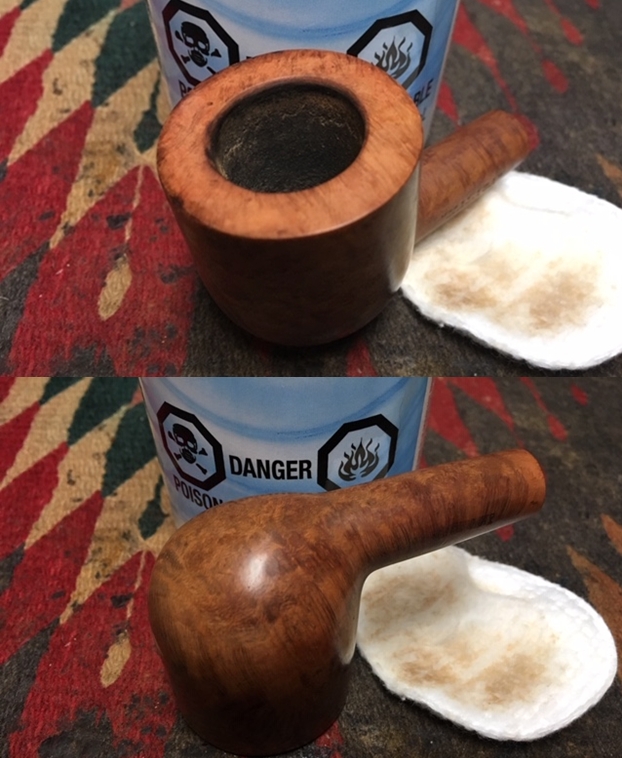
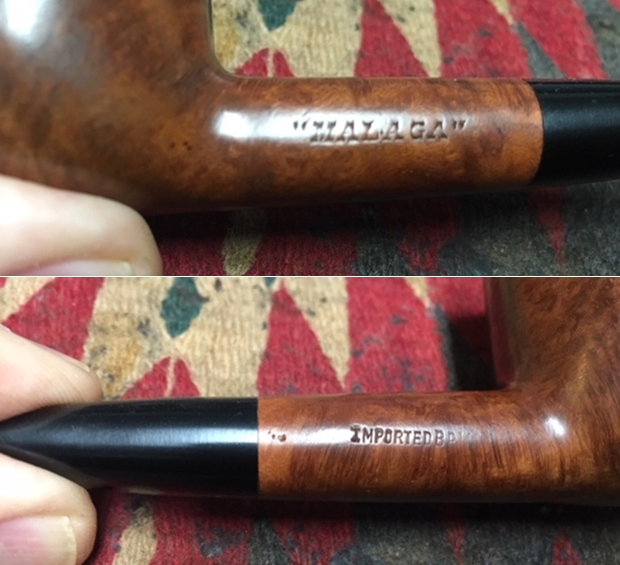 Now that the stink was gone I did not even think of cleaning the shank and airway I just immediately went to the most irritating part of this pipe – the beat up rim top and edges. I topped it on a topping board with 220 grit sandpaper to remove the damage to the rimtop and to try to minimize the damage to the inner and outer edges. The rim top looked significantly better as can be seen in the second photo below. I cleaned up the outer edge with some sandpaper and wiped it down. I filled in the deep nicks in the edge with briar dust and super glue.
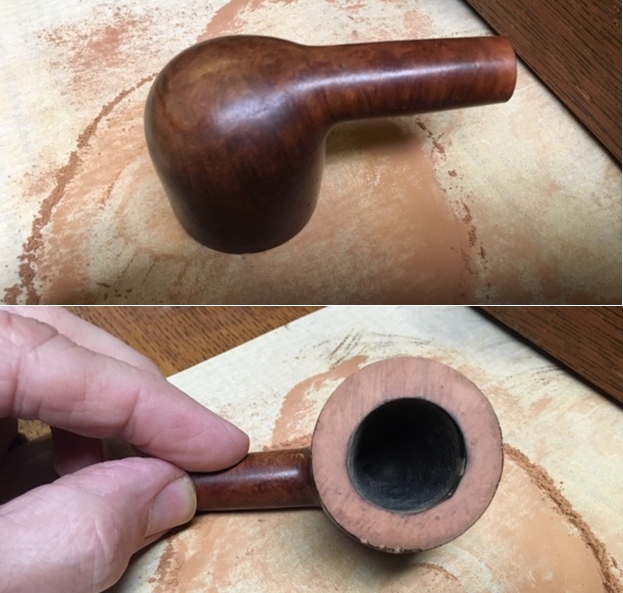
 I sanded the edge repairs with 220 grit sandpaper to blend them into the surface of the briar. I would polish out the scratches later but for now the edge was at least smooth.
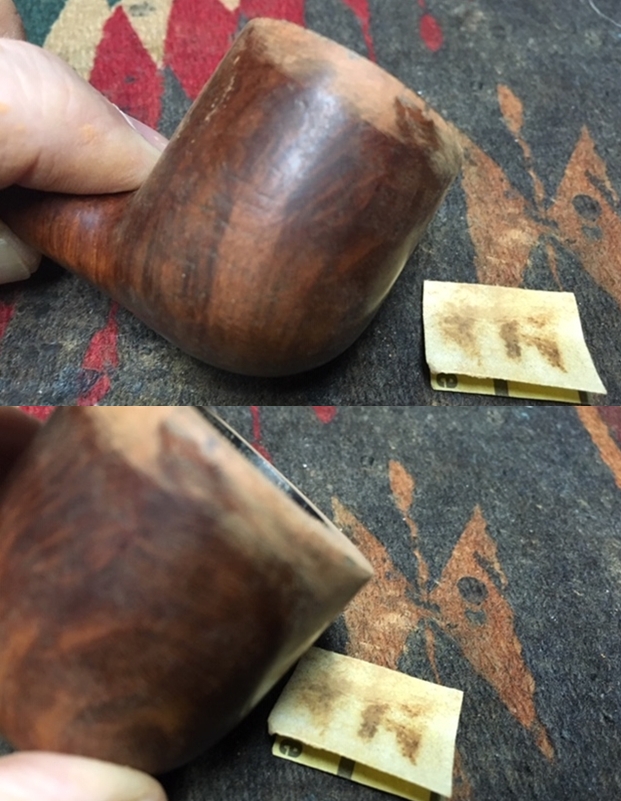
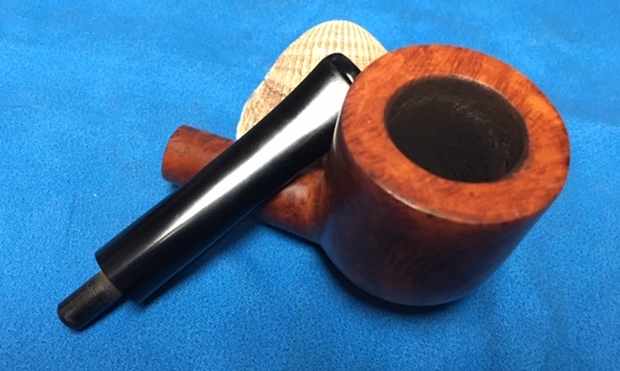
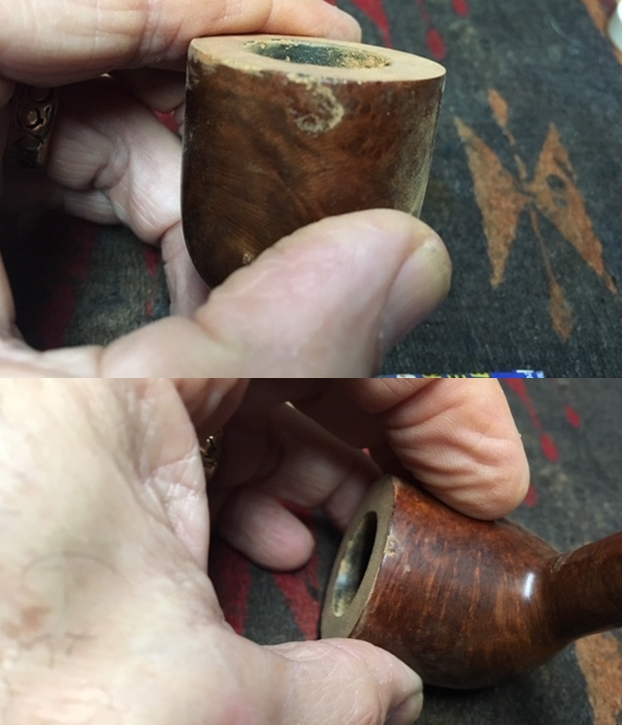
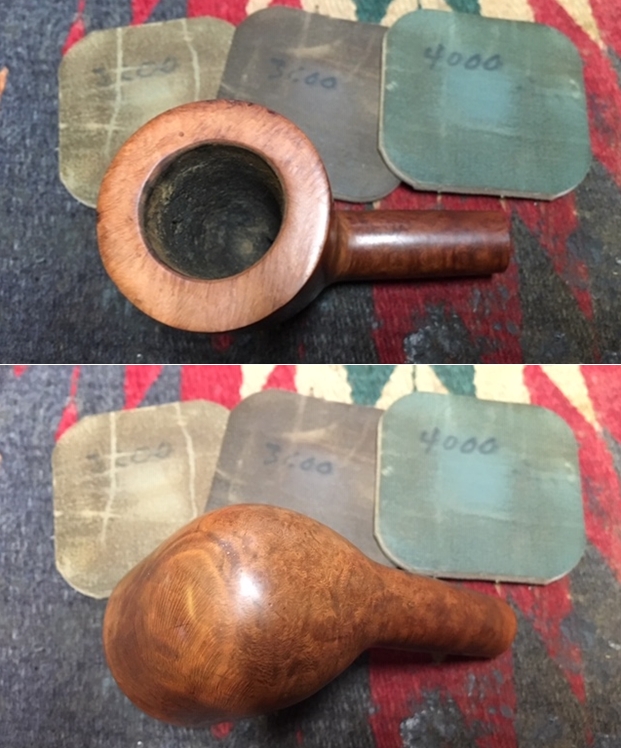
 Once the outer edge was cleaned up I worked on the inner edge. I used a folded piece of 220 grit sandpaper and smoothed out the edge. I gave the edge a slight bevel to take care of the rim damage and darkening that was present.
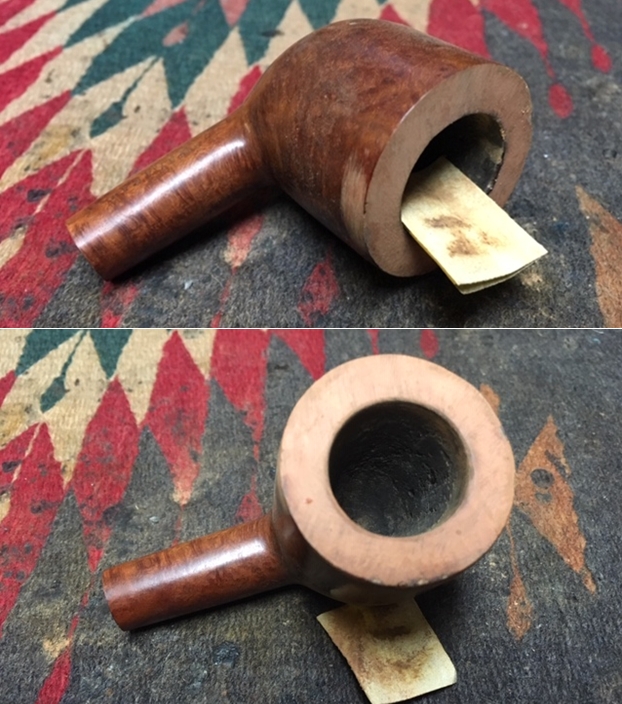 I polished the rim top and the rest of the bowl with micromesh sanding pads – wet sanding with 1500-2400 grit pads and dry sanding with 3200-12000 grit pads. I used the wet sanding on the first three pads to give me the traction to remove the scratches in the briar and the dry sanding to polish the briar. I wiped the bowl down after each pad with a damp cloth.
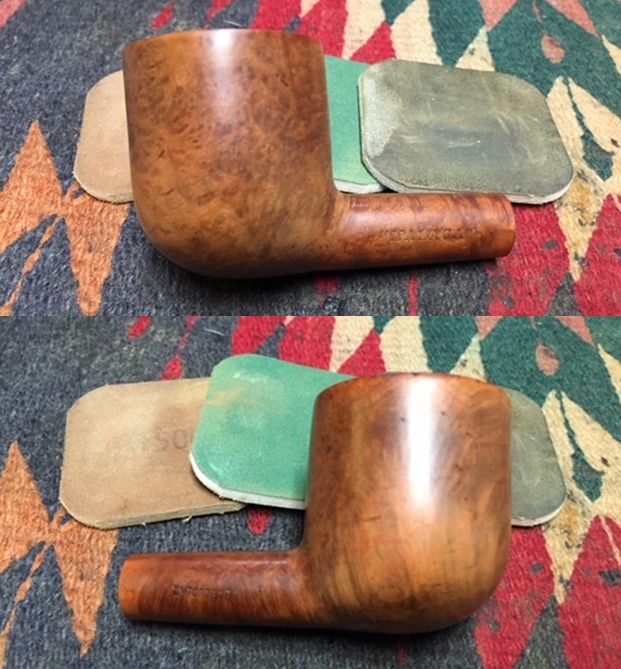
 At this point in the process the finish looked very uneven to me – even spotty. I decided to wipe down the bowl and shank with isopropyl alcohol to remove the uneven finish. I was able to even out the look of the finish to a point where I was happy with the look.
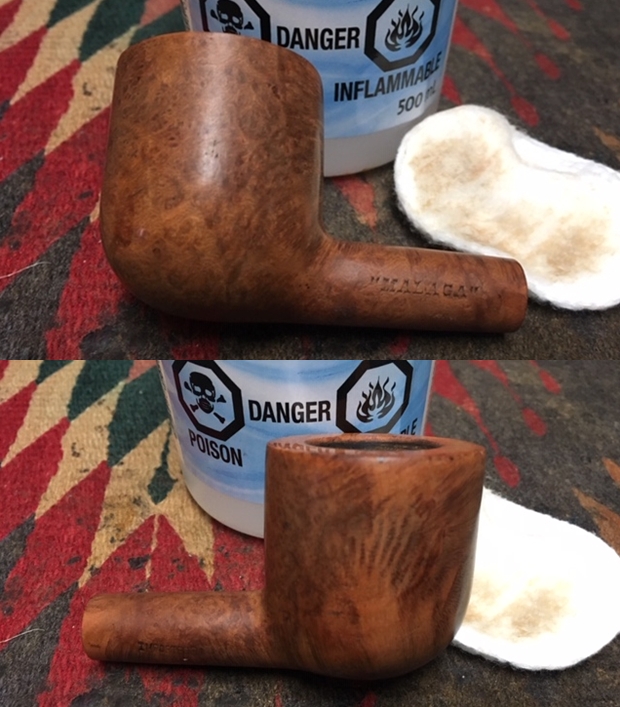
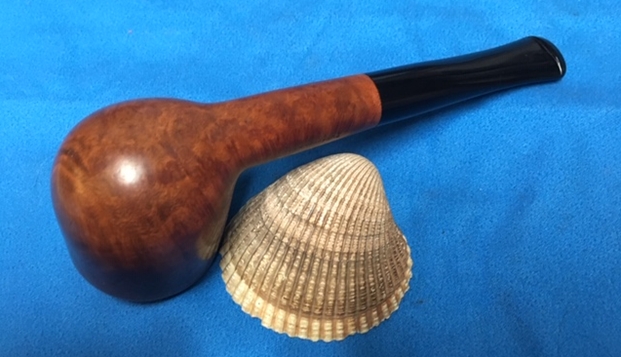
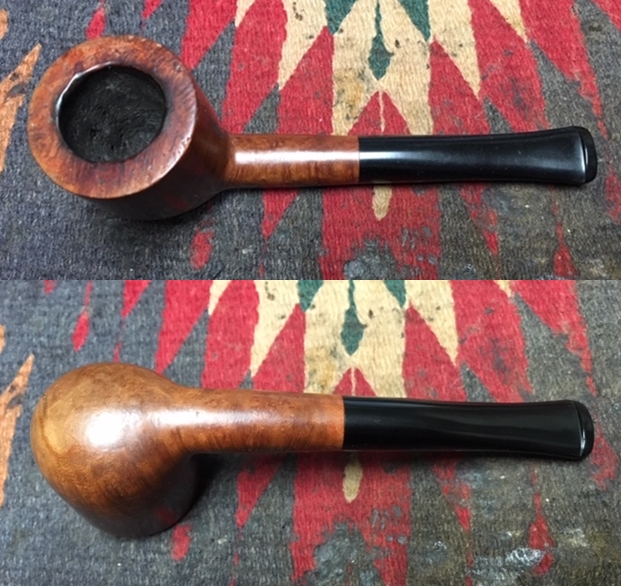
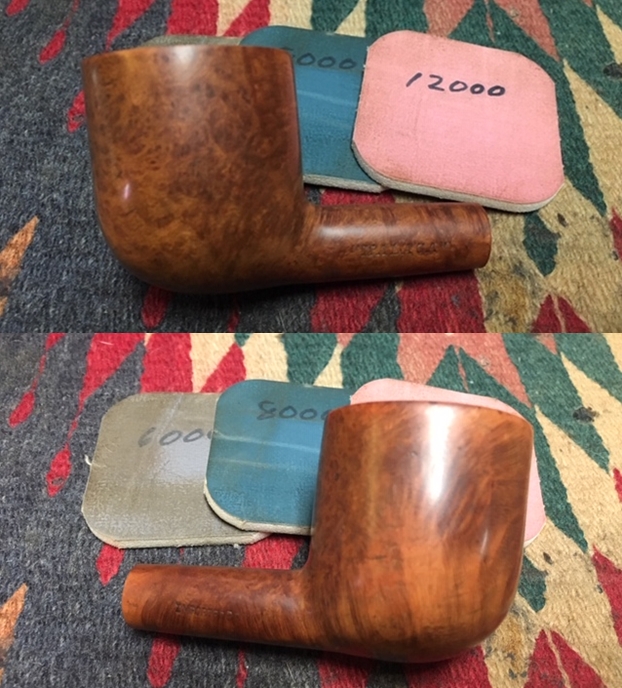
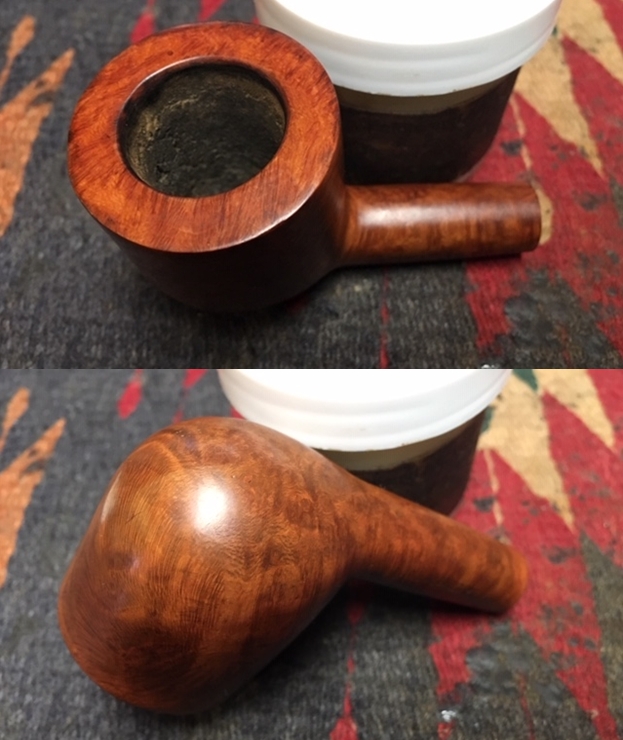
 I worked some Before & After Restoration Balm into the bowl and shank with my fingertips to clean, enliven and protect it. I let the balm sit for a little while and then buffed with a cotton cloth to raise the shine. The following photos show the bowl at this point in the restoration process. The bowl and the rim top look really good and the damage is gone. I am very happy with the results.
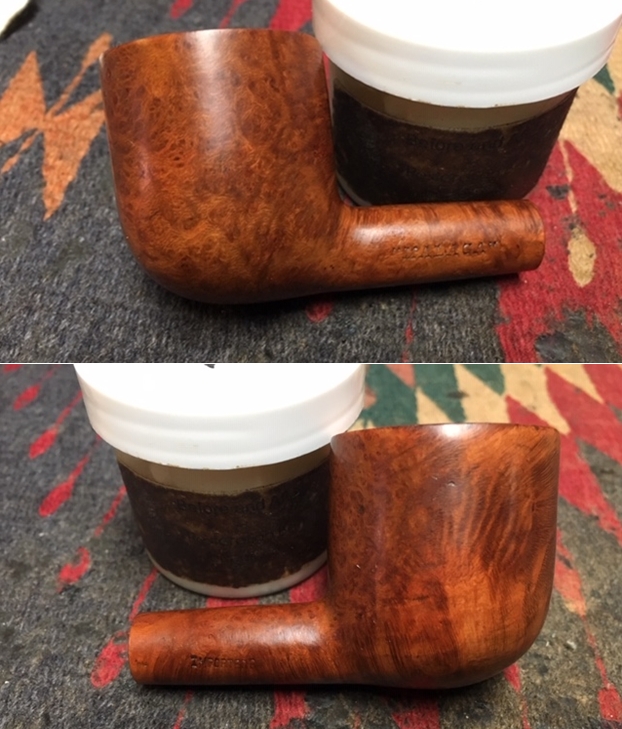
 It was at this point that I realized that I had not reamed the bowl or done any cleaning of the internals after the cotton ball and alcohol treatment. I had been so intent on cleaning up the damaged rim that I totally skipped my normal pattern of work. So I went back to ream the bowl with a Savinelli Fitsall Pipe Knife. I sanded the inside of the bowl with a piece of dowel wrapped with 220 grit sandpaper to remove all remnants of the cake. When I was finished the bowl walls were smooth and clean.
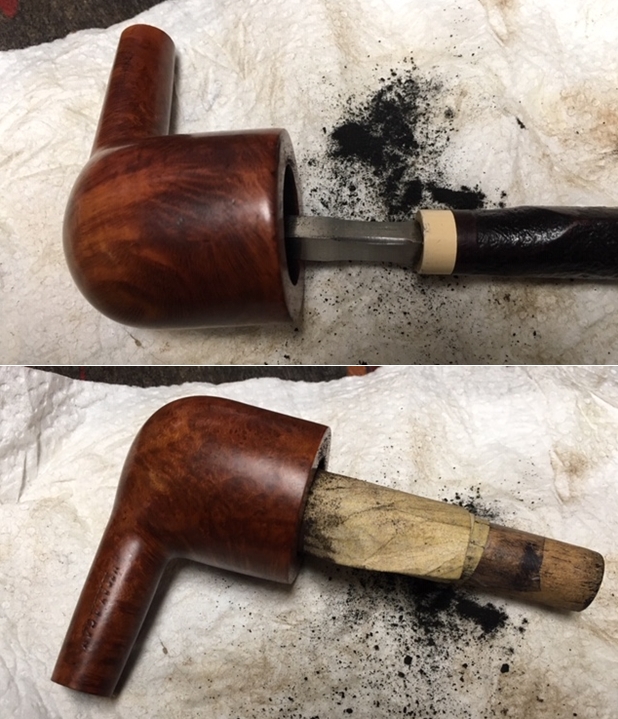 I cleaned out the airway in the shank and stem with cotton swabs, pipe cleaners and isopropyl alcohol. I cleaned out the mortise in the shank with cotton swabs and alcohol until the mortise walls were clean and looked bare. I stopped and checked out the smell of the pipe and it was clean and fresh smelling.
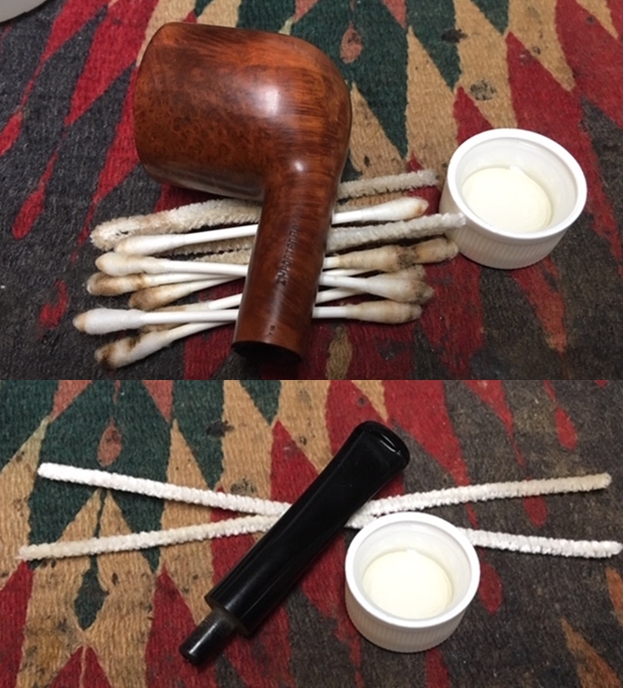 The stem on this Malaga was flawless. There were no tooth marks and no chatter. The stem absolutely glow it was so clean so there was nothing to be done with it. I wiped it down with some Obsidian Oil to protect and deepen the shine but otherwise it was perfect.
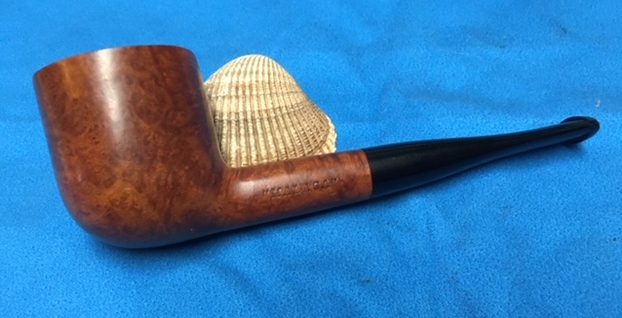
I put the stem back on the bowl and polished the pipe with Blue Diamond polish on the buffing wheel. I gave the bowl and the stem multiple coats of carnauba wax. I buffed the pipe with a clean buffing pad to raise the shine. I hand buffed it with a microfiber cloth to deepen the shine. The pipe polished up pretty nicely. The grain came alive with the buffing. The rich brown finish on the briar works well with the polished black vulcanite stem. The finished pipe is a beauty and feels great in the hand. Have a look at it with the photos below. The dimensions are Length: 5 ½ inches, Height: 1 3/4 inches, Outside diameter of the bowl: 1 9/16 inches, Chamber diameter: 7/8 of an inch. This one will be going back to Alex with the other two previously foul pipes that I worked on. Thanks for walking through the restoration on this now great looking “Malaga”. It is really a beauty. I think Alex should get a better smoke from it now.