Blog by Steve Laug
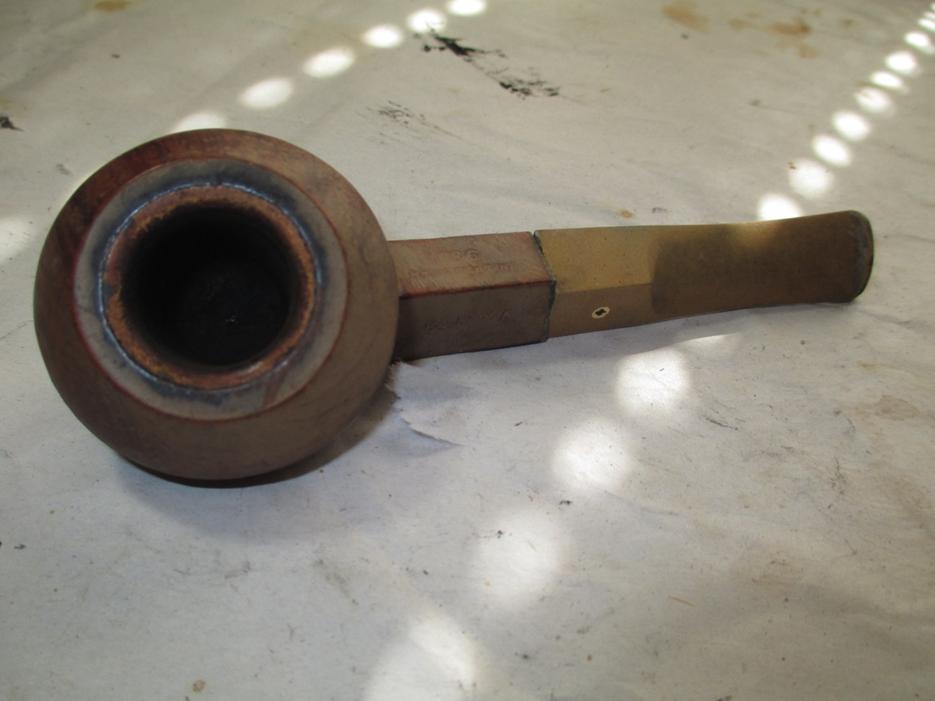
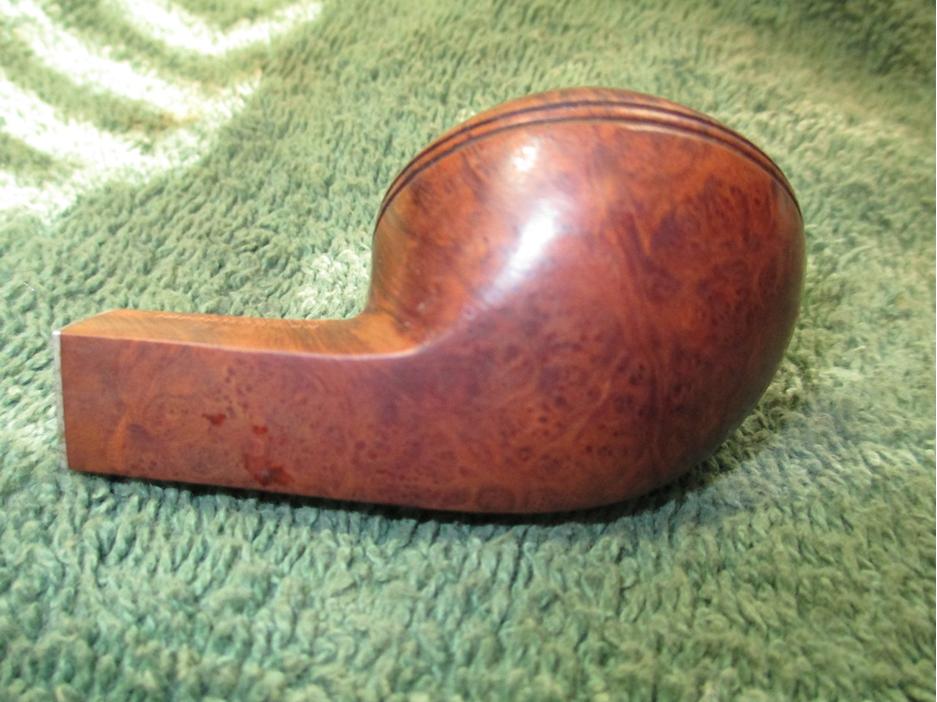
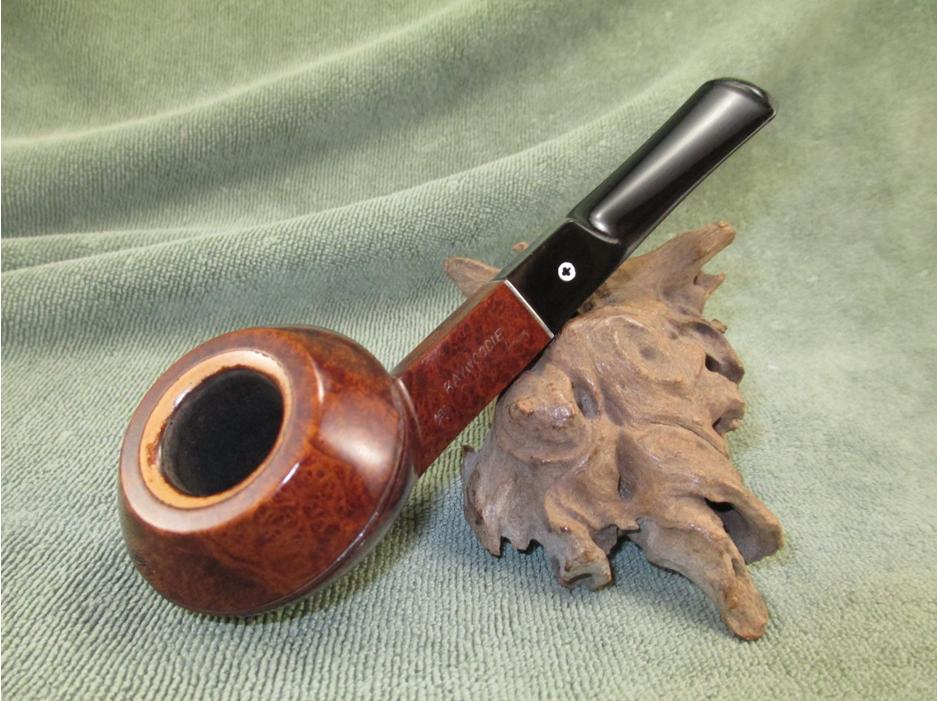
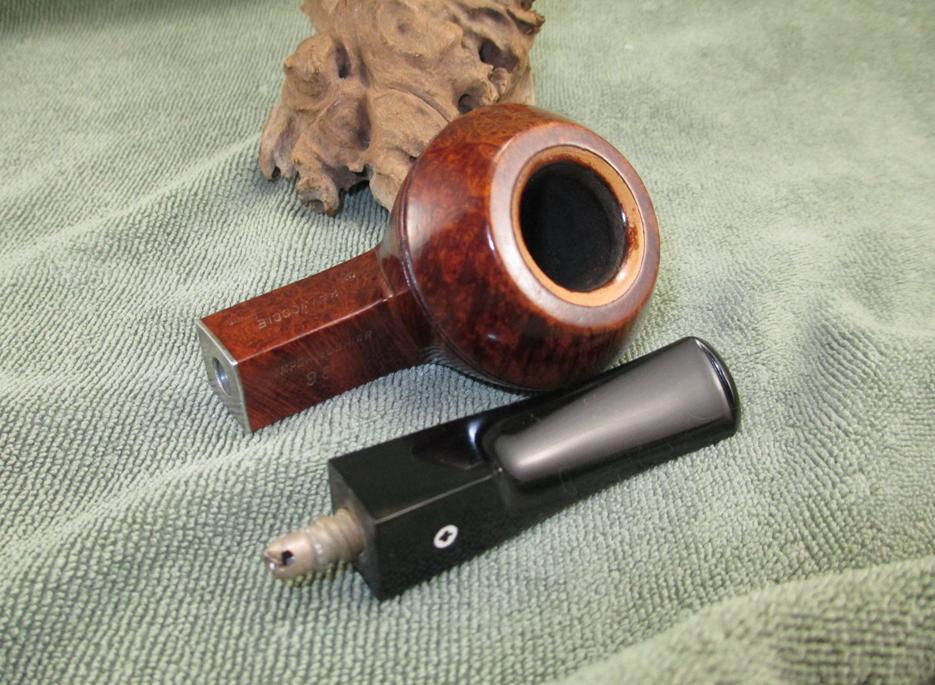
When I repaired Troy’s LHS Park Lane Lovat he gifted me this little beauty as a thank you. It is a small billiard and is stamped on the left side of the shank, Park Lane in an arch over the LHS Diamond and underneath the diamond it is stamped De Luxe. On the right side it is stamped with US Pat. 1,908,630. The shape number 19 is stamped on the underside of the shank. The finish was dirty and chipped all around the bowl. The rim had a buildup of tars and lava and the cake in the bowl left the bottom virtually conical. The stem was under clocked slightly. The stem (Bakelite?) was oxidized and had some small tooth marks near the button on the top and bottom sides. I love the swirl patterns of the stem material. They really give the pipe a look of class. When I removed the stem the stinger itself was black with tars and the inside of the shank was also dirty.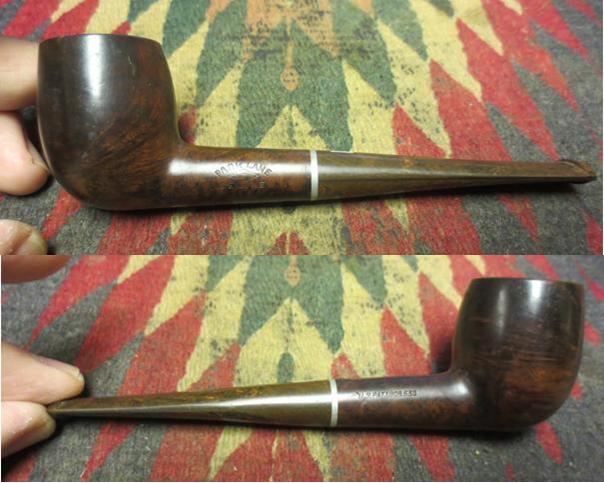
 I looked up the patent number on the US Patent information website and found out that the patent was filed for the stinger and tenon apparatus in 1933. The one in the diagram is shorter and slightly different from the one in this pipe so I am thinking that it is a later modification that was introduced. That combined with the dates for Bakelite I would put the dates on this pipe in the late 1930s or early 1940s. It is in pretty decent shape for a 75-80 year old pipe.
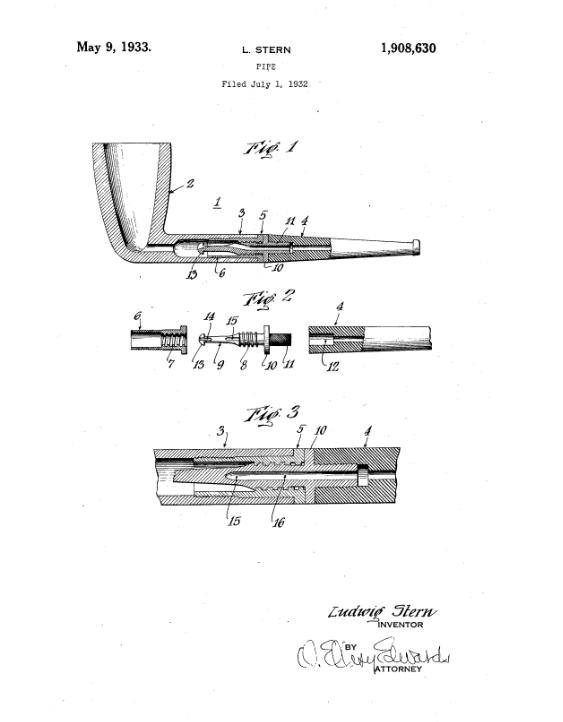
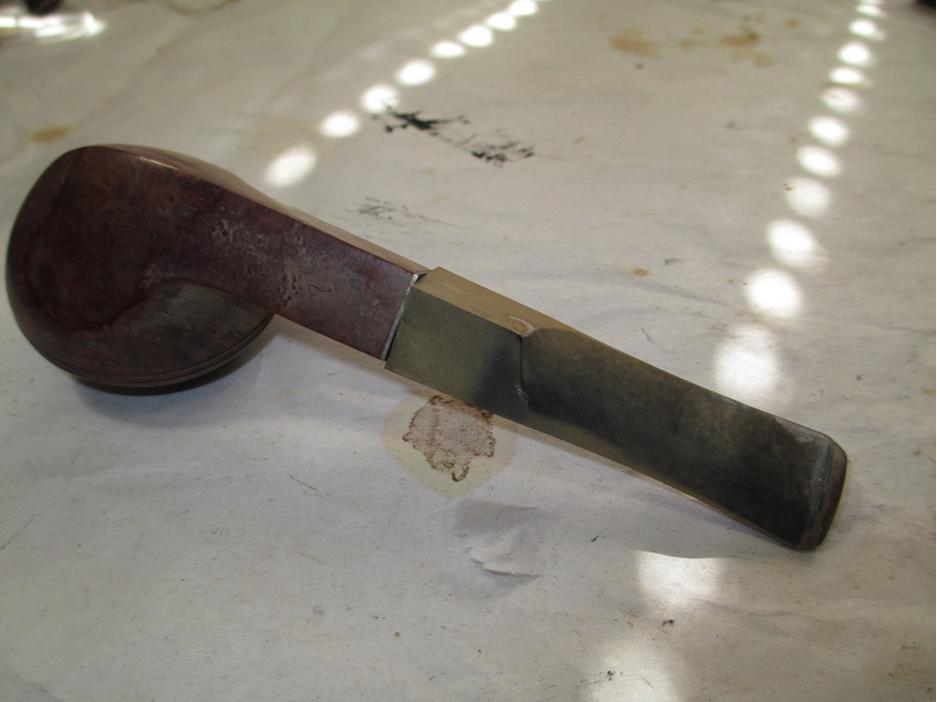
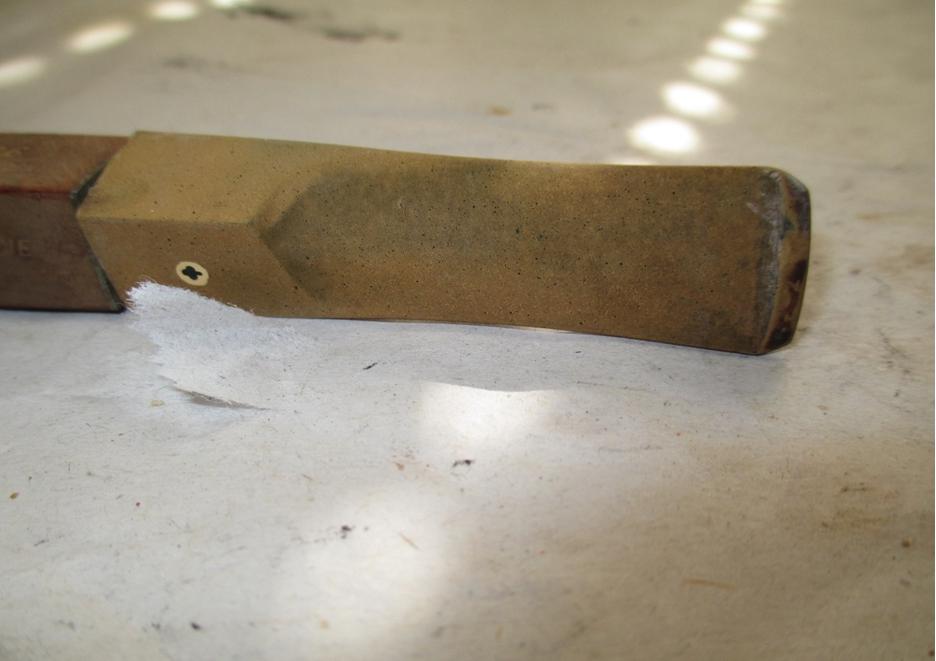
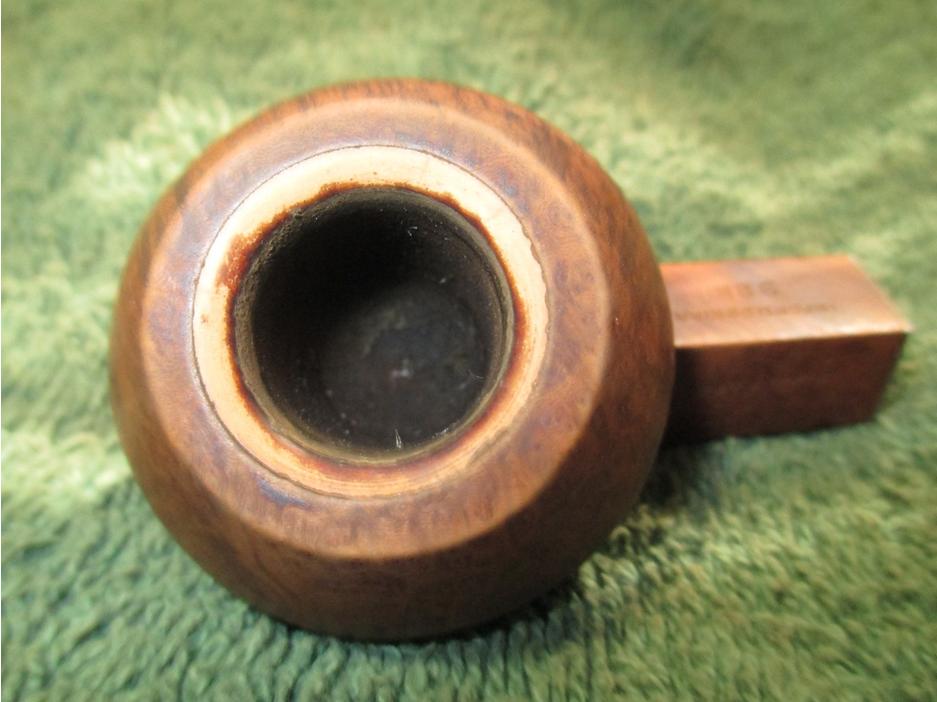
 I took the next three photos to give an idea of the state of the rim. I was uncertain of the condition of the inside edge of the rim because of the thickness of the build-up. The stamping was weak in the middle and the LHS diamond also quite weak.
 I reamed the bowl with a PipNet reamer. I find that I use that reamer for almost all of the refurbs that I do. The four different sized cutting heads, the T-handle and the carbon steel blade make short order of the most difficult cake. In this case I reamed it back to bare wood. I really wanted to see what the interior looked like as there was significant darkening around the top half of the bowl. The rim itself was just slightly out of round so it would be no issue to clean up.
 I used a brass bristle tire brush on the long aluminum stinger to clean off the tars. I wanted it clean before I heated it to reclock the stem.
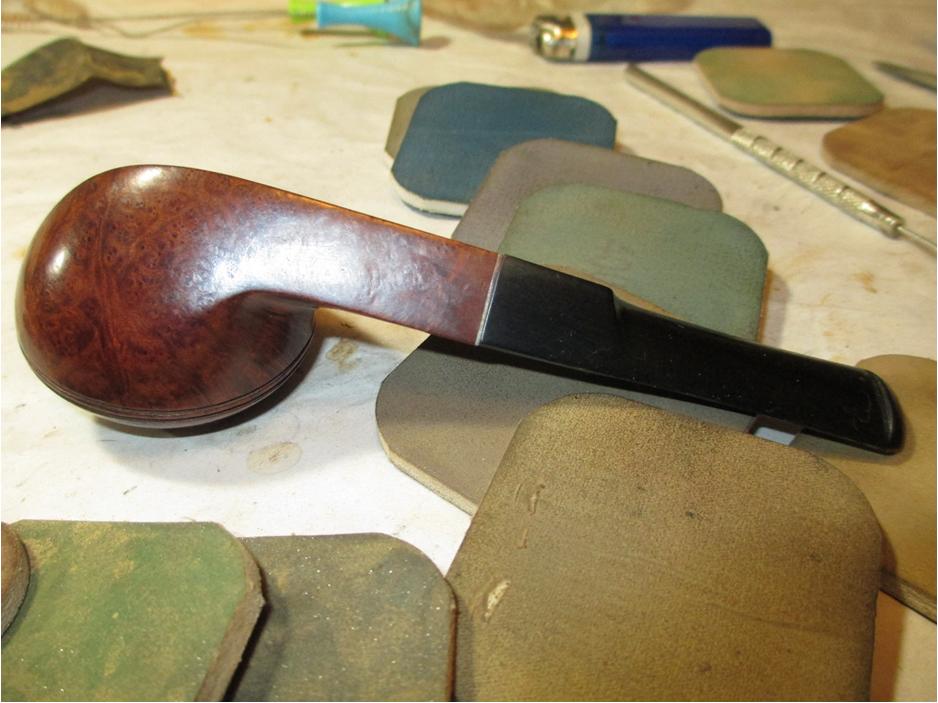
 With it clean I heated the stinger with the lighter to loosen the glue in the stem. Once it was loose I was able to align the stem correctly. I let it cool in place.
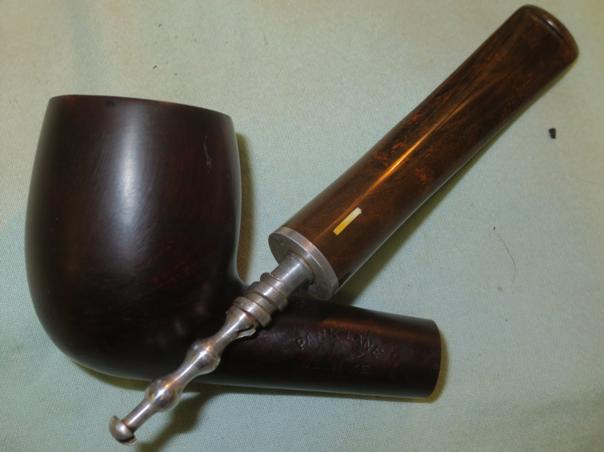
 With everything aligned I decided to try to pull the end of the stinger to get it to line up with the top of the stem. I wanted the slot in stinger to match the white bar in the stem material. I wrapped the jaws of a pair of needle nose pliers with cellophane tape to protect the aluminum from damage when I clamped them on it. I gently twisted on the end of the stinger and to my surprise the entire tenon unscrewed from the stem. That was a good thing by the way as it made cleaning the stem far simpler.
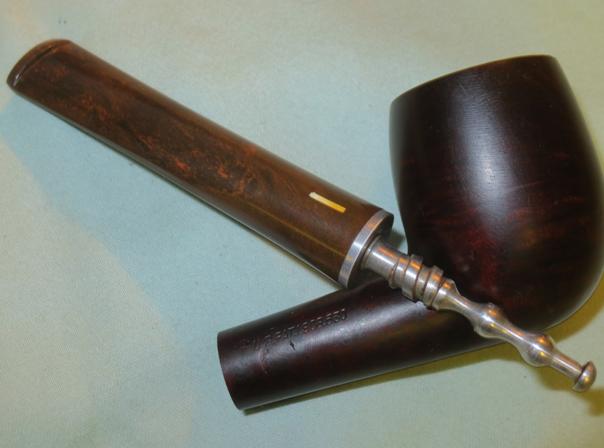
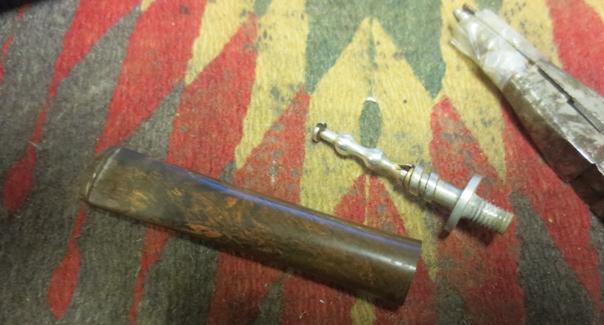 I cleaned the inside of the stem and the stinger with pipe cleaners, cotton swabs and isopropyl alcohol. I had already tested the stem material and I knew that it would not dissolve with the alcohol.
 With the inside of the stem clean I put the tenon back in place on the pipe and worked on the exterior. I sanded the surface and particularly the tooth marks with 220 grit sandpaper until they were smooth and blended into the stem surface.
 I decided to work on this pipe from the opposite direction of my normal practice and finished working on the stem first. I wet sanded it with 1500-2400 grit micromesh pads and then rubbed it down with Obsidian Oil. I dry sanded with 3200-4000 grit pads and then gave it another coat of oil. I finished with 6000-12000 grit pads and a final coat of Obsidian Oil. I set the stem aside and let the oil dry.

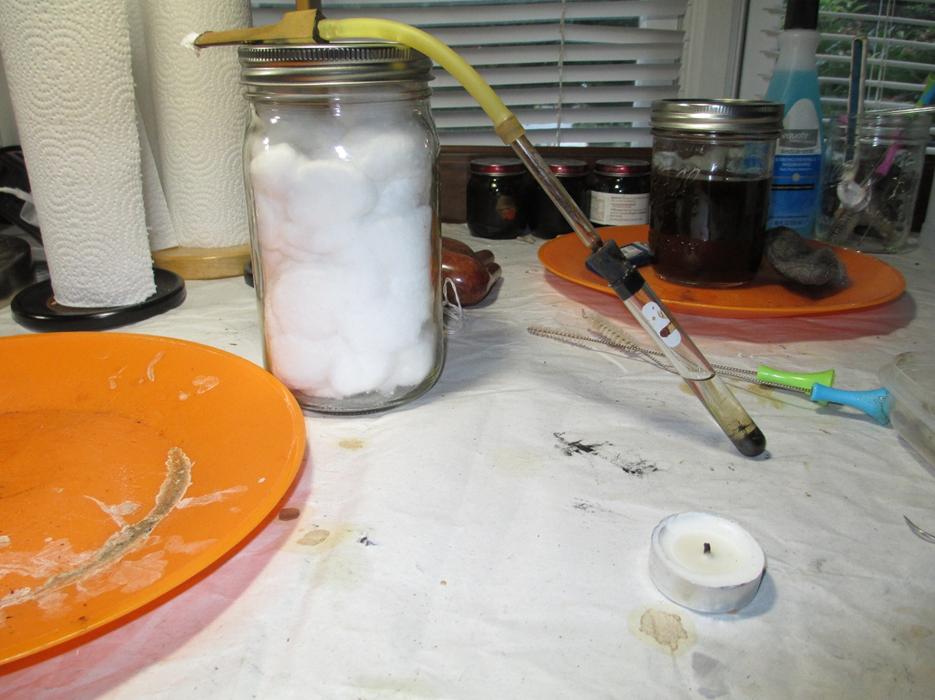
 I cleaned out the bowl and shank with pipe cleaners, cotton swabs and alcohol until it was clean and smelled fresh. I thought about using the retort on it but I am just not certain what the hot alcohol will do with this stem material.
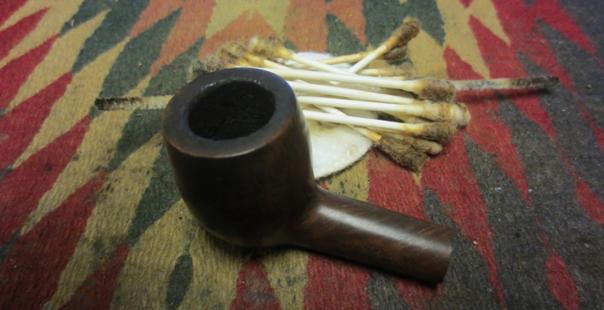 Once the rim was cleaned I could see the chips and damage to the surface so I decided to lightly top the bowl.
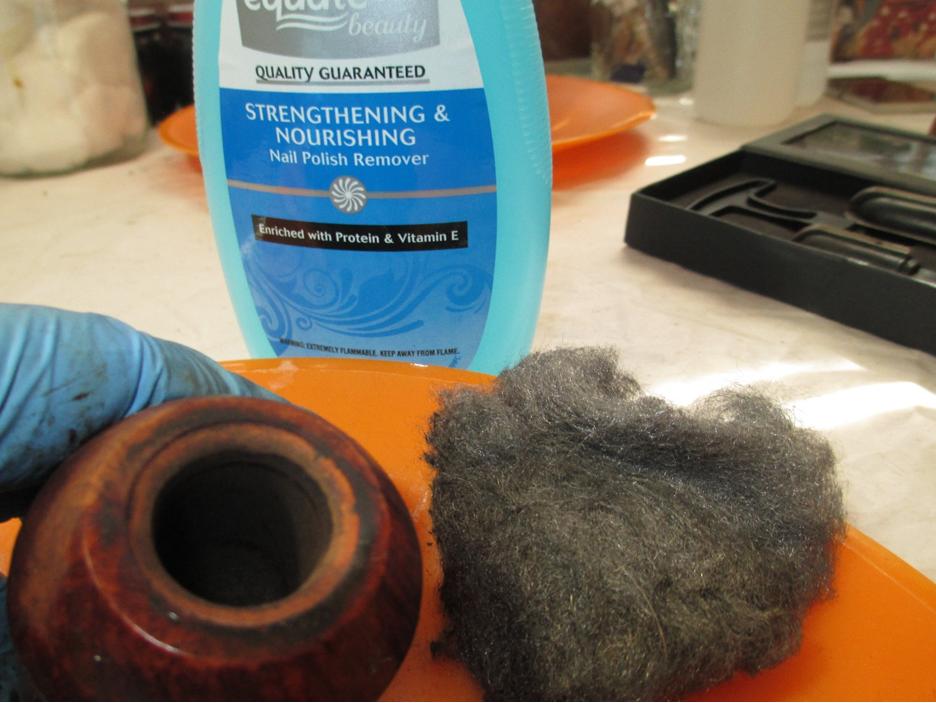
 I decided to do some experimenting with Dave Gossett’s method of stripping a bowl finish. I read about it on the Dr. Grabow Collectors Forum. He uses Oxyclean and alcohol he said. I had no idea how he went about it and fired him an email. Due to my impatience I did not wait and just jumped in. I tried to mix the Oxy with the alcohol. It did not work! It made a grit paste but I decided to give that a try anyway. I scrubbed and scrubbed and succeeded in removing a lot of the finish. The mixture left a white/grey ghost on the briar.
 I happened to check my email and saw that Dave wrote back. He said that he dissolved the Oxy in hot water and then added the alcohol. He said to be careful of the stamping as the mixture had a tendency to raise the stamping in the weak areas. Boy I wish I had not been impatient. I lost some clarity on the week areas of the stamping. I did the mixture as Dave suggested and wiped down the bowl with it and was able to get some more of the finish removed.
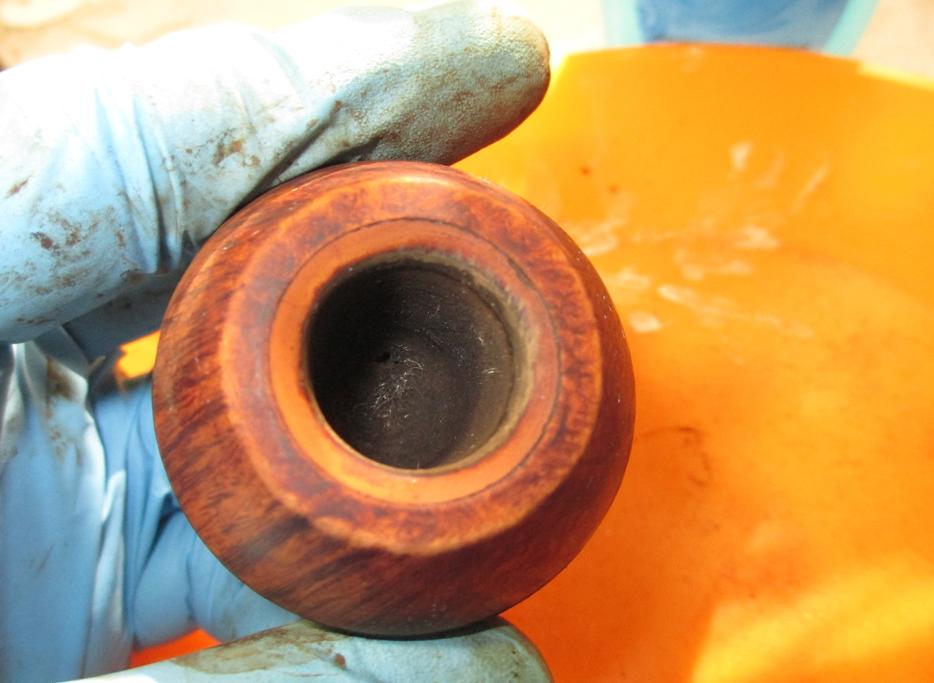
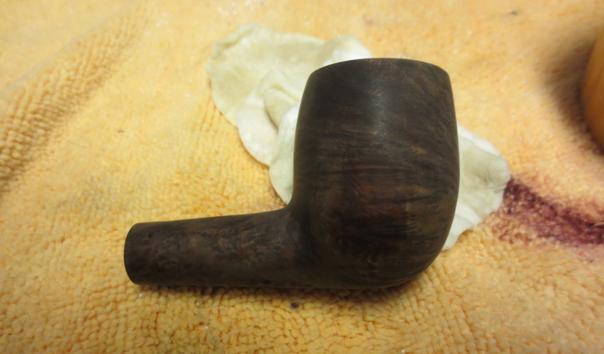 There were some deep cuts in the surface of the bowl. I steamed out the dents but these did not raise. I repaired them with superglue and briar dust.
 I sanded the repaired areas smooth to match the surface of the bowl. I wiped the bowl down with alcohol to remove the dust. I heated the briar with a blow dryer and then stained it with a Dark Brown aniline stain thinned with 3 part alcohol to 1 part stain. I flamed the stain and set it in the briar.
 I buffed it with White Diamond and found that even with the thinning it was too dark to my liking. I wiped the bowl down with alcohol on cotton pads to remove some of the stain and make it more transparent.
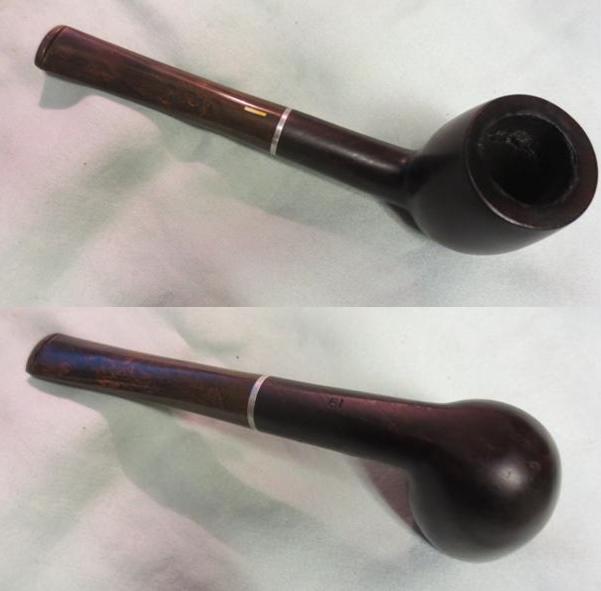
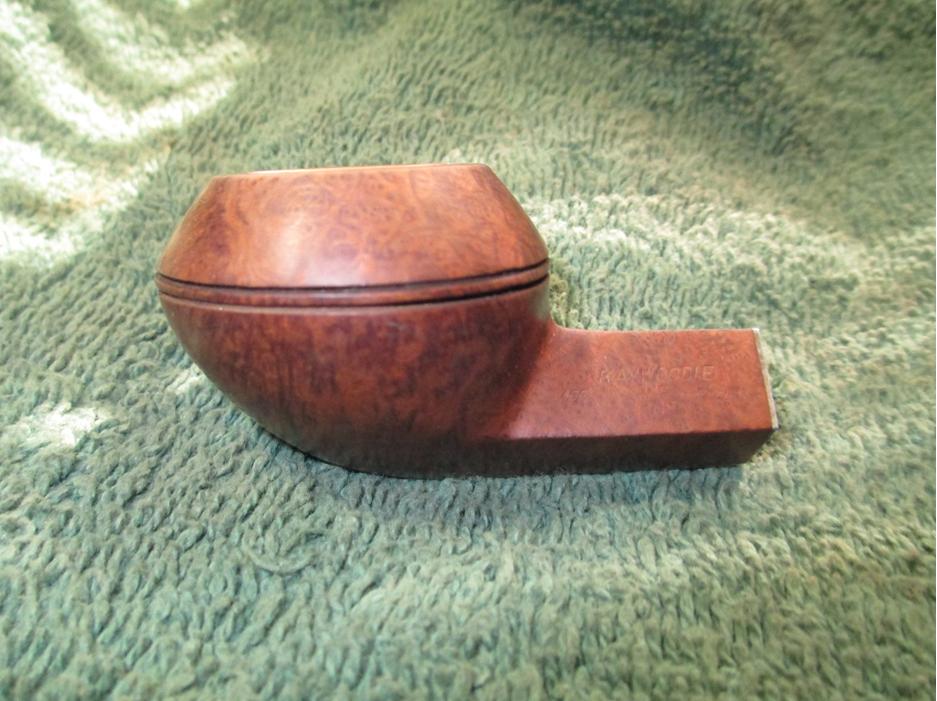
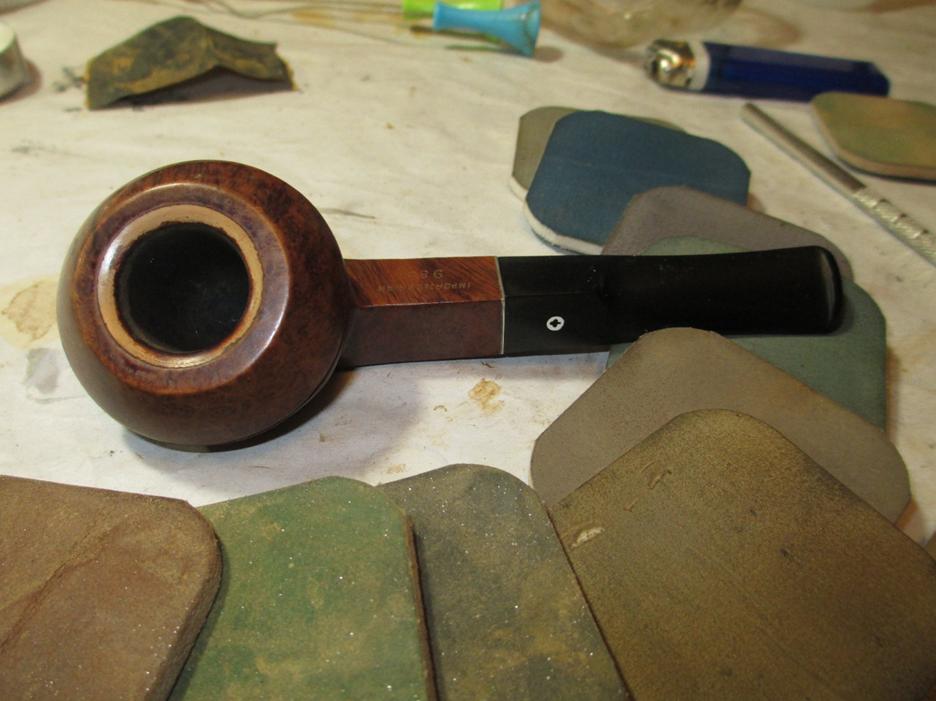
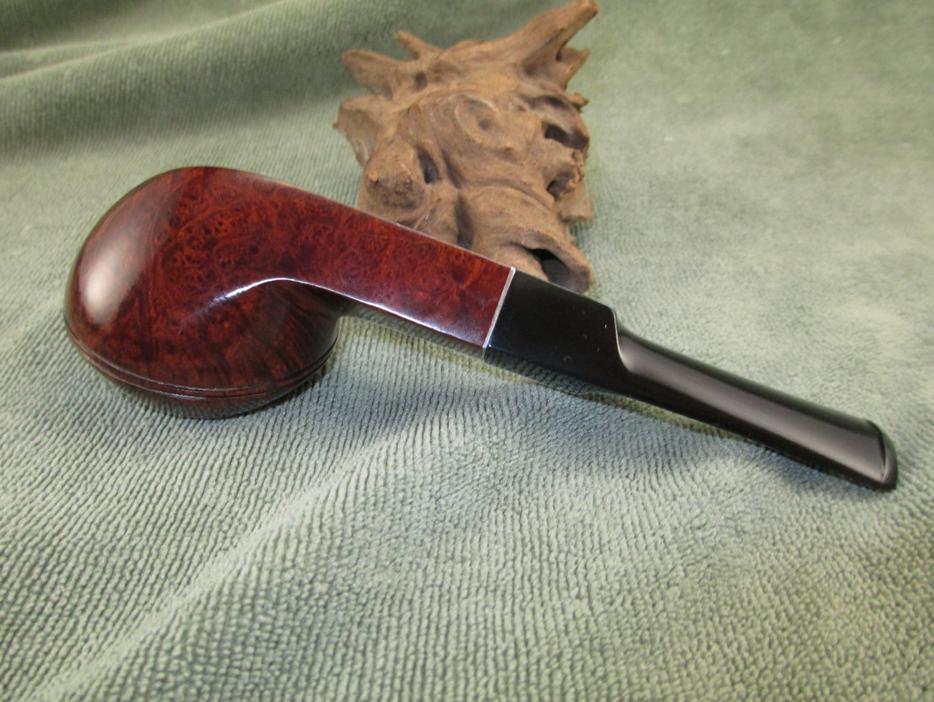
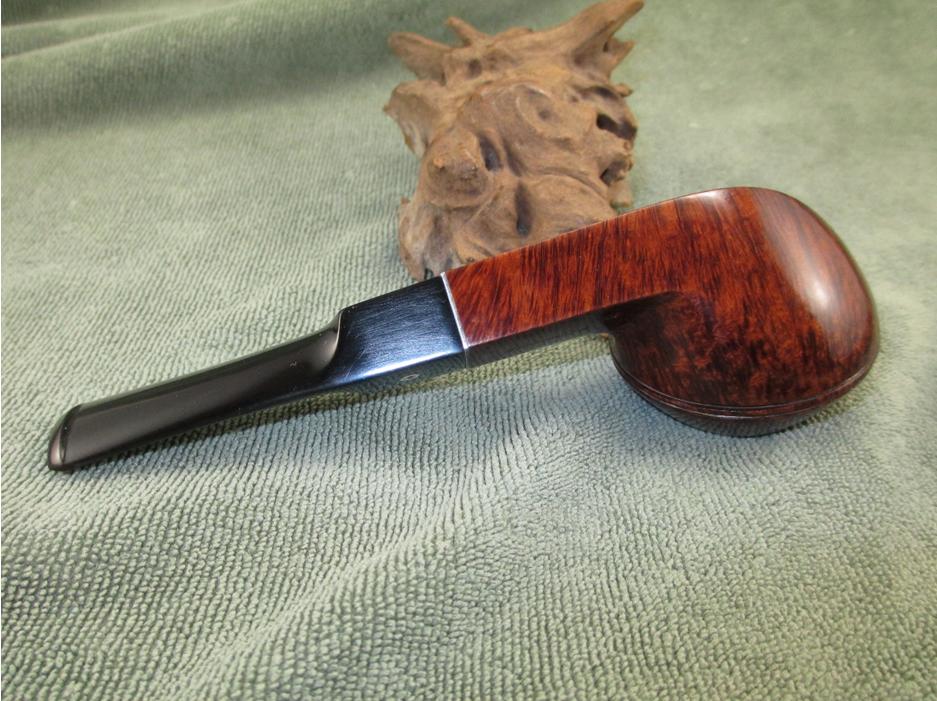
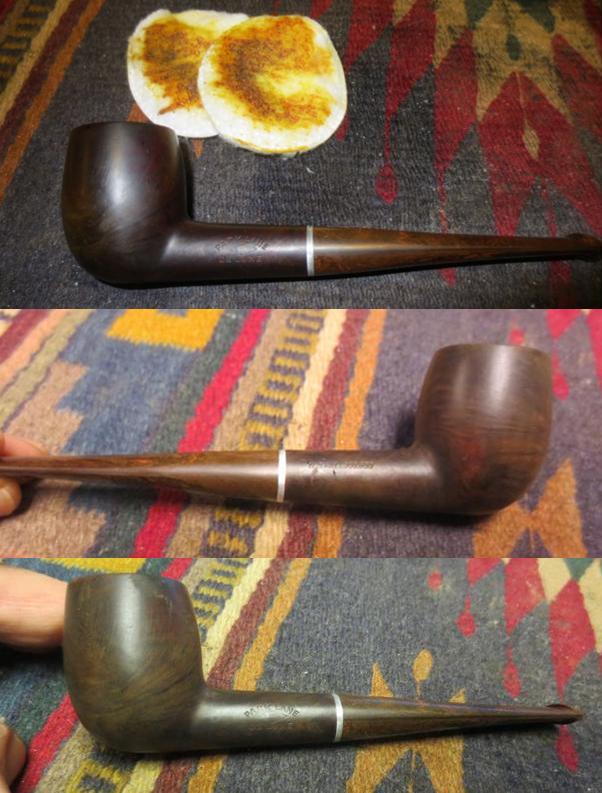 The grain showed through nicely and the colour once it was waxed would look good with the stem material. I buffed with Blue Diamond and then gave it multiple coats of carnauba wax. I buffed it with a clean flannel buff and then with a microfibre cloth by hand. The finished pipe is shown in the photos below. Thanks for looking.