by Steve Laug
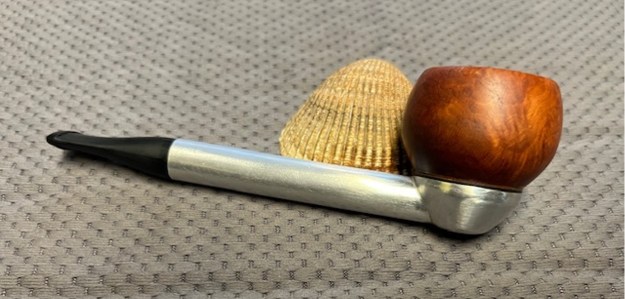
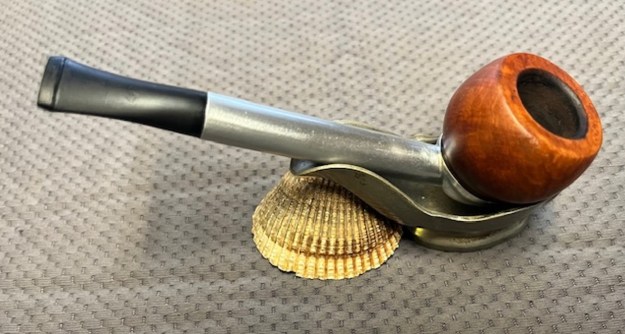
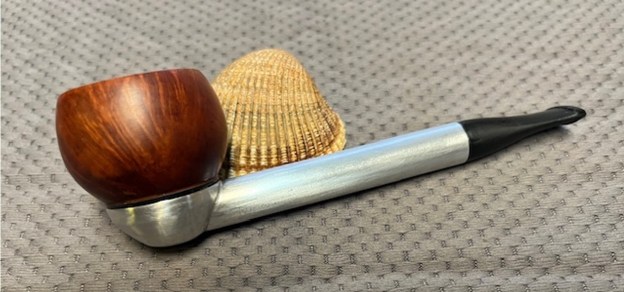
Back in January I received an email from Robert with a group 12 pipes that needed to be restored in various ways from cleanup to restemming. I chose to work on second metal pipe next. It is a nice looking straight pipe with an apple style bowl and a metal base. It was a smooth bowl with no rustication. The rim top and the base of the bowl were both very dirty. The bowl had been reamed at some time so there was no cake in it. The rim top had an overflow of lava on it and some darkening around the inner edge. The underside of the bowl was dirty and it was coated with a varnish coat. The stem and bowl were stuck on the base and could not be removed at this point. The underside of the metal base was stamped Quiet Companion. The stem was dirty and had a lot of tooth marks and chatter on the top and underside ahead of the button. I took some photos of the pipe to show its condition before I started my work on it.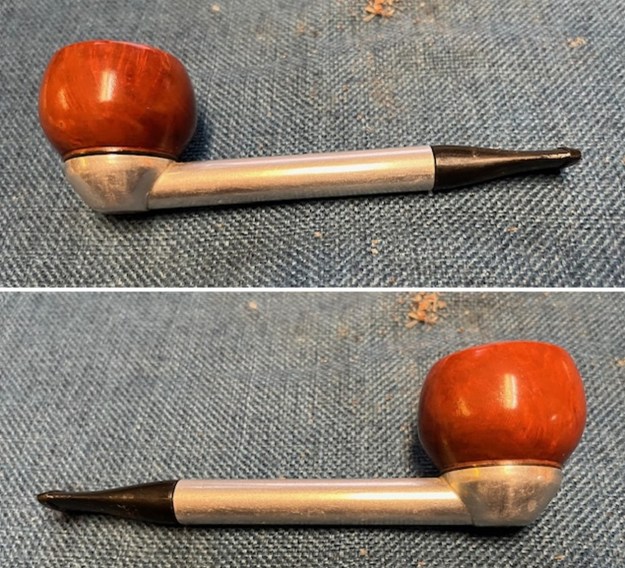
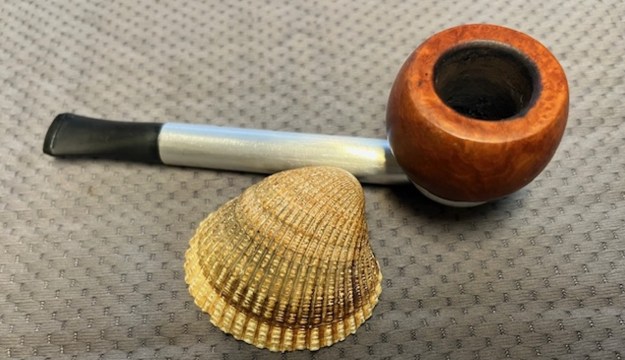
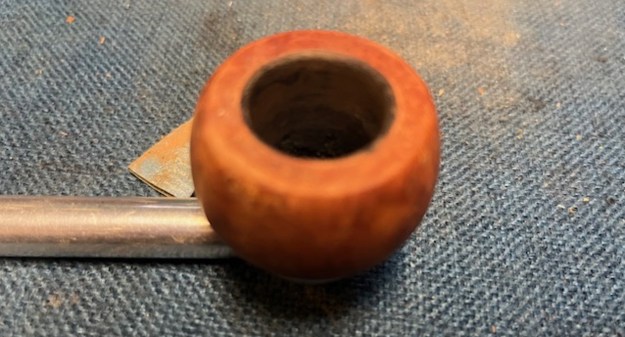
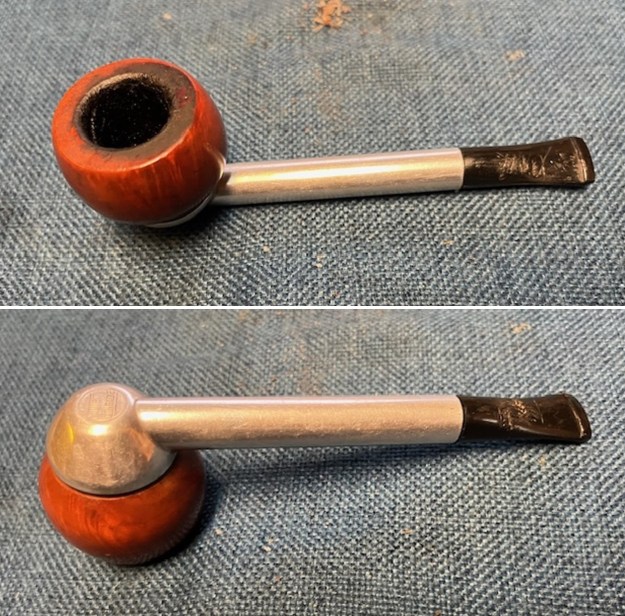 To capture the condition of the bowl and rim top along with the stem I took the following photos. You can see the tar in the bottom of the bowl and the entrance to the shank is quite large. The bowl is not removable at the moment so once I am able to remove it I can do a better assessment of the condition. The rim top has a thick lava coat that is heavier on the back side. The stem is well chewed but none of the marks are too deep. The stem is also not removable at this point. I will need to see what I can find out about the internals so that I can take it apart.
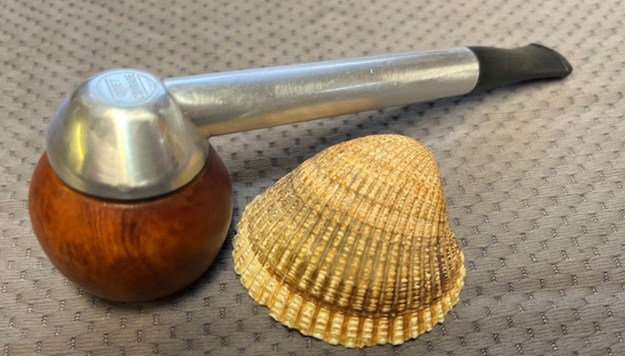
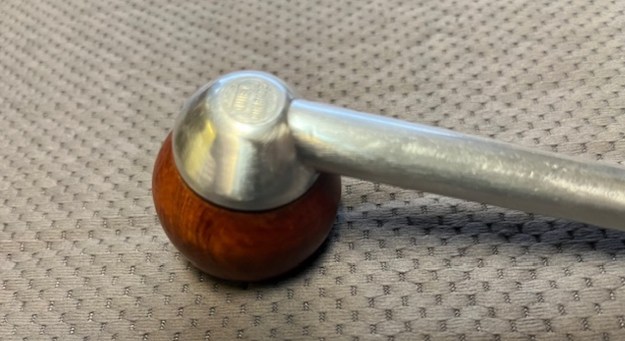
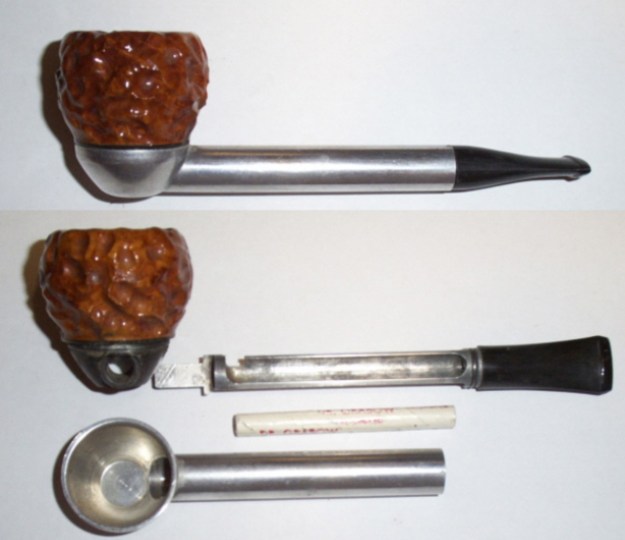
 I tried to capture the stamping on the heel of the base. It read The [over] Quiet [over] Companion. It was clear and readable.
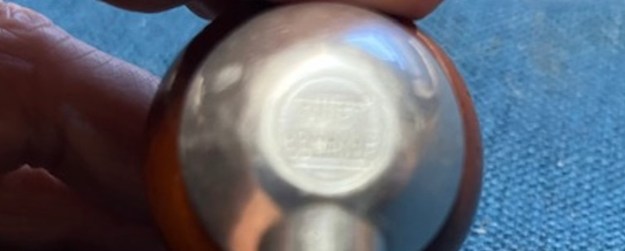 This is a brand I had not seen before, let alone worked on. I had no idea how it came apart and it was solidly stuck. I could not remove the stem from the shank or the bowl from the base. Before I started to work on it I decided to see if I could find out how the parts were held together. Here is the link (http://www.smokingmetal.co.uk/pipe.php?page=83). I quote the information that was included along with the photos.
QUIET COMRADE
Department : METAL STEM & Plug in bowls
QUIET COMRADE stamped under cup and on the base of the bowl. The filter holder is designed such that smoke has to travel three time the length of the shank, the last run is enabled to take an absorbtion filter.
The bowl is retained by the filter holder locking into the bowl, this has to be pulled out before the bowl is released. Attempting to unscrew the bowl can have disastrous effects
Variety of bowls , smooth and carved.
Overall length is 5 3/8 inches (137 m/m)
19 Feb 1974 – US patent # 3,792,705 Inventor Robert J Frederick , Ashtabula, Ohio and manufactured by Mech.Tech.Inc., PO box 487 – 3128 State Road – Ashtabula, Ohio 44004 – USA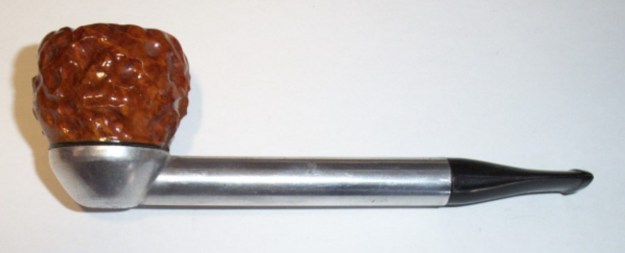
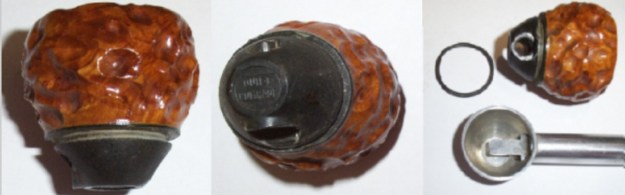 I also found a link on another site selling the pipe that showed the way the pipe fit together (https://eliesfreehandpipes.com/Elie%27s_Comrade.html).
 Now I knew how to take it apart… I thought. Now the hard work began. I tried all the tricks up my sleeve from years of working on pipes. I tried the freezer trick – letting it sit in the freezer for repeated periods of time and having absolutely no success. I tried heating the shank with boiling water to try to loosen the internals from the metal base – I repeated the process of heating it several times to loosen it. Again – I had no success. I heated it with a heat gun repeatedly to remove the internals – no success. The only thing that worked at this point was that I was able to remove the stem. I soaked the shank in a bath of alcohol for several days hoping to break things loose. It did not work. I heated it again to combine the alcohol and heat. It did not work. I tried plugging the shank end and soaking the internals with acetone. It still did not work. I am stumped at this point. I decided to clean up the pipe as best as I could without taking it apart. So that is what I did today after work.
I wiped off the debris from the soaking that bowl had received and reamed it with a Savinelli Fitsall Pipe Knife. I took the cake back to bare briar and it looked much better. 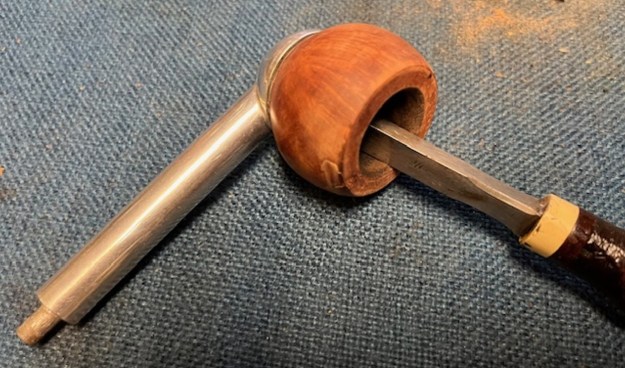 I cleaned out the airway in the shank and the inside of the bowl and the entrance of the airway at the bottom of the bowl with alcohol, pipe cleaners and cotton swabs. I also cleaned the airway in the stem at the same time. It was beginning to look very good.
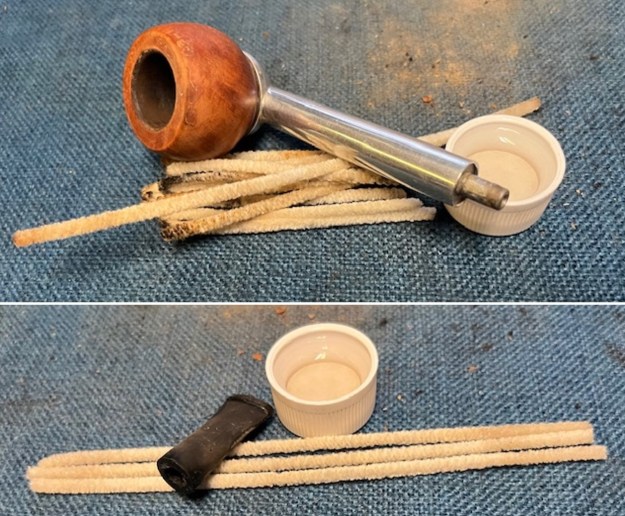 With the internals clean I turned my attention to the briar bowl. It had started the heating/cooling process I described above with a thick varnish coat. One of the benefits of the long process was that the varnish had bubble and peeled off. I sanded it with a folded piece of 220 grit sandpaper to remove the remnants of shiny varnish on the sides and top of the bowl. It actually had some nice grain underneath the coat.
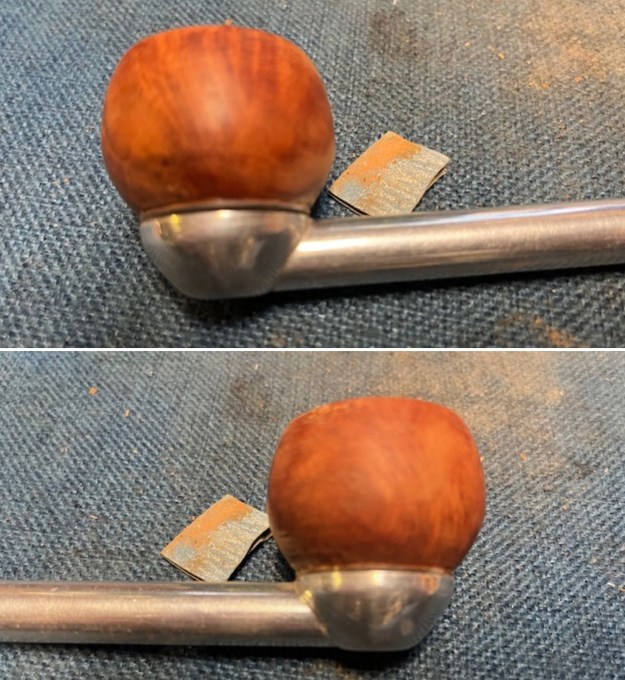
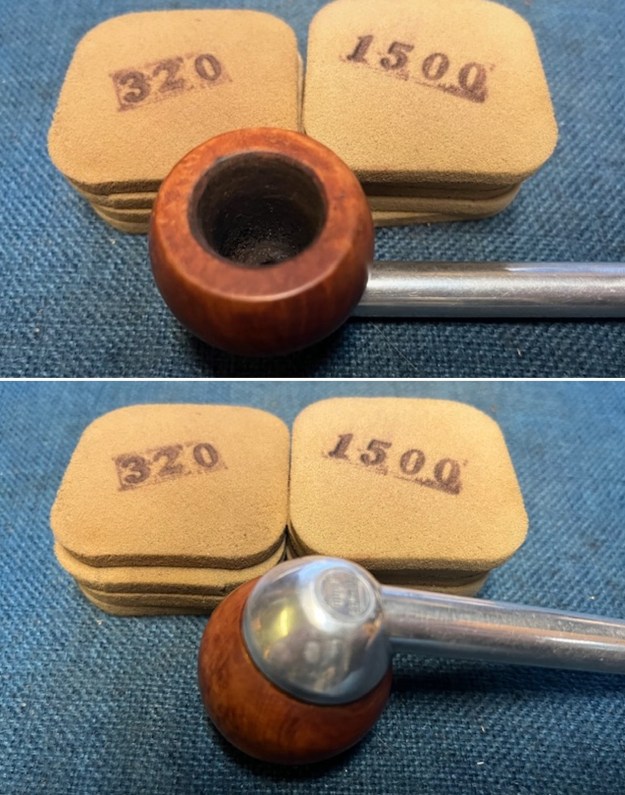
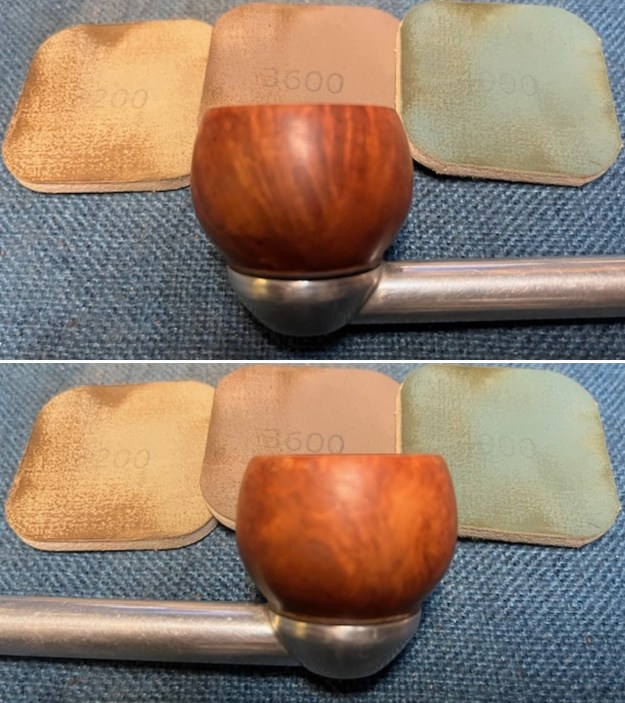
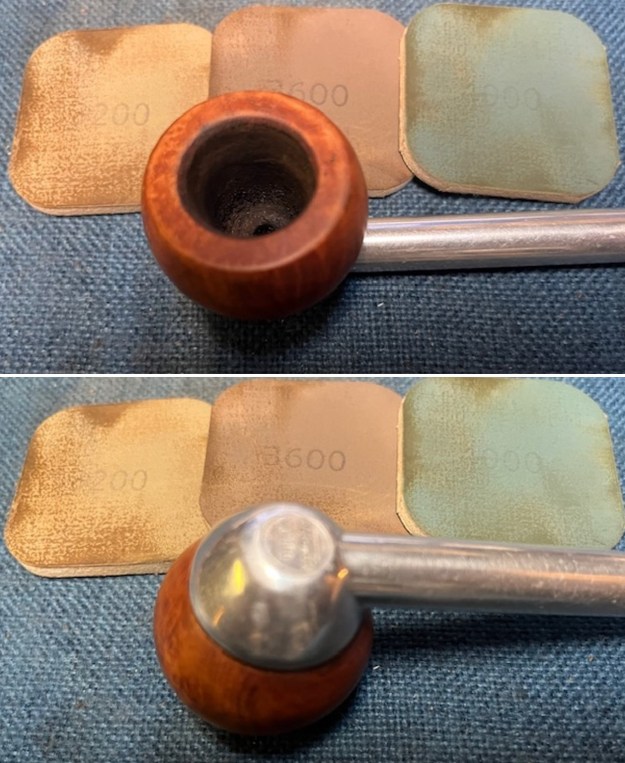
 I continued to sand the bowl with 320-3500 grit sanding pads. I wiped the bowl down after each pad with a damp cloth to remove the debris from sanding. By the last pad the bowl had begun to shine.
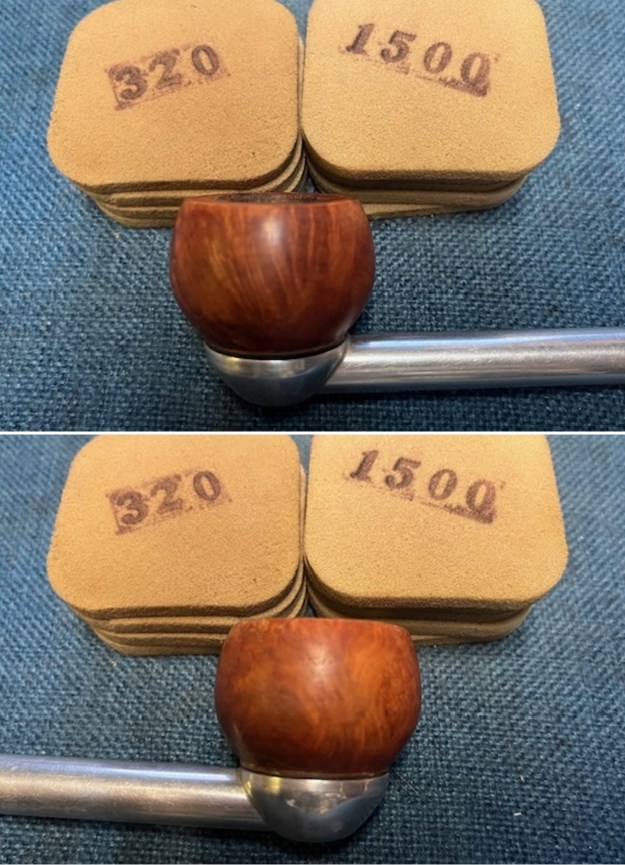
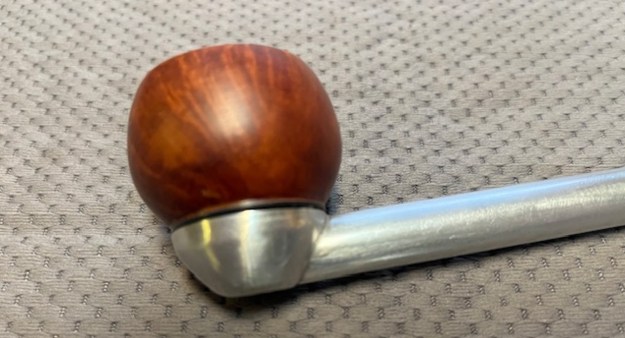
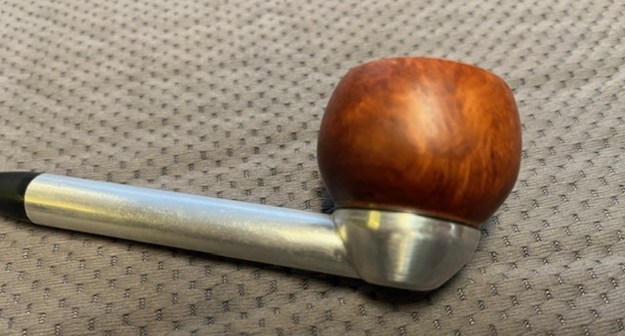
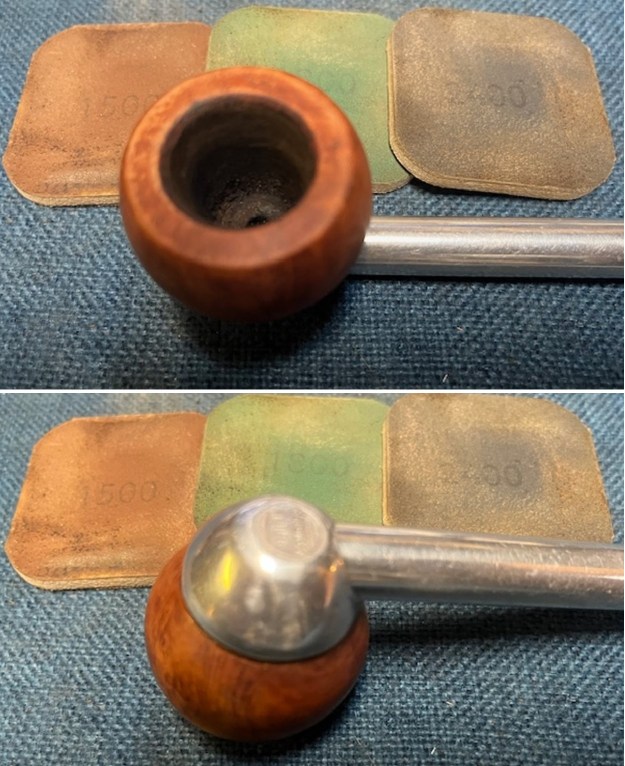
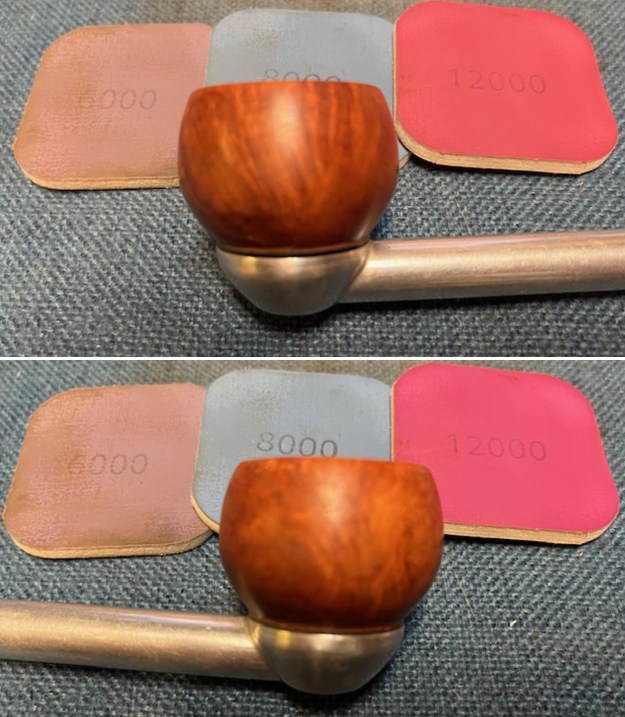
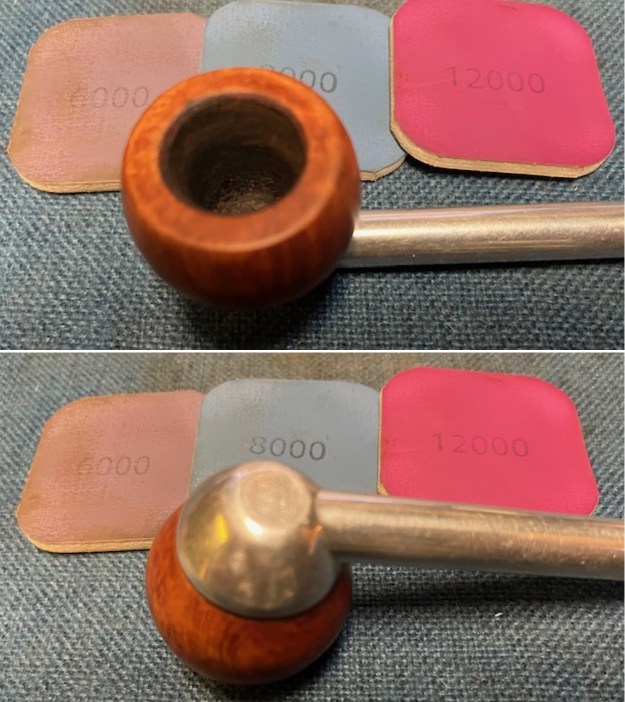
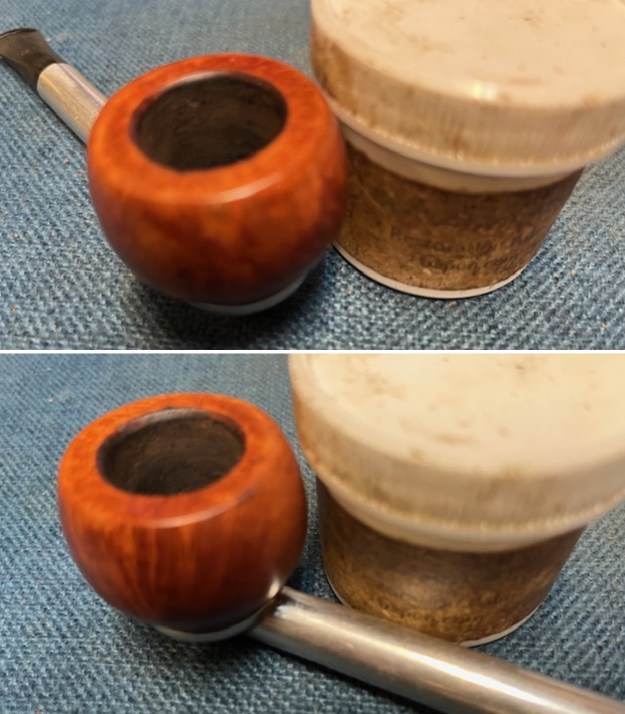
 I polished the briar bowl with micromesh sanding pads – dry sanding with 1500-12000 grit pads. I wiped the bowl down after each pad to remove the debris. By the end the grain just popped. It is a pretty bowl.
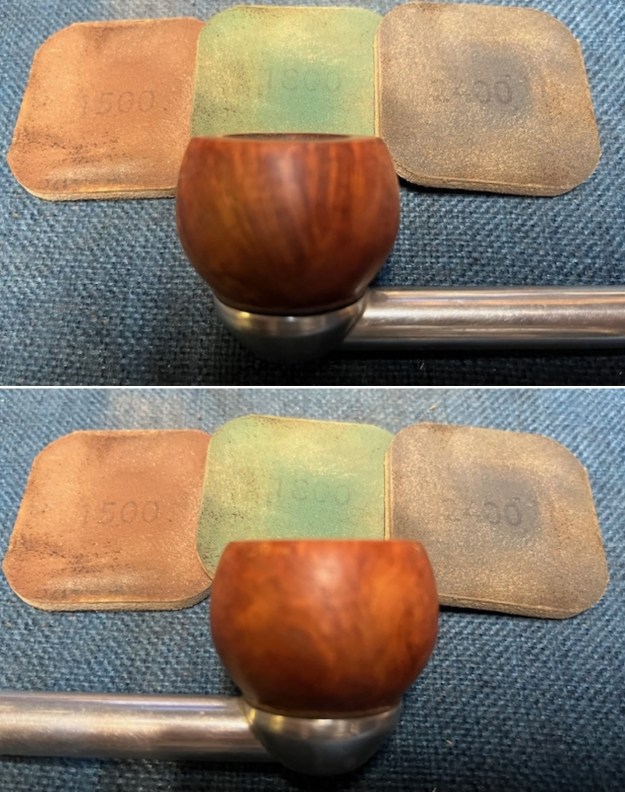
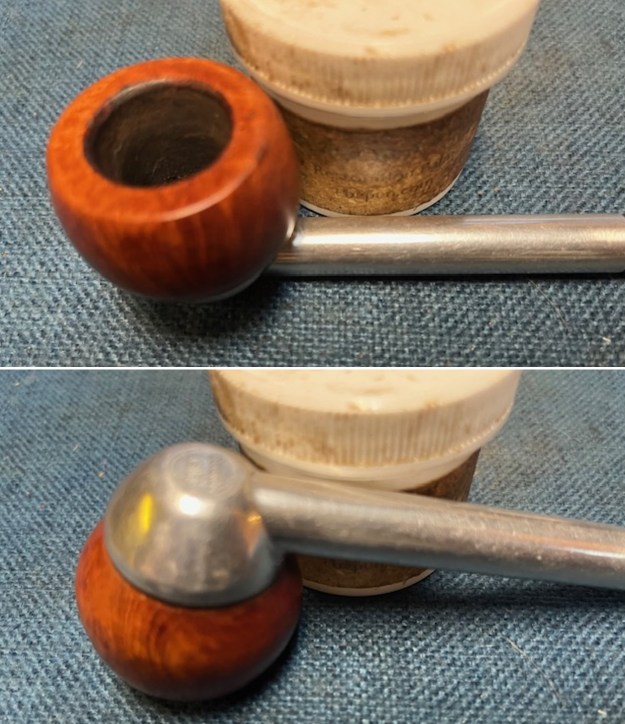
 I rubbed the bowl down with Before & After Restoration Balm. It is a paste/balm that works to deep clean the finish, enliven and protect the briar. I worked it into the briar with my finger tips to make sure that it covered every square inch of the pipe. I set it aside for 10 minutes to let it do its work. I buffed it with a cotton cloth. The briar really began to have a deep shine. The photos I took of the bowl at this point mark the progress in the restoration.
 I turned my attention to the other end of the pipe. I sanded out the oxidation and scratches in the surface with 320-3500 sanding pads. I wiped the stem down after each sanding pad with an Obsidian Oil saturated cloth. Once finished it revealed deep marks and gouges in the surface.
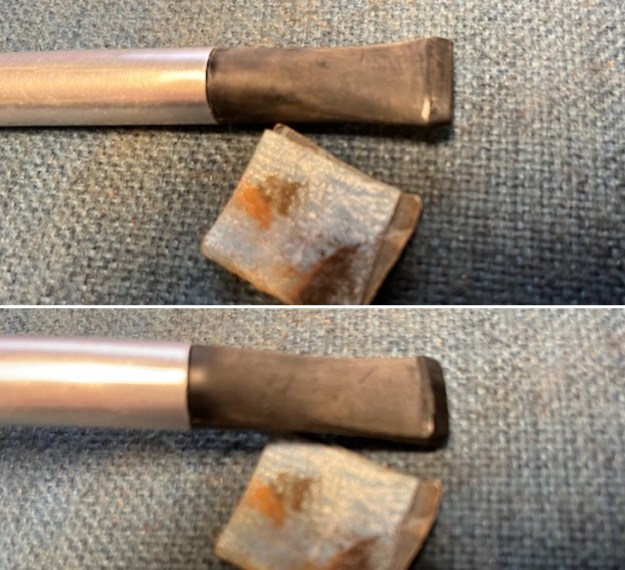
 I filled in the marks and nicks on the surface of the stem with black, rubberized CA glue. I pressed it into the marks on the surface with a tooth pick. Once the repairs cured I sanded them smooth with a folded piece of 220 grit sandpaper.
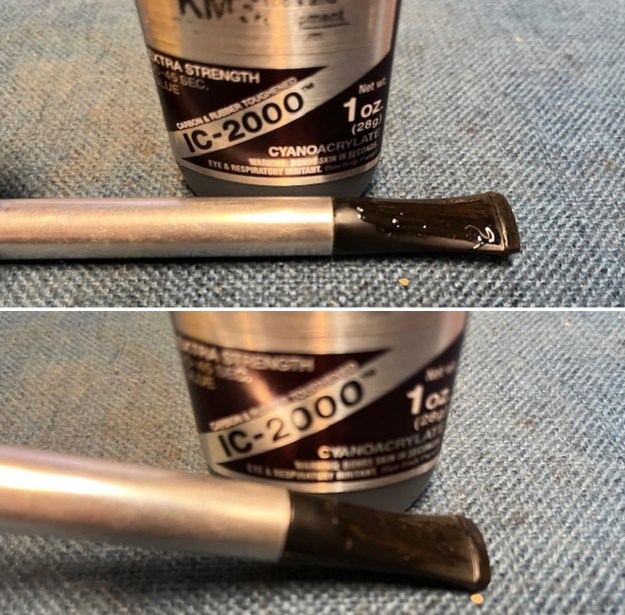
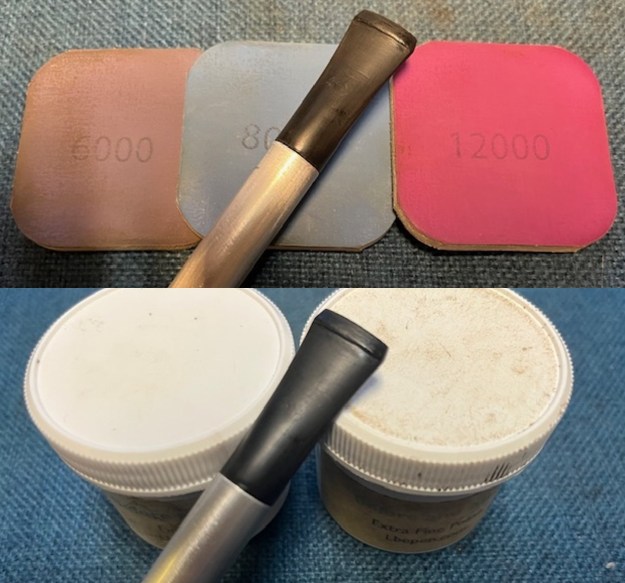
 I polished the stem with micromesh sanding pads – dry sanding with 1500-12000 grit pads. I wiped it down with some Obsidian Oil after each sanding pad. I polished it further with Before & After Stem polish – both Fine and Extra Fine and then wiped it down another time with the oil.
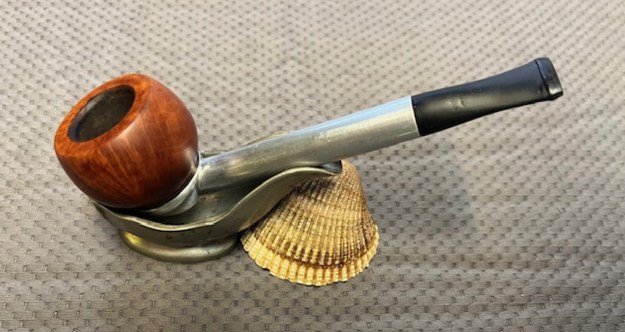
 The frustratingly frozen pipe looked better. Even though I could not break down the internals I worked over the internals with alcohol and pipe cleaners. I put the Quiet Comrade Metal Pipe and stem back together. I polished the bowl and stem with Blue Diamond to polish the briar and the vulcanite. I gave the bowl and the stem multiple coats of carnauba wax. I buffed the pipe with a clean buffing pad to raise the shine. I hand buffed it with a microfiber cloth to deepen the shine. The pipe polished up pretty nicely. The original brown stains gave depth to the beautiful grain around the bowl and worked amazingly well with the polished vulcanite saddle stem. The grain around the bowl and shank and looks quite remarkable. There are still some nicks for the pipe’s journey that I left as it is part of the story of the pipe. This is truly a beautiful Quiet Comrade Apple on a metal base. The finished pipe is shown in the photos below. The dimensions of the pipe are Length: 5 ½ inches, Height: 1 ¾ inches, Outside diameter of the bowl: 1 3/8 inches, Chamber diameter: ¾ of an inch. The weight of the pipe is 1.45 ounces/41 grams. This pipe will be put in the box while I work on Rob’s remaining pipes in the 12 pipe lot. Once I finish them I will be mailing the lot back to him. Thanks for walking through the restoration with me. Cheers.
As always, I encourage your questions and comments as you read the blog. Thanks to each of you who are reading this blog. Remember we are not pipe owners; we are pipe men and women who hold our pipes in trust until they pass on into the trust of those who follow us.