Blog by Paresh Deshpande
I had two meerschaum pipes in my grandfather’s collection that I have inherited. One, an antique Kalmasch meerschaum pipe, was restored by my Guru, Mr. Steve. For those interested in the read, here is the link to that write up; https://rebornpipes.com/2018/04/17/pareshs-grandfathers-pipe-4-an-antique-kalmasch-meerschaum-pipe/
The second is a block meerschaum Kaywoodie in classic Dublin shape with a four holed aluminum stinger, which I want to restore. I had never restored a meer before and as such had no desire to ruin this inheritance piece. Thus began my earnest search for a cheap meer, with an equally lesser costs of shipping (which at times is more than the cost of the item itself!! LOL!). I came across this “Meerschaum Sitter” pipe on auction block on eBay. The cost of shipping was the lowest that I have ever come across on the site. The condition of the pipe in the pictures, advertised as a “No Name Meerschaum Sitter”, uploaded by the seller was convincing enough for me to be the only bidder and I won this pipe for a single digit!! A prolonged wait followed and the pipe arrived after two months.
As advertised, there were no marks of identification on the pipe and it was in a demoralizing condition (Abha, my wife, absolutely detested the shape and appearance of this pipe!!). But there was something about this pipe that stopped me from completely discarding it. Mr. Dal Stanton, a gentleman and a fellow pipe restore who also guides me, has a page “For Pipe Dreamers only” on his site https://thepipesteward.com/. I have commissioned pipes from this page and they received a 360 degree makeover at the expert hands of Mr. Dal and have turned out to be beautiful masterpieces. He did encourage me to look beyond the present condition and dream about its future potential!! And this no name meerschaum sitter pipe did have loads of potential. What remains to be seen is whether I could do justice to it while gaining hands on experience in restoring a meerschaum pipe.
INITIAL VISUAL INSPECTION
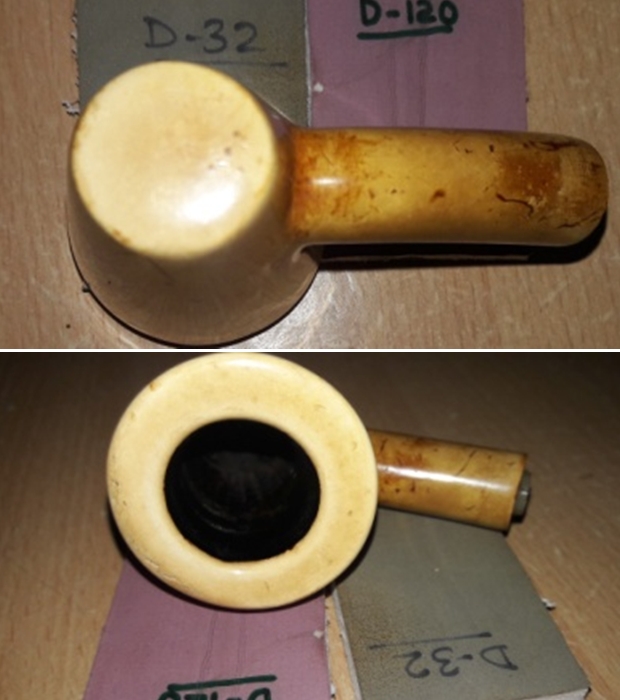
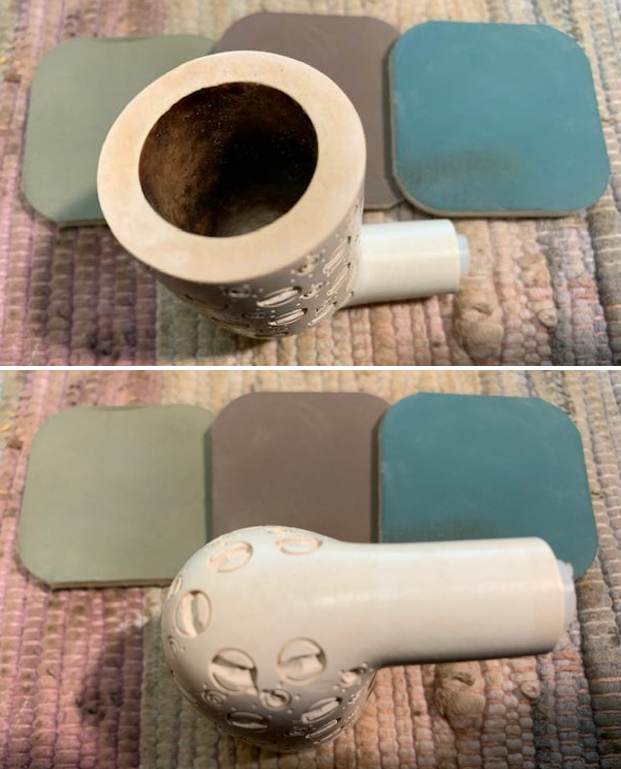
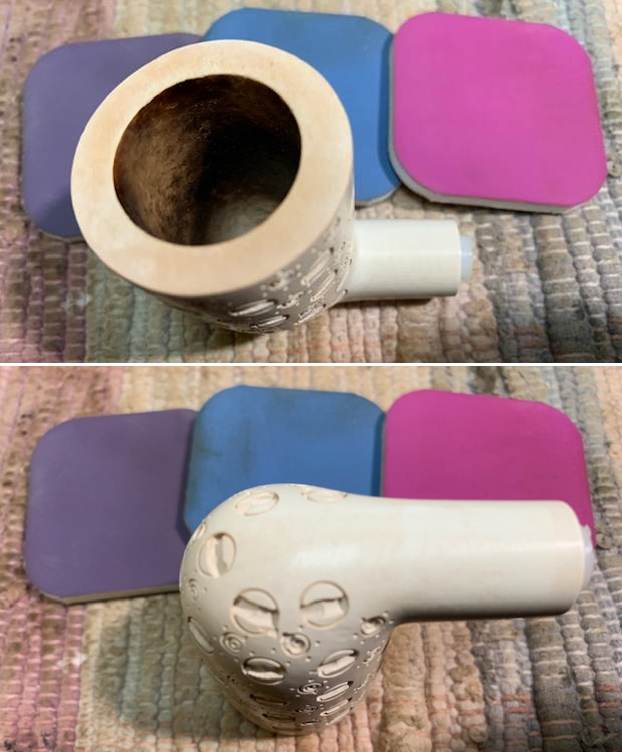
The following pictures show the condition of the pipe when it arrived at my door step. The surface of the meer stummel is covered in dirt and grime. There is overflow of lava which is seen as blackened portions of the stummel. There is not a single patch on the stummel which is not scarred with scratches, gouges, dents and dings. The grime has accumulated on these gouges and resembles the battle wounds which have healed over the years. The stummel has developed a beautiful coloration on the bottom of the bowl half way up to the rim and the shank.

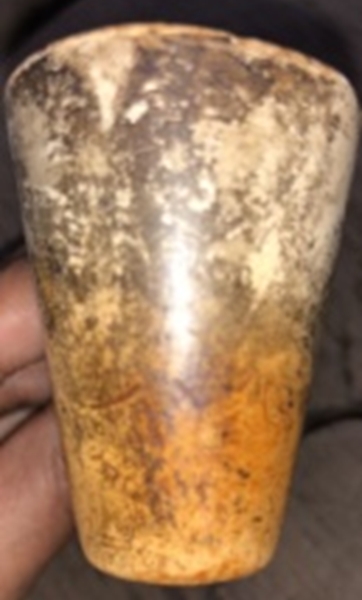 There is heavy buildup of cake in the chamber with a thicker layer seen at the bottom half of the chamber. The cake has dried and is crumbly due to prolonged storage. The condition of the inner walls of the chamber can be ascertained only after the cake has been removed completely. No apparent cracks or damage to the stummel surface is seen from the outside. The rim top has darkened due to thick overflow of lava. There are a large number of dings and chips to the rim top which are visible through the lava overflow. This will be a challenge to address. The entire left side of the outer edge of the rim is severely damaged, the result of striking the edge against a hard surface to remove dottle, presenting lop sided appearance to the rim on to the left. The inner edge of the rim is dented in a number of places and combined with the damaged left outer edge gives the appearance of out of round chamber. This issue can be ascertained only after the chamber has been reamed and the rim top is cleaned.
 The shank end has a Delrin tube insert which seats the push-pull Delrin tenon on the stem. The mortise does show signs of accumulated dried oils, tars and remnants of ash, greatly restricting the air flow. This should be easy to address.
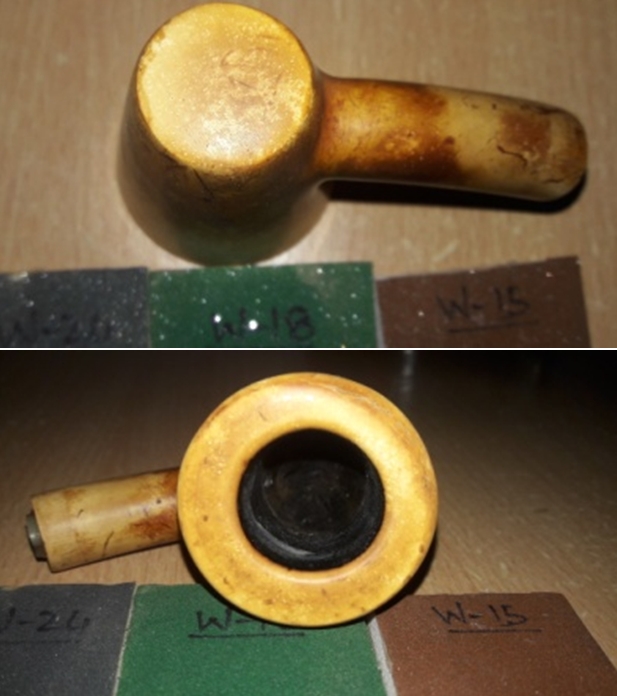
 The brown translucent acrylic stem has beautiful swirls that can be seen on either side of the airway. The airway itself is a very dark brown/ black color. Is it due to accumulation of oils and tars needs to be ascertained? However, I was unable to blow through the stem. Both the upper and lower surfaces of the stem show deep tooth indentations and minor tooth chatter. The buttons on both surfaces has been chewed and with deep bite marks. The entire stem is covered in dirt and grime over which dust and dirt has accumulated and hardened. The fit of the stem in to the mortise is snug; however, the Delrin tenon has tooth marks, which was surprising. Why anyone would bite on the tenon, is a very perplexing question that comes to my mind? These issues will need to be addressed.
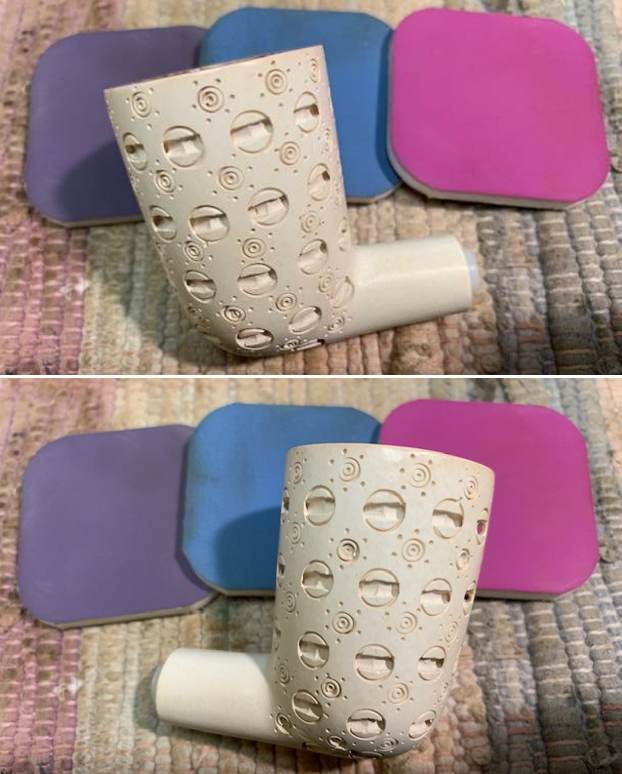
 Though the seller had advertised this pipe as a sitter but being top heavy with a narrow circular base, it is anything but a sitter. Looking at the condition of the rim top, rim edges, proliferation of the scratches, lacerations, dents and dings over the stummel and shank, blocked airways, and stem condition, to me, it appears as if the pipe has been through a war zone with its previous owner and then discarded as it had become unsmokable. Once cleaned up and restored, I am confident that it will turn out to be beautiful and functional pipe.
THE PROCESS
I started this project by reaming the chamber with size 1 followed by size 2 head of PipNet reamer. With my smaller fabricated knife, I scraped out all the carbon from difficult to reach areas. I used a 220 grit sand paper, pinched between my thumb and forefinger, to sand the inner walls of the chamber of the pipe. Once I had reached the bare walls, I wiped the chamber with a cotton pad dipped in isopropyl alcohol. This removed all the residual carbon dust and also rid the chamber of all ghost smells. The walls of the chamber are nice and solid with no signs of cracks. Using a sharp knife, I gently scraped out the overflow of lava from the rim top. The dents and chips on the rim surface are now clearly visible and so is the extent of damage to the outer edge of the rim. The inner rim edge too shows a few chipped spots along the edge.
 I followed up the reaming by cleaning the stummel surface. I sand the stummel with a folded piece of 220 grit sandpaper followed by 600 and 800 grit papers. This was done with utmost care and diligence as I did not want to sand away a lot of meerschaum material from the surface and also wanted to preserve the nice golden hued color taken on by the meer from being smoked. A few deeper lacerations and gouges were left unaddressed as it would have led to loss of lot of bowl material. Also these dents and dings appear like a soldier’s battle scars to be worn with pride!! Similarly, I worked the rim top and addressed the dents and scratches from the surface to an extent that was possible. I attempted to address the chipped inner and severely damaged outer edge was leveled by creating a bevel on either edge with 220 grit sandpaper. I realized that if attempted to top the rim to match the surface, there would be a significant loss of meerschaum material, greatly altering the stummel profile and size. I decide to let it be. This old warrior will limp, but walk he will and that is all that matters to me.
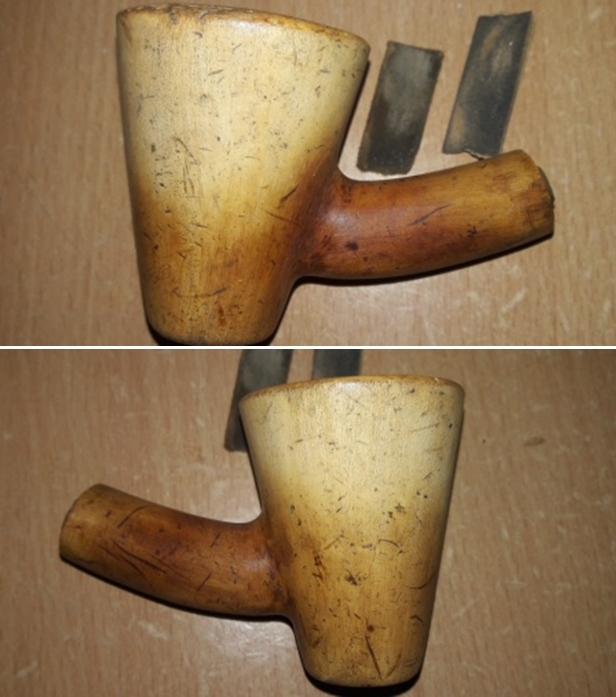

 I followed up the sanding of the external stummel surface by cleaning the mortise and air way of the pipe using hard bristled and regular pipe cleaners, q-tips dipped in alcohol. The mortise and the draught hole were given a final clean with shank brushes dipped in alcohol. I dried the mortise with a rolled paper napkin. The shank internals and the draught hole are now nice and clean with an open and full draw. This was easier said than done. The pipe cleaners would not pass through the draught hole for the love of money!! A great deal of poking and prodding with a straightened paper clip and drill bit got me there.
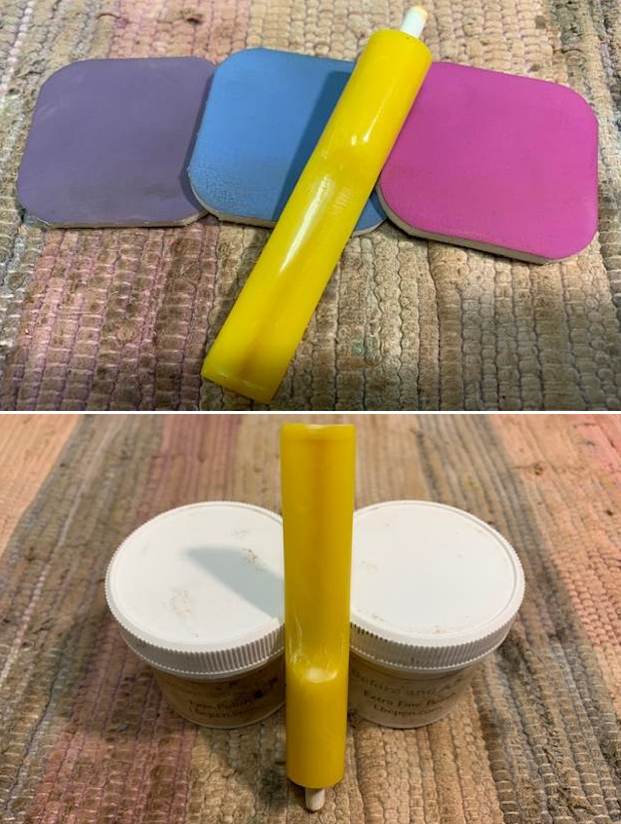
 I polished the top of the bowl and rim edges with micromesh sanding pads to remove all of the tar and lava that was on the surface. I wet sanded it with 1500-2400 grit pads and dry sanded with 3200-12000 grit pads. I wiped the bowl down with a damp cloth to remove the dust that was left behind by the sanding. While I was working on the bowl top I also worked over the sides and bottom of the bowl to polish them as well. I wanted to minimize the scratching but not necessarily remove them all. These lacerations and dings must have had a history and I wanted to preserve it.

 I set the stummel aside and worked on the stem. The acrylic stem was so chock-a-block with hardened oils and tars that a pipe cleaner would just not pass through. Even a straightened paper clip could not make any head way in to the airway!!!!! I decided to soak the airway in isopropyl alcohol. I inserted a folded pipe cleaner in to airway from lip end, to the extent possible and folded the pipe cleaner upwards. Using a syringe filled with alcohol, I filled the airway from the tenon end and set it aside to soak.
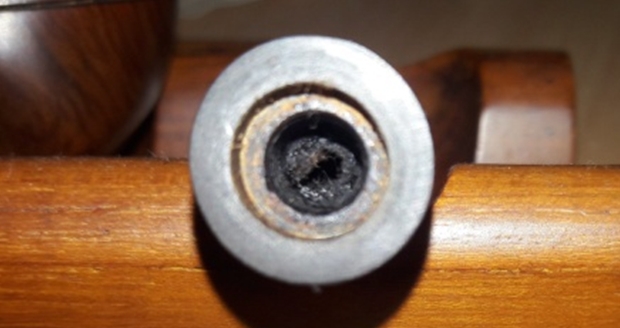
 Couple of hours later, I removed the pipe cleaner and wiped the stem clean. I tried to clean the saddle of the stem when suddenly the Delrin tenon turned in my hands. I carefully turned the tenon further until it came free. It was indeed a threaded Delrin tenon and the previous owner had tried to unscrew it while holding it between his teeth. Hence the bite marks on the tenon!! A mystery solved…. A closer inspection of the saddle churned my stomach; it was completely filled with hardened tars and gunk. Even the threads on the tenon were smeared in the now jelly like gunk due to soaking. Here is what I saw.
 What followed next were the most excruciating 6-8 hours of backbreaking and laborious time spent on cleaning the internals of this stem. It was a battle of will between the stem and self. A couple of more soaks and later, use of all the cleaning weaponry in my arsenal, I emerged victorious. I was able to pass a hard bristled pipe cleaner dipped in alcohol from one end through the other. I further cleaned out the internals of the stem using hard bristled and regular pipe cleaners dipped in alcohol. However, the dark coloration of the airway persisted. I consulted with my mentor, Mr. Steve and he suggested using a scouring cleanser like Vim paste or Comet cleaner. I tried the Vim powder, but without success. He then suggested using toothpaste applied on a moist pipe cleaner and worked inside the air way till clean. Well, this did not work either and the dark coloration remained. This one is a true warrior and a fighter to the core; bugger would just never give up without a fight!!!! I thought I was missing some trick here; ideas, methods and tricks suggested by Mr. Steve never fail, and yet in this case, nothing seemed to work. I closely observed the entire stem under my table lamp and then it suddenly dawned on me. It was like Eureka moment for me!!!! It appeared that the Delrin screw-in tenon is seated in to the stem in a dark brown tube extending to the stem end slat and is covered in lighter shade of brown acrylic casing. What a relief. I can finally progress ahead and address the deep tooth marks.
 From my experience, I have learnt that getting rid of the oxidation from and around the surface to be filled helps in subsequent better blending of the fill with the stem surface. With a folded piece of used 150 grit sand paper, I sand the area that is required to be filled. I cleaned the sanded portion of the stem with cotton pad dipped in alcohol and spot filled the damaged area with clear superglue. I set the stem aside for the fill to cure.
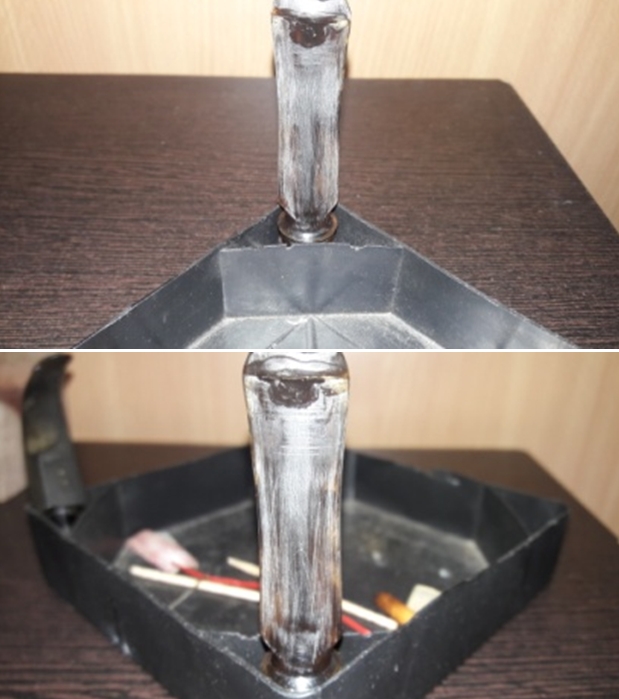 Once the fill had cured, I sand the fills to match the surrounding stem surface with a flat head needle file. I sharpened the lip edges using a needle file and sand the entire stem with 220 followed by 400, 800 and 1000 grit sand paper to achieve an exact match. This also helps to reduce the sanding marks left behind by the more abrasive 220 grit paper as well as eliminated the oxidation seen on the stem. I was so engrossed and preoccupied with the task at hand that I missed out on taking pictures of this process. To bring a deep shine to the stem, I went through the complete set of micromesh pads, wet sanding with 1500 to 2400 grit pads and dry sanding with 3200 to 12000 grit pads. I wiped the stem with alcohol after each pad and rubbed it down with Extra Virgin Olive oil.
 To finish, I re-attach the stem with the stummel. I mount a cotton cloth buffing wheel on to my local machine which is similar to a Dremel. I set the speed at about half of the full power and applied White Diamond compound to each of the three pipes. I wiped/ buffed the pipe with a soft cotton cloth to clear it of any leftover compound dust. I then mounted another cotton cloth wheel on to the polishing machine and applied several coats of carnauba wax over the stummel and the stem. I finished the restoration by giving the pipe a rigorous hand buffing using a microfiber cloth to raise the shine further. The completed pipe, with the shining white and golden hued meerschaum stummel, contrasting with the shiny brown acrylic stem with swirls inside, looks lovely, fresh and vibrant; the photographs speak for themselves. Admiring the pipe, it made me wonder, did he really have a spirit which kept him ticking after having suffered the kind of abuse which was evident from all the lacerations, dents and dings and chips. But he has survived his past nonetheless and will continue on his warpath with me………..Cheers!!


 Jeff removed it from the case and took photos of the pipe. It is a really nicely made pipe.
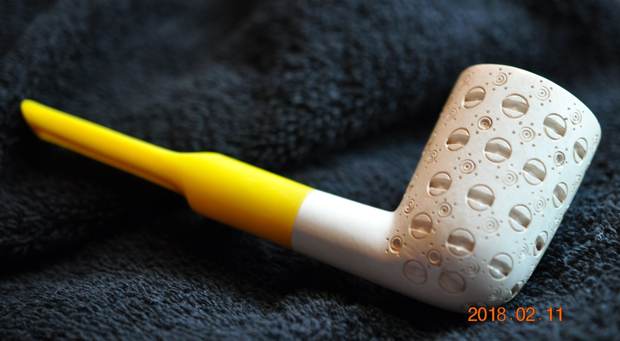
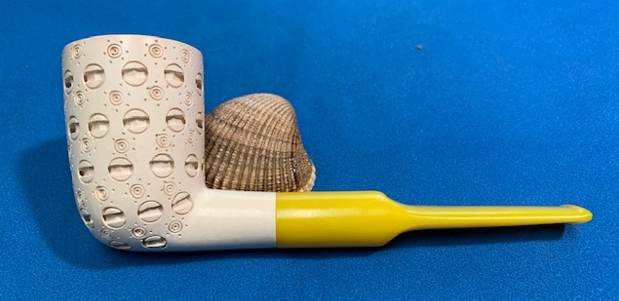
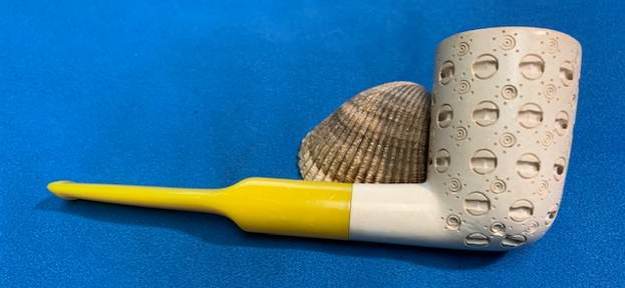
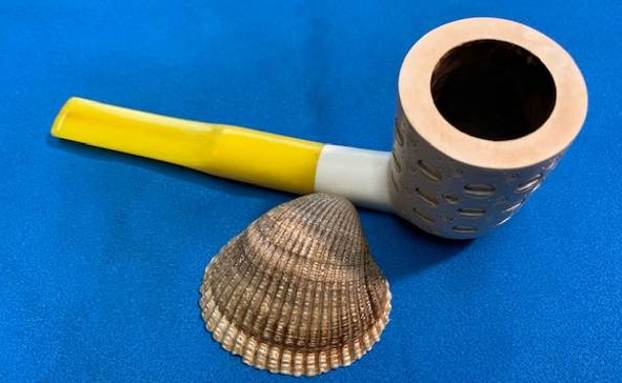
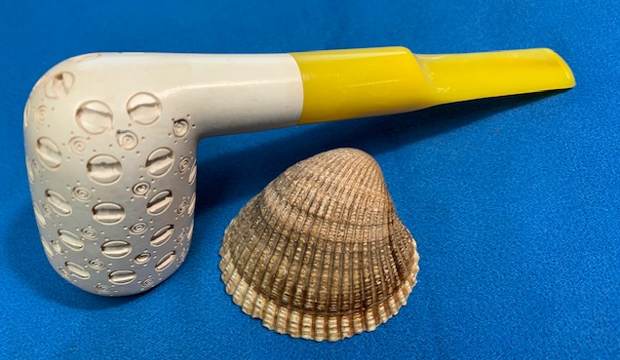
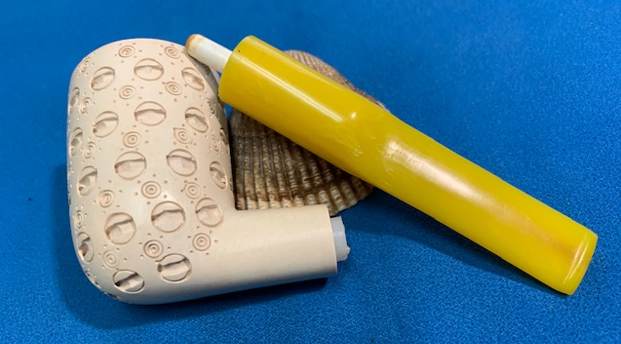
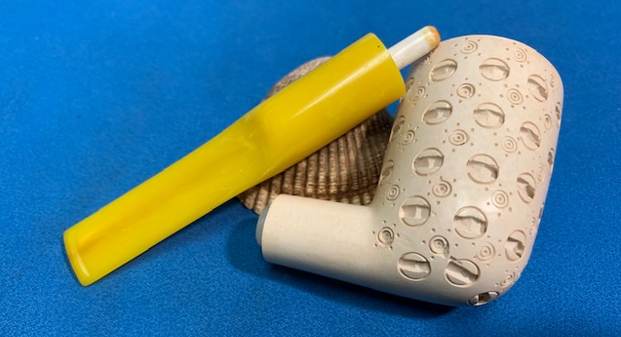
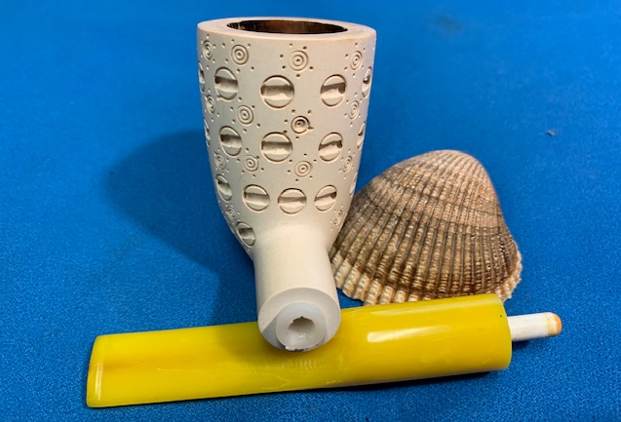
 He took a close up photo of the bowl to show the marks and the lava on the rim top. There was some darkening on the front and back of the top side. The stem photos show the tooth chatter and marks on the top and underside near the button.
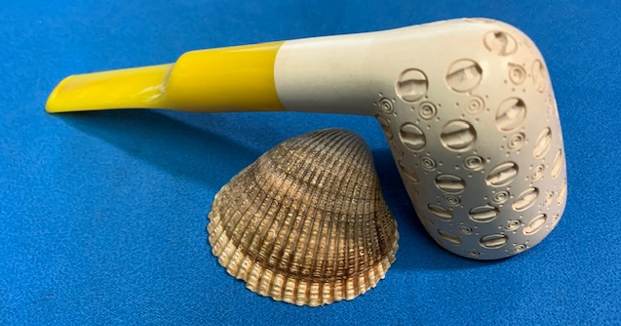
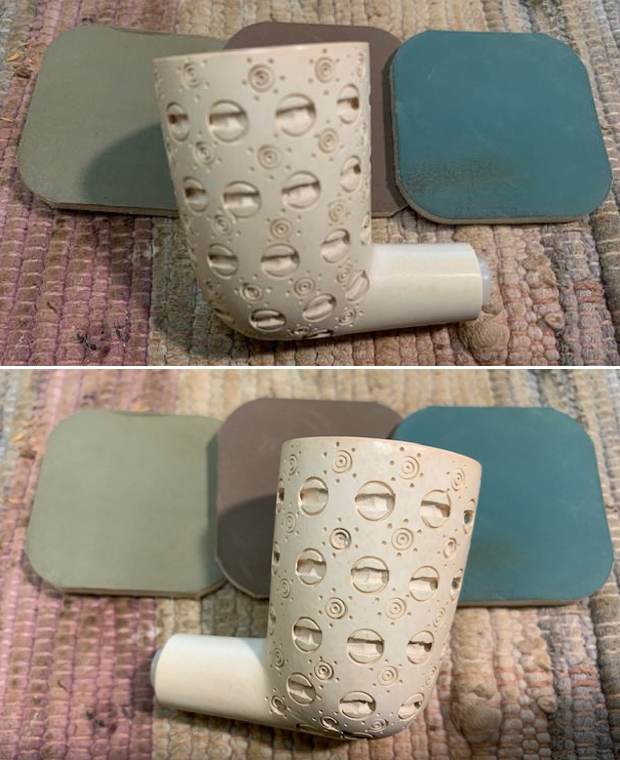
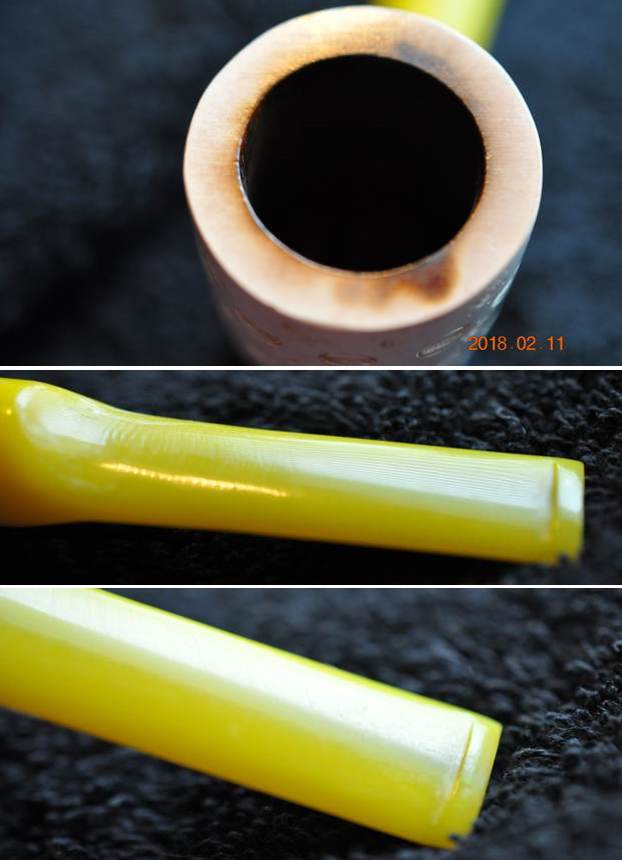 Jeff took some photos of the sides and heel of the bowl to show the pattern that had been carved around the bowl and shank.
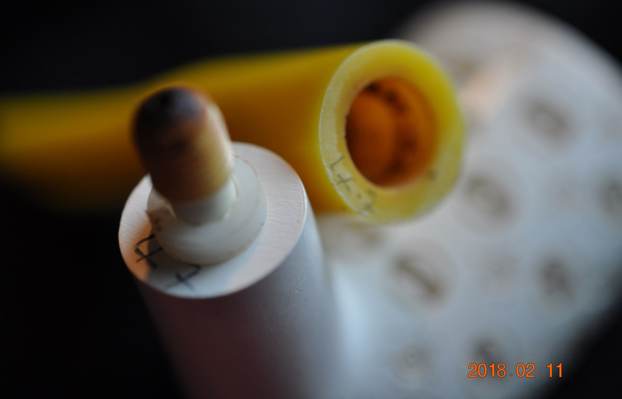
 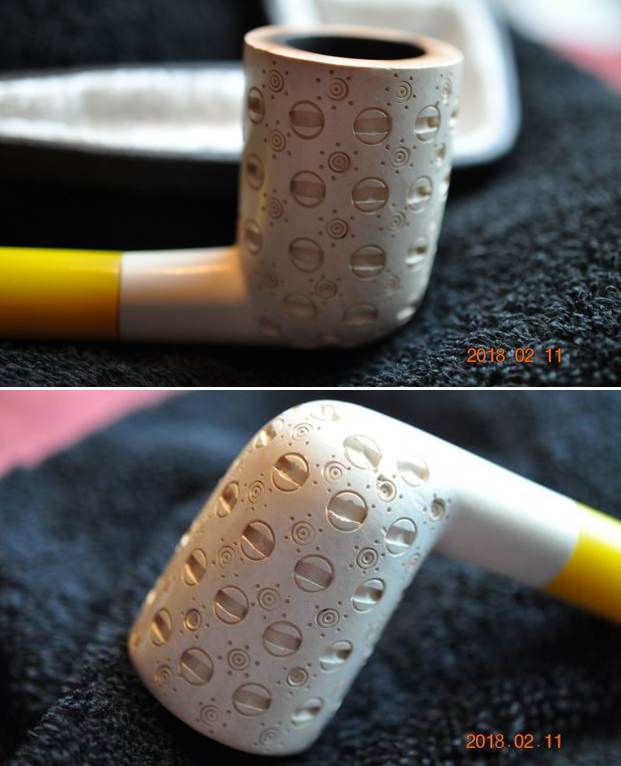 Jeff also took photos of the push style tenon. It came out of the stem when turned but remained in the shank. You can also see what appear two numbers 77 on the end of the shank and the stem. My assumption is that the numbers match the parts when the pipe was made.
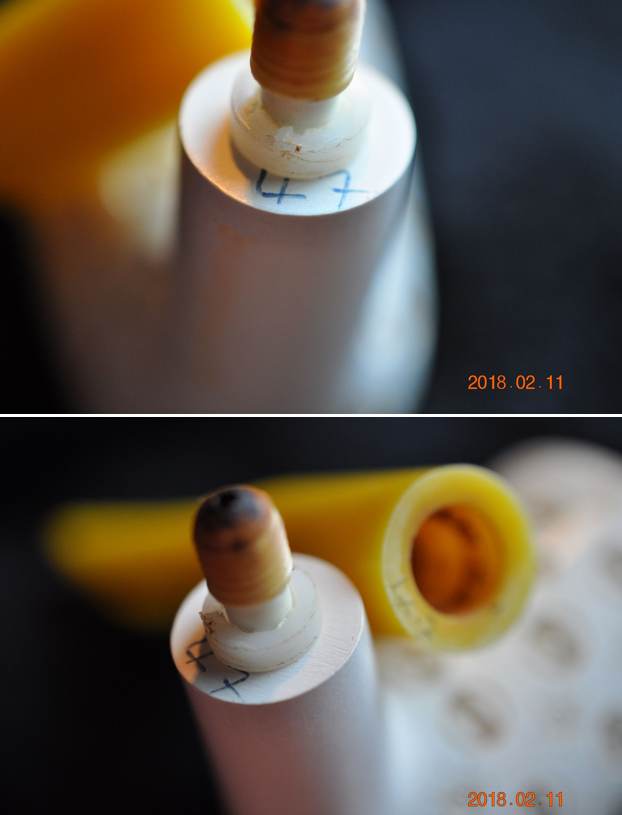
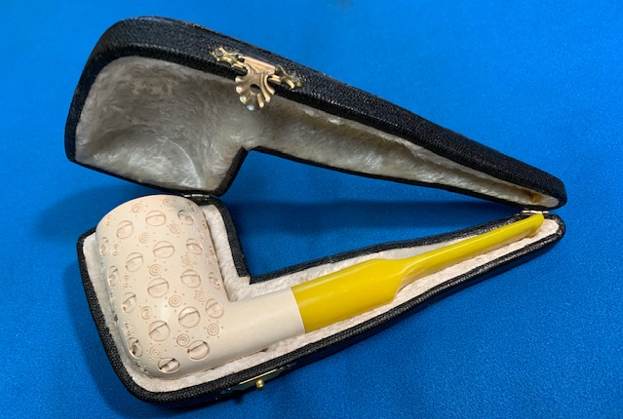
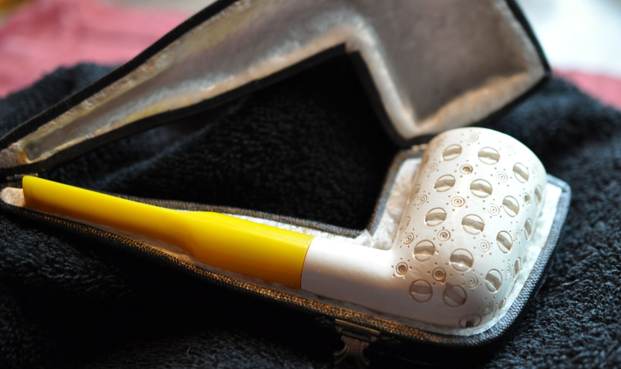
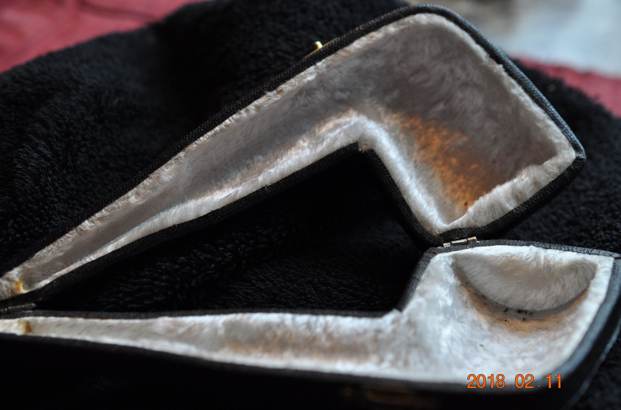
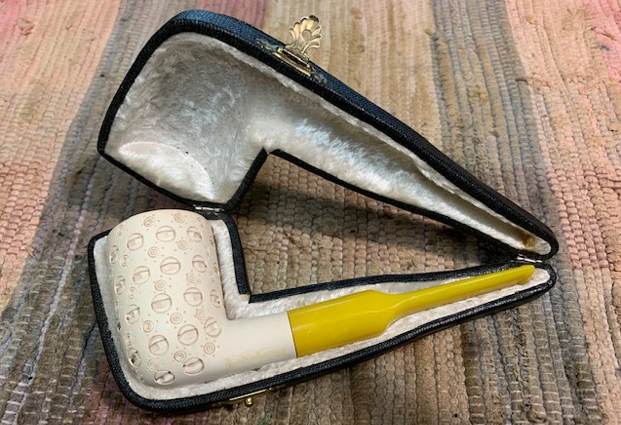
 Jeff had cleaned the pipe thoroughly. He had reamed it carefully with a PipNet reamer and cleaned that up with a Savinelli Fitsall Pipe Knife. He worked slowly so as not to damage the inner edge of the bowl. He had scrubbed the exterior of the meerschaum with undiluted Murphy’s Oil Soap and a soft tooth brush. He cleaned out the interior of the shank and airway with alcohol, pipe cleaners and cotton swabs. He cleaned out the acrylic stem with alcohol, cotton swabs and pipe cleaners to remove the debris and oils in the airway and the threads of the push tenon. Once it was clean he turned the tenon into the stem. I took photos of the pipe when it arrived here. The first two photos show the condition of the black case. It was in excellent condition. The third photo shows the pipe in the opened case. It was a great looking pipe.
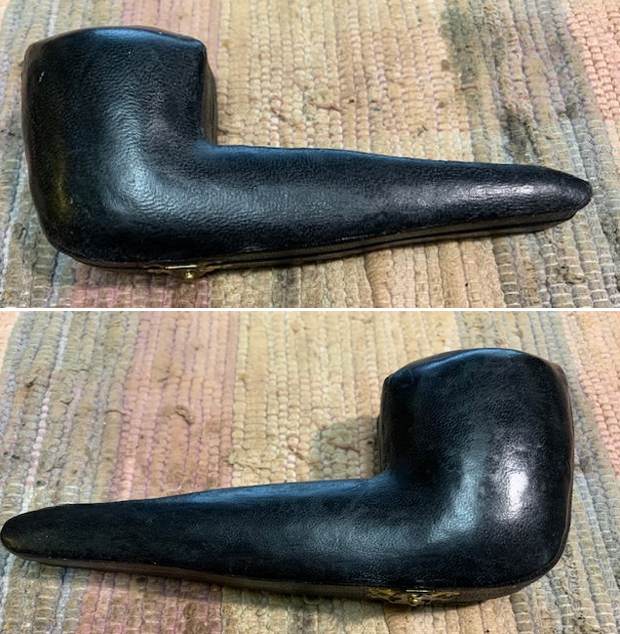
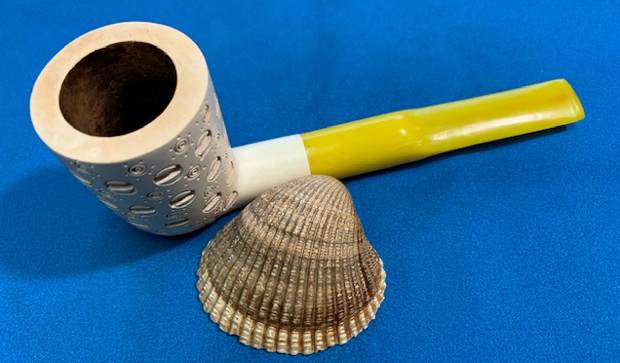
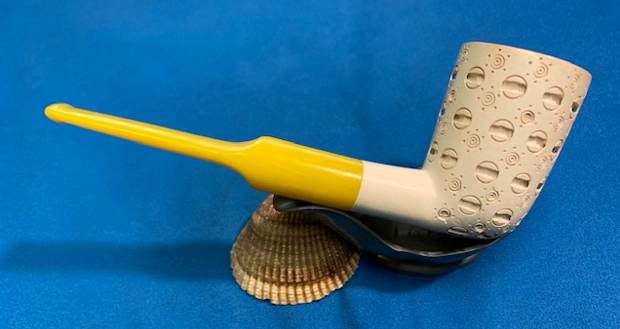
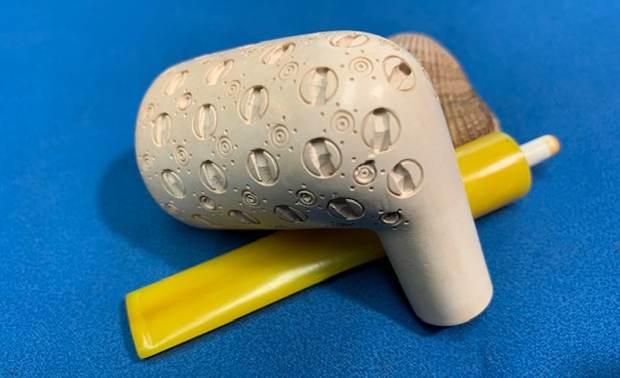
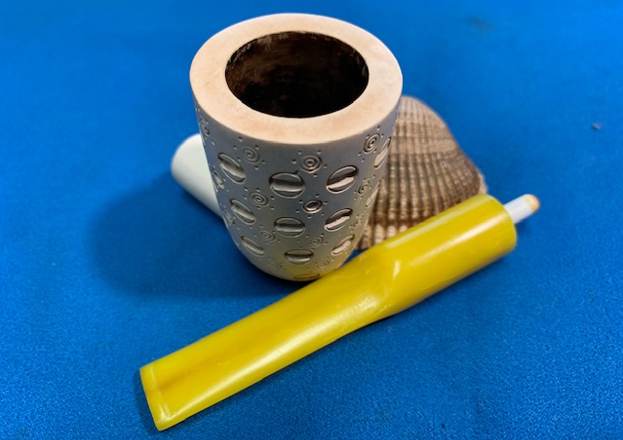
 I took the pipe out of the case and took photos of the cleaned pipe. The bowl has the look of a tall Dublin. The exterior of the bowl looked very good as did the stem. There was still some dark spots on the rim top on the front left side.
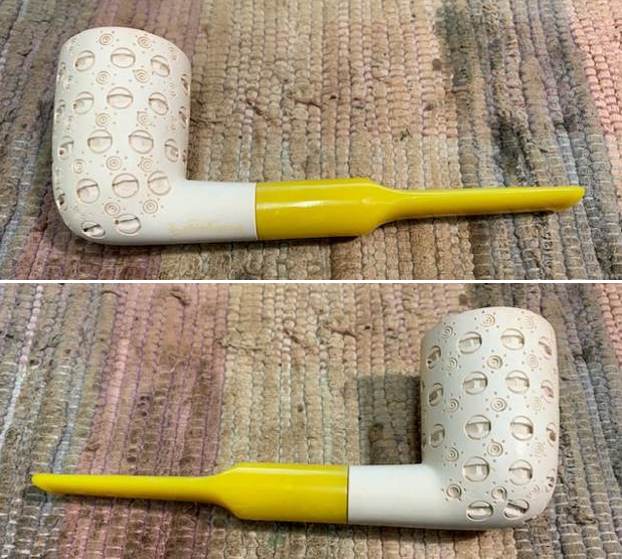
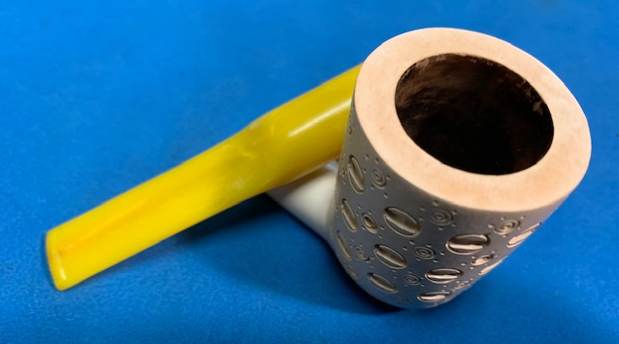
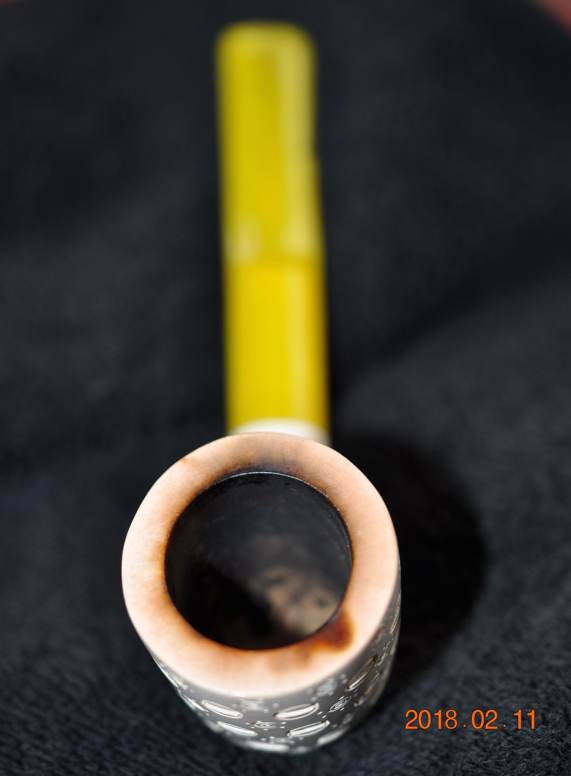
 I took some close up photos of the rim top and stem. You can see the marks on the rim top that I noted above. The tooth chatter on both sides of the stem were quite light.
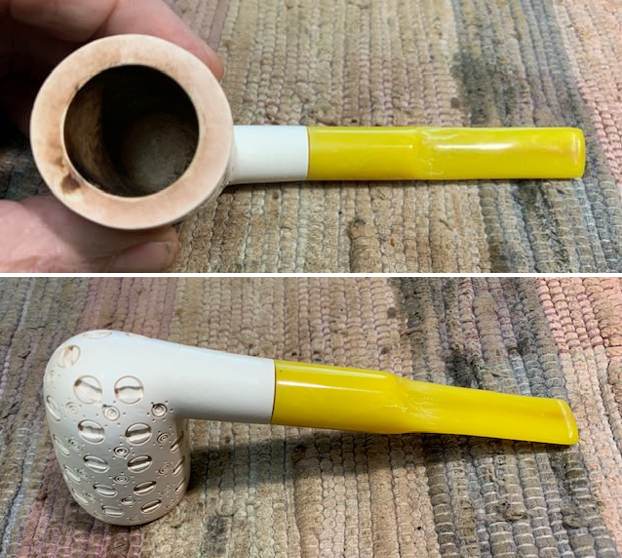
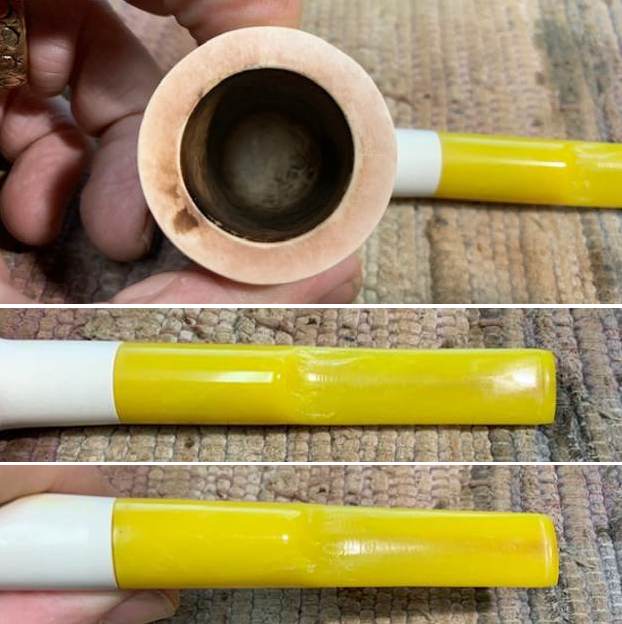 I removed the stem from the shank and took a photo of the parts of the pipe. It is well proportioned and looked really good.
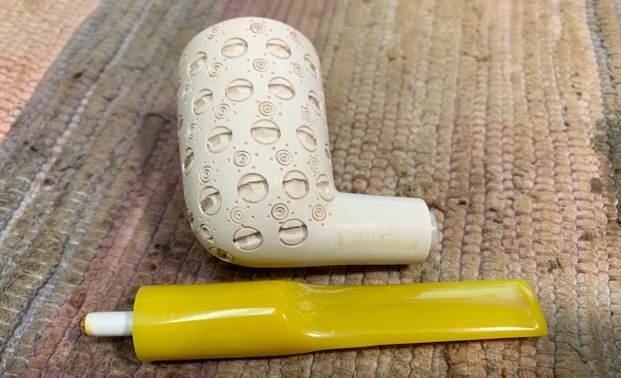 I decided to start my work on the pipe by polishing the bowl with micromesh sanding pads. I worked over the rim top with the pads at the same time. I used micromesh pads – dry sanding with 1500-12000 grit pads and wiped the bowl down with a damp cloth after each pad. I was able to remove the dark spots and give the bowl a shine.
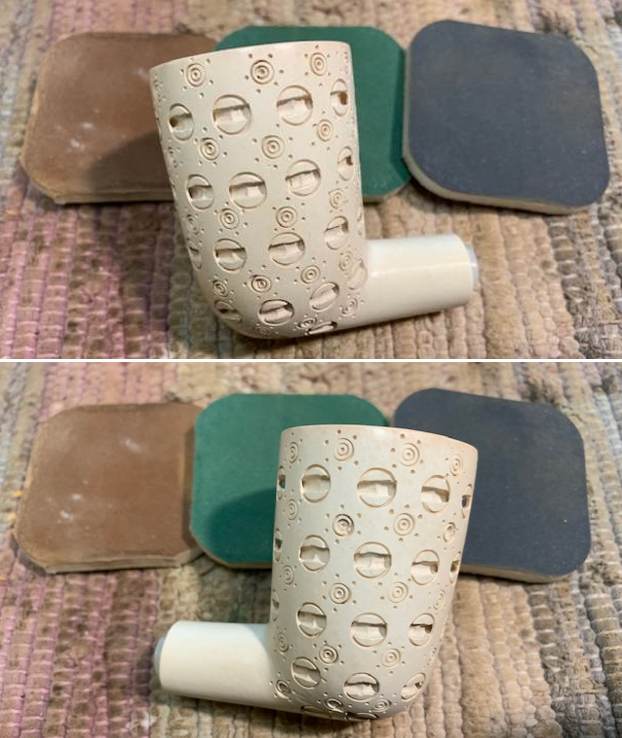

 I set the bowl aside and turned my attention to the stem. Since the tooth chatter was quite shallow I polished the newly shaped acrylic stem with micromesh sanding pads – dry sanding with 1500-12000 grit sanding pads. I wiped it down after each sanding pad with a cloth containing some Obsidian Oil. I know Obsidian Oil does nothing for acrylic but I have found that it removes the small particles left behind by the polishing. I finished polishing the surface with Before & After Pipe Stem Polish – both Fine and Extra Fine and buffed it off with a cotton cloth. I gave it a final coat of obsidian Oil and set it aside to dry. It is a beautiful looking golden, yellow acrylic stem.
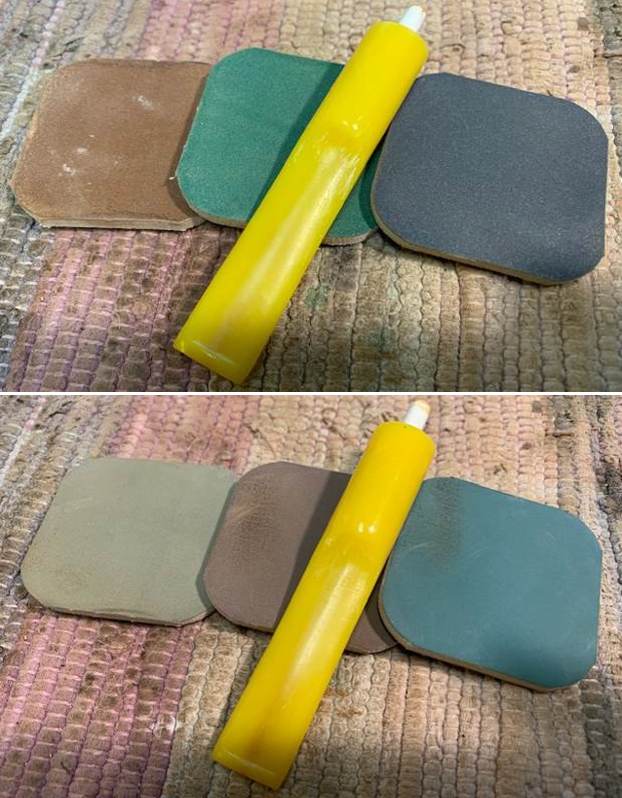
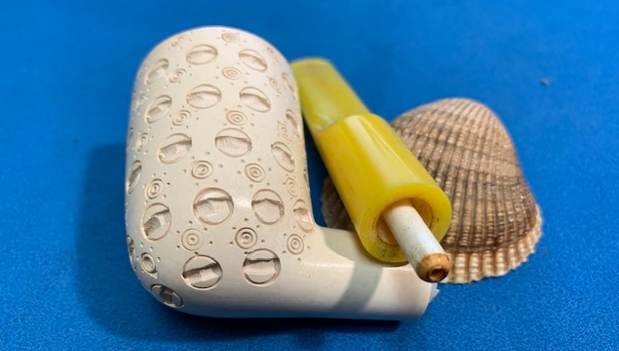
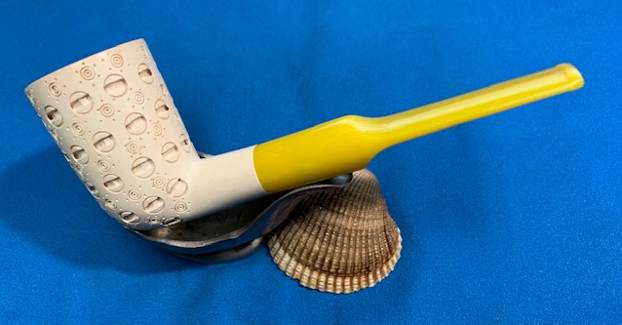
 This Carved Meerschaum Dublin with Geometric Patterns turned out to be another fun pipe to work on and I was excited to see it come back together. It was a clean pipe that did not take Jeff too much work to ream and clean. My work was also simpler than expected. I chose not to rewax it because of the shine that still showed on the bowl. I put the stem back on the bowl and lightly buffed the pipe with a clean buffing pad to raise the shine. I hand buffed the pipe with a microfiber cloth to deepen the shine. The rich polished meerschaum on the bowl looks really good with the polished yellow/golden acrylic stem. The bowl and stem came together looking quite spectacular. Give the finished pipe a look in the photos below. I can only tell you that it is much prettier in person than the photos capture. The dimensions of the pipe are Length: 5 ¾ inches, Height: 2 ¼ inches, Outside diameter of the bowl: 1 ½ inches, Chamber diameter: 1 inch. The weight of the pipe is 36 grams/1.27 ounces. This is truly a great looking Meerschaum. Thanks for walking through the restoration with me as I worked over another beautiful pipe. I will be putting it on the rebornpipes store in the Ceramic and Meerschaum Pipe Section. If you are interested in the pipe send me an email or a message. Thanks for your time.