Blog by Steve Laug
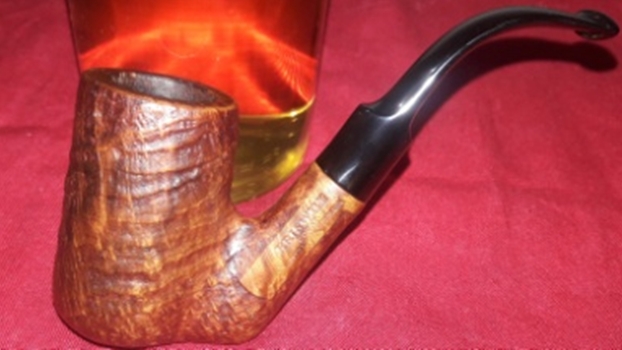
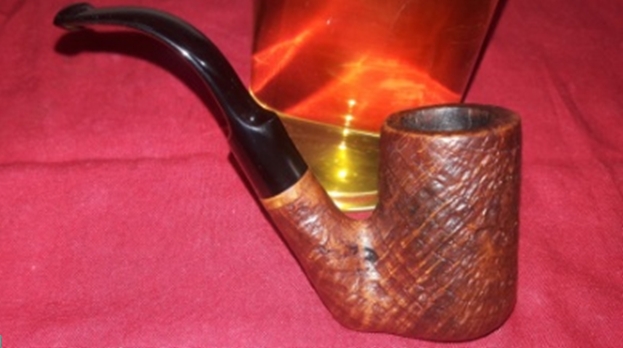
The next pipe on the table is one that has been around here for quite a while and today was its day to be cleaned up. It is a Kriswill Handmade pipe. It is a pretty pipe with a nice looking shape. The condition is a bit rough. The left side of the shank is scratched and there is a significant road rash toward the bottom of the bowl. There was a think cake in the bowl and there was a thick lava overflow on the rim top. The pipe was dirty and grimy feeling. The pipe is stamped on the left and underside of the shank and reads Kriswill Count over Handmade in Denmark on the left side and on the underside it has the shape number 370 at the shank/stem junction. The vulcanite taper stem is not too bad – there is light oxidation and tooth marks and chatter near the button on both sides. It has the Kriswill Snowflake Logo on the left side of the stem. I took photos of the pipe before I started my clean up work.
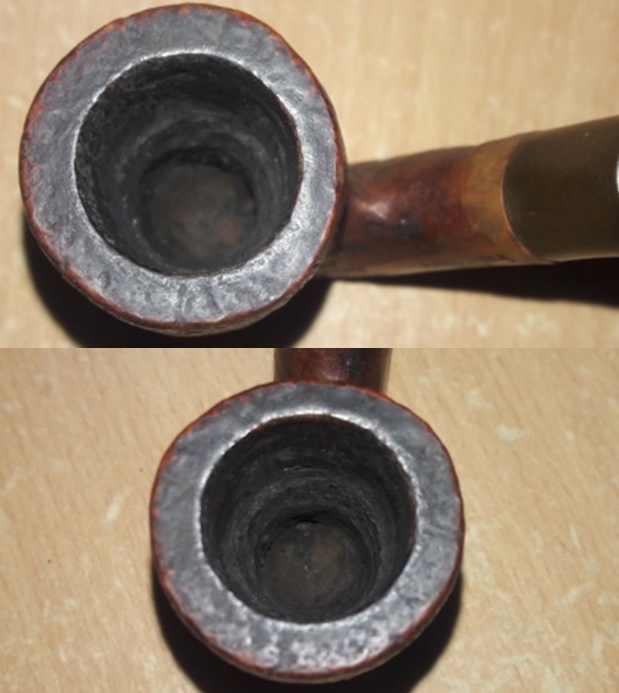
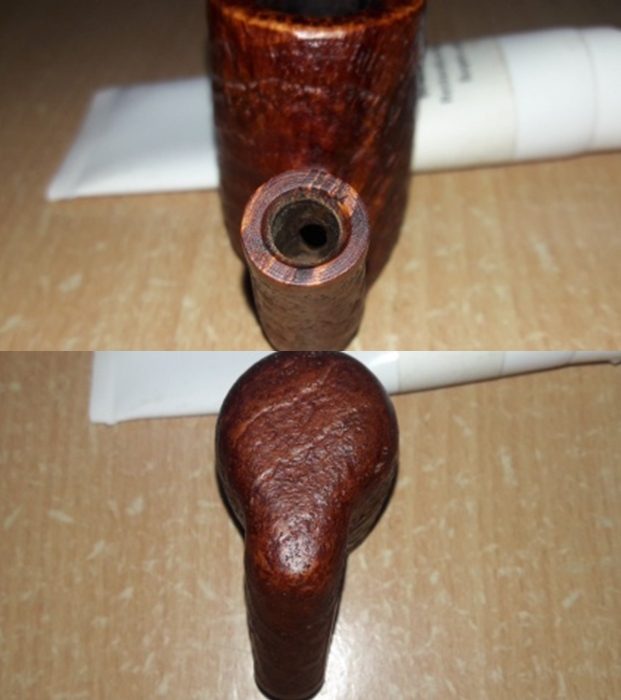
 I took photos of the rim top and stem to show the condition of the bowl, rim top and edges and stem. The bowl has a thin cake and a thick overflow of lava on the rim top. The inner edge is dirty and caked so it is hard to know what the condition was like. I was hopeful that the edges were in good condition! The next photos show the condition of the stem. It is also clean and has light oxidation. There are tooth marks and chatter on both sides near the button.
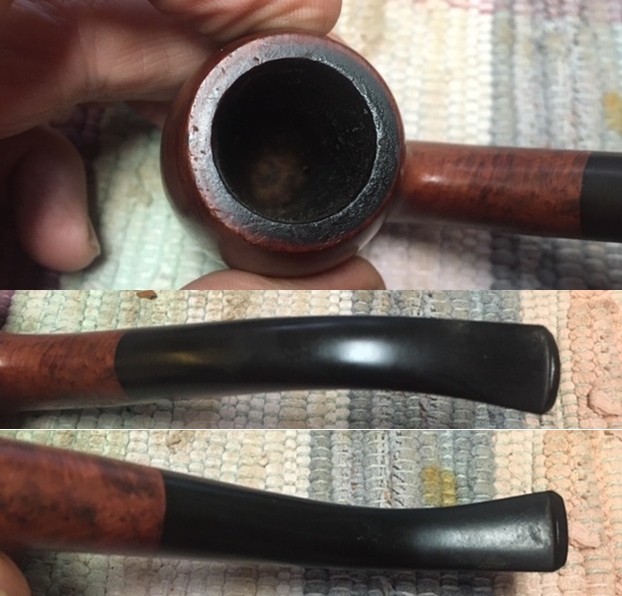 I took a photo of the stamping on the left side of the shank. You can see that it is clear and readable. I forgot to take a photo of the shape number 370 stamp on the underside. There is also the snowflake logo on the left side of the taper stem.
  I took a quick photo of the damaged area on the lower left side of the bowl – the road rash!
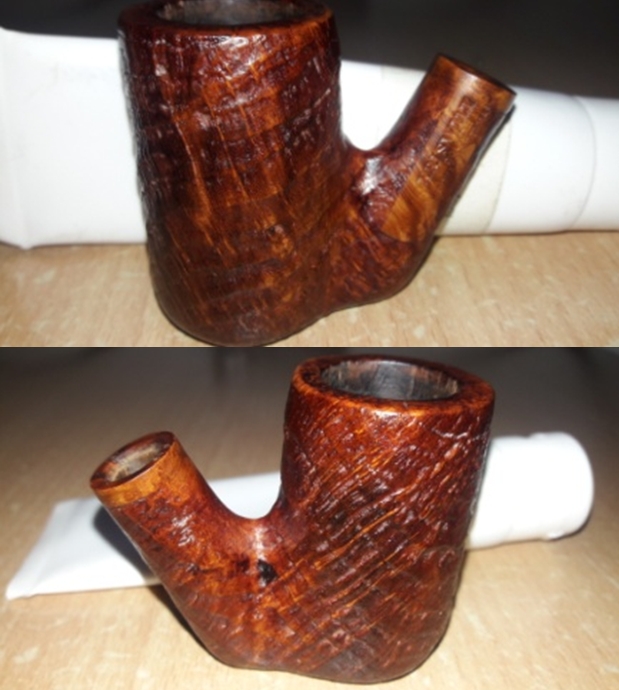
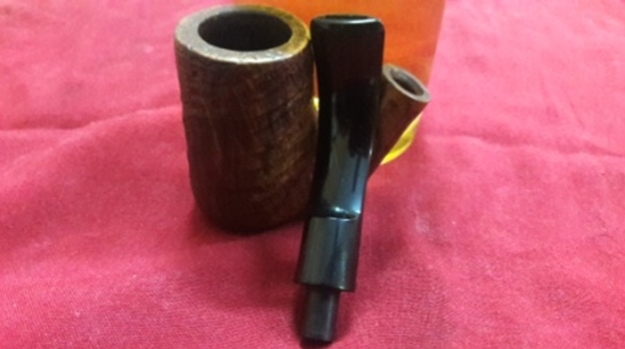
 I took the stem off the shank and took a photo of the pipe.
 I turned to the Pipephil website to do a quick review of the brand and try to see if there was any information on the Count line (http://www.pipephil.eu/logos/en/logo-k3.html). I have included a screen capture of the section on the site:
 I quote from the side bar on the above screen capture:
Kriswill is a brand of Kriswork Briar Trading, in Kolding (Denmark) established about 1955.
Some of Kriswill pipes were designed by Sigvard Bernadotte, Swedish prince and brother to the late Queen Ingrid of Denmark. He collaborated with his Danish partner Acton Bjørn.
When the company went bankrupt in the late 1970s it was on a level with Stanwell. Dan Pipe Cigar & Company (Hafenstrasse 30 D-21481 Lauenburg/Elbe, Ge) bought the rights to use the name and it is Holmer Knudsen and/or Poul Winsløw who make the Kriswill line. Nørding, on its side, bought the plant and introduced a Kriswell line.
I turned to Pipedia (https://pipedia.org/wiki/Kriswill) and sure enough I found catalogue page Circa 1970, courtesy Doug Valitchka. Unfortunately it did not have the 370 shape on the page.
I also have included a large part of the history from the article.
Founded in the late 1950s, Kriswill was one of two large pipe manufacturers in Denmark during the 1960s and 1970s, on par with Stanwell as measured by number of employees, pipes produced, and quality. The Kriswill catalog cover reads “By Appointment to the Royal Danish Court, KRISWILL, Kriswork Briar Trading, Briar Pipes Hand Made in Denmark.”
…Kriswell began immediately after World War II. Karl Robert Kris, an engineer for the shipping company AP Møller at the time, was in port (undoubtedly in the Mediterranean) when he encountered a shipment of briar. The briar blocks awakened his curiosity and he took some home. About this time the the shipping trade become difficult due to the war, causing Kris to consider other business opportunities. In 1947, Kris (then 47 years old) established himself as a pipe maker in his hometown of Kolding.
Kris started his pipe making operation in a house located at Haderslevvej 115 in Kolding, and was soon joined by 3-4 employees. The pipes were sold under the name Rocky and supplied the domestic market. Within 6 months the company had grown, more employees hired, and their sales expanded to markets abroad.
Due to increasing production and marketing, Karl Robert Kris decided in the mid-1950s to expand. An entirely new factory was built at Sdr. Ring road on the outskirts of Kolding. At that time the pipes were branded Kriswell. That name did not last long, however, as Stanwell believed that name was too close to theirs. The compromise was to change the name to Kriswill. Krisill soon grew to become a serious competitor to Stanwell, especially in the export markets. The Kriswill factory logo, stamped on the stem, became the stylized compass rose – as a reference to the manufacturer’s maritime background.
Kriswill pipes excelled in design and craftsmanship. Karl Robert Kris was not afraid of new designs and had a good eye on the US market, where larger and more innovative designs were increasingly popular. Craftsmanship was given top priority throughout Kriswell’s production. A local designer / architect had designed the first models. Later, the famous architects Sigvard Bernadotte (Swedish prince and brother of Queen Ingrid) and Acton Bjørn designed their own series, which were known as Bernadotte designed.
Two other series were the Golden Clipper and the Chief. The Golden Clipper pipes were smaller, lighter, more reserved, and popular in Europe. The Chief series was especially designed for the Americans, who wanted larger pipes. These pipes were light for their size, however, very different from the “Danish Free Style” pipes that other Danish makers were sending to the US market. Kriswill pipes that did not meet the requirements of the main lines were sold as “seconds” under the names Danish Crown and Navigator…
…Karl Robert Kris died in 1966. The factory was well-run, and Kris’s widow wanted the family to continue the business. Karl’s son, Jens was groomed as director and remained with the company until 1975. The 1970s were difficult times for pipe-making in Denmark, as in the rest of the world. In addition to declining demand, they struggled with runaway inflation and annual wage increases of 18-20 percent. It was challenging to maintain the level of craftsmanship without raising prices, yet customers had difficulty accepting large price increases. As a result manufacturing become less profitable. Soon Jens Kris left Kriswell and new management and staff were hired at the factory.
Shortly after Jens departed Kriswill the company failed. The Kriswill name and model series were sold to the Norwegian pipe factory Lillehammer. The machines were acquired by Erik Nørding, and the property was sold.
After a few years Lillehammer also ceased production. Kriswills were made for a while in the 1980s at the Catalan factory, Iberica de Pipas. But these pipes were far from the quality of the originals, and became Kriswills in name only.
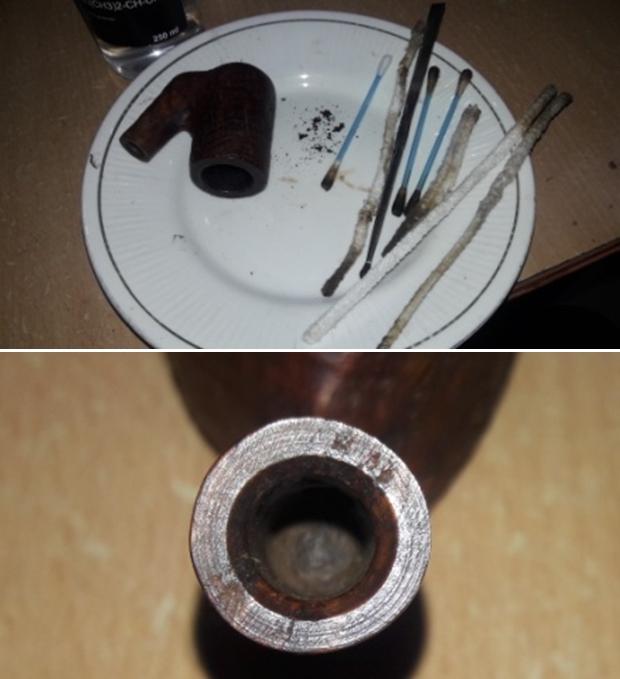
I now knew that the Count I had on the table was made between the start of the company in 1950 and the sale of the company in the late 1970s. Armed with that information I turned to work on the pipe. I started by reaming the cake back to bare briar with a PipNet pipe reamer so I could check out the integrity of the bowl. I cleaned up the remnants of cake with a Savinelli Fitsall Pipe knife. I finished by sanding the walls of the bowl with a piece of 220 grit sandpaper wrapped around a piece of dowel.
 I scrubbed the interior of the bowl and shank with pipe cleaners, cotton swabs and alcohol to remove the tars and oils. I scrubbed the inside of the stem with alcohol and pipe cleaners. The shank was very dirty and appeared to not have been cleaned. The stem was much better.
 I scrubbed the exterior of the bowl and rim top with a tooth brush and undiluted Murphy’s Oil Soap. I rinsed it off under warm running water and dried it off with a soft towel.
 With the bowel cleaned inside and out it was time to address the remaining lava on the rim top. I scraped it off with the edge of the Savinelli Fitsall knife. I sanded off the remaining tars and cleaned up the darkening on the inner edge of the rim with a folded piece of 220 grit sandpaper. I started to polish the rim top and edges with a piece of 400 grit wet dry sandpaper. When I finished the rim top looked far better. I also sanded out the road rash on the lower left side of the bowl with 220 and 400 grit sandpaper. I was able to smooth it out and blend it into the surrounding briar.
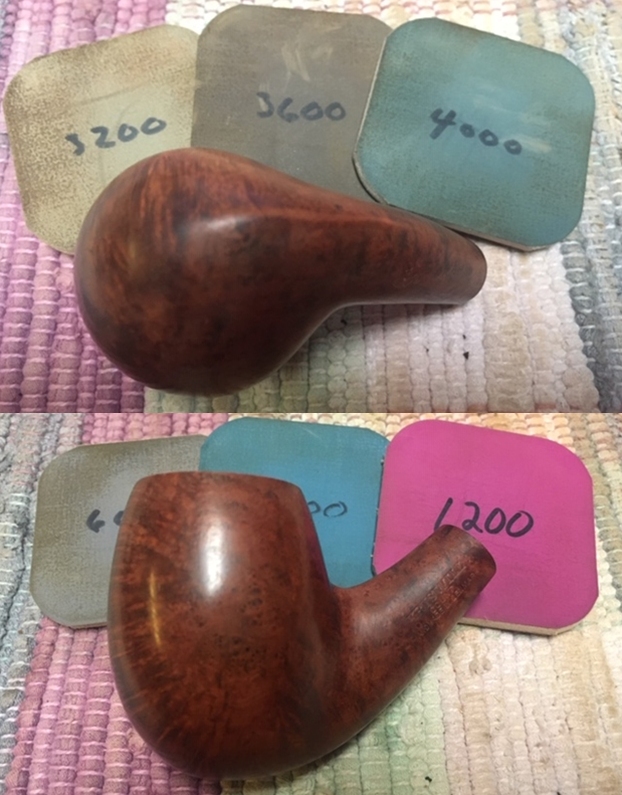
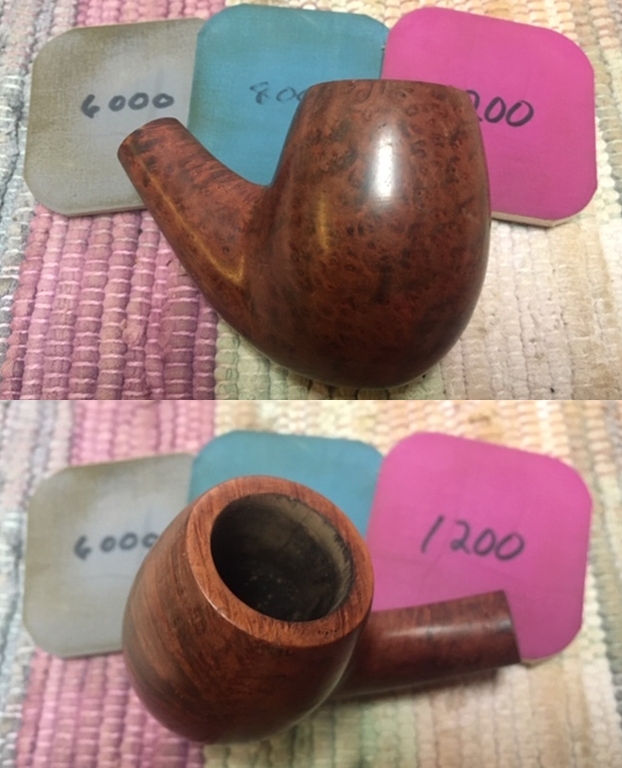
 I polished the briar with micromesh sanding pads – wet sanding with 1500-12000 grit pads. I wiped the briar down with a damp cloth after each sanding pad.


 I rubbed the briar down with Before & After Restoration Balm. I worked it into the briar with my fingertips. The product works to clean, enliven and preserve the briar. I let it sit for 10 minutes while I worked on the stem. After the time passed I buffed it with a cotton cloth to deepen the shine. The briar really comes alive with the balm.

 I set the bowl aside and turned my attention to the stem. I “painted” the stem with the flame of a Bic lighter to lift the tooth marks and chatter on the vulcanite. I was able to lift all of them.
 I sanded what remained and blended them into the stem surface with 220 grit sandpaper. I started polishing the stem with 400 grit wet dry sandpaper. At this point it is starting to look much better.
  I polished the vulcanite with micromesh sanding pads – 1500-12000 grit pads. I wiped it down with a damp cloth after each sanding pad. I used Before & After Pipe Polish – both Fine and Extra Fine to further polish the stem.
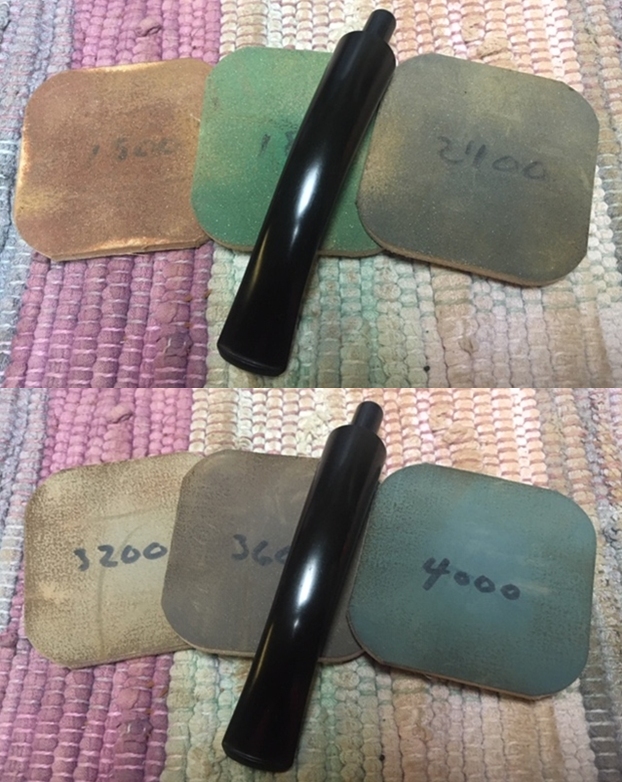
 This Kriswill Count 370 turned out to be a great looking pipe. The mix of brown stains highlights the mix of grain around the bowl sides, top and bottom. The finish on the pipe is in excellent condition and the contrasting stains work well with the polished vulcanite taper stem. I put the stem back on the bowl and carefully buffed the pipe with Blue Diamond on the buffing wheel using a light touch on the briar. I gave the bowl and stem multiple coats of carnauba wax on the buffing wheel and followed that by buffing the entire pipe with a clean buffing pad. I hand buffed the pipe with a microfiber cloth to deepen the shine. The finished Kriswill Count fits nicely in the hand and feels great. Give the finished pipe a look in the photos below. The dimensions of the pipe are Length: 5 ½ inches, Height: 2 ¼ inches, Outside diameter of the bowl: 1 ¼ inches, Chamber diameter: ¾ of an inch. Thanks for walking through the restoration with me as I worked over another beautiful pipe. This pipe will be going on the rebornpipes shortly. If you are interested in adding this one to your collection let me know. Thanks for your time.