Blog by Steve Laug
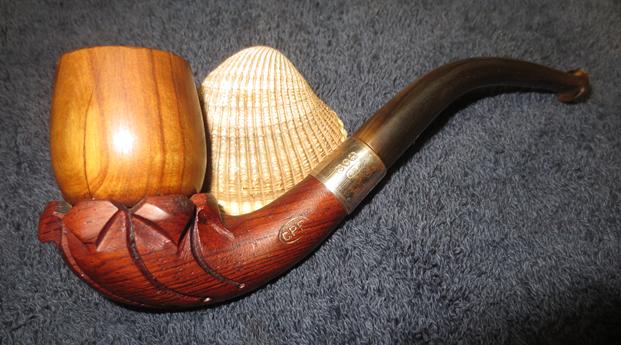
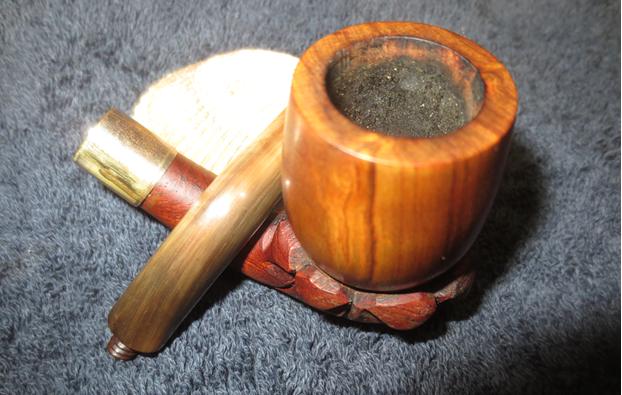
This is yet another unique older C.P.F. pipe find from our Virtual Pipe Hunt in Montana. It is amazing the number of older C.P.F. and other brands we found in that antique shop. Even more amazing is the sheer number of shapes that I have never seen or worked on before. This one is a C.P.F. that is made in two parts – a bowl that is screwed onto a base. The wood is not briar. The bowl is olivewood and the base is cherry. The pipe has the C.P.F. in an oval stamp on the left side of the shank. It is also stamped on the band with the faux hallmarks from that era and the logo. The stem is made of horn. It is a graceful and elegant looking pipe and one that I look forward to working on. My brother took quite a few photos of the pipe before he cleaned it up to show the details of the carving and the wood. I have included them at the beginning of the blog. My guess is that this pipe also comes from the mid-1880s to the early 1890s like the other C.P.F. pipes in the lot.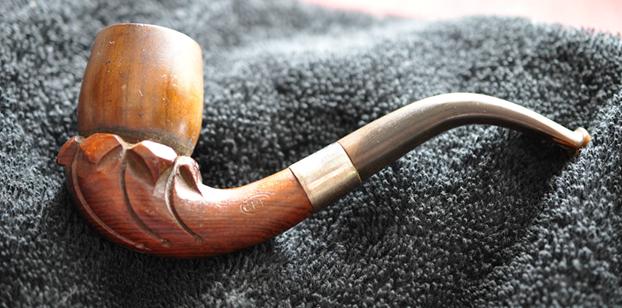 The pipe was in pretty rough shape. The bowl had a thick cake with lava overflowing the rim. The finish was very dirty though appeared to look good underneath the grime. The screw in bowl was stuck in place on the base and we were uncertain that it would even come off. It looked like it originally was a separate piece but the grime and grit had locked it in place. The grooves in the base were filled with grime and the silver band was tarnished. The gold C.P.F. logo on the shank was faint. The horn stem had the usual tooth chatter and marks but other than that was in decent condition. With a little work this would be a beautiful pipe.
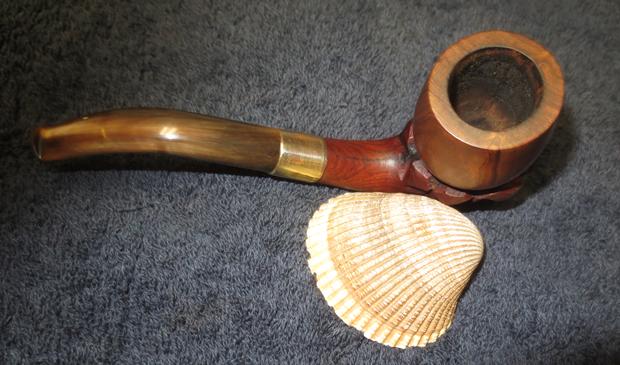
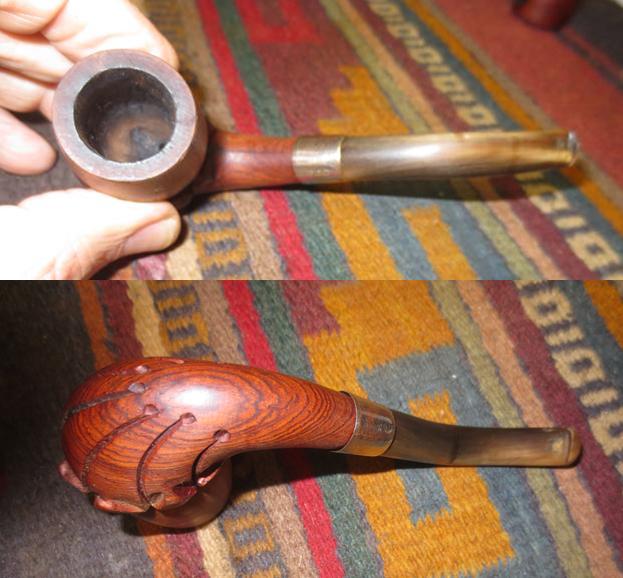
If you would like to read a bit of history on the brand you can have a look at a blog I wrote concerning C.P.F. or the Colossus Pipe Company https://rebornpipes.com/2013/04/14/some-reflection-on-the-historical-background-on-cpf-pipes/.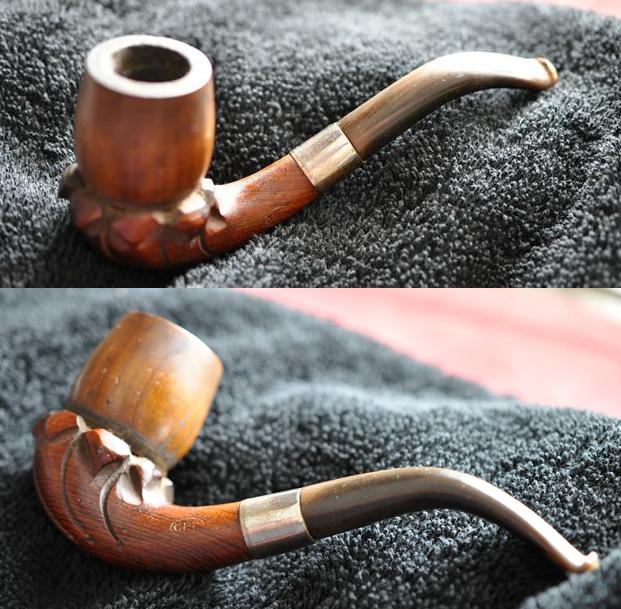 The next series of photos show the condition of the bowl before cleaning. It was very dirty and there appeared to be cracks in the backside of the bowl. I would not be certain until it was cleaned and I had it in hand.
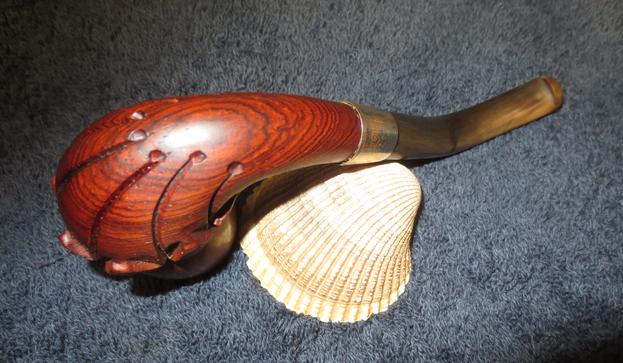
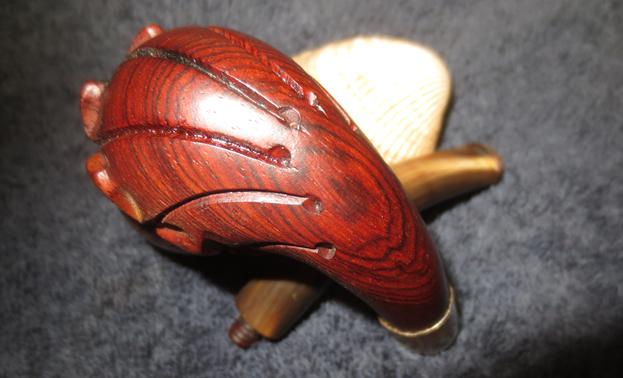
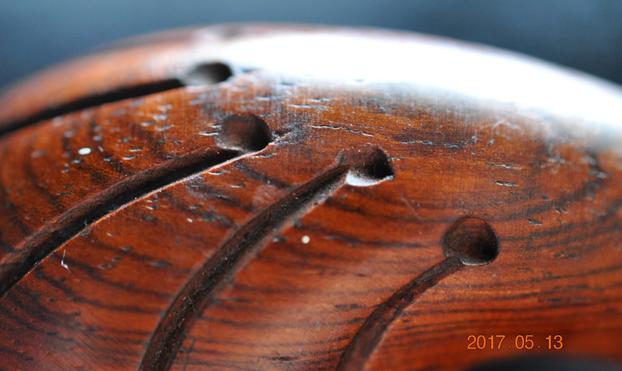
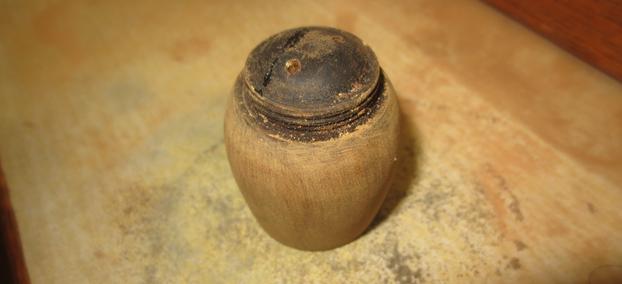
 The next photos show some of the detail on the base of the pipe. It is an interesting piece of carving. I have never seen one like it in either the old C.P.F. catalogues or in my online research regarding the brand. The bottom of the base shows the grain on this portion. Notice how well the carver centered the grain pattern on the base. It is a beautiful piece of wood. I am guessing cherry but I am not certain.
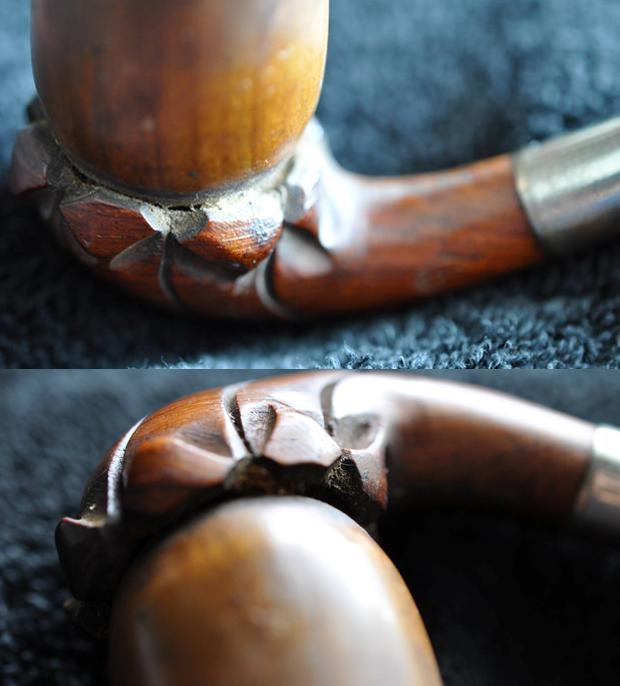

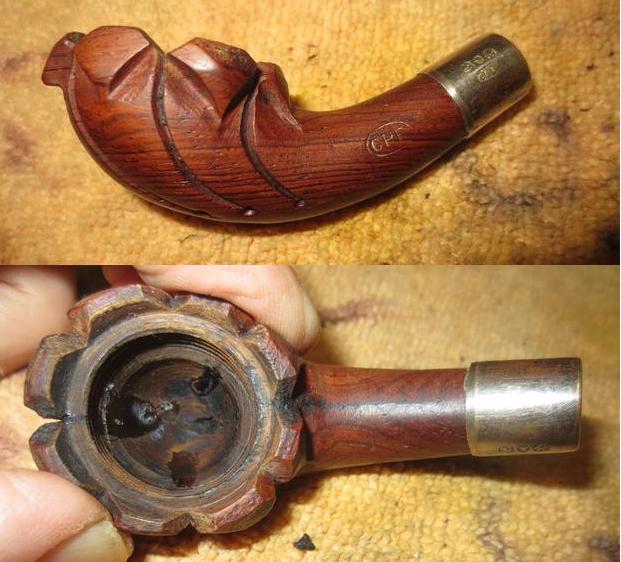
 You can see from the unique vertical grain on the bowl portion of the pipe that it is not briar. My thoughts are that it is olivewood but I could be wrong. Note also the buildup of grime around where the bowl sits on the base.
 The C.P.F. oval logo can be seen on the left side of the shank and also on the silver band. You can see from the photo that the band appears to be loose. Later photos reveal that it was indeed loose and could be slipped on and off the pipe.
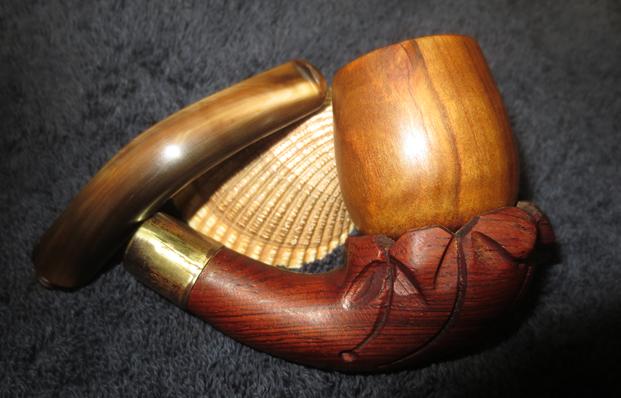
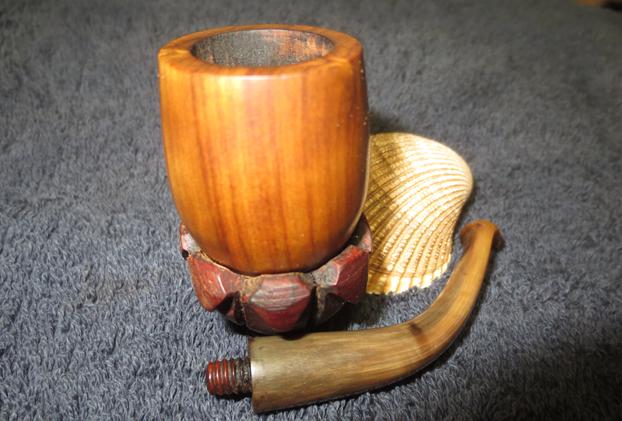
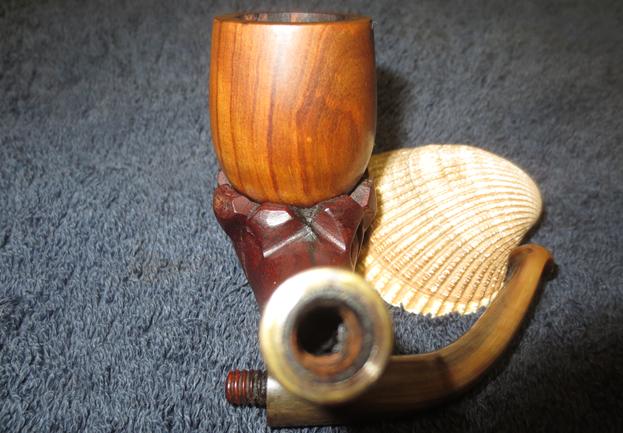
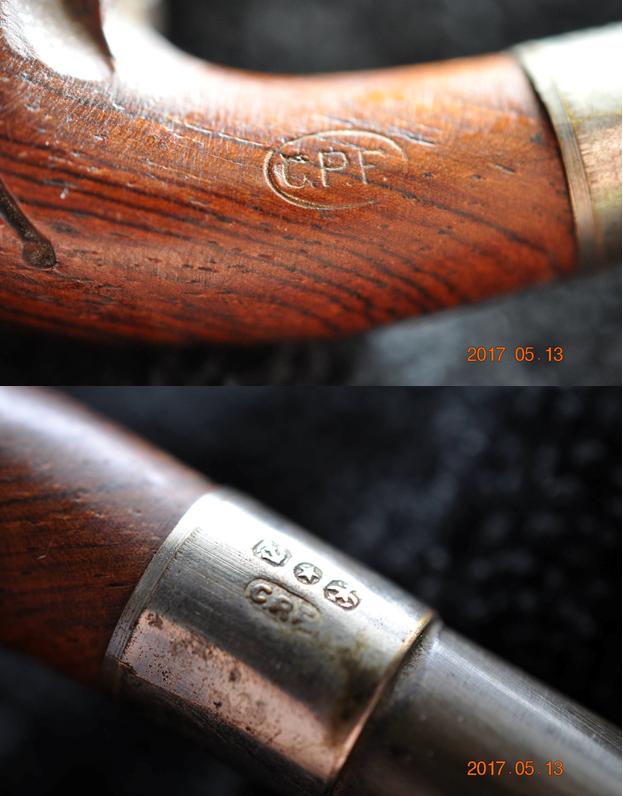 The next two photos show the shank with the band sitting under it and the threaded bone tenon on the horn stem. It is really dirty looking in the shank and mortise.
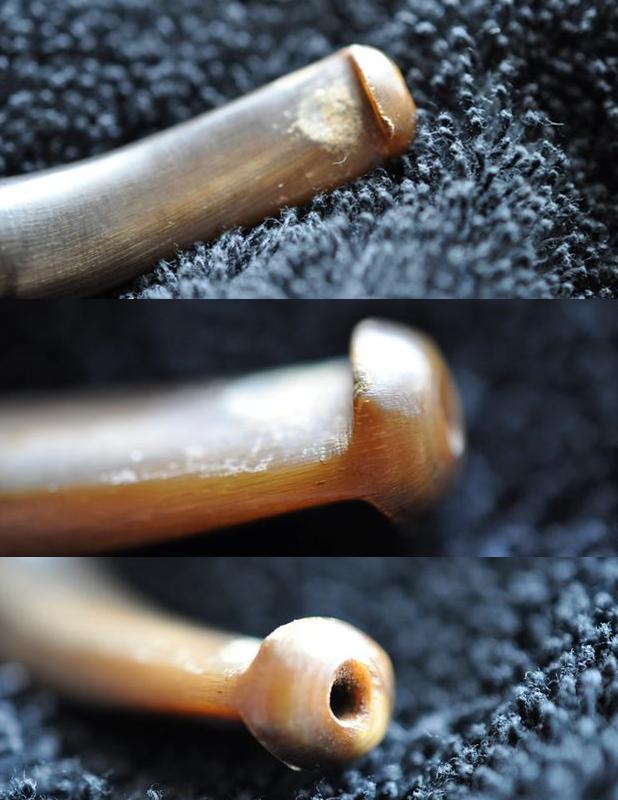
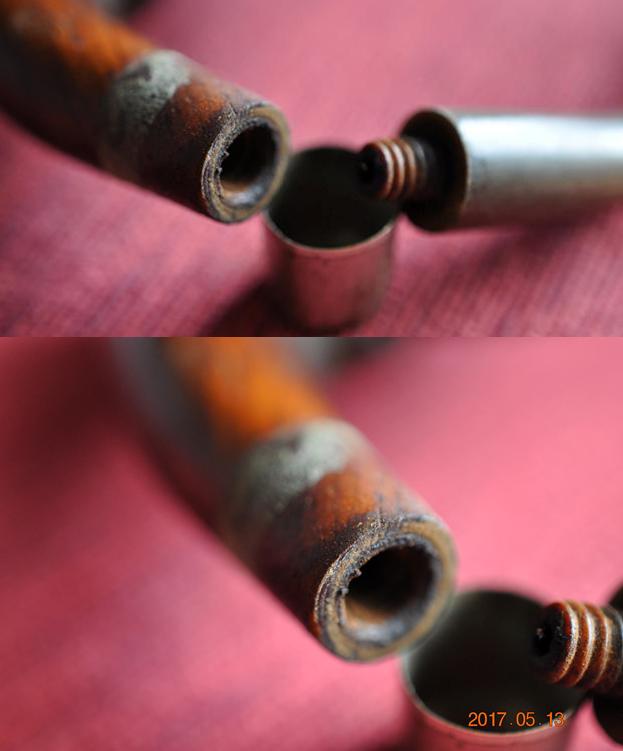 The stem was probably in the best condition of the entire pipe. The graceful curve of the horn was undamaged. The striations were not separating and the variation in colour was stunning. The overall condition was really good. There was some light tooth chatter and marks near the button on each side but otherwise it was clean. The button was not chewed and the orific airhole in the centre of the button looked good.
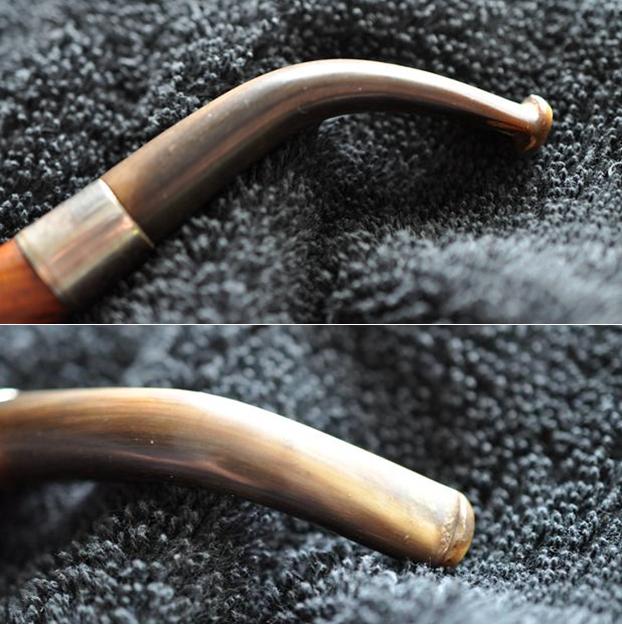
 Jeff cleaned up the pipe – reaming the bowl with a PipNet reamer and cleaning up the reaming with a Savinelli Fitsall Pipe Reamer. He took the cake back to bare wood. He scrubbed the exterior of the pipe with Murphy’s Oil Soap and rinsed the soap and grime off the pipe. He removed the band and scrubbed under that as well with the soap. He cleaned out the mortise and the airway in the shank and the stem with pipe cleaners, cotton swabs and alcohol. He cleaned the horn stem with some oil soap as well. I took these pictures when the pipe arrived in Vancouver. It was in better shape than when we picked it up. Jeff had not been able to unscrew the bowl from the base as it was stuck with the goop that had covered the bowl and base. The rim top still had some darkening and spotty damage to the surface.
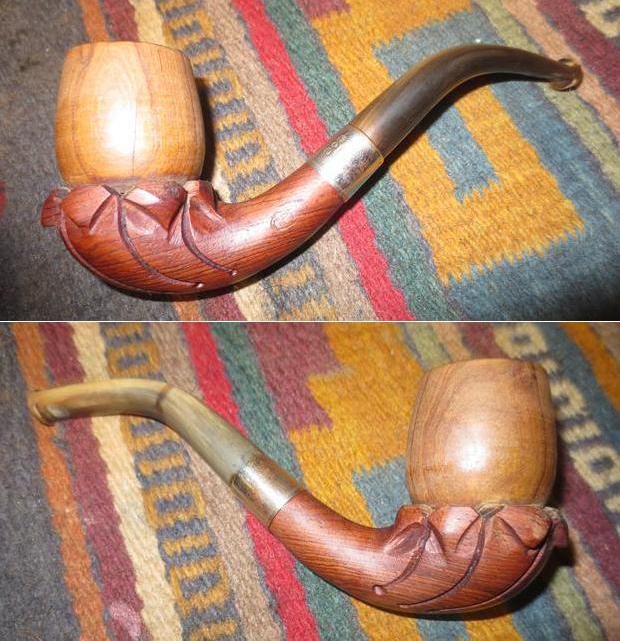
 Jeff and I were talking last evening on FaceTime and I decided that I would tackle the restoration on this old timer next. While we were chatting I held the base in one hand and wiggled the bowl with the other. After a few moments I was able to turn it from the base. What was underneath was absolutely gross. It looked like someone had packed the base with some kind of coarse material to act as a filter to trap any moisture that came from the combustion of the tobacco above. I also noticed that the bowl bottom had three airholes and one was entirely plugged and could not be seen from the inside of the bowl. The bowl had some dark staining and build up on the bottom of the bowl. I put the junk back in the bowl and set the pipe aside for the night.
 In the morning I took the pipe apart again to clean out the bowl base. I used a dental pick and a spatula to clear out the debris and hard build up in the base. I scraped out the threads on the bowl and the base to remove the debris. I scraped out the rounded base bottom to also remove the debris.
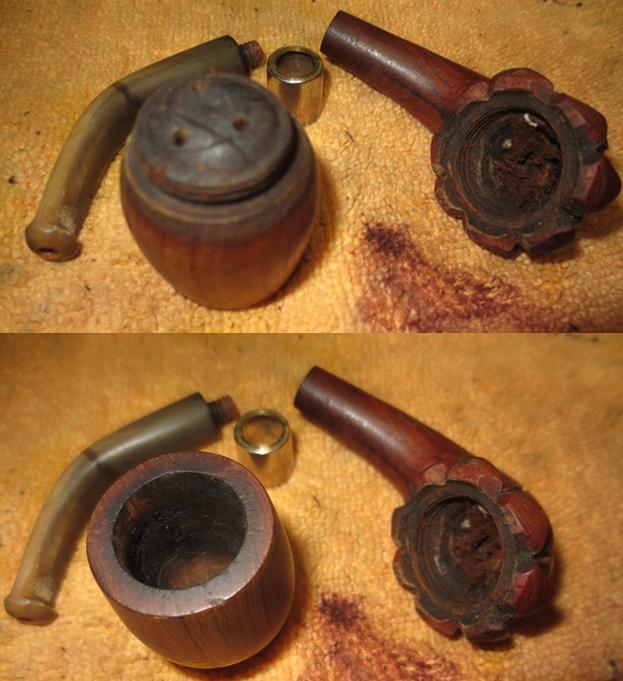
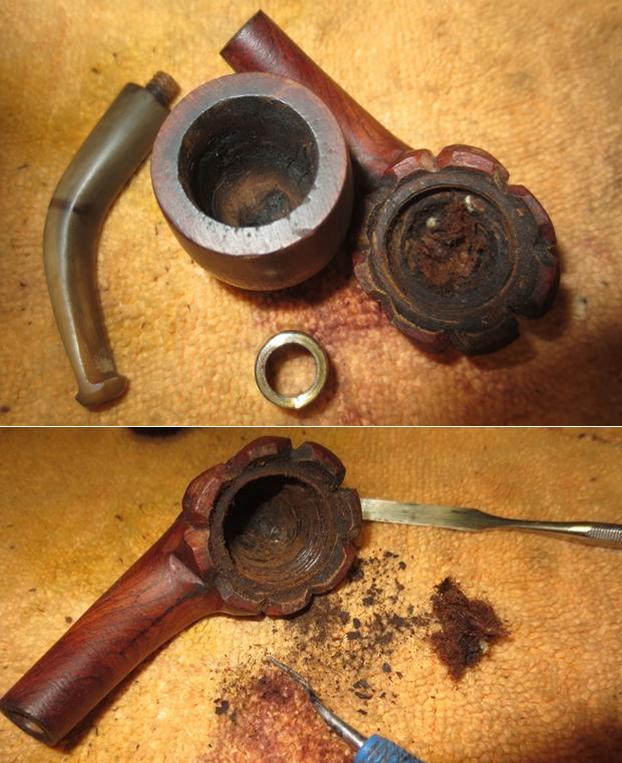 I twisted the tip of a dental pick through the clogged third hole in the bottom of the bowl. I worked it from both the inside and the outside of the bowl until I had cleaned out the blockage. Once again the bowl had three holes that worked.
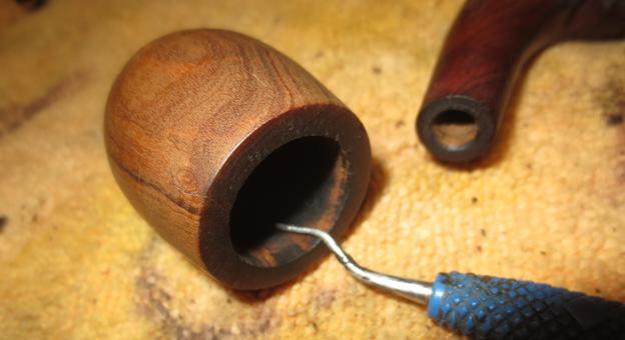 I scrubbed the base and the bottom of the bowl with alcohol and cotton swabs. I scrubbed until it was absolutely clean. I scraped out the ledges on the inside of the base to remove the buildup that was there as well.
 I painted the shank end with Weldbond white glue so that I could put the band back in place. The band had a split on the right side that would need to be worked on as well. I put the band on the glue and held it in place until the glue had dried. I sanded the split in the band with 220 grit sandpaper and filled it in with clear super glue. There were also cracks in the bottom of the base just below the threads that matched the grooves carved on the outside of the shank. Once the glue dried I sanded the inside of the base smooth.
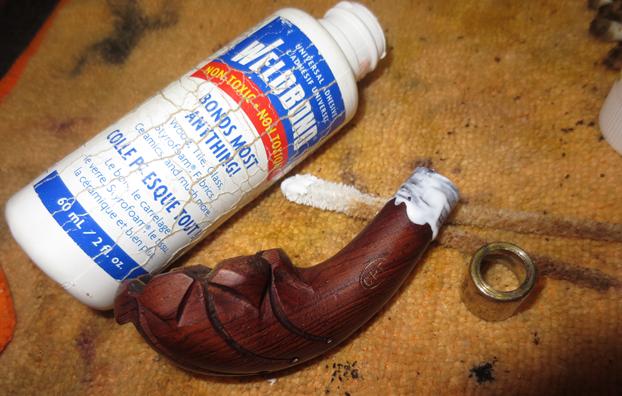
 With the repairs done to the base I turned to what had appeared to be cracks in the bowl sides and base. I sanded the stained and dirty base and the part of the bowl that had been seated in the base behind the leaves. I used clear super glue to fill in the small cracks on the bowl sides and bottom. They were very tight and did not move when I worked them with a dental pick. When the glue dried I sanded the bowl with 220 grit sandpaper until they were smooth and blended in well with the surface of the olivewood. I lightly topped the bowl with 220 grit sandpaper on a topping board until all of the damaged areas were removed and the rim top was smooth once again.
 I polished the olivewood with micromesh sanding pads – wet sanding it with 1500-2400 grit pads and dry sanding it with 3200-12000 grit pads. I wiped the bowl down after each of the micromesh sanding pads with a damp cotton pad to remove the sanding dust. The photos below show the progress of the polishing.
 I sanded the stem to remove the tooth chatter on the top and underside near the button. There was one deep tooth mark on the underside that I could not remove by sanding. I filled it in with clear super glue and let it dry. Once it had cured I sanded it smooth with 220 grit sandpaper to blend it into the rest of the stem surface. It was smooth but a bit lighter in colour than the surrounding area. Thankfully it was on the underside.
 When the stem was turned on to the shank it was slightly underclocked and there was no give in the stem to get the alignment correct. I carefully heated the bone tenon without burning it to soften the glue that held it in place. While it was still warm I was able to screw it in and align the stem properly.
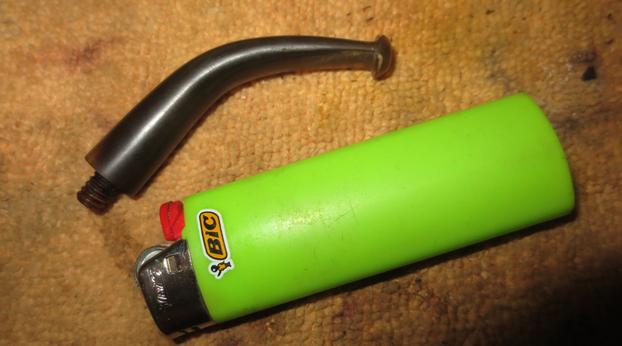 Now that things were aligned it was time to polish the stem. I polished the stem with micromesh sanding pads – wet sanding it with 1500-2400 grit pads and dry sanding it with 3200-12000 grit pads. I wiped the stem down after each of the micromesh sanding pads with Obsidian Oil to remove the sanding dust and give it more life. The photos below show the progress of the polishing. I love polishing horn stems because as you work them over they seem to take on a life of their own with a deep and resilient sheen.
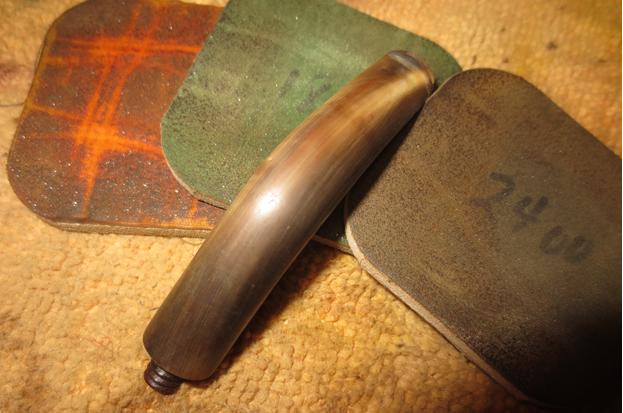

 I took the pipe apart and buffed the parts. I buffed the bowl and the bottom and sides with Blue Diamond on the buffing wheel. I buffed the stem with Blue Diamond as well to polish out the tiny scratches that were left behind by the micromesh. I gave the parts multiple coats of carnauba wax and buffed them with a clean buffing pad to raise the shine. I hand buffed all of the parts with a microfiber cloth and put the pipe back together. I hand buffed it once again to finish the restoration. The finished pipe is shown in the photos below. It is a remarkable example of pipe making at the end of the 19th Century. The wood and the shape work well with the beautifully striated and gracefully bent horn stem. The silver band with the hallmarks and C.P.F. logo is a nice transition between the stem and the cherry wood base. Thanks for walking with me through this restoration.