Blog by Steve Laug
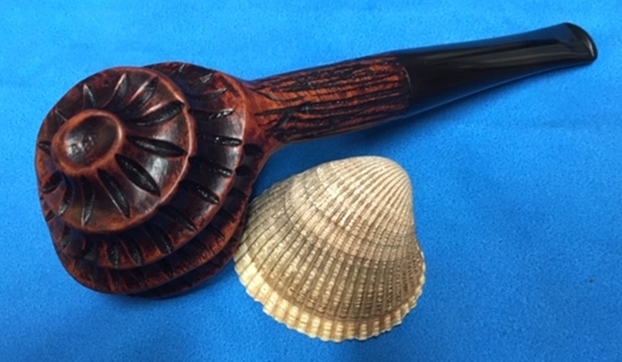
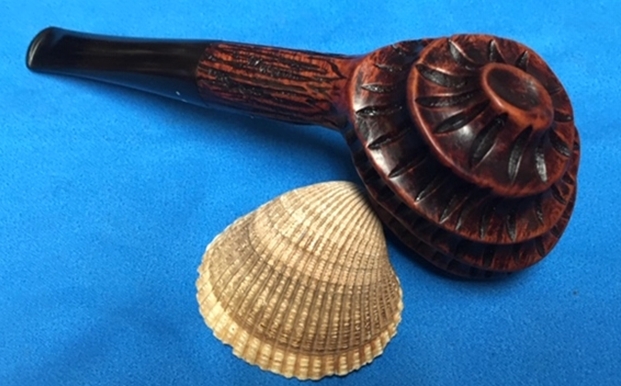
The next pipe on the work table is a relatively new acquisition from a collection Jeff and I purchased from Michigan. It included a pipe cabinet and 21 pipes that is pictured below. There were some nice pipes in that collection and some that I have never seen before. 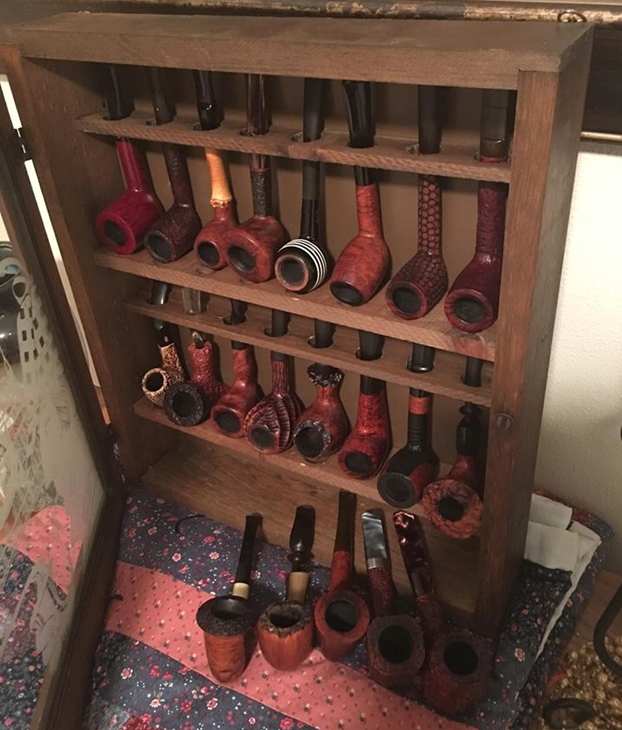 This pipe was so unique that is I just had to tackle it next. It is shown in the photo of the rack above – the fourth pipe from the left side. Jeff showed me photos of the pipe on Messenger and I was intrigued. I had really no idea who had made it and I could not see the shank or stem markings to help with the identification. Jeff looked it over and could see no stamping on the shank that would help us out but it was undeniably unique. The carving reminded me of nautilus shell and Dal said it reminded him of a scorpion…nothing quite captured and accurate description of the shape and the carving on this pipe. Jeff took photos of the pipe before he started his cleanup process. I have included these below.
 The next photo is a close up of the bowl. You can see the thick cake in the bowl and heavy overflow of lava on the rim top. You can also see the tars and grime in some of the carvings toward the top of the bowl. It was a dirty pipe and obviously it was someone’s favourite pipe because it is so dirty and caked.
 He also took photos of the side and bottom of the bowl to highlight the unique carving on the bowl sides. The shank itself had more a striped carving almost bark like that ran the length of the shank to the stem.
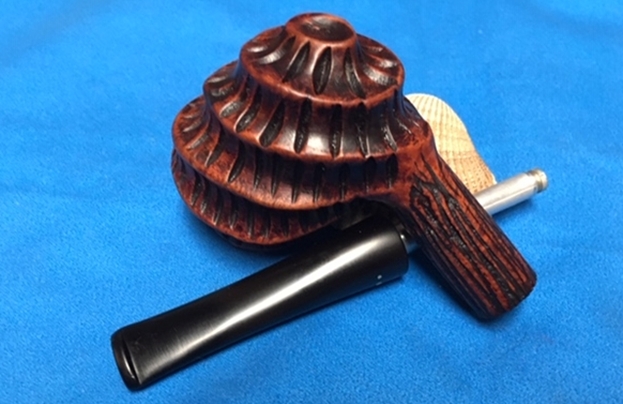
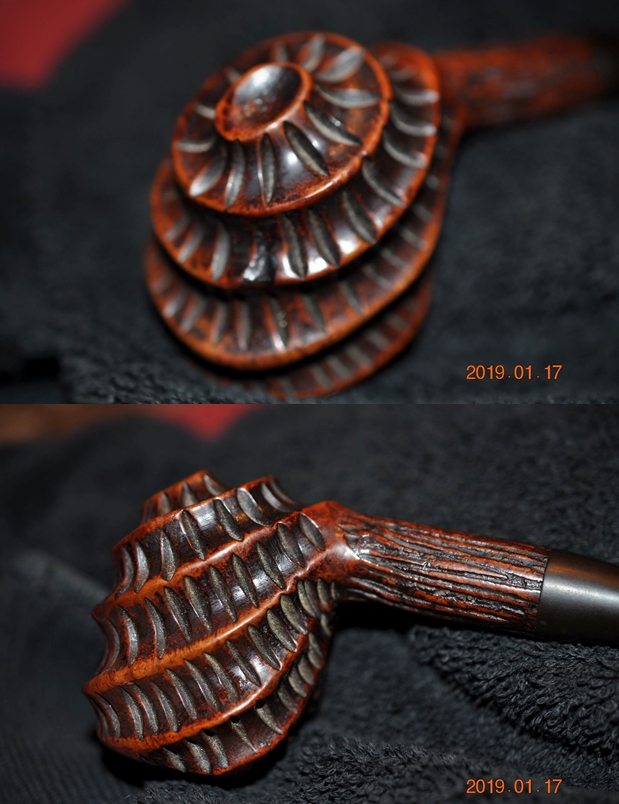 The photos finally gave me my first clue about the pipe. The three vertical dots on the left side of the stem made me wonder if it was a Brigham. Usually Brigham will use those dots to signify particular lines of their pipes but I had never seen a bowl like this in all the years that I have been working on pipes so I had to wonder if it was on or if it had been a cannibalized stem that had been put into service on some other bowl. I would only know once I had it in hand and saw what it looked like off the pipe.
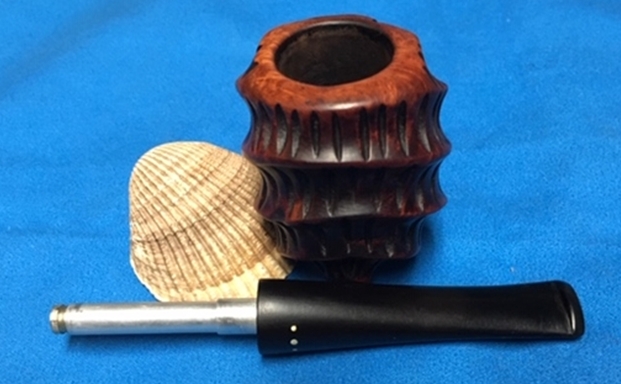
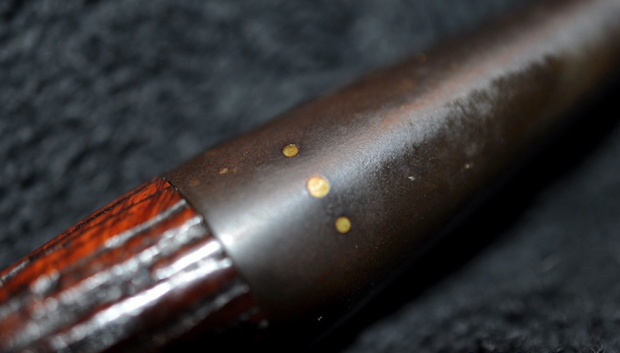 The stem itself had a lot of deep scratches on the surface that looked like someone had scraped away the calcification that can build up under a rubber Softee bit. There were tooth marks on the stem surface on both sides near the button and some wear and tooth marks on the button itself.
 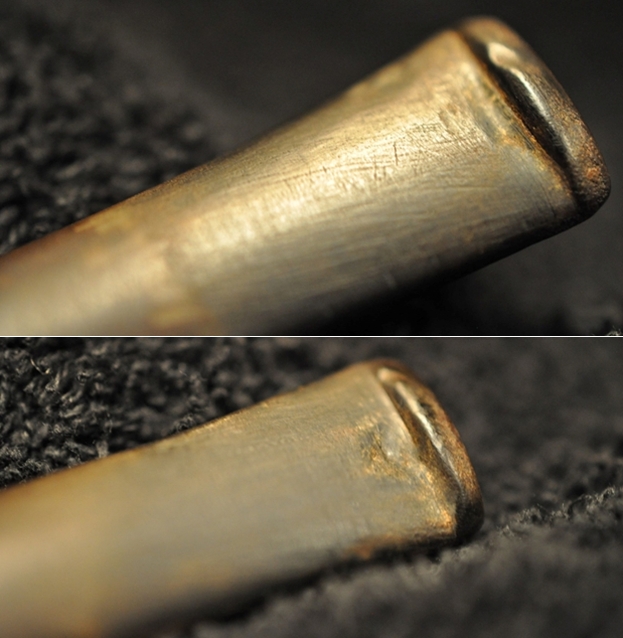 I have started to mention in the last few blogs that Jeff and I have established a habitual pattern that we both follow when we work on pipes. I include it here so you have a sense of that pattern. Jeff reamed the bowl with a PipNet pipe reamer and followed up with a Savinelli Fitsall pipe knife to remove the cake. He scrubbed out the mortise and the airway in the shank and the stem with alcohol, cotton swabs and pipe cleaners. He scrubbed the exterior of the bowl, rim, shank and stem with a tooth brush and Murphy’s Oil Soap to remove the oils and tars on the rim and the grime on the finish of the bowl. He rinsed it under running water. He dried it off with a soft cloth. He was able to remove the lava build up on the rim top and you could see the damage to the flat surface of the rim and the inner edge on the right side and toward the front of the bowl. I took photos of the pipe to show its condition before I started my work on it.
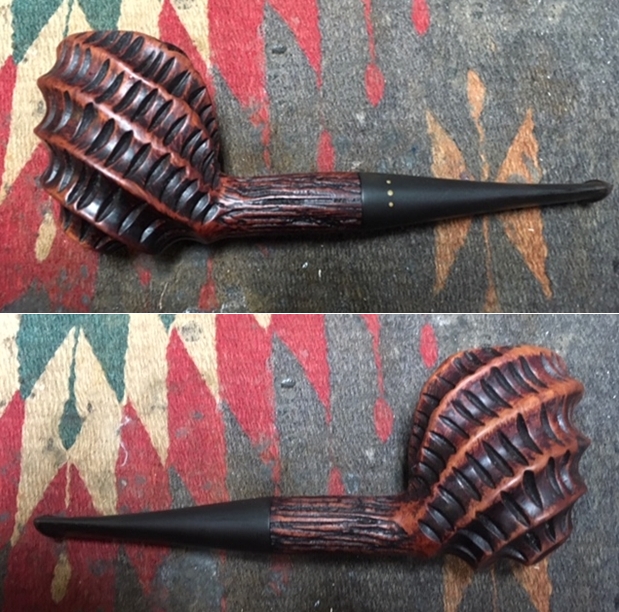
 I took close up photos of the bowl and rim top as well as the stem. You can see the condition of the rim top and bowl in the first photo. Jeff was able to remove all of the tar and oils and all that remained was some darkening toward back of the rim top. The inner edge of bowl was slightly damaged toward the front side. The vulcanite stem had tooth chatter and some tooth marks on the top and underside of the stem near and on the button surface. Jeff had soaked it in Before & After Deoxidizer and was able to get the stem really pretty clean. The tooth marks are quite prominent and will need to be addressed on both the stem surface and button. The three vertical brass dots on the side of the stem really stood out now that the stem was clean.
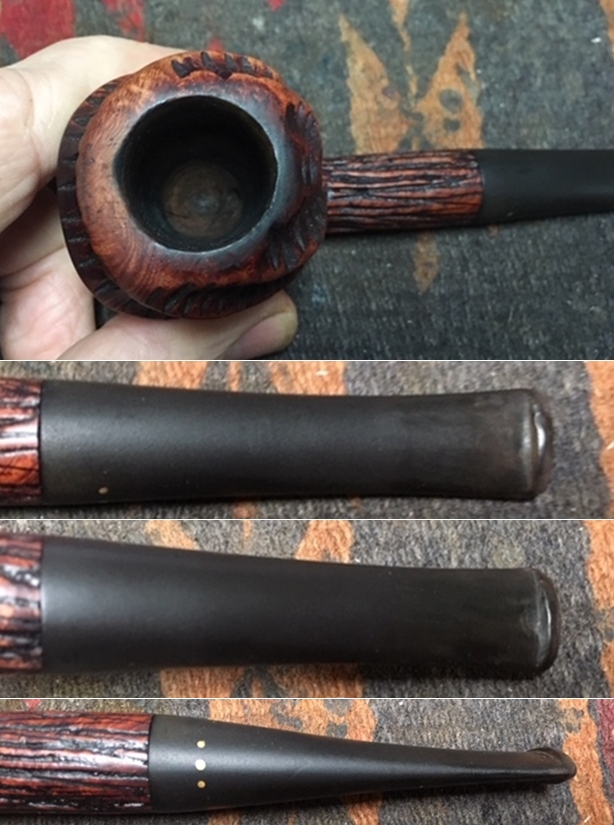 At this point I took that pipe apart and I was pretty sure I was dealing with a very unusual Brigham pipe. I was not sure what it was or what era or even the stamping because even though I thought I saw some faint stamping Brigham over Made in Canada on the underside of the shank I was not sure because the rustication went right through the stamping. There was a number on the heel of the bowl in the cone bottom that was either 688 or 889 depending on the how the pipe was held. I really was mystified so I did what I usually do when I am dealing with a Brigham – I go to my resident expert in Eastern Canada. I wrote Charles Lemon of Dad’s Pipes a quick email to see what he could tell me. I am including his response and the copy of the Brigham pamphlet that he included with his email.
Hi Steve. I think you have a real find there!
I was out when your email came through but dug into my Brigham material when I got home. I think what you’ve got is a Brigham X4 – one of their “experimental” shapes from the 60s.
I’ve attached a close up pic from the Brigham brochure titled “Brigham Pipes – Makers of Fine Pipes Since 1906”, published circa 1960s. Same nautilus carving pattern, same stem. All the X shapes in the brochure are marked with the 3-dot vertical pattern.
These originally sold for the princely sum of $14.95 & Up! 😁
This is the first time I’ve seen an example of the X shapes outside of a brochure. They are very rare, limited edition pipes made in small numbers. Kind if Brigham’s way of testing new designs on the market…
Is it yours? If it’s for sale I’d love to add it to my collection. — Charles
The brochure that Charles included is below. The blow up of the pipe he is referring to is in the first photo. The only difference with the one in my hands is a tapered rather than a saddle stem.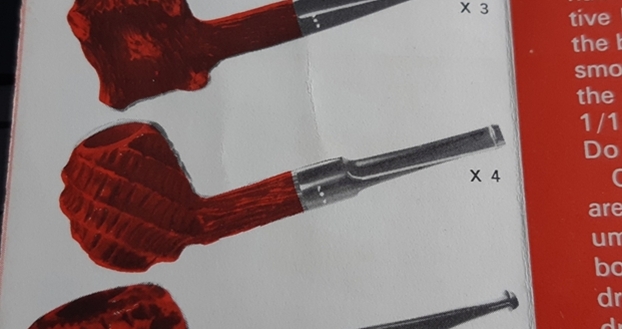
 So it appears I am dealing with a bit of a rare, limited edition Brigham X4 – one of their “experimental” shapes from the 60s. I wondered when I first took it apart if that was not the case but it is always good to be able to ask someone who knows more about a particular brand than I do. Thanks Charles. We will see if I let this one go.
I decided to address the damage to the rim top and the inner edge of the bowl first. I used a folded piece of 220 grit sandpaper give the inner edge a light bevel to minimize the damage to the inner edge of the rim. I also lightly sanded the darkened areas on the back side of the rim top.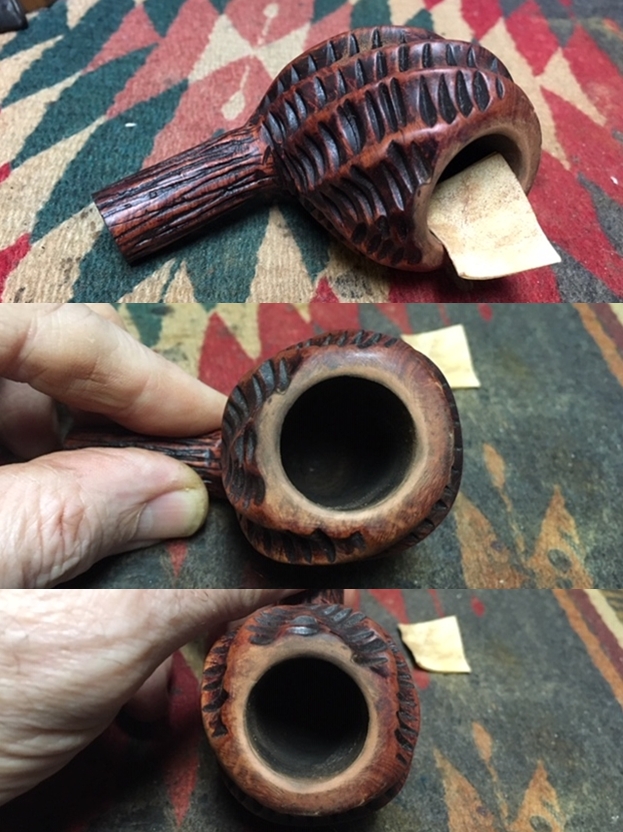 I polished the rim top and edge with micromesh sanding pads – wet sanding with 1500-2400 grit pads and dry sanding with 3200-12000 grit pads. I wiped the rim off after each sanding pad to remove the dust. The damage on the rim is pretty much invisible after polishing and the rim top really looked good.
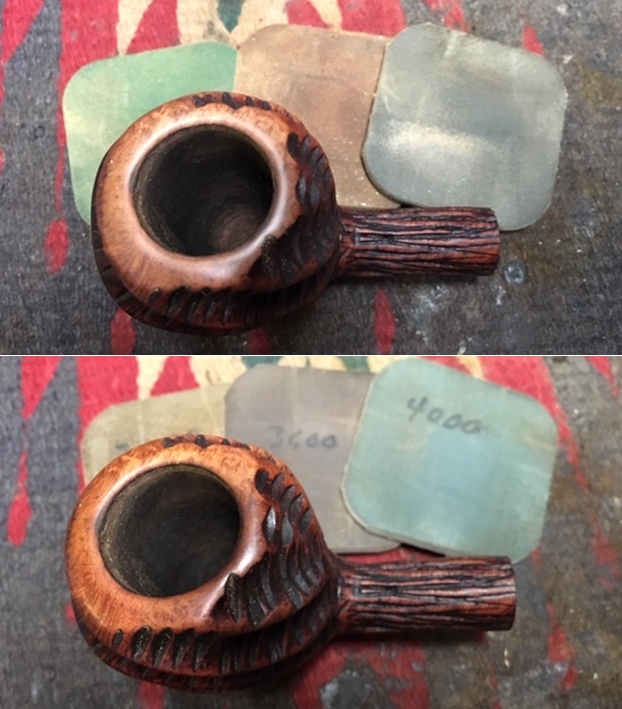
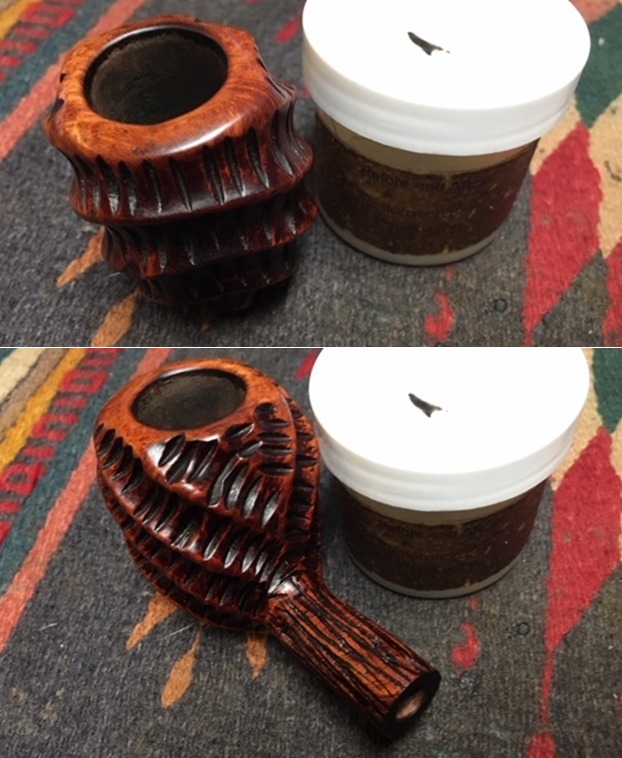
 I worked some Before & After Restoration Balm into the rusticated and the smooth surface of the briar with my fingertips to clean, enliven and protect it. It took some time to really get it into the grooves and valleys of the rustication but I was able to work it in. I used a cotton swab to work it into the smaller divots in each ring around the bowl. I let the balm sit for a little while and then buffed with a cotton cloth to raise the shine. The following photos show the bowl at this point in the restoration process. The reworked rim top looks really good and matches the colour of the rest of the pipe. I am very happy with the results.

 Before calling it a night I cleaned out the tooth marks and reshaped the button on both sides of the stem. I wiped them down with alcohol on a cotton swab. I filled them in with Black Super Glue and set the stem aside to let the repairs cure overnight. There was morning and there was evening and it was good!
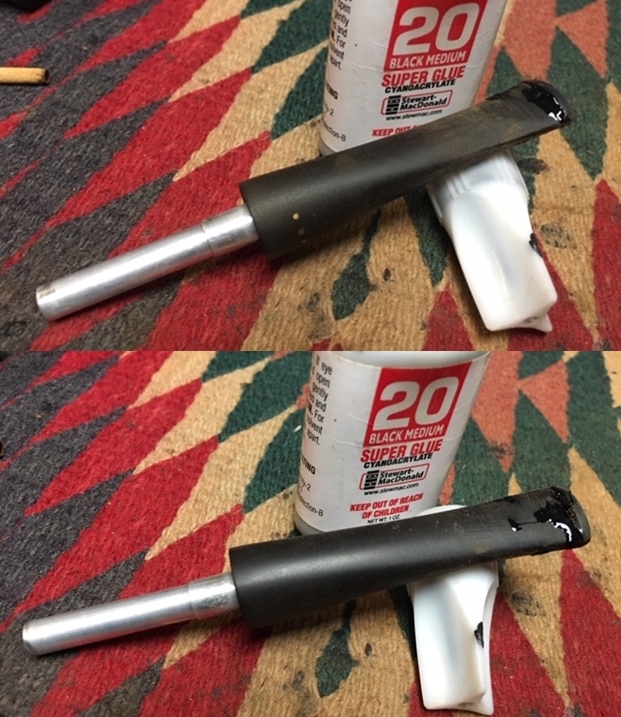 The next morning after the repairs had cured I sanded the stem surface with 220 grit sandpaper to blend the surface of the repairs into the stem. I further reshaped the button with a needle file to sharpen the edges.
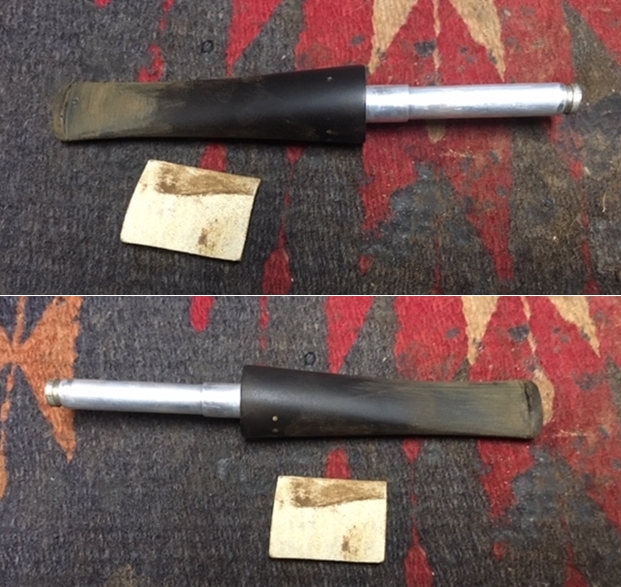 I polished the stem with Denicare Mouthpiece Polish to remove some of the scratches. The gritty substance that makes up this polish makes it work really well as an intermediary step after sanding out the repairs and tooth chatter. (I used it because I have three small tins of it to go through before it dries out and is useless.)
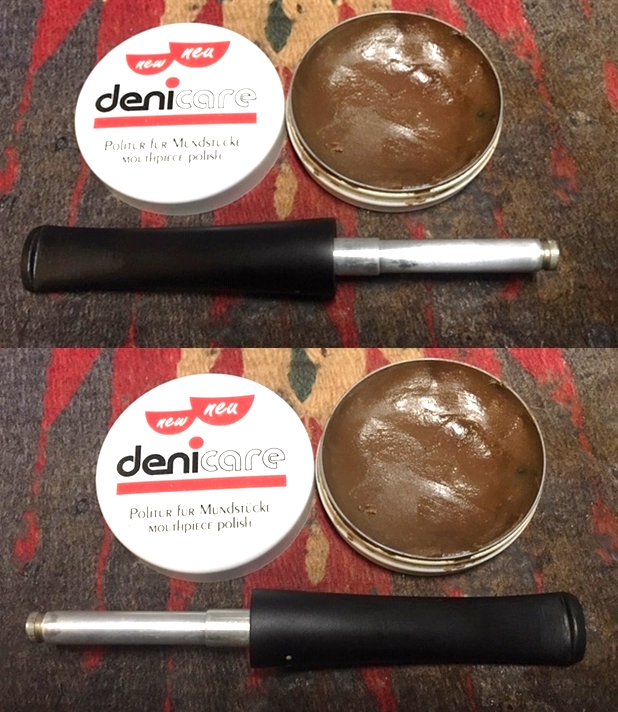
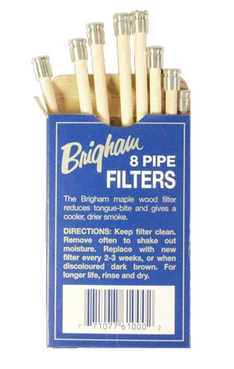 Some of you might have notice the Brigham Hard Maple Filter in the long aluminum tenon in all of the above photos and the ones that follow. I forgot to mention that I put one in the tenon when I worked on the stem to protect the aluminum from accidental damage. The Maple filter is a hollow tube made of hard maple that fits in the metal tenon. The metal tip is at the end of the tenon and actually extends all the way down the shank and sits against the opening of the airway into the bowl. It thus provides a distillator to pick up the moisture from a smoke while allowing uninhibited airflow through the pipe. One benefit of the design is that you can easily slide a pipe cleaner down the stem and into the bowl through the wooden filter/distillator tube. It is a pretty unique and effective design and one that is worth a try if you have never smoked one.
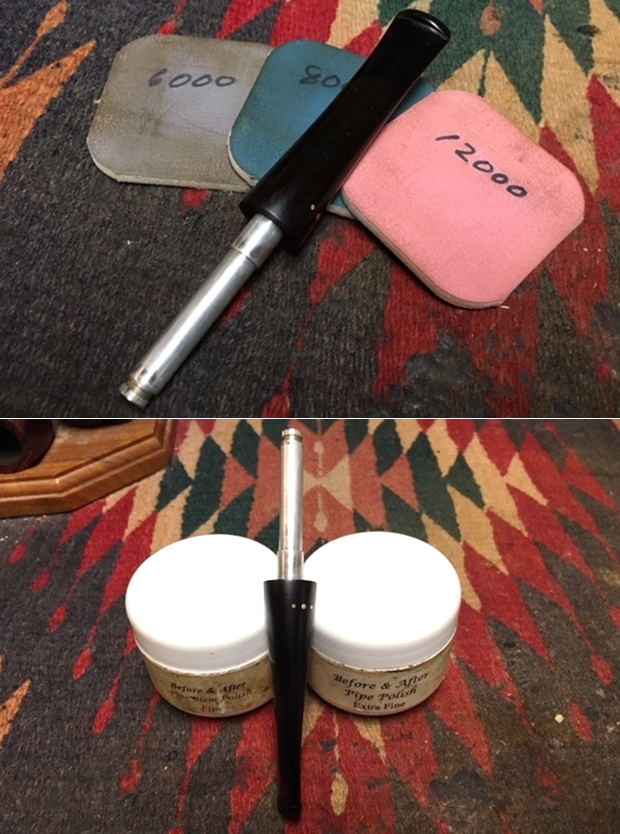
Back to the restoration… I polished the vulcanite stem with micromesh sanding pads – wet sanding with 1500-2400 grit sanding pads and dry sanding it with 3200-12000 grit sanding pads. I wiped it down after each sanding pad with a damp cloth. I polished it with Before & After Pipe Stem Polish and wiped it down with a last coat of Obsidian Oil. I set it aside to let the oil dry.
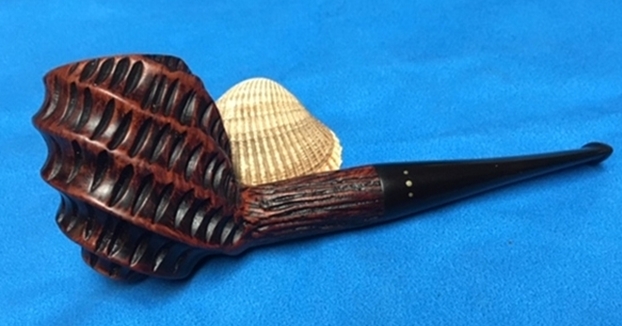
 This is one of the most uniquely carved Brigham pipes that I have ever worked on and I have worked on many of them. The unique spiral rustication with slots in the spiral bands and the smooth rim top is really nicely. The striated, barklike rustication on the shank works well with the rest of the shape. I polished stem with Blue Diamond polish on the buffing wheel. I gave the bowl multiple coats of Conservator’s Wax and the stem multiple coats of carnauba wax. I buffed the pipe with a clean buffing pad to raise the shine. I hand buffed it with a microfiber cloth to deepen the shine. The pipe polished up pretty nicely. The spiral rustication and the smooth edges and rim top began to almost take on life with the buffing. The rich contrasting brown colour works well with the polished black vulcanite stem. The finished pipe has a rich look that is quite catching. Have a look at it with the photos below. The shape, finish and flow of the pipe and stem are very well done. The dimensions are Length: 6 inches, Height: 2 inches, Outside diameter of the bowl: 1 5/8 inches, Chamber diameter: 7/8 of an inch. I will be hanging on to this pipe for the time being but may well one day pass it on to Charles. Time will tell. Thanks for walking through the restoration with me as I worked over this unique Brigham X-4.