Blog by Steve Laug
Jeff picked up this unusual poker from an auctioneer in Los Angeles, California. He picked it up and also an old Surbrug Best Make bent billiard. This one turns out to be a Barling’s Make Poker. It is unusual in that the shank is not attached to the bowl. It is a friction fit shank that is removable. The tapered vulcanite stem is long and makes the look of the pipe unique and is also removable. The pipe breaks down into three parts. The pipe is stamped on the left side of the shank with Barling’s arched over Make and the right side is stamped S-M near the bowl shank union. The stamping is light but readable with a light and lens. The S-M stamp may refer to the size of the pipe. Early Barlings had a size stamp of S, S-M, M, L which would make the S-M a small medium which fits the size of this petite pipe. The bowl had a thick cake lining the walls and some light lava on the rim top. The inner edge of the bowl appears to be slightly damaged I will know more once it is reamed and cleaned. The outer edge looks good and the top of the rim has some nicks and dings in it. The finish on the bowl and shank is very dirty. The removable shank end is also blackened and will need to be cleaned up. The stem is oxidized and has some light tooth chatter but otherwise no tooth marks. Jeff took some photos of the pipe when it arrived to give a clear picture of its condition. 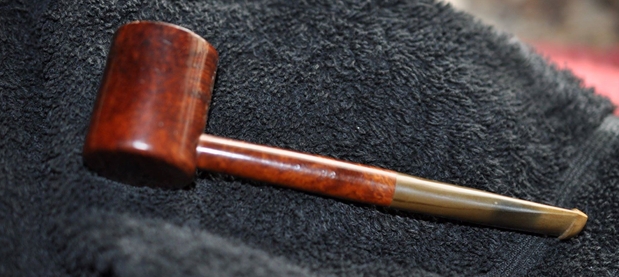
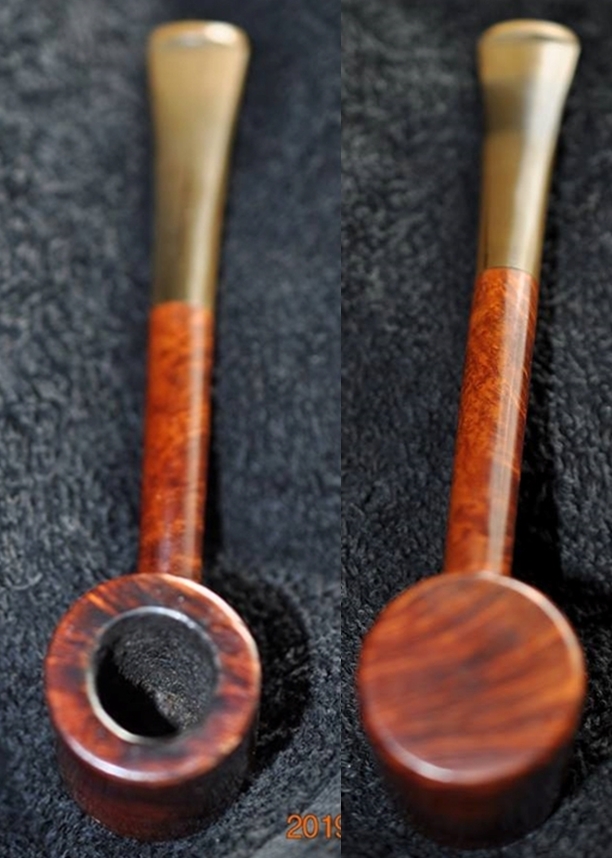 Jeff took 2 close-up photos of the bowl and rim at different exposures to capture the condition of the pipe when it arrived. The rim top had some light lava and some darkening on the back rim top. The bowl had a cake that was quite thick and tobacco debris stuck to the walls.
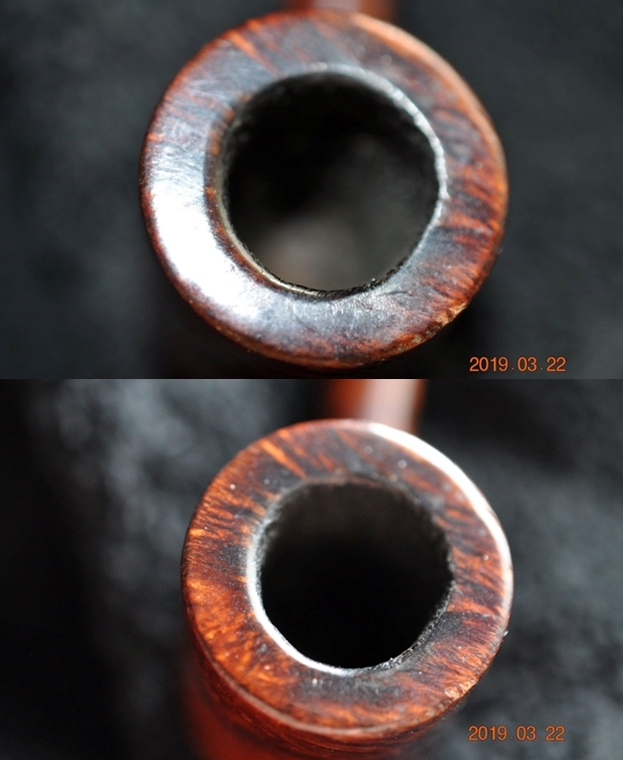 He also took a photo of the right and underside of the bowl to show the shape and the grain on the bowl and heel. The finish is very dirty but this grain is quite stunning.
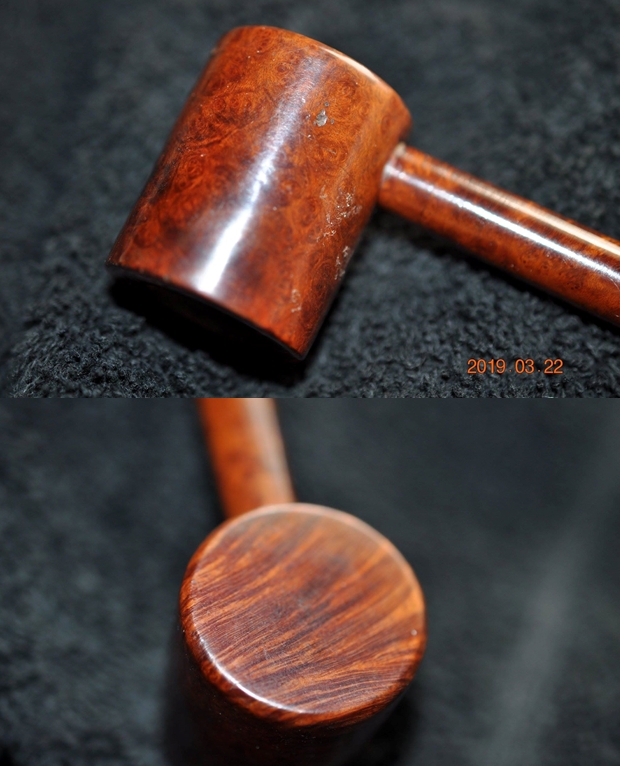 He took the shank off the bowl to show the nature of the connection. Note that the shank had not been glued in place in the bowl. The second photo shows the stamping on the left side of the shank. It is clear but faint.
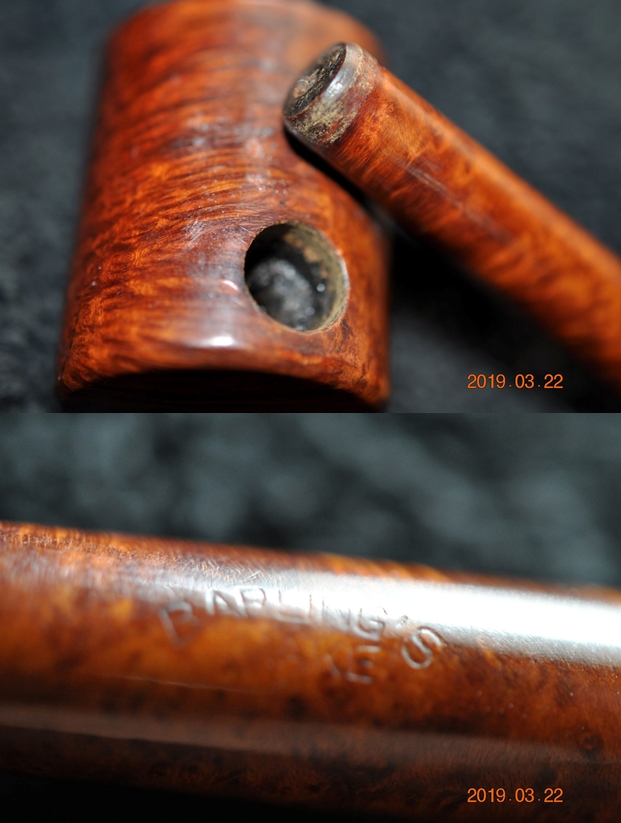 The next two photos show the stem surface. They show the oxidation and the chatter on both sides near the button. There is also some wear on the button edges.
 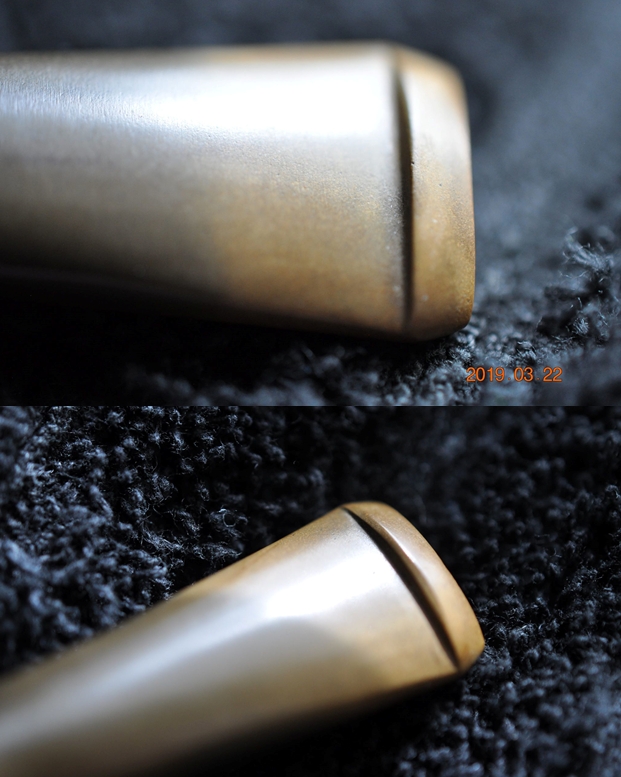 Jeff reamed the bowl with a PipNet pipe reamer and followed up with a Savinelli Fitsall pipe knife to remove the cake. He scrubbed out the mortise and the airway in the shank and the stem with alcohol, cotton swabs and pipe cleaners. He scrubbed the exterior of the bowl, rim, shank and stem with a tooth brush and Murphy’s Oil Soap to remove the oils and tars on the rim and the grime on the finish of the bowl. He rinsed it under running water. He dried it off with a soft cloth. He was able to remove light lava build up on the back of the rim top and you could see the great condition of the bowl top and edges of the rim. He soaked the stem in Before & After Deoxidizer to remove the oxidation. I took photos of the pipe before I started my work on it.
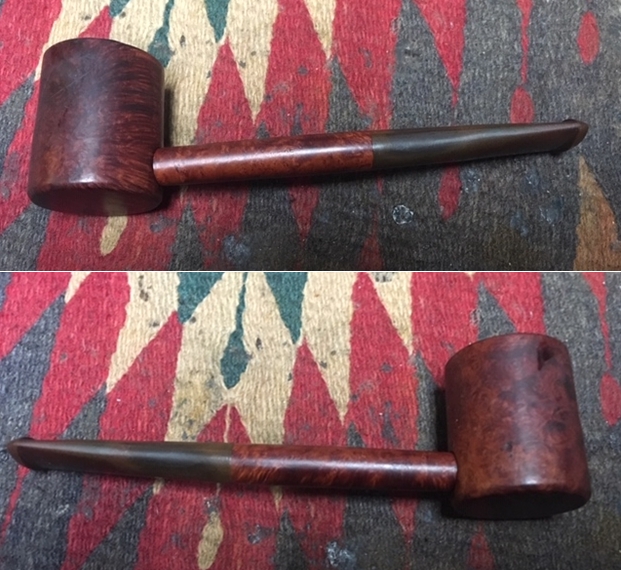
 I took a close up photo of the rim top to show the condition of the bowl and rim after Jeff had cleaned and reamed the bowl. The rim top had some deep nicks toward the rear left and there was some damage to the inner edge. The outer edge of the rim had some damage as well with some nicks and dings. The stem photos show that the oxidation is stubbornly present even after the soak in Before & After Deoxidizer. There are not any tooth marks and the stem surface is in good condition.
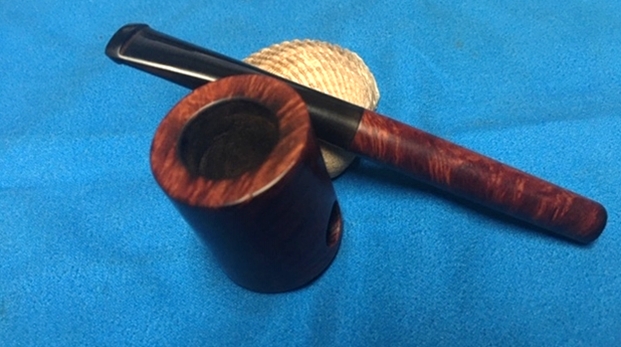
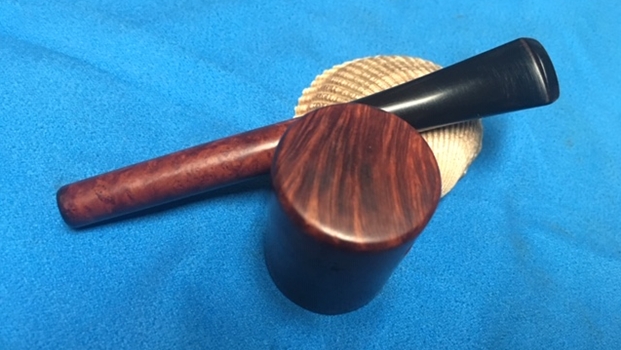
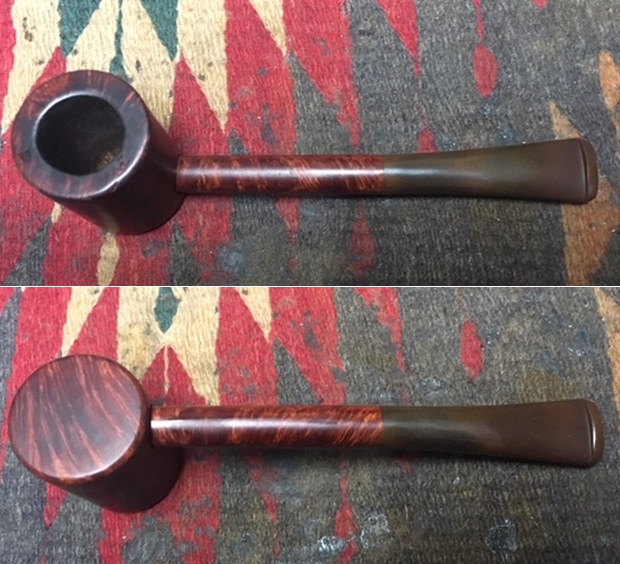
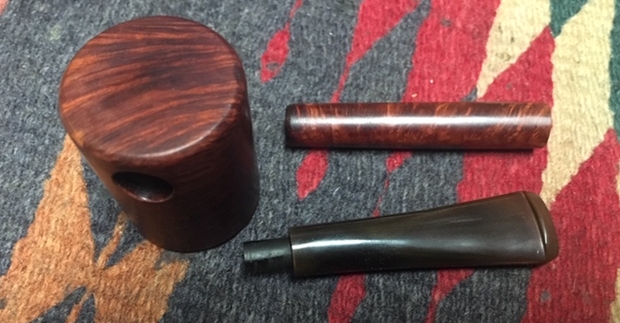
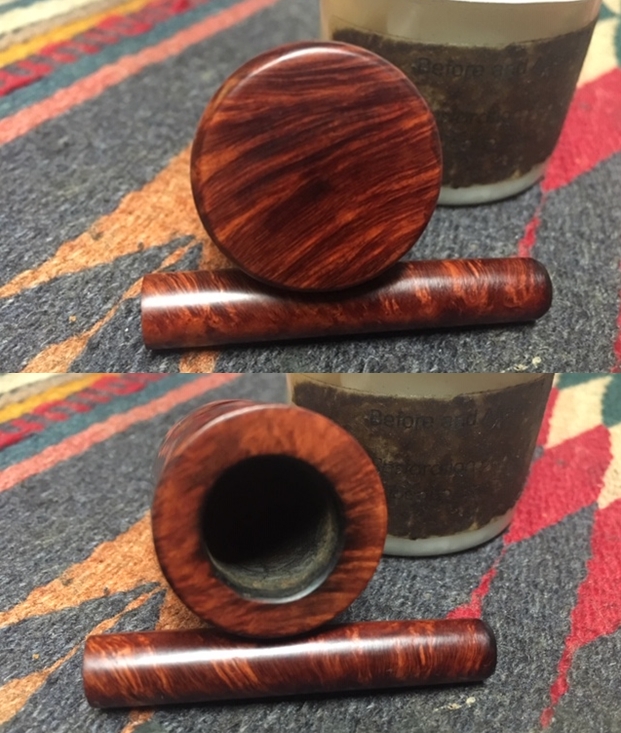
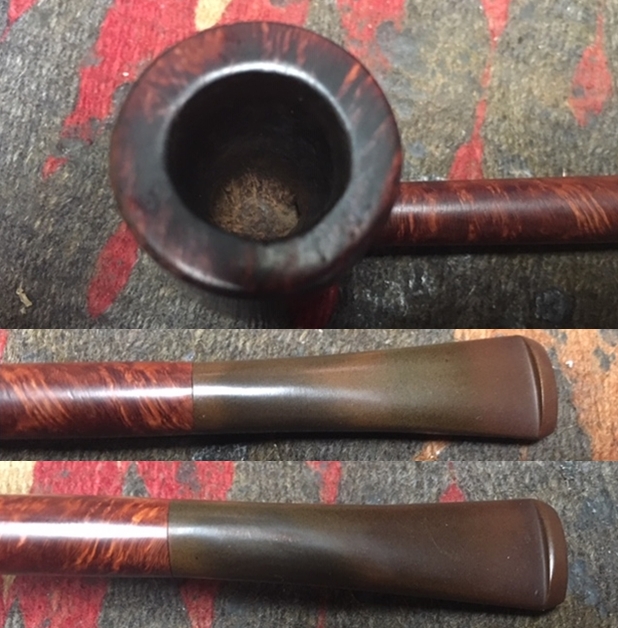 I took the pipe apart and took pictures of it from various angles to give a clear picture of the uniqueness of this old Barling’s Make.
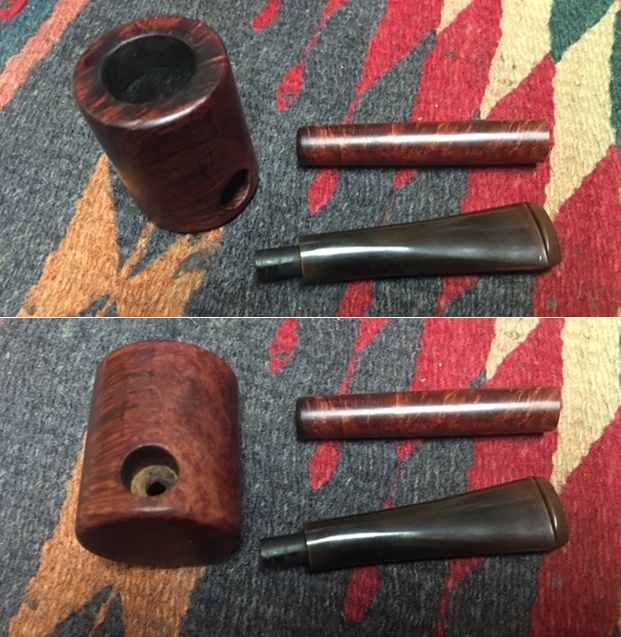
 To start the restoration work on this one I decided to gently top the bowl to deal with the damage to the rim top and edges. I used a piece of 220 grit sandpaper on a hard board and worked the rim on it in a circular motion until I had removed the damage.
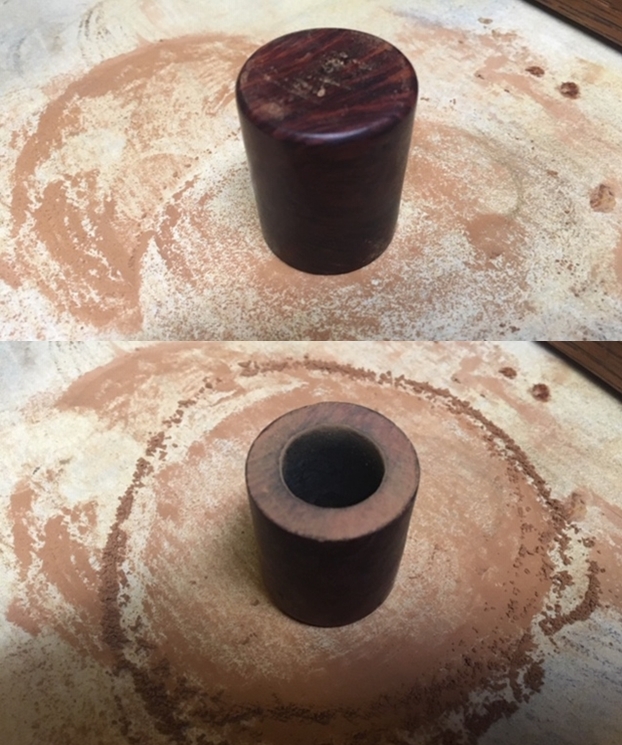 There were still some shiny spots on the sides of the bowl that looked like the remnants of a spray lacquer finish. I wiped the bowl and shank down with isopropyl alcohol and spot wiped the shiny spots with acetone. I was able to remove all of the spots and the finish looked better.
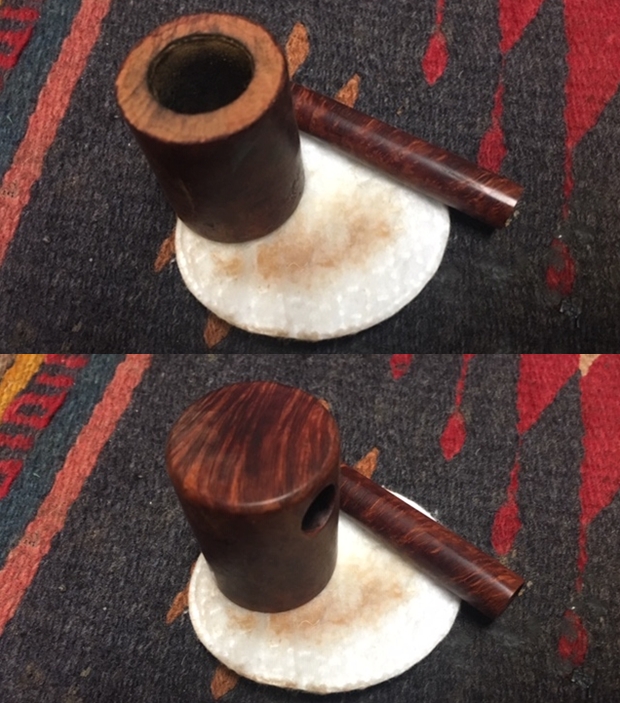 I used a folded piece of 220 grit sandpaper to smooth out the inner edge of the rim. When I finished the rough spots were smoothed out and the rim had a very slight bevel.
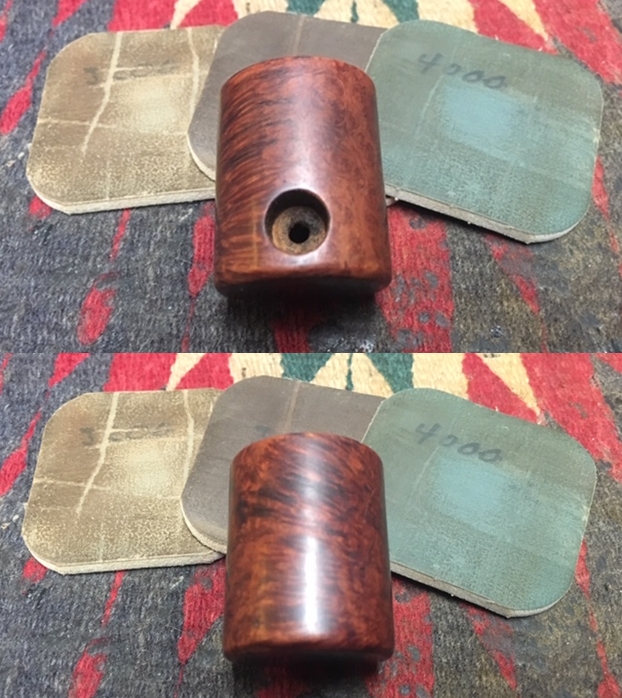
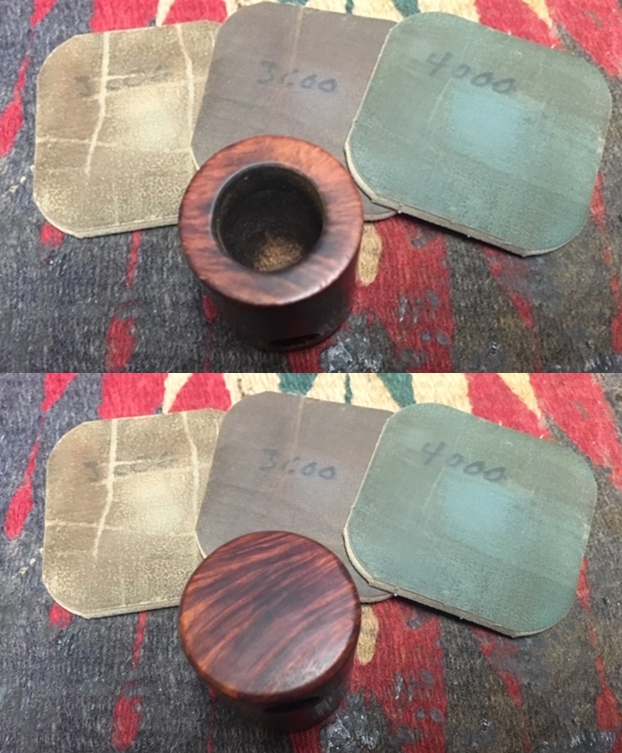
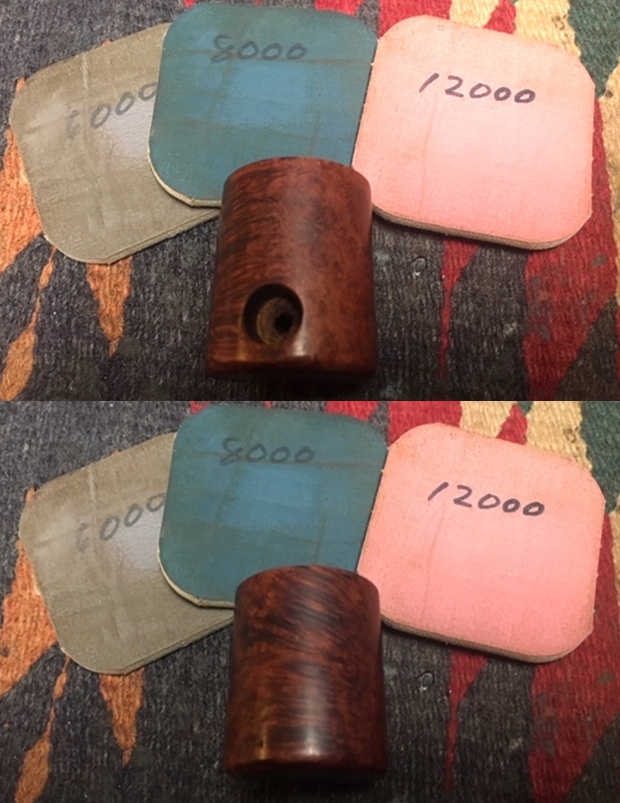
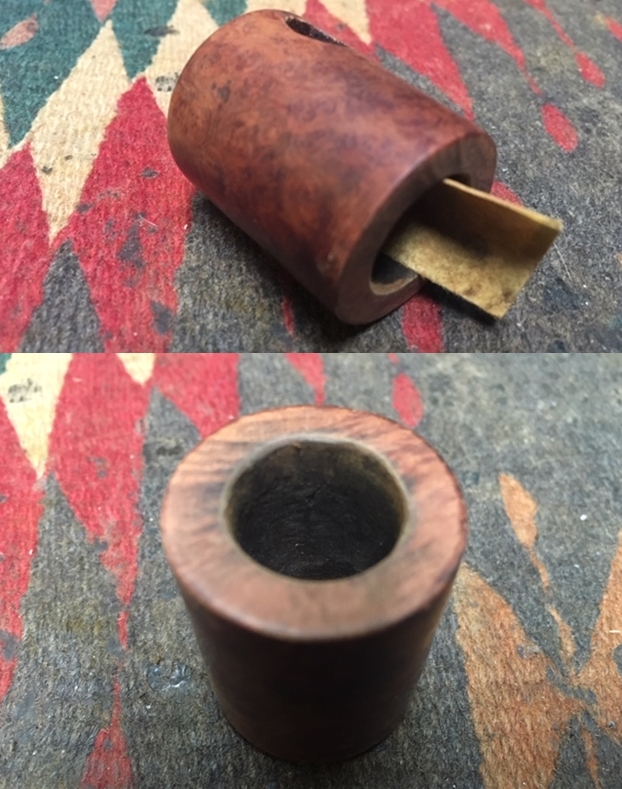 I polished the bowl and rim top with micromesh sanding pads – wet sanding it with 1500-2400 grit pads and dry sanding it with 3200-12000 grit pads. I wiped it down with a damp cloth after each pad to remove the dust. To finish, I hand buffed it with a cotton cloth to raise a shine.
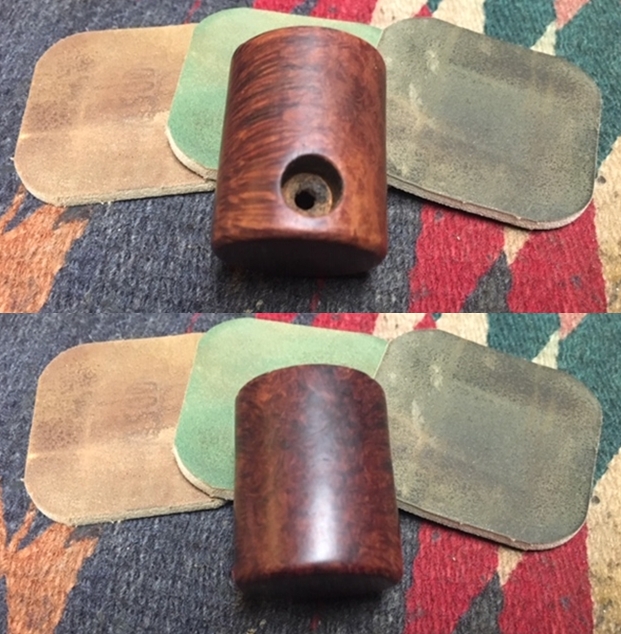
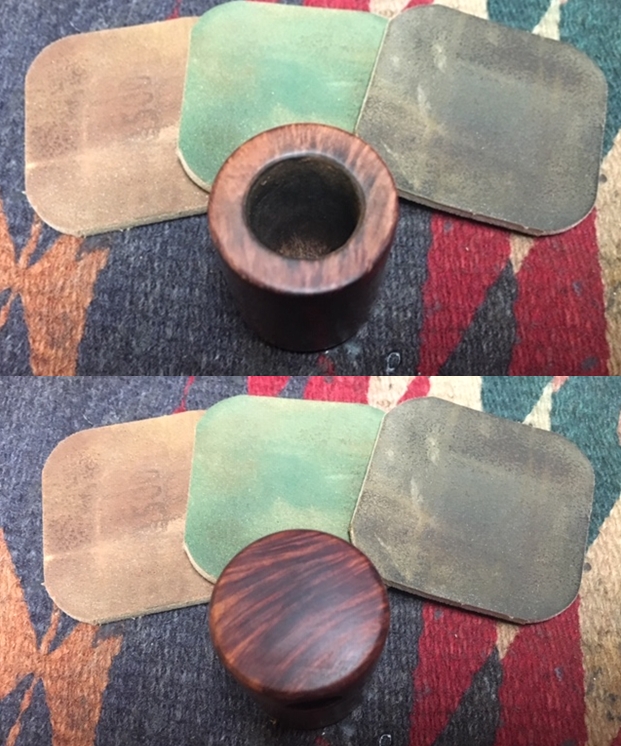
 I worked some Before & After Restoration Balm into the surface of the briar bowl and the shank piece with my fingertips to clean, enliven and protect it. I let the balm sit for a little while and then buffed with a cotton cloth to raise the shine.The following photos show the bowl and shank at this point in the restoration process. The bowl, rim top and shank look very good with rich grain patterns.
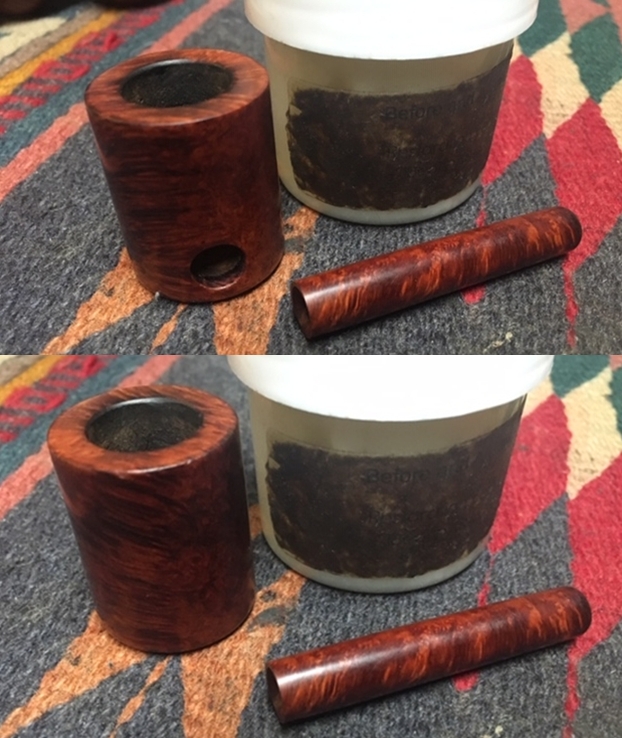
 With the bowl finished I set it aside and turned my attention to the stem. I sanded the stem surface with 220 grit sandpaper to remove the oxidation on the surface of the button. I am happy with the stem surface once that was done. I started the polishing of the surface with 400 grit wet dry sandpaper.
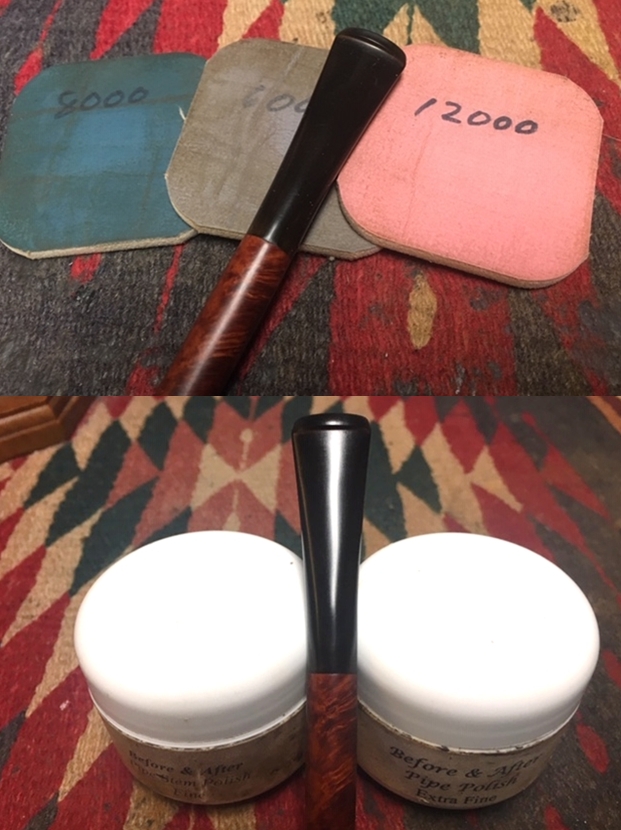
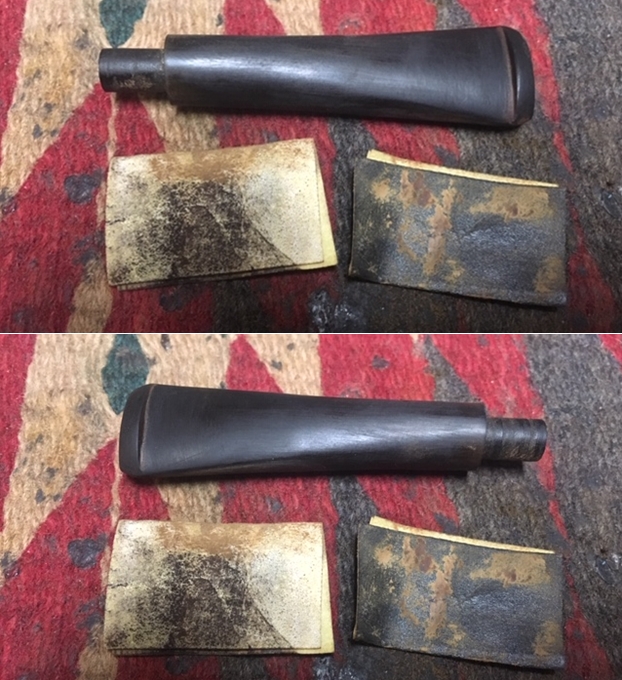 I polished the stem with micromesh sanding pads – wet sanding it with 1500-2400 grit pads and dry sanding it with 3200-12000 grit pads. I wiped the stem down with a damp cloth after each pad. I further polished it with Before & After Pipe Polish – both Fine and Extra Fine. I wiped it down with a coat of Obsidian Oil and set it aside to dry.
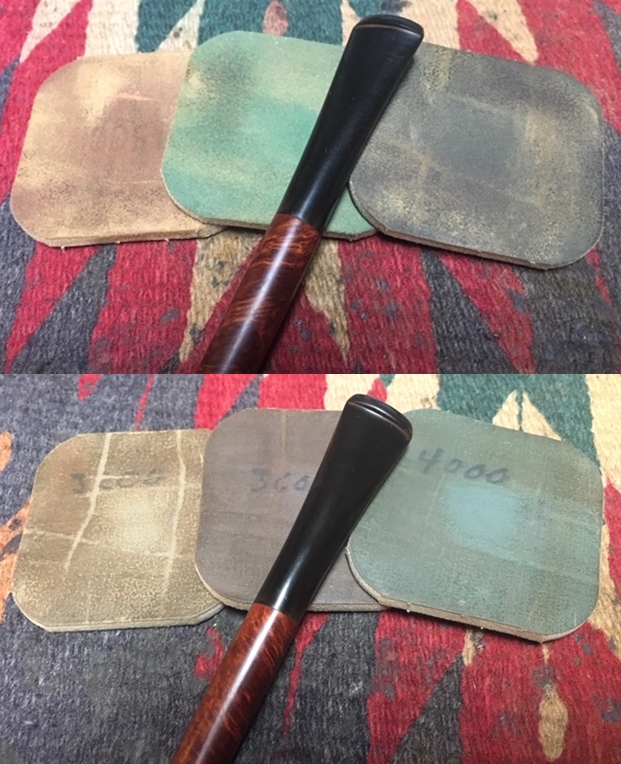
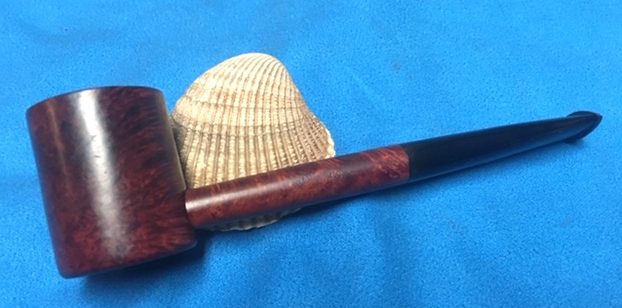
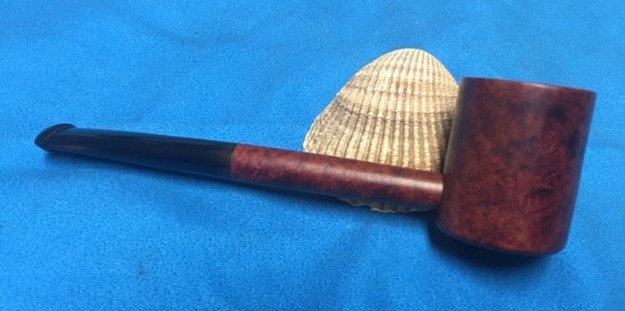
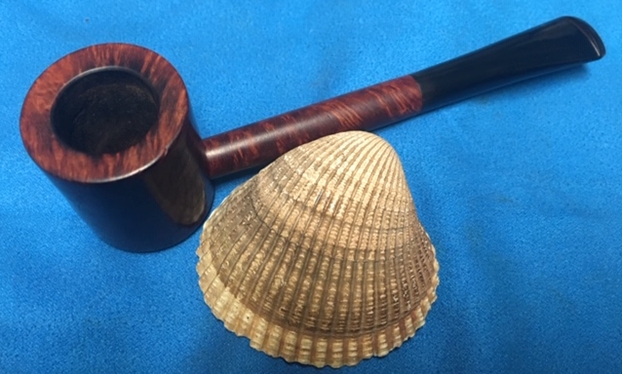
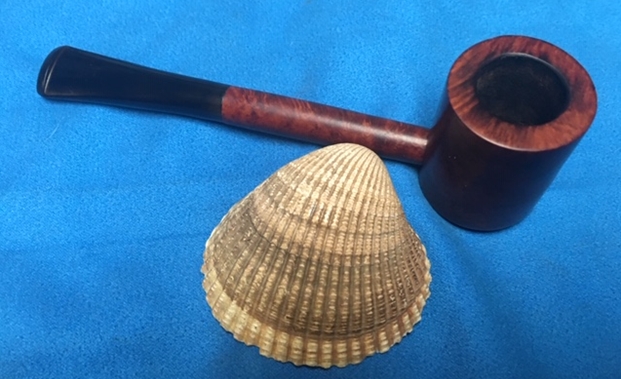
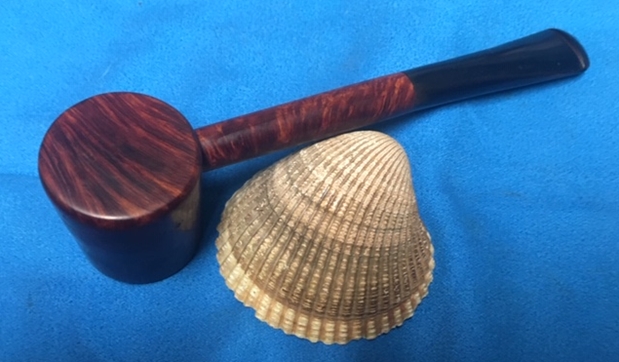
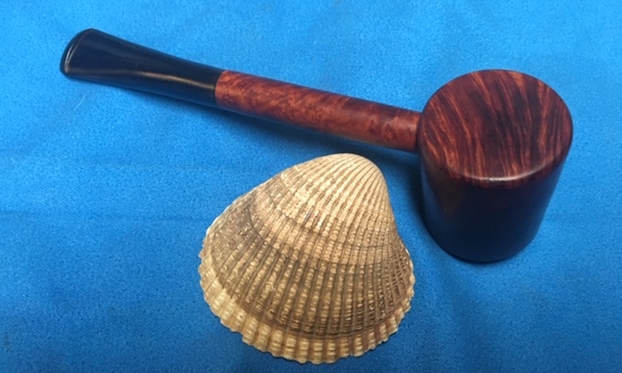
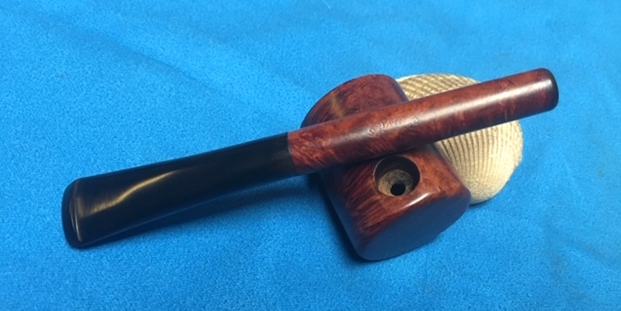
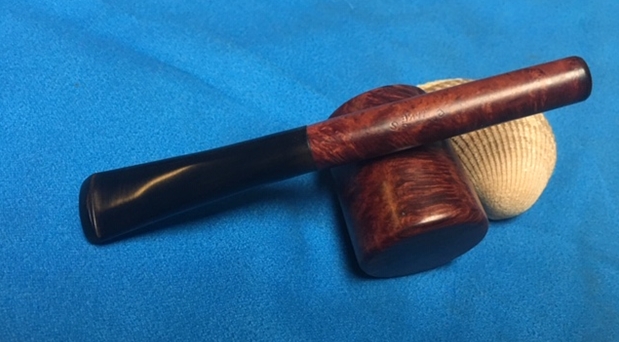
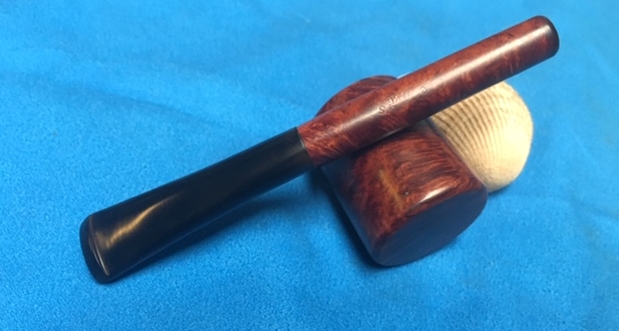
 Once I have all the parts of a given pipe finished I follow the same finishing routine. I polished the bowl, shank and the stem with Blue Diamond polish on the buffing wheel. I gave the bowl and the stem multiple coats of carnauba wax. I buffed the pipe with a clean buffing pad to raise the shine. I hand buffed it with a microfiber cloth to deepen the shine. The pipe polished up pretty nicely. The rich Barling stained finish shone through and the grain came alive with the buffing. The brown stains on the briar work well with the polished black vulcanite stem. The finished pipe is a beautifully laid out poker that is proportionally well made. Have a look at it with the photos below. The dimensions are Length: 5 inches, Height: 1 1/2 inches, Outside diameter of the bowl: 1 1/8 inches, Chamber diameter: 5/8 of an inch. I think I will hang on to this one as it is a Barling’s Make style that I have never seen before and probably will never see again. It was an interesting pipe to work on and I love the finished product. Thanks for reading.