Category Archives: Examples of Refurbished Pipes

In this section of the blog you will find before and after pictures of pipes that I have reworked. In each of them I give a summary of the work done to them. There are tips on working with different materials in these posts as well. For instance I have posted two horn stem pipes that I did work on the horn stems to removed tooth damage.

Had fun with this one – GBD International


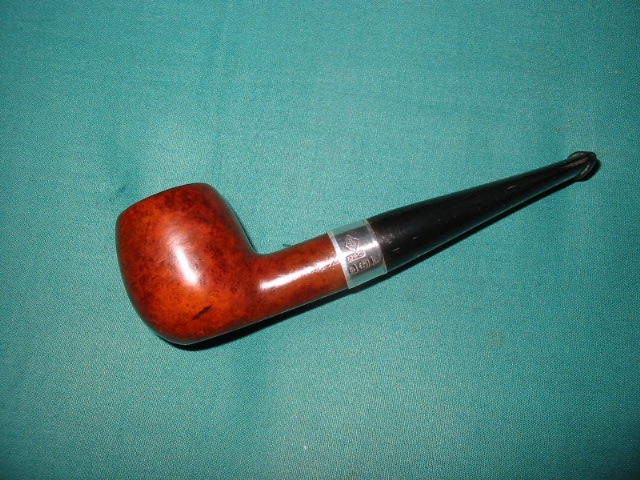
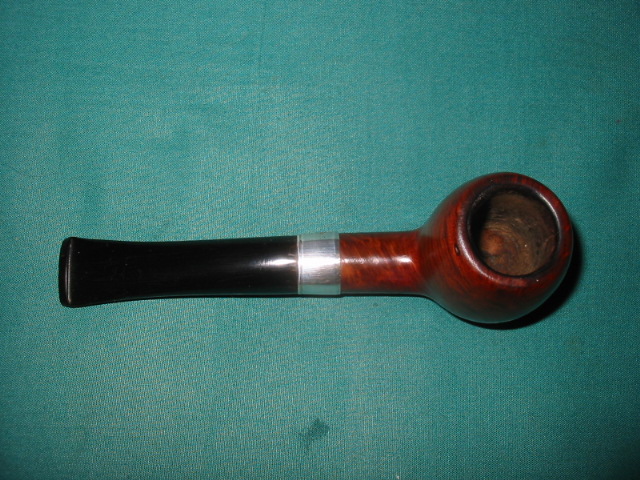
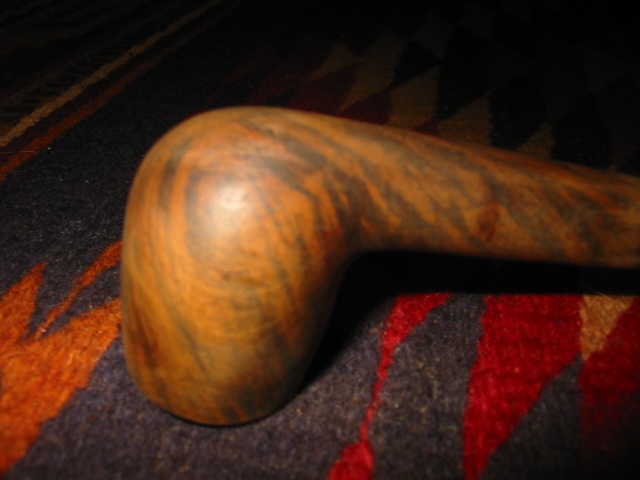
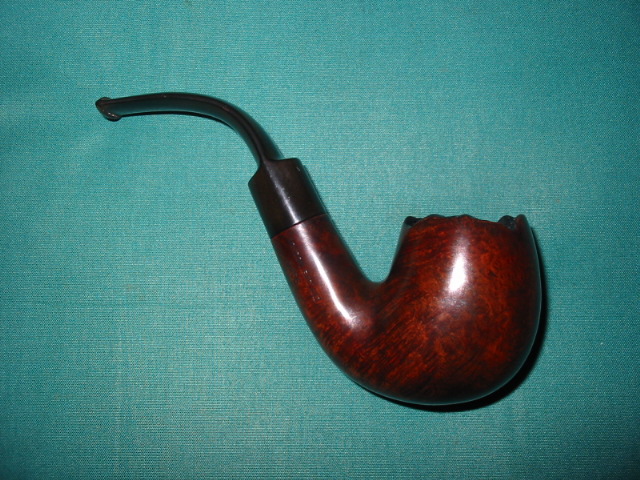
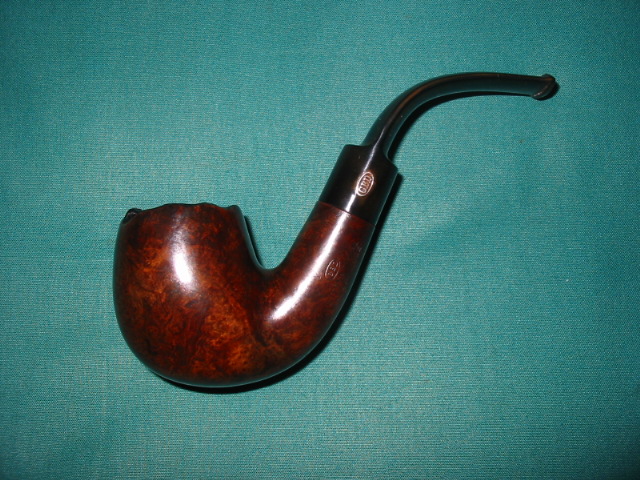
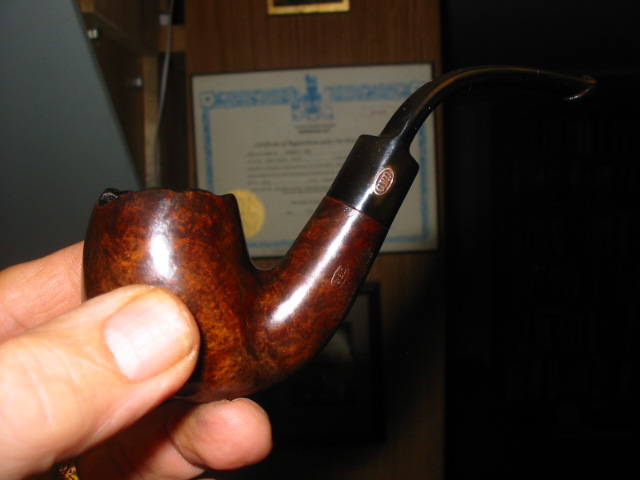
I just finished this beauty – a GBD International. It is a beautiful little pipe. The shape #9456 says it is a bent apple – I suppose that is so. I did some work on what they originally looked like. They had a plateau (Faux?? not sure) top that was stained black and the bowl was a medium warm brown.

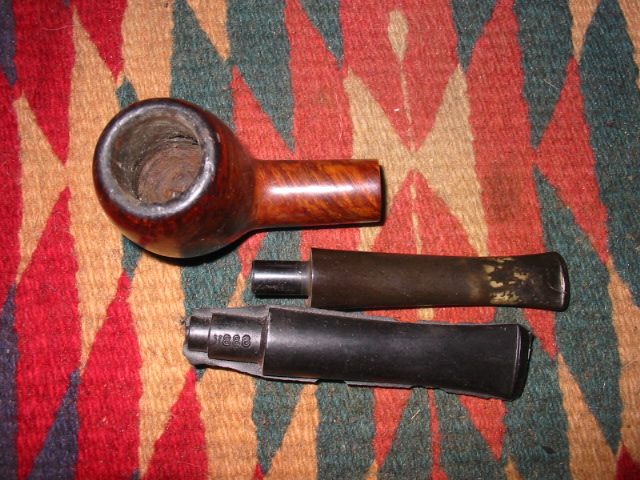
This one was pretty well stained with dirt and grit. The finish was blown and the bowl was caked and dirty. The stem was brown and it was a pretty gross mess. It was one I was going to put off but today I decided to work on it. I am glad I did as it was actually quite fun to work on.

I cleaned the stem as usual. It was tough and still shows some oxidation under the flash of the camera. I will do a bit more in brighter light. But it looks good to the natural eye. The bowl was reamed and cleaned and put in the alcohol bath. I removed any of the bits of left over stain left. Then I used a pipe cleaner and stained the plateau black. Once I did that I had the notion to stain the whole pipe black as well. I then wiped off the stain on the bowl and washed it with a damp alcohol rag to get it to the tone of brown I was looking for. I am really pleased with the stain and how it came out. I love the contrasts of the brown undertones and the black overstain. The wipe and then sanding with micromesh really worked to highlight the birdseye and grain in it.

Thanks for looking.

ImageImageImage

Image

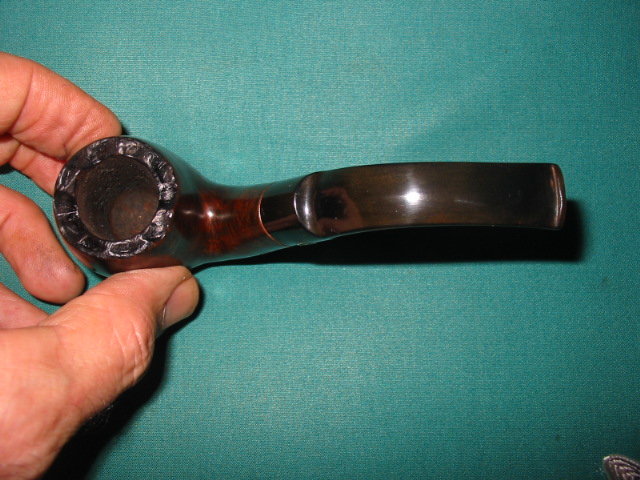
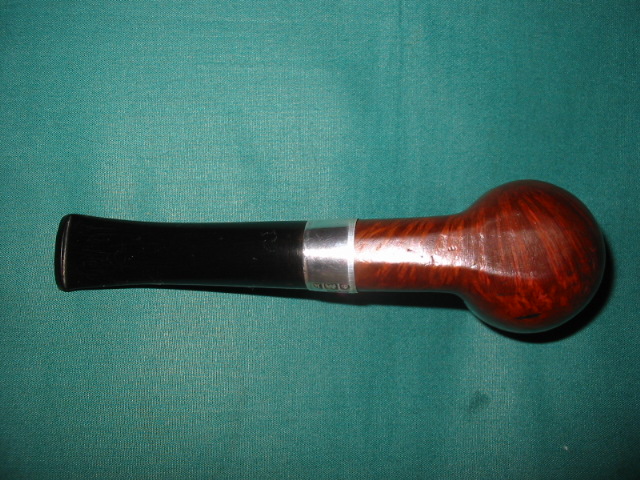
Here is a final picture to give you an idea of the size.


Reworked Old Apple


Blog by Steve Laug

I had this old apple with very faint stamping that looked like it could have been stamped Edwards but not clear. I decided yesterday to rework it. The old stem had a split in the button and was shot. I decided to fit a new stem for it. I reamed and cleaned the bowl and fit the stem. While I worked on the stem I dropped the bowl in my alcohol bath for an hour. Once it was done I sanded the bowl and cleaned it some more. There were a couple of spots on it where small fills had fallen out so put some briar dust in them and then a spot of super glue. Once dry I sanded them smooth so that the stain would take around and in them. I put the stem on and stained the bowl with an oxblood stain as I figured that would match what was originally on the pipe. Once it was all polished it reminded me of an old timer that I had seen and been hunting for – a straight shanked BBB apple. Well that got me thinking and I dug through my box of bands and sure enough I had an old BBB silver band hallmarked 1909 that fit perfectly. The stem and pipe look older so the band added some more age to it. I really like the final look of this one.

Before pictures:
ImageImage

And the finished pipe:
ImageImageImageImage

Unique old pipe – “The Rubywood”


Blog by Steve Laug

I enjoy working with alternative woods that over the years have been used in pipes. I have worked with pear wood, cherry, walnut, manzanita and mountain laurel. But last evening I finished restoring an old pipe that revealed more than I expected as I worked away the old finish. It became more than speculation that I was not working with briar. It was too light in weight and just felt different. Once the black grime was gone I could see graining that was very different. The pipe is stamped “the Rubywood” that is all. I researched a bit and found that ruby wood is red sandal wood that is very hard and used for fine furniture. I don’t know about that but this is amazing looking wood. It has dark graining that is deep and then swirls that go through the grain as well. There are dark spots of ruby/red colouration that have come out in the refinishing. I turned the tenon and fit a stem for this one. Then restained it with an oxblood stain to highlight the natural reddness of the pipe.

Here are some pictures of the wood with the finish removed.
Image

Here are some pictures of the refinished pipe:

I wondered about toxicity of the wood so I posted it on Smokers Forums to see if anyone knew about this wood. I got this reponse from a friend there:
“I found quite a few pipes (made in China and India) made from Red Sandal Wood. Apparently parts of the tree are used in herbal medicine. Heck, if it gets rid of wrinkles I wouldn’t mind smoking that pipe

Pterocarpus Santalinus Uses : It is an astringent and a cooling agent and is used in several skincare preparations. It is used in the treatment of pimples, acne, wrinkles etc. It us also used internally in chronic bronchitis, gonorrhoea and gleet, chronic cystitis with benzoic and boric acids. Much used as a perfume for different purposes. The wood is used for making fancy articles and is much carved. It has been used in Ayurvedic medicine as an anti-septic, wound healing agent and anti-acne treatment. A paste of the wood is used as a cooling external application for inflammations and headache. A decoction of fruit is used as an astringent tonic in chronic dysentery.”

Thanks for looking.

Hot off the refurb desk


This is one that I just finished refurbishing. It came in a box of pipe bowls that I was given that needed re-stemming. I cleaned and reamed it and removed the tars on the rim. The shank had a small crack in it that needed to be fixed so before I re-stemmed it I cleaned the outside of the shank with a cotton swab of acetone to remove any finish that was on the area that the band would cover. I measured the outer diameter of the shank, picked out a nickel band. Just before placing the band I put some super glue in the crack and let it dry. Once done I dabbed a bit of all purpose glue where the band would go and then heated band so that I could pressure fit it in place. I re-stained the bowl with a dark brown aniline stain to give it a more even finish. I buffed it with Tripoli and White Diamond before giving it a coat of wax. Then I laid it aside.

I found an interesting stem blank that would give the pipe a pleasing look to my eye. I turned the tenon with a PIMO tenon turning tool until it was a close fit and then did the rest of the work on the tenon with sand paper by hand. Once I had the tenon fitting snugly I took my Dremel to the outer diameter of the stem to bring it as close as possible to the diameter of the shank of the pipe. I finished the exact fit by hand with varying grades of sand paper. Upon completion of the fit I used 240, 400 and 600 grit sand paper to remove the scratches and then 1500,1800, 2400, 3200,4000 and 6000 micro-mesh sanding pads to finish the polish on the stem. I put the stem on the pipe and then took it to the buffer and did a final buff with White Diamond buffing compound on a mixed felt/flannel wheel. Remember never buff a stem without it being in place on the bowl or you will round the edges at the stem/shank connection.

Once I had the stem as smooth as I wanted I gave it a coating of Obsidian Pipe Stem Oil and let it dry for half an hour and then buffed the entire pipe with a carnuaba wax buff.

Here is the finished product:

ImageImageImageImage