Category Archives: Examples of Refurbished Pipes

In this section of the blog you will find before and after pictures of pipes that I have reworked. In each of them I give a summary of the work done to them. There are tips on working with different materials in these posts as well. For instance I have posted two horn stem pipes that I did work on the horn stems to removed tooth damage.

Restemmed Sasieni Mayfair


Blog by Steve Laug

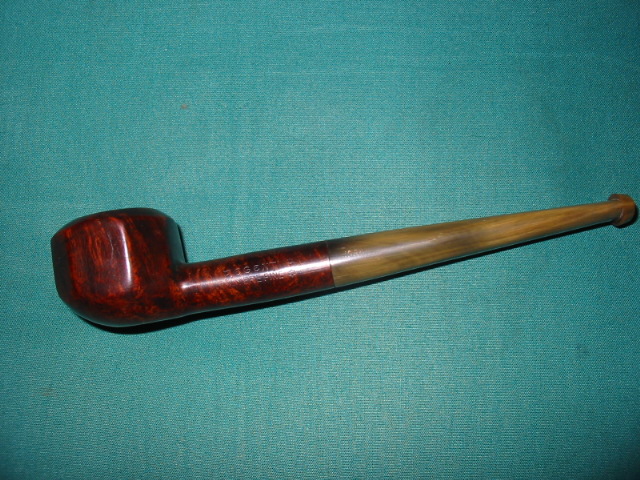
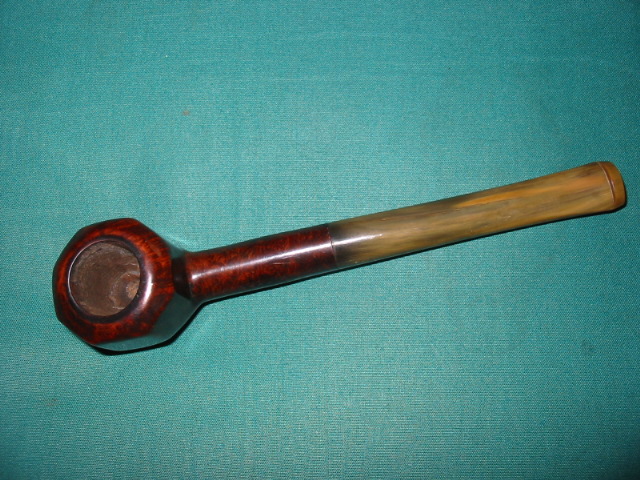
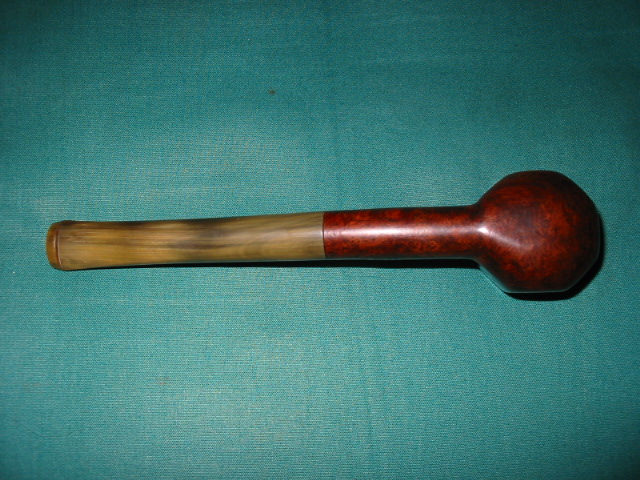
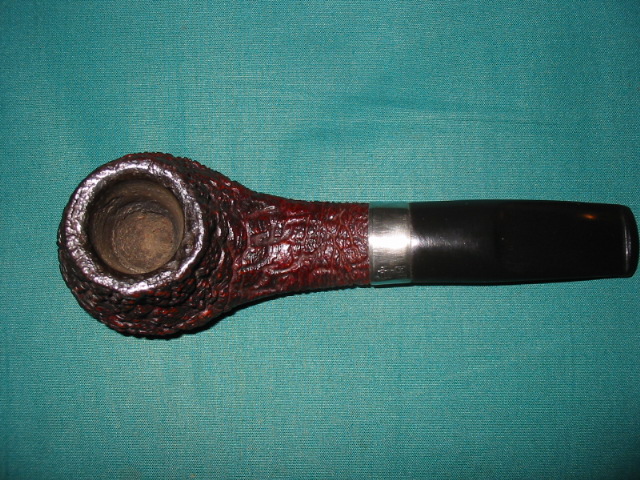
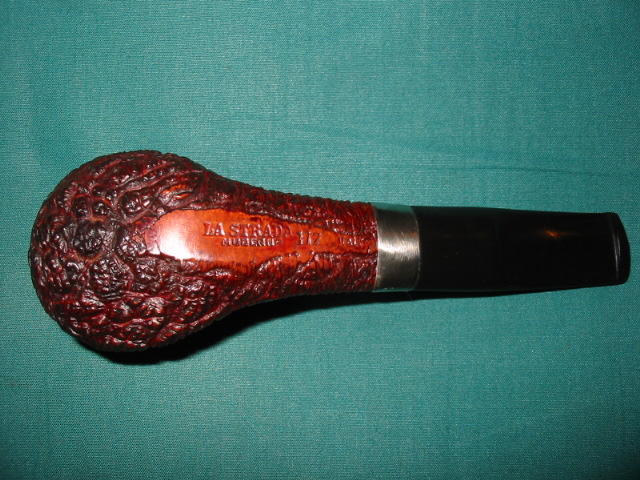
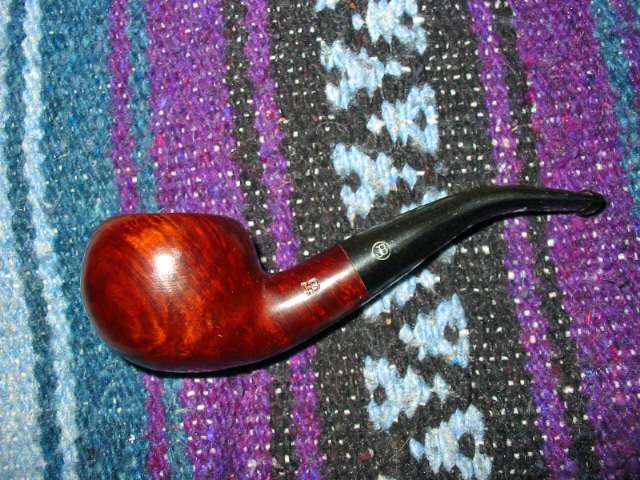
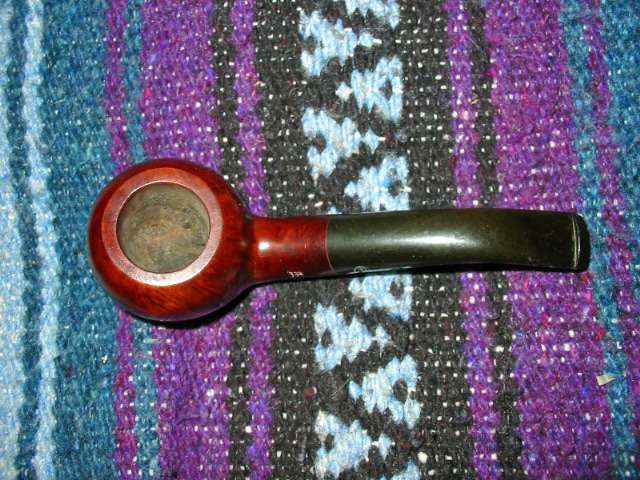
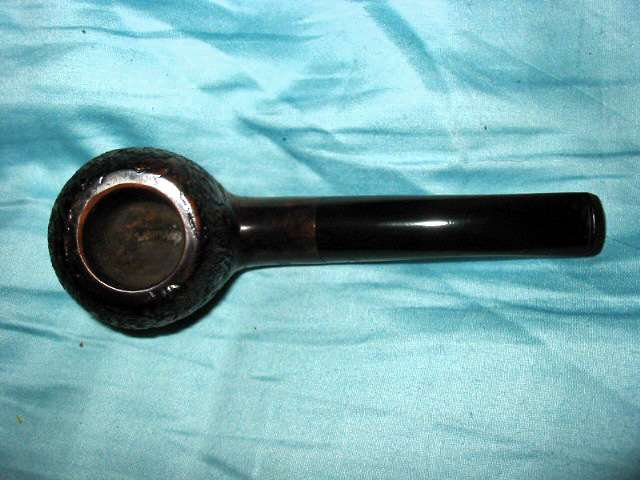
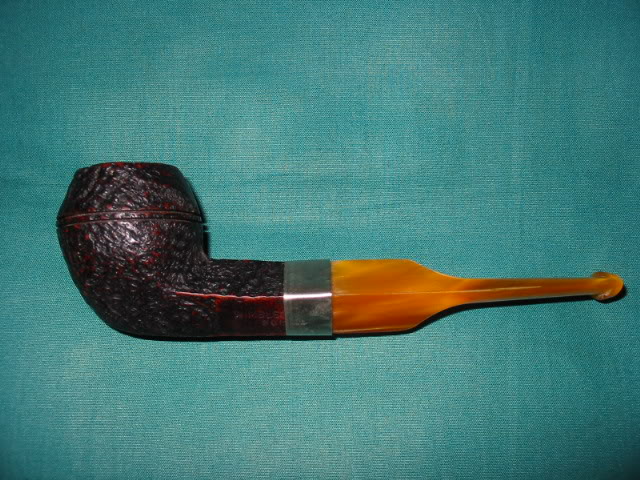
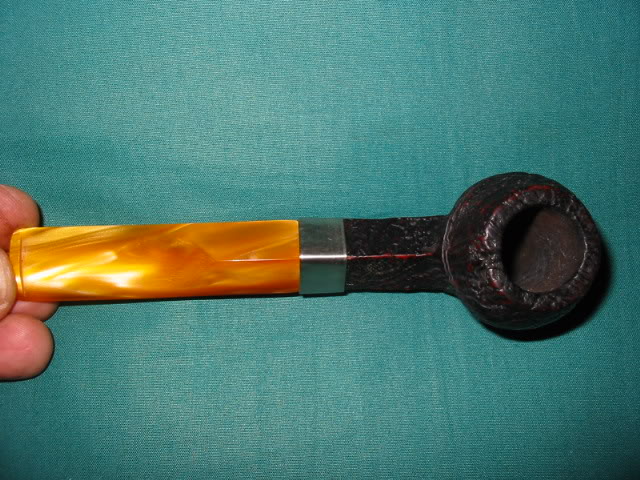
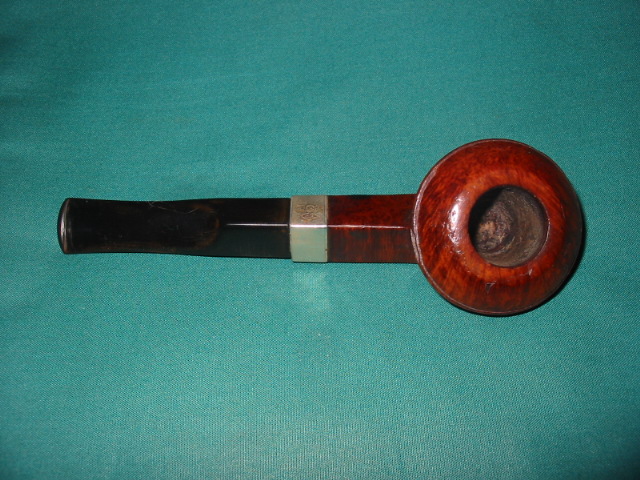
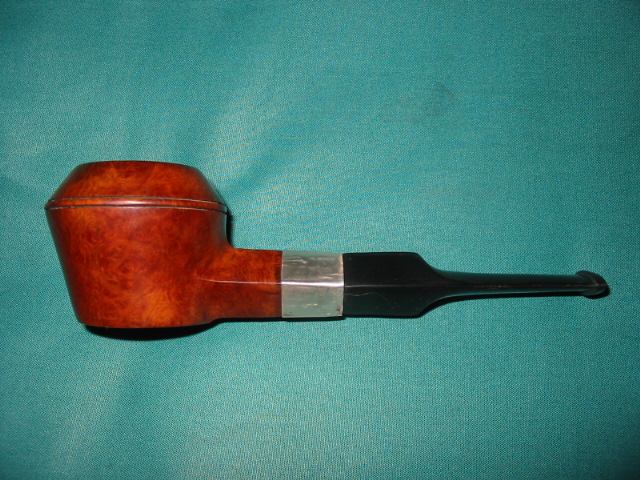
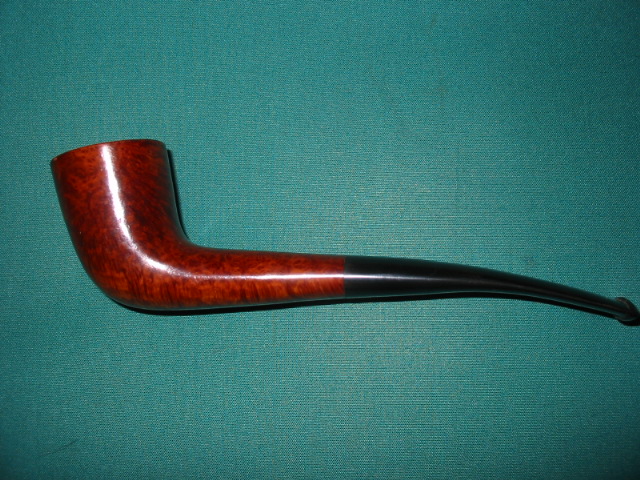
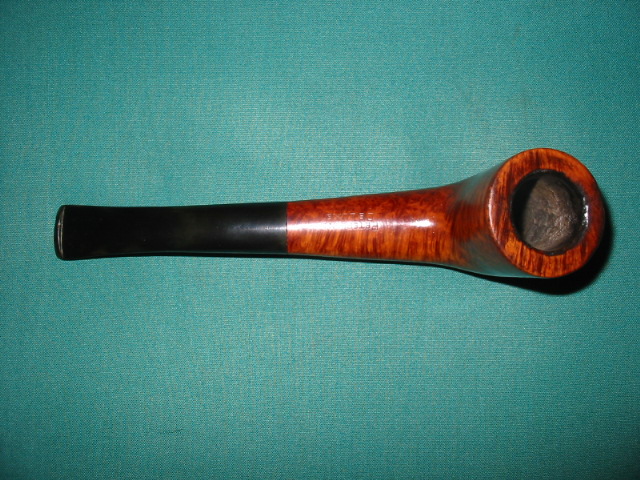
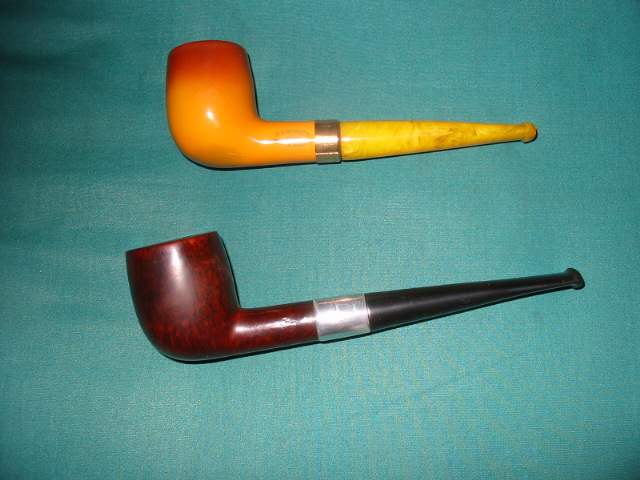
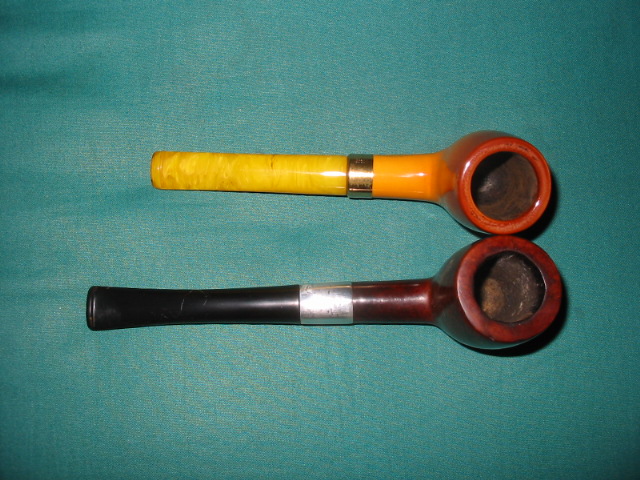
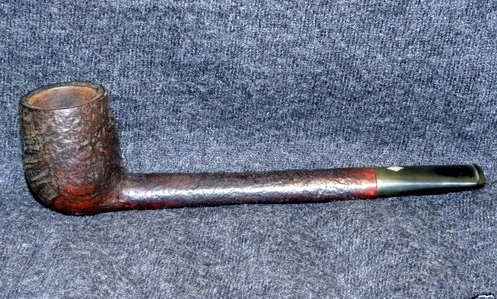
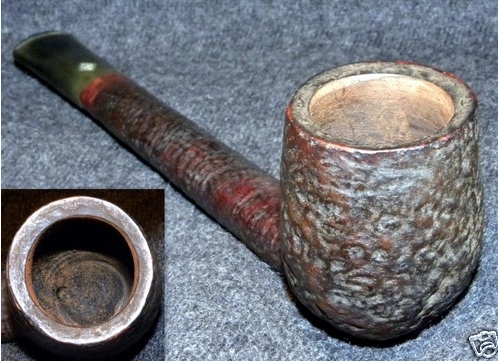
I have had this old Sasieni Mayfair on my desk for a long time. It had come to me in a box of stummels/bowls that I received from a friend over a year ago. It sat for several months in that box before I took it and cleaned it up. I reamed and cleaned the bowl and had even restained it after it had an alcohol bath. I had restemmed it after that with a Lucite tapered butterscotch coloured stem. It looked nice and fit well but something did not quite work with the combination in my opinion. I had it sitting on the table for several months with that stem. I smoked it occasionally and looked it over but never really like the way the stem looked with the old pipe. It seemed like two different eras were colliding in the combination of the old bowl and the new stem so it just sat on the table.

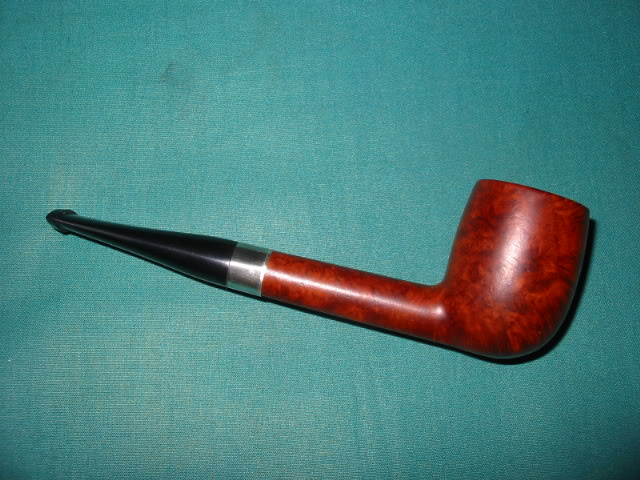
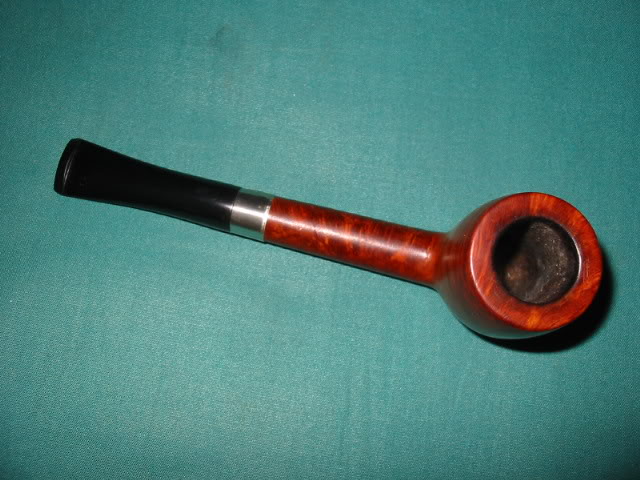
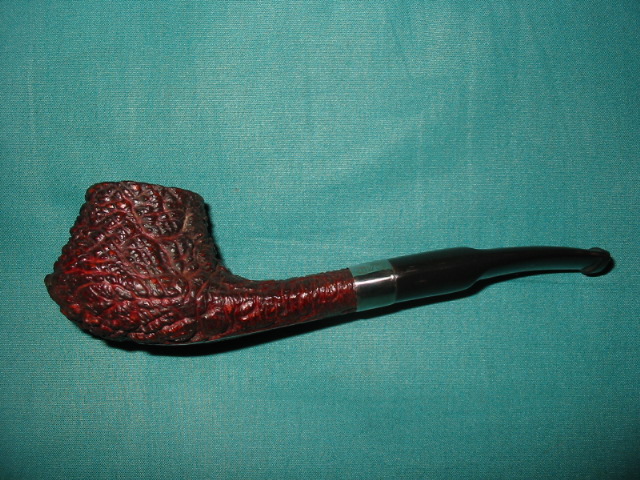
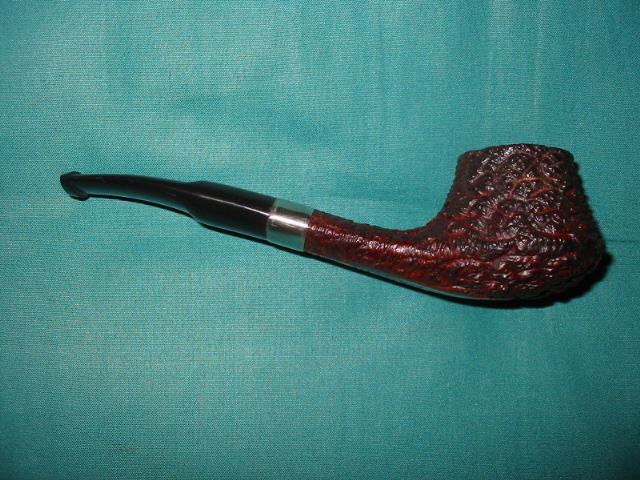
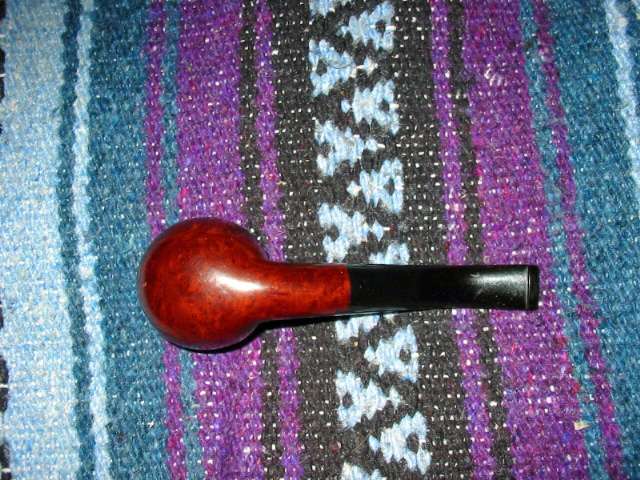
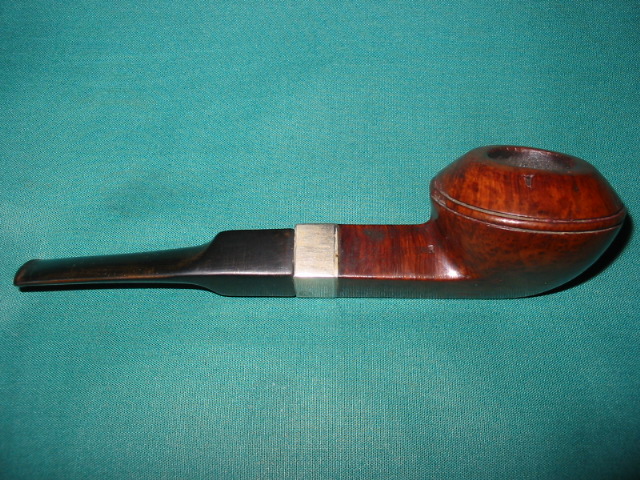
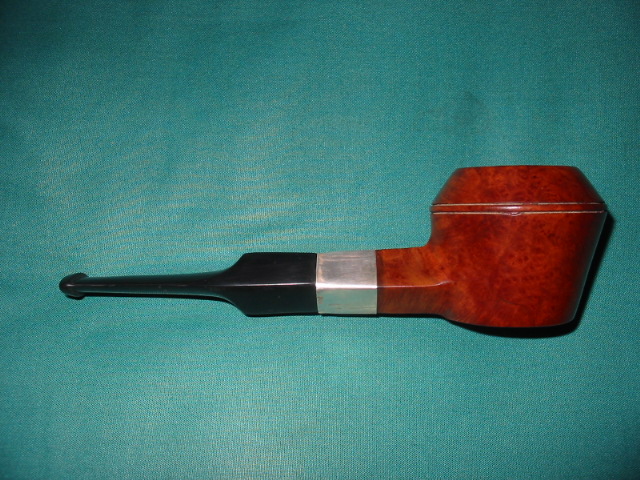
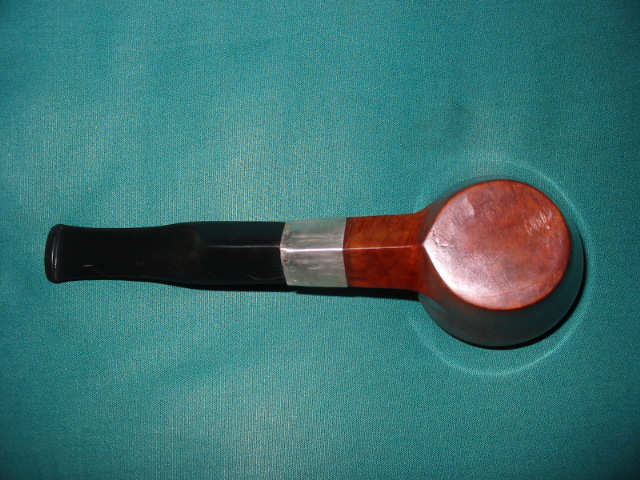
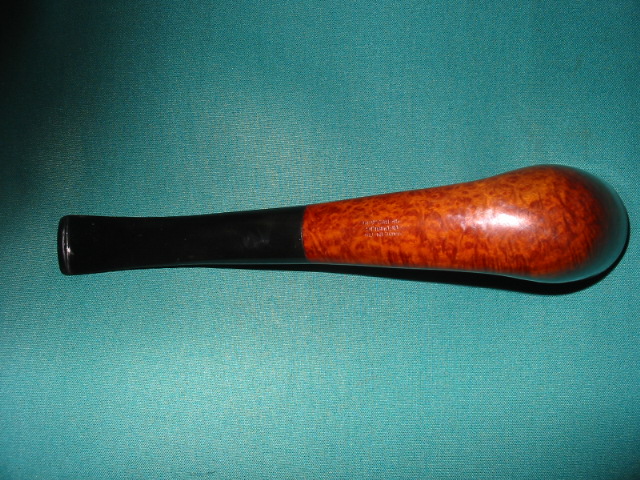
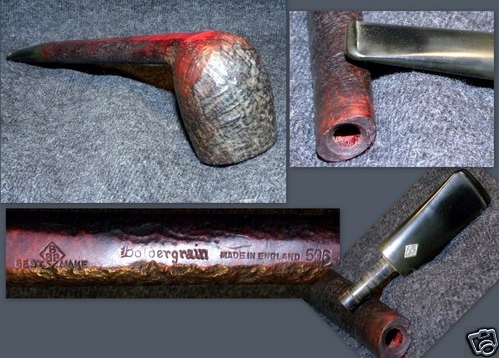
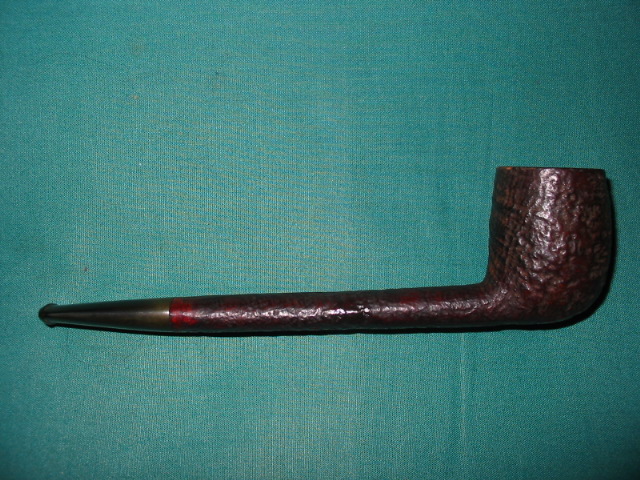
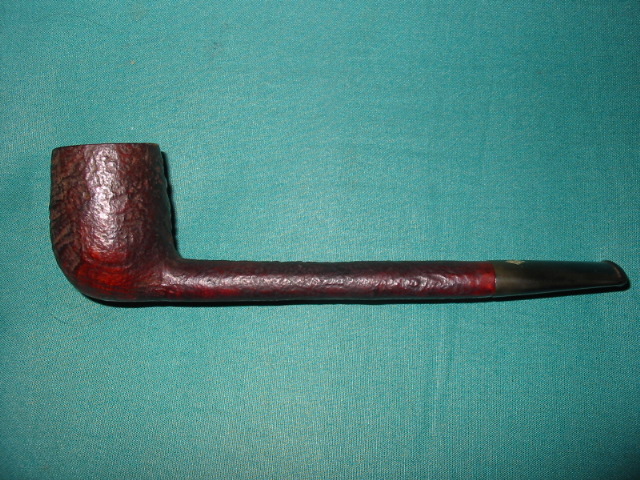
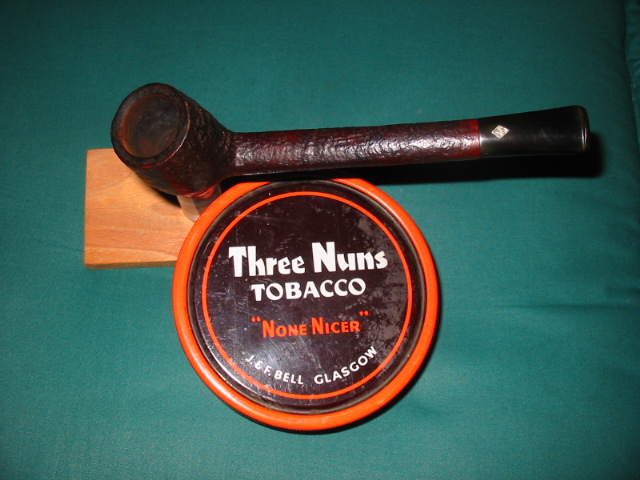
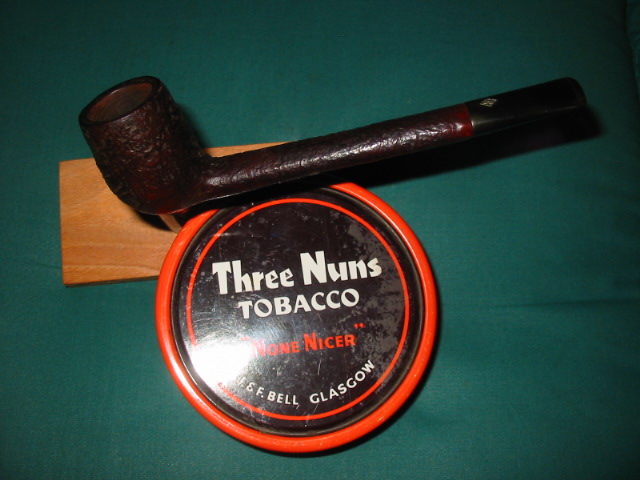
One day after I had finished the pipes that I was working on and was not quite ready to close up shop for the night I picked up the Sasieni. I turned it over in my hands debating with myself what to do with it. It did not take long before I decided to restem it with a vulcanite stem. So I found a stem in my can of stems that was the right shape and angles on the slope of the stem and turned the tenon and fit it to the pipe. Even with just that much work the stem looked like it was a better choice for the pipe. I then used my Dremel with the sanding drum to take down the rest of the stem to fit the shank and band. Once I had a good fit I used emery cloth, 240 grit sandpaper and 400 and 600 wet dry sandpaper and water to smooth out the sanding scratches and marks from the drum and to fine tune the fit. I opened up the button with needle files and also funneled the end of the tenon for a smooth airflow. Once it was finished I took it to the buffer and buffed the pipe with White Diamond and several coats of carnauba wax.

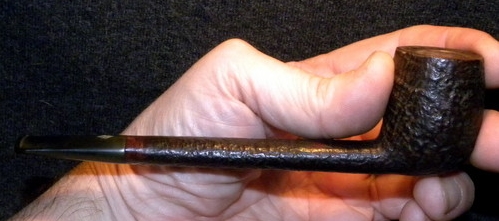
I liked the look of the pipe immediately and knew that the new stem was the ticket to returning this old pipe to its former glory. Now with the new stem I find myself reaching for it regularly. ImageImageImage

Reclaimed a Horn Stem Oldenkott Panel


Blog by Steve Laug

I find that I enjoy smoking pipe with horn stems. The feel in the mouth is unique in range of pipe stem material. It is not hard like Lucite nor is it like Vulcanite. There is a very different feel in the mouth than anything else. I really don’t know how to describe it – it is smooth like well-polished Vulcanite or Lucite. It is soft like Vulcanite but somehow a different kind of softness. It has a luminescence that is beautiful when polished to a reflective sheen. It that almost indescribable feel that keeps me on the lookout for more horn stemmed pipes. I think that I have probably a half dozen in my rack at the moment. All but one of them is small bowled and lightweight. All of them are great Virginia Flake pipes and seem to be made for that style of tobacco.

Here  is a few of my horn stem pipes. Image

The pipe below is one I added recently. It is the fourth pipe from the left in the picture above. It is an Oldenkott pipe. When I got it the finish was rough as it seemed to have had a varnish or some kind of topcoat on the bowl that was flaking off and broken. The bowl was unevenly caked but the pipe showed promise. I reamed and cleaned it then put it in the alcohol bath while I worked on the stem. The stem had a few minor bit marks that I repaired by sanding them smooth. The tooth chatter disappeared in the same manner. I have found that with horn I have to be a bit careful with the sanding so that the horn itself does not sliver or splinter so I used micromesh pads exclusively on this one. I started with 1500 grit and sanded up to 6000 grit. Then I took the stem to the buffer and carefully buffed it with White Diamond.

After removing the bowl from the alcohol bath the finish coat of varnish was gone and the colour looked very nice so I sanded it with micromesh pads and then buffed the bowl with White Diamond. I reinserted the stem and gave the pipe several coats of carnauba to bring back the sheen to both the horn and the bowl. The final picture shows the unique tenon and filter apparatus on this pipe. It is aluminum and seems to work as a condensation chamber more than a filter. The shank and stem were clean on the inside and took very little work to clean out the tars that were present. ImageImageImageImageImage

A New Stem for a La Strada Moderna Volcano


Blog by Steve Laug

I restemmed a couple of pipes for a fellow Canadian who needed one done for himself and one for his father in law. In thanks he gave me a couple of pipes. This La Strada Moderna Volcano was one of them. It was in need of a stem as well and also needed a good cleaning and restaining. The mortise in the tenon was actually very thin at the top of the shank and had some very small cracks that seemed to have come from just removing and reinserting the stem. I repaired the cracks by opening them a bit with pressure on a dental pick and dripped some superglue into the cracks and held them closed until the glue set. I then banded the shank with an oval nickel band that I pressure fit.

I had an oval stem blank in my can of stems that would fit with a bit of work. I fit the tenon with my tenon cutter and sandpaper. Then I used the Dremel to shape the stem to a fit. Using the larger sanding drum on the Dremel I can get very close to a good fit and with a light touch can leave the surface with minimum scratching. I then finish the fit with sandpaper. In this case I used some medium grit emery cloth to bring it very close and then 240 grit sandpaper to finish the fit. Once that was done I used 400 and 600 wet dry sand paper to finish removing the scratches and then took it to the buffer and buffed it with Tripoli so that I could see the scratches I needed to work on some more with sandpaper before turning to the micromesh sanding pads. I used 1500-6000 grit pads to finish sanding the stem. I then finished with White Diamond on the buffer and gave the stem several coats of carnauba wax. I restained the bowl with oxblood aniline stain and then buffed the bowl lightly with White Diamond and coated it with Halcyon II wax to give it a sheen.

ImageImageImageImage

Reworking a John Bessai Pipe


Blog by Steve Laug

I picked this old pipe up on EBay for a very cheap price. In fact I think the postage was more than the pipe. I had read on the forums that John Bessai carved some great smoking pipes.

Pipedia has this information http://pipedia.org/index.php?title=Bessai

John Bessai was a long time pipemaker, repairman and tobacco shop owner who operated his pipe shop at the “Old Arcade” in Cleveland, Ohio. The shop was opened in approximately 1898. It was a small 2-room shop where he hand-crafted his own pipes in the back room and could work when customers were not there. Like so many other shop made brand, John Bessai’s limited production was quickly acquired by regular customers and thus his craftsmanship remained little known outside of Ohio and the Midwest. While his name is known by pipe collectors in the Midwest, his work is seldom seen elsewhere! He died before 1969. Nevertheless, John Bessai left behind a small number of classic shaped pipes; all were made on-site. They are praised worthy of collecting and reflecting skills well beyond most American pipe makers. John Bessai’s logo “JB” appeared as one letter as the “back” of the “J” and the “back” of the “B” share a single line. The logo was stamped on the stem and on the left side of the shank. His son Herb Bessai took over the business and also continued making pipes. He closed the shop in about 1978.

I was excited to have one of his pipes and looked forward to its arrival here in Canada. When it came and I opened the package I loved the shape and the feel of the pipe, but the large fills really bugged me. I cleaned up the pipe and gave it a smoke to see if I would even keep it. It smoked incredibly well and the draw was effortless. It was comfortable and lightweight so it seemed like one that I would keep. But what to do with the fills that covered the right side and the front of the bowl puzzled me. I wanted to keep the pipe clearly a Bessai pipe. I did not want to destroy what he had carved but I wanted to do something to deal with the fills.

ImageImageImageImage

So I decided to rusticate it with a leather-like rustication and then give it a contrast stain on it give it an interesting look. I used my rustication tool (the pipe and nails that I have written about in another post on the blog) to cut into the finish and rusticate the surface of the bowl. Once the bowl was rusticated to the place I liked I took it to the buffer and buffed off the rough spots and made the overall surface smooth to the touch. I then stained it with a coat of black aniline stain and flamed it to set the stain. Once it was dry I took it to the buffer and removed the black stain on the high spots with a Tripoli buffing pad. I then took it back to the desk and gave it a coat of medium brown aniline stain and flamed it. I let it dry and then buffed it with White Diamond. I then buffed the whole pipe with White Diamond to polish the stem and bowl and gave it several coats of carnauba wax. I used a light touch on the bowl as I did not want to fill the grooves with wax. ImageImageImageImage

Restemming a Wimbledon Bulldog


I have this old bulldog in a box to be repaired for quite a while. It is stamped Wimbledon 800 and from research appears to have been made by Briar Craft/Grabow. It needed a new stem as it came to me without one. I had this interesting old butterscotch coloured Lucite stem in my can of stem. It was a diamond shaped saddle stem that I fit to the bowl. I had to turn the tenon to get a fit on the bowl and then had to remove much of the Lucite material on the sides of the diamond shape and thin down the blade and button of the stem. I used my Dremel with a sanding drum to cut away most of the material on the angles and also flatten and thin the stem. I shaped the stem until the angles were correct and then finished the shaping of the stem with sandpaper. I used a medium grit emery cloth to start with as it seems to work really well in removing material and getting rid of the deep scratches and grooves left by the sanding drum. I then used 240 grit sandpaper followed by 400 and 600 wet dry sandpaper with water. I finished by polishing the stem with 1500-600 grit micromesh pads. I had to band the shank as it had a small crack near the top left edge. I fit the stem and then buffed the pipe lightly with White Diamond and then coated the stem with carnauba wax and the bowl with Halcyon II wax. I buffed it to a shine with a flannel buff.ImageImageImage

Refurbished Mastercraft Bulldog


Another old timer, a Mastercraft Bulldog was in my box of bowls without stems. The squat shape of this little bulldog caught my eye.

The bowl pretty rough looking. The finish was gone and the top had been used as a hammer so it was badly dented and the roughening of the wood left a lot of splintering edges. It was also badly caked and still had a remnant of tobacco left in the bowl. Since it was missing its stem I have no idea when the bowl and tobacco got separated from the stem. I have a coffee can in which I keep a wide range of stems that I have picked up and another can of stem blanks that need to be shaped and fit to the new pipe. For this pipe I found an old stem in the can that was a perfect fit once I removed the old stinger type insert. The stem was badly oxidized virtually brown. There were no tooth marks on the stem and no dents that needed to be repaired.

I reamed and cleaned the bowl and shank until the pipe cleaners came white. I use 99% isopropyl alcohol for doing this as I find that it works well and evaporates quickly leaving no residual tastse. The top had been hammered so much that the bowl had to be topped so that it would be smooth again. The trick with this one was not to remove too much of the top and thus change the angles of the bulldog shape. So I removed enough to give me a smooth surface to work with but not enough to change the shape. Once it was topped and sanded I put it in the alcohol bath and left it while I worked on cleaning up the stem.

I had soaked the stem in a mixture of Oxyclean to soften the oxidation and prepare it for the sanding that would be necessary to clean it. Once I remove it from the soak I buffed it with Tripoli to remove the oxidation that had softened and then sanded it with 240 grit sandpaper. Once I had removed the brown surface I used 400 and 600 grit wet dry sandpaper to continue the smoothing and polishing process. I finished the stem with the micromesh pads from 1500 – 6000 grit. Then I set it aside to wait until I had finished bowl and polish the entirety on the buffer.

I took the bowl out of the alcohol bath and sanded it with the micromesh pads to remove the surface scratches and remaining marks in the bowl surface. I steamed out the dents with a damp cloth and a hot knife and then sanded them smooth again. I restained this bowl with a Medium Brown stain. I flamed it to set the stain, inserted the stem and then took it to the buffer and buffed it with White Diamond to polish it. The entirety was then given several coats of carnauba wax. This one found a new home with someone who loved the shape and it is providing a great smoke for them. ImageImageImage

Refurbished and Restemmed this interestingly shaped no name pipe


I refurbished this interestingly shaped no name pot/rhodesian/bulldog (?) or you name it shape. I was drawn to it and liked the look of it when I found it in my box of pipes and bowls that I have gathered for refurbishing. It is a box I have that at one point held over 300 pipes that needed work but is slowly shrinking even though I add to it each time I go scavenging. I am pretty much incorrigible about picking up estate pipes and hunting for them. I am getting more picky over the years as to what I want to work on but I pick up ones that will be a challenge to me or that I like the brand or the shape.

This one was truly a mess. I forgot to take pictures of what it looked like when I took it out of the box but I will describe it to you. In many ways it was no different than most of the others that I work on. The bowl was caked to the point of barely holding any tobacco any longer. It was a tarry mess on the rim and running down the sides of the bowl. There were dents and deep “wounds” in the briar of the rim. It also was without a stem. The silver band on the shank was badly beat up and to be honest the pipe was downright ugly. But in its ugliness I saw something that drew me to pick it up and see what I could do with it. So I took it to my work table and it became a project that took me two days.

I did what I call field dressing the pipe the first day. That includes reaming the bowl and cleaning out the grit and grime from the shank and bowl. I washed the bowl down with acetone to remove the overflow from the bowl and rim on the outside of the bowl. I also removed the dirt and grease marking on the bowl. Once it was clean I fit a stem for it. It has a diamond shank, and those have always been a challenge for me to make a proper fit. I find that on these old timers what appears to be a diamond with equal sides never truly is equal. Each side on this one had a different measurement. I used a blank that I had here and shaped it to fit. It is difficult to get each side correct and maintain the shape to fit the shank. I cut the tenon with my Pimo tenon turner and worked the shape for a long time to make it flow with the shank. It took a long time because I would get one side perfect only to lose a bit of the angle on the next side. I finally was able to get the angles right and fit the stem to the shank well. In the finished photos you can get a bit of an idea of the work involved in that.

I then removed the silver band and put the bowl in the alcohol bath while I tried to straighten and smooth out the silver band. I got a lot of the wrinkles and dents out of it but a few still remained even after my work.  I set it aside to reinstall on the shank once it was restained and turned my attention to sanding and polishing the stem. I used 400 and 600 grit wet dry sandpaper as usual to remove the scratches and marks left by the shaping. I then use my normal regimen of 1500-6000 grit micromesh to bring a shine to the stem. When I had it finished and ready for the buffer I put it aside and went back to the bowl.

I removed the bowl from the bath and sanded it with the usual variety of sand papers and micromesh pads. Then I restained it with a cherry stain that I use on some of the older pipes as I have found that it brings out the old colours from the briar and really looks good. I then sanded again with micromesh and put the stem on it before taking it to the buffer to polish it with White Diamond. Once that was finished I gave the bowl and stem several coats of carnauba wax.

There are no stamping or marking on it all. But the unusual shape continues to attract me in an odd way. It is 6 inches long, bowl height is 2 inches. The chamber diameter is 1 inch and the chamber depth is1 1/4 inches. The rim is chamfered and clean. Anyone have a name for the shape??
ImageImageImageImage

Refurbished a Peterson’s Deluxe Zulu


In one of my EBay purchases was this little Peterson’s Deluxe Zulu shape #268. To me this pipe epitomizes the Zulu shape – in other words, when I think Zulu I think of a pipe that is shaped like this. When the pipe arrived the bowl was dirty and caked (two things that I almost forget to say as they are to be expected in estate pipes and I am surprised when I find one that is not). The finish was mottled with light and dark spots where the stain had worn off. It also had some flecks of paint on the surface that are not clearly visible in the photos below. The rim was very caked and covered with tars. Fortunately there was no charring that was visible as I looked it over. The stem also had paint flecks on it and was slightly oxidized. There were tooth marks on the top and bottom of the stem that would need to be repaired.ImageImage

I reamed and cleaned the bowl and the rim of the pipe. The shank took some work with isopropyl alcohol and many pipe cleaners and a shank brush before it was clean. I wiped down the surface of the bowl with acetone to clean off the remaining finish and the paint spots. I use cotton makeup removal pads that I picked up at the store. They work great and are easier to use than just cotton bolls. Once the finish was cleaned I dropped the bowl in the alcohol bath to soak while I turned my attention to the stem.

I buffed the stem to remove the oxidation and the paint spots. I was careful to avoid the area where the stem and shank meet so as not to round the sharp edges and ruin the great fit of the two. I heated the tooth marks that needed to be lifted with my heat gun and when they had come back as far as possible I sanded the stem with 240 grit sandpaper to remove what remained. I sharpened up the edge of the button with my needle files to give it a good crisp edge. I then sanded the whole stem with 400 and 600 grit wet dry sandpaper and water. I finished the sanding and polishing process with micromesh pads from 1500 to 6000 grit. Once that was finished I laid the stem aside with a coat of Obsidian Oil and turned back to the bowl.

I took the bowl out of the alcohol bath and restained it with a medium brown aniline stain. I flamed it, let it dry and then took it to the buffer and buffed it with White Diamond. This was done and the entirety buffed and polished with carnauba wax to give it several layers of wax. The cross grain, birdseye and straight grain on this beauty are well laid out. ImageImageImageImage

Reclaimed – an Old Baronite Ceramic and an Old Briar


Blog by Steve Laug

When I saw this pair of old pipes on EBay I was intrigued enough to put in a bid. I did not bid high as I was intrigued not captured by them. As I looked at them the upper pipe had some interesting possibilities in grain and the shape of the stem and angles looked old to me. The bottom pipe fooled me a bit – when I first looked I thought it might be a meerschaum with an amber stem. But after bidding and a bit more digging on the internet I found that it was a double walled ceramic pipe and the stem appeared to be Bakelite. I found out that I had bought these pipes when I got home from work that evening. They would arrive soon and I would have the pleasure of working on them.Image

When they arrived I took time to look them each over to get a feel for what needed to be done to bring them back to service. Looking over the briar pipe first I could see that it is old. The stem style and the orific button point to an older pipe. The silver band has no hallmarks or stamping so it is no help in identifying the pipe’s brand or age. The stamping on the shank is too faint to see even with a bright light and a jeweler’s loupe for magnification. The bowl was thickly caked and much of the tars of the tobacco were built up on the rim. It appeared that the rim was not damaged with char or denting. The finish, as can be seen in the photo below as very dirty and darkened with oils from the hands on the sides of the bowl. The stem had deep tooth marks and much chatter from teeth along top and bottom from the button up about a ½ inch.

The second pipe was a double walled ceramic pipe. It was stamped Baronite Made in Holland. The outer surface of the bowl was dirty and darkened with what appeared to be grease. The band on it appeared to be a golden colour under the dirt. The stem was in pretty good shape but the cork seal on the tenon was dry and thus loose in the shank. The inside of the bowl was caked and black. The shank was also black and dirty. I shined a light into the shank and could see the gap between the walls of the inner and outer bowl. This area was in need of a thorough washing.

On the briar pipe I cleaned and reamed the bowl. The shank was a mess and full of grime and grit. It took many pipe cleaners, a shank brush and isopropyl alcohol before it was clean and the pipe cleaners came out white. The deep tooth marks on the stem were lifted with my heat gun and then sanded smooth. I used 240 grit sandpaper, 400 and 600 grit wet dry sandpaper and then finished the work on the stem with micromesh pads from 1500-6000. While I worked on the stem I had put the bowl in the alcohol bath to soak and hopefully remove the darkened and soild finish. When I took it out of the bath and dried it, I sanded the bowl and restained it with a medium brown aniline stain. I put the stem back on it and then buffed it with White Diamond and polished it with carnauba wax

On the Baronite Ceramic pipe I did a bit of seeking advice and found out that I could flush out the bowl with hot water. I did this at my sink with the water running through the bowl and out the shank. I repeated it the other direction as well. Several times I filled the bowl and shank and shook it to help the water scour between the inner and outer bowl. After about five minutes of this the water came out clear and the pipe smelled clean again. I decided to do the same process with isopropyl alcohol as well and ran it through the pipe both directions for a final cleaning. I used repeated applications of Vaseline on the cork seal on the tenon to soften it and expand it again. Once that was done the stem fit snuggly to the shank. I cleaned the stem with isopropyl alcohol and pipe cleaners and a shank brush to get the dark areas out of the inside of the stem near the button. Once the stem was done I put it on the pipe and buffed the entirety with carnauba wax. The series of photos below show the finished look of the two pipes.ImageImageImage

A surprise awaited me when I opened the package and looked at this BBB Boldergrain Canadian


Blog by Steve Laug

When I saw this one show up on EBay I had to have it. Multiple reasons made it one that I wanted to own. The first is that I love the older BBB pipes. I like the way they look and smoke. I like the classic shapes and the old patinas that grace them. Then of course for me was the fact that in my reading and buying estates I had not come across this line of BBB pipes. It was new to me. So I placed a bid on it and won it – it turns out that I was the only bidder so no surprise really.

The first series of four pictures show the pipe as it appeared on EBay. The finish looked to be very worn, the stem oxidized but it did look promising to me. It looked like it would need a bit of work to bring it back to life. The stain would probably have to be redone. The stem cleaned and polished and who knows what the inside would be like. The second picture gave me a bit of hope that maybe the pictures were not quite the whole story. The final picture of the bowl looked like it may have been over reamed and I wondered if there was not a crack in the bowl. But I would know more when it arrived.

Image

ImageImageImage

When the box arrived from England I opened it to see what would await me in terms of cleanup and restoration. You can imagine my expectations and what went through my mind as I cut the tape and the wrapping paper to open the box. When I took the bubble wrap off of the pipe and stem I was amazed at the pipe. It did not even look like the one in the pictures above. The three pictures below show the pipe just after I took it out of the box. The stem was slightly oxidized but the finish was actually not too bad at all. It was nothing that a good buff with some carnauba could not take care of.

ImageImageImage

The next series of photos show what the pipe looked like once it was buffed and the stem polished and the oxidation removed. This probably took the least amount of effort to clean of any of my EBay purchases. Even the inside was very clean. The shank and bowl were clean. I ran a few pipe cleaners through to check it out and they came out spotless. There was no old tobacco smell to the pipe at all – it smelled new. I loaded it up and smoked some older Three Nuns that I had around and enjoyed what appeared to be a very clean pipe. The first smoke was clean and flavourful with no hints of ghosts or residual flavours that I have come to expect from old estate pipes. This one was like smoking a well broken in pipe that had been thoroughly cleansed and exorcised of previous ghosts. It has since become a favourite of mine!

ImageImage