by Kenneth Lieblich
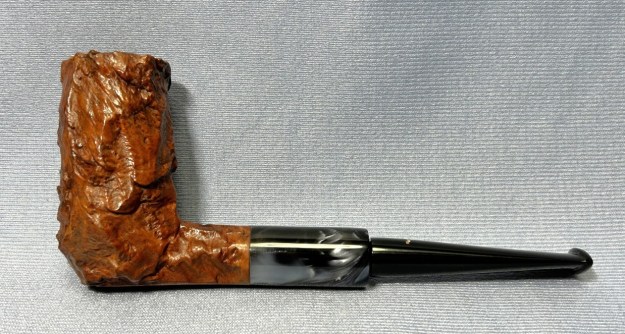
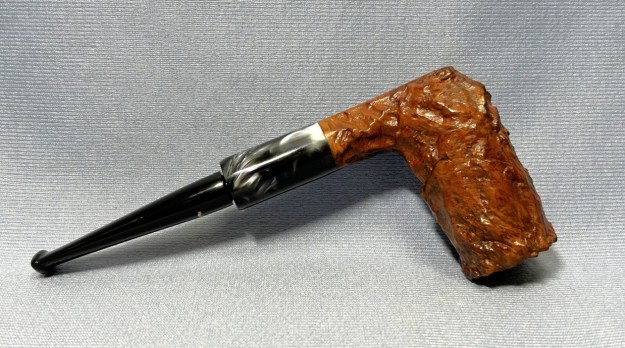
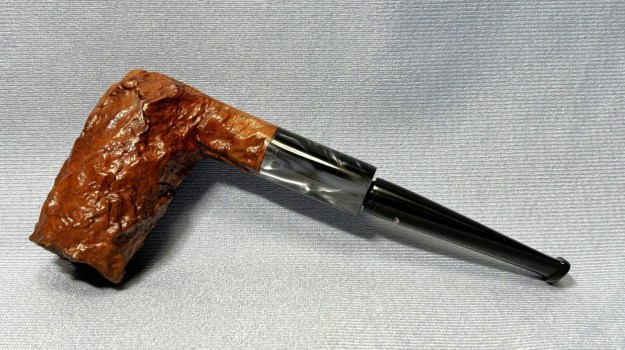
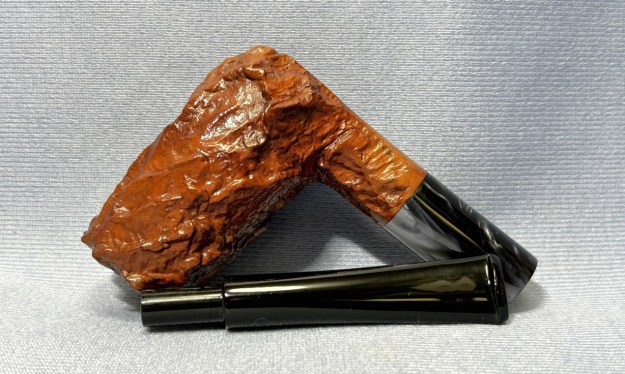
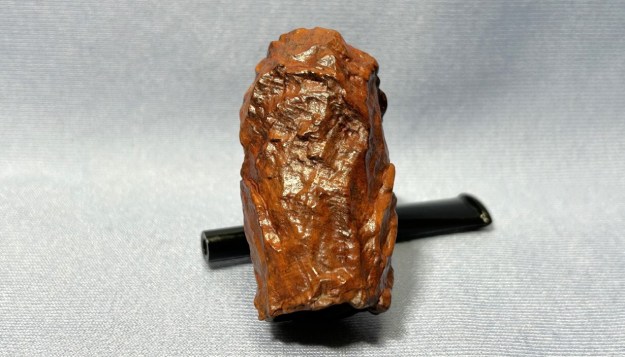
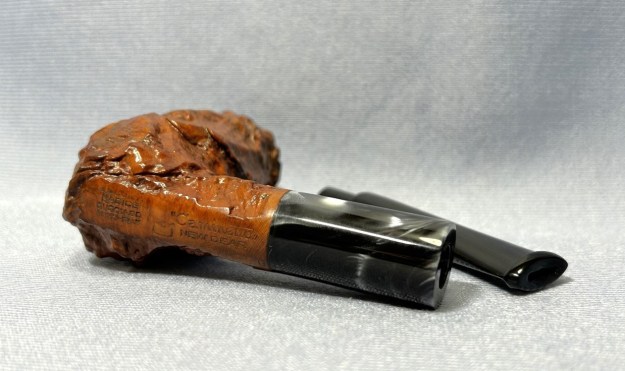
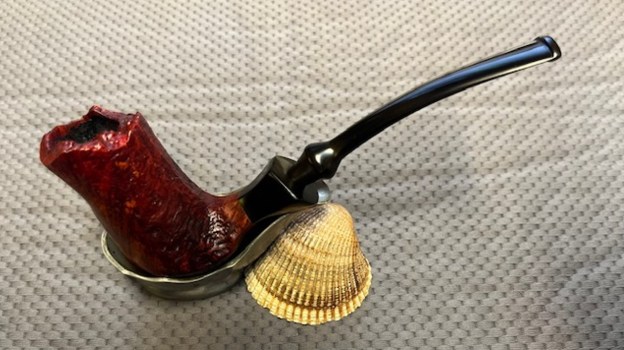
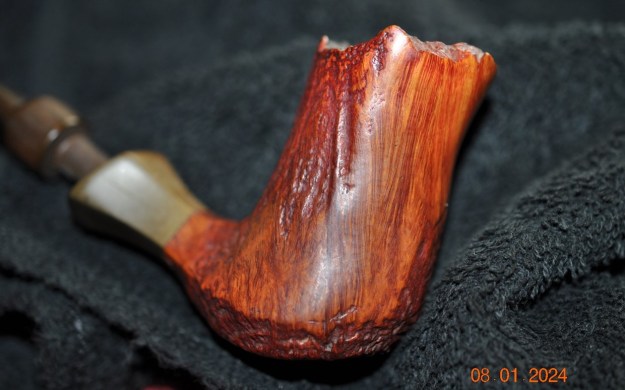
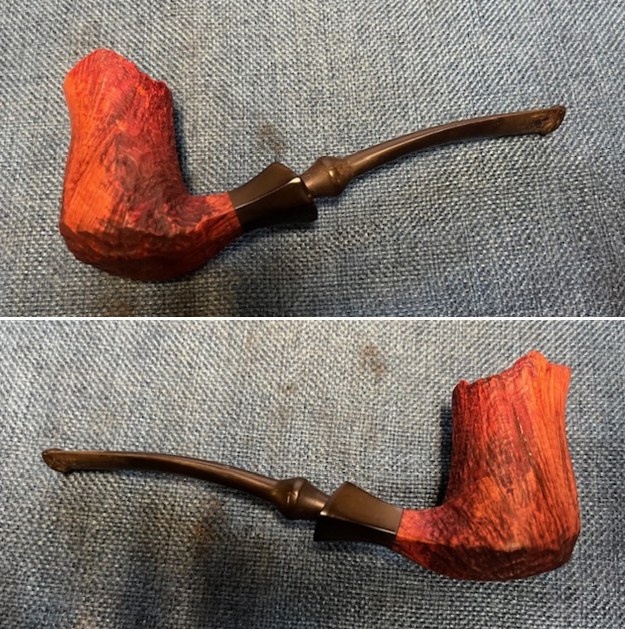
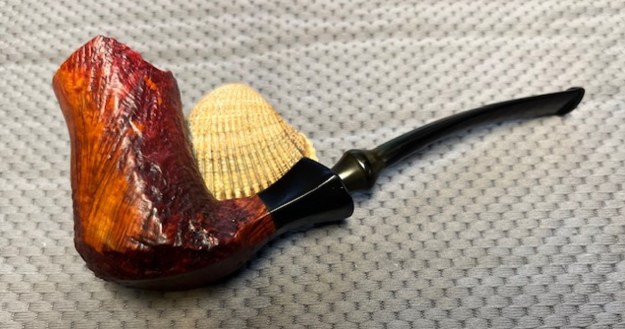
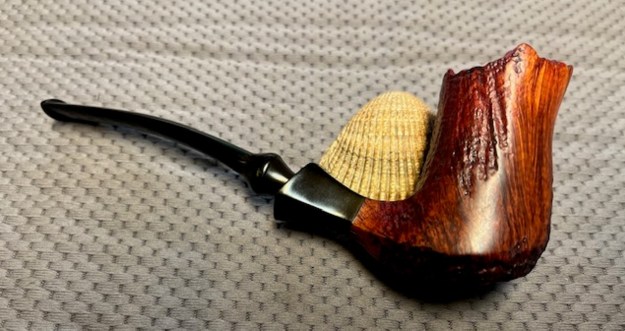
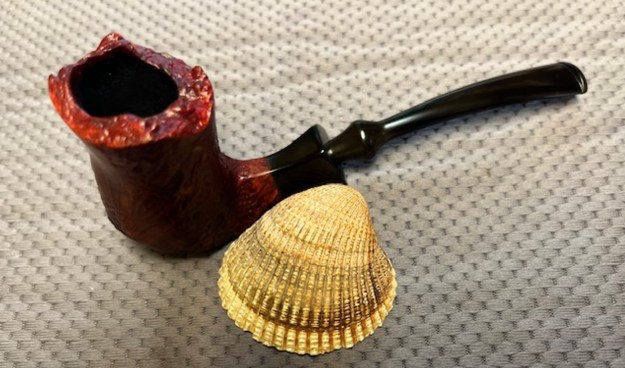
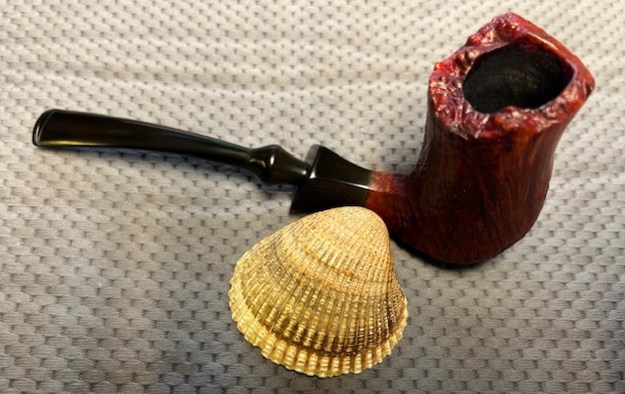
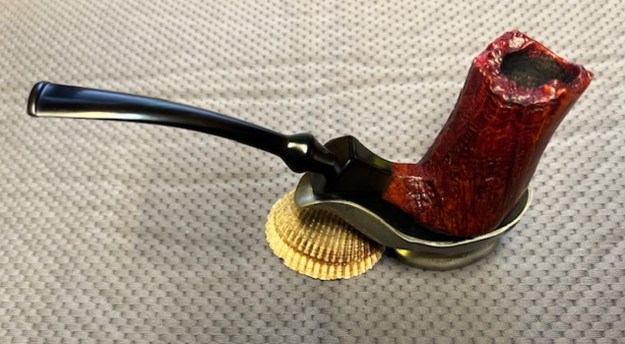
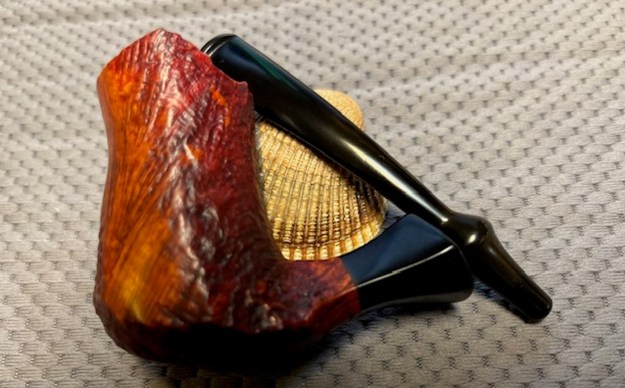
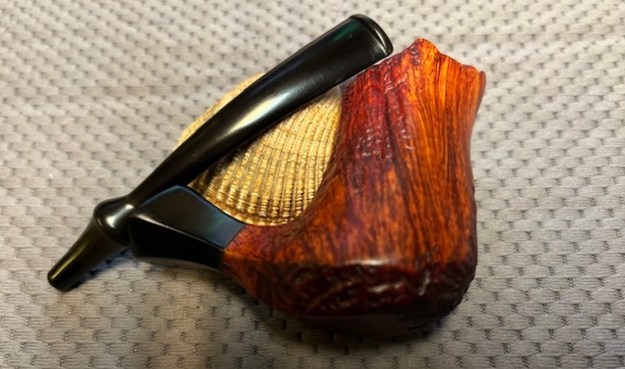
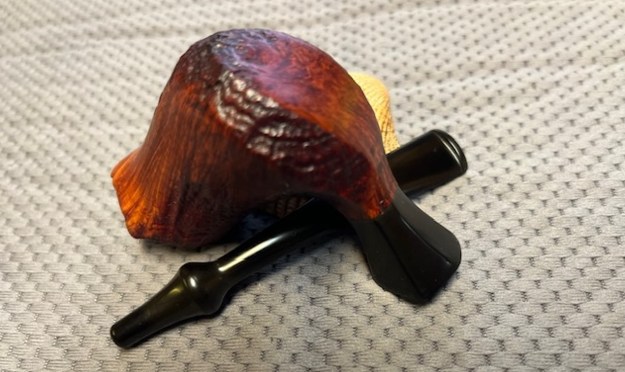
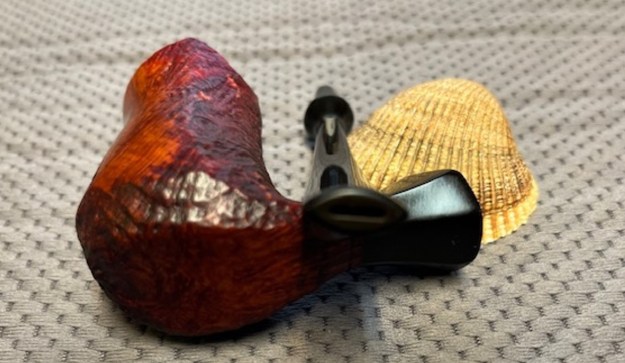
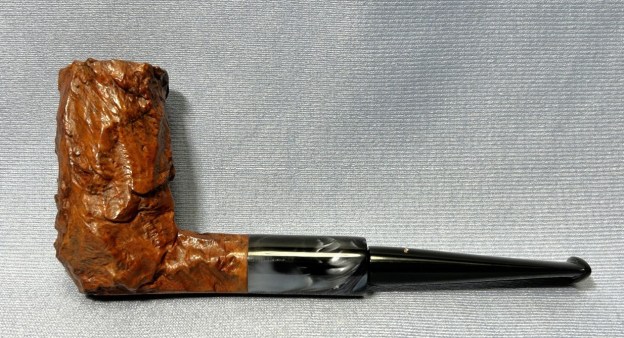
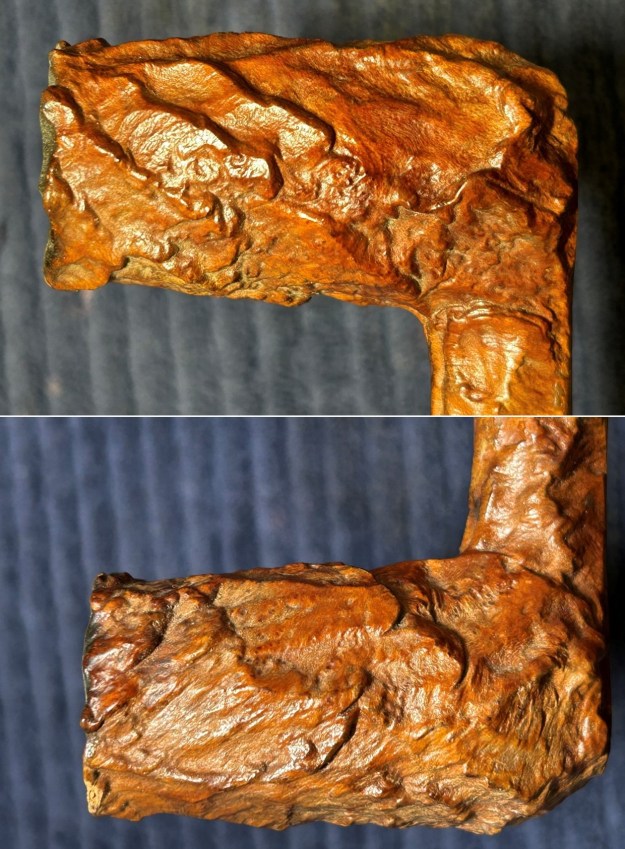
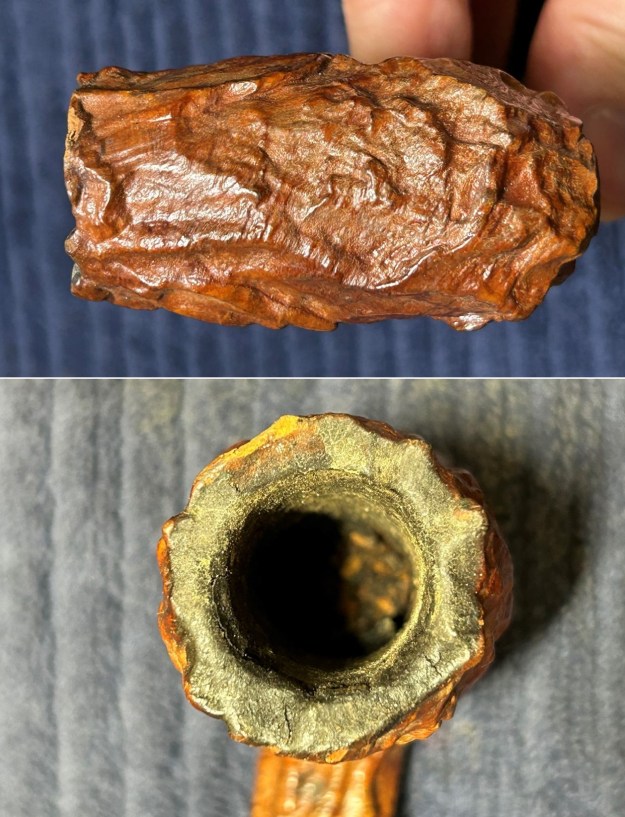
Roll up! Roll up! Come and see the amazing Ascorti Radice Caminetto New Dear Chimney! What a stunning pipe! I picked up this pipe while I was visiting the historic town of Bellingham, Washington. I wish I knew some of this pipe’s individual history, but – alas! – the shop purveyor had no information. It is a remarkable pipe – with the recognizable rustication of the New Dear line and an astonishing chimney elevation. This is your chance to get your hands on an extraordinary pipe – one of the original Caminettos.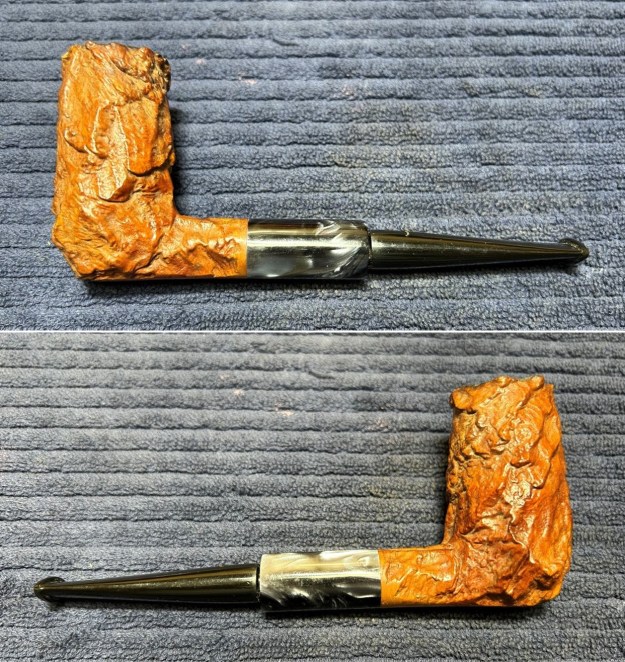
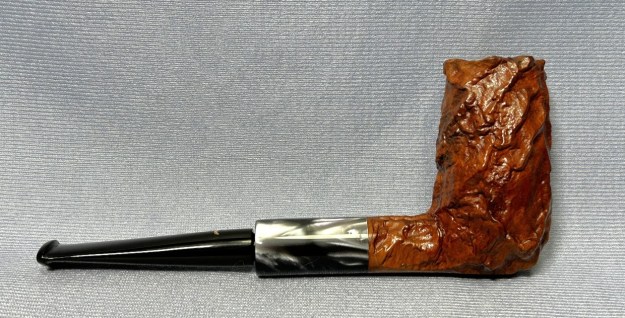
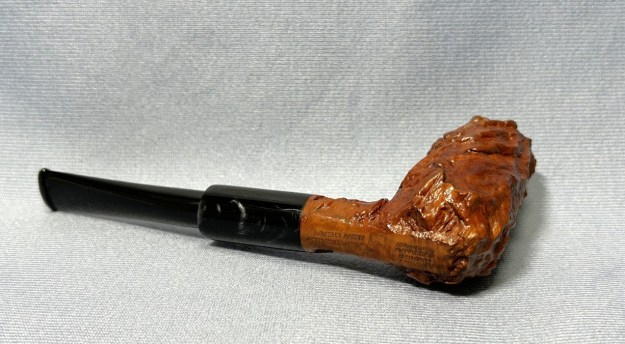
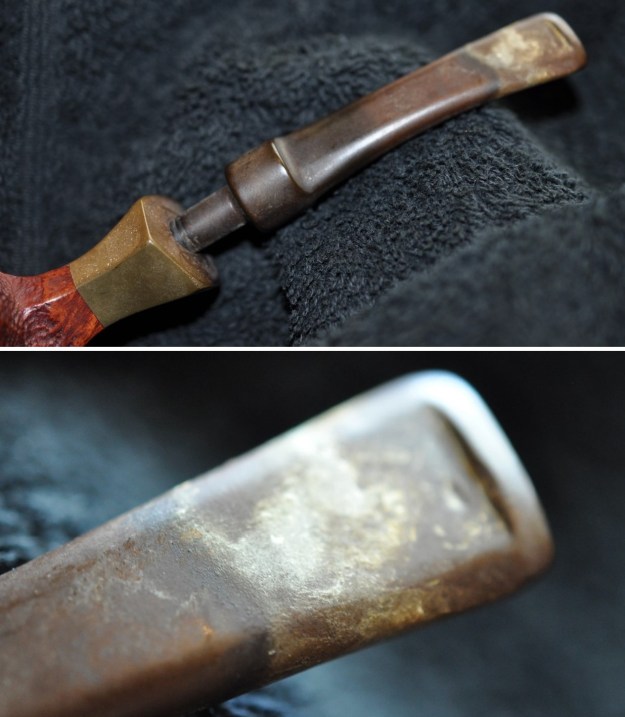
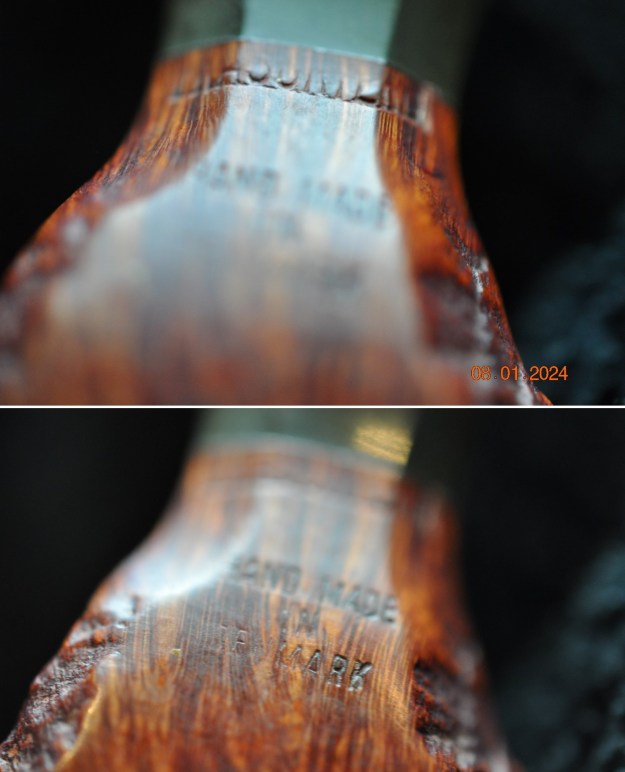
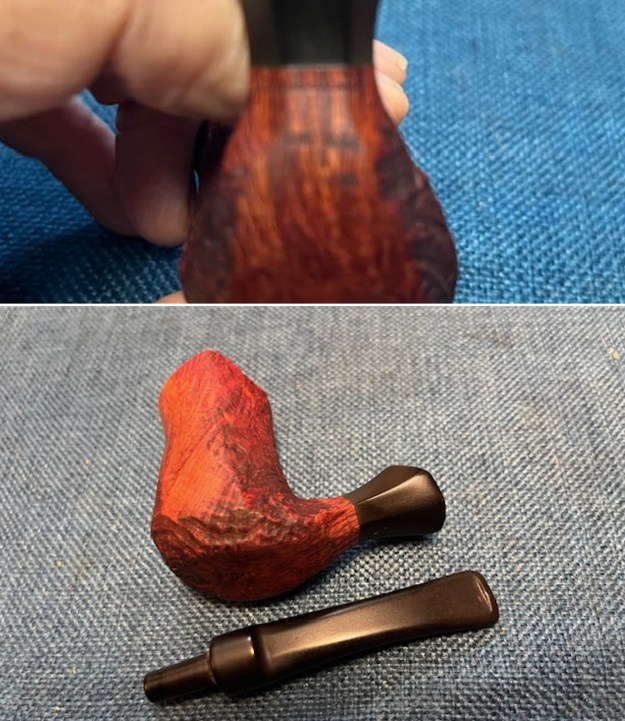
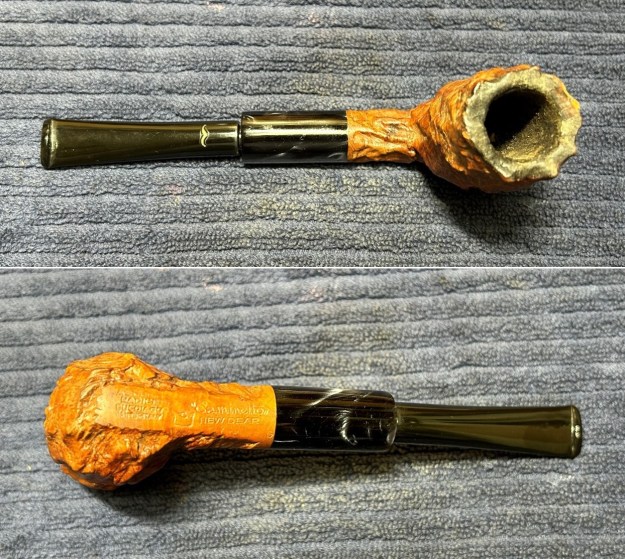 The markings on this pipe were just what one would hope for. They read Ascorti [over] Radice [over] Cucciago [over] Cantu-Italy. Next to that is a little shield symbol. Further to the right are the words “Caminetto” [over] New Dear. Finally, at the end, is a letter G. There is also, of course, the moustache logo on the stem. This information is worth its weight in gold, as it will help us to get a reasonably accurate date on this beauty.
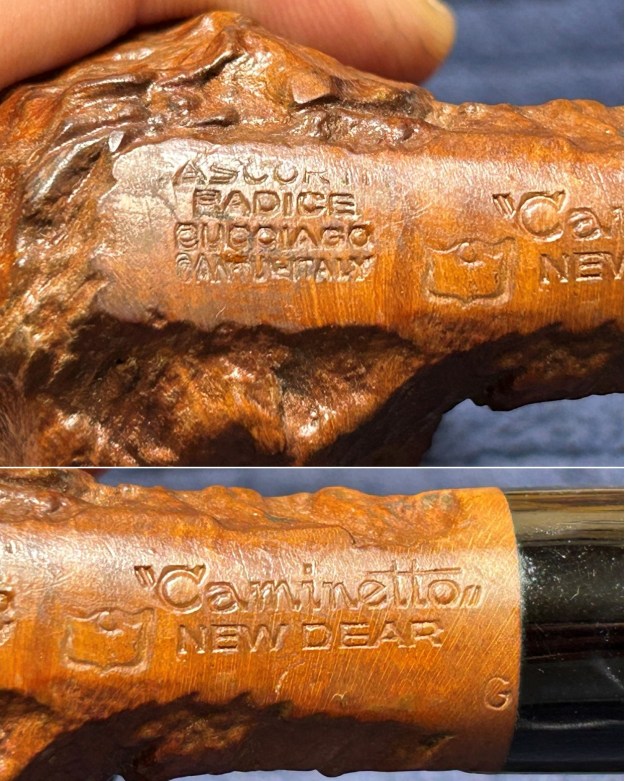 First, let’s talk about Caminetto. There is quite a bit of information to be had on Pipedia about the company and I won’t attempt to reproduce it all here. However, I enthusiastically recommend reading the general Caminetto article here, the Caminetto history article here, the Ascorti article here, and the Radice article here. If you’re really keen, you could even read the Castello article here.
 Phew! After all that reading, I would like to quote a bit of the history from Pipedia:
Caminetto’s history started in 1959 when Guiseppe Ascorti, from Cucciago, and known to his friends as “Peppino”, was hired by Carlo Scotti to work at Castello, located in nearby Cantu. Since it’s foundation in 1947 Castello had contributed substantially to regained glory for Italian pipemaking.
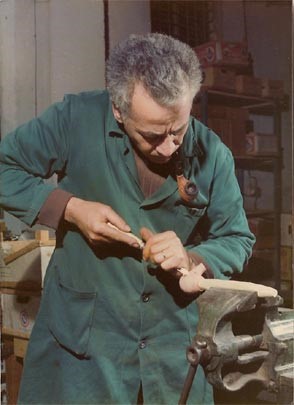
Talent and assiduity soon made Ascorti one of Scotti’s most notable pipemakers – a man he counted on for the future. But, Ascorti had his own far reaching plan: He wanted to work as a self-employed pipemaker! After his wife, Paola, had taken over her parent’s small greengrocery in the early 1960’s this plan became more concrete. The additional income from the shop enabled him to buy tools and machines little by little to furnish his own workshop. By the end of 1968 he was ready and left Castello. Ascorti also persuaded his co-worker, the young and highly-talented pipemaker Luigi Radice (born 1939), to join him – the two were neighbors in Cucciago. Carlo Scotti, whom is known as a perfect gentleman, is reported to have spoken unreservedly about this development.
Ascorti & Radice started to manufacture pipes on their own. One of the first who agreed to market their pipes was Gianni Davoli, proprietor of a tobacco shop in Milan. The situation was perfect–two pipemakers in search of a distributor, and a pipe merchant in search of a mainstay brand to market. Davoli – via friends and relations in the States – had made flourishing contacts with US pipe wholesalers and traders. He shipped some pipes across the pond for inspection and received excellent feedback for the very high quality of the pipes. He, shortly after, offered to be the sole distributor worldwide, and Ascorti & Radice happily accepted.
Then came the legendary evening when Ascorti, Radice and Davoli gathered around the fireplace after a hard day’s work enjoying their pipes, a glass of wine, and humorous conversation. Davoli is said to be the one who associated the pipes with the fireplace or chimney, which is “camino” in Italian. Hence “Caminetto”, the diminutive (smaller) singular version of camino, was coined as the brand’s name.
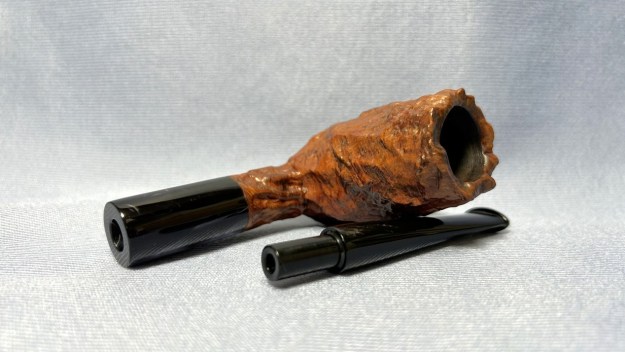
It is, of course, so fitting, so appropriate that this pipe is, itself, in a chimney shape. Fantastic! Reading on, I learned more about the time period in which this was made. This history was originally provided by a fellow named joshoowah on brothersofbriar.com. It is now on Pipedia. I’ve actually taken a screenshot of the relevant information so that it is easiest for you to see and understand. So, based on the above information, I can safely state that this pipe is from the earlier time period of 1968/9-1974/5.
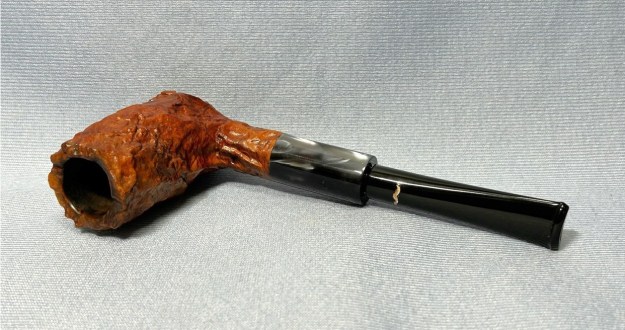
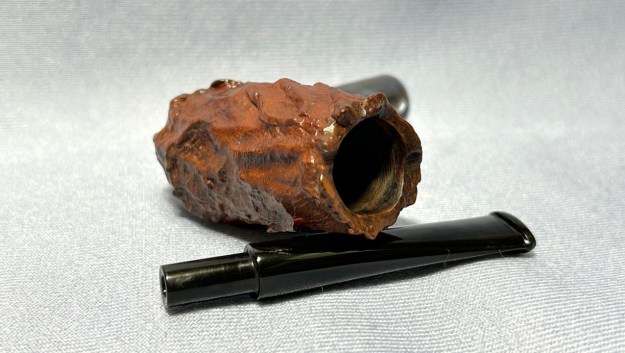
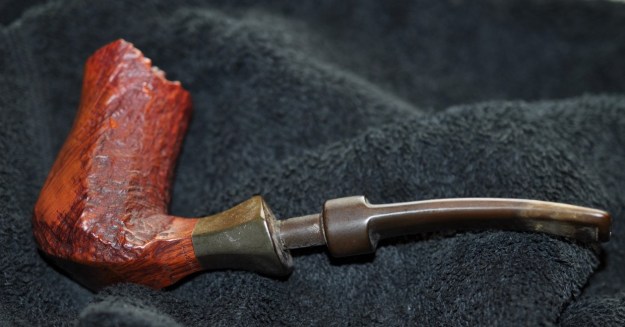
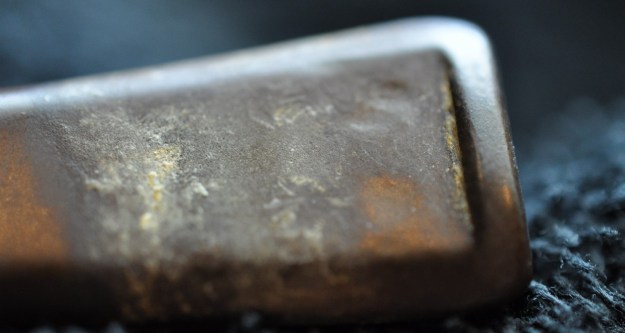
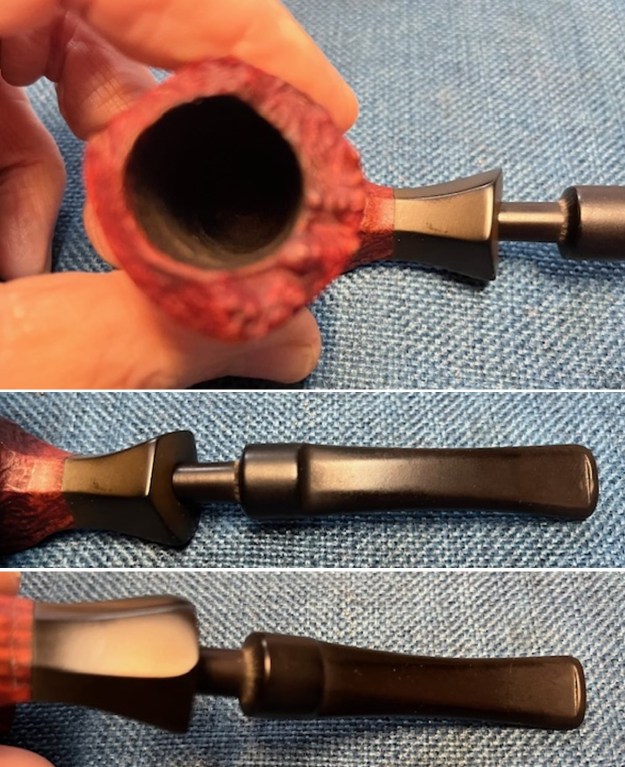
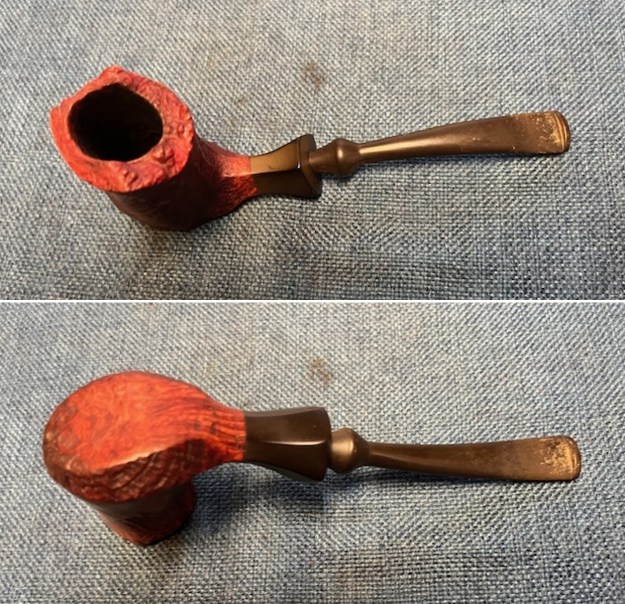
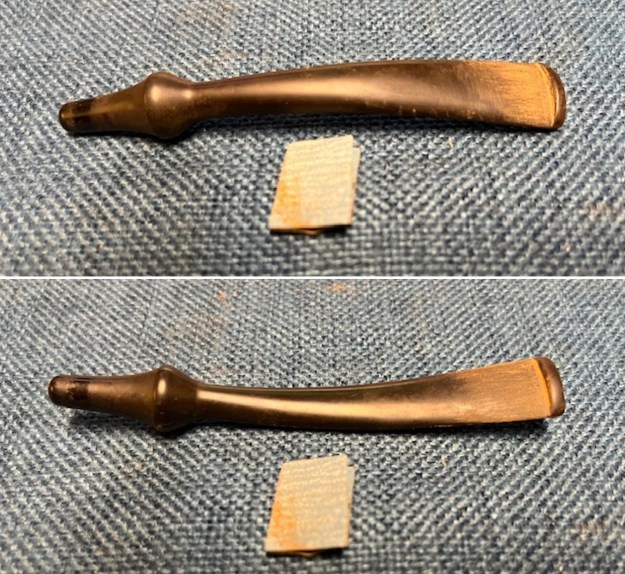
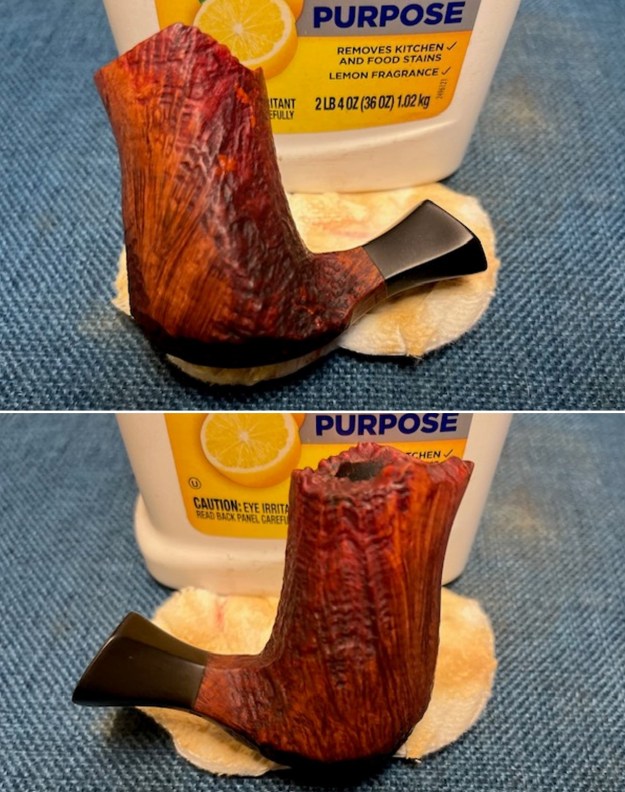
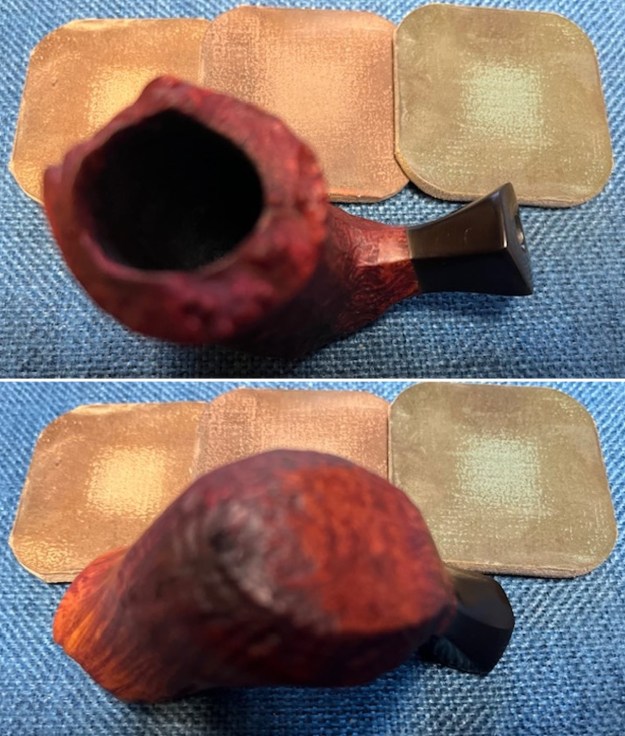
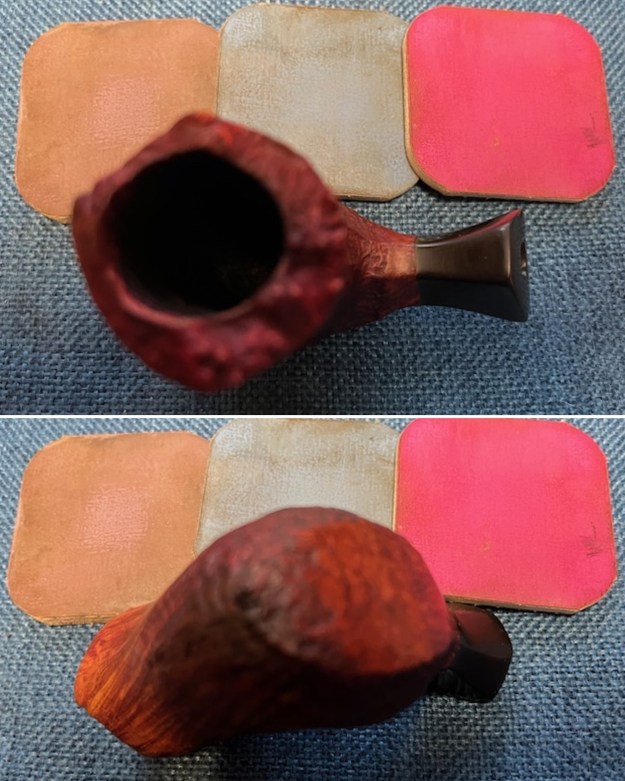
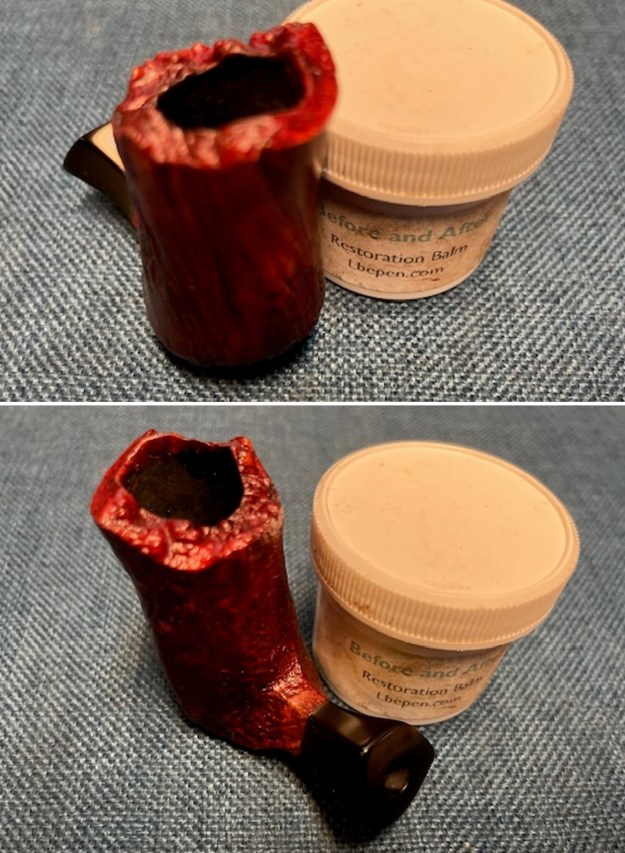
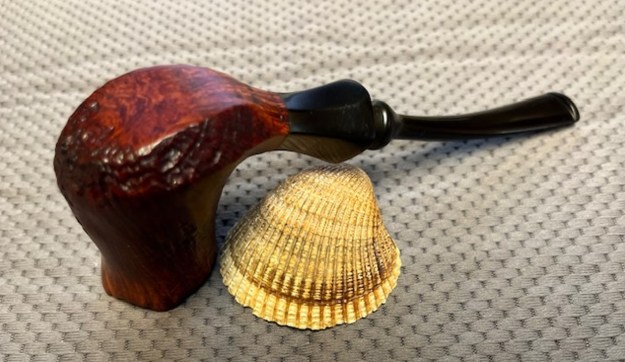
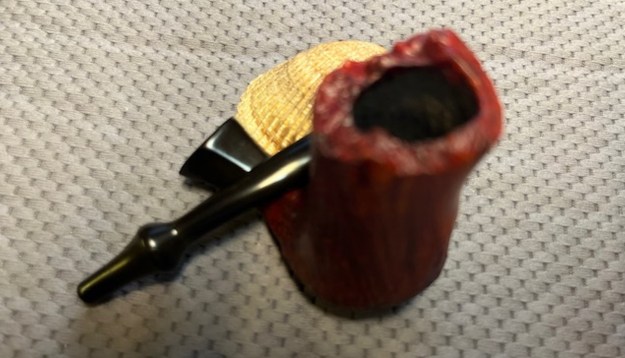
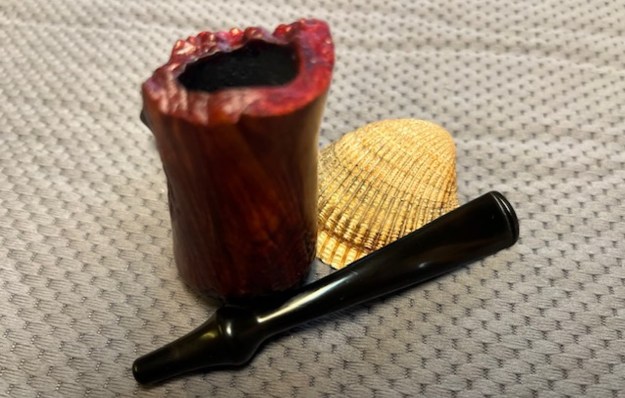
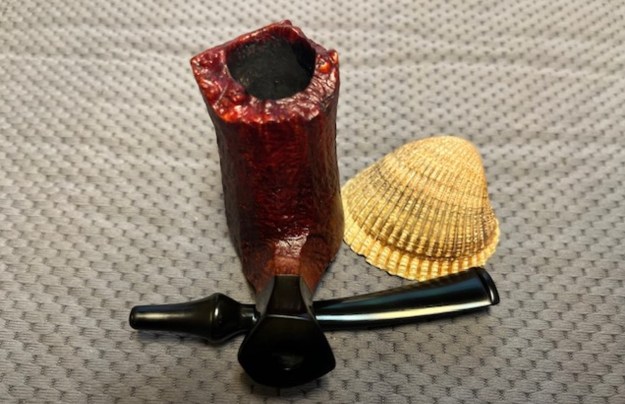
Let’s take a closer look at the condition of the pipe. It’s actually in great shape, all things considered, and must have been greatly loved by its owner, as it was well smoked. The beautiful acrylic stem had some very minor tooth marks, but nothing of concern. The stummel was heavily caked inside the bowl and there was some definite darkening on the rim. I’d have to inspect that more closely after cleaning. 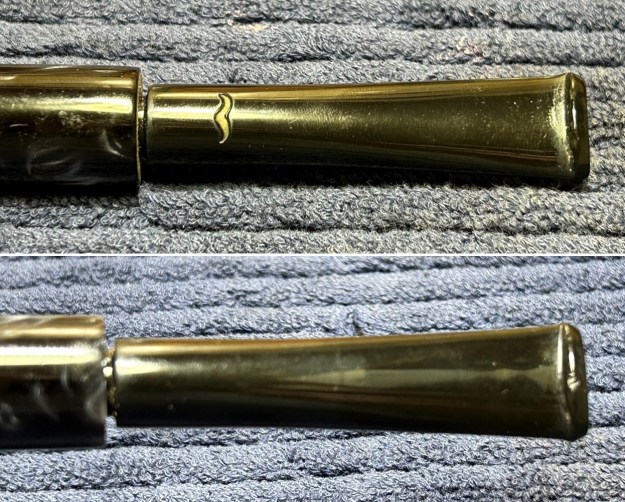
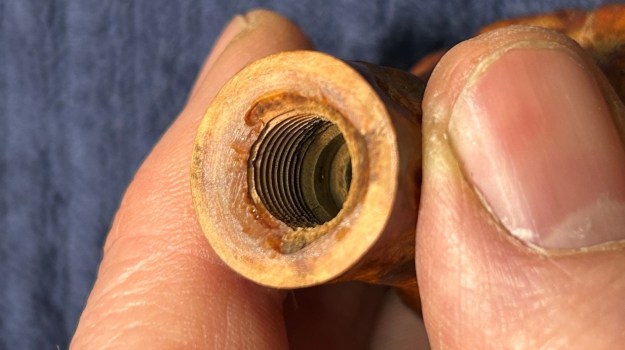
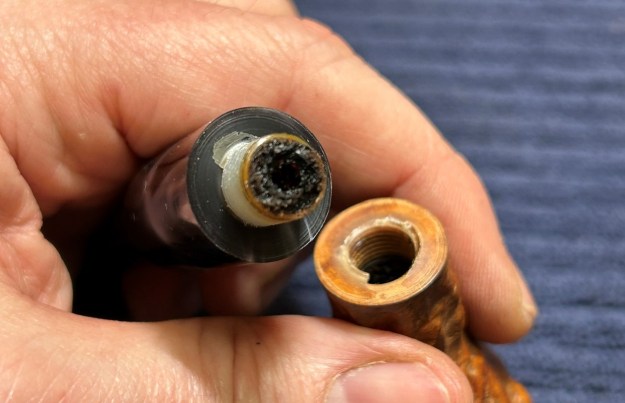 Stem first. To be precise, it was stem and shank extension first. They are both acrylic, and the shank extension came off with ease, so they could be cleaned up together. I cleaned the insides with pipe cleaners, cotton swabs, and isopropyl alcohol. It was pretty dirty, and I went through a good number of pipe cleaners and swabs. A lot of debris was trapped in there and I needed to do some significant scrubbing. I also tried using some cleanser with tube brushes on the inside and that did help. I gave it a thorough rinse and moved on.
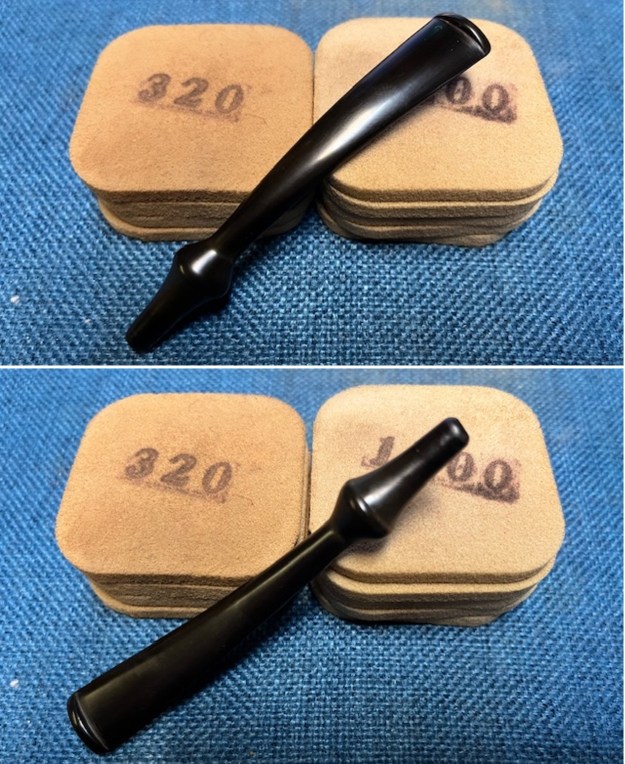
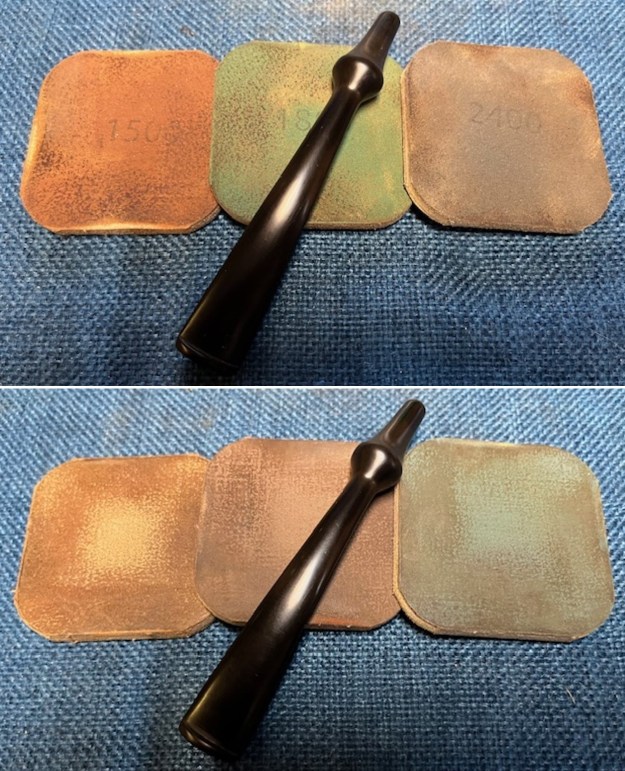
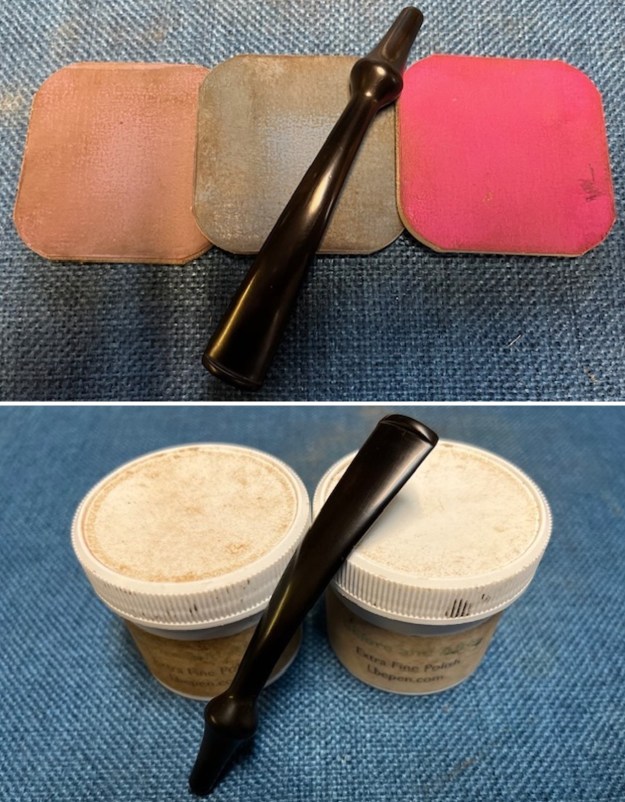
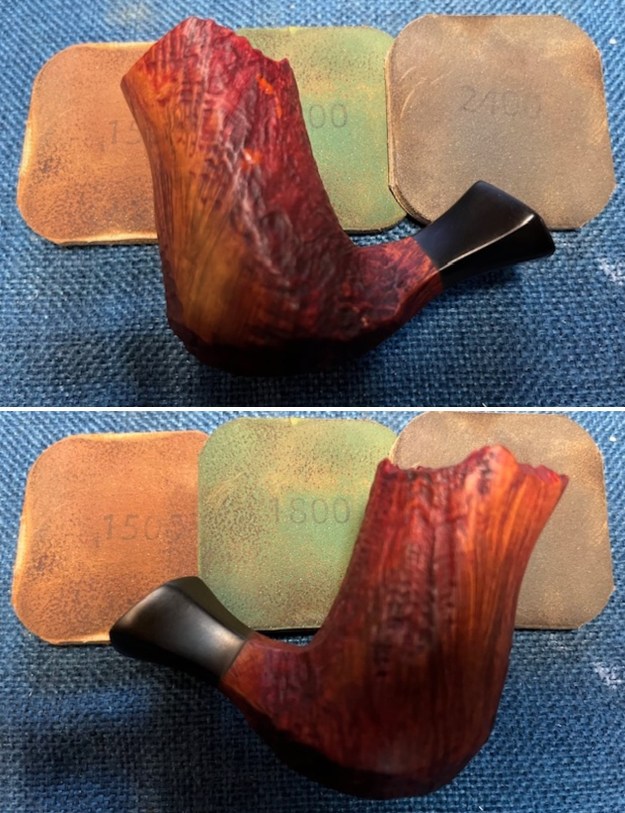
 I filled the few tooth marks in the stem with some black cyanoacrylate adhesive (the shank extension didn’t need any). After allowing that to cure, I sanded the glue down with some sandpaper, then the whole stem with my Micromesh pads. For the last few pads, I also added some pipe stem oil. I forgot to take pictures, but I restored the moustache in gold too.
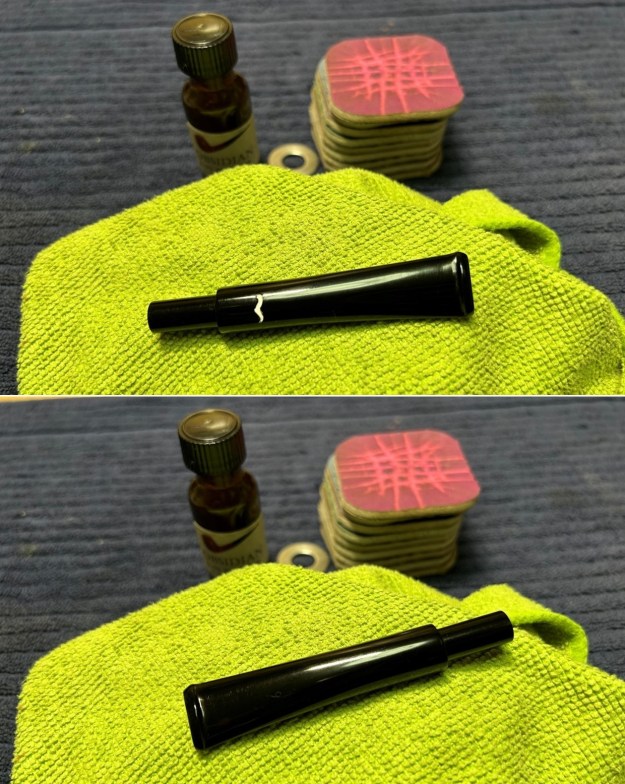
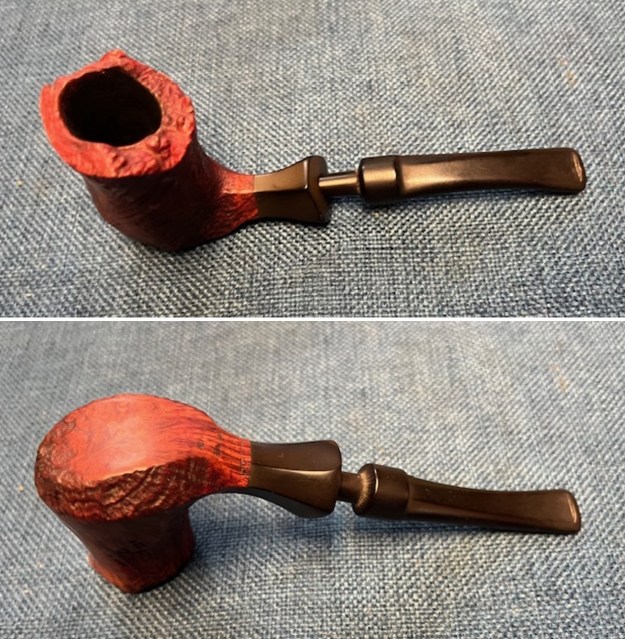
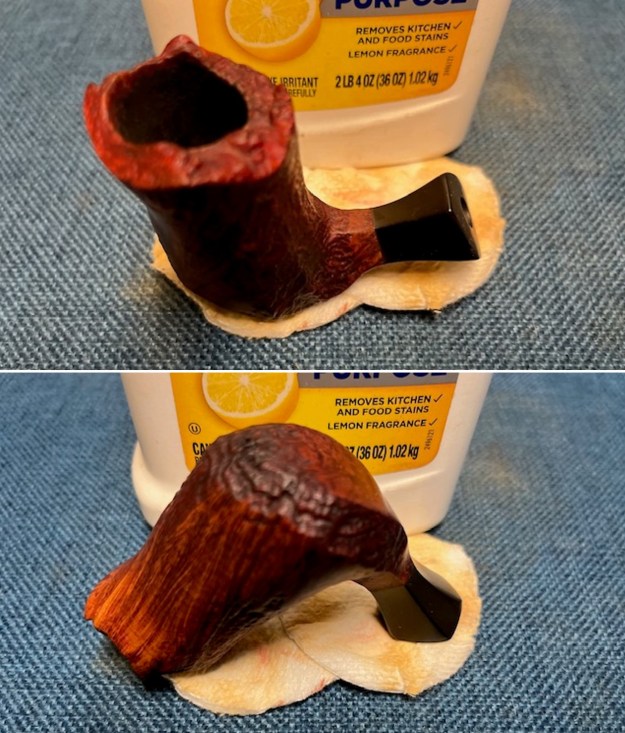
 On to the stummel, and there was some work to be done here! I needed to get the darn thing clean. I reamed out the stummel and removed all the cake. Fortunately, there was no damage to the interior walls.
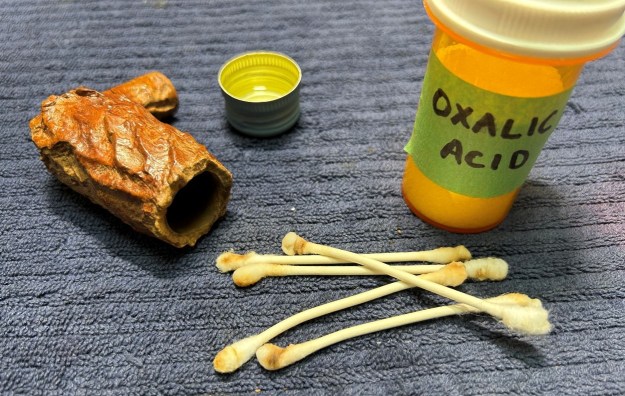
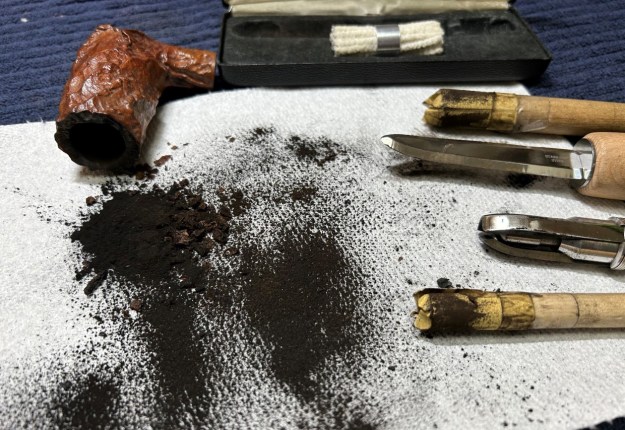 I used a dental tool to mine some chunks of gunk out of the mortise – yuck! Just like the stem, I also used pipe cleaners, cotton swabs and alcohol to scrub the insides. It was quite dirty – much cotton was expended.
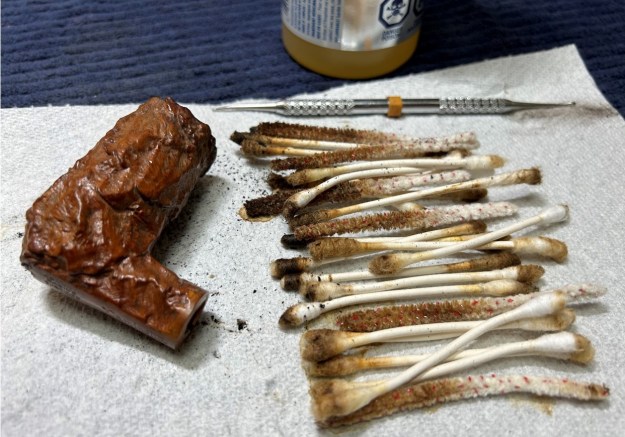 I decided to de-ghost the pipe in order to remove any lingering smells of the past. I thrust cotton balls into the bowl and the shank and saturated them with 99% isopropyl alcohol. I let the stummel sit overnight. This caused any remaining oils, tars and smells to leach out into the cotton. The bowl was nice and clean after this. But, just to make sure, I followed that up by cleaning the insides with some dish soap and tube brushes. Then it was really clean.
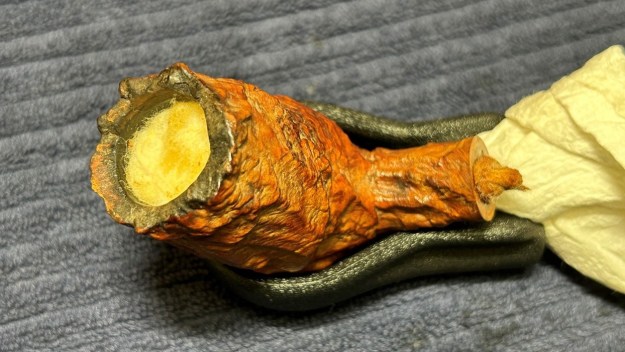

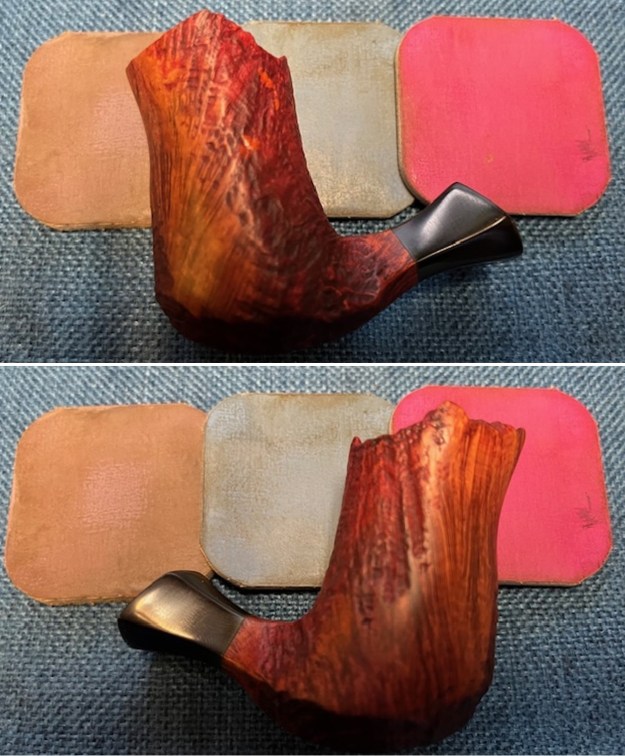
 I used cotton rounds and some Murphy’s Oil Soap to scrub the outside of the stummel and a toothbrush with Murphy’s for the lava on the rim of the pipe. Once complete, I took a closer look at the darkness on the rim. It wasn’t too bad, but I thought it could use a little help. I mixed up a little oxalic acid and rubbed the dark spots with cotton swabs. This worked really well in removing a lot of the dark. I was pleased.
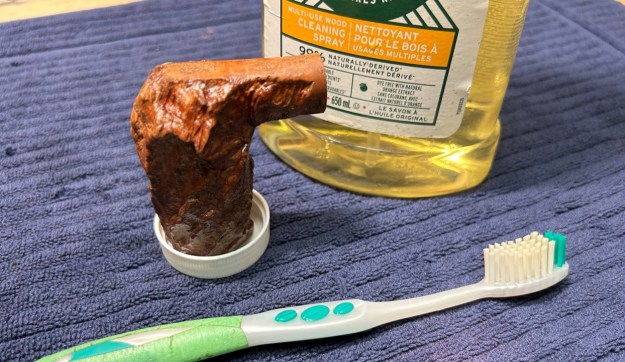
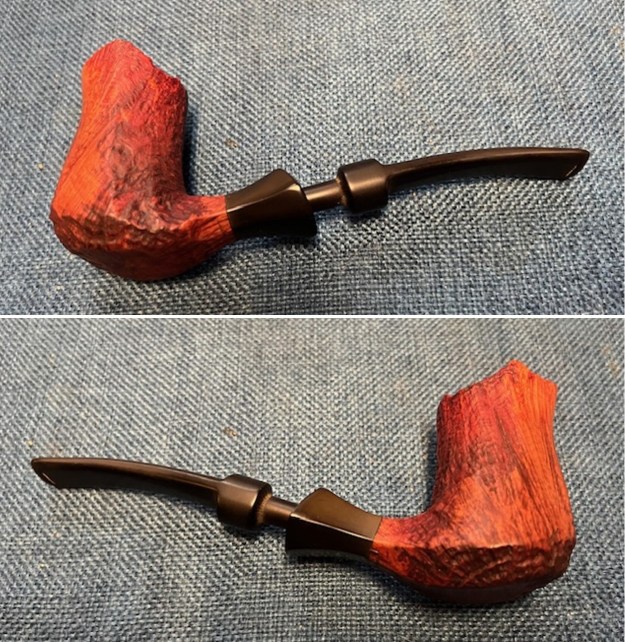
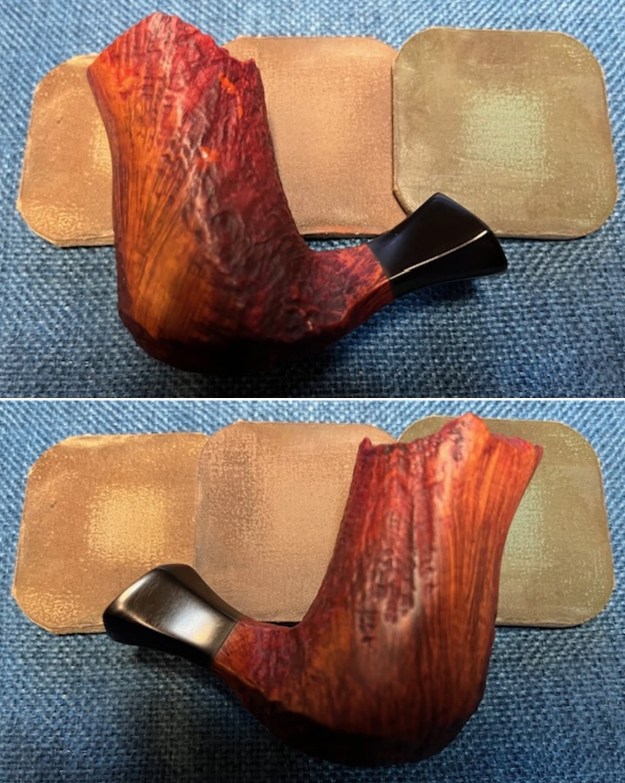
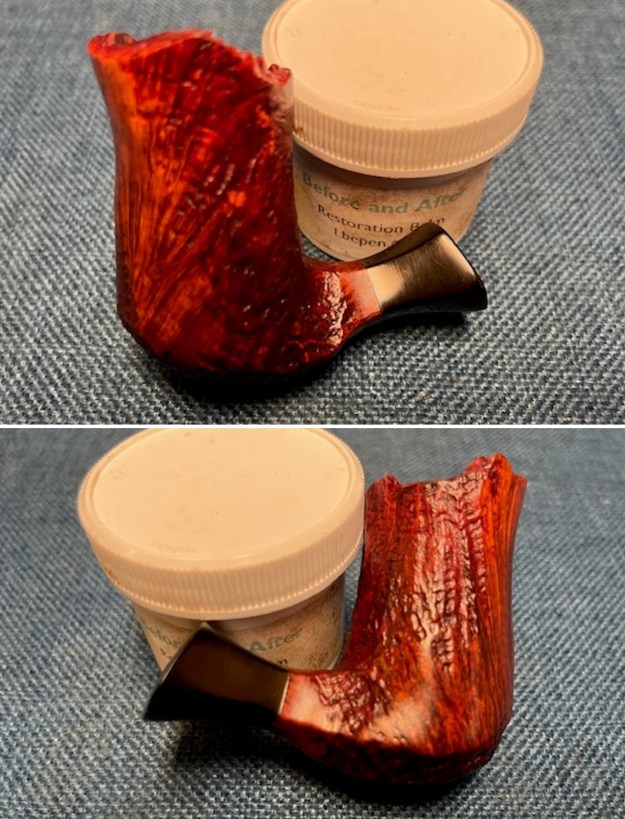
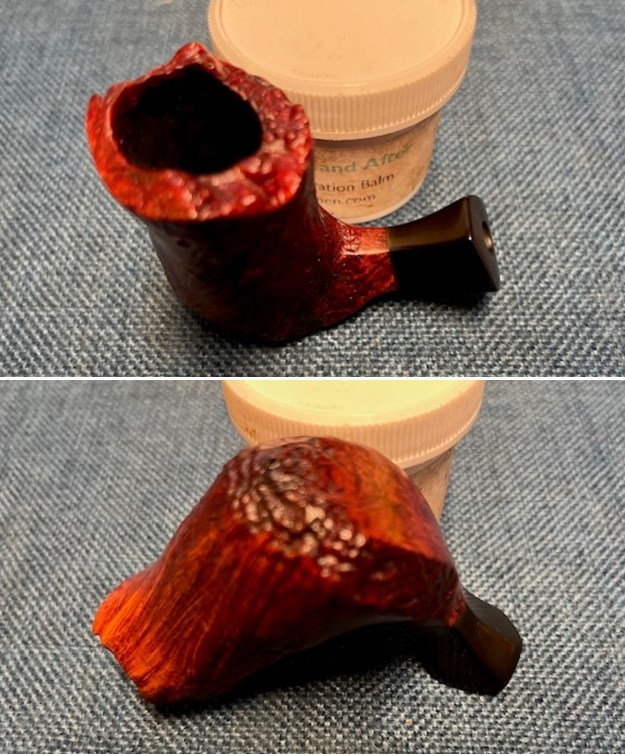
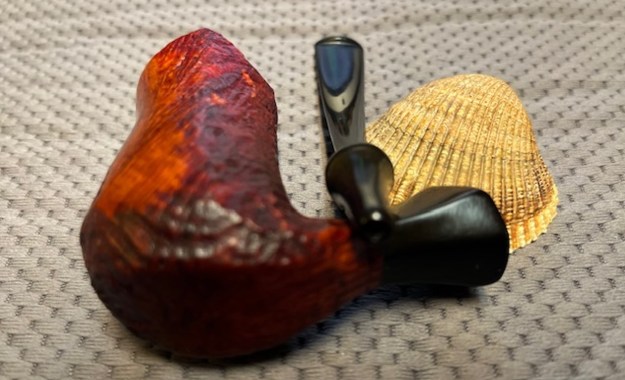
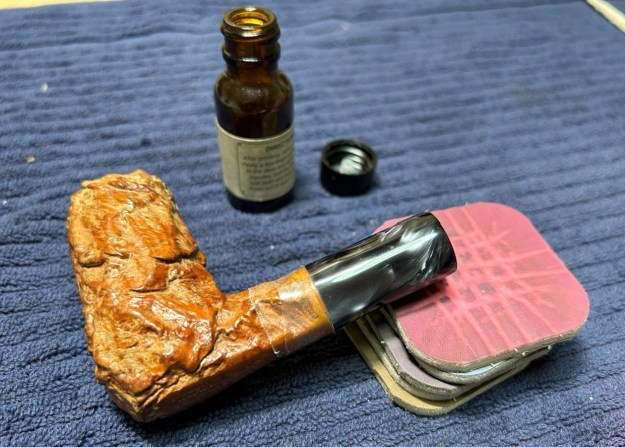
 I then rubbed some Before & After Restoration Balm into the wood. I gently brushed it into the rustication grooves and let the balm sit for twenty minutes or so. The BARB works so well at bringing out the best in the wood. I brushed it with a horsehair brush and buffed it with a microfibre cloth. Beauty!
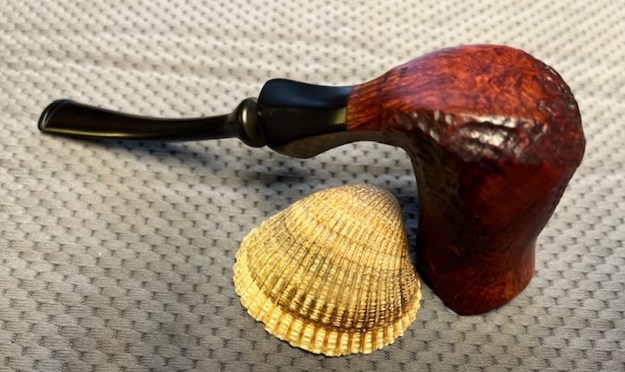
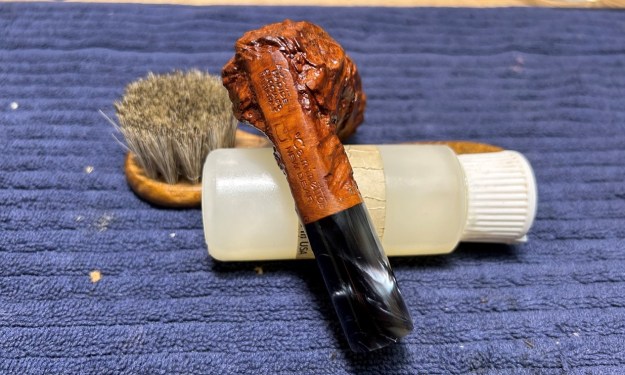 Later, I went to the bench buffer and applied some White Diamond to the stummel and stem. Then the final polish! The rusticated surface meant that I didn’t use carnauba wax – it gets gummed up in the grooves. Instead, I used Conservator’s Wax which worked like a charm.
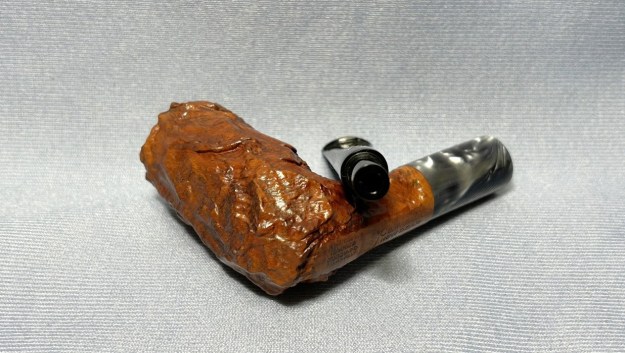
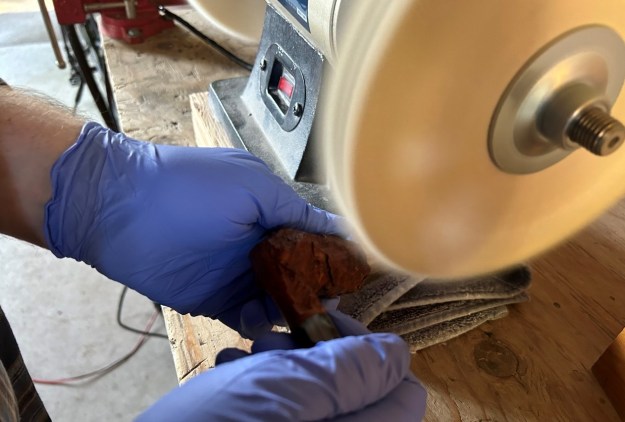 This Ascorti Radice Caminetto New Dear Chimney was a nifty restoration and I had fun with it. I think the result is terrific and it’s a stunning pipe once again. I am pleased to announce that this pipe is for sale! If you are interested in acquiring it for your collection, please have a look in the “Italy” pipe section of the store here on Steve’s website. You can also email me directly at kenneth@knightsofthepipe.com. The approximate dimensions of the pipe are as follows: length 6 in. (152 mm); height 2½ in. (65 mm); bowl diameter 1⅓ in. (33 mm); chamber diameter ¾ in. (18 mm). The weight of the pipe is 1⅝ oz. (49 g). I hope you enjoyed reading the story of this restoration as much as I enjoyed restoring it. If you are interested in more of my work, please follow me here on Steve’s website or send me an email. Thank you very much for reading and, as always, I welcome and encourage your comments.