Blog by Steve Laug
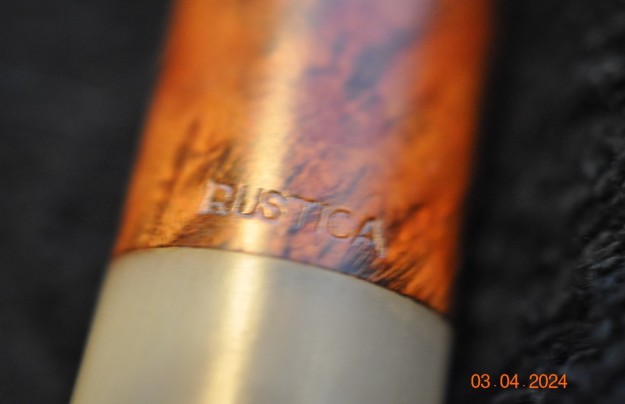
The next pipe on the worktable is a Danish made pipe from the workshop W.O. Larsen. It is a combination of rustication and smooth portions and a horn shank extension. The bowl is a classic Danish looking Canadian with almost a Brandy shaped bowl. It came without a stem. The pipe came to us from eBay on 01/22/2024 from a seller in Jordan, Minnesota, USA. The pipe is very dirty with a thick cake in the bowl and lava on the rim top. The rim edge looks like it might be slightly out of round but it was hard to know what was under the lava coat on the top and edges. It is stamped on the underside of the bowl and shank on a smooth panel. It reads W.O. Larsen [over] Handmade [over] Made in Denmark. On the top side it is stamped Rustica. The finish was dusty and there were oils and grime ground into the rusticated and the smooth finish around the sides of the bowl. The horn shank extension had a metal insert to protect it from cracked but there were still two hairline cracks – one on the top and one on the underside. Jeff took some photos of the pipe before he started his cleanup work.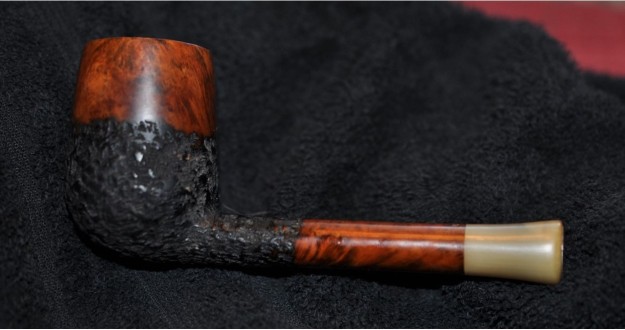
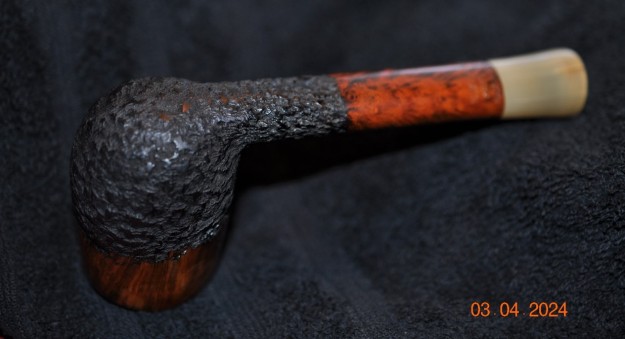
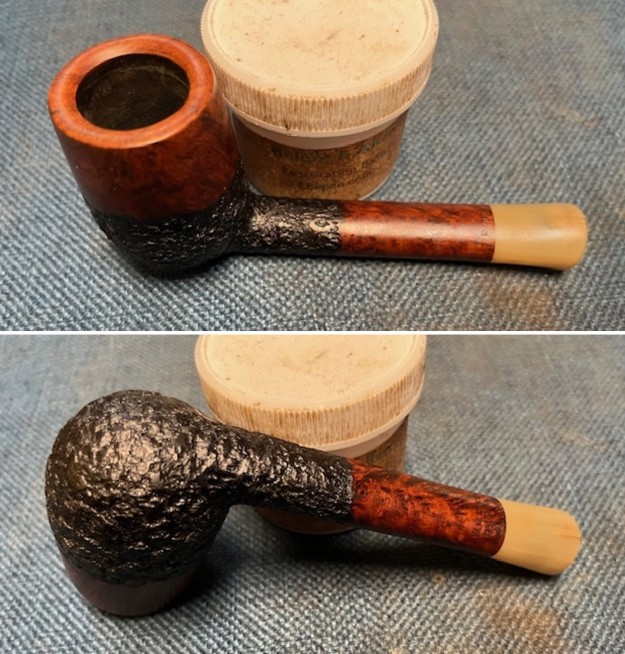
 Jeff took a photo of the rim top to show the thick build up of lava in the sandblast of the rim top. It is also built up on the inner edge of the bowl. The thick cake in the bowl is very visible.
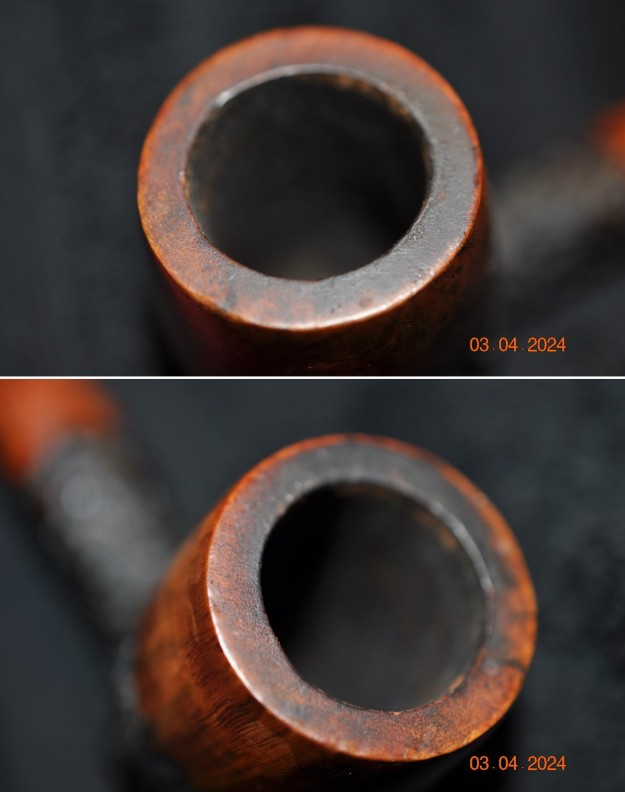 He took photos of the sides and the heel of the bowl to show the blast finish on the pipe. It is a unique blast that really shows the birdseye and other grain around the bowl sides.
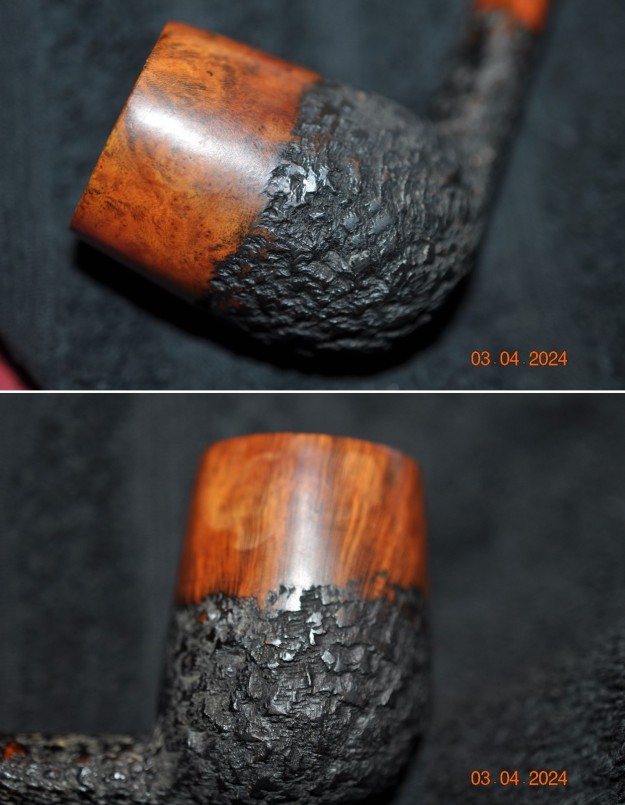
 He took two photos to capture the stamping top and underside of the bowl. Each one moves down the shank to the horn shank extension. It is clear and readable as noted above.
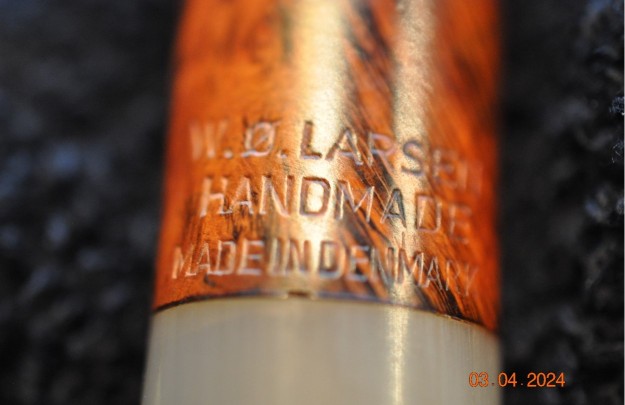
 Jeff took a photo of the hairline crack on the underside of the horn extension. There is a matching one on the topside. The shank itself is lined with a metal insert that actually stabilized the extension to protect it from further cracking.
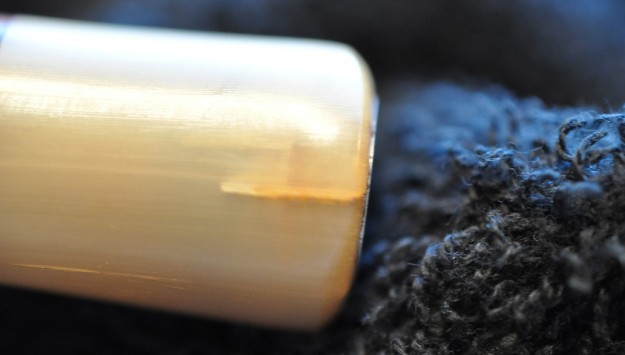 I turned to Pipephil (http://www.pipephil.eu/logos/en/logo-l2.html) to get a quick view of the brand once again. I did a screen capture of the site’s information and have included that below. The pipe I am working on is a W.O. Larsen as it is stamped similarly to the ones in the photos. It is interestingly stamped with a lot more detail than any of the ones shown in the screen capture below. With the “Designed By W.O. Larsen” addition it is a bit unique.
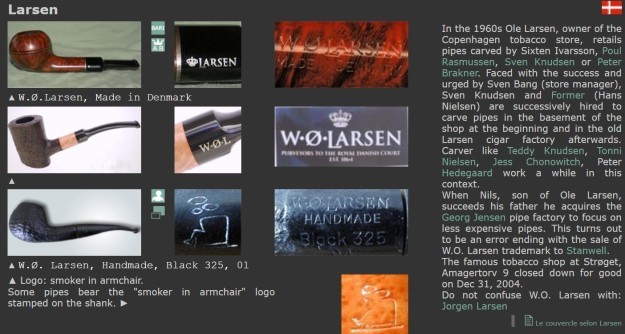 I turned to Pipedia (https://pipedia.org/wiki/W.%C3%98._Larsen) for a quick read. The site is worth reading the history of the shop and the brand and its influence on Danish pipe carving. There was no additional information on the unique stamping on this pipe.
What I learned from the research is that the pipe is a W.O. Larsen made pipe that could have been designed by W.O Larsen himself or at least one of the shop carvers. It is a beauty though.
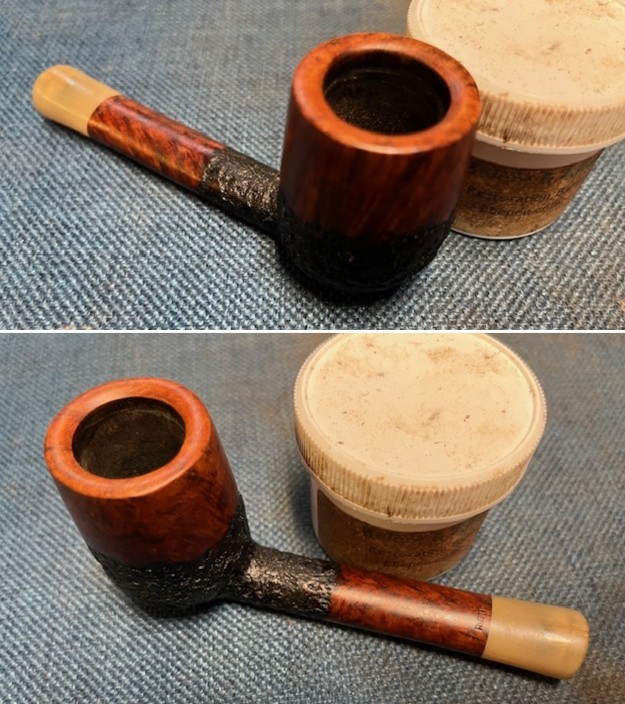
With that information I moved forward to work on the pipe itself and see what I had to do with it. Jeff had done an amazing job in removing all of the cake and the lava on the sand blast rim top. He had reamed the bowl with a PipNet Pipe Reamer and cleaned up the remnants with a Savinelli Fitsall Pipe Knife. He took the cake back to bare briar so we could check the walls for damage. He scrubbed the exterior of the bowl with Murphy’s Oil Soap and a tooth brush to remove the grime on the bowl and rim and was able to remove the lava and dirt. The finish on the bowl and rim top looked very good showing a unique and beautiful combination of smooth and rusticated finishes. He cleaned out the interior of the bowl and shank with pipe cleaners, cotton swabs and alcohol until they came out clean. I took photos of the pipe before I started my part of the restoration.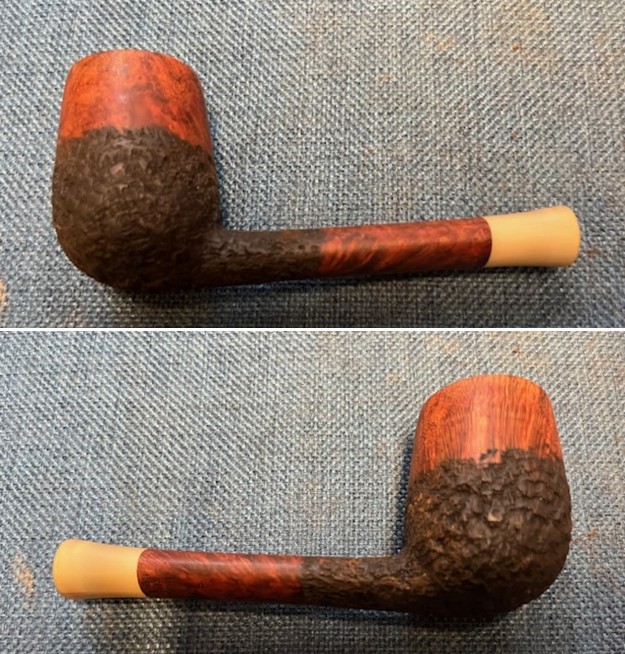
 I took some close up photos of the rim top showing the inner edge of the bowl – damages and nicks in the edge and some damage on the top itself. I took photos of the cracks in the top and underside of the horn shank extension.
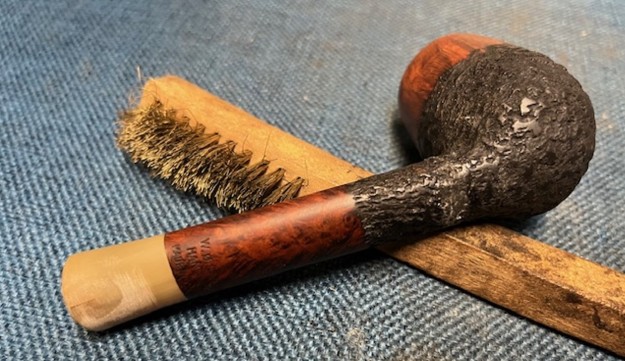
 I took photos of the stamping on the top and underside of the shank to show the condition after the cleanup. This stamping is clearer than the photos show.
 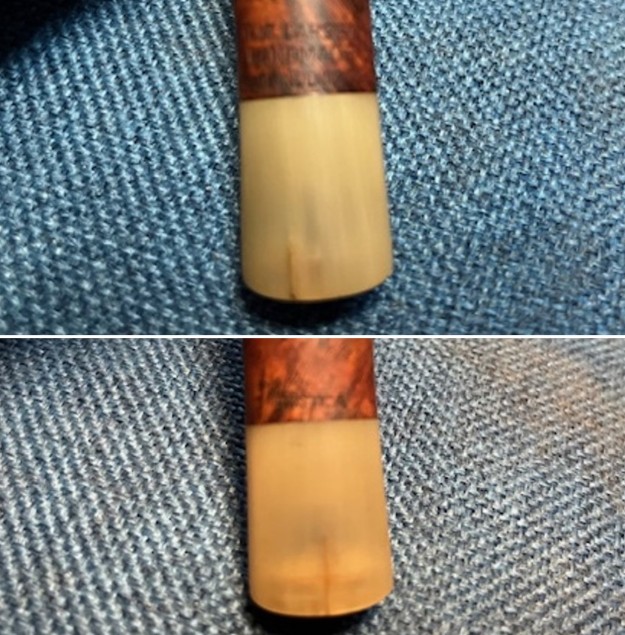 I went through my can of stems and I found one that was the right shape and length. It has been shaped a little but I would need to reduce the shank end diameter and shape for a proper fit in the metal shank insert. NB: This is the reason I am always picking up stems where ever I can find them. I just know that one day I will need one and it might just be the one!
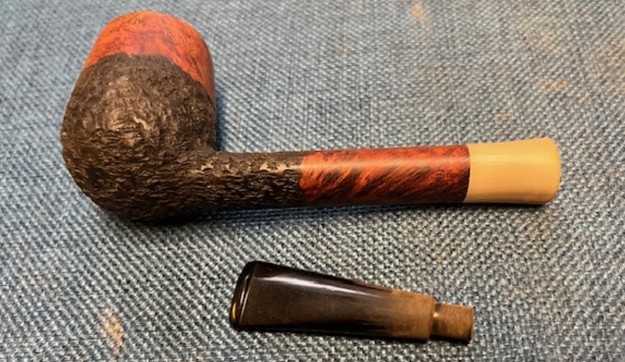 I laid the stem aside to work on the shank repair first. I applied some clear super glue to the crack in the horn extension on the top and the underside and clamped the horn shank end with a small clamp. THEN DISASTER STRUCK! I was standing at my work table and was about to lay it down with the pipe shot out of the clamp. It literally shot across the room and hit the floor. I cannot tell you enough how many times I have dropped the pipe on the same floor with nothing happening to the pipe. I would pick it up and carry on. BUT THE TIME THAT SOMETHING WAS GOING TO HAPPEN WAS THIS TIME! THE BOWL SHOT OUT FURTHER & THE SHANK AND CLAMP WAS MUCH CLOSER.
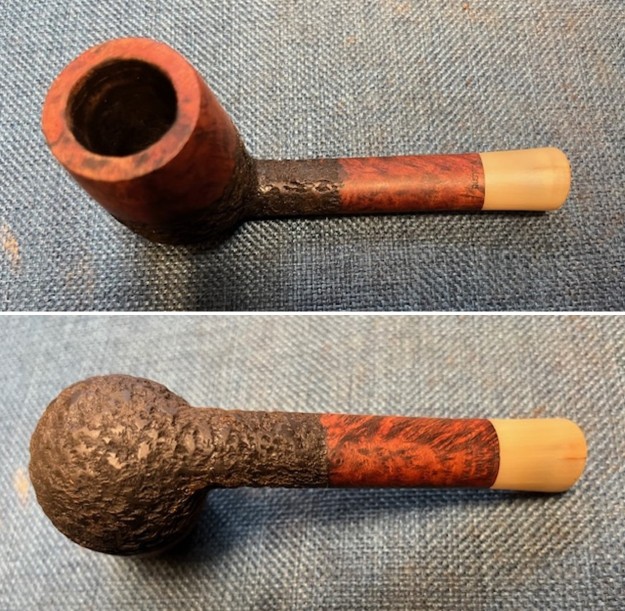
Now I needed to add yet another project to the work on this pipe. I wrote Jeff and told him about the accident and his response was that he was okay with throwing it away. I told him that I still wanted to work on it. I cleaned up the cracks on the shank and added new glue to the repairs. I clamped the extension together with the clamp while it was laying on the table. You can see the snapped off bowl and shank in the photos below. The only good news was that it was a clean snap and everything fit together really well.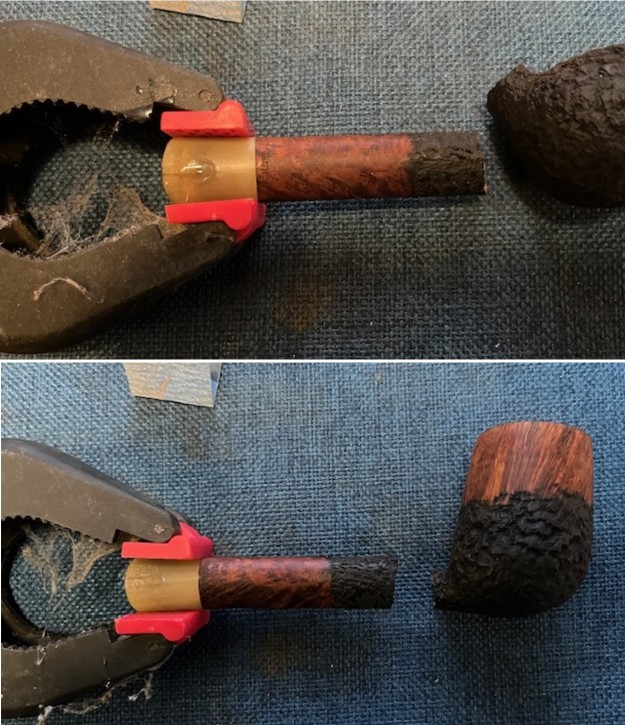 Once the repair cured on the shank end it was time to address the broken shank. I found a metal piece of tubing in my collection of tubes and stingers that fit into the hole in the shank and in the airway into the bowl. I cut off a piece long enough to extend into the airway into the bowl and into the shank end almost a half inch each way.
 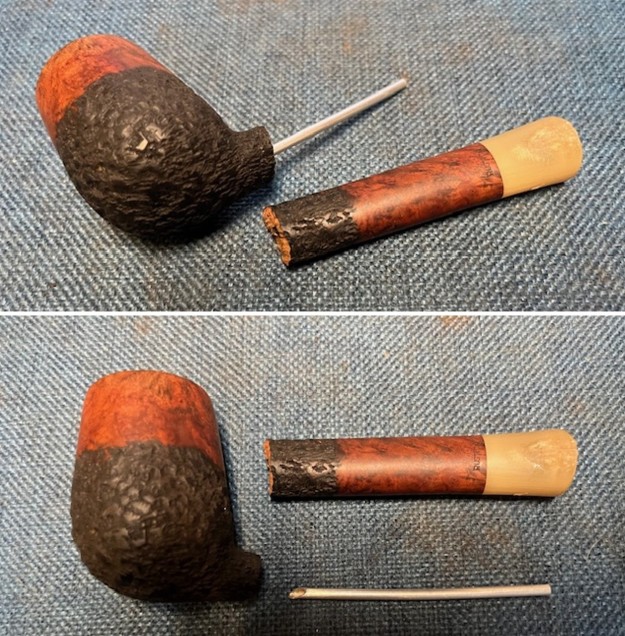 I glued the cut off tube into the bowl airway first with a clear CA glue. I coated the shank ends on both sides with clear CA glue and painted the tube with the same glue. I pushed the bowl and shank together. The tube went easily into the shank and the pieces of briar fit together with no sign of the damage other than the glue.
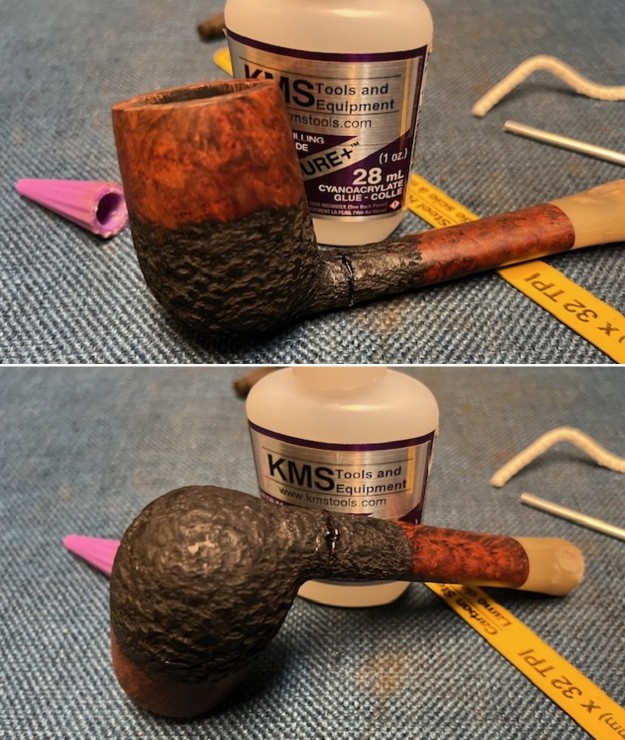 Once the repair cured and the shank was stable I worked over the repaired area with a brass bristle brush to remove the excess glue. It was looking much better once I finished.
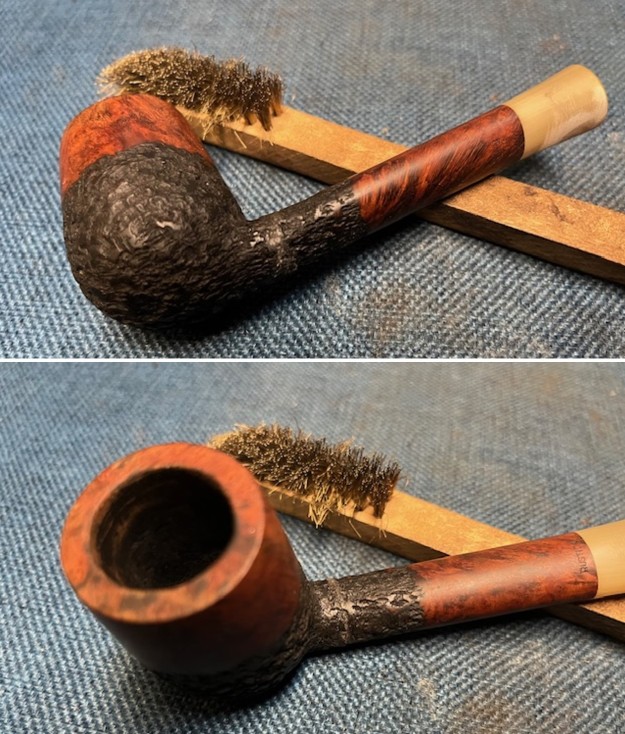
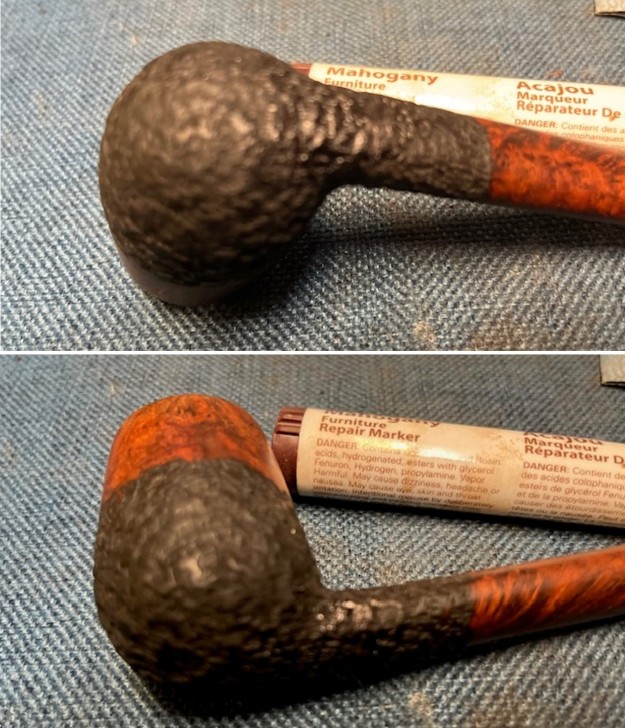
 I stained the repaired area with a Mahogany stain pen to match the colour on the rusticated portions of the bowl. It looked much better once it was finished.
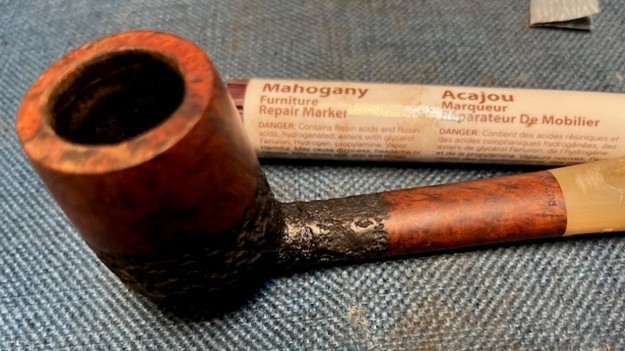
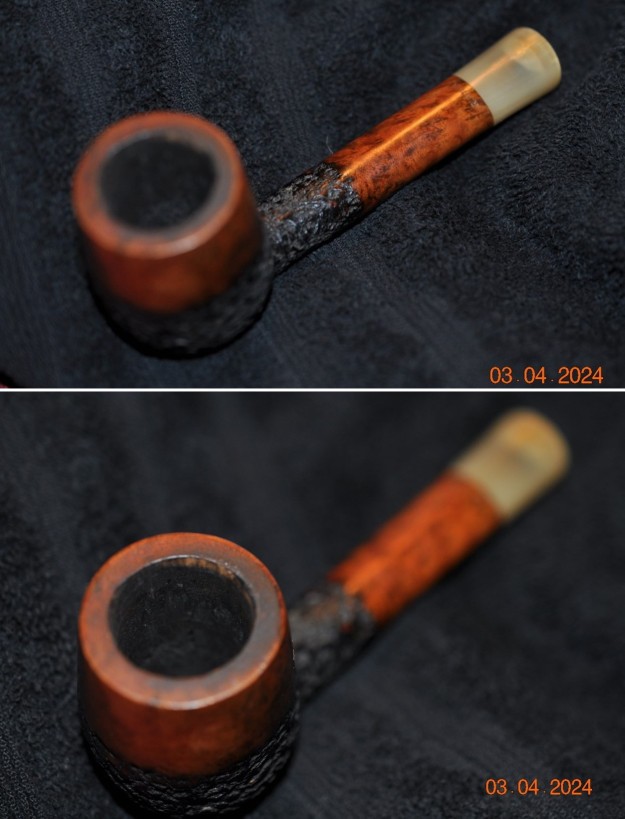
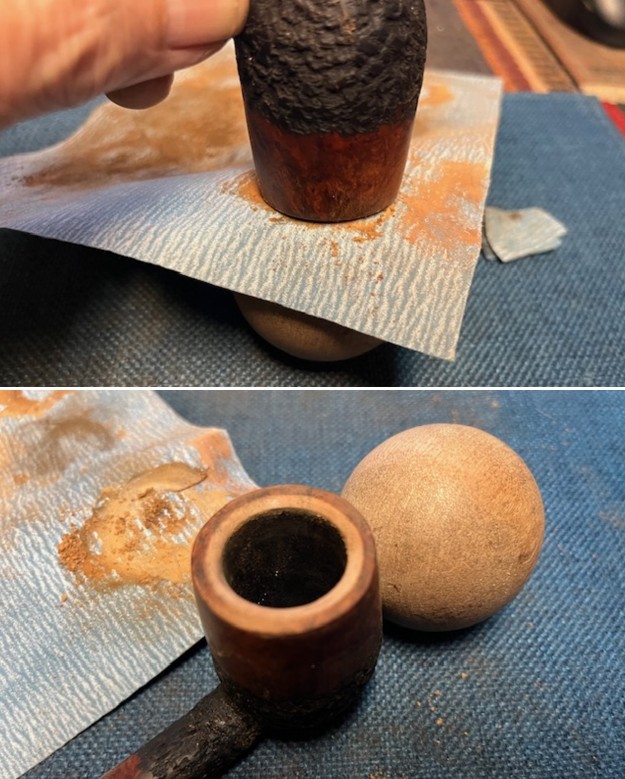
 With the repair finished I turned to address the rim top and inner edge of the rim. I used a folded piece of 220 grit sandpaper to remove the damage and smooth out the edge. I used a wooden sphere and a piece of 220 grit sandpaper to reshape the rim edge and give it a light bevel. It cleaned up the edge and the darkening to the rim top at the same time.
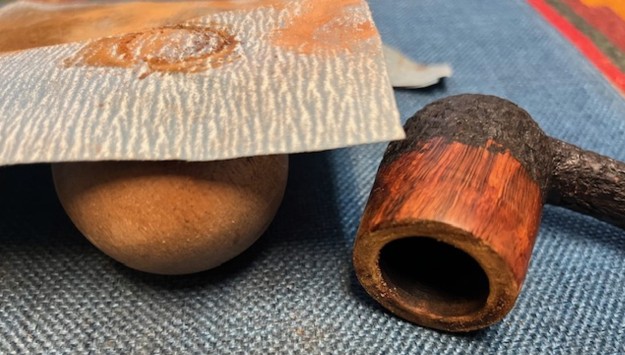
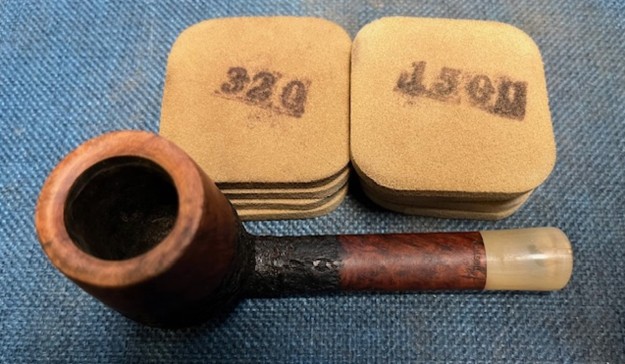
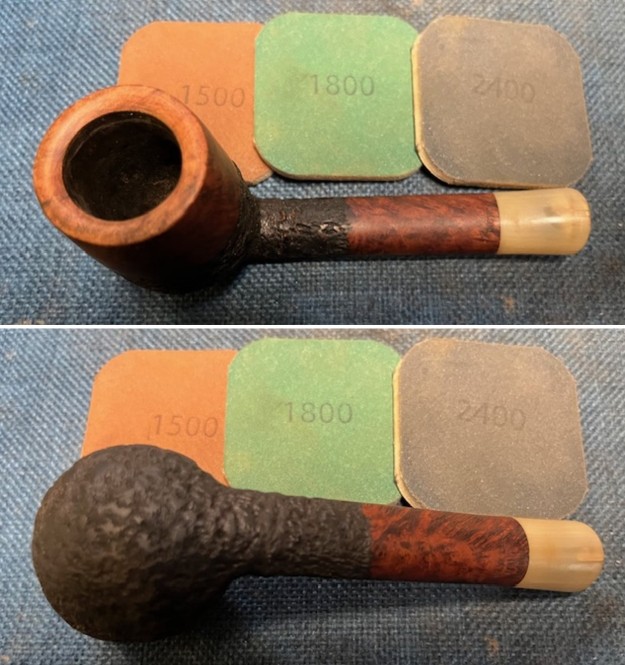
 I sanded the rim top and the horn shank repairs with 320-3500 grit sanding pads. I sanded the horn shank extension at the same time. I wiped it down after each sanding pad to remove the dust and debris.
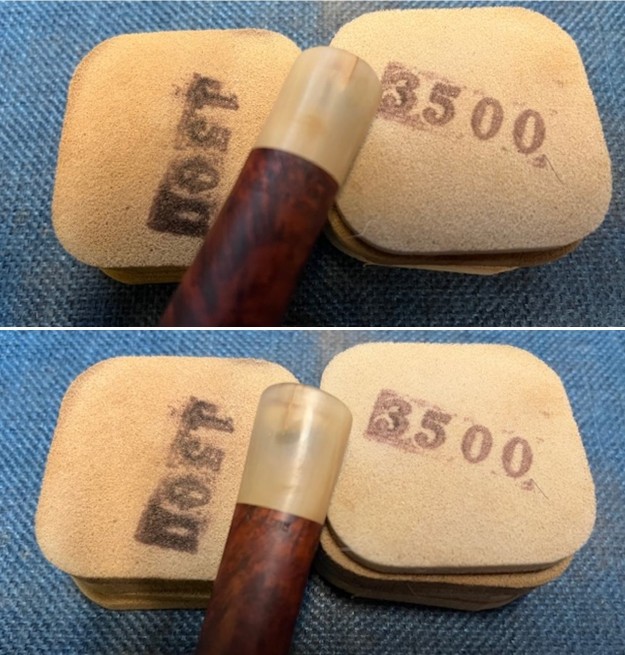
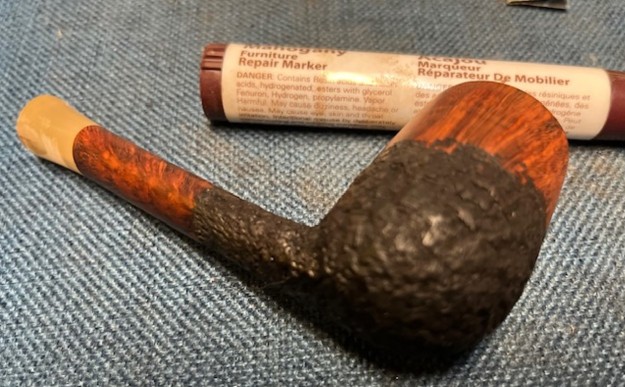
 I restained the rim top with a Cherry Stain pen to match the smooth finish around the bowl. The finish was spotty but it matched well. I knew that once I polished it with micromesh sanding pads and the stained top blended in very well.
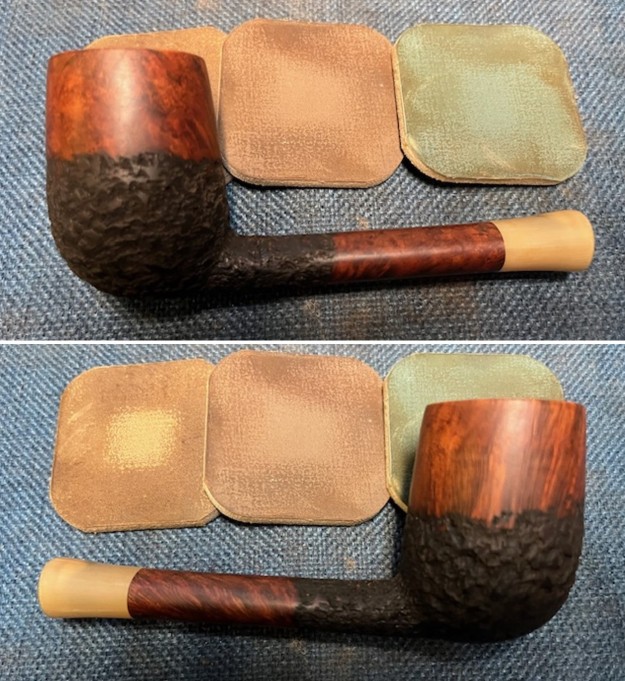
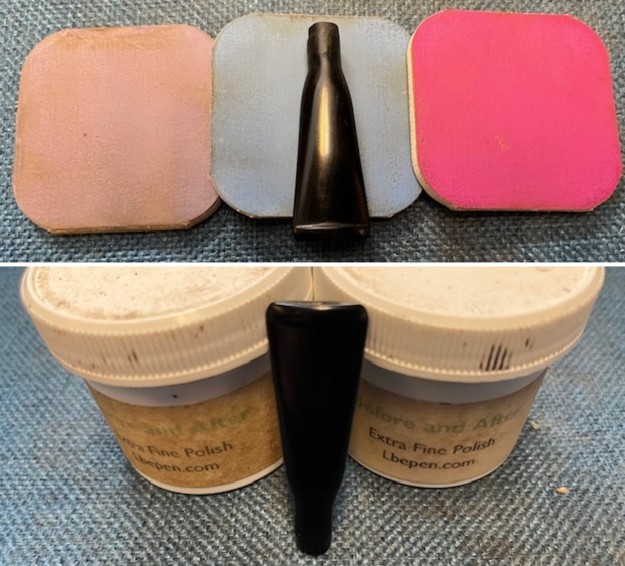
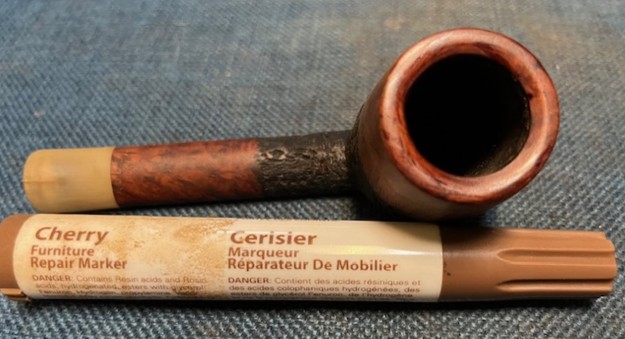 I polished the briar and the horn shank extension with micromesh sanding pads – dry sanding with 1500-12000 grit pads. I wiped the bowl down after each pad with a damp cloth to remove the sanding dust.
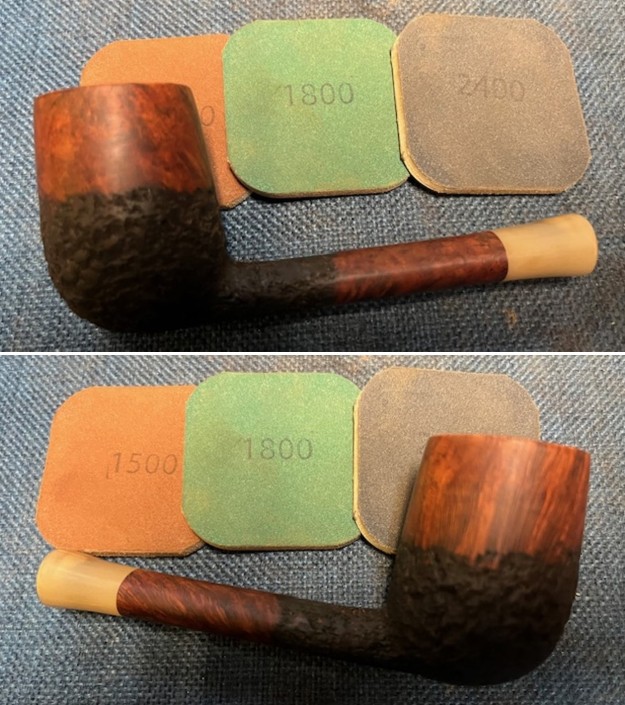

 I rubbed the bowl down with Before & After Restoration Balm. I worked it into the smooth and the rusticated finish of the bowl, rim top and shank with my fingertips and a shoe brush to clean, enliven and protect it. I find that the balm really makes the briar come alive again. The contrasts in the layers of stain and the contrasting finish really made the grain stand out. I let the balm sit for 15 minutes and then buffed with a cotton cloth and shoe brush to raise the shine. The shank repair and the rim top reworking came out looking very good at this point.
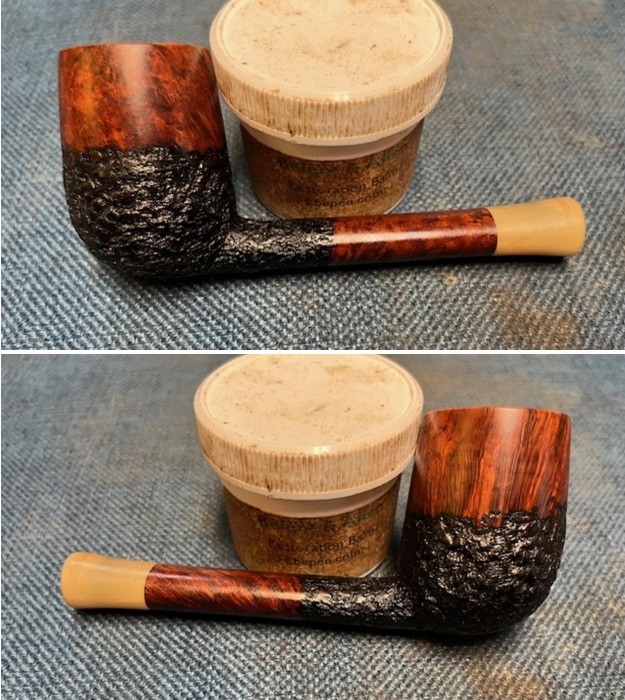
 I started with the stem fitting. I needed to shape the flow of the stem from the shank upward. It needed some work to change the taper to incorporate and tenon that fit in the shank and still allowed the stem to fit well. I used a Dremel and sanding drum and files to shape the stem to fit. I fine tuned the shape of the stem with a folded piece of 220 grit sandpaper to give it the stem a proper fit in the shank.
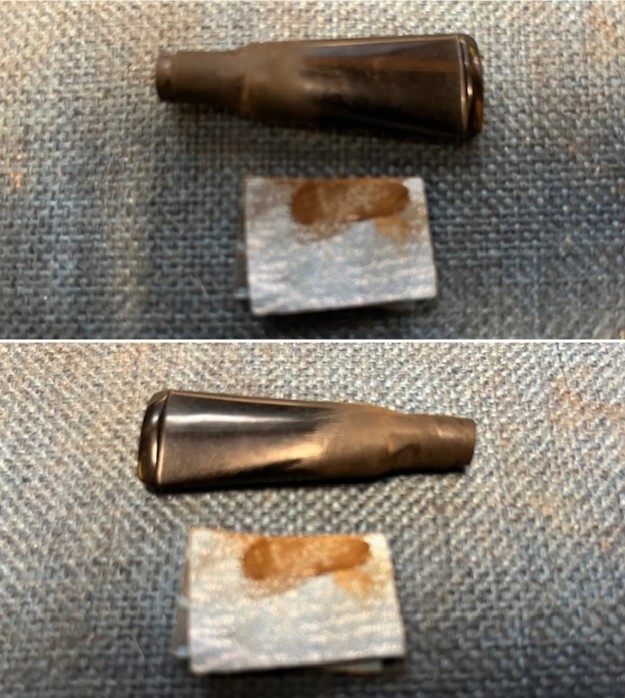 Now I needed to sand it to clean up the file marks and fine tune the shape. I sanded the newly shaped tenon with 320-3500 grit sanding pads. I worked on the file marks and fine shaping of the stem fit against the shank. The pads worked to polish out the marks and the fit to the shank was very good. The stem began to take on a rich shine in the vulcanite by the time I sanded it with the 3500 grit pad.
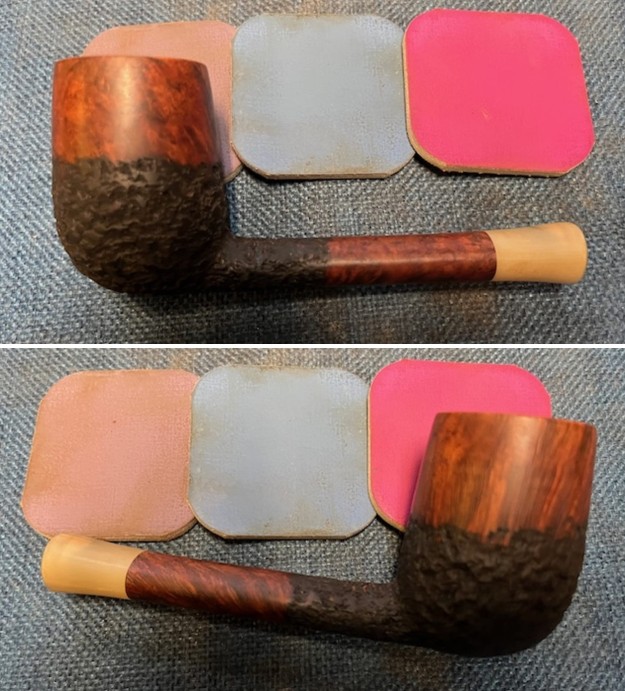
 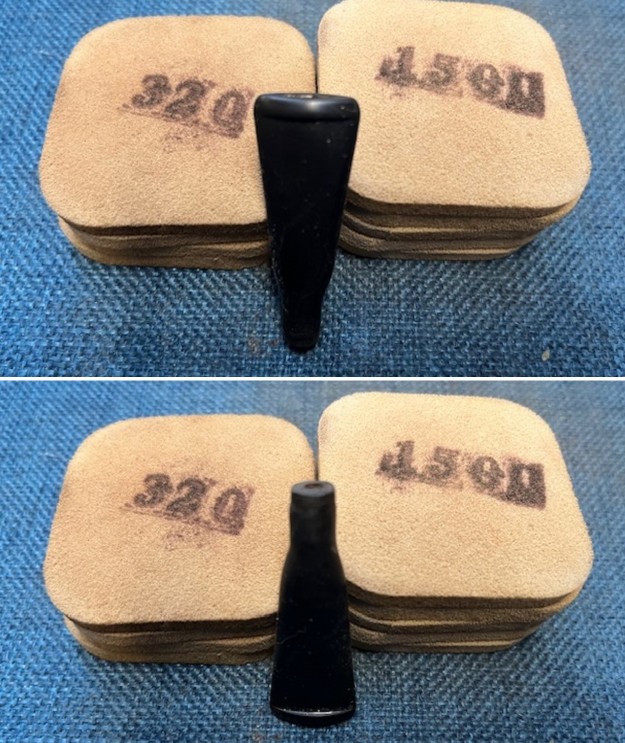 I set the bowl aside and polished it with micromesh sanding pads – dry sanding with 1500-12000 grit sanding pads. I wiped it down after each sanding pad with a cloth containing some Obsidian Oil. I finished polishing it with Before & After Pipe Stem Polish – both Fine and Extra Fine and buffed it off with a cotton cloth.
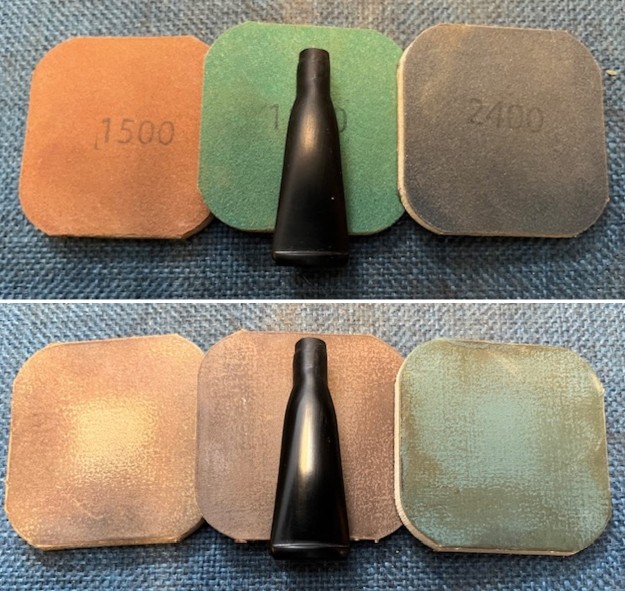
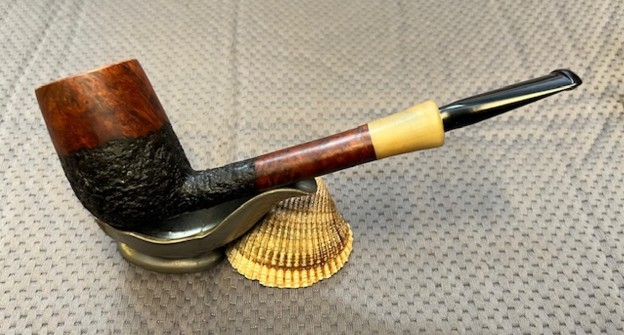
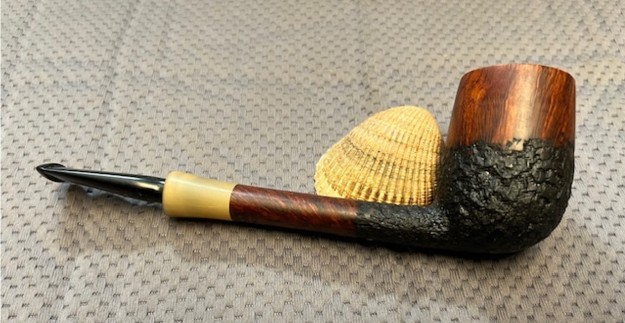
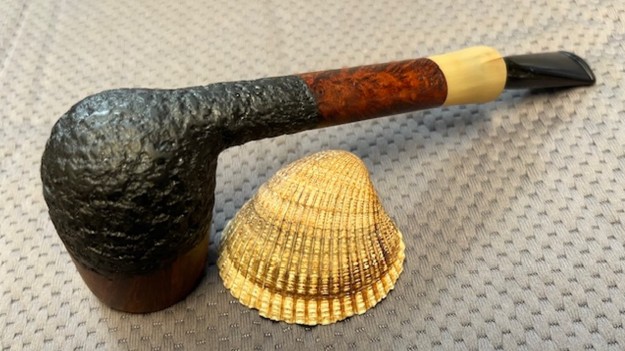
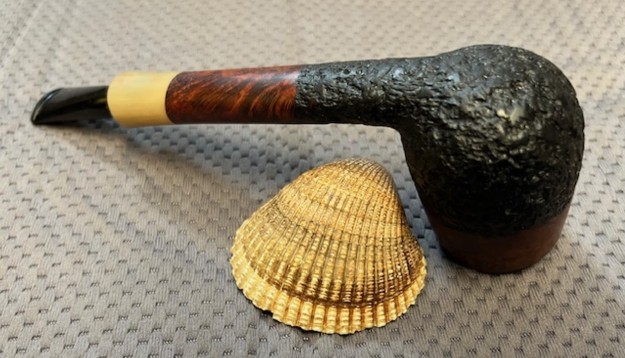
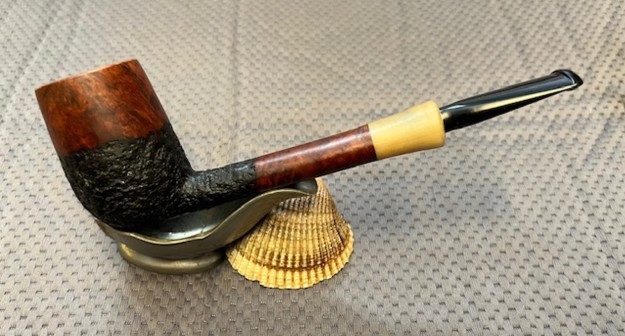
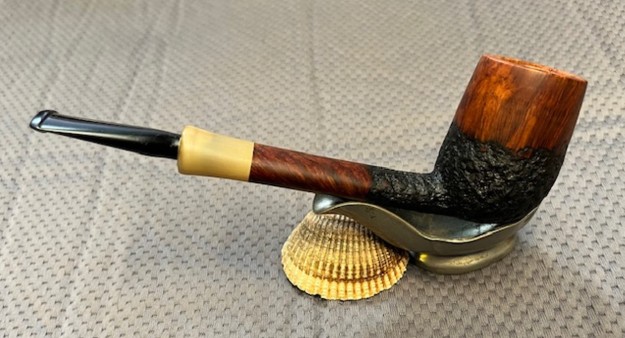
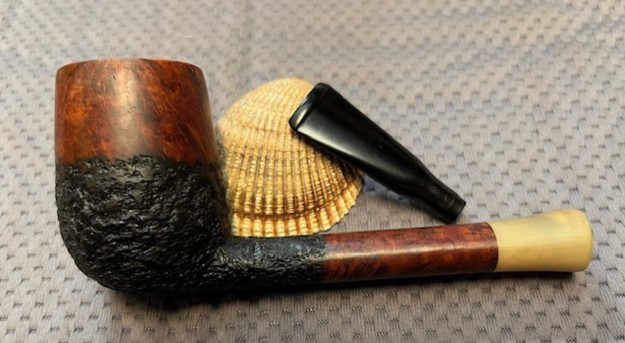
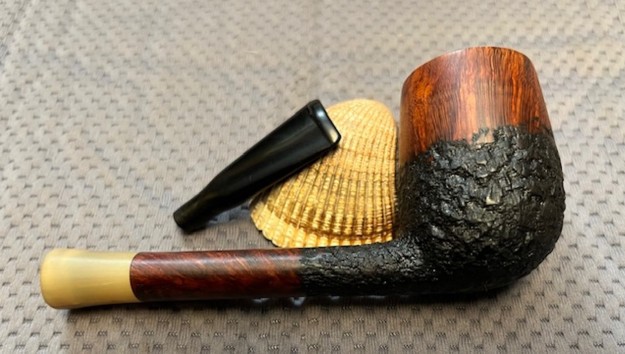
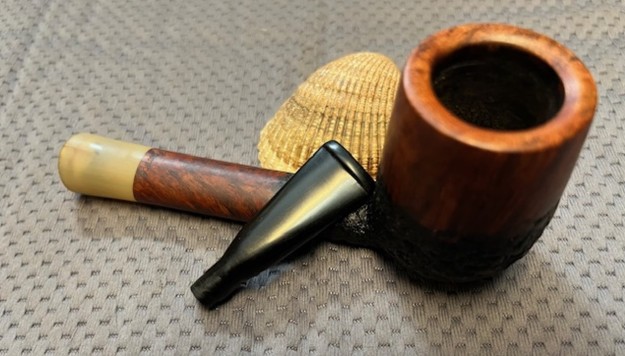
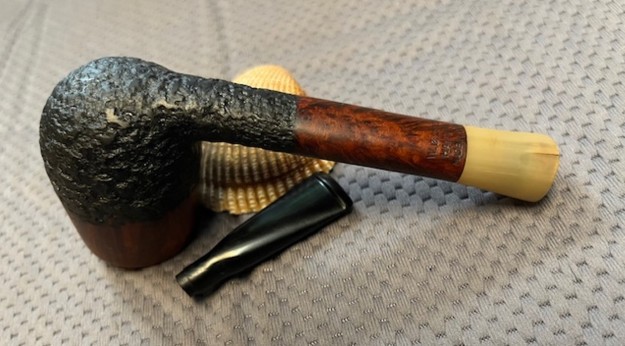
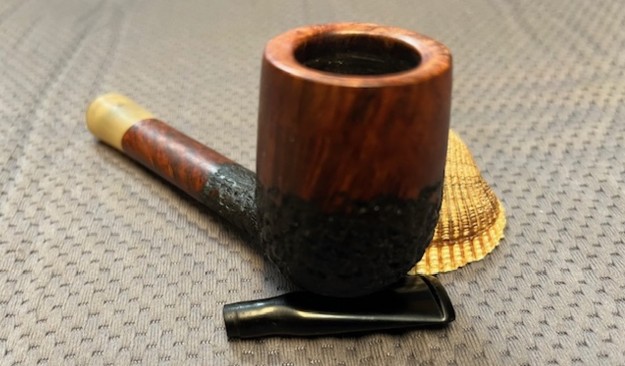
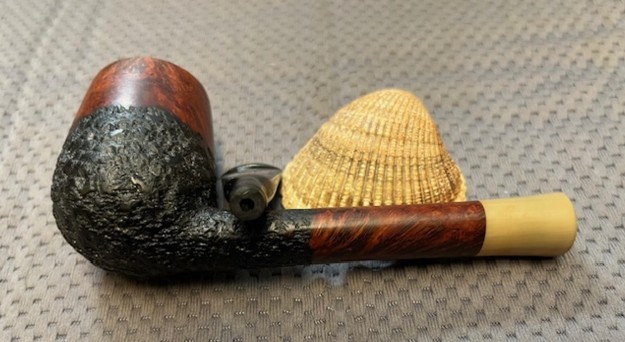
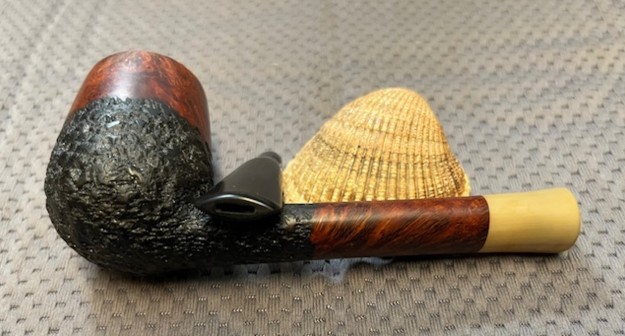
 This W. O. Larsen Hand Made Rustica Canadian is a great looking pipe now that it has been restored. The shape is elegant and flowing with a thin, fitted taper vulcanite stem. I put the new stem on the bowl and carefully buffed the pipe with Blue Diamond on the buffing wheel using a light touch on the briar. I gave the rusticated parts of the bowl multiple coats of Conservator’s Wax and the smooth portions and the stem multiple coats of carnauba wax on the buffing wheel and followed that by buffing the entire pipe with a clean buffing pad. I hand buffed the pipe with a microfiber cloth to deepen the shine. The finished W. O. Larsen Rustica Canadian fits nicely in the hand and feels great. Give the finished pipe a look in the photos below. The dimensions of the pipe are Length: 6 ½ inches, Height: 2 inches, Outside diameter of the bowl: 1 ¼ inches, Chamber diameter: ¾ of an inch. The weight of the pipe is 1.55 ounces/44 grams. I will be putting it on the Danish Pipe Maker Section of the rebornpipes store shortly. If you are interested in adding this pipe to your collection send me a message or an email. Thanks for reading this blog and my reflections on the pipe while I worked on it. There are many more to come!
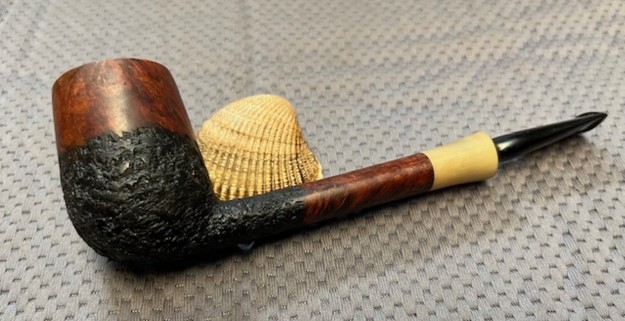


Pingback: Restoring and Repairing a Larsen Copenhagen Handmade Made in Denmark Rustica | rebornpipes
Quite tthe ordeal, Steve. Well done
Does a shank repair like this reduce the air way diameter?
LikeLike
Thanks. Yes it does reduce it slightly but it still takes a pipe cleaner easily and the draught is good
LikeLiked by 1 person