Daily Archives: January 14, 2018

Charatan Special Bulldog Restoration (1955-1960)


By Al Jones

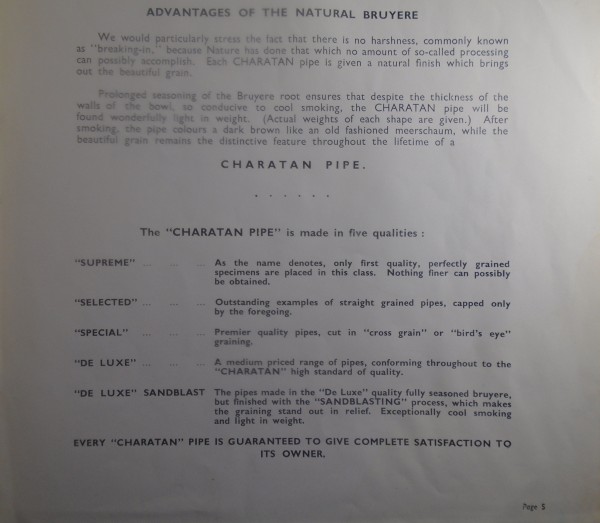
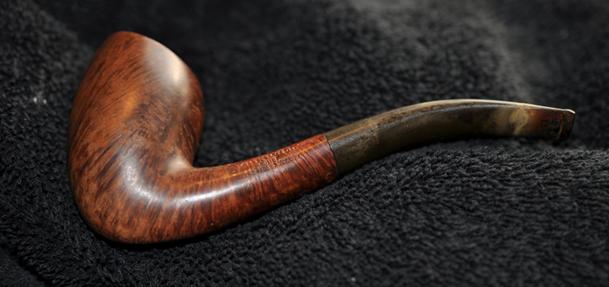
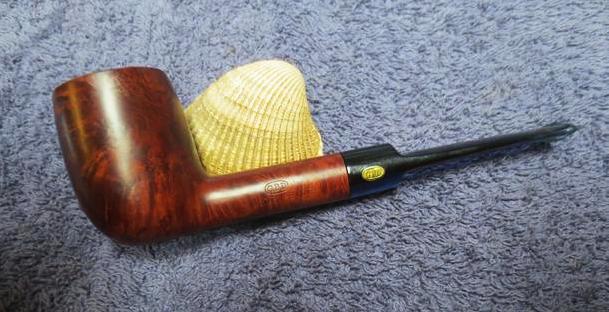
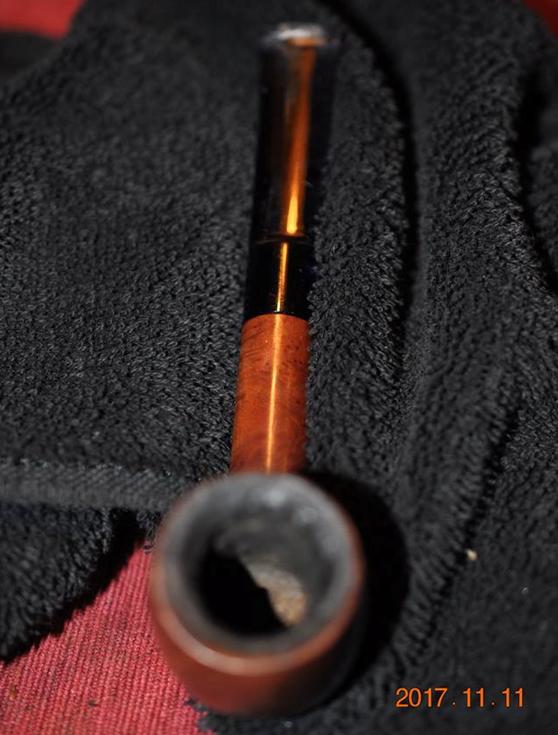
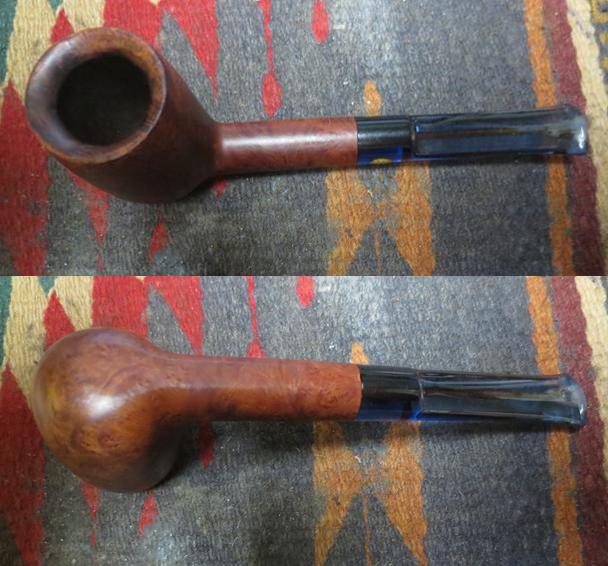
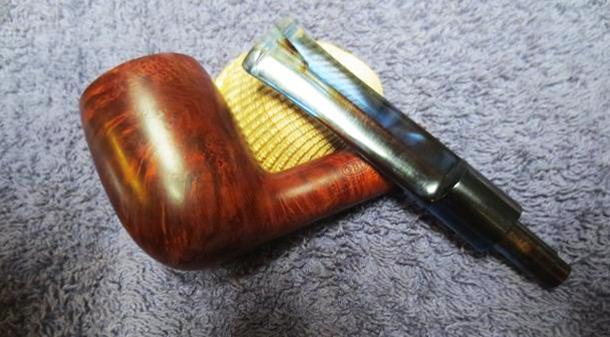
I don’t purchase many Charatans because most of them are simply too large and I’m more of a “classic shape” guy versus freehands. To be honest, I also don’t look forward to dealing with the stamped “CP” stem logo, which are usually very lightly stamped. This shape 08 bulldog caught my attention as it is one of only two Charatan bulldog shapes, the other being the 109 (which is listed as a Rhodesian). This one is stamped a “Special” but like many Charatans, it seems undergraded to my eye.

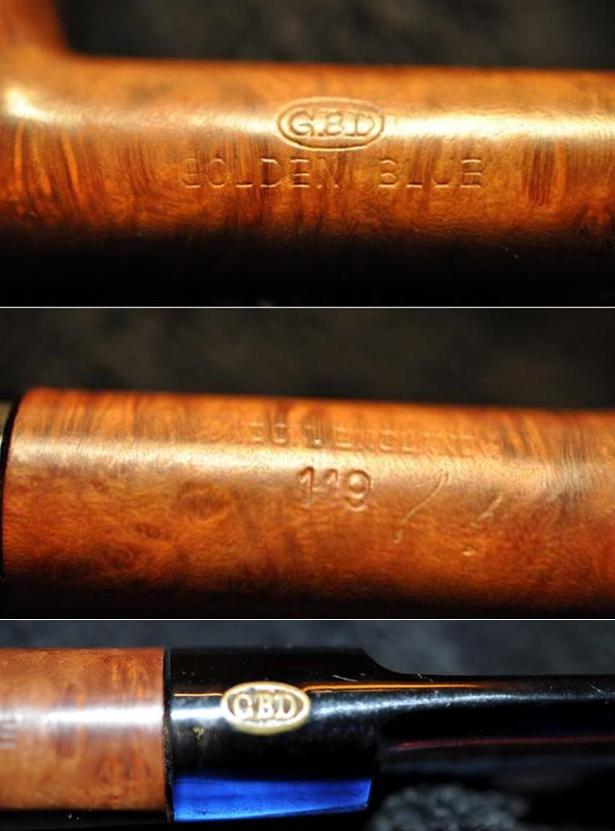
I can date the pipe to being made from between 1955 and 1960. The circled “L” logo stamp was first used in 1955 and all Charatans received double-comfort stems starting in 1960.

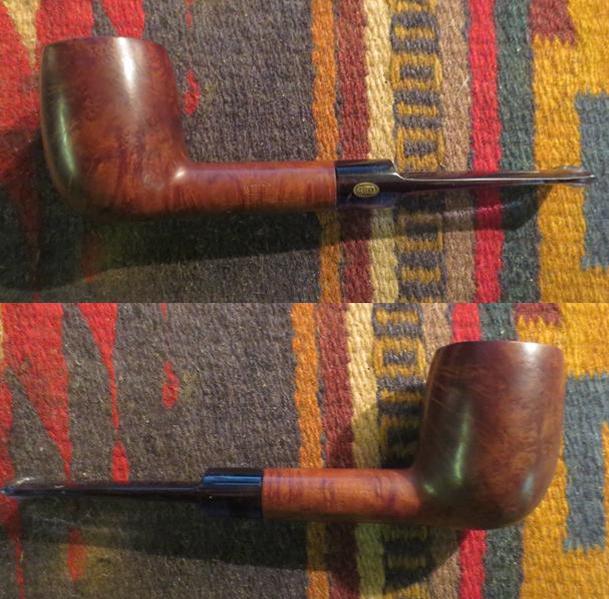
Another plus for this pipe, in my collection is the size – despite being a solid Group 4 (or maybe even a Group 5), it only weighs 38 grams. That is diminutive by Charatan standards.

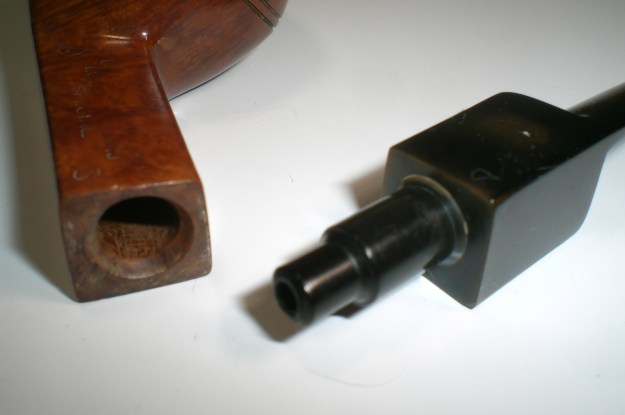
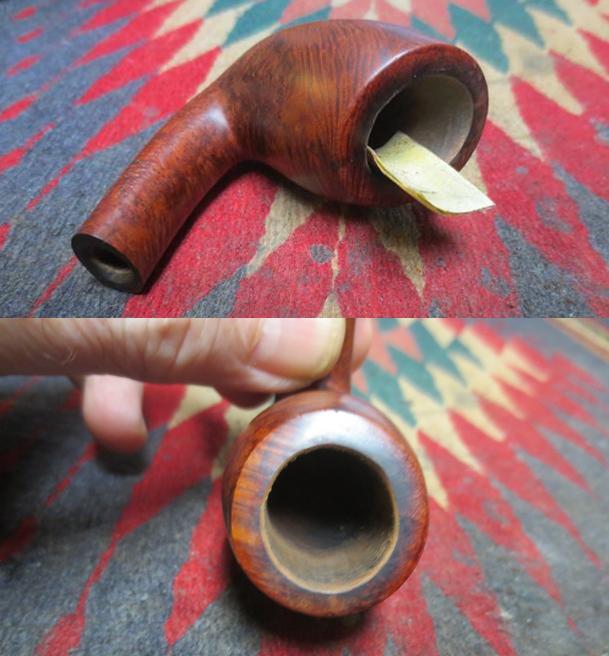
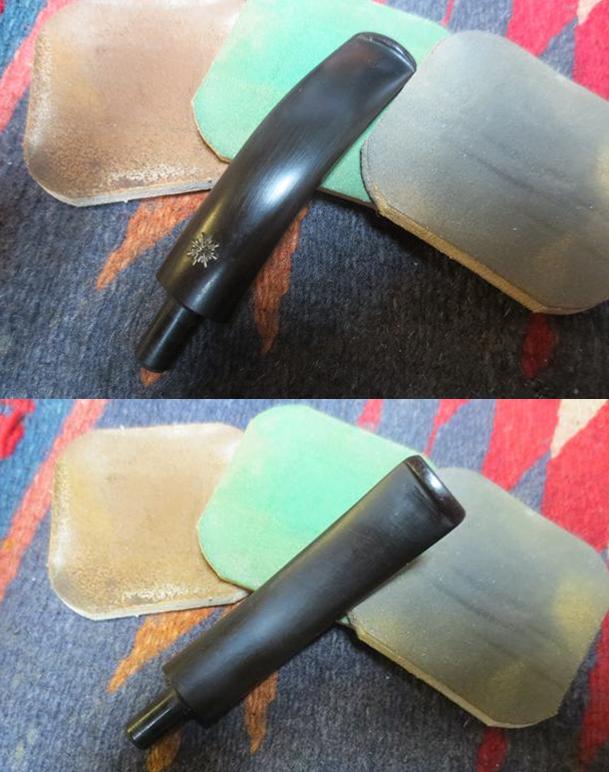
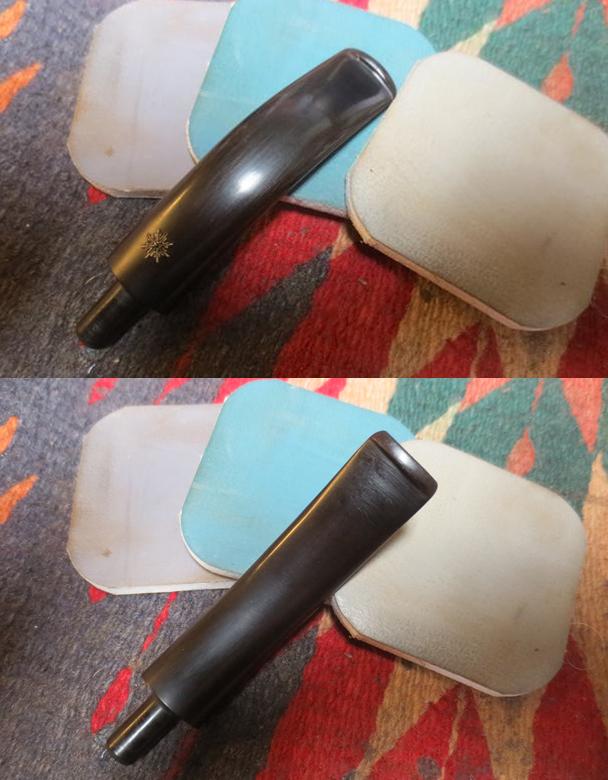
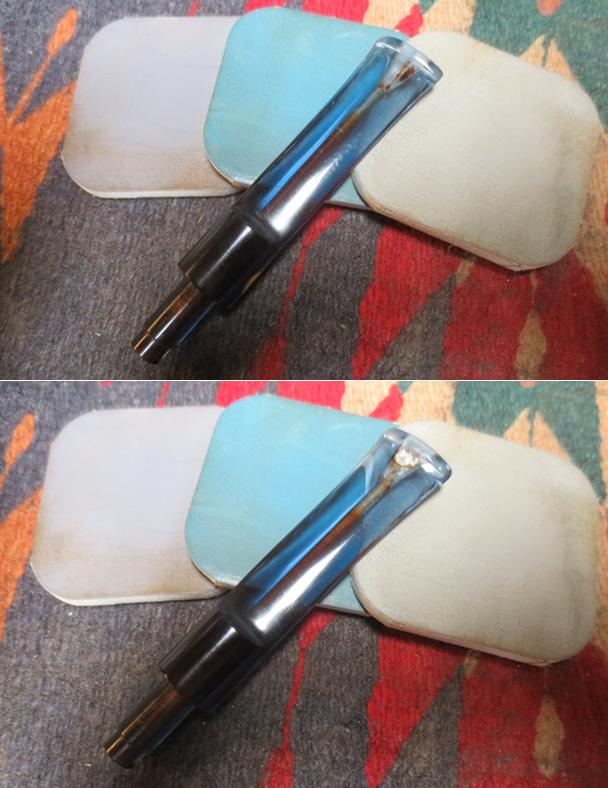
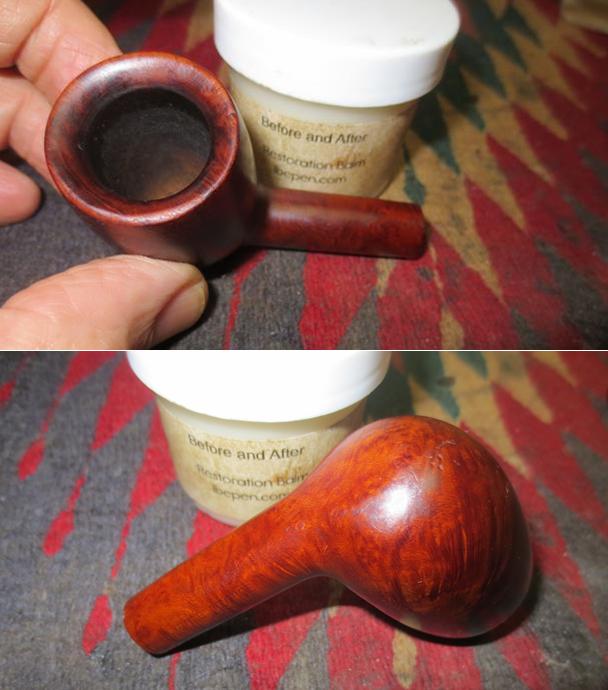
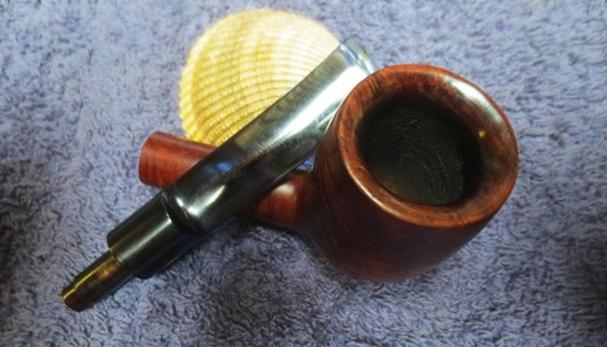
Beside the oxidized logo, this one had other challenges. The diamond shank bulldog stem had several facets that I typically don’t see on a bulldog stem, including the flat sides of the stem. The top of the bowl had some rim darkening as well.

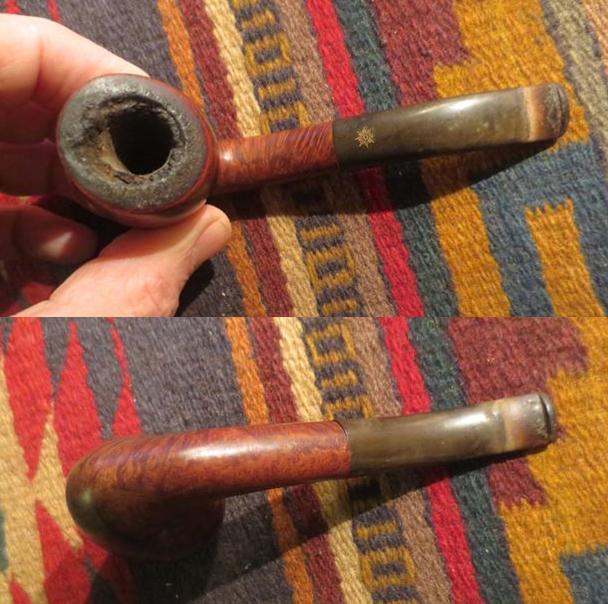
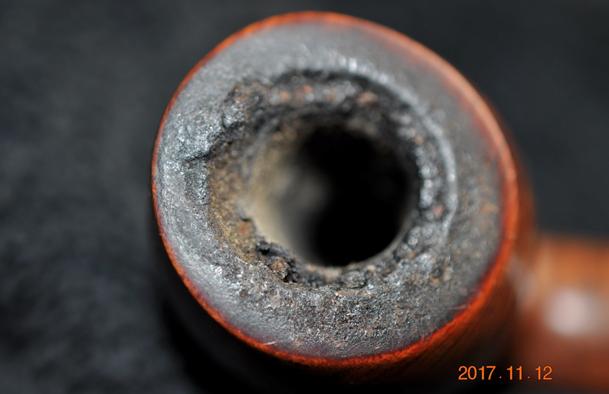
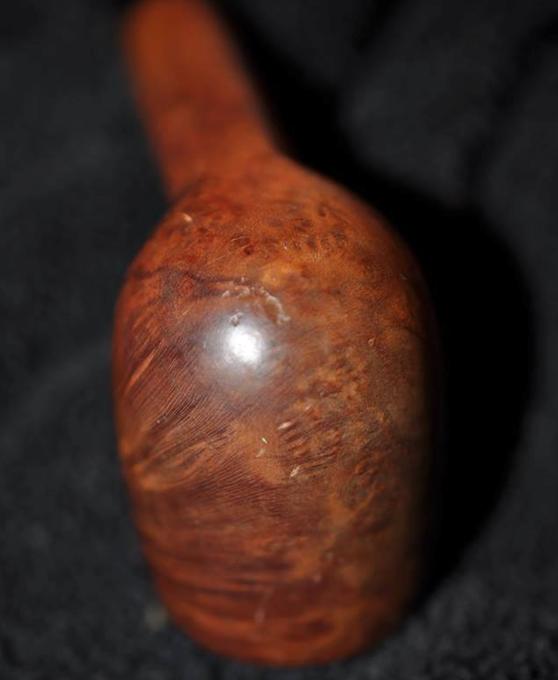
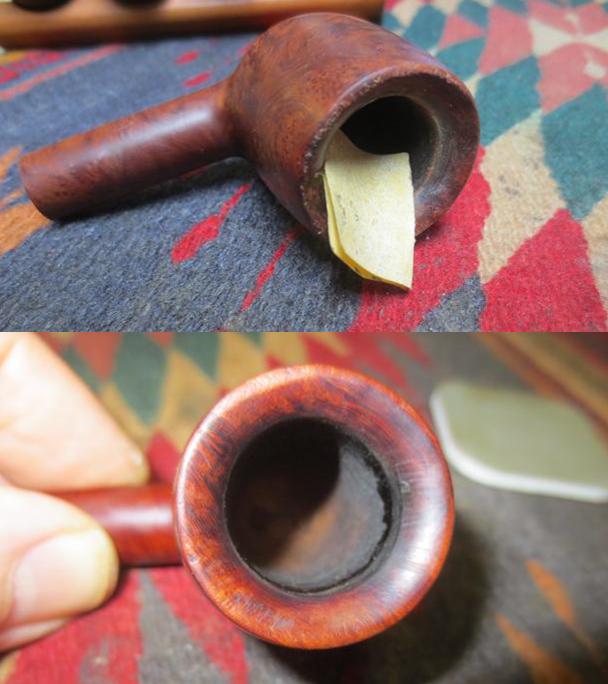
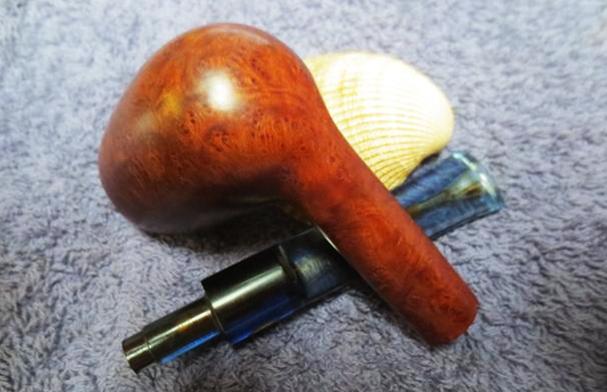
The bowl had numerous marks around the bowl, including these peck marks.

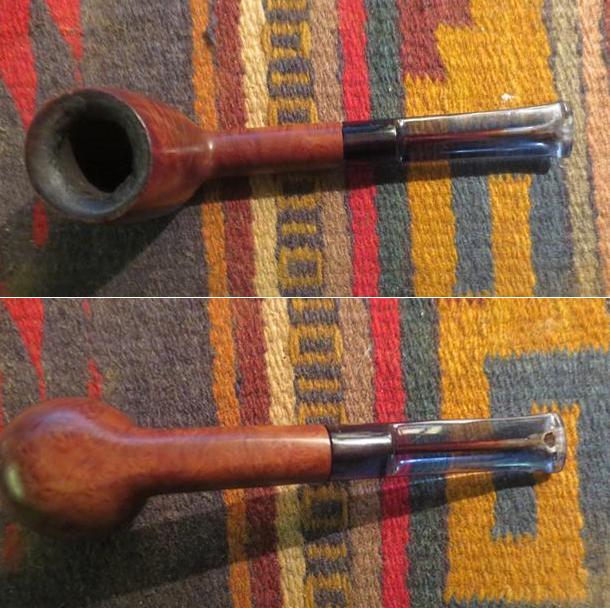
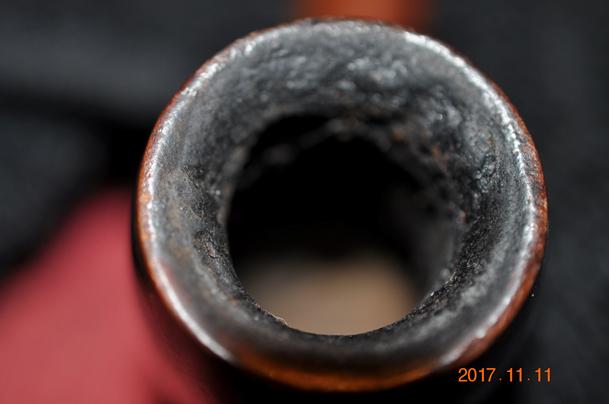
The pipe had a very slight cake and after reaming, I found the bowl was in great shape. I used an electric iron on high to steam out most of the marks. As I thought, the peck marks on the front of the bowl proved problematic. I was able to remove a few marks in that area and slightly diminished the others, but they could not be removed completely.

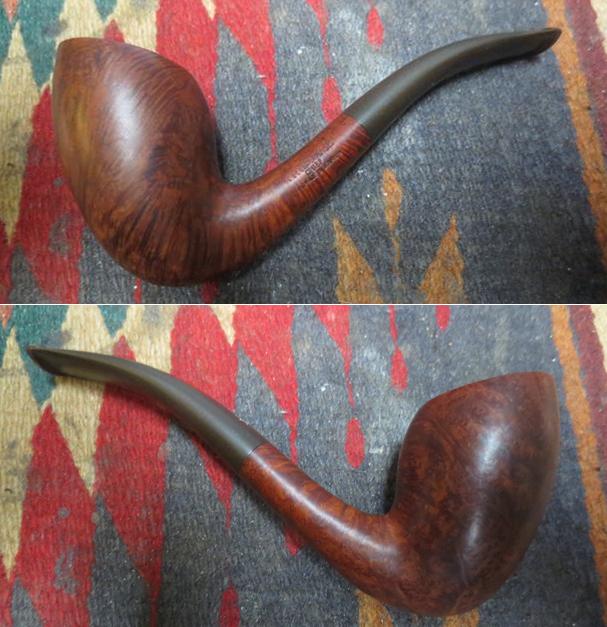
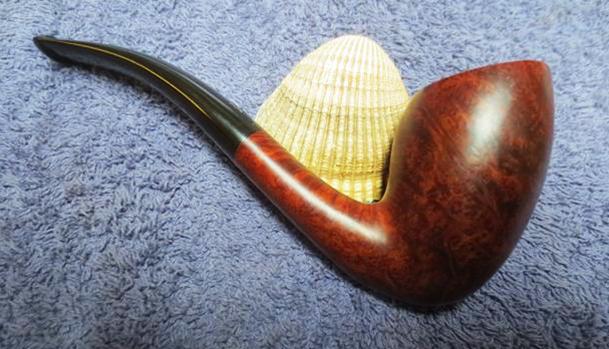
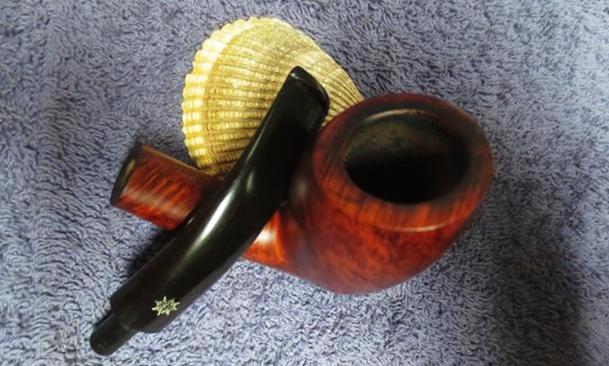
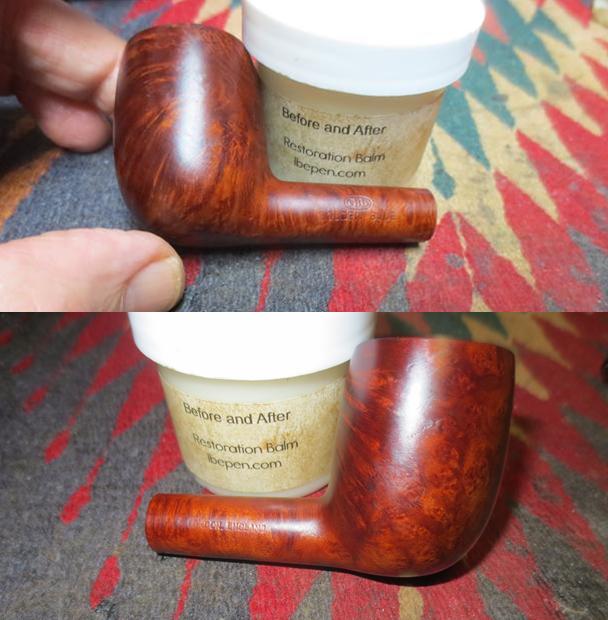
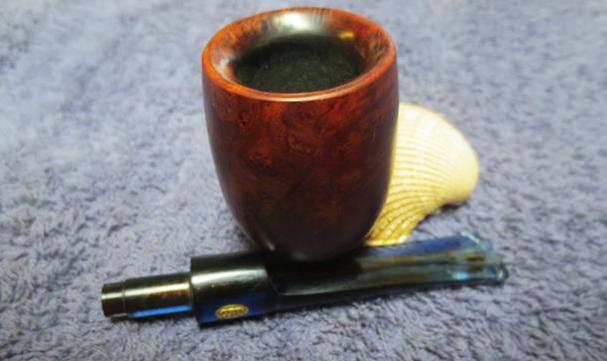
I used 6,000 and 8,000 grade micromesh on the bowl top to remove a lot of the darkening. To remove it any further would have required topping the pipe and restaining it. I thought it had greater value keeping it as original as possible.

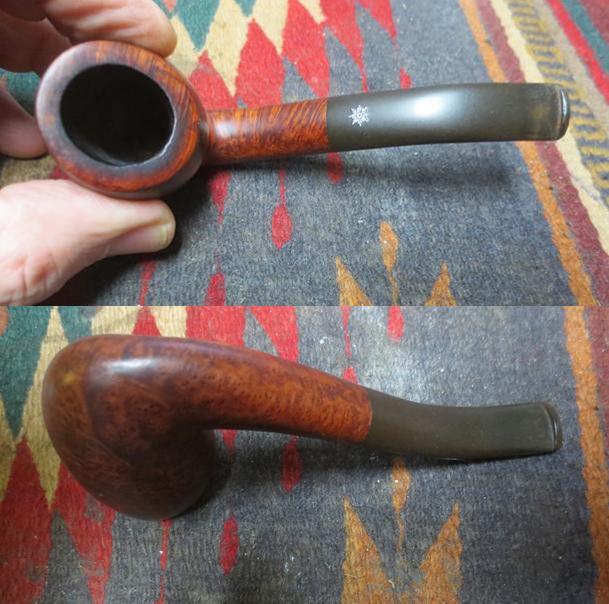
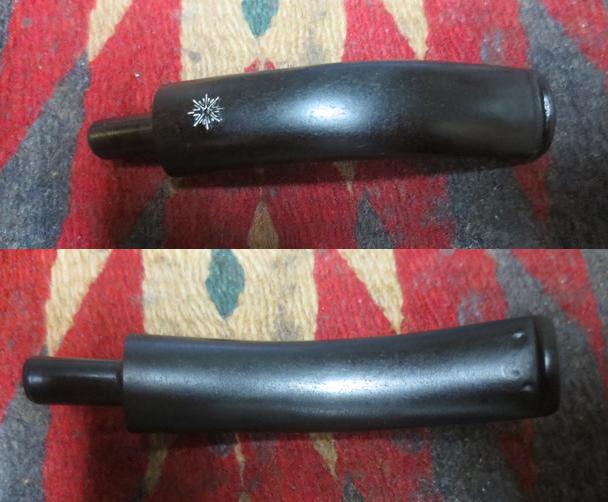
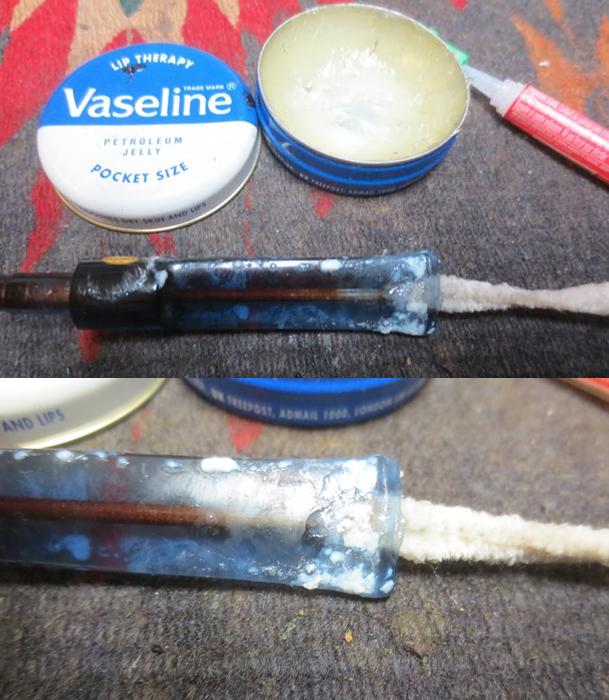
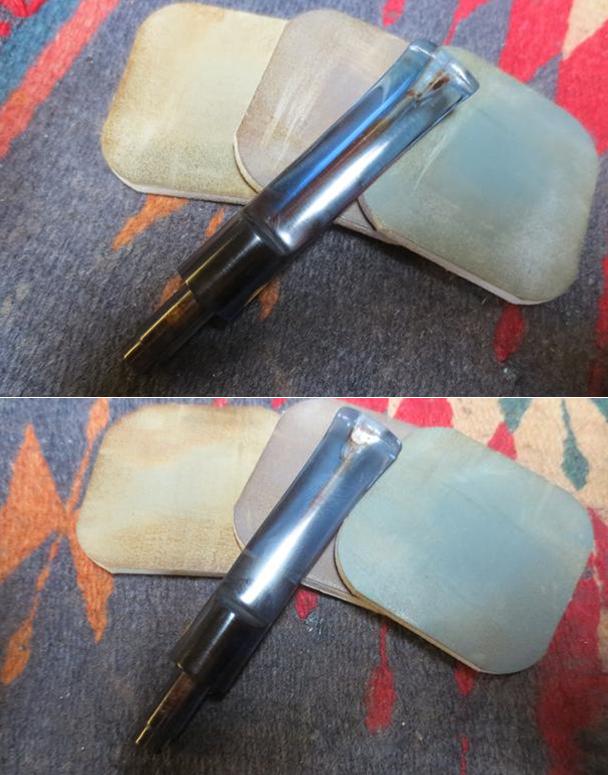
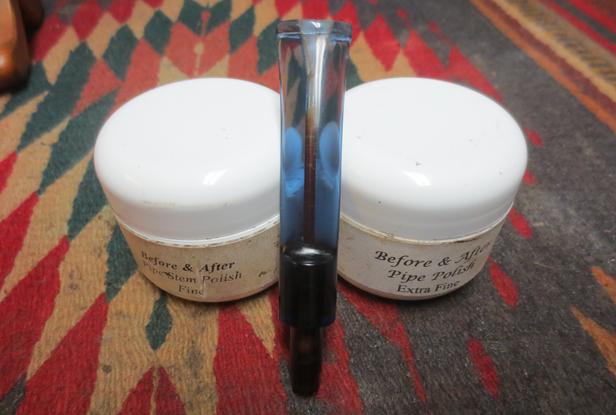
I removed the outer layer of oxidation on the stem with 400 and 800 grit paper, then moving thru the 1,500 and 2,000 grades. Finally, 8,000 and 12,000 grades micromesh were used. Working around the faintly stamped logo was of course a big challenge. The stem was then buffed with White Diamond and Meguiars Plastic polish.

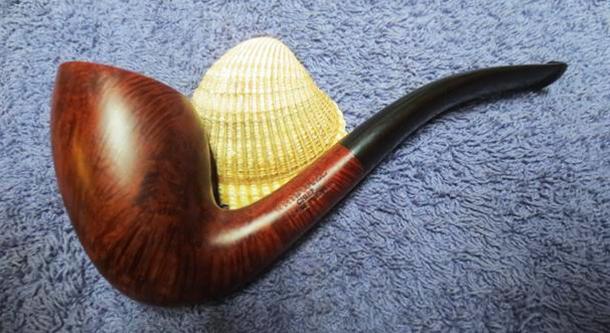
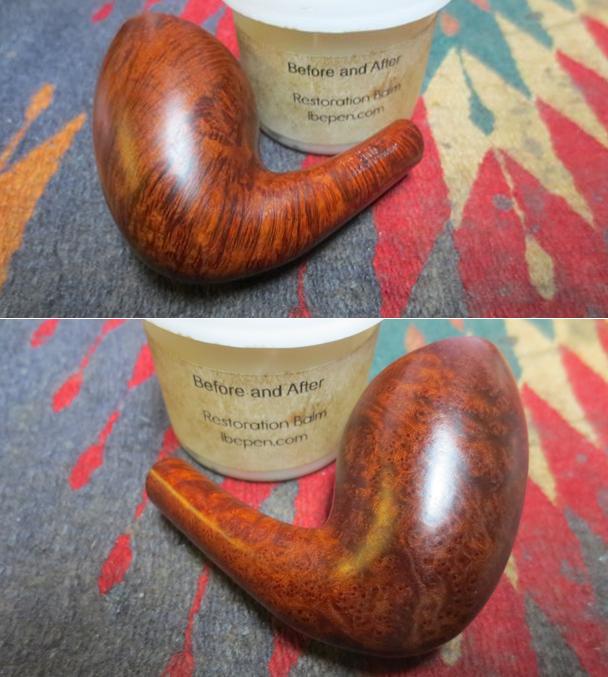
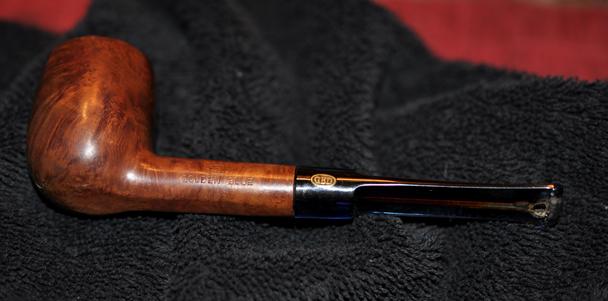
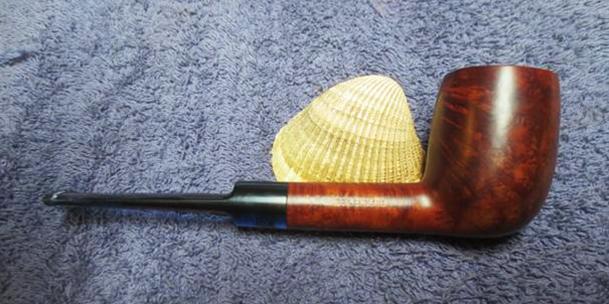
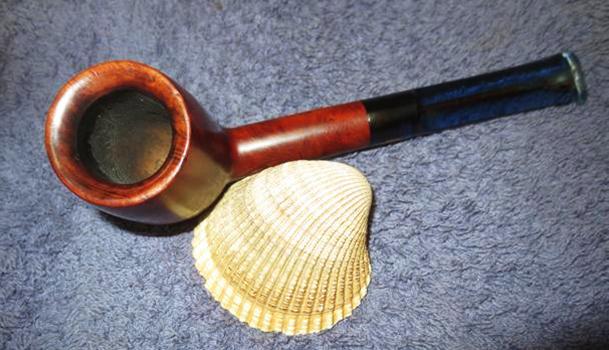
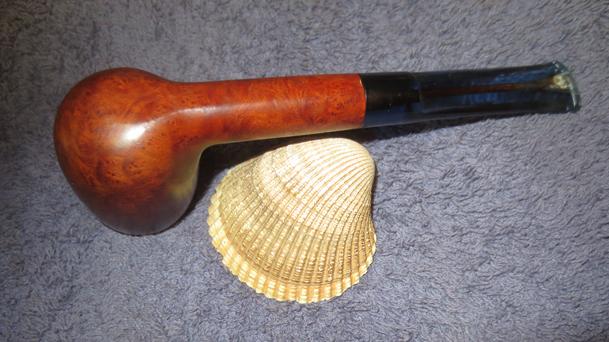
Below is the completed pipe.

CIMG4852

Update Jan 17, 2018:

We are fortunate at the PipesMagazine.com forum to have the participation of Ken Barnes. Ken is the son of Colonel Kenneth Barnes, who was a managing director for Charatan. Ken himself started working at Charatan when he was 14 years old and is a wealth of information on that brand as well as James Upshall. Ken added this information about the pipe brand and these two catalog pages.

The Special quality was around in 1951 as shown, and this was the largest size of the Bulldog shape no. 8

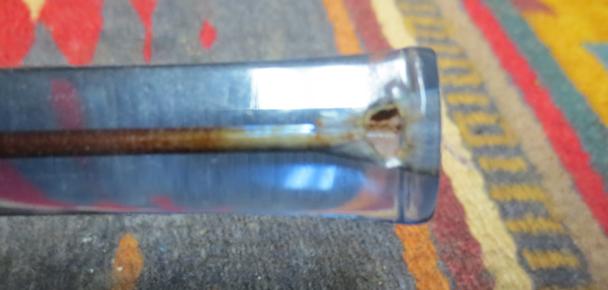
I think that the mouthpiece is hand-cut. I have learnt that the clue is that the saddle ‘step’ is sharp and 90 degrees rather than curved (a photo of the bite opening would confirm this).
I was thinking that there may be someone out there who could etch the Cp a little deeper and then fill the stamp with Crayola white wax and wipe away the surplus. I think that Reubin Charatan first used Crayola wax for the logos in 1910. I do know that the Crayola company was founded in 1903.

Restoring a Danish Handmade Kriswill Chief 40


Blog by Steve Laug

This Kriswill is yet another one from a local pipe shop. It came from the estate of the same older gentleman whose wife returned them to the shop for restoration and resale. This one is a smooth finished Kriswill. The briar is a combination of mixed grain around the bowl. It is stamped on the left side of the shank Kriswill over Chief over Handmade in Denmark. On the underside near the shank stem junction it has the shape number 40. I reviewed the information I had on Kriswill and have included some of that here.Kriswill was one of the large pipe manufacturers in Denmark during the 1960s and 1970s, and closed around 20 years ago. Their catalog cover read “By Appointment to the Royal Danish Court, KRISWILL, Kriswork Briar Trading, Briar Pipes Hand Made in Denmark.” After the Danish Kriswill enterprise ended, pipes were made in Norway and in France under the Kriswill label. In the 1970s Kriswill was bought by Lillehammer, and in the 1980s the pipes were made for a while at the Catalan factory, Iberica de Pipas. https://pipedia.org/wiki/File:Kriswill_Factory.jpg

The finish on the pipe was dirty and dull. The beveled rim top had lava built up that extended up and over the outer edge. It was hard to tell if there was damage to the inner edge of the rim. The bowl had a thick, hard cake filling the bowl. The stem was heavily oxidized and had some deep tooth marks on the top and underside at the button. It also appeared to have had a Softee bit at some point as the usual calcification was present on the stem from the button forward about an inch. This was included in the pipes that I sent off to my brother for cleaning. This is the third pipe that I have brought to the work table from the lot of about 50 to rework. I can’t say enough how much I appreciate his willingness to clean and ream the pipes for me. It allows me to move through the repairs much more quickly. When he received the pipe he took a series of photos of it to show its condition. He took a close up photo of the rim top showing the thick cake and the overflow of lava onto the top of the bowl. The cake is very thick and the lava hides the rim top. The bowl is quite small and in this condition would hold very little tobacco.The next photos show the stamping on the left and the underside of the shank. It is clear and readable. The Kriswill snowflake logo on the top of the stem is in very good condition and is undamaged.The vulcanite stem was heavily oxidized and had some deep tooth marks on both the top and underside near the button. They were deep but did not go all the way through the stem. There were scratches and nicks in the surface of the stem all the way around the stem. The button was worn down on both sides. There was some heavy calcification going on where there must have been a Softee bit covering the end of the stem. There were no surprises as this was true of most of the pipes in this estate.I am once again very grateful for the thorough cleanup that Jeff did on the bowl and stem. He carefully reamed the bowl back to bare briar with a PipNet Pipe Reamer and cleaned up the remnants with a Savinelli Fitsall Pipe Knife. He cleaned the internals of the bowl and stem with alcohol, pipe cleaners and cotton swabs – scrubbing out the mortise as it was dirty. He scrubbed the exterior of the pipe with Murphy’s Oil soap and a tooth brush and was able to remove all of the oils and dust in the smooth finish on the briar. He was able to remove all of the lava and grime from the beveled rim top and left it looking very clean. The inner edges of the bowl were slightly out of round and would need to be worked on. The outer edge of the rim top looked very good. He soaked the stem in an Oxyclean bath to remove the grime and calcification and to bring the oxidation to the surface. When the pipe arrived I took some photos to show how it looked before I did the restoration. It really is a beautifully grained piece of briar that should look amazing when it is polished. Jeff removed the thick, hard cake and the lava buildup on the rim top and clean off the inner and outer edges of the rim. The inner edge had some minor damage that made it slightly out of round. The outer edge looked really good. The top surface of the rim had some minor darkening but otherwise looked very good. The vulcnaite stem looked far better than when Jeff started the cleanup. There were a lot of scratches on the surface and a few tooth marks on both the top and underside if the stem. The snowflake logo was undamaged.The stem still had some deep oxidation in the vulcanite so I dropped it into the Before & Stem Deoxidizer bath and let it soak overnight. (The photo below shows the stem before I pushed it into the bath.)I used a folded piece of 220 grit sandpaper to reshape the inner edge of the bowl and to smooth out the surface and remove the darkening. I used 1500-4000 grit micromesh pads to polish the surface of the rim and the inner edge.I worked some Before & After Restoration Balm into the surface of the briar with my finger tips to deep clean the smooth finish, enliven and protect the briar. I let it sit for a few minutes and then buffed it with a cotton cloth. The grain of the briar really had begun to show through at this point and there was a rich shine to the briar. I took some photos of the bowl at this point to mark the progress in the restoration. I set the bowl aside and called it a night. In the morning I removed the stem from the Before & After Stem Deoxidizer and wiped it off with a paper towel to remove the remaining oxidation and bath. I cleaned out the airway with pipe cleaners and alcohol until it was clean. The stamping on the stem was untouched. The stem was pitted slightly and the tooth marks were very visible. It was ready for repairs to the tooth marks and polishing.I filled in the tooth marks with clear super glue on both sides of the stem and set it aside to allow the repairs to cure. When the repairs had dried I sanded them smooth and blended them into the surface of the stem. I reshaped the button on both sides of the stem with a needle file and sanded the stem down 220 grit sandpaper. The 3rd and 4th photos below show the stem at this point in the process. The surface of the stem on both sides looks good. The tooth marks are gone and the surface is smooth. I worked over the stem with micromesh sanding pads. I polished out the sanding scratches and marks in the vulcanite – wet sanding it with 1500-2400 grit pads and dry sanding it with 3200-12000 grit pads and wiped it down with Obsidian Oil after each one. When I finished with the 12000 grit pad I gave it a final coat of oil and let it dry. After the polishing I could still see light scratches in the vulcanite on the top at the curve and on the underside next to the stem. I buffed it on the buffing wheel with Red Tripoli and Blue Diamond and polished them out. I took it back to the work table and polished it with Before & After Pipe Stem Polish Fine and Extra Fine. I rubbed it down with some Obsidian Oil and took the following picture.I put the stem back on the bowl and took the pipe to the buffing wheel to work it over. I buffed the bowl and stem once again with Blue Diamond to polish it. I gave the bowl and the stem multiple coats carnauba wax. I buffed the entire pipe with a clean buffing pad to raise the shine. I hand buffed it with a microfiber cloth to deepen the shine. The finished pipe is shown in the photos below. It is a beautiful older Kriswill pipe in one of their classic shapes that looks great and feels comfortable in the hand. The reddish brown stain and the polished black vulcanite work together to give the pipe a rich look. If you are a fan of older Danish pipes this is one of the classic shapes from Kriswill. It will make a great pipe addition to the rack and should be a great smoker.  The dimensions of the pipe are: Length: 5 1/2 inches, Height: 2 1/4 inches, Outer Diameter of the Bowl: 1 1/4 inches, Diameter of the Chamber: 3/4 inches. I will be adding this one to the rebornpipes store shortly if you are interested in adding it to your collection. If you are interested email me at slaug@uniserve.com or send me a message on Facebook. Thanks for looking.


Restoring and repairing a stem on a GBD Golden Blue 119 Billiard


Blog by Steve Laug

The next pipe on the table is another one from a local pipe shop. It is a pipe from the estate of the same older gentleman whose wife returned them to the shop for restoration and resale. This one is a smooth finished GBD with a Blue Perspex stem. The smooth finish shows mixed grain around the bowl. It has a rim top that is beveled inward to the inner edge of the bowl. It is stamped on the left side of the shank GBD in the oval over Golden Blue. On the right side it reads London, England over the shape number 119. The finish on the pipe was dirty and dull. The beveled rim top had lava built up that extended up and over the outer edge. The bowl had a thick, hard cake filling the bowl. The stem had deep tooth marks on the top and a bite through on the underside at the button. The bite through was repairable but it would be visible. I sent the pipes off to my brother for cleaning. This is the second pipe that I have brought to the work table from the lot of about 50 to rework. I really appreciate his willingness to clean and ream the pipes for me. When he received the pipe he took a series of photos of it to show its condition. He took a close up photo of the rim top showing the cake and the overflow of lava on the beveled top of the bowl. The cake is quite thick and the lava has almost leveled the bevel in many spots around the bowl. He also took photos of the bowl sides and underside to show some of the nicks and dents in the finish. The next photos show the stamping on the left and the right side of the shank. It is clear and readable. The brass rondel on the left side of the saddle stem is in very good condition and is undamaged.The stem was Blue Perspex and had some deep tooth marks on the top side near the button. They were deep but did not go all the way through the stem. There were scratches and nicks in the surface of the stem all the way around the stem. The button was worn down on both sides. On the underside of the stem there was a large bite through. With the stem being blue it was going to be a challenge to repair. The repair on the bite through would be hard to blend in as there was not a blue super glue or epoxy that I could match.As I have come to expect, Jeff did his usual thorough cleanup on the bowl and stem. He carefully reamed the bowl back to bare briar with a PipNet Pipe Reamer and cleaned up the remnants with a Savinelli Fitsall Pipe Knife. He cleaned the internals of the bowl with alcohol, pipe cleaners and cotton swabs – scrubbing out the mortise as it was dirty. He scrubbed the exterior of the pipes with Murphy’s Oil soap and a tooth brush and was able to remove all of the oils and dust in the smooth finish on the briar. He was able to remove all of the lava and grime from the beveled rim top and left it looking very clean. The inner edges of the bowl were in excellent condition and outer edges have many small nicks. He soaked the stem in an Oxyclean bath remove the grime in the bite through and the edges of the stem. He cleaned out the blue Perspex with soapy water to remove the tarry oils and grime in the airway. He was able to remove much of the internal grime. When the pipe arrived I took some photos to show how it looked before I did the restoration. Jeff was able to remove the lava buildup on the beveled rim top and clean off the inner and outer edges of the rim. The inner edge looked very good but the outer edge had nicks and scratches. The top surface of the bevel had some minor darkening but otherwise looked very good. The Blue Perspex stem was in rough condition. There were a lot of scratches and nicks in the surface, tooth marks on the top side and a bite through on the underside. The airway still showed darkening from the tars and oils of the tobacco.I took a close up photo of the bite through to show the size and shape of the damaged area on the underside of the stem.I folded a pipe cleaner and flattened it to fit in the funnel of the airway. I greased it with Vaseline so that it would prevent the glue from sticking to the inside and anchoring the pipe cleaner in the airway. I worked my way inward building up the edges of the hole. I filled in the tooth marks on the top side of the stem and sprayed it with an accelerator. I filled in the remaining hole in the underside of the stem with clear super glue. Once it was filled in I sprayed it with accelerator and removed the pipe cleaner. Filling in the hole with the glue was a messy proposition as the glue was thin and ran up the stem surface.I used a needle file to remove all of the excess glue on the surface of the stem and blend the repairs into the surface. I also reshaped the button on both sides of the stem. I sanded the stem down with 180 grit and 220 grit sandpaper. The photos below show the stem at this point in the process. The top side is in excellent condition now. The tooth marks are gone and the surface is smooth. The underside where the bite through was filled in is solid but visible.I worked over the stem with micromesh sanding pads. I polished out the sanding scratches and marks in the Blue Perspex – wet sanding it with 1500-2400 grit pads and dry sanding it with 3200-12000 grit pads and wiped it down with Obsidian Oil after each one. When I finished with the 12000 grit pad I gave it a final coat of oil and set it aside to dry. I polished it with Before & After Stem Fine Polish and wiped it down. I followed that by polishing it with the Extra Fine Polish. I buffed it with a microfiber cloth to raise the shine. I sanded the inner edge of the bowl with 220 grit sandpaper to smooth out the surface and remove the darkening. I used a 1500 grit micromesh pad to smooth out the outer edge of the bowl. I rubbed the bowl down with Before & After Restoration Balm to deep clean the smooth finish, enliven and protect the briar. I hand rubbed it with my fingers to get it deep into the briar. I let it sit for a few minutes and then wiped it off with a soft cloth and buffed it with a cotton cloth. The briar really began to have a deep shine. The smooth surface showed some nice grain patterns and begun to look really good. I took some photos of the bowl at this point to mark the progress in the restoration. I put the stem back on the bowl and took the pipe to the buffing wheel to work it over. I buffed the bowl with Blue Diamond to polish the briar. I buffed the stem at the same time to raise the gloss on the Blue Perspex. I gave the bowl and the stem multiple coats carnauba wax. I buffed the entire pipe with a clean buffing pad to raise the shine. I hand buffed it with a microfiber cloth to deepen the shine. The finished pipe is shown in the photos below. It is a beautiful GBD pipe that looks great and feels comfortable in the hand. The reddish brown stain and the Blue Perspex work really well together. Though the repaired area on the bite through is visible it is solid. Thankfully it is on the underside of the stem. It will make a great pipe addition to the rack and should smoke dry and cool.  The dimensions of the pipe are: Length: 5 1/2 inches, Height: 1 3/4 inches, Outer Diameter of the Bowl: 1 1/4 inches, Diameter of the Chamber: 3/4 inches. I will be adding this one to the rebornpipes store shortly if you are interested in adding it to your collection. If you are interested email me at slaug@uniserve.com or send me a message on Facebook. Thanks for looking.