Monthly Archives: March 2015

Surbrug’s Special Restoration


Blog entry by Al Jones

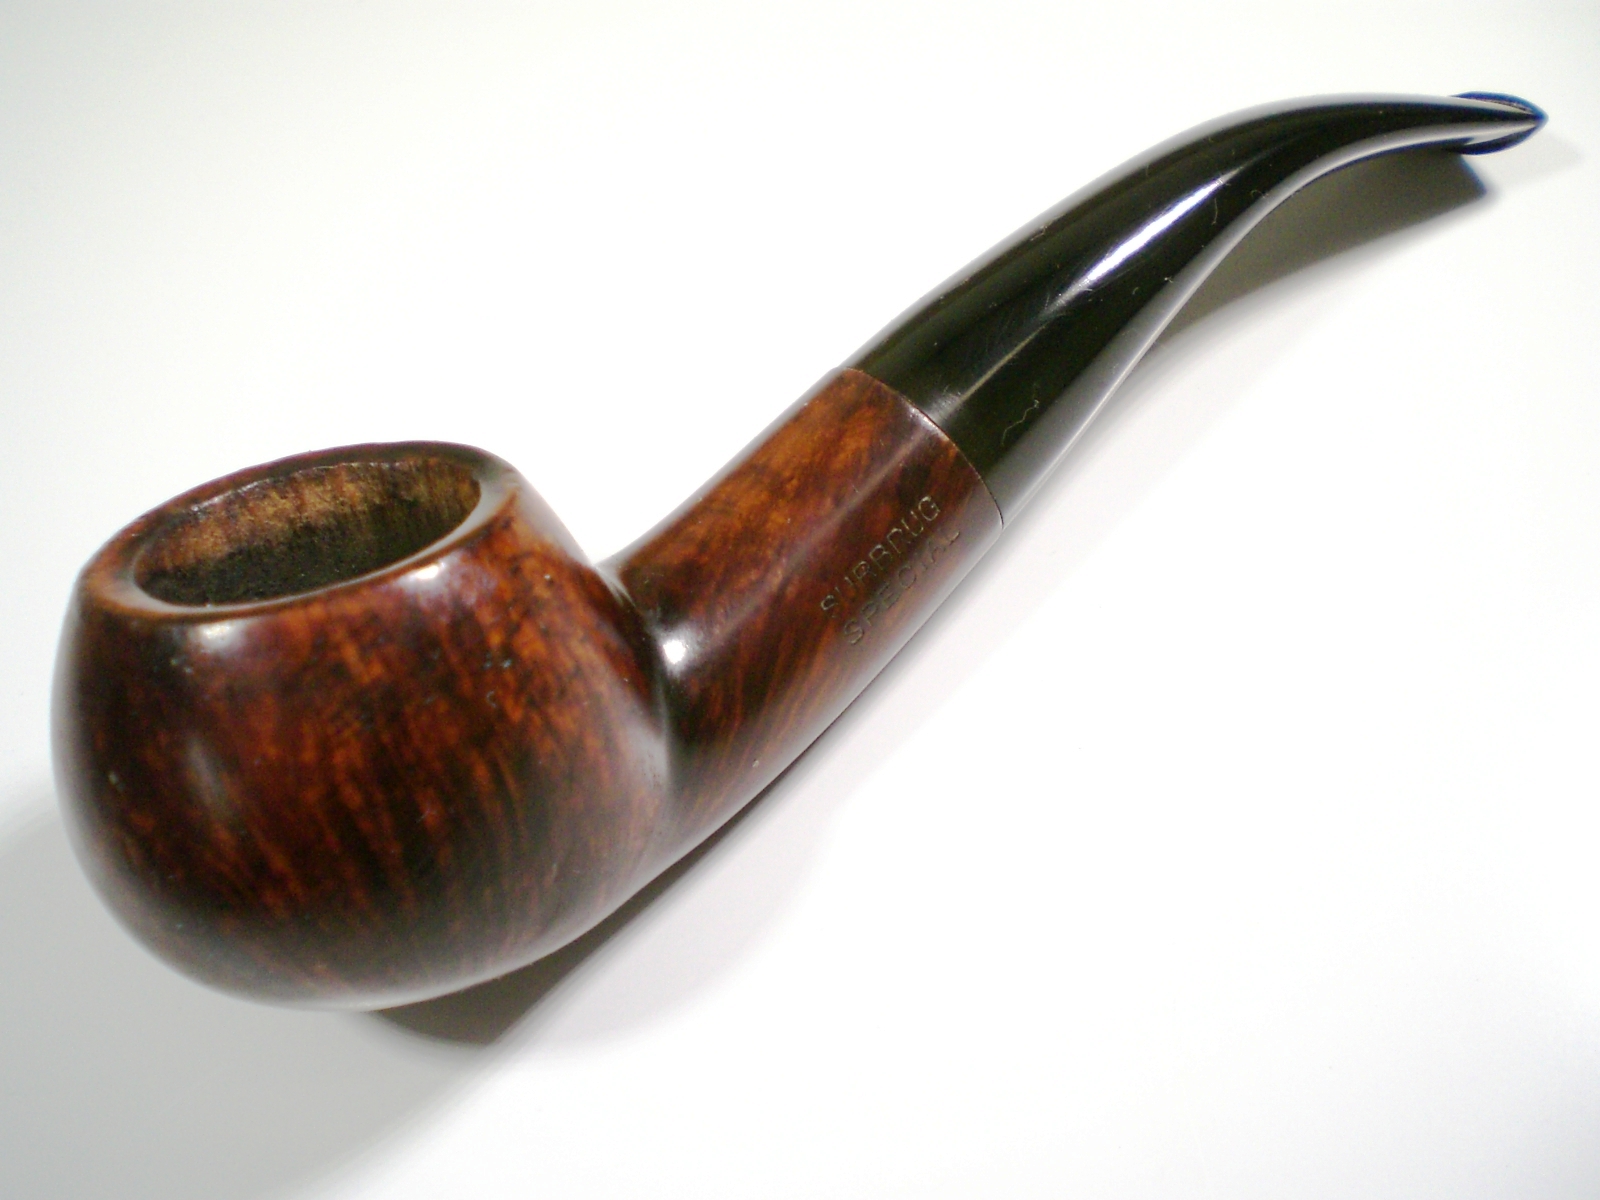
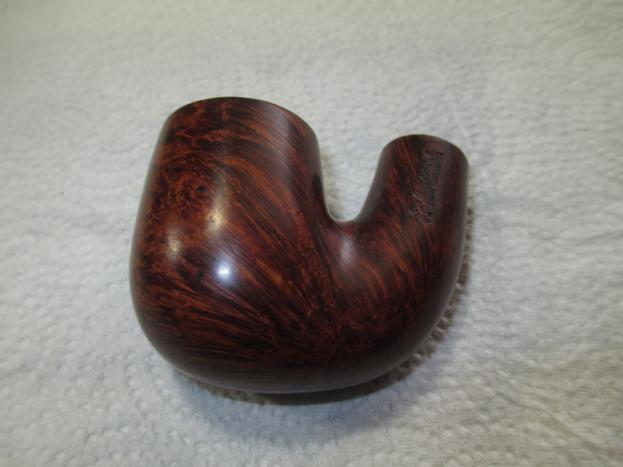
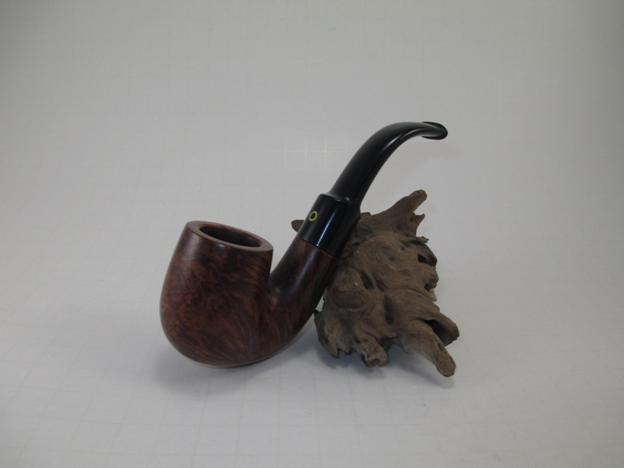
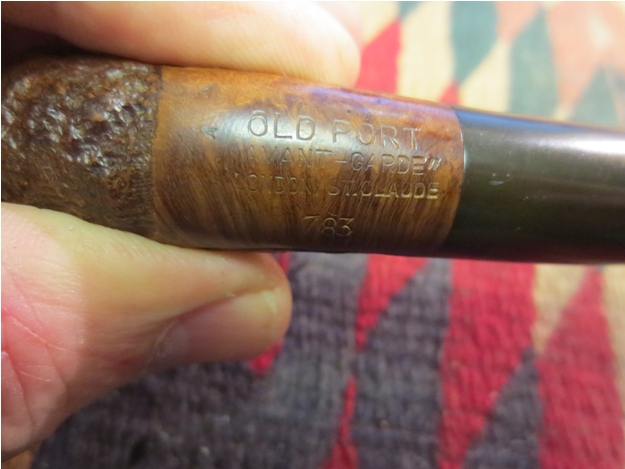
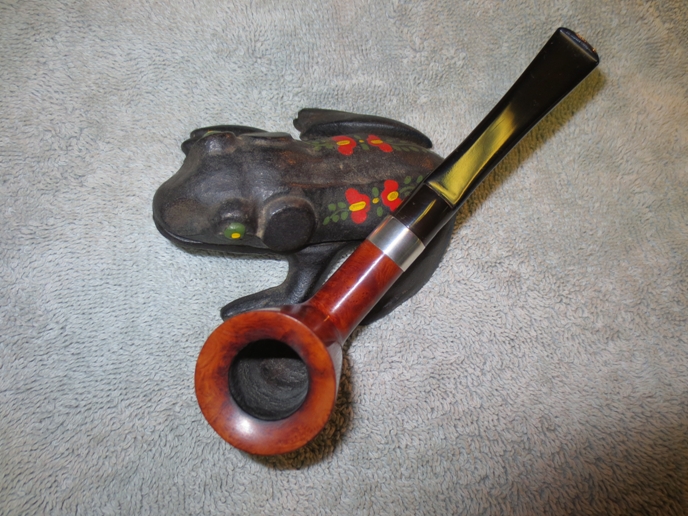
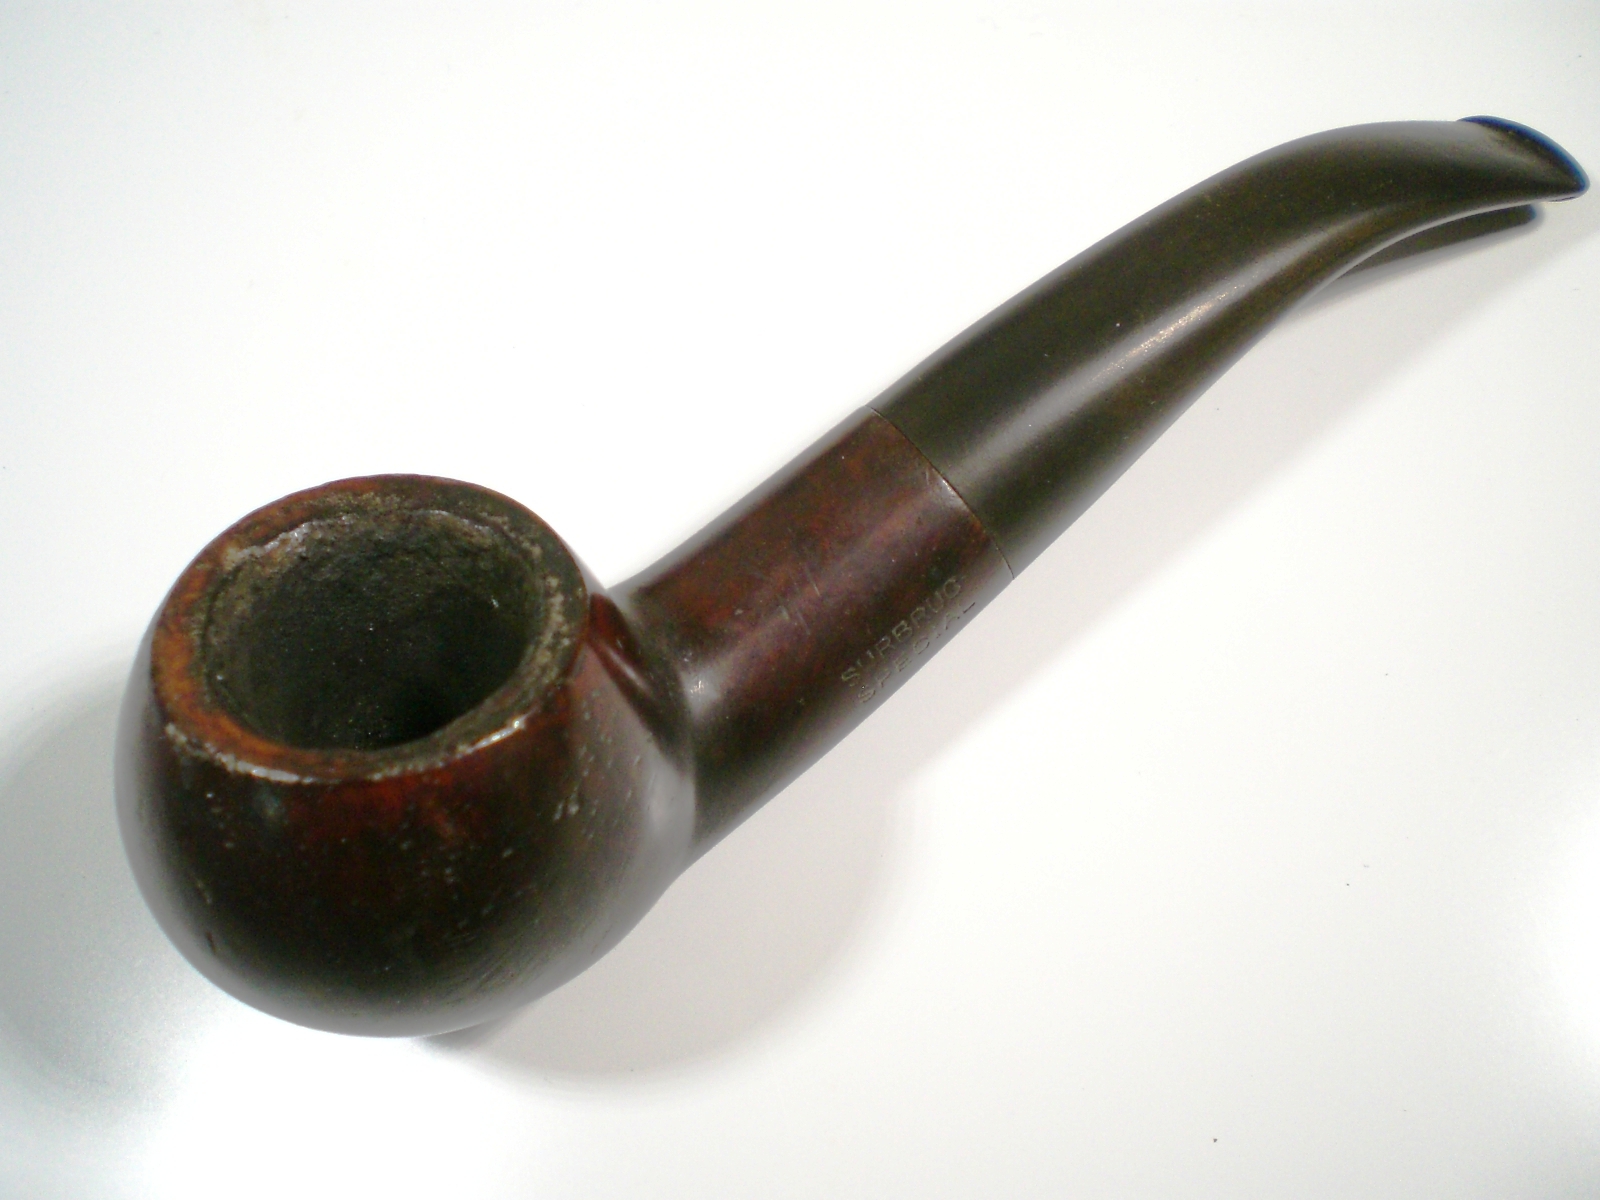
This Surburg’s Special came from a group of four pipes sent to me to from Jon Guss.  You may be familiar with Jon’s work in the “Barlings” section of Pipepedia or in the Vintage portion of Neill Archers Roan’s “A Passion for PIpes” blog.    Jon always has a lot of historical information to contribute to threads on the PIpesMagazine.com forum, so I was honored to work on his personal pipes.  Jon found this pipe at the recent NYC PIpe show.  It was in a bin of pipes from famed Delware collector, Bob Herbert.

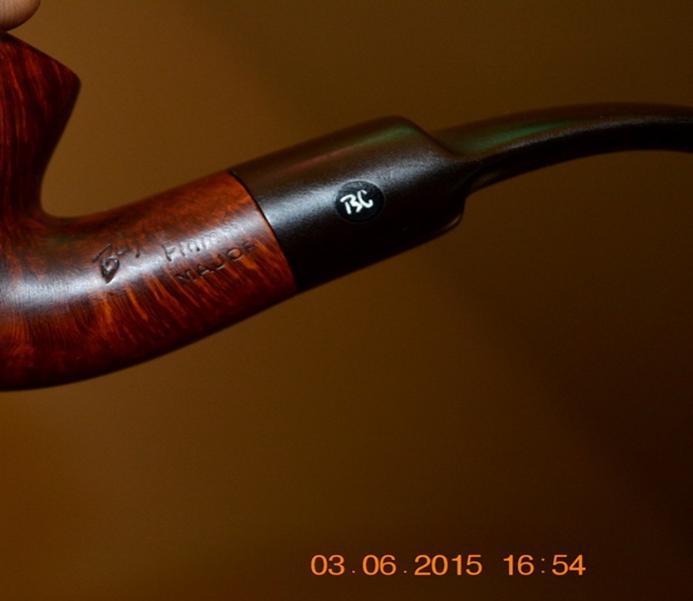
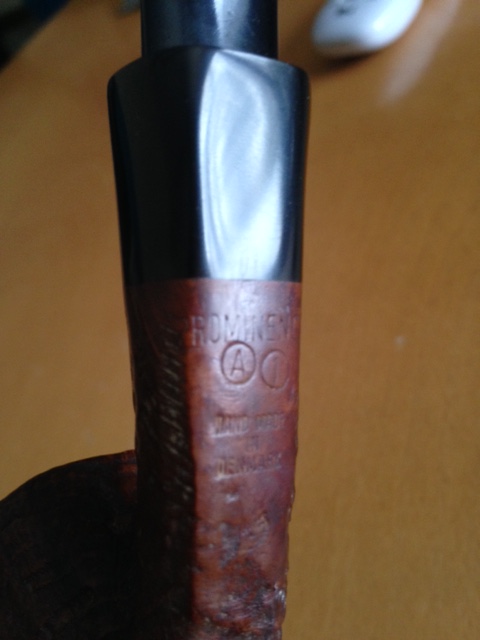
I only knew that Surbrug’s was a New York City tobacco shop and I’ve seen their shop pipes pop up occasionally.  Jon sent me this about the shop:

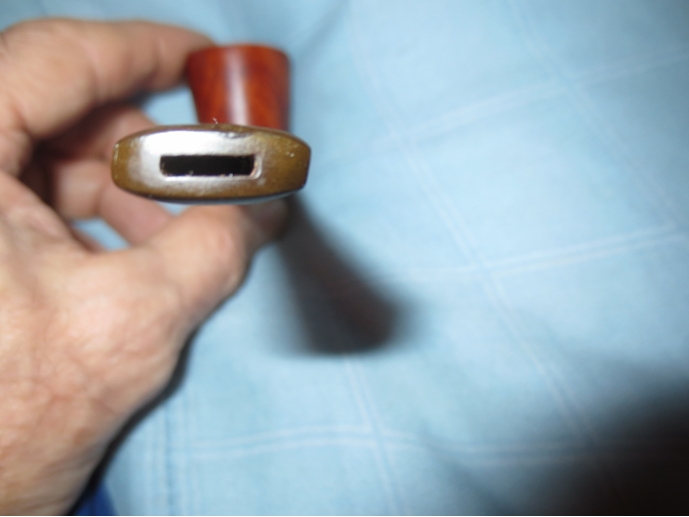
John R Surbrug, born in Switzerland of a Swiss father and Ohio mother, had a small tobacco shop in New York City. After his death in the 1880s, his young son John Willard Surbrug (born in NYC in 1859) took over the store. Incorporating the business in 1895, John W. expanded into the cigarette market and prospered greatly. After buying a cigarette competitor name Khedivial, Surbrug’s business in turn was acquired by the Tobacco Products Company (TBC) in 1912. TBC was what we would now call a roll-up play, created by George and William Butler as a vehicle to compete with the American Tobacco Company. Surbrug’s business was acquired for stock, which meant John was left with an active role in the combined business. The later part of his career (and his son’s career), though interesting, is irrelevant here; what matters is that the Surbrug Company, while primarily engaged in the manufacture and sale of cigarettes, continued to be true to its roots offering well known tobacco blends and pipes. In regard to the former, the company was especially famous for its Golden Sceptre, Best Make, and Arcadia Mixture tobaccos. In regard to the latter, it appears that Surbrug was not a manufacturer, but rather a reseller of pipes that were stamped with their name by a variety of third party suppliers. Some at least of these were major players in the world famous London pipe industry. Surviving early hallmarked examples make it clear that BBB/Frankau, Barling, and Delacour Brothers were three of Surbrug’s vendors.

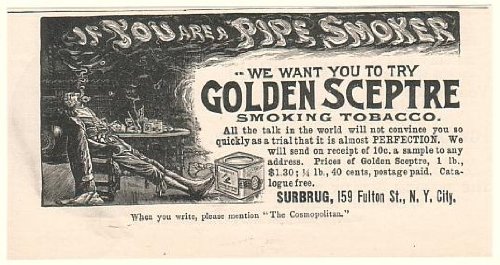
Here is an old advertisement for one of their famed tobacco blends.

Surbrug_Tobacco_Ad

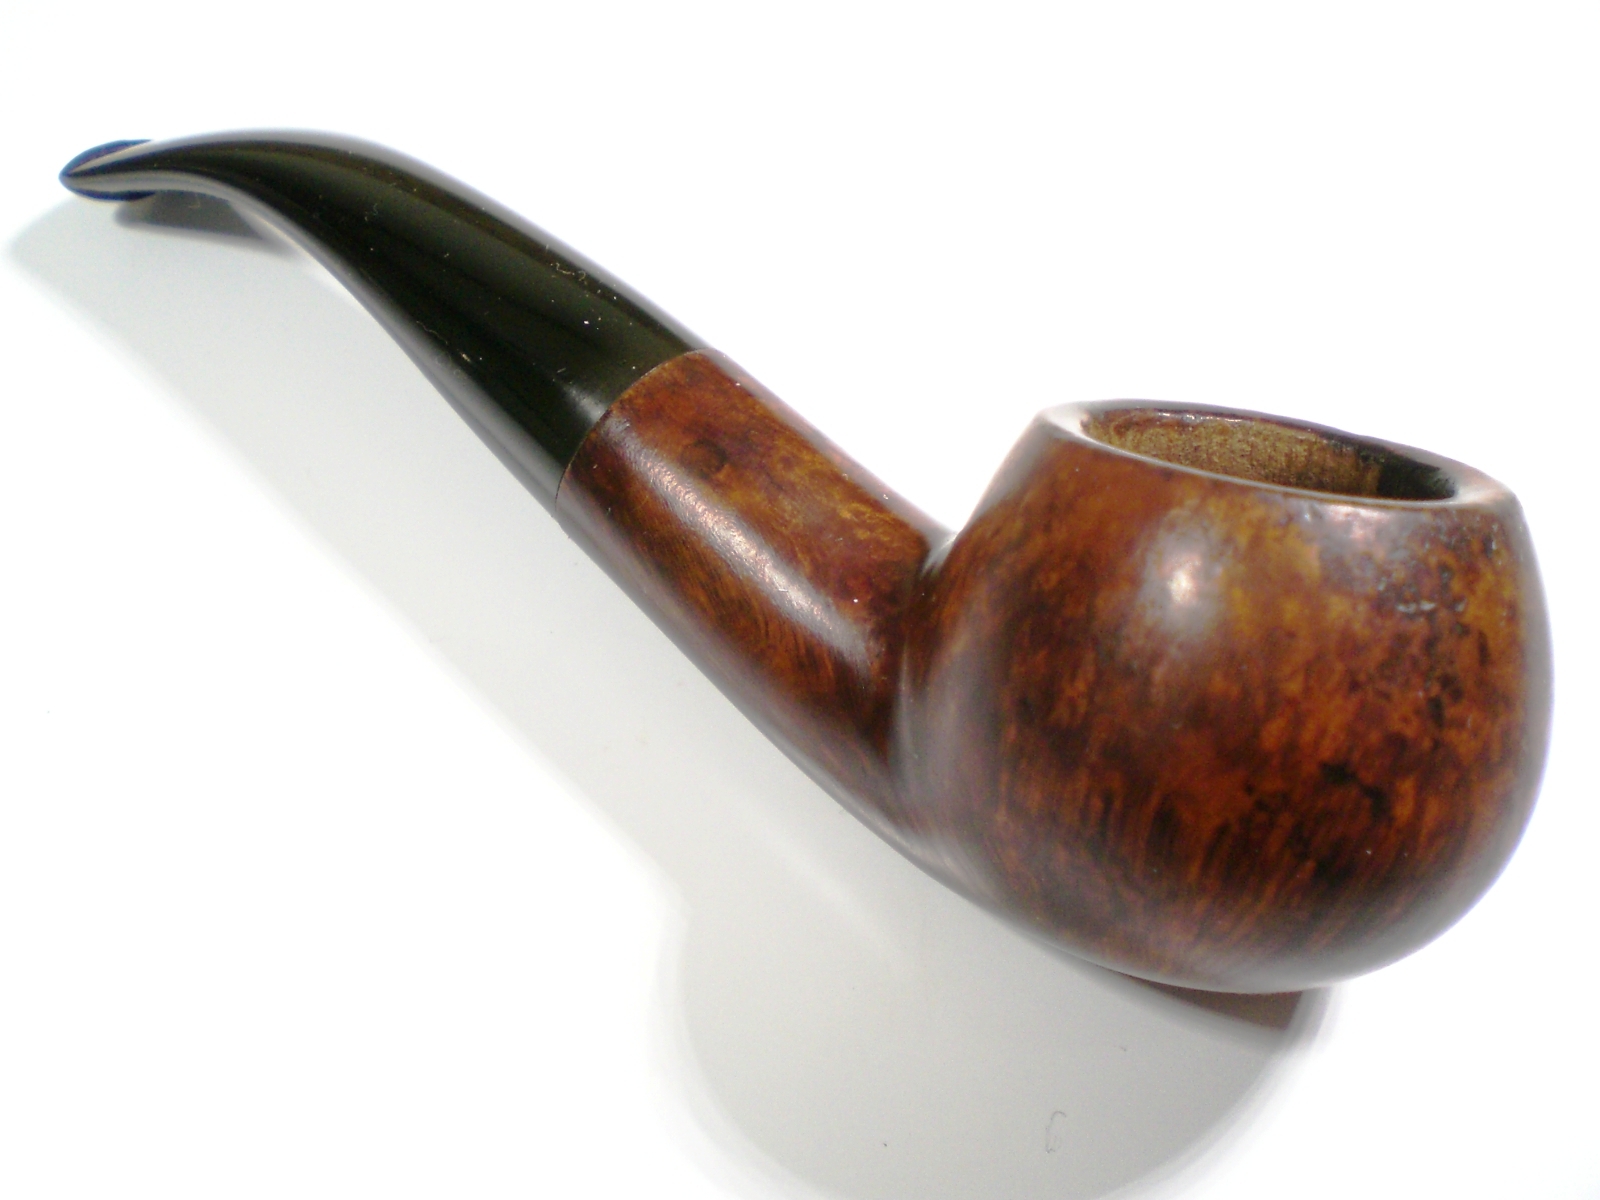
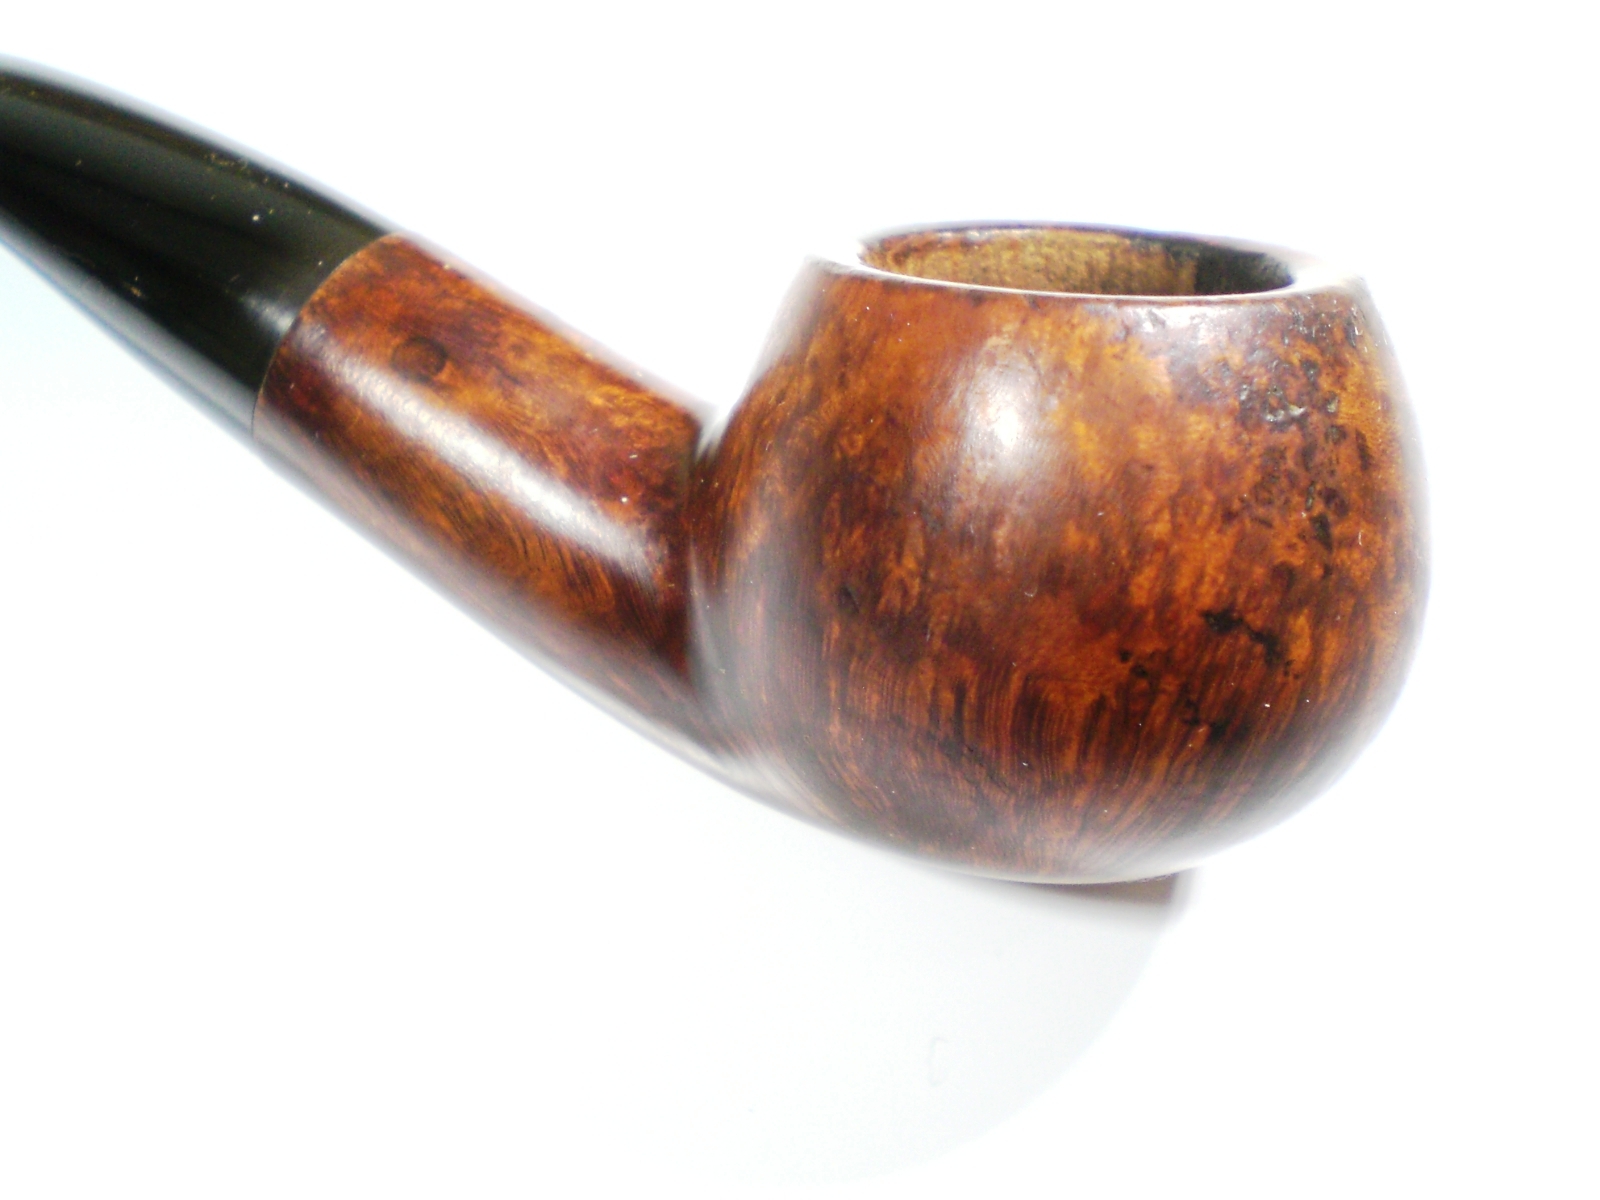
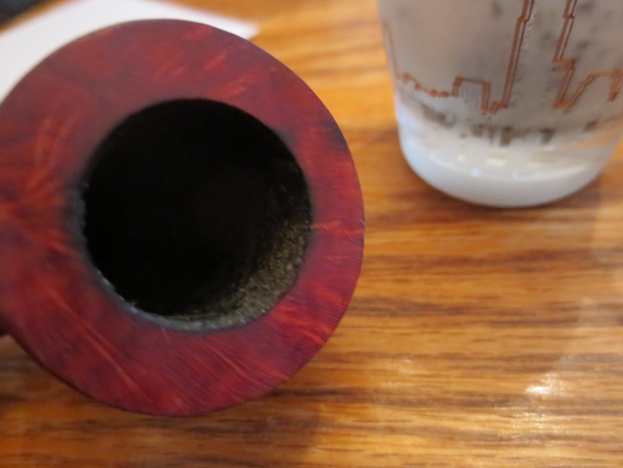
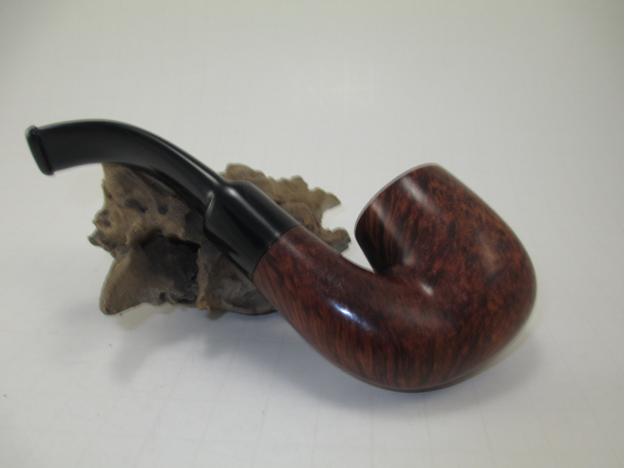
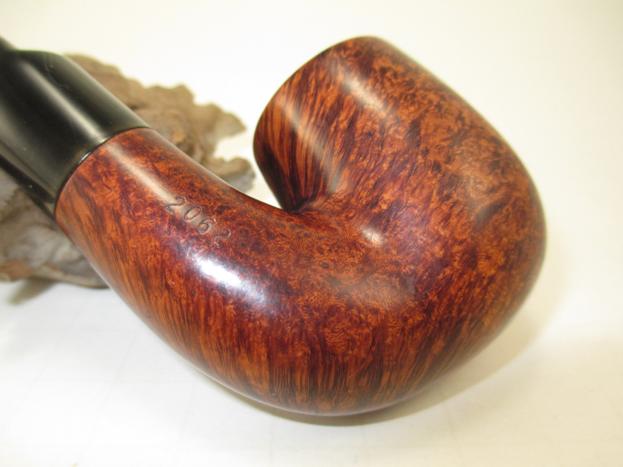
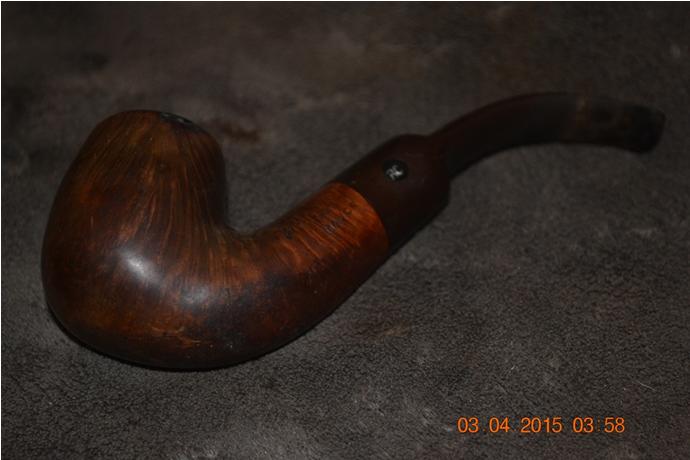
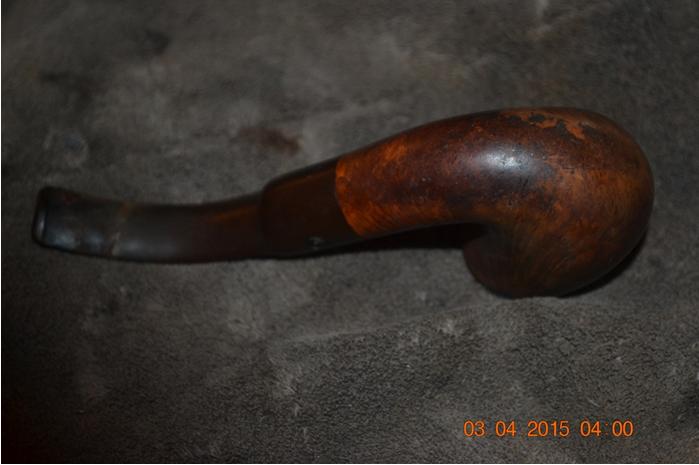
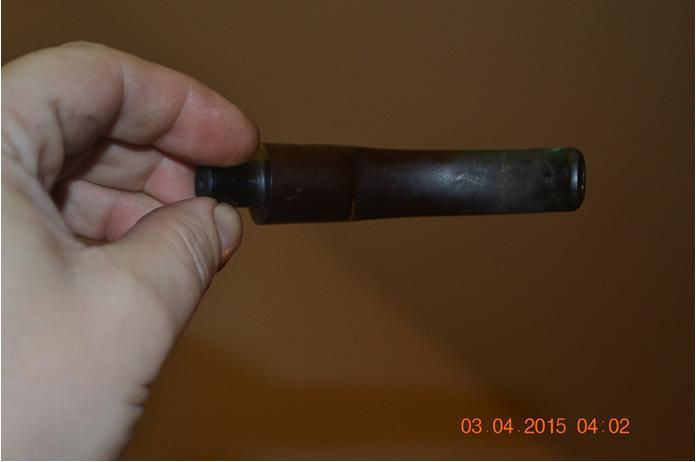
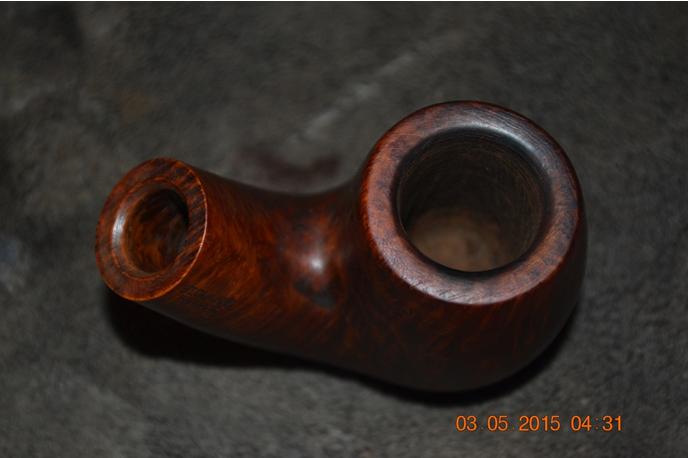
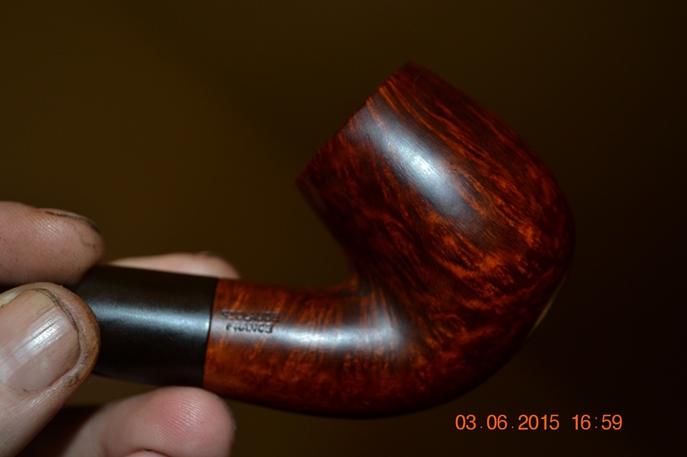
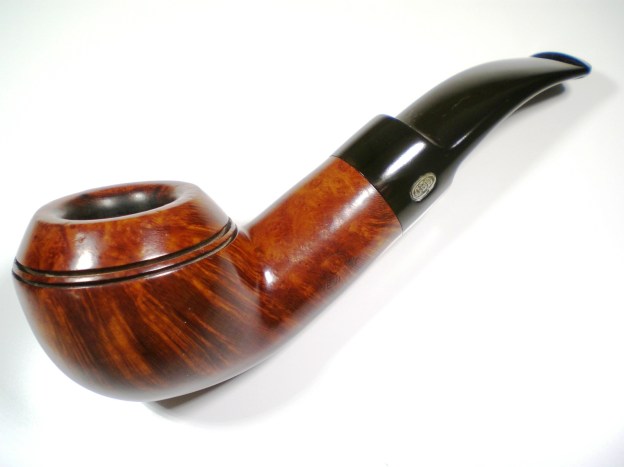
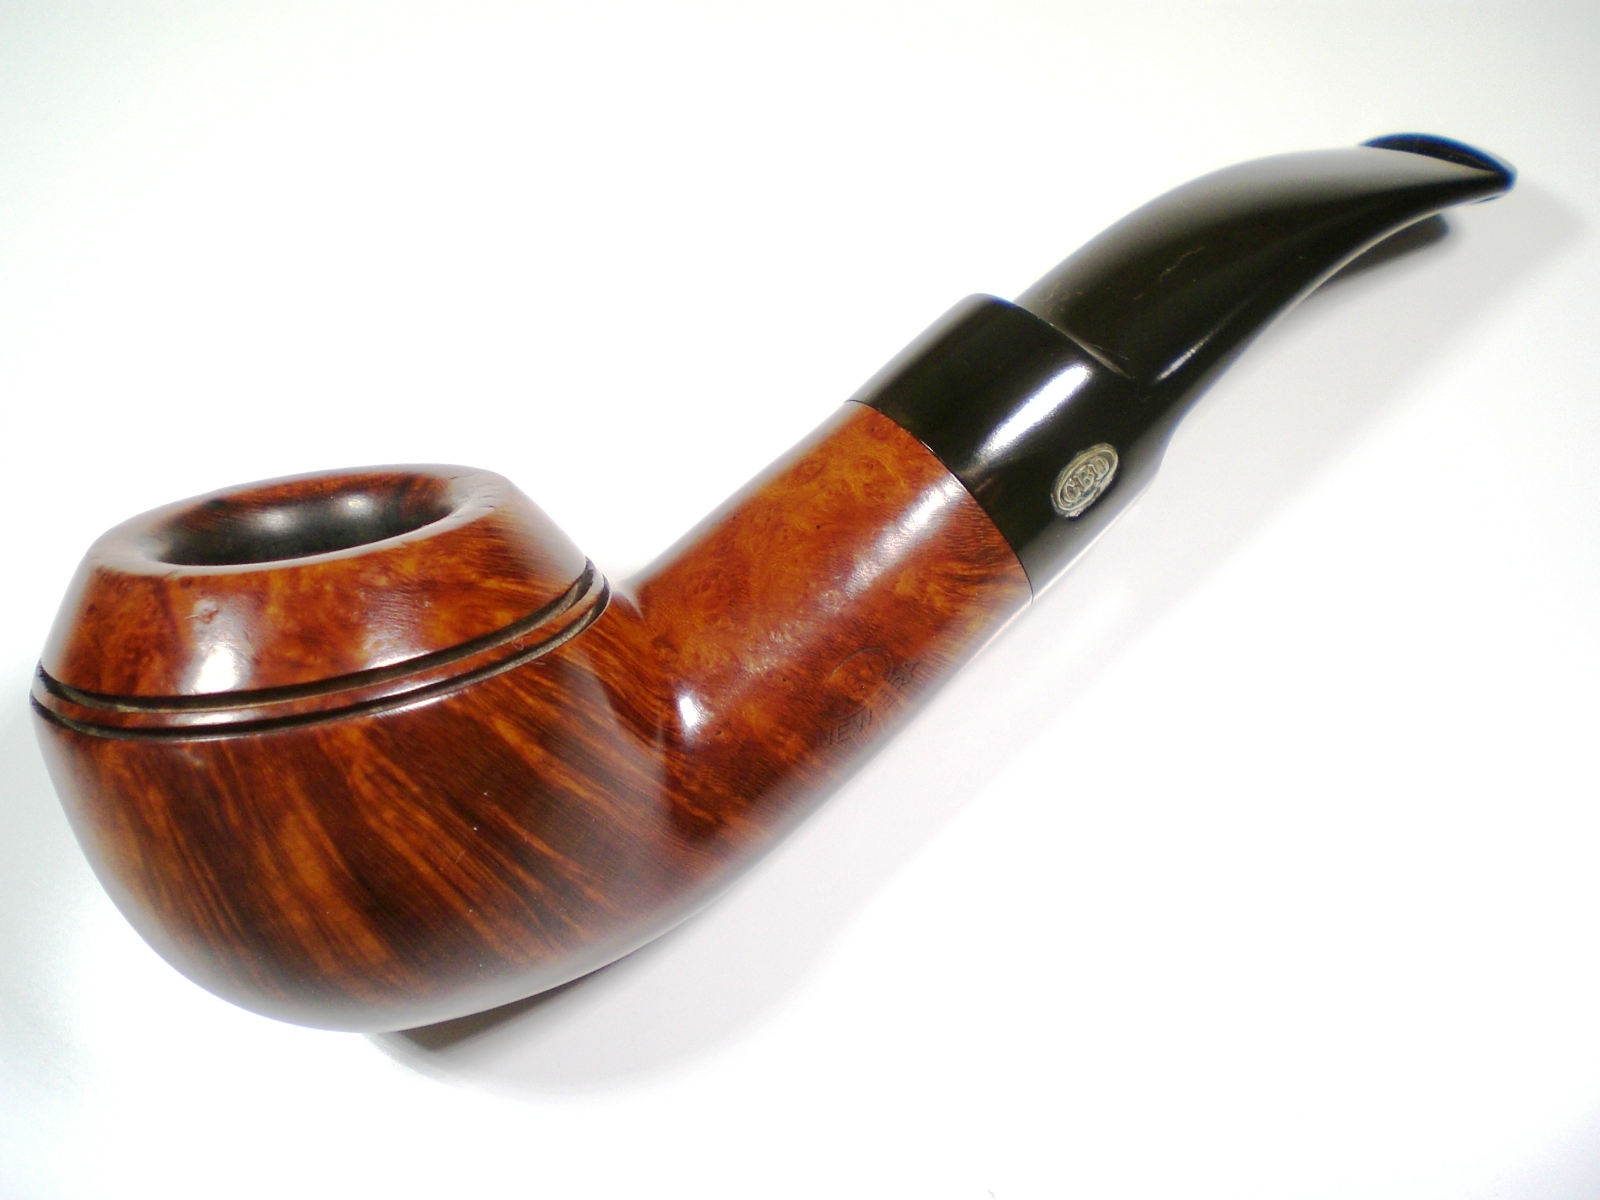
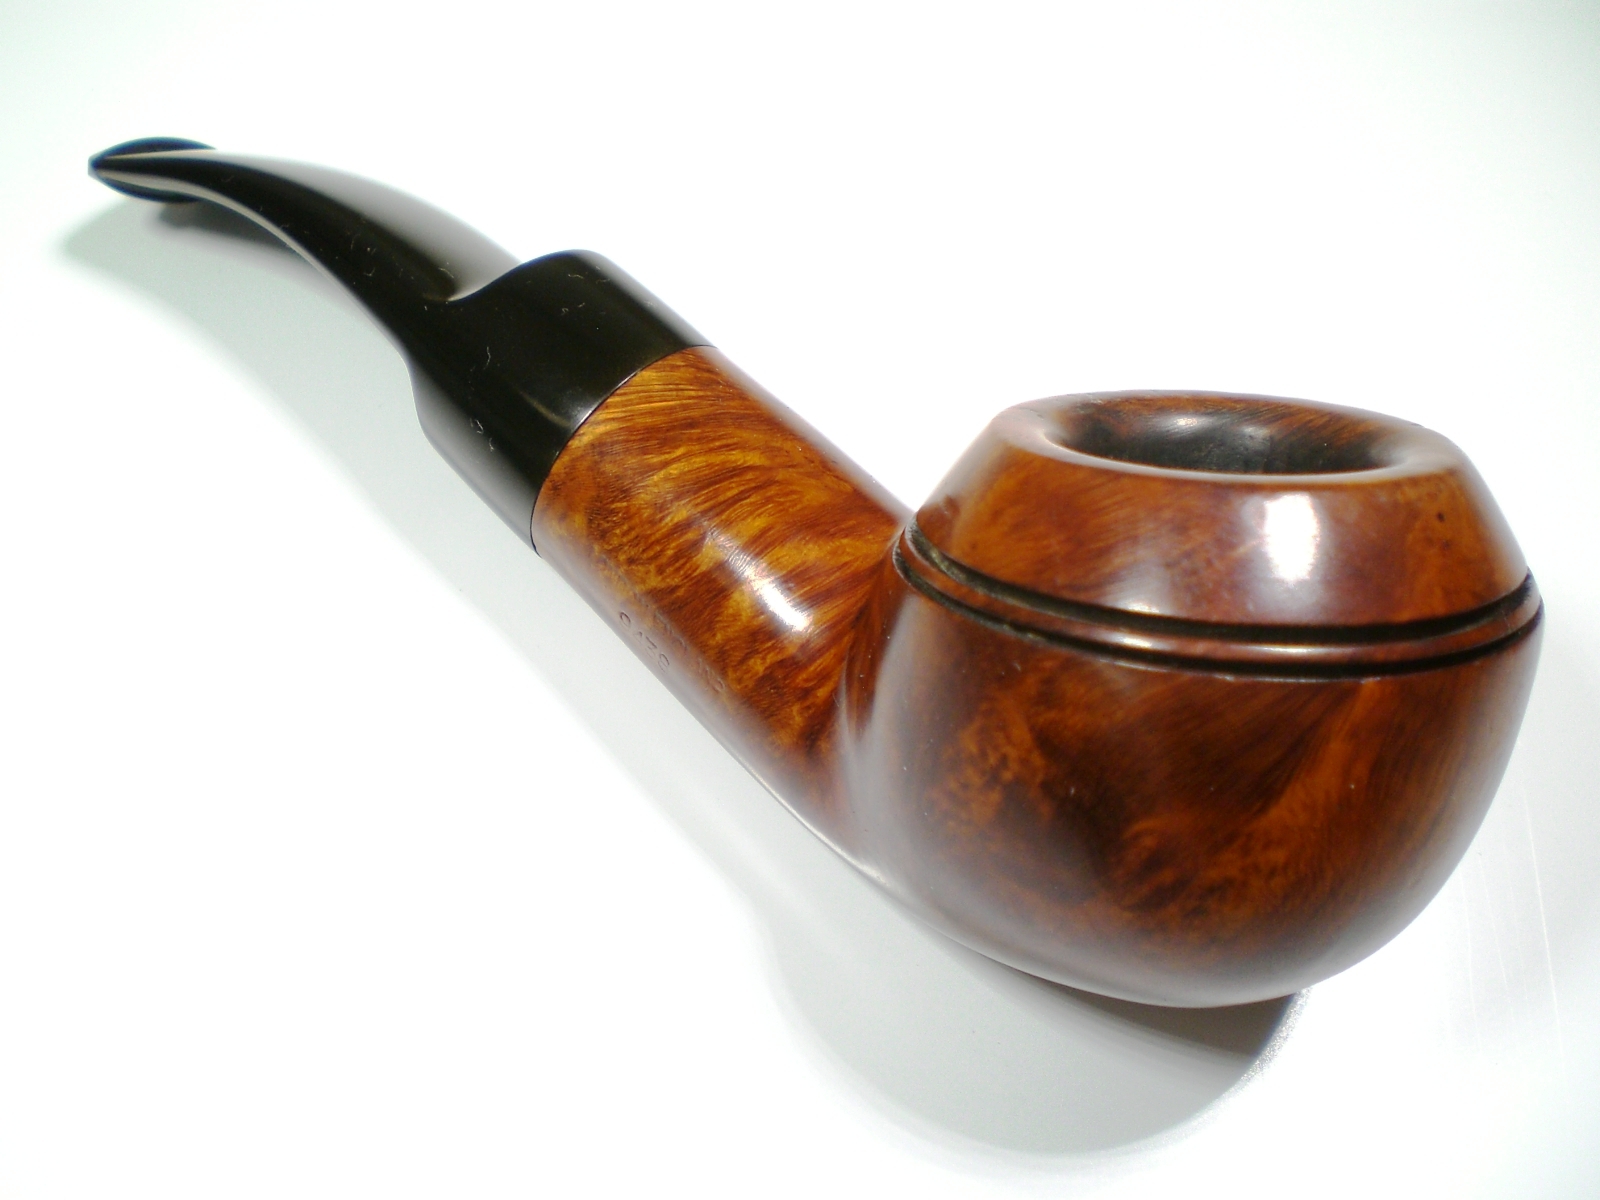
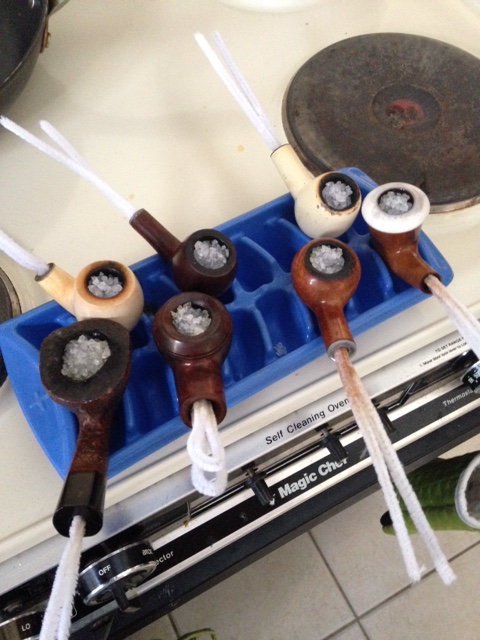
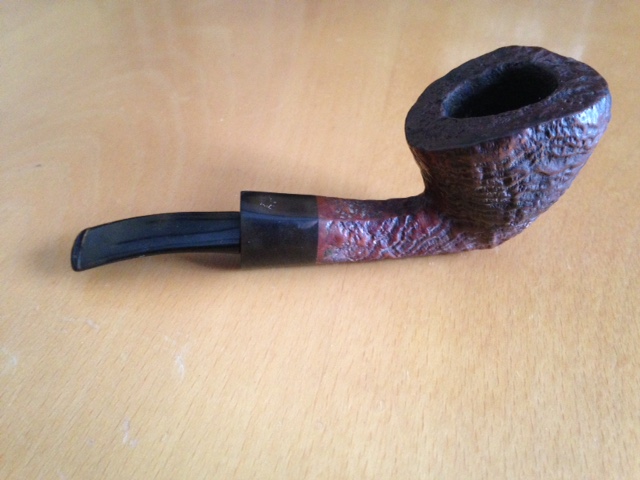
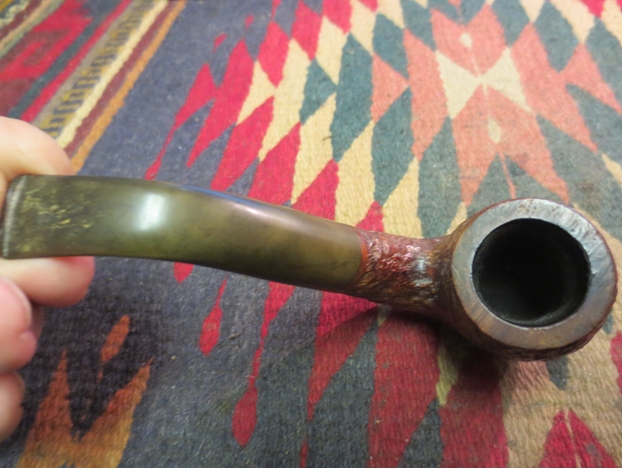
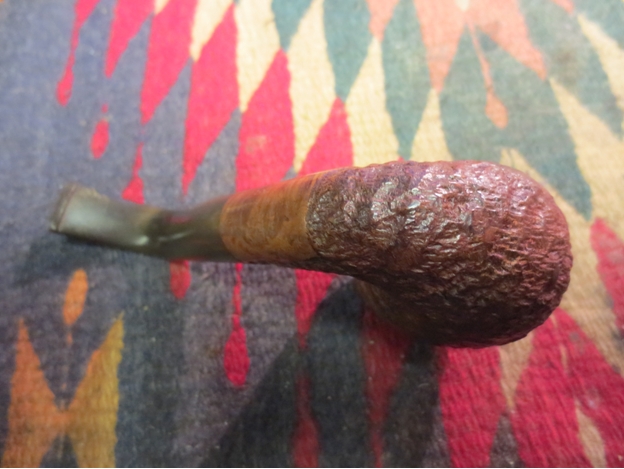
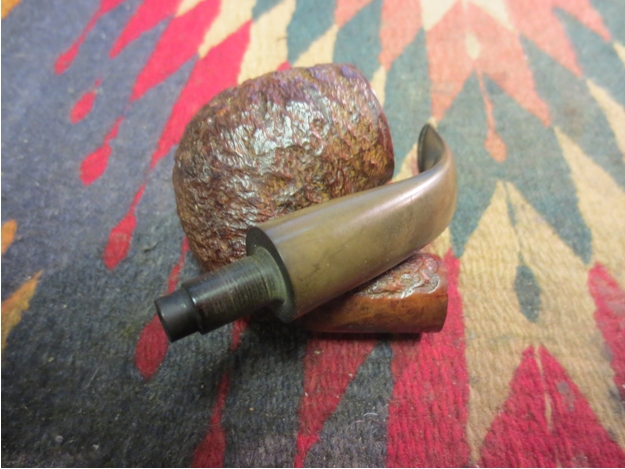
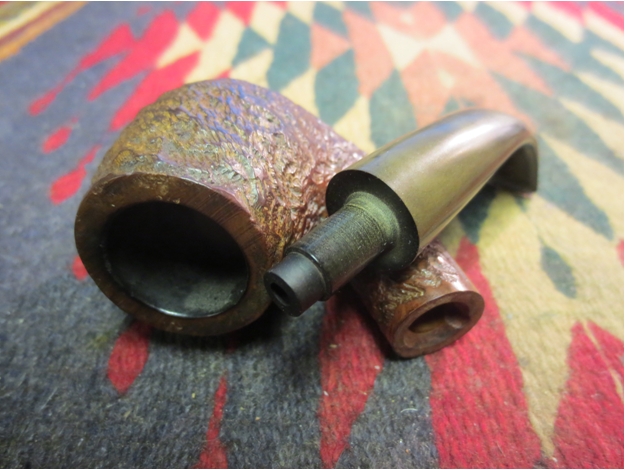
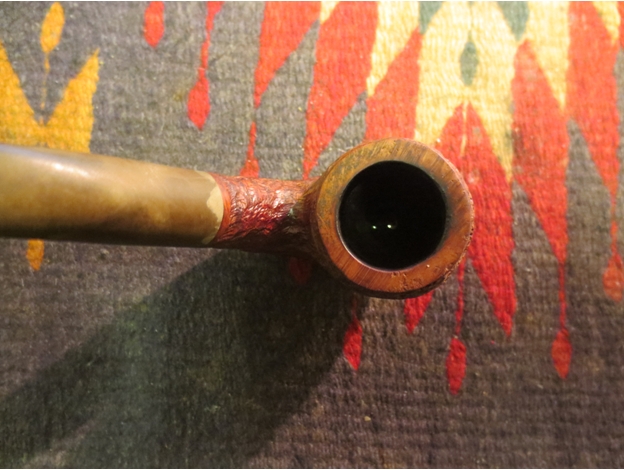
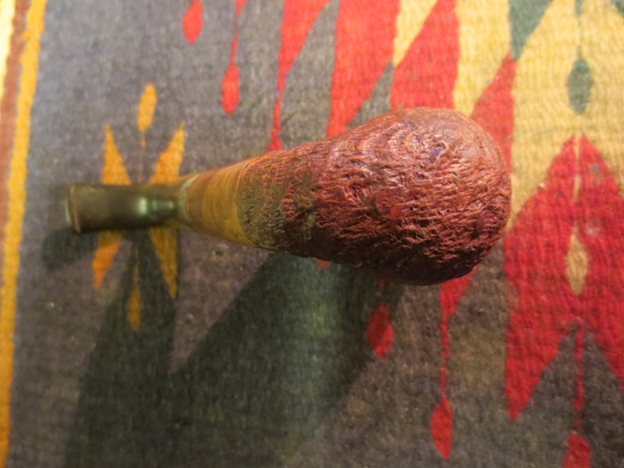
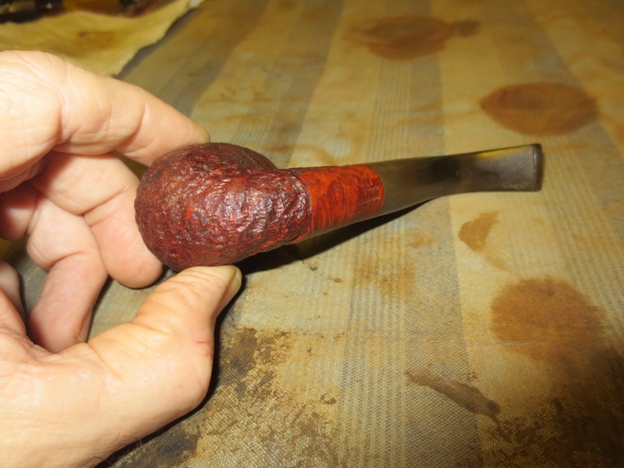
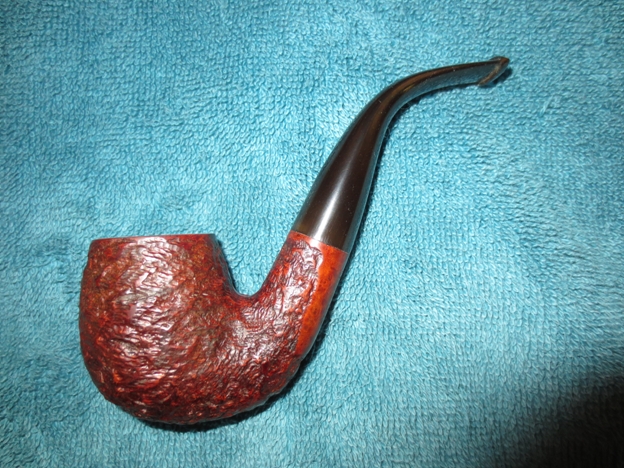
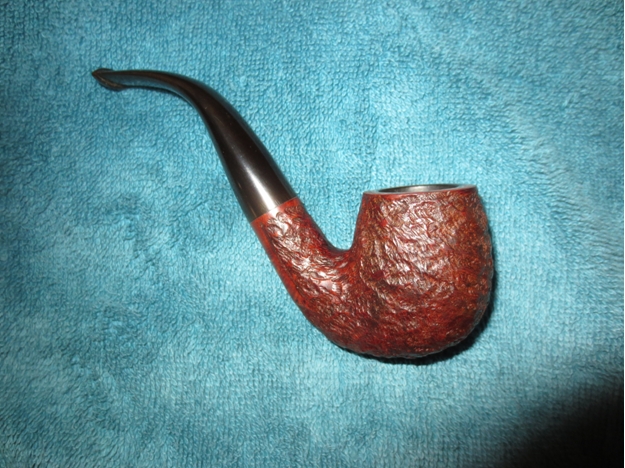
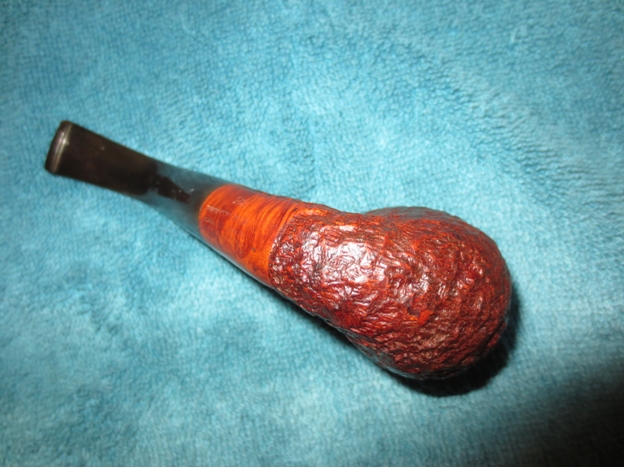
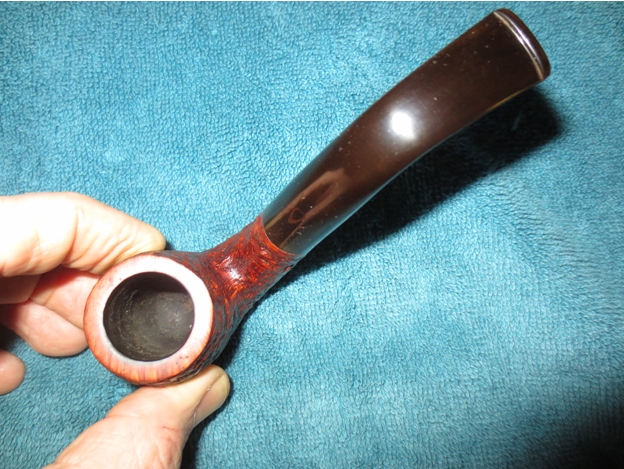
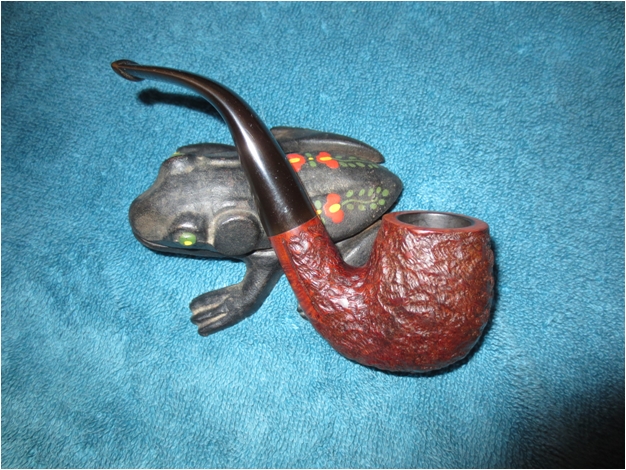
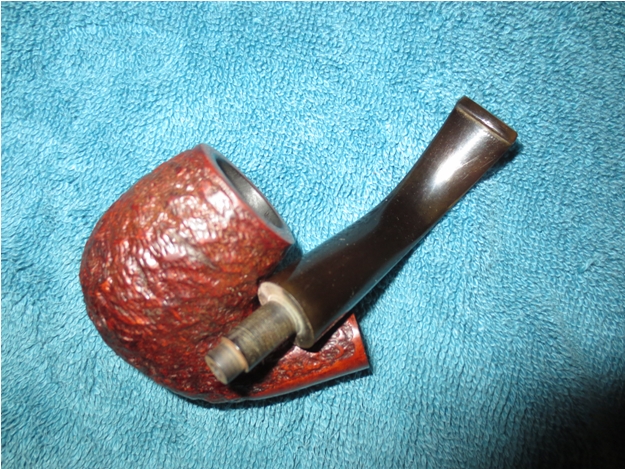
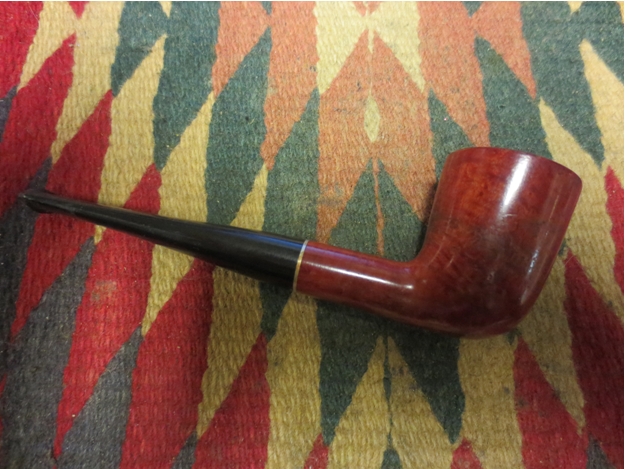
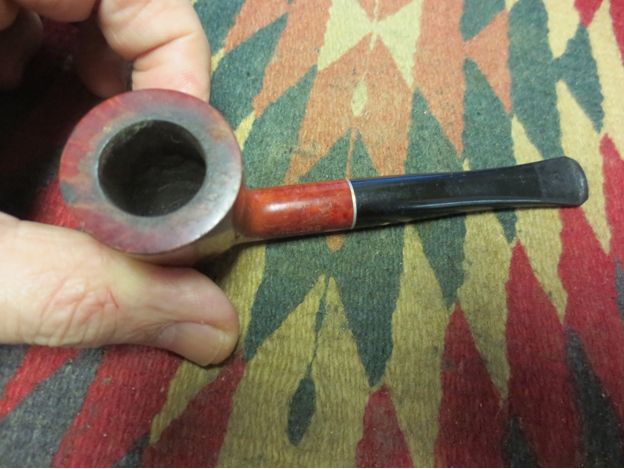
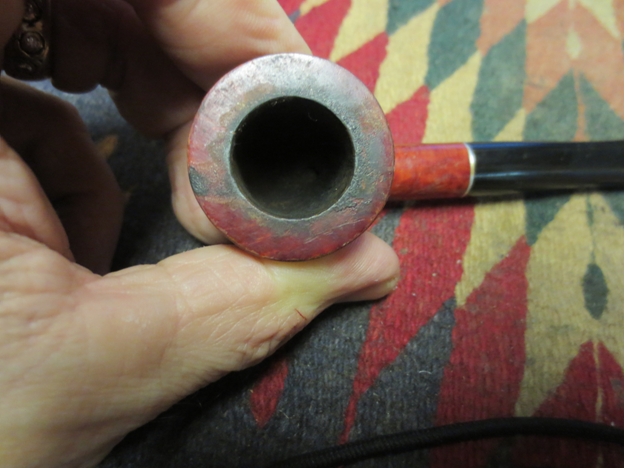
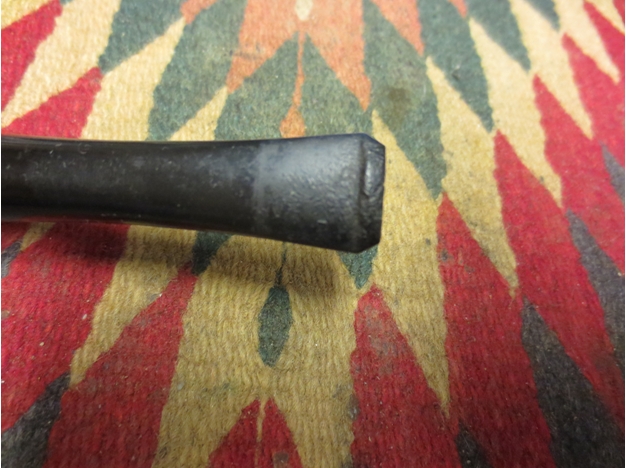
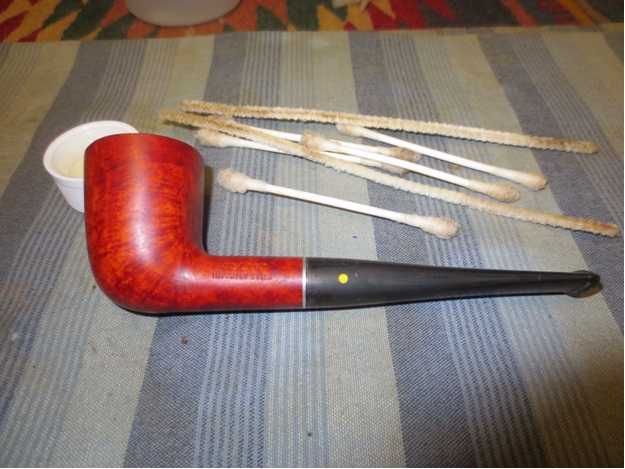
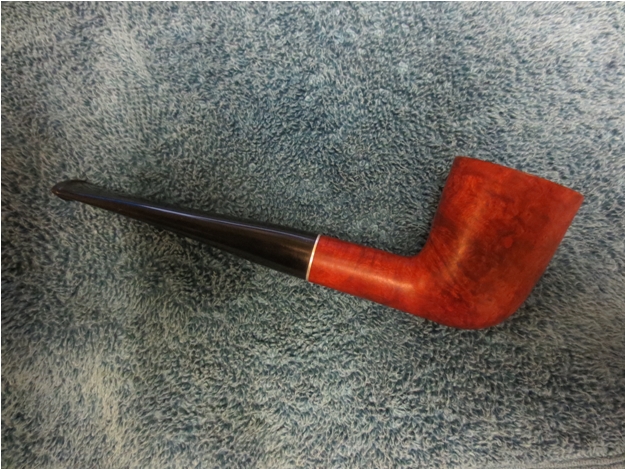
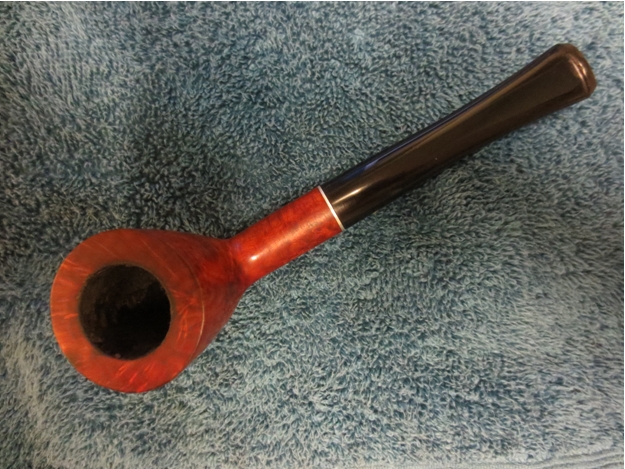
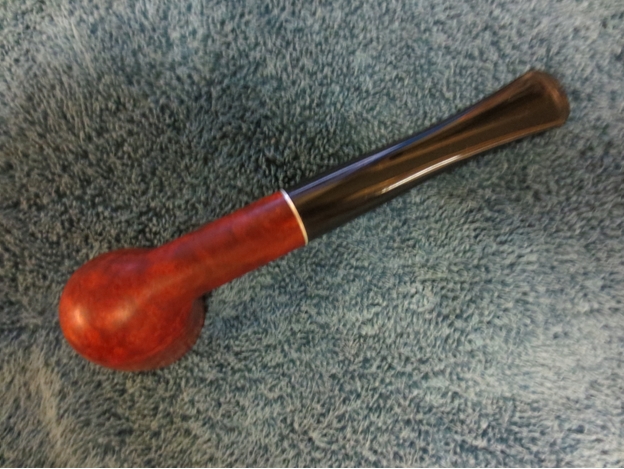
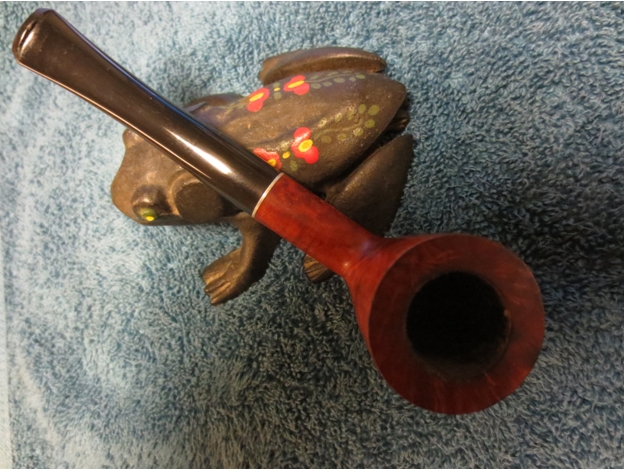
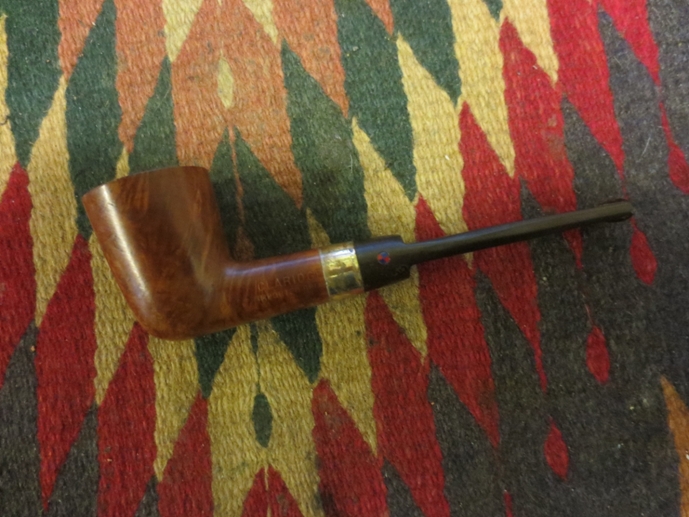
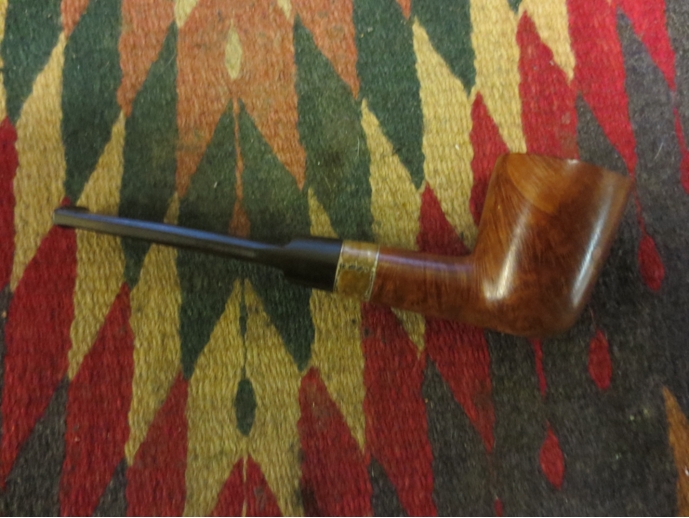
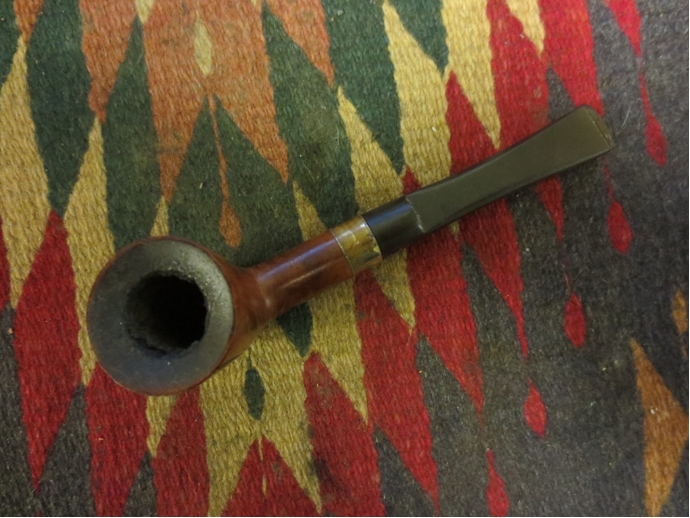
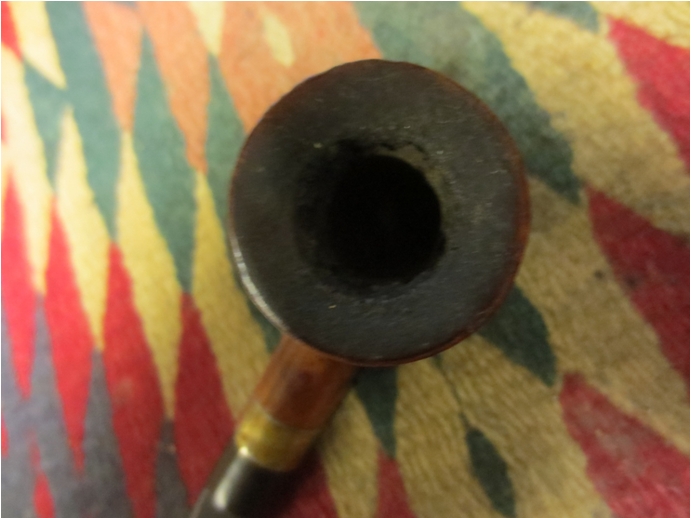
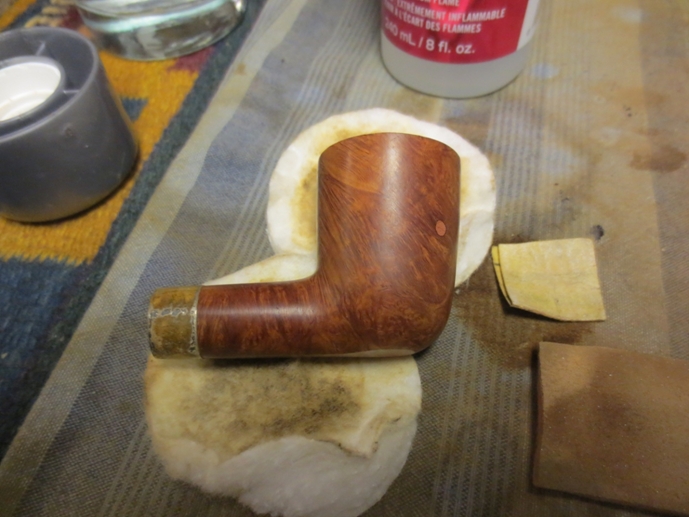
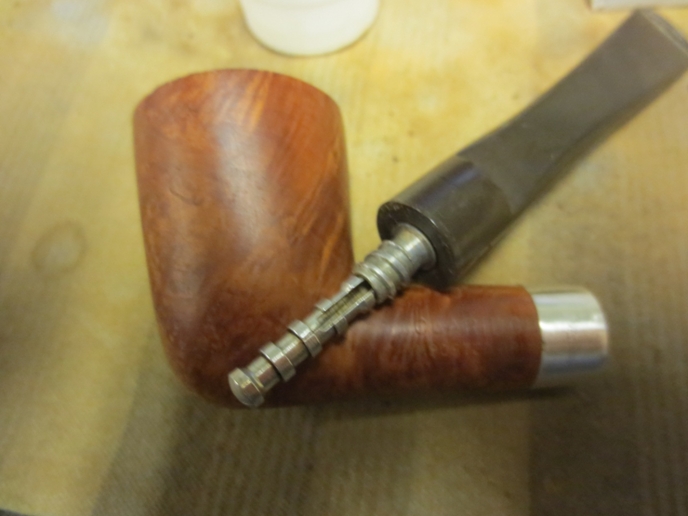
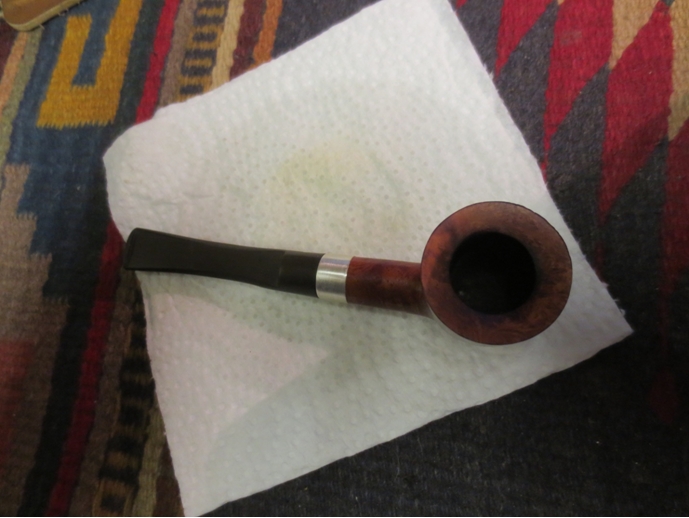
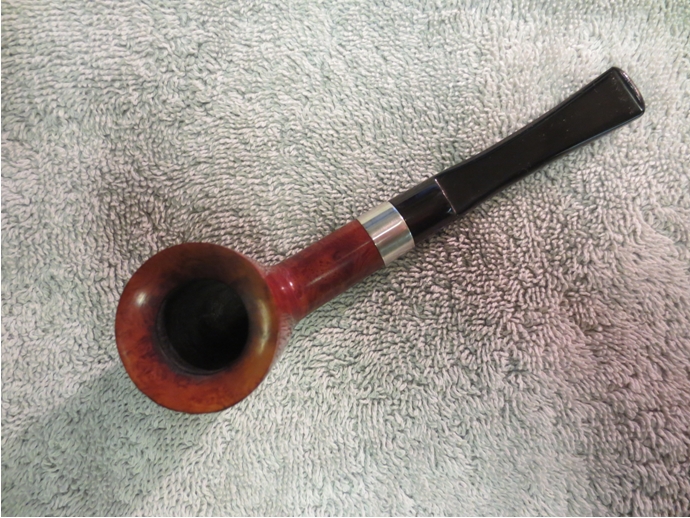
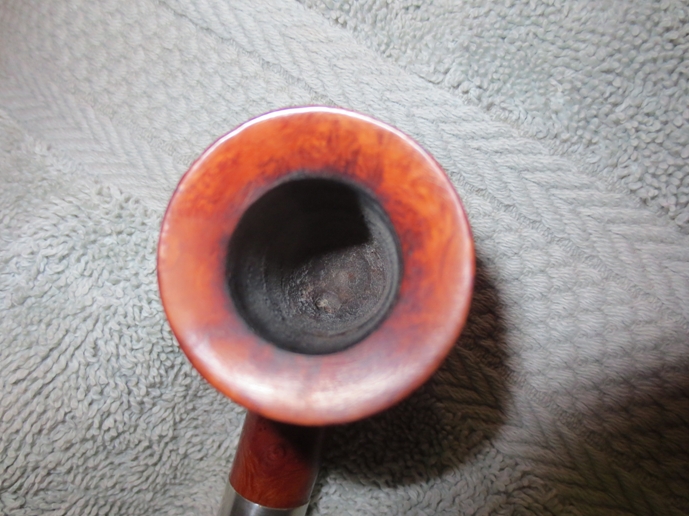
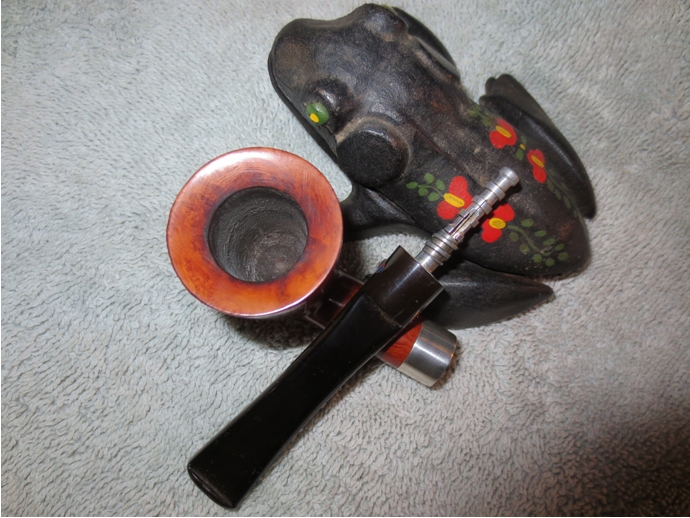
The pipe had seen some hard use and was in general very grimy.

Surbrug_Special_Before Surbrug_Special_Before (6) Surbrug_Special_Before (1) Surbrug_Special_Before (2)

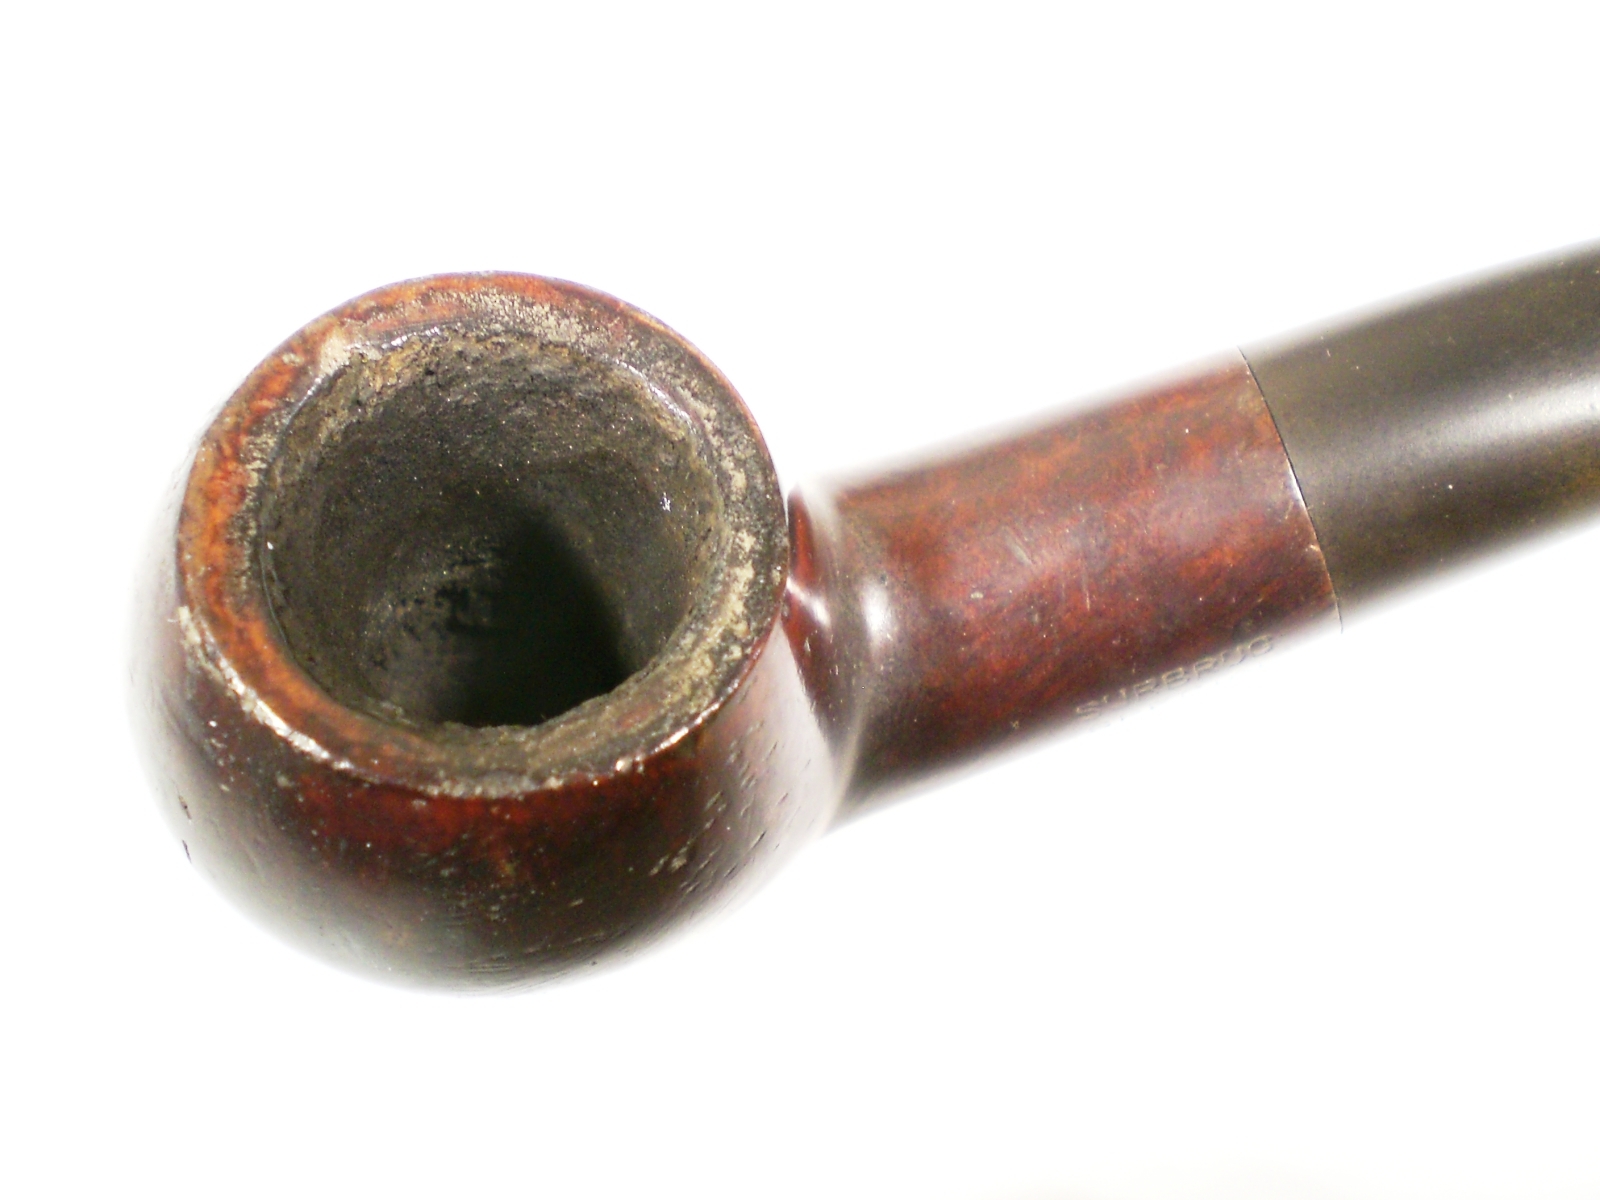
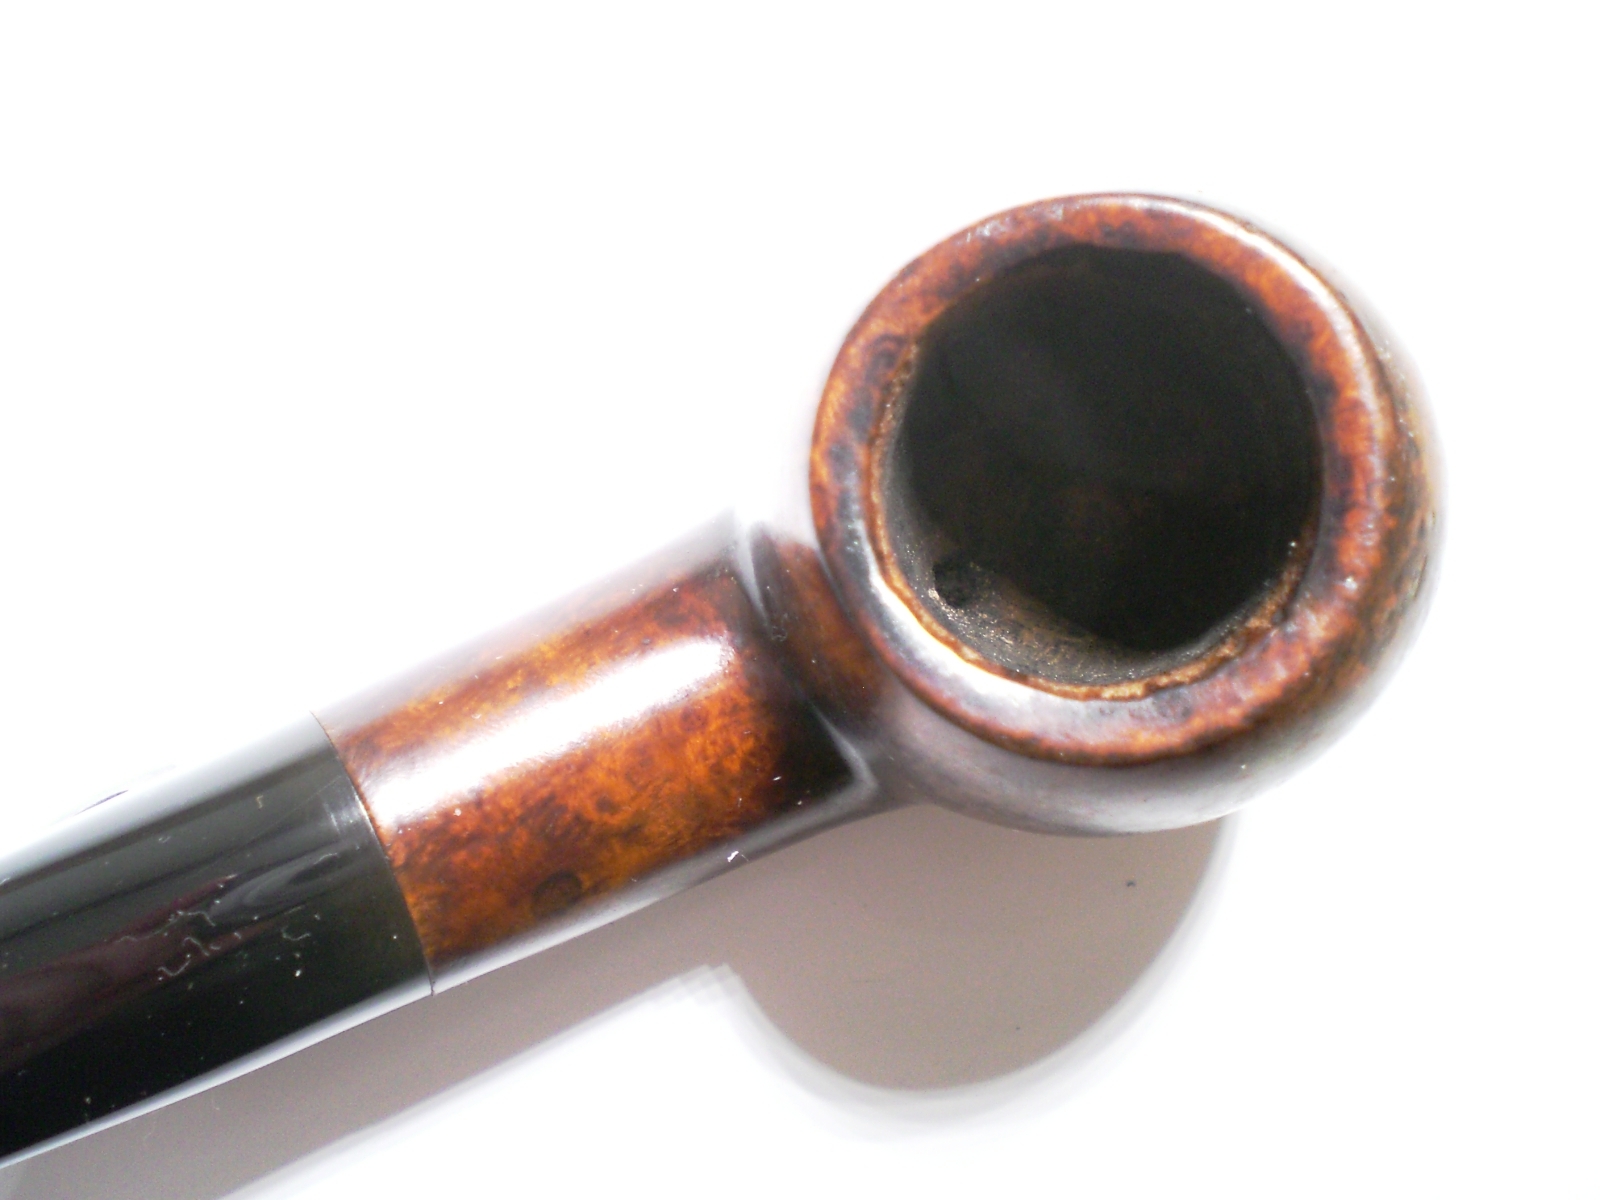
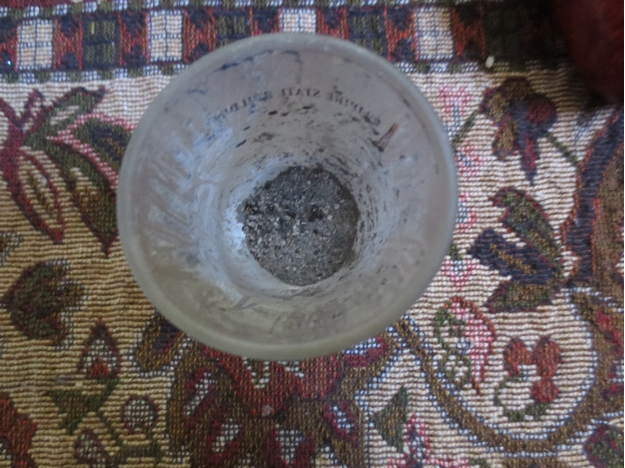
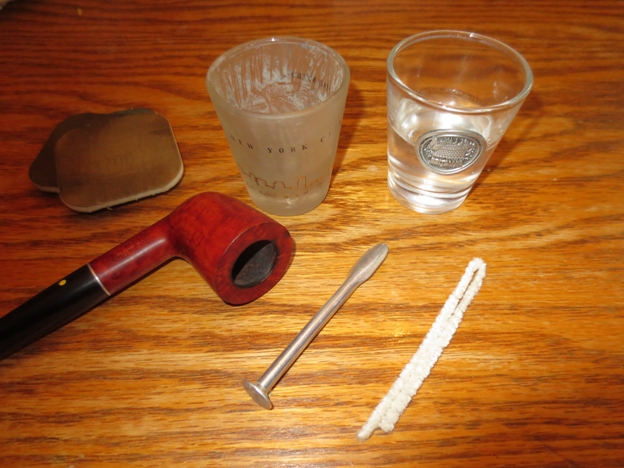
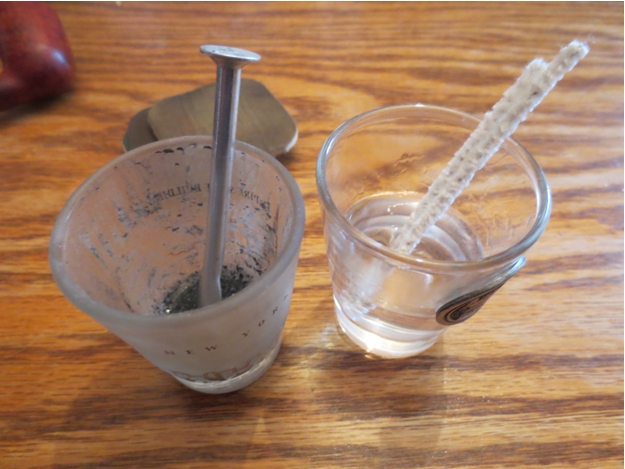
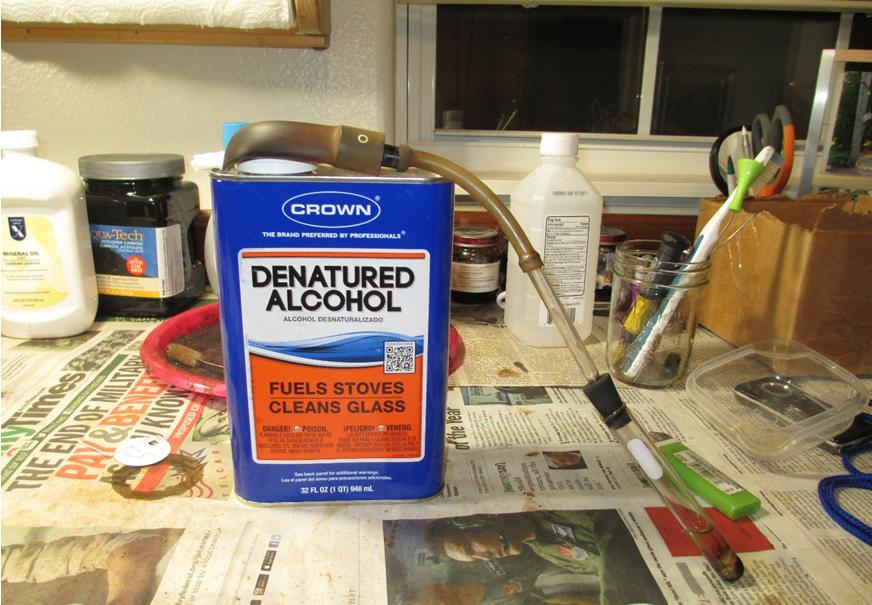
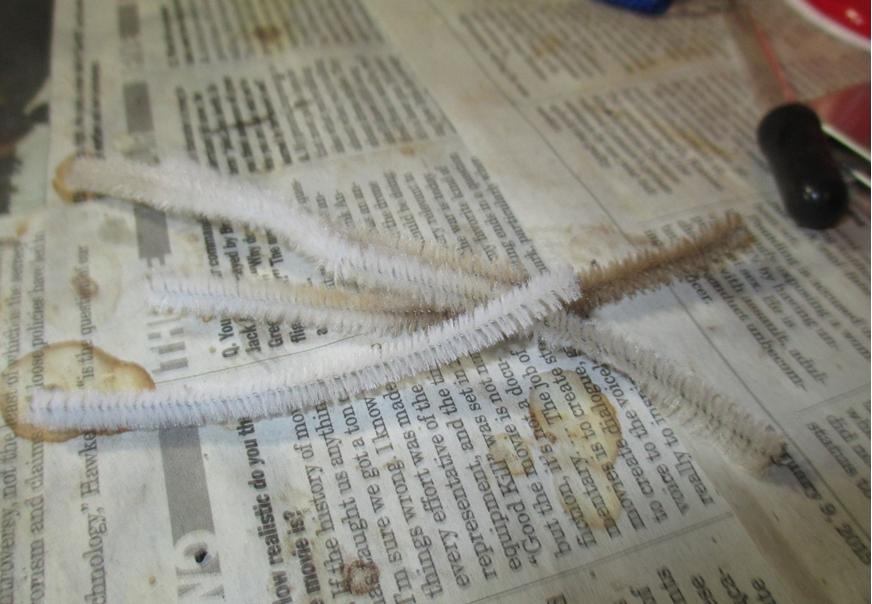
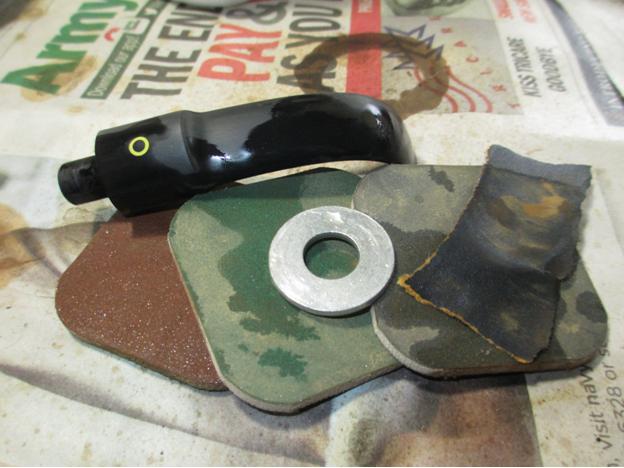
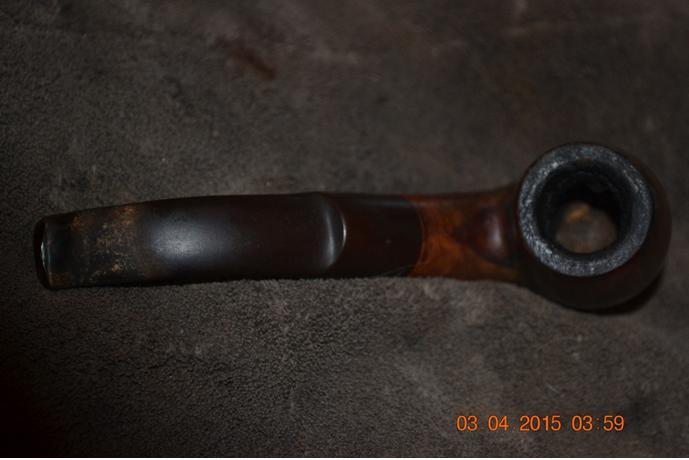
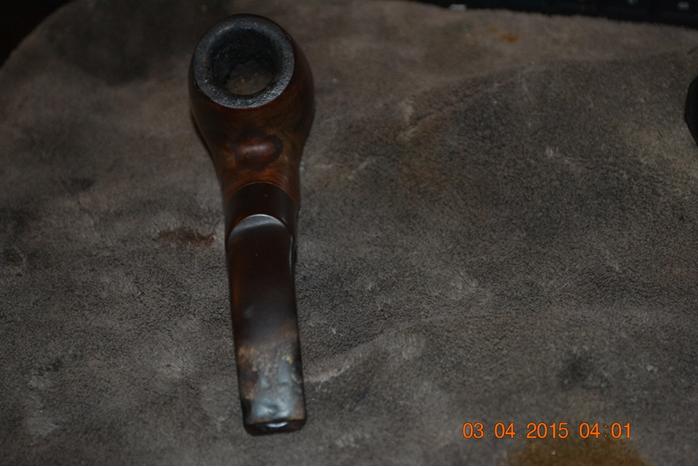
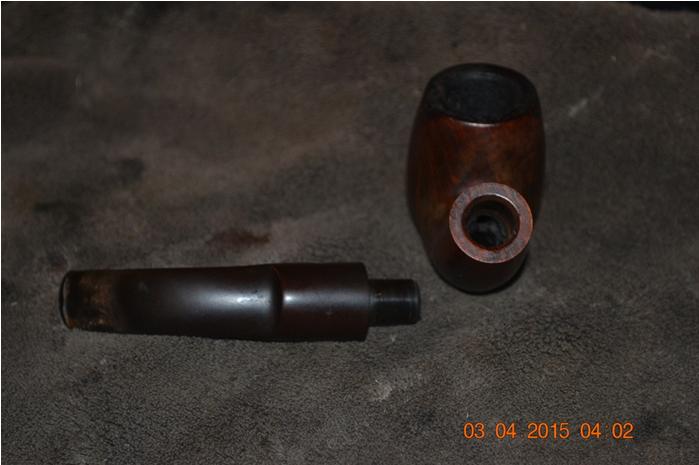
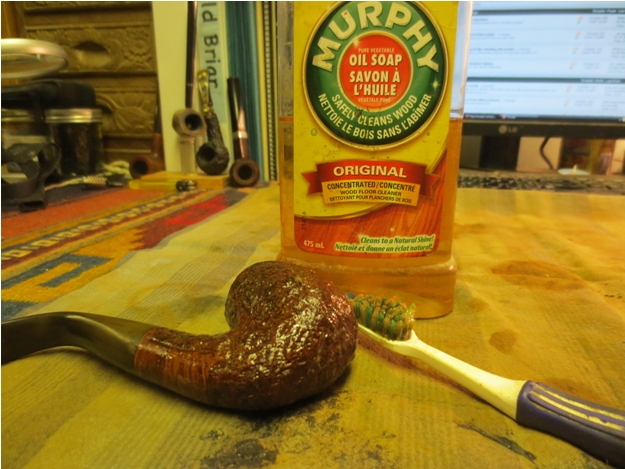
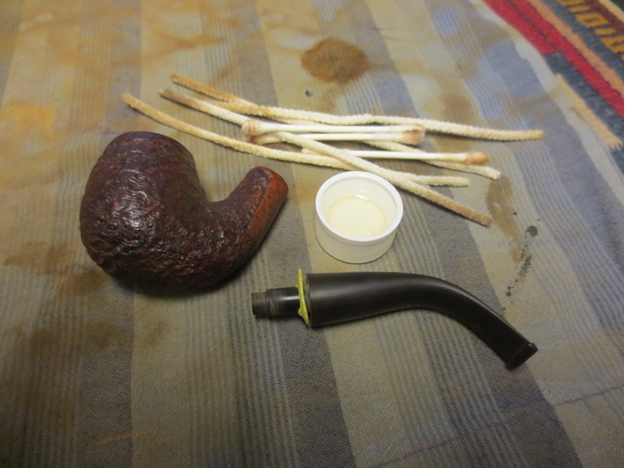
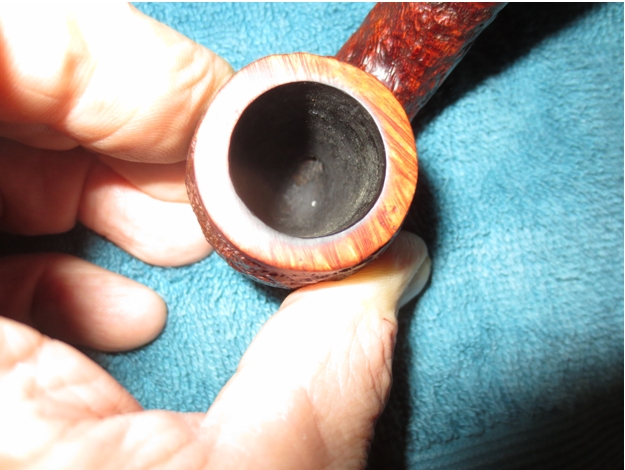
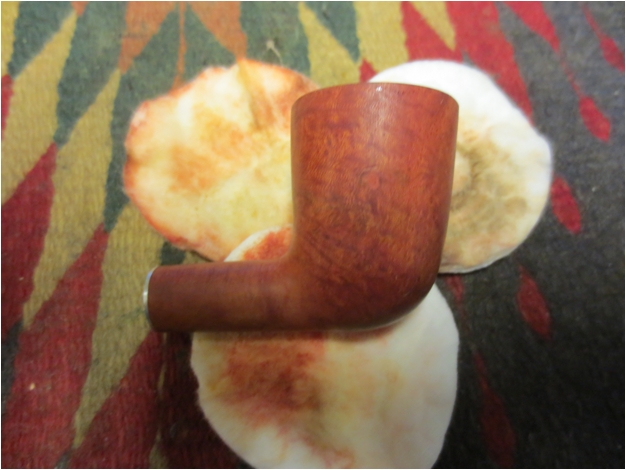
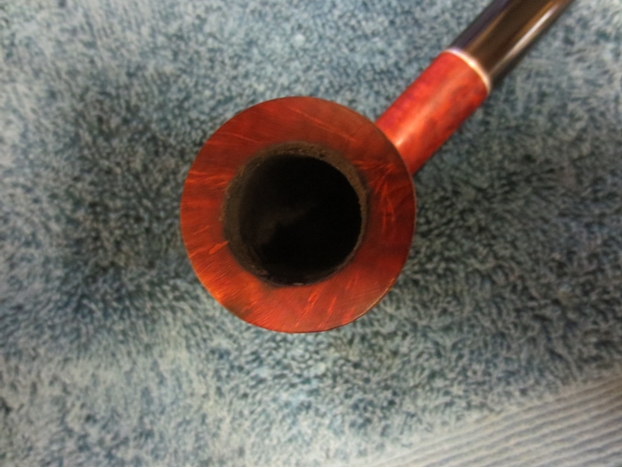
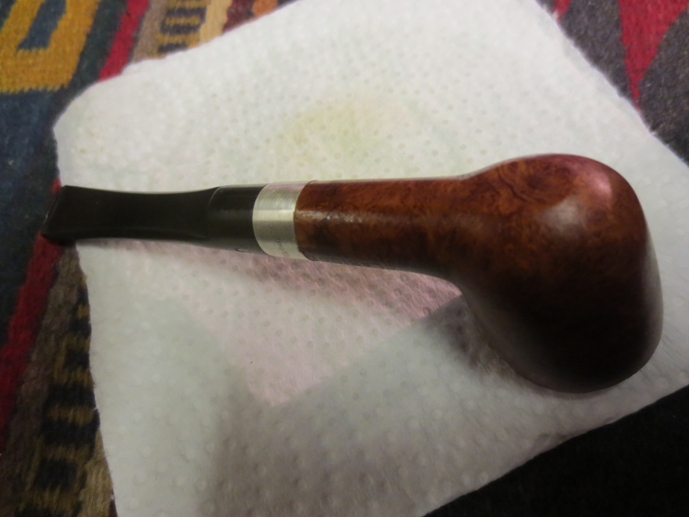
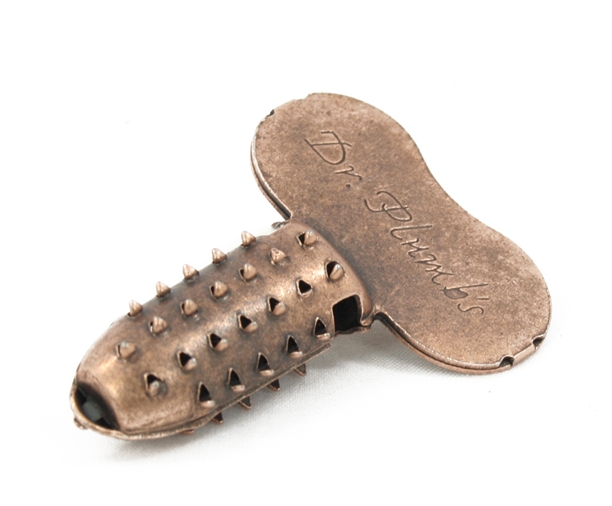
The bowl was reamed and soaked with alcohol and sea salt.  I cleaned the shank with alcohol and a soft bristle brush.

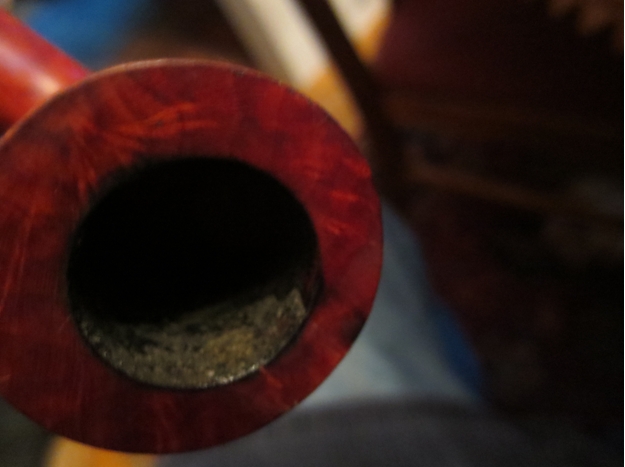
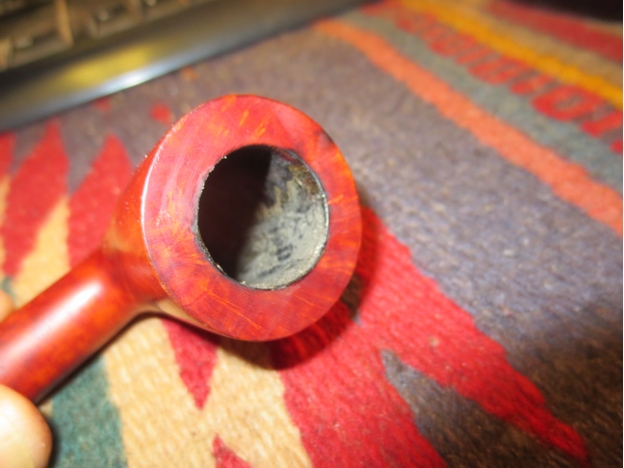
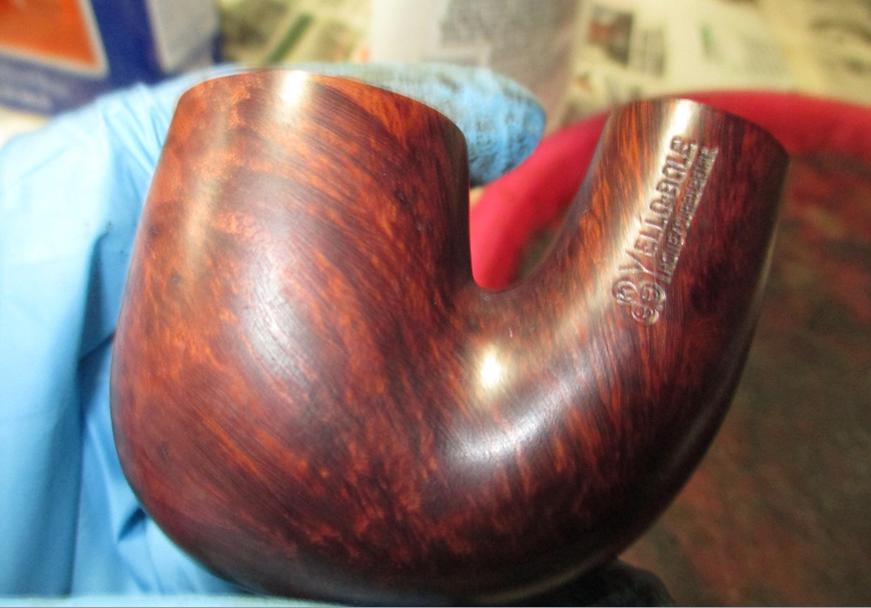
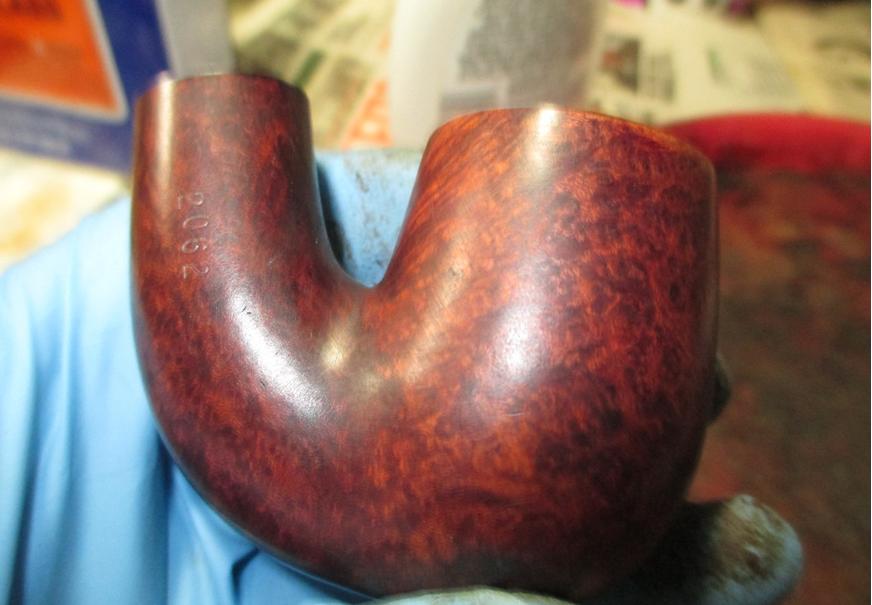
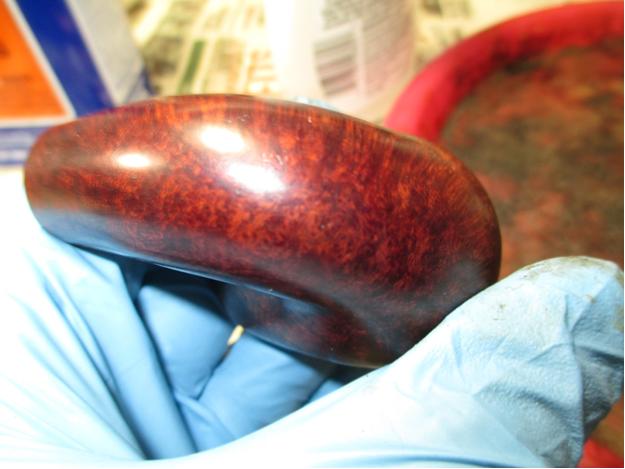
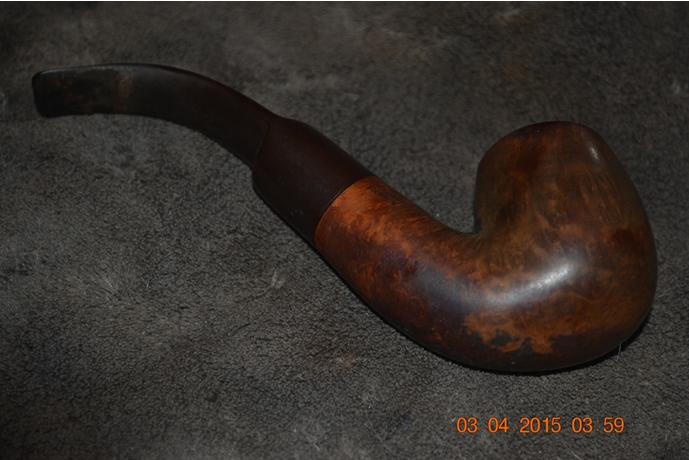
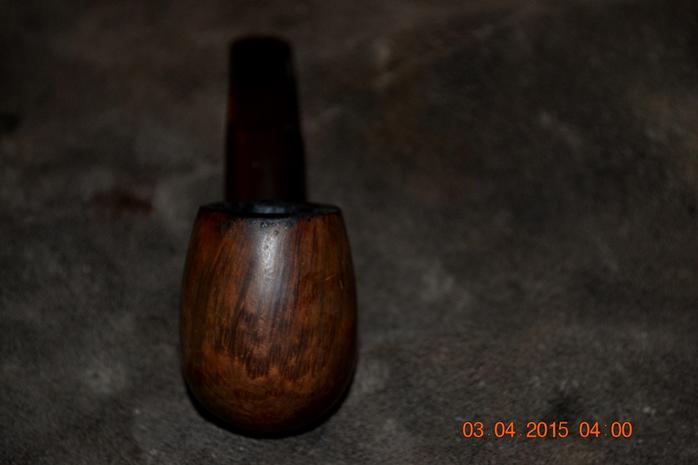
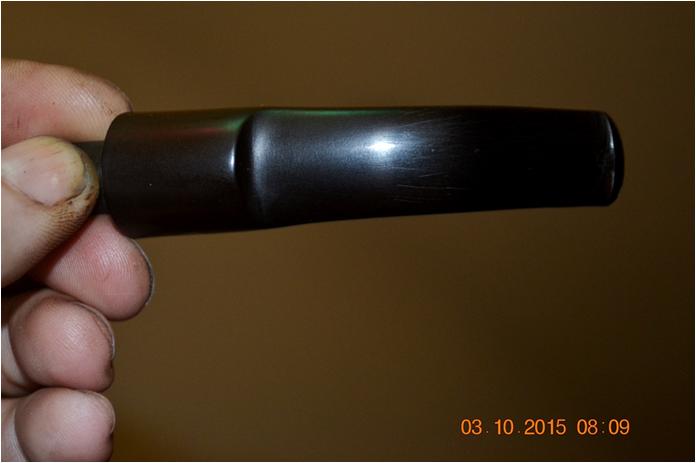
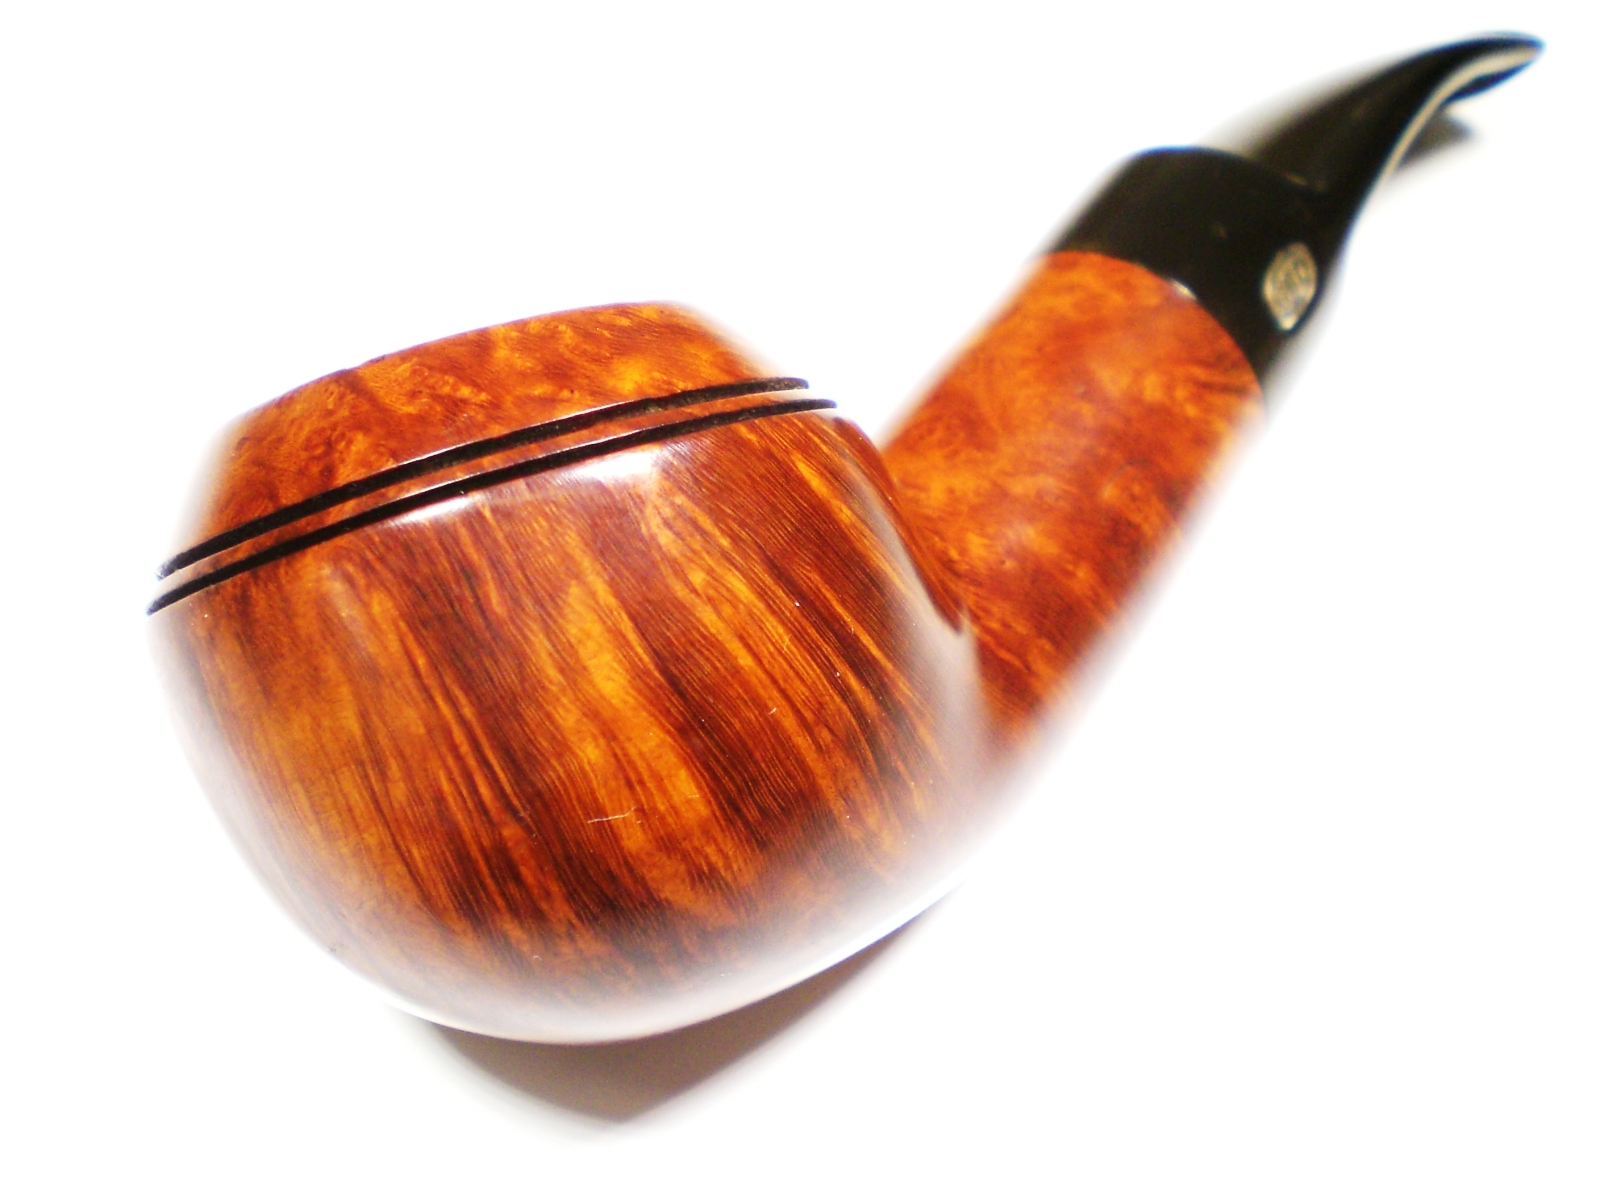
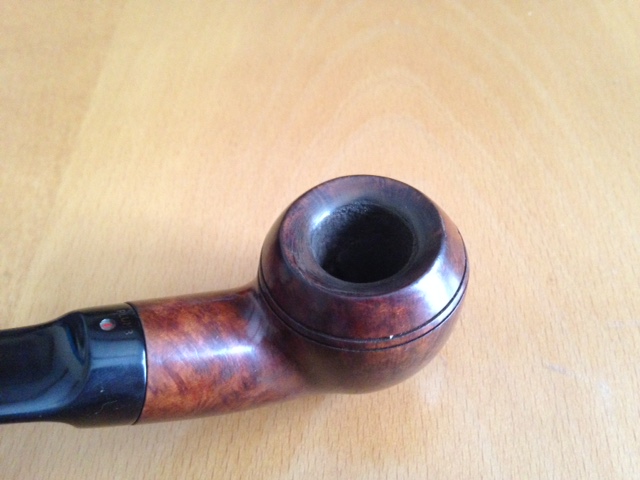
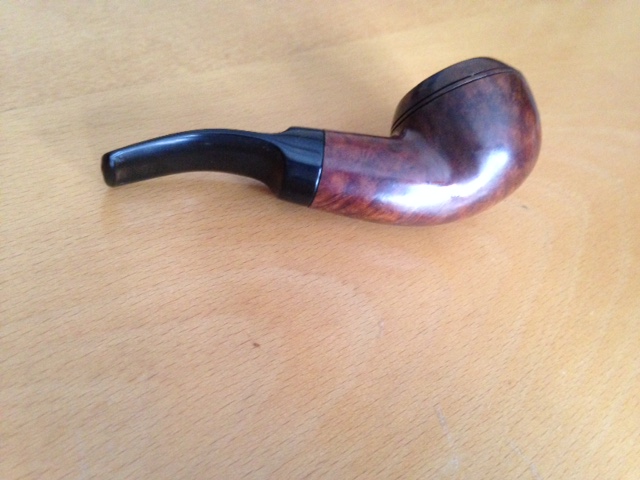
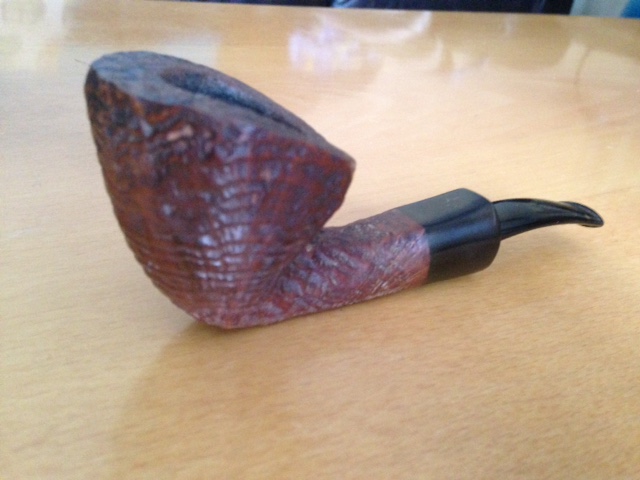
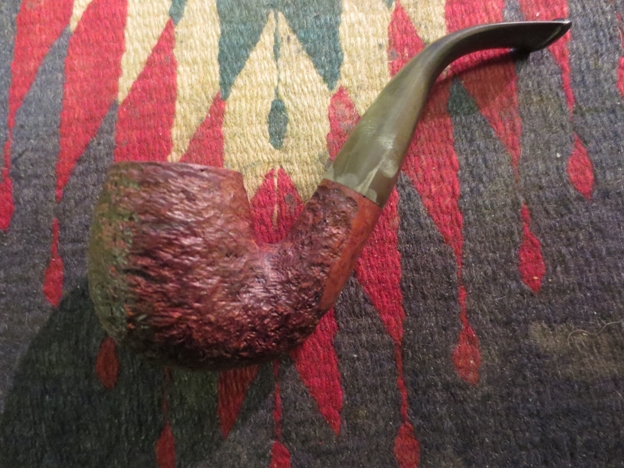
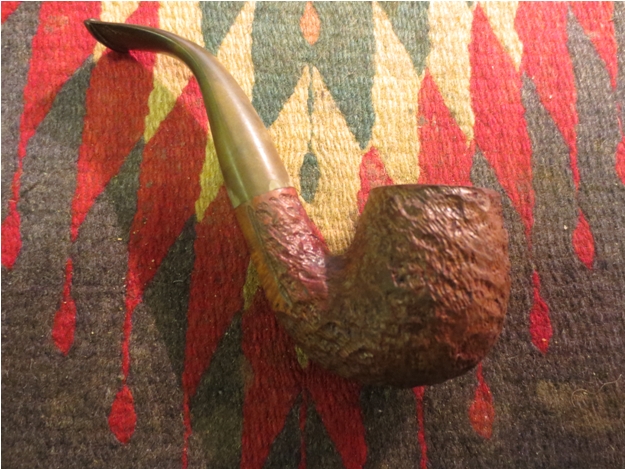
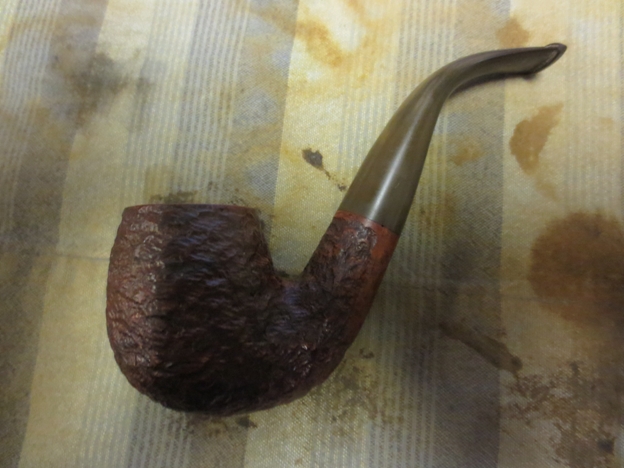
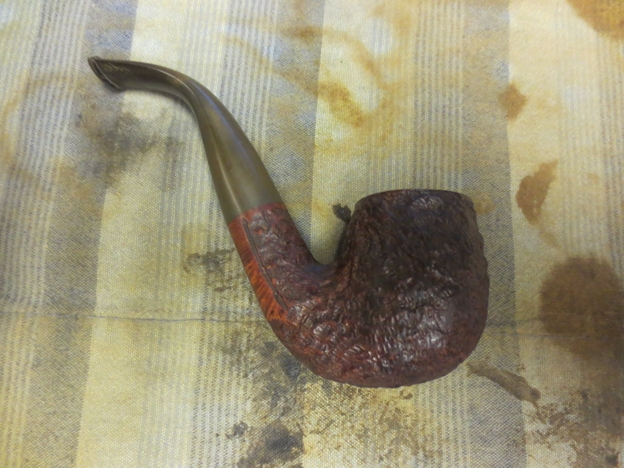
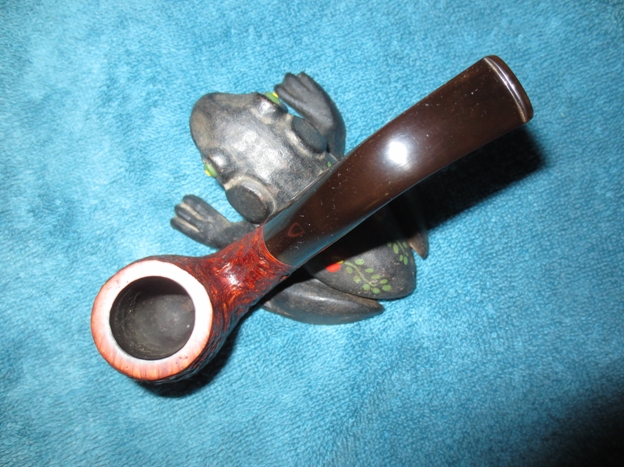
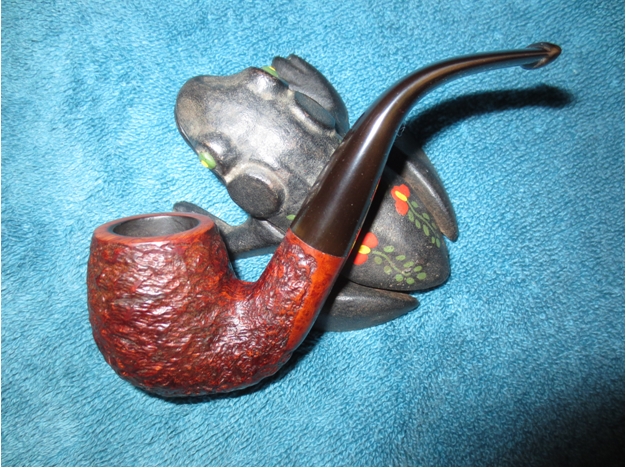
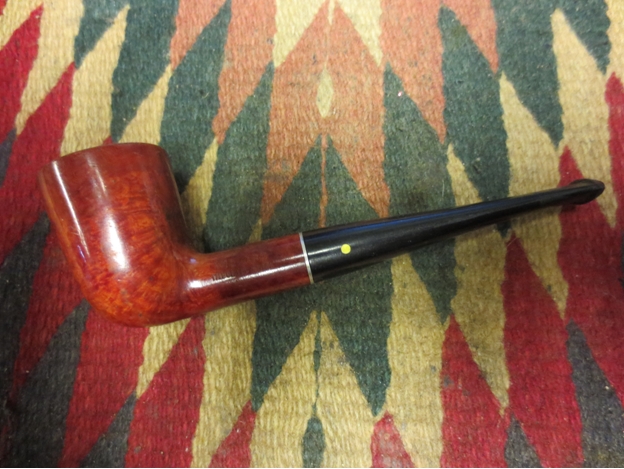
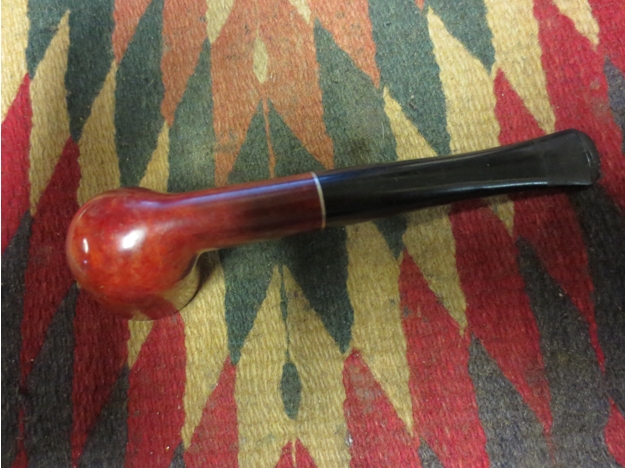
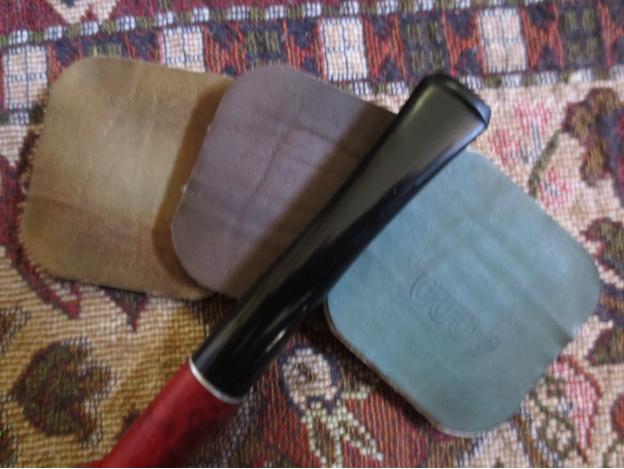
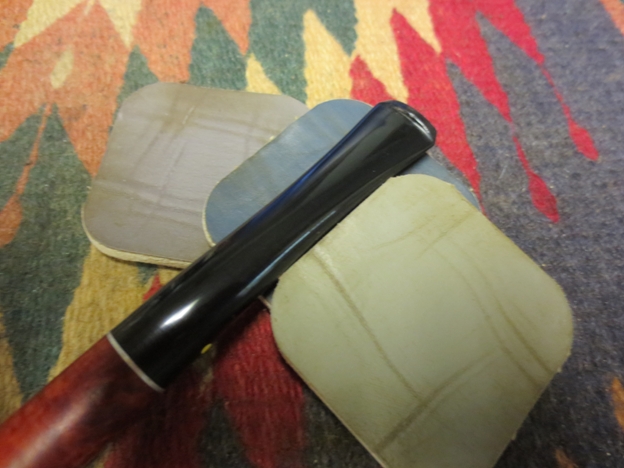
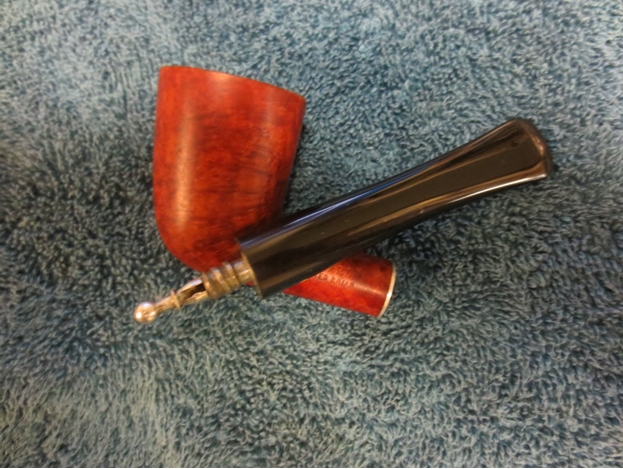
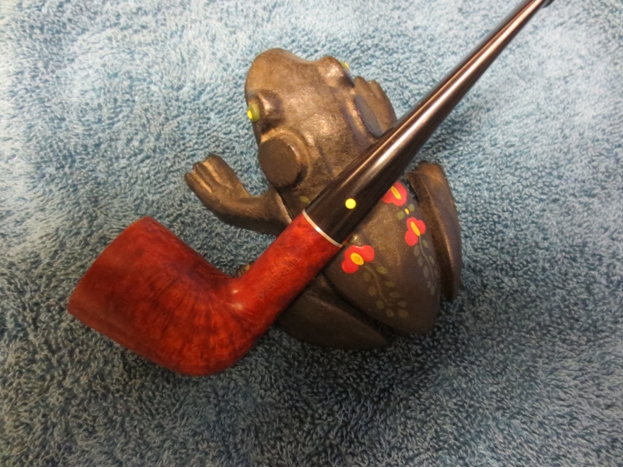
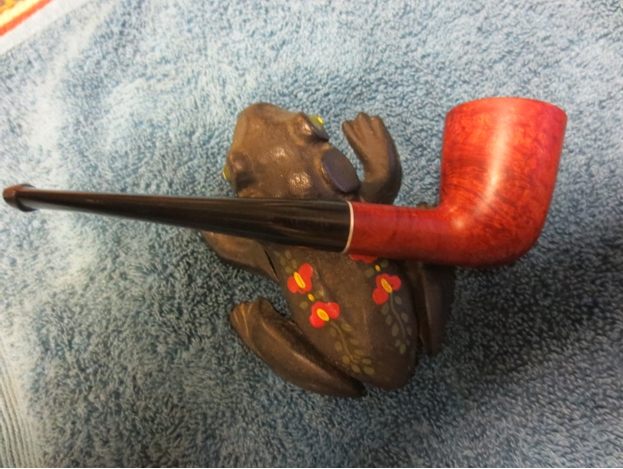
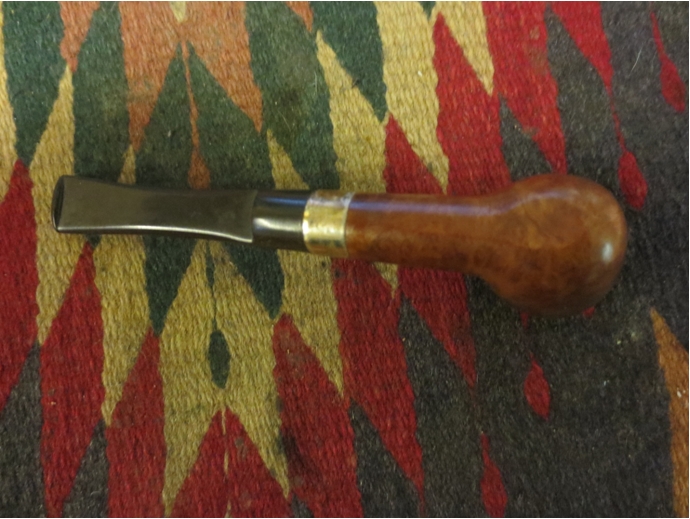
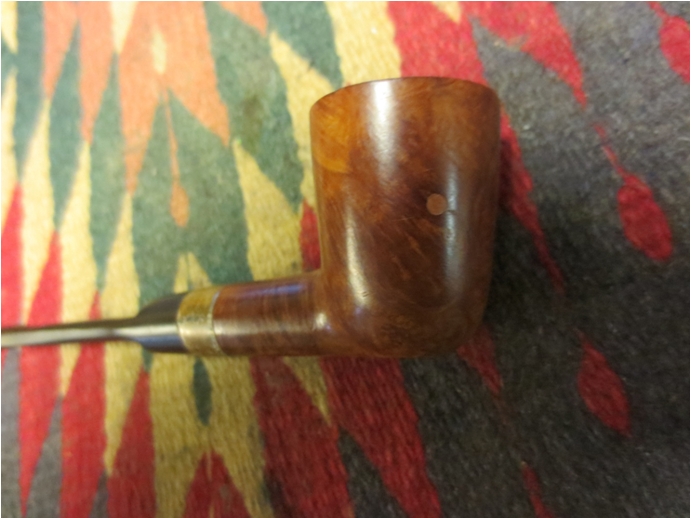
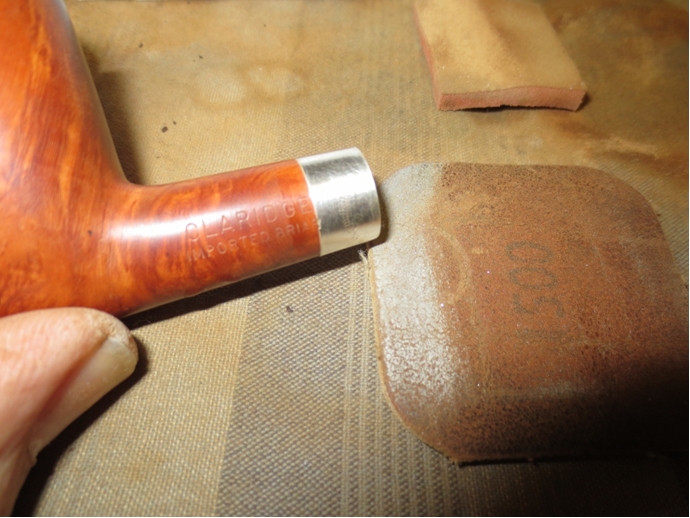
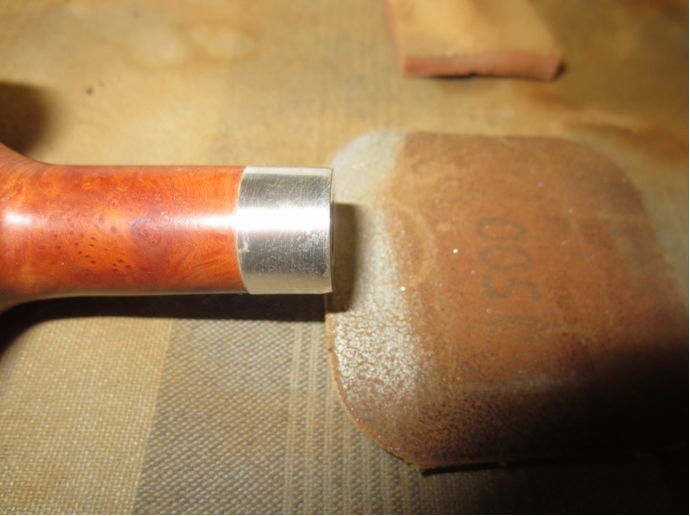
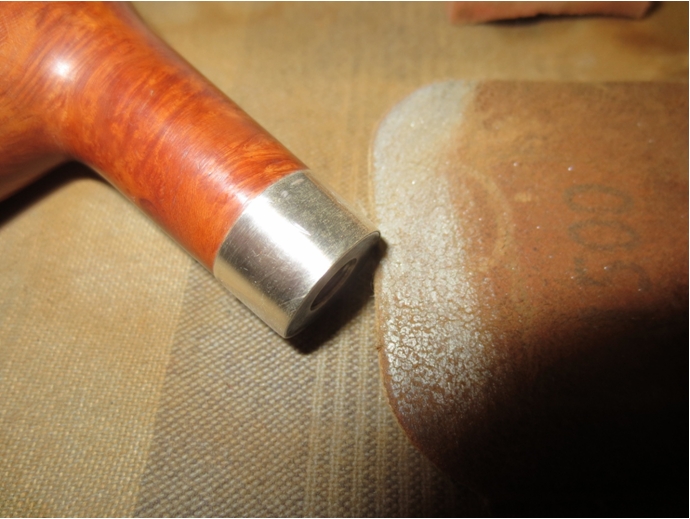
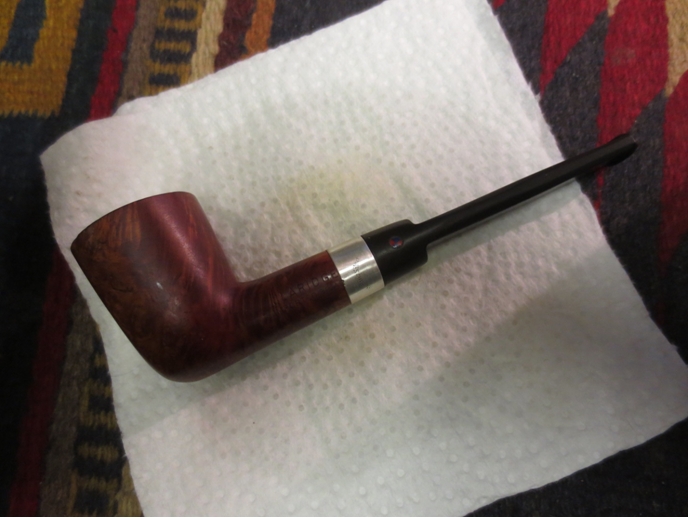
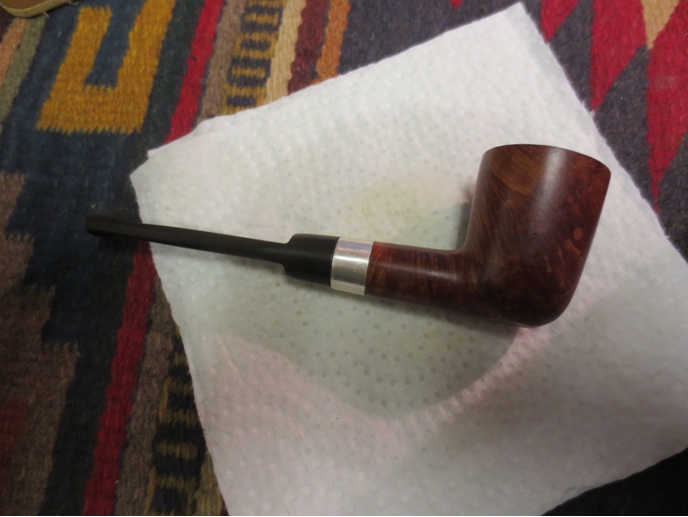
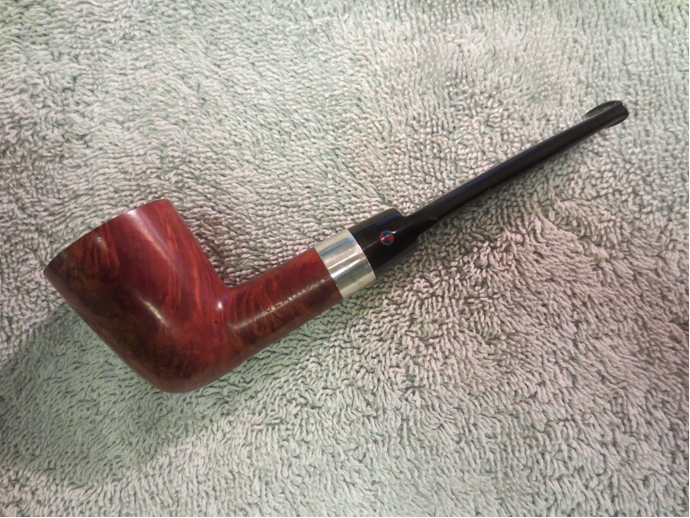
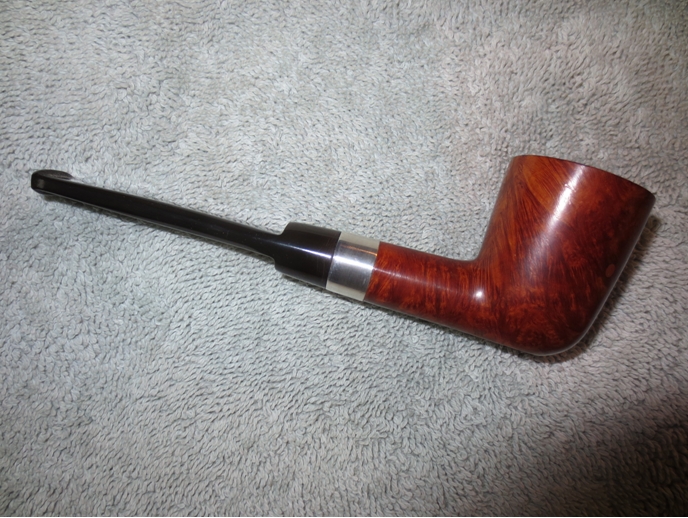
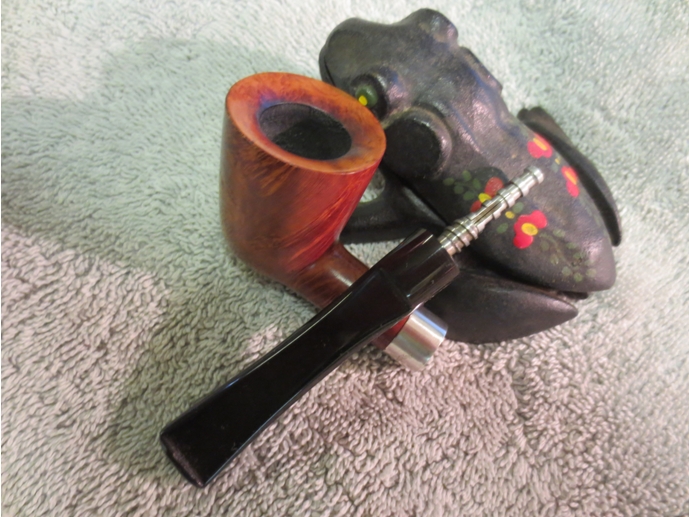
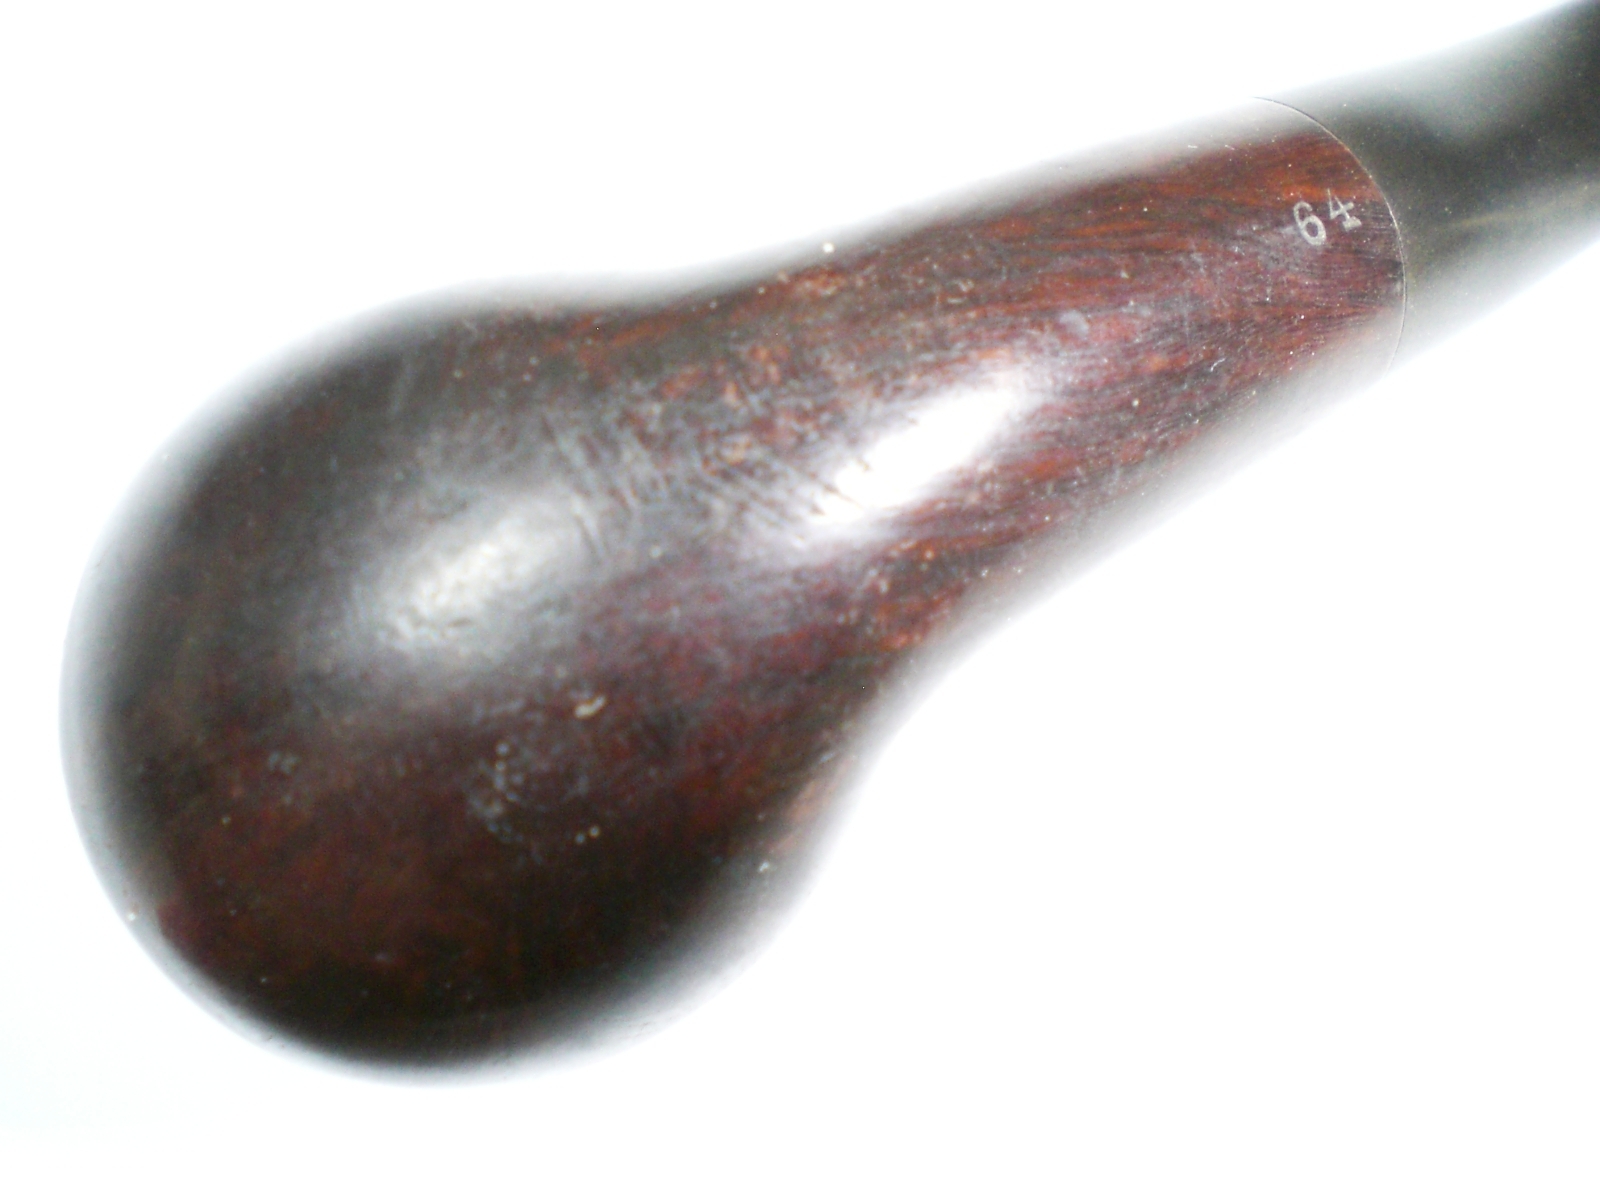
The rim had a build up of carbon. I used a worn piece of 8000 grit Micromesh paper to remove most of it.  The rim has some nicks and bruises, but Jon and I agreed that the patina was part of the pipes charm.  The rest of the briar was stained with grime from use.  Again, the 8000 grit micromesh paper revealed some interesting grain.  That also removed some of the scratch marks seen in the earlier photo.  I then buffed the pipe lightly with white diamond rouge and several coats of carnuba wax.

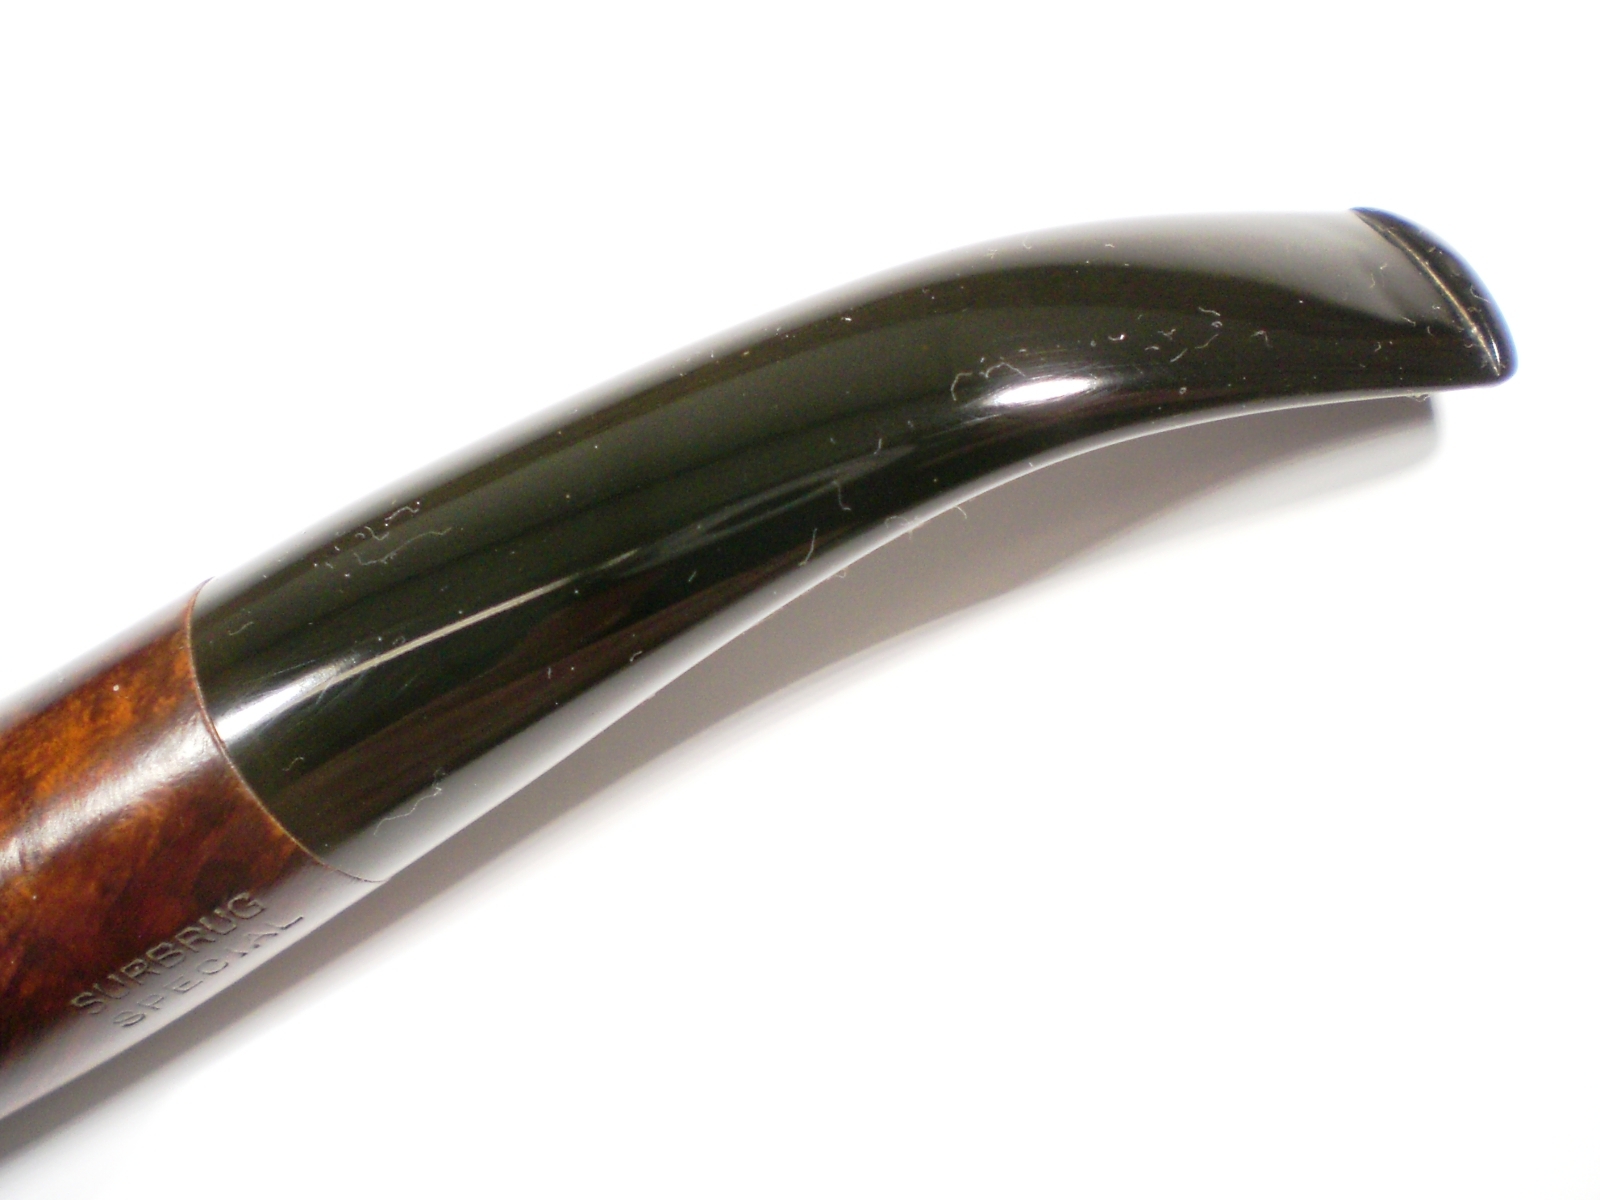
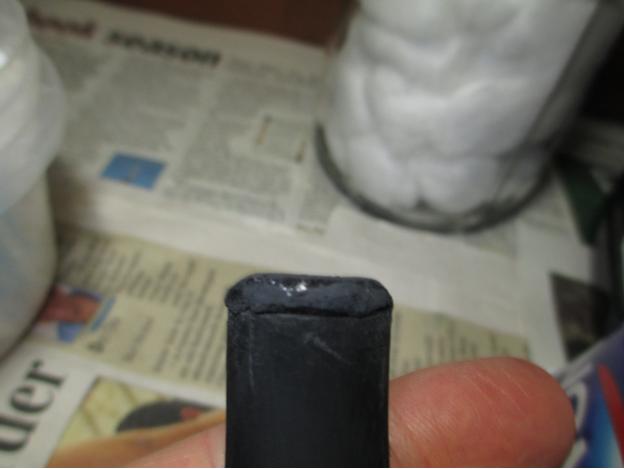
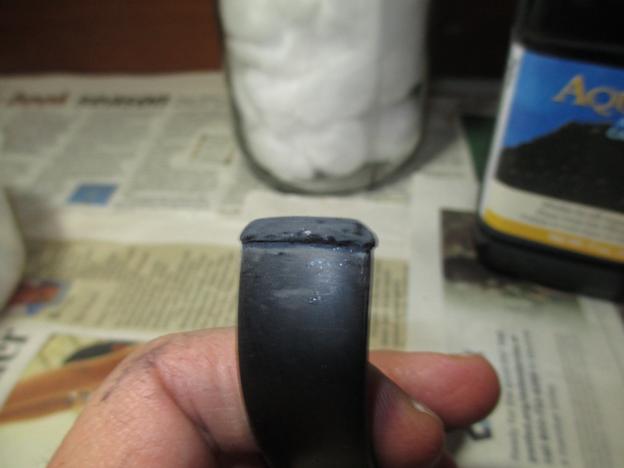
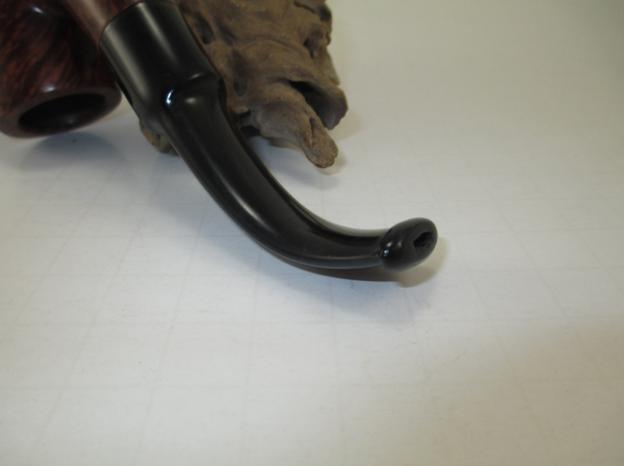
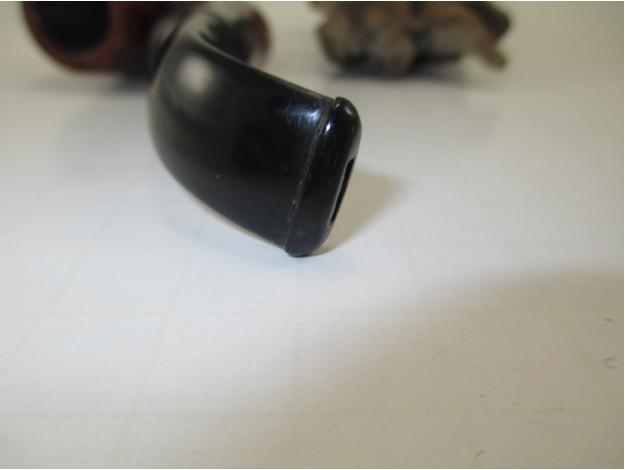
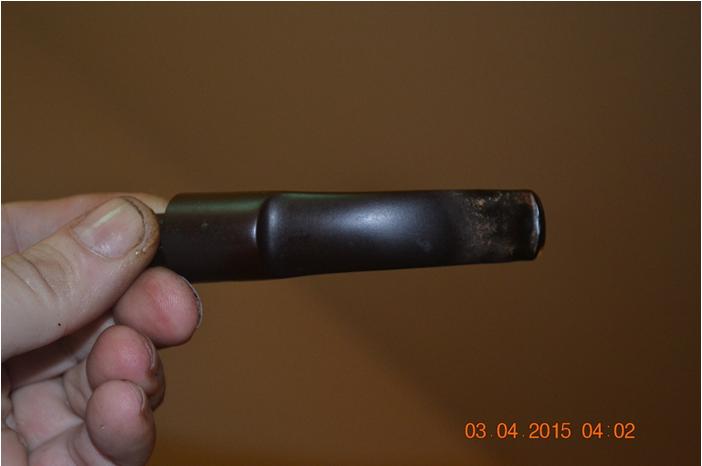
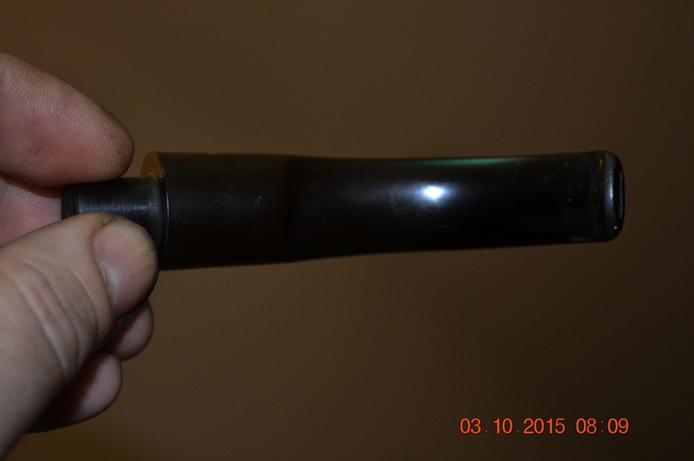
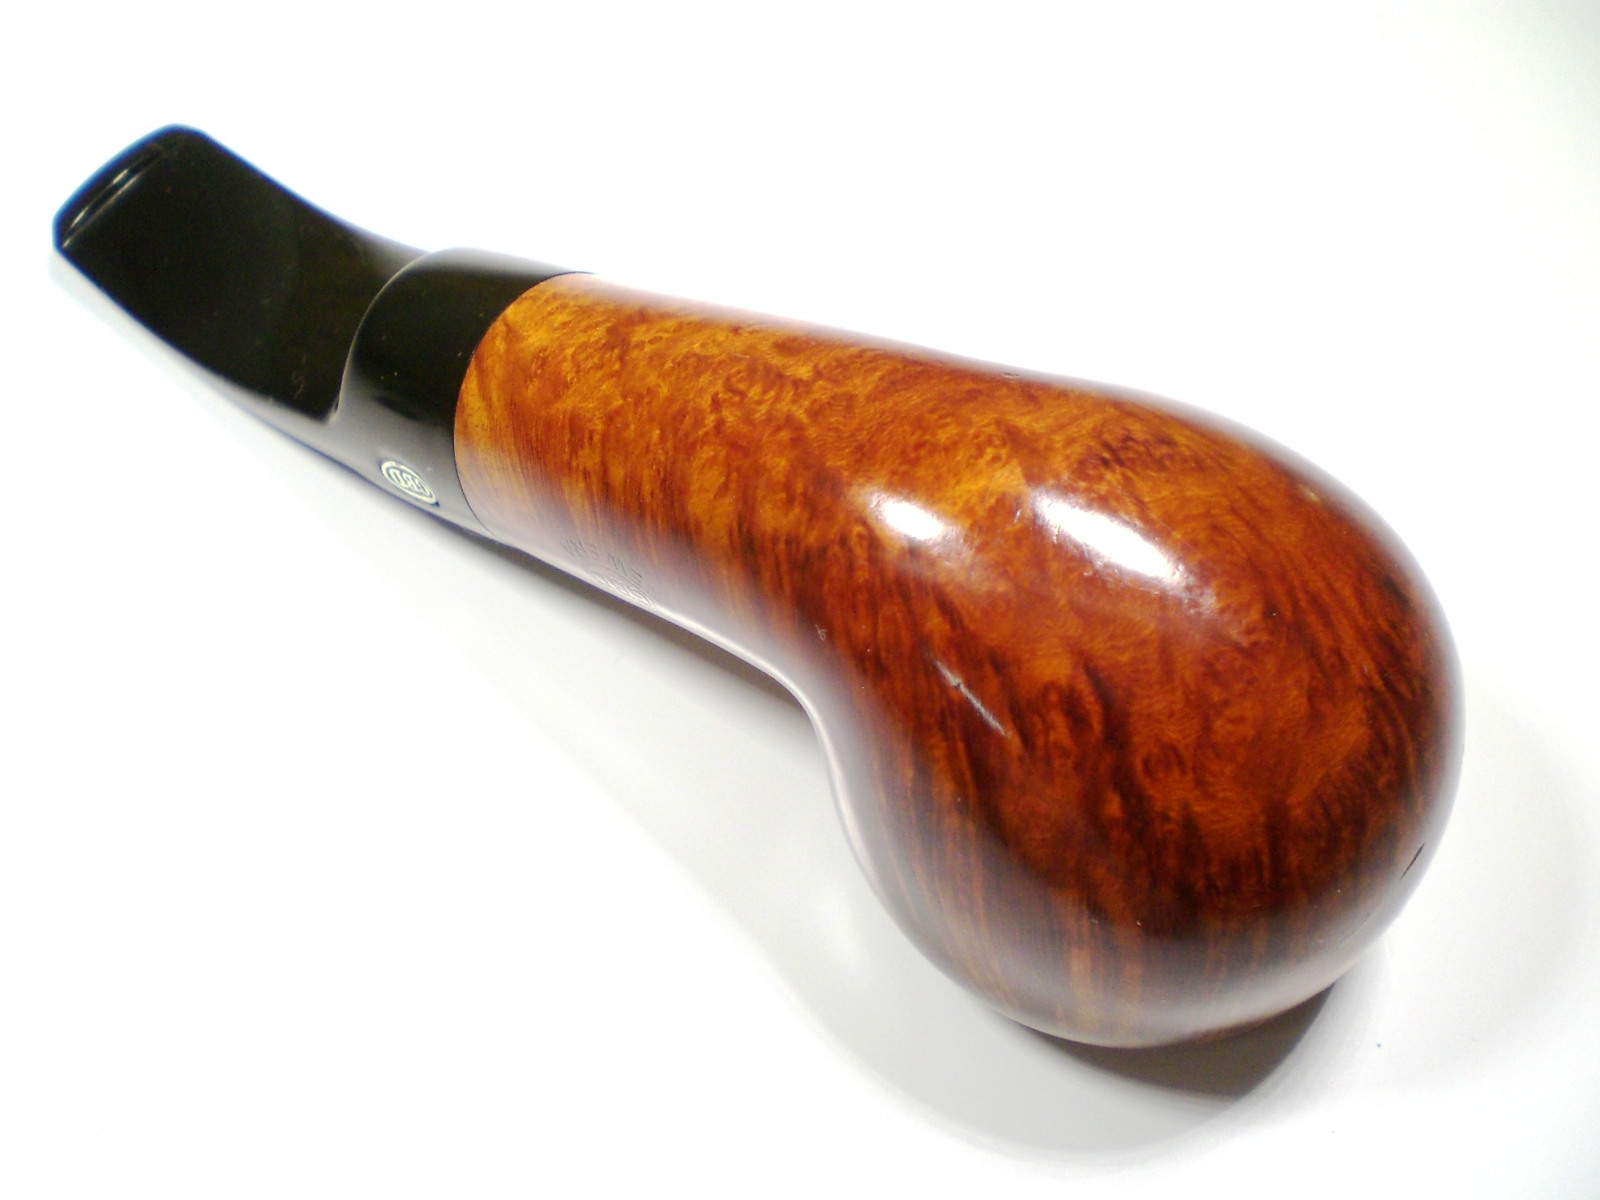
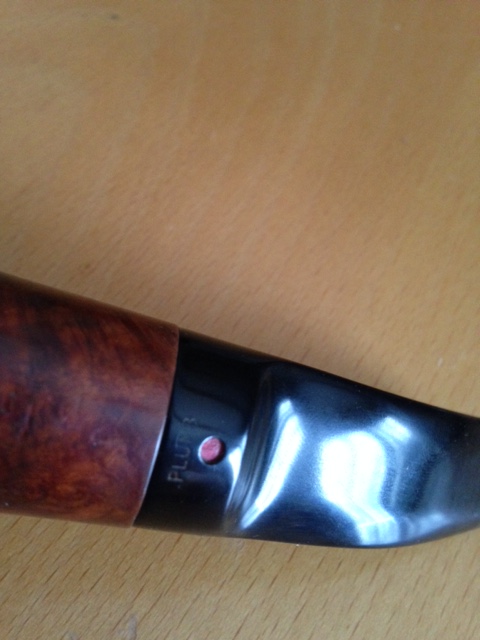
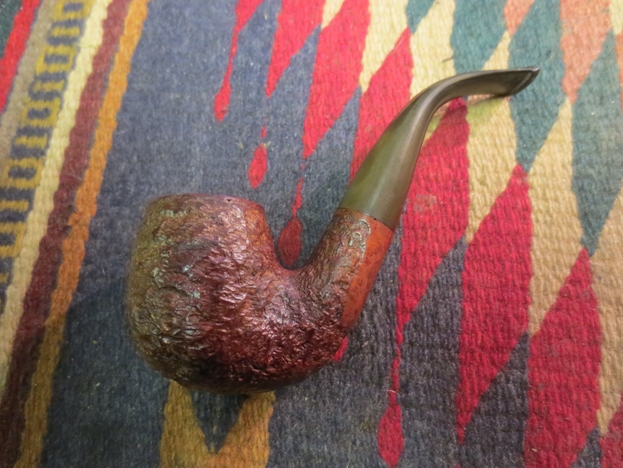
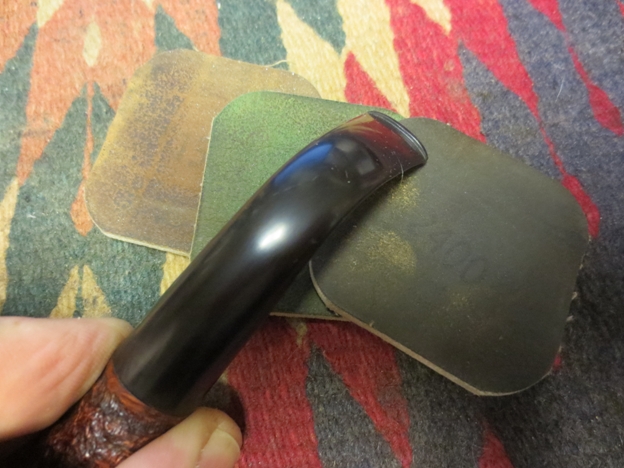
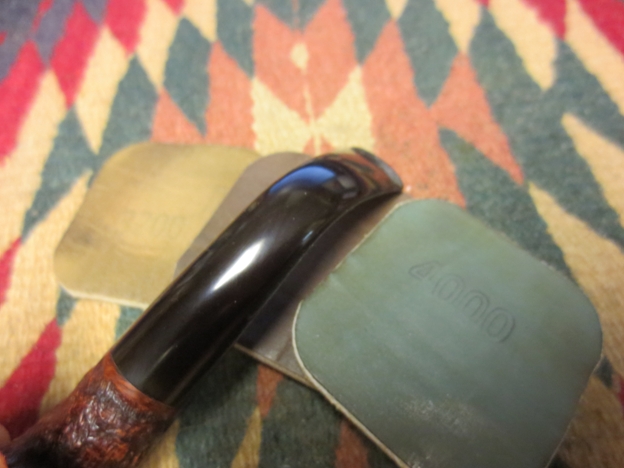
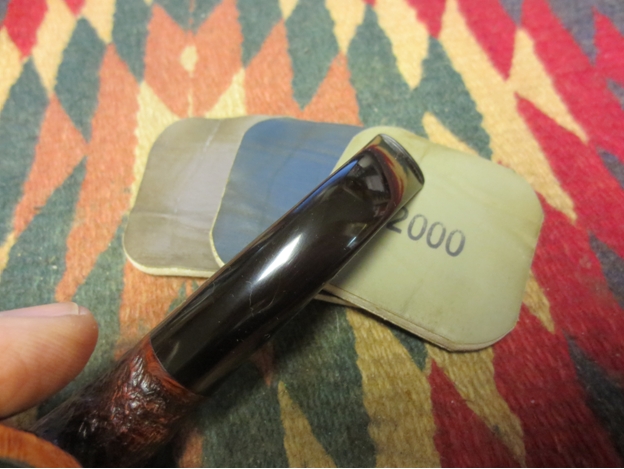
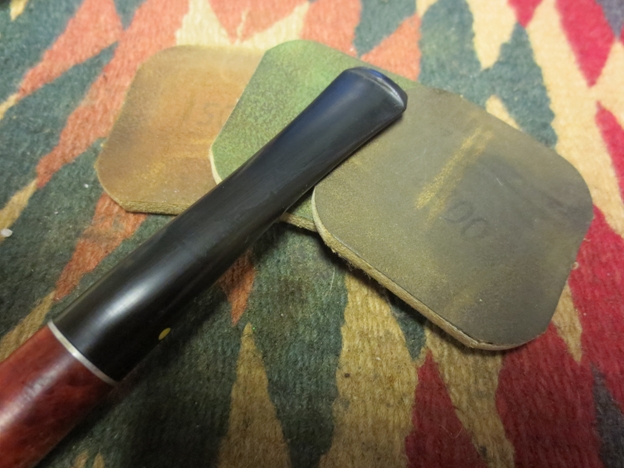
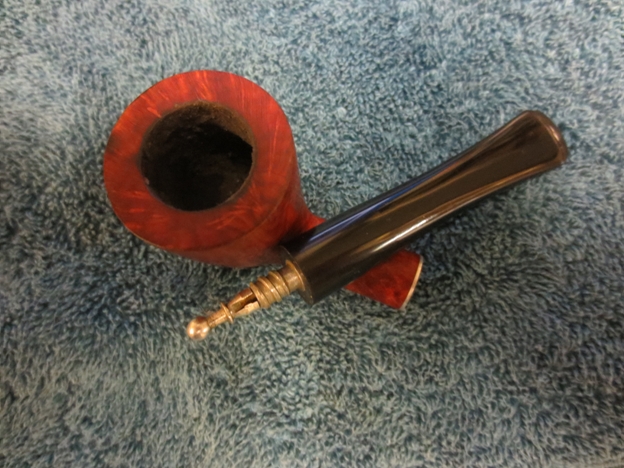
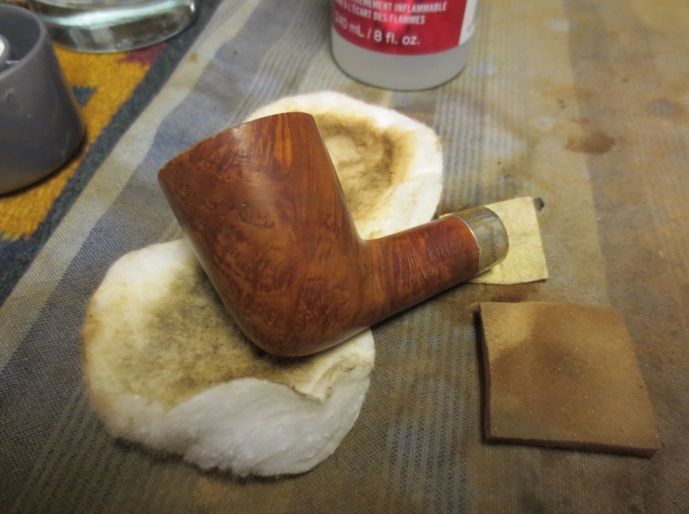
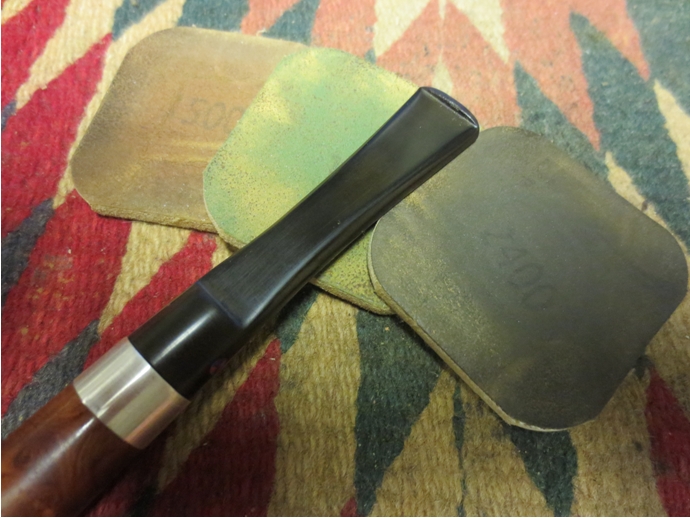
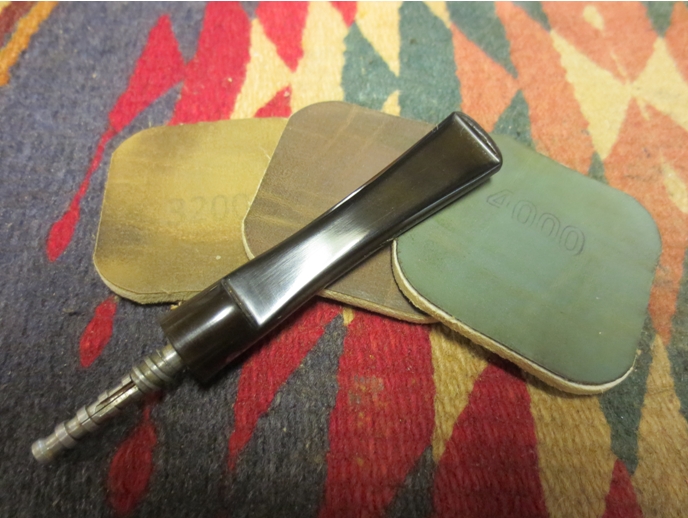
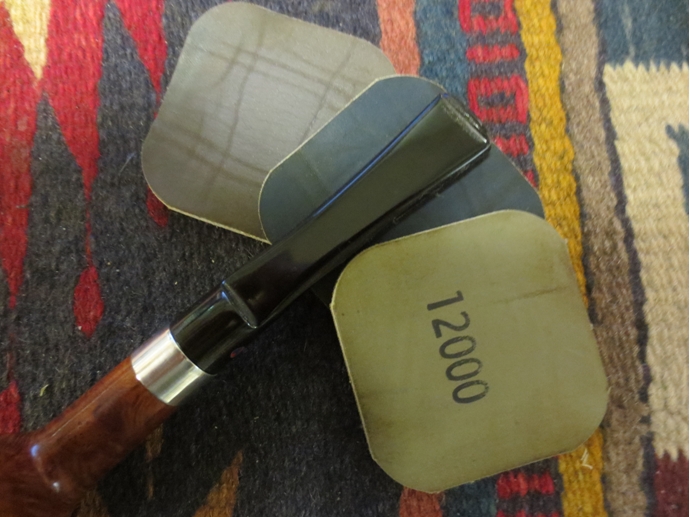
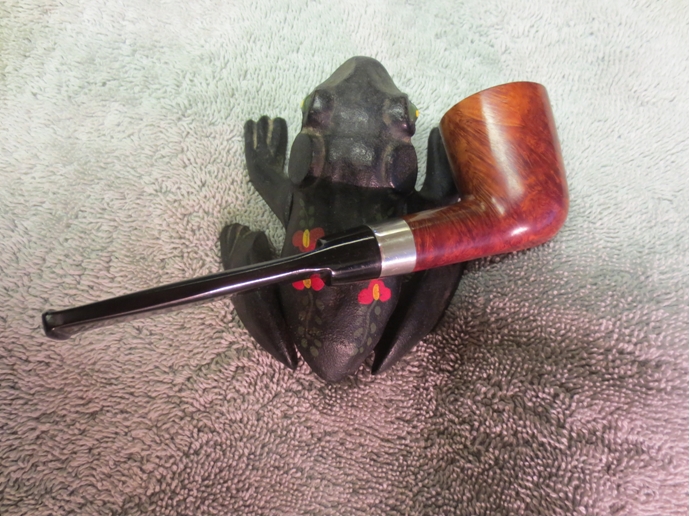
The stem had some mild oxidation but was in pretty good shape.  I soaked the stem in a mild Oxy-Clean solution and started using 800 grit wet paper.  This was followed by 1500 and 2000 grit paper.  Next the 8000 and 12000 grade micromesh sheets were used.  The stem was then buffed on the pipe with White Diamond and Meguiars Plastic Polish.

Surbrug_Special_Finished Surbrug_Special_Finished (3) Surbrug_Special_Finished (4) Surbrug_Special_Finished (1) Surbrug_Special_Finished (5) Surbrug_Special_Finished (2)


Mixing and using a batch of pipe mud


Blog by Steve Laug

Over the years I have used a lot of pipe mud to build up the bottom of a bowl on an over reamed pipe or an airway that entered the bowl too high. I have also used it to protect a briar plug on repaired bowl and on the sides of a bowl where there was damage. It hardens and provides a protective coat until a cake is built up. In the case of a recent bowl that I restored I noticed that the side of the bowl had a deep gouge in it. I picked and probed it with a dental pick to determine if it was a burn out in the making and decided that the briar was stable and not charred in the damaged area. It looked to have been gouged with a knife of with an overzealous reaming that hit a flaw in the briar and expanded it. I reamed out the bowl to take the cake back to bare wood and then cleaned the surface of the briar with a pipe cleaner and isopropyl alcohol. Once it was clean and the surface of the damaged area was free of debris I set the pipe aside to dry. I took a cigar out of my humidor and retired to the porch to smoke it and collect the ash for the repair that I had in mind.Willard13 I collect the cigar ash in a shot glass that I picked up somewhere along the way. I find that it is perfect for mixing a batch of pipe mud. I crush the ash with the flat end of a pipe nail to make sure that there are no chunks of unburned tobacco in it and that I have a fine grey dust.Willard14 I fill a second shot glass half full of water to mix with the ash. I have used an ear syringe and even a teaspoon to put the water in the second glass. The tools for the project are very minimal and are shown in the next photo. I use a pipe nail both the flat end and the spoon end for mixing the mud and also for packing or tamping it in place in the bowl. I use a folded pipe cleaner to paint the surface of the bowl with the mud.Willard15 In this case I dribbled the water slowly into the shot glass with the ash and mixed it with the pipe nail. I added extra water with the pipe cleaner.Willard16 When I had the ash and water mixed to the consistency of a thick paste I paint it on the wall of the bowl and work it into the gouge in the side of the bowl. It takes multiple applications to build it up. I paint it on with the pipe cleaner and then tamp it in place with the spoon end of the pipe nail. I repeat the process until the side of the bowl is smooth and the gouge is even with the bowl sides.Willard17

Willard18 I let the initial application of pipe mud dry for thirty minutes and periodically checked the bowl to see if the mud is showing signs of shrinkage. If it had shrunken at all (which in this case it had) I refilled the area with more pipe mud using the pipe cleaner and then tamped it into place again. I repeated this process as often as necessary until the surface dried smooth. When it dries the repair is grey in colour and quite hard.Willard19 The repair works very well. It provides a base for the cake to build on. I am careful when wiping out the bowl and don’t ream until there is a solid cake formed over the repair. I have smoked pipes repaired like this for several years and never had the mud fall out of the repaired area before the cake builds over it. With initial care this bowl will smoke well for many years to come. Anyone else experimented with pipe mud for this type of repair? Let us know.

Building a Better Button on a 1930’s Yello Bole Oom Paul


Blog by Andrew Selking

Have you ever found that Holy Grail pipe only to realize that it has a major flaw? For me, this pipe ticked all the boxes, a KB&B pipe made between 1933 and 1936, it was a less common shape and looked to be in decent condition. The only problem I could see was that a previous owner had filed off the button.Andrew1

Andrew2

Andrew3

Andrew4 I’ve been experimenting with super glue and ground charcoal for stem repair and I had an idea how I might use that to re-create the button. Now just a quick disclaimer. I am not a medical professional and I do not pretend to know any potential health hazards to the use of super glue on something you put in your mouth. On the other hand, I am aware that the state of California has found that pipe smoking is not healthy for pregnant women or their unborn children. As an adult, I accept these risks as the relaxation benefit outweighs the health risks.

Before tackling the button I needed to clean up the pipe. I started the process by giving the bowl an alcohol bath.Andrew5 While the bowl marinated, I dropped the stem into a solution of Oxyclean. After a good long soak, I reamed the bowl.Andrew6 After reaming the bowl, I retorted the stem and bowl. I forgot to take pictures of the bowl during this process.Andrew7 The stem was pretty clean, which I expected based on the minimal amount of chatter and the lack of cake build up in the bowl. A couple of fuzzy sticks dipped in alcohol did the trick.Andrew8 The alcohol bath serves two purposes, it loosens up the internal gunk and it helps remove the old finish. On this particular pipe, I noticed that the bowl was stained a purplish read and had a heavy varnish on it. That’s usually a sign of inferior briar and lots of fills. With great trepidation, I used acetone and 0000 steel wool to see what was under the old finish.Andrew9 I was pleasantly surprised to find beautiful grain and not a single fill.Andrew10

Andrew12

Andrew11

Andrew13 I was not happy with the purple tint of the wood though, I mean who does that? My guess is, this pipe could have made the cut as a Kaywoodie, maybe they were short on the Yello Bole line so they put a Yello Bole stem on it and that hideous varnish. Interestingly enough, this pipe has the identical shape number as the Kaywoodie medium billiard Oom Paul. Just to give you an idea how many pipes Kaywoodie used to make, they had three models of the Oom Paul shape.Andrew14 I decided the best way to take care of the purple stain was with some judicious sanding. Since the bowl didn’t have any scratches or dents, I didn’t have to go too heavy. I started out with 1500 grit micro mesh and worked my way up to 12,000 grit. You will notice the washer between the stem and shank. I’ve learned that the best way to get a sharp shoulder on the shank and the stem is by using the washer to prevent the sanding medium from rounding it off.Andrew15 This is what the bowl looked like after the micro mesh pads.Andrew16

Andrew17 I decided to keep the stain light, so I diluted some Pimo Pipe Supply mahogany and used a single coat. Unfortunately I didn’t take a picture of that process, I was kind of excited about fixing the stem.

I removed the oxidation on the stem with a progression of 1500-2400 grit micro mesh pads with water. I didn’t have the bowl attached, so I just held the washer over the tenon to prevent rounding.Andrew18 With the oxidation addressed, it was time to start building the new button. I’m not the best when it comes to carving the bottom side of the button so I decided to use clear tape to create definition.Andrew19

Andrew20 I built up layers of tape until it was the thickness that I wanted for the underside of the button. Next, I mixed some ground charcoal and super glue and started applying it. After each application I put a drop of accelerator on the end and applied another layer. It was not looking the way I wanted it to look.Andrew21 I remember Steve said that when he used activated charcoal it was very fine. So I sanded off the mess and started over. To get a finer charcoal I used our coffee grinder, which did a pretty good job, but still left some larger chunks.Andrew22 To solve that problem, I used a tea strainer. The result was very finely ground charcoal.Andrew23 I mixed the super glue and charcoal and applied it as before.Andrew24 I sanded between applications and filled in any remaining divots.Andrew25 Once I had the button shaped to my liking, I used a progression of micro mesh pads from 3200-12,000. Then I used my rotary tool with white diamond and carnauba wax to bring out the shine.Andrew26 I gave the bowl a quick spin on the buffing wheel with white diamond and carnauba wax. Here is the result.Andrew27

Andrew28

Andrew29

Andrew30

Andrew31

Andrew32

Andrew33

Andrew34

Andrew35

Andrew36

Andrew37 I am happy to say that this pipe smokes as well as it looks. It is a system pipe. I couldn’t be happier with the button. The thing I like about using the charcoal and super glue is, it polishes and shines just like the vulcanite. This pipe is a keeper. Thanks for looking.

The French Girl with the Fuzzy Identity


Guest Blog by Robert M. Boughton
Member, North American Society of Pipe Collectors
http://www.naspc.org
http://www.roadrunnerpipes.com
http://about.me/boughtonrobert
Photos © the Author

“The problem with putting two and two together is that sometimes you get four, and sometimes you get twenty-two.”
― Dashiell Hammett (1894-1961), U.S. author who re-invented and popularized the hard-boiled private investigator genre, in “The Thin Man” (1934)

INTRODUCTION
I take great solace from life’s frequent misadventures through activities that nevertheless focus on the same causes of grief: reading a good book, realistic or fantastic; writing news articles, blogs, letters to the editor and my own versions of literature; photographing street life, landscapes, nature and the occasional spot news event; drafting, filing and arguing civil actions in courts of law when I too frequently encounter those who would do me harm through ignorance or the misperception that I lack understanding of that study of knowledge, and researching and at times investigating anything and everything. But when I need to retreat all the way into the pleasure centers of my brain, I have only my local tobacconist and pipe acquisition disorder on which to fall back, and on the great majority of my P.A.D. attacks for almost a year now I can at least blame my small but expanding online business of refurbishing or restoring estate pipes for sale. Yet even that endeavor involves research and background checks.

Other than the classic but elegant shape and crafting of the Butz-Choquin bent billiard I scored a few months ago in an estate lot with several lesser gems – including a unique red Kaywoodie lumberman that was, for the most part, sandblasted, but with two natural rings around the billiard bowl and matching sitter bottom and ferrule – the obvious challenge of restoring the shapely French pipe to her original fine condition was a definite attraction. Except for the BC logo clear on the left side of the stem and the overall haggard appearance, I had no idea what I was getting. When the lot arrived, I searched for the BC, but when I found her the nomenclature was so fuzzy I could make out little more of the brand stamp on the left shank than the distinctive cursive B. Of the name itself, I saw two lines, the top beginning with a definite F and the bottom a clear word: MAJOR.

This may sound like plenty to go by, but my browser search suggested multiple possibilities for Butz-Choquin matches starting with F. There was the Formula, Formula Noir, Fait Main and filter, all of which I ruled out. And so I added an L and found Flamme, Flamme Extra, Flamme Standard, Flash and Fleuron. Then I tried Flamme Major and, seeing no suggestions, just Major. That excavated a site with images for BC Major Pipes, among which I saw a similar although straight stem specimen.Butz1 Therefore I returned to the full Butz-Choquin Flamme Major search and completed it, confirming that indeed was what I had.

THE RESTORATION
Butz2

Butz3

Butz4

Butz5

Butz6

Butz7

Butz8 I recently started making several basic changes in my pattern of restoration S.O.P. First, I now begin with an OxiClean stem wash as it can go on in the background, so to speak, while I do other tasks. I’ve also found it really works, although not with the comprehensive results sworn to in the site I found for its basic instructions, including the consistent lack of need for additional work such as sanding and on occasion using Black Super Glue for deep fills. Sometimes after washing with OxiClean and warm water, rubbing out the excess discoloration with a cloth and micro-meshing, the result is a perfect stem ready for the wheel. More often than not, however, I need to sand out scratches that are exposed. Such was the case with this stem. But the practice serves its purpose, to clean the stem inside and out and make the job of producing a shinier end product far easier.

Before
Butz9

Butz10
Ready for buffing:Butz11

Butz12 The second new habit is working on the rim and chamber and scraping out the major buildup of old tobacco and its related substances from the shank with a wire cleaner rinsed over and over in Everclear. All of these can be completed during the OxiClean wash. Third, I now retort every pipe at this stage.

All of these stages of the process completed, I turned to the bowl and shank, which showed the wear and tear of age. Tell me about it! After washing the briar with purified water, I used a piece of super fine steel wool to lighten the all-too-often over-dark original finish, shine the wood and make the grain show with more clarity. The wood was in very good condition with no pits, dings or scratches worth mentioning, and the slight appearance of discoloring in areas disappeared. I did a full micromesh workup with 1500, 1800, 2400, 3200, 3600 and 4000.

By the end of the restoration, the nomenclature somehow was much clearer.Butz13

Butz14

Butz15

Butz16

Butz17The time was right for the final buffing, and so I repaired from the comfort of the living room for the prep work to the workroom for finishing. The stem, as usual, I gave a nice shine with red Tripoli and White Diamond. The briar I buffed with white Tripoli, White Diamond, and a few coats of carnauba.Butz18

Butz19

Butz20

Butz21

Butz22

Butz23

Butz24

Butz25CONCLUSION
I think the most notable achievement of this restoration is that for the first time I was able to sand the chamber until it was baby smooth and like-new. I accomplished this by reaming and then sanding with 150-grit paper as usual but followed those steps with a second sanding using 320-grit paper.

All in all, I am happy with the outcome and will, of course, be sorry to let this one get away from me.

Final 9438? – New Era


Blog by Al Jones

The GBD 9438 is my favorite pipe shape.  I’ve been fortunate to find most of the seven other 9438’s in different grades.  However, to this point, a “New Standard” has eluded me.  I attended the recent NYC Pipe Show but left the show without a pipe purchase.  On the drive home from New York to Maryland, I remembered a 9438 New Era Ebay auction was ending.  The pipe was offered by estate seller extraordinaire, Steve Fallon, aka “Pipestud”.  Using my Ebay phone app, I pulled off the highway and put in a bid.  I was delighted to win my second GBD from Steve.

The “New Era” grade slots somewhere between the Virgin and New Standard grades.  It is described in a 1973 GBD catalog as:

New Era: “The beauty of this pipe’s perfect briar is accentuated by the richness of the ‘take-off’ dual finish.”

The pipe was so clean, I can’t say this is a “restoration” and I didn’t feel compelled to take any before pictures.  The stem had a little oxidation on it, but was in overall very good condition.  The briar had a few dings and some darkening around the rim.

I was able to remove much of the rim darkening with a worn piece of 8000 grit micromesh sheet, which doesn’t pull any stain.  I used a damp cloth and a hot iron to lift out most of the dings around the bowl and a few underneath.  One small score mark remains.

I removed the oxidation around the saddle section of the stem with 800 grit paper followed by 1500 and 2000 grades.  Next 8000 and 12000 grade micromesh sheets were used.  The stem was buffed lightly with White Diamond rouge followed by Meguiars Plastic Polish.

The interior of the bowl is in excellent condition and the pipe is drilled perfectly.  I’m pleased to add this final 9438 to my collection of that shape.

GBD_9438_New_Era_Gallery GBD_9438_NE (2) GBD_9438_NE (1) GBD_9438_NE (3) GBD_9438_NE (5) GBD_9438_NE (4)


Restoring a Dr. Plumb 9438 and a Ben Wade Freehand


Blog by Joey Bruce

I am always on the lookout for pipes every time I’m… Well pretty much anywhere but especially thrift stores and flea markets. I have picked up a few Kaywoodies and Dr. Grabow’s along with some no names here and there and they are sitting on the shelf collecting dust. It wasn’t until recently that I was in another thrift store that I spotted a group of pipes sitting on the shelf. I didn’t even bother looking for logos I just grabbed them and took them to the front to ask how much. For four pipes the guy wanted a whopping $5. I happily agreed and took them home. That’s where I discovered the store had sold me some really nice pipes.

Two noteworthy and impressive looking pipes were a Ben Wade freehand and a Dr. Plumb. This immediately started a fire under me and I quickly went to the closet and got out all my pipe restoring equipment.
I started working on the stems first. It had been awhile so I forgot my routine. Usually the first thing I do is soak them in a Oxyclean solution, then break out the alcohol soaked pipe cleaners and let them sit overnight, then start with the sanding. This time in my excitement I forgot the Oxyclean and went straight into the pipe cleaners and then the sanding.

It wasn’t until I noticed all the oxidation wasn’t coming off that I remembered my original routine. So I threw them in the Oxyclean solution and after 6hrs removed them. That lifted the rest of the oxidation up to where I could now sand it off. You can see here as I’m part way through the Ben Wade stem.

I usually wet sand until the brown goo stops and that’s when I know it’s time to hit the buffer. A few minutes issuing a mild polish then hit it up with a finishing polish for that extra bright luster. On the BW freehand the logo was already worn down pretty well so I couldn’t sand it much or I’d risk losing the logo completely. So you’ll see some brown oxidation around that area.

While the stems are being polished I let the bowls soak in sea salt and alcohol for about a day.Joey1 I keep topping them off with alcohol throughout the day as they dry up. Not sure if this is the proper technique but it works for me.
Neither the Ben Wade or Dr. Plumb had much cake built up so lucky for me I didn’t have to go into the bowl and clean it up. If you look back at the first pic (sorry I didn’t photo document the steps well) you can see some build up on the rim of the two pipes. The Dr. Plumb needed to be wet sanded to get that off but the Ben Wade came off super easy on the buffer.
I finished the Dr. Plumb up on the buffer the same way I did the stems and it came out nice. This pipe is quite large in diameter and you can feel it with the weight. The grain of the wood is this rich dark almost tiger stripes grain. It rests very comfortably in the palm of your hand.Joey2

Joey3

Joey4 The BW however, I tried to take the buffer to it and quickly noticed it took off the black worn look to the rustic briar. Not sure if that’s what it looked like in the beginning but I like the black weathered look to the wood so I took some toothpaste and brush to it to clean it and then I spent a good amount of time just rubbing it with my hands. Working the natural oils (and probably some grit and grime) into it. It too is a large pipe but it’s a featherweight. Not sure how they were able to do that. It’s almost like an illusion or some magic trick.Joey5

Joey6

Joey7 I’m pleased how they turned out. All in all not a bad purchase for $2.50.

An Easy Restoration – An Old Port Full Bent Billiard


Blog by Steve Laug

Yesterday afternoon I took my wife and daughter to Walmart – the only thing that makes going to Walmart even remotely interesting is that across the street is a shop that sells movie props and also consignments. I have had good luck with finding old pipes just about every time I go there. This time was no different. I came across a rusticated full bent pipe that was in pretty good nick. The bowl was in great shape – actually barely smoked. The stem was oxidized and had some minor tooth chatter on the top and underside of the stem near the button. The top of the rim is smooth as is the patch on the underside where it is stamped.Old Port1

Old Port2
The stamping reads:
Old Port
“Avant – Garde”
London/St. Claude
783

The stamping on this one was a mystery. I could find nothing on it identifying it with any maker. There was no OLD PORT brand listed in any of my reference books or the sites that I check. The London/St. Claude stamping makes me think it might be a company with both French and British connections. I did some digging on the shape number on the Comoy’s shape number sites on the web and could find nothing even close to that number. I decided to check on the French side of their operation and found some similar shapes and three digit numbers on the Chacom site. Still nothing that identified the pipe definitively though.Old Port5 The top of the rim had some damage that came from tapping out the bowl. There was also some rim darkening.Old Port3

Old Port4 The step down tenon is characteristic type of English and French made pipes. The fit in the shank is snug and clean.Old Port6

Old Port7 I scrubbed the rusticated finish with Murphy’s Oil Soap and a soft bristle tooth brush to remove the dirt and wax build-up in the finish. I rinsed it down with water under the tap, keeping my thumb in the bowl to prevent water from getting into the bowl.Old Port8 I dried off the pipe bowl with a soft cloth and set it aside to dry. I took the next four photos to show what the pipe looked like after I dried it out with the cloth.Old Port9

Old Port10

Old Port11

Old Port12 Once the pipe dried I rubbed down the finish with a light coat of olive oil. I buffed it by hand with a shoe brush.Old Port13

Old Port14

Old Port15

Old Port16 I put a plastic washer on the tenon and sanded the stem with 220 grit sandpaper and then with a medium and fine grit sanding sponge to break up the oxidation. I ran a few pipe cleaners through the airway to clean up the sanding dust and freshen it.Old Port17 I finished by sanding the stem with micromesh sanding pads – wet sanding with 1500-2400 grit pads and dry sanding with 3200-12000 grit pads. I rubbed the stem down with Obsidian Oil between each set of three pads.Old Port18

Old Port19

Old Port20 I buffed the pipe with Blue Diamond on the wheel and then gave the bowl a coat of Halcyon II wax and buffed it with a soft flannel buffing pad. I gave the stem multiple coats of carnauba and then buffed it with the flannel buff as well. The finished pipe is shown below. I was able to finish it in time to put it in my pipe bag for my upcoming trip this afternoon. I am looking forward to firing up a bowl and enjoying it in the week ahead. (Under the bright light of the flash more oxidation showed up. I will need to take care of that when I return from my trip.)Old Port21

Old Port22

Old Port23

Old Port24

Old Port25

Old Port26

Old Port27

Old Port28

Old Port29

A Willard Dublin Renewed and Given a Facelift


Blog by Steve Laug

This is another pipe from the box of pipes that I was gifted. It is stamped Willard over Imported Briar. I have cleaned up quite a few old Willard pipes over the years but never took the time to figure out the manufacturer or other information regarding them. I turned to Pipedia and did not find the listing so I checked on PipePhil’s site and found what I was looking for. I have included the photo below for comparison sake. The Willard I have is stamped the same as the top photo. The stem logo is also the same. On the side bar the site included the following information: “The Willard pipes were made by Sparta Industries in Sparta, N.C from 1963 to 1975 (about 60,000 pipes per week). Some were distributed by the Post and Base Exchanges that serviced the military during the Vietnam War. Others were produced for R. J. Reynolds Tobacco.” So I had time frame for this pipe – made in Sparta, North Carolina sometime between 1963-1975. That was way more than I had when I started.Willard The pipe on my work table had the same overall look as the one in the top photo above. Even the darkening of the rim was similar and the wear on the stem. The finish was the same indestructible varnish coat over a red stain. When I started the cleanup I thought the bit was nylon but as I worked on it I am sure it is not. The sanding dust is dark black and is like rubber of some sort. I am still not sure of the material but it is soft to the teeth.Willard1

Willard2 The stem material did not seem to oxidize. There was some definite tooth chatter on the stem near the button but it also looked like someone had put a softie bit on it to protect it after the initial chatter. The metal tenon had a removable stinger in place that was covered with “gunk” (technical pipe refurbisher terminology). The varnish coat was in rough shape and peeling. There was underlying dirt that had gotten in under the edges of the peeling varnish. The briar itself was in decent shape under the finish and did not have much damage other than scratching on the sides of the bowl. The rim was blackened but not charred. The varnish had disappeared on the rim almost as if the heat had peeled it back from the inner edge outward. There was also some surface scratching on the rim.Willard3

Willard4 I have included the next close-up photos of the rim and the stem to show the extent of the damage to both. The bowl had been reamed but there was some damage on the side of the bowl that I will talk about shortly.Willard5

Willard6

Willard7 I used acetone on cotton pads to scrub the finish off the bowl. It took some elbow grease and repeated applications of the acetone to the surface of the bowl to remove the varnish but I was able to remove it totally from all the stamping and the entire finish of the bowl. Underneath was some decent grain and very few fills.Willard8

Willard9

Willard10

Willard11 I scrubbed out the mortise and shank with isopropyl alcohol on cotton swabs and pipe cleaners. It was actually one of the cleanest pipes that I have worked on lately. It took very little effort to clean the stem and shank. The pipe shows some promise in the photo below.Willard12 With the exterior of the bowl clean and the shank clean it was now time to address the issue that I had found in the bowl. The photo below shows the divot out of the side of the bowl. I don’t think it was a burn out happening though it certainly could go that way. I picked at the briar in that area with a dental pick and nothing was soft or crumbly. Even the edges of the area were solid and hard. I wonder if it was a soft spot in the briar, a flaw that showed up when the pipe was smoked and then when it was reamed fell out of the side of the bowl. There was no darkening on the exterior of the bowl relative to the flaw on the inside so I figure I was safe to repair it.Willard13 I fired up a cigar and retired to the porch to smoke it and collect the ash to make up a batch of pipe mud. I collect the cigar ash in a shot glass as I can easily mix it with water when I work the ash into mud.Willard14 The next photo shows the tools (the micromesh pads just happened to be there. I don’t use them in the process, in case you were wondering.). I have the shot glass of ash, a shot glass of water, a pipe nail and a folded pipe cleaner. These are all the tools necessary to make and apply the mud.Willard15 I put a few drops of water into the ash glass and slowly mix it into the ash. It is easy to put too much water and then you either have to fire up another cigar or pour off some of the excess to get the consistency needed in the mud to stick to the wall of the pipe. To wet and it puddles in the bottom of the bowl and too thick it just sticks to the applicator.Willard16 Once I have the mix the right consistency I apply it to the side of the bowl with the “applicator” – a folded pipe cleaner and then tamp it into place with the spoon end of the pipe nail. I put it in place, tamp it down and then let it sit. As it dries I added further applications to the surface until it is level with the rest of the bowl. The next photos show the bowl side and give an idea about the consistency of the mud.Willard17

Willard18

Willard19 I set the bowl aside to let the pipe mud cure and worked on the stem. I sanded it with 220 grit sandpaper to remove the tooth chatter and reshape the button. I sanded until the surface was smooth and then sanded it with a medium and a fine grit sanding sponge. I wiped it down with a soft cloth and then sanded it with micromesh sanding pads. I wet sanded with the 1500-2400 grit pads and dry sanded with 3200-12,000 grit pads. I rubbed the stem down with Obsidian Oil between each set of three pads and then rubbed it down a final time once I finished sanding with the 12,000 grit pad. I buffed the stem with White Diamond using a light touch as I was still uncertain of the stem material. I have learned the hard way that soft nylon stems are quickly melted by the heat generated by a buffing pad.Willard20

Willard21

Willard22 I rubbed the bowl down with a light coat of olive oil to highlight the grain and the red stain left in the briar. I buffed the bowl and stem with Blue Diamond plastic polish to raise the shine. I then gave the pipe multiple coats of carnauba wax and finished by buffing it with a soft flannel buff to finish. The completed pipe is shown below. The pipe mud is cured and will only harden with time. Once it is good and hard it will provide a base for a cake to build up and the gouge will be invisible. It should provide a good smoking pipe for the next pipeman who takes it to his rack.Willard23

Willard24

Willard25

Willard26

Willard27

Willard28

Willard29

Willard30

Willard31

Willard32

Restoring an old Claridge Dublin made by Comoy’s


Blog by Steve Laug

Several times over the past few years I have run across Claridge pipes. The last two I had were the same shape as the one in this post. They were a nicely shaped Dublin with a chamfered rim and fairly decent grain with one or two fills. This one was no different it was a nice piece of briar with a large round fill on the right side of the bowl. It was the last pipe I worked on from the Ebay foursome shown in the picture below. It is the bottom pipe in the photograph. You can see from the photo that it had a thick cake that was uneven in the bowl with a lot of overflow onto the rim. The coat of tars and grime on the rim made the rim almost flat. The varnish coat on the bowl was in rough shape and the sterling silver mortise fitting was oxidized and yellowed with tarnish. The stem had the characteristic Claridge logo – a circle divided into four wedges – two blue and two red. It was badly oxidized and almost brown in colour. Inside the shank the metal mortise was threaded to house the threaded tenon. There was an odd stinger apparatus that was removable in the end of the tenon. Inside the shank was heavily built up with tars and oils as was the stinger and the airway in the stem. Clar I took the next four photos of the pipe before I started to work on it. I wanted several close-up photos to show the state of affairs at the beginning of the process. I know that I generally include these in the blog I write about pipes I refurbish but I have to let you know that I do that more for me than you. I must have some encouragement when I get to the midway point that the pipe is actually looking better than when I started. I take these for a documentation of the progress of an estate pipe from grime to shine.Clar1

Clar2

Clar3

Clar4 I took two close-up photos of the bowl. The first was to show the thick build-up on the rim that would need to be removed in the cleanup process. It is hard to tell from the first photo below but the rim is actually chamfered inward at a significant angle. The tars/lava that has overflowed onto the rim has virtually filled the cup of the rim to the point where the rim is flat. The cake in the photo is also visibly thick and hard. The second photo shows the one fill on the bowl. It is on the right side toward the front of the bowl. It is almost perfectly round and is a tan coloured putty material. It stood out to me every time I looked at the pipe. The rest of the grain on the bowl was decent. It is also the only fill on the bowl.Clar5

Clar6 In the back of my mind I remembered something about the Claridge brand be made by Comoy’s as a seconds line. It was only a dim memory so I looked it up on Pipephil’s site and on Pipedia and found that indeed it was one of many sub-brands of Comoy’s. The picture below shows the logo and stamping on the Claridge. It came from the PipePhil site. My pipe is stamped like the second one in the photo – Claridge over Imported Briar and bears the same stem logo.Claridge The list below was the one found on Pipedia and includes quite a few of the older pipes that I have refurbished over the years. I have highlighted the Claridge brand in the list by making the text bold and upper case.

Ace of spades, Ancestor, Astor, Ayres, Britannia, Carlyle, Charles Cross, CLARIDGE, Cromwell, Dorchester, Dunbar, Drury Lane, Emerson, Everyman, Festival of Britain, Grand Master, Gresham, Guildhall, Kingsway, Lion’s Head, Lord Clive, Hyde Park, Lloyds, Mc Gahey, Moorgate, Newcastle, Oxford, O’Gorman, Royal Falcon, Royal Lane, Scotland Yard, St James, Sunrise, Sussex, The Academy Award, The Golden Arrow, The Mansion House, The Exmoor Pipe, Throgmorton, Tinder Box Royal Coachman, Townhall, Trident, Westminster, Wilshire.

I reamed the cake out of the bowl with a PipNet reamer using the smallest cutting head first and then working up to the cutting head closest in diameter to the bowl. I took the cake back to bare wood in order to be able to work on the rim and to check out the interior of the bowl for checkering or cracks. In the second photo below you can see that some of the cake on the rim fell away as I reamed it and the chamfering is becoming visible.Clar7

Clar8 The challenge with a chamfered rim is that you cannot top the bowl without seriously damaging the inward cant of the rim toward the bowl. I scrubbed the rim with acetone on cotton pads and then sanded it lightly with 220 grit sandpaper and then a medium and fine grit sanding sponge to remove the tars. When I had finished removing the build-up on the rim I also scrubbed the bowl with acetone to remove the varnish coat.Clar9

Clar10

Clar11

Clar12 The yellow tinge to the silver band seemed like it also was varnish that had peeled and bubbled. I scrubbed it with the acetone as well to soften it and then used a 1500 grit micromesh sanding pad to polish the silver and remove the varnish and build-up. I then used silver polish to further polish the silver and remove the small scratches left behind by the micromesh. On the top side of the band/mortise insert it is stamped Sterling Silver in script at an angle across the surface of the band.Clar13

Clar14

Clar15 I scrubbed the stinger with alcohol on cotton pads to remove the grime and then 0000 steel wool to polish it. The stinger end was pressure fit into the tenon so it was easy to remove to clean out the airway in the stem.Clar16 The stem was overturned or over-clocked to the right. I heated the tenon with a Bic lighter until the glue softened and then turned the stem all the way around until it lined up. I cooled the tenon with water to reset the glue.Clar17 I really starting to like the natural finish on these older bowls and decided that rather than staining this one I would give it a light coat of olive oil and rub it in with my hand. The beauty of the oil is that it helped to blend the fill into the natural colour of the briar. It is still present but does not stand out as blatantly to me.Clar18

Clar19

Clar20

Clar21 I let the oil sit over night and in the morning while I had a cup of coffee I sat and rubbed down the bowl by turning it over in my hand. I finished the coffee and then took a picture of the pipe where it stood after the rub down. You can see the chamfer on and the nice birdseye that is on the surface of the rim.Clar22 With the bowl finished to this point I turned to work on the stem. I used a Bic lighter to paint the flame over the surface of the vulcanite to lift out some of the tooth chatter and to raise the oxidation to the surface. I then sanded it with a medium and a fine grit sanding sponge, wiped it down with a cotton pad and painted it with the flame yet again. When I had finished that the majority of the oxidation was gone. I polished the stem with micromesh sanding pads. I wet sanded with 1500-2400 grit sanding pads and then dry sanded with 3200-12,000 grit pads. I rubbed the stem down with Obsidian Oil between each set of three pads. After the sanding with the 6000 grit pad I buffed the stem with White Diamond and then brought it back to the work table and sanded it with the 8000 and 12,000 grit pads.Clar23

Clar24

Clar25

Clar26 I buffed the stem and bowl with Blue Diamond polish on the buffing wheel and then hand buffed it with a soft flannel cloth. The final buff with the Blue Diamond removed many of the light scratches in the briar. I gave the stem and bowl multiple coats of carnauba wax and a final buff with a soft flannel buffing pad to raise the shine. The finished pipe is shown below.Clar27

Clar28

Clar29

Clar30

Clar31

Clar32

Clar33

Clar34

Clar35

Clar36

A gift pipe reamer that looks like an instrument of torture – A GBD reamer


Blog by Steve Laug

I was gifted this old GBD Pipe reamer by Mark Domingues recently. (Thanks Mark for the great gift.) I have added it to my collection of pipe reamers. It is a frightening looking tool that for all appearances could be an instrument of torture rather than a pipe reamer. I have to say I have tried it out and I would think seriously before using it again to ream a bowl. The spikes and points are sharp like the teeth on a cheese grater. This one was unused which is amazing for a tool of this age from the 50’s. It is stamped on one side of the handle with the GBD logo in an oval over the PAT. NO. 22411-09.
GBD Reamer
On the other side it is stamped with the GBD Logo in an Oval over MADE IN ENGLAND. The reamer is made out of Sheffield Steel with the spikes hardened against damage and to promote efficiency. It measures about 5.6cm by 3.6cm.
GBD2
In researching the background on the reamer I found that original patent on the reamer was for a Terry’s “Hedgehog” Pipe Reamer. It bears the same patent number and is essentially the same tool. In the 2 photos below I have put the two reamers above and below each other to show how they are the same. The Hedgehog is pictured with a Euro coin and an American 25 cent piece to an idea of its size. On the opposite side the Hedgehog reamer has the same PAT. NO. 22411-09 stamping. It appears to me that the reamer design is identical between the GBD and the Hedgehog.
GBD3

GBD4
I did some more digging and found that they also made one for Dr. Plumb pipes. It is stamped Dr. Plumb’s in script on one side and has the same patent information on the other side. That is not surprising as Dr. Plumb is a seconds line from GBD. But the research I did makes me believe that the Terry’s Hedgehog reamer was manufactured and stamped for a variety of pipe companies and used as an advertising gimmick.
GBD5
I have no idea when the sales card in the next photo was made but it gives an idea of how the Hedgehog tools were marketed by Cadogan. These are the Dr. Plumb’s version of the tool.
GBD6
I also found this modern version of the reamer that is still available today. It is clearly not as well made as the original and the two halves are not joined in the same manner. Even the spikes on the new one do not look as well made or as sharp.
GBD7
Hopefully this little piece on the Hedgehog Pipe Reamer, no matter what the stamping or age, has sparked your interest in this piece of pipe history. It certainly has joined the ranks of other pipe paraphernalia that I have in my collection. I will keep an eye for more of the older versions that bear different pipe marks on the top of the reamer.