Blog by Steve Laug
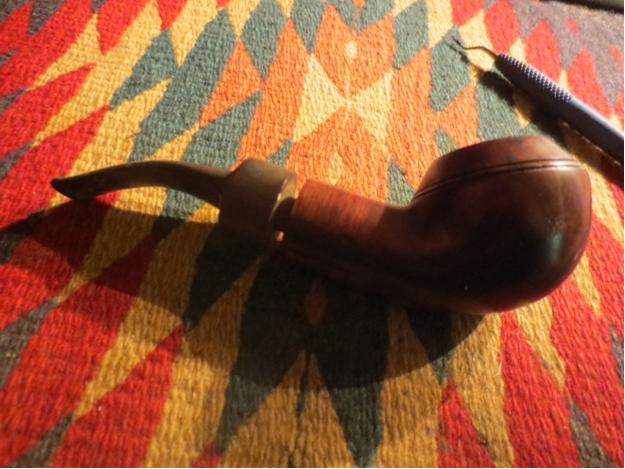
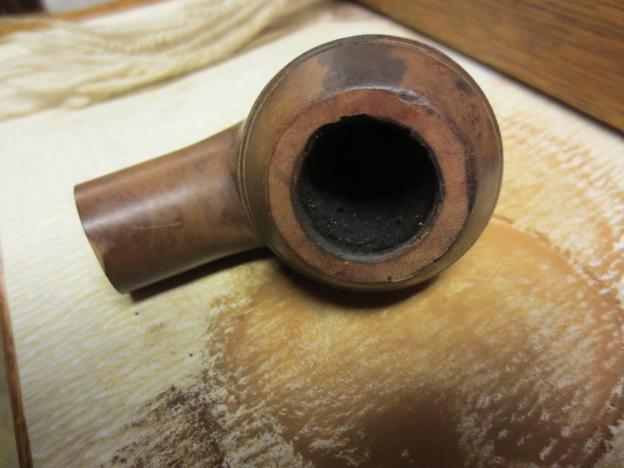
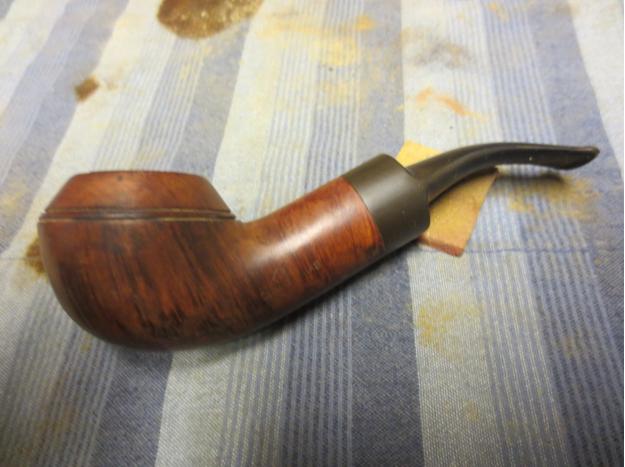
I saw a foursome on Ebay and the one pipe in the lot that caught my eye was of course this older Rhodesian. At first glance I figured it was a GBD 9348. Then I looked more closely at the photos and could see that it was not a GBD at all. It was clearly a BBB with the brass inset on the top of the stem. I bid and won the lot. While the other three pipes are probably fine in terms of additions to the pipes for sale this one was the one I wanted for my collection. It had two things going for it that caught me – it was Rhodesian and it was a BBB. Both fit the one of the focuses of my collection. Needless to say but the one in the roughest shape was the BBB. In the photo below you can see the hole in the stem and the roughening around the inner edge of the rim on the left side of the bowl. It was going to take a bit of work to bring this one back from the brink and keep the original stem.
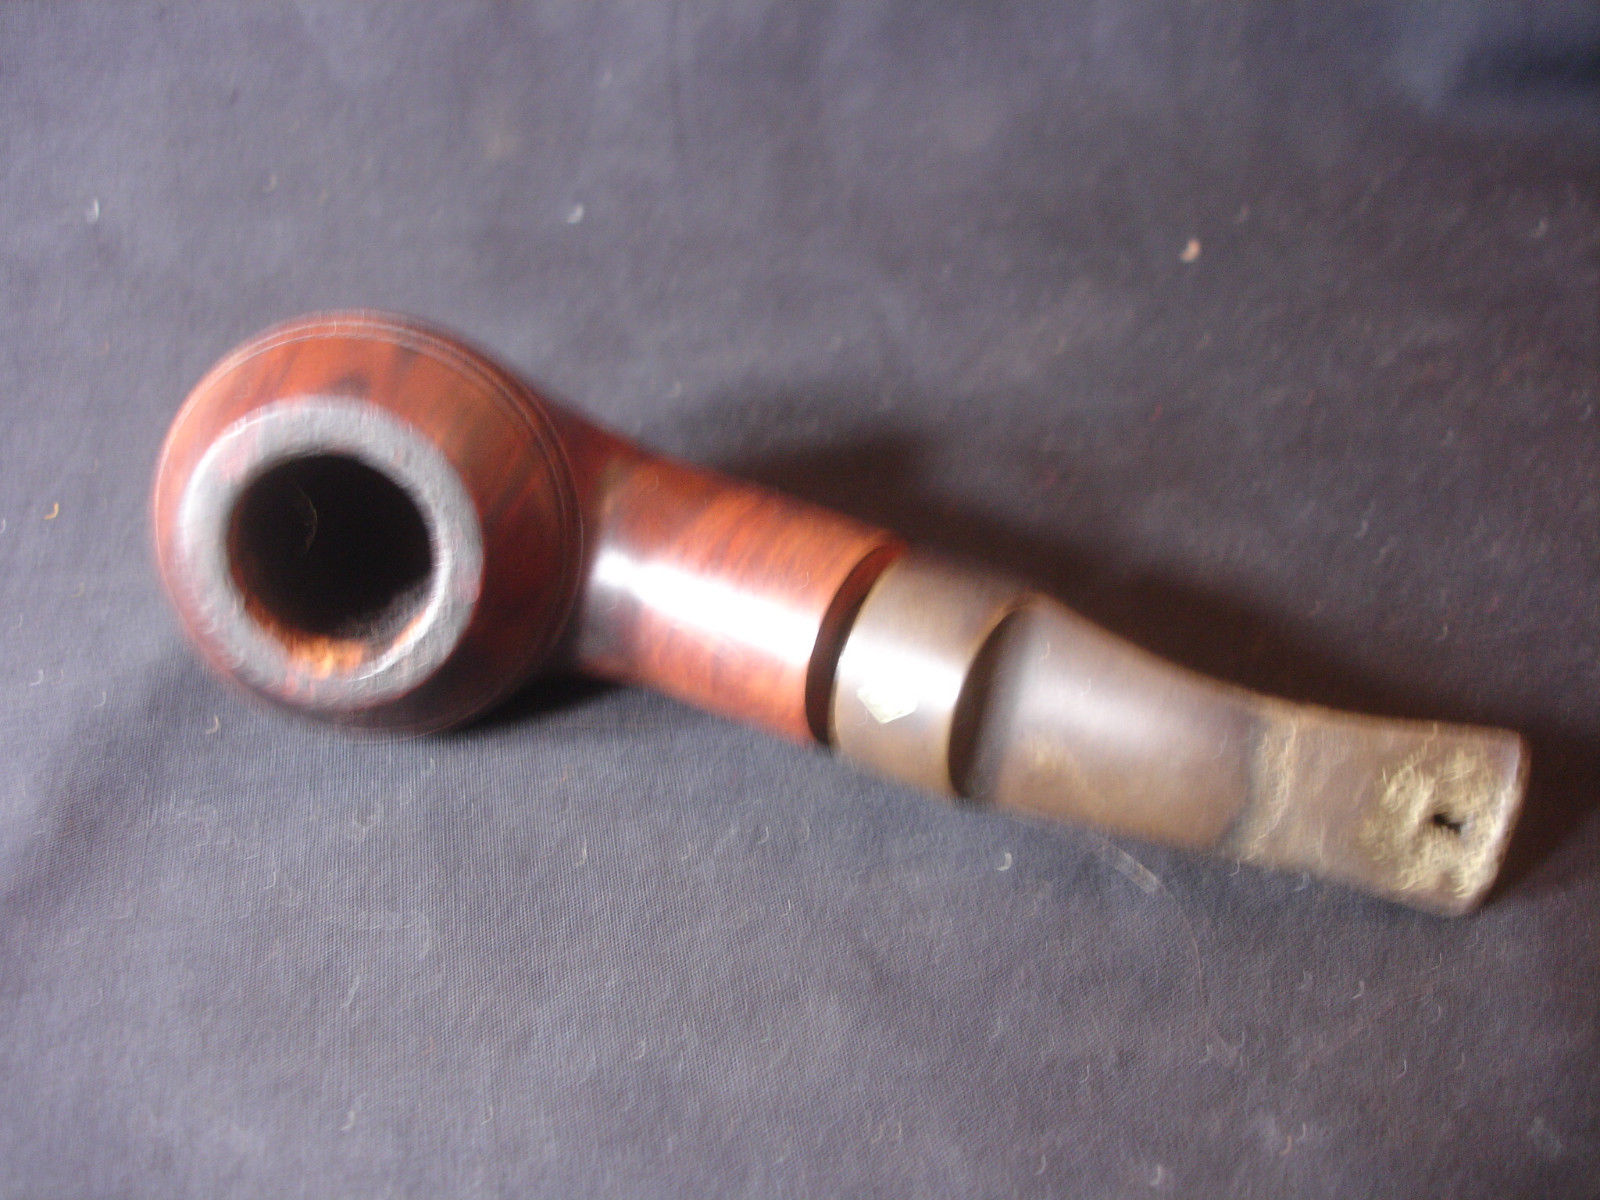
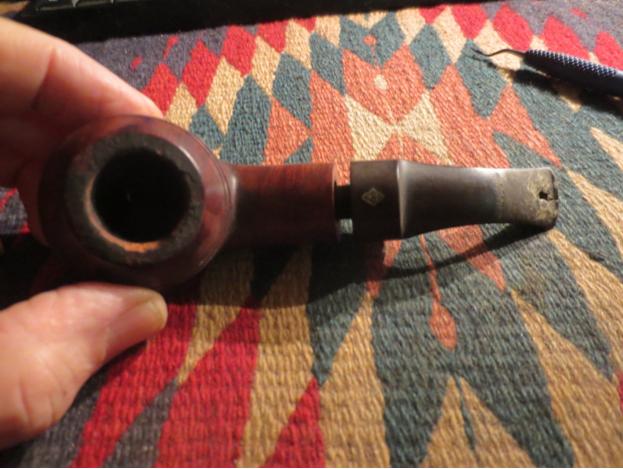
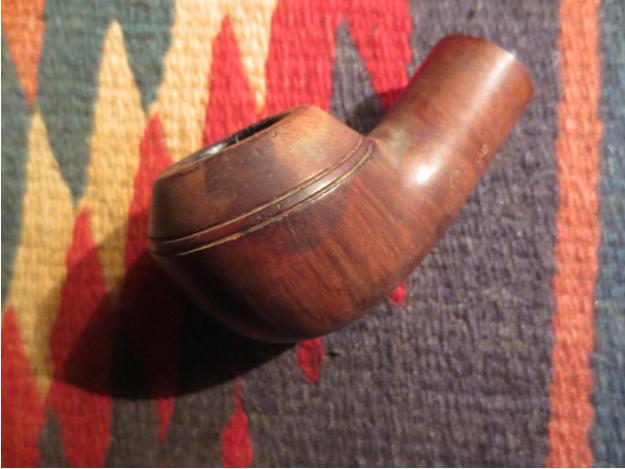
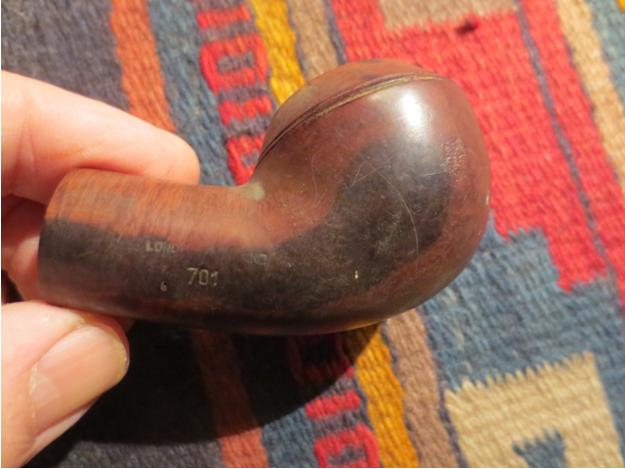
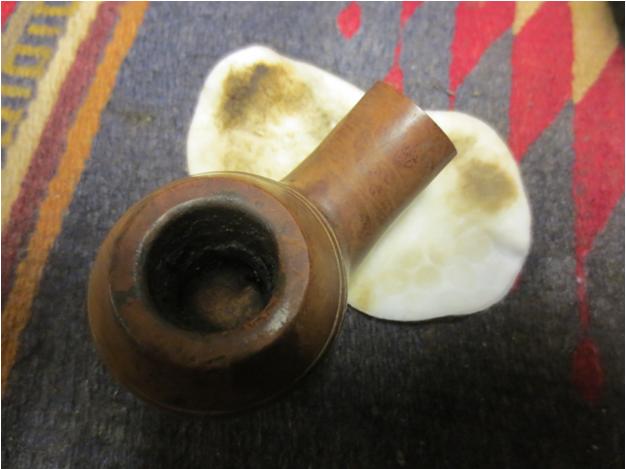
 When the package arrived I took out the BBB and unwrapped it from the bubble wrap. The stem was stuck in the shank and the damage to the bowl was quite extensive. The stamping on the left side of the shank read BBB in a Diamond and under that was Own Make. On the right side it read London England in a straight line over the shape number 701. On the right side of the bowl and on several spots on the shank it had dark stains from sitting in water or juice. It had discoloured the briar and damaged the finish. There were also some dents and dings under the dark discolouration from the bowl having been dropped on concrete or something that left the side of the bowl dimpled with dents and marks. The stem was quite gnawed on – the hole on the top was solid around the edges and the button was chewed and worn on the top side. The underside of the stem had bite marks and was worn from clenching.
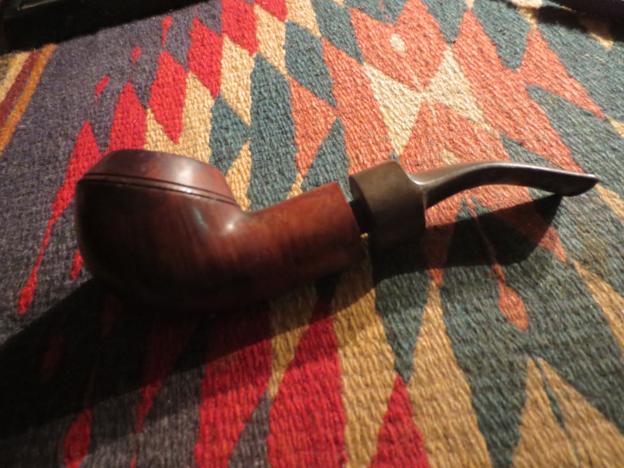
 I put the pipe in the freezer for 30 minutes and when I took it out I was able to easily remove the stem. I cleaned the edges around the hole in the top of the stem with alcohol and a dental pick to remove the buildup and the detritus that was caught in the edges. The good thing was the edges were solid and not crumbling.
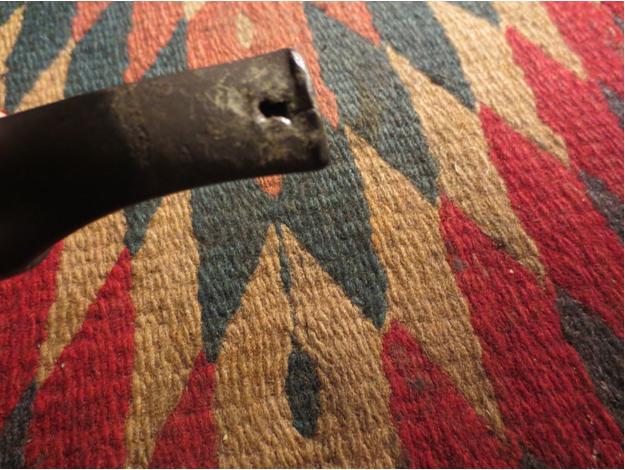 I put Vaseline on a nail file that I have here and use for more wide repairs on the stem and inserted it into the slot. It provided a solid base for me to drip superglue onto the hole. I built up the edges and worked my way to the centre of the stem bite. You will note that I grossly over filled the hole with the superglue. I have been having trouble with the accelerant that I am using. It tends to dry out the surface of the patch and the centre never sets correctly. I decided to set the stem aside overnight and let the patch cure overnight.
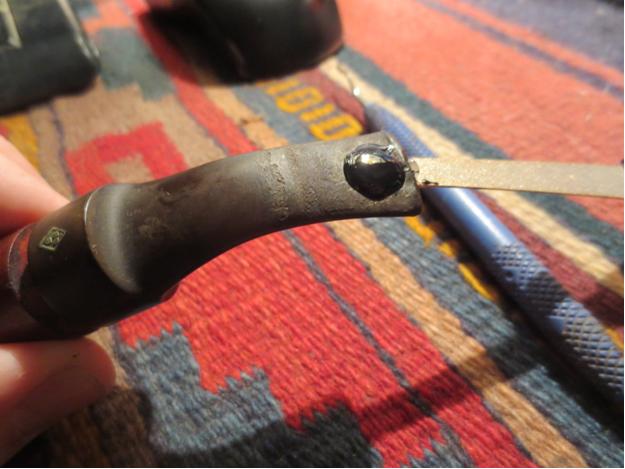 I dropped the badly stained bowl into my alcohol bath and called it a night. The bowl soaked for over 12 hours and the stem cured while I slept soundly.
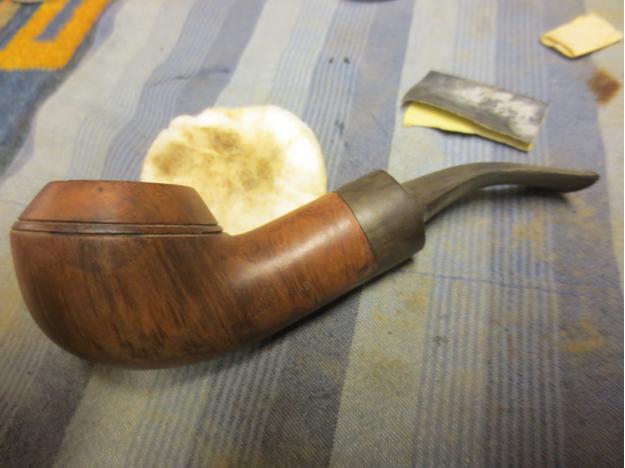
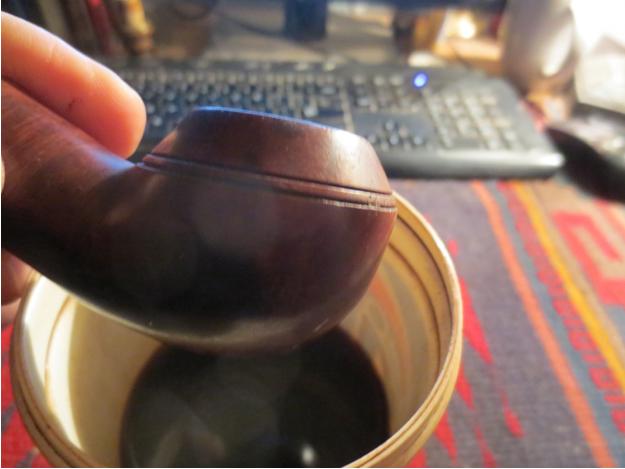 In the morning I took a look at the stem and saw that it was pretty hard. I removed the bowl from the alcohol bath and dried it off. You can see the dark stains on the right side of the bowl and on other spots on the bowl. It was almost black in colour and the alcohol had not lightened it at all.
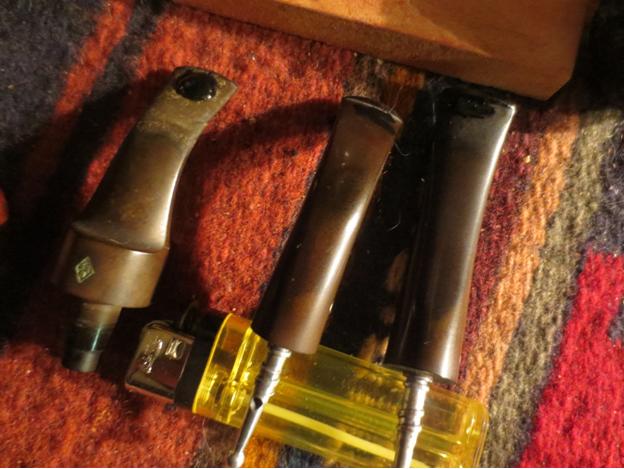
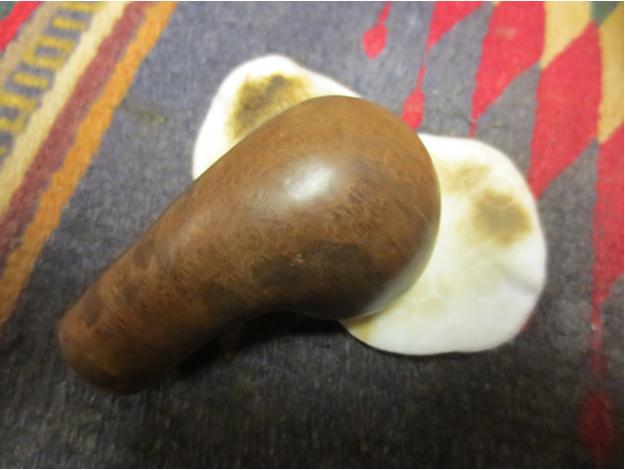
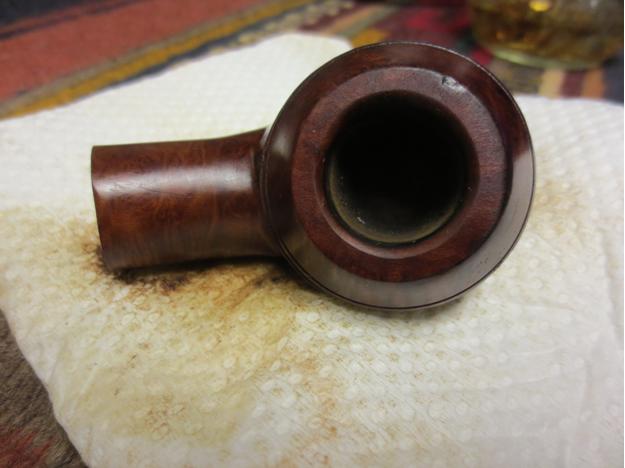
 The top view of the bowl below shows the extent of the damage to the bowl. It was out of round and the gouge out of the left inner edge was rough.
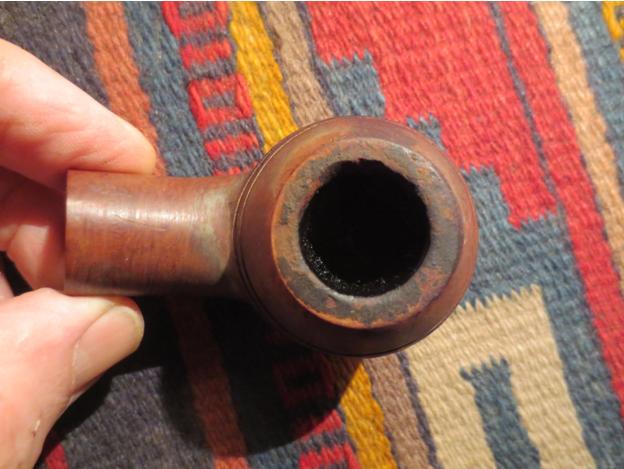 I wiped the bowl down with acetone on cotton pads to remove the finish and see if it would lighten the stains on the bowl. While it indeed lightened them it did not remove them. It was encouraging to see the grain through the stains however, so I knew that sanding the damaged areas would remove much of the darkening.
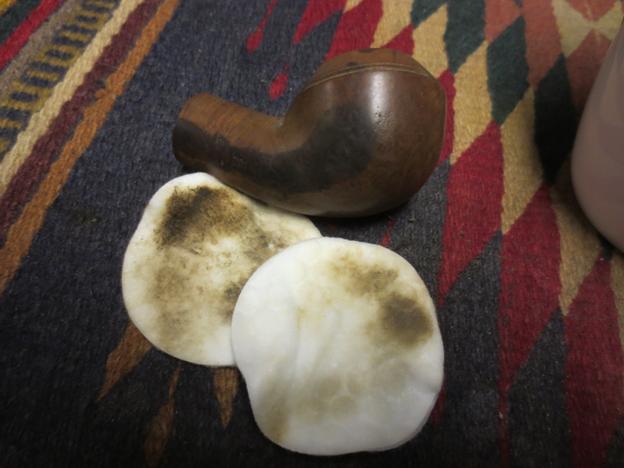

 I lightly topped the bowl on my topping board to remove some of the damage to the rim surface.
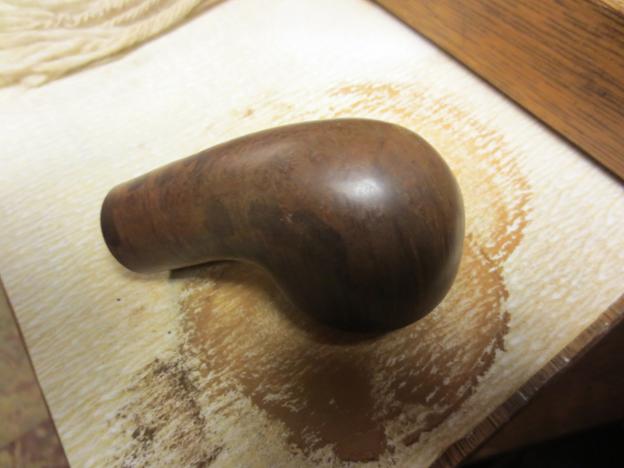
 I reamed the bowl with a PipNet reamer and took the cake back to bare wood. I wanted to remove as much as possible and see if I could also clean up the inner edge of the rim.
 I used a retort as has become a habit lately and boiled alcohol through the stem and shank to remove the tars and build up. After the retort I cleaned out the shank and the stem with pipe cleaners, cotton swabs and isopropyl alcohol.
I worked on the stem using needle files to recut the button and clean up the sharp edge. I sanded with 180 grit sandpaper to smooth out the repair to the topside and underside of the stem. I followed that by sanding with 220 grit sandpaper to smooth out some of the scratches left behind by the lower grit paper.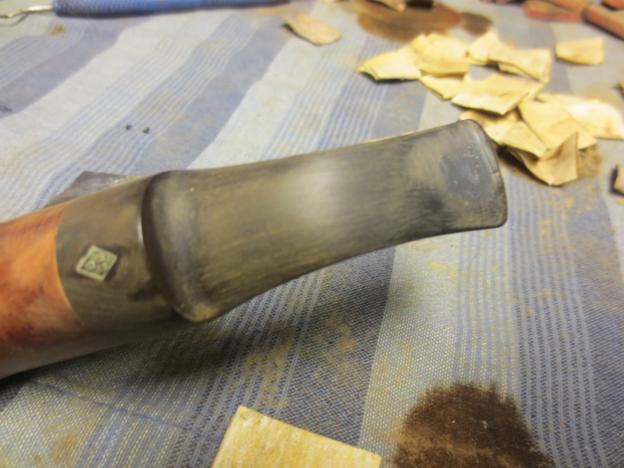
 While I had the 220 grit sandpaper out I sanded the bowl as well to remove the stains on the sides of the bowl and the cap. I also used a folded piece of sandpaper to work on the inner edge of the rim and give it a slight bevel to minimize the damage there.
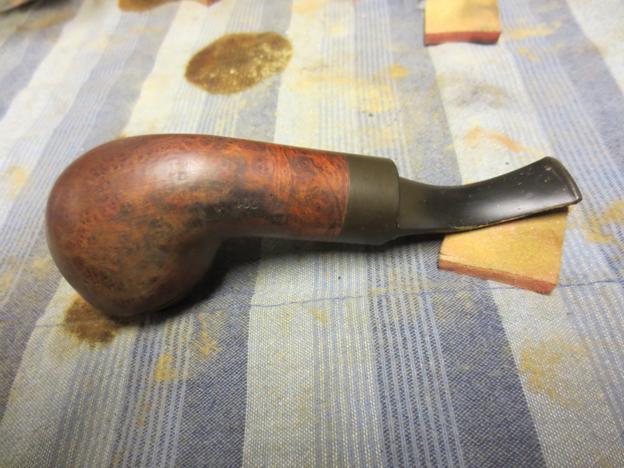
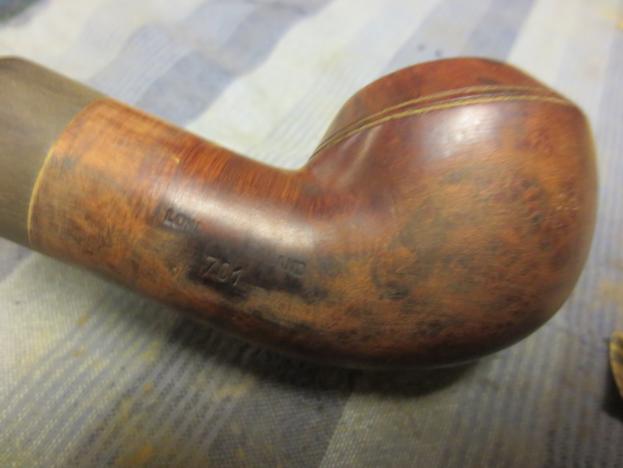 I wiped the bowl down with alcohol and then sanded it with a medium grit and a fine grit sanding sponge followed by 400 grit wet dry sandpaper. In the photos below you can see how it worked to remove the majority of the stain on the bowl. I very carefully sanded around the stamping on the right shank as I did not want to damage the stamping.

 I used a hot knife and wet cloth to steam out the dents on the bowl sides, cap and rim. When I had lifted them as much as possible I sanded the bowl further with the 400 grit wet dry paper and also with the fine grit sanding sponge. I wanted to clean up the damaged areas on the sides and top as well as the stem repairs.
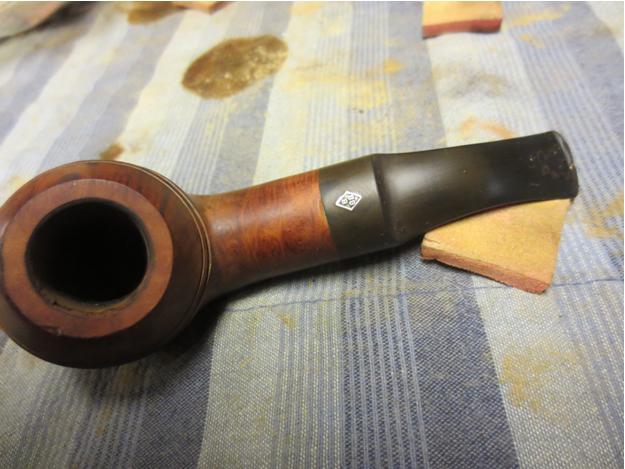

 After the steaming and sanding I spent some more time on the inner edge of the rim. I wanted the bevel to smooth out the damaged side of the rim and also wanted to bring the bowl back into round. It took quite a bit of time to handwork the rim damage but I am happy with the end result. When finished I rubbed the bowl down with a soft paper towel and olive oil. I rubbed the oil into the bowl, paying special attention to the areas that were previously damaged with the stain and the dents. Again, I set the bowl aside for the night to let the oil soak in and be absorbed into the briar.
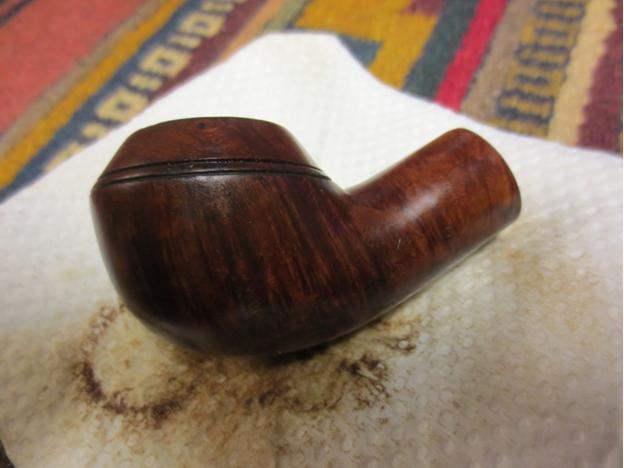

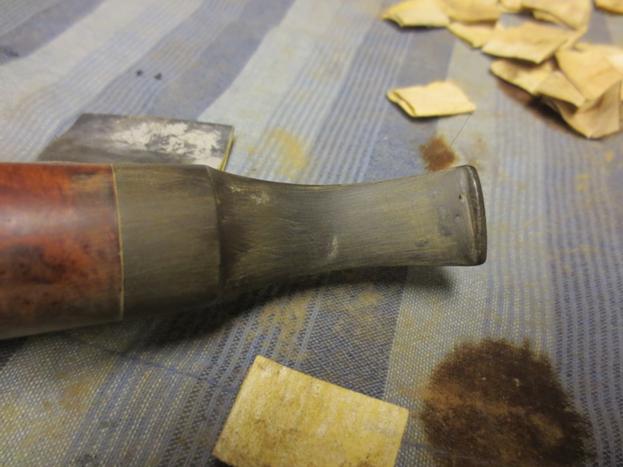
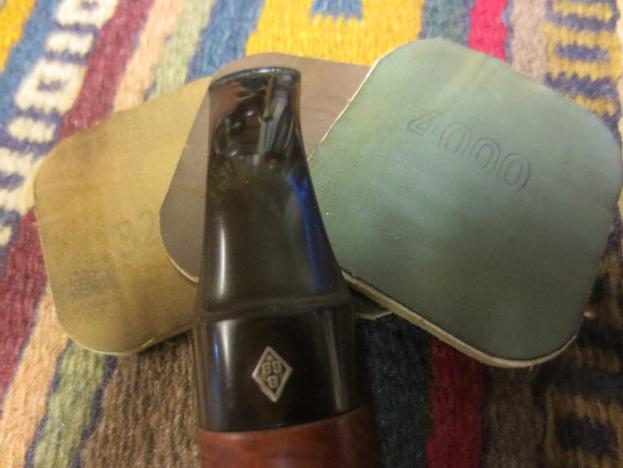
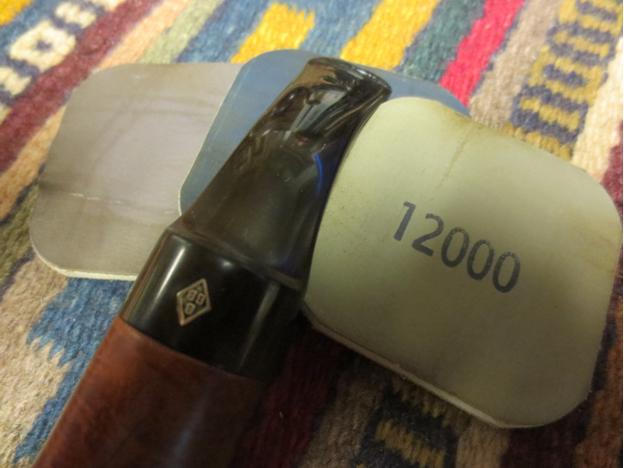
 The next morning I worked on the stem with fine grit sanding sponges and then with micromesh sanding pads. I wet sanded with 1500-2400 grit pads and dry sanded with 3200-12,000 grit pads. The higher grit pads allowed me to blend in the repair as much as possible and though still visible it looks very good. The patch is hard and solid with no give when pressed on.
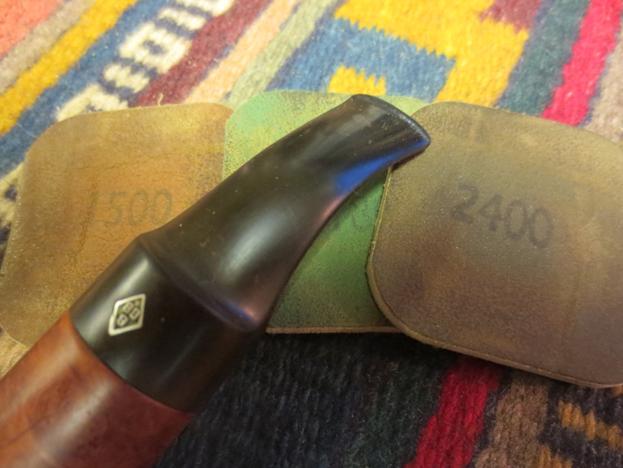
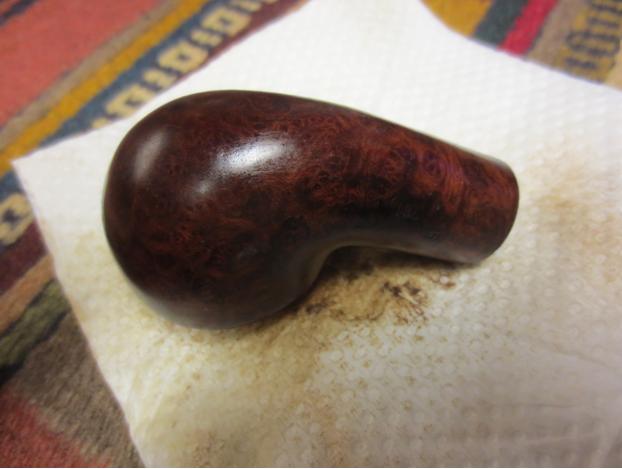
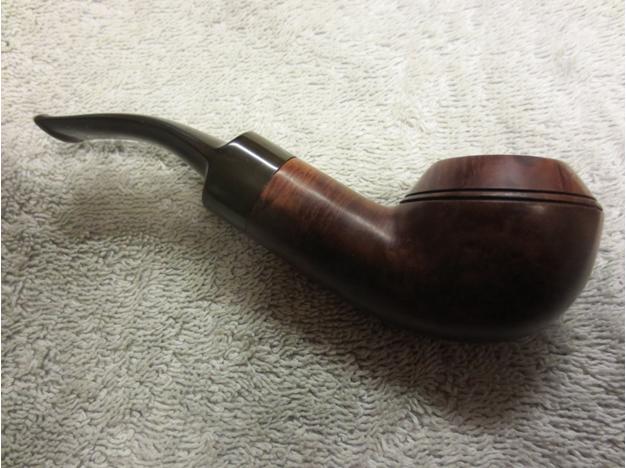
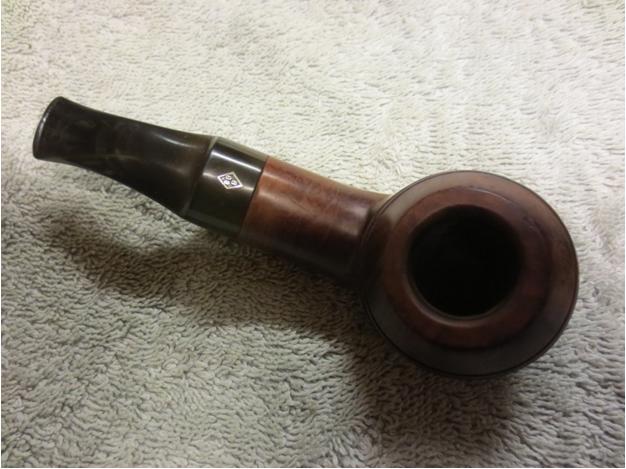
 I rubbed the stem down with Obsidian Oil and when it had dried I buffed it on the wheel with White Diamond. I gave the bowl and stem multiple coats of carnauba wax and then finished by buffing it with a soft flannel buffing pad to raise the shine. The finished pipe is shown below. It is ready for loading up and enjoying a good smoke. It should serve me well for a long time.


Another super job, Steve. Do you apply the accelerator both before and after applying the super glue? I read somewhere that doing that makes the glue set more evenly and – of course – faster. In the few times I’ve tried it, it does seem to keep the middle section from staying in that almost gel-like state it tries to hang up in.
LikeLike
I have done it before and after and lately have found the issues. I also have it leaving a slight discolouration sometimes that make it harder to blend in.
LikeLike
I’ve been applying it before the glue and after; if it needs more to raise the patch i do the same process: accelerant, glue, accelerant. Twice that I recall I’ve gotten a “haze” in the patch, which I attributed it to either too much or too little accelerator or applying it unevenly; I’ve not figured out the exact culprit yet though.
LikeLike
You had a double challenge on that one. It turned out really well. I’m especially impressed with how you rebuilt the stem.
LikeLike
Thanks Andrew. That stem was a real challenge for me. I find that my tendency is to rush the curing of the patch and compromise the integrity of the repair.
LikeLike
Another exceptional job as always. I am at a loss how you get your stems to come out so well. Stems are my nemesis. Would it have made a worthwhile difference if you used a new alcohol solution to lighten the stains more? You achieved the end results without doing it but with some light wood pipes I have changed it for fear of transferring stain to them.
LikeLike
I have tried clean and new alcohol and had the same results. I really only want to try and lift it from the briar a bit. Then I can sand the surface and remove the stains as much as possible.
LikeLike
I usually wash down a light coloured bowl with alcohol on a cotton pad rather than letting it soak in the wash.
LikeLike
Thank you very much for your help with both issues!
LikeLike
Great job on both the bowl, and stem. This shape is a favorite of mine. Please let us know how this beauty smokes.
LikeLike
That Rhodie turned out beautiful. Did you use the black superglue and if so, where did you get it.
LikeLike
I did use the black super glue and got it from stewmac online
LikeLike